Enemy Territory: Quake Wars Walkthrough
Are you one of Earth's saviors, or one of its destroyers? Whatever your mission, GameSpot's Walkthrough to Quake Wars is here to help you achieve it.
Quake Wars is the spiritual sequel to the free Return to Castle Wolfenstein modification Enemy Territory. The weapons and battles of World War II have been replaced by hyperblasters, railguns, and other elements of id Software’s Quake universe. Quake Wars is a team-based first-person shooter. Distinct classes, intense vehicle battles, and focused map objectives create exciting, memorable battle gameplay.
We cover strategies for each GDF and Strogg class, reveal all experience rewards, and provide in-depth coverage of all multiplayer maps. This GameSpot Enemy Territory: Quake Wars game guide includes:
Basic Training
General strategies covering all Quake Wars maps and game types.Strogg Classes
Tips and experience rewards for Strogg classes.Vehicles and Deployables
This section provides tips on GDF and Strogg vehicles and deployables.Map Strategies
Look here for complete strategies for all multiplayer maps, including tips for completing primary and optional objectives.Experience Rewards
A compilation of all GDF and Strogg experience rewards.
Chapter 1 - Basic Training
If you purchased Enemy Territory: Quake Wars then you probably already know this isn’t your older sibling’s Quake. This isn’t an individual game where you’re trying to rack up the most frags. Quake Wars is a team game. If every GDF or Strogg player was playing an individual game, it would be nearly impossible for the team to succeed. This section provides "basic training" general tips for conquering the competition in Quake Wars.
There are five unique classes for each side. These classes complement each other—GDF Medics and Strogg Technicians provide valuable health (as well as ammo for the technician) and can revive teammates, GDF Soldiers and Strogg Aggressors provide support through heavy weaponry, and GDF Field Ops and Strogg Oppressors offer long-range fire support through their deployables.
Map objectives require certain classes—the soldiers and aggressors can destroy objectives, the covert ops and infiltrators hack objectives, and the engineers and constructors build objectives. A team can’t succeed without a diverse roster. A team full of covert ops or infiltrators using their sniper rifles and railguns won’t last long against a mixed squad. If the map objective is to build a bridge and your team doesn’t have an engineer then you’re in a no-win situation and you may as well be playing deathmatch instead of a team game.
Everything works in unison, including vehicle usage. Engineers or constructors should provide support with their repair tools. Soldiers and aggressors can help escort vehicles and eliminate anti-vehicle threats such as enemy soldiers or aggressors armed with rocket launchers or obliterators or by destroying anti-vehicle turrets. And vice versa, utilize your vehicles to provide support for ground forces. Titans or Desecrators should bombard anti-personnel turrets to help ground troops. If you’re simply the driver, switch into a vehicle’s turret for additional firepower. On the other hand, you shouldn’t drive off in a vehicle without seeking out a passenger.
Even with the best teamwork possible, there’s still a twitch aspect to the game. You must still become proficient with weaponry. Skillful aiming is extremely important because you will inflict greater damage (twice as much damage, in fact) when your weapons fire strikes an enemy head and less when your projectiles strike an enemy’s legs. Players that consistently aim for the head will have more kills and fewer deaths than players who fail to emphasize aiming. Crouching or going prone will increase the accuracy of your shots; to decrease weapon spread, use short, controlled bursts, particularly with the GDF assault rifle and Strogg lacerator.
"Learn the maps" is a cliché tip for first-person shooters but it’s even more important for Quake Wars. Not only should you learn the terrain, cover, and general layout of each map, but since each map feature unique objectives, it’s extremely important to understand the location of all primary and secondary objectives. This is vital for both offensive and defensive tasks. Learn the quickest routes to objectives so you can maintain pressure on offense or aid your teammates on defense. Toggle through available missions to mark the location of primary and optional tasks.
The map objectives help determine your team’s class roster. If you’re playing as GDF on Valley, the first task is to build a bridge with a GDF Engineer. If your team lacks an engineer, obviously it’s going to be impossible to progress to the next objective, much less actually win the map. Make changes as necessary depending on the current map and objective.
For the first section of Valley, you will need more engineers to complete the bridge task and to repair the MCP as it moves into position to complete the second task. But with those tasks completed, engineers become less important—at least as far as map objectives go. Valley’s next objectives require a covert ops to hack and a soldier to destroy. For the final push, a few players could switch to these classes so you have more players able to complete the objective. A single covert ops will have more trouble than a group.
There’s a downside to switching classes midgame (or during a three-map campaign game). As you play a particular class, you build experience—for instance, an engineer gains experience from repairs and a medic gain experience from reviving teammates. Gaining experience unlocks class rewards; there are four rewards for each class. Plus since classes complement one another, it’s still important to have an engineer around to repair vehicles or a medic around to heal troops.
It takes time to reach the higher rewards and these are reset once a three-map campaign game is complete. If you switch classes, the previous class retains its rewards but your new class’ experience begins from wherever it left off—which could be zero. Before switching classes, assess what will be more important: your class’ unlocked rewards or the addition of the new class to your current team roster. Often when you’re trying to make the final push to complete the map’s last objective, it can be more important to have enough of the required class type to reach and complete that last task and win the map.
Like "knowing the map" it’s also extremely important to understand each class’ unique abilities. Check the GDF and Strogg class sections of this game guide to learn each class’ diverse abilities (and experience rewards) and how to utilize each class in specific situations. Understand as a GDF Covert Ops or Strogg Infiltrator it’s your job to provide radar for your team; know as a Strogg Technician, you should create spawn hosts to help your Strogg teammates return to battle as quickly as possible; and remember as a GDF Field Ops, one of your primary duties is to drop ammo packs to keep teammates supplied.
Check your team’s class roster and communicate to your teammates the team needs—perhaps the team needs more engineers or soldiers to aid in the current task. After firefights, communicate to GDF Medics or Strogg Technicians and request medpacks or Stroyent cells. Or point out the location of wounded teammates for these players to assist.
Chapter 2 - GDF Classes
This section highlights strategies for each of the five GDF classes. There’s a Strogg counterpart for each GDF class; although mostly similar, there are both some small and large differences between the two sides. Here we’ll cover tips on using each class, including strengths, weaknesses, experience rewards, utilizing equipment, and emphasizing teamwork.
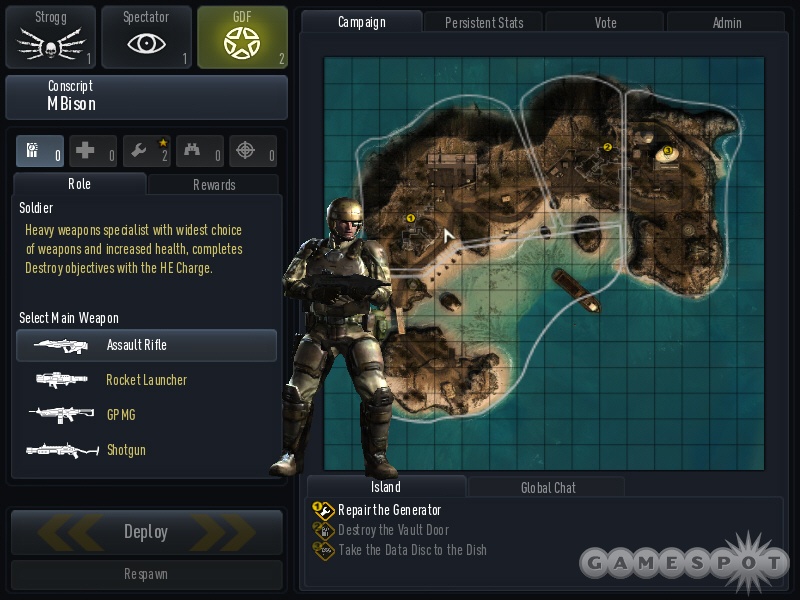
Soldier
The soldier is the GDF’s primary combat class and starts with greater health and weapon options than the other classes. You can equip the soldier with the assault rifle or shotgun—both of these weapons are available to other classes—or opt for heavier weaponry such as the GPMG (General Purpose Machine Gun) or rocket launcher. The rocket launcher in specific allows the soldier to serve as a mobile anti-vehicle or anti-deployable force in addition to other potential tasks. Note that you run slower with heavier weapons selected; if you’re trying to quickly move point to point, equip the pistol to reach your destination faster.
Although the soldier can have specific map objectives to complete, the soldier should also provide important support fire for engineers attempting to complete construction tasks or covert ops trying to complete hacking tasks. Soldiers are also ideal for guarding objectives against Strogg classes, such as Strogg Aggressors attempting to blow up the salvage on Salvage. Support a defending soldier with Medic health kits and Field Ops ammo kits to keep the combat class healthy and supplied.
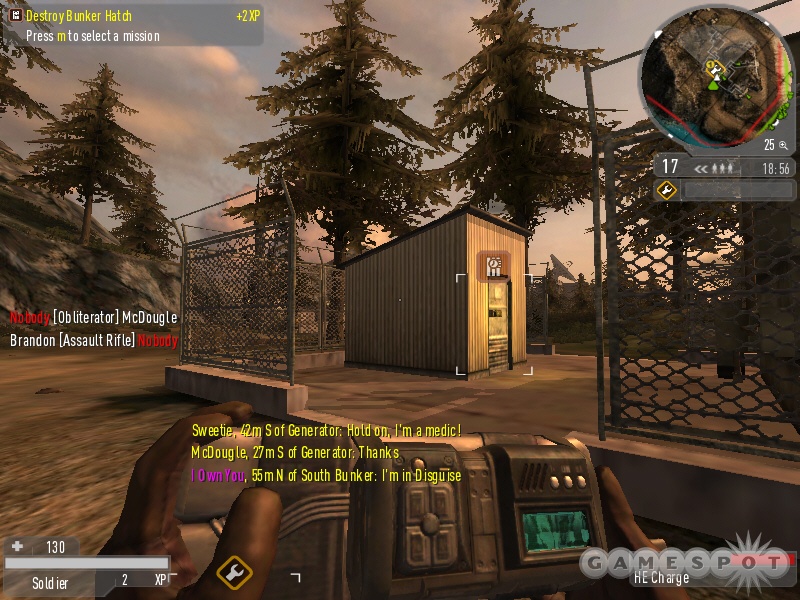
As stated, the soldier is also required for certain map tasks (both primary and secondary), specifically those that require the destruction of objectives and structures. The soldier is equipped with the HE charge and arming device. Place the charge on an objective then use the arming device to set the charge. The timed charge will automatically detonate. Remember however that Strogg Constructors can remove the charge—don’t leave the area expecting your work to complete unprotected. Take cover and ambush any Constructor hoping to disarm the HE charge.
The chart below reveals the campaign reward for the soldier class. These rewards are especially beneficial for the soldier’s heavy weapons options (and faster rocket lock-on enhances its ability against enemy vehicles and deployables) as well as the soldier’s role in destruction tasks when using the HE charge.
| XP | REWARD | DESCRIPTION |
|---|---|---|
| Level 1 | Faster Rocket Launcher Lock-On | When using the alternate fire button, the rocket launcher locks onto targets faster. |
| Level 2 | Gain Heavy Weapon Ammo | Increases the amount of the initial loadout of heavy weapon ammunition. |
| Level 3 | HE Charge Faster Arm | Arms the soldier’s HE Charge at a faster rate. |
| Level 4 | Faster Heavy Weapons Movement | Increases the soldier’s rate of movement while holding the rocket launcher or heavy machine gun. |
Medic
The medic’s primary role is to provide support to other classes. The medic can drop medpacks to replenish a teammate’s health, use defribillators to revive unconscious teammates, and use a special smoke grenade to call in a supply drop to restore health and ammo to adjacent players. The medic has limited offensive weaponry, only the assault rifle and shotgun, limited ammunition, and none of the experience rewards aid in combat. Your chief duties should be working behind the front lines and restoring health to attacking GDF forces, looking for unconscious teammates (which appear as possible missions), and using supply drops to keep vital teammates full of health and ammunition.
One of the medic’s most important roles is to eliminate Strogg spawn hosts created by Strogg Technicians. Spawn hosts are created on GDF corpses and Strogg players can spawn at those locations making both offensive and defensive situations easier. If you’re playing as a medic, you should seek out spawn hosts and destroy them with your defribillator to avoid making the Strogg task easier than it should be. Strogg reinforcement time is longer than GDF and spawn hosts help counter this; counter it back by destroying them.
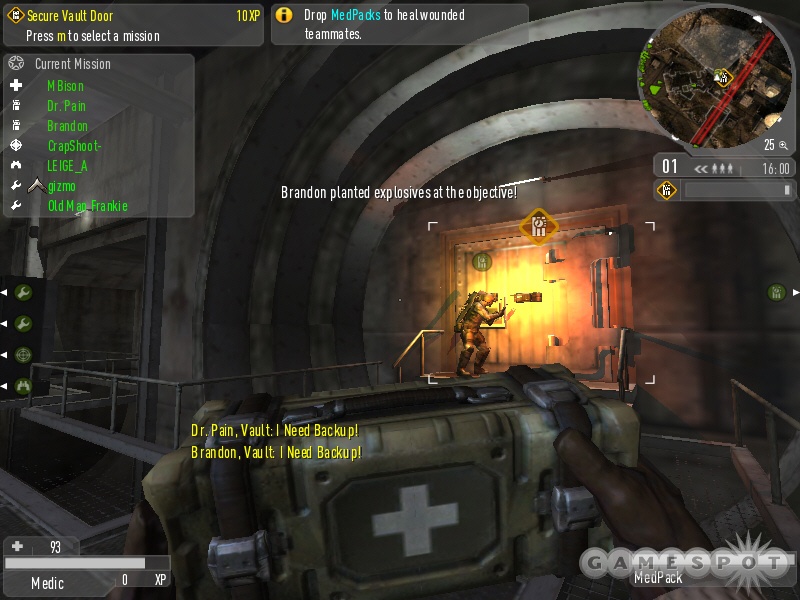
The supply drop is another extremely important task for the medic (it’s also unique to the GDF Medic; the corresponding Strogg Technician does not have this ability). The supply crate will replenish the ammunition and health of any player that stands adjacent to the crate. Drop a supply crate near an engineer tasked with constructing a bridge objective to replenish health or order a supply drop near a defense objective to keep defending soldiers stocked with rocket or heavy machine gun ammunition.
Although the medic has an unlimited supply of medpacks, you can’t dispense an unlimited amount at a time. Tossing medpacks uses a medic’s energy; you can toss four medpacks before you must wait until energy replenishes to toss another one. While you should be careful not to haphazardly toss medpacks, don’t become conservative either. Find GDF teammates that require health and drop a medpack or two nearby to keep your team at as close to full strength as possible. Teammates may request medical attention as well; be ready to move quickly to support your team. You shouldn’t select the medic class, ignore teammate requests, and assume a combat role—don’t consider yourself the only GDF troop worth healing.
The chart below reveals the campaign reward for the medic class. These rewards emphasize the medic’s role as a support class—none of these rewards provide combat benefits.
| XP | REWARD | DESCRIPTION |
|---|---|---|
| Level 1 | Large Medic Pack | Increases the restoration power of the medic’s dropped medpacks. |
| Level 2 | Additional Supply Drop | This reward allows the medic to call two supply drops instead of one. |
| Level 3 | Shock Shelf (Health Boost) | Using the alternate fire with the defibrillators restores a small portion of the medic’s health. |
| Level 4 | Full Health Revive | Revived teammates receive full health. |
Engineer
The GDF Engineer serves a variety of support and objective tasks. Although the engineer is primarily a defensive class, the engineer’s vehicle repair ability can provide the extra push needed for GDF vehicles to take down Strogg defensive positions. The GDF engineer can construct deployable turrets, repair vehicles and deployables, plant mines, and is tasked with constructing important objectives, such as the bridge on Valley and Canyon and the EMP Disruptor on Sewer. The engineer is essentially the equivalent to the Strogg Constructor.
The engineer is equipped with the assault rifle and shotgun, similar to the medic, but can unlock an assault rifle, grenade launcher combination as a reward for reaching the first experience level. Use the alternate fire button to switch to the grenade launcher, which provides excellent added firepower in defense situations, especially indoors. Combine the engineer’s ability to lay mines with the grenade launcher’s killing power in tight spaces for a solid one-two punch.
This is especially important in defensive tasks where you are protecting against a Strogg Aggressor from planting a plasma charge on a specific object, such as the final task on Salvage. The engineer is the only class with the ability to defuse charges; if the Strogg Aggressor completes his task, the GDF Engineer has a limited time to defuse the charge; if successful, a Strogg Aggressor must complete the task again. As an engineer, use mines and the grenade launcher to defend the area then be prepared to defuse the charge when required.
As stated, engineers are required to complete particular objective tasks on certain maps (such as Valley, Canyon, Sewer, and Island). It’s often extremely difficult, if not impossible, for an engineer to complete the task alone—use chat to request additional support from soldiers to provide covering firepower and medics to provide medpacks and a nearby supply drop. If you’re playing as a soldier or medic, it’s your duty to assist the engineer in completing the task.
You should also look for ways to use terrain objects to protect you from incoming fire. Drive a GDF vehicle adjacent to the construction spot and take cover while you build. If Strogg Infiltrators are attempting to snipe you, the vehicle can sustain significant damage before you’re in trouble. A fellow engineer could even assist by repairing the vehicle as you work. A GDF Covert Ops could drop a smoke grenade to provide cover.
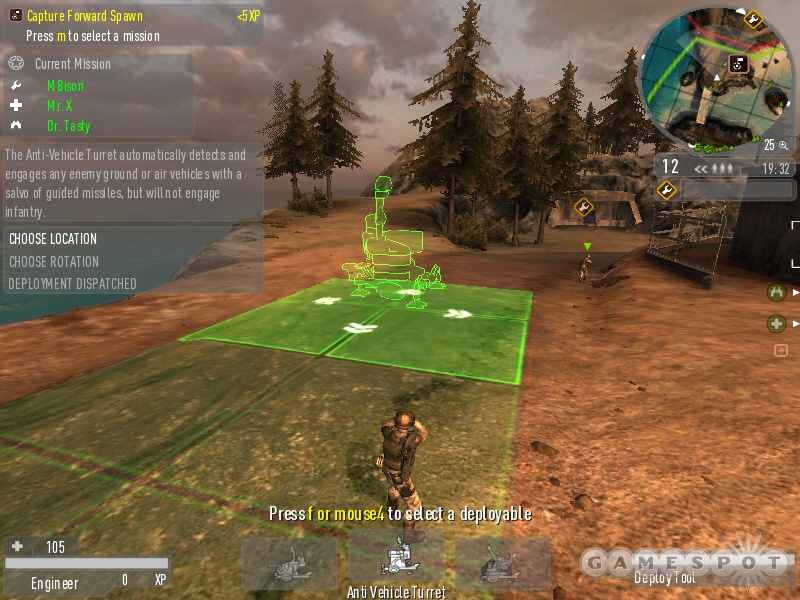
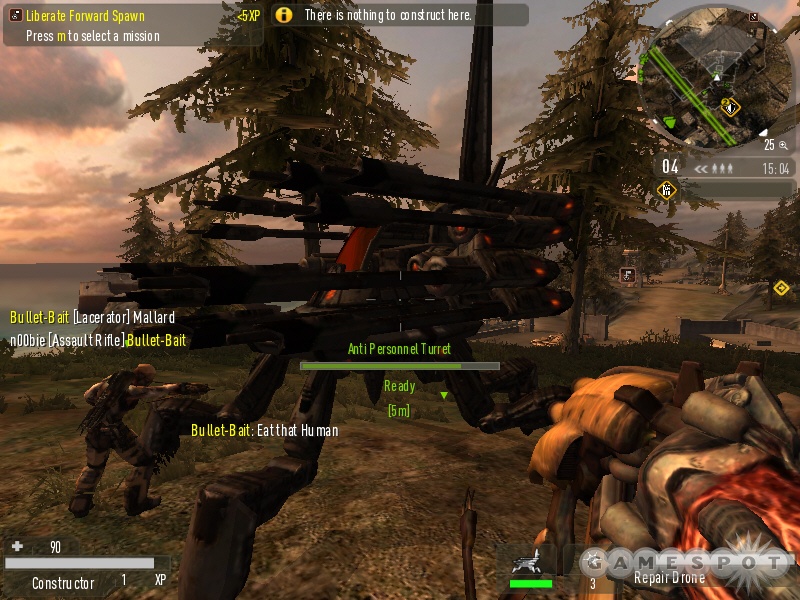
The engineer can deploy one of three different turret types, each with its own specific counter target. Note that the engineer can have only one deployable at a time; if you attempt to place a second turret, you will be told the other will be destroyed and you must wait for the turret to be air dropped once again. The engineer’s anti-personnel turret targets Strogg ground targets; the anti-vehicle turret targets Strogg vehicle targets; and the artillery interceptor turret targets incoming Strogg howitzer, mortar, and cannon projectiles.
The chart below reveals the campaign reward for the GDF Engineer. The first reward increases the engineer’s offensive and defensive capabilities with the addition of the grenade launcher. Additional rewards aid the engineer’s task in repair vehicles, constructing objectives, disarming Strogg plasma charges, and setting up a defense faster by unlocking self arming mines.
| XP | REWARD | DESCRIPTION |
|---|---|---|
| Level 1 | Unlock Grenade Launcher | Adds a grenade launcher attachment to the assault rifle (use the alternate fire button to switch between modes). |
| Level 2 | Faster Repair | Repairs to vehicles and deployables are faster. |
| Level 3 | Faster Contruction and Disarm | The engineer can complete build objectives and can disarm Strogg plasma charges faster. |
| Level 4 | Self Arming Mines | Engineer’s mines no longer have to be manually armed with the repair tool. |
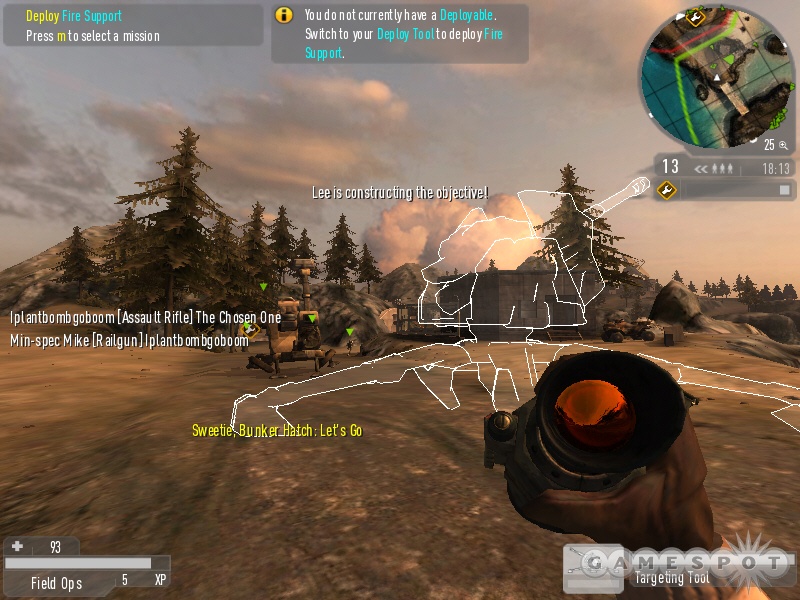
Field Ops
The GDF Field Ops is another support class. There are similarities to the engineer, because the field ops also has the ability to call in deployables but the field ops won’t be required to complete any specific map objectives. Instead of shorter range turret defenses, the field ops’ deployables are longer range artillery, rocket, and hammer missile strikes. Use these deployables to target specific map areas or even Strogg vehicles (for instance using the rocket artillery against a Strogg Tormentor).
Ammo resupply is another important duty of the field ops player. While the medic can call a supply drop that can replenish adjacent units’ health and ammunition, you can’t call a supply drop indoors. It’s the field ops duty, both indoors and outdoors, to drop ammunition packs to keep teammates’ (particularly soldiers) supplied. This is extremely important in defensive situations. Running out of rocket launcher ammo can turn a solid defense into a crumbling one; keep your teammates’ supplied and stocked with ammunition. Note that the field op ammo packs do not replenish grenades (restock grenades from a medic supply drop).
The field ops is only equipped with an assault rifle but can unlock a scoped assault rifle after the first experience reward. The scoped assault rifle is a decent medium-to-long range weapon—a good combination for the field ops task of supporting teammates with long-range fire support.
Providing long-range fire support is the field ops primary task. Like the engineer, each field ops can have one deployable at a time. But unlike the engineer’s turrets, the field ops’ deployables do not fire automatically. The field ops uses a targeting tool to designate a specific area (or vehicle) for the fire support to target. The field ops’ deployables must recharge between firings.
Utilize the field ops’ fire support to clear out Strogg defenses, both deployable and ground forces. Use the targeting tool to scope out Strogg territory. Use the long-range weapons to eliminate a Strogg radar, defensive turrets, or fire support. The rocket artillery is effective against Strogg vehicle targets. For instance, lock on to the Strogg Tormentor aerial vehicle and the rockets will track, and hopefully eliminate, the target. Field ops long-range fire support can be countered by the Strogg Artillery Interceptor Turret. Have teammates clear out any artillery interceptor turrets before using fire support on that area.
The field ops final piece of equipment is the airstrike marker. Toss this smoke signal to call in a powerful airstrike—GDF bombers drop their payload over the designated position. Utilize the airstrike in both offensive, to weaken or destroy Strogg deployables and defending vehicles, or defense, to hamper an aggressive Strong assault. Avoid placing the airstrike marker in plain sight—Strogg forces can conceal the marker with a prone body or a vehicle.
The chart below reveals the campaign reward for the GDF Field Ops. Reaching the first experience reward unlocks an additional firearm, the scoped assault rifle. Further experience rewards enhance the field ops abilities by increasing the size of ammo packs, providing faster target lock-on for fire support, and increasing the fire support recharge rate.
| XP | REWARD | DESCRIPTION |
|---|---|---|
| Level 1 | Unlock Scoped Assault Rifle | The scoped assault rifle becomes a weapon option. |
| Level 2 | Larger Ammo Packs | Increases the amount of ammunition in dropped ammo packs. |
| Level 3 | Faster Target Lock-On | Fire support targets acquire at a faster rate. |
| Level 4 | Faster Fire-Support Rechage | Fire support recharges at a faster rate allowing you to fire more frequently. |
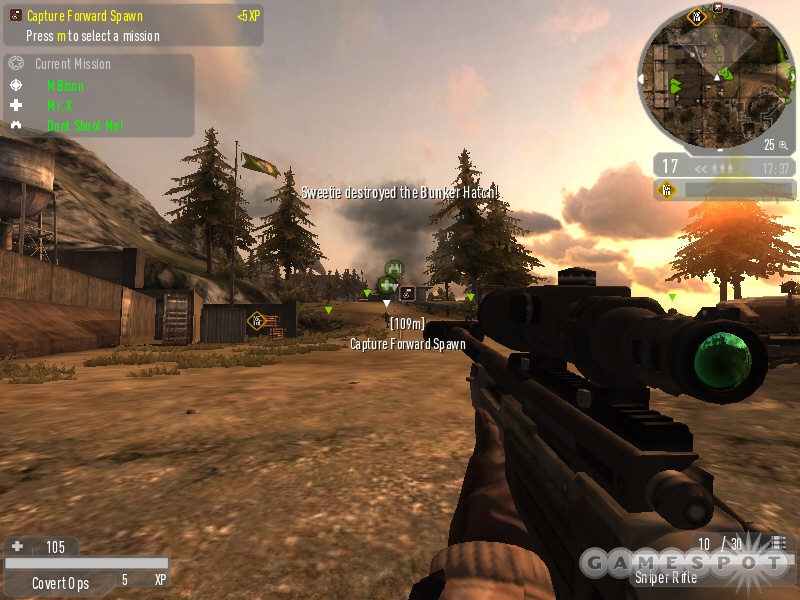
Covert Ops
Players who enjoy long-range sniping will gravitate to the GDF Covert Ops class—however, covert ops is much more than just sniping and arguably has one of the most important duties of any GDF class. The covert ops class is responsible for deploying radar. Without radar you would have no knowledge of Strogg positions. You wouldn’t be able to detect how many Strogg are defending a particular area or even see that Strogg sneaking up behind you. If you choose to be covert ops, your first job is getting radar up—don’t run to your favorite sniping position and not provide this invaluable source to your teammates. This can’t be overemphasized.
The covert ops player can use a scoped assault rifle or the sniper rifle. Select the sniper rifle if you plan to support your teammates from long-range by trying to pick off Strogg defenders (after you deploy radar of course!). Choose the scoped assault rifle if you plan to engage at closer range; you can still utilize the scoped assault rifle for medium-to-long range support but it’s also better suited for tighter engagements. If the map calls for a hacking objective (and especially if it’s the current task), the scoped assault rifle will be stronger since you should be attempting to complete the objective and may be required to eliminate Strogg from close range. The covert ops also carries EMP grenades, which can be used to temporarily disable Strogg vehicles or deployables.
Speaking of hacking, it’s the covert ops specialty. The covert ops’ hacking tool will be used in both map objectives (such as the shield generator in Valley, Canyon, and Outskirts and the sewer controls in Sewer) and against deployables. Hack a Strogg deployable to disable the device for a minute. Covert ops can also temporarily disable deployables and vehicles with an EMP grenade.
The hacking tool can also be used to disguise as the enemy. Use the hacking tool on a Strogg corpse and you can roam relatively undetected among the Strogg forces—perfect for disabling some deployables or attempting to maneuver close to the map’s hacking objective. You can’t fire weapons or you will lose the disguise; however, you can use the covert ops’ knife to backstab (causing high damage) while maintaining the disguise.
The third eye camera is another piece of equipment unique to the covert ops class. The third eye camera is a remote camera, short-range radar, and bomb all rolled into one. Use the camera to keep an eye on Strogg positions and advances. Perhaps you’re hacking an objective and need to know if any Strogg have entered the area.
You could also use it to keep an eye on an area you’re protecting. For instance, place a third eye camera near the HE Charge on a destruction objective. If a Strong Constructor arrives to disarm the charge, detonate the camera. Drop a third-eye camera when you need some radar; perhaps you’re inside a hostile building and need to see if there are Strogg present. Finally, you can also attach the camera to a vehicle and create a very discreet bomb.
The chart below reveals the campaign reward for the GDF Covert Ops. The first experience reward offers a new weapon, the silenced machine pistol. Additional experience rewards include enhancing radar range, faster hacking rate, and the ability to jam enemy radar—you will not appear on Strogg radar.
| XP | REWARD | DESCRIPTION |
|---|---|---|
| Level 1 | Unlock Silenced Machine Pistol | Allows the covert ops to select a silenced machine pistol instead of a pistol or silenced pistol. This is a stronger combination with the sniper rifle. |
| Level 2 | Enhanced Radar | Increases range of the GDF radar. |
| Level 3 | Faster Hacking | The covert ops can conduct hacking tasks faster. |
| Level 4 | Gain Personal Jammer | Masks the covert ops player from enemy radar. |
Chapter 3 - Strogg Classes
This section provides strategies for using each of the five Strogg classes. While each Strogg class has a similar GDF counterpart, there are some small and even some large differences between the two sides. We’ll cover strengths, weaknesses, duties, and experience rewards for each class.
One of the global differences between GDF and Strogg is the Strogg’s ability to transfer ammo to health and health to ammo. The Strogg use one substance for both health and ammo: Stroyent. The Strogg Technician can drop Stroyent cells to replenish teammates. During the game, any Strogg class can use the plus and minus keys to transfer Stroyent from ammo to health or vice versa. A wounded Strogg could transfer ammo to health while waiting for a technician to supply more cells. Or a camping Strogg Infiltrator could gain additional sniper ammo from health—sufficiently hidden, that Strogg would not need to worry about sustaining damage.
Aggressor
The aggressor is the Strogg’s primary combat class; like the GDF Soldier, the Strogg begin with greater health and a wider variety of weaponry. The Strogg Aggressor is the only Strogg class that can equip the obliterator and hyperblaster. The obliterator is the Strogg’s answer to the rocket launcher while the hyperblaster is basically equivalent to the GDF heavy machine gun (a bit more powerful but its rotors start slower, keep this in mind during a firefight).
The Strogg Aggressor is responsible for certain destruction tasks. For example, it’s the Strogg Aggressor’s responsibility to destroy the jamming generator on Salvage, Quarry, Area 22, and Ark and the slipgate on Area 22. Equip and place the plasma charge on the objective then use the arming tool to set the explosive. GDF Engineers are the only class that can disarm the plasma charge. Protect the charge against counter. Take cover close to the area and assist Strogg teammates in defense.
Strogg Technicians should provide support for the team’s aggressors by reviving slain teammates and by dropping Stroyent cells. The Strogg have no corresponding ammo pack drops or supply crates—the cells serve both purposes. Use the plus and minus keys to shift Stroyent from ammo to health or from health to ammo. Take advantage of this unique Strogg feature to keep the aggressor both healthy and supplied. Make adjustments after firefights; if you’ve sustained damage, convert Stroyent from ammo to health and request a technician to provide more cells.
The chart below reveals the experience rewards for the Strogg Aggressor. These rewards are similar to the soldier’s offerings and provide benefits to both the Aggressor’s unique weapon options and arming the Strogg plasma charge, which is used in a variety of map objective tasks.
| XP | REWARD | DESCRIPTION |
|---|---|---|
| Level 1 | Faster Obliterator Lock-On | The obliterator’s alternate fire lock-on mode is faster. |
| Level 2 | Gain Heavy Weapon Ammo | Increase the aggressor’s loadout of heavy weapon ammunition. |
| Level 3 | Plasma Charge Faster Arm | The aggressor can arm the plasma charge faster. |
| Level 4 | Faster Heavy Weapons Movement | Increases the aggressor’s movement rate while holding a heavy weapon. |
Technician
The Strogg Technician provides support to other Strogg infantry; essentially equivalent to the GDF Medic, the technician can revive unconscious Strogg teammates and drop Stroyent cells to replenish Strogg health and ammo. And perhaps one of the most important abilities for the Strogg, the technician has the ability to create spawn hosts from GDF corpses. The spawn host allows Strogg teammates to activate the host and spawn at that location upon death.
The technician’s support is vital. With only the lacerator and nailgun as weapon options, combat isn’t what the technician was built for. Instead, you should be providing Stroyent cells to Strogg teammates engaged in battle. Be alert for fallen Strogg teammates and use the Stroyent tool to revive. Assess the battle situation before running into the line of fire to revive a teammate. It’s a waste of time and effort if you’re immediately gunned down attempting to reach the fallen Strogg. Note that the technician’s revive ability is slower than the GDF Medic’s similar trait; to offset the difference, the technician has a unique ability, the ability to create spawn hosts.
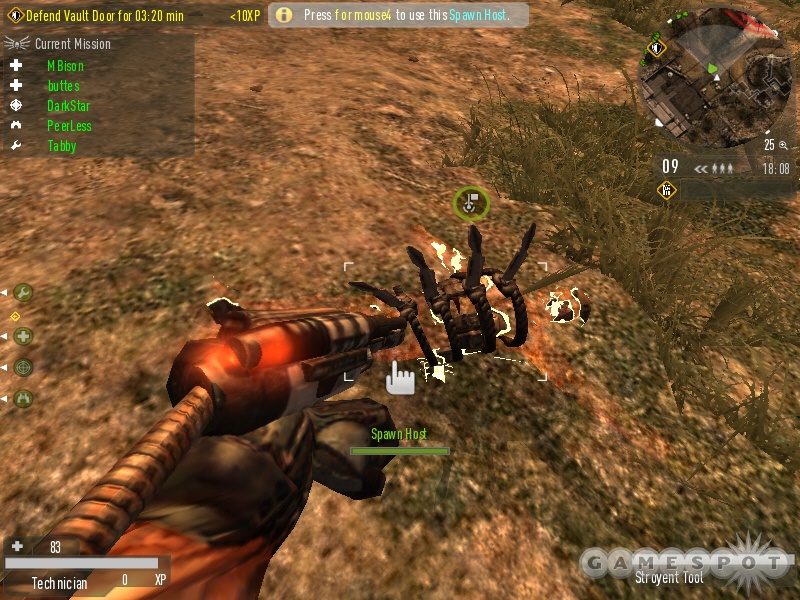
Creating spawn hosts is not only one of the technician’s most important tasks it’s one of the most vital abilities of the Strogg. To create a spawn host, locate a GDF corpse and use the Stroyent tool. The spawn host created replaces the corpse (your team will also be notified of its creation). A Strogg teammate can activate the spawn host and, upon death, return to that location. This is an excellent means of reaching both offensive and defensive positions quickly because standard Strogg reinforcement time is longer than GDF. GDF Medics counter Strogg spawn hosts with their defribillators; upon locating a spawn host, the medic uses the defribbilator to destroy it.
Like the medic’s medpacks or the field ops’ ammo packs, the technician carries unlimited Stroyent cells but can only drop four before having to recharge energy. While you should avoid dropping cells unnecessarily, don’t be too conservative either. While supporting other Strogg, drop cells close and communicate their location if necessary.
The chart below reveals the rewards for the Strogg Technician. The initial reward increases the size of the Stroyent cells, which can be converted into health or ammunition by Strogg teammates. The spike boost allows the technician to use the Stroyent tool to self heal. The technician’s final two rewards offer benefits to the revive ability: faster revive rate and revive Strogg to full health.
| XP | REWARD | DESCRIPTION |
|---|---|---|
| Level 1 | Large Stroyent Cell | Increases the amount of Stroyent provided by the cell. |
| Level 2 | Spike Boost | Use the alternate fire button with the Stroyent tool to increase health by a small amount. |
| Level 3 | Fast Revive | Increases the speed at which the technician revives a fallen Strogg. |
| Level 4 | Full Health Revive | Revives a Strogg to full health. |
Constructor
The Strogg Constructor provides vehicle support through repairs and defensive support through turret deployables. Similar to the GDF Engineer, the constructor is also required to complete build objectives on a number of maps, such as the mining laser on Area 22, Ark, and Salvage. The constructor is also the counter to the GDF Soldier’s ability to plant an HE Charge on a map objective; the constructor can disarm the charge before it detonates requiring the soldier to plant another charge in an effort to complete the task.
Equip the constructor with either the lacerator or nailgun. Reaching the first experience reward unlocks the plasma launcher, which turns the lacerator into a combination Strogg assault rifle and plasma launcher (use the alternate fire to switch to the plasma launcher). Although this can make the constructor more combat capable, your primary duties are repair, deploy, and construct mission objectives.
The constructor’s build objectives take time; request cover from Strogg Aggressors and support from Strogg Technicians (supplying Stroyent cells used for health). Take advantage of terrain vehicles or vehicle to provide cover from GDF attackers. Strogg Oppressors can also use their long-range fire support to eliminate attacking GDF troops while your constructor works on completing the build objective.
When the Strogg defensive maps, the constructor should call in a defensive deployable to aid Strogg forces against GDF ground forces, vehicles, and artillery projectiles. Each constructor can have only one deployable at a time; if you choose to build a second deployable, you will be prompted that the first will be destroyed. The constructor should utilize the Strogg anti-personnel turret to counter GDF ground forces; the Strogg anti-vehicle turret to battle GDF vehicles; and the Strogg artillery interceptor turret to counter incoming GDF artillery, rocket, and missile projectiles.
The chart below reveals experience rewards for the Strogg Constructor. The first reward unlocks an additional weapon, the plasma launcher (it becomes the alternate fire mode for the lacerator). The second reward allows the constructor to target Strogg vehicles or deployables and use flying drones to administer repairs. Finally, the constructor receives increased rate of special abilities—faster construction and disarm and self arming mines.
| XP | REWARD | DESCRIPTION |
|---|---|---|
| Level 1 | Unlock Plasma Launcher | Adds the plasma launcher attachmenet to the lacerator. Use the alternate fire button to toggle between modes. |
| Level 2 | Target Flying Repair Drone | Allows the constructor to use flying repair drones to repair remotely. |
| Level 3 | Faster Construct and Diasrm | The constructor can complete build objectives and can disarm GDF HE Charges faster. |
| Level 4 | Self Arming Mines | Constructor’s mines no longer have to be manually armed with the repair tool. |
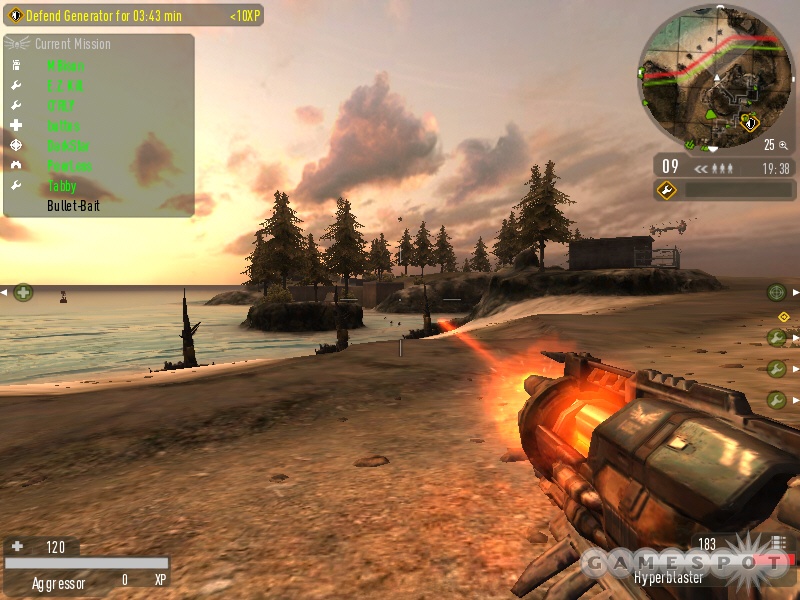
Oppressor
The Strogg Oppressor is a support class with the ability to deploy long-range fire support, much like the GDF Field Ops. Utilize the long-range fire support to aid in both offensive and defensive situations. Bombard attacking GDF to help your Strogg teammates defend a vital objective or use the long-range fire support on the defending GDF troops to weaken the defenses and open the way for your Strogg forces to assume control of the area.
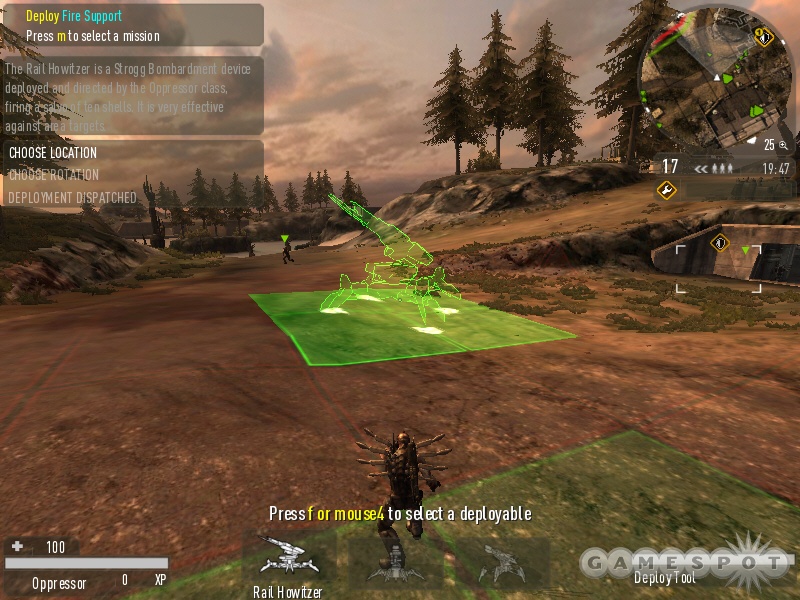
Use the oppressor’s artillery deploy tool to call in a rail howitzer, plasma mortar, or dark matter cannon. Like the engineer, field ops, and constructor, each oppressor can have only one deployable at a time. If you attempt to place a second deployable, you will be prompted that the first deployable will be destroyed before the second one will build.
The constructor’s turrets fire automatically but the oppressor’s fire support weapons have a recharge rate. Choose your shots carefully; a complete miss means waiting for another chance to fire while the GDF forces attack or defend unscathed. Likewise, be careful not to create friendly fire casualties with your artillery strikes. Check the radar carefully to ensure you aren’t hampering the Strogg forces with your bombardment. Killing your Strogg defenders just to eliminate a couple GDF attackers will likely have disastrous results. Have teammates clear any GDF artillery interceptor turrets from your target location before firing.
The Strogg Oppressor also carries the Violator Beacon; this is similar to the field ops’ airstrike marker. Drop the beacon where you want to target the Strogg’s orbital beam weapon, a devastating strike that can’t be countered by the GDF artillery interceptor turret. Note that the beacon and the oppressor’s fire support use the same recharge; if you use the beacon, you won’t be able to use fire support until the energy has recharged.
Although the Strogg Oppressor doesn’t drop ammo packs, it does come equipped with a unique feature its GDF counterpart lacks: tactical shields. The oppressor can drop a tactical shield indoors or outdoors; the small shield is used primarily to provide Strogg infantry cover. Drop the tactical shield as you attack a room defended by GDF forces; the added protection could provide the extra seconds of defense required to gain the upper hand on even a superior enemy force. Without experience rewards, the tactical shield remains up for about 40 seconds. It can be destroyed by enemy fire; a close-quarters frag grenade will destroy the default shield.
The chart below reveals experience rewards for the Strogg Oppressor. Reach the first experience reward to unlock an additional weapon option, the accurized lacerator. The second reward increases the effectiveness of the oppressor’s tactical shield: it stays longer and can sustain more damage. Additional rewards include faster targeting for the oppressor’s long-range fire support and faster recharge rate for the long-range fire support.
| XP | REWARD | DESCRIPTION |
|---|---|---|
| Level 1 | Unlock Accurized Lacerator | Adds the accurized lacerator to the oppressor’s weapon options. |
| Level 2 | Tactical Shield Upgrade | Enhances the durability and lasting power of the oppressor’s tactical shield. |
| Level 3 | Faster Targeting | Fire support targets acquire at a faster rate. |
| Level 4 | Faster Fire-Support Recharge | Fire support recharges at a faster rate allowing you to fire more frequently. |
Infiltrator
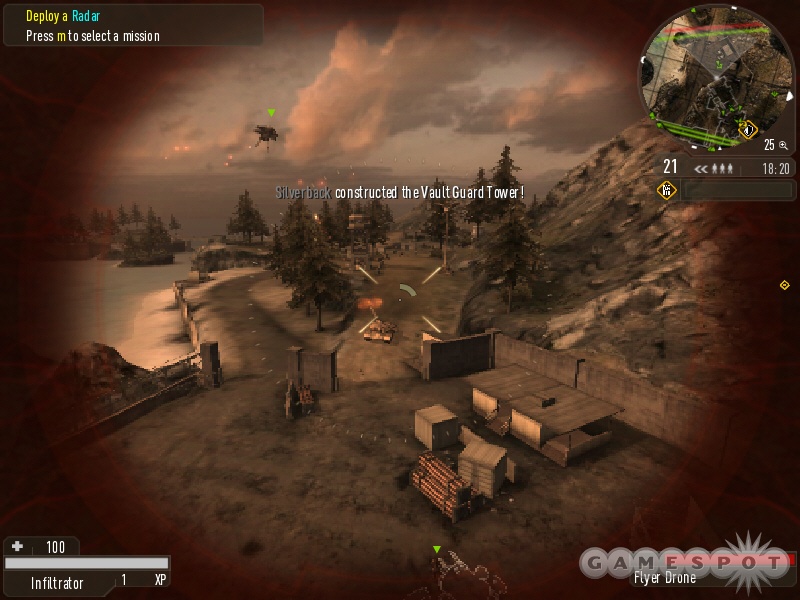
Players can equp the Strogg Infiltrator with the railgun; Quake veterans will recognize this weapon as a long-range sniper weapon. But like the GDF Covert Ops class, the infiltrator isn’t simply a sniper. Don’t select the infiltrator for sniping purposes only; your Strogg teammates will be counting on the infiltrator for a variety of important tasks, including completing hacking objectives and flying drone objectives, scouting, and perhaps most important of all, deplying the Psi Radar.
Deploying radar should be the first job of any Strogg Infiltrator. Even if you plan to find a safe railgun area, assist your teammates first by creating the Psi Radar. Strogg goals become much easier with the help of radar. You can spot GDF positions, important for both offensive and defensive situations. You’ll know exactly how to maneuver Strogg ground troops and vehicles to counter the GDF opposition. A team with working radar has a huge advantage over a team without it.
The infiltrator’s hacking tool has a variety of uses. It’s used to complete map hacking objectives, such as hacking the security controls on Volcano. You can also use the hacking tool to hack GDF deployables, which temporarily disable them. Like the GDF Covert Ops, the infiltrator can steal an enemy disguise from a fallen enemy. Approach and use the fallen enemy to steal the disguise; firing weaponry will cause you to lose the disguise but you can use the melee spikes weapon for extra backstab damage and maintain the disguise.
The Strogg Infiltrator also comes equipped with flyer drones. These are actually key to the map objective on Volcano (infiltrators must fly droops into the access vents and destroy the energy core). You can also use drones to scout defenses and even eliminate a GDF trooper who thinks he’s well-hidden and under cover. For example, fly a drone into the final room of Salvage (where a Strogg Aggressor must destroy the salvage with a plasma charge). The infiltrator can scout enemy defenses inside the room—and even eliminate a defender! Fly the drone and detonate it with the fire button when you’ve moved as close to the target as possible. Nothing surprises a camping GDF Soldier like a flying drone! The drone can remain airborne for 30 seconds before deactivating.
The chart below reveals experience rewards for the Strogg Infiltrator. The first reward allows the infiltrator to move silently—an excellent combination for the infiltrator’s disguise and backstab abilities. The infiltrator’s enhanced radar experience reward increases range of the Psi Radar. Finally, the infiltrator can receive faster hacking and faster disguise rates by reaching the third and fourth experience rewards respectively.
| XP | REWARD | DESCRIPTION |
|---|---|---|
| Level 1 | Stealth (No Footsteps) | Allows the infiltrator to move silently without the sound of footsteps. |
| Level 2 | Enhanced Radar | Increases the range of the Psi Radar. |
| Level 3 | Faster Hacking | The infiltrator can conduct hacking tasks faster. |
| Level 4 | Faster Disguise | The infiltrator steals the disguise faster. |
Chapter 4 - Vehicles and Deployables
Effective use of a map’s vehicles and the GDF or Strogg deployables can dramatically turn the tide of a game. This section provides strategies for using GDF and Strogg vehicles and deployables.
While certainly formidable, vehicles do have vulnerabilities. A GDF Soldier or Strogg Aggressor can use their rocket launcher or obliterator to inflict heavy damage on an enemy vehicle (use lock-on mode with the alternate fire button). Standard grenades also inflict big damage. A GDF Covert Ops or Strogg Infiltrator can use EMP and scrambler grenades respectively to temporarily disable a vehicle. Long-range fire support from a field ops or oppressor can also take out an enemy vehicle. A GDF Engineer or Strogg Constructor can deploy anti-vehicle turrets to provide vehicle defense; also don’t forget to use proximity mines along expected vehicle routes.
Deployables are also vulnerable to explosives from the soldier and aggressor. Anti-vehicle turrets won’t fire on ground troops so you can get close and easily disable the defensive unit. Anti-personnel turrets won’t fire on vehicles. Deployables that aren’t protected by an artillery interceptor turret will be vulnerable to field ops or oppressor fire support. A GDF Covert Ops or Strogg Infiltrator can use EMP or scrambler grenades or hacking ability to disable a deployable.
GDF Vehicles
The smallest GDF vehicle is the Husky, essentially a one-man all-terrain vehicle. It’s quick, but lacks weaponry, and is best suited as means of getting from point to point as quickly as possible. For example, capturing a forward spawn on a map or charging to the first objective as quickly as possible. The Husky handles unlevel terrain better than other vehicles.
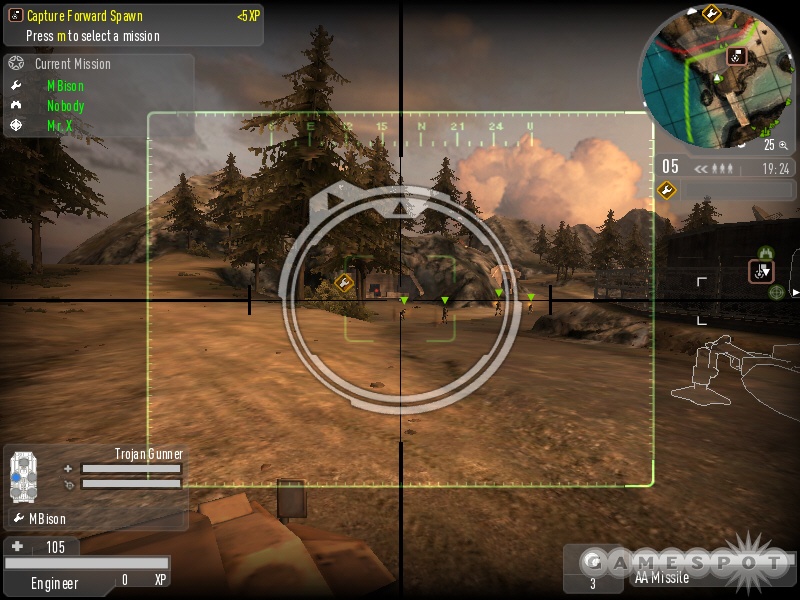
The Armadillo is a fast, but lightly armored GDF transport vehicle. It does feature and weapon seat and can be effective in picking off Strogg ground troops but it will fall quickly to heavier counterattack. Use the Armadillo as a means of transporting multiple teammates quickly and defending an area using the mounted machine gun. GDF’s Trojan APC is a heavier transport and features two weapon seats, one providing anti-air support against Strogg Tormentors and Icarus and a mounted machine gun to counter ground troops and lighty Strogg vehicles.
The Platypus is essentially a fast water transport (though the Trojan APC can move through water as well); it holds two players with a driver and a second manning the machine gun seat. There are a couple maps using the Platypus—for example, Island—that offer crafty mission completion possibilities, such as the ability to transport player to a map objective away from the dangers of battle.
GDF’s primarily aerial attack unit is the Anansi. It holds a couple crew members; the driver has control of the missiles while the passenger uses the machine gun. Don’t neglect to have decoys ready to counter missile locks. If the Strogg fail to deploy anti-vehicle turrets, an Anansi can make quick work of Strogg defenses. Awhile excellent against vehicles and deployables, the passenger can eliminate Strogg infantry attackers or defenders to pave the way for a GDF push. The Bumblebee is another GDF aerial unit. It’s slow but has multiple weapon seats offering both attack and transport potential.
GDF Deployables
GDF Engineers can deploy anti-personnel turrets, anti-vehicle turrets, and artillery interceptor turrets. The names clearly define their functions. Note, however, that each engineer can only have one deployable so it’s important that multiple engineers use their deployables to protect the GDF against particular threats. Montior turret status and repair as necessary. Deploying another turret wastes valuable time.
Don’t neglect the artillery interceptor turret. It won’t protect against ground or vehicles but it protects against the Strogg Oppressor’s long-range fire support, which could be even more important. Place an artillery interceptor to protect other defensive structures as well as near objectives you’re attempting to complete. The artillery interceptor will not block a Strogg violator beacon.
The GDF Field Ops can deploy the artillery gun, rocket artillery, and hammer launcher. Utilize the artillery gun as an area effect weapon. Target Strogg defensive units and structures as well as Strogg attackers attempting to complete an objective. It can also inflict heavy damage against Strogg vehicles blocking the GDF advance. The field ops can use the rocket artillery to lock onto Strogg vehicles (including air vehicles). The rocket artillery fires on a lower trajectory so make sure there’s open space between the deployable and its target. Finally, the hammer launcher is a single, high area of effect damage missile. Aim it at a cluster of deployables or at a high concentration of Strogg defenders to clear the area quickly.
The final GDF deployable is perhaps the most important: the GDF Covert Ops can deploy radar. At the beginning of every map, a GDF Covert Ops player should deploy radar. It’s essential to tracking Strogg movements. Place your radar away from firefights and replace or repair as needed. Don’t neglect radar for indoor objectives, though obviously the radar must be deployed outside.
Strogg Vehicles
The Strogg’s Hog is a fast two-person vehicle (a driver and a hyperblaster weapon seat). Use it to move from point to point quickly and to attack GDF infantry and light vehicles. The Hog also features a unique ramming ability. Use the sprint button to both increase speed and to create a shield on the front of the Hog. The Hog can ram GDF players and vehicles for heavy damage—an interesting method for taking down a GDF Titan tank!
The Icarus is essentially a Strogg jetpack. It’s a one-man device that can serve as both means of reaching otherwise inaccessible areas, moving quickly over structures, or even providing aerial attack against GDF ground targets. The Icarus "pilot" can fly the device for a short period of time before it must recharge. You can fly as high as possible, allow the Icarus to recharge as you descend, then continue flying for a bit longer. The pilot can drop bombs on targets below. Aiming can be difficult as you must compensate for the Icarus’ movement and the slight roll of the bomb. Beware of GDF anti-vehicle turrets and other air counters—use your decoys!
The Strogg Cyclops is the most powerful vehicle in the game. It’s an impressive ‘mech with two powerful plasma cannons and the ability to enter siege mode for even faster damage inflicting ability! Maximize the Cyclops’ potential with long-range destruction of GDF deployables and vehicles. Strogg Constructors should stick close to the Cyclops and keep the vehicle repaired. Have Strogg teammates eliminate dangers to the Cyclops, particularly anti-vehicle turrets. Use decoys on missile locks. The Cyclops can also stomp when standing still. Press the space bar to squish infantry.
The Tormentor is an aerial attack vehicle similar to the Anansi. Use it to provide support for Strogg ground troops but beware of anti-air (Trojan APC, anti-vehicle turrets, soldiers with rocket launchers). Be prepared to use decoys. The pilot has a couple missile armaments similar to the Anansi while a passenger can utilize the hyperblaster seat.
Strogg Deployables
The Strogg Constructor can deploy the anti-personnel turret, anti-vehicle turret, and artillery interceptor turret. These function identically to their GDF counterparts. Anti-personnel turrets should be placed in likely infantry routes and to protect objective targets. Anti-vehicle turrets counter the GDF MCP (use at least two) as well as the standard GDF vehicle force. And don’t neglect the artillery interceptor turret, which must be used to protect against GDF Field Ops fire support attacks. Place the interceptor turret near your other deployables and to protect defending ground troops against long-range bombardment.
The Strogg Oppressor can ceploy the rail howitzer, plasma mortar, and dark matter cannon. Use the rail howitzer’s ten shots as an area effect weapon against GDF deployables or infantry units surrounding a defended objective. The plasma mortar can be used to target aerial units (using lock-on mode) as well as other vehicle targets. The dark matter cannon fires a single powerful projectile that can obliterate infantry, vehicles, and deployables within its area of effect. Have Strogg teammates eliminate any GDF artillery interceptor turrets before using.
The final Stogg deployable is radar and its deployed by the Strogg Infiltrator. Radar is extremely important—downright mandatory actually. Any infiltrator players should focus on getting radar up before proceeding to other tasks. Radar is vital for both offensive and defensive tasks. If you can’t see GDF troop and vehicle positions it’s impossible to generate an effective counter or to catch the GDF off guard.
Chapter 5 - Map Strategies
This section provides specific strategy for Quake Wars’ twelve multiplayer maps (though you can play against the computer as well). Each map features its own primary and optional objectives; we cover tips on completing all of these objectives and how GDF and Strogg teams can work collectively to conquer the competition.
Succeeding as a team means combining all game factors—basic training, class tips, and map strategies. Although many of these elements are covered in the map strategies, the list below provides some general tips for winning across all maps. These are important fundamentals. Look for more tips in the basic training, class, vehicle, and map strategy sections of the guide.
- Teamwork, teamwork, teamwork. Communicate with your team. Provide support. This isn’t deathmatch.
- Destroy objectives require soldiers or aggressors. Construction objectives require engineers or constructors. Hacking objectives require covert ops or infiltrators. If your team lacks the necessary class to complete an objective then you’re in a no-win situation. Don’t hesitate to switch classes if the team needs it.
- Covert ops and infiltrator players should deploy radar immediately. If your team doesn’t have radar, request it! If the enemy has radar and your team doesn’t, you’re at a huge disadvantage.
- Forward spawn points are always important. Be the team player that goes for the forward spawns immediately. Don’t forget they must be held from the enemy. Place a deployable nearby or use mines. Radar will help you discover when the enemy gets behind the lines.
- Medics and technicians aren’t built for combat—if they were, they’d carry a rocket launcher. These are support classes. Aid your teammates with medpacks and Stroyent. Revive teammates. Strogg have a long reinforcement time, which makes the technician’s spawn host ability vital to both offensive and defensive tasks. The medic also features a unique ability: the supply drop. Do not neglect to drop a crate near an attack or defense position to replenish teammates’ health and ammo quickly.
- Gain experience by completing optional objectives such as constructing guard towers or destroying barricades. Check the list of missions for other tasks, such as destroying an enemy deployable or repairing one of your own. Elevating experience unlocks valuable rewards. This is especially valuable on a three-map campaign game.
- The artillery interceptor turret can be one of the most valuable turrets…and it’s often underused. Use this turret to protect your defense against field ops or oppressor fire support bombardment. This can mean the difference between maintaining a strong defense or falling apart quickly under a rain of artillery fire.
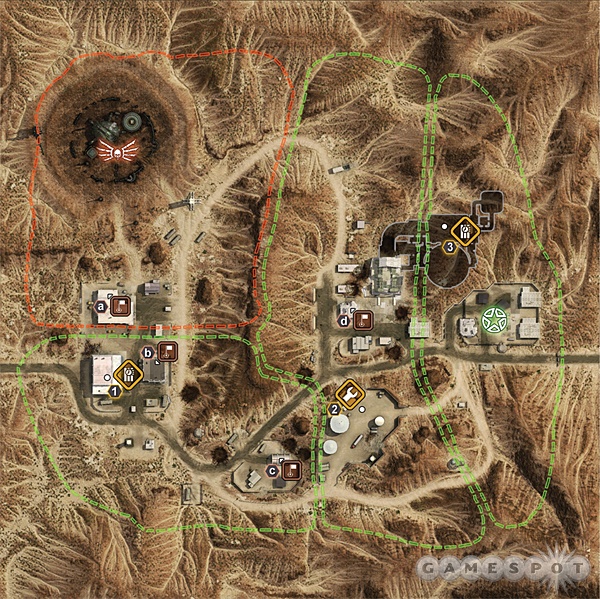
Area 22
The GDF have captured a Strogg slipgate and are about to make a major breakthrough in understanding the sinister technology. The Strogg are now determined to destroy the captured slipgate before the GDF can uncover its secrets. The GDF must defend their underground research facility at all costs!
Objective: A Strogg Aggressor must destroy the jamming generator.
There are two forward spawn points close to the generator; one to the north and another to the east. Both Strogg and GDF players should capture their closest spawn point then organize mixed squads to liberate the other. Maintaining both spawn points can put a big squeeze on either the attacking or defending teams. There are plenty of vehicles available from start. Strogg players should pressure the area around the jamming generator and the GDF forward spawn point while avoiding the defensive turrets deployed by GDF Engineers. Both teams need to get radar deployed, of course!
When playing as GDF, have engineers deploy anti-vehicle turrets to depel the Strogg Desecrators and Cyclops. The anti-vehicle turret also counters the Strogg Icarus, which can be used to get on top of the building holding the jamming generator. GDF Field Ops utilize long-range fire support to bombard the area around the Strogg’s forward spawn point. Send a covert ops sniper into the hills; maintain sight between the Strogg spawn and generator building and pick off attacking Strogg.
Attacking Strogg maintain constant pressure on the area around the generator building. Eliminate defensive turrets using fire support. If the GDF side fails to utilize an anti-vehicle turret, grab an Icarus and use it to reach the top of the generator building; there’s an entrance here providing quick access to the upper catwalk overlooking the jamming generator. There are multiple ground routes into the structure; send teammates into multiple entrances to force the GDF to protect every route.
The Strogg should have several aggressors—to muscle the GDF defenders and deployables and to place a plasma charge on the jamming generator to complete the objective. GDF Engineers responsible for deploying turrets must be ready to defuse the plasma charge.
Objective: A Strong Constructor must construct the mining laser.
The mining laser is located in an open lot, though there’s plenty of cover available for both attacking and defending troops. Strogg players should immediately move toward the compound spawn point and capture it. Vehicles will reappear closer to the jamming generator so select your spawn point accordingly.
This is a tough uphill battle for the attackers. Send vehicles in from multiple sides to force the GDF to divide their defenses. Strogg Oppressors use long-range fire support to bombard the area around the mining laser. Use the hills to the south as vantage point (a good place for Strogg Infiltrators using a railgun). Make sure your team has plenty of Strogg Constructors to reach and construct the mining laser to complete the objective.
GDF defenders will have plenty of vehicles at their disposal, including Anansi air support. Have GDF Field Ops bombard the area between the compound spawn point and entrance into the mining laser lot. Watch for vehicles approaching from the southern roads. Keep some troops inside the buildings near the mining laser to avoid howitzer strikes and to keep an eye on approaching Strogg forces.
Objective: A Strogg Aggressor must destroy the slipgate.
The final objective is indoors (the mining laser destroys the doors opening a route into the building). Strogg attackers need to capture and hold the admin bunker spawn point west of the building holding the slipgate.
There are a couple key locations inside. For the GDF defenders, there’s a machine gun nest protecting one of the paths to the slipgate; a GDF Engineer can construct the machine gun for additional defense. For the Strogg attackers, there’s the service door. A Strogg Aggressor can destroy the service door with a plasma charge; doing so opens a faster route to the slipgate (and avoids the machine gun nest).
The route opens to the upper catwalks circling the slipgate. Use oppressor shields and toss grenades below to clear GDF defenders. A Strogg Aggressor is required to plant a plasma charge onto the slipgate. On the other side, GDF Engineers should stand by and prepare to defuse. Remember that even though the objective is indoors, both teams need to deploy exterior radar. On that note, seek out the enemy radar and eliminate it to gain a big advantage.
Ark
The remore GDF research station known as The Ark has made a breakthrough in analyzing Strong biotechnology. The Strogg must destroy the lab equipment in the underground laboratory before their secrets are made public.
Objective: A Strogg Aggressor must destroy the jamming generator.
Strogg attackers spawn south of the jamming generator; GDF defenders spawn to the north. The generator is positioned on the eastern side of a small village. The village buildings provide ample cover for both Strogg attackers and GDF defenders.
Strogg attackers have several options approaching the village. Take advantage of multiple routes to the jamming generator. Split the Strogg attack groups to the western and eastern sides of the village. The hills to the eastern side provide an excellent vantagepoint to provide covering fire from a crouched Desecrator. A Strogg Oppressor can use this area to target long-range fire support to help weaken the GDF troops defending and approaching the laser from the GDF spawn point to the north.
GDF defenders must watch each Strogg attack route. Pay attention to the snowy hills east of the jamming generator for Strogg forces looking to flank the GDF defense forces. Place long-range fire support north of the jamming generator and away from Strogg attackers. The GDF Field Ops must make careful decisions on how to best use fire support against a spread Strogg squad.
Strogg Aggressors are required to complete the objective; the aggressor must destroy the jamming generator with an armed plasma charge. GDF Engineers will deploy defensive turrets but must also be ready to disarm the aggressor’s plasma charge to keep the jamming generator intact.
Objective: A Strogg Constructor must construct the mining laser.
A short time after the Strogg successfully destroy the jamming generator, the mining laser appears on the small islet west of the village. The Strogg now spawn near the completed generator objective while the GDF spawn between the mining laser and the biodome to the northwest.
Vehicles and long-range fire support will be key for Strogg maintaining pressure on the GDF defenders. Target approaching GDF defenders and vehicles. If you gain an upperhand near the laser, form a perimeter on the northwestern side and battle approaching GDF forces there while Strogg Constructors make a run for the mining laser. Protect your constructors! Strogg Technicians create spawn hosts for teammates to return to battle quickly.
GDF Engineers and Field Ops must deploy defensive turrets and fire support to counter the Strogg attack. Engineers should plant mines near the mining laser and along routes the Strogg team are tending to use to reach the area.
Objective: A Strong Aggressor must destroy the lab equipment.
Once a Strogg Constructor finishes construction, the mining laser destroys the entrance into the biodome and provides access to the map’s final objective. The Strogg spawn near the mining laser, which isn’t close to the lab equipment inside the biodome. One of the Strogg priorities will be to capture the biodome entrance spawn point. This will cut down the time required to reach the lab equipment considerably. Plus the Strogg can avoid being harassed by GDF troops choosing to spawn outside the dome.

There are two entrances into the front of the biodome: the main entrance destroyed by the laser and a rear entrance on the northern side. Using the rear entrance can flank GDF defenders if they’re crowding the area around the biodome entrance spawn. Use the path to reach the area above the spawn to aid in eliminating defensive forces. Note that vehicles can easily maneuver inside the biodome entrance.
Once inside the dome, follow the halls to the lab equipment. There are several routes; you can use the marked paths (yellow lines) to find the lab room. Strogg attackers should move as a group to push through the GDF defenders. Technicians can create spawn hosts on GDF corpses and a skilled infilitrator could steal a disguise and clear out some GDF troops with backstab. A Strogg Aggressor will be required to utilize a plasma charge to destroy the lab equipment.
GDF defenders should attempt to defend the biodome entrance spawn point for as long as possible. Maneuver vehicles into the diodome to increase defense. GDF defenders inside the final room should take cover and pounce on Strogg attackers. Medics and field ops must keep teammates healthy and supplied. Have engineers on hand to defuse the plasma charge.
Canyon
The Strogg have taken over an abandoned fortified base to develop an improved Stroggifier. The GDF must fight their way down the canyon and destroy the Stroggifier before it can be used to produce new armies of Stroggtroopers.
Objective: A GDF Engineer must construct the bridge.
There’s a forward spawn, the domed building spawn point, closer to the bridge. Immediately drive a Husky (using the sprint button for increased speed) east. As you approach the building, drive up the rocky incline on the right side to reach an entrance into the upper floor of the domed building—the spawn is inside the upper floor. Capturing this spawn point quickly and holding it is a GDF priority. The bridge is a long way from the GDF base! A couple GDF Engineers should also pile into a vehicle and make a quick run for the bridge in case Strogg defenders are disorganized.
The road to the bridge runs through a valley; there are two mountain roads to the west and east of the bridge. This provides a lot of defensive cover on the bridge point. GDF players must help clear out Strogg snipers and defenders from these areas or GDF Engineers will have a tough time staying at the bridge long enough to complete construction. Use vehicles postioned on the left side of the build point to provide cover from Strogg snipers; crouch or go prone to become a smaller target while completing construction.
Strogg defenders should capture the destroyed building spawn point on the mountain road just north of the bridge. Continuing south, the Strogg can drop off the mountain road into an alley adjacent to the bridge. Strogg defenders should push quickly to the bridge to avoid GDF Engineers getting a quick and easy build. After thwarting the initial rush, Strogg defenders should spread into the mountain road buildings to the east and west of the bridge and take aim on GDF troops and vehicles below. This is also an excellent spot for infiltrators and oppressors to aid with long-range support.
Objective: Any GDF class must drive the MCP to the outpost and deploy it.
After a GDF Engineer completes the bridge, the MCP is dropped near the domed building spawn point. Any GDF class can drive the MCP to its destination, which lies across the bridge and well into Strogg territory. A second GDF troop can main the minigun atop the MCP and provide covering fire as the MCP pushes forward toward the outpost. Meanwhile, GDF forces should take the ruined building spawn on the eastern mountain road north of the bridge.
The biggest Strogg threats initially are aggressors and vehicles. Escort the MCP with vehicles in front to both draw enemy fire and overcome any hostiles. Field ops will be responsible for fire support ahead of the MCP. As you near the outpost, the path for the MCP forks to the left and right; the left path provides some cover from mountain rocks and is generally the quicker route to the outpost destination.
Strogg defenders should erect several defensive turrets on the roads leading to the east and west of the outpost. Anti-vehicle turrets can make quick work of the MCP and will soften up any escort vehicles as well. Strogg Constructors must keep these turrets active and running to keep the MCP from advancing. GDF attackers can use the mountain roads to attack any Strogg turrets from high ground. Once the MCP reaches the destination, it automatically fires the SSM—and the Strogg shield blocks it.
Objective: A GDF Covet Ops must have the Strogg shield generator.
The GDF now spawn in the outpost and follow an uphill road east into Strogg territory and the shield generator protecting the entrance to the Stroggifier. The challenging uphill battle will require GDF Field Ops to provide long-range fire support to weaken Strogg vehicles and deployables crowding the narrow road.
Strogg defenders have a longer trip to protect the shield generator. Ensure that the area is defended by constructor and oppressor deployables. Any Strogg Technicians should create spawn hosts for slain Strogg to rejoin the defense as quickly as possible. Mine the area around the generator to fend off ambitious GDF Covert Ops hoping for an easy hack.
Objective: A GDF Soldier must destroy the Stroggifier.
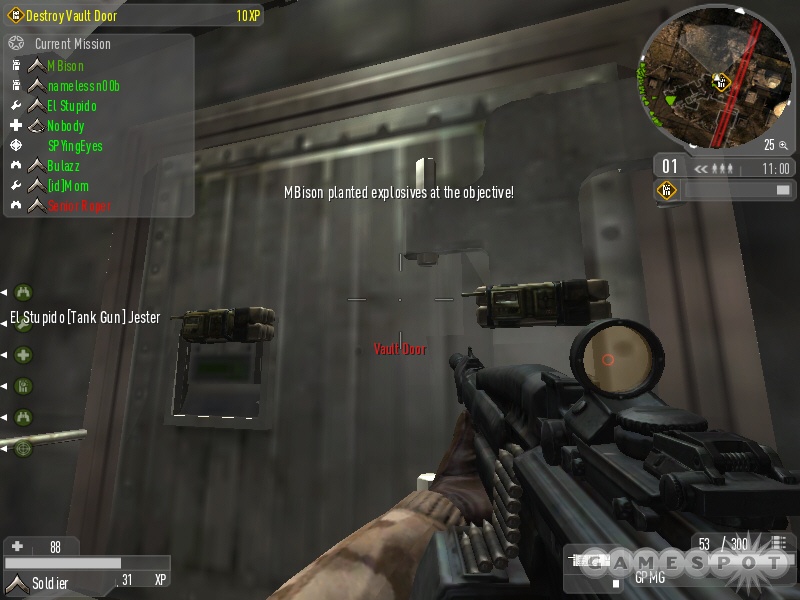
After a GDF Covert Ops hacks the shield generator, the MCP SSM destroys the hanger doors. Attackers should capture the hut spawn near the shield generator and hold it. A GDF Soldier will be required to place an armed HE Charge on the Stroggifier. The interior isn’t complicated, though there are a few routes to the target. Make sure you have working radar to detect Strogg movements. After arming the charge, maintain position inside the room to repel any Strogg Constructors attempting to disarm the explosive.
Strogg defenders can attempt to hold the hut spawn and force the GDF attackers to travel long distance to reach the Stroggifier. This can be especially effective if the GDF fail to implement defenses around the spawn. Deploy a Psi Radar to track GDF movements and create spawn hosts on GDF corpses close to the Stroggifier to maintain a defense. There should be at least a few constructors on the team to disarm the explosive.
Island
Moore Observatory is the only surviving facility which still holds data on the appearance of the first Strogg slipgate. The GDF must recover this DataDisc and get it to the transmitter for broadcase to waiting GDF scientists.
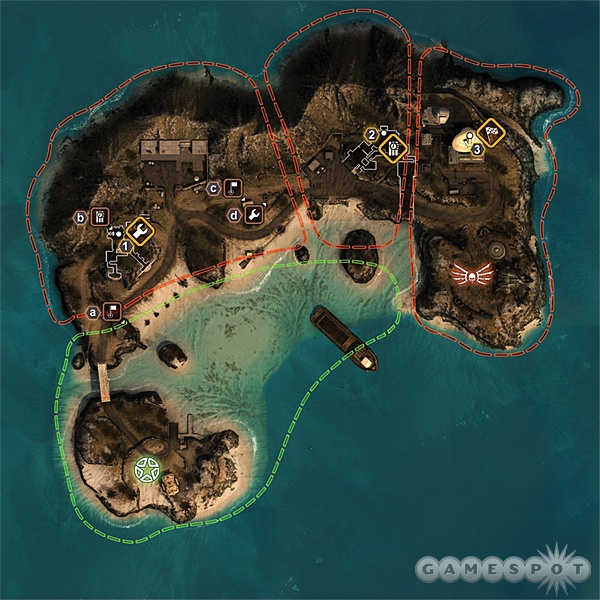
Objective: A GDF Engineer must construct the generator.
GDF forces start with a couple options approaching the generator: a high bridge route or a low water route. You can use vehicles to traverse both. The bridge route is a bit faster in reaching the bunker spawn point, which should be captured immediately.
A GDF Soldier and Engineer should take a Trojan across the bridge at high speed, capture the spawn, and then split up to their next respective targets. The GDF Soldier goes for the destructible bunker hatch on the hill above the generator; the Engineer proceeds inside the bunker to the generator to begin construction. Destroying the bunker hatch provides a fourth route to the generator; it drops down above the generator, and offers a potential ambush route on Strogg defenders inside.
There are three entrances into the bunker holding the generator (four if the bunker hatch falls) which means the Strogg must use turrets and long-range fire support to enhance defense. Deploy both an anti-personnel and anti-vehicle turret (can target GDF air units too) around the bunker to slow down the GDF advance. The task completes once a GDF Engineer finishes the generator.
Objective: A GDF Soldier must destroy the storage room door.
GDF forces will push east toward the vault entrance. Capture and hold the outpost spawn point just west of the vault. Field ops should remain at a distance and deploy fire support to bombard Strogg defenses around the entrance. A GDF Soldier will be required to plant an armed HE Charge on the storage room door to free the DataDisc.
Strogg defenders will likely crowd the tight storage room area. Beware of constructor proximity mines scattered through the tunnels and near the door itself (toss grenades to detonate the mines). Make sure to keep Strogg deployables away from the vault entrance to keep the battle inside the structure instead of outside. On the other hand, Strogg should keep the fight outside by using fire support and turrets to slow down the GDF push inside the vault. Make sure radar has been deployed to detect GDF troops getting inside and near the storage room.
Objective: Any GDF class must take the DataDisc to the transmitter dish.
The DataDisc is found just inside the storage room. Any GDF player must grab the disc and take it to the large transmitter dish in the northeast corner of the map. This section works somewhat like capture the flag. If the GDF player holding the disc is killed, the disc is dropped. Another GDF player can grab it but if a Strogg player touches a dropped disc, it’s returned to the start location.
There are a few routes out of the vault area: through the front entrance, downstairs through a tunnel leading out to sea (also includes a Platypus), and upstairs to a path above the vault entrance. Penetrating an organized Strogg defense can be tough—the Strogg can maintain close quarters to the transmitter.
GDF fire support must bombard the area to weaken and eliminate deployables (including radar). Charging the dish from the western side can be predictable; consider using the Platypus or aerial transport to maneuver around the back of the dish where there’s another path. This can be especially effective if the Strogg fail to deploy radar (or the GDF destroy it).
Outskirts
The Strogg have deployed a high-ranking DataBrain to oversee construction of a major new facility. The GDF must crack the Strogg defenses, steal the DataBrain, and take it to a transmitter for analysis by GDF High Command.
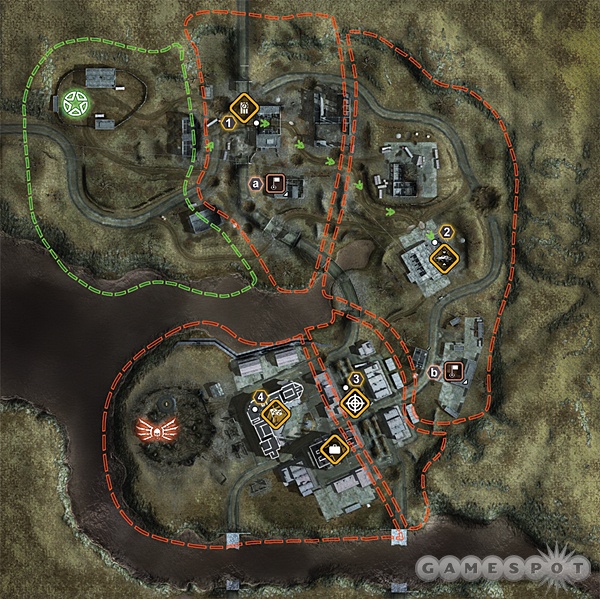
Objective: A GDF Soldier must destroy the barricade.
GDF initially spawn just west of the barricade; destroying the barricade requires a GDF Soldier’s armed HE Charge. There are two gates leading out of the GDF base: the main gate and the side gate. Heading out the main gate reaches the barricade faster but plentiful cover will block a vehicle’s advance; the side gate is a slower route but a clear road for the GDF vehicles. Utilize the vehicle’s gunnery positions for long-range weapon support against defending Strogg.
Strogg defenders can clutter the buildings on either side of the barricade. Have a covert ops help clear Strogg campers with long-range sniper fire. A well-placed rocket from a soldier can also eliminate some of the Strogg presence. Likewise, Strogg defenders should pick off GDF forces approaching the gate; be prepared to take cover if spotted by the attacking force. Watch for other Strogg approaching from the north and south around the barricade. Protect the GDF Soldier arming the HE Charge and remain ready for any Strogg Constructors attempting to disarm the charge.
Objective: Any GDF class must drive the MCP to the Outpost and deploy it.
Once a GDF Soldier successfully destroys the barricade, the MCP drops nearby; the GDF also receive a set of new vehicles to provide escort. Players should grab vehicles and provide escort for the MCP toward the outpost on the eastern side of the map. Engineers will be required to repair the MCP should it become damaged or disabled.
The MCP will follow a marked path to the outpost; however, there’s an "unauthorized" shortcut that’s available. It’s worth a risk depending on the layout of Strogg defenses. When the marked path turns right, you can continue to drive the MCP straight. Proceed straight and continue around to the right when it opens up; the marked destination lies just ahead.
It’s a risk because it’s off the MCP path and you have just 30 seconds to reach the destination (or close to the marked route) before the MCP resets. Strogg defenders may set up defense on this unauthorized path to prevent the shortcut. Have teammates scout ahead to determine the MCP’s best path. Strogg defenders should erect anti-vehicle turrets close to the outpost and along both routes.
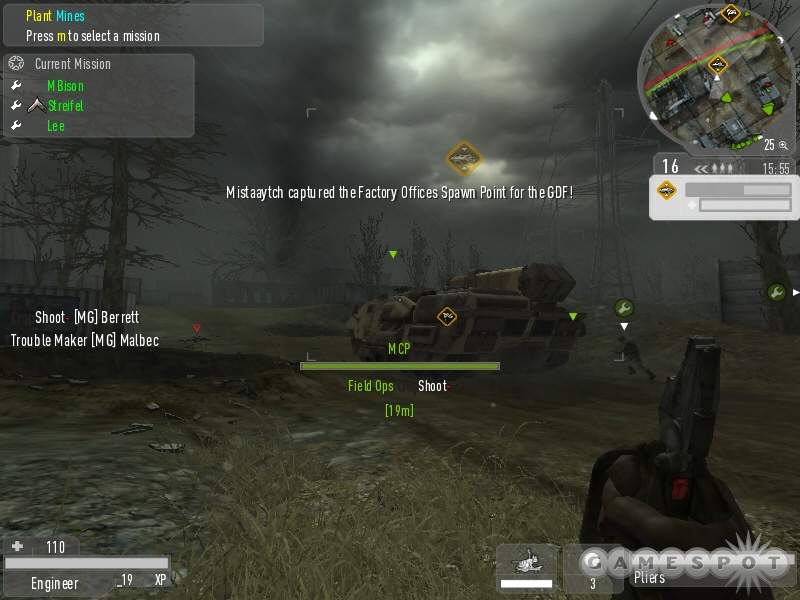
Repairing the disabled MCP close to the outpost can be challenging because the Strogg can maintain a strong defense here; plus, the factory offices spawn isn’t particularly close (use Husky Quads to reach the area quickly). Field ops and soldiers should move around the northern side and take cover overlooking the outpost to utilize long-range fire support or use a rocket launcher to destroy Strogg deployables.
Objective: A GDF Covert Ops must hack the Strogg shield generator.
Once the MCP reaches the outpost, it fires an SSM—blocked by the Strogg shield generator. GDF players should capture the hilltop spawn point closer to the shield generator, which is located within city grounds. The shield generator is a short distance west of the hilltop spawn.
The city creates a tense battleground because it’s difficult to find where enemy fire originates from. Vehicles will be important to control streets and field ops should use artillery to slow down Strogg defenders. A GDF Covert Ops is required to hack the shield generator.
Strogg Constructors should mine the area around the shield generator while oppressor bombard the area around the generator and the path from the hilltop spawn. Spread out and use radar to track groups of GDF troops. Keep Strogg Desecrators and Cyclops repaired and ready to repel GDF forces around the generator.
Objective: Any GDF class must steal the DataBrain and take it to the transmitter.
Once a GDF Covert Ops hacks the generator, the SSM fires and the route to the DataBrain opens. Proceed west into the city square. The DataBrain is found in the southern building; the transmitter is located in the northern building of the square. Similar to capture the flag games, if the GDF troop carrying the DataBrain is killed, it’s dropped at the site. Another GDF player can grab it but if a Strogg player touches the dropped DataBrain, it resets to the spawn location.
Strogg must organize quickly. It’s a fast route from DataBrain spawn to transmitter. Defend the transmitter building and stairways (mines too) and surround the city square to provide crossfire for brain carriers attempting to cross the open area.
Quarry
The GDF have forced a Strogg ship to crashland in a quarry. The ship’s autodestructor has failed; the Strogg must power it up with three energy cells to prevent the GDF from learning the secrets of deep space travel.
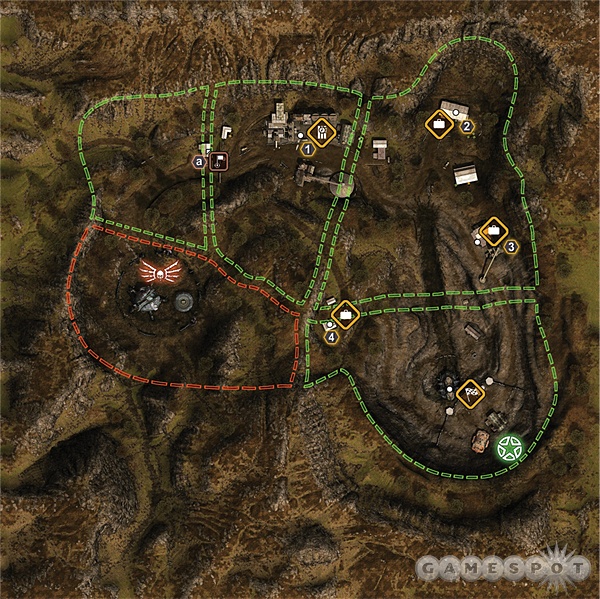
Objective: A Strogg Aggressor must destroy the jamming generator.
Strogg attackers should move quickly north and take the railyard spawn; it’s just west of the jamming generator. Hold this position by setting up defensive deployables to ensure the GDF don’t liberate the spawn and force your teammates to restart back at the Strogg start position. GDF players can attempt to liberate this spawn point if the Strogg don’t implement sufficient defenses around the structure and are primarily occupied around the generator itself.
There are upper and lower paths heading east toward the generator. These lead inside a structure that provides high ground advantage over the generator defenders below. If the GDF defense fails to deploy an anti-vehicle turret, use an Icarus to bomb GDF defenders and vehicles around the generator to clear the way for a Strogg Aggressor to plant and arm a plasma charge. Strogg Infiltrators can provide long range sniper support; Strogg Oppressors should utilize fire support to bombard the GDF defenses.
GDF Engineers should deploy both an anti-personnel and anti-vehicle turret; the anti-vehicle turret can counter any Strogg air support, including the Icarus. An artillery interceptor will be necessary if the Strogg implement fire support. Have engineers on hand and ready to defuse the plasma charge if the Strogg succeeds in their task. If the generator is destroyed, the next objective begins.
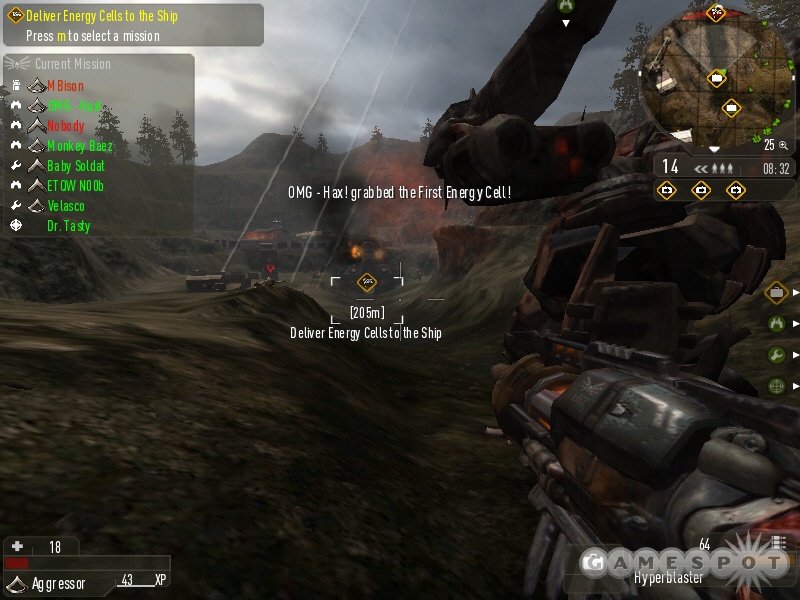
Objective: Any Strogg class must take the first, second, and third energy cell to the ship.
There are three separate energy cells; any Strogg class can grab and deliver an energy cell into the ship. The cells appear inside structures that surround the valley leading into the crashed Strogg ship. Look for the beam of light that indicates the location of an energy cell. If a Strogg player carrying a cell is killed, it’s dropped and can be reset to its spawn point if a GDF player touches it.
GDF Engineers need to deploy anti-personnel turrets close to the ship; GDF Field Ops deploy long range fire support to bombard the valley leading into the crashed ship. The area above the ship offers good cover for GDF snipers. Other defenders can surround the sides of the valley and attack Strogg making a run through the valley toward the ship. Radar and frequent communication is imperative to alert teammates to the location of Strogg making a run for the ship.
Strogg players must maintain pressure on the GDF defenses around the ship. Attack and destroy all deployables to clear a route for Strogg cell carriers. The Strogg Cylclops is particularly powerful with its long-range and relatively high rate of fire. You can clear out turrets on either side of the ship with relative ease. Support the Cyclops with ground troops to eliminate GDF counter attackers, especially soldiers armed with rockets. Getting one cell inside the ship completes that objective—the cell can’t be returned once it’s inside the ship. Once all three cells are in the ship, the task completes, the ship is destroyed, and the Strogg emerge victorious.
Refinery
The Strogg have adapted a North African oil refinery to Stroyent production and are coverting the GDF’s strategic fuel reserves for their own use. The GDF must fight their way through the Strogg defenses and destroy both the Stroyent Converter and Filter to permanently halt the refinery’s Stroyent production.
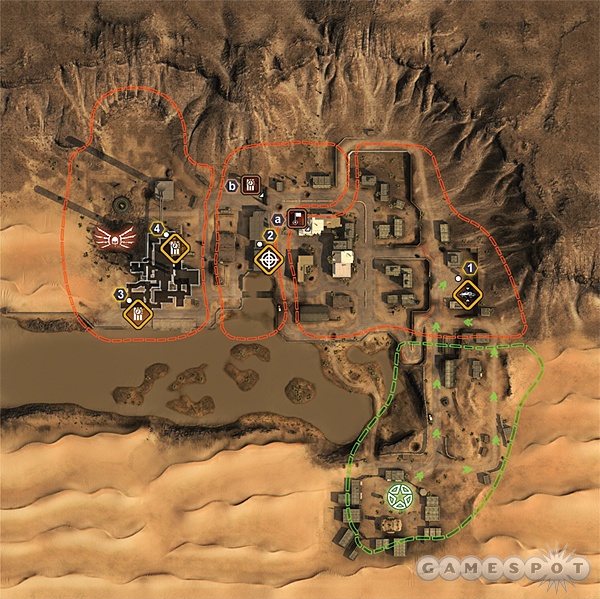
Objective: Any GDF class must drive the MCP to the outpost and deploy it.
The GDF begin in the southeastern corner of the map and must drive the MCP north to the outpost. There are two gates out of the GDF base: the main gate and the side gate. The MCP will leave through the main gate; GDF troops can take vehicles out of the side gate to cut off Strogg forces attempting to set up defenses to block the MCP’s route.
You have a couple route options with the MCP. After exiting the base through the main gate, you can follow the path straight ahead or turn right and follow a longer route that’s further from the Strogg base (and usually from the Strogg defenses). GDF vehicles should escort the MCP from the front to draw Strogg fire and help clear the Strogg defenses. A few GDF vehicles should exit the side gate and attempt to delay Strogg defenders. If you follow the path on the eastern side, you can drive the MCP over a barrier and drop down toward the outpost instead of turning left and resuming course on the original route.
Send Strogg scouts quickly to discover the MCP’s route so Strogg Constructors can deploy appropriate defenses. A couple anti-vehicle turrets in the outpost can shut down the MCP once it enters within firing sight either from the western route or over the shortcut. Strogg Oppressors will use fire support to bombard the MCP’s route.
Objective: A GDF Covert Ops must hack the Strogg shield generator.
Once the MCP reaches the outpost, it deploys and fires an SSM that’s blocked by the Strogg shield generator, which is located west of the outpost. GDF forces should immediately capture the hotel spawn point positioned between the outpost and shield generator. There’s also a guard tower across the street; have an engineer build the tower, which can assist in defending the spawn point and clearing out Strogg defenders.

There are a few optional objectives to make the attack on the shield generator easier. A GDF Engineer can construct the assault ramp on the southern side of the shield generator; this provides an alternate route to the primary target. There’s a barricade north of the shield generator; A GDF Soldier can plant and arm an HE Charge on the barricade and clear another path to the generator. Strogg defenders must maintain radar to follow GDF movements toward the generator.
Objective: A GDF Soldier must destroy the Stroyent Converter. A GDF Soldier must destroy the Stroyent Filter.
Once the generator has been hacked by a GDF Covert Ops, the SSM launches against and opens access to the structure holding two Strogg devices, the converter and filter. A GDF Soldier will be required to plant and arm an HE Charge on each device. The tasks can be completed in either order as well as simultaneously.
There are two primary entrances into the structure, one on the southern side and another on the northern side. There’s a secondary entrance in the back close to the Strogg spawn point. Strogg Constructors can deploy turrets outside the front of the structure to slow down the GDF advance from the spawn near the hacked shield generator. GDF Field Ops should be ready to eliminate these quickly with long-range fire support. Both teams must maintain radar to keep track of enemy movements inside the building; on the other side, seek out and target enemy radar to gain the upper hand.
GDF players must beware of Strogg mines scattered throughout the tight halls and on the converter and filter. After planting and arming the charge, seek cover inside the room and counter any Strogg Constructor attempting to disarm the mine. When a charge is armed, Strogg players should escort a constructor to the objective to attempt to defuse.
Salvage
The GDF are salvaging Strogg technology and are about to transport it on an underground military train network. The Strogg must destroy the GDF-salvaged equipment on the train before it can be removed for analysis and reproduction.
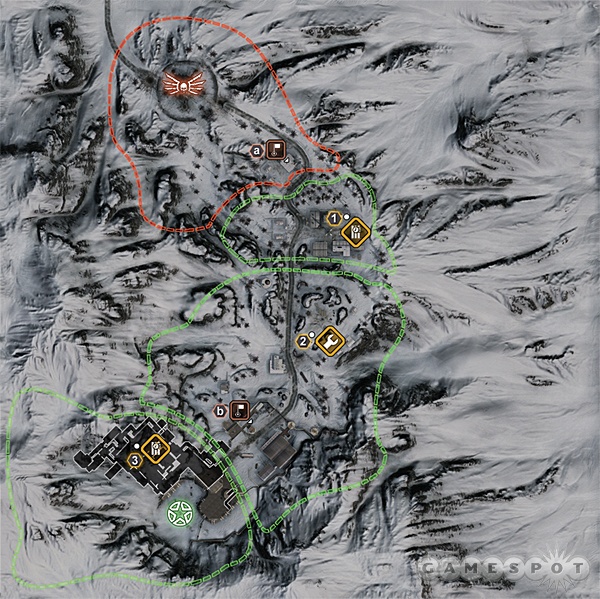
Objective: A Strogg Aggressor must destroy the jamming generator.
Strogg forces must prevent the GDF from transporting salvaged Strogg technology via an underground train network. Strogg attackers begin in the northwest corner of the map. Proceed southeast at the start and immediately capture the research hut forward spawn to cut down on the sprint time between the Strogg start and the jamming generator.
The jamming generator is positioned at the center of a collection of buildings; it’s a tight battle zone with plenty of cover as well as ladders and staircases to reach rooftops to gain high ground advantage. Without the benefit of long-range firepower from vehicles, Strogg attackers must utilize oppressors’ fire support to weaken the GDF defenses around the generator and buildings.
GDF will focus entirely on anti-personnel and artillery interceptor turrets; have Strogg Aggressors eliminate them with grenades and obliterators while oppressors bombard with artillery and violator beacon strikes. It’s an extremely tough battle for infantry alone—long-range fire support is essentially against an organized GDF defense. If the GDF can keep Strogg Oppressors’ deployables disabled, well-positioned GDF troops can target Strogg troops from many angles making a run for the jamming generator very difficult. The objective completes once a Strogg Aggressor successfully plants an armed plasma charge on the jamming generator and it detonates; GDF Engineers, along with maintaining anti-personnel and artillery interceptor turrets, must be ready to disarm.
Objective: A Strogg Constructor must construct the mining laser.
The mining laser drops south of the jamming generator, where the Strogg now spawn. Strogg Oppressors should target the hill the mining laser drops onto and clear out GDF defenders while the bunk of Strogg forces push up the hill and escort the Strogg Constructors into position to construct the objective.
Completing the mining laser begins the map’s final task. The mining laser destroys the entrance into the underground train network providing access to the salvage. A Strogg Aggressor will be required to complete the map’s final task.
Objective: A Strogg Aggressor must destroy the salvage.
First task for the Strogg will be breaching the depot yard which contains the entrance into the train network and the salvage. There are two breach points: one to the west and another to the east on the side of the depot yard. Both points require a Strogg Aggressor to plant an armed plasma charge. The eastern point is the East GDF Base Pillbox Breach and the west is the West GDF Base Bunker Breach. There’s a third way in as well: a Strogg Infiltrator can also open the depot’s main gate using the hacking tool.
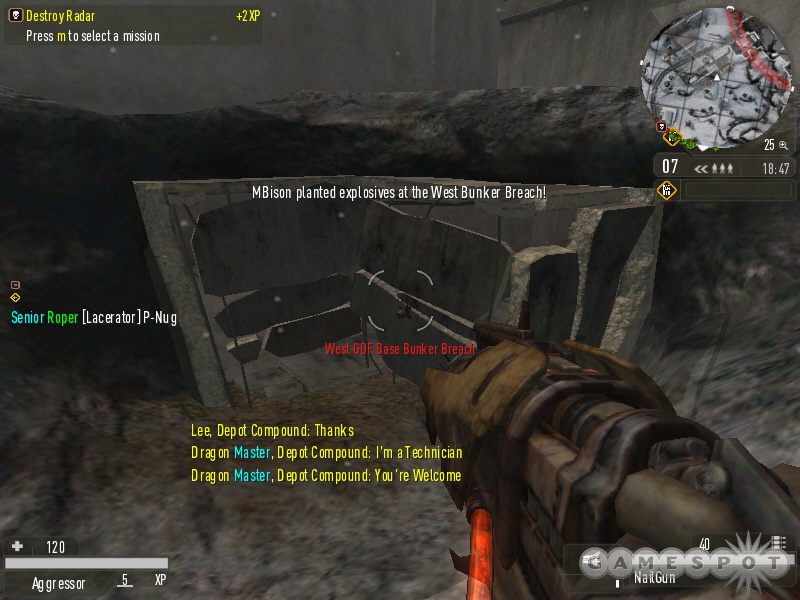
Once inside the depot yard, the Strogg should capture and control the depot yard spawn point; find it on the eastern side of the base. A Strogg Infiltrator should deploy radar to track GDF movements inside the underground tunnels. You can proceed through the main entrance opened by the laser or drop down a hatchway on the right side of the depot yard.
The forward spawn still takes time to rejoin the fight so Strogg Technicians should create spawn hosts so teammates can rejoin the fight faster. Strogg forces should proceed through the tunnels as a group to overwhelm scattered defenders. A Strogg Aggressor is required to destroy the salvage; plant a plasma charge and arm it to destroy the objective. Take cover inside the room and counter any GDF Engineer attempting to disarm.
Sewer
The Strogg have infested the mammoth underground sewer network leading from the urban districts to the rural coast. A GDF task force must break through and override the sewer controls to flush the Strogg out before large sections of city are overrun.
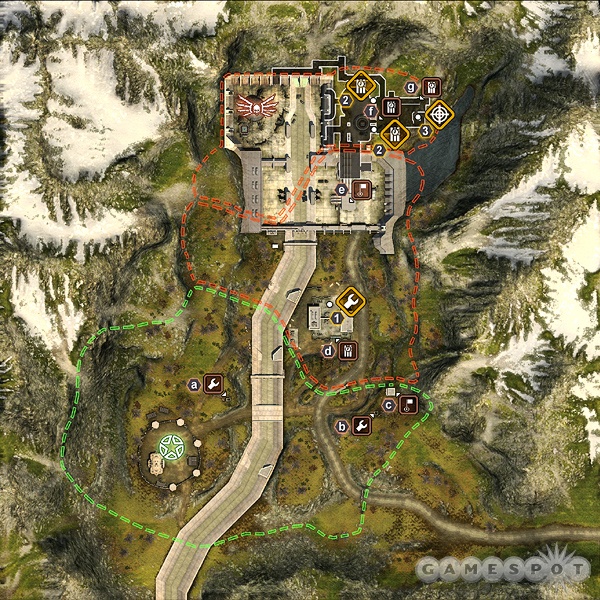
Objective: A GDF Engineer must construct the EMP Disruptor.
GDF forces begin in the southern corner of the map. Gain a forward spawn by moving northeast to the hill-top spawn point; capture the point and GDF troops will spawn closer to the objective target and can rejoin the battle faster. Vehicle skirmishes will be extremely important around the substation. The side that gains the upperhand with heavy vehicles (GDF Titan or Strogg Cyclops) will maintain control of the area.
A GDF Soldier can make the team’s job easier by destroying the substation barricade with an armed HE Charge. The barricade is located on the southern side of the objective. Destroying the barricade provides a large opening to the objective—plenty large enough for vehicles to push toward the objective and help maintain position while GDF Engineers go to work on completing the Emp Disruptor. GDF Field Ops will be called upon to bombard the substation with fire support to clear out Strogg turrets, ground forces, and vehicles, especially the Cyclops.
There are alternate routes into the station other than the destroyed barricade. There’s a ladder on the left side and a few passage ways but destroying the barricade provides the best entrance; it’s quick and easy to enter and allows for ample vehicle support. Strogg defenders should protect the area with mines and anti-personnel turrets. Target GDF vehicles with fire support and keep Strogg vehicles repaired using the constructor’s repair drone.
Objective: A GDF Soldier must destroy either of the sewer gates.
Constructing the EMP Disruptor lowers shields around the sewer complex located to the north. The Strogg spawn on the northwest side of the complex. GDF forces must push north and capture the spillway spawn point as quickly as possible to ensure teammates can rejoin the battle around the sewer gates as quickly as possible.
GDF troops will enter the complex from a couple entrances on the southern side; Strogg forces approach from their spawn point to the west. Expect battles to occur outdoors before reaching the complex interior. The Strogg will still receive vehicle spawns to delay GDF forces and protect the complex entrance. There are two sewer gates; one to the north and one to the south. Destroying either gate completes the objective; a GDF Soldier is required to plant and arm an HE Charge.

There are a couple optional objectives for soldiers as well. The overflow hatch is located adjacent to the south sewer gate. Climb a ladder and locate the hatch at the end of short tube. A second destructible appears after blowing the sewer hatch. The maintenance hatch is located to the north close to the sewer controls. Destroying the maintenance hatch with an HE Charge provides a side route to the sewer controls.
Strogg defenders can enter the complex from the west side entrance or a back route to the north (faster to the sewer controls). Strogg Constructors must be ready to defuse planted HE Charges on the sewer gates and on the optional objective hatch doors. Use vehicles to slow the GDF advance outside the complex and to eliminate GDF radar.
Objective: A GDF Covert Ops must hack the sewer controls.
The sewer controls are found in the northern corner of the complex. It’s a small room and likely guarded by Strogg mines so toss a grenade at the controls before approaching. A GDF Covert Ops will be required to hack the sewer controls. Destroying the maintenance hatch provides an alternate side route to the controls; a GDF Covert Ops could use it to sneak into the room or other GDF troops could use the entrance to ambush Strogg defenders inside. A covert ops player could remain disguised and wander near the control room and wait for GDF forces to take over the room and free the controls from Strogg defenders.
Slipgate
The GDF have located the presence of a Strogg slipgate in a remote North African valley. The GDF must have the slipgate controls and travel through it to destroy the Strogg Nexus Tower in Antarctica. The Strogg must destroy and delay the GDF forces, defending the Nexus Tower until reinforcements arrive.

Objective: A GDF Covert Ops must hack the slipgate controls.
This map takes place in two distinct locations: the deserts of Africa and the snowy tundra of Antarctica. To reach Antarctica, you must travel through a slipgate located on the northern side of the desert map close to the Strogg base. The initial GDF task is to use a covert ops to hack the slipgate controls so GDF forces can use the slipgate to reach the Strogg Nexus Tower located in Antarctica.
One player should immediately grab a Husky and drive quickly through the main gate and stay on the eastern road. Although a barricade blocks the main road, the Husky can drive over the crumbling wall on the right side. The garrison forward spawn point is located right here; GDF should capture and hold this point to spawn closer to the Strogg slipgate.
As mentioned, barraicdes block the roads. This prevents the GDF heavy vehicles from reaching the Strogg defenses to the north. There are three barricades: the west, south, and east barricades. The west and east barricades are located on the western and eastern roads respectively; the south barricade is located on the middle road. A GDF Soldier can plant and arm an HE Charge on the barricades to destroy them; not only does it gain valuable experience but it allows GDF vehicles to push north toward the slipgate.
The deserted village grounds spread south of the slipgate provides a lot of cover and possibility for rootop sniping and high ground advantages. Radar will be imperative for both teams to maintain tabs on the enemy team movements through the village. GDF attackers should move heavy vehicles up to provide ground troop support; engineers repair vehicles as needed to pressure the defense. Strogg defenders should protect the eastern side of the slipgate and that route from sneaky GDF Covert Ops; plant proximity mines and keep an anti-personnel turret on this side in range of the approach to the slipgate but far enough from potential hacks.
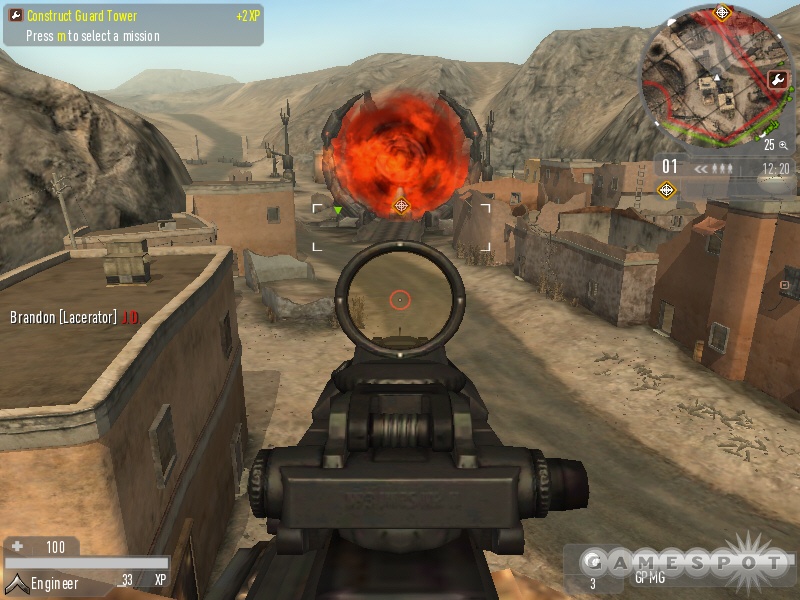
Objective: Any GDF class must drive the MCP through the slipgate.
After the slipgate has been successfully hacked, the MCP drops at the garrison spawn point. It’s a quick drive to the slipgate; any class must drive the MCP through the slipgate to complete this part of the objective. GDF vehicles and ground troops should provide covering fire for the MCP; engineers must keep the MCP repaired and moving. GDF Soldiers and Covert Ops should move ahead of the MCP and attempt to destroy or disable any Strogg anti-vehicle turrets.
Although the GDF must hack the slipgate in order to gain access to Antarctica, the Strogg can move through the slipgate at any point, including the very start of the mission! Strogg Constructors could move through the slipgate and erect turret defenses in preparation for the MCP objectives. A Strogg Infiltratrator could also have radar up. Do not place deployables too close to the slipgate itself, however; once the MCP moves through, GDF gains the territory. Deploy the turrets and radar into the second territory section.
Objective: Any GDF class must drive the MCP to the outpost and deploy it.
Once the MCP reaches Antarctica, the available path forks to the left and right; the right path is quicker but the left is closer to a forward spawn point. GDF forces should capture the slipgate checkpoint spawn located just northwest of the slipgate as quickly as possible. GDF Soldiers and Covert Ops should move ahead of the MCP and attempt to destroy or disable any Strogg turrets. Strogg defenders should deploy anti-vehicle turrets close to the area where the two forks connect near the outpost to maximize firepower against the MCP.
Objective: A GDF Soldier must destroy the Nexus Tower Core.
When the MCP reaches the outpost, it fires an SSM that opens a route into the Nexus Tower Core. The battle is indoors but make sure radar has been deployed to help your team. Strogg defenders should mine the entrances to the core and the core itself.
The objective room contains multiple levels; defenders should spread out and take cover and make it difficult for GDF attackers to discover their position inside the room. Strogg Technicians must create spawn hosts so slain Strogg don’t have to make the long spawn from the Strogg base. A GDF Soldier is required to plant and arm an HE Charge on the core (toss a grenade or two at the core to destroy any mines). Remain behind and defend the explosive against constructor counterattack.
Valley
The Strogg are using a contaminator device to infect the region’s water supply. The GDF must destroy it, or let the Strogg turn the local population intro mindless zombies.
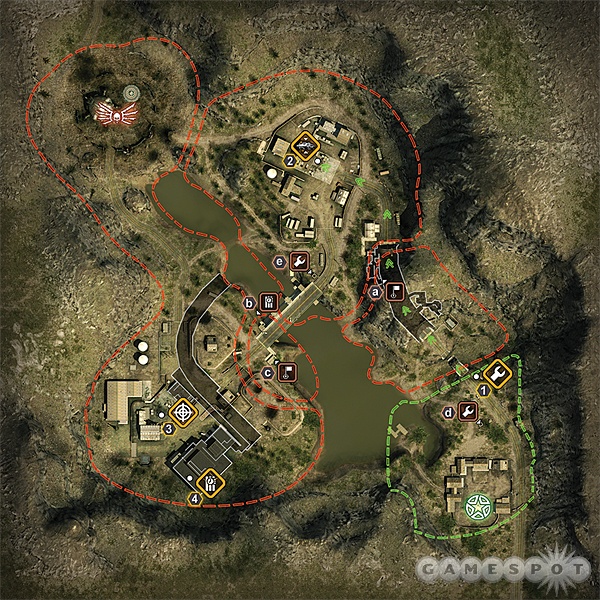
Objective: A GDF Engineer must construct the bridge.
The bridge is located just north of the GDF base. Both sides have plenty of vehicles to attack and defense creating an explosive battle at the objective point. A GDF Engineer will be required to construct the bridge; there’s also an adjacent optional guard tower objective that can provide additional firepower against the Strogg advance. GDF Medics should be near engineers at the objective point to drop medpacks and supply crates for support. Deploy an artillery interceptor turret to protect against Strogg bombardment.
Strogg defenders should focus attacks on the objective point and heavy GDF vehicle support. Eliminate any GDF radar or artillery interceptor turrets to allow oppressors to target the objective with long-range fire support. Strogg players can mix up their approach to the objective by moving around the bridge to attack from the sides.
Objective: Any GDF class must drive the MCP to the outpost and deploy it.
The MCP appears once a GDF Engineer completes both stages of the bridge construction. Any class can drive the MCP (which also features a minigun for defense). Follow the marked route through the tunnel toward the outpost toward the northwest. Send escort vehicles through the tunnel first to clear out Strogg ground troops. GDF players should also capture and hold the tunnel spawn here to avoid starting back near the bridge upon death. GDF Engineers will be required to repair the MCP if needed to keep it moving toward the outpost target.
Strogg should set up anti-vehicle turrets between the tunnel exit and outpost. Use an artillery interceptor turret to combat GDF Field Ops attempting to bombard the Strogg defenses. GDF Soldiers can exit the tunnel spawn around the left side and target Strogg defenses from long-range with the rocket launcher. A couple anti-vehicle turrets are enough to stop the MCP; they must be disabled by weapons fire, bombardment, EMP grenade, or hack for the MCP to reach the outpost.
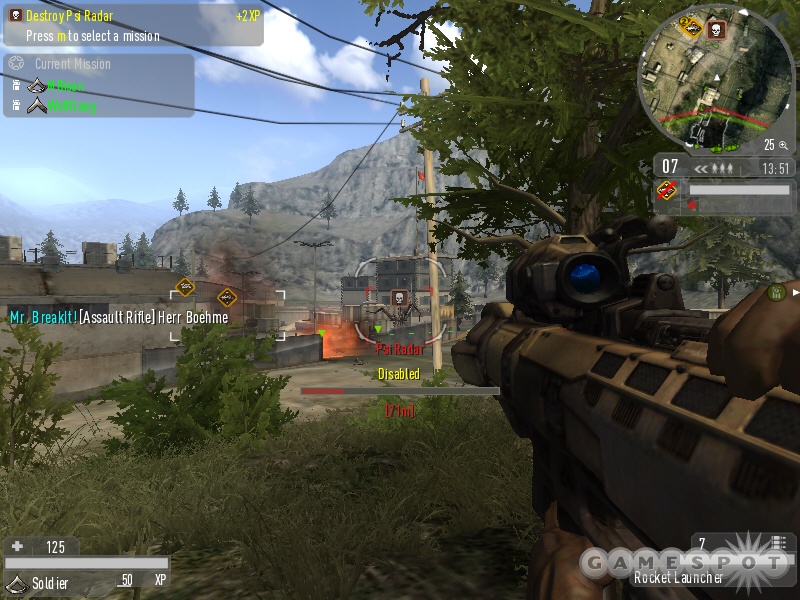
Objective: A GDF Covert Ops must hack the Strogg shield generator.
The MCP fires an SMM but the Strogg shield generator blocks the missile. GDF now spawns at the outpost but can gain further ground toward the shield generator by capturing the reservoir spawn point over the bridge. A GDF Engineer can construct a guard tower at the bridge for experience and to provide extra firepower in defending GDF troops and the spawn point. GDF Field Ops should deploy artillery to bombard Strogg defenses around the shield generator to help clear a way for the covert ops to complete the objective.
Strogg defenders should deploy anti-vehicle turrets between the bridge and generator and anti-personnel turrets closer to the generator to target approaching GDF Covert Ops. Also use an artillery interceptor turret to guard against GDF Field Ops long-range bombardment. Strogg Constructors will need to maintain repairs on these turrets for adequate defense. Both sides have plenty of vehicles creating another huge battle around the shield generator.
Objective: A GDF Soldier must destroy the Strogg Contaminator.
Successfully hacking the shield generator allows the MCP to launch the SSM, which strikes the building holding the contaminator. It’s just southeast of the shield generator. A GDF Soldier must reach the contaminator and plant and arm an HE Charge to destroy the device and complete the objective. After planting the explosive, remain in the area to counter any Strogg Constructors attempting to disarm the explosive.
Volcano
The GDF are using an outlying geothermal facility to create an atmospheric EMP weapon with which to drive the Strogg out of Earth’s orbit and halt the invasion. The Strogg must destroy the geothermal energy core to prevent the GDF from disabling their fleet.
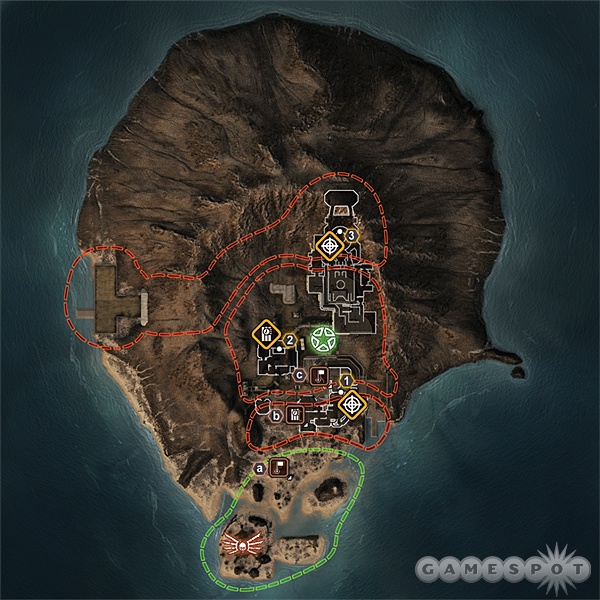
Objective: A Strogg Infiltrator must hack the security controls.
Strogg attackers begin on the southern edge of the beach; the targets lie inside the well-foritified GDF base on the northern side. Strogg players can use various debris and walls as cover against GDF snipers. Immediately advance to the beach head spawn point located on the eastern edge of the beach north from the original Strogg spawn point. A Strogg Constructor should deploy an artillery interceptor turret to avoid frequent GDF bombardment along the beach.
There are multiple ways to breach the GDF base. A Strogg Aggressor can plant and arm a plasma charge on the forward bunker door (located in the middle, due north from the Strogg spawn), seawall breach (just west of the forward bunker door and best route to the transformer objective), and the east bunker breach (positioned east of the forward bunker door and contains vents infiltrators can teleporter into and sneak into the control room). All of these optional tasks reward experience and provide new access points for all mission tasks. A Strogg teammate with vehicle experience can call an Icarus, which provides an easy method of moving into GDF territory.
Strogg Infiltrators need not worry about these breach points: the infiltrator’s teleporter can be shot over the walls to quickly gain access to the objective area. Fire the teleporter and hit the fire button again to teleport; use the alternate fire button to reset the teleporter if you missed your mark. An infiltrator can use the teleporter to quickly liberate the GDF’s forward spawn at the bunker building, which will greatly slow GDF defense. Gain a disguise and check the GDF defenses around the controls or start backstabbing the enemy. Once a Strogg Infiltrator successfully hacks the ssecurity controls, the next objective begins.
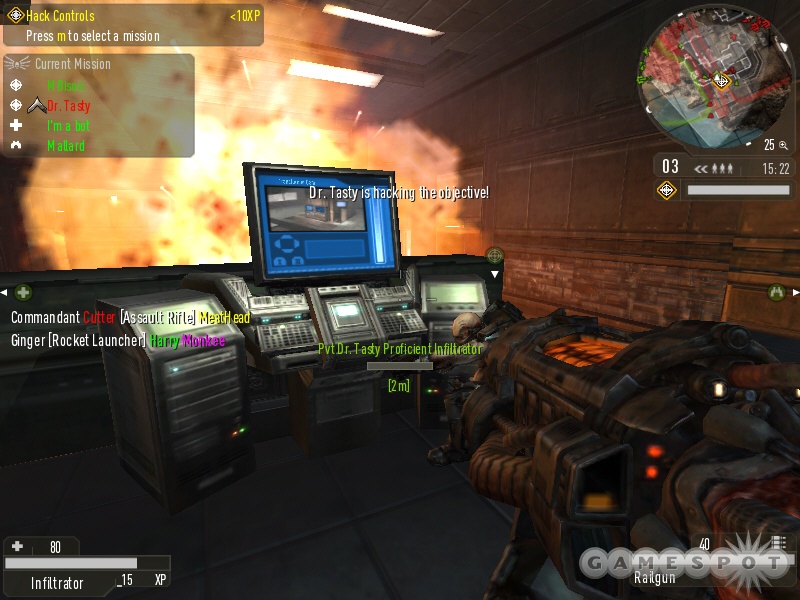
Objective: A Strogg Aggressor must destroy the transformer.
The transformer is located in a building on the western side of the base. Moving through the seawall breach is the fastest route to the building. GDF defenders should attempt to slow down the Strogg exterior advance with turret defenses. Don’t forget to have radar up and away from possible Strong counterattack.
There are multiple routes into the building itself; a back entrance that the GDF will generally use provides faster access to the transformer room. Strogg must work in groups to push GDF defenders down into the transformer room where they can be picked off from the higher catwalks. Technicians should create spawn hosts so Strogg teammates don’t have to make the long trek back from the spawn position. Beware of engineer mines throughout the halls and around the transformer. A Strogg Aggressor must plant and arm a plasma charge on the transformer. Take cover inside the room and eliminate any GDF counters, specifically the engineer who can defuse the charge.
Objective: Strogg Infiltrators must fly their flyer drones through the access vents and destroy the energy core.
Destroying the transformer opens a route into the geothermal energy core, located on the northern side of the base. To complete the final objectives, the Strogg Infiltrators must use their flying drones to bombard the energy core. Five drones must strike the core; the energy core begins at 100% and each hit from the drone brings it down 20%. Each time a drone strikes the core, the percentage is revealed so you know exactly how many more hits you need.
From the main entrance, use the entrances on the bottom level to locate the vents. Fly a drone into the vent and follow to the energy core; detonate the drone on the core to inflict damage. Flying drones only last 30 seconds before they are deactivated. It’s possible, though time critical, to keep the infiltrator back and away from GDF defenses while moving the drone through the main room and into the vents. The mission ends in a Strogg victory once five infiltrator drones explode next to the core.
Chapter 6 - Experience Rewards
This section compiles the GDF and Strogg campaign experience rewards. You will earn these during online (and versus the computer) play. You gain experience through completing missions (such as constructing a guard tower or defending an objective for a period of time) as well as kills and even surviving for a period of time (Battlesense). These rewards reset after the end of a single-map or campaign three-map game. Note that the Light Weapons, Battlesense, and Vehicle rewards carry over to another class but class-based rewards are restricted to that specific class.
GDF Experience Rewards
The tables below reveal the experience rewards for the GDF classes.
Soldier
| XP | REWARD | DESCRIPTION |
|---|---|---|
| Level 1 | Faster Rocket Launcher Lock-On | When using the alternate fire button, the rocket launcher locks onto targets faster. |
| Level 2 | Gain Heavy Weapon Ammo | Increases the amount of the initial loadout of heavy weapon ammunition. |
| Level 3 | HE Charge Faster Arm | Arms the soldier’s HE Charge at a faster rate. |
| Level 4 | Faster Heavy Weapons Movement | Increases the soldier’s rate of movement while holding the rocket launcher or heavy machine gun. |
Medic
| XP | REWARD | DESCRIPTION |
|---|---|---|
| Level 1 | Large Medic Pack | Increases the restoration power of the medic’s dropped medpacks. |
| Level 2 | Additional Supply Drop | This reward allows the medic to call two supply drops instead of one. |
| Level 3 | Shock Shelf (Health Boost) | Using the alternate fire with the defibrillators restores a small portion of the medic’s health. |
| Level 4 | Full Health Revive | Revived teammates receive full health. |
Engineer
| XP | REWARD | DESCRIPTION |
|---|---|---|
| Level 1 | Unlock Grenade Launcher | Adds a grenade launcher attachment to the assault rifle (use the alternate fire button to switch between modes). |
| Level 2 | Faster Repair | Repairs to vehicles and deployables are faster. |
| Level 3 | Faster Contruction and Disarm | The engineer can complete build objectives and can disarm Strogg plasma charges faster. |
| Level 4 | Self Arming Mines | Engineer’s mines no longer have to be manually armed with the repair tool. |
Field Ops
| XP | REWARD | DESCRIPTION |
|---|---|---|
| Level 1 | Unlock Scoped Assault Rifle | The scoped assault rifle becomes a weapon option. |
| Level 2 | Larger Ammo Packs | Increases the amount of ammunition in dropped ammo packs. |
| Level 3 | Faster Target Lock-On | Fire support targets acquire at a faster rate. |
| Level 4 | Faster Fire-Support Rechage | Fire support recharges at a faster rate allowing you to fire more frequently. |
Covert Ops
| XP | REWARD | DESCRIPTION |
|---|---|---|
| Level 1 | Unlock Silenced Machine Pistol | Allows the covert ops to select a silenced machine pistol instead of a pistol or silenced pistol. This is a stronger combination with the sniper rifle. |
| Level 2 | Enhanced Radar | Increases range of the GDF radar. |
| Level 3 | Faster Hacking | The covert ops can conduct hacking tasks faster. |
| Level 4 | Gain Personal Jammer | Masks the covert ops player from enemy radar. |
Light Weapons
| XP | REWARD | DESCRIPTION |
|---|---|---|
| Level 1 | Gain Extra Clip | Acquire an extra weapon clip. |
| Level 2 | Gain Extra Grenade | Acquire an extra grenade. |
| Level 3 | Reduced Weapon Spread | Decreases projectile spread, which assists aim. |
| Level 4 | Unlock Akimbo Pistols | Unlocks dual pistols. |
Battlesense
| XP | REWARD | DESCRIPTION |
|---|---|---|
| Level 1 | Faster Sprint | Increases sprint speed. |
| Level 2 | Gain Flak Jacket | Adds flak jacket for increased durability. |
| Level 3 | Detect Mines | Gain ability to detect mines. |
| Level 4 | Regenerate Health | Gain ability to regenerate health. |
Vehicles
| XP | REWARD | DESCRIPTION |
|---|---|---|
| Level 1 | Vehicle Drop | Can request a dropped Husky. |
| Level 2 | Decoy Reloads Fater | Anti-missile decoy loads faster. |
| Level 3 | Faster Weapon Recharge | Increases vehicle weapon recharge rate. |
| Level 4 | Vehicle Armor Upgrade | Increases vehicle armor. |
Strogg Experience Rewards
These tables reveal the experience rewards for the Strogg classes.
Aggressor
| XP | REWARD | DESCRIPTION |
|---|---|---|
| Level 1 | Faster Obliterator Lock-On | The obliterator’s alternate fire lock-on mode is faster. |
| Level 2 | Gain Heavy Weapon Ammo | Increase the aggressor’s loadout of heavy weapon ammunition. |
| Level 3 | Plasma Charge Faster Arm | The aggressor can arm the plasma charge faster. |
| Level 4 | Faster Heavy Weapons Movement | Increases the aggressor’s movement rate while holding a heavy weapon. |
Technician
| XP | REWARD | DESCRIPTION |
|---|---|---|
| Level 1 | Large Stroyant Cell | Increases the amount of Stroyent provided by the cell. |
| Level 2 | Spike Boost | Use the alternate fire button with the Stroyent tool to increase health by a small amount. |
| Level 3 | Fast Revive | Increases the speed at which the technician revives a fallen Strogg. |
| Level 4 | Full Health Revive | Revives a Strogg to full health. |
Constructor
| XP | REWARD | DESCRIPTION |
|---|---|---|
| Level 1 | Unlock Plasma Launcher | Adds the plasma launcher attachmenet to the lacerator. Use the alternate fire button to toggle between modes. |
| Level 2 | Target Flying Repair Drone | Allows the constructor to use flying repair drones to repair remotely. |
| Level 3 | Faster Construct and Diasrm | The constructor can complete build objectives and can disarm GDF HE Charges faster. |
| Level 4 | Self Arming Mines | Constructor’s mines no longer have to be manually armed with the repair tool. |
Oppressor
| XP | REWARD | DESCRIPTION |
|---|---|---|
| Level 1 | Unlock Accurized Lacerator | Adds the accurized lacerator to the oppressor’s weapon options. |
| Level 2 | Tactical Shield Upgrade | Enhances the durability and lasting power of the oppressor’s tactical shield. |
| Level 3 | Faster Targeting | Fire support targets acquire at a faster rate. |
| Level 4 | Faster Fire-Support Recharge | Fire support recharges at a faster rate allowing you to fire more frequently. |
Infiltrator
| XP | REWARD | DESCRIPTION |
|---|---|---|
| Level 1 | Stealth (No Footsteps) | Allows the infiltrator to move silently without the sound of footsteps. |
| Level 2 | Enhanced Radar | Increases the range of the Psi Radar. |
| Level 3 | Faster Hacking | The infiltrator can conduct hacking tasks faster. |
| Level 4 | Faster Disguise | The infiltrator steals the disguise faster. |
Light Weapons
| XP | REWARD | DESCRIPTION |
|---|---|---|
| Level 1 | Gain Extra Stroyent | Adds Stroyent. |
| Level 2 | Gain Extra Grenade | Acquire extra grenade. |
| Level 3 | Reduced Weapon Spread | Decreases weapon spread essentially improving aim. |
| Level 4 | Charged Blaster Shot | Adds a charged shot to the blaster. |
Battlesense
| XP | REWARD | DESCRIPTION |
|---|---|---|
| Level 1 | Faster Sprint | Increases sprint speed. |
| Level 2 | Health Bonus | Provides a health bump. |
| Level 3 | Detect Mines | Adds ability to detect mines. |
| Level 4 | Regenerate Stroyent | Can regenerate Stroyent. |
Vehicles
| XP | REWARD | DESCRIPTION |
|---|---|---|
| Level 1 | Vehicle Drop | Can call an Icarus drop. |
| Level 2 | Better Decoys | Enhances anti-missile decoys. |
| Level 3 | Faster Weapon Recharge | Increases rate of vehicle weapon recharge. |
| Level 4 | Vehicle Armor Upgrade | Increases vehicle durability. |
Got a news tip or want to contact us directly? Email news@gamespot.com
Join the conversation