Saints Row Walkthrough
It's time to take back Saints Row from the murderous gangs that have inhabited it. How? By joining a murderous gang of your very own. GameSpot's Walkthrough to Saints Row will show you how.
Design: Randall Montanari
Saints Row. Not the nicest part of town by any stretch of the imagination. Sure, it's the projects, but they're your projects. When three rival gangs come running for your hood, are you going to sit back and let them take it? It's up to you; you can either lay down like a dog, or you can fight like a man. Given that Saints Row is all about fighting, we're going to assume that you're up to the challenge. In Saints Row, perhaps the best GTA clone of all the many variants to come out over the last few years, you play as an up-and-coming gangster intent on taking over the town of Stilwater. Doing so will require being quick with a gun, excellent driving skills, and a flexible sense of morality.
GameSpot's Game Guide to Saints Row covers the game's main storyline missions and the many extra activities that are available to you in the game, in addition to the cheat codes and achievements that you're going to be able to use and unlock. Enjoy!
Activities
Activities are basically mini-games. In most games of this nature, they'd be optional, but in Saints Row, you're going to have to pull some of them off in order to earn enough Respect to unlock new story missions. They can also be a good source of cash, especially in the case of Insurance Fraud and Mayhem, since the highest level of any activity can be repeated for $5,000 when you've beaten it once for respect.
Snatch
Level Eight Completion Rewards
| Area of Completion | Completion Rewards |
|---|---|
| Los Carnales | Pimp suit and pimp hat (can equip these in your crib). |
| Vice Kings | Pimp Bling |
| Westside Rollerz | Baron pimpmobile |
| All Locations | Pimp Cane shotgun |
Snatch sees you attempting to help a prospective pimp start his bidness. To do so, you’ll have to basically kidnap (or rescue, if you want to see things in an appropriately up-beat light) the pros from other pimps and return them to your man. You’ll want a four-seater car for this mission, if you don’t have one already, and before you head out to rescue the hos, be sure to fill it up with homies.
The basics of this activity remain the same throughout all the levels: you have to head out to where the pimp is walking his hos, kill the pimp, recruit the hos (they'll automatically take the place of your homies), then drive them back to where you got the mission. Simple, huh? Well, at first it is, but when you start hitting the higher levels of the activity, you're going to start having to deal with numerous gang enforcers that act as bodyguards for the pimps, and with the fact that the pimps will start driving around town instead of standing on street corners.
In any case, your basic methodology remains the same. Just be always sure to have a full load of homies in your car before attempting to pick up any prostitutes. (If you're trying for level eight in all of the Snatch missions, it's best to wait until you've completely controlled Stilwater, as well, since they'll be out in force on the streets to help you out.) When you reach the pimp, kill him quickly, along with any other bodyguards, then get close to the prostitutes and recruit them. At this point, your homies will get out of the car to make room for the hos, which will in turn give the gangsters another target to shoot at.
When you're loaded up with prostitutes, slam on the gas and head back to the drop point. Prostitutes, obviously enough, aren't going to fire back at anyone that shoots your car, so you'll have to be on your own if you fill the car up with three hos. The time limits here are usually pretty generous, though, so if you need to switch cars you'll probably be able to do so, especially if the gangsters roll up in a four-door car; just shoot out the driver and any passengers, then hop in with your hos and get back on track. Also note that after you pick up hos, you can head to a Forgive and Forget to make the ride back to the drop point a smooth one. The next time you assault a pimp, though, you'll shoot right back up the pressure meter for the gang that's guarding him, so your rest won't last long. That said, most missions won't ask you to get above six hos, or two carfulls, so you won't have to do it too often, even if it does cut into the profit margin.
Just be sure to stock up on SMG ammo between attempts at completing the activity on the highest difficulties, as you'll definitely expend quite a bit of it in your attempts to rescue the hos.
Hijacking
Level Eight Completion Rewards
| Area of Completion | Completion Rewards |
|---|---|
| Los Carnales | Racing clothes at crib. |
| Vice Kings | Bling pack at crib. |
| Westside Rollerz | Attrazione at crib. |
| All Locations | Titan car variant at crib. |
Hijacking is a fairly fun activity. When you start it, the dealer you’re running for will give you a target car. When you track the car down, you have to deal it enough damage to force the driver to pull over, but not enough to destroy it, then kill the driver, grab the vehicle, and bring it back to the dealer before the cops smash you to bits (assuming they’re on your tail).
Each mission will start you out with a car of some sort near the chopshop, so you won’t have to look around to find something to jack. You’re definitely going to want to bring along as many homies as possible, though; they’ll fire on the target car (you can shoot it yourself to start them off) and deal a good amount of damage to it while you’re just attempting to keep up with it. Higher levels of the mission will increase the evasive abilities of the target car, so you’ll have to be pretty spry to get close enough to knock it around.
Depending on the type of target car, you may find yourself deflecting either cop attention or gang attention. Even if you've cleared out all of Stilwater, you'll still occasionally be sent after a car belonging to a rival gang, and firing on it can earn you anywhere from two to four wanted stars with that gang, depending on the level of the mission. If you wind up with too much heat when you capture the car, sometimes your only option is to head towards the nearest Forgive and Forget to clear yourself of hostility before heading back to the dealer. Also, keep in mind that some of the later levels of these missions feature exceedingly fast cars, so you'll want to have your own fast car before attempting them, lest the target smoke you in your Samson after they get wind of your tail.
Insurance Fraud
Level Eight Completion Rewards
| Area of Completion | Completion Rewards |
|---|---|
| Los Carnales | Take less damage when run over by vehicles. |
| Vice Kings | Take less damage when shot. |
| Westside Rollerz | Take less damage from explosions. |
| All Locations | Health regenerates more quickly. |
Insurance Fraud is fun, although it can be difficult. The basic goal is to let yourself get hammered by as many cars as possible within the amount of time given you. In order to gain money, you have to travel to the red target area denoted on your map, then dive in front of fast-moving cars by tapping the left or right analog sticks. About half of the cars on the streets will temporarily be driven by insane people while you perform Insurance Fraud, causing them to move about twice as fast as they normally do and drive through red lights and stop signs.
Your score here is primarily determined by how hard you get hit by the car, but there are a large number of multipliers involved in the process. Here are a few of the factors involved in getting a big score.
| Factor | Multiplier |
| Ordinary Car | 2x |
| Expensive Car | 3x |
| Government Vehicle (Police, Ambulance, etc | 4x |
| Witnesses (someone sees you get hit) | 2x (4x for police witnesses) |
| Vehicle ejection (get thrown out of the windshield of a car | 5x |
| Airtime (stay up in the air after a collision) | 2x, 3x, and higher, depending on the length of airtime |
| Distance travelled after collision | 2x, 3x, and higher, depending on the length of airtime |
In general, your best bet for getting a large score from Insurance Fraud is to initially grab a speedy car and head towards the target zone. When you hit the zone, veer into oncoming traffic and try for a head-on collision with the fastest oncoming vehicle that you see. You'll get a good amount of cash from this first collision, especially if you travel a long distance. After that's done, it's time to get the busywork done. Stand in the middle of the street and look either way in hopes of catching sight of a fast-moving car. (Keep in mind that more cars will be on the streets in the day than at night, making this a mission that's easier to do when it's light out.)
As the car approaches, stay out of its lane; cars will still try to swerve away from you, crazy or not. When they're almost on you, quickly run in front of them and attempt to hit your trigger just before they hit you. If done correctly, you should get knocked up into the air and down the road a bit, automatically earning the car multiplier for the collision and hopefully a bit of airtime and distance, as well. The average collision should net you anywhere from 2,000 to 4,000 bucks, with some exceptionally bruising collisions (especially those for which you get both distance and airtime multipliers) getting you 20,000 or more. (Our record is around 425,000, but this involved a glitch in which we rammed into a truck with a car, ejected, and wound up inside the truck, which subsequently drove off. When the truck pulled away, our distance multiplier went sky-high. Fun, but likely non-reproducible.)

To maximize cash, try to run in front of the most expensive cars that are jetting down the road, with a premium placed on civil servant cars like ambulances and cop cars. Also, keep in mind that it's easier to find cars to get hit by if you stay away from intersections; with simple two-lane roads, cars can't help but come right past you, but at intersections, you'll sometimes get ready to jump in front of them, only to have them turn out of your way. If your scoring zone happens to have a road coming down a hill, try to get hit by cars that are heading down the slope; you'll have a better chance of achieving good air and distance that way.
Lastly, be sure not to get any police stars while attempting one of these missions, as they'll simply arrest you when you hit the ground after getting hit by a car. One star isn't a big deal, but if any cops see you, you'll have to run from them, as killing them would simply bring more around. On the other hand, if you manage to steal a police car while you're on one of these missions, they'll let you rack up huge scores by repeatedly causing head-on collisions, since you'll get the 4x bonus for the civil servant vehicle when you bash through the windshield.
Chop Shop
Level Eight Completion Rewards
| Area of Completion | Completion Rewards |
|---|---|
| Los Carnales | Hollywood vehicle. |
| Vice Kings | Stilleto vehicle. |
| Westside Rollerz | Ricochet vehicle. |
| All Locations | All vehicle repairs have their costs lowered. |
These are the equivalent to the GTA game's car retrieval missions, with three separate chopshops around the city all requiring eight different cars. The difficulty here is two-fold; not only are some of the cars rather rare and difficult to find, but many of them will also require body modifications. The body mods aren't actually all that difficult, but since you'll probably have to wind up buying them yourself at a garage, they'll cut into your bottom line.
The basic technique here is pretty obvious: do whatever it takes to find the car the garage is looking for, take it to a garage for any necessary modifications, then return it to the shop for your reward. Your respect and cash rewards for each car is based on its rarity or difficulty to obtain, so tracking down the harder cars will definitely be worth your while, and even the simpler cars are going to be a good way to earn respect early in the game.
One way to increase the frequency with which a vehicle appears on the streets is to drive another model of that car around; as in GTA, the game is more likely to spawn a car model that's already loaded into memory than a fresh one.
Docks And Warehouses
| Name of Car and Modifications | Where to Obtain |
| Reaper | Mainly found at night, in such zones as the High End Retail. You can also call Lin on your phone when you unlock her as a homie late in the game; her ride is usable for this. |
| Ambulance | Call 911, or just wait until you see one driving around. |
| Destiny | 3rd Street Saints gang car. When you unlock Wheel Woman, you can call her as a homie and kill her to easily obtain one of these. |
| Taxi (Street Hood) | All over the place. |
| Slingshot (Stylish Hood) | Look around in Saints Row for these. |
| Bootlegger (Hot Rod Hood) | Factories district. Can also be found in a couple of the later Rollerz missions. |
| Compton (Muscle Hood, Stylish Rims) | Vice Kings gang car. |
| La Fuerza (Hot Rod Hood, Low-Rider Rims) | Los Carnales gang car. |
Downtown
| Name of Car and Modifications | Where to Obtain |
| Cavallero | A popular ride, but mostly used as a Los Carnales gang car. |
| Quota | Found all over the place, especially in Downtown areas. |
| FBI | You'll have to get to five wanted stars with the police to nab one of these. Do a safecracking mission, grab the goods, then drop them to immediately get up to three wanted stars. Killing cops should get you the rest of the way. Drive back to the garage, get yourself up to five stars, kill the FBI agents, then drive it into the shop for your reward. |
| Keystone (Retro Spoiler) | SUV-looking vehicle. Since there are a few SUVs for this shop, stop anything you see on the street until you find it. |
| Nordberg (Sport Spoiler) | Another SUV that's popular all over the place. |
| Nelson (Street Spoiler) | Saints gang car. If you can't stop a homie for it, you can buy it at Foreign Power. |
| Mag (Off Road 1 Bumpers, Off Road Rims) | After completing the Vice Kings storyline, you'll get one of these. You can't turn it in, but riding around in it will increase the likelihood of others spawning on the street. |
| Bulldog (Luxury Body Kit, Stylish 1 Rims) | If you wait until later in the game, this becomes a popular Saints gang car in the Downtown area. |
Chinatown
| Name of Car and Modifications | Where to Obtain |
| Peterliner | All over the highways of Stilwater. One is occasionally parked near the Drug Dealing mission in the Museum District. |
| Nightingale | The airport firetruck. Can be found...at the airport. |
| Halberd | Common small-size two-door vehicle. |
| Westbury (Muscle Rims) | Minivan. Look for it in the Suburbs. |
| Varsity (Street Grille) | Look for pickups with Wasabi on their rear, and you'll find a Varsity when you pop in. |
| Raycaster (Racing Exhaust) | What Dex drives. You can jet around in his until another one spawns. You can also buy it if you have to. |
| Attrazione (Street Front Bumper, Convertible Roof) | Price drives this, so you can use that to spawn another one. Can also buy it. |
| Zenith (Racing Exhaust, Racing Convertible Roof) | This is Julius' car, so use that to spawn a fresh one, or buy it. |
Racing
Level Eight Completion Rewards
| Area of Completion | Completion Rewards |
|---|---|
| First Location | 10% off upgrades at Rim Jobs. |
| Second Location | 20% off upgrades at Rim Jobs. |
| Third Location | 30% off upgrades at Rim Jobs. |
| All Locations | 50% off upgrades at Rim Jobs. |
Racing is...well, it's racing. There are a couple different variants on the standard racing theme here, but what it all boils down to is getting to the finish line before the other guys do. The computer will automatically populate the race with cars comparable to your own, so you can compete in racing without having an incredible car, or you can wait until it's possible to control an Attrazione or Fer De Lance and use those to pull away from the pack.
Although the computer AI is capable of keeping up with you, you can get a bit of a performance boost by taking your car and equipping it with NOS at a Rim Job store. Use it on the straightaways for a speed boost to put some distance between yourself and your competitors.
Unfortunately, with the way the tracks are set up, you're often going to find yourself having to take a lot of damage in learning the routes before you can complete them to the point where you're actually winning. Racing is thus an expensive proposition in the early portions of the game, where you'll find yourself repairing your car after every couple of races, and that can add up, money-wise. You may want to wait until later in the game, when you can afford to constantly repair your car, before taking on racing as a serious avocation.
Drug Trafficking
Level Eight Completion Rewards
| Area of Completion | Completion Rewards |
|---|---|
| Los Carnales | Your wanted level with Los Carnales drops 5% faster. |
| Vice Kings | Your wanted level with the Vice Kings drops 5% faster. |
| Westside Rollerz | Your wanted level with the Westside Rollerz drops 5% faster. |
| All Locations | Your wanted level with the police drops 5% faster. |
Drug Trafficking is a challenge, but it can be fun nonetheless. When you roll up to the drug dealer’s location, you’ll hop in a car of theirs and ride shotgun for their deliveries, sometimes literally.
The drug dealers will make two or more stops, and will pick up heat from local gangs and the cops as they do so. You’ll have unlimited ammo for your pistols, so you’ll want to use them as best you can to shoot out the drivers of cars that attempt to follow you. For the first couple of missions, this shouldn’t be too much of a problem, but for level three and above, you’re probably going to have to use some of the other weapons supplied to you, like the SMG or the shotgun. These don’t come with unlimited ammo, but you’ll need them nonetheless when you start having to deal with three cars at once, especially when the drivers and passengers start packing SMGs of their own. Note that you can't bring in any weapons from outside the missions; when you start one, all of your weapons will be replaced with the weapons supplied to you by the dealer. When the mission's over, your old inventory from before the mission will be restored to you. So there's no cheating the system by coming in with a full load of RPG ammo. That said, any ammo you get during the missions is essentially "free", so feel free to use it up. Sometimes it won't respawn between individual levels, so you might want to conserve the rifle and RPG ammo until the last couple of levels.
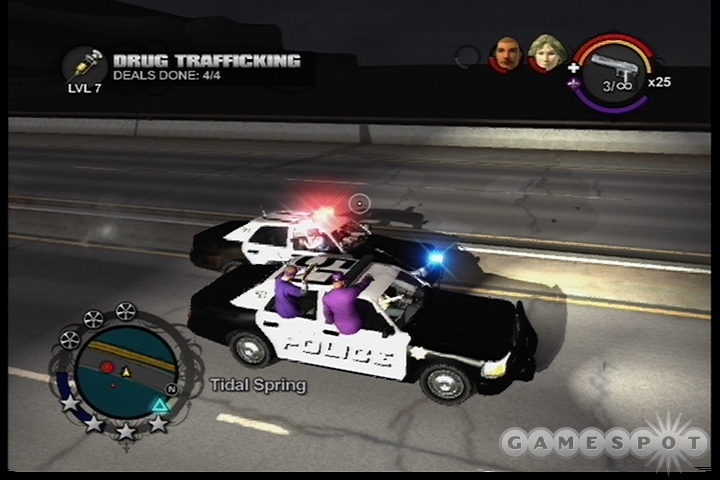
At the very least, you don’t have to drive the car while you shoot; it’ll be automatically controlled by the drug dealer. He acts like a homie, so if he gets killed, you can revive him, meaning that the car is what you really need to protect. Luckily for you, the car is also dispensible; if it happens to blow up or catch on fire, quickly dive out, then attempt to get into the first cop car or FBI vehicle that looks like it isn't completely beat up. The dealer will automatically come around and start driving in the new vehicle.
These missions aren't going to be too hugely difficult until level five or six, when you start clearing three wanted stars for the police. Your best bet will usually be to try and fire your pistol through the windshield of the cars that chase you in an attempt to knock out the driver; blowing the cars up entirely will waste precious time, and thus the health of your car. When you do start hitting level six or above, you'll have to start making car switches a few times during the mission in order to survive the whole thing. This is easiest to do when the dealer stops to make a package; when they get out, hop out as well and wait for a Five-Oh or an FBI car to pull up. Shoot the driver, then hop in and take off. (In general, it's best to hop out of the car when the dealer's making a delivery, whether you intend to jack another one or not; it'll spare the car some damage.)
Also, if these missions take you through Saints territory, try tapping up to recruit some homies as you drive along, or when you stop to deliver a package. If you're in transit, they'll often run along quickly enough to catch up with you when you do finally stop, and any recruits you manage to hold onto will be helpful when you drive off and have to defend yourself against cops and gangsters, assuming they fit in the car.
Hostage
Hostage is an interesting mini-game, albeit one that’s difficult to track down. When you jack certain cars with both a driver and a passenger (or passengers), you’ll occasionally get the option to start Hostage if the passenger doesn’t leave the vehicle before you start driving away. (Having any followers will likely make it impossible to start a Hostage mission. You'll also be required to enter the car from the driver's side. Try to jam on the gas as you're getting in the car to reduce the chance of them exiting.) When it starts up, you’ll be given a timer; the goal is to drive as fast as you can until the timer runs all the way down to the bottom, at which point the hostage will fork over all the cash they’re carrying. Complicating matters somewhat are the fact that your wanted level will quickly escalate until you have multiple cop cars on your tail, and that the hostage will escape if you slow down too much. You can pull a 180 without them hopping out, but if you get pinned by cop cars, they’ll likely get away from you. Ideally, you want to be somewhere where you can keep going forward without worrying about turning; the elevated highways are generally going to be the best option here, unless you can find a long straightaway down below you. The rewards for Hostage are fairly substantial, at least early on in the game, so it's well worth your time to perform the mission when the option becomes available.
Hitman
Level Eight Completion Rewards
| Area of Completion | Completion Rewards |
|---|---|
| Los Carnales | Gold GDHC pistol. |
| Vice Kings | Platinum TK3 Urban. |
| Westside Rollerz | Platinum AS12 Riot shotgun, and Mr. Wong joins you as a homie. |
| All Locations | All weapon purchases are discounted and a platinum RPG is added to your crib. |
One of the most challenging of the minigames in Saints Row, Hitman sees you trying to take down a large number of targets for the three employers that give you the missions. The problem here is that not only are many of the targets going to be painfully difficult to find, but will also require you to use a specific weapon for the kill in order to get credit. Not only that, but many of the targets will only appear at certain times fo the day. This makes Hitman probably the most time-consuming of any task assigned to you in the game. It's definitely doable, but it's worth remembering that these missions are entirely optional; you don't have to perform any of them if you just want to get through the main game. This one's for completionists only.
Note that if you ever want to check the appearance of a target or the weapon required to kill them inside the game, you can go to the Start Menu, Info, Activities, Hitman, then check any of the specific Hitman assignments to get all available information on the targets. You're also going to get the option to add any available target to your HUD. If you do, then that target will appear on your minimap (but not the larger pause map) as a crosshair icon, allowing you to track them if they get close.
Chinatown
| Target | Weapon | Location |
|---|---|---|
| Jackie | VICE 9 | Jackie's a paramedic. If you want to kill her, buy a VICE 9, then call 911 a few times until she shows up. |
| Alan | Knife | Arena. Will walk down the main street here every so often. Keep him on your HUD and cruise around until he shows up. |
| Jose | T3K Urban | Truck Yard. Drives a bus or truck on the highway here during the day. Can be tricky to track down, but if you keep him on your HUD he should pop eventually. |
| Charles | Nightstick | Suburbs. Should be walking the streets. Not too difficult to find. |
| Roxanne | NR4 | Apartments, but may be found in the Suburbs or Barrio or that general area. Large-breasted woman dressed in white. She should be walking around during the day. |
| Juan | Tombstone | Apartments. Difficult to find, but impossible to miss when he does pop up. Although he's listed as being in the Apartments, you may have to search around the southern half of the city for a while to find him. Check the Barrios during the day. |
| Bucky | Hand Grenade | Arena. Dressed up in a hot dog costume, he's impossible to miss. Also sometimes appears in the Projects. |
| Bill | K6 Krukov | This FBI agent only shows up when you have five wanted stars under your belt. Rob a few shops and kill cops until you get up to five wanted stars, then take him out. He'll also apparently show up during game missions and mini-games like Drug Trafficking. |
Projects
| Target | Weapon | Location |
|---|---|---|
| Dick | Knife | Downtown. Can also appear in the Projects, Chinatown, or in several other places, usually at night. |
| Marty | Baseball Bat | Suburbs. He'll either be walking around or driving. |
| Richard | .44 Shephard | High End Retail. Should be found either there or Downtown, usually during the day. |
| Henry | T3K Urban | Downtown. Drives a limo, so whatever you can do to make a limo spawn will help you find him. If you spot any limos, even one that Henry isn't driving, grab it and use it to increase the spawn rates of limos, and eventually he'll appear. |
| Billy Bob | 12 Gauge | Downtown. This redneck appears either walking or driving a truck. |
| Don | .44 Shephard | Red Light District. He'll usually appear at dusk or at night, somewhere around the Red Light District, or occasionally in the projects or in Saints Row. |
| Hank | Molotov Cocktail | Museum. Hank drives a delivery truck at night. It can be difficult to pull off a kill with a molotov, so you may want to try using your fists to knock him down, then just dropping the molotov at your feet with the L trigger. You'll catch on fire, too, but you'll live, whereas Hank will die. |
| Louise | RPG Launcher | High End Retail. Drives a Quota around (the small parking enforcement vehicle). Jack one of those to increase their spawn rate, then drive around until you find Louise. |
Airport
| Target | Weapon | Location |
|---|---|---|
| Julia | Vice9 | Barrio. An old woman, tottering around, mostly during the day. Can also sometimes be found driving a truck at night. |
| Thomas | Baseball Bat | Docks & Warehouses. Usually found during the morning in this district. This district is big, so add him to your HUD until he pops up. |
| Gabriel | Tombstone | Factories. Walks around during the day and during a portion of the night. Look for the yellow hard hat. |
| Chris | SKR-7 Spree | Airport. This guy's a mailman, who drives a mail truck. He'll drive around the airport zone, so track him down, park your car in front of him, and pull him out of the truck before offing him. |
| Theresa | Knife | Barrio. This zoftig prostitute usually walks around on the main drag at night. |
| Tina | GDHC .50 | Although Tina is listed as being in the Barrio, she'll often roam around the city, with spottings in the Suburbs and even the Museum districts. Add her to your HUD and look for a girl in a bikini rollerskating around. |
| Bill | Molotov Cocktail | Factories. This guy wears a white hardhat. Again, big district, so you may have to search for a bit. |
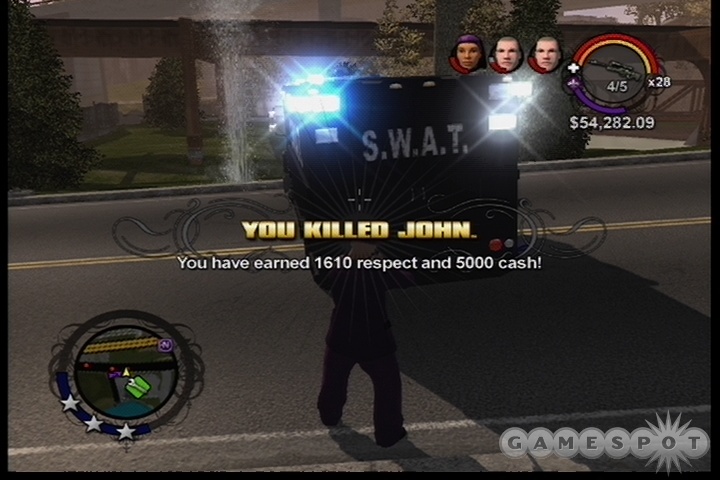
| John | McManus | John's a SWAT officer. Get to three stars on your wanted meter, drive around for a bit, and you'll start seeing SWAT Peacekeepers blocking your path. John will spawn for each one of them, leading to the odd situation where you can be in sight of two separate Johns at the same time. |
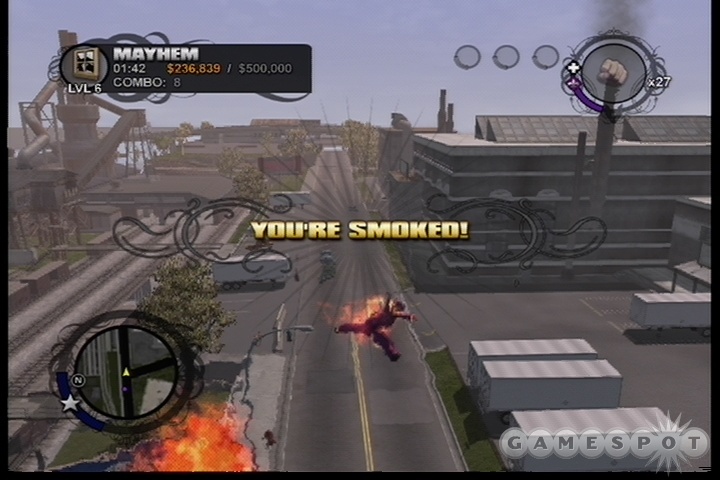
Mayhem
Level Eight Completion Rewards
| Area of Completion | Completion Rewards |
|---|---|
| Los Carnales | Molotovs appear in crib armory. |
| Vice Kings | Grenades. |
| Westside Rollerz | Pipebombs. |
| All Locations | RPG. |
Mayhem, along with Insurance Fraud, is going to be one of the most fun side missions you can undertake, mostly because the goal is to simply run around and blow crap up. Each time you find a Mayhem mission, you'll be given a target district and told to head there and cause as much damage as you possibly can before the timer runs down. If you exceed the targeted amount of money, you get to move on to the next round. Like Insurance Fraud, the amount of stuff you need to blow up will increase each round, but the timer will stay fixed at five minutes per round, forcing you to do more damage in the same amount of time to move on.
Almost any kind of damage will net you points here, whether it's blowing up cars or ramming them with your own car, shooting people or running them over, or simply knocking over fences and traffic lights. The trick to netting huge points, though, is to get your combo rating up as high as it'll go. Whenever you cause some damage, you'll get a combo point; hit something again in a small amount of time, and you'll extend the combo even further. The combo rating isn't a straight multiplier, but it will let you net some bonus cash for each object you hit.
In order to most quickly hit your target number, the easiest thing to do is to simply get into a sturdy car, like an SUV or pickup truck, and start running down street signs, trash cans, newspaper boxes, and traffic lights, while also running down any people that get in your way. While individually, each of these targets will net you less cash than blowing up a car would, you can blow through them incredibly quickly, assuming that there aren't any huge telephone poles that you'll have to swerve around. The real combomakers, though, are clusters of small items that are in close proximity to each other, such as chain-link fences. If you blast through fences that you see, each individual part will add to your combo meter, resulting in some large bonuses. Also great are any kind of benches or table/chair combos, such as are seen outside the various Freckle Bitch's stores. These items respawn as soon as you drive away from them, so you can simply smash through them, drive away, then turn around and hit them again for a big combo meter.
That said, if you're a traditionalist, you can also get out of your car and attempt to blow up plenty of stuff while on foot. Destroying cars will net you large destruction bonuses, with more expensive cars being especially worthwhile. Bring along some homies if you're going to try and kill stuff on foot, though, obviously; you'll need their help to protect you from the cops that will undoubtedly be coming your way when you start blowing crap apart. You can take advantage of your bonus goals while running around on foot. After you start a new round, you'll be told what targets and what weapons will net you bonus cash. Sometimes these are easy enough to take advantage of (e.g. killing civilians) while sometimes they're quite difficult (such as when you're instructed to kill members of enemy gangs after you've already taken over Stilwater).
Escort
Level Eight Completion Rewards
| Area of Completion | Completion Rewards |
|---|---|
| Los Carnales | Zoot Suit outfit; equip at your crib. |
| Vice Kings | Samantha homie. |
| Westside Rollerz | News Van in crib and garages. |
| All Locations | "The Job" stretch SUV limo. |
Escort missions see you acting as a chauffer to a high-priced call girl. These are essentially just driving missions, where you have to please the john, not only by avoiding the prying eyes of investigative reporters, but also by fulfilling certain requirements that they give to you while you drive around.
At low levels, you won't have a problem with these missions. The news vans are tenacious, sure, but they're also controlled by the computer, rendering them vulnerable to any number of techniques that'll get them off your back. Our favorite is to attempt to squeeze through any narrow alleyways divisions that you can find; they're wider than your car is, so they won't usually be able to follow you through. You can also try going over jumps and ramps, which they usually won't hit cleanly. More news vans will spawn as you lose the earlier ones, but again, they shouldn't be too difficult to deal with if you're a decent driver. If worst comes to worst, find a long stretch of four-lane road and weave through the oncoming traffic; the vans will generally get hung up on something before long.
As the levels get higher, you'll have to deal with more difficult tasks given to you by your desperate-to-get-off johns. Some of these are simply more avoidance missions, where you have to avoid the IRS or a private investigator that'll begin trailing you; feel free to shoot these guys through the windshield if you can to get them off your ass. Other johns will require you to drive them to certain destinations, get a bunch of air time (ramps are great for this), or simply go fast for a certain amount of time. None of these are particularly difficult to pull off, but you'll usually be forced to complete the tasks before the john will reach his full satisfaction.
Tagging
Scattered throughout the world of Saints Row are a full 75 different graffiti spots which you can paint over with a Saints tag to claim them as your own. These are fairly difficult to find, and require quite a bit of footwork to track down. Each one will net you a good amount of respect when you hit them, though, so keeping an eye out can be a good way to unlock new story missions if you don't particularly enjoy performing the mini-games.
| Area of Completion | Completion Rewards |
|---|---|
| Los Carnales | Sprint 10% faster. |
| Vice Kings | Sprint 10% faster. |
| Westside Rollerz | Sprint 10% faster. |
| All Locations | Unlimited Sprint energy. |
CD Collecting
As with the tags, there are also a number of floating CDs scattered around the game world. These have less of a tangible effect on the game, since collecting ten of them will simply unlock a new track for your mp3 player. They also don't offer any respect when found, so feel free to skip them if you wish.
| Area of Completion | Completion Rewards |
|---|---|
| Every 10 CDs collected, maximum of 60 | New song unlocked. |
Walkthrough
You're offered a fairly free-form gameplay experience in Saints Row. After completing the first few missions of the game, you'll be given the ability to pursue missions that aim to take down the other three gangs in the city. You can take down one at a time, go after all three simultaneously, or go after the minigames listed above, if you wish.
For simplicity's sake, we're going to list each of the gangs in a subjective order of difficulty, with Vice Kings coming first. They're likely the hardest gang to take down, or at least the most time-consuming.
3rd Street Saints
The 3rd Street Saints are going to be your initial salvation from the gangs that have overrun your part of town. Although it’s probably somewhat telling that you’re dumb enough to join a gang just because someone tells you to, we won’t hold it against you; we’d have a hard time saying no when Keith David asked us to do something stupid, too.
Canonized
Rewards: $1,000 Cash
Unlocks: Natural Leader (Recruit one Homie), Wheel Woman cell phone

After the initial cutscene, you’ll have to get the crap beaten out of you if you want to join the gang for sure. This just sounds better and better!
Anyway, there’s not much to say about this mission. You’ll have five dudes to fight here. First, one wave of one target, then two more waves of two targets each. We found that simply spamming punches was the best way to go; blocking won’t do much for you. You can lead the waves of two into the headstones to try and keep one of them off you while beating on the other one. Don’t forget to kick them when they raise their fists to block!
If you win, you win. If you lose, you win. So, you win! (You do get more cash for beating up all comers, though.) Consider this more a tutorial of the fighting system than a real mission.
Back To Basics
Rewards: $500 Cash, 500 Respect
Unlocks: Crib
This is another extended tutorial, involving such tasks as buying weapons (buy a VICE9, and get a few extra for the ammunition involved) and popping some caps. After you buy your weapon, you’ll be told to hit the bricks and take down some of the gangsters in your area. There are six of them walking around, each armed with their own VICE9, but they’re not so tough. You can either jack a car (with the Y button) and run them down, or just bring your homie along with you on the mission and lock shots nonstop until you see their gangster asses drop. The benefit to going on foot is that you’ll be able to pick up any cash and guns that the gangsters drop when they die.
After running the errands that you’re assigned after the killing, you’ll polish off the mission. You won’t be able to pick up the next mission until you earn more respect, though, so you’ll have to find the Snatch activity and perform that to get some rep. It’s a simple enough mission, so perform it twice and get a couple of respect boosts before moving on.
Abandoned Storefront
Neighborhood Gained: Athos Bay
There’s an abandoned building near the Snatch questgiver that’s being used as a stronghold for the Los Carnales gang. Nothing mysterious here: you just have to go in and murder everyone in the building. When you hit the back door, an informant will run off towards Mission Beach in a car, and you’ll be forced to give chase. The key thing here is to ensure that your own car stays mobile long enough for you to chase the informant all the way to the beach; it’s theoretically possible to kill the informant by blowing up his car, but it’s much easier to just tail him to the beach and run him down when he ditches his car. Killing him will earn you your second neighborhood, and trigger the appearance of the next 3rd Street Kings mission.
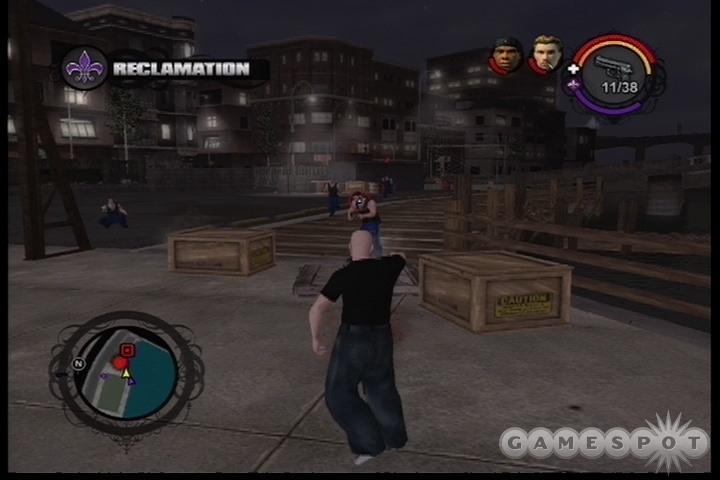
Reclamation
Neighborhood Gained: Harrowgate
Troy’s got word on a gangfight happening on the edge of Saints turf. His big idea is to head over there, sweep through the various gangs, and finish them all off in one fell swoop.
Sounds easier than it is, but it’s still not too complicated. Before you head out, you’ll need a four-door vehicle to bring along Troy and Vincent, as well as plenty of gun ammo if you plan on proceeding through the mission on foot. When you arrive at the destination, you’ll see plenty of red dots on your map. The red dots need to be destroyed. Doing so will either entail running in on foot, using your pistol to pop some domes, or stay on your vehicle and run enemies down while Vincent and Troy fire away from the windows. Going on foot is probably the better choice, as you’ll be able to pick up enough ammo to replenish what you expend on your foes, while you’ll also find a fair amount of cash on the ground when you off the enemies.
When you finish off the last lieutenant, you’ll earn the enmity of the cops, who’ll soon arrive in a cruiser and attempt to take you into custody. You’re going to have to outrun them if you want to survive this mission, and it’s easier said than done. If you want a good start, wait for the cop car to come to a stop, shoot the cop as he exits the vehicle, then take it for yourself. Five-Ohs are sturdy, speedy cars, and you’ll need something like it to last long enough to escape from the police. If more cruisers are on their way by this point, let them enter the gated area where you killed the last lieutenant, then take off towards the north towards the residential areas nearby. If you’re able to, find some kind of very narrow street or path and attempt to get away by making hard cuts into roads, or perform 180 degree turns to throw the cops off your tracks. The cops aren’t stupid, and they’re hard to shake, so prepare to retry this mission a couple of times until you get the hang of losing them.
When you do, though, you’ll gain another neighborhood, and earn the respect of Vincent, who now divides his forces up to go after the three main gangs in the city. Before you can become a foot soldier for his lieutenants, though, you’ll have to earn a bit more respect by performing Activities.
Vice Kings
The Vice Kings, run by the eponymous Benjamin King, are the biggest and baddest gang in the city, and they control most of Stilwater's most profitable districts, including all of downtown. They'll be the hardest gang to uproot and eradicate, but with a little willpower you'll be able to take them down.
Aisha’s Favor
Neighborhood Gained: Bavogian Plaza, Red Light District
It appears that the Vice Kings are making a habit of kidnapping girls and forcing them into prostitution. That just ain’t going to sit well with the Saints, so your job is to track the girls, starting with Aisha’s sister, then free them all one way or another.
Begin by tracking Aisha’s sister’s kidnapper. Pretty standard GTA fare here; follow the car, but don’t get too close or you’ll spook him. He’ll head to an abandoned motel in the Red Light District, then push Aisha into the building. You’ll have to follow them inside, kill all the Kings, then walk up to a locked door to find that the pimp holding the key is in a nearby strip joint, the Tee’N’Ay. You’ll need to head over there, kill the pimp (watch out for his SMG), then grab the key off his body and return to the motel to free Aisha’s sis and the girls. There are three of them, and you need to rescue them all, so you may have to abandon your homie if you still have one following you by the time you return to the girls. Do so by holding up on the directional pad before you rescue the girls; that’ll allow you to fit all of them into a four-door car.
Drive the girls back to the church to finish the mission off. In our case, Aisha’s sister decided she didn’t like our character’s driving, so she came around to the driver’s seat, threw him out, then proceeded to fight him. A few pistol whippings later, she got the point and died.
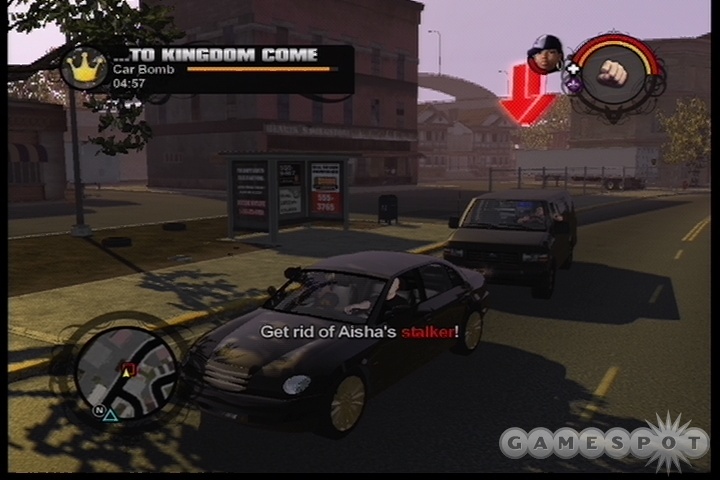
...To Kingdom Come
Neighborhood Gained: Union Square, Downtown District
Aisha’s going to try and disappear to evade the Vice Kings’ wicked record label, and it’s up to you to help her out. If you’re lucky, you’ll also be able to take out a good number of the Kings when she disappears.
You’ve got to get her car to the garage shop, first off, where it’ll be loaded up with a car bomb. Again, pretty standard Grand Theft Auto stuff. If you get knocked around too much, you’ll set the car bomb off, so try to avoid any crazy collisions. Unfortunately, you’ve got a few problems to deal with. First off, you’ve got a stalker of Aisha’s, who’s going to be following you in a truck. You also have to deal with a jackknifed 18-wheeler on the main bridge leading north to Union Square. Lastly, there’s a five-minute timer you’re on before the carbomb explodes.
Your first goal is to find an alternate route to the northern island. To do so, pop open your map as soon as you leave the garage, and plop your waypoint down on the Freckle Bitch restaurant to the east. When you come out to the highway, take a left and stay on the road to head north unimpeded.
More troublesome is the stalker. His van can easily match the speed of your car, so you need to act quickly to get him off your tail before you all go out in a blaze of glory. There’s no easy solution here; we found it useful to quickly make a couple of 180 turns, then attempt to brush him off on a telephone pole or something similar. He’s an adept driver, so it’ll be difficult to easily evade him, but at the very least you won’t have to replay much if you do happen to die in the chase.
Once you ditch the stalker, though, the rest of the drive should be fairly uneventful, so long as you don’t ram into any cars or anything. When you drop Aisha off, you’ll win the mission and a new territory for your team.
Always Use Protection
Neighbordhood Gained: Prawn Court, Red Light District
This is a straight-up kill mission, as you’re told to head into Vice Kings territory and take out one of the whorehouses that they’re running. You’ll be heading through Saints territory before you reach the brothel, so be sure to pick up a homie; they’ll do a lot of damage this mission. You’ll also want plenty of pistol ammo before heading out.
First off, you’ve got four car patrols around the brothel to deal with. Nothing complicated here: just shoot your pistol into the driver’s face to finish them off, and switch cars as necessary. Each of these drivers will drop SMGs, so if you want to let your homie grab one, you’ll have a much easier time pulling drivebys on the remaining foes. Easy-peasy. The point here isn’t to make it difficult, though; you’re really just earning more hostility from the Vice Kings gangsters.
When you roll up on the brothel, you’ll have to kill the guards outside, then move into the building itself to take out the rest of the foos in there. Nothing too complicated, really; just head in and kill everything that moves. You can kill the whores and customers as well; some of them drop extra cash.
Reinforcements
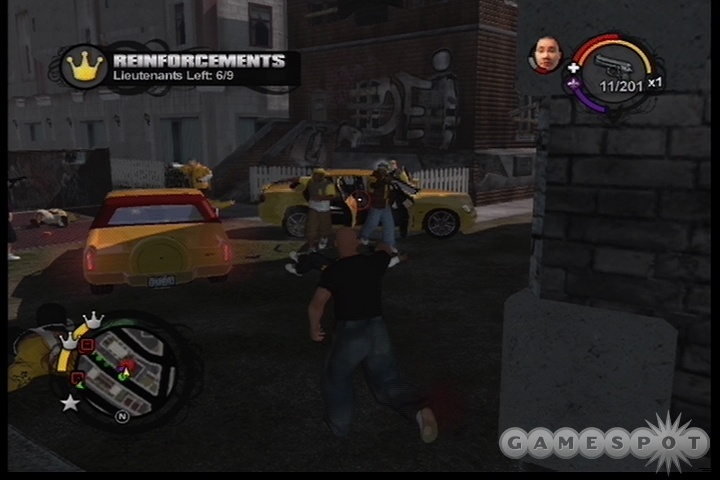
Rewards: $1,500 Cash
Reinforcements is one of the introductions of the Pushback mechanic, wherein a rival gang will attempt to come in and take back one of the territories that your crew took from them. In this instance, the Kings will hit back hard in Prawn Court, so you’ll have to head back that way and attempt to kill off the lieutenants in the area. Killing them all will net you the reward.
Stay in a car for this one, if possible, and be sure to bring your homie with you. When you spot the lieutenants, run them down or shoot them from the safety of the vehicle. You’re going to be rolling with two or three wanted stars for the Kings before long, so they’ll be sending out vehicles full of gangsters your way, and getting caught on foot will earn you a quick death in a lot of instances. So try to stay in your vehicle as often as possible, run down the lieutenants, then get back on the beaten path for the main missions of this branch.
Best Laid Plans...
Rewards: $1,000 Cash
Time to take out Tonya once and for all! Hop into Jonny’s sweet-ass ride and get to the abandoned police department to start the fun.
Again, fairly standard kill-everything-that-moves mission. Come in hard, let Johnny do the work if possible, and start dropping fools. You’ll take some damage here, but at least a few of the soldiers in your way will drop food, so you shouldn’t die. When you hit the stairs, head down to the jailhouse to find a shotgun and an SMG. The SMG is locked up, but if you punch the door in front of it, it may collapse and let you through.
When you track down Tanya, things go...poorly. You’re going to find yourself staring at a crappy-ass car, with three wanted stars from the police and a couple for the Vice Kings. Your goal is simply to survive, and get yourself back to the Church as best you can.
Your best bet here is to avoid the car in front of you, and instead wait until the five-o roll up on you. Shoot the driver as he gets out of the car, then nab the cop cruiser and use that instead. It’s tough enough to stand a beating and fast enough to match the speed of the other cop cars that’ll be coming with you. You may have to switch cars once or twice before you make it all the way back to the church. If yours is starting to smoke, try ditching it in the middle of a construction lot or other non-road area, then sprint away from any followers back towards a street and jack one there.
When you reach the church, the mission ends.
Green With Envy
Neighborhood Gained: Atlantis Avenue, High End Retail District
A devious plan is set in motion to rescue Johnny. You’ll have to track Tonya back to the rebuilding of the recording studio (why’s a madam overlooking construction?), kill her chauffeur, take his place, then have her drive you back to Tony, where you’ll theoretically be able to kill him and get Johnny back.
This is going to be a somewhat lengthy mission, so save ahead of time and be sure to have a few burgers or something in your inventory before setting yourself up. You apparently can’t get any homies for this mission, so don’t bother looking for them.
The Chaffeur
When you reach the recording studio, you’ll witness the chaffeur driving away. Killing him isn’t too difficult; just roll up in front of him, stop, then fire a few rounds through the windshield at the driver seat. You won’t be able to see the driver through the tinted glass, so you’ll have to make your best shot. If this doesn’t work, you’ll have to try and pull off a drive-by as the driver speeds away, which is obviously a lot more difficult.
When Tonya hops in, though, you’ll have to ferry her around to a couple of shopping trips. First you’re heading to the clothing store, then you’re going to the Friendly Fire shop. Not much to say here; if you burn rubber and avoid collisions, you should be able to make each destination with about fifteen seconds to spare.
Intervention

After Friendly Fire, a group of rogue Saints are going to roll up on the limo and attempt to take Tonya out. There are going to be at least three cars involved, and you’ll have to lose all of them before you can drop Tonya off. Doing so can be frustrating, but at least initially you can try doing some quick 180s or hairpin turns and hope the cars get locked up on each other. The last car is generally going to be the worst; try to find an alley or scrape it off your tail by weaving into oncoming traffic. There’s no timer for this mission, at least, and the limo can take a lot of damage, so you can feel free to run around for a bit if you enjoy the chase.
When you do drop Tonya off, it’s basically another Stronghold mission come to life. Head inside the condo, drop Anthony and his thugs, and you’ll free Johnny and get to get back to Saints Row in style. Anthony’s tough, though, so be ready to retreat and eat some food if you need to.
After this mission is over, it’d be a good idea to try and do some of the Vice Kings stronghold missions. Finishing a few of them might get you enough respect to earn another homie follower, which will come in pretty handy in the last few Vice Kings missions. Just be aware that some of them are fairly tough, so be sure to pick up plenty of ammo for your SMG and shotguns before heading into them. Beating them will, of course, net you new territories, so at least you’ll have those to play around with before heading further into the missions.
3rd Street Vice Kings
Neighborhoods Gained: Nob Hill, High End Retail District
Basically, the goal here is to cause as much trouble as possible while wearing Vice Kings colors. Sounds like fun!
To get police attention, just start blasting a couple of civilians near the mission start. If you can find a cop or cop car, killing the cop will rocket you towards the two-star level, which is where you need to be to get the game started in earnest. When you reach it, kill a cop and steal the five-o car, then head towards the high end retail district, where your goal is to kill a couple of shopkeepers. Don’t worry about the television truck that’s following you; just leave it behind and it’ll catch up eventually.
When you hit the shops, head in and kill the proprietors. You can jack the safe in the second shop if you wish, but you can’t cancel out when you start, which may leave Johnny outside in the line of fire. If he dies you might not be able to revive him within the 30 seconds.

Secondly, you have to head down to a weird bowling-pin work of art and hit the ramp nearby to knock the pins off the pedestal. If you’re still in a cop cruiser, this should be easy. Just hit the circle, see where the arrows are pointing you towards, then back up a little bit and get full speed off the makeshift ramp. If there are plenty of cop cars in the area then you may have to run around a little bit to get a clean shot at the ramp.
Lastly, Johnny points you towards a bulldozer, and asks you to pummel a statue of Alderman Hughes. When you’re in the bulldozer, you’ll have to quickly move towards the statue on your map and knock it down. The bulldozer will easily destroy any car that gets in your way, but it can only withstand so much damage! It’s best to avoid cars altogether and simply make your way to the statue and knock it down before you start to smoke.
Round Peg, Square Hole
Neighborhoods Gained: Humboldt Park, Museum District
If you want to bring the Vice Kings down for good, you’ll have to expose their links to the cops that provide their protection. How, you ask? Well, it involves a whole mess of destruction. Using the weapons you found in Anthony’s crib, you’ll be able to ride along with Johnny as he visits all of the drop meetings for the protection money the Kings are paying the cops. Cause enough ruckus, and you’ll start making people wonder why all these cops are meeting up with all these gangsters.
For this mission, you’ll be riding and Johnny will be driving, leaving you with nothing to do but shoot. You’re going to have infinite ammo for all of your weapons here, including the RPG and the AK-47, so you’ll have tools to work with; you’ll also have plenty of targets to hit. Johnny’s going to hit up four or five meetings, so be ready with your weapons. A single RPG blast into the middle of the crowd at each meeting will usually bust them up enough to let you move on to the next. Killing everyone isn’t required, so long as you make a loud noise.
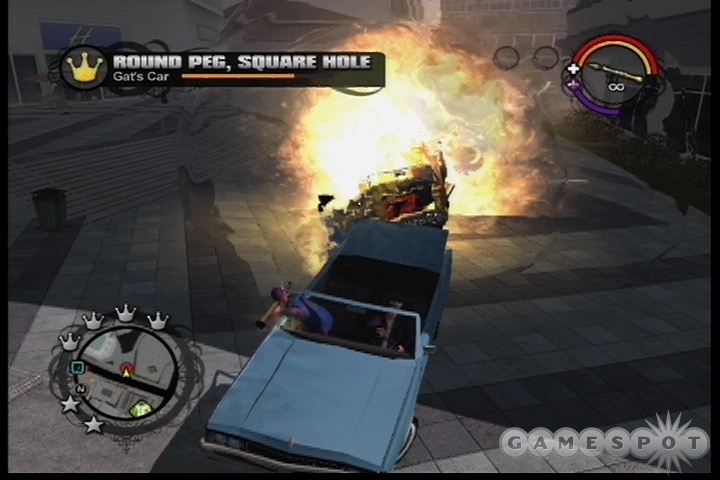
Of course, by causing your ruckus you’re going to attract the attention of both the police and the Kings. Eventually you’re going to have pretty much every cop in the city on your ass, and a good number of the Kings, as well. Luckily for you, your car can take a bit of damage, so try to use the RPG to blow off any followers. Just make sure you use it while they’re at range, as hitting a car at point-blank range with an RPG will deal significant damage to Johnny’s ride. If someone gets too close for comfort, switch to the AK and blast the driver as best you can.
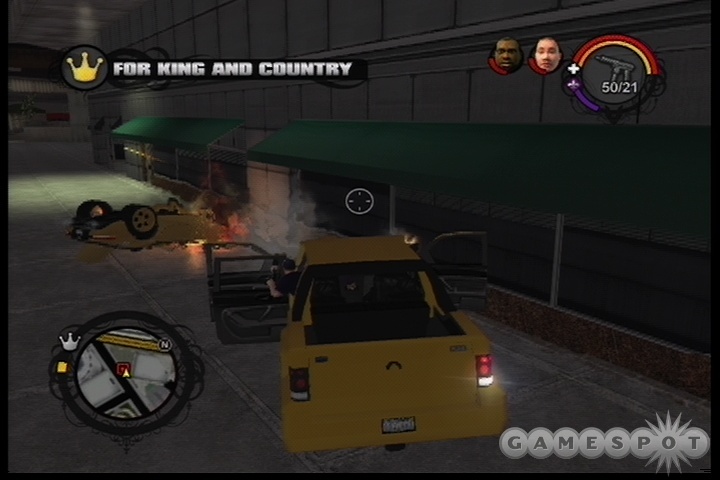
For King And Country
Neighborhood Gained: Amberbrook, Museum District
It turns out that Benjamin King didn’t actually die in the boardroom attack, but you probably could’ve figured that out yourself since it didn’t show him getting offed. Why those gangsters thought they would come after him with bats is beyond us; guy’s pretty huge. If you’re not going to come hard, don’t come at all, is what we always say. Because we’re from the streets. Yeah.
Anyway, through some mysterious twist of fate, Julius and King go way back, so Julius’s going to expect you to get to King and help him survive the end-of-Scarface-esque takedown the Kings are attempting to enact on him. It’s best if you have a homie or two, as well as a good car, in your possession before the mission starts, because some Kings will be heading to the church in an attempt to whack you. Regardless, get to the museum where King is as quickly as possible.
When you reach him, you’ll find your path blocked by barriers, so you’ll have to disembark and proceed in on foot. There are plenty of Kings in the area, but with a couple of homies you should be fine; there’s plenty of concrete to hide behind if the going gets tough. Just keep an eye on King’s health meter; if it starts to dip down too low, sprint towards him and get him in your party. He’ll take over one of your homie slots, which is fine. At this point, you can hang around and kill all of the Kings in the area for their ammo and cash, if you like, or just book it towards the car that you’re being pointed to, if you wish.
Vehicular Homicide
After you reach the car and get in, it’ll be time to take care of business with Warren. First up are a few Vice King cars; they’re easily dispatched, but they’ll wear down your car a bit.
When you get on Warren’s tail, let King and your other homie start whittling his car’s health with their weapons, while you focus on ramming it whenever possible. It’ll run a pretty devious route through the museums and mansions in the district, so it can be easy to lose him; try to take him out quick!
When you finish off Warren, you’ll have to return to the church while under the onus of a four-start Kings wanted level. You may want to hit a Forgive & Forget if your car is busted up too much, but at least it can take a bunch more damage than most other vehicles you’ve driven thus far.
The King And I
Neighborhood Gained: Brighton, Downtown District
Fairly easy mission, all told. King knows of three gang hideouts in the northern part of town. His plan? Lure the Vice Kings holed up in each out out, then force them to chase you towards a police blockade, where they’ll get shot up by the cops.
And...that’s pretty much how things work out. Your goal here isn’t to outrun the enemy cars; merely to survive their fire until you bring them to the cops. Get a nice, beefy car, like an SUV, drive to the hideouts, fire a couple of shots at the ballers, then race towards the cops. This needs to be repeated three times, but you can switch cars in between hideouts if you need to.
All The King’s Men

Neighborhood Gained: Adept Way, Downtown District
Unlocks: King’s Penthouse Crib; Johnny’s Car; Vice King Cars.
It’s time to finish things. To off Tonya, you’ll need to infiltrate the Vice Kings building, make it to the penthouse, then kill the madam. Getting in won’t be easy, however, as the only lead King has to the elevator in the apartment building is a devious little hairdresser known only as Stefan.
Getting Stefan to talk will be difficult, though, as you have to drive around while King is holding him by his feet from the side of the car. You may remember a couple of missions in San Andreas where you had to drive quickly to scare a passenger, but not hit anything hard enough to kill them. This is basically the same deal, save for the fact that picking up Stefan will automatically pop you with three wanted stars with the police. When the police ram your car, they’re going to do a good amount of damage to Stefan, meaning that they can easily kill him before you extract the information you require.
If you’re a decent driver, you might be able to avoid killing Stefan and still avoid the cops, but in general, it’s best to just make a beeline for the Forgive and Forget station, whichever one you prefer. On your way there, you’ll hopefully be able to keep your car in fairly good repair. When you hit the Forgive and Forget, you can either blast through there with Stefan in tow to get a few seconds free of police interference to try and put him over the top, or just run through there after you’ve got the penthouse codes from him to completely get the cops off your back while you make your way to the King Tower.
The Big Finish
When you reach the tower, you may be surprised to learn that you have to shoot some people! Nothing too difficult here; you just have to fight your way to the elevator on the second floor, then clear out the penthouse in your pursuit of Tonya. One thing to be aware of is that there are a lot of madams in the penthouse, and a few of them will be packing the most expensive type of pistol, which can blow you away with just a few shots. Be careful and try to let Johnny and King do the brunt of the work here.
When you reach Tonya, the mission will end, and you’ll unlock a good number of extras.
Los Carnales
Los Carnales are the oldest gang in the city, and used to rule most of it before the Vice Kings swept in. They offer somewhat fewer missions than the Vice Kings will, but some of them can be rather difficult.
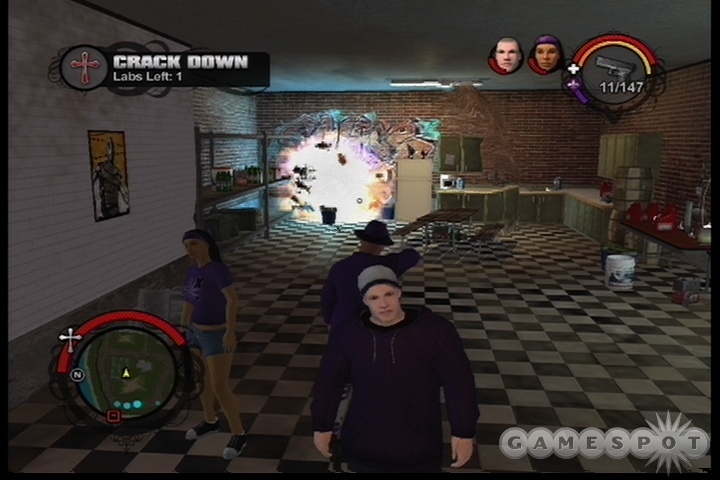
Crack Down
Neighborhood Gained: Southern Cross, Barrio District; The Mills, Factories District.
It’s time to start moving on the Carnales. In order to do so, you’re first going to try and frustrate them by cutting off their supply of cash. And what might that be? Drugs. There are a couple of drug labs run by the Carnales; taking them out will certainly get their attention.
This one’s easy enough. Get a homie, head to the locations on your maps, kill the defenders, then find the white barrels near the markers on the map and shoot them to destroy the lab equipment. You’ll be done and get yourself two fresh hoods for your troubles.
The Missing Shipment
Rewards: $500
Dex is a thinker. For some reason, he needs a truck. It’s up to you to get it!
Grab a car and a couple of homies before picking up this mission. Troy will accompany you to the docks. If you have any other homies besides him, try to kill off some Carnales and get them an SMG. They’re going to need it.
You’ll want to have a car with a good amount of stamina for the initial run towards the truck. An SUV or something similar would be best. The truck itself is surrounded by Los Carnales members, and they’re not going to let you just walk off with it. It’ll take Troy a second or two to hotwire the truck, so run down any gangsters nearby until he’s ready to run. When you leave the lot, you’ll have to fend off Los Carnales in cars. Luckily, if you manage to pop out the driver of one of the Cavalleros, you can quickly nab their cars when you need to refresh your ride.
If Troy’s truck gets too far ahead, he’ll stop. This can be dangerous, since any nearby Carnales will attack him, but the truck has enough health to last for a while.
Homeland Security
Rewards: $750
Not much to say about this one. Los Carnales are in the Row, and you’ve got to buck them out. Grab some homies, get a car, and try to let your homeboys drive-by on the enemies in cars, first off. When you roll up on Carnales that are on the streets, be careful, as the targets on your HUD will occasionally wield special weapons like Molotov Cocktails or rocket launchers.
Trojan Horse
Neighborhood Gained: Pilsen, Factories District
It's time to put Dex's plan into action. Turns out that he wants the truck in order to set up the Carnales drug factory; you're going to load it up with Saints, drive it into the factory, then unload everyone and take that place over by force. Loading up the place is automatic, so just hop into the truck and start driving. Like the bulldozer, it can easily blow up vehicles when it impacts them, so try to avoid any collisions.
Anyway, when you're there, this is a straight up kill mission. Take your force (most of which will be eliminated quickly), get around to the back of the factory, and head inside to kill everyone in there. There are going to be a bunch of soldiers on top of scaffolding; shoot the white barrels underneath them to quickly destroy their little platforms.
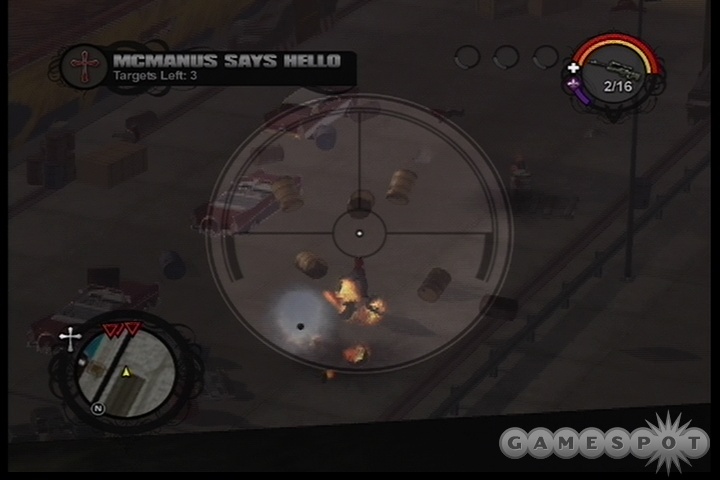
McManus Says Hello.
Neighborhood Gained: Poseidon Alley, Docks & Warehouses District
You're going to lose whatever Rifle ammunition you've built up thus far when you take this mission; hope you didn't buy the expensive stuff. In exchange, you'll earn a McManus sniper rifle, which you'll need to snipe away at some fools on the docks. Note that you're going to be starting this mission outside the gun shop. If you want some easy cash, run back and open the safe in the rear of the shop. When you run outside and grab the mission, the wanted stars from the cops will vanish.
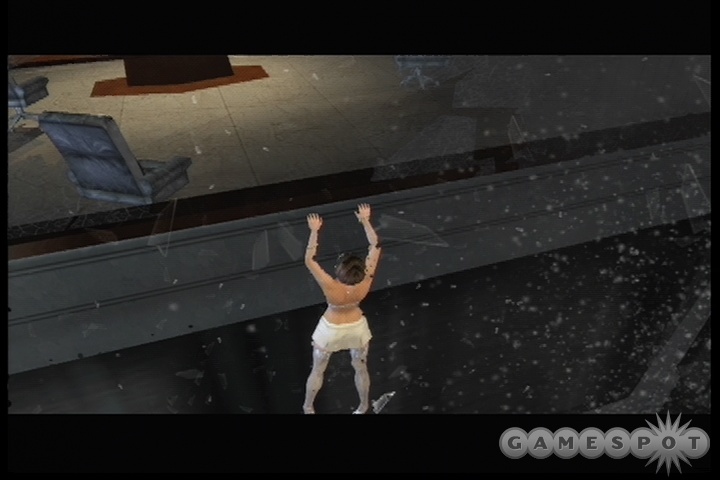
You have five minutes to make it to the docks, so grab a speedy car and book it. Actually, five minutes should be more than enough time for you, so take your time if you like. The quicker you get there, though, the more time you'll have to zoom up the fire escape near where you park and head to the top of the building to assume a sniping position. You have to hop onto some boxes, leap onto the dumpster, then run up the fire escape. At the top, walk across the wood plank to the other building, then climb up the air conditioning to reach the top. When you take up position, the timer will reset to indicate the appearance of Hector and the Colombians.
After Hector (the guy in the long coat) walks over to the Colombians (dressed in white), snipe him in the back. This will cause the timer to be completely shut down, giving you as much time as you need to finish off the 11 other soldiers in the area. They're all armed with rocket launchers, though, making them difficult foes to kill. Since you have as much time as you need, however, you're going to be able to return to cover (the two water reservoirs are going to be useful for this case). Try not to be intimidated by the rockets going off around you; so long as you stay crouched and use the cover provided to you, they won't be very damaging, assuming they hurt you at all. Just try to sneak around from cover and sweep from right to left, killing the first rocket soldier you see, then ducking back to reload. You don't need to be perfectly precise; so long as the red icons on either side of the crosshair (as well as the crosshair itself) are red, you'll hit, even if you're a bit off the mark.
Meeting Orejuela
Rewards: $1,500
It's time to finally meet this mysterious Colombian that's the source of the Carnales' drug supply. Grab a four-door car, get a couple homies (in addition to Dex) and head to the airport. Be sure that your car is relatively undamaged before entering the green circle in front of the strip club.
When you do, a huge number of Carnales will flood from the surrounding areas, resulting in a quick death if you don't hit the street right away. The objective here is to "lose them" and return back to the church, but with three wanted stars with their faction, that's going to be difficult to do, especially since it'll be tough to switch out your damaged car when you need to. Our best bet? Check your map and place a waypoint on the Forgive and Forget to the northwest of the airport. Checking in there will eliminate the Carnales interference and let you get back to the church without breaking a sweat.
Strength In Numbers
Rewards: $3,000
Time to get your mack on. Victor and a huge number of the Carnales enforcers are going to be coming up and attempting to raid the church, and it's up to you, Dex, Julius, and Troy to punk 'em back to the southern part of town. It'll be best if you have at least one RPG launcher before starting this mission, although it's not 100% necessary. Some grenades will also help a lot.
By now, you should be familiar with how this goes: kill everything that moves. After clearing out the church, help out in the southern graveyard, then get ready to roll to the north, where the toughest part of the fight will take place. At least six or seven different Carnales rides will come up on you here, and it's going to be tough to deal with them all individually. (Although, of course, if you get wounded you can always hide out inside the church until your health regenerates.) Better to just lay down grenades as the cars roll in and attempt to start a conflagration.
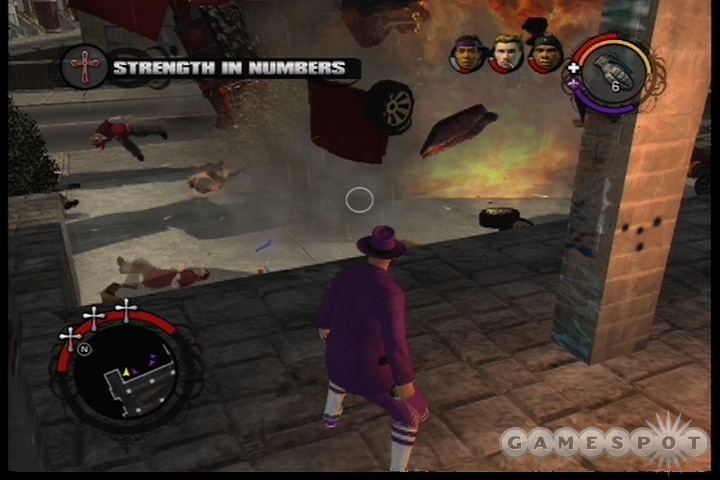
After a while, Victor himself will ride up in a Humvee-looking vehicle. Your goal is to finish him off, but he's a tough cookie. You'll have to begin by destroying his car, and this is where the RPG launcher comes in. The Humvee will run a predictable-looking route, so run out to the street, stand in its way, and blast it when it comes towards you. Surprisingly enough, this won't be enough to take it out; you'll have to hit it again if you want to destroy it for good. If you don't have an RPG launcher, then a rifle or SMG will be your best bet, although it'll take a hell of a long time to wear it down, and you'll have to deal with other Carnales during this time.
When Victor finally pops out of the car, he'll hopefully be engulfed in flames from the explosion. You now have to completely kill him, but he can take much more damage than most enemies can. If you have a 12-gauge shotgun, though, three or four blasts to the chest should be enough to finish him off.
Possession With Intent
Neighborhood Gained: Encanto, Barrio District
This is possibly going to be the first time you've hit five wanted stars with the police, so come prepared. Plenty of SMG ammo, max homies, the works.
When you get the bomb rigged up, you need to drive quickly (and safely) to the police station indicated before the timer runs out - if it does, then you go bye-bye. You've got a little bit of leeway, so don't fret too much over the speed; just try not to hit too many cars.
When the bomb goes off, you'll have to wait a full three minutes for your homeboys to load it up. Every 30 seconds or so another police cruiser will come along and give you some trouble, so be ready with your pistol or SMG and pop caps on them through the windshield before they can get to you.
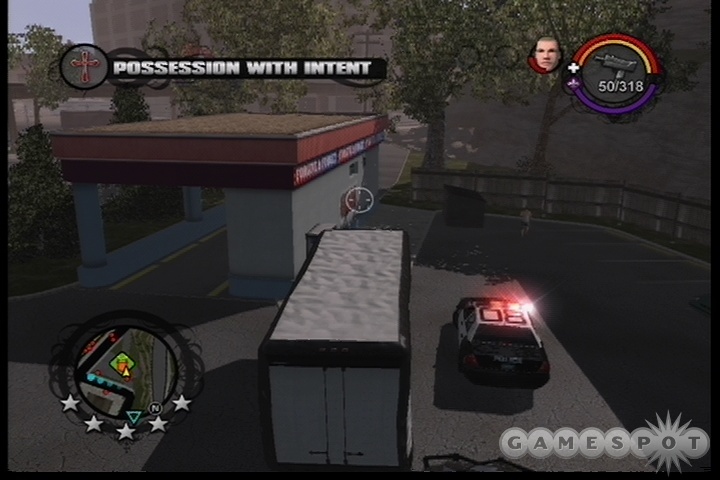
After the three minutes is up, you have to get the truck back to the church while somehow managing to avoid the cops and FBI. To be blunt, you're not going to make it unless you hit a Forgive and Forget store. There's one to the east of the police station, but it is a bit of a hike to get there. Just try to avoid hitting any oncoming traffic, and take the turns slowly to avoid getting shoved past the intersections by all the cars ramming you. It's difficult to make it to the F&F, but if you can, then you'll be able to drive easily from there.
House Call
Neighborhood Gained: Ezpata, Barrio District
Guess what? It's another home invasion mission. This time you're going to be heading to the Lopez mansion and attempting to take out one of the remaining brothers. You know...that one guy. The one with the name.
Grab Dex and a couple of homeboys and make your way to the mansion. Nothing too unfamiliar here; just clear the place out, proceedingly slowly, while attempting not to die. You can't kill the Lopez brother here; he'll automatically escape in one of his cars.
Luckily for you, Dex is on the scene, and he'll ride up in a car his own self. He's going to give chase to Lopez while you attempt to keep the rest of the Carnales off your back. You should have an infinite amount of rocket launcher ammo here, so use that and/or your assault rifle to keep any Carnales away from your vehicle. Don't worry about Lopez; you can't destroy his car. So long as you don't do anything silly like blow your car up, you'll eventually win the mission.
What Goes Up...
Neighborhood Gained: Wardill Airport, Airport District
Rewards: Lopez Mansion crib; Dex's Car; Los Carnales Cars
Looks like Lopez is trying to get the heck out of dodge. It'll be up to you to stop him before he can get on that plane and rebuild his base!
Luckily, Dex's car is a beast. Follow the freeway path laid out for you and you should be able to reach the first blue marker with around 45 seconds remaining, give or take a few for miscellaneous accidents. Do your best to keep your car in tip-top shape while you're on the road, though, as you'll need it shortly.
Now the fun part begins. You have to somehow prevent the plane from taking off; in the world of Saints Row, this entails blowing it up. Getting to it won't be easy, though, as Lopez has surrounded the airfield with the remnants of his little army, and they're all going to be on your tail as soon as you enter the airfield. The cars themselves aren't very difficult to deal with, and in any case won't be doing a supreme amount of damage to your vehicle. That job will be given over to the four Carnales who are stationed around the airport with RPGs. If they hit your car twice, you're dead, so you'll have to focus on them when they pop.
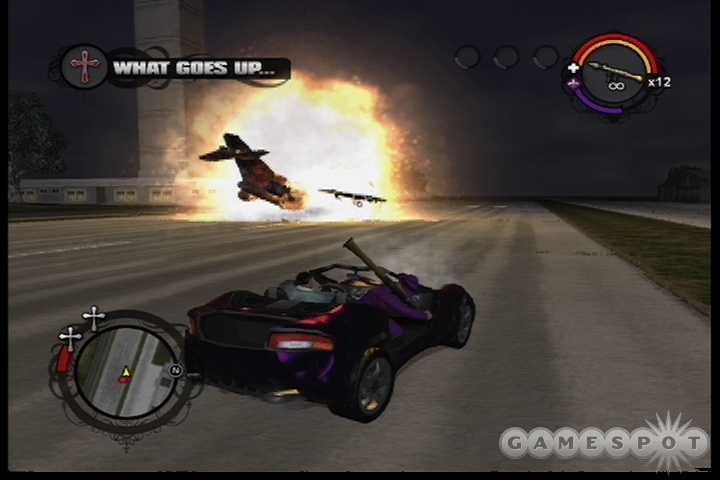
Unfortunately, without having us there to play the game for you, this is a matter of live and learn. You're going to have to play through the mission a few times to learn where all the RPG soldiers are and accurately blast them with your AK. Only one of them is on the ground, though; most of them are in elevated positions, such as near the two ramps you're going to be launching over. They have the kindness of thought to be standing near a group of explosive barrels, so look out for the white canisters on the roofs and shoot those, instead of aiming for the smaller targets that are the RPG soldiers themselves.
With a little luck, you'll survive the RPG onslaught. If you don't, you'll have to replay the entire boring drive down the freeway again until you get to the airport, then try and live through the firefight. When you do manage to avoid or kill the RPG soldiers, though, you'll reach the runway, and if you have any life left in your car, then you should be able to easily take it out with a few RPG rounds of your own.
Westside Rollerz
The Westside Rollerz are arguably the shortest and easiest of the three gangs to finish off; they definitely offer up fewer missions than the other two gangs. If you want to get an extra homie in as short a time as possible, these guys are a good choice for your first gang.
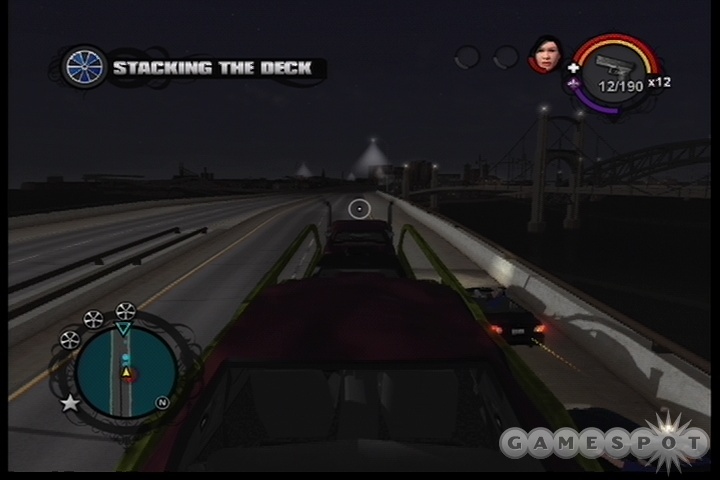
Stacking The Deck
Rewards: $500
Lin wants a truck, she gets a truck. Grab a car and head out ot the truck's location; it'll be riding around on the freeway. In order to hijack it, you'll have to deal a set amount of damage to it. This can be accomplished either by shooting it (easiest if you have a homie or three along) or just by ramming it.
When the truck pulls over, hop out and nab it. You'll earn the enmity of the Rollerz by doing so, fo sho, but all you have to do to win the mission is drive it down the freeway a bit. Try to avoid ramming cars in front of you; stick to the shoulder and scrape off the Rollerz in pursuit by sticking close to the traffic on your left. When you reach the exit ramp, the mission ends.
Samson's Surprise
Neighborhoods Gained: Chinatown, Chinatown District
Another pretty easy one; not so surprising considering how close we are to the beginning of this tree. After getting the mission from Lin, Troy will pull up outside and offer up his car for the race. Your only job here is to hit the markers in the race while staying close to one of the cars; given enough time, Troy will taunt them into hitting the NOS, resulting in their quick death. This is one long-ass race, so you have plenty of time to get this done. Just be sure to actually hit the waypoints; if you miss one, the other cars will begin acting oddly.
Pleasant View Storage
Neighborhoods Gained: Pleasant View, Arena District
A fun mission, but again, not superbly difficult, especially if you have a few homies at this point. Come in loaded for bear; grenades will especially be useful here, since you're going to have to destroy a few vehicles.
When you reach the storage area...start blowing up cars! If you have homies with you, just stay in a car and drive around to each of the open storage areas, then throw a grenade at the cars that are marked as targets. If you don't have enough ammo or cash for grenades, you can hop into the cars themselves, drive them near the explosive barrels around the lot, then shoot the barrels to destroy the cars.
The only twist here is that a couple of the cars will have Rollerz in them and will be driving around, but they won't leave the lot, so you shouldn't have too many problems tracking them down and destroying them.
Guardian Angel
Neighborhoods Gained: Sommerset, Apartments District
Lin's next master plan involves a staged attack. If you head towards a couple of Rollerz mucky-mucks and attack them, she'll step in and save the day at the last moment, thus solidifying her role in the Rollerz.
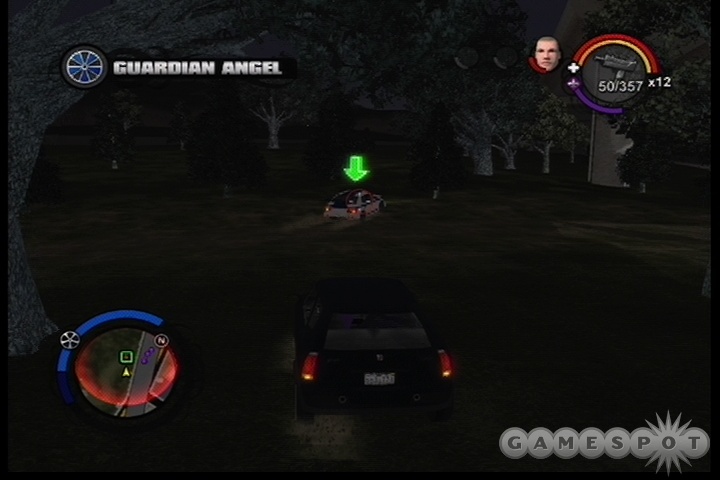
Begin by grabbing some homies and heading towards Donnie's car shop. Plenty of Rollerz around outside, so either run them down or let your followers ice them. When you're ready to head inside, gingerly kill off the defenders, but be sure to leave Donnie (marked with a green arrow) alive. He'll escape, and get picked up by Lin. You'll have to give chase in the little Halberd parked nearby, but that shouldn't be hard; Lin seems to intentionally drive slow enough for you to follow. When she hits the Suburbs district, though, you'll need to let them get away. Just stop and drive in the opposite direction to pass the mission.
Escort Service
Reward: $1,500
Another driving mission. This one's going to go a lot more smoothly if you happen to have two or three homies in your crew. If you don't, try to stock up on SMG ammo at the gun shop before attempting it, as it'll require a lot of firing from vehicles.
Your goal here is to stop the Rollerz from hijacking a convoy. Of what? Belonging to whom? The world may never know. Anyway, there are three trucks you have to defend here. Although it might look like you're attempting to escort them to a distant location, that isn't true; all you have to do to win here is destroy the cars belonging to the Rollerz. Again, much easier if you happen to have a homie or two along for the ride. If you can't kill everyone in the car, try to settle for the driver by running up alongside the left side of each of the cars and shooting away. If you have a hard time driving, aiming, and shooting, check your control configuration and switch it so that you move your car forward by pushing up on the left analog stick; this will free your right thumb to aim while you drive, if you can get the hang of it.
After the first two trucks are defended, get into the fastest car you can find and head towards the last truck. When you get nearby, you'll learn that it's been cornered by Rollerz and isn't moving. You have to speed towards its location and shoot up the Rollerz before they can destroy it. They'll focus all of their fire on the truck, so just get close, hop out of your car, and use your biggest weapon to finish them off.
One Step Ahead
Reward: $2,000
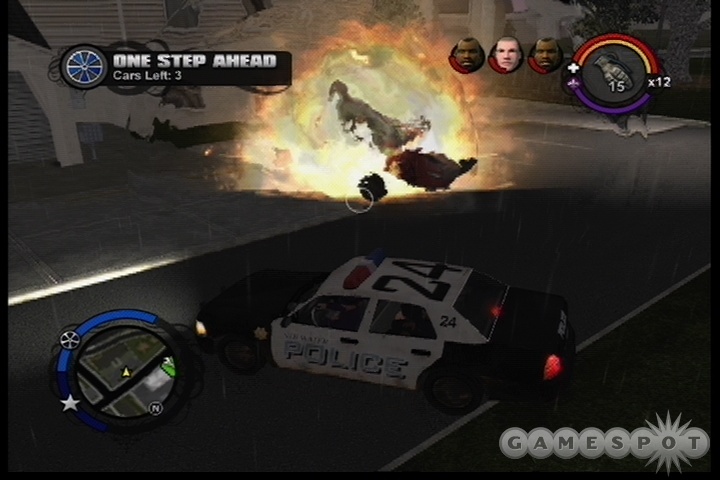
The Rollerz need to hijack a few cars to get the parts they need, to make up for the ones that you jacked from them. They have four cars targeted around the city; it's up to you to find them and destroy them before the Rollerz get them.
Again, lots of homies, lots of grenades, if you have the cash for them. Your goal here is to race towards each of the cars as they pop up on your HUD, kill any Rollerz that might be running towards them, kill them, then destroy the car. Obviously enough, you're occasionally going to be unable to get to the car before a Roller gets into it, forcing you to give chase. They don't appear as Rollerz cars to your homies, so you'll have to shoot them yourself to start your homies shooting themselves. From there, all you have to do is keep pace with the cars to destroy them. If you do happen to get close enough to a car before the Rollerz get into it, try to run down the Roller running towards it, then chuck a grenade under the car in question to destroy it.
If a car manages to get away from you, all is not lost; you have at least one free car before you fail the mission. Your goal is destroy four cars, but even if one gets away, you'll get a shot at at least a fifth, maybe more.
Liberation
Neighborhoods Gained: Ultor Dome, Arena District
Another kill mission. Head to the pool hall with some homies and some grenades. (A lot of SMG ammo will also be helpful for the next mission in the line.) As soon as you kick open the door, a Rollerz car will attempt to ram you. If you're inside the building, it'll ram into the door, probably running down some of your homies and preventing you from leaving. The solution? Kick down the door, then run down the street a little bit and dodge the car. Destroy it, and then head inside the building. (Alternately, you can just run across the street and blow it up before heading through the door.) Instead of taking on the group of Rollerz head to head, start chucking grenades around the corner into the main part of the pool hall, then head in with your homies to lighten up the rest of the crowd. When you're ready to head upstairs, again, chuck grenades in front of you, and only then run up there and kill any remaining soldiers.
When you reach the upstairs storage room, the mission automatically ends and segues into another cutscene. You wind up shot, and about to be dumped into the ocean. Fun!
Burying Evidence
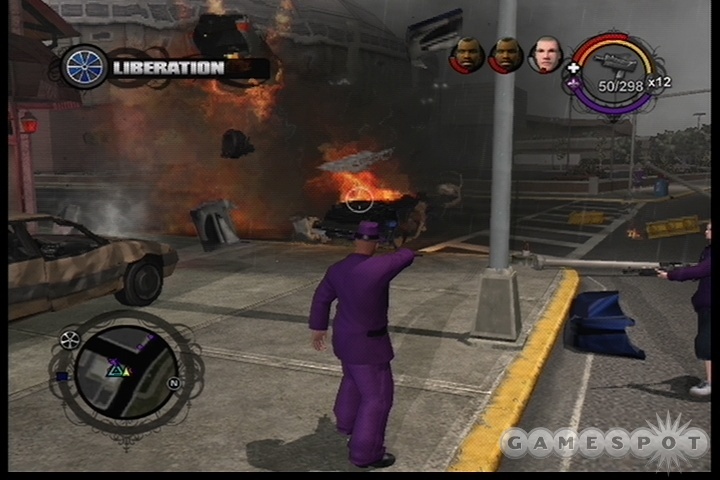
Rewards: $3,000
Time to exact vengeance on Sharp for his cold treatment of you and Lin. You have two minutes to get from the end of the alley here into the Bootlegger; just sprint down the alley as quickly as you can and look for a set of steps on your left. When you reach the Bootlegger, take a minute and try to find a homie if you can; they'll make the rest of this mission a lot easier.
When you reach Sharp's car, you have to destroy it, and kill him. Well, duh! It's going to be harder than it sounds, especially since the Bootlegger can only hold one extra passenger, and because Sharp will take one of those patented crazy routes through the city in an attempt to elude you. If he loses you, you'll have 30 seconds to get back in sight of him before he's gone for good. Try to catch up with him on straightaways and unload your SMG into his car.
When the car blows up, Sharp and his buddies will jump out for their last stand. Shoot him as long as it takes to kill him, and the mission ends.
No Time To Mourn
Rewards: $4,000
Lin is dead, and the Rollerz are heading to Saints Row, intent on burning it to the ground. Only you and Julius are man enough to stand in their way. If you can afford it, pick up at least one ammo pack for the most expensive automatic rifle; you'll be getting infinite ammo for it here, and it'll come in handy to have something powerful at your disposal.
When you reach the destination on the highway, you'll switch places with Julius, so that he's driving and you're shooting. Your goal is to take out nine or ten Rollerz cars on the highway, before they get to the Row. The rocket launcher will be handy at long range, but it can be murder to land your shots accurately; if you took our advice and picked up the military-grade assault rifle, it'll easily chew through these cars and set them alight with a single clip. Infinite ammo for the win! You don't even need to destroy the cars; shooting out the drivers will prevent the cars from moving on, and you'll quickly leave them in your wake.
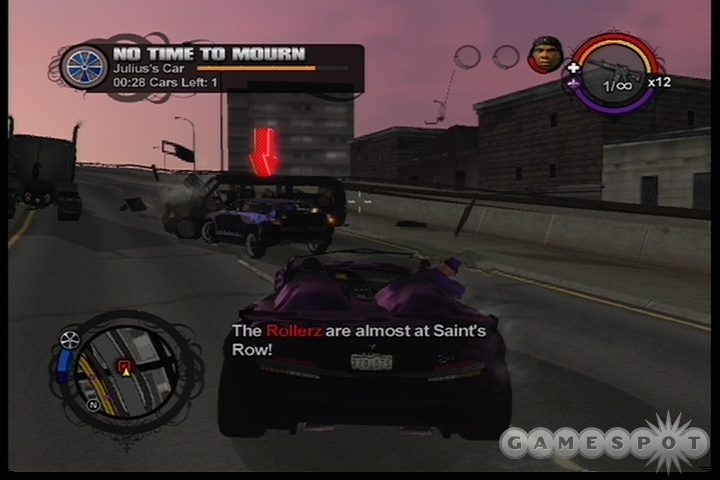
When you destroy all of the cars, Price will eject you from your car, forcing you to let him get away. After this point, you'll have to finish off any remaining Rollerz strongholds before you can move on to the last mission. If you've already completed the available strongholds, then the only one that'll pop up will be Price's mansion, which you'll have to assault and clear out before stealing Price's exceedingly fast car and heading down to a Forgive and Forget. After that occurs, your cell phone will ring, allowing you to pick up the last mission.
Semi-Charmed Life
Rewards: $5,000
Unlocks: Price Mansion Crib, Julius's Car, Westside Rollerz Cars
The grand finale to the Rollerz missions takes place on the highways of Stilwater, as Price attempts to run an 18-wheeler into the Row. The semi is, for some reason, loaded up with Rollerz cars.
Anyway, assuming you start out with no teammates or a car, this is going to be a tough mission. After you almost get run down by the semi, hop into the Bootlegger nearby and give chase to Price, who'll quickly hit the highway. If you spot a teammate on the road, stop and pick them up before hitting the highway proper; they'll be a big help in defending your car when you reach Price.

When you do finally catch up to Price, you'll be told to destroy the cars that are loaded onto the trailer on his semi. This is something you'll have to do yourself, since your homies can't be told to fire on empty vehicles. Any kind of SMG you have will do the trick nicely, but you'll have to watch out for the pipe bombs that Price drops on the road. They'll detonate a few car lengths behind his semi, so try to avoid sitting directly behind him; get on either side of his vehicle and fire from there. Of course, it'll be difficult to fire and aim and drive, all at the same time; if you're having trouble, try switching the controls so that you can move forward simply by pushing up on the left analog stick, which will eliminate the need to hold A to accelerate.
After the cars in the rig are destroyed, you'll have to take down Price's semi as well. This is where things can get difficult, since the cab of the truck is awfully hearty, and you'll also have to be dealing with plenty of Rollerz on your ass. There's not much you can do here except to start firing away at the cab and hope that you manage to destroy it before you get taken out yourself. Try to stay off to the right of the cab as you fire on it, as that will likely prevent Price from returning fire your way. You'll probably have to try this a couple of times to take out Price without getting destroyed yourself, but if you absolutely need to, you can try switching cars on the highway if you happen to get damaged. The best target for this is a Rollerz car; shoot out the driver as they approach you, then quickly hop into their car and hope you can get back on Price's trail before he gets away.
3rd Street Saints Final Missions
Stuffing The Ballot
Rewards: $3,000
The chief of police wants one of the mayoral candidates of Stilwater to get taken down a notch or two...or all of them, really. Well, he wants him dead, actually. That's probably the best way of putting it.
For some reason, though, he doesn't just want you to hit Marshal Winslow, he wants him taken out by having you hijack his campaign bus, then park it on the train tracks so that it gets demolished. Sounds like a plan.
To save time, hop into a car as soon as you answer your cell phone and immediately head towards the Chinatown district. Since the timer doesn't start until the cell call ends, you can save 30 seconds or so of time just by being on your way before the call ends. When you do reach Chinatown, you'll find the campaign van, flanked by a number of police vehicles. There's no way to avoid police pressure here, so just fire on the bus and let your teammates do enough damage to it to convince the driver to abandon ship. If you're lucky, the van won't be in a completely immobile position at this point (the driver will flail about in a panic when you first shoot at him), allowing you to get on and start heading back the opposite way.
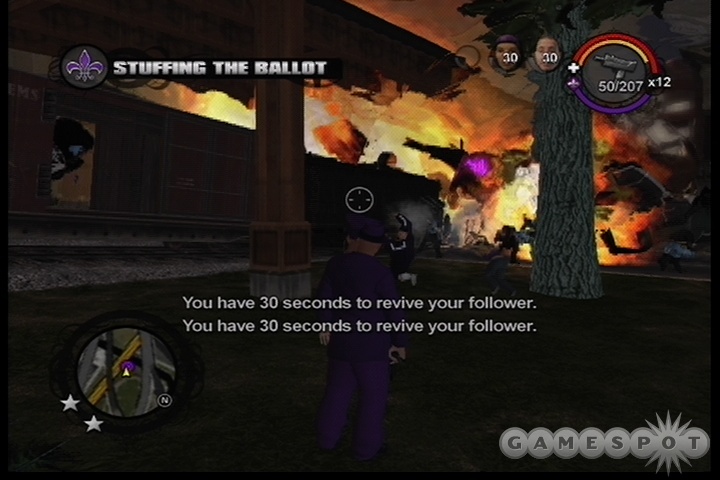
The police will fire at you as you drive off (perhaps unwisely, considering that there's still a mayoral candidate aboard), but the bus is hearty, and shouldn't take much damage before you reach the train tracks. When you do, park the bus, hop out, then watch the fireworks.
Hail To The Chief
Rewards: $5,000
Time to take out the Chief of Police. That bastard isn't going to jerk you around forever, so get up there and take him out while he's at Winslow's funeral! That's ice cold.
When you reach your destination, you'll be facing off against six or seven cop cars. Not to worry; Johnny will destroy most of them with his rocket launcher. It'd still be a good idea to take along a few grenades, just for mopping up the remnants of the police vehicles. You shouldn't have to worry about getting killed, though, especially since this area is likely crawling with Saints.
It's when all of the vehicles are destroyed that the trouble begins. You've got five wanted stars now, making the trip to the Forgive and Forget a treacherous one, at best. Your best bet is to wait on the street after destroying the vehicles, shoot out the driver of one of the incoming FBI vehicles, and use it to start making your way to the FAF. Getting there isn't going to be easy, so if you have to switch cars, try to veer off the road into a protected lot, such as in one of the museums, and nab one of the cars that follows you. Actually entering the FAF itself will be difficult, with all of the cars that will be attempting to ram you, so just slow down as much as possible when you approach the entrance, then quickly veer in to clear your wanted level.
Salting The Earth
Rewards: $5,000
Oh, what a crappy ending. There's no mission here, really, just a long cutscene. Enjoy it, then watch the credits if you want. You can't keep on playing after the credits roll, for obvious reasons, so if you want to play the game some more, be sure to save your game right before entering this mission.
Phone Numbers And Passwords
Although you can get through the entire game without ever using the phone yourself, it can provide you with a good number of services and even some cheats if you wish to whip it out. You can find it in your start menu if you use the L or R triggers to maneuver through the menus.
The numbers below are available to be dialed. Note that all of the numbers that begin with the # symbol are cheats and will prevent the accumulation of Achievements while activated.
| Password | Effect |
|---|---|
| 911 | Ambulance (Restores Health) |
| #42637867 | Unlock Special GameStop T-Shirt Cheat |
| (555) 018-0174 | Eagleline Yellow (Taxi Service) |
| 555-455-8008 | TNA Taxi Service |
| 555-5966 | Eye for an Eye Voodoo |
| 555-7296 | On the Fence (Pawn Shop) |
| 555-3863 | Lik-a-Chick |
| 555-6238 | The Dead Cow |
| 555-3493 | Rim Jobs |
| 555-9467 | Legal Lee's |
| 555-9473 | Grounds for Divorce |
| 555-5926 | On The Rag Clothing |
| #AMMO | Infinite Ammo |
| #10 | God's Wrath (lightning strikes randomly) |
| #66639 | Give money |
| 1-555-ITS-OVER | Suicide Hotline |
| 555-2626 | Stocks |
| 555-3765 | Brown Baggers |
| #SPRINT | Infinite Sprint |
| #Rocket | Enables "Give RPG Launcher" |
| #AS12Riot | Enables "Give AS12 Riot" |
| #12Gauge | Enables "Give 12 Gauge" |
| #Tombstone | Enables "Give Tombstone" |
| #T3KUrban | Enables "Give T3K Urban" |
| #GDHC50 | Enables "Give GDHC .50" |
| #Shepherd | Enables "Give .44 Shepherd" |
| #NR4 | Enables "Give NR4" |
| #Pipebomb | Enables "Give Pipe Bomb" |
| #Vice9 | Enables "Give Vice 9" |
| #Knife | Enables "Give Knife" |
| #Molotov | Enables "Give Molotov Cocktail" |
| #Grenade | Enables "Give Hand Grenade" |
| #AQUA | spawn the Aqua car |
| #268 | Spawns an Ant |
| #2855364 | Spawn a Bulldog |
| #732737 | Spawns a Reaper (Hurst) |
| #78682 | Spawns a Quota |
| #3378469 | Spawns a Destiny |
| #22766 | Spawns a Baron |
| #7288537 | Spawns a Rattler |
| 5552445 | Chicken Ned |
| #bulldozer | Spawn bulldozer |
| #fullhealth | Full Health |
| #sunny | clear skies |
| #shogun | Shogun in garage |
| #66732374 | Spawns a Nordberg in your garage |
| #262852623 | Spawns an Anbulance in your garage |
| #746486 | Spawns a Shogun in your garage |
| #5878423 | Spawns a Justice in your garage |
| #867839 | Spawns a Vortex in your garage |
| #936484 | Spawns a Zenith in your garage |
| #882727 | Spawns a Tuasar in your garage |
| #267667 | Spawns a Cosmos in your garage |
| #566636 | Spawns a Komodo in your garage |
| #pimpcane | Gives a pimpcane shotgun |
| #nocops | No Cop Notoriety |
| #nogangs | No Gang Notoriety |
| #Nightstick | Enables "Give Nightstick" |
| #936484 | Enables "Give Zenith" |
| #7288537 | Enables "Give Rattler" |
| #3373352623 | Enables "Give Fer De Lance", the best car in the game! |
| #KEYSTONE | Spawns 'Keystone' in your garage |
| #TAXI | Spawns 'Taxi' in your garage |
| #BETSY | Spawns 'Betsy' in your garage |
| #CAVALLARO | Spawns 'Cavallaro' in your garage |
| #TRAXXMASTER | Spawns 'TraxxMaster' in your garage |
| #HALBERD | Spawns 'Halberd' in your garage |
| #843562 | The Job |
| #27409863 | Give Ar-40 Xtnd Rifle |
| #K6Krukov | Give K6Krukov |
| (555) 455 8008 | TNA Taxi |
| (555) 819 8415 | Big Willys Cab |
| #FBI | Spawns FBI |
| #mag | Spawn Mag in Garage |
| #Macmanus | Gives McManus Sniper Rifle |
| #hollywood | Spawns Hollywood in Garage |
| 555-2564 | On Thin Ice |
| 555-MART | Crash Landing |
| #BaseBall | Spawn BaseBall Bat |
| #Newman | Spawns "Newman" in your garage (Mail Truck) |
| #Macanus | Gives you the "McManus" sniper rifle |
| #Anchor | Spawns "Anchor" in your garage (Newsvan) |
| #Quasar | Spawns "Quasar" in your garage |
| #Hammerhead | Spawns "Hammerhead" in your garage |
| #Compton | Spawns "Compton" in your garage |
| #Baron | Spawns "Baron" in your garage |
| #Gunslinger | Spawns "Gunslinger" in your garage |
| 555-3248 | Impressions Clothing |
| #84816 | Spawns a Titan |
| #87935 | Spawn a Voxel |
| #34836 | Spawn a Five-O |
| #635766 | Spawn an Nelson |
| #947266 | Spawn an Zircon |
| #2668534437 | Spawn an Bootlegger |
| #94667 | Spawn an Zimos |
| #2277429 | Spawn an Capshaw |
| #742462438 | Spawn an Richochet |
| #67468 | Spawn an NRG V8 |
| #52383792 | Spawn an La Fuerza |
| #66254642473 | Spawn an Mockingbird |
| #5225722248 | Spawn an Jackrabbit |
| #42664225 | Spawn an Hannibal |
| #8277489 | Spawn an Varsity |
| #84676463 | Spawn an Thorogod |
| #64448464253 | Spawn an Nightingale |
| #money | $1000 cash |
| 555-6328 | Freckle Bitch's Phone Number |
Achievements
This table lists the point reward and details on how to unlock the various achievements in Saints Row.
| Achievement | How to Unlock |
|---|---|
| Colombian Made (40) | Take over Los Carnales territory. |
| Regicide (40) | Take over Vice Kings territory. |
| Road Warrior (40) | Take over Westside Rollerz territory. |
| Ruler of Stilwater (160) | Help the 3rd Streets Saints take over Stilwater. |
| Thug (10) | Reach a TrueSkill rank of Thug in any Multiplayer mode. |
| Killa (20) | Reach a TrueSkill rank of Killa in any Multiplayer mode. |
| Gangsta (40) | Reach a TrueSkill rank of Gangster in any Multiplayer mode. |
| Kingpin (80) | Reach a TrueSkill rank of Kingpin in any Multiplayer mode. |
| Penny Pincher (10) | Earn $1,000,000 in the city of Stilwater. |
| Grifter (10) | Earn $200,000 in Insurance Fraud. |
| Shopaholic (10) | Acquire 100 clothing and jewelry items for your single player wardrobe. |
| Coupon Clipper (10) | Purchase 100 clothing and jewelry items for your Multiplayer wardrobe. |
| Leader of the Pack (10) | Acquire all 7 Homies. |
| Getting Up (10) | Tag all tag locations hidden throughout Stilwater. |
| Grease Monkey (10) | Own a total of 50 cars. |
| Racket Lord (160) | Successfully complete all activities in Stilwater. |
| Contract Killer (10) | Successfully complete all of the Hitman locations. |
| Demo Demon (10) | Successfully complete all levels of Demolition Derby. |
| Fast and Furious (10) | Successfully complete all of the Hijacking locations and levels. |
| Fluffer (10) | Successfully complete all of the Escort locations and levels. |
| Pimp (10) | Successfully complete all the Snatch locations and levels. |
| Pusher (10) | Successfully complete all of the Drug Trafficking locations and levels. |
| Scavenger (10) | Successfully complete all of the Chop Shop locations. |
| Tuner (10) | Successfully complete all of the Racing locations and levels. |
| Vandal (10) | Successfully complete all of the Mayhem locations and levels. |
| Bulletproof (10) | Successfully complete Co-Op level Turbulence at the highest difficulty level. |
| Errand Boy (10) | Successfully complete Co-Op level Mob Rule at the highest difficulty level. |
| Canonized (10) | Join the 3rd Street Saints. |
| Reclamationist (10) | Retake Saint's Row. |
| Marathon Runner (10) | Traveled 26.2 miles on foot. |
| Chain Gang (20) | Drop off a total of 500 chainsaw the Big Ass Chains multiplayer mode in ranked matches. |
| Addicted to tha row (20) | Play Saints Row for 20 hours. |
| Stilwater PD Award (10) | Kill 50 Stilwater residents with only melee attacks. |
| Professional Thief (10) | Steal 30 boxes and deliver them successfully. |
| Negotiator (10) | Take 50 hostages. |
| Jump the Shark (10) | Withdraw a total of $200,000 from the loan office. |
| Dominator (10) | Win 10 ranked matches in a row. |
| Audiophile (10) | Collect all 60 hidden cd's. |
| Scourge of the Air (10) | Destroy 50 helicopters. |
| Clocktower Camper (20) | Head shot and kill a total of 100 enemies with a sniper rifle in ranked matches. |
| Pimps Down (20) | Kill the Pimp In Protect the Pimp 50 times in ranked matches. |
| Tourist (20) | Drive 500 miles in the city of Stilwater. |
| Xzibitionist (20) | Get your team car to level 4 in the Blinged Out Ride mode a total of 50 times in ranked matches. |
Got a news tip or want to contact us directly? Email news@gamespot.com
Join the conversation