Tomb Raider: Angel of Darkness Walkthrough
This comprehensive guide includes general tips for navigating Lara through this challenging Tomb Raider adventure, combat and weapon strategies to help Lara survive the dangerous encounters throughout the game, and complete walkthroughs for all of Lara's perilous missions.
Design by Collin Oguro
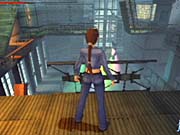
Lara Croft returns in Tomb Raider: Angel of Darkness, which has been in development for years, and it's her most challenging adventure yet. Lara is seen leaving the apartment of her mentor, Professor Werner Von Croy, after he has been murdered inside. Lara has no memory of the event and finds herself on the run from the Parisian authorities. Her adventure takes her through Paris and Prague, and she's up against a secret alliance seeking to unearth an ancient evil.
This GameSpot game guide for Tomb Raider: Angel of Darkness includes:
- General Strategies: You'll find a collection of general tips in this section for navigating Lara through this challenging Tomb Raider adventure.
- Combat Strategies and Weapons: This section offers combat and weapon strategies to help Lara survive the dangerous encounters throughout the game.
- Walk-Through: Look here for complete walk-throughs for all of Lara's perilous missions. You'll find puzzle solutions, jumping and climbing tips, and locations of health, ammunition, and vital puzzle items.
Index
General StrategiesCombat Strategies
Walk-Through
Derelict Apartment Block
Industrial Rooftops
Margot Carvier's Apartment
Parisian Ghetto
The Park--Seeking Bernard
The Serpent Rouge--For Bernard
Café Metro--Seeking Pierre
Renne's Pawnshop
The Serpent Rouge--For Pierre
Returning Item to Bernard
Returning Item to Pierre
St. Aicard's Graveyard
Bouchard's Hideout
St. Aicard's Church
Louvre Storm Drains
Louvre Galleries
The Archeological Dig
Tomb of the Ancients
The Hall of Seasons
Neptune's Hall
The Breath of Hades
The Sanctuary of Flame
Wrath of the Beast
The Hall of Seasons (All Crystals Completed)
Galleries Under Siege
Von Croy's Apartment
The Monstrum Crime Scene
The Strahov Fortress
The Bio-Research Facility
Sanitarium
Maximum Containment Area
Aquatic Research Area
Vault of Trophies
Boaz Returns
The Lost Domain
Eckhardt's Lab
Chapter 1: General Strategies
Lara's journey through Angel of Darkness is tough. The general strategies in this section can be applied to all aspects of Tomb Raider: Angel of Darkness' gameplay. Use them to aid in your survival through this challenging game. This section also reveals the health items found in Angel of Darkness, their descriptions, and their healing powers.
The most important tip for Tomb Raider: Angel of Darkness is: Save your game! Save your game frequently--before every tough jump, before every "off the beaten path" exploration, before every boss battle, before climbing situations...before almost anything! Lara can die at the drop of the hat. Jumps are easy to miss, and her new grip meter can be a challenge in itself. Sometimes you just won't make the climb. Taking the seconds required to save your game could alleviate frustration down the road. Also, save your game in multiple slots. Always have a backup saved game! There are some glitches in the game that can cause serious problems and frustration if you lack a backup.
Learn to use Lara's short hop jump. Press and hold the L1 button while pushing circle and forward at the same time. Lara performs a shorter standing jump. This comes in handy during many aspects of the game. Otherwise you would have to back away from the edge and try to gauge Lara's jump distance, which increases during the course of the game.
The walk button is also your friend. Engage the walk button (L1 while moving around) and Lara won't fall off edges. You can walk to the very edge of a platform without worrying about falling off. If you do want to drop off and grab hold of the edge, just hit the X button while standing at the edge. Engage the walk button during a standing jump to prevent Lara from overextending her landing and falling off the edge of your destination.
Scan every new area or room for items to gather. You can detect items by a distinct flashing light. A flashing red light indicates the item is ammunition; a flashing green light indicates the item is a health power-up. Search every room for these valuables or follow this guide's walk-through, and you'll find more than enough ammunition and health items to keep you alive during the adventure.
Usable items, such as health items, ammunition, and money, respawn after a level loading screen. So if you find a spot with ammunition near a level load border, you can go back and forth and gather as much ammunition as you want. It's easy to gain lots of money during the Parisian Ghetto this way, although unfortunately you don't need much money in the game, so it's not really that important to exploit this. Accumulate more than 1,000 euros, and you'll have enough to purchase the gun from the reporter later in the game.
Consult Von Croy's notebook early and often. If you're having trouble on a puzzle or on what to do next, check out Von Croy's notes. The notebook is updated throughout the game and is an important source for solving puzzles, such as the lock in the archaeological dig. Watch for the notebook icon in the bottom right corner of the screen; when it appears, it means the notebook has been updated.
Don't forget to use all of Lara's moves in your arsenal. Some moves that are particularly important through the course of the game include: jump and grab (jump to a ledge and hit the action button to grab hold), sideways jump (jump while pressing the stick to the side), low crawl (hold triangle and L2, then crawl), and sprint dive (after gaining sprint, press L2 plus forward plus jump). Here's an interesting move: While hanging from a ledge, press the R1, R2, L1, and L2 buttons at the same time and press the controller up--Lara will do a handstand.
Use health items strategically. If you still have a third of your health bar left, don't use the large health pack--you're wasting it! Use the appropriate health item to replenish Lara's health. Also, keep in mind that when you enter new areas, Lara's health replenishes to full. So if you can hold out, avoid using a health item if you believe you're near the end of a particular level. Save your game if you decide to risk it. You can always reload the game and use the health item. The chart below describes the five health items and their healing strength.
| Health Item | Description | Healing Strength |
| Chocolate Bar | Energy boost | Restores health 10% |
| Health Pills | Stamina boost. | Restores health 20% |
| Health Bandages | Prevents bleeding. | Restores health 40% |
| Small Medipack | Contains limited medication. | Restores health 60% |
| Large Health Pack | Extensive medication. | Restores health 100% |
Chapter 2: Combat Strategies and Weapons
This section offers combat strategies for Tomb Raider: Angel of Darkness. This chapter also features a weapons database for Lara and Kurtis.
When you encounter an enemy, switch targets using the square key. This will align your weapon onto the target. This is particularly useful if there are multiple targets or when Kurtis faces off against Boaz in a late-game boss battle.
In all combat situations, seek out cover--behind crates, pillars, or boxes. This will typically lure the enemy toward your position. You can rotate the view a bit to see where the enemy is approaching from, then emerge from your cover and discharge your weapon at the enemy.
Lara has a new stealth mode that comes in handy. Press the L2 button to engage stealth mode while moving around. You can use the stealth mode to sneak up on specific guards that stand with their backs turned. When you approach a guard, press the action button to disable him.
Use the appropriate weapon for the situation. Check weapon descriptions and use long-range weapons against enemies at long range; the shotgun against the skeleton warriors in the Hall of Seasons; the submachine gun against the enemies throughout the latter half of the game (from Von Croy's apartment onward); and the K2 impactor against the guards and SWAT team in the Louvre Galleries and the Galleries Under Siege levels.
The following chart describes Lara's and Kurtis' arsenals with added comments.
| WEAPON | DESCRIPTION | COMMENTS |
| Boran X | Prototype pistol created by Kurtis. | Used only by Kurtis Trent. He has lots of ammunition. |
| Dart SS | Four- dart stealth weapon. Renders target instantly unconscious. Short -range. | In Renne's’ Pawnshop after it’s ransacked. |
| Desert Ranger | Advanced .50-caliber semi-automatic. Medium range. | On the desk in the Serpent Rouge (Pierre path) or in the Serpent Rouge’s garage office (Bernard path) |
| K2 Impactor | Fires 50,000-volt twin electric probes. Effective at ranges up to 21 feet. Short range. | Very effective weapon-- as a single accurate shot can disable a guard. In Renne’s Pawnshop after it's ransacked. |
| Mag Vega | 9mm with, 30- round clip. Long range weapon. | Powerful weapon. Should be used against the guards in the later portion of the game. |
| M-V9 | Basic design. 9mm semi-automatic with. 12- shot clip. Long range. | Lara’s initial weapon |
| Rigg 09 | Single- action 9mm handgun with. nine9- shot magazine. Short range weapon. | N/A |
| Scorpion X | Fully automatic machine pistol. 9mm with 30- shot clip. Medium range weapon. | Can be purchased from the reporter at the Monstrum Ccrime sscene. If not there, get it from the room in which he’s killed. |
| Vector-R35 | .45-caliber semi-automatic with nine rounds. Low velocity. Short range. | N/A |
| Viper SMG | Holds 70 rounds. Long range weapon. | This submachine gun is extremely powerful against guards. Target the guard and fire continuously. |
| V-Packer | Pump- action 12- bore shotgun. Close quarters. Six 6 shots, slow reload. | Found in the closet room at the bottom of the Tomb of the Ancients. |
Chapter 3: Walk-Through
This section offers the complete walk-through for Tomb Raider: Angel of Darkness. You'll find specific puzzle solutions, dialogue choices, and the location of vital puzzle items and even secret health items and power-ups.
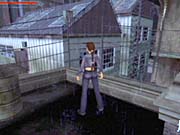
Parisian Backstreets
Lara's on the run from the police, and it's your job to keep her safe. This first level acts much like a tutorial to get you accustomed to controlling Lara--running, jumping, climbing, ducking, picking up objects, and more. Lara may interrupt your movements and offer an explanation on how to perform a particular action. Just follow the walk-through and listen to Lara if you wish to get through the level without a scratch.
Walk forward and a bit to the left and grab the chocolate bar in the small alcove. When used, the chocolate bar replenishes 10 percent of Lara's health. Exit the alcove and climb onto the bin on the right. Face the balcony above you (to the right of the bin). Jump straight up and Lara grabs hold of the ledge above. Pull Lara onto the balcony. Press the walk button and move to the edge of the balcony; you'll receive instructions on how to successfully make this jump. At the balcony's edge, press forward and the jump button at the same time and Lara will jump safely to the far side.
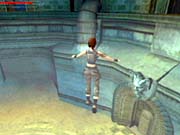
Follow the balcony to the ladder on the left. Climb the ladder. At the ladder's top, press left to drop onto the higher balcony. Follow this balcony to the open window. Press forward against the window and Lara will crawl inside. Search the cabinets and drawers on the right-hand wall to find money and a chocolate bar. Walk to the opposite side of the room and grab the antique doubloons from off the ground. You can check the armoire, but it's locked and Lara can't open it...yet. Keep this location in mind, because you can return here later with the appropriate tool.
Exit back out the window. Climb the ladder to the window's left. Drop down on the higher balcony. Grab the antique doubloons off of this platform. You must jump to the canopy on the far side. It's a difficult jump. Back Lara against the wall and line her up with the jump. Run toward the ledge and press the jump button to reach the canopy.
After landing on the canopy, hop over the railing to the left and snag the chocolate bar. Return onto the canopy and follow the path until Lara speaks to you again. You can turn right and hop to the far ledge. Walk to the edge and press forward and the jump button to make the leap.
Move forward to the pipe. Grab hold of the pipe and begin your ascent. Once you reach the top, shimmy to the right until you're over the platform. You must work quickly because Lara's strength can't hold her in this position for very long (watch her strength meter dwindle as you hang on). When you're over the platform, drop down. Walk to the right then leap up to the ledge on the right and shimmy around the corner until you're under the opening in the railing.
Pull yourself up and approach the shed. Search behind the shed on its far side to find some health bandages. Go to the opposite side of the roof and note the barrel. Lara says you can push it, but you can also pull it. Use the action button and pull the analog stick back to pull the barrel, which gives you room to investigate the roof's edge.
There's a crowbar on the platform below. Hang onto the ledge and drop down. Pick up the crowbar. The crowbar is the perfect tool for busting open doors that are padlocked. Remember the armoire you couldn't open earlier? You can return to that room and use the crowbar to open the armoire and grab a rare necklace inside. You may also wish to drop from the canopy to the small alcove below. There's a medical kit there. Don't dawdle near this door or you will suffer damage. Return to the roof.
The crowbar also opens the shed here. Use the crowbar on the shed and search the cabinet for a gun. Exit the shed and return to where you grabbed the crowbar. Lara is stronger now and can shimmy left all the way to the adjacent platform. Drop down onto the platform. Jump up so Lara grabs hold of the ledge. Shimmy left until the adjacent platform is under your feet. Drop down.
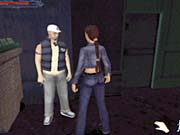
Use stealth mode to peer around the corner. Carefully grab the key off the sawhorse. You can stay in stealth mode and eliminate the guard by using the action button when you're behind him. Follow the walkway back to the door and use the key you just found to unlock it. Climb down the ladder. As you near the bottom, a cutscene interrupts your game. Looks like the hunt for Lara continues!
Derelict Apartment Block
The authorities are busting through the front door, and if you don't do something quickly, Lara is in deep trouble. Run to the cabinet to the right of the door and pull it in front of the door. You're safe for now, but things will soon take a turn for the worse. Run up the staircase and follow it around to the right. You'll see the cops bust through the door and drop some gas into the building. Note the blue "breath" meter under your health. If it runs out, it'll be time to reload a saved game. You must work quickly and get into clean rooms before your breath meter runs out and Lara succumbs to the gas.
Continue around to the right and leap over the hole in the staircase. The floor drops out on the next level. Time to put those jumping skills to use. Leap over the hole in the floor with a running jump. Use the action button to grab hold of the other side, then pull Lara up. Note that before you jump over the chasm, if you search the hallway to its left, you'll find a locked door. Remember its location for a small secret.
After making a successful jump, grab the health from the small hallway ahead of you. Turn around and note the huge armoire blocking the staircase. Pull it back a couple of steps so Lara can move around it. Ascend the staircase. At the top, go into the left hallway and grab the health power-up, then bust through the door on your left by opening it (Lara improves her strength in doing so).
Search the green cabinets for ammunition. Return outside and follow the floor around to the right. Search the hallway for another health power-up. Ascend the next staircase on the right. If you go to its top, you'll realize that it's blocked and you can't get past. Return down one flight and spot the crate. Pull the crate toward the bottom flight as far as it will go. Hop onto the crate. Look toward the bottom flight of stairs and spot the railing above. Perform a standing jump and use the action button to grab hold of the railing. Pull Lara up onto the higher floor.
Enter the door on the right. Grab the key from off the ground. This key opens the locked door that was in the hallway before the hole in the floor. You can return down there and open the door, but you must work quickly or Lara will suffocate from the gas. The room with the key also has the controls to power the elevator, so you can use the elevator to quicken your search. If you go by foot, be careful on the jump; if you miss the jump over the hole in the floor, you risk being spotted by the police. If you're spotted, Lara instantly puts her hands over her head and surrenders to the authorities. It's a risky move, but searching the room nets you another weapon, a chocolate bar, and some ammunition.
In the room where you found the key, open the door on the other side. This sends you outside and into the next level.
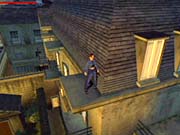
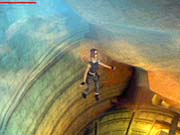
Industrial Rooftops
You're outside now. Spot the ladder just in front of you. Hop onto the barrel and climb the ladder to its top. When you reach the top, note the wire above Lara. You can leap up and grab this wire and go hand-over-hand. Watch Lara's strength, though; you must move quickly or she'll fall (or be shot by the authorities). When instructed, press the crouch button and Lara will raise her legs onto the wire. Continue across all the way to the far platform. Don't drop onto the slanted roofs or you'll slide down and perish.

Grab the health power-up from off this platform. Walk to the edge of the slanted roof and spot the ladder along the rooftop. Crawl down the ladder. You can stop halfway and leap to an adjacent roof to grab another health power-up or simply continue down until you reach the ground near a door. Open the door and snag the antique doubloons from off the ground.
Open the next door and search the room for a chocolate bar on the left side and ammunition on the right. Exit through the next door, cross the short catwalk, and open another door. You're on a narrow stairwell now. Go left until it stops. Drop down onto the stairwell below you. If you go all the way to the far edge, Lara notes she can't make this jump. Return to the left-hand ledge and jump down onto the box in the room below. Grab the medical kit from the corner of the room.
Crouch and crawl underneath the metal door. Once outside, go right and grab the ammunition. Follow the path around a couple of corners. Continue down an alley on the left side to find another medical kit. Return to the brightly lit alley and notice the ladder above the double doors. Pull the crate to the left of the double doors underneath the ladder. Leap onto the box and finally up onto the ladder. Climb the ladder all the way to its top.
When you reach the top, look right and snag the ammunition. Turn back around and slide down the roof to the path below. Grab the health to the left, then go right. Climb the ladder on the left to the platform. From this platform, perform a running jump to the adjacent rooftop. Grab the antique doubloons from the alcove. Continue to walk forward and a cutscene will interrupt your gameplay. Lara makes another daring escape from the authorities!
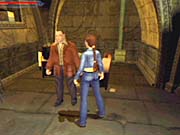
Margot Carvier's Apartment
Lara automatically pays a visit to Margo Carvier's apartment. What follows is an extended conversation between the two. Make sure you are nice to her so she hands over Werner's notebook. Use the following dialogue choices to get the notebook:
- Can I get you anything?
- Package?
- Obscura paintings?
- Werner didn't scare easily.
- We argued, I can remember that. And gunfire!
- Mademoiselle, I was a good friend of Werner's. I didn't kill him. I didn't!
- I really am going to need Werner's notebook.

The police are on their way so you can either scurry quickly to the front door and leave or quickly search Carvier's apartment for some goodies. Grab a health power-up from the desk drawer, snag a diamond ring from the small round table with the lamp, and go into the kitchen and pick up a bottle of vintage cognac from off the counter. Exit through the front door to complete the level.
Parisian Ghetto
Exit the subway car and turn left. Go all the way down to the end of the tunnel and speak with the homeless men. Return toward the subway car on its left side and spot the pipe resting against the car. Leap onto the pipe, then grab hold of the subway car's roof. Pull Lara up onto the roof. Go left across the subway car's roof and duck under the pipe. Turn right and perform a standing jump to the pipes on the wall. Use the action button to grab hold. Climb up to the top of the pipes and shimmy to the right. Drop down onto the bridge.
Now you can simply cross the bridge and leap through the fence to end this portion of the level, or you can go after a couple of secrets.
To get them, perform a running jump from this bridge to the next one. Just look toward the far end of the tunnel. Lara can make the jump. Use the action button to grab the bridge's edge if necessary. Pull yourself up onto the bridge. From there, leap again--in the same direction--to the small ledge against the wall. Walk to the right and into the small alcove. There you'll find a chocolate bar and some money. Return to the first bridge.
On the first bridge, go through the hole in the fence and speak with the city guide. Be nice, so you can get as much information as possible. After speaking with the guide, go right and down the hall and down the staircase to find some money. Return to the guide and exit through the door into another part of the level.
Speak with Janice, the streetwalker, just ahead of you. Once again, be nice, and get as much information from her as you possibly can. You'll notice that your notebook is updated after many of these information-gathering sessions.
There's a useful unlimited money cheat that you can exploit here. After speaking with Janice, turn right and find money in the alcove on the left (it's by the door). After grabbing this money, turn around and go up the staircase on the right (across from Janice). You'll enter a new area. Go around to the left in this area and find more money near a park bench. Return down the staircase and to the alcove you just searched. The money has reappeared! Return to the park and search by the park bench. The money there has reappeared too! You can keep going back and forth for as much money as you want. Unfortunately, money isn't very important in the game. Accumulate over 1,000, but beyond that it's not important.
As Janice mentioned, there are two people with information, a janitor in the park named Bernard and the bartender at the Café Metro named Pierre. You'll need 160 euros to take the Bernard route. Both eventually lead to the same place. If you choose Pierre, skip ahead to The Serpent Rouge--For Pierre.
The Park--Seeking Bernard
Go up the stairs across from Janice. At the intersection go left into the next area. Locate the gate on the far right-hand side (across from the church). Go inside the park and speak with Bernard. Use these dialogue choices:
- Your name's Bernard. Janice said I might find you here.
- I'm trying to find someone.
- Here. Now, how do I find Bouchard. (Lara gives Bernard 160 euros.)
Bernard gives Lara a mission. He'll help out but only if Lara retrieves a box from the Serpent Rouge. It's in a broken light fixture. Get the garage keys from Bernard. Return to Janice and go left. Look along the buildings on the right to find the door marked Garage. Enter it with your key.
The Serpent Rouge--For Bernard
You're now in the garage of the Serpent Rouge to find the item for Bernard. Go right to the desk and grab the socket spanner. Turn left toward the lockers and snag ammo. There are other lockers on the left containing health and an antique flintlock to pawn. Use the switch to the left of the jeep. Go to the right of the desk and pull the lever. This opens a trapdoor beneath the jeep and also increases Lara's strength. Go up the stairs to the small office on the left side of the garage. Lara has enough strength to bust down the door now. Grab the weapon and the clip on the desk.
Return to the jeep and drop down the hole. Grab the chocolate bar and ammo from off the box. Climb the ladder on the right. Cross the room to the switch on the far wall. Use it and Lara will apply the socket spanner. Use the switch, which alerts a guard. Wait for him to come in the door opposite the switch, and then eliminate him.
Go up the stairs and enter the club using the door. There are other guards around, including one on Lara's immediate right. Terminate him. Walk right from the entrance into the bar. Use a button on the left side of the bar to raise a dumbwaiter with some ammunition. Check the bar for a couple of chocolate bars and a bottle of liquor. Exit the bar and approach the stage. Walk around the right side of the stage to find a health power-up. Climb up onto the stage. Grab the vinyl record from off the equipment on the right. Turn around and look on the left side of the wall. Use the switch here to start the music and the wild spotlight mechanism that hovers above the room. Listen carefully and you'll also hear a guard enter the far door. Equip your weapon and eliminate him as quickly as possible. Ensure the area is clear (another guard may be in the room) before continuing onward.
Cross the room and ascend the staircase on the left side. Terminate the guard at the top of the stairs. Continue beyond where the guard was and around the catwalk until you encounter a small black box. Push the box toward the room's center as far as it will go so it's on the small balcony extension. Climb up onto the box. Jump straight up and grab hold of the scaffolding.
Pull Lara up onto the scaffolding. Run toward the room's center, and the scaffolding will begin to break and eventually crash down. Run and jump where the scaffolding fell and land on the far catwalk. Grab the health power-up. There's a guard to your right, and he's probably firing at you. Terminate him and collect his weapon as well as the health power-up in the far corner. Another guard can be found on the other end of the catwalk (beyond where you landed from the jump). Terminate him as well if you desire.
Return to where you killed the first guard up here and look at the railing toward the center of the room until you find a missing piece. You must successfully jump Lara to the moving spotlight mechanism in the room's center. To do so, walk to the edge (using walk mode so you don't fall). When the spotlight mechanism is at its lowest point, perform a standing jump to land on the narrow scaffolding. Be prepared to press the action button if you're short, and Lara may grab hold.
Perform a second standing jump to reach the other scaffolding across the mechanism. Turn left and climb the vertical scaffolding. Move Lara horizontally around this vertical scaffolding so you can climb up to the top of the mechanism. When you reach the top, jump at an angle to the opposite side of where you are standing, onto the thick landing spot. Perform a standing jump from the edge of where you're standing, and you'll land safely.
Ignore the walkway to your left. You're actually trying to reach the ledge on the far side of the room. Spot the ladder against the wall--that's where you're jumping. Perform a running jump from the top of the mechanism to this ledge. Climb the ladder to the higher ledge. Follow the walkway to the small catwalk on the left. Notice the box you can open. Remember this because it plays a part in this area's puzzle. Return to the walkway and look left.
The walkway slopes down. Start sliding down but hit jump after about one second so Lara avoids falling to the floor and instead jumps to the far ledge. Turn left and perform a standing jump to the next ledge. Now you must reach the scaffolding ahead of you. Perform a running jump and grab hold of the scaffolding. Shimmy to the left underneath the obstacle and pull Lara up on the other side. On top of the platform adjacent to the scaffolding, perform a running jump to the walkway below.
After landing on the walkway, kick the bridge down--Lara will feel stronger. Walk toward the control room and bust down the door. Pick up the key from off the floor. Turn around and face the control mechanism. The puzzle is to position the broken light into the correct position--that empty box you saw earlier. To do so, use the left-hand lever twice. This moves the broken light toward the box. Now, move the right lever once to slide the broken light into the empty box.
Exit the control room and scamper across the bridge. Climb the ladder at the far end (you've been here before). On the walkway, approach the box and grab the item inside--this is what Bernard wants! Return to the control room. Kill the guard inside. Descend the ladder in the back of the control room and grab the chocolate bar on the floor. Open the door near the chocolate bar to exit back into the Parisian Ghettos.
Descend the ladder next to you. Drop down through the hole and descend the staircase. You'll reach another small ledge. Drop down. Follow the road to the left and you'll note you're back near Janice.
Skip ahead to Renne's Pawnshop.
Café Metro--Seeking Pierre
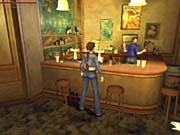
From Janice, go up the stairs across from Janice then go forward and around to the left to find Café Metro. Enter the door; it's next to the motorcycle. Speak with the bartender and he'll offer to trade you information if you'll perform a job for him involving The Serpent Rouge. Sounds good. Exit the café and go back onto the streets. You can head to Renne's Pawnshop or proceed directly to the Serpent Rouge.
Renne's Pawnshop
Return down the stairs toward Janice. Go right from the bottom of the stairs and open the door on the right that's just before the striped barricade. This is Renne's Pawnshop. Go forward and then left into the shop. Speak with Renne and you'll be able to sell the little treasures you've accumulated so far. Sell everything you have, then exit the pawnshop.

If you completed Bernard's mission, skip ahead to Returning Item to Bernard.
The Serpent Rouge--For Pierre
Head left and walk past Janice. You can snag some more money in the alcove on the left if you haven't already. As you do, watch the cutscene with the guy on the motorcycle. Keep going past Janice until you find an alley on the right. Go down the alley and approach the small green door on the right. Open it using the key provided by the bartender.
You're now in the Serpent Rouge in search of the item for Pierre, the bartender at the Café Metro. The opening fly-through reveals a guard in an office room. Turn around from your start position and sneak down this hallway. Enter the office with the patrolling guard and take him out in stealth mode. Grab the pistol he drops and pillage his desk for additional items, including ammunition, a gun, and a chocolate bar.
Exit the office and return to the entrance. Be sure to grab more ammunition off of some boxes on the left side of the hall. Go left from the entrance and all the way to the end of the hall. Open the door up the staircase at the end. A guard may spot you immediately. Equip a pistol with plenty of ammunition and eliminate him. There are additional guards patrolling the room, so it's wise to explore the area and take them out before solving puzzles. Pick up any ammunition the guards discard upon their death.
Walk right from the entrance into the bar. Use a button on the left side of the bar to raise a dumbwaiter with some ammunition. Check the bar for a couple of chocolate bars and a bottle of liquor. Exit the bar and approach the stage. Walk around the right side of the stage to find a health power-up. Climb up onto the stage. Grab the vinyl record from off the equipment on the right. Turn around and look on the left side of the wall. Use the switch here to start the music and the wild spotlight mechanism that hovers above the room. Listen carefully and you'll also hear a guard enter the far door. Equip your weapon and eliminate him as quickly as possible. Ensure the area is clear (another guard may be in the room) before continuing onward.
Cross the room and ascend the staircase on the left side. Terminate the guard at the top of the stairs. Continue beyond where the guard stood, and around the catwalk until you encounter a small black box. Push the box toward the room's center as far as it will go so it's on the small balcony extension. Climb up onto the box. Jump straight up and grab hold of the scaffolding.
Pull Lara up onto the scaffolding. Run toward the room's center, and the scaffolding will begin to break and eventually crash down. Run and jump where the scaffolding fell and land on the far catwalk. Grab the health power-up. There's a guard to your right, and he's probably firing at you. Terminate him and collect his weapon and snag the health power-up in the far corner. Another guard can be found on the other end of the catwalk (beyond where you landed from the jump). Terminate him as well if you desire.
Return to where you killed the first guard up here and look at the railing toward the center of the room until you find a missing piece. You must successfully jump Lara to the moving spotlight mechanism in the room's center. To do so, walk to the edge (using walk mode so you don't fall). When the spotlight mechanism is at its lowest point, perform a standing jump to land on the narrow scaffolding. Be prepared to press the action button if you're short, and Lara may grab hold.
Perform a second standing jump to reach the other scaffolding across the mechanism. Turn left and climb the vertical scaffolding. Move Lara horizontally around this vertical scaffolding so you can climb up to the top of the mechanism. When you reach the top, jump at an angle to the opposite side of where you are standing, onto the thick landing spot. Perform a standing jump from the edge of where you're standing and you'll land safely.
Ignore the walkway to your left. You're actually trying to reach the ledge on the far side of the room. Spot the ladder against the wall--that's where you're jumping. Perform a running jump from the top of the mechanism to this ledge. Climb the ladder to the higher ledge. Follow the walkway to the small catwalk on the left. Notice the box you can open. Remember this because it plays a part in this area's puzzle. Return to the walkway and look left.
The walkway slopes down. Start sliding down but hit jump after about one second so Lara avoids falling to the floor and instead jumps to the far ledge. Turn left and perform a standing jump to the next ledge. Now you must reach the scaffolding ahead of you. Perform a running jump and grab hold of the scaffolding. Shimmy to the left underneath the obstacle and pull Lara up on the other side. On top of the platform adjacent to the scaffolding, perform a running jump to the walkway below.
After landing on the walkway, kick the bridge down--Lara will feel stronger. Walk toward the control room and bust down the door. Pick up the key from off the floor. Turn around and face the control mechanism. The puzzle is to position the broken light into the correct position--that empty box you saw earlier. To do so, use the left-hand lever twice. This moves the broken light toward the box. Now, move the right lever once to slide the broken light into the empty box.
Exit the control room and scamper across the bridge. Climb the ladder at the far end (you've been here before). On the walkway, approach the box and grab the item inside--this is what Pierre at the Café Metro wants! Return to the control room. Kill the guard inside. Descend the ladder in the back of the control room and grab the chocolate bar on the floor.
You could hunt for additional items in the Serpent Rouge. If you descend back to the main floor, you can search the cashier's office for some money (across the dance floor from where you entered) and the basement area (the door to the left of the dance floor entrance) for additional items. None of it's too important however. Instead, just open the door near the chocolate bar to exit back into the Parisian Ghettos.
Descend the ladder next to you. Drop down through the hold and descend the staircase. You'll reach another small ledge. Drop down. Follow the road to the left and you'll note you're back near Janice.
Skip ahead to Returning Item to Pierre.
Returning Item to Bernard
Return to Bernard in the park. Speak with him and Lara will return the item. He provides a vital password. Exit the park and go left. You'll find a man standing behind a gate. Speak with him and enter. You enter the bottom level of the graveyard. Skip ahead to the third paragraph of the St. Aicard's Graveyard section.
Returning Item to Pierre
Grab the money in the alcove on the right (it's still there) and ascend the staircase on the right toward the park. Grab the money off the park bench (still there!) and return to the Café Metro to deliver Pierre's goods.

Talk with Pierre inside the café and he trades information for the object. He knows someone that can help you find Bouchard--his ex-girlfriend. He gives you her address and a code for the gate.
Exit the café (and return to grab the money on the park bench, again, if you wish) and continue straight across the intersection. Look for the brown door on the left with a keypad. Enter the code 15328. Open the door, ascend the stairs, and open the entrance at the top.
St. Aicard's Graveyard
Talk to Francine; she says Bouchard is in the old church. Guess it's time to search the graveyard. Turn right and exit through the door. On this small balcony, turn right and make the jump to the adjacent balcony. Hop over the railing and climb the vertical pipe. On the higher walkway, run back the way you were traveling from. Move quickly because it's crumbling beneath your feet. When you reach the edge, use the action button to hang on, and shimmy right until you're over the platform and wire. Drop down. Jump up to the wire. Go hand-over-hand across to the far balcony.
When you reach the opening in the railing, drop down onto the tomb. You're now on the ground level, which is where you would enter from if you chose to follow Bernard's route.
Go left and around the corner; kill the guard dog with your pistol. Search the far right corner for a health power-up. Return the way you came. Note the height of all the tombs. You must traverse their roofs to an enclosed area across from where you grabbed the health power-up.
From the health power-up, return to the left bend and leap onto the high tomb with the red door (there is a tomb with a cross on it to its left). From the top of this tomb, jump to the tomb across the path. On this tomb, turn left and leap to the roof of the next tomb. Do it again for the next and final tomb. Turn right and leap into the enclosed area.
Open the door on the tomb with the metal door. You'll get stronger. Grab the ammunition from off the ground. Walk over to the angel statue. Climb up behind the angel statue and push it over. It opens a hole in the tomb. Hop down into the tomb to proceed.
Before hopping into the tomb, you can explore for some medical kits and other items. Climb onto the tomb where you opened the metal door. Face the wall and leap up onto the ledge. There you will find some additional items. It's not worth the trouble unless you're low on health power-ups.
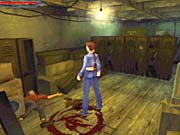
Bouchard's Hideout
Walk forward down the hall until the floor crumbles under your feet. Don't worry--it won't hurt. After falling, walk forward to the wall. Lara states she can climb it. Ascend the wall onto the walkway. You're now overlooking another hole. Look right and spot the pipe along the ceiling. Jump up and shimmy left across the gap in the floor. You'll just barely make it, so work quickly. Continue down the walkway until it crumbles under your feet. Drop down into the water.
Swim down and into an adjacent area. You'll know you're there when you see a broken pipe hovering over the water. Swim to the wall opposite of the pipes, and Lara will note she can climb it. Turn right and climb the wall and go out onto the walkway.
Continue down the hall until you find a grate on the right. Bust it open. Snag the ammunition inside the tight crawl space. Open the door on the left side of the room. Cross the next hall and open the next door. Turn left. There's some debris in your way. Return back through the busted gate and go right. Pull the object away from the debris; this opens the passage in the other room. Return to that room and move through the cleared debris.
Follow the tunnel until you're overlooking water once again. Jump into the water and swim to the far walkway. Pull yourself up on the other side. Go right and around into the opening. Take your first left and check out the sick man on the hospital bed in the left-hand corner of the room. Grab the medical kit to the left of the sick man. Exit this room through the iron doorway and cross into the dark chamber. Grab the ammunition on the right side of the room past the caskets.
Return into the hallway and go right. Open the door ahead of you to find Bouchard. He trades information for a favor. You must deliver some passports to Renne, the pawnbroker. Make sure you choose nice responses or Bouchard will get nasty!
- Easy Bouchard. I lost that friend yesterday. Now I'm wanted for his murder.
- What would you suggest?
- Why not have one of your men deliver your...passports?
Go toward the blue door and pull the lever on the right. You'll see a door opening. Exit Bouchard's chamber and go straight across into a room to the far left corner. Grab the ammo from the corner. Pull the crate over and place it to the left of the door as far as it will go toward the wall and the door. Hop onto the crate and then leap to the high ledge above the room (face the door). Pull the lever to open the blue door in Bouchard's chamber. Return to Bouchard's room and exit through the opened door.
St. Aicard's Church

Don't bother talking to anyone if you want to keep your money. Cross the room to the block in front of the statue. Push the block to increase Lara's leg strength. You can exit the church or go for some goodies. Here's how: Push the block to the left of the statue and climb onto the block. Grab the ledge above you (facing the wall to the left of the statue) and you can shimmy left. You'll have to drop down onto the pillars and rest, but eventually you'll get to the pillar with the medical kit. Do the same thing on the other side to gain some ammunition.
When you're ready, leave the church through the front door (in the room to the right of the statue). Return to the Parisian Ghetto. Head left and then take the next left back toward the park. Don't forget to grab the money by the park bench (again!) if you wish. Go down the staircase and go right. Walk to the barricade and open the door on the right. It's Renne's Pawnshop--you were here once before. You'll find out in a second why we recommended pawning those items earlier.
The shop is empty. Go into the back room and find Renne dead on the ground. Grab his wallet next to him. Open your inventory and use his wallet to get a keypad code. Walk to the door on the left; it has the keypad. Enter the code 14529. Walk inside and grab everything inside the room. Save your game before grabbing the last item.
As soon as you grab the last item, a bomb triggers inside the pawnshop. Press the button inside this small storeroom to open the door. Run right after exiting the storeroom and open the trapdoor on the ground. Dive inside. Keep running toward the screen to avoid getting barbequed. Watch Lara make one of her trademark escapes.
Louvre Storm Drains
Walk out into the chamber and look left. Grab the chocolate bar on the ground. Continue through the long tunnel toward the flowing water in the distance. Avoid getting nibbled by the rats. When you reach the room with the flowing water, go around to the left and walk to the drainpipe. You can climb it. Ascend the drainpipe to the upper catwalk.
Cross the catwalk to the switch. Use it. The switch disables a fan in another area. Return over the catwalk and descend the drainpipe back down into the room. At the bottom, turn right and go down the first hall on your left. Take the first right turn down this hall. There's the fan. Climb the ladder then use the fan blades twice to create a hole. Crawl through the hole. Grab the item on the other side. Continue forward. Drop down into a small recess and use the valve.
Return back the way you came and into the room with the flowing water. Go around to the left and enter the second tunnel on your left. Take the left turn at the end of this tunnel. Grab the ammunition on the ground. There's another valve in this room. Turn it. Two down, four to go.

Return back the way you came and into the room with the flowing water. Ascend the drainpipe. Cross the catwalk again. Just before the fan switch, look left and notice the narrow bridge. Cross this bridge under the water and find another valve. This valve opens a tunnel in the water below. Three down, three to go.
Go right along the catwalk and look up at its end. There's a ladder. Jump up to the ladder. Ascend to the next catwalk. Climb another ladder to yet a higher catwalk. Go right until you're under the wire. Leap up to the wire. Cross the wire until the bridge is under you. Drop down and go into the small orange room; it has some ammunition on the floor. Descend all the ladders and the drainpipe back to the room's center.
Swim down the room's center pool and keep left. Keep swimming until you can swim up through a tunnel. You're in a new chamber. Swim along the edge of this chamber until you're up against a broken catwalk. Lara can climb the catwalk. Climb the catwalk to its top. As you walk, Lara notes she can climb up on something; there's a pipe overhead. Hop up and grab onto the pipe.
Cross the pipe using hand-over-hand and drop down onto the narrow bridge. Go left and find another valve. Four down, two to go. Return across the bridge and leap to the catwalk. Go left on the catwalk. Walk to the edge. Perform a running jump to the far catwalk. Grab hold if necessary. Pull Lara up and walk to the broken catwalk.
Climb all the way up the catwalk until you reach a higher walkway. Go left and walk to the edge; Lara notes she can make the jump. Perform a standing jump toward the next piece of catwalk. Turn the valve. Five down, one to go.
Jump onto the previous walkway and enter the tunnel on the left. Crouch and crawl under the bars. Slide down the ramp on the left. Go left at the bottom and return to the room with the flowing water. Ascend the drainpipe again and all the ladders. Go up until you're at the wire. Traverse the wire all the way to the other side (instead of stopping at the bridge). There's the sixth valve. Turn it. The flowing water shuts off.
Cross the wire and drop onto the bridge. Walk over the bridge to the opening where the water was flowing. Jump inside. Hop into the upper drain. Open the gate. Walk forward to the edge of the room. Hang onto the edge and drop down to the walkway below you.
Turn right and keep going until Lara notes that this is the right place. Use the large pipe and she'll place an explosive. Quickly turn around and jump into the water. If you're not fast enough, Lara will die in the explosion. Once you're in the water, you can't swim to the surface. So move quickly! Swim to the second opening on your right.
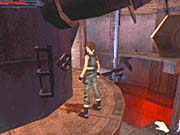
Keep going and you'll eventually be out of the water. Follow the pipe around to the left and you'll be overlooking the room you just detonated. Hang over the edge and drop down to the walkway below you. Turn left and ascend the ladder. Go down the next ladder. Perform a backflip over the small fire. Do a running jump over the next fire. Exit into the blue-lit area and exit on the far left.
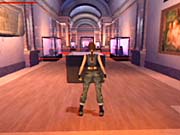
Louvre Galleries
Equip a weapon, because there are many guards to eliminate in this art gallery! Ascend the staircase. Expect to find a few guards during the trip up. Continue to the top of the stairs. When you reach a narrow hallway, go right and follow it around to a door. Open the door. You're now in a gallery protected by a laser field. Don't trip any of the lasers or you will alert guards.
Jump onto the display case ahead of you. Turn left and jump to the pillar. Grab the medical kit on the pillar. Turn right and face the room. Leap to the display case along the left wall. Once on it, turn right and hop to the middle display case. Turn left and face the room. Time your jump when the laser field is at a low point. Perform a running jump when the laser field is low to get to the next display case.
Walk to the edge of this case, which triggers the laser field. You'll need to perform a running jump to the next display case when the upper lasers aren't lit. This means you should start running when they are lit in order to make the jump at the proper time. You'll see on the next case that the lasers aren't going away. Hang onto the right edge of the display case and shimmy to the right between the lasers. Drop down on the other side.
Here's the last laser field in this area to get through. There's an opening on the right side of the field. Climb the display case on the right side of the room. Jump through the opening in the field. Open the door.
You're now in the next gallery. Crawl under the laser field. The next lasers look tough. Stand sideways facing parallel to the lasers. Perform a side jump over the field. Enter stealth mode. Walk up the right side of the room and attack the guard using stealth mode. He drops an ID card. Search the far back right corner of the room for a medical kit. Open and go through the door the guard was guarding.
Cross the room and terminate the guard in the next gallery (wait until he's walking to the left and eliminate him using stealth mode). Go to the far right corner of the room (from the protected Mona Lisa). Move the display case in front of the switch. You just became stronger. Go to the large middle display case across from the Mona Lisa. Move it toward the Mona Lisa until it stops at the small chairs.
Return to the button. Press it; this disables the laser field in front of the Mona Lisa. You must work fast, as the field returns after a short period of time. After pressing the switch, run to the middle display case and jump on top. Run and jump to the ledge above the Mona Lisa. Pull yourself up quickly and crawl through the vent.
Keep right until you reach another crawl space. Crawl through. Take the ladder on the right all the way up. There's a grate you can bust open. You'll also see a guard through it. Wait until he leaves or bust through the grate and terminate him with one of your pistols.
Turn right and climb the piping up to the air conditioner. Jump up against the wall and grab onto the ledge. Shimmy to the right. Pull yourself up to regain your strength. Shimmy again until you're under the wire. Leap up onto the wire and quickly go hand-over-hand across the wire to the far platform. If you hesitate, it's better to start over because Lara will barely make it. She feels stronger after doing it.
Go right on the platform and leap to the next small walkway. Hang onto the edge and drop down into the open window. Go left and spot the guard with his back turned. Kill him using stealth and grab the key.
Exit through the window. Shimmy left and climb the pipe back up to the ledges. Go right and along the pathway next to the roofing. You'll reach a ladder and an enclosed area. If you go down the ladder, you can gather some goodies. Eventually just open the gate in the fenced-in area. Climb onto the machinery in the middle and go through the vent. Go down the ladder and through the tunnel.
Drop down into the storeroom. Kill the guard outside the door. Exit the storeroom to the left. Go down the hall and enter the second door on your right. Kill the guard inside the security office. Use the computers on the desk. You're looking through a security camera into a locked office. Zoom in on the monitor and note the code on the sticky note.

Exit the control room and go right to the door with the keypad. Enter the code 14639 to open the door. Enter the office. Search the desk for the security pass. You can also search the drawing table and above the mantle for information on the obscura paintings.
Exit the office and enter the second door on your left. Enter the room on the right and notice the respirators from the cabinet on the right. You can't get them yet, but you can later. (Actually, there's a bug that lets you get them now. Just duck and press the action key and Lara will magically retrieve them). Exit the room and go right. Use the card reader to the right of the door to unlock the door. Open the door to proceed. Descend the staircase to the bottom. Go to the right door. Open it and shoot the guard.
Cross this gallery room to the far side. Use the card reader to the right of the door, then open the door. Go forward and to the right to find another door. Use the card reader to the door's right, then open the door. Descend the staircase all the way (a guard will spot you--turn around and terminate him). When you reach the bottom, open the doors ahead of you to enter the next area.
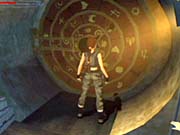
The Archeological Dig
Go around to the right. When the guard appears, shoot him. Go around to the left and enter the far left office (deal with the other guard). Snag the printout on the printer and search the room for more information. Enter the office on the far right where the first guard emerged. Use the switch on the wall to power the dig site. Exit the office and enter the door between the two offices. Use the computer to activate the machine. Move the machine to the upper left corner to discover the symbol. It appears in your inventory. Remember it (along with the printout).

Exit the room and go around to the left. Look along to the right near the fence and spot the ladder. Descend the ladder into the dig. At the bottom of the ladder, turn to Lara's right. Walk to the next ladder but don't go down. Face the dig and jump to the rock ledge along the left wall. Jump straight up and grab the plank above you. Climb onto the walkway next to you.
Walk along the path and take the first left. Use the switch that controls the elevator. Cross the bridge to the opposite site. Look left. See the platform below you; there's a small alcove with some sort of mechanism down there. Perform a running jump over the railing to this platform.
This lever mechanism controls the dig's lock. Each time you pull a lever, it clamps one of the rings into place. The lock has four rings. So you should pull three of the levers so you can adjust just one ring at a time. Here's a solution to the puzzle:
- Pull the three levers on the right, leaving the lever on the left up.
- Walk over to the lock (left from the levers), and use the lock until the outer ring has the half-moon symbol (it's in your notebook) in the opening.
- Return to the levers.
- Pull the left lever down. Push the second lever from the left up.
- Return to the lock. Use the lock until the second ring from the left has the symbol recovered from the dig machine (it's in your inventory).
- Return to the levers.
- Pull the second lever from the left down. Push the third lever from the left up.
- Return to the lock. Use the lock until the third ring from the left has the symbol revealed in your notebook in the opening.
- Return to the levers.
- Pull the third lever from the left down. Push the far right lever up.
- Return to the lock. Use the lock until the center ring has the symbol recovered from the printout.
When you complete the last step, the passage opens. From the lock, go right. Jump to the platform on your right. Turn around. Leap to the stone platform along the right wall. On this platform, jump straight up and hold onto the plank. Pull up onto the walkway. Take the first left and go all the way to the dig opening. Hop inside.
Tomb of the Ancients
Walk through the cavern to the edge. Drop down onto the wooden beam below, then down into the room. Walk to the edge of the large chamber. The bats may pester you, so equip a pistol to get rid of them should they attack. Walk to the edge and hang on. Climb down the side of the wall. You'll descend onto a narrow platform.
Jump to the small walkway on the right. On this platform, turn right into the cave opening. Go inside and drop down into the opening overlooking the bridge. Run across the bridge and leap over the hole. If you go up the stairs, there's a health power-up in the room. Return to the edge of the bridge and turn right. Spot the platform along the edge of the chamber that's missing the statue. Perform a running jump to this platform.
When you reach the platform, turn to Lara's left and leap to the adjacent platform with the statue. Jump down to the walkway below. Walk to the center of this walkway and hang off the edge. Climb down into the alcove below. Turn right and jump to the first platform along the right wall. Jump to the next narrow beam and use the lever on the right wall. This creates more platforms to use as landing pads as you jump your way down to the chamber's bottom.
Jump from platform to platform (using the action button as necessary to hang on for dear life) until you're at the bottom of the chamber. Avoid the skeleton guard, and crawl through the tunnel on the right side. Use the lever inside. This just created more platforms outside. Time to go back up!
Exit the crawl space and hug the left side of the chamber to find the first platform. Climb up it (working quickly to avoid the skeleton guard) and jump from platform to platform (standing jumps work well--just walk to the edge using the walk button). When you reach the top one, climb up into the alcove and use the lever to open the grate in the floor below you.
Time to go back down! Leap from platform to platform until you are back down at the bottom. Drop down into the hole. Follow the tunnel and keep to the right. Break down the door and snag the shotgun and ammunition. Exit and continue down the tunnel until you reach another door. Walk through the next room and into the long hallway. You'll note the darts shooting out from the walls. Pull the lever on your right and get ready to move!
Time is of the essence here. You don't have long. Traverse the room as fast as possible. Jump over the spikes that appear in the floor. Exit the room on the far side. Go through a couple of doors to reach the next area.
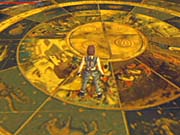
The Hall of Seasons
You've entered the Hall of Seasons. There's a skeleton warrior wandering around the room. He's slow, however, and Lara can easily outmaneuver him, so simply stay away and you won't incur any damage. Walk to the center of the main room and notice the floor switches. Each one has a different symbol. The symbols correspond to particular sublevels in the Hall of Seasons. You must complete each sublevel and return a crystal gathered at the end of each sublevel to the Hall of Seasons to achieve success.
Each floor button opens three of the doors in the hall. Each door contains a lever. If you pull the incorrect lever, you're dropped into a "torture" area and must find your way back up to the hall to try again. Pick the correct lever, though, and the passage opens into the sublevel.
Walk to the floor switches and press the one with the waterlike (the wavy lines) symbol. The three doors to the right of the entrance should open. Go into the far right door and pull the lever. The adjacent gate should open. The passage into the sublevel is through the door. Walk through it and into Neptune's Hall.
Neptune's Hall
Walk forward and around the hole in the floor. There's ammunition on either side of the path, but the skeleton guard with the flaming sword may interrupt your gathering. Avoid him and maneuver around him into the next chamber. Hop into the small hole in the floor that's filled with water. Swim down into the flooded room below. Go left at the bottom. You should see a passageway protected by blades. Avoid getting skewered and swim into the alcove. Pull the lever.
Avoid the blades again and swim up to the top. Exit the hole you hopped in and avoid the skeleton guard once again. Return to the adjacent chamber and jump into the hole in the floor you avoided earlier.
You're now in a larger, still-flooded chamber. Swim to the right of the statue head and find a narrow passageway in the alcove. Pull the lever inside. The room just became more flooded. Swim to the surface. Hop onto the ledge above the statue head and locate a health power-up in the tunnel. Drop back into the room. Go up onto the ledge to the statue's left.
Go left and drop into the hole. More water! Swim the only way possible and grab the health power-up as you move. It's a long way. Look for a passage leading down. Swim down and snag the health power-up. Swim through the broken grate and up. Lara finds a place to get a quick breather. Swim back down and follow the passage through another broken gate. Now here comes the hard part.
Blades block the passage. The blades extend from the sides of the pipe. Time your swim carefully to avoid getting punctured. Swim along the left side of the pipe and swim slowly. You have plenty of breath. When you make it through the first grate, you aren't finished. Another trap lies ahead--many more blades in a single flurry. Wait until the blades retract, and then swim through the next grate. Go to the right to get air once you're through.
You're in the final stretch. Swim straight across from where you got air and go down into the next chamber. Pick up the crystal from off the pedestal. Swim straight up to the surface to get air. Return down to the bottom of the chamber and locate the lever. Pull it. A door opens near the statue. Swim back to the surface and locate the door. Swim inside.
Swim up in the next room. You'll reach the surface where you originally jumped into the water. Climb out and avoid the skeleton warrior again. Exit Neptune's Hall the way you arrived.
You're back in the Hall of Seasons. Go right and you'll return to the hall's entrance. This is where you place the crystals. Approach the slot with the matching symbol on top and use the action button to place the crystal. One down, three to go. Return to the Hall's center and press the floor switch next to the water symbol. It's the symbol that looks like blowing wind (curled lines). Find the open doors. Go to door on the far right and pull the lever to open the entrance into the next sublevel.
The Breath of Hades
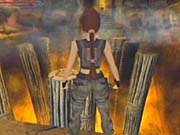
Walk forward. It looks intimidating! Walk along the ledge to the right. Lara can push in this wall. Push against the wall to reveal an alcove. Pull the lever to raise a series of pillars in the center of the chamber. You must traverse these pillars and reach the other side to find the crystal--and make your way back! Here are some tips on making the trip successfully:
- Don't worry about the wind too much. It only affects you when you're jumping from pillar to pillar, and even then it isn't particularly strong. Certainly don't worry about it while you're standing on a pillar.
- Use Lara's small jump (hold L1 down and tap forward and the jump button) to reach most of the pillars. Otherwise, you should do standing jumps and try to gauge her jump distance, which is difficult. The short hop is easier to gauge.
- Activate walk mode so Lara won't inadvertently fall off the far edge of the pillar after landing a jump.
- There's no time limit to solve this jump puzzle. Wait until the pillars have moved into the position you desire before attempting the leap.
- Save your game frequently. There's no bad place to be on the pillars, so save your game after each successful jump.
Hop to the far side and grab the crystal off the pedestal. Return over the pillars. Here's a secret: Go along the right side (if you're facing the chamber), and one of the dragons will retract. Hop up here and grab some goodies. Exit the chamber and return into the Hall of Seasons.
Go to the entrance and place your newly gathered crystal into the appropriate slot. Two down, two to go. Return to the hall's center. Press the floor switch that looks like a star. Go to the opened doors and enter the door on the far right side. Pull the lever to open the entrance into the next sublevel.
The Sanctuary of Flame
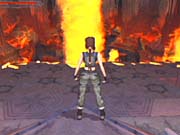
Walk forward until the door closes behind Lara. You're overlooking a large chamber with lava flooring and with fireballs and flames spreading throughout the room. You must traverse the blocks in front of you and safely make it to the far side of the chamber to recover the crystal. Don't worry about the fire too much. It's not very damaging and you can always use a health pack. Instead, be sure not to fall off the platforms, because swimming in the lava is instant death.
Walk forward onto the large section of platforms. Eventually you'll note fewer platforms and a lot more lava. Walk to the edge of the platform sections and perform standing jumps to the next safe landing area. You'll virtually do a zigzag back and forth across the small sections of platforms. When you reach the other side, walk up the stairs and grab the crystal at the top.
Now you must make your way back. Turn around toward the vast lava pool--with not a whole lot of standing room. Go down to the staircase and leap onto the first platform. Turn right and perform a standing jump to the floating platform. Jump straight up and pull yourself up onto the overhead platform. Turn left and perform a running jump to the next floating platform.
Turn left and perform a standing jump to the platform below your position (it's easiest to leap from the right-hand platform you're currently standing on). Walk forward and to the right when the platform appears next to you. Go to the right edge and leap to the floating platform. Another set of platforms appears just ahead of you. Jump to them and then down onto the walkway. Proceed up to the exit and return to the Hall of Seasons.
Place the crystal in its appropriate slot. Three down, one to go. Go to the center of the hall and press the last floor switch--the symbol you haven't pressed yet. Go to the opened doors and enter the middle passage. Pull the lever. Go through the opened passage to the final sublevel.
Wrath of the Beast
Walk forward until a cutscene interrupts you. What was once a fairly normal chamber is now a ruined mess that you have to navigate! The hard part is that most of your path isn't stable. If you stand on a block too long, it will crumble and crash into the bottomless pit below. You must move quickly at times in order to cross the enormous chamber and gather the fourth and final crystal.
Turn left immediately and jump down to the ledge below. Walk to the wall on the left-hand side and follow it to the ledge in front of you. Jump to two more platforms. The pillar in front of you will fall. Turn to the right. Scamper quickly over the narrow walkway and leap to the next platform against the right-hand wall. You'll spot a narrow ledge to the left.
Traverse the narrow ledge (Lara can put her back to the wall). At the end, turn left and face the chamber. Here's a tough part. Perform a running jump to the next ledge. You'll need to use the action button to grab hold of the ledge's side. Pull Lara up. Here's the problem. The ledge is unstable and about to crumble. As soon as you pull Lara up, do a side jump to the right and land on the adjacent pillar. It's crumbling too. Just turn right and walk to the edge of the next platform and you'll be fine.

Jump to the platform ahead near the corner of the chamber. Turn right quickly and go to the edge. Jump up the next series of ledges, working quickly because many are crumbling beneath your feet. At the top, turn a bit right and perform a standing jump to the next-higher pillar. It's crumbling as soon as Lara grabs hold so pull up fast and hop up onto the next ledge. You're safe on this one. Pull up onto the next ledge and turn a bit right. You'll spot the path toward the crystal.
Run quickly over the path as it begins to crumble. You'll need to jump over the ledge as the path breaks. You have one more jump left. Perform a running jump from the last platform to the end of the chamber. This last platform is falling, so you must work quickly.
Pick up the items in the alcove, then grab the crystal on the pedestal. This triggers a transformation in the room. You can now walk around the chamber without fear of falling. However, two skeleton guards have entered with their flaming swords. You must pull two levers--one on each side of the room. If you come in contact with the skeleton guards, you may catch on fire. Scamper to the flowing water at the opposite ends of the chamber and stand underneath the water to temper the blaze.
After pulling both levers, exit back to the Hall of Seasons. Deposit the crystal in its appropriate slot.
The Hall of Seasons (All Crystals Completed)
You've placed all four crystals in their appropriate slots. Return to the room's center and press the floor switch with the water symbol on it (the wavelike lines). Go to the opened doors and pull the middle lever. You will drop down into the torture zone. This is where you would have fallen if you hadn't pulled the appropriate levers when hunting for the crystals.
Follow the corridor to the intersection. When you reach the intersection, you should have a clear path on the left and a series of obstacles on the right. You can traverse the obstacles on the right (stay away from the vertical blades, and do a running jump past the block) and find a health pack in an alcove to the right. Otherwise, go left at the intersection.
Watch out for the blades that come down from the ceiling. The next area has a blade that rotates. Wait for it to rotate horizontally and then scamper underneath. Leap over the pits and grab some ammo from the alcove on the left. Continue left through the torture area. The next catwalk has spikes that appear from the left and right walls. Adjust your camera view so it's somewhat overhead. You can then more easily maneuver Lara in a left-right pattern around the spikes.
Leap over the pit and go through the door on the right. Descend the staircase. Pull the lever to open the nearby door. This reveals a brand-new chamber.
In this area, you must turn four valves, all labeled with the symbols from the Hall of Seasons. Turn left immediately. There's a valve close by. Turn it. One down, three to go.
Return to the start position. Perform a running jump to the next platform (it's tough, so use the action button to grab hold of the edge as Lara jumps). Go to the ladder on the end of the platform. Climb up. Turn the lever at the top. Two down, two to go.
Descend the ladder. Go right and leap back to the start position. Turn right toward the middle of the room and jump to the walkway encircling the machinery. Walk around to the left until you see the chain above. Jump up and grab it. Traverse the chain to the far platform. Go up the ladder and turn the valve. Three down, one to go.
Descend the ladder. Return to the center walkway using the chain. You need to drop to the circular walkway below the one you're currently on. It's easiest to do this standing above the ladder that's attached to this lower walkway. Once you're on the lower walkway, walk around the machine until you find the valve. Turn it. All valves are completed.
This starts the machine in motion. Drop down to the bottom floor and find the ladder that leads up (it's practically right behind you, slightly to Lara's right shoulder). Go fast after turning the last valve, and you'll avoid the blades. Climb up to the start position and exit.
You're back in the torture zone. You need to find the elevator that leads back up to the main Hall of Seasons chamber. You used it if you happened to fall down here during your search for the crystals. Upon entering the torture area again, go right. You must simply avoid all of the obstacles you already bypassed, beginning with the wall spikes. Look for an opening on the right wall--that's the elevator.
Enter and use the chain to ascend. After Lara stops pulling the chain, look in the opposite alcove for some goodies. Pull the chain again to return to the Hall of Seasons.
The room has changed a bit. There are pillars moving up and down in the room's center. Don't forget the skeleton warrior wandering around the room too. You must ascend the pillars. Do so by jumping and grabbing hold onto the shortest pillar. Pull Lara up on the pillar, then jump pillar to pillar until you're on the highest. Perform a standing jump to traverse the moving pillars. Wait until they're aligned before jumping so you can ensure a safe grab and hold.
On the top pillar, look up and find the circular platform above. Jump straight up and pull Lara onto the platform. There are walkway spokes that extend from the platform. Find the flat one and walk to the area along the chamber's edge. Run along this pathway--avoiding the skeleton warriors that burst out from the wall--and up the staircase.

You're on the next-higher level. More skeleton warriors wander around. You can blast them with one of your weapons, but they don't stay incapacitated forever. Emerge onto the pathway and go around the room in a clockwise direction. Go all the way until the pathway ends. Turn left toward the outer wall, and Lara can grab on. Shimmy across the wall to an upper ledge with a lever. Pull the lever, which opens a passageway in this floor's start position.
Shimmy across the wall back to the pathway and return to the start position. The skeleton warriors can pose a problem here since at least one may hang out in the start location and prevent you from passing. Ready a weapon just in case. The shotgun works particularly well.

Follow the new tunnel to its end. Turn right. Lara can push the wall, which increases her strength. Grab the ammo and health nearby. Return to the end of the pathway where you pulled the lever. Lara now has enough strength to shimmy across the ceiling. Shimmy to the lever and drop down to recharge Lara's strength. Start up the wall just to the left of the lever. Keep going up as Lara shifts position. Eventually she will turn around and face the room's center. Spot the small edge to the left. Go to that ledge and drop down on it.
Look straight out from the ledge. Note the pattern on the ceiling where Lara can climb. What you want to do is jump straight up from the platform to grab hold of the ceiling, then follow the pattern until you can go toward the upper left. Lara will then shift to a new climbing position. You're almost there. Keep climbing up. When you're just over the platform, slide to the left and drop down. Lara has just enough strength to reach the platform. Save your game before attempting the climb. Any hesitation could cost you.
Go through the door on the left and up the staircase. Save your game here before the boss battle. You may also want to replenish your health and ready the shotgun (or some other weapon).

Enter the room and watch the cutscene. When it concludes, you're in battle. You must avoid the apparition (if it goes through Lara, she'll suffer extreme damage) while seeking the statue with the blue light, which rotates from statue to statue. You can temporarily disable the apparition by shooting him several times. That's the best time to go to the blue light. The reason for the blue light is that it indicates the correct painting. Press the action button when you reach the statue with the blue light, and Lara will grab the painting. Grabbing the painting doesn't end the battle. You must flee the room (through the same route you entered) to reach safety.
The hall is flooded. Continue forward until you return to the Tomb of the Ancients. Go forward until the corridor floods completely. Swim straight up out of the corridor. This area should look familiar. You'll exit onto the broken bridge. Swim straight up until Lara pops up out of the water. You can snag a health power-up from an alcove up here.
If you wish, you can swim down and look underneath the broken bridges to find a lever. It opens a grate in the floor. Swim back up to catch your breath. Return down to the grate and swim to the door you busted down to get the shotgun. Bust it down again to get a strength upgrade, and grab the shotgun and more ammo if you wish. Return to the surface (you'll need to use health power-ups to survive the long swim).
Your eventual goal is to swim out of the tunnel you entered the Tomb of the Ancients from. Locate it above the bridges along the outer wall. It's near one of the beams protruding from the wall. Swim through the passage until you return to the archaeological dig.
Turn right. Hop onto the crate and jump up to grab hold of the fence. Drop down on the other side.
Galleries Under Siege
Ascend the staircase. Ready a weapon, because there are plentiful guards on this level. You'll face the first as you ascend the stairs; the guard emerges from a side room. Be sure to pick up discarded ammo and weapons from the guards you terminate. Continue up the stairs until the cutscene plays.
Terminate another guard at the top of the stairs. Go around to the right and open the door. Lara can't breathe in the gas. You must get those respirators shown in the cutscene. Terminate the guard. Walk through the gallery on the left. Eliminate the guard standing by the rope. Go through the exit door.
Go left into the stairwell and terminate another guard. Go up the stairs and open the door at the top. You've been to these locations before. Kill the guard patrolling this hall. Enter the first door on the right. Once inside, enter the room on the right. Lara spots the respirators. Open the cabinet and grab a couple of them. You gain the sprint ability (hold down the R2 button to run faster). Open your items inventory and equip a respirator.
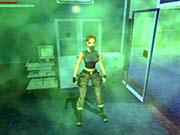
Exit the room and return to the stairwell. Go down the stairs all the way to the bottom. More guards lurk in the next lobby area. Terminate them both. Open the door with the red light above it. Walk forward and eliminate the guard sliding down the rope. Go around to the right and to the top of a staircase. Eliminate another guard here. Go down the stairs and kill the guard patrolling to the left. Continue down the stairwell and go around through the passage on the right. Turn left and walk into the next room until a cutscene interrupts the action.
Von Croy's Apartment
Thoroughly search Von Croy's apartment, but do not pick up the cane by the broken glass until you're finished. Grabbing the cane triggers an event. Instead, take the time to search every corner and room for ammunition and health power-ups. You can go upstairs and search the bedroom and bathrooms. Go through the door underneath the staircase; a second stairwell leads up to the bathroom from here. You can also look through desks (such as the computer desk) for background information on the storyline. Rummage through the kitchen for ammo on the counters. You'll need all this ammo to counter tough enemies very soon.
When you're done, pick up the cane. This triggers the arrival of the cleaners. Equip a weapon and battle the first enemy that emerges through the hall on the far left. He'll take many shots to defeat. Use the apartment's features as cover against his attacks. There are several pillars and couches to take cover behind.

Exit and go right. Kick the door down. Grab the health power-up on the right. Return to the hall and take the first door on the right. Grab the ammunition from the room. As you are gathering the ammo, another guard breaks through the wall. Eliminate him. Grab his discarded weapon and ammunition. Now you have better firepower. Exit to the hallway and turn right. Crouch down all the way to the floor and crawl (L2 plus triangle), and turn right into the next hall. A bomb goes off.
Move through the damaged room to the bottom floor. Grab the medical kit from off the table and the ammunition from under the staircase. Go back up the stairs to the second floor. Go forward, and the laser beams will appear behind you. There's a guard at the far end of the hall; you must use the alcoves on the left and right sides of the hall as cover against his fire. Use your newly acquired weapon to eliminate the guard as you approach. There's ammo in the first alcove on the left.
You must time your advance through the beams. Watch their pattern. When the closest beams disappear, walk forward and up to the three beams. When the top two disappear, leap over the third and hide in the left alcove. Eliminate the guard and end the mission.
The Monstrum Crime Scene
Walk forward and a bit to the left and speak with the reporter. Be nice!
- The one you're watching? With the police tape all around it.
- I gather Vasiley was some kind of art dealer.
- You say he found something. Do you know what it was? A painting perhaps.
- Keep talking until the money runs out.
- All of them?
After concluding the conversation, turn left and go down the alley. Kill the guard around the corner. Grab the combined claw hammer from off the ground. You can use it to open the manhole covers in this area. One manhole cover in the center area leads to ammo and a health pack. The cover you want is down a bright alley across from the reporter. Go around the corner to the left and terminate the guards and guard dog. Open the cover and hop inside.
Follow the sewer tunnel to an opening on the right. Go up the staircases and into the far room--Lara finds Bouchard. After pulling her gun on him, Lara interrogates Bouchard. Speak with him for information.
Go left from Bouchard and open the door. You'll enter what appears to be a library area. Go right and up the staircase. Once at the top, follow the catwalk to Lara's left and push the crate against the scaffolding until it increases her strength. Leap up onto the scaffolding. Once at the top, perform a running jump to the scaffolding to Lara's left.
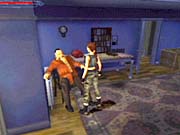
Pull the chain twice on this scaffolding until a cutscene plays. Perform a running jump to the next scaffolding, now on Lara's right. Pull this chain three times until the cutscene plays. Return across the scaffolding. Pull the chest again to improve Lara's strength. Walk down to the main floor of this library. Walk to the first opened item (from when you pulled the chain twice) and grab the medical kit. Go up to the clock and use it. Adjust the time to 3:00.
Go down the new staircase. Walk to the desk and pick up the fax. Look at the fax in your inventory to gain an access code. Enter the code 31597 in the keypad to the right of the artwork. Grab the item in the safe. Exit the library back to Bouchard--he's gone.
Exit into the hall and open the closet door on your left. Bouchard's body is inside. Pick up the discarded key. Return to the room you entered from the sewers and use the key on the red door at the top of the stairs.
You're back in the alley, and the reporter has arrived. He has an access code for Lara. Talk with him. If you have enough euros, the reporter will sell you a machine pistol. At the end of the conversation, Lara automatically enters the next level.
The Strahov Fortress
Search the ground floor for an open crate with a health power-up. Hop onto the single canister and then onto the adjacent double canister. Perform a running jump to the wall and hold onto the machinery unit (the one with the pipes coming off to its right). Turn right and perform a running jump to the catwalk.
Hop up onto the bridge and perform a low crawl across it. You'll reach a ladder to the left on the far opposite side. Go down. Follow the next catwalk to another ladder, this time going up. Climb and go left along the catwalk to the door. Open the door. Use the security pass to open the next door.

You're in a new warehouse, and you can see guards in the distance. Prepare a weapon and terminate them as you approach. Go to the far opposite side of the room. Follow the catwalk all the way (ignoring the high ladder on the left) until you spot a ladder, a door, and a small opening at the top of the ladder. There's a guard inside. Either sneak up the ladder when he's looking away or shoot him from the catwalk.
Enter the room where the guard patrolled and use the lever. Power is restored to a small room as revealed in the cutscene. Exit this room and follow the catwalk to the long ladder. Climb it and traverse the upper catwalk to the small building. Lara automatically uses the device to destroy sentry guns on the room's bottom floor.
Exit from this upper area and go down the long ladder. Return to the area where you shot the guard in the control room and look for a ladder on the right. Descend down to the room's bottom floor. Cross the warehouse to the far door and enter.
Walk forward and go right. There's a stack of crates here and a pipe, which Lara notes she can climb up on, above the crates. You need to stack the crates so Lara can reach the pipes. Push the crate to the right of the stack up against the crate closest to the fence. Hop onto the crate and push the adjacent crate over against the wall. Hop on the crate you just pushed and pull the crate to the left as far as it will go (Lara is crammed up against the fence so it won't go far). Drop down and find another crate to the left of the stack. Push it against the stack of crates. Hop on it and pull yourself up behind the top crate. Push it into position. Do not hop on this top crate, though. There's steam coming from the pipe that will kill Lara.

Return to the chamber's center and look along the wall toward the crates. You'll see a valve up high. Look into the left alcove and find the double stack of crates. Push them under the platform with the valve. Hop up and turn the valve to disable the steam.
Go back to the stack and climb to the top. Leap up to the pipe and traverse it over the fence. Drop down and kill the guard dog. Climb the ladder on the left and use the lever at the top. This activates a couple of massive blades that do damage to an overhead vent. Drop down and investigate your damage and Lara makes a note that she can't read the writing on the blocks. Return to the ladder.
You need to leap up to the girders overhead. You'll want to get onto the vent that is perpendicular to the platform with the lever. It should be on your left. Climb on top of it, then drop down on its open side (next to the blade). Pull up and crawl into the vent. Go all the way to the end and drop down. Walk forward until a cutscene interrupts the action.
Poor reporter. Crouch and crawl to the end of the vent. You're overlooking a new room; a guard patrols below. Wait until the guard walks off the screen, then drop down and equip a weapon quickly. Eliminate the guard. You can also shoot an object to the right, which may cause a trip mine to detonate the guard. After terminating the guard, grab the security pass he drops. Search the shelves for goodies, then go right from the vent toward the closed door.
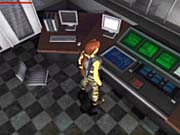
Use the security pass to open the door. Terminate all guards inside (there are more around the corner). Search the cabinets for ammunition, and grab the chocolate bar from the adjacent room. Examine the computer to initiate a cutscene.
Exit the offices. Walk toward the laser beams. You can search a room on the left--where the reporter was--to locate a weapon and a health power-up. Avoid the trip mines and crawl low underneath the beams. In the next area (you've been here before--the stack of crates are on the left), go right to the door and use the security pass. Open the door into the next level.
The Bio-Research Facility
Walk forward and down the steps into the garden area. Follow the path to the left and speak with the man. After the conversation, search the planters for ammunition, though be careful around the plants--they bite! Walk into the fountain in the center. Pull the statue head to open a passage. Locate the passage to the right of one of the staircases. Enter the passage into the room on the right. Climb the ladder.
Pick up the ammunition and pull the switch, which opens another door. Descend the ladder or just fall down. Go up the opposite stairs and into the small room. Push the yellow button.
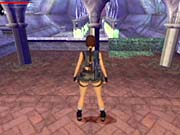
You enter a room with many tubes--one has something nasty inside, which breaks out as you enter the room. Equip a weapon and eliminate the beast. There are more awful things in this room; the enlarged insects emerge from the left and right sides of the room. Terminate them all. You may need to switch targets to survive; press the square button to do so.
Go up to the second level on the left side of the room. Go to the middle of the level and look for the overhead pipe. There's also ammunition up here in the far corner. Traverse the pipe all the way to the upper middle of the room. You can drop down on the walkway there. Go to Lara's right and turn the valve. Follow the catwalk to the other side of this area, using small hop jumps to get over the break in the platform. Turn the other valve. This opens the flooring in the busted tube. Return to the pipe and traverse it back to the side of the room. Drop into the busted tube into the next area.
Climb out of the sludge. Slide down the ramp in the next room; jump as you near the ramp's button and grab hold of the ladder against the wall. Climb up and grab the health pack. Open the door. Ascend the staircase to the door at the top. Enter the door into the next area.
Listen carefully. There's a guard in here. He's below you on the staircase. Eliminate him. Go to the right. Do a running jump over the gap in the platform. Don't go on the right ledge; that distortion you see will kill Lara. Instead, go left and up the ladder; there's ammunition and health up there. Return across the break in the platform. Time to fix that pipe.
Go to the bottom and face the pipe that runs along the left wall. You must leap on that pipe, go forward, and turn the valve. Don't fall in the water; there's a beast inside that won't hesitate to have Lara for dinner. After turning the valve, go to the very bottom of the stairs below where you entered. You can climb those vines along the left wall. Climb them up to the very top over the door you entered. Climb the ladder here and up the platform. Use the lever to move the high platforms.
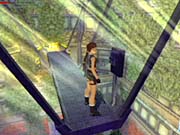
Return down to the bottom of the room and up the stairs. Jump over the gap. Walk on the narrow ledge along the right wall. At the end of the ledge, ascend the pipe. Grab hold of the ledge and shimmy to the left until you can pull Lara up onto the larger platform.
Climb the vines on the right-hand wall all the way up the ceiling. You want to drop down on the high platform you moved a moment ago. Follow the catwalk down the ladders until you reach the yellow button. Press it and enter the room. Press another yellow button to enter the next area.
A cutscene reveals an angry tree that locks the exit doors. Climb down the ladder and search the grounds near the staircase for ammunition. Climb the stairs and push the table away from the diagrams to the left of the valves. Note the diagram with the "X" through it. You must turn those valves to eliminate the tree. Turn the first, second, and fourth valves from the left, then pull the lever on the right to eliminate the tree. Go through the door the tree guarded.
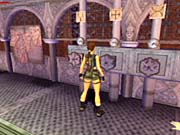
There are four guards in this area. One is dead (as shown in the cutscene), and the other three patrol the lower and upper regions of the room. Three have security cards (the dead one, the lower one, and one of the upper guards), which you need in order to exit this area of the facility. So, if you kill a guard, make sure you eventually search around where his corpse fell. For instance, you might kill the higher guard while you are standing far away, and you may not be able to get the discarded pass until much later. Just remember where he stood and search that location for the pass.
Go through the middle and to the left. One of the guards patrols here (another patrols on a higher level to the right). Terminate the lower guard and grab the pass. If you shoot the higher guard, remember to search for the pass near where he died. You're looking for a ladder on the right side of the center section. Climb it up to the second level.
Go left down the catwalk and up some stairs. Ignore the blue door on your left. Instead, perform a standing jump as far as you can onto the slanting roof and against the right wall. It's OK if you miss the platform. You're trying to slide down to the lower platform on the slanted roof. Once there, perform a standing jump to the next platform, then jump to the catwalk (with the break in the railing). Go left. Terminate a guard if he patrols here. If you walk to the edge, Lara notes she can't make that jump.
Go left past the tree (open the blue door on the left if you wish). Go right from the tree and around the catwalk to the left. You'll eventually get to a break in the catwalk. Perform a running jump, which increases Lara's jumping ability. Grab the medical kit on the other side. Return over the break in the platform and go back to the jump Lara couldn't make. You can make it now.
Go up the stairs and follow the path left to a pipe on the wall. Climb it. Shimmy right at the top and pull up onto the walkway. Follow it until the cutscene plays. Continue to the dead guard. Grab the security pass on the ground. Continue to the far corner for ammo.
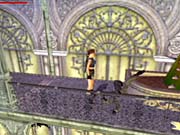
You should have three bio-research passes now. If you don't, you missed one from this room. Look carefully around where you killed each guard. Look near the jump Lara couldn't make (where she landed). Take all three security passes to the switches in the hallway on the right side of the area. Use all three in their appropriate slots.
Descend the staircase into the next room. You can either run across the room immediately to end the level or take a little detour for some items. Search the bottom of the area for ammo, then jump into the water and swim to an adjacent room. Use the crate (pull it under the hole above) to get on the higher catwalk. Look in the cabinets for health. Return to the bridge. Go across the bridge and enter the door after pressing the button. In the next room, go into the left chamber and press the button to end the level.
Sanitarium
You now play the role of Kurtis Trent. Walk to the right and grab the ammo off the floor. Keep going forward to the edge and drop down; hang on the edge, then drop down to the platform below. Snag the nearby ammunition. Turn right from the ammo and leap to the alcove with the ladder. Descend the ladder. Turn right and go all the way to the edge of this platform. Look toward the center structure. Jump from this edge to the edge of the walkway that encircles the center structure.
Drop down to the platform below you. Walk into the opening in the center structure and hop down into it. There's a hatch in the floor. Open it and drop down inside. Head to Kurtis' left and go down two ladders. At the bottom of the second ladder, walk to the edge toward the center structure. Look up and see the pathway just above Kurtis' head. Jump and grab hold of this pathway. Pull Kurtis up. Turn left and proceed through the door.
Ready your weapon. Open the gate in front of you and shoot the sanitarium beastie. Continue forward until you watch the cutscene. It's the proto--as if Kurtis didn't have enough to contend with already. Grab the ammo from near the guard. Go forward to the doorway and shoot another sanitarium beastie. Turn right. Go to the far gate and use it; Kurtis will automatically use his far-see ability to look inside the room and gain a key code: 06289.
Turn around and go into the open cell on the left. Speak with the sickly old man for some information: Yep, the proto is on the loose. Return to the gate on the right. Use the keypad on the left and enter the code 06289. Go through the opened gate.
Walk around the control room and to the opposite gate. Kill the sanitarium creep on the other side. Open the gate. Go down the hall and open another iron gate. Take the first left in the next hall. Shoot another sanitarium creep in the room on the left. Open the doors at the end of this hall into the next area.
Walk forward and terminate another sanitarium lunatic. Go forward through the misty hallway. The first open cell on the right contains another lunatic as well as a chocolate bar. Kill the crazy guy in the orange straightjacket if you wish. You can explore in the large cafeteria on the left for some ammunition, but there's nothing you can do inside just yet.
Continue down the hall and terminate another insane resident. You can search the rooms on either side of the hall if you wish. Open the doors at the end into a lab. Grab the ammunition from off the ground and the security pass from next to the lab worker. Return to the cafeteria.
Look at the door across from the cafeteria (it's along the left wall now in the hallway). Note the number: 38471. Go into the cafeteria and hug the right-hand wall. Use the security pass to open the door.
Ascend the stairwell. Go right at the top to find a medical kit. Head the other way to the console. Use the console and enter the code 38471 to open the door. Return to the cafeteria and enter the opened door. Beware of sanitarium psychos as you enter. Enter the next door.
Turn right and walk forward; a cutscene plays, revealing the proto at work once again. Continue forward and turn left. Ready a weapon and eliminate the raging lunatic running toward you. Go forward and right into the alcove. Open the grate. Crawl inside and go until you can stand up. Hop up to the overhead vent. Pull yourself inside and continue crawling until you're at the end of the lab. Fall inside. Turn right and cross the room. There's another grate on the far wall. Open it and crawl inside.
When you can stand, hop up and pull yourself into the overhead vent. Drop down into the room. Shoot the canisters to the fan's right. Hop up onto the catwalk where the broken ladder was. Flip the switch up here to disable the fan. Crawl through the fan blades. Go right into the next level.
Maximum Containment Area
Walk forward to the gate. Open the gate. Go forward and through the next gate. Open the next doors ahead of you. Turn right and walk forward until you see the cutscene. Kurtis uses his far-see power once again to look into a cell on the left. He uses it to find another key code: 17068. Return back down the hall and through the first gate you come to. Turn right and enter the office.
Walk to the console and use the code 17068 to unlock one of the cells. Exit the office back into the previous hall. Take the first right and open the second cell on the left. Grab the security pass near the guard's body. There's also a chocolate bar on the desk. A tougher sanitarium beastie enters while you're gathering items. Use your pistol and terminate him (he can sustain many more shots). Exit the cell.
Go left and around the corner. Use the pass on the reader on the right wall. Go through the opened doors. Search the cell straight ahead (on the right wall) for ammo. You want to go down the now-left hallway (right from where you entered from). Enter the doors at the end.
Walk forward with your gun out; another sanitarium psycho attacks from the right. Go down this right hallway. Take the first right with your gun drawn and kill another sanitarium freak. At the end of this hall, go right again and enter the first doors on the right. The proto is inside and scampers past Kurtis. He runs under a door at the end of the hall.
Have your gun ready, because all the commotion alerted another psycho. Exit and go right, then right again to the end of the hall. Crawl under the broken door. Descend the stairwell on the left. Follow the hallway to the usable door. Enter.

Walk out into the large circular room. This is where you saw the proto caged in the cutscene earlier in the game. Go right to the ladder. Ascend it. Turn left at the top and walk to the bridge that connects the catwalk to the center structure. Climb onto the center structure. While on its roof, walk along the edge until you see the broken catwalk that you can jump to. Perform a standing jump and grab onto the catwalk. Pull Kurtis up.
Go left. Leap over the gap. Hop into the vent on the right. Drop down a few times and continue through the vent. Go right, left, then right again to the new area. Take a final left and drop down into the room.
Climb the ladder. Grab the security pass from the dead guard. Search the room for a chocolate bar. Use the switch on the wall to open the door. In this new hallway, go left, then take the next left. Use the reader to open the door. Descend the staircase and have another encounter with the proto. This time it's the final encounter.
Pull out your weapon and shoot the proto until it collapses. You must repeat this action several times. If you are near death, use a health item. Each time the proto collapses, walk up to it and hit the "X" button. Eventually, Kurtis will stab the proto with the shard, killing the beast for good. When you battle the proto, avoid it as much as possible by backing away, but it's more important to simply keep shooting the monster. Use the square button to ensure you are aligned with the target.
After killing the proto, walk to the generator and use the switch to complete the level.
Aquatic Research Area
You're back to controlling Lara. Press the button and exit onto the catwalk. There are sentry turrets below that will chew Lara up if you try to cross the room. Instead, drop off the catwalk to the left. Crawl low along the left edge of the room. You'll spot a tight crawl space. Crawl inside. Turn the valve in here. This releases gas in the room that will confuse the turrets. Cross the room to the far side.
Climb the pipe in the middle of the far wall. Shimmy right, then climb up another pipe. At the top, grab the ledge and shimmy right until you're over the pathway. Drop down.
Go forward and use the button. It's a camera with a clue on how to bypass the next turret. Note the sign with the arrow and the flashing light. It's that simple--just do something to the flashing light. You can't get close enough to touch it, because of the turret, so how about shooting it. Crawl along the left edge of the hall and line up your targeting reticle with the flashing light. Shoot it until the wall explodes. You can now pass the turret.
Walk to the far right side of the hall. Use the button and go into the chamber. Climb the ladder. Follow the hall to the door. You will enter a large aquatic area. The pool below your feet contains a sea creature. Don't fall in!
Walk forward and go to the left side of the chamber. Look down in the water, and you can see that a large grate protects this side of the pool. The creature can't get you here. Dive in and swim down away from the room's center. You can swim through the opening near the floor. Turn left in the opening and use the lever. Swim down this hall opposite from the lever. Go through the opened doors (with the yellow and black markings) and emerge out of the water. Look in the left corner for a health pack. Use the button to exit the door. Return to the aquatic area.
Cross the chamber to the opposite side. The door is open here. Enter this opposite door. Go through a series of doors (using the buttons) until you're in the larger room. You can use the camera on the left if you wish. Pull the switch on the right side and go into the elevator. Use the switch inside to lower the elevator.
Enter the room. Go forward and drop down. Continue through the next door. Pull the lever at the end of the hall. The console reveals you've powered up the consoles. Exit back the way you came and ascend in the elevator. Return to the aquatic research area. The cutscene reveals a couple of important rooms for the next puzzle.
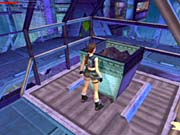
You must figure out a way to distract the sea creature as you pull some levers in the tank below. Feeding time! Exit into the aquatic research area and ascend the staircase on the right to the top platform. You'll see a control room on the left and some sort of container on the right. Approach the container. Pull the container toward the control room until it's on the square. Push the button on the post. This sends the container toward the control room. Push the container into the control room as far as it will go. Pull the switch in the control room to deposit the food inside the container. Pull the container back to the square. Push the button on the post. Finally, push the container back onto the center platform. By the way, Lara's receives a leg-strength upgrade during this process.
Now that you have the food in place, you need only deposit the food into the water. Descend the stairs down to the lower area of the aquatic research area. Go around to the left and bypass the alcove on your left. Drop down and continue toward an upper control room, which you'll spot ahead and just above your position. Ascend the ladder into the control room. Use the switches on the console; they're security cameras to reveal a couple of important levers marked one and two.
Exit the control room and follow the path to a pipe on the right. You must ascend this pipe and eventually shimmy across a ledge to a high walkway on the left. This is a tough climb because Lara has just enough strength to complete it. Ensure you are always moving. Don't hesitate or Lara will fall. Once on the platform, use the switch to call the moving bridge. Go over to the control room.
At the intersection, you can go right and explore a room containing a confined sea creature and some ammo. If you want to explore here, be sure to do it before you pull the switch to the left. This switch deposits the food into the water. In our experience, if you deposited the food then explored the side area to the right, the food dissipated and you had to gather the food again. You should save your game before pulling the switch either way.
When you're done exploring, pull the switch. A cutscene reveals the food dropping into the water. Exit the control room and jump into the water. Look for the lever marked #1 on the side of the underwater chamber. With food in the water (the bloody ooze in the water), the sea creature won't hurt Lara. Pull the lever and a scene reveals one hatch opening. Swim up and to the ladder along the walkway. Climb out.
Cross the chamber to the opposite side and jump in. Dive down and enter the tunnel marked #2. Swim to the surface and get out; Lara dons a sleek wet suit. Locate the lever marked #2 in this same room. Pull it, which opens a second hatch. Swim to the main chamber and down to the middle of the floor. Continue swimming into the next level.
Vault of Trophies
Swim around the corner. Beware of the spikes. Wait until the spikes retract and then quickly swim through. At the intersection, swim up to catch your breath. Swim back down and to the left from the spikes. Swim around the corner to another intersection. You can swim up to catch your breath again. Go back down and straight across to where you just came from. There's a hole in the wall on the left. Swim down inside it.
At the bottom, go right at the intersection. Continue around the tunnels. Take a right at the next intersection and swim up. Get out and grab the health and the aqualung. It's a power-up to give Lara extra breath during the long swims. Equip it when you wish to activate the power-up.
Swim back down and straight across at the intersection. When you reach the wall, use the action button, and Lara busts through. You're now in a chamber with statues. Swim up and to the right to locate another breakable wall. Bust it open and catch your breath.
Swim back down. You have some tasks to perform. If you need breath, return to this upper chamber. You should use the aqualung here because you can gain a second one after completing this puzzle. You need to locate the statues "Limoux" and "Vasiley." Swim to these statues and the chains directly behind them. Pull both chains so the statues move toward the chamber's center. After pulling both chains, the statues break the cracked section in the ceiling. Pull Lara out of the water.
Follow the cavern path. Avoid the falling rock by running and then jump when it rises. You approach the edge of a chasm. Pull the lever to create platforms ahead of you. Leap to the closest platform in the center with a small hop. Leap to the platform on the right. Continue leaping toward the right wall. There's an upper platform. Jump up to it and pull up. Leap over to the alcove. Grab the aqualung.
Return to the platforms and perform short hops to the larger ledge on the right wall. You can even make it from the upper platform you used to get to the alcove. Hop to the three platforms in succession and onto the new cavern path.
Follow the hall to a library. Avoid the skeleton warriors in the library. Go to the wall opposite the tapestry and pull the lever. This increases Lara's strength. Grab the health from the alcove to Lara's right. Return to the tapestry and pull the chain to its left. The tapestry rises. Use the distortion pattern on the wall to climb up to the upper ledge. Jump toward the middle of the room onto the scaffolding. Jump straight up and traverse the upper scaffolding to the middle of the room. You're over a platform. Fall on it to open a secret alcove.
Return down to the lower floor of the room the same way you got up. Grab the painting from the secret alcove. Crawl through the fireplace and open the door. Jump into the water. This is a good spot for the second aqualung if you have it. Swim through the tunnels until you can go up. This ends the level. Save the game before jumping into the water in case you run out of breath.
Boaz Returns
You now control Kurtis again. You must battle the transformed Boaz with only a pistol. Boaz is big and nasty but can be tamed rather easily. Be sure to use health items if Kurtis is near death. To kill Boaz, you must target the small area below her mouth. When you shoot this area enough times, Boaz turns sideways and launches ooze from spots on her back. These spots are vulnerable. While she's sideways, you must target these spots and shoot them. Eventually Boaz returns to face Kurtis, and you must shoot her vulnerable area near the mouth again until Boaz turns sideways again.
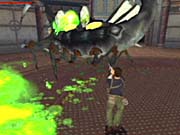
Use the square button to target the mouth area and the two spots on either side of Boaz. The ooze doesn't hurt Kurtis much, but it simply makes it difficult to maintain a constant barrage of fire on Boaz. Move around Boaz while she fires to avoid the ooze as much as possible. Continue to pound away on her vulnerable areas until Boaz falls.
A cutscene plays. Boaz is back! When you regain control of Kurtis, fire at Boaz as many times as you can. When she falls again, go up to her to complete the battle.
The Lost Domain
You're back to controlling Lara. You need to find Eckhardt's old lab and the third Periapt shard. Walk forward and go right. You must cross this chamber and use the lever on the far side. As you enter, Lara begins to slide. Jump to the pillar while she slides. Leap from pillar to pillar. It's very tough because Lara has gained a lot of jumping ability and can leap fairly far. Save your game before attempting any of these jumps. From the last pillar (not the lower one on the left) you can make a standing jump to the lever. Pull it to increase Lara's strength.
Go back across the catwalk and grab the health pack. Exit and go through the other passageway. There's a lever on the left. Using it opens a door at the end of this chamber. Unfortunately the door closes quickly, so you must traverse and exit the room with blinding speed. Save your game before pulling the lever.
Perform a running jump to the first platform and a sprint jump to the second (hold R2 down). Sprint-jump to the exit before the door closes.
Enter yet another ominous chamber. Jump down to the platform below your position. Turn left and spot the ladder. Leap over to it. Climb the ladders. Turn right and perform a running jump across the gap in the bridge. Turn left. You must slide down the ramp yet jump onto a platform against the right wall. When you jump, control Lara's direction so she lands on the platform against the right wall.
Pull the lever here. Turn left and perform a running leap toward the exit. Walk up to the door, which magically opens. Walk through.
Eckhardt's Lab
Walk forward. Jump up onto the platform on the left. From here, jump all the way across the gap and spikes toward the exit doorway. Enter Eckhardt's lab.
Search the left corner of the room for a health pack. Grab the alchemic phial (purified oxygen) on the table in the upper left corner of the room. Return to the room's center and pull the lever. Climb the ladder near the entrance. Turn right and follow it to the back of the doorlike monuments. Walk around to the front of the monuments and use the action key to insert the phial. There's a health pack on the wooden beams behind these monuments if you want to leap up and grab it.
Return to the ladder. Look right toward the room's center. Perform a running jump over the railing and onto the cage. Walk along the top of the cage until Lara drops through. Remember where the opening was (along the right side). Grab the alchemic phial (purified hydrogen) inside the cage. It begins to lower. Climb the wall underneath the opening in the roof. Climb out.
Look in this hole to find a niche containing the third alchemic phial (purified salt). Crawl in and get it. Climb out of the hole using the climbable walls. Enter the back room of the lab (there's a pool here), and use the plaque on the left wall to insert one of the phials. Return to the lab and approach the face of the lower monument. Enter the last phial.
Swim down in the pool near where you placed the second phial. Grab the shard at the bottom. This opens an exit. Swim back up and go through the opened door. Slide to the door and enter.
Walk to the middle of the chamber to begin the battle against Eckhardt.

Eckhardt uses powerful weaponry against Lara, but it's easily dodged. Just get into a crawl position. His projectiles are too high and will miss Lara every time. After he fires a series of projectiles, Eckhardt creates three beings to run into the middle of the chamber that Lara's trapped within. Don't get hit by them. When the three beings connect, Eckhardt appears in the middle. Avoid the projectiles around the room and approach Eckhardt; use the action button to punch or kick him. Lara automatically drives one of the shard pieces into Eckhardt.
You have to drive all three pieces into Eckhardt to win the fight, so avoid his projectiles a second and third time. Move out of the way of the three beings that approach and hit Eckhardt when he's in the middle a second and a third time to finish him off. To make things easier, save your game after Lara hits Eckhardt for the first and second time.

Walk to Eckhardt's body and grab the glove. Avoid the blue projectiles being thrown at you if possible (they don't do much damage--they just knock Lara down), and be sure to use health power-ups as needed. After grabbing the glove, walk to the back of the pillar to the left of Eckhardt and use the glove on the switch.
You can now reach the upper areas of the chamber. Climb the ladder behind Lara to the second level. Avoid the projectiles if you can. If you get knocked off, just climb up again. You need to reach the upper floor (essentially the fourth floor) using the ladders. Once there, walk around to the catwalk that lies toward the sleeper. Just run out onto the catwalk to complete the game.
Got a news tip or want to contact us directly? Email news@gamespot.com
Join the conversation