INTRO:
Having spent so many years in its comfort zone established by its flagship IPs like Street Fighter and once-profitable IPs like Mega Man, Capcom is oftentimes at a loss of what to do next to diversify its portfolio before the old IPs become too stale. Sometimes, it does poorly, such as its less-than-welcome attempt to reboot Devil May Cry.
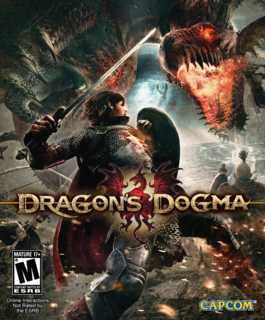
Some other times, it resulted in a windfall, if not an opportunity. Dragon’s Dogma is one such game.
PREMISE:
There are plenty of fantasy worlds that have been created for the fantasy genre, and almost all of them have monsters. Invariably, these monsters include dragons, often the most feared for being the pinnacle of lifeforms that are living and (usually) sapient. There had been plenty of dragons in works of fiction, most of them being portrayed as capable of incredible destruction.
The world in Dragon’s Dogma has dragons that are also incredibly destructive. The game opens with a cutscene that suggests that they are of supernatural origin, which is something that is not entirely new to the fantasy genre either. What is shown afterwards though, becomes the main draw of the game.

One of these dragons – a particularly large and strikingly red-orange one – had landed in the village of the protagonist. It begins to wreck things, but was stopped by the astounding but foolhardy bravery of the player character. Of course, he/she is hardly any match for the dragon, but it recognized something of value in the protagonist – and proceeded to tear his/her heart out and swallow it.
Despite this grave wound, the protagonist survived, albeit with a glowing scar that throbs like a heart would and one that carries the challenge of the dragon, who also pronounces the protagonist as the “Arisen”. The protagonist henceforth is driven to become stronger, and eventually face the dragon again.
There is actually far more to this story. One hint of that is the existence of human-like beings called the Pawns, all of whom appear to be very skilled but rather aimless, at least until they enter the service of the Arisen, whom they unquestioningly obey.
THE PROTAGONIST:
The protagonist is one of those semi-silent types in video games. He/She still has some means of communication, though these are limited to conversation options that are rather similar to those in the Elder Scrolls titles. Decisions are also made through these conversation options.
The protagonist is the only player character that the player gets to control. There may be other members in the protagonist’s entourage and the player might be able to direct them around, but only the player character is truly reliable in getting what the player wants done get done.
The protagonist is one of two characters whose progression systems are within the player’s control. The progression system will be described in their own sections.
CHECKPOINTS & AUTO-SAVE:
The player is simply redirected to the latest checkpoint save if the protagonist dies. There are not a lot of checkpoints, however, so the player will want to consider triggering the auto-save feature whenever convenient.
Speaking of which, the player only ever has a single profile, and a single auto-save. If the player wishes to have another playthrough, he/she would have to do some user profile management shenanigans.
This limitation remains as one of this game’s biggest flaws. This can be a bit disappointing, considering the many improvements to the game since its launch.
PAWNS:
One of the main features of the game is the legion of Pawns at the Arisen’s employ. The Pawns appear human-like, but observation of their demeanour would reveal that this is at most an uncanny similarity. They have stoic and/or plaid faces, and emotions do not come easily to them outside of tense situations like combat.
Most master-less Pawns are also aimless. Canonically, they can be ordered around by humans who are not Arisen, but their ability to perform tasks is little better than a simpleton’s. When left to their own devices, they wander throughout the lands, from one stone to another. (The stones will be described later.) Even then, they are near oblivious to threats (both in the narrative and actual gameplay).

As they would make it quite clear early on in a playthrough, they require the direction of the Arisen in order to express their full potential.
In gameplay terms, this means that the Pawns are the player’s party members, albeit impossible to control directly. They can be given general directions, but the player has no fine control over what they do. On the other hand, they are efficient, most of the time.
MAIN PAWN:
One of the pawns is the Main Pawn. This is the only character other than the protagonist whose progression can be controlled. The gear and items that this pawn carry are also within the player’s control. The main pawn also has his/her own experience and vocation experience meters, like the protagonist does; these will be described later.
QUEST KNOWLEDGE:
The Pawns are entities that can travel across timelines. This is the narrative excuse for them knowing things about a quest, including one that the player might not have undertaken before.
The Pawns who know something about a quest have red speech bubbles appearing over their heads. Talking to them has them making remarks about what to do next.
Doing this will also trigger any script to have them lead the player character to where to go next, especially after the player has gone out of urban areas. This seems handy, at least on paper. In practice, they are sometimes pre-occupied with this that they fail to notice nearby threats. Fortunately, as soon as they are attacked, they will snap into combat mode and fight.
However, the Pawns, including the main one, will not have any opinion on any story-affecting decision that the player would make. They will abide by any of the player’s decisions.
Pawns learn things about quests that they have not undertaken before as the player undertakes them. The Pawns generated by the game will learn too, but ultimately cannot benefit other players like the Main Pawns can. This advantage of the Main Pawns is of importance to one of the few multiplayer features of the game, which will be described later.
EXPERIENCE LEVELS:
Of course, Dragon’s Dogma is one of those games with a system of character levels and experience points. Experience points are obtained by defeating enemies and completing quests; this is, of course, nothing new. The game also uses the usual meter system to inform the player how many experience points are needed before reaching the next character level. Reaching the next level increases a character’s statistics in combat performance.

The protagonist and the Main Pawn have separate experience meters (and vocation ranks; more on these later). Whenever the player character gains experience points, the points are completely duplicated and given to the Main Pawn too. However, the Main Pawn can be eliminated from the party, typically through being “killed”. During his/her absence, the Main Pawn does not gain any experience points. There are also segments of the game where the protagonist is on his/her lonesome. This means that the Main Pawn is always a few steps behind the protagonist in terms of power levels.
Interestingly though, if the Main Pawn is out of commission for a while, he/she gains a massive bonus to his/her experience point gains; the size is commensurate to the difference in levels between the Main Pawn and the player character. He/She can catch up surprisingly quickly.
CHARACTER VOCATIONS:
The player character and the Pawns all belong to one “vocation” or another. A “vocation” is the equivalent of character classes in typical fantasy RPGs. A character’s vocation determines what he/she can do in combat, but does next to nothing for non-combat situations.
Low-level characters start with the “basic” vocations. These represent the usual class archetypes in fantasy RPGs, such as the front-liners, ranged damage-dealers, the healers and the combat magicians. The naming convention that Dragon’s Dogma has for them does not matter more than just being labels for these tried-and-true roles in a typical fantasy RPG party. (This review article will refer to some of the vocations by name, however, usually for the purpose of elaborative examples.)
It should be noted here that some vocations are off-limits to the Main Pawns. These are the hybrid might-and-magic vocations, such as the Mystic Archer and Mystic Knight. This limitation is not told to the player; it is only discovered after the player notices that the Main Pawn cannot be directed to take up these vocations. The likeliest reason for this limitation is that Capcom’s designers do not know how to design reliable behavioural scripts for them (but they would later design scripts for hostile Pawns in Dark Arisen).
VOCATION RANK:
The interesting thing about vocations is that they have ranks, not unlike character levels. Every time the player gains experience points, some of the points are duplicated and invested into the meter for vocation rank.
Reaching the next rank does not appear to increase a character’s statistics, but the player does unlock augments and other skills that can be “equipped” on the character; there will be more explanation on augments later, for this is one of the long-term meta-game features of Dragon’s Dogma.
DISCIPLINE POINTS:
The vocation points that have been duplicated from experience points are in turn partially duplicated into another kind of points. These are “Discipline” points, and they are used to purchase augments and skills. These points can be hoarded like a currency, to be used later whenever the player desires so; indeed, the player might have no choice other than to hoard them throughout a playthrough, because there are no worthwhile augments or skills that the player might want to buy.
Understandably, more powerful augments and skills are more expensive. This is especially the case for upgraded versions of skills.

CHANGING VOCATIONS:
Eventually, the player characters would hit the highest rank of their vocation. There is nothing left to be gained from this vocation, especially after the player has bought all the augments and skills that it offers. At this point, the player should switch vocations. This can be, for whatever reason, done at inns, soldiery camps or barracks. However, changing vocations is something that the player cannot readily do without planning, due to certain limitations.
Firstly, after a character has changed vocations, he/she no longer gets to purchase any augments or skills that have been unlocked by progress in the previous vocation, unless the augments or skills are also applicable for the current vocation. Fortunately, the character does retain the rank of any vocation that he/she has attained, and switching back does not cost Discipline points. (The player does have to return to an inn or resthouse, however.)
Secondly, there are gear pieces that can only be used by specific vocations. The player could end up losing the use of a piece of gear or more by switching vocations, if the player has not been paying attention to the requirements of the gear pieces. This can be a problem if the player does not have another separate set of gear to use. Furthermore, the game will force the character to unequip any piece of gear that is not usable by his/her next vocation.
AUGMENTS AND SKILLS:
Augments are practically passive bonuses or enablers that a character can “equip”, whereas skills are actions that the player has to actively use, typically through control inputs.
There is of course a limit on the number of skills that a character can have at any time; these are tied to the control inputs after all. This limit also applies to pawns too.
Augments are a different matter. As a character gains experience levels, the number of his/her augment slots increases, though there is still a hard limit on the slots. Therefore, the player will want to be careful about his/her choices of augments. (Typically, this will be determined by the player’s preferred playstyle.)
By the way, the player can only change the augments and skills of the protagonist and the main pawn, and not those of the other pawns. This is not unlike the limitation on the options of the party’s gear.
MELEE ATTACKS & SKILLS:
Melee attacks and skills generally do more damage than ranged ones, but obviously, characters need to get close to their targets in order to use any of them. This is easier said than done in Dragon’s Dogma, because terrain is actually a significant matter in combat. Although terrain does not impart any overt gameplay effects, rough terrain can slow down the approach of melee combatants. Similarly, if a character wants to hit the weak spots of monsters with melee attacks, he/she has to be get right on top of these spots.
Incidentally, many melee attacks happen to impede the enemy. Many of the front-line vocations have skills that can toss enemies around, or hobble them if they cannot be thrown to the ground. This is just as well, because one of the responsibilities of the front-liners is to prevent enemies from getting to the squishier party members.

RANGED ATTACKS/SKILLS:
Ranged attacks are performed through the use of weapons like crossbows and bows. This is generally the purview of archery-oriented vocations (though this is not the only things that they can reliably do).
Obviously, the purpose of these ranged attacks is to engage enemies for afar, preferably hurting them plenty before they reach the player’s party. There are also some ranged skills that can slow down enemies, or even knock them down. Ranged attacks are also the most reliable means of hitting the weak spots of enemies, such as the eyes of cyclopi.
Some ranged skills have animation speeds that are independent of the attack speed of the weapon that has been equipped by the character. Indeed, some of these can be quite slow, thus requiring the player to have some means of slowing the enemy down or at least distracting them while using the skills.
Ranged attacks also suffer from damage and accuracy fall-off over distances. It is very unlikely that an arrow can hit anything at long distances; “long” being generally defined by the relative size difference between the silhouette of the target and the aiming crosshair. Even if the arrow hits, it might not do much.
SPELLS:
Spells are the most arduous of combat skills, no thanks to their long-casting animations. However, the benefits that they can impart on the party and the damage that they can inflict on the enemy is considerable.
Most spells are the kind that target individual enemies. More often than not, these are explosive too, often affecting any enemies that happen to be close to the targets.
Some are the kind that are placed on the ground with a dome-like area of effect that lasts for a while. These are a particular rarity in video games with fantasy settings, but after having experienced the gameplay in Dragon’s Dogma, it is an understandable design. Most enemies will move about such that they rarely cluster together, but they do not seem to consider any hazards in their path.
Some spellcasting vocations also allow characters of the same vocation to cast mutually known spells simultaneously. This increases the power of the spells. On the other hand, this means that the composition of the party has to be lopsided towards one vocation, which is not a good thing.
Theoretically, any spell-casting character can smash apart entire groups of enemies on his/her own – if he/she is not assailed while casting spells. Most spells take a while to cast, especially the higher-end ones, thus requiring other party members to act as foils or impedances while they do their work.

HEALING SPELLS:
Among the spells that the player would want are healing spells. All healing spells are always dome-shaped, albeit the boundaries of the domes are not visible.
This means that party members will need to stay in one place in order to heal. This is not always practical, especially if there is a large monster that happens to like stomping around a lot. Yet, even the least of healing spells can heal rapidly, and the better ones leave lasting healing-over-time buffs.
Such a design also made it possible for the game designers to implement self-preservation scripts for the Pawns. Any Pawns that are low on health will saunter over to the healing zones to heal – even if a huge monster is looming down on them.
ENCHANT SPELLS:
The other kind of spells that the player might want are the enchant spells. These spells imbue a character’s weapons with additional damage properties that make them more potent against any enemy that is not resistant to it. These spells are essential, because there are many enemies that are resistant to mundane weaponry: ghosts, undead, and monsters with tough hides, to name some. This means that the player needs to have at least one magician in the team that has such a spell, in addition to a magician that has a healing spell. (Preferably, the magician should have both.)
OFFENSIVE SPELLS:
Unlike spellcasters in other video games, the magicians in this one are not glass cannons. Of course, they are still squishy, but they do not have the damage output that an experienced player might expect from magic-users. This is mainly because of their casting times.
That is not to say that they are useless against enemies in the long run. Rather, the main reason to use their offensive spells is for the de-buffs that are applied on enemies. These affect the statistics of enemies and trigger responses from certain monsters, if the correct spells are used. These will be described later when the weaknesses and behaviours of enemies are described.
LASTING DAMAGE:
Healing spells are of course cheap and free ways to heal; the player can, after all, direct a Pawn that has them to heal the party outside of combat.
However, to prevent the player from abusing healing spells, not all damage that has been inflicted on a party member can be healed; about 90% of lost health can be recovered, as is shown by a light grey fill in the health meter of a character. (Players with colour-blindness that concern colour intensities may have a problem seeing them though.) The next hit shrinks the fill, as well as reducing health. A character’s health can only be restored by healing spells to the edge of the grey fill.
To heal the semi-permanent damage, the character needs to use healing items. In the case of the protagonist, the player has the convenience of being able to use them at any time by simply bringing up the inventory (which pauses the game). However, the Pawns will only use any healing items that they have if they have taken severe damage, for better or worse. (Better, if the player wants to conserve healing items; worse, if the player prefers to keep them at tip-top health.)

However, Pawns do have the advantage of healing automatically if they come into proximity with a Riftstone (which will be described further later). The protagonist cannot heal this way, however.
STAMINA:
Taking a leaf from Monster Hunter and perhaps the King’s Field successors, Dragon’s Dogma has a system of stamina that determines what a character can do in a short amount of time. Almost every action in combat would drain the character’s stamina; the special skills of the character’s vocation are particularly voracious.
Obviously, if a character runs out of stamina, he/she is not capable of doing anything further; he/she can only put his/her hands on his/her knees, panting heavily while his/her stamina regenerates. The player character is very vulnerable at this stage, so the player will not want to overtax his/her character.
Strangely, only the player character’s stamina is shown. The stamina meters for the player’s Pawns are not shown. It is not entirely clear whether the system of Stamina applies to them too or not, even though they do have Stamina statistics.
CARRY WEIGHT:
For better or worse, Dragon’s Dogma is one of those games that has an inventory design that mixes unbelievable convenience with believable limitations, resulting in a silly blend. This design insists on each party member carrying his/her own stuff, all of which goes into somewhere on or in his/her person regardless of their volume, yet there is a limit on the total amount of weight of all the stuff. The stuff also includes whatever gear that they are equipped with.
Experienced game consumers might utter a groan when they realize the presence of this system, because it is one that requires the player to frequently check the weight amount of the stuff that party members are carrying. Redistribution of the loot that they are carrying is even more of a hassle.
The carry weight of a character is dependent on his/her vocation. Typically, front-liners can carry the most. However, much of that weight capacity would be taken up by their gear; it so happens that the gear for front-liners are heavy things, such as metal armor and weapons. There are some augments that can increase carrying capacity, but that means that one augment slot has been taken up by something that does not contribute to the character’s combat performance.
The current weight of a character is also affected by anything that the character is hauling around, such as rocks, barrels and bodies. This is of particular significance in a number of scenarios. For example, there are regions of Gransys where the winds are abnormally strong and capable of blowing light characters around; in such a case, a light character can compensate by hauling something heavy around.

CHARACTER BODY BUILD:
The body build of the player character and the main pawn is a feature that the player can control during character creation. This is not just an aesthetic feature.
The body build of a character does determine a character’s carrying weight; typically, beefier and taller characters can carry more. However, such characters restore stamina slowly, and their animations appear to be noticeably slower. Bigger humans, of course, also have bigger hitboxes.
(Taller humans also have faster jogging and walking speeds, but they have no advantage in full sprints.)
Such significances can be a lot to take in for players who are used to video games where the body builds of a human does not matter much at all. Fortunately, the game does make it clear during character creation that this does affect a character’s physical performance.
EFFECT OF WEIGHT ON MOVEMENT SPEED:
As if the weight capacity is not enough of a problem, there is the effect of weight on the movement speed of a character and the rate of depletion of his/her stamina. To represent this, the carrying capacity and the weight of the stuff are represented by a meter with sections. These sections represent the penalties on the movement speed and stamina of the character. Having more sections filled up means more cumulative penalties.
These penalties are the reason for the player having to redistribute weight around. Moving about is essential in this game’s combat, after all.
STATISTICS:
Like just about any other fantasy RPG, Dragon’s Dogma has a system of statistics that determine a character’s performance in battle. There are hit-points, Defense and Magick Defense, which are collectively the durability of a character. There are the aforementioned Stamina, Strength and Magick, which determine how much damage that the character can inflict in a given time. These are the primary statistics of a character.
There are also secondary statistics, which determine the character’s capability in the more nuanced aspects of combat. These will be described later.
Primary statistics grow with each level-up. Generally, a character grows a bit more powerful with each level gain. However, the main problem with primary statistics is that the growth in stats upon each level up is not made clear in-game, other than a general statement that characters grow more powerful with each level up. The association of the stat growths with the character’s vocation is not made clear either.
Fortunately, even if the player realizes this rather far into a playthrough, there is not much potential for min-maxing that has been wasted. The various vocations, from the starter vocations to the advanced vocations, have relatively balanced stat growths in terms of overall numbers. The main differences between them are the skews that they have towards specific stats. For example, the difference between the Warrior and the Fighter – both being melee-oriented front-liners – is that the Warrior gets more hit-points and attack strength, whereas the Fighter has better Magick Defense and Stamina growth. In other words, it is up to the player’s preferred playstyle.

More importantly, a character’s gear and ability are far greater factors in determining his/her combat performance. His/her stats are, at best, just smaller numbers that are stacked onto the numbers that represent his/her combat performance.
STASH:
Fortunately, Dragon’s Dogma has a feature that is now one of the genre standards for fantasy RPGs: a stash. The protagonist’s stash is, handily enough, somehow managed by a bunch of innkeepers and logistics officers. The player can access the stash by speaking with any of these characters.
Strangely though, the acts of depositing items and withdrawing them are implemented as separate functions. If the player is depositing things, the player is only shown the inventories of characters, whereas if the player is withdrawing things, the player is only shown the stash.
This makes it impossible to simultaneously keep track of what is in the party’s inventories and that of the stash. The player has to go through the hassle of depositing surplus stuff and loot before withdrawing items to resupply the party.
There is also a hard limit on the number of items that can be kept in the stash. However, the limit goes into many digits; it is very unlikely that the player ever would have too many things, especially if the player has been actively consuming stuff. Besides, the loot drops from enemies and containers are not as copious as one would think.
AGGRO MANAGEMENT:
The player’s team only ever numbers four. They are often outnumbered by their enemies, so it is important that the player monitor the movement of enemies so as to determine who they are focusing their attacks on, if impeding them is not possible.
Most enemies do not focus their attacks, but there are some that do target specific members of the player’s party, especially the spell-casters. In such cases, the player might want to have party members that can draw attention to themselves. It so happens that the dedicated front-line vocations have skills that do just that.
The problem here is that unless the player character is of such a vocation himself/herself, the player can only cross his/her fingers that the pawns will use such skills when it is critical to do so. Thankfully, they are usually good at knowing when to do so.
WEAKNESSES AND BEHAVIOURS OF MONSTERS:
Almost all monsters have weaknesses or habits that can be exploited. This is not immediately clear to the player, if he/she is encountering a monster for the first time and has yet to look up the wiki entry for this enemy. However, the player’s Pawns, especially the ones who are not the Main Pawn, might know how to deal with a monster.
The Pawns who do know how to deal with them will call out the monster’s weakness or bad habits, if any. Even if the player knows them already, they will mention them anyway, if only as reminders.

The degree to which a Pawn knows about a monster is measured in star-based ratings. Having more stars means that they know more. For example, the highest star rating means that the Pawn knows about any weakness to specific elements that the monster has, any of its special attacks, its target preferences and any weak spots.
The Main Pawn starts with next to no knowledge about monsters. However, he/she can learn from any encounter with a monster, as long as anything about a monster has been demonstrated. She/He can bring this knowledge into another player’s game.
The most important reason to have a Pawn know as much as possible about a monster is that the Pawn will exploit a monster’s idiosyncrasy where possible, if he/she knows it. For example, a Pawn that knows that there is a weak spot on a monster will climb it and hurt it at the weak spot. Indeed, a Pawn or two that do this can very quickly whittle down even the most powerful of monsters.
Of course, the player could have just studied a monster’s entry on the wiki for the game and know its weaknesses and attack patterns before even fighting them. There is no reason to wait for the Pawns to figure things out when the player can have the protagonist doing most of the legwork (and teaching them at the same time).
CLIMBING LARGE MONSTERS:
The main appeal of fighting large monsters is that the protagonist and Pawns can climb onto them and stab or maul them in their soft spots.
Dragon’s Dogma makes this possible through the use of a layer of hitboxes for climbing that has been overlaid onto the regular hitboxes for the monsters. This layer is dedicated to the system of climbing. With this layer, a character can climb along the contours of the body of a monster, in almost every direction. For example, a character can jump onto the hind leg of a monster, climb around its leg and over its crotch, and up over its rear end onto its back. Of course, there are few practical reasons for such an elaborate (and silly) path.
The main reason to climb onto a large monster is to reach its weak spots, which tend to be inaccessible from the ground. The monster might also move too much for ranged attacks to be effective.
LARGE MONSTER’S DEFENSES AGAINST CLIMBING:
Of course, the monsters will not tolerate humans crawling all over them and hitting their tender spots. Many monsters have ways to deal with this.
For one, if they have hands, hand-like extremities (e.g. the talons of dragons), or any grasping appendages, they might just slap the human like a fly or swat him/her off like a fleck of dust. Worst of all, they might grab the human.
The “tell” for a grabbing attempt can be as slow as the lumbering motions of an ogre’s tree-trunk arms, or short enough that there is almost no warning. The latter case almost always happens for particularly tough bosses (like a certain dragon).

After a human character has been grabbed, there is very little that he/she can do. In the case of some monsters, and if the protagonist is the one grabbed, the player has a chance of breaking free, but this requires a button-mashing quick-time event that can be quite irritating.
If the human character cannot break out, bad things happen. Ogres toss him/her away, cyclopi take a bite, dragons slam him/her into the ground and some others squeeze. The human character will also take damage from a fall, if any.
The human can be released by having the monster’s hand (or equivalent) vigorously attacked. This releases the human (though he/she will take damage from any long fall), and causes the monster to do a flinching animation that can buy some time for the player’s party to inflict some more damage.
Monsters that do not have hands or grasping appendages often resort to shaking humans off. This is generally a futile attempt, for as long as the human (generally the Arisen protagonist) has the stamina to hold onto them, he/she cannot be shaken off. On the other hand, this does greatly deplete a climbing character’s stamina (which can be regained by opening the inventory and consuming a Stamina-restoring item anyway).
However, being shaken off is often a bad thing; the character is tossed prone onto the ground, and has to make a getting-up animation. Being shaken off flight-capable monsters while they are high up in the air is guaranteed to be fatal.
The mechanism for climbing is perhaps the greatest achievement of Dragon’s Dogma. It even marks it above certain other IPs of Capcom, especially the Monster Hunter series, the latest entry of which (at this time of writing) still lacks free-form climbing on monsters.
HUMAN ENEMIES:
Following the story-telling trend of modern-era fantasy stories, Dragon’s Dogma has adversaries that are very much other people. These include the genre staple of bandits and robbers, as well as soldiers and knights who serve slighted lords.
These enemies have skills that are similar to the player’s own. There are bandits with arrow barrages that work similar to the archery-oriented vocations, mages who can cast spells and brutes whose attacks can stagger their victims like front-liners can. Having foreknowledge of the skills of multiple vocations can help a lot in recognizing these attacks, especially in the case of attacks that take time to be prepared (namely spells) or have noticeable wind-ups (namely powerful melee attacks).
Human enemies more often than not outnumber the party, but they lack the direction that the player’s party have; even the Pawns acting on their own without any orders from the player still perform better than they do. Then, of course, there is the fact that the player controls the player character. It might seem daunting having to fight enemies that have the same skills, but they are actually not much of an obstacle for an experienced player who can see their attacks coming.

PICKING UP HUMANS – AND HUMAN-SIZED MONSTERS:
One of the easiest ways to disrupt the animations of human and human-sized enemies is to pick them up. Almost any character can do this, but muscular and big characters do this much better than anyone else; the size difference between the wrangler and the target matters.
However, the player should observe the posturing of the target (the Pawns certainly will). This is because only the default combat posture makes the target vulnerable to being picked up. (If they had not been made aware of the player’s presence, they can definitely be picked up.) The body parts of some monsters also prevent grappling from certain directions. For example, Saurians’ tails, as long as they are still attached to their bodies, prevent grappling from behind.
If a human or humanoid target is picked up from the front, it is carried on the character’s shoulder. If the target is grabbed from behind, it is immobilized and rendered vulnerable to attacks from the front. For some monsters, especially the non-humanoid and fast ones, the character pins them down instead. In any case, there is not much the target can do other than to flail about.
If the target is an enemy, it will eventually break free; it breaks free earlier if the size difference is smaller, and even quicker if the target is larger than the wrangling character. Nevertheless, there will be at least a second or two during which the target is vulnerable.
Speaking of which, enemies that are immobilized from grappling take much more damage from attacks. Pawns are quick to capitalize on this (including even the magicians). If the Pawns intend to have the player character perform the finishing blows, a slow-motion zoom happens when they grapple enemies while they inform the player of what they are doing.
In the case of humanoid targets that are being grappled, they can be tossed onto the ground if they are being carried over the shoulder, or just kicked forward if they are being grappled from behind. In either case, the targets will need time to get up, during which they are vulnerable to attacks. They do not suffer additional damage, however.
PICKING UP INANIMATE OBJECTS:
Characters can also pick up rocks, barrels, pots and any suitably-sized inanimate objects. They can either put them down elsewhere, or hurl them. In the latter case, they are likely to be destroyed, with the exception of rocks (which can be picked up again, if the player so chooses). However, in combat, explosive barrels are perhaps the only object that is worth being used in such a manner. On the other hand, the wind-up to the throw is so long as to make this option unreliable.
KNOCKDOWN:
All attacks have a Knockdown rating; this is especially so for the attacks of large climbable monsters. The Knockdown rating of an attack that landed is in turn resisted by the Knockdown resistance of a target. In the case of human characters, this resistance rating is generally determined by how heavy their armor is.
In the case of a human-sized (or slightly larger) target, if the target’s resistance is lower than the rating, the target is knocked down and has to spend time to get up. If the target’s resistance is higher, he/she/it is merely displaced.

Large climbable monsters are of course immune to knockdown attacks, but this is because they have a mechanism of their own for the matter of falling down. Any limbs that such monsters use for support on the ground have invisible meters that track how damage has been inflicted on them by hitting the monsters at these limbs. These meters deplete over time, but piling pressure on specific limbs outpaces the depletion. If the meters are filled, the monsters stumble and fall down. In this case, their size works against them as their getting-up animations are rather long, during which the player can pile more pressure on them.
Hitting their soft spots at moments when they are vulnerable to attacks also causes them to collapse. For example, Cockatrices expose their weak spots when they are charging up their most powerful attack; hitting these spots disrupts this powerful attack and makes them crumple onto the ground.
STAGGER:
Attacks also have Stagger ratings. Like Knockdown, the ratings are compared against the corresponding resistance rating of the target. If the target fails, he/she/it has his/her/its current animation interrupted, which is then followed by a stumbling or staggering animation. Understandably, staggering attacks are best used against enemies that have powerful attacks with long wind-ups, or spells with long casting animations. Large climbable monsters are immune to staggering, of course.
HIT-AND-RUN:
There are some enemies that resort to a lot of hit-and-runs. Wolves (and wolf-like enemies) and harpies (and their demonic variants) are particularly fond of such tactics. Incidentally, these enemies tend to have the lowest Knockdown and Stagger resistances. Moreover, they appear to have invisible meters that track how much damage that they have been taking in a short amount of time; if they take too much damage in too short a time, they are immediately knocked down and winded. They are very vulnerable during these moments, especially to pinning.
ROCK-PAPER-SCISSORS:
Dragon’s Dogma has a system of elemental damage and resistances, which long-time veterans of combat-oriented fantasy RPGs would be quite familiar with. Capcom’s designers tried to make it seem different by calling it “Archmagicks”, but it works the same.
However, the elements do have an additional layer of complexity. This layer uses invisible meters that track the amount of element-laced damage that has been inflicted on a target. If the target has taken enough damage laced with one element to fill a meter that is associated with that element, it is inflicted with the secondary effect that is associated with that element. (By the way, the elements are Fire, Ice, Lightning, Holy and Dark.)
Attacks with the element of Fire, as its name suggests, sets things on fire, thus applying damage over time. Some monsters, such as goblins, do not like fire and will panic helplessly when they are alight.
Ice attacks freeze targets. A frozen target turns into an icicle that can be shattered for considerable damage, often killing it outright.

Once Lightning attacks have built up enough charge, Thundershock is triggered: lightning jumps from one enemy to another that is in close proximity. Any enemy that is struck by this lightning has to test for Knockdown and Stagger. Obviously, lightning attacks are handy to use if the player expects to be fighting in close quarters against many enemies. (Incidentally, encounters with goblins are exactly such scenarios.)
Holy attacks do not inflict damage on the target, but heals their user instead.
Dark attacks are the nastiest. When the meter for Dark damage is filled, the next Dark attack inflicts a guaranteed critical hit. Dark attacks are also often paired with de-buffs, which are likely applied when the critical hits occur. However, many monsters are resistant to Dark damage, being borne from darkness as most of them are.
Interestingly, the mass of the weapon that is used to make attacks laced with elemental damage does matter. This is implemented through a percentage modifier on the cumulative points that go into the meters that are associated with the secondary effects of elemental damage. For example, hits with daggers inflict the least elemental points, but this is balanced by their prodigious attack rate.
BUFFS AND DE-BUFFS:
Buffs are called “invigorations” in-game. The most common buffs are those cast by magicians: these are buffs that grant elemental properties on weapons (or replace existing ones, if any). There are two levels of potency to these buffs, called “Boon” and “Affinity” respectively (Affinity being the stronger one).
The other buffs are not so readily available. Many of them come from consumable items that characters have to carry around. Some of these items are also difficult to get, either due to being sold in small amounts by specific vendors or due to their ingredients being very rare. Therefore, using such items is a matter that requires careful decisions. Some buffs come from skills, but these skills also often grant de-buffs at the same time.
Buffs other than those by the enchantment spells happen to have very short durations – shorter than de-buffs, even.
De-buffs are called “debilitations” in-game. There are many of them, though most of them are associated with Dark-element attacks. Most of them do not outright incapacitate a victim, but they do slow them down, diminish their combat performance or inflict damage over time, among other things.
De-buffs have notoriously long durations. However, there are also many consumable items that can remove de-buffs. For example, Eyedrops, which are easy to get, remove Blindness.
Buffs and de-buffs have icons that appear in the inventory screen and under the list of conditions in the status screen. They also appear in the heads-up display, next to the health meter of any character. However, only one icon is visible at a time; if there is more than one buff or de-buff, the game cycles the icons, even though this is not really a good solution. There are other visual indicators, but only those for the latest-applied buff or de-buff are shown.

RIFTSTONES:
Riftstones are the aforementioned stones that are associated with the Pawns. Riftstones heal any Pawns in proximity, but not the player character. Nevertheless, the Arisen can interact with any stone, which sends him/her into a pocket dimension that is frequented by (inhumanly patient) Pawns looking for employment.
The Pawns that are standing around waiting for the player’s decision can be examined at any time, or just dismissed. However, there are only ever a handful of Pawns around. The player can dismiss any undesirable Pawn, who runs off into the abyss. A new Pawn with different capabilities then comes in.
Pawns that are encountered in the Rift appears to be of the same level as the player character. They are handy if the player wants to replace under-levelled Pawns as soon as possible.
If the player is playing online, the Pawns of other players may appear too, especially if the other players are the player’s friends on whichever community platform that the player is connected to. (In these cases, the other players’ Pawns may be of different levels.)
There are other nuances concerning the hiring of other Pawns, which will be described later.
WANDERING PAWNS:
Pawns are also wandering about the game world, for whatever strange reason. (There is canonical speculation that the masters of these Pawns are otherwise unavailable, or just dead.) These Pawns will readily join the player’s party, provided their recruitment cost is paid and there is an empty slot in the party. If the player’s party is full, the player can choose which Pawn to replace.
The main appeal of the wandering Pawns is that they might be of a higher level than the player character. They may also have more quest and bestiary knowledge, which makes them doubly even more useful.
However, Wandering Pawns will not defend themselves from monsters and bandits.
FAVORITE PAWNS:
If the player has hired a Pawn of another player that happens to be quite capable (likely due to careful min-maxing on the other player’s part), or the player has come across a wandering Pawn that is of a particularly high level, the player might want to tag them as Favorites. This handy feature guarantees that they will appear in the Rift when the player character enters it.
RIFT CRYSTALS:
Rift Crystals are another currency to look out for.
In the base game, the main use of Rift Crystals is the hiring of Pawns with higher levels than the player character; pawns of equal or lesser levels have zero price in crystals. Obviously, more powerful Pawns are more desirable, assuming that the player has examined their gear and skills to make sure that they are not flukes with incompatible assets.
Rift Crystals can be found as rare loot from certain enemies, or as the reward of some quests. In fact, there are some quests (that originated from much-maligned DLC packages for the original version of the game) with hefty rewards in Rift Crystals.
The Dark Arisen expansion has more uses for Crystals; this will be described in a different review article.

JONATHAN:
Rift Crystals are also used to purchase special items that are only sold by a certain vendor of the name “Jonathan”. In the computer version of Dragon’s Dogma, this is not an issue. The player could grind the Crystals for them, though some of them has exorbitant prices, and are next to useless when compared to gear that is bought with gold. Some of them do not even appear on the player character’s model.
(In fact, the descriptions of the items that happen to be useless state that the player would buy these just for the sake of buying them.)
There was a contentious issue in the original PS3 and Xbox 360 versions of the game. The problem was that these items are only available for sale after certain DLC packs had been purchased; having to fork out Rift Crystals for them when they were already paid for with real money can seem onerous. Worse, Rift Crystals could be bought through microtransactions.
Fortunately, such a system was swept away with regards to the computer version (and the PS4 and Xbox One versions) of the game. Jonathan is still there for players with more Rift Crystals than they need.
THE BLACK CAT:
If Jonathan’s “Rift Shop” is the shop for DLC stuff that has to be bought with Rift Crystals, Montebank’s Black Cat has DLC stuff that is bought with gold. Fortunately, in-game gold cannot be bought with microtransactions, but that also means that gold has to be obtained through considerable effort. Incidentally, the Black Cat shop has incredulous price tags on its goods, with the only reason for this being the narrative excuse that they are not entirely legal goods sourced from “secret” sources.
For better or worse, there is a work-around for this: there are metal idols that can be kept in the player’s inventory to reduce the prices of offered goods. However, these idols are heavy.
NO EQUIPMENT CHANGE FOR OTHER PAWNS, AND GIFTS:
As mentioned earlier, the equipment for the pawns other than the Main Pawn cannot be changed - or removed, if the player is thinking about exploiting the system of Pawn hiring for profit.
However, the player could give pieces of gear to these other Pawns; the game will inform the player that these gear pieces will be considered as gifts, and cannot be retrieved once given. (The other Pawns will also have to deal with the weight of the items that are gifted, if they are given while the party is not in the Rift.) If the other Pawns are owned by other players, the other players will receive them when they receive any Crystal earnings that their own Main Pawns have accrued.
The game could have been better if the player could temporarily change the gear of other Pawns, “loaning” them better gear while they are still in the player’s employ. Alas, this is not so.

HIRING OUT MAIN PAWN:
One of the few multiplayer features in the game is the hiring out of the Main Pawn, thanks to the convenient piece of lore that is the multi-dimensional nature of the Pawns.
As soon as the player’s Pawn has been created and as long as the player is connected to the online service for the game, he/she will be present in the world of other players, sometimes as wandering Pawns or Pawns in the Rift, if the other players are connected too. The Pawn could be hired by anyone.
The Pawn collects the Crystal fee that the other players pay, if any, while also earning additional Crystals as long as other players are employing them; these additional Crystals are not paid by other players, but are generated automatically.
Any Crystals (and gifts) that a player’s Pawn has accumulated will be turned over to the player when he/she returns to the game. Alternatively, the Pawn will turn over his/her earnings when the player character rests at inns.
This feature is of course there for the sake of grinding Crystals.
GATHERING ITEMS:
Throughout the playthrough, the player would be coming across ingredients and materials that are growing in the wild, taken from containers (smashed or opened), or looted from defeated enemies. There are a lot of sources of these, though none of them would surprise any player that has played the Elder Scrolls titles for a long time. Conveniently though, the sources of these items periodically flash or are otherwise highlighted with higher contrast, making them easier to identify.
Some sources are not highlighted, but the player would eventually learn about them when the party comes close to them. The player might have button prompts appearing on-screen, informing the player that the player character is close to a gathering spot. The player might also see Pawns gathering things, something that they will readily do (and something that the player can learn from them, if the player does not know already).
However, there are a few gathering spots that are not marked and are ignored by Pawns. For example, there are loot-bearing corpses in the locale beyond Barta Crags. Perhaps the designers forgot to activate the Pawns’ searching scripts, or activate the visual highlights for these item sources.
Item sources are eventually respawned after several in-game days, so the player theoretically could make mental notes of the whereabouts of specific item sources and do a collection circuit every once in a while. This is, of course, quite pedantic.
Perhaps the least fun thing about gathering items is the weight limit. It can be frustrating to have a gleeful gathering spree befouled by the realization that some party members had been slowed down by their loads.

COMBINING ITEMS:
The inventory management is tedious, but there is one shining appeal that it has: mashing stuff together to make other stuff. All recipes for combining items are actually available from the start, but bits of details are hidden from the player until the player gains the ingredients or components for the combinations.
Even so, the actual product of the combination is hidden from the player, until the player actually attempts the combination. This means that the player might have to risk rare items. Furthermore, the resultant item from a combination may not retain any of its ingredients’ properties. Of course, the player could just resort to looking at the wiki, if first-hand learning is unpleasant.
Combinations can be done at any time; indeed, the player is likely to resort to combining items just to lighten the team’s loads. However, this is a poor choice in the long run, because the player’s choices are limited. The player is better off dumping items into the stash, and use the combining option in the list provided by stash-managing NPCs. Indeed, the player might want to do this before resupplying the team with consumables.
UPGRADING GEAR:
As had been mentioned earlier, gear determines most of a party member’s combat performance. Therefore, the player should either swap out current gear for superior gear, or upgrade that current gear to better ratings. The latter happens to be a better choice, unless of course, the player could upgrade the superior gear instead, for which the results would be even better.
In the base game, gear upgrades require the expenditure of gold and some items, which tend to be loot drops from specific monsters. This means that the player might have to look for these items if he/she really wants to upgrade something. This can be a problem since the game does not tell the player what a monster drops until it drops it, or where items that are not associated with monsters can be found. (Of course, the player could just search the wiki of the game for this, just to save time at the expense of immersion into the game.)
Interestingly, if the player can find the ingredients for the highest regular upgrade before the ingredients for the previous ones, the player could upgrade a piece of gear to the highest regular rating outright. This means that a player can save money, ingredients and trouble by going for the third rating, but that also means that the player would not be benefiting from halfway-there upgrades while looking for the ingredients for the highest regular upgrade.
A minor but noticeable problem with the system of gear upgrades is that the player could not compare gear pieces at the same rating levels. This could have helped the player plan upgrades.
ROTTING AND AGING ITEMS:
Some items are labelled in-game as “time sensitive”. This means that they change into other things the longer they stay in characters’ inventories. This is usually for the worse: fresh consumables like meat dropped from slain beasts and newly harvested plants eventually rot into rancid things that are only useful for the creation of poison-inflicting ammo. Some others simply disappear.
However, there are some time-sensitive items that become better over time; this is called “aging” in-game. For example, regular eggs can be left in the inventory to age into Golden Eggs, which – like they famously did in the Resident Evil series since the fourth game – heals and restores stamina considerably.
Unfortunately, in the base game, there does not seem to be any way to age such items other than to carry them around in the characters’ inventory. Some of these items can be heavy, such as Ambrosial Meat. The game’s method of informing the player that they have aged into more valuable items is also insufficient; it uses little more than the brief pop-up that appears whenever the player picks up anything.
Aged items can be preserved with Airtight Flasks, which appear to have been implemented in the game specifically for this purpose. However, doing so adds to their weight, which might not be desirable.
Interestingly, storing time-sensitive items in the stash preserves them, thus giving the player the convenience of planning about what to do with them in the future. Furthermore, time-sensitive items that are lying about as loot do not age or rot either.

FORGING ITEMS:
Mountebank of the Black Cat contraband shop offers the service of forging items, i.e. making forgeries of them. This service can be used for some quests, while the player retains the original (to be used for more copies, of course). Forgeries, however, take time to be made. On the other hand, they give the player a good reason to visit Mountebank regularly.
Strangely though, items that are not usually believed to be imitable can be copied, and the copies actually work like the original. (Mountebank is coy about how this is so.) For example, Golden Eggs – of all things – can be copied, thus giving the player a good source of reliable healing items.
FAST TRAVEL:
There is a fast travel system in Dragon’s Dogma, and it understandably uses magic (specifically the magic that affects the Arisen, the Pawns and sometimes others that are part of their party). Using a magical object called a “Ferrystone”, the party can be teleported to “Portcrystals”.
There are two kinds of Portcrystals: a ring of small standing stones, and a large but portable crystal. There are only two of the former: one ring is next to the Pawn Guild in Gran Soren, and one is just outside the sea-side town of Cassardis, the home of the player’s Arisen. These two places will be visited the most – which is just as well, because the original version of the game only has the one in Gran Soren, which drew a lot of complaints.

The portable ones are also scarce, and was even scarcer in the original version of the game. Furthermore, after the player has retrieved a Portcrystal, the player can no longer warp to the location that the Portcrystal was in. To use the Portcrystal again, the player’s party has to deliberately reach where the player wants to place it. Portcrystals are also heavy.
Not all places allow the placement of Portcrystals either. Indoor and underground places, in particular, block this.
In the original version of the game, in order to teleport to Portcrystals, the player has to use Ferrystones, which are consumable items that also happen to be quite rare to find and expensive to buy. Understandably, that such limitations are around in a time when convenient fast travels are the norm caused a lot of complaints – more so when one considers that the game is inspired by the Elder Scrolls titles, which had long gone past such tedium. There were arguments that defended this, but “character-building” is a weak excuse for gameplay designs that necessitated so much tedious and unrewarding busywork.
By the time of the Dark Arisen expansion, this has changed for the better. The ring of stones outside Cassardis was implemented (complete with remarks from Pawns who wondered if they were there before). More Portcrystals were added into the game too.
Most importantly, the player gains the Eternal Ferrystone, which is a Ferrystone that can be used over and over. This effectively makes all other Ferrystones vendor trash. Incidentally, their prices have also been greatly decreased.
NIGHT AND DAY:
As to be expected of an open-world game, the world in Dragon’s Dogma has an accelerated day-and-night cycle. A day lasts barely half an hour, and night just as long. This cycle does happen to affect gameplay.
During the day, human NPCs go about their business, travelling from one place to another. Everything outdoors is also obviously well-lit, such that the player can see threats quite far away.
During the night, the outdoors become quite dark. It is next to impossible to see beyond several steps ahead, whereas monsters do not have such an impediment. The player character and the Pawns can equip lanterns (fuelled by flasks of oil), but these (even with an augment that bolsters them) would not penetrate far into the darkness of the outdoors.
The only warning that the player would have about encroaching threats are the exclamations by the Pawns, and even so, they are already quite near. Furthermore, during the night, sunlight-fearing things like the undead comes out.
If there is any incentive for going around in the night, it is the presence of those very same sunlight-fearing things, or rather, the loot that they drop. There are also some quests that can only be completed at night.

Most NPCs follow a day-and-night cycle in their behaviours and routines, but some do not. They happen to be the NPCs that sell things and run inns, among other services that the player would like to have as readily available conveniences. This means that the player might come across some goofy scenes, like shopkeepers who seem to be standing on the same spot all the time, without doing much of anything else. Of course, to some players, this exchange of believability for convenience might be alright.
QUESTS & QUEST-BOARDS:
As an experienced game consumer might expect from a fantasy RPG, there are quests to pursue for rewards and/or to progress down the storyline. In the case of the latter, the quests are always provided by NPCs who just walk up to the party and talks to the Arisen; people who have played the Elder Scrolls titles would find this all too familiar. Some optional quests (called “side quests” by veterans of Western RPGs) are also obtained from NPCs, albeit the player walks up to them and talks to them instead of the other way around. Conveniently, these NPCs have noticeable speech bubbles over their heads.
The other optional quests are busywork. Incidentally, they are posted on quest boards, one of which can be found outside any inn or rest-place. There are also boards around a certain Riftstone or two.
Most of the quests on quest-boards are the old “kill X number of monsters” or “collect X number of things” hum-drum. Fortunately, many of these can be completed while the player’s party is pursuing more interesting quests and/or exploring places, but the player has to regularly check boards and take them when they appear.
ESCORT QUESTS:
Escort quests are among the optional quests that the player can pursue. As an experienced game consumer might expect - and dread – the player has to escort an NPC across the lands to somewhere. Sometimes, the quest provides an explanation of why the NPCs want to go there, but sometimes it does not.
The NPC does not have the decision-making scripts of Pawns, meaning that they are sub-optimal combatants at best. That is, assuming that they are even capable of fighting. Some NPCs, which are based on non-combatant NPCs like travelling merchants, are completely incapable at battle. Worse, these NPCs might even walk into the path of enemies, who will attack them. Since they have scripts that merely make them follow paths, they would not even protect themselves.
Fortunately, the player could at least use the Ferrystone to warp them and the party over to a Portcrystal that is closest to the destination. The player also has no time limit on the escort mission, so the player can rest the night away and continue the escort in the morning, when the conditions are more conducive to keeping an eye on the client. However, the player may not take on another escort quest.
One of the reasons to do such quests is that they reward the player with some items that can be riskier to get in ways other than escorting people. Another reason is that they increase the NPC’s affinity with the player character, which does affect a few aspects of the endgame.

JUMPING, RUNNING & VAULTING AROUND:
The player character and the Pawns are incredibly athletic people, even if they might not seem so. They can sprint, jump and vault onto things with gusto. They do expend stamina doing these, some more efficiently than the others.
In Cassardis, Gran Soren and some outdoor locations with plenty of rocks, ledges and ruins, the player could use their nimbleness to climb onto precarious places. The player can explore nooks and crannies that are out of sight. More often than not, there is some reward to be had, such as a peculiar chest that someone has dragged up onto the roof of a building or a ledge overlooking some buildings. It is silly, but experienced players would know that these things are exactly there just as rewards for curiosity.
Of course, there is always the risk of falling, but as long as the player character is within reach of a viable ledge, he/she will automatically grab it. Besides, the player character will automatically stop at a ledge that is over a deadly fall. (If the player insists on having the player character run off the ledge afterwards, the player character certainly will run off it.)
INVISIBLE WALLS:
Unfortunately, the player character’s nimbleness is not as easily enjoyed anywhere else, especially in places where the player’s party is shoehorned into specific paths. This is especially so in dungeons, lairs and abandoned buildings where the places are not all indoors.
Sometimes, the opportunities for exploration and platforming shenanigans are clearly curtailed by the obvious presence of walls and other sheer obstacles. At other times, the player could see ledges and corridors in the distance, including even a precariously narrow but seemingly viable path to there. Unfortunately, these are just part of the scenery and have not been coded with traversable hit-boxes. Attempting to get onto them results in the player character falling to his/her death, after he/she hits an invisible wall (or near-vertical slope).
MAP SYSTEM:
The mini-map is perhaps the player’s only means of knowing where the player character can go and where he/she cannot, but it is not always reliable.
Ultimately, the mini-map only shows a 2D condensation of the area that the player’s party is in, but the actual environment is three-dimensional, with height being a clear factor (and hazard). The most that the player could reliably read from the mini-map is where the level boundaries are.
Bringing up the full map for an area does not help much either, because the mini-map is generated using a section of the map; whatever deficiencies that have been described about the mini-map applies to the full map too. There is an option to check separate levels of a map, but making sense of where one level ends and another begins is not easy because the camera is not in the player’s control when the player is doing this.

At the very least, it can inform the player of where the player has not been; a fog-of-war obscures parts of the map that have yet to be explored. It also shows nook and crannies that are not in immediate sight, which is usually an indicator that some goodies are tucked away there.
SWITCHES:
There are some barriers that can be raised or lowered by using switches. There are two types of switches: levers and pressure plates, which work as intended, most of the time.
Perhaps the switches could have been used for some light puzzle-solving. Indeed, there is one segment of the game where the player has to manipulate two barriers with mutually exclusive states in order to progress. However, this is the only challenge there is, and it is not impressive.
There were also game-breaking bugs that are caused by some gaps in the coding for the switches, but they have since been fixed in the latest build of the game. Yet, one would wonder why the switches are there in the first place, if they are only there to make things unrewardingly complicated while posing risks of glitches.
THE BRINE:
There are bodies of water, but they are entirely off-limits. The narrative excuse for this is that something invisible infests deep waters; this “Brine” will attack anyone who is immersed up to their chest or neck, quickly killing them. In the case of the Arisen, the Brine somehow decides to just deposit the Arisen somewhere close to the water, albeit with some damage. Anyone else, including enemies and most monsters, is killed if they fall into the water.
The aforementioned narrative excuse can be difficult to accept, because of inconsistencies that are explained away with even worse excuses. The Saurians can jump into and out of deep waters, with no explanation of why they are immune to the Brine. It is also not clear why fish can still live in water.
Of course, the Brine is just an excuse to implement out-of-bounds restrictions in the gameplay.
POST-DRAGON GAMEPLAY:
Interestingly, the game does not end after the player has defeated the titular Dragon. Rather, the mystery deepens, and the player would then be experiencing the “Dogma” side of Dragon’s Dogma.
Suffice to say, things did not exactly turn out for the better after the Dragon was defeated. Nasty monsters that were once held back by the Dragon flooded Gransys. These include stronger versions of monsters that the player has fought earlier, such as uglier and more aggressive variants of the Chimaera. Once rare monsters like lesser Dragons become uncomfortably more common.
Some humans are also all too-aware that the protagonist is to blame, and would henceforth be hostile to the player. These human enemies include soldiers of angered lords and criminals that had been emboldened by the weakening of civilization and law.

On the other hand, the player could see all these emergent predicaments as opportunities for greater challenges and rewards. Indeed, many of the nastier monsters have body parts that the player wants, and the tougher human enemies have better loot.
Perhaps the most welcome change is that the nasty earthquake in Gran Soren has forced merchants to relocate. It so happens that they have relocated close to each other, which is very convenient. The earthquake has also revealed a huge sinkhole of magical nature, clearly indicating where the player should go next in order to progress further.
DRAGON-FORGING:
The appearance of Dragon-forged equipment is perhaps the player’s first clue that there is more gameplay content past the titular Dragon’s demise. (Of course, the player could have discovered Dragon-forged equipment earlier if the player has found a certain massive creature in a forest and killed it.)
In the base game, Dragon-forged gear is the most powerful form of gear. They will be needed if the player intends to take on the nastier monsters that appear in the late-game sections of a playthrough.
Killing one of the draconian life-forms – officially called “Dragonkin” – that appear in Gransys afterwards gives the player a chance of obtaining Dragon-forged ratings for any piece of armor or weapon that the protagonist has equipped since the start of the battle with the draconian. (Apparently, the coding for this has been tight enough to notice when unscrupulous players swap their current gear out for others during a fight.)
That only the protagonist’s gear becomes Dragon-forged – if it is not already – can seem like an unacceptable limitation. After all, Capcom’s designers could have had Dragonkin drop specific items that are used for a next tier of upgrades.
There are occasions for which equipped gear pieces are guaranteed to become Dragon-forged. However, there are only two of these: the defeat of the titular Dragon, which can only be done once per playthrough, or the defeat of the online version of the Ur-Dragon. The Ur-Dragon is a repeatable boss, but it has a long respawn time. It is also a very tough boss, with some daunting conditions that will be described later.
The player could defeat lesser Dragonkin, but this is where another problem surfaces: whether a piece of gear becomes Dragon-forged or not happens to be a matter of an RNG roll. Of course, having a piece of gear upgraded to the highest regular rating increases the chances of this happening, but it is still a far cry from a guarantee.
Considering that so much of the gameplay in Dragon’s Dogma has avoided straight RNG rolls (with the exception of perhaps the loot drops from defeated enemies), having a thing as desirable as Dragon-forging be the subject of a matter of luck is unpleasant.

UR-DRAGON:
The lore of dragons is explained a bit further with the reveal of an ancient undying Dragon that the player can choose to fight (or not; this combat encounter is optional). This Dragon is far tougher than the one that the player has defeated. Coincidentally, it is one of several sources of a magical mineral that the player needs to collect in order to reach the endgame.
Incidentally, this Dragon is another multiplayer feature of Dragon’s Dogma. The game’s online service component has a variant of this Dragon whose hitpoints are much greater, but its current hitpoints happen to be shared across the playthroughs of all players who happen to be connected to the service at the time.
A copy of the boss’s current hitpoints is made when the player engages it. The player proceeds to wound the Ur-Dragon, inflicting as much damage on it as possible. The catch here is that the Ur-Dragon loses interest within 15 minutes, and will leave afterwards. However, any damage that the player has inflicted on this online version of the Dragon is applied on the aforementioned shared hitpoints too, up to a certain minimum.
This means that multiple players can engage the Ur-Dragon, whittling it down to a very manageable level of hitpoints. Defeating this version of the Ur-Dragon grants great rewards.
Of course, players who cannot or will not go online for whatever reason are not entirely left out. There is the offline version of the Ur-Dragon, which is much weaker and provides less rewards for its defeat. The problem with it though is that it still has the same short attention span. The player’s party could have come well-equipped and –supplied to defeat it in a single go, but if they need more than 15 minutes, they would need more than one go. On the other hand, the player could force its return by exiting its lair in the Everfall, go back to Gransys, and come back again. Unfortunately, the defeat of the offline Ur-Dragon does not guarantee Dragon-forging like the online one would.
NEW GAME PLUS:
Upon finishing the first playthrough, the player is prompted about starting a second. In this second consecutive playthrough, the player retains whatever progress and milestones that the player has attained in the first, including an already-developed player character and Main Pawn.
Already discovered and placed Portcrystals are retained. The convenience of buying additional Portcrystals from a certain NPC also becomes available. Some additional quest-board missions also become available, but they are really more busywork.
Interestingly, a special Riftstone appears in one of the bays of Cassardis. This Riftstone immediately sends the player’s party to the Ur-Dragon, thus allowing the player to bypass a lot of story segments.
Alternatively, the player could start a playthrough in Hard Mode; doing so has the game fetching data from the most-recently completed playthrough. Hard Mode might be a better challenge for already powered-up characters.

HARD MODE:
Speaking of Hard Mode, this mode has the usual traits: the player character is weaker, and enemies are much stronger. The rewards are also greater, e.g. more gold, Crystals and experience points. Furthermore, certain items are only available as rewards in Hard Mode.
The player could switch out of Hard Mode at any time, but certain achievements become impossible to get until the player restarts a playthrough on Hard Mode and stick with it all the way.
VISUAL DESIGNS:
The protagonist is one of those mostly silent video game protagonists. Specifically, he/she is the kind that would appear in cutscenes, but whose contribution to the cutscene is limited to little more than facial expressions and body language.
This means that the player can create a wild- and/or ridiculous-looking player character whose appearance will not even be commented on by any NPC. Perhaps, the player might not even bother and would just use the preset looks – with the exception of body builds, which do affect gameplay, as mentioned earlier.
Unless, of course, the player is a “content creator”, in which using the character creation tools would have been required as part of “due diligence”. In this case, the creation tools are par for the course, at best, by present-day standards. For example, there are variables that control body builds, though the extremes are laughably unbelievable.
Interestingly, the player is also allowed to decide the main pawn’s appearance. Thus, the player could choose to be consistent with his/her artistic decisions (or lack thereof), or make a pawn whose looks contrast greatly.
Climbing large monsters is always a fun thing to do. However, due to the implementation of a different layer of hitboxes for the purpose of climbing, there are moments where a character appears to be holding onto thin air, or their hands are sinking into the monsters’ models. Watching characters climb with their bodies upside down or sideways is also hilarious.
The camera may not always help the player do this either, especially if the monster has plenty of body parts that can obscure the player’s view of the player character. The lack of a feature that highlights the player character’s model when this happens is particularly noticeable.
MONSTER DESIGNS:
Most of the monsters had been designed with the intention of making them look terrifyingly inhuman but also familiar. For example, the titular Dragon is an awesome creature whose immense presence and sinuous reptilian body are always showcased in just about every scene that has it.
Some monsters are just hideous enough to rival those in the King’s Field successors (i.e. the Souls series and Bloodborne). For example, Dragon’s Dogma’s take on the floating eyeball monsters that are Beholders is disturbingly awful.
The game makes it a point to have long draw distances, especially for the silhouettes of monsters. Indeed, large climbable monsters can be seen from far away, at least in the outdoors.

Of course, there is also the gratuitous wavering and/or thrashing that such monsters make when they die – something that the game’s designers have wisely copied from Monster Hunter.
There are some problems with the appearance of monsters in the Everfall, after the defeat of the titular
Dragon. Model pop-ins happen quite often, specifically after the game has triggered the scripts that lock the player’s party into an arena with the monsters.
ENVIRONMENT DESIGNS:
The models for monsters and humans are mostly well-done, but the effort that went into the design of the environments that they live in is uneven.
Cassardis appears to be the only human-inhabited locale that had been lovingly designed. There are plenty of curves in the streets of the sea-side town. There are drying racks for fish and a jetty made of mismatched wooden planks. Such details give the town a convincing rustic appeal.
Gran Soren, however, is not as impressive. Some of its livelier places, like the market square, have more details, but its keep and its slums are rather boring with their plain geometries. The normal mapping textures for the cobbled roads of Gran Soren look convincing, at least until the player encounters slopes that reveal the visual illusion.
There are a few fortresses at the borders of Gransys, purportedly built to keep out horrors that live beyond Gransys. They have rather boring designs, being mainly composed of very high walls with no discernible defensive or maintenance features.
The dungeons and lairs are better designed. Many of them had seen better days when they were part of human civilization, and their ruination gives them an ominous air. Quite a few are claustrophobic, made all the worse by enemies whose bodies prevent further progress.
Players might want to look out for sudden changes in the spatial volume of indoor environments, because these often mean that a fight with a large monster is coming up. In hindsight, it might seem silly that such a sizable thing could have been brought into or raised in such an environment. Yet, of course, this is just video game logic at work.
SOUND DESIGNS:
Capcom has hired writers and voice-talents of significant calibre for the English dubbing, because they gave a convincing impression of the medieval European aspect of the setting. There are a lot of archaic terms and words, as well as sentence structuring. Of course, the lack of voice-acting for the protagonist sticks out like a sore thumb.
The NPCs that manage the inns have a decently diverse variety of sound clips when they greet the player character. However, Capcom’s developers have not bothered to diversify the sound quips of some vendors that the player might interact frequently with. The most notorious example of these is the blacksmith at the market square of Gran Soren, whose signature remark about his goods has turned into a sub-culture joke because of his voice-actor’s odd enunciation.

Perhaps the best voice-acting is that of the titular Dragon. It is convincingly menacing, but also tinged with noticeable weariness that hints at the true purpose of the Dragon. It is unfortunate that the Dragon does not get a lot of show-time, but it does overshadow the other villains, most of whom are forgettable.
Since the player would be encountering gargantuan creatures of considerable strength, the player can expect to hear a lot of thundering stomps, the beating of massive wings and, of course, lots of sonorous roars and howls. They can seem a bit clichéd at times, but there are just no other way to make these giants sound gratuitously impressive.
Enemies make a lot less noise, and sometimes this noise is drowned out by environmental ambience, such as the rustle of leaves in the wind. However, some monsters do have signature audio, such as the beating wings of harpies and the echoing whispers of ghostly threats. Indeed, the player would be wise to keep an ear out for these noises, though the Pawns do a good job of pointing them out if they are close enough.
The music of the game is introduced through the main menu track, which by the time of Dark Arisen, has been replaced. The song is sung by a voice-actress that can carry a tune but necessarily blend the archaic words in the lyrics with the melancholic melody. Indeed, without a text copy of the lyrics, the words that were sung could be easily mistaken for other words. (On the other hand, the song is still more appropriate than the song for the original launch version of the game, if only for its greater use of orchestral instruments than bass guitar.)
The rest of the music is the fantasy genre’s staple of orchestral tracks. There are some tracks with less instruments, such as the beautiful piano and slightly vocalized track for Cassardis that makes a return there almost always worthwhile.
There are, of course, more intense tracks for combat encounters and especially battles with bosses. There is considerable bass and percussion weaved into these though, which can be a bit unseemly to the ears of players who prefer purer orchestral.
CONCLUSION:
There is much to like in Dragon’s Dogma. For one, there is the vocation system, which has mostly run-of-the-mill fantasy classes but gives the player options in mixing and matching skills from different vocations.
Encounters with monsters are entertaining most of the time, especially if the player could exploit their disadvantages or climb onto them and stab them. Human enemies pose the challenge of having to counter skills that the player’s own party uses.
There are many small nuances, such as the secondary effects of elemental damage, that make the game subtly more complex than it seems to be. The impressiveness of these nuances would have been more noticeable if the game did a better job of explaining them with in-game documentation.

For a game that has been developed by Capcom’s in-house studios, which are well-known for prizing style over believability, Dragon’s Dogma has a convincing presentation of its setting, and that is despite the presence of obviously fantastical things.
Yet, even after some improvements that have been implemented by the time of the release of the Dark Arisen expansion, the game still has some irksome flaws.
Inventory management is still tedious. There is also the grindy meta-gameplay of accumulating gold and Rift Crystals to purchase overpriced items that were once part of contentious DLC packages.
Pawns have mostly reliable scripting for their decisions in combat, yet the lousy-scripting of NPCs that aggravates the frustration of escort quests show how lopsided the game designer’s attention had been with regards to AI programming.
Nonetheless, the flaws of Dragon’s Dogma do not overshadow the fact that this game is the result of a daring move by Capcom. Even if it had been inspired by the Elder Scrolls franchise and its gameplay ideas are not exactly new when it is placed next to Monster Hunter, Dragon’s Dogma is a breath of fresh air.