INTRO:
A game-maker might have many ideas for a game post-launch, but eventually it will hit a wall, or two, or more. One of these walls is the inherent technical limitation of the game; its coding and its user interface, among other things, can stymie ideas for fresh gameplay designs.
This leaves the game-maker with only a few options: crank out more of the same goodness, which risks the “too much of a good thing is a bad thing” consequence, or to go through a checklist of tried-and-true implementable designs and tick a box.
The latter is the case for the Color of Madness expansion of Darkest Dungeon.
PREMISE:
The Ancestor’s research has yielded insight into many things: things from within, things from beyond and things from without. Although he has settled on becoming the herald of the dark progenitor of all life in the world, his endeavours in attracting the attention of other powerful entities have continued to bear terrible fruit anyway.
One of these endeavours involved the acquisition of a piece of failing farmland from a miller who did not know better. In return for funding from the deceased lord of the estate, the Miller turned over his Farmstead to the Ancestor for his own purposes (such as feeding most of the harvests to the Swine). Ultimately, the Ancestor was not keen on development of the land, much less farming, but instead used the mill of the Farmstead as the anchor of a ritual that would summon something from the stars.
The ritual would take many years of course, during which the Ancestor has died and made his choice in his pledge of allegiance. The ritual ended with the mill being struck by a comet of extra-terrestrial origin. Instead of annihilating the Farmstead, the comet cast it into a state of lambent limbo.
Slimy crystalline growths began to grow all over the place, infecting the Miller, his family and his workers, even the scarecrows and beasts of burden. Not unlike how the aforementioned dark progenitor spread its influence with cancerous growths, the comet used the crystalline growths to shackle things to its will.
Of course, where there is inhuman disaster, there is inhuman opportunity. The player can send parties into the Farmstead to harvest Crystals, which have powerful if risky properties.
NARRATIVE NOT TURNED TO GAMEPLAY IDEAS:
There has been the complaint that some narrative elements remained as such, and were not utilized in gameplay designs. Unfortunately, the Colors of Madness would incur another complaint.
The comet and the dark progenitor have been described as violently competing for the consumption of the world. However, the player would never see any fights occurring between the comet’s forces and the progenitor’s own, much less influence or participate in them. The most that the player gets is the description of the battles that are fought between them.
There could have been a gameplay system that turns Darkest Dungeon on its head, such as pledging allegiance to either side, or goading them into a devastating final confrontation. Ultimately though, Red Hook Studios settled for gameplay that is much easier to implement.
ENDLESS QUEST:
The core gameplay of the content in this DLC is practically an endless mode.
After completing the two core quests in the Farmstead locale, the endless quest is unlocked for pursuit. There is no end to this quest. Even if the player’s party has found the comet and defeated it, the farmstead is not saved; it continues to be blighted by extra-terrestrial crystals. The comet is even said to have merely reincarnated itself with its space/time bending powers.
The player can only just keep trudging through, trying to earn as many crystals and other rewards as possible. The steadily deteriorating team faces increasingly worse enemies until the player decides to have the party leave, or risk having it wiped out.
THE FARMSTEAD:
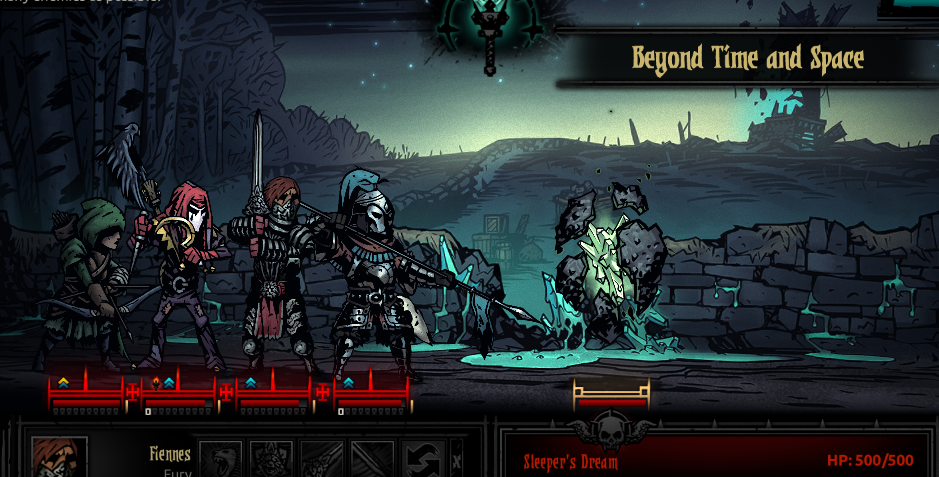
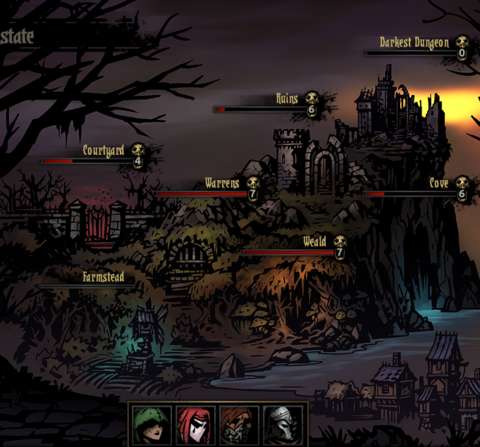
The Farmstead’s main trait is that it has no maps, due to the narrative yarn about the place being stuck in incomprehensible limbo. Instead of rooms and corridors, there are only two types of places where the party would be: the battlefield, or a sanctuary. It also has its own light meter, which will be described later.
The enemies that the player would encounter in the Farmstead are mostly the Husks, a new category of enemies that are introduced in this DLC; they will be described in their own section. Other enemies from other locales would be here too, including the enemies from the Darkest Dungeon.
KILL METER & ENEMY REPLACEMENTS:
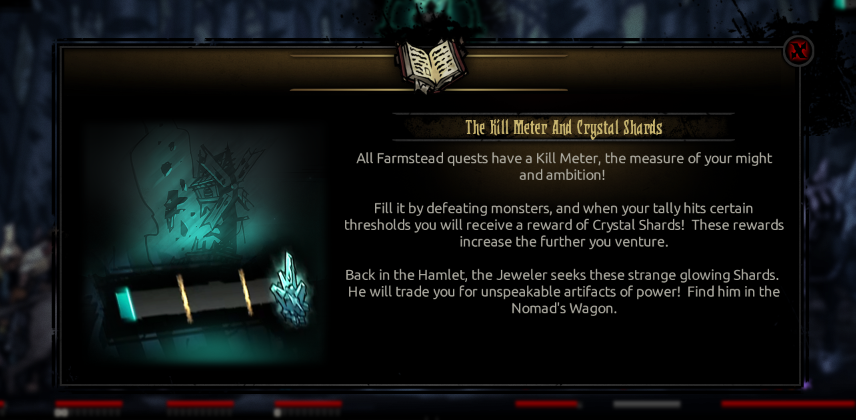
For better or worse, the method of progress in this locale is to kill, kill and kill some more on the aforementioned battlefield until target goals are met. The target goals are represented by the divisions in a meter on one corner of the screen.
The meter fills as kills are made. Every other round, the game checks for empty slots in the enemy group and fills them in with replacement enemies, so that the player can continue the killing. The next division is always further than the previous one, i.e. the number of kills to meet the threshold gradually increases.
When the division thresholds in the meter are reached, a special ‘enemy’ appears. This character immediately makes an ‘attack’ against the party, transporting them elsewhere.
Such a method of progress can seem very crude to players who have expected more sophistication from the gameplay of Darkest Dungeon. There is also no narrative excuse for this; if there was any, it is so weak as to be forgettable. Alas, these are some of the hints that Red Hook Studios is running out of ideas.
Even if the player accepts this, the differences between fights at the Farmsteads and the fights at other places are considerable. The biggest difference is the replacement of enemies, which can be too much for players who are used to enemies that eventually thin out, or enemies with limited means of reinforcements.
SANCTUARIES:
The sanctuaries are coded to be practically rooms, but with an additional icon that appears on-screen to let the player continue on to the next battlefield. There is usually one curio in any sanctuary; the curio is unique to the Farmstead locale.
It is also guaranteed to be beneficial; in fact, all of the curios at the Farmstead are. This is just as well, because they help the party recover some of their strength. The player should still realize that the party’s stint at the Farmstead will come to an end though; they either leave when the player runs out of means to keep them in one piece, or they die because the player is not wise enough to have them cut and run.
(Side note: Most of the curios do not yield better rewards when any supply item is used on them, but one of them does accept the Skeleton Key.)
LOOP REWARDS:
The aforementioned gameplay designs apply to both the quests with definite goals at the Farmstead and the endless mode. However, the differences between them are what happens after the player has completely filled up a meter.
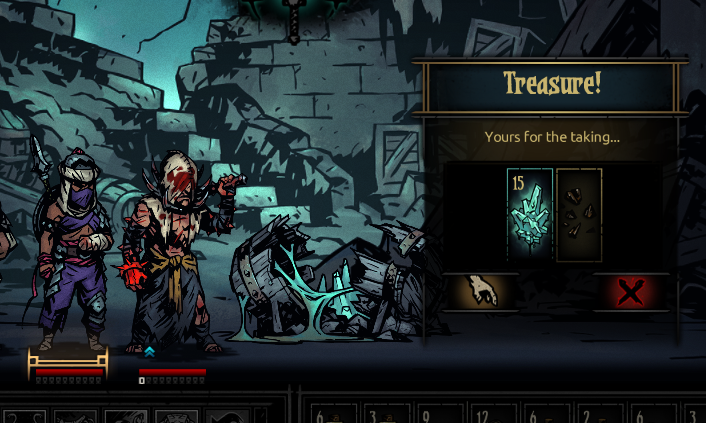
In the quests that lead to the opening of the endless mode, the meter shows the player’s progress towards reaching the quest objective. In the endless mode, the meter shows the player’s progress towards completing a ‘loop’ of the Farmstead. Completing a loop grants rewards, usually in the form of a bunch of Crystals.
SUPPLY ITEM CHOICES:
The game does not make it clear that some supply items will be quite useless in this locale. The most notable of these is the Torch, which has no use whatsoever and does not even appear in the provisions screen. The Shovel is also seemingly useless. (Of course, at this time of writing, this expansion is barely two months old; there may be players who have yet to completely experiment with every supply item on every curio.)
SHARD DUST:
This DLC introduces a new supply item: the Shard Dust. This is essentially a potion that buffs damage output in return for compounded stress gains. It can only be purchased with Crystal Shards (which are presumably pounded into the Dust).
Thus far, it is unclear whether it can be used with any curio. Perhaps like the Laudanum, it does not have much use other than being directly consumed.
LIGHT STATUS:
The Farmstead has its own light meter, or rather, multiple light statuses. Whenever the player exits from a sanctuary onto a battlefield, the light status has a chance of changing into something else.
The initial light status is the Farmstead’s Miasma. This one compounds stress gains and reduces the effectiveness of healing. Three other light statuses have benefits for the player’s party, but also gives buffs to enemies. The worst of these is “Gleaming”, which increases the chance for enemies to land critical hits. “Splendorous” is the only light status that inflicts penalties on enemies.
The different light statuses might provide different experiences in the Farmstead’s endless mode, but they also introduce randomness, and thus further amplify the factor of luck in the gameplay.
HUSKS:
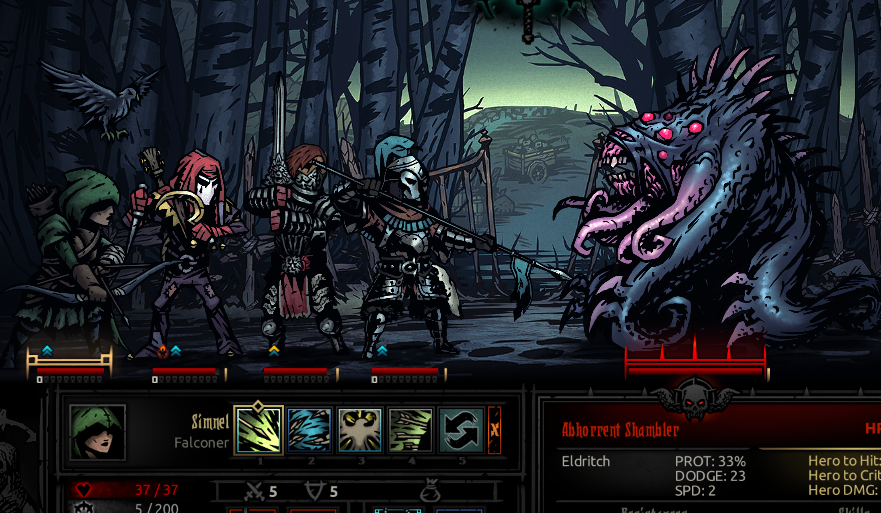
The comet’s minions are categorized as “Husks”, which is appropriate because much of their formerly mortal innards have been replaced with crystals and crystalline slime. However, killing them will not yield any crystals; only the loop rewards and a specific curio do.
The most numerous Husk that the player would fight is the Farmhand. On paper, it does not seem much of a challenge, even at the Champion difficulty. However, they can be empowered by their betters, namely the Foreman or the Miller himself. The Scarecrows are also alive, and for whatever strange reason, can give healing-over-time buffs to other Husks. Then, there is the corrupted Plow Horse, which is one of very few enemies that can gain Stealth readily.
Most of the Husks appear to have relatively low Blight and Bleed resistances, making these de-buffs more useful – or not, if the player intends to have them produce corpses when they are defeated.
Many of the Husks inflict stress damage. Consequently, this makes the Jester a lot more indispensable than he already is.
CRYSTALLINE ABERRATIONS:
The formerly mortal Husks produce corpses when they are slain. If not destroyed, these corpses turn into Crystalline Aberrations. These are primed to move last (generally), and when they do, they blow up to attack the entire party for either considerable damage or nasty de-buffs. However, for whatever reason, if they are destroyed before they detonate, they heal whoever destroyed them.
THE MILLER:
The Miller is a recurrent boss, one with two actions. He can summon Husks to his side, which can be problematic if these happen to be the Scarecrows or the Foremen because they can buff him. If he summons a Farmhand, he can buff it, converting it into a crystalline pillar; the pillar in turn buffs the Miller. The Miller also has powerful attacks, one of which hits the entire party.
Curiously though, if the player has the luck for finding the Trinket known as “Mildred’s Locket” (presumably the locket of the wife or daughter of the Miller) and has remembered to bring it along, the Miller has to randomly gift someone in the party with a buff that lasts the entire fight.
THE FRACTURE & THE SLEEPER:
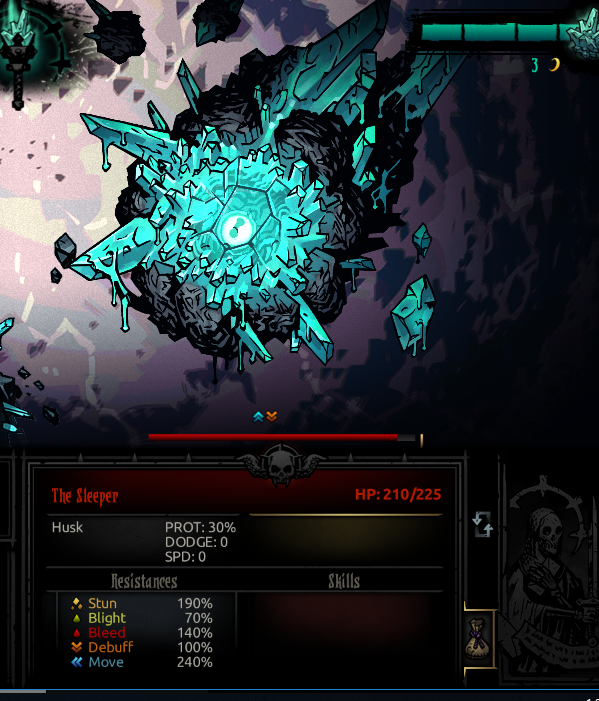
The Sleeper is the aforementioned comet. It appears at the end of the third loop of the Endless mode, and defeating it is the only way to gain a special resource for a certain District building. Compared to other bosses, the Sleeper has only one action per round, suggesting that it might be manageable. However, both of its moves attack the entire party, and they inflict stress too.
The main hurdle in fighting the Sleeper though, is its previous phase: the “Fracture”. Apparently, the Fracture is actually the tip of one of the crystalline pillars on the Sleeper (such is its size). The Fracture is a three-action boss that summons and enhances crystalline formations, which blow up like Crystalline Aberrations. This phase of the fight can be costly, if the player could not rush down the Fracture’s health quickly.
OTHER ENEMIES:
When the light status changes, the types of enemies that the player will encounter change too. The enemies from other locales in the base game can appear, thus requiring the player to recall the strategies to fight them. This can be a problem if the player has tricked out the party to fight the Husks.
From the fourth loop onwards, the player might also fight other bosses, such as the Collector and the Shambling Horror at the end of a loop. Alternatively, the player might have to fight the bosses that are introduced by this DLC, including the Sleeper – again.
DARKEST DUNGEON ENEMIES:
After the player has completed all the quests in the Darkest Dungeon in the base game, the player would not be encountering any more of its denizens. According to the narrative, they are the protectors of the dark progenitor and would not venture elsewhere without good reason.
The comet is a good reason. Unfortunately for them – and unfortunately for the player’s party – when they ventured to the Farmstead to confront the comet and its minions, they were trapped in the limbo too.
Gameplay-wise, this means that the player might encounter them, especially from the fourth loop onwards in the endless mode of the Farmstead. As players might recall (likely with dread), these enemies are some of the toughest and meanest in the game, and they still are; the Husks are nowhere near as nasty.
If the player has bad memories of encounters with them, encounters with them in the Farmstead would make for even worse experiences. Many experienced players’ strategies against them in the Darkest Dungeon is to knock out individuals as early as possible so that they cannot contribute to the pressure on the player’s party; these strategies obviously do not work here.
More often than not, a string of these enemies is enough to end a run at the Farmstead.
FLEEING:
In the endless mode, as long as the player has completed at least one loop, the player’s party can somehow retreat from the Farmstead without severe problems. If the player has not completed any loop, one of the party members, selected at random, is stuck in limbo for a week.
If the player has completed multiple loops, e.g. defeating the Sleeper at least once, the party can retreat without gaining quirks or diseases, or at least have very low chances of doing so. This makes it easier to reuse them for another run in the Farmstead, if they are not terribly stressed.
CRYSTAL SHARDS:
The main reason to go on runs in the Farmstead is to collect Crystal Shards. Shards can be used to build the District buildings that have been introduced in the DLC package, and also to buy Crystalline Trinkets from the Jeweller.
Any experienced game consumer would recognize this as grinding-heavy gameplay. This is perhaps the most significant hint that Red Hook Studios has run out of ideas.
There may be other rewards, such as Trinkets, but these are obtained from curios that might spawn if the player is lucky.

ADDITIONAL DISTRICT BUILDINGS:
This DLC introduces additional district buildings, most of which have to be purchased with Crystal Shards. These buildings increase the benefits from consumable supply items. For example, the Tainted Well (somehow) increases the bonuses provided by Holy Water.
However, the rules for using the improved supply items remain the same as they were. For example, Medicinal Herbs may buff disease resistance after the Miasmal Orchard has been built, but the Herbs can still only be used on a character with Mortality De-buffs.
MEMORIES:
Each time the player defeats the Sleeper, the player gains a “Memory”. If the player can gain ten of these, the player can build (or rebuild) the Mill, a special District building. This essentially disables the scripts for Hunger Checks.
Although this is a very desirable reward, it highlights the gameplay’s dependency on grinding, more so than anything else thus far in the Darkest Dungeon IP. There had been mods that disable Hunger Checks, though arguably they were not stable. That Red Hook Studios implemented this “reward” that disables one of the most aggravating luck-dependent gameplay elements in the game can seem a tad cynical to a player that is not already a die-hard fan.
MERCENARY HEROES:
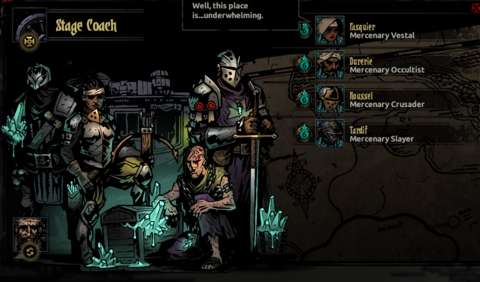
The Stagecoach user interface gains a new icon. If the player clicks on the icon, the regular user interface is swapped for another that is used to hire “Mercenaries”. These adventurers are already at Resolve level 6 and have their gear upgraded to the highest level.
The origin of these adventurers is unclear; their in-game description suggests that they want crystals from the Farmstead, but they are also implied to be adventurers that are stuck in limbo because they can only ever be used for the endless runs.
Every time that they are used for a run in the Farmstead, they will take 10% of the Shards that have been collected. Therefore, the player might want to consider using regular adventurers instead.
THE JEWELLER & CRYSTALLINE TRINKETS:
Curiously, not long after the Farmstead is consigned to its terrible fate, a shifty merchant moved into the Hamlet. The Jeweller’s user interface makes use of a swap feature, like the one for hiring Mercenaries. The Jeweller only takes Crystal Shards as payment for selling Trinkets that obviously either incorporate the Crystals in their make-up.
The Crystalline Trinkets have coding that are not used in previous Trinket designs. One of these pieces of code checks the player’s inventory for specific supply items, and only apply one or two of a Trinket’s properties if the items are there. Another piece of code checks who has just attacked the wearer of the Trinket, and applies certain properties if the attacker is of a certain enemy group. Another piece of coding applies a small chance for an attack by the adventurer to miss the intended target and hit another enemy instead.
Incidentally, most of the official Crystalline Trinkets are best used for the endless mode runs.
THE THING FROM THE STARS:
Most of the things in the Farmstead cannot seem to venture out of the Farmstead, which is perhaps for the better. However, the only exception is the “Thing” from the Stars. Perhaps Red Hook Studios is running out of words to use to describe its latest monstrosities, but “Thing” is the best word to describe it.
It is a boss that can replace any encounters with regular enemy groups, not unlike the Collector. However, it is a far nastier than the Collector. To give the player some forewarning, any locale that the Thing from the Stars is roaming in during the current week is labelled with its artwork.
The Thing hits very hard with its attacks, and most of the time it is inflicting stress too. Moreover, after it has lost much of its health, it gains a massive buff to its protection rating, among other things. It also starts to spawn Crystalline Aberrations, thus forcing the player to choose between attacking it or the Aberrations. (It does lose some health when spawning them though, and it could actually kill itself doing so.)
PRISMATIC QUIRKS:
The coding for the Corvid quirks that are granted by quests involving the Shrieker has been used again, this time for this DLC package.
If the Thing from the Stars is defeated, it yields rewards that include Crystal Shards and perhaps some non-Crystalline Trinkets. However, the yield that the player would covet the most is the Quirk that is granted randomly to one of the party members that defeated it. Unlike the Corvid’s quirks, these are all positive Quirks.
Some of these Quirks can also appear among the Quirks of adventurers that are generated by an event that is introduced by this DLC. The player can hire these adventurers with Crystal Shards, but unlike the Mercenaries at the stagecoach, they can be used normally like any other adventurer.
VISUAL DESIGNS:
The arid ashen fields of the Farmstead form the backdrop of the runs in the Farmstead. Turquoise and other shades of blue, and plenty of grey, are the predominant colours in the artwork.
When the light status changes and other enemies are summoned to fight the player’s party, the backdrop changes from that of the ruined Farmstead to warped versions of the artwork for the other locales. The light statuses also have their own colours, which meld almost seamlessly into the centre section of the backdrops while also tinting everything else on-screen.
The Husks have the core of their bodies made up of Crystals, which shine through their orifices. The Farmhand is perhaps the most entertaining of them, because the sprite frames for some of their abilities strongly suggest that they are not entirely aware of what has happened to them.
The Thing from the Stars has an impossible body structure. Even the Shamblers, including even the one corrupted by the dark progenitor, have bodies that are somewhat logical compared to it. Perhaps, Red Hook Studios’ artists randomly slapped together something to pass off as the boss, or perhaps it did come out of some of their waking nightmares.
Perhaps the most disappointing visuals to be had from this DLC is the artwork for most of the Crystalline Trinkets. Some of those that have Crystals incorporated into them do not look particularly impressive, as if the artists had simply crusted them with Crystals and pass them off as Trinkets.
SOUND DESIGNS:
Additional sound assets have been introduced in this DLC. The most noticeable of these are the music tracks. Where the music tracks in the base game (and the Crimson Court DLC) use vocals and physical instruments (or at least digital compositions of them), the tracks in Color of Madness are clearly electronic.
Perhaps this was deliberate, if only to express that the Farmstead is stuck in a space/time limbo. The tracks are not bad, but they contrast with the pre-existing tracks perhaps a bit too much. They also further reinforce the impression that Red Hook Studios is running out of ideas for game content, even from the aural perspective.
Most of the sound effects are associated with the Husks and the Farmstead. The crinkling, tinkling and shattering of crystalline things are particularly pervasive, and perhaps thematically appropriate. The utterances of the Husks are not as impressive though; they are just more illegible utterances in a game that has already so many of them.
CONCLUSIONS:
Color of Madness is not a slapdash piece of lazy work, but it has so many signs that Red Hook Studios is running out of ideas for its game designs. What they made is very much a reminder and a stark highlight of how much of the gameplay in Darkest Dungeon is about grinding. Perhaps it would satisfy players that have yet to find the game stale, but for anyone else, it is a wake-up call that Red Hook Studios should consider working on their next game.
