Zelda: Tears Of The Kingdom - Starview Island Mayasiar Shrine Guide
Complete the puzzle of the Death Star-esque Starview Island for the Mayasiar Shrine in The Legend of Zelda: Tears of the Kingdom.
The Legend of Zelda: Tears of the Kingdom Starview Island will hold you in awe. Well, at least when looking at it from the outside. This Death Star-esque structure can be seen in the distance, and you might be wondering what you can find therein. Here's our guide to help you complete the Starview Island puzzle for the Mayasiar Shrine Death Star in Zelda: Tears of the Kingdom.
How to solve the Starview Island puzzle for the Mayasiar Shrine in The Legend of Zelda: Tears of the Kingdom
The Legend of Zelda: Tears of the Kingdom Starview Island is one of a select few Death Star-like mega-structures in the high heavens (it has counterparts in other regions, too). It's found in the North Gerudo Sky Archipelago in the western portion of the map.

If you've been to Lightcast Island/Ga-Ahisas Shrine, then you'll probably want to keep going south (there are two other Shrines that you can tag and complete on the way). Alternatively, there should be a few floating islands and small platforms closer to the Gerudo Highlands Skyview Tower. Either way, the idea is to use Zonai Devices, like makeshift planes (i.e. Wing, Steering Stick, Fans, Batteries, and a Rocket) or a hot air balloon (i.e. Balloon and Flame Emitter).
Once you're high enough in the air, fly inside the opening. You'll notice that the Empire won't strike back from inside. Rather, the place is just filled with Mirror devices.

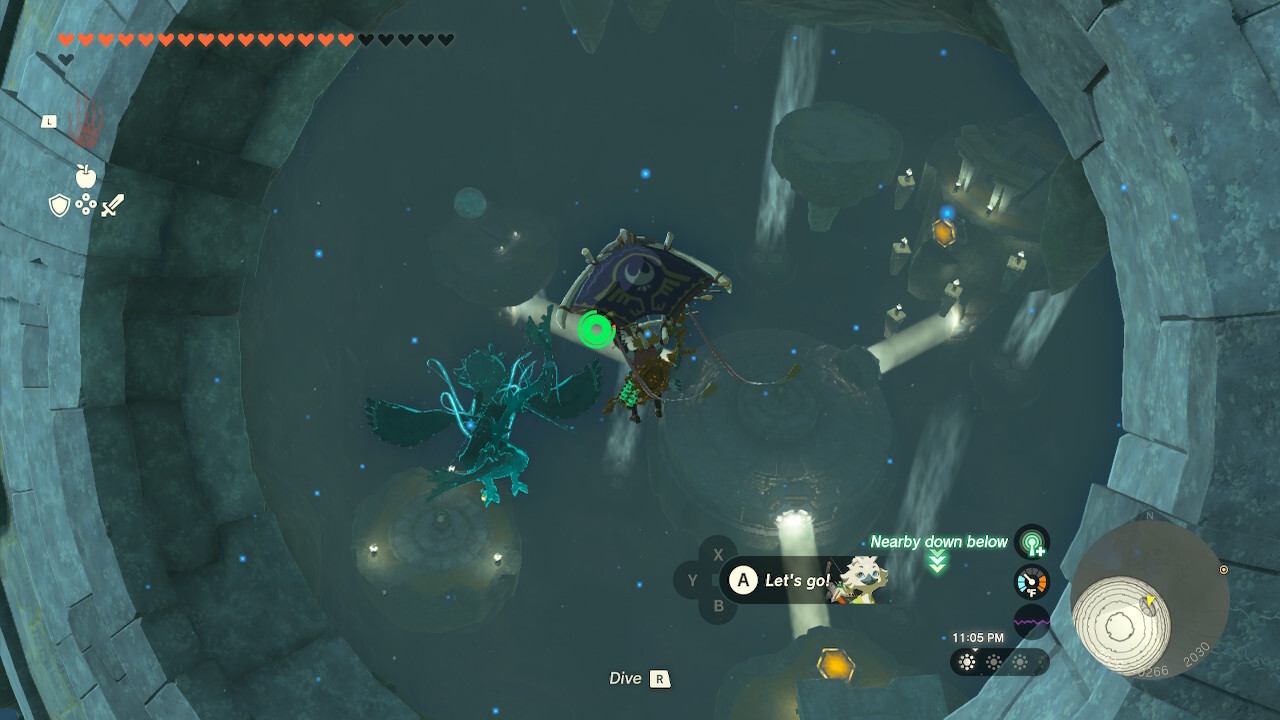
Here's the thing: the Zelda: Tears of the Kingdom Starview Island puzzle has objects that can only be rotated, not removed or repositioned. As such, trying to solve it as is would be akin to ordering a migraine and requesting another headache for dessert.
So, we'll just cheese with our own Mirror devices. You can find a few via the Device Dispensers in Ga-Ahisas Shrine or the nearby Ganos Shrine (both are just north of Starview Island).
If you have around two Mirrors, you should be fine. This is mostly just trial and error from here on out, but the idea is:
- With the central beam active, reflect that to either of the two Mirrors on the higher ledges.
- Bring out one of your own Mirror devices, then use Ultrahand to lift and rotate that. Find the right angle so that it shoots out a beam that hits the plate hexagonal plate at the bottom.
- This will unlock a small nook, and the chest will reward you with a Sage's Will. You'll need four of this kind of item to boost the offensive capabilities of a Sage Companion.
- Next, as for the main puzzle itself, the goal is to use another Mirror from one of the topmost ledges. With one of the weaker beams facing up, raise your own Mirror to reflect the beam. Then, rotate that at a downward angle to hit the central hexagonal plate.


In doing so, you'll solve the Zelda: Tears of the Kingdom Starview Island puzzle, causing the Mayasiar Shrine to materialize. This is a Rauru's Blessing domain, and the chest has a Star Fragment Staff. It's basically a Magic Rod with a Star Fragment fused to its tip. It lets you cast light sparkle projectiles when you hold down the R button.
In any case, this is but one of many activities that you can do in the game. Don't forget to take a look at our Shrine locations main guide for all the other challenges that you can tackle.
There are numerous mechanics and facets to learn in The Legend of Zelda: Tears of the Kingdom. For more information, you can visit our guides hub.
Got a news tip or want to contact us directly? Email news@gamespot.com
Join the conversation