World in Conflict Walkthrough
World War III is upon us, and it's up to you to win it. GameSpot's Walkthrough to World in Conflict will give you all the info you need to do so.
World in Conflict takes place in 1989, in the tense years before the fall of the Soviet Union. Instead of détente and peace, however, the storyline of this game supposes an imaginary World War III, where the Soviet Union and the US get involved in a war, first in Europe, then in America itself.
In this guide, we've included:
Single-Player Walkthrough
In the single-player portion of the game, you take control of a small section of the American army as you and your commanders attempt to rout the Soviet forces and prevent them from taking over the entire world. Although the game was mostly built as a multiplayer exercise, the single-player campaign is excellent, with some incredible storytelling and narration by Alec Baldwin, of all people. We've included a complete walkthrough for the game within, including tips on how to achieve all the secondary objectives.
Multiplayer Tips
Multiplayer gaming on Massgate will keep you busy with World in Conflict long after you're done with the single-player game, so read our tips to get your bearings before you hop online!
Enjoy!
Multiplayer Tips
Knowing Your Role
In most multiplayer matches (save those that have very few human players), you're going to have to select a role to play. This is different than in the single-player game, where you can deploy any units in the reinforcement menu that you like; roles force you to specialize in a specific type of unit and will make all other units either more expensive or completely inaccessible to you. You can change your roles at any time during the fight, but it'll take you some time to redeploy new units. It's usually best to wait until all of your forces are wiped out before switching roles.
Armor
Armored units are typically going to be the main force to be reckoned with on the battlefield, as they're quicker than infantry, tough to kill, and can capture control points (which is something that aerial units can't do).
Using Armor
Tanks
You have three choices of tank here: heavy, medium, and light. Predictably enough, the heavier a tank is, the more damage it will be able to take and dish out, but the slower and more expensive it will be. This can make for some interesting dilemmas, depending on what kind of player you are. If you like to advance forward and capture control points, you may want to use a mixture of medium and light tanks, as you'll be able to make a lot of units and spread them out among the perimeter points that you'll be assaulting. If you're going to be hanging back and defending, then heavy tanks will prevent any enemy armor from getting too close to your perimeter points, especially if you manage to find the high ground.
You also can't lose track of the special abilities that each tank has. Offensively speaking, the special abilities of the heavy tank let it quickly killed light tanks and armored carriers, the medium tank will be best used against infantry, while the light tank will be able to deal more damage to heavy armor with its special ability than it will with its main cannon. All of these tanks can pop smoke screens, which will shield them from view for ten or fifteen seconds; pretty handy when choppers come a-callin'.
APCs
Bringing up the rear are the armored personnel carriers, of which there are regular and amphibious variants. These are mainly intended to shephard infantry units to the front lines, so if you see a friendly player's infantry slogging their way across the battlefield, try to give some of them a ride. APCs are very lightly armed, but their machineguns can take out enemy infantry relatively well and also fire on enemy choppers, although this will most likely just wind up in them getting pasted by missiles. It's probably best to simply spend your points on actual tanks here, but if you team up with someone playing infantry, you can definitely get some mileage out of APCs.
Defeating Armor
Heavy choppers are the undisputed kings of tank-killing; one or two heavy choppers will be able to destroy almost any tank with a single full barrage of their missiles. Their Hellfire missiles will also be devastating to tanks. If a squad of your tanks comes under fire from choppers, quickly pop some smoke shields off and call for help, or simply call down an air-to-air strike on your adversaries. Just remember that if you have a large number of tanks in a single squad that all of their smokescreens will go off at once if you use the R button shortcut. You might want to cycle through your tanks individually and pop off their smoke screens one or two at a time to ensure that your tanks survive until help comes. Tanks can't do much to attack choppers directly, so if you get caught out in the open you're probably toast unless someone helps you out.
Anti-tank soldiers are next up in the queue. Their rapid-fire anti-tank weaponry will quickly destroy light and medium tanks and will eventually take out heavy tanks, given a couple of reload periods. If you run headfirst into anti-tank soldiers, you can quickly pop smoke and then use the SHIFT+N shortcut to tell your tanks to back away from the enemies, if you don't mind retreating; it's better than dying. Alternately, if your enemies are out in the open, you can charge into them by clicking on the ground past them; you'll probably pound a few of them underneath your treads. Tanks, again, can't do much offensively against infantry, since their machineguns don't really work too well on them. Medium tanks can use offensive abilities on them to destroy them, however, and APCs will be able to slowly machinegun them down.
Artillery is also adept at quickly taking out tanks, but will need to have some help spotting them. That said, there's no greater thrill than ruining an enemy's very expensive heavy tanks from halfway across the map. Fighting back against artillery requires more than a smokescreen; those might as well be big target markers for artillery units. You'll need to get help or use tactical aid to destroy them.
In terms of tactical aid, strong dedicated strikes like tank busters and heavy air support are best at taking out enemy tanks. If you're going up against light and medium tanks, then heavy artillery barrages can usually wipe them out, but heavy tanks will generally escape without being destroyed unless you layer multiple strikes on them.
Air
If you enjoy high-risk, high-reward gameplay, then aerial combat is probably right up your alley. Choppers can quickly decimate an opposing force of tanks or chop down infantry if they catch them in the open, and are much more agile when moving around the battlefield than any other unit.
Air units are unique in that they can't capture control points, which can make them a liability in close games. If you're in a must-win round and neither side seems to be capable of getting the upper hand, switching from air to armor or infantry will sometimes be the smart way to go; even a couple more tanks can sometimes make all the difference in the world if a stalemate is going down.
Using Air
Offensive Choppers
You have four choppers to choose from here, but only two of them are offensive. Heavy choppers are your groundpounders; they possess rockets that can easily destroy any vehicle that you spot, in addition to an offensive ability that can one-shot most vehicles. In addition, they can usually wear down and destroy most buildings without too much of a problem, although this takes some time unless you have multiple heavies on your side. Note that heavy choppers fire rocket barrages that take a bit of time to reload. If you want to finish off the last slice of an enemy unit, you don't have to wait for the choppers to reload; simply right-click on the enemy unit and they'll fire whatever rockets they've already reloaded, even if they haven't loaded a full complement yet.
Medium choppers are more specialized. They don't do nearly as much damage to vehicles as heavy choppers do, although they seem to be a bit better at firing on infantry. However, they're very powerful against enemy choppers. They can fire on them normally for heavy damage or use their offensive ability to fire an air-to-air missile that will one-shot most enemy choppers. If you like playing a spoiler, then you can make a squad of two or three medium choppers, keep them in reserve, and fly them towards any enemy choppers that you spot and quickly take them down in a precision strike before moving them back to a far corner of the map. It might be unorthodox, but most players usually seem to focus on heavy choppers over mediums, since they want to fire on your ground units and rack up a lot of kills. If you want to make them pay for their mistake while also protecting the other players on your team, medium choppers are a good start.
Choppers are great for quickly scouting and destroying enemy units, but you need to constantly be moving them and watching their health bars in order to ensure that they don't get killed. What you typically want to do is separate your choppers into groups of heavy and medium units, using the heavies to dart in and fire at enemy tanks that are in conflict with your own, then dart out before your foes can call down air-to-air strikes on you. If you spot enemy helicopters that are performing the same action, use your medium choppers to take them down; there'll be plenty of them to choose from in any given game. Just try to always keep your choppers on the move, and always be watching their health bars.
Other Choppers
In addition, you can also call in the lowly scout chopper and transport chopper. Scout choppers are very lightly armed and armored, and are mostly used for scouting enemy positions. Unfortunately, this is most useful against enemy artillery, which is usually going to be protected by anti-air units that will quickly shoot down your choppers. It can also be handy for flying above a control point near a town or forest and using the IR Scan ability to see if there are any infantry units hidden nearby, but again, even infantry will quickly shoot down a scout chopper.
Transport choppers are used to shuttle infantry units around the battlefield, but are unarmed and will be quickly shot down if they encounter any hostile forces. You can make good use of them if you're teaming up with an infantry-based player, but if you're acting solo, you're generally not going to need them.
Defeating Air
Anti-air units are in the domain of the Support role, but these are usually used to defend weak units like artillery from the predations of enemy choppers; you won't often see them escorting enemy tanks, although this may happen if your opponents are playing well as a team. They don't move particularly fast, but by the time you get within range of them, they'll probably already be chopping down your choppers, especially when you come across the heavy anti-aircraft forces. If you do happen to come across anti-aircraft units, you can choose to either run away while dropping flares (which will confuse the missiles from heavy anti-air units), or simply focus your fire on the units that are attacking you. Since heavy choppers are designed to destroy vehicles, anti-aircraft vehicles will quickly explode under your fire, but they will inflict a lot of damage on you in the meantime.
Medium choppers are the next best option, and allow you to take a much more aggressive stance against enemy choppers. Their offensive ability will shoot down most choppers in one hit, and their fire will quickly finish off anything that they can't kill. A group of medium choppers will usually be able to take out a group of heavy choppers twice its size, assuming that you use your offensive abilities wisely, since heavy choppers have a difficult time firing on enemy aircraft.
Of course, if your opponents are foolish enough to leave their choppers in one place for too long, you can simply call down an air-to-air tactical strike on top of their position, which will immediately wipe them out. Most other tactical aid abilities won't affect aircraft, although heavy air strikes, daisy cutters/fuel air bombs, and nukes will all destroy enemy choppers.
Infantry
Infantry units are the unsung heroes of the battlefield: although most players will look to the flashier tanks and choppers to forward their aims, a smart, subtle player can use infantry to harry their foes and destroy much more powerful enemy forces. Infantry units are unique in that they can garrison themselves in buildings to fire on their enemies from within, as well as hide inside forests to prevent enemies from spotting them.
When controlling infantry, keep in mind that they're fairly vulnerable to enemy fire: enemy helicopters will chaingun them to death, while enemy tanks will use offensive abilities or simply run them over. If your troops are out in the open, well…they shouldn't be. You may have to move across open stretches of land, but if you do, constantly jam on your Sprint button to force your troops to move more rapidly. You want to get them to cover or have them moving towards cover at all times. Helpful buttons to remember here are Y and H. Tapping Y will tell all of your targeted infantry to move towards the nearest transport, while hitting H will move them towards any nearby buildings and plant them inside. Pretty handy for when you come under fire.
As multiplayer games creep onward, it'll be much more likely that the control points will have been decimated by tactical aid and that there won't be any buildings or forests for you to hide in. If you find this to be the case, then you may want to consider switching to armor in the late game to help keep your forces alive long enough to capture the control points.
Using Infantry
You have four primary infantry units to use here.
Infantry Squad
Generic infantry is something of a jack of all trades unit, in that they have anti-aircraft, anti-tank, and machinegun capabilities. They won't be overwhelmingly powerful against any particular type of unit, but they can be handy at forestalling enemy advances, especially if you station them inside buildings near control points. Their jack-of-all-trades nature makes them useful, especially since they're the only infantry unit that can fire on enemy helicopters.
Anti-Tank Squad
One of the secret dreads of the armored commander is the suspicion that the trees or buildings that he or she is approaching are filled with anti-tank infantry units. When controlled well, a group of anti-tank soldiers can decimate an entire opposing force of tanks.
Anti-tank soldiers wield rockets that will quickly kill any armored unit that they fire on. If you can control your units directly (i.e. if they're not parked in a building), group all of your anti-tank infantry units together and control their fire, focusing first on medium tanks (their offensive ability can quickly wipe you out), then APCs, then moving on to the light and heavy tanks. Of course, if you're totally exposed, enemy armor will try to run you down, so you may want to activate your sprint ability and stay moving while you run for cover.
Anti-tank squads do pack some light machineguns for defending themselves against enemy infantry, but will still fall to infantry squads or snipers before they manage to deal much damage.
Sniper
Snipers require a fair amount of resources, but you only get a single unit here, so it's sometimes tough to justify the expense, especially since snipers can only fire on enemy infantry. That said, they do a bang-up job of eliminating infantry, and can be handy as spotters, but they'll be dead weight unless you come across enemy soldiers, and it can sometimes be a bit of time before that happens in an armor-happy online game. You can always send them out on their own and have them sneak through the forests near enemy drop zones and hope that they get lucky, but all it takes is one napalm strike and they're done for.
Demolition Engineer
Demo engineers are the most specialized of the four infantry types, and are going to be at their best when used to destroy bridges that lead to control points you already own and want to protect. Not all maps will have bridges, but if you do manage to find a control point that needs protection, capturing it with infantry and destroying the access roads with demolitions can make it pretty difficult for armor to get to you without making some major detours. Bridges can be replaced with tactical aid, though, so you won't be able to count on this making a permanent difference in the battle. Sometimes, however, all you need is a temporary diversion for a bit, and blowing a bridge is a great way to get that.
Demo teams can also destroy buildings, which is somewhat less useful than blowing bridges. Generally if you want to blow up a building, it's because there are enemy forces inside, but said forces will often chop through your demo teams before they can reach the building, making this a dangerous tactic unless you're willing to suicide your demo unit. If you do want to destroy a building, be sure to use your sprint ability to get your unit to the target quicker than they would be capable of otherwise.
Troop Transport
The troop transports are lightly armored vehicles that can carry a squad of infantry to the front while also serving some other functions. It has machineguns, so it can fire on enemy infantry squads (although it will quickly be destroyed by any number of default infantry or anti-tank infantry squads), but more importantly, it moves quickly and has a decent range of sight, making it a cheap way to scout enemy positions. It can also slowly perform repairs on other vehicles, so if you have a squad of these, they can all repair each other; this will be done much more slowly than a real repair tank can do, though.
Transport Truck
Unarmed and barely armored, the troop transport's only job is to get infantry to the front. Apart from that, it can't do much, but if you need to capture a control point that's relatively clear of enemy presence, you can leave them on the perimeter points to help you capture and fortify them. Transport trucks will die under the lightest of enemy fire, so they're only useful if your drop zone is very far away from the control points you want to take; even then, you need to carefully monitor them and pop your troops out if they come under fire, as a troop transport will also kill any troops inside of it when it's destroyed.
Defeating Infantry
Enemy infantry poses some problems for your commanders, as soldiers are pretty good about hiding away from your fire. If they head into buildings, they can't be attacked directly, and they're often almost impossible to see if they enter forests.
First off, though, if you encounter infantry in the open, you can try to wear them down with helicopter machineguns. This will take a bit of time, however, since your targets are small. Tanks fare better against infantry most of the time, since you can simply charge forward to a point on the far side and squash most of the infantry under your tracks. Yeah, they'll get some rockets in on you, but you'll rout most of their units if they're bunched up together in a single group (as they often will be). You can also try to use artillery on them, but be sure to lead them a bit, as infantry in the open will almost always be on the move.
More often than not, though, you're going to be facing infantry that's hidden away in buildings surrounding a control point. Garrisoned infantry are difficult to take out with anything other than artillery, since they can fire out of the building onto incoming forces. In order to kill these guys, you'll need to demolish the building that they're in. Tanks or choppers can do this just as well as artillery, but it'll take them longer; use special attacks on the buildings to wear them down more quickly. Unfortunately, a good infantry commander will be ready to unload his forces when the building is about to blow and will usually park them in another one nearby. Thus, your best bet for dealing with pesky infantry, especially when there are multiple units in a single large building, is to use laser guided bombs to instantly blow it away. Your enemies will take time to recover, and you'll also prevent them from using the building in the future.
Infantry in the forests are less protected from gunfire, but are also much more difficult to spot. Helicopters (including attack helicopters) can usually spot infantry in the woods if they get close enough to see them, but usually you'll be alerted to their presence by the smoke trails that lead back to their rocket launchers as they blow up your tanks. Most kinds of tactical aid will smoke them out, but napalm is custom-made for this purpose: lay it down along the treeline, and you'll burn up any infantry in the woods while also destroying the trees and preventing them from taking cover there again. Daisy cutters are another step up the ladder, if you have the aid points; they'll kill anything anywhere near the area of effect, and also destroy the trees as well.
Support
The support role, like the aircraft role, isn't focused much on capturing control points, but rather on preventing the opponent from doing so and supporting the ability of your teammates to charge forward into them. Support is a pretty popular role choice, thanks to the ability to fire artillery across the map towards your opponents, but it's also one that requires a good deal of strategy to use well.
Support can roughly be divided into artillery and support vehicles.
Using Artillery
You have two kinds of artillery here, medium and heavy. Artillery is very expensive, but can rain destruction down on distant parts of the battlefield. Do this by firing on the ground. If you hold the F key down, you can get a targeting reticule on the ground. Every artillery unit will have a dead zone around their immediate area in which they can't fire, designated by the green circle. Everything between that circle and the more distant red circle, however, is free game, so click on the ground to fire away!
Now, artillery can fire long distances, but the rockets or shells will usually take five to ten seconds to arrive at their destination, so it's very difficult to accurately hit moving enemies. Instead, you should try and focus on weakening defenders and allowing your teammates to more easily take control points that they're heading for. If you hold F while you're looking at any enemy control point, you can usually see the fortification points; blasting those will destroy the fortifications and usually make it easier to capture the perimeter points. Alternately, you can always use an aerial recon tactical aid power over a rear control point to expose the defenders, then start shelling them from long range.
Unfortunately for you, artillery is both slow to move and lightly armored; if enemy choppers or tanks get within range of your arty, it'll be toast before you know it. You also have to deal with enemy tactical aid that'll be coming your way, and come it will! If your enemy can see your units directly, then there isn't much you can do about this, but even if you think you're well away from enemy forces, get in the habit of moving them after each barrage of rockets. You don't need to move too far, but you do want to
If you ever run out of enemies to hit, then take your time to destroy buildings near enemy control points. You may get lucky and destroy enemy infantry, but in any case, you'll prevent infantry from using the buildings when your team starts attacking. Your artillery should always be either firing or moving.
Although artillery is the preferred choice of the loner, since you don't have to really do anything but guard your own vehicles, you should still be on the listen for teammates that are calling for artillery. Even if you're not grabbing control points yourself, you can still help your team out by supporting them and destroying enemies that stand in their way.
Defeating Artillery
Artillery, as mentioned, is very weak. If you can roll a heavy or medium tank or two into the vicinity of artillery, you can toast them pretty quickly. However, a good commander will keep his artillery far, far away from the combat, in a corner of the map where no one will think to look for him. Thus, finding him is often going to be the most pressing concern of yours.
Luckily, it's pretty difficult for artillery to be stealthy. Both medium and heavy artillery will leave behind trails in the air when they fire, with the trails of the heavy artillery being particularly easy to spot, especially on the NATO and US sides. Medium artillery trails are more difficult to spot. Still, if you find yourself getting hit by artillery, start looking for trails and try to follow them back to their source. If you can do so, you'll often see a bunch of trails starting at a point near the ground, then disappearing. This is the location of the enemy artillery. The best part here is that you don't need to be able to actually see the artillery to trace the smoke trails back to the source; the smoke trails appear as soon as the artillery fires, and is visible to you no matter where you are on the map.
Thus, if you can get an eye on the enemy artillery, you can relatively easily call down tactical aid onto the position of your foes and destroy them, or tell your friendly artillery units to fire on that location via the help request menu. This, however, is why we stressed the importance of moving your artillery as soon as you fire, and you can expect a smart enemy to do the same. If you have heavy choppers, then you can try to quickly move them over to the artillery and take them out, assuming they aren't completely surrounded by anti-air vehicles, or try to move a tank or two in that direction. If your enemy is quickly moving around his artillery and is defending his vehicles well, one option may be to drop airborne infantry nearby. These guys can call down a very quick artillery strike on your foes and hopefully catch them before they move again, and there will usually be relatively few vehicles in the support commander's arsenal that can take out infantry units, save perhaps medium anti-air forces. If you're really getting frustrated, load some anti-tank soldiers into a troop transport and issue them waypoints so that they avoid the main combat while they rush the artillery, then unload them and take out your opponents.
Using Support
In addition to the artillery, you have three other support units that can be used to help your team achieve victory.
Heavy Anti-Air
The heavy anti-air unit is capable of quickly taking down any choppers that come anywhere within a fairly long range around it. It fires heavy-duty missiles that will track down enemy aerial units and rapidly damage them. These can be avoided if the chopper drops flares, but this will be difficult for most players to do before they get hit a couple of times.
Medium Anti-Air
Medium anti-air units can blast helicopters that come within their immediate area. They use machineguns for this purpose, and as such deal damage more gradually, allowing enemy choppers to escape without much damage if they notice that they're getting fired on. However, these rounds are fairly difficult to see in the heat of a pitched battle, at least compared to the rockets of the heavy anti-air, so you can sometimes take out choppers without them even noticing that they're getting hit.
Medium anti-air units are also unique in that they can turn their guns on ground units to fire on them as well, assuming you use their offensive ability. This is mostly useful against enemy infantry, but even then you shouldn't expect to kill too many units with it.
Repair Tanks
You're going to be using repair tanks a lot during the single-player campaign of the game, so if you play through that, you should have a good idea of how useful they are. However, since they're grouped with support instead of armor in the multiplayer portion of the game, they probably won't be used quite as often. They can still come in handy if you play solely as a support player, in that you can repair any damage your artillery and anti-air units take, but in most cases, if you take damage at all, it'll be of the catastrophic and instantaneous tactical aid sort, so you'll just wind up losing a repair tank in addition to your other units.
Using Support as Support
If you want to actually play as a helper, you can try to team up as a support class with someone who's playing armor and move together. If you share the same drop zone and can keep your movements coordinated, then a few anti-air units and a couple of repair tanks will let your armored friend worried about enemy ground forces while you deal with the sky and keep him repaired. Unfortunately, most smart enemy players will target your repair tanks before firing on the tanks that you're repairing, so you can expect to have to redeploy them pretty often.
Defeating Support
Repair tanks aren't difficult to take out if you can get close to them. They're lightly armored, and although they have a self-repair power, it takes a while to work, letting you kill them pretty easily. Anti-air units are another matter: they'll fall easily to tank fire or anti-tank soldiers, but will keep choppers at bay. That said, if you can mass your choppers up for an attack, a couple of hellfire missiles will do a number on your foes without too much of a problem, and you won't even take all that much damage if you're facing off against a medium anti-air unit. If there are two or more heavy anti-air units in an area, though, you'll need to find some other way to take them out.
Walkthrough
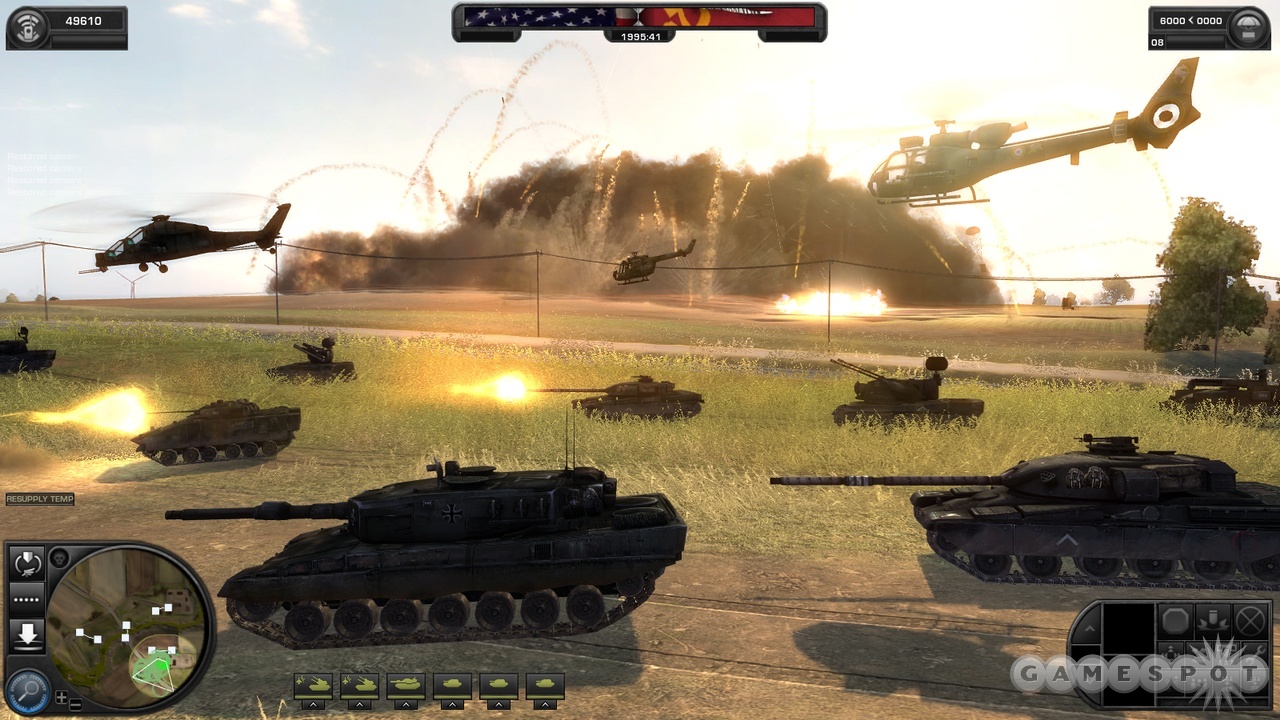
This walkthrough was written based on the game's normal difficulty setting. One of the telling aspects of the single-player game is that you almost never have to use infantry when assaulting the enemy. You can, of course, if you enjoy doing so, but in general you'll want to devote the bulk of your points to armored units. The single-player campaign isn't necessarily difficult, but it does offer up one of the best stories in any RTS game in recent memory, so it's well worth playing.
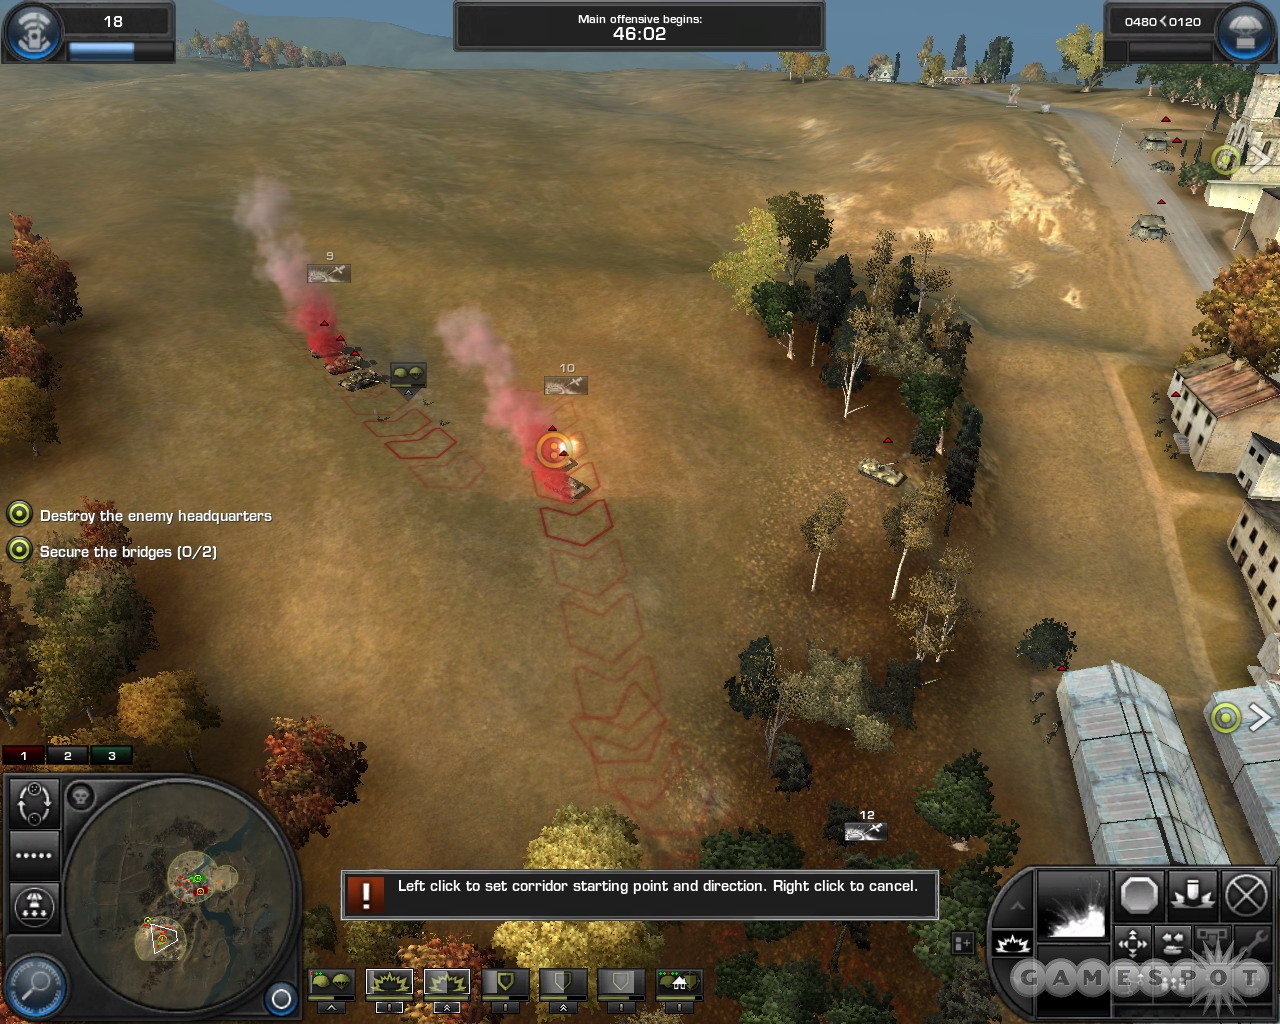
Mission One: Invasion!
Nothing too difficult here; this is only the first level of the game, after all. Move your two Bradleys up to the command point in front of your position when you begin to recon the harbor.
Rescue The Infantry
Move the Bradleys over to where the National Guard squad is located. If you get them up close to the enemy troop transports, they'll quickly be destroyed.
Secure The Supply Depot
With the infantry secure (they'll join your team, so move them into one of the Bradleys), move the Bradleys over to the supply depot and take it over. That'll cause you to shift over to your next objective, as well as obtain another Bradley for your little ragtag crew.
Recon The Route to the Kingdome
Time to ensure that your path to the Kingdome is relatively secure. To the east, you'll spot a Soviet Light Tank near the next control point. Use your Bradleys to destroy it with their TOW missiles, then move over to the control point and kill the infantry there to take it over.
Clear The Route to the Kingdome
You have a number of infantry squads between you and the Kingdome, and no way to take them out with your Bradleys. Fortunately for you, you'll get the ability to use artillery here, which will make quick work out of them.
Click on the command ability menu on the top left corner of the screen and click in for three barrages of heavy artillery, placing them all in and around the buildings that the infantry are holed up in. (There's also a few tanks that are attacking some of the National Guard nearby; you can use precision infantry to destroy them.) If the heavy artillery doesn't destroy all of the buildings here, use a single precision strike to take out any remaining buildings.
Clear the LZ at the Kingdome
Now, move your Bradleys up around the path towards the Kingdome. You'll get a Humvee here; select it, then right click on the damaged Bradley to add it to your forces. You can use the Humvee to repair any damaged Bradley at this point, and it'd be wise to do so.
When you're ready to clean out the Kingdome parking lot, select one of your Bradleys and have it fire a TOW at the closest AA vehicle there; they should be highlighted on your view. Use the TOWs to destroy them in succession while popping the smoke flare ability to ensure that you don't get hit in return. When the AAA vehicles are done, repeat the TOW process on any remaining tanks, then move in and clear out the infantry.
Set Up A Perimeter at the Kingdome
When you reach the Kingdome, a short cutscene will play.
Evacuate Remaining Guardsmen
There are two sets of Guardsmen in the area, both of which are under fire from enemy light tanks. Move your Bradleys in a box formation through the streets until they're in range to fire TOW missiles on the enemies, then pop smoke and start pounding them.
Clear the Underpass
You get more artillery at this point, so it's time to bust out. Secure the secondary objective LZ nearby, then hang back and start repairing your Bradleys while using your artillery to clear out any enemies that you happen to be able to see.
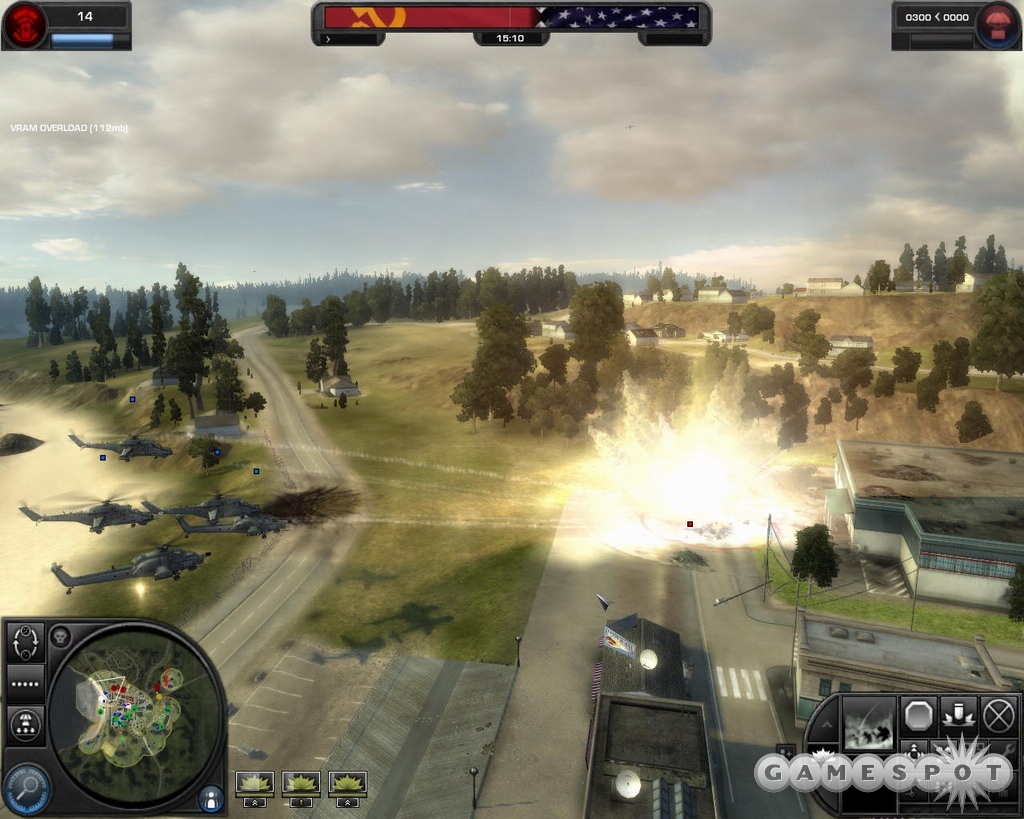
Mission Two: Reunion
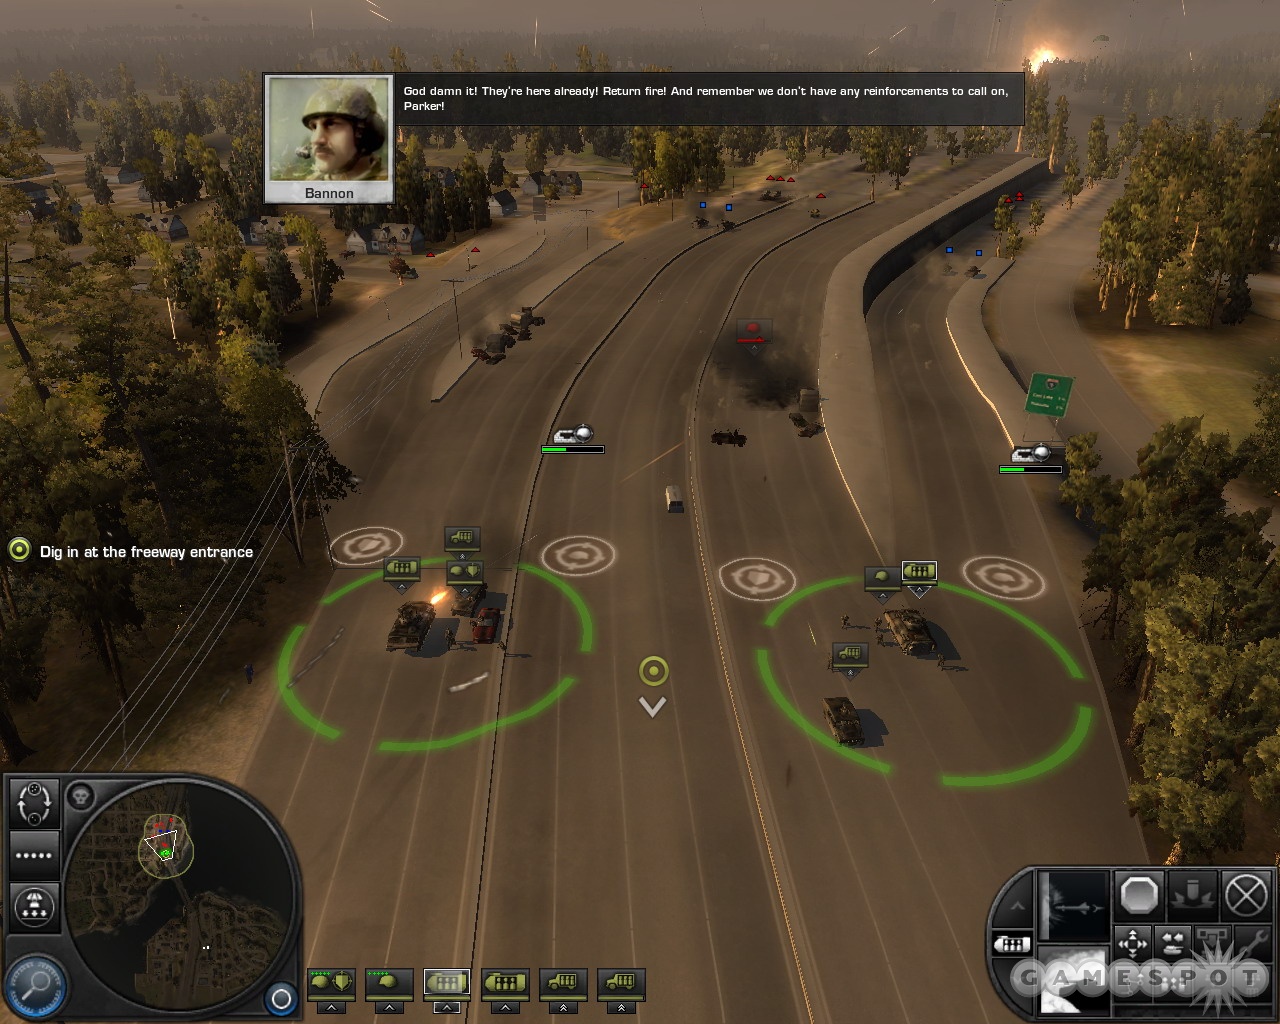
Dig In At The Freeway Entrance
When the mission begins, quickly move your Humvees to the control points on the bridge, then load up your infantry into the Bradleys and move them along behind. You need to get to the control points quickly; when you take them, fortifications will start to be built that will let you more easily defend the bridge. Use the Bradley's TOW missiles to fire on any incoming vehicles.
Rescue the Civilian Evacuees
When you have the control point secured, it'll disappear. Group your units together and move over to the school buses to kill the enemies there.
Save the Levinson Family
Get over to the Levinson house and kill the nearby enemies. That'll let you rescue the family and return to the bridge. Keep in mind that you have two Humvees here; they can repair each other as well as the Bradleys.
Hold the Bridgehead
Return to the bridge and start TOWing any incoming vehicles that come your way. The allied units will do most of the heavy lifting here, so just keep your vehicles repaired and firing. You'll get a couple of light tanks here, so position them near your Bradleys and be sure that your Humvees are repairing your tanks as they get hit.
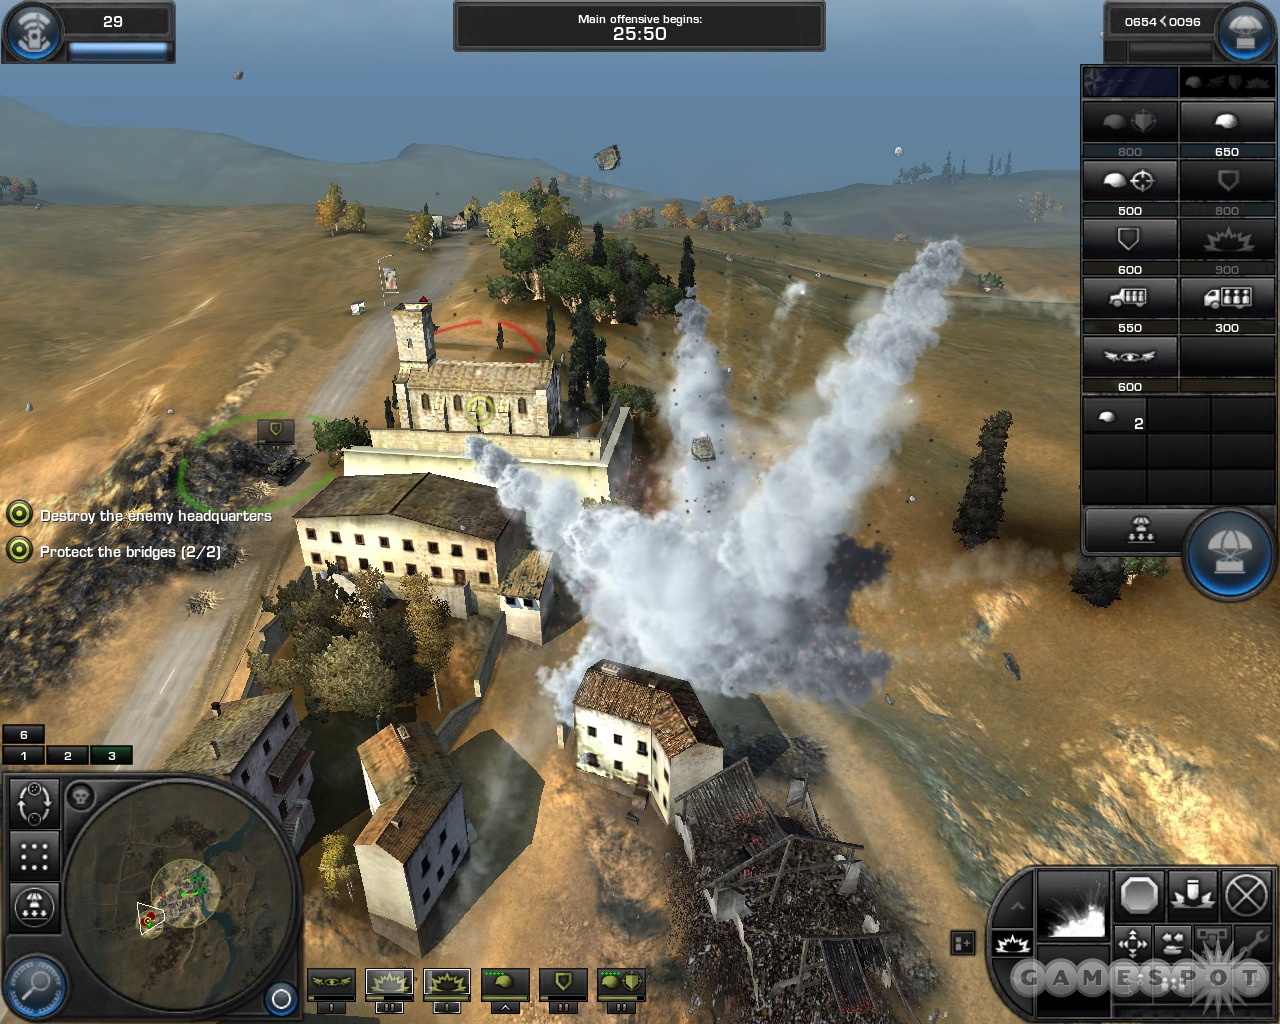
Defend the Southeast Bridgehead
A more pressing action comes upon you at this point, as you'll be tasked with holding the southern section of the bridge and repelling a heavy enemy attack. The control points here are fully fortified, so that'll help, and you'll be able to call down some reinforcements to help you out. Immediately bring down a repair tank and some more light tanks. When the secondary objective involving repairing the AA comes up, send a Humvee over to perform that task; that'll let you shoot down enemy choppers as they come in overhead. You won't be able to move the AA vehicles, but that's fine; they'll be dandy where they are.
Completing the secondary objective will let you call down a free medium tank from your reinforcements menu, so nab it and anything else you can. Just keep repairing your tanks here, and you should be fine.
Evacuate The Hospital
Eventually you'll be told to evacuate a nearby hospital. Split your forces into roughly equal amounts and move each half into one of the two control points here, being sure that each side has repair units in it. Enemy tanks will start coming in force, but if you fortify the points, you should be able to hold them off without too many problems.
A secondary objective here has you disrupting Soviet airborne drops. Nothing too complicated; use precision artillery to destroy the marked homes and prevent the airborne troops from getting together.
Assist Bannon and Charlie Company
You need to shift your target to where Bannon is defending the bridge now and use your tactical powers to help support him. This will be somewhat difficult to do; there are a lot of enemy tanks in the area, and you're going to get a secondary objective that will use the same resources as you need to defend Bannon. Still, it's definitely doable.
When you have a camera on Bannon and his tanks, call down Heavy Air Support to eliminate most of the tanks in the area. Heavy air support doesn't target friendly tanks, so you can place it right on top of Bannon's tanks without harming them. Apart from that, you'll want to use heavy artillery barrages to turn the area north of Bannon to dust. These attacks can harm friendly units, so be sure not to place these over friendly tanks.
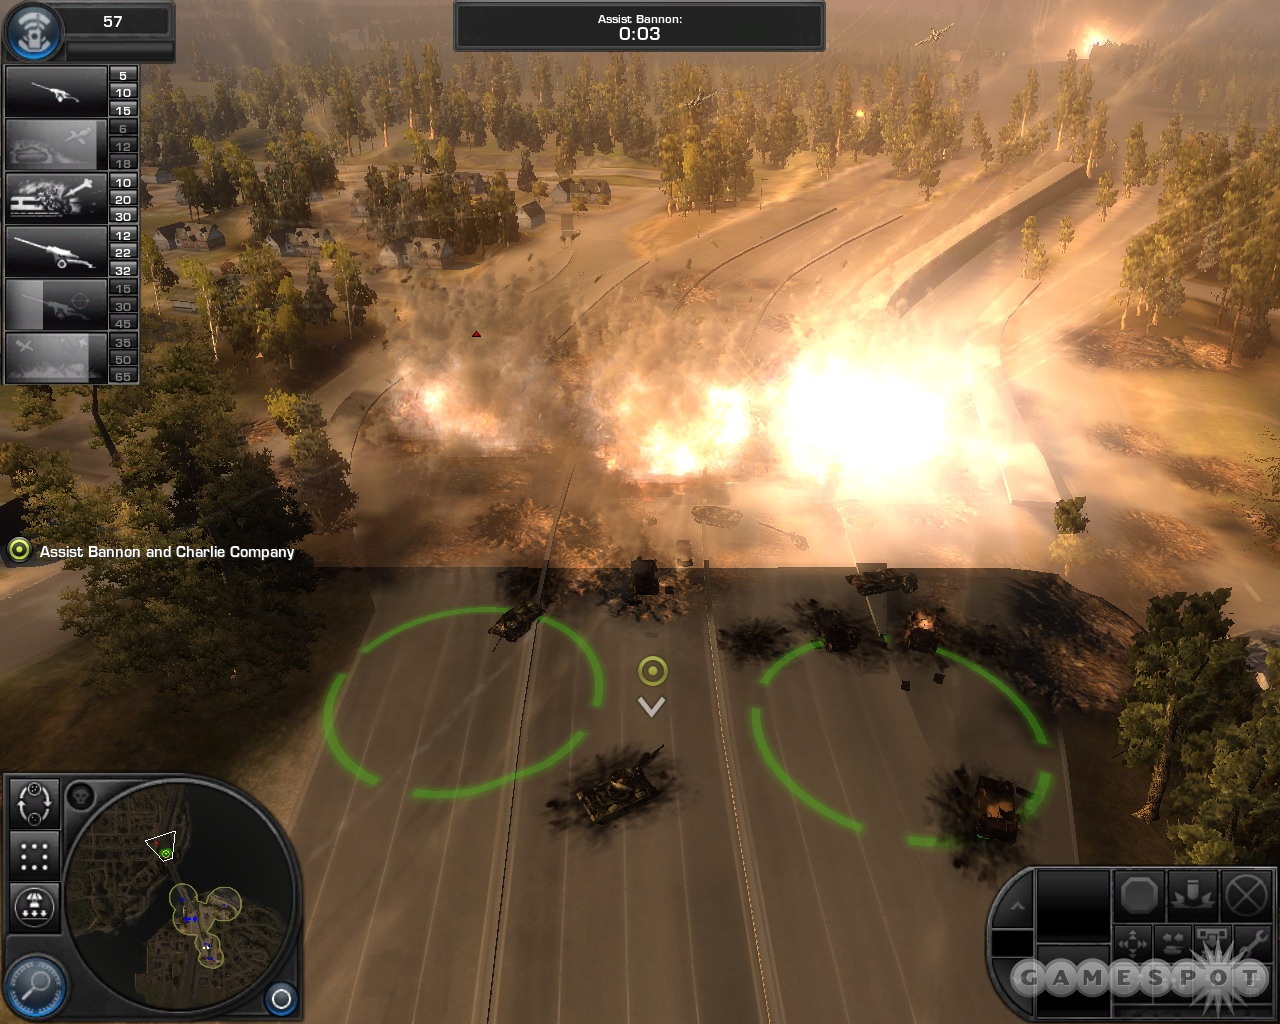
When you get the Scorched Earth secondary objective, use precision artillery to destroy the marked targets three at a time while being sure to periodically call down the heavy air support on Bannon's position. If you can clear all of the structures that are on your map, you'll complete the objective.
If you manage to take out the secondary structures, you can devote all of your attention to Bannon. You should be rolling in tactical points here, so continually call down the heavy artillery and precision artillery onto the Russians as they arrive, and use the heavy air support centered directly on Bannon's position to keep his tanks alive. After a few minutes he'll withdraw and you'll win the mission.
Mission Three: Battle for Pine Valley
Secure The Gas Station/Eliminate the Soviet Sniper
Your first goal here is to secure the gas station from the enemies that hold it. To do so, call down a few vehicles. Two Bradleys and a repair tank are your best bet here, although you can afford more stuff. Infantry might wind up slowing you down, so you may want to just stay mechanized.

The optional objective here is to eliminate the enemy sniper in the tower near the gas station. Doing so is easy enough; just wait for the enemy waves to subside, then move your Bradleys over and start firing TOWs at it. It'll fall eventually.
With that done, move the Bradleys towards the gas station and start attacking, using the repair tank to repair them and itself when you take damage. As soon as you get ten tactical points, you can call down a light tank to bolster your squad; you can call as many as five of these guys, so nab a new one after every ten points you gain.
Clear The Way Into Pine Valley/Clear the Strongholds ASAP
Three new control points for you to take here, each with fortifications. You only have ten minutes to clear the fortifications if you want to complete the secondary objectives, so move forward with your armor. If you have a few light tanks, you should be able to roll over the first couple of objectives without too many problems: simply get close enough to fire on your foes, pop smoke, then let loose with the TOW missiles. Keep your repair tank in a separate group from your offensive vehicles, and you should be fine.
The third objective is a bit more compact, since it'll be surrounded by buildings. Again, though, rushing it and popping smoke should let you quickly overrun it, especially if you have all five light tanks on the ground by this point. Just be sure to deploy them manually or they'll probably get a bit confused in the tight streets.
Secure the TV Station/Eliminate the Soviet Forward Observer
With the town secure, you need to eliminate the Soviets at the TV station. This is easy to do; simply move your squads away from the beach towards the hills to the south and wrap them around to approach the TV station from that direction. You should see the artillery spotter when you arrive; take him out, then destroy the buildings with TOW fire before moving into the area and capturing the buildings.
Defend The Supermarket/Help Captain Bannon With Repairs
Get your troops over to the supermarket here on the double, using any infantry you have to occupy it and the vehicles to occupy the control points. You'll need to manage two fights here; send one of your repair tanks over to Bannon's front, where a single tank (marked with the circular target symbol) is in need of repairs. While it's tasked on the tank and repairing it, keep your concentration on the supermarket and use your command abilities to soften up the enemies that come your way (you can also fire on the tanks near Bannon, if you like). You'll get an M1 tank for repairing Bannon's vehicle.
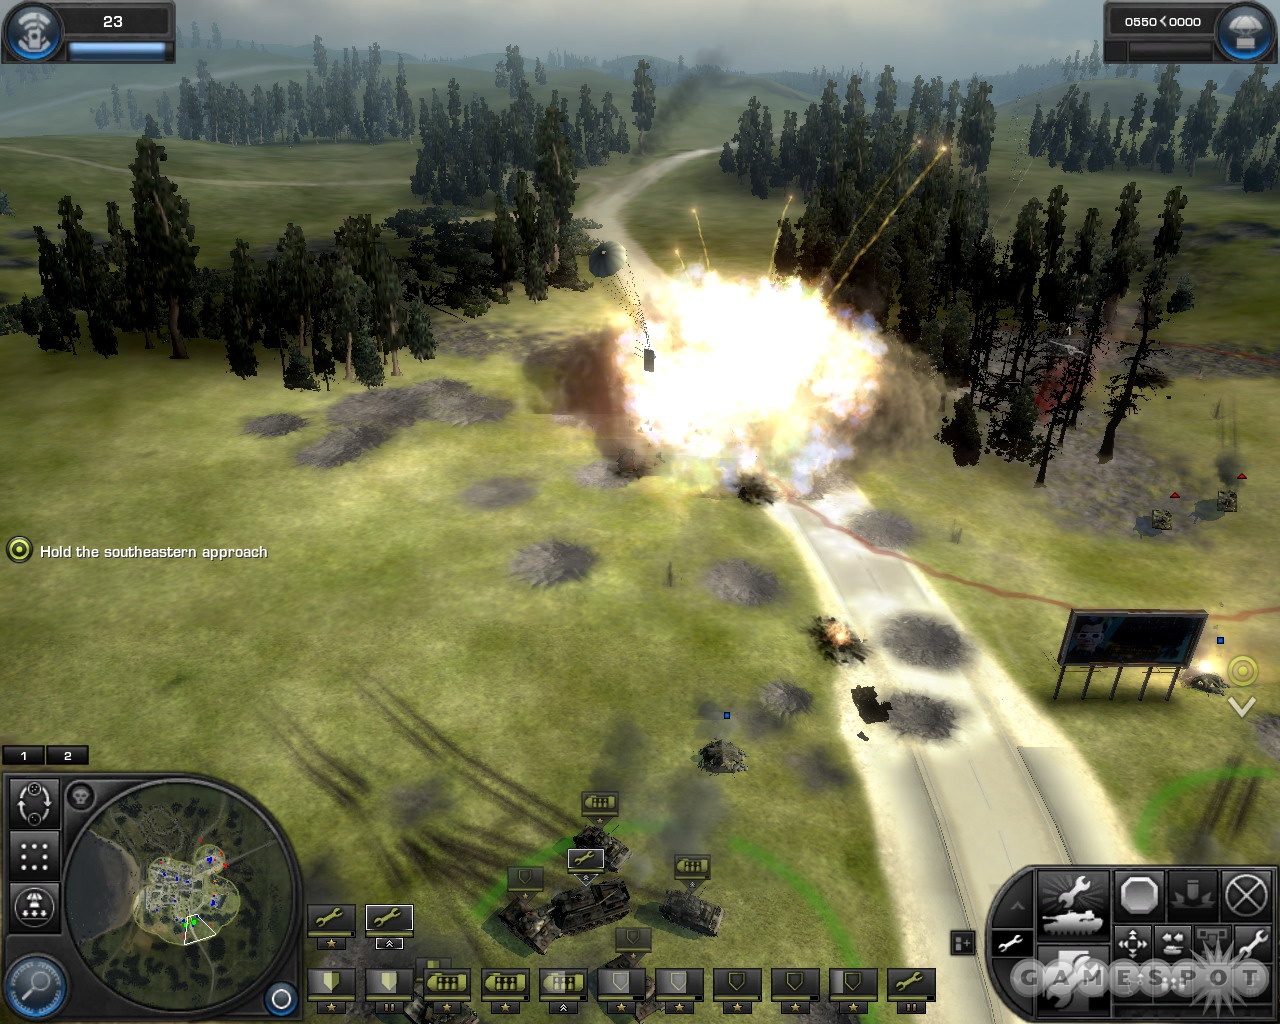
Retake the Southeastern Approach
When you hear your captain calling out that artillery is coming towards the supermarket, immediately move back to the south towards the center of town. The supermarket will be destroyed, but no big deal.
Take your time to repair your units and nab some new ones through the drop menu at this point. When you're ready to roll, retake the southern control points and start fortifying them.
Hold The Southeastern Approach/Destroy the Enemy Mortars
Not too hard. Dig in, split your forces into the two control points, and repair your tanks when they get damaged. You'll get more airstrikes here, so use artillery and tankbusters when needed.
Eventually the enemies will set up mortars to fire on you. You can't see them from the control points, but you can see where they're located if you move your view out to the hills. Use heavy artillery barrages on those locations to destroy the mortars; if for whatever reason you happen not to hit the mark, send out a few tanks to finish the job.
Hold this position for a bit. If you destroy the mortars you get the daisy cutter bomb, which deals a vicious blow to enemies caught in the blast. You can use it to destroy the forests near your position and aid your sightline a bit, then start pounding the enemies with heavy artillery. You will have to deal with a pretty heavy assault before this phase ends, so be prepared!
Defend the Town Square/Aid the Artillery
When Bannon retreats, start pulling back yourself; a huge horde of enemy tanks will start rolling down the highway where you were positioned. If you can time it correctly, a daisy cutter will take out the bulk of them. Otherwise, use tank buster tracks to eliminate as many as you can.
When you reach the town square, you'll get a secondary objective noting the presence of friendly mortars that are going to be overrun. Leave three friendly units in the control points to secure and fortify them, then run a few tanks and Bradleys over to the building where the mortars are to rescue them. Doing so will give you three mobile mortar vehicles. They won't be too useful here, but hey; they're units.
With the mortar in tow, head back to the center of town and start defending yourself. Watch your map for enemy offensives and use tankbusters and heavy artillery barrages to bust them before they reach you. With your repair tanks (you should have at least two or three by now), you can repair any damage your units take before things get out of hand.
Break the Soviet Offensive
When the Missouri arrives, you've basically won, but you need to seal the deal. You need to use the guns of the ship to fire artillery on your targets. You have three guns on the ship, which fire in a small area, but which only take a few seconds to come down. Zoom out and try to find the small blips of enemy units coming your way, then lead them by a few seconds with your ship fire. Keep in mind that you can use the number pad's 1, 2, and 3 keys to automatically select these firing abilities here.
When you manage to hold off the Russians for a few minutes, you'll win the mission.
Mission Four: Into The Mountains
Secure The Two River Fords/Secure Both Fords ASAP
There are two control points lying across the nearby river, and you need to conquer both of them. Despite Webb's comment about infantry being powerful here, you may find it advantageous to stick with the mechanized forces, which are going to be much more quick when moving around. We initially deployed a light artillery unit, three Humvees for repairs, and four light tanks. That'll let you move around quickly, which is best if you want to secure the secondary objective.

Begin by heading to the northern control points, which have the small building in the middle of them. There's some light infantry here when you arrive, which your Humvees will be able to take care of. After placing your troops in the two control points on your side of the river, scout the other side with a light tank, but be ready with your artillery; there'll be a couple of Soviet tanks on the small hill near the last control point. Destroy them with command abilities or your artillery fire, then move the bulk of your remaining forces across the river. Hold there for a couple of minutes, popping smoke when enemies arrive, and you should be fine. You can use your artillery to fire on the ground in the direction that the enemies approach for some lucky kills.
When the points are fortified, Webb will come along to take control of the area, so withdraw your forces to the river and head south. There's a large hill overlooking the remaining control points, so place your troops up there while you pelt the three points with light artillery barrages.
When you're ready to head down the hill, move a unit down until you can get an idea of where the anti-tank fortifications are, then start pelting them with mortars (since you get another few deploy points after taking the first control points, it might be wise to summon another artillery unit here). When the first point near you is clear, move down and take it, then split your crews up and move over to the other points after softening them up with more artillery. You may also want to napalm the forest between the two points here, as there is a bit of infantry in there. You'll be dealing with more armor at this point, so be sure to move your drop zone and quickly call for reinforcements if you take losses.
Secure The Bridge/The Bridge Must Not Be Destroyed/Hold Until Bannon Arrives
You get extra reinforcement points here, so use them all and quickly make your way north to the bridge. You should be able to arrive before the Soviets come, so get the bulk of your troops across it to the far side and start fortifying. You can use napalm on the forests here to clear them a bit.
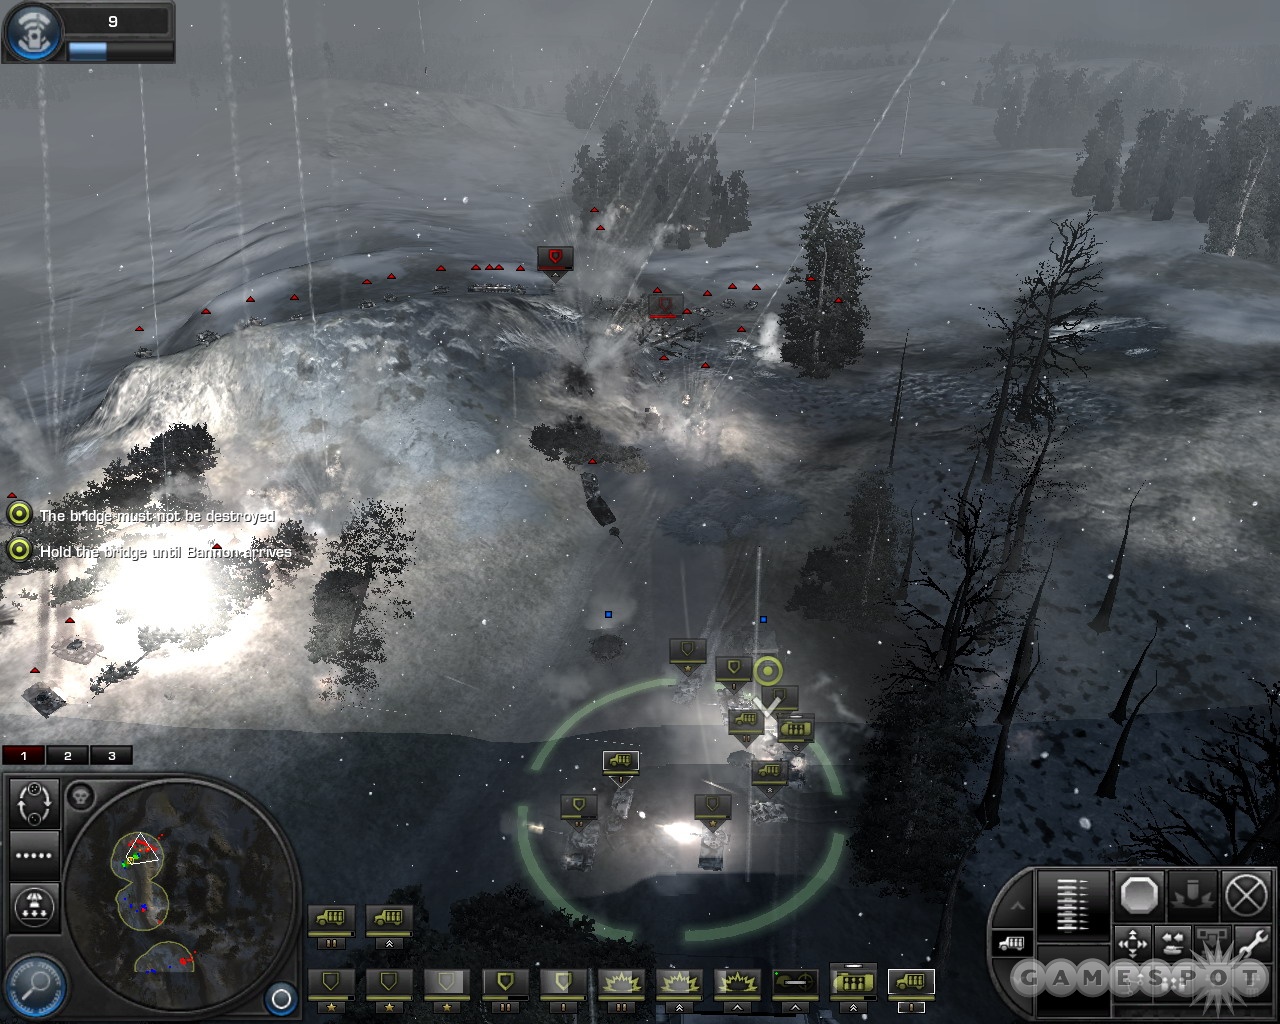
This is a straight-up waiting objective: just hold position until your reinforcement menu is removed and the Soviet artillery appears on your map. You can try to use artillery on them, whether via tactical aid or your artillery units, but they're spread out, so you'll probably need to move a few tanks out to deal with them, while still keeping the bridge fortified with troops. Get rid of them quickly, then fall back and keep your units around the bridge.
Now, at this point, you just have to wait. Put most of your tank on the eastern side of the bridge, but hang back at least a couple on the other side, where your artillery should also be located. Have the artillery firing at the ground along the approaches that the Russians are using.
Eventually a huge Russian attack will come your way; they'll take up positions around your forces and start to fire away. There's not much you can do to save your units, but you can call down artillery on the Russians to weaken them a bit. After 20 or 30 seconds of this pounding, you'll see Bannon coming up to the rear of the Russians. After he pounds them, you'll win the mission.
Mission Five: Last Stand
Secure And Hold the East Bridge
You've got to drop your men quickly here, as the Russians will be attacking you in just minutes. Drop two or three anti-tank units here; they'll be helpful in the upcoming battle, and you get some free transport units to match up with them. They'll probably be more useful to you than the light tanks will be at the moment, so feel free to concentrate on building a couple of armored transports instead of the tanks.
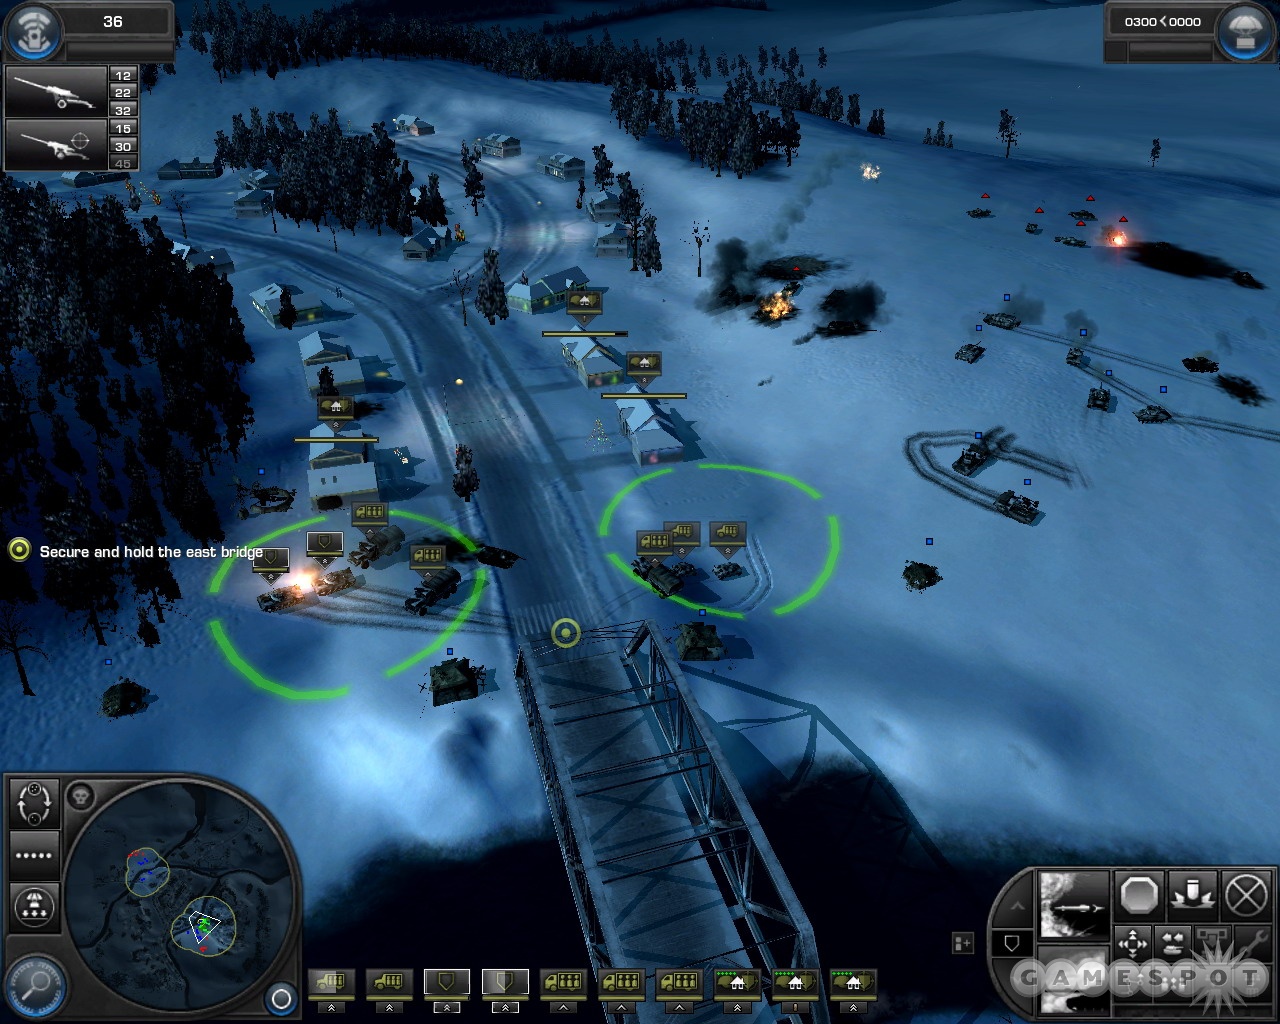
When you drop, quickly shuttle your troops up to the control points and let them help you capture and fortify them quickly. When the timer on the Russian attack meter gets down to around 15 seconds or so, move the soldiers into the homes nearest the control points. Be sure to have a couple in the homes nearest Webb's tank, as they'll be helpful in destroying the tanks coming from that direction, but be sure to cover both sides of the street, as tanks will be approaching from the direction of the small town nearby, as well.
The AT infantry inside the buildings will be able to destroy pretty much anything that comes your way, and Webb's tanks will do a good job of holding back the other tanks, so you should be set at this point. Use your tactical aid artillery on the forces as they arrive, if possible, and hold your position.
Secure and Hold the West Bridge
Eventually you'll change your objective and be asked to switch positions and head to the western bridge near Bannon. Leave one or two anti-tank units in the buildings here, but eject the others and load them up into your transports and get rolling.
You get some reinforcement points here, so immediately change your drop zone and deploy as many light tanks as you can and move them to the western bridge. You have to very quickly get your troops into the circles here and reinforce the area. You can't move your anti-tank units into the greenhouses, so you'll have to leave them in the open. This section is another slog, but if you manage to rebuild light tanks as they get destroyed and move them back out to the reinforcement points, you should be able to hold. Don't forget to call down artillery barrages on the enemy tanks as they amass.
Hold The North Bridge/Eliminate the Soviet Recon Squad
When you get the call, move up to the north bridge and start fortifying it. You'll be able to call in anti-air units now, but you may not even need them; a few helicopters will come your way, but you can use an air-to-air tactical aid ability to get rid of them, and the anti-air fortifications, or your Bradleys, should be able to handle the rest. Keep in mind that the southern part of this bridge will be the one that the Russians attack most heavily, i.e. the one closer to the center of town. Fortify that first.
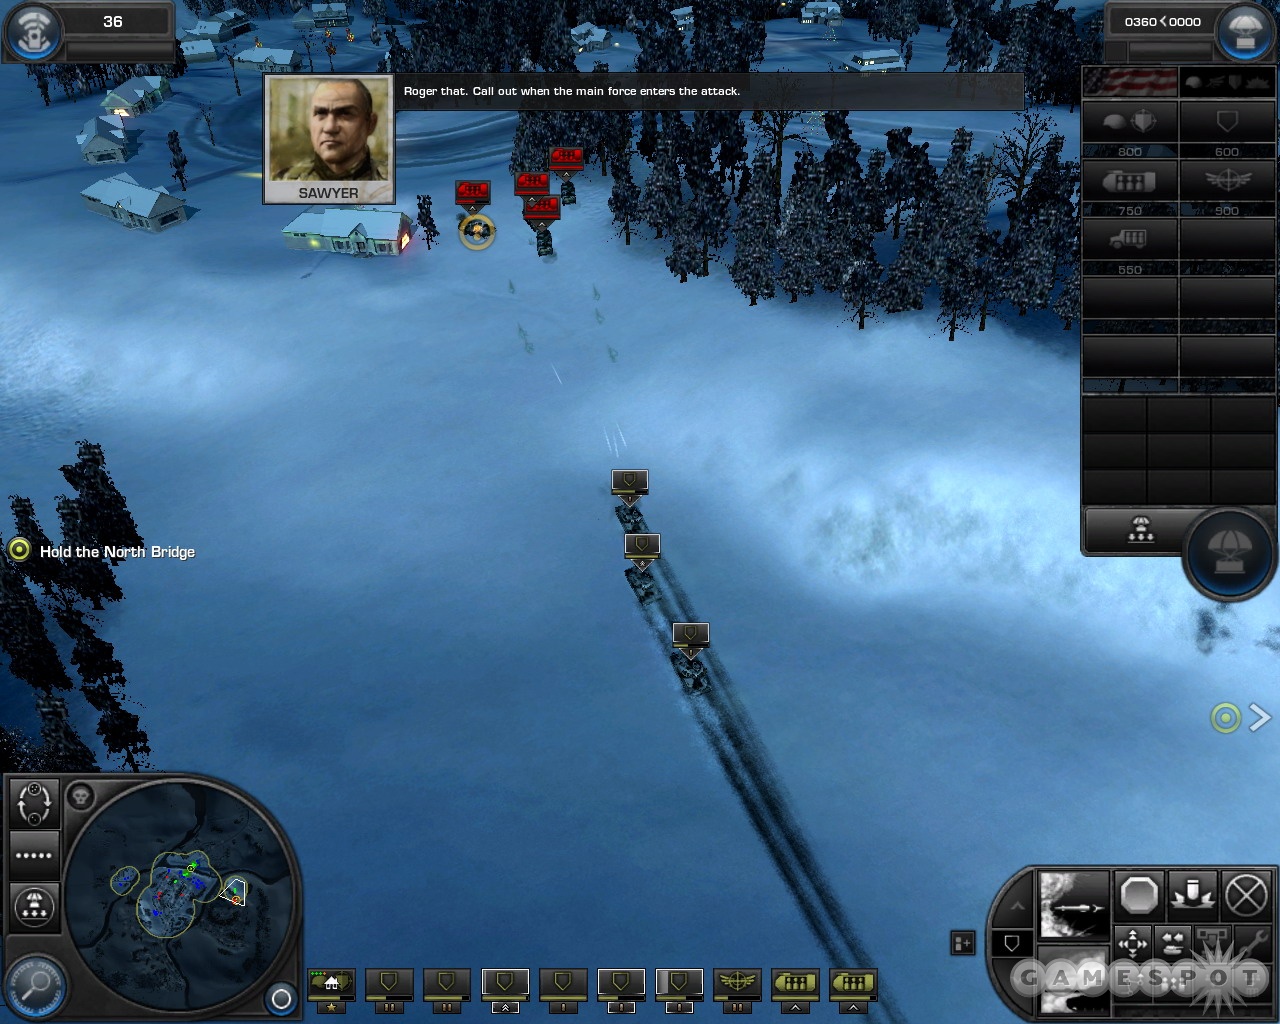
A Soviet recon squad will eventually appear and start heading up the eastern side of the map. You need to destroy them before they reach the edge of the map if you want to complete the secondary objective. If you left your anti-tank units in the buildings near the first bridge that you held, they might be able to destroy them; if not, pull two or three light tanks away from the current bridge defense and move them to the northeastern corner of the map to intercept and destroy them.
Retake the Town Center
When the carpet bombing comes in, quickly mass your troops and move them to the south, towards the town center. Ivan is coming in force, so you'll need to split your troops up and place a couple into each control point. Webb and Bannon will help, but only a bit, so call down reinforcements after making sure that your drop zone has been adjusted. Light tanks are the way to go here, with the occasional Bradley being used for anti-air support.
If you can make it this far, you've probably already won. Just keep calling for reinforcements on your light tanks. When Sawyer gives you the bad news above enemy reinforcements, drop back to the high school and use tactical aid to summon Shiva, the destroyer of worlds. When Bannon gives you the position, drop the nuke and end the mission.
Mission Six: Seeing The Elevator
Secure the Soviet Fire Base/Clear the Vineyard
Lots of units here to play around with, including helicopters. For the moment, though, don't bother with them, as there's some heavy anti-air units coming up ahead. Stick with the armor, building a couple of heavy tanks, a couple of medium tanks, and a repair tank. To supplement this force, you can either build a heavy helicopter for long-range anti-tank firing, or a medium tank or armored transports as anti-air forces.
With your tanks in the fore, head down the hill towards the vineyard. When you have the requisite tactical aid points, use a laser-guided bomb on the large mansion there to destroy the anti-tank infantry inside, then start probing the defenses from the road. There will be heavy enemy forces inside, but nothing you can't handle. Repair your vehicles as they take damage (and be careful, as the artillery on the hill will be coming your way), and reset your drop zone to make your troops land in the vineyard. You will have a few helicopters coming your way here, so hopefully you brought along some Bradleys. If not, call in a quick air-to-air strike to eliminate them.
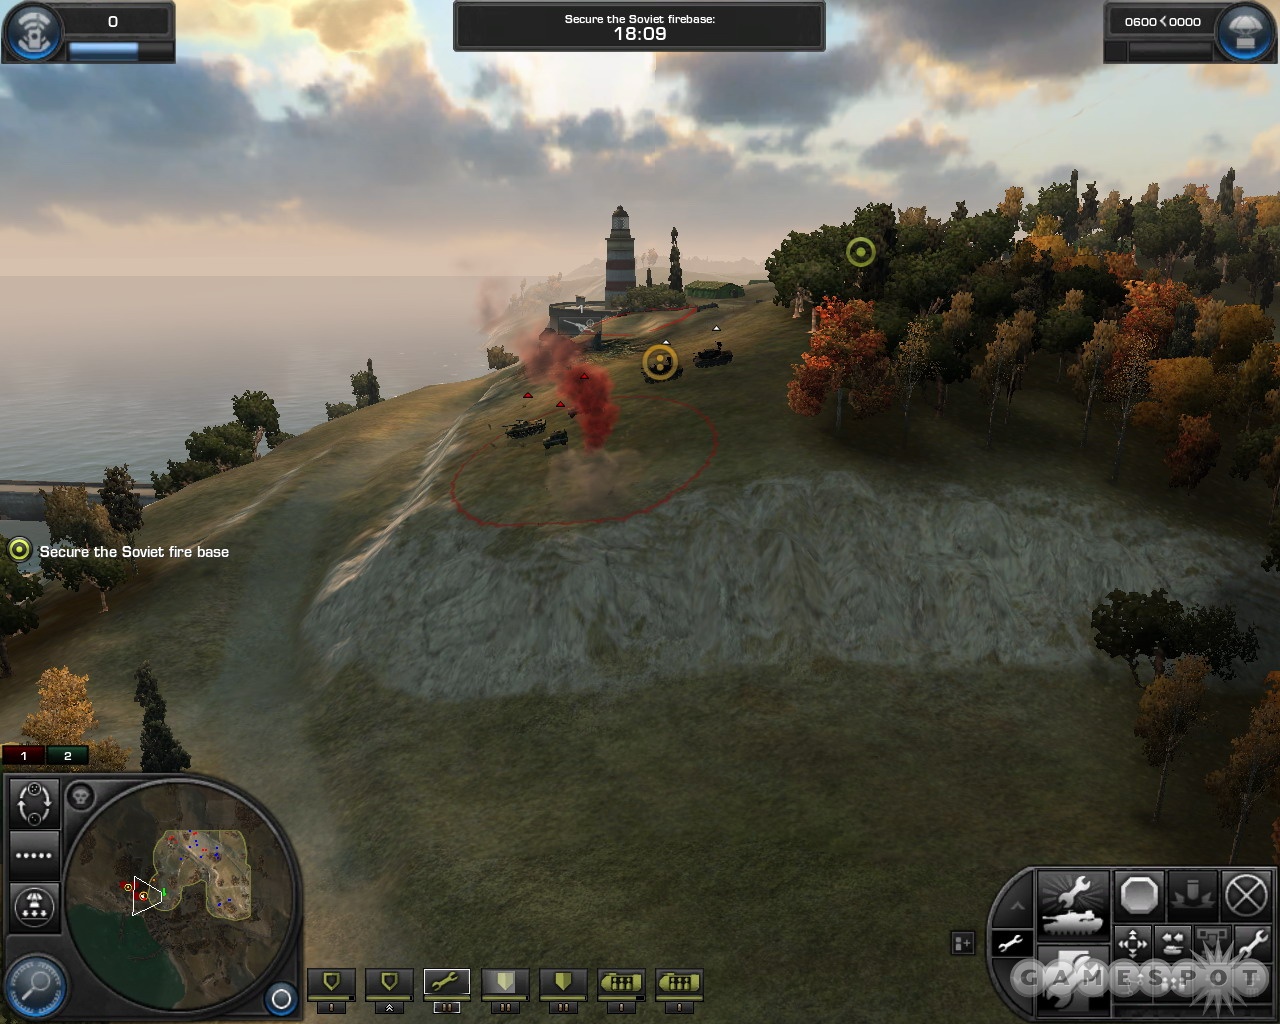
When you're ready to charge up the hill, let your tanks again lead the way, and use more bunker busters on the bunkers that guard the path.
Save the AA
When you near the fire base, you'll spot a couple of captured AA units on the hill nearby. You can save these and gain them as free units if you can capture the base without destroying them. When you have enough tactical aid to do so, call in a precision artillery strike on the hill nearby to clear out the troops there, being sure that the anti-air units aren't in the area of effect.
More tanks will be rolling along the hilly road towards you, so mass your tanks on the road itself and start picking them off, using your repair tank to repair them as they tank damage. When you have enough tactical aid, bomb the control points here and sweep your tanks up to eliminate any remaining artillery units.
Kill The Hidden Infantry
After taking over the base, position the bulk of your troops in the northern and western control points to fortify them quickly. You'll be given the position of infantry in the woods; burn them out with napalm to easily complete this objective.
After you fortify the hilltop, you'll be given access to a pair of heavy artillery units. Deploy them at the lighthouse and make each of them into their own squad. These guys can fire across the bulk of the map, and you'll be using them to clear out the nearby village. You also gain access to the anti-air units if you managed to rescue them without destroying them.
Clear Out the Village Defenders
There are four clusters of defenders in the village below, so go ahead and start using your artillery to clear them out. If you select the artillery, you can tap F and left-click on the ground to have them fire away at your target. To reveal the map, use the Aerial Recon tactical aid, then concentrate your artillery fire on the buildings with infantry inside and the fortifications around the control points.

The control points will disappear as you destroy the fortifications, so take them out and keep using radar to scan for infantry units. You can complete this objective with nothing but your artillery, so keep them safe! When you've eliminated three of the control points, though, pack your troops up, move them down outside of town, and make sure they're all repaired. Save your game before destroying the fourth point.
Hold The Village
At this point, you'll be asked to fortify the village and hold it. There are going to be five spots that you can fortify here, and you should start doing so immediately, with preference given to the outlying zones. Move your soldiers there and try to hold out until each spot builds a full load of fortifications.
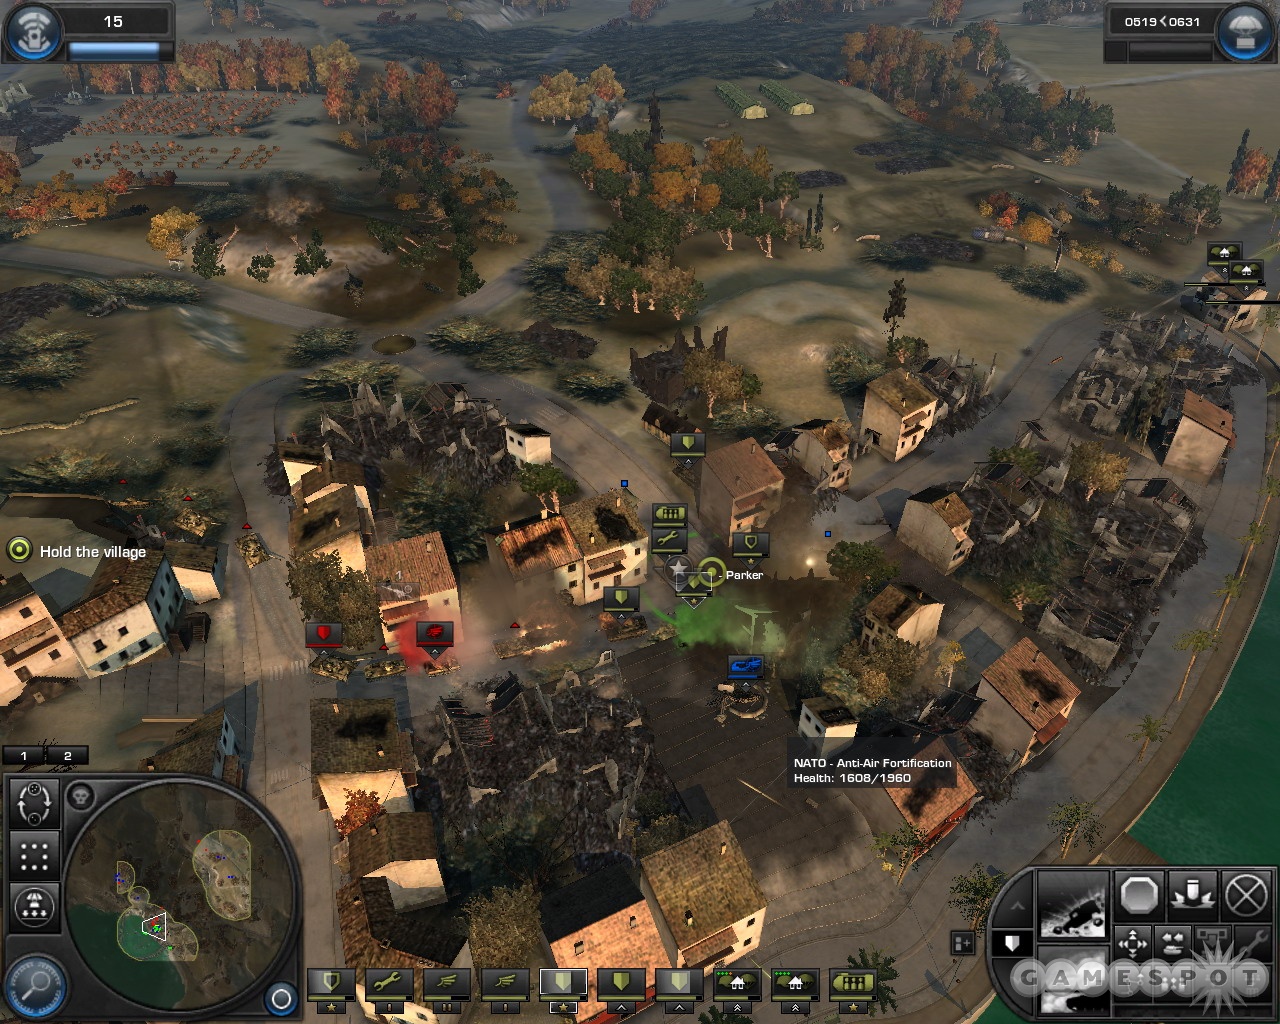
When the Russians arrived, you can attempt to hold the external portions of the town, but a better strategy might be to simply fall back to the center of town and concentrate your forces there, concentrating on heavy and medium tanks with repair tanks to back them up as your reinforcements go down. You can lose the exterior portions of the town, but if you get overrun at the center point, you'll lose the mission.
But yes, your best bet here is to simply hold the center of town and use tactical aid on your opponents as they attempt to roll on you. You can slow them down a bit by calling for infantry drops and positioning them into the buildings near the outside of town; if they decide to stop and fire on your troops, bombs away! Near the end of the mission, a huge line of heavy tanks will come at you from the direction of the lighthouse, so be ready to roadblock them with tanks and use your aid to finish them off. If you can hold the center of town, though (be sure to call reinforcements as soon as they become available), you'll win the mission.
Mission Seven: Deep Strike
Secure The Bridges/Destroy The Enemy Mortars
Although Sawyer recommends using infantry here, it'll be difficult to do, since they have a hard time capturing control points when they're stuck inside a building. Build one, but the rest of your reinforcement points should be devoted to a couple of medium artillery units and then a bunch of light tanks, with perhaps one medium for support.
When you're ready to move towards a bridge, use your artillery units to fire mortars at the anti-tank fortifications in the area until they're destroyed, then move up your tanks and start controlling the eastern side of your chosen target bridge. With the mortars firing on the far side, you should be able to quickly move across the rest of your tanks and take the control point. Leave them on the far side of the bridge until you build your own fortifications, using your mortars to start taking out the fortifications at the other bridge.
Around this time, you'll be told of enemy mortars in the southern hills. To destroy them, call down an airborne infantry drop onto the location and use their artillery feature. (You can also use a scout helicopter if you built one of those). Alternately, you can just use a tankbuster aid to take out the mortars with ease, assuming you can see them.
Clear out the Town Defenders/Capture or Destroy the MRLS
When you have the bridges in your possession, deploy more tanks and start making your way through the town, using your artillery to clear out occupied buildings. You'll get the position of some enemy heavy artillery on the northern side of town. You can capture it, but with difficulty; it's easiest to again drop some infantry there and use tactical aid to simply destroy them.
Now, the trek through the town is pretty difficult. There are a lot of occupied buildings here, with various types of enemy troops inside of them. Some of them will be anti-armor, some will be snipers, and some will be regular old infantry. It can be a slog to get through the town, but you have options: the best way to go is to keep your troops near one of the bridges and use a scout helicopter and a pair of medium artillery units to fire away at any fortified buildings that you find. As you clear the areas around the control points, move tanks up to them to eliminate them from the map.
The Church Must Stay Unharmed
After you reach up towards the church itself, you can start moving up your tanks for real. If you're trying to eliminate the enemy without destroying the church, use bunker busters on the anti-tank fortifications and avoid using your artillery units. In fact, at this point, you can probably disband the artillery and summon more tanks, or fortify the western sides of the bridges with anti-tank units in the buildings around them.
After clearing the church, a huge enemy assault will start coming your way from across the bridge. Quickly move all of your forces back to the bridges. Note here that you can only lose if the enemy manages to actually build fortifications around the river points; that means you don't have to completely hold the eastern sides of the bridge. If you're willing to forego the fortications, you can simply park a whole lot of tanks near the western sides of the bridges and prevent them from overrunning you. Periodically helicopters will come and attack you; you won't have much to use on them, but they'll leave soon enough.
Hold the bridges for a couple of minutes and you'll win the game.
Mission 8: Beyond The Iron Curtain
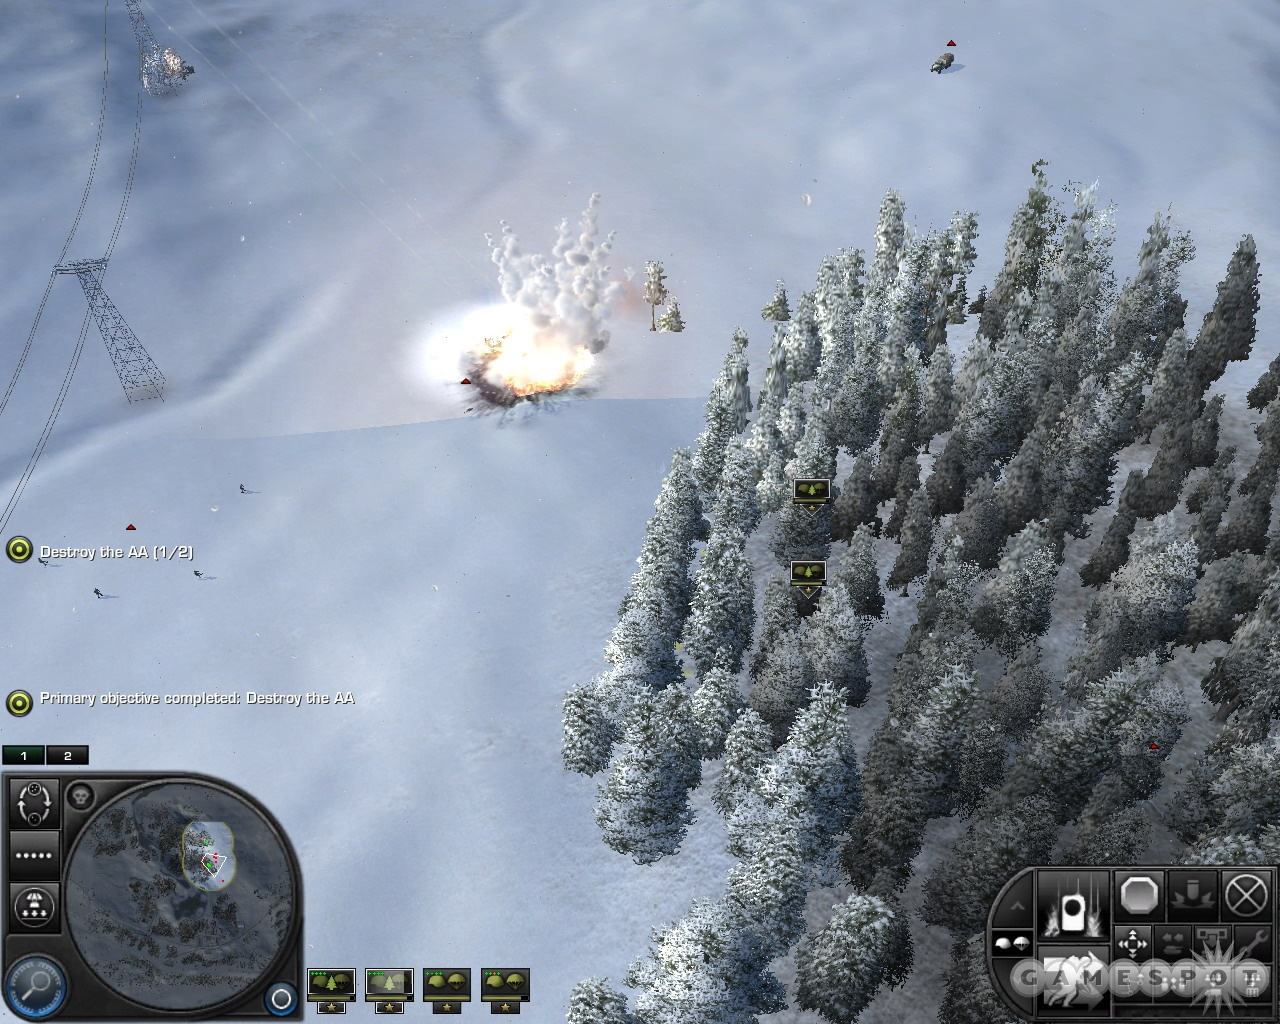
Secure The Perimeter/Destroy the AA
Move your rangers through the forest here, eliminating any infantry that you see. When you get near the crash site, keep the rangers in the forest and use up all of their artillery charges on the assembled infantry and vehicles near the crash. When that's done, leave a couple of your teams at the crash site and move the other two towards the two anti-air units nearby after splitting them up. When you get close enough to do so, call down artillery on the anti-air units to destroy them and begin the second phase of the attack.
Hold the Crash Site/Destroy the Power Plant/Assist Bannon
Immediately deploy troops to the crash site here, with a couple of armored transports and a smattering of infantry units, mostly consisting of regular old infantry. Be sure to build one or two anti-air units, as well. Snipers won't be too useful since there isn't anywhere for them to station themselves, while the anti-tank units will probably be overkill against the light vehicles you'll be fighting. Your regular infantry will be able to use grenade barrages on most of them, and you'll soon have anti-tank fortifications as well. Be sure to deploy all of the free transport trucks to help you quickly build the fortifications.
You have two objectives here: destroy the nearby power plant, and assist Bannon. Bannon needs help taking down some planes, so send your anti-air units over to his position and take them down. You also have to destroy a nearby power plant. You can use the Rangers to call down artillery on it, or simply use tactical aid on it.
Hold the crash site for a few minutes, and don't forget that you can resupply infantry squads by clicking on the tiny button to the left of their combat ability icons in the lower-right corner of the screen.
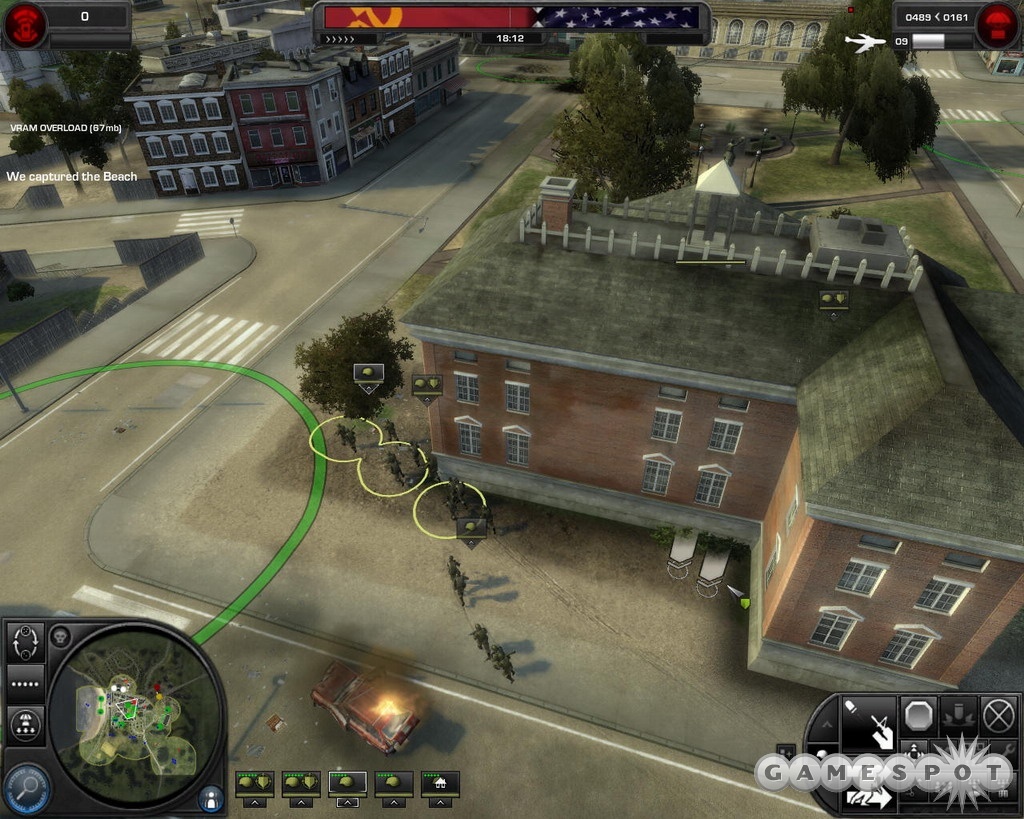
Search the Train Station
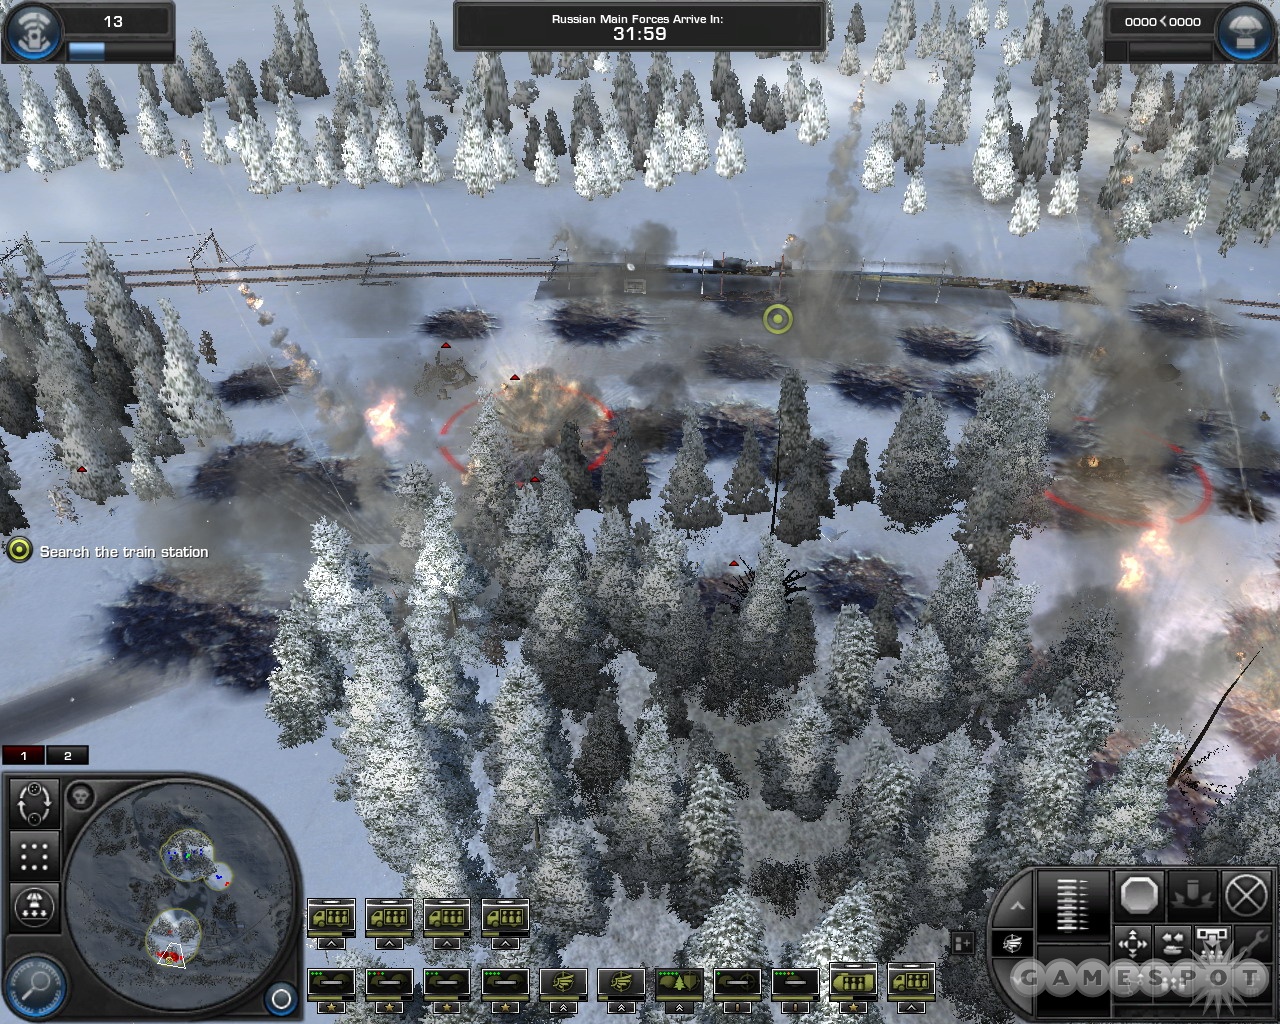
When you hold the train site long enough, you'll get an objective involving tracking down and occupying the train station to your south. Sawyer will clear a path for your vehicles, so load up all of your infantry into trucks and the armored carriers and head out! On the way, start softening up the station with heavy artillery barrages. When you unload your soldiers, move them into the forest near the station and start using the airborne artillery barrages to finish off any remaining fortifications, then run into the command points and take them over. It looks like you have plenty of time, but it helps to get this done quickly.
Search the Apartment Complex/Hold the Train Station
Now it's time to have some fun. You now have to move to the nearby apartment complexes and start to search them, with the bonus objective here being to hold the train station. You definitely want to hold the train station regardless of whether or not you care about bonus objectives in general, as it'll let you drop more reinforcements and the constant battle there will let you replenish your tactical aid.
So, the first objective here should be to fortify the two command points. Put all of your vehicles and troopers into them and quickly get the outfitted with machinegun and anti-aircraft forces. With that done, you'll have to hold them from attacks that'll mostly come from the southwestern corner of the map. You can probably hold them with a single armored transport and an anti-tank infantry squad if you station the latter unit in the forest between the two points. If you find yourself getting overrun, you'll only be a deployment away from reinforcements.
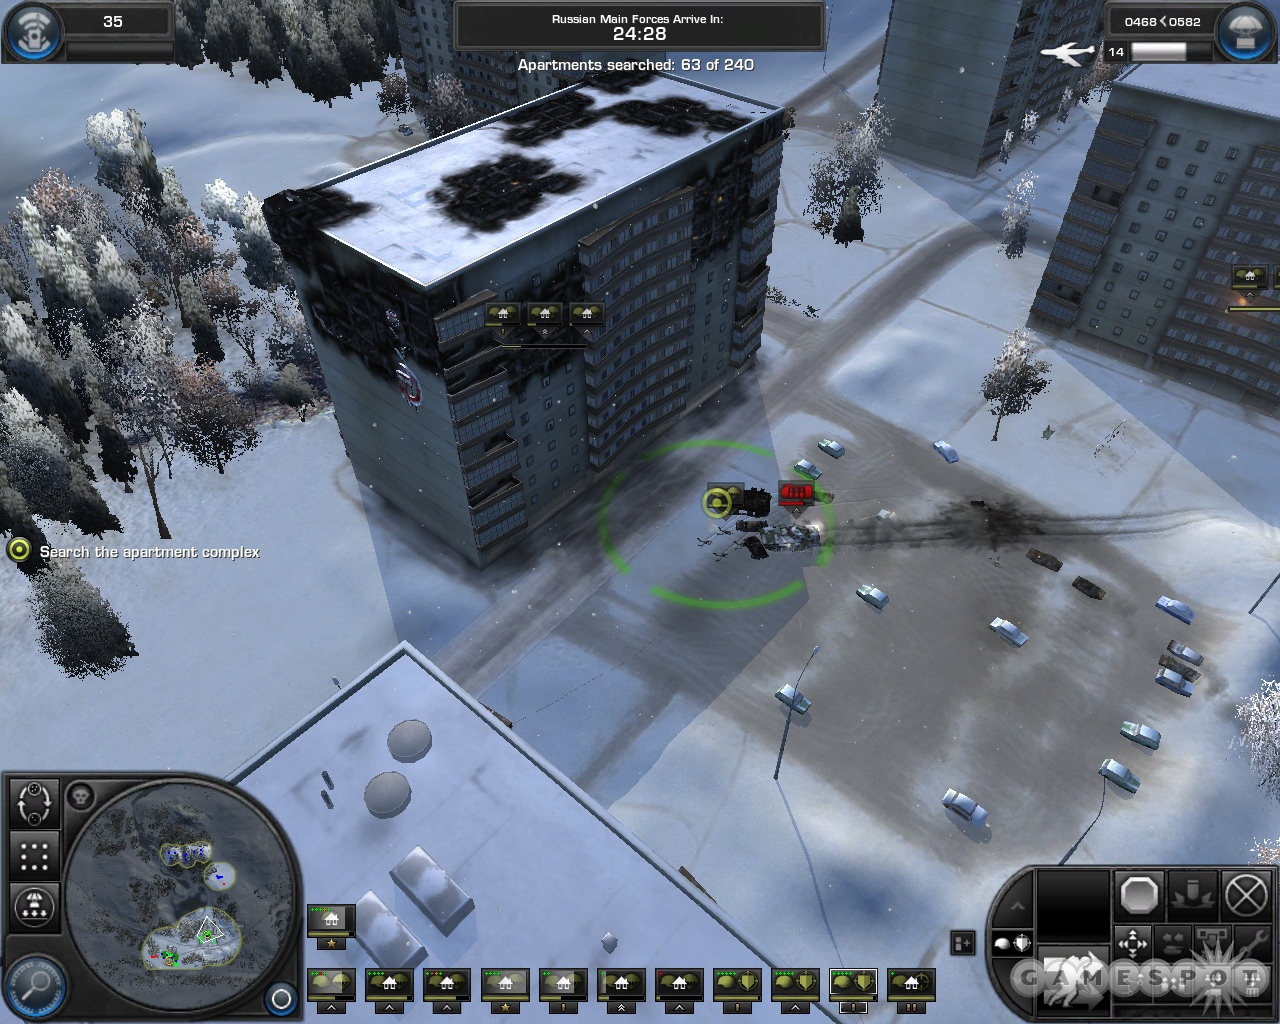
The rest of your units will want to start heading up to the apartment buildings nearby. Searching them requires you to have a unit in the command point outside the building while a few infantry units search the building. There'll be a lot of incoming fire during this exercise, though, so you'll have to be at your best, and you can expect the infantry that gets left outside the buildings to be quickly chopped down; try to plant some anti-tank infantry in some of the buildings if possible. Your permanent troops should be planted into the buildings and fire on the soldiers and vehicles outside. If you have to keep troops in the command circles, use your airborne infantry tactical aid ability to call in three squads of troopers. They'll be fodder, but that's fine; you should have enough points to summon in three more squads by the time the first three get destroyed.
Clear the Extraction Route
When you finally find the pilots (it'll take you up to over the 200 mark of the 400 possible apartment searches), you'll shift modes again and be told to clear the extraction route from the city. At this point, you can disband or sacrifice your soldiers at the apartment complex; you probably only have 15 or 20 minutes left to go, so walking them back through the map will take too long. Still, you can try your best to keep them in the forest as they move, if you wish.
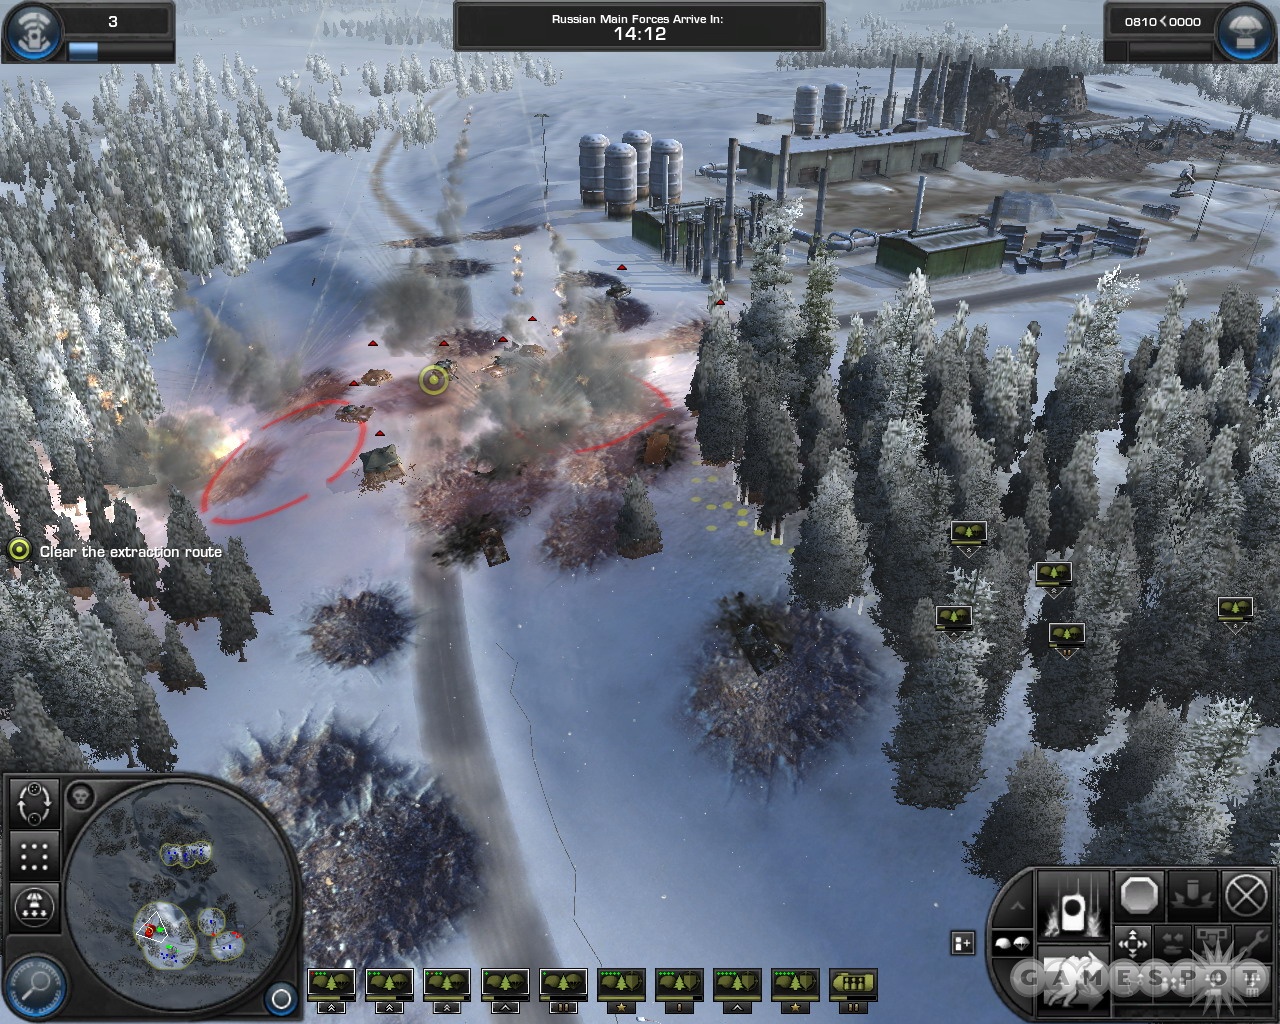
In order to end the mission, you have to clear the extraction route and fortify the control point there. That'll be easier said than done, since it's well fortified at the moment and there are also a few heavy tanks around. Use heavy artillery barrages to eliminate the bulk of the forces while sneaking up additional anti-tank forces into the forests on either side of it. If you have any remaining airborne, they can likewise sneak up and start calling for artillery on the base. When the area is clear, move your troops out of the forest, take the points, and end the mission.
Mission 9: Lair of the Bear
Secure Submarine One
Four heavy tanks and a single repair tank will form the bulk of your offensive strategy here. There's too many dug-in enemy infantry to worry about here to bother deploying infantry at this point; just stick with the tanks and roll them towards the first submarine. When you reach it, park three heavy tanks and your repair tank on the perimeter point furthest from the sub while a solo tank holds the point closest to it. That'll let you build up an anti-tank fortification while you hold the points.
Secure Submarine Three Before It Leaves/Destroy the Helicopters
When you get the objective to head northwest towards submarine three, pack up your tanks and start moving out. You'll eventually get word of choppers to the north that are planning on harrassing you by airlighting in more troops. You can take them out with tactical aid pretty easily; just drop a few airstrikes over the airfield to destroy the bulk of the choppers, then use tankbusters to finish off any stragglers.
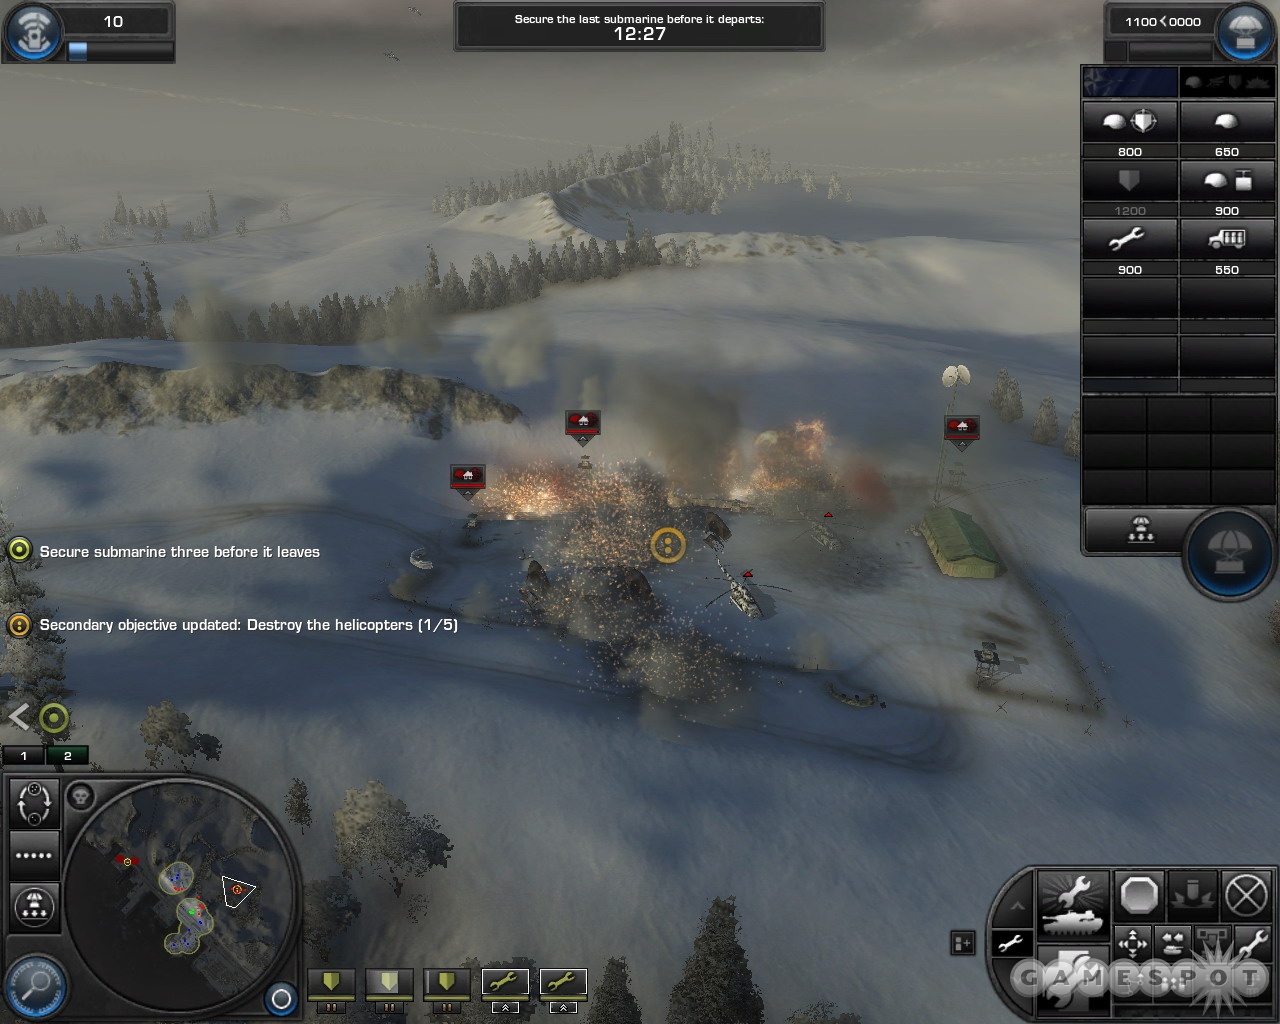
When you reach the third submarine, it should be an easy job for your tanks to overwhelm the control point and take it. Use their HEAT rounds on the anti-tank fortifications to destroy them from a distance.
Hold Submarine Three/Destroy the Soviet Artillery
You'll get some extra points here, so nab another heavy tank and start fortifying your position, placing the bulk of your tanks at the perimeter point furthest from the submarine. If you manage to completely fortify the position and quickly repair any tanks that take damage, you shouldn't have a problem holding your ground, especially if you periodically call in for airstrikes along the approaches of the enemy.
There will be a secondary objective here involving enemy artillery. Find the spot on your map and do the same thing you did for the helicopters: place an airstrike or three down on the spot, then use the visuals that you get to call for a tankbuster for each of the artillery that remains alive. That'll finish them off.
Secure the Residential Area
You may be looking at the residential area and thinking about how cool it would be to use the buildings as positions for your anti-tank soldiers, don't bother; the Russians are way ahead of you and have already occupied them. Use laser-guided missiles to destroy them as you proceed to the control point there.
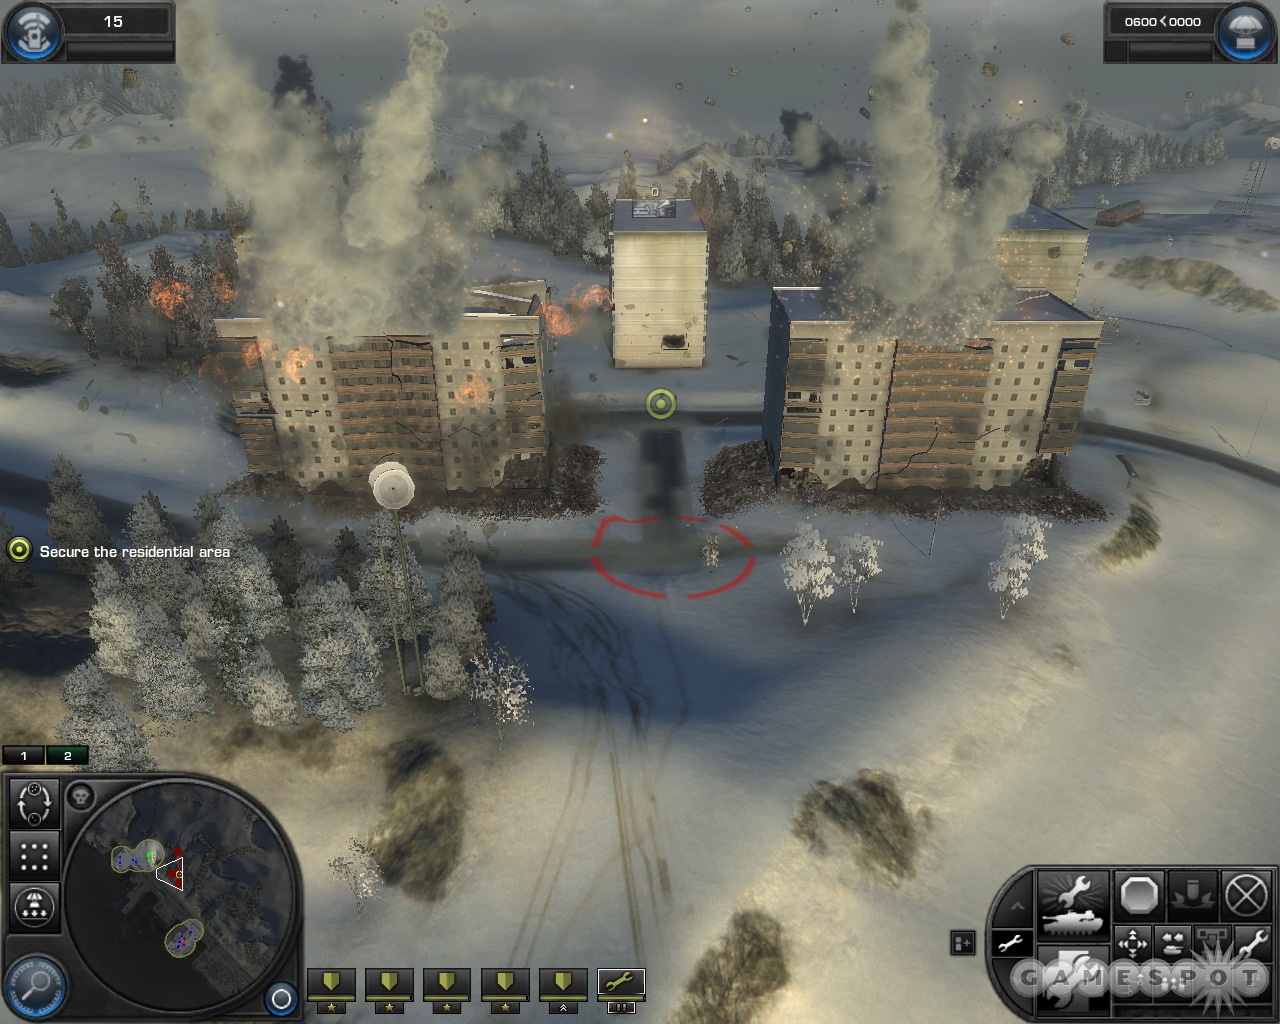
Start with the southwestern perimeter points and control them with one heavy tank apiece. You should have five heavy tanks and a repair tank at this point, so move three heavy tanks and the repair vehicle up to the northern perimeter point, where the bulk of the enemies are coming from, and fortify it to prevent the enemy tanks from breaking into town. Some will rush past you, but the heavies back in the other perimeter points should be able to take them down.
The first rush here is the worst, since helicopters will both attack and drop tanks behind your northern fortifications. You should be able to fight them off if you just stay calm and perhaps drop some airstrikes between your perimeter points. The choppers will last a while, but eventually your machinegun fortifications should drop them.
Your goal here is to build a full set of fortifications at each perimeter point. The northern one should be done quickly, but if you need more help at the southern points, move your repair tank down to more quickly build the fortifications.
Hold Submarine One
Fall back with your tanks to the position that Bannon is supposed to be holding. As he asks, bulk up the rear command point here, with the bulk of your tanks again facing the inland portion of the pier. Build it up and hold your ground. You should have plenty of tactical aid points here, since your heavy tanks can fire at targets so far away, so continually pelt the opponents with airstrikes along their roads of approach. You can lay down the airstrikes in between waves, feeling rather secure that by the time the planes do come, there'll be something there for them to hit.
At this point, all you need to do is hold your position until you reach the end of the timer. Repair your tanks and hold your ground.
Mission 10: Liberty Lost
Assist in Securing Ellis Island South/Locate and Destroy the Artillery
This is a somewhat unique mission for you, since you won't be able to build any units of your own for a while; you'll only be capable of controlling the helicopters that are given to you at the beginning of the mission that are going to be used to support the assault on the various islands here. Group them together so that your heavy choppers and medium choppers are in two groups. Heavy choppers are best against ground targets, while medium choppers will quickly take down enemy aerial units. All of your units will need to be on the lookout for enemy AA units, though, which will deliver a pounding to them. Use the heavy choppers' Hellfire missiles to quickly destroy these units.
At the outset, use your heavy choppers to destroy any amphibious landing vehicles that you see in the water, then withdraw toward the artillery on the eastern island and take that out as well. Be quick about it, though; by the time you take them down, Vance will have destroyed the AA fortification back on Ellis, so you can move your choppers over the island and start to destroy all of the targets there.
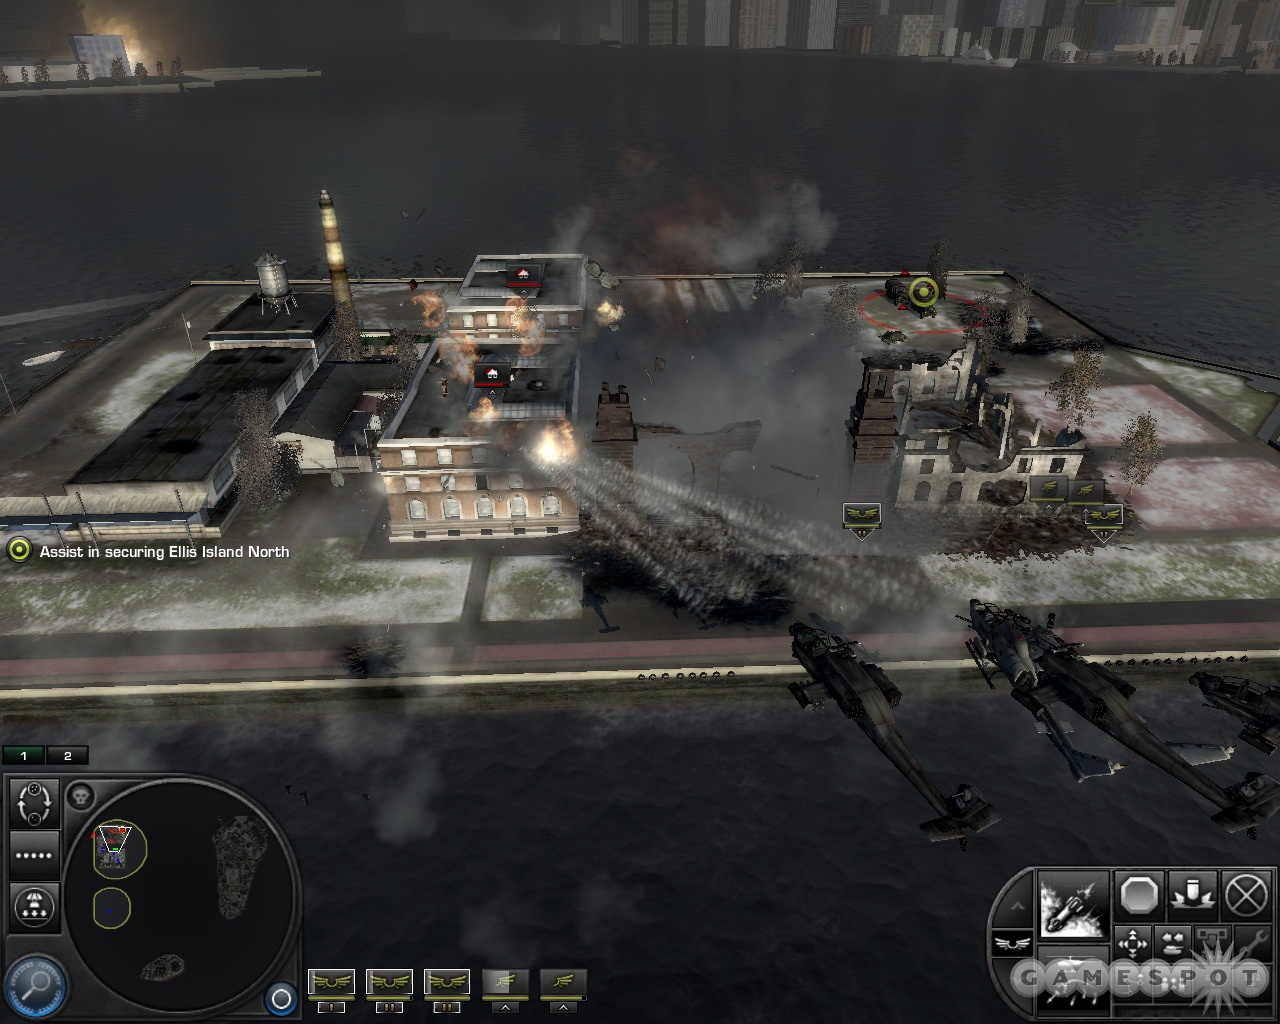
Assist in Securing Ellis Island North
Use your heavy choppers to destroy any incoming APCs, as well as the buildings in which the Russians are holed up. This should be a quick objective.
Help Secure a Beachhead/Conserve Your Forces
To ensure that you don't overwhelm your limited reserves, Sawyer wants you to ensure that you don't lose more than ten choppers at most. Keep your choppers safe from AA whenever possible, and keep in mind that you can fly them over the repair trucks on Ellis Island to repair them if they take damage. In truth, it'll be tough to complete the mission without losing at least a couple of choppers. If you lose the medium choppers, replace them with the heavies, as you'll be facing a lot more ground units than you will air units here.
Do your best to keep the enemies from overrunning Vance as he builds up his forces. Repairing your choppers here is annoying, since they have to fly all the way back to Ellis and hover over the southern perimeter point there, but it's worth doing, since you have such a limited amount of reinforcements (at least if you want to complete the secondary objective).
Destroy the Harpoon Launchers
After Vance takes and secures the control point, though, a few repair tanks will appear at the bottom edge of Governor's Island, letting you repair your choppers without flying all the way back to Ellis. Pretty handy. At this point, your goal is to take out the ten Harpoon launchers that are scattered around the island. You can do so by attacking them directly, but that's difficult, since there's AA scattered around. It's safer to simply use your choppers to attack the enemies coming your way from the north and use the tactical aid points that you get to airstrike or precision artillery the Harpoons. You won't be able to see them all, but you should be able to hit them given enough airstrikes.
When eight of the Harpoons have been destroyed, it'll be time for you to head to Liberty Island.
Destroy all Hostiles on Liberty Island
You have eight minutes to kill everyone on Liberty Island now. Don't worry about Governor's Island; just focus on destroying all of the enemies around the Statue at this point. This is easier said than done, though, as there are strong anti-air defenses around the island, in addition to some heavy helicopters. You'll have to be somewhat ginger in going in; you can use air-to-air strikes to eliminate the helicopters, if you must, but your points will be better served in calling down airstrikes on the ground forces.
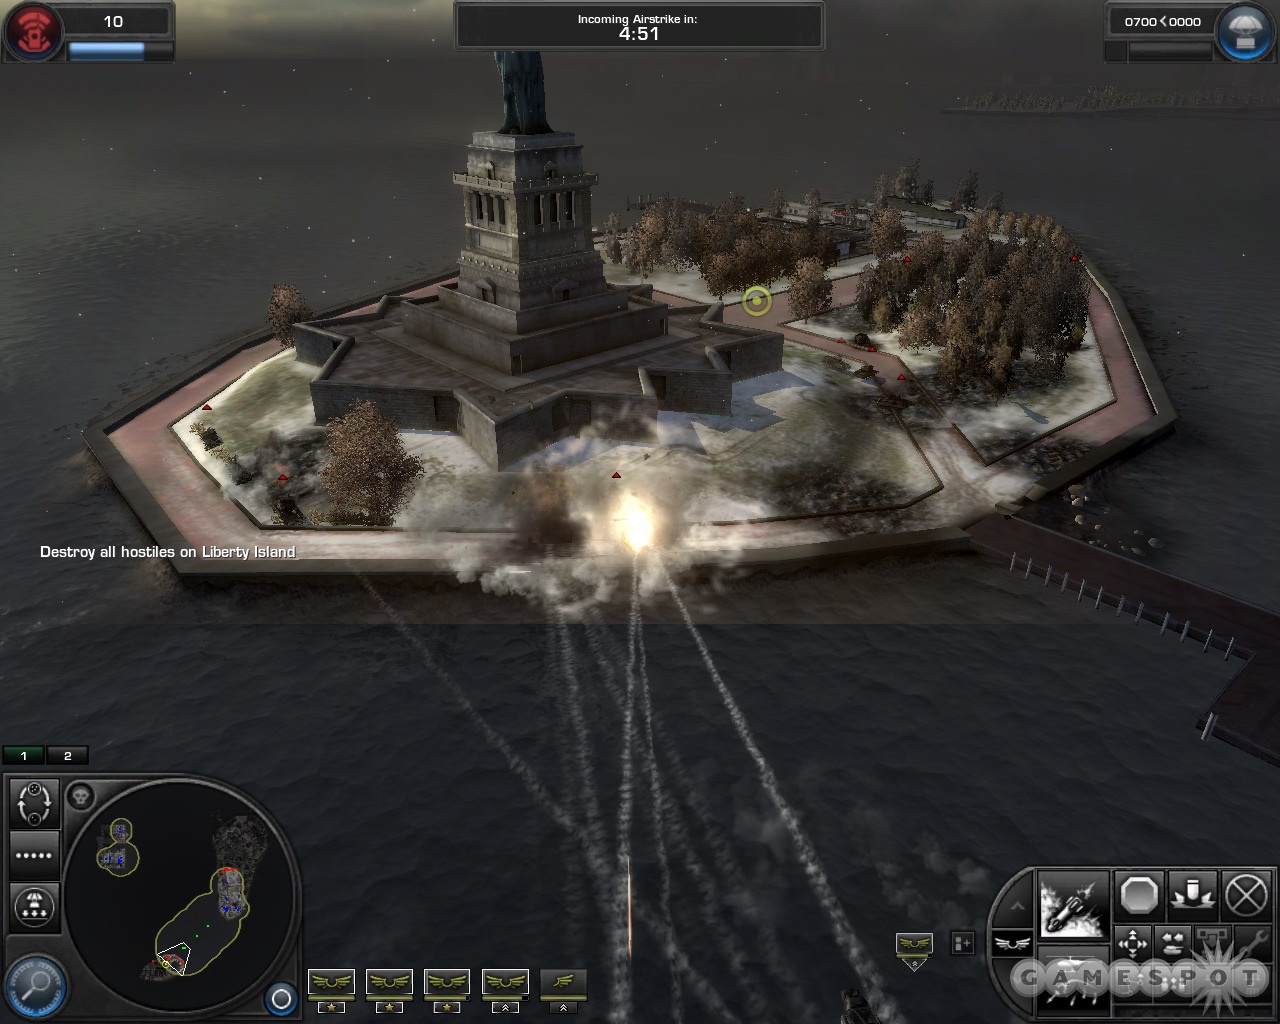
If you can eliminate the remaining helicopters (any remaining medium choppers of yours will be handy for this), start probing the island and pressing the ALT key to find out where the anti-aircraft vehicles are located. Target these guys first, with tactical aid if possible; if not, then use your heavy choppers and their Hellfires to eliminate them before they can take you out. Keep an eye on the health of your units and return them to Governor's Island when they're about to fall. There are plenty of armored personnel carriers here that have light machine guns that will attack your choppers, so your order of fire should be enemy aircraft>armored carriers>infantry in buildings>tanks.
There are a bunch of infantry holed up in the western buildings in this area, so if you have the tactical aid, use airstrikes or precision artillery to weaken or destroy the buildings before finishing them off with your choppers.
Take and Defend Fort Jay
With Liberty Island saved, return to Governor's Island and start working on Fort Jay. The enemies have incredible numbers here, and the anti-aircraft fortifications will make life difficult for you. Use airstrikes to weaken one of the perimeter points, then use your choppers to eliminate any remaining forces there. If you can kill one of the perimeter points and let Vance take it over, you can prevent the rest of the fortifications from being rebuilt; just dart in with your heavy choppers, take down a couple of vehicles to get tactical aid points, then duck out for repairs before continuing the assault. This will take some time, but you're not on a timer, so don't worry about it.
Help Defend Fort Jay
When Jay is taken, the Russians will counterattack through the woods to the east. Napalm them to prevent their infantry from taking cover, then use your choppers to finish off the last of the troops and move on.
Mission 11: Aftermath
Keep Your Units Alive/Rendezvous with Webb at the Ford
Nothing too complicated here; just roll out and meet up with Webb. The only units you'll see are plain riflemen who won't be able to do much to your vehicles.
When you reach Webb, use your repair tanks to repair his vehicles. You may want to have your repair vehicles in two separate groups so that you can more easily switch them up and repair different targets in the heat of combat. You'll have to escort him to the south. You can't participate much in combat, so all you really have to worry about is keeping Webb's vehicles alive.
Repair All Units at the Rally Point
After you move through the woods for a bit, you'll have to support Webb's tanks as they come under fire from a mass of enemy personnel carriers. Use your repair vehicles to repair, and constantly monitor Webb's health with the ALT key, prioritizing repairs on the most heavily damaged vehicle. Press E, hold it, and left click on damaged units to quickly repair a large chunk of their health.
When the enemies are dead, you can repair the scattered tanks and one more repair vehicle. Again, the E command will let you repair the broken vehicles much more quickly than you'd be able to otherwise.
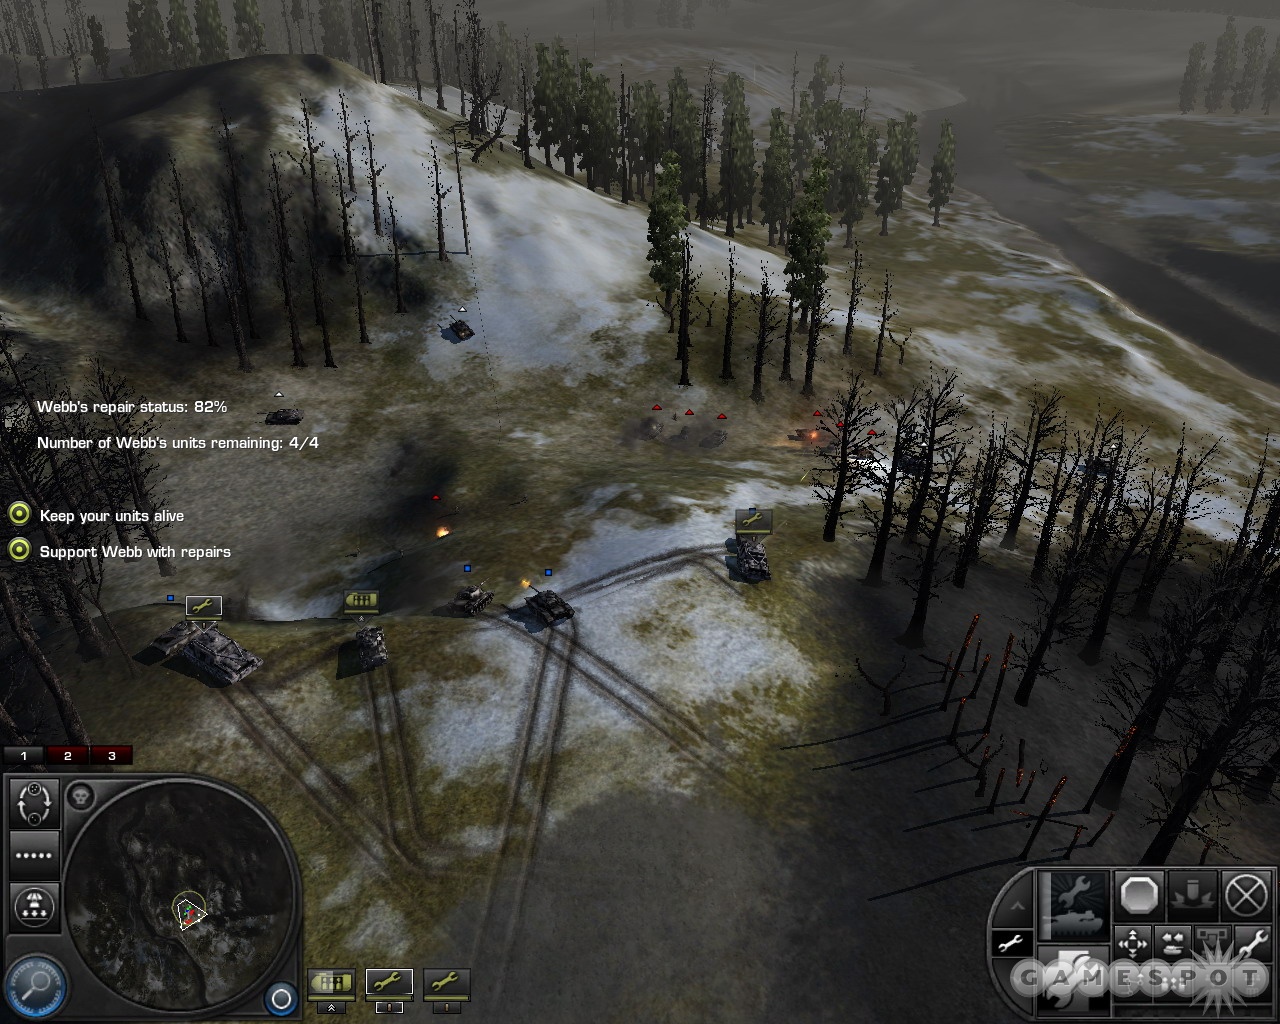
Repair the Abandoned Vehicles
Now that you have three repair tanks and a Bradley, split two of the repair tanks and the Bradley off into their own group, leaving behind one of the repair tanks in a separate group to help repair Webb's tanks, which will periodically come under light attack. Get used to double-tapping the number keys to instantly shift your view back to where your groups are located so that you can quickly manage both aspects of the fight.
Sweep your main group up to the north a bit towards the first group of vehicles. Use the Bradley's AT-5 missile to destroy the vehicle here, and run down any infantry before repairing the vehicles. You'll need to repeat this process four times, as the defenders get tougher. Be sure to use all of the special abilities available to your forces! The special offensive missiles will be needed to deal with the many vehicles in your way, and the smoke screens that you can create will be a big help in defending yourself.
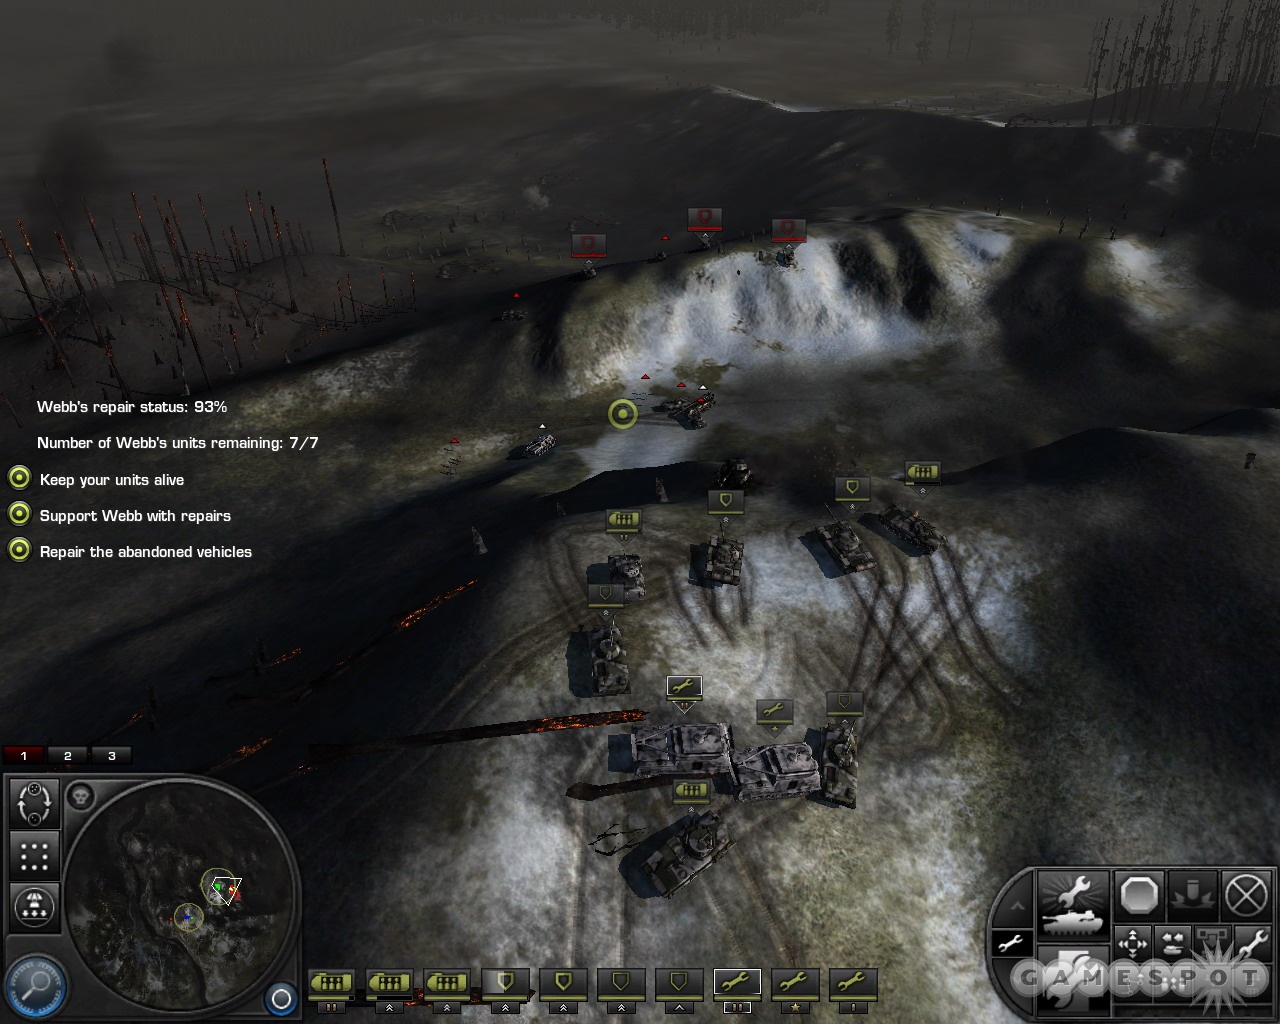
The last vehicles, including another repair tank and a heavy artillery vehicle, are going to be the toughest to get to, as they're surrounded by enemies. There's a Russian heavy tank on the mountain to the west that will be the toughest foe. Gather all of your tanks and vehicles into one large group, with the repair tanks behind them, and move up the mountain to its position. If you use all of your special attacks on it, it'll go down; just be sure to withdraw any tanks that are getting damaged and move them back to the repair vehicles. You don't need to move them too far, as it's not quite atop the ridge.
When the heavy tank is dead, move your offensive vehicles out into a line on the ridge; they'll start firing away at the vehicles below. Repair them until all of the vehicles are dead, then move in and repair the abandoned vehicles that are left to you and quickly return to Webb's position, being sure to place your artillery in a separate group.
Repair All Vehicles At the Rally Point
Start moving out towards the nearby rally point now, being sure to keep your vehicles on the high ground as you approach. You can use the heavy artillery to fire from long range at your targets when you spot them, but only if it's not too close to its target. Sweep down and start repairing the numerous vehicles there; most of them will go under Webb's control, but there'll be a new repair tank and troop transport for you to wield.
Follow Webb to the Rally Point
After Sawyer sends out the location of the rally point, use your artillery strike and artillery unit to fire away at the tanks on the far side of the river; there won't be much you can do to break them, but you won't need to fire on them for long, since Webb will quickly retreat.
Follow Webb to a Safe Location
When you get back in touch with Sawyer, follow Webb to his safe location, but immediately move when the helicopters come, as there'll be artillery coming your way.
Clear the Riverbank of Enemies
When you get the call that you have more artillery available to you, use heavy artillery barrages on the troops across the river from the points designated on your map. These are basically free kills, so take them out and use your heavy artillery unit to fire on any stragglers.
Fight off Soviet Counterattack/Destroy the Soviet Flanking Force
When the beach is cleared, Webb will move forward and attack the Soviets from across the river. Use heavy airstrikes on the Soviet positions to weaken them up, and move your tanks forward to support Webb. Don't forget the repairs!
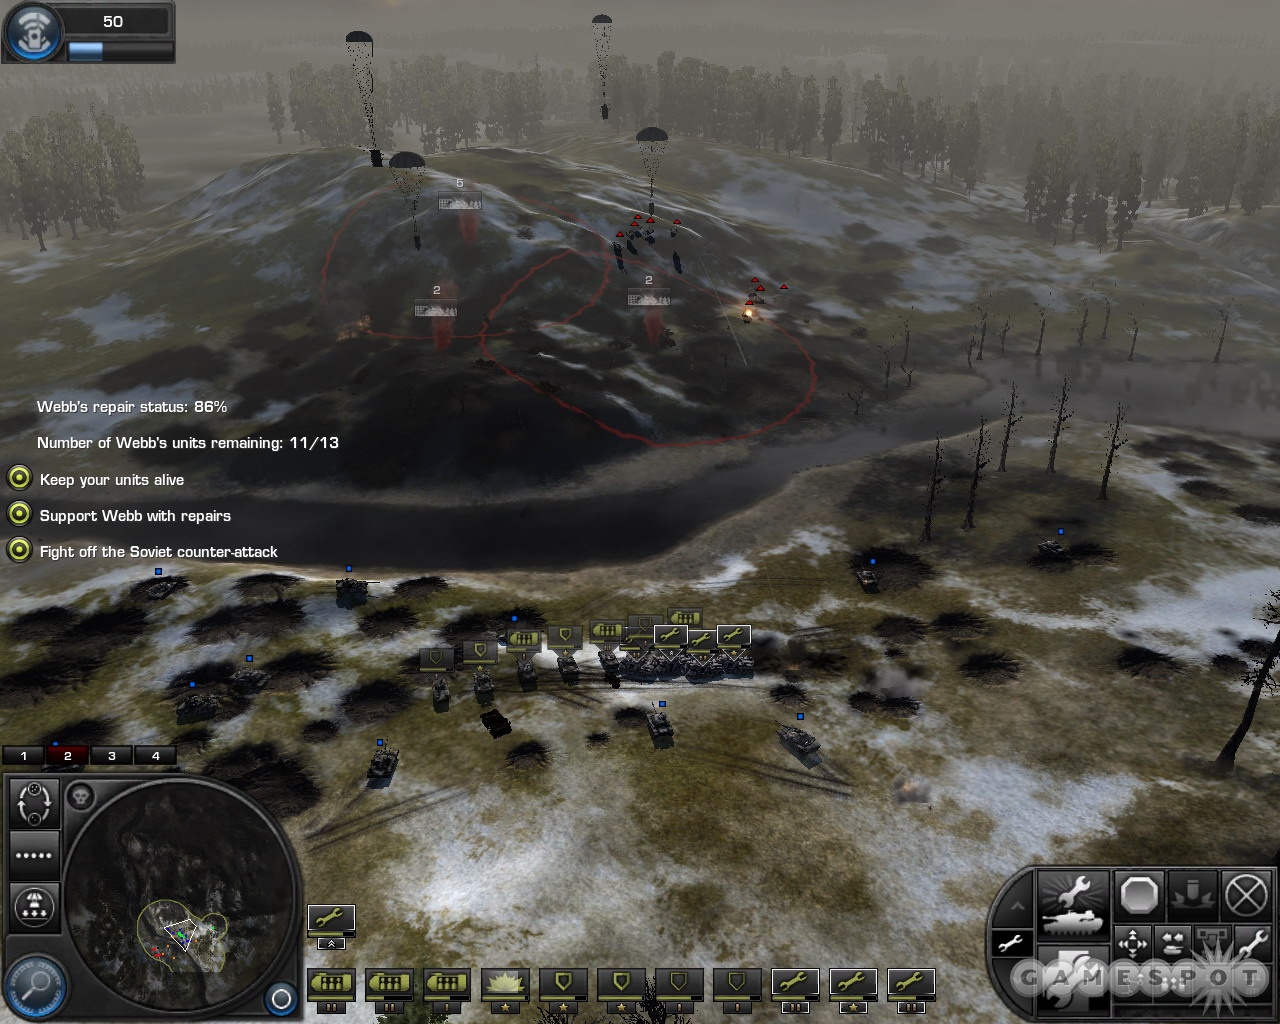
You have two Soviet flanking forces to destroy here, so lock their positions and call down fire support on them, or use your heavy artillery vehicle to take them out.
Eventually the Soviets will come back in even more force, but you'll get additional tactical aid abilities to use on them, including carpet bombing and daisy cutters. There are three enemy artillery units to the rear of the hill that you urgently need to take out, so drop daisy cutters and carpet bombing back there to scout, then retarget your tactical aid until they're destroyed. When that's done, you can just use your daisy cutters and carpet bombing on the locations where the enemies seem to wait and destroy them. A few minutes of this will win you the mission; don't forget to repair where you can.
Mission 12: Once More Unto The Breach
Secure the Soviet Outpost
Our choice of forces here included two medium artillery units, three heavy tanks, a medium tank, and two repair tanks, but your mileage may vary. Head towards the church, but before you approach it, use the artillery to barrage the two control points, especially the one on the western side. That'll earn you some tactical aid. If you wish, you can use a radar scan to reveal the enemy positions. Be sure to take out the anti-tank fortifications before moving up with your tanks.
Take the church and hold it, but be prepared to move out quickly, as the Soviets will move to bomb it. Retreat to the river nearby and wait for the bombs to fall.
Secure the Southern Part of Town/Eliminate The Soviet CO
When you get the two objectives here, see if you can't drop a daisy cutter into the control point that you need to take; you'll need something like that to eliminate the heavy enemy presence in the area. Using a daisy cutter may also let you block the road with ruined tanks, thus preventing the escape of the Soviet CO. Regardless, if you want to kill him, you'll need to get to the southern part of the city quickly and hit his car as he rolls south.
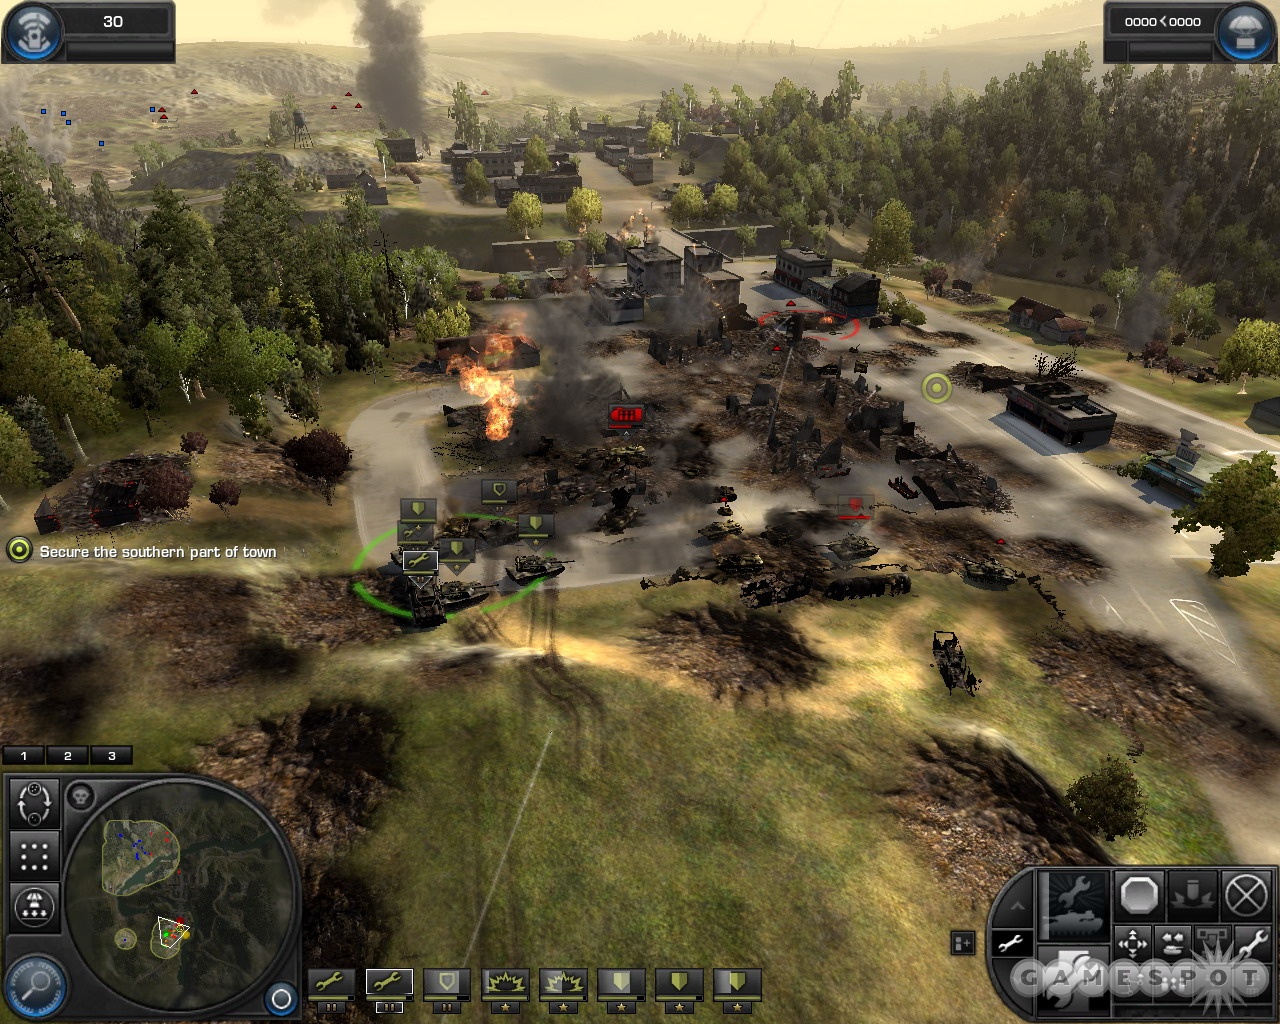
When you manage to clear the town and take the points, you'll have to basically immediately regroup and retreat, as the Soviets will launch a harsh counterattack. Regroup near the southwestern perimeter point and hold there, being sure to use your repair tanks. Keep your artillery back and firing on the bridges to the north and east; you may get a lucky kill.
After the counterattack fades away a bit, retake the perimeter points and take the town. When you do, you'll move on to your next objective.
Secure the Sawmill ASAP
You're now told to head east to the sawmill, with a bonus objective being given if you can take it in nine minutes. Before crossing the bridge, use radar on the sawmill itself, then call down precision artillery on the artillery units you see there; they're grouped close enough together that they'll all be destroyed. That'll make it a lot easier for you to penetrate to the sawmill without getting destroyed. There are also a couple of medium artillery units up there, but if you take out the heavies, you should be able to charge in with your tanks and destroy them.
Head to the sawmill and put some heavy tanks into each of the perimeter points. When you fortify the mill and beat off the counterattackers, you'll be tasked with your next objective.
Break Through the Soviet Lines
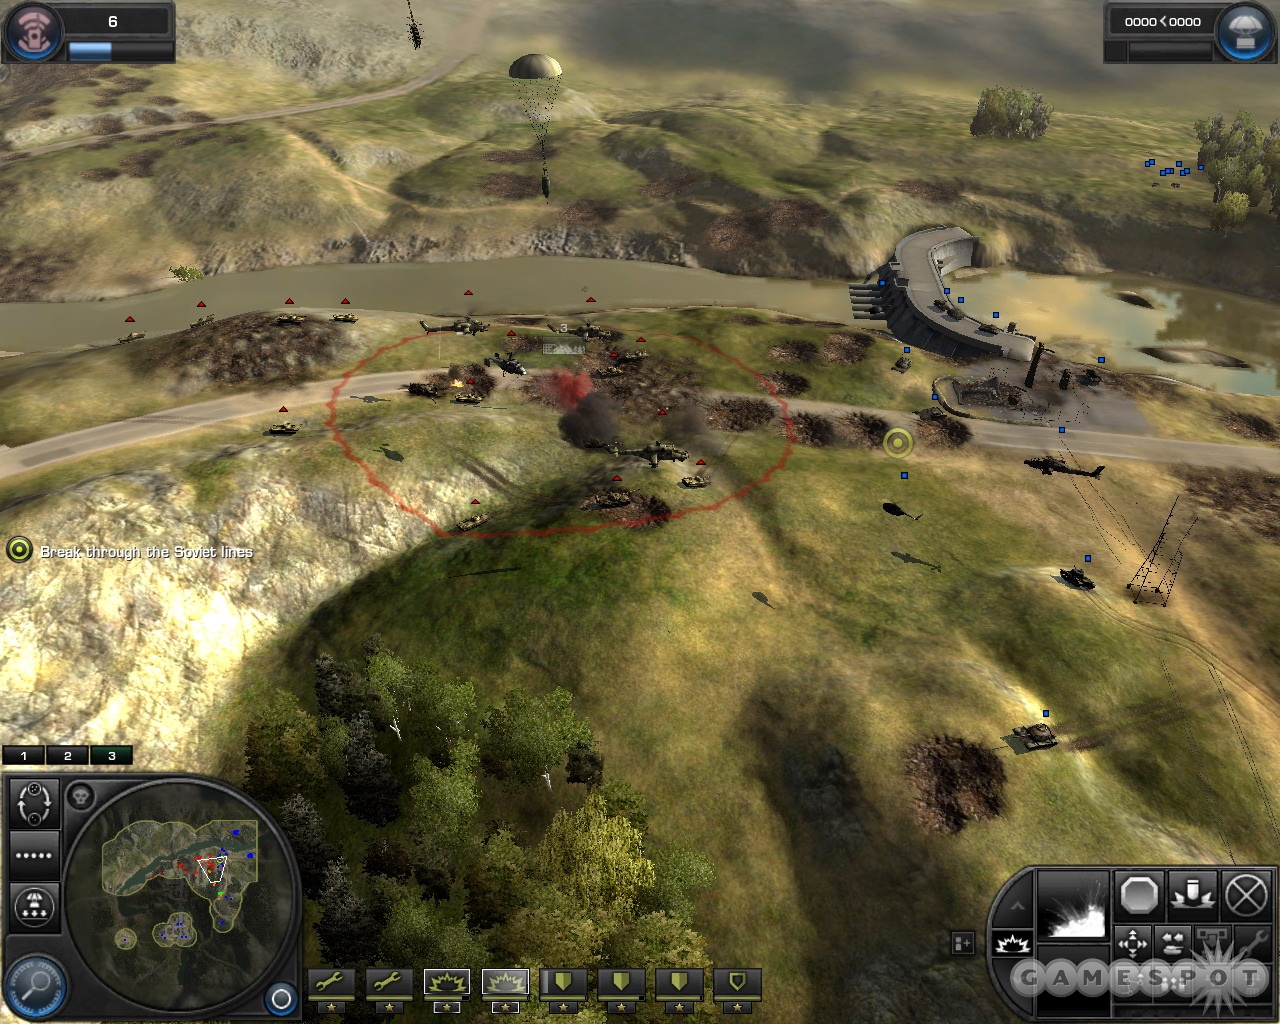
With the Sawmill secured, you should be able to call in a couple of free heavy artillery units. Use them and your tanks to start firing at the nearby Soviets that Webb is engaging. Don't worry about the choppers; just don't get too close. If you use your tanks, artillery, and daisy cutters to bomb the Soviets, they'll eventually retreat to town.
Secure the Town Square
There are four perimeter points here, but Webb will handle some of them. Try to bunch your units into the easternmost perimeter point and hold there, then use artillery and tactical aid to destroy most of the rest of the town. The primary attack vector for the Soviets will be the western road, so pound it with your heavy artillery after destroying any fortifications at the other perimeter points. When you're ready to do so, move some units to any remaining perimeter points and start fortifying them. The western point will likely be the weakest link, so set up some of your heavy tanks there and when the place is fully fortified, move them to the edge of the hill so that they can fire down on the incoming tanks. Don't forget to have your artillery continue their fire on the Russians!
Mission 13: Before The Storm
Destroy the AA Emplacements ASAP
You have four AAVs here, each loaded with four squads of anti-tank infantry units. In order to complete the mission in the required time for the secondary objective, get used to using the U and Y keys to quickly unload and load your anti-tank soldiers, respectively. In order to destroy the AA emplacements, you'll need to first deal with the anti-tank fortifications. The process here is like so: keep your anti-tank units in the APCs as they roll towards the perimeter points here. When you spot an anti-tank fortification, quickly unload the AT soldiers and have them sprint towards it. When they're in range, unload their missiles into it to destroy it, then bring forward your APCs to finish off any infantry in the area while the AT soldiers move on to the AA fortifications.
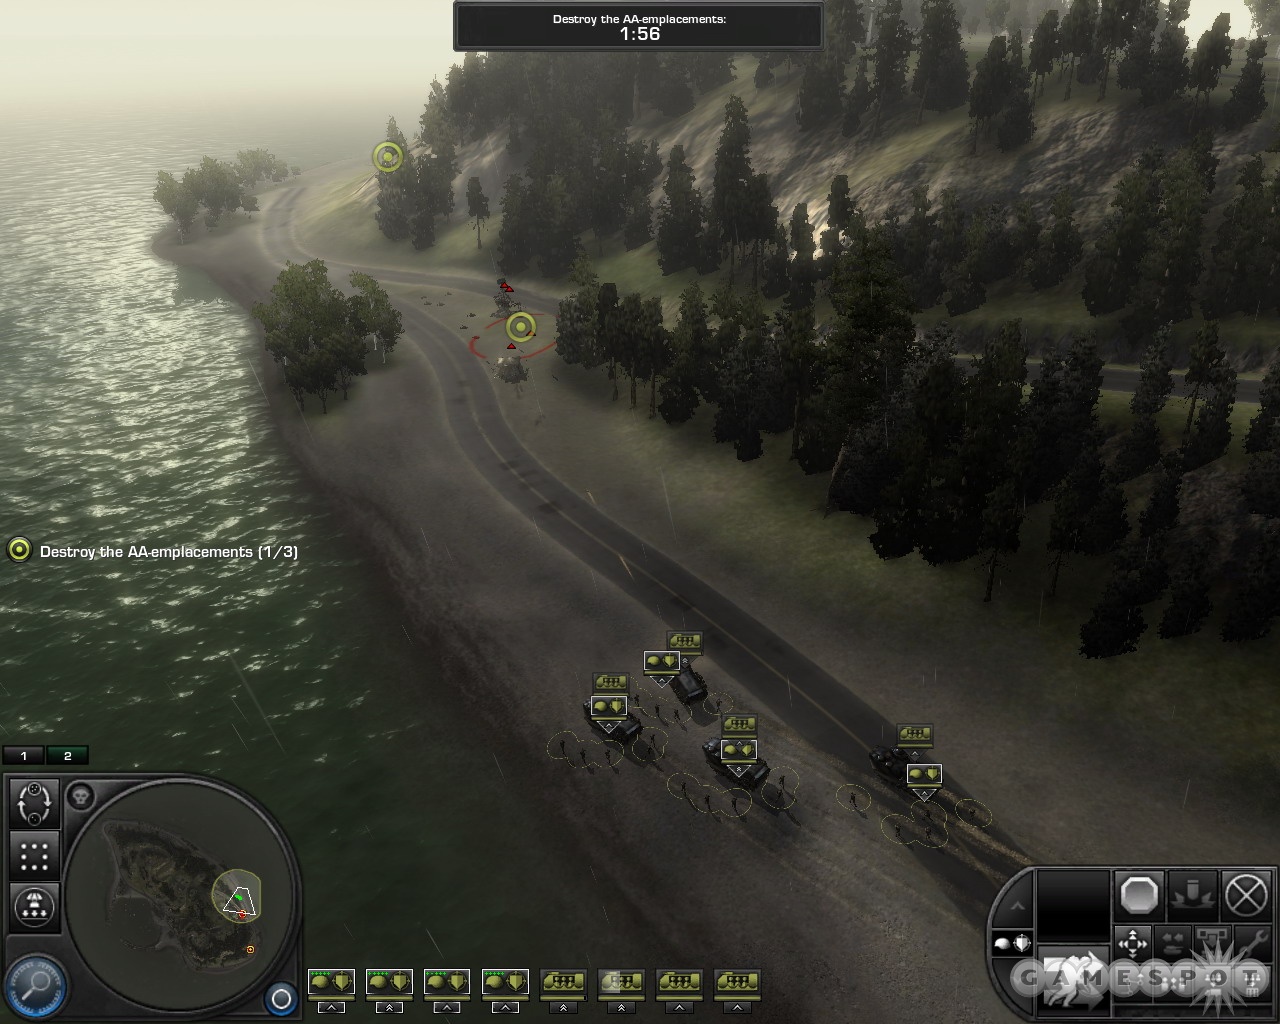
You'll need to repeat this process three times in four minutes to achieve the secondary objective, which will definitely be difficult: at most you'll have around 30 seconds of leeway, so get a move on!
Capture Both ASM-Launchers
There are two anti-ship missile launchers on the island, and to capture them, you'll need to capture the control points near them without destroying them by accident. If you approach one of the launchers, though, a timer will begin to count down, giving you only 17 minutes or so to complete your objective before the mission ends. If you want to complete the two secondary objectives, it's best to avoid their locations for now and simply concentrate on the secondary objectives.
Destroy the AA Vehicles
There are a couple of groups of AA vehicles on the northern side of the island that need to be taken out. Your APCs and anti-tank groups will be ideal for this, but you want to ensure that they take the road on the northern side of the island; they'll be destroyed if they head through the marina to the southwest. You get some reinforcements here, so you may want to call down a couple of heavy choppers and a scout helicopter.

Move the APCs and your anti-tanks up to the northwesern corner of the island, where the first AA position is located. Your AT units can destroy pretty much everything here, and whatever losses they take can be amended by using their Resupply ability, but if you want a little insurance, you can drop your airborne into the woods here and use their artillery call to weaken the positions.
The AA vehicles and their helpers shouldn't last long against your anti-tank forces. When you've pounded them thoroughly, load up your soldiers back into the APCs and retreat along the northern road a bit. Map node D-2 has a road that leads south towards the two control points here; that'll be where you want to park your APCs while you ready your forces for an assault.
Capture the ASM Launchers/Eliminate the Spetsnaz
There are three Spetsnaz teams on the map, hidden in map grids C1, C3, and B3. If you want to complete the secondary objective, you'll need to find them and destroy them; that's what your helicopters will be good for here. You don't need to worry about it overmuch right now; concentrate on getting the ASM launchers under your control.
First, though, you should start the countdown by assaulting and taking over the northern control point. Move your APCs back to map grid D2 and move them up the road towards the inland there; you can use your heavy choppers to clear one of the perimeter points here, then drop airborne nearby to take it over so that the Soviets can't rebuild their fortifications. Then move up your APCs and unload the anti-tank forces to destroy the fortifications at the other control point. If you have a chopper in the area, you'll probably spot one of the Spetsnaz teams in the forest nearby; use napalm to drive them out.
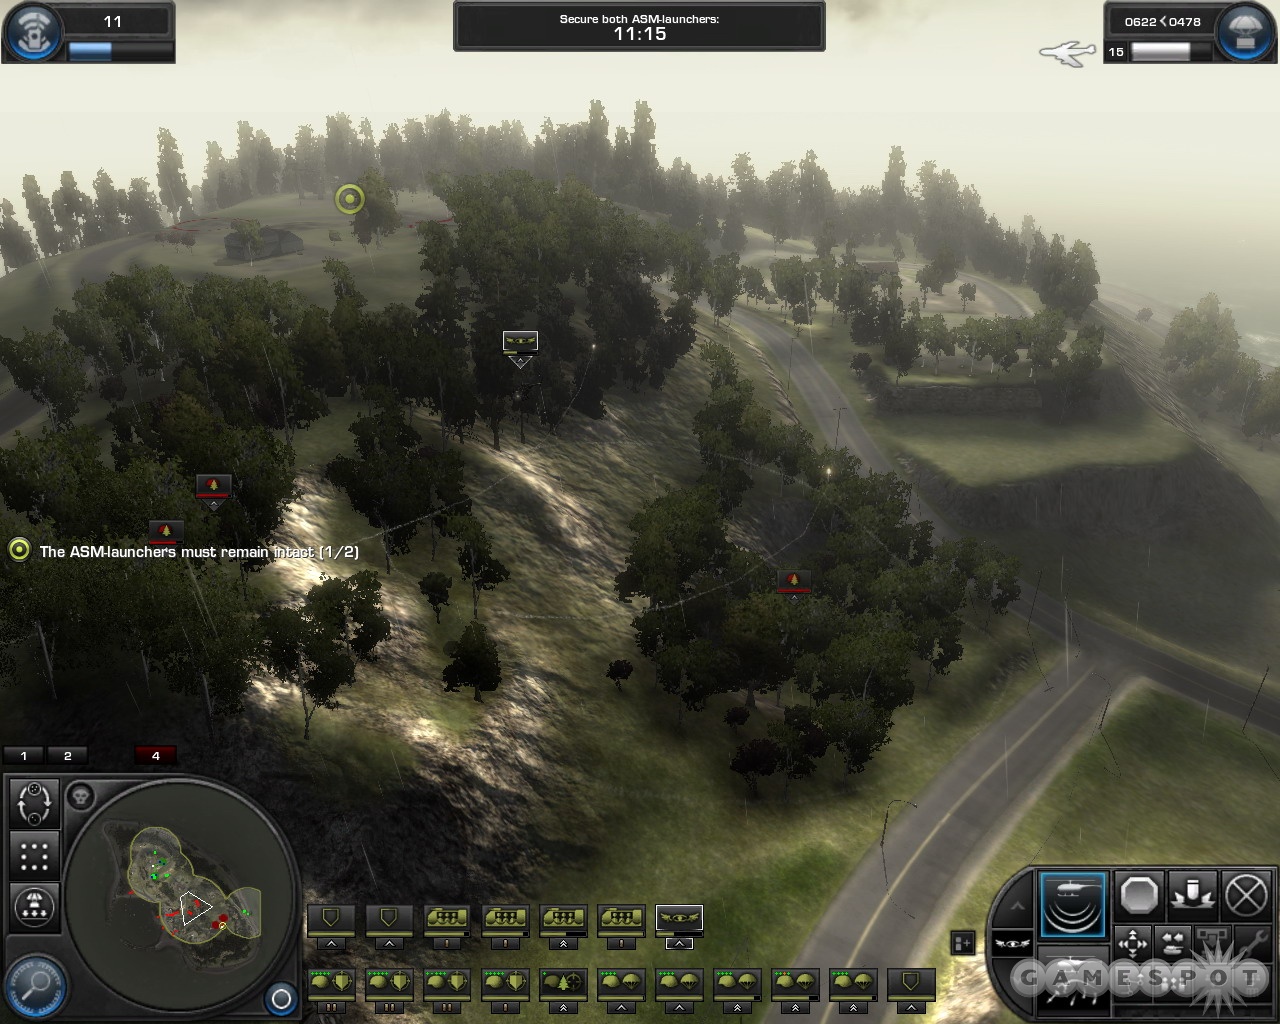
Now that you have one of the control points, park your anti-tank soldiers in the chokepoint perimeter zone. Between them and the APCs, you should have a relatively easy time defending this control point, but you will need to keep an eye on it, as artillery will sometimes come your way.
The southeastern control point will be a bit more difficult. You'll probably want to send your choppers down there first to weaken up the opposition, and drop as many airborne soldiers as you can into the woods nearby to drop artillery and run into the perimeter points. The choppers will probably be taken out pretty quickly, but that's fine; you can switch their reinforcement points over to light tanks or anti-tank infantry, drop them on the coast, and quickly move them up to the perimeter points to help you take them.
Secure the Russian Main Camp
When the control points are yours, you'll face a stiff challenge at the southeastern point, which will be shelled with artillery as soon as you take it. Your drop zone will change and let you place units directly on top of it, so take advantage of that and start dropping anti-tank units into the area. Place them in the treeline overlooking the western road that leads this way; that'll let them shoot the tanks that come up from the coast as they arrive. Just be sure to also keep some units in the perimeter points themselves so that fortifications can be built. When you have fortifications up, you can probably start concentrating on the marina itself.
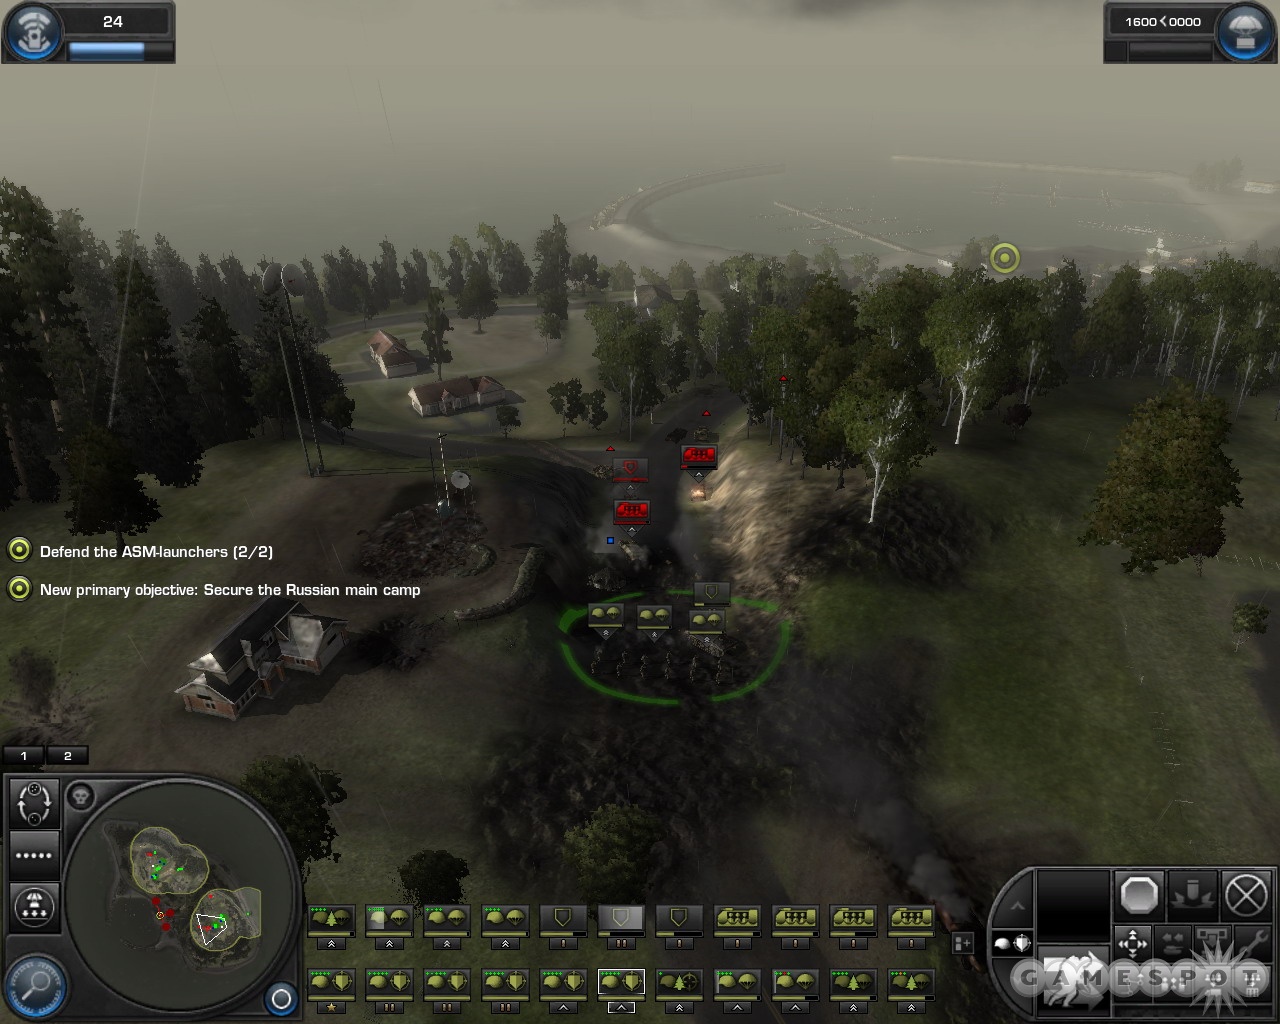
At this point, if you haven't eliminated all the Spetsnaz, now would be the time to do it. Again, they're hidden in map coordinates C1, C3, and B3, so call down a scout chopper and use its IR Scan ability to find them. They'll also probably fire on any helicopters that you call in, so keep an eye on them as you scan around. When you locate them, you can call in napalm to finish them off.
When you're ready to assault the main Soviet camp, first call down airborne infantry into the treeline nearby to call for artillery and distract the ground forces. When you have them weakened up a bit, it'll be time to simply call in a lot of heavy choppers and use them to eliminate most of the vehicles in the area, as well as the fortifications. Don't worry about losing choppers; just replace them when they fall, and keep an eye on your defenses at your control points to ensure that you don't lose any of them. Just use the choppers to clear out the marina and continually call down airborne infantry into the perimeter points, and eventually there won't be anyone left to contest you save the water vehicles that roll in off the coast, and those will be easy to take out.
Mission 14: One Last Fight
Save Seattle
Time to take Seattle back! You have 45 minutes to complete all of your objectives here. Begin by deploying a heavy artillery unit, three heavy tanks, one medium tank, and one repair tank. Separate out these units into one group of armor, one repair group, and one artillery unit. When you obtain more points, you'll generally want to use them on more heavy tanks.
Destroy the Soviet Guard Post
Use your artillery to weak the enemy control point nearby, then start shepharding your tanks towards it. Some of the buildings here will be occupied, so use precision artillery when possible to destroy them. Regardless, you should be able to quickly approach the point and take it over. Return to the diner where you began when you're done.
Protect the Diner
Group your tanks around your artillery unit and repair tank in the middle of the circle here. Beating back the enemies will take three or four minutes of solid combat, but you'll have help from Webb. Just keep your tanks in good repair and replace any of them that get destroyed; you're right underneath your own drop zone, so that shouldn't be a problem. You should've gotten more reinforcement points after destroying the guard post, so summon another heavy tank if possible.
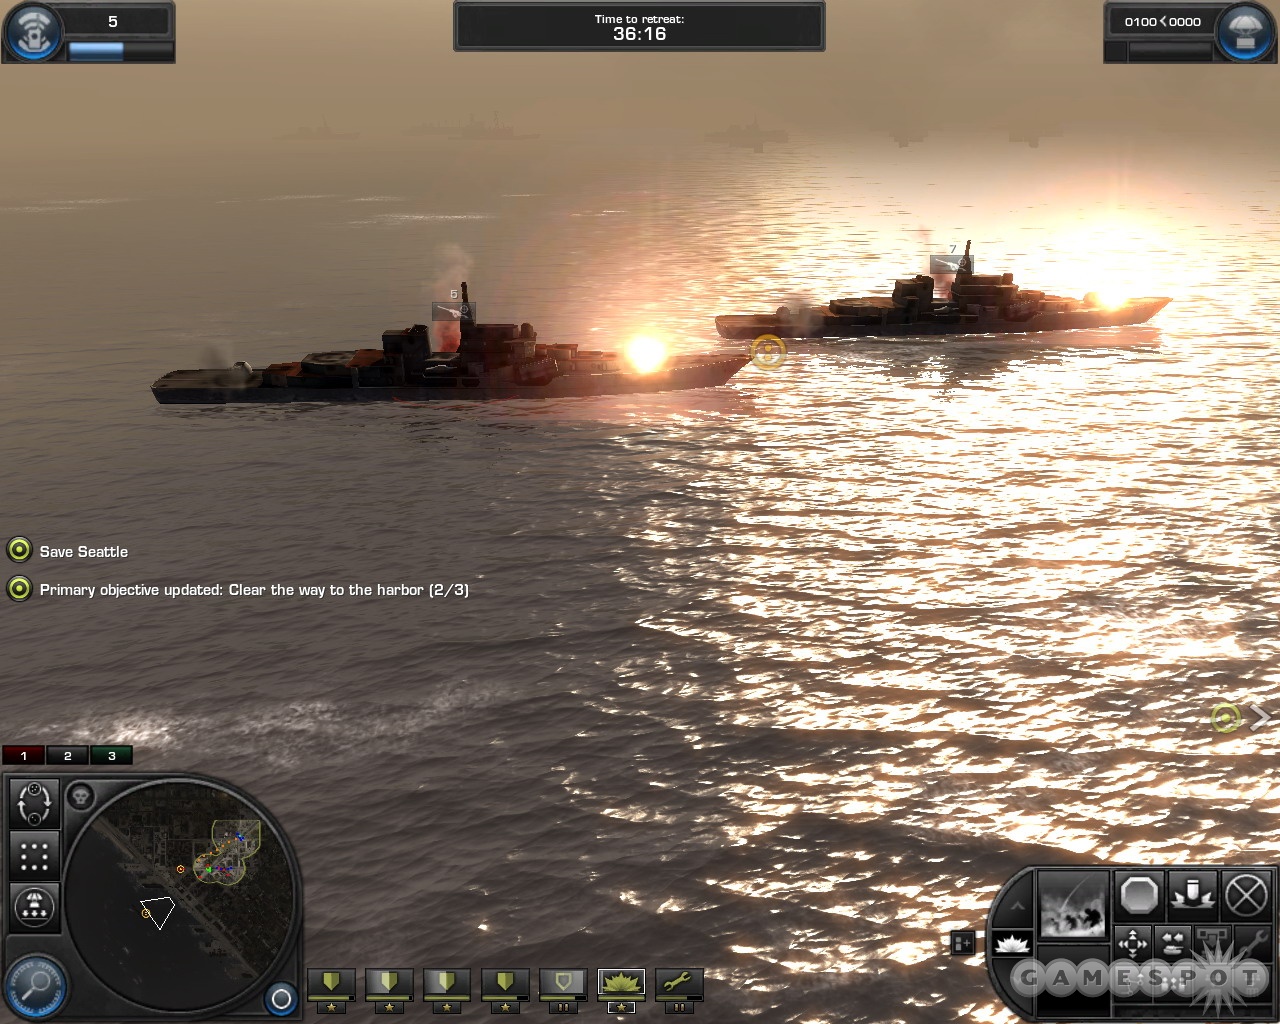
Clear The Way to the Harbor
Three control points stand between you and the harbor. Before assaulting them, though, use your artillery unit on one of them to get some points, then queue up a couple of air-to-air strikes. As soon as you see the helicopters coming your way, drop both of them over the diner to take out the hostiles.
Start making your way towards the three control points, using your artillery unit and heavy artillery barrage tactical aids to clear them out before your tanks arrive. You can leave your artillery unit back at the diner; it should be relatively safe there.
While you clear out the first two objectives, you'll probably have to deal with more choppers. You can probably ignore them if you wish; they'll fly away eventually and the damage they deal can be dealt with if you use your repair tank adroitly enough.
Destroy the Soviet Ships
A pair of ships in the harbor are going to be shelling you relentlessly here. When you get the queue to destroy them, do so by painting them for precision artillery strikes. Two precision strikes should be able to clear the area.
When you have one point remaining, use your artillery and tactical aid to clear it, then charge in with your tanks to finally clear the path.
Secure the Harbor/Destroy the Soviet Helicopters
You should hopefully have half an hour or more time remaining to you here; there's plenty of leeway, but you don't want to take too long to complete your objectives. When you get the objective to try and clear the harbor, begin by moving all of your tanks into the northwestern point, where Soviet tanks are rolling off of the water to engage you. A defensive stand here will let you build up your tactical aid points and support your expansion to the southeast.
Before you can do that, though, you'll need to engage a few Soviet helicopters far to the east. Air-to-air strikes are going to be your friend here. Just queue up three strikes, spread them around the area, and repeat the process until all the helicopters are down. It can be tricky to do so, since the helicopters will appear and reappear in intervals, but you should have plenty of tactical aid to repeat the process until you nab them all.
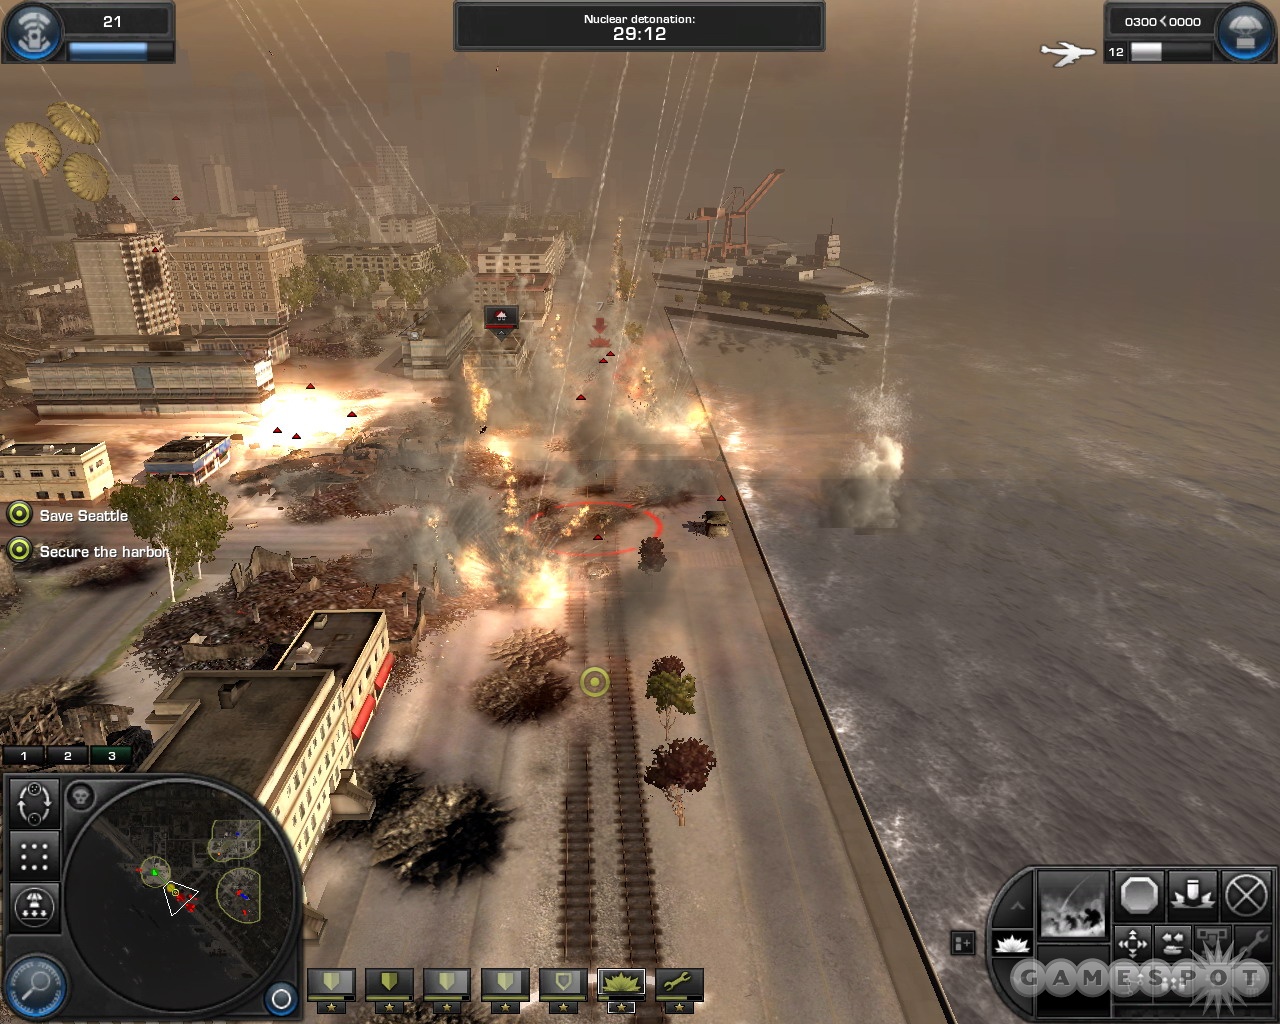
At this point, move your heavy artillery up to the base of the Space Needle to ensure that it can hit all of the harbor perimeter points and start it firing at them. That'll build up your tactical aid and help you clean them out without risking your tanks. Heavy artillery barrages will also help weaken the defenders.
With the northwesternmost of the four harbor points secure, leave a couple of heavy tanks there to defend your rear while moving to the southeast. One heavy tank can hold a point by itself, assuming you've weakened them with heavy artillery barrages and fire from your heavy artillery unit. Spread your lines thin and nab all four points, keeping an eye on the damage to your units and the enemy positions. Continue to use artillery as best you can while remaining sure that your own forces are out of the area of effect.
Secure the Soviet Main Base
When you clear the harbor, regroup your tanks into a column and get your repair tank behind them. You'll be shown the location of the main base of the Soviets now. Moving in without weakening it would be a bit crazy, so use your heavy artillery unit to fire away at the buildings inside and use your laser-guided bombs, precision artillery, or heavy artillery barrages to try and destroy some of the units inside.

You should have a number of minutes left, so after using your artillery to weaken the positions a bit, move a heavy tank over and try to judge what remaining fortifications they have. The walls will make it difficult to get inside the base, so try to make a hole for yourself with artillery of some sort. When that's done, roll in, destroy any remaining forces, and take the perimeter points. A short counterattack will be all you need to face to finish the mission. But wait…
Survive the Soviet Counterattack
You have three points to defend here. At this point in the fight, we had five heavy tanks, two medium tanks, a repair tank, and a heavy artillery unit. You'll also gain control of some of Webb's units, including another repair unit and a couple more artillery units, as well as an anti-air unit.
Split up your forces so that you're equally distributed in terms of firepower between the three points. You're going to be facing slightly more enemies to the north and middle, so if you have an uneven number of units, put them in the middle control point. Move the artillery units back a bit from the action so that they can actually fire on the enemy, and assign them each to a separate group. You can have them fire at the ground in the distance beyond the perimeter points, but that'll likely require a bit more micromanagement than you want to deal with. If you assign them to groups one, two, and three, though, they'll be a little easier to manage. Just fire them onto the roads to deal with them.
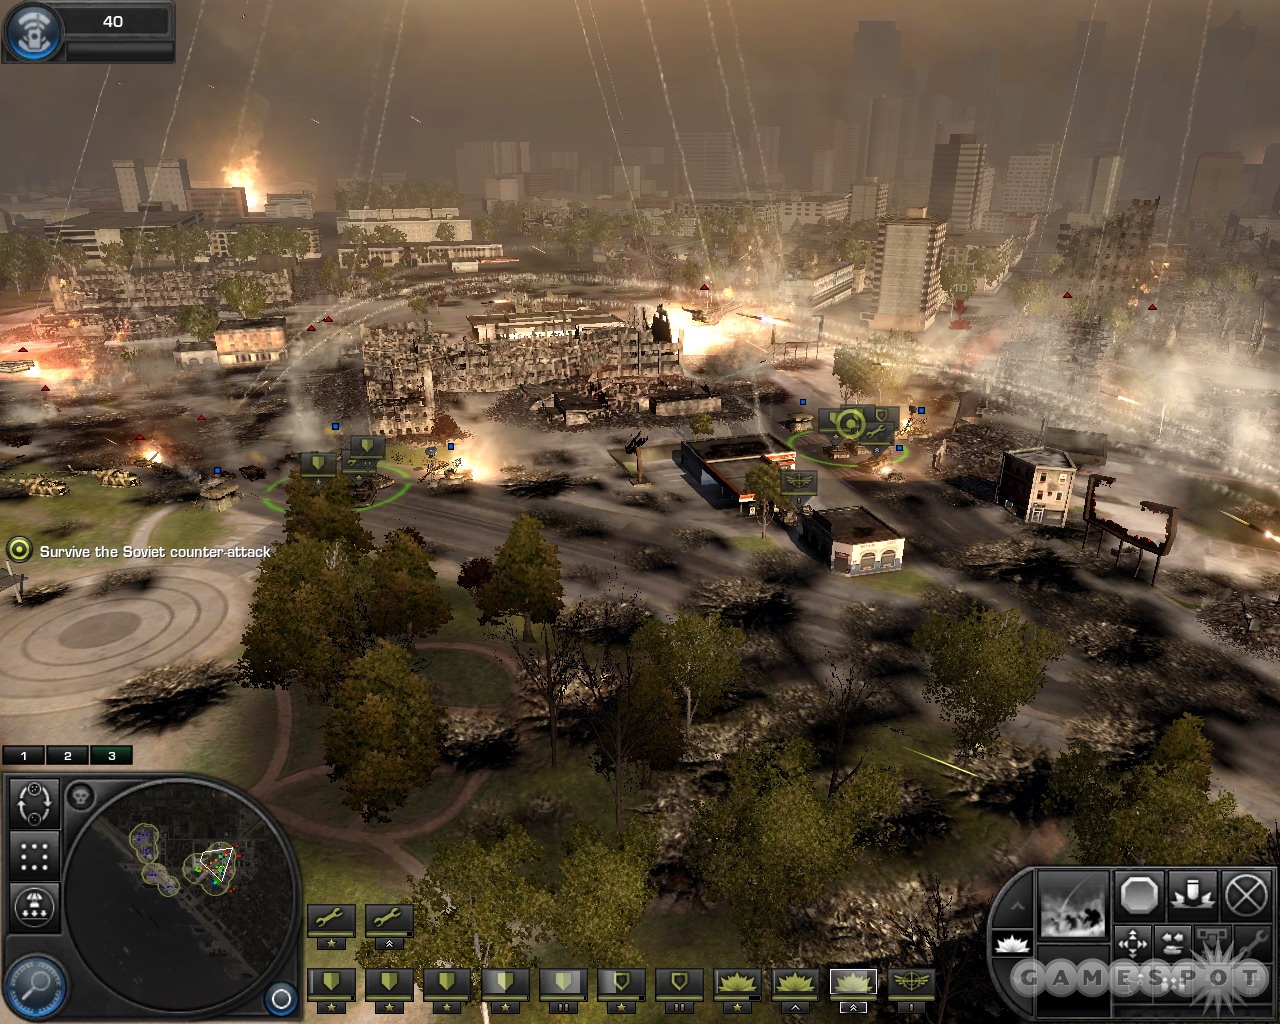
Anyway, when the Russians start attacking, you can simply keep your tanks parked in position while you maneuver your repair tanks and attempt to fire your artillery and tactical aid at the enemies. The first section of the fight will be the more difficult, as you won't be able to call in for reinforcements; it'll be crucial to keep the perimeter points occupied. Your tanks won't take as much damage as the repair tanks will here, so be sure to repair them whenever you can. You'll have more tactical aid points than you'll know what to do with, so continually call down for heavy artillery barrages in the area beyond your perimeter points.
Bringing It Home
If you can survive to the point where Sawyer gets back in contact with the Air Force, you've basically won. Your tactical aid points expand greatly here, and you'll also be able to use carpet bombing and daisy cutters. With the points that you obtain by firing, just wait until you have enough to call for a triple daisy cutter and start dropping them on the approaches to your position. Since you can now call in for reinforcements, you shouldn't have to worry too much about being overrun; just call for a new tank whenever you have the opportunity to do so, guard the perimeters, and drop your daisy cutters.
After a few minutes of this, a friendly captain will appear to the rear of the Soviets and start pounding them. Hold out until he arrives, and you've beaten the game!
Got a news tip or want to contact us directly? Email news@gamespot.com
Join the conversation