True Crime: Streets of L.A. Walkthrough
This guide to True Crime Streets of LA includes walkthroughs for every mission, including alternate missions and episodes, as well as cheats, and advice for picking out upgrades.
Design by Collin Oguro
You are Nicholas Kang, an ex-cop with a shady track record (excessive violence, property damage, etc) who has been recruited into the Elite Operations Division, a branch of law enforcement created to combat the toughest and most controversial cases in Los Angeles. True Crime: Streets of LA mixes several styles of gameplay, including hand-to-hand fighting, gun battles, and driving challenges, to form a storyline that branches depending on your success and failures.
This comprehensive Gamespot True Crime: Streets of LA game guide includes:
- Street Crime Tips: Solving crimes is key to earning upgrades. Look here for tips on fighting, chasing, and overcoming criminals.
- Episode Walkthroughs: This section provides complete walkthroughs for all True Crime episodes and missions. You'll also find all alternate episodes and alternate missions included so you can unlock all three endings.
- 24/7 Upgrades: This section offers details on all fighting, shooting, and driving upgrades and how to obtain them.
- Bonus Cruisin': Earn more upgrades during Bonus Cruisin' mode. This section reveals the fighting, shooting, and driving upgrades and how to obtain them.
- Cheats and Secrets: Look here for True Crime cheats for all three consoles, including unlocking all upgrades and launching Dogg patrol. You'll also find instructions on changing your character model!
Table of Contents
Street Crime TipsWalk-through
Episode 2 - Mean Streets
Episode 3 - International Ties
Episode 4 - Russian Face-Off
Episode 4 (Alternate) - Con Girls
Episode 5 - The Rescue
Episode 5 (Alternate) - High-Rise Terror
Episode 6 - House of Wu
Episode 6 (Alternate) - Rampage
Episode 7 - Finding Rocky
Episode 7 (Alternate) - Blood Money
Episode 8 - Retribution
Bonus Cruisin'
Cheats and Secrets
Chapter 1 - Street Crime Tips
True Crime: Streets of LA offers a unique way of acquiring upgrades for its lead character: solving street crimes. At various points during the game, you're given untimed driving missions in which you have an infinite amount of time to reach the destination. During this time you can solve street crimes to earn points toward badges (100 points equals one badge), which are then used to enter the 24/7 facilities that house the upgrades. This section provides tips on solving street crimes and earning badges. For more on the 24/7 facilities, see the 24/7 Upgrades section of this game guide.
- If you don't mind "ignoring" some crimes, you can take on the less difficult crimes and ignore the tougher crimes, such as battling huge mobs (those disgruntled stockbrokers, for instance) and instead go after muggers and chase sequences. Just drive away from a crime and before long another will appear.
- Don't hesitate to walk around instead of drive around. Muggings and car jackings can appear while you're walking around and they're pretty easy crimes to solve. Further, as you walk around you can earn points by frisking random civilians. If you happen to find illegal drugs or weapons, you'll earn points and receive a boost to your good cop status.
- After solving a crime (such as beating up a mugger), don't forget to handcuff the criminal for additional points.
- You don't have to drive Nick's car. You can jack a faster car and use it to chase down criminals when those types of crimes occur. You'll have an easier time pursuing the faster criminals if you use a faster car.
- When driving one of Nick's cars and pursuing a criminal, switch on your siren and stay on the left side of the road. The civilian cars attempt to get out of your way and they swerve to the right.
- You can "solve" a crime by running over the offender. It won't help your good cop rating very much but can solve the crime in such cases as mugging, theft, and brawls. If you're careful, you can knock a running criminal down with your car (injuring him but not killing him) then get out and go hand-to-hand to preserve your good cop status.
- The second gun upgrade, aim assistance, will help you disable criminals more effectively. Aim assistance allows you to aim at a criminal's arm or leg to neutralize them. Otherwise, you're likely to kill the suspect, which doesn't help your good cop rating. Instead, neutralize them to solve the crime and preserve your stature as a good cop.
- When approaching criminals, flash your badge or fire a warning shot. There's a chance the criminal will stand down and give in, which makes the entire process much easier. Combine the technique with your siren. But then again, the criminal could ignore the badge and flee, or cause them to pull out their own weapon! Proceed with caution. You could just beat them down or neutralize them!
- When moving around town solving crimes, seek out parking garages so you can save your game. This also replenishes you and your car's health for free.
- When you're fighting someone with a weapon, use the grapple button then the punch button to disarm them.
- If a criminal stands with his hands up but his gun remains in his hand, be cautious! He'll likely shoot at you when you get close! If he's already dropped the weapon, expect him to surrender peacefully.
- The way you conduct yourself on the city streets affects your good cop and bad cop rating. If you want to be a bad cop, start running over civilians, shooting criminals in the head, and pick fights with random people. If you want to be good, watch your driving and avoid running over pedestrians, go for neutralizing shots, and frisk random people on the street in search of drugs and weapons.
Chapter 2 - Walk-through
This section offers a complete walk-through of all True Crime: Streets of LA episodes, including all alternate missions and alternate episodes.
Episode 1 - Triad Violence
Your first task in True Crime's first episode, Triad Violence, is a little target practice. But it won't take long for you to become embroiled in your first lead.
Mission 1 - Shooting Practice
Objective: Destroy 10 Targets.
This is essentially a training mission to get you accustomed to using your firearms. There are no consequences for failing the mission other than being chastised by the Chief (though you'll need to ensure you successfully complete it to reach the "Bonus Cruisin'" at the episode's end).

Destroy the 10 targets by firing your weapons as quickly as possible. Reload in between targets so you aren't stuck reloading your firearms while a live target remains on the screen. You can hold down the fire button for more precise aiming; it slows down time, which is a plus, but it isn't necessary to finish off the targets. One good use for precision targeting is against targets about to leave the screen. When the top of the target begins to flash, the target is about to exit. Slow down time to give you a chance to hit the target before it moves.
Just fire quickly! For moving targets, wait until the target stops and fire rapidly. Watch your ammo level and avoid having to reload while there's a target on screen.
Mission 2 - Rushing to E.O.D.
Objective: Race to the Chief's Office.
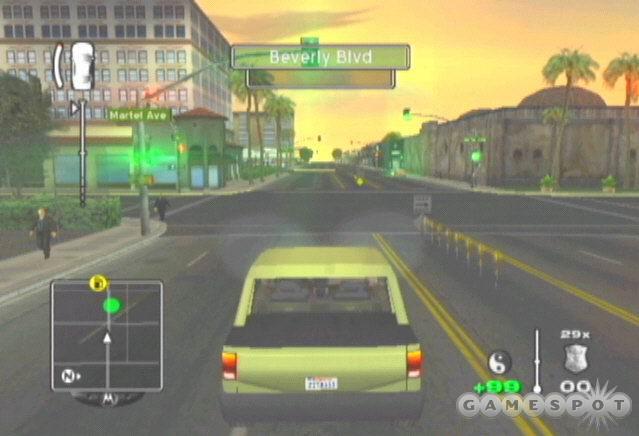
Orders are to meet the Chief at the E.O.D. offices. She's a stickler for tardiness apparently because you only have a minute, 29 seconds to reach the destination to successfully complete the mission. There's no time to waste. Walk to your car, enter, and turn around--the green indicator on the mini-map marks your destination.
Follow Olive St. to 7th St. and take a left. Go to the corner of 7th and Broadway and enter the green circle to complete the mission. Avoid running over civilians if you're trying to be a good cop. Don't worry about speeding, running red lights, or smashing into cars. Driving recklessly, as long as no one gets killed, maintains your good cop status. If you are late, the mission ends incomplete and the Chief gets in a rib about your lateness upon your arrival.
Mission 3 - Driving for Chow
Objective: Drive to Restaurant. Solve Street Crimes (Optional).
This is the first of many freeform missions. There's no time limit to reach your destination so you can take the time to solve as many street crimes as you desire. Check out the "Street Crime Tips" section of this game guide for tips on solving street crimes to earn points and badges. Your badges are your ticket inside the 24/7 facilities that offer upgrades to your shooting, fighting, and driving abilities. You definitely want to take advantage of these missions and earn points and badges! The upgrades, particularly the shooting and fighting, make more difficult parts of the game much easier.
Your destination is still downtown Los Angeles. Take 7th St. toward the green indicator on your mini-map. Turn right on Flower and find your destination down several city blocks. Enter the green circle to complete the mission successfully.
Mission 4 - Triad Muscle
Objective: Fight Triad Thug.
You meet Rosie in the restaurant for some drinks and conversation. Just as you begin to relax, a member of the Triad enters and begins harassing the restaurant's owner. After displaying a creative use of a chopstick, Kang enters a fist fight with the thug.
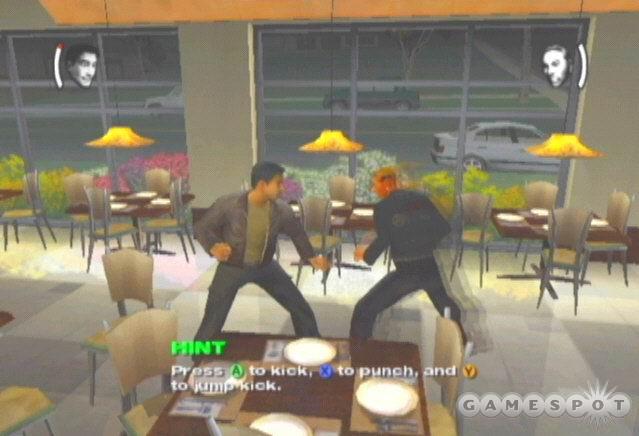
The Triad thug has four exclamation points (essentially stamina) to work through before he'll be stunned. Mix up your punch, kick, and jump kick attacks to stun the thug. While the thug stands stunned, use a finishing move revealed in the manual (you haven't learned any others), such as the jumping monkey, monkey paw, or monkey kick, to perform a damaging blow. Defeat the triad thug to end the mission successfully.
Mission 5 - Rosie Trouble
Objective: Shoot Triad Thug.
If you defeated the thug in the previous mission, he grabs Rosie as she exits the restaurant. She gives him a good gut shot before he tries to make an escape in his getaway car, which then leaves him out to dry. If you failed to defeat him in the hand-to-hand fight, he drags Rosie out of the restaurant and Kang "rescues" her with a reckless shot. Either way you must defeat the Triad thug in a gun battle!
Use the cars as cover against the thug's weapons fire. Perform your rolls and slow motion dives to try and evade his shots. Keep him targeted and on screen and rapidly press the fire button.
If you want to reach the "Bonus Cruisin'" segment at the end of the episode, don't fail this mission. If you perish, restart the mission. Failing the mission sends you to crime patrol and you'll miss out on a bonus upgrade (see the Bonus Cruisin' section of this game guide for more information on these special upgrades) until you complete all of the episode's missions.
Episode 2 - Mean Streets
True Crime: Streets of LA's second episode, Mean Streets, introduces Nick's brother and features a variety of mission types, which will be repeated over the course of the game.
Mission 1 - Cruising for Leads
Objective: Drive to Destination. Solve Street Crimes (Optional).
This is the second freeform driving mission. There's no time limit to reach the destination; take the opportunity to solve some crimes and use your points and badges to gain upgrades. The missions will continue to become more challenging so it's to your advantage to take time to get as many fighting, shooting, and driving (prioritize in that order) upgrades as possible.
You begin this mission in different locations depending on if you completed "Rosie Trouble" successfully. If you shot the thug, you begin at headquarters; if not, you begin on Hill Street already in the car and on the phone with an unhappy Chief. Use the mini-map to find the green indicator; it's a dojo on San Pedro Street. Drive there after solving some crimes and gaining some upgrades to complete the mission.
Mission 2 - Dojo Attacker
Objective: Fight Attacker.
The mysterious dojo attacker possesses five exclamation points. Mix up your punch, kick, and jump kick attacks to stun the attacker then perform a known finishing move. If you have completed some of the fighting upgrades, this mission becomes much easier (each upgrade not only gives you a new move but it also improves your overall damage and damage resistance abilities). Defeat the attacker (actually your brother) to complete the task and enter the next mission. If you lose the fight, you'll slow some points toward badges.
Mission 3 - Red Lantern Rush
Objective: Race to Bar.

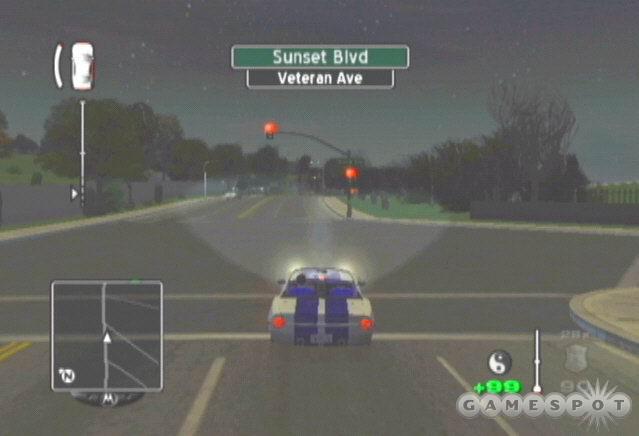
You have 59 seconds to make it to the bar. No time for pit stops here! Get in your car quickly and go north down San Pedro Street. When the road splits, stay slightly left on Onizuka. Speed down until you reach Los Angeles Street on the right. Go down Los Angeles to Temple and take a left. You'll find the bar on the corner of Temple and Hill. Alternatively you could take Onizuka to 1st and when you reach Hill St., take a right. You'll spot the green circle in the distance. Stop there to reach the bar in time.
Don't forget to use your siren, which will help get cars out of your way. Reaching the bar in time sends you directly into the next mission, Bar Brawl. If you fail to reach the bar, you instead go to an alternate mission, The Arsonist.
Mission 4 - Bar Brawl
Objective: Fight Feng.
If you reach the bar in time, you find Feng inside. He's the getaway driver that left the Triad thug behind in the first episode of the game. Feng possesses five exclamation points of stamina and also carries a knife. Pummel Feng into the many breakable items scattered around the bar. Stun him and perform a known finishing move for excellent damage. As with all fight missions, the more upgrades you've unlocked the better! Defeating Feng leads directly into mission five. If you fail to defeat him, you skip ahead to mission six.
Mission 4 (Alternate) - The Arsonist
Objective: Chase Feng.
If you failed to reach the bar in time, you find the establishment torched and Feng on the loose. He runs out of the bar and into a getaway car. Your goal is to chase him in your own vehicle and force him to stop. Firing on Feng's car is an easy method of stopping him. Get behind Feng as close as possible and rapidly press your fire button to shoot at his car. You can aim for the tires or gas tank if you've unlocked the "Aim Assistance" gun upgrade. Force his car to stop and Feng exits with hands up.
Don't let Feng get out of your sight. If he gets too far away, the mission ends in failure. Completing the mission with success or failure sends you directly to mission six. You'll either be praised or ridiculed depending on your accomplishment or lack thereof.
Episode 2 - cont.
Mission 5 - Chasing Triad Thug
Objective: Chase Feng.
This is a foot chase. You can use your car to get closer or just run him down on foot (or even run him down with your car). As you get close to Feng, press an attack button to dive and knock Feng down. If you have unlocked the "Aim Assistance" gun upgrade, you could neutralize Feng with your weapon or even just go for a head shot to end the mission quickly. Watch out because Feng will counter attack with his own weapon. If you let him get too far away from you, the mission ends in failure. Success or failure in the mission sends you into mission six with the standard or alternate introduction.
Mission 6 - Driving to Jimmy's
Objective: Drive to Warehouse.
This is a freeform driving mission. Take the opportunity to solve crimes, earn points, and use badges to get shooting, fighting, and driving upgrades (the shooting and fighting are more important). Reach the green indicator on your mini-map to at your leisure to complete the mission.
Mission 7 - Sneaking In
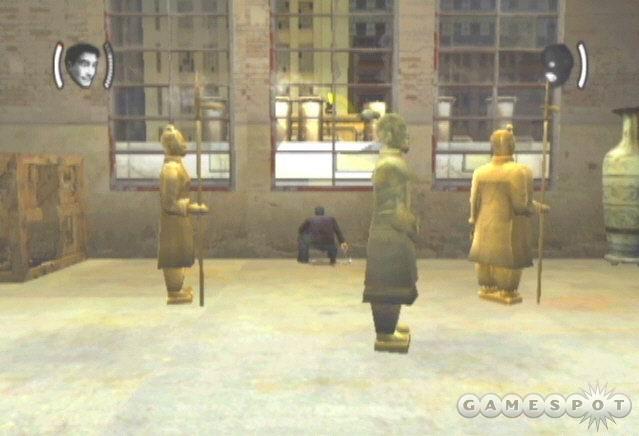
Objective: Sneak into Warehouse.
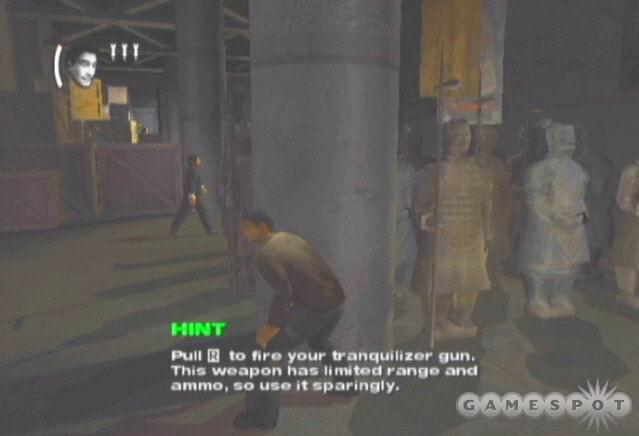
This is the first of several stealth missions. Your goal here is simple: don't get caught. You'll spot guards throughout the area. Some stand in place while others patrol the grounds. You can defeat opponents with a stun attack (punch) or a neck snap (grapple). A stun attack improves your good cop rating while a neck snap improves your bad cop rating. You also can fire a tranquilizer gun (three shots) if you're in a pinch.
You don't have long once an enemy spots you. You can try and hide or just run and stun him quickly (or fire the tranquilizer gun). If you fail to disable the enemy in time, the stealth mission ends in failure.
Controlling the camera plays a huge role in successfully completing a stealth mission. Rotate the camera around to get "around-the-corner" views so you can see the status of nearby guards. Also, use the kick button to take cover behind walls and objects; Kang puts his back up against the object and you can rotate the camera for a better view.
Look around the pillar and stun the guard while he faces away. Peer around the next pillar and when the guard moves away to the right, approach and disable him. Peer around the next pillar and spot the guard in the distance. You can come around from the left to avoid the broken glass on the ground (stepping here alerts the guard). Peer around the next pillar and when the guard moves to the left, disable him. Ascend the ramp and approach the green marker. When the final guard enters from the open doorway, disable him and stand at the marker to complete the mission. If you're caught, the mission ends in failure and the episode ends in crime patrol. Complete the task to enter mission eight.
Mission 8 - Jimmy's Ambush
Objective: Shoot Jimmy's Crew.
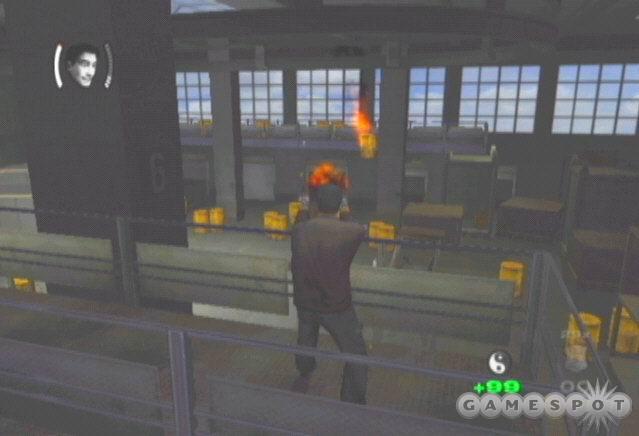
This is the first shooting mission and you'll find it much easier if you have unlocked some shooting upgrades (and especially if you got the .40 revolvers from the first episode's bonus segment). The most important things to remember during this shooting mission are to keep moving and firing (also to continually scan for new targets), pick up discarded weapons (particularly automatic weapons; those AK-47s rip through enemies very quickly), and to watch out for explosive areas (such as the wooden crates on the left wall or, in later missions, barrels and tanks).
There's a health kit on the pillar at the far end of this warehouse room. Save it until you're heavily wounded. It doesn't replenish your health fully but will provide extra time to survive against the room's plentiful and dangerous adversaries. Watch for the enemies that appear on the balcony above the room. You can utilize cover moderately (such as hanging behind pillars) and can use the opportunity to reload when necessary. Failing this mission sends you into crime patrol; completing the task successfully moves you to mission nine and the episode's finale.
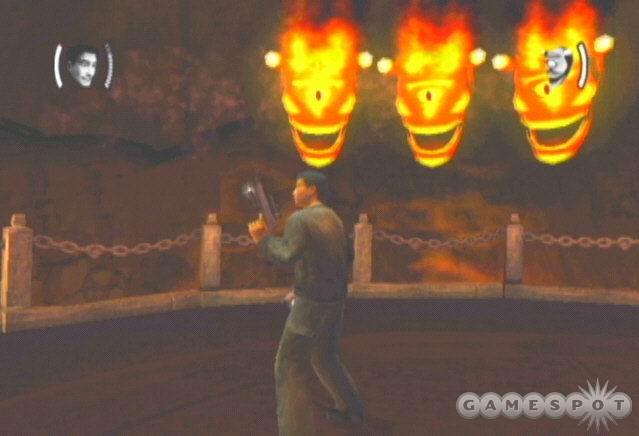
Mission 9 - Finale: Sniper Assassin
Objective: Shoot Sniper.
The sniper is in the building across from the warehouse. You can crouch behind the window in front of you and wait for your opportunity to fire on the sniper. Precision aim is your best option. Engage precision aim to slow down time temporarily and focus your reticle on the stationary sniper (he stops when he's about to fire). You can make an attempt to avoid being shot by rolling or diving sideways. Neutralize or eliminate the sniper to complete the mission successfully.
If you fail the mission (the sniper kills you), you're sent into crime patrol at a failed episode. If you want to enter "Bonus Cruisin'" then exit the mission before it's failed and retry until you successfully defeat the sniper. Be sure you have completed the other missions successfully or you will miss out on the bonus upgrade. See more about these bonus upgrades in the "Bonus Cruisin'" section of this guide.
Episode 3 - International Ties
The third episode, International Ties, reveals there's more going on than meets the eye. Enter the Russians. This section provides walk-throughs for all of episode three's missions. Failing in the finale sends you through the alternate episode four, Con Girls.
Mission 1 - Off to Chong's.
Objective: Drive to Chong's Residence. Solve Street Crimes (Optional).
This is a freeform driving mission. Take your time and don't hurry to Chong's residence--there's no rush so you should solve some street crimes, earn points and badges, and enter the 24/7 upgrade areas to boost your shooting, fighting, and driving abilities.
Mission 2 - Tailing Chong's Limo.
Objective: Tail Chong's Limo.
This is your first tailing mission and they're all essentially the same. You must follow the vehicle indicated on the mini-map by a red circle. If you fall too far behind (essentially the circle gets off of your mini-map and turns into an arrow indicating it's further off screen) for too long, the mission ends in failure. You will be warned when you're falling behind and that you'll need to speed up. Likewise, you can't follow too close or you'll raise the suspicions of the driver. There are five question marks in the upper corner of the screen. If you're too close, the question marks begin to light up. Light all five and you'll be detected.
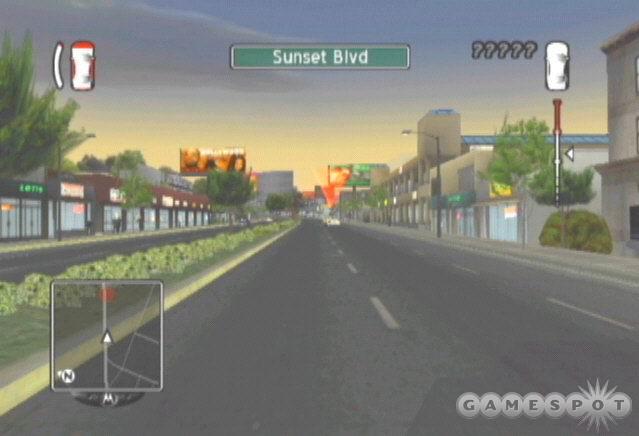
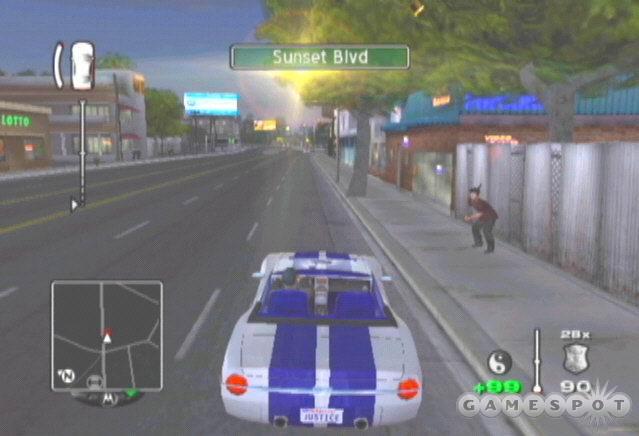
So you must strike a balance between being too close and too far away. Watch the meter on the upper right side of the screen. Stay in the middle--not in the upper red and not in the lower jagged area. Tail the limo down Sunset Blvd. Note that the limo can get stuck in traffic so be prepared to slow considerably at a moments notice. Watch the mini-map and position the tailed car between you and the upper edge of the map.
If you lose the limo, you're sent to mission four. If you're caught, you can run down the limo and enter mission four through another introduction. But if you want to successfully complete the mission and enter mission three, you must safely tail the driver without detection.
Mission 3 - A Stakeout Gone Bad
Objective: Escape Attackers.
This is pretty much the opposite of the tail mission--now you must escape the pursuer. Naturally bonus car upgrades will help you flee. Plus, you could have jacked a faster car instead of using your default convertible. But even your default car is sufficient to escape the attacker. The key is to avoid remaining on a straight line. Make frequent turns down side streets, especially if you're good at making tight turns by using a combination of acceleration and brakes.
Keep an eye on the mini-map and drive away from the pursuing car. If you see the pursuer take a different route, make sure you turn off and drive away from the red dot indicating the pursuer's vehicle. It's also possible to destroy the enemy car but it's a tough task unless you have accumulated some gun upgrades. If you fail to escape, you're sent to the alternate mission five. Otherwise, prepare for mission four.
Mission 4 - Driving to Spa
Objective: Drive to Russian Spa. Solve Street Crimes (Optional).
This is a freeform driving mission. There's no rush to reach the Russian Spa so take your time and solve the optional street crimes. Continue to visit the 24/7 upgrade shops and get as many of the fighting and shooting upgrades as possible. If you happen to locate a driving upgrade, go there too. Reach the Russian Spa to complete the mission and go immediately into mission five.
Episode 3 - cont.
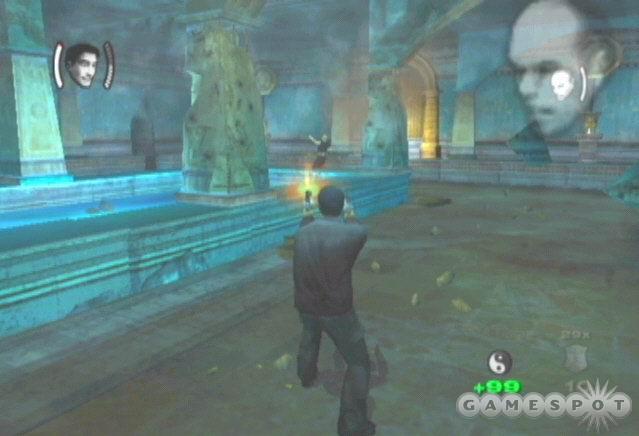
Mission 5 - Spa Infiltration
Objective: Sneak into Russian Spa.
Start in the locker room. Move forward and peer around the locker ahead of you. Look around to the left and wait for the guard to face away then disable him. Continue forward and peer around the next locker to the right. You'll spot a guard smoking a cigarette and patrolling the hallway. When he moves away from you, move up behind him and disable him with a punch or kick strike.
Move down into the tunnel and wait for the waitress to move from right to left. Disable her. Turn left and move slowly in front of the saunas. People emerge from each sauna room (including something unsightly from the second one). Wait for them to emerge and sneak up behind each one and disable them.
After the last sauna, turn left into the boiler room. Go to the right and avoid the buckets. If you step on a bucket, the sleeping person is alerted. After the sleeping man, note the opening to the left and go through. Spot the guard ahead of you. When he's not looking, disable him. Turn right and scurry to the exit marker. If you're caught, you're sent to the alternate mission five. If you succeed, proceed directly to mission six.
Mission 5 (Alternate) - Russkie Trouble
Objective: Fight Russian Goons.
You wake up in the Russian Spa either cause you were run down by a pursuer or you were caught trying to infiltrate the spa. Your task is simple: beat up all of the Russian goons! There are four goons initially. The guy in the grey suit is the toughest: he has five exclamation points to work through before he's stunned while the other three goons only have three. Failing to defeat all the goons sends you into crime patrol and you'll miss out on the bonus upgrade. Pound each goon into submission and head into mission seven.
Mission 6 - Shower Room Antics
Objective: Fight Bathers.
Time to beat up some angry men wearing towels! The first three aren't too tough. Each possesses four exclamation points to punch or kick through before you can stun them for a finishing move. If you have accumulated some fighting upgrades, this battle shouldn't be too tough. Utilize any new finishing moves you've learned as well as ground attacks to pummel the bathers into submission.
After the first three, a guy in a skimpy suit emerges from a stall. He's tougher, with six exclamation points to pound through before he's stunned. Failing in this battle sends you into crime patrol and into the alternate fourth episode "Con Girls." Succeed here and move to the seventh and finale mission for this episode.
Mission 7 - Finale: The Accomplice
Objective: Shoot Spa Crew.
After eavesdropping on a conversation, you're thrust into a shootout against the spa crew. Use the pillars as cover against the enemy fire but don't stand still for long. Keep moving and keep the crew targeted and in your sights. Continue in a circular pattern around the spa and eliminate the crew members that appear from either end of the spa. Don't neglect to pick up the discarded weaponry. Locate a health kit along the middle pillar on the left side (from your start position). Save the health kit until the last possible moment. Don't waste it if you've just been nicked. Wait until you have suffered at least half damage.
Just keep moving. You don't need to use precision aim but it does help to use rolls and dodges. The dodging slows down time and can help you evade the enemy's weapons fire. Watch the four corners of the area; it's these doorways from which the enemies appear. When a cutscene reveals the hunched-over guy walking into the spa, you know you're almost finished. Defeat this last enemy (he fires rapidly, so precision aim and dodging could help here) to complete the task. If you have successfully completed the episode, prepare to enter "Bonus Cruisin'" for your chance at a bonus upgrade.
Episode 4 - Russian Face-Off
Complete episode three, International Ties, with success and your story continues through the best path into the fourth episode, Russian Face-Off. This section features complete walkthroughs for all of episode four's missions.
Mission 1 - En Route to Autoshop
Objective: Drive to Autoshop.
This is a freeform driving mission. There's no rush to reach the autoshop so take your time and solve the optional street crimes. Continue to visit the 24/7 upgrade shops and get as many of the fighting and shooting upgrades as possible. If you happen to locate a driving upgrade, go there too. Reach the autoshop to complete the mission and go immediately into mission two.
Mission 2 - Grease Monkeys
Objective: Fight Bikers.

Pound the bikers into submission inside the autoshop. The first two enemies have four exclamation points worth of stamina; a third exits after you defeat these two and he possesses five exclamation points and a weapon. Knock the enemies into the yellow barrels for explosive fun. Perform a mix of punches, kicks, and jump kicks to wear down the enemies' stamina then unleash a finishing combo move. Failing to defeat all three bikers sends you to mission four. Successfully beat down the bikers and head directly into mission three.
Mission 3 - Chasing Francis
Objective: Chase Francis.
Chase Francis along the highway and target his vehicle with your firearms. The more gun upgrades you've accumulated the better. You can use precision aim to shoot his tires or gas tank if you have unlocked the appropriate upgrade. You must disable his car to complete the mission successfully. Francis won't make the task easy, especially while he remains on the highway. He can be difficult to catch unless you're in a fast car. Follow him off the exit ramp and blast him along the residential streets. Failure or success sends you to mission four.
Mission 4 - Off to the Gulag
Objective: Drive to the Dance Club
This is a freeform driving mission. There's no rush to reach the dance club so take your time and solve the optional street crimes. Continue to visit the 24/7 upgrade shops and get as many of the fighting and shooting upgrades as possible. If you happen to locate a driving upgrade, go there too. Reach the dance club to complete the mission and go immediately into mission five.
Mission 5 - Another Way In
Objective: Sneak Into Dance Club
Sneak behind the car on the left then disable the guard while he's turned away. Avoid the glass along the path ahead and disable the second guard ahead of you. Marvel at the Hollywood sign in the background as you round the corner to the left. Wait until the guard walks away and disable him. Quickly scamper to the right wall. When the guard beyond the dumpster walks away from you, scurry up behind him and disable him and a second guard to his right.
Continue along the left path and avoid the glass. Round the corner to the left and take out the next guard. Disable the guard near the door and walk onto the green marker to complete the mission. If you're caught, you're sent to the alternate mission six. Complete the mission successfully and enter mission six directly.
Mission 6 - Disco Inferno
Objective: Shoot Bouncers.
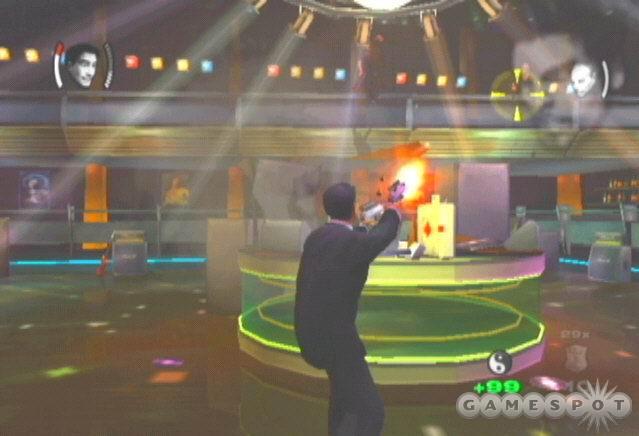
Annihilate the dance club bouncers with your firearms. Watch for additional bouncers appearing on the balcony above the dance floor. As you have in previous shooting missions, gather discarded weapons (especially automatic weapons and machine guns) for use against the enemies. When you need health, move near the center bar and find the health kit on its right side (from your start location). Don't stand too close to the bar or stray shots could ignite some of the machinery there. Success or failure sends you into mission seven.
Mission 6 (Alternate) - Alley Brawl
Objective: Fight Bouncers.
If you were caught sneaking into the Gulag then you must battle the bouncers behind the dance club. Success or failure here sends you into mission seven. You must defeat three bouncers to complete the mission. Two of the bouncers possess four exclamation points that must be worked through before you stun the men and can perform a finishing combo. The pony-tailed bouncer contains six exclamation points. Mix up your punches and kicks to stun each bouncer then perform your array of finishing move combinations.
Mission 7 - Cary in Trouble
Objective: Race to Cary's Dojo.
You have 2 minutes, 54 seconds to reach Cary's dojo. You begin on New Hampshire Avenue. Stay on this street until you reach 3rd St. Take a left and start racing toward the green indicator on the mini-map. This is a long driving mission so turn on your siren and try to avoid ramming into traffic. The road will eventually fork. Take the right fork, which is actually 4th St. and stay on it as you move along the home stretch toward the dojo. You'll find the dojo on the corner of 4th and San Pedro. Move into the green circle to complete the task. Failing the mission sends you into crime patrol and the next episode. Succeed and reach this episode's finale.
Mission 8 - Finale: Vandal Wrath
Objective: Fight Vandals.
Defeat the three vandals inside Cary's dojo. All have five exclamation points of stamina to work through before you can stun and perform a finishing move. One wears a samurai hat and carries a sword. Mix up your attacks and ready one of your finishing moves. You should have unlocked some fighting upgrades by this point (if not, you really should have!), which will make the battle much easier. Fail this mission and you're sent to crime patrol. Succeed (and succeed in all other of the episode's missions) by pounding all of the vandals and enter the bonus cruising section.
Episode 4 (Alternate) - Con Girls
This is the alternate episode four. You'll enter this path if you fail to complete episode three's finale successfully.
Mission 1 - Strip Club Detour
Objective: Drive to Strip Club. Solve Street Crimes (Optional).
This is a freeform driving mission. Take the chance to solve some street crimes, earn some points and badges, and visit the available 24/7 facilities to earn fighting, shooting, and driving upgrades. When ready, proceed to the strip club marked on the mini-map by the green indicator.
Mission 2 - Cat Fight
Objective: Fight Strippers.
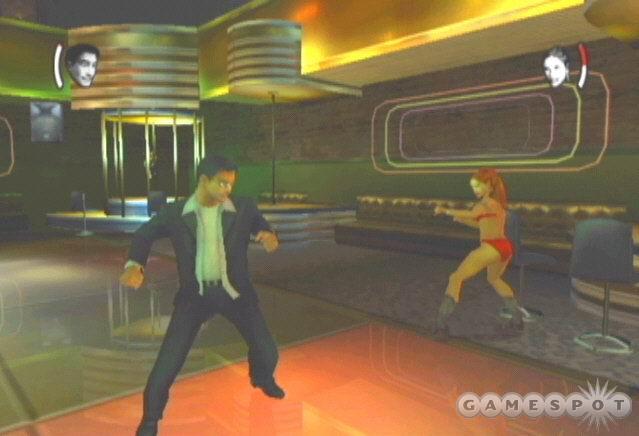
Your conversation during the lap dance doesn't exactly go as smoothly as you'd hoped. Now you must fight the club's strippers and go-go dancers. These aren't particularly tough opponents (though there are six total). Each can be stunned after just four successful punches or kicks. Perform your unlocked finishing moves to eliminate the strippers (some carry weapons) as quickly as possible.
After eliminating the strippers and dancers, a bouncer emerges as your last opponent. He's a bit tougher with five points of stamina. Fail this mission and you're sent to the alternate third mission. Otherwise, proceed to mission three after a successful beat down.
Mission 3 - Cruising for Lola
Objective: Drive to Lola Meeting. Solve Street Crimes (Optional).
The incident at the strip club puts you on the trail of Lola. This is a freeform driving mission. Solve some street crimes and earn some upgrades if applicable before driving to the meeting with Lola. Just follow the mini-map to the green indicator marking the destination.
Mission 3 (Alternate) - Lola Rush
Objective: Race to Meet Lola.
You just got pounded by the strippers (Rosie finds it very funny), but you have information on Lola anyhow. You have 1 minute, 29 seconds to reach the Fortune Cookie Factory.
Turn around and follow Santa Monica Blvd. to Wilton Street. Follow Wilton to Melrose and take a left. You'll find the destination up on the left. Fail here and you're sent to the alternate mission five. Lola gives you a chance, even though you were late.
Mission 4 - The Driving Test
Objective: Race to Destination.
Lola tests your cover by challenging you to a driving test. You must reach the destination in 1 minute, 29 seconds. The biggest obstacle is your vehicle. You must drive this van to complete the exam.
When you start on Burnside, take the first right onto Hauser. Follow Hauser until you reach 3rd Street. Hop on 3rd and burn rubber. Follow it to La Cienega Blvd. You could also take a left on Hauser and follow it to 6th. Go down 6th to San Vicente. You might also start on Hauser, which you can use to get to Colgate. Head up Colgate to San Vicente (which turns into La Cienega) and turn right to find the destination. Fail here and you're sent to the alternate mission five.
Mission 5 - Police Getaway
Objective: Escape Police.
Lola might be impressed with your driving but the cops aren't. You're being chased by the police and to maintain your cover, you must elude them. Although you're in a slow van, your tactics remain the same. Avoid long stretches of straight road. The police car can easily catch up here. Instead, perform frequent turns down side streets and watch the mini-map to follow the cop's position and move away from him as much as possible. Complete the mission to move on to mission six. Otherwise, you're off to crime patrol and a huge undercover failure.
Mission 5 (Alternate) - Five Laps
Objective: Beat Lola in Five Laps.

The goal here is simple: beat Lola in a five lap race along a short course. You begin in whichever car you were using before so the faster the better. Stick on the inside and avoid the yellow barrels (which explode). Stay ahead of Lola by cutting the corners sharply. Beat here and continue to mission six. Fail and you're off to crime patrol and the next alternate episode.
Mission 6 - Busting Lola
Objective: Fight Lola.
Lola breaks your cover rather easily: not too wise to talk on your cell phone when you aren't sure where she's standing! Now you must fight her one-on-one. Lola is a tough customer with six exclamation points of stamina to beat through before you can stun her for a finishing move. You should also employ the block button to deflect her attacks and set up your own counters. Defeat her and you move on to the finale of this episode. Lose, though, and you're off to crime patrol.
Mission 7 - Finale: Sniper Redux
Objective: Shoot Sniper.
Lola doesn't stay in your custody for long--she's killed by a sniper. Run to the fence ahead and duck behind it to avoid the sniper's shots. This is similar to the sniper task in the early episode. Use precision aim to slow time and, if you have acquired some gun upgrades, aim for a head shot or a neutralizing shot. Defeat the sniper (and all the rest of this episode's missions) to go to the bonus stage. If you fail, you're off to crime patrol before reaching the next episode.
Episode 5 - The Rescue
Cary is in trouble during the fifth episode, The Rescue. You'll remain on this path if you completed the fourth episode along the best ending route. The story branches again at the end of this episode if you fail to save your brother.
Mission 1 - Tailing Suspect Cop
Objective: Tail Suspicious Cop.

Follow the suspicious member of the Hollywood PD. You know the drill by now. Don't fall too far behind (allow the red circle on the mini-map to move off of the mini-map for too long) and don't get too close. The suspicious cop seems to abide by traffic laws so expect him to slow down around other cars, traffic lights, and stop signs. Don't drive at full speed. Go fast enough to keep the car on the mini-map. Be especially cautious around turns as the cop slows down considerably and you might get caught if you're speeding around turns. Fail the mission (he gets away) and you're sent to mission three; fail and catch up to him and you enter mission four. Successfully follow him to his destination and you'll go directly to mission two.
Mission 2 - Bum Encounter
Objective: Fight Winos.
Reenact a "Bum Fight" video with this mission. It's a fist fight against a couple of bums in this abandoned house. You battle two weapon-wielding bums initially; both possess four exclamation points to punch and kick through. Stun them and perform one of your unlocked finishing moves (or just any finishing move!). You can move through the various rooms of the abandoned house. Battle in the kitchen and slam one into the stove for additional explosive damage. The third bum appears after you have defeated the first two. This final attacker possesses six exclamation points. Fail this task and you're sent into the alternate third mission.
Mission 3 - Meeting Rafferty
Objective: Drive to Meeting. Solve Street Crimes (Optional).
This is a freeform driving mission. Take the opportunity to solve some street crimes and earn points and badges. Use them to enter the 24/7 facilities and grab any more upgrades you haven't already unlocked. When done, drive to the green indicator marked on the mini-map to complete the mission.
Mission 3 (Alternate) - The Peking Duck
Objective: Drive to Butcher Shop.
This is a freeform driving mission. Take the opportunity to solve some street crimes and earn points and badges. Use them to enter the 24/7 facilities and grab any more upgrades you haven't already unlocked. When done, drive to the green indicator marked on the mini-map to complete the mission.
Mission 4 - Butcher Shop Rush
Objective: Race to Butcher Shop.
You have 2 minutes, 14 seconds to reach the butcher shop and complete this driving mission. You begin on Crenshaw Blvd. Stay on Crenshaw until you can take a right on Olympic. Now it's just a straight rush down Olympic. Turn on your siren to encourage civilians to get out of your way. You'll find the butcher shop near the corner of Olympic and Hoover. Failing to reach the butcher shop in time skips mission five and sends you directly to mission six.
Mission 5 - On the Chopping Block
Objective: Fight Triad Butchers.
Time to bash some Triad scum. These guys brandish weapons and aren't slouches. You can pummel them into the stoves for additional damage. Work through their four exclamation points with punches and kicks so you can perform a finishing move. A third butcher arrives once you have defeated the first two. He has six exclamation points to erase before he's stunned. If you fail to defeat all three, you're sent to mission seven.
Mission 6 - Slaughterhouse
Objective: Shoot Triad Butchers.
Fight your way through the butcher shop and shoot every Triad member you encounter. These butchers can also appear on the meat hooks moving through the shop. Pick up their discarded automatic weapons for added firepower. You'll find a health kit after the first stretch of meat hooks after you enter a doorway to the left. Locate the health kit on the right wall. You're now in the final horseshoe-shaped section. Nail the remaining guards and reach the green triangle marking the exit. Failing this task sends you to crime patrol and the alternate episode six.
Mission 7 - Finale: The Great Escape
Objective: Escape from the Triad Goons
You and Cary must escape two cars filled with Triad goons. Might be an easy task if you were in your normal car but instead you're driving a beat down old truck! Evade the pursuers by making frequent turns, especially down tight streets (your start point is a good place to move through a couple times). Avoid staying on straight roads for an extended amount of time because the pursuers can easily catch your truck.
Watch the mini-map and monitor the pursuers' positions so you can turn away from them at every opportunity. When you've managed to get one pursuer off of the screen, be sure to drive away from his position so you don't have to deal with him again and can focus on the last remaining enemy vehicle. Complete the great escape successfully to enter the bonus stage (as long as all other missions have been completed successfully). Fail and you enter crime patrol and the alternate episode six.
Episode 5 (Alternate) - High-Rise Terror
This section provides complete walkthroughs for all missions in the alternate fifth episode, High-Rise Terror.
Mission 1 - The Airport Lead
Objective: Drive to Airport. Solve Street Crimes (Optional).
You've got a new lead and it sends you to the airport. This is a freeform driving mission. You can solve some street crimes and earn upgrades if you wish or just follow the mini-map to the airport. Reach the destination to enter the next mission.
Mission 2 - Chasing Assassins
Objective: Chase Assassins.
Nick finds some of the General's handiwork and also spots the potential assassins leaving in a cargo truck. Follow the cargo truck at close-range and start shooting at its rear passengers. Annihilate the truck with all of your firepower. You can use aim assistance to shoot out tires or just shoot until the truck can't move any more. Complete this mission to move on to mission three. Fail, however, and you move on to mission four.
Mission 3 - A Race Downtown
Objective: Race Downtown.
You begin on the freeway--10 moving eastbound. Stay on 10 until you reach the exit onto Grand Street. Turn left on Grand to locate the blocked off area and the next mission. Fail to reach the destination in time and you move to the alternate mission five.
Mission 4 - Bank Standoff
Objective: Reach Bank Entry.
Commandos have taken over the bank and they're demanding 500 million. Nick pulls out his trusty firearms and moves to pave a path into the bank. Shoot the commandos near the cop cars as you push forward to the bank. Watch for the commandos in the upper windows of the building (you could enter precision aim to shoot them). Grab the commandos' automatic weapons for more firepower. Reach the green triangle marking the bank entrance to complete the mission. If you fail, you move to the alternate mission five.
Mission 5 - Lobby Firefight
Objective: Shoot Terrorists.
In a not-so-subtle nod to the Matrix lobby scene, Nick must battle through scores of terrorists before moving on to the next task. When you need a health boost, find a kit near the outer wall. Watch out for terrorists behind the teller windows. Grab their discarded automatic weapons for more firepower and take cover behind the central pillar as needed. Fail and move to the alternate mission five.
Mission 5 (Alternate) - Going Up
Objective: Reach VIP Office.
Here you must battle through the hallways and stairwells with your firearms. Grab the commandos' discarded weaponry for additional firepower. You'll find medical kits at the entrance to the stairwells. Approach corners quickly. The commandos have a tendency to hide behind corners and in small alcoves. Reach the green triangle marking the VIP office to complete the mission.
Mission 6 - Hostage Crisis
Objective: Reach VIP Office.
This is a tricky mission because the commandos have taken some hostages. If you're trying to preserve your badges and good cop rating, you will need to enter precision aim to neutralize or kill the hostage takers without harming the hostages. Follow the linear path through the halls and offices and fire like mad (if you don't care about the hostages) or be prepared to enter precision aim to avoid killing the innocents.
Grab the medical kit in the second office. It's directly in front of the entrance. Find another near the exit after you battle through the office. Crush the last remaining commandos near the VIP entrance (use a precision shot to free the hostage if you wish) and walk to the green triangle to complete the mission.
Mission 7 - Finale: Bad Politics
Objective: Fight General Kim.
Battle the General in hand-to-hand combat on the roof of the bank--what a perfect setting for a little beat down! The General is a solid fighter and possesses six exclamation points of stamina to work through before you can stun him. Mix up your punches and kicks. Don't neglect your ground attacks and successfully pull of those finishing moves when you have him stunned. Block his attacks and counter with your own punches and kicks. Defeating General Kim unlocks the poor ending. There are a lot of loose ends that didn't get tied up!
Episode 6 - House of Wu
Save Cary and you follow leads on the mysterious Ancient Wu. This section features walkthroughs for episode six, House of Wu. Continue along this episode route to reach the best ending in the game.
Mission 1 - Off to Wu's Place
Objective: Drive to Destination. Solve Street Crimes (Optional).
This is a freeform driving mission. You aren't timed so there's no hurry to reach your destination. Take the chance to solve some street crimes and earn badges to enter remaining 24/7 facilities. Unlock as many remaining upgrades as possible before reaching the destination, marked by the green indicator on the mini-map.
Mission 2 - Up the Food Chain
Objective: Sneak into Restaurant.
Peer down the opening ahead and wait for the guard to turn away then disable him. Slowly approach the opening to the right. When the guard looks away, disable him. Move through the next room and take out the guard that patrols near the opening on the left. Avoid the chairs in the next room and disable the smoking guard ahead.
Eliminate the guard to the left. Turn right and wait for the waitress to pass by. Disable the waitress, avoid the chairs in the next room, and take out the last guard standing near the exit. Walk to the green indicator marking the exit. If you're caught in the restaurant, you're sent to the alternate mission four. Successfully reach the end without detection and go directly to mission three.
Mission 3 - Kitchen Inspection
Objective: Fight Cooks.
You successfully reach the restaurant's kitchen but the cooks are waiting. You must defeat the cooks in hand-to-hand combat to complete the mission. The first three enemies aren't tricky--just pound them with punch, kicks, and jump kicks and use your finishing maneuver combinations. The first three cooks each have four exclamation points to eliminate before you can perform a finishing move.
After defeating the first three cooks, two more appear. Both of these enemies also possess four exclamation points of stamina to eliminate before they're stunned. Try and shove the cooks into the stove; this causes an explosion and fire which will come in handy shortly. After defeating both sets of cooks, a final enemy enters: it's some sort of zombie creature. He's impervious to your punches, kicks, and finishing moves. Instead, you must battle him near the fire. Keep him around the fire and he'll suffer damage from the flame. If you're defeated, you're sent to the alternate mission four. Otherwise, go directly into mission four.
Mission 4 - Seeking Ancient Wu
Objective: Locate Ancient Wu
You must battle through the underbelly of the restaurant. Thankfully those zombies aren't impervious to your firearms. If you have unlocked the flash light upgrade at the 24/7 facilities, then you'll have the added benefit of being able to see better in the dank tunnels. Note that if you switch weapons to those discarded by enemies, you won't have the flash lights attached.
When you reach the first intersection, take a left. Continue to shoot any enemy that appears on screen. Reload your weapons between fights so you always have a fresh clip. Stay to the right at the next intersection. Keep turning to the right and pick up discarded weapons if you wish. Follow the dark hallway through several more right turns. If you can go left or right, always go right. You'll find the green indicator marking the exit. Approach the exit to complete the mission. Dying in these tunnels drops you into mission six. Succeed here and move into mission five.
Mission 4 (Alternate) - Tunnel Vision
Objective: Reach Sewer Exit.
Instead of the restaurant's basement catacombs, you're dropped into the sewer. The dangers are plentiful here. A runaway spiked wall pursues you, and zombies inhabit these tunnels. Don't let the wall catch you or you will suffer damage. Use your firearms and quick feet to reach the sewer exit. Just keep moving forward and firing. Reload during lulls in the action. Reach the green indicator marking the exit to complete the level. Dying in the sewer sends you to mission six.
Mission 5 - Inner Demons
Objective: Shoot Wu's Demons
Ancient Wu's demons circle around the platform. Follow them in a circular pattern and fire as rapidly as possible to eliminate them. When the demons face you, be prepared to move. As the demon approaches, roll to the left or right side to avoid sustaining damage from the demon's attack. You must defeat several waves to complete the mission successfully. The key is to just follow the demons around the platform while you fire. When the demons stop, you stop moving but keep firing. As the demon approaches, dodge quickly. Repeat until all of Ancient Wu's demons have been defeated. Dying here sends you to crime patrol and the next episode.
Mission 6 - Die Die My Concubine
Objective: Fight Wu's Concubines
You just finished shooting Wu's demons now you must go hand-to-hand with Wu's concubines. The concubines aren't pushovers; each possesses six exclamation points of stamina to punch and kick through before you can unleash a finishing move combination. Watch the edges of the platform. The railing can break and you can send a concubine over the side and into the flames below. Perish here and you enter crime patrol and the next episode. Survive, though, and you reach the finale mission of this episode.
Mission 7 - Finale: Nightmare
Objective: Fight Wu's Dragon
Ancient Wu's dragon follows a similar pattern of the demons. The dragon encircles the platform then faces Kang and attacks. You can attack the dragon as it moves around the platform and when it attacks. When the dragon circles the platform, enter precision aim and shoot the dragon in the head. When the dragon faces you, shoot its head. When it breathes fire, back up and run or dodge away from the flames to avoid damage. Failing to defeat the dragon sends you to crime patrol and the next episode. Successfully complete the mission (and all others in the episode) to enter the bonus stage.
Episode 6 (Alternate) - Rampage
You have failed to save Cary and now prefer revenge to investigation. You'll enter the alternate sixth episode, Rampage, if you failed to save Cary at the end of episode five.
Mission 1 - Revenge Rush
Objective: Race to the Gulag.
Thugs have killed Cary, Nick's little brother, and revenge has now become a priority. You must reach the Gulag in 59 seconds to complete the mission. You begin on La Cienega. Get inside your car quickly and race down La Cienega (if you're in one of Nick's cars, turn on the siren). Follow La Cienega until you reach Sunset. Turn right and find the Gulag just ahead. Drive into the green circle to complete the mission. Fail and your revenge gets off to a bad start as you're sent to the alternate mission two.
Mission 2 - Rocky's Getaway
Objective: Chase Rocky.
You reach the Gulag just before Rocky departs. Now you must pursue him! Get in your car and trail Rocky's vehicle, marked with a red circle on the mini-map. Stop his limo with precision shooting or just block it with your own car so it can't move forward. Fail here and go to mission four. Succeed and you move to mission three.
Mission 2 (Alternate) - Gulag Goons
Objective: Fight Rocky's Goons.
You enter the Gulag and find a goon on the ground…but it's a trick. You must battle Rocky's goons inside the Gulag. This is another hand-to-hand battle and all of your fighting upgrades will definitely help out here. You must defeat three goons. The leader (the one who was on the ground tricking you) features five exclamation points of stamina to punch and kick through; the other two goons possess four. Finish them off to proceed into mission four. Should you fail, you're sent to mission five.
Mission 3 - The Bodyguard
Objective: Fight Misha.

In this mission you battle Rocky's bodyguard, Misha, in the city street. He has six exclamation points of stamina to work through before you can stun him. Mix up your punch, kick, and jump kick attacks until he's stunned then perform a finishing move. Repeat as necessary until he's down for the count. Fail to defeat Misha and you move to mission five.
Mission 4 - Wu's Turn
Objective: Drive to Wu's Place. Solve Street Crimes (Optional).
This is a freeform driving mission. You can head directly to Wu's place (marked on the mini-map by the green indicator) or take the opportunity to solve street crimes to earn badges for any remaining 24/7 upgrades.
Mission 5 - Payback
Objective: Shoot Wu's Crew.
Nick's revenge continues at Wu's restaurant. Apparently Nick and the hostess don't hit it off too well and the pleasantries turn into a firefight. Start shooting! Pick up the discarded weapons for more firepower. When you can move to the right, go into the room (defeat the guards inside) and find a health kit. Exit and move to the right and follow the rooms to the green triangle marking the destination.
Mission 6 - Off to the Airport
Objective: Drive to Airport. Solve Street Crimes (Optional).
After a briefing meeting with Ancient Wu, you're off to the airport to continue your revenge. This is a freeform driving mission; there's no rush to reach the airport. Take the time to solve some street crimes and earn any upgrades you might be missing.
Mission 7 - Finale: Rocky's Loot
Objective: Escape with Money Truck.
You've stolen Rocky's money truck filled with counterfeit bills. Note that the money truck is highly durable. You can withstand a lot of damage from Rocky's pursuing goons. Use this to your advantage. Get the enemy cars in front of you and blast them with your weaponry. Use precision aim to take out the tires and gas tank. It's very hard to outrun the pursuers but you have so much armor that it's easier to survive a firefight. After disabling their cars, drive off to complete the mission.
Episode 7 - Finding Rocky
This section provides complete walk-throughs for episode seven, Finding Rocky. This is the preferred mission path as you continue your investigation of Rocky.
Mission 1 - In the Driver's Seat
Objective: Drive to Destination. Solve Street Crimes (Optional).
The first mission of episode seven is a freeform driving mission. Take the chance to unlock any remaining upgrades. You should definitely have all of the fighting upgrades by this point and could also be well on your way to completing all shooting and driving upgrades. Solve some street crimes, earn points and badges, and visit the 24/7 facilities to unlock remaining upgrades.
Mission 2 - Pressing Rafferty
Objective: Fight Barkeep.
Battle the barkeep in the darkened establishment. He's a tough customer with six exclamation points to punch, kick, and jump kick through before you can unleash a finishing move combination. Failing to defeat the barkeep sends you into the alternate mission three. Defeat the barkeep and go directly to mission three.
Mission 3 - On Rafferty's Tail
Objective: Tail Rafferty.
You must follow the vehicle indicated on the mini-map by a red circle. If you fall too far behind (essentially the circle gets off of your mini-map and turns into an arrow indicating it's further off screen) for too long, the mission ends in failure. You will be warned you're falling behind and will need to speed up. Likewise, you can't follow too close or you'll raise the suspicions of the driver. There are five question marks in the upper corner of the screen. If you're too close, the question marks begin to light up. Light all five and you'll be detected.

Strike a balance between too close and too far. It's not easy in this mission, though; Rafferty has a lead foot and can speed away very suddenly. If you have trouble following him, follow along the adjacent side street (just west of the street Rafferty initially turns down). Remember to be ready to brake at any time. Rafferty may happen upon some traffic or a stop sign and slow down to compensate. This is a long tail so just hang in there and keep his car on your mini-map without venturing too close. Fail this mission (Rafferty gets away) and go to mission five. If you're detected but you catch him, go to mission six. Otherwise, head into mission four.
Mission 3 (Alternate) - FBI Goons
Objective: Fight FBI Agents
Losing in the bar fight from mission two sends you behind the bar into another fight. It's the FBI agents and they aren't too pleased with your conduct thus far. Time for another hand-to-hand battle! Both FBI agents carry weaponry and possess five exclamation points to work through. Pound them with punches and kicks and use some of your finishing moves to complete the mission. Fail here and you're sent to mission six. Succeed and go to mission five.
Mission 4 - Escaping the Feds
Objective: Escape from Feds.
The feds aggressively pursue your vehicle. The more driving upgrades (including the bonus car upgrades) you have unlocked, the better. The key to evading the pursuers is frequent turns. Get onto side streets as soon as possible and avoid remaining in a straight line. Monitor the mini-map and turn away from your pursuers. The feds are very quick on the straight roads but likely won't be able to turn as quickly as you. Keep turning down narrow roads and put distance between you and the pursuing vehicles until you have evaded them. Fail to evade the feds and you're sent into mission six.
Mission 5 - Rafferty's Date
Objective: Tail Rafferty.
You've caught up to Rafferty once again and now he has an accomplice…or is she a date? This is another tailing mission. Follow Rafferty. Don't let him get too far away but don't follow too closely either! Monitor the gauge in the upper right corner. Keep the marker in the middle of the gauge. If you're too close to the top, Rafferty will grow suspicious and you might be detected. If you're too close to the bottom, Rafferty is pulling away and you might lose him. If you lose Rafferty, you move to mission seven. If you are detected and catch up to him or if you succeed, you enter mission six (though with different introductions).
Mission 6 - Eavesdropping
Objective: Sneak into Warehouse.
The first guard patrols around the crate to the right. When he turns away, disable him. Find the next guard around to the left. Move the camera to gain sight on him. When he turns away from you, disable him. Go to the right and around the crates. The next guard patrols near the wall. Take him out. His buddy stands just to the left past the barrels. Disable him and walk to the left. Watch for the patrolling guard ahead of you and disable him.
Follow around to the right and take out two more guards to the right. Make sure you get both. If you move left too quickly, you'll be detected. Find the green triangle marking the exit to the far left. Two more guards stand near the exit (just left of the exit). Hug the left crates to stay out of view. Get close and disable the two guards. Move on the green indicator to complete the level.
Mission 7 - Finale: Father's Killer
Objective: Shoot Rocky's Posse.
You have a great view from this catwalk--rain fire down on the posse below! Shoot the yellow barrels for additional explosive damage. Be on the lookout for additional enemies to appear across the warehouse (on the opposite catwalk), on the cranes), and from the left of your start position. If you're low on health, grab the kit off of the pillar to the left of your start position. Complete the mission (and the other episode's missions successfully) to enter the bonus stage. Otherwise, you're sent to crime patrol before the next episode.
Episode 7 (Alternate) - Blood Money
This is the final episode of the game if Cary died and you're on the revenge route. You'll find complete walk-throughs for all of the alternate episode seven's missions.
Mission 1 - Race to Rocky's Lair
Objective: Race to Meet Rocky.
You have 1 minute, 14 seconds to meet with Rocky. If you've reached this mission by successfully escaping with the money truck then you begin on Holt. Turn around and go down Holt until you reach 18th. Turn left on 18th and then left when you reach Hayworth. Locate Rocky's lair just up ahead.
Alternate introduction (you were caught in the money truck): get into the car and turn right on Washington. Take a left on La Cienega and take the fork off on Venice (though you'll remain on La Cienega). Turn right onto Sawyer and then left onto Hayworth and find the destination up ahead. Fail to reach Rocky's lair in time and you're sent into mission three.
Mission 2 - Kinks in the Path
Objective: Sneak into Rocky's Mansion.

It doesn't take long for you to figure out that Rocky is one sick dude. You must sneak your way through Rocky's S&M dungeons. Walk forward and wait for the woman to stop. Disable her and follow the path to the right. Follow the bend to the left and wait for the staggering guy ahead to move to the right. Disable him and continue on. Take out the waitress that moves across your path.
Walk around the next right corner then peer to the left. Find the next guy and disable him when he's turned around. Sneak past the sleeping guy (don't step on anything) and proceed down the hall. In the second alcove to the right, wait for the girl to turn around before proceeding beyond the sleeping guy ahead. Go left, disable the guard near the exit, and end the mission by moving on the green triangle. If you're caught, you go to mission four.
Mission 3 - Freak Show
Objective: Fight S&M Freaks.
You find Rocky but you also find a handful of freaks as well. In order to complete the mission, you must defeat all of the S&M freaks. You battle against three initially; each of these chicks possesses four exclamation points of stamina. Defeat them and the cavalry enters: six S&M male freaks! These guys might have numbers but they aren't particularly strong (between three and four bars of stamina). If you've upgraded your fighting skills sufficiently, it shouldn't take more than a single combo string and finishing move to eliminate the freaks.
Mission 4 - Rosie's Ransom
Objective: Drive to Retrieve Truck. Solve Street Crimes (Optional).
Rocky has kidnapped Rosie as ransom for you to return his money. He orders you to bring the truck to a specific location. This is a freeform driving mission. Solve some crimes if you wish and earn any remaining upgrades before driving to the green indicator on the mini-map.
Mission 5 - Escaping Masterson
Objective: Escape Masterson.

Apparently the FBI isn't too impressed with your revenge crusade--Masterson finds you at the money truck. You must escape the two FBI pursuers. You're in the money truck, though; it's heavily armed and can withstand a lot of damage. Instead of trying to out run the FBI pursuers, just shoot them! Get the FBI agents in front of you and blast them with your firearms. You can use precision aim to destroy tires and gas tanks. With the FBI cars disabled, flee with the truck until the mission is completed.
Mission 6 - Chinatown Showdown
Objective: Shoot Commandos.
You deliver the money truck to Rocky in Chinatown but there are others waiting--apparently for both of you! Survive the shootout in Chinatown against plentiful commandos. Shoot the commandos that appear in your targeting reticle. Grab their weapons for additional firepower. Look out for the commandos on the rooftops (use precision aim if necessary). Stick close to the money truck for cover and grab a medical kit off of the pole near the area's center section. Defeat all of the commandos to complete the mission. Keep moving to present a difficult target. It also helps you spot the next target as quickly as possible.
Mission 7 - Finale: Last Stand
Objective: Fight Rocky.
Turns out Rocky is alive and well. Time to change that! Rocky may have six exclamation points of stamina to punch and kick through but he shouldn't be a formidable opponent if you have accumulated some fighting upgrades. Mix up your attacks and stun him for your finishing move maneuvers. Successfully defeat Rocky to unlock the average ending. You got your revenge but you didn't find the bigger fish.
Episode 8 - Retribution
This section provides complete walk-throughs for all of episode eight's missions. This is the final episode of the best path in the game. Complete these missions and you will unlock the best ending possible.
Mission 1 - The Girlfriend Angle
Objective: Tail Rocky's Girlfriend
Follow Rocky's girlfriend. Strike a balance between being too close and too far away so you aren't detected but you also don't lose track of her vehicle. Watch the gauge in the upper right corner. Don't let the indicator get too high or too low. Losing track of Rocky's girlfriend sends you to the alternate mission three. If you catch her or you successfully tail her to her destination, you're sent to mission two.
Mission 2 - Back to the Gulag
Objective: Race to the Gulag.
You have 3 minutes, 58 seconds to reach the Gulag. This is one of the simpler timed driving missions. Just get on Sunset Blvd. and head east bound. The Gulag is on Sunset so as long as you continue east on Sunset, you will locate the green circle marking the destination. Having unlocked driving upgrades and cars will certainly help you reach the destination quickly. If you're inside one of Nick's cars, turn on the siren to keep traffic out of your way. If you fail to reach the Gulag in time, you're sent to the alternate third mission.
Mission 3 - Rocky's Trap
Objective: Fight Rocky's Goons.
You enter the Gulag and find a goon on the ground…but it's a trick. You must battle Rocky's goons inside the Gulag. This is another hand-to-hand battle and all of your fighting upgrades will definitely help out here. You must defeat three goons. The leader (the one who was on the ground tricking you) features five exclamation points of stamina to punch and kick through; the other two goons possess four. Finish them off to proceed into the next mission. Should you fail, you're sent to mission five.
Mission 3 (Alternate) - Chopper Ambush
Objective: Escape Helicopter.
You've just lost the trail of Rocky's girlfriend and now a helicopter is after you. You can either escape the helicopter or shoot it down with your weaponry. Perhaps the easiest way to defeat the copter, if you have sufficiently upgraded your guns, is to just remain in place and allow the helicopter to swoop in front of you. Enter precision aim and target the helicopter's cockpit. Keep firing and with any luck you may down the helicopter in just a few shots.
Mission 4 - Driving to Airport
Objective: Drive to Airport. Solve Street Crimes (Optional).
This is a freeform driving mission and your last chance before this episode's end to gain some upgrades. Take the opportunity to seek out any 24/7 facilities and acquire the remaining upgrades. When finished, drive to the green indicator marked on the mini-map to reach the airport and proceed into the next mission.
Mission 5 - Hangar Showdown
Objective: Shoot Commandos.
Battle the commandos in this fierce shootout. Don't forget to shoot the yellow barrels for additional explosive damage. You can also shoot the large grey tanks to cause explosions. Grab the discarded weapons from slain commandos for more firepower. Find the health kit on the far side of the warehouse on the right side. Maneuver through the hangar and reach the green indicator marking the exit.
Mission 6 - Jetting Away
Objective: Shoot Rocky's Jet.
Hop into the sports car and pursue Rocky's jet, which is automatically targeted. Drive close to the jet and fire your weapons rapidly. You can use precision targeting if you wish to shoot the tires or engines or just remain in standard aiming and fire rapidly on the jet target. Rocky's jet weaves through the tarmac so stick close and keep him on-screen and targeted.
Mission 7 - Finale: Puppet Master
Objective: Fight General Kim.

Finally you meet the man behind the scenes. You must defeat General Kim in hand-to-hand combat. Fully upgraded fighting skills will pay off here but you must also use the block button to aid in counter attacking General Kim's vigorous attack. Watch for Kim to perform frequent grapples (be ready to shake out of them). Block his successive strikes then unleash your own mix of punches and kicks. It's difficult to knock down his stamina so concentrate on scoring damaging blows even if you never are able to unleash a finishing move. Block his attack, counter attack, and repeat.
Defeating General Kim unlocks the best ending in the game. All unanswered questions have been answered and the puppet master himself was defeated.
Chapter 3 - 24/7 Upgrades
The blue icons on your mini-map (you'll spot them when you approach within range) are 24/7 upgrade facilities. Visit them during the freeform driving missions (mentioned during the episode walk-throughs). You must spend a badge to enter the facility; one badge equals 100 points, which can be earned from solving street crimes. If you fail to acquire the upgrade, you can spend another 100 points to try again or leave and return later. Once you use a particular facility, it's closed.
The highest concentration of facilities is located in downtown Los Angeles in the southeast corner of the map. Others are scattered all over the area. When on the freeform driving missions, proceed along major roads and wait for them to appear on your mini-map.
Shooting Upgrades
Drive to the 24/7 facilities offering shooting upgrades to receive a number of improvements to your weapon and shooting ability, including aim assistance (excellent for neutralizing criminals or shooting a car's tires), fast reload, and the addition of a scope and flash light.
Upgrade #1 - Dual-Target Aim
Info: Provides ability to auto-aim at two targets at once. Reticle highlights the primary target. Other nearby targets are fired upon when possible.
Objectives: Destroy five targets. Avoid civilian targets (three).
Gun targets appear one and two at a time during this upgrade trial. The key to completing it is to shoot rapidly when the targets appear on screen and to reload your weapon between target appearances. You don't want to spend time reloading your weapons while a target sits on the screen.
The fourth target moves from right to left behind civilian targets; wait for it to move to the area's center before shooting it if you want to play it safe (though you should have time to destroy it on the far right). After the two moving targets (they move toward you), the next target moves from left to right behind civilian targets. Wait for this target to move to the area's center before shooting.
Upgrade #2 - Aim Assistance
Info: Allows targeting of vital points during precision aim. Reticle turns green when neutralizing point targeted. Reticle turns red when lethal point targeted.
Objectives: Achieve seven neutralizing shots. Avoid civilian targets (two).
As the targets appear, enter precision aim (hold down the fire button) and aim the reticle at the target's arm (either side) or between the legs. Head shots do not count as successful neutralizing points in this trial. Don't remain in precision aim the entire time. Exit and re-enter so you recharge slow time, which will provide more opportunity to line up your aim. It only takes one shot to neutralize (if your aim is true). Beware of the civilian targets. Against the moving target, slow down time (re-entering precision aim) and lead the target's neutralizing point slightly.
Upgrade #3 - Fast Reload
Info: Increases reload speed.
Objectives: Destroy or neutralize 10 targets. Avoid civilian targets (one). Avoid head shots.
Four targets drop down immediately. Fire as quickly as possible. Alternatively, you could use precision aim to slow time and score neutralizing shots (not head shots!). The fifth target should be neutralized as it rests behind a civilian. Exit precision aim and shoot the next two targets (one moving) with rapid fire. Four more targets are dropped. Shoot them quickly or use precision aim to slow time and score neutralizing shots. The final target is behind two civilians. The target's arms are covered so use precision aim to score a neutralizing blow on the target's legs. The key to this task is destroying as many as possible when the four targets drop on the screen (twice). Watch for the blinking light at the top of the targets, which indicates the target is about to be raised.
Upgrade #4 - Fast Aim Speed
Info: Increases reticle speed. Improves aim for moving targets.
Objectives: Destroy or neutralize 12 targets. Avoid civilian targets. Avoid head shots.
The first batch of targets can be destroyed with rapid fire. Nail the first target then wait for the next two to move past the civilians. The targets then move along the edge of the screen. Destroy them here. The next tough point is after the three targets that drop down. Shoot the next target then enter precision aim mode to shoot the target behind the two civilians. Shoot the last three moving targets quickly to complete the task. Remember you can enter precision aim to slow time temporarily and use neutralizing shots; however, normal aim mode is generally much easier for these moving targets.
Shooting Upgrades - cont.
Upgrade #5 - Laser Sight
Info: Engages tracking laser beam during precision aim. While precision aiming, use directional buttons to select desired vital point. Pull away from current target to enter free-aim.
Objectives: Achieve 10 neutralizing shots. Avoid civilian targets. Avoid head shots.
The targets rest behind wooden barriers but otherwise it's a similar task. Enter precision aiming to score the neutralizing shots. Between dropped targets, exit and re-enter precision aim to slow down time. Don't forget to watch your ammo level and reload when low so you've got a fresh clip to work with! For the moving targets, be sure to re-enter precision aim for slower time and lead slightly. When the target drops behind the two civilian targets, go for the neutralizing shot on its leg area.
Upgrade #6 - Flash Light
Info: Illuminates vicinity in dark environments. May blind enemy during precision aim.
Objectives: Destroy or neutralize 10 targets. Avoid civilian targets. Avoid head shots.
The target range is dark and it'll be tough to spot targets that aren't close. Use precision aim to nail each target with a neutralizing shot. Enter and re-enter precision aim to slow down time. It will also provide an opportunity to scan for the targets' locations. When you're in precision aim, it's difficult to see how many targets are currently in the range. Slow down time against moving targets and lead the arm or leg to score a neutralizing blow.
Upgrade #7 - Scope
Info: Provides 2x zoom level during precision aim.
Objectives: Perform 10 headshots. Avoid civilian targets.
This is one of the tougher gun upgrades to complete. It's all head shots, there are plentiful barriers obstructing targets, and some of the targets move. There's little room for error too as you must hit nearly every target to successfully complete the trial. Remember to enter and re-enter precision aim to slow down time temporarily. This will help you strike the moving targets easier. Also, watch your ammo levels and reload between targets when necessary. For the eighth and ninth targets that appear, keep your targeting reticle on the center barrier aimed near the head level. These two targets move from the right and left sides of the screen into this center area. They're much easier to hit here.
Upgrade #8 - Top Accuracy
Info: Reduces aim error.
Objectives: Destroy or neutralize 12 targets. Achieve 50% accuracy. Avoid head shots and civilian targets.
Destroy all of the targets. You should use precision aim to avoid pelting the civilian targets. Enter and re-enter precision aim to recharge slowed time. Don't fire wildly since 50% or above accuracy is mandatory for completing the task successfully. Be very cautious when striking the moving targets (enter precision aim when any appear). You fail the mission should one civilian target perish.
Upgrade #9 - Hollow Point Ammo
Info: Increases bullet damage factor.
Objectives: Destroy or neutralize 15 targets. Avoid civilian targets. Avoid head shots.
There's a lot of barriers, moving targets, and obstructing civilians in this one. Any time you don't have a civilian on the screen, remember you can just fire away and forget about precision aim. Destroying the target works just as well as a neutralizing shot. When the three targets drop down, the remainder of the targets lack civilian obstructions so just start firing like mad. For the first few, use precision targeting. You can try and score neutralizing shots or just aim your reticle at the target and fire as many shots as required to destroy the target (just avoid the head!).
Fighting Upgrades
Visit the 24/7 facilities offering fighting upgrades to receive a number of new attacks and finishing moves. Additionally, being awarded fighting upgrades also improves your overall damage and endurance abilities.
Below is a quick reference list for the fighting maneuvers and how to perform them.
- Running Attacks: Run plus punch or kick or jump kick.
- Back Attacks: Away plus punch or kick or jump kick.
- Ground Attacks: Stand next to down opponent plus punch or kick or jump kick.
- Tiger Sweep: Kick, Jump Kick, Kick
- Tiger Claw: Punch, Kick, Jump Kick
- Leaping Tiger: Jump Kick, Punch, Kick
- Dragon Kick: Kick, Jump Kick, Kick, Jump Kick
- Dragon Fist: Punch, Kick, Jump Kick, Punch
- Flying Dragon: Jump Kick, Punch, Kick, Jump Kick
Upgrade #1 - Running Attacks
Info: Run toward opponent, then press: kick for running kick, punch for running punch, and jump kick for a running jump kick.
Objectives: Perform 12 running attacks. Survive session.
You have 58 seconds to complete this session to receive the upgrade. Wooden targets drop down at the four corners of the training area. Run toward each target and perform any of the new running attacks--run at the target and press the punch, kick, or jump kick button. You can use the same button; it won't affect success. The fifth target is a dummy. Perform another running attack. The remaining targets are a mix of wooden (at the corners) and dummies. Get the upgrade by performing running attacks on everything.
Upgrade #2 - Back Attacks
Info: When opponent is behind you, use: kick for back kick, punch for back punch, and jump kick for back jump kick.
Objectives: Perform 12 back attacks. Survive session.
You have 58 seconds to complete the session to receive the upgrade. Remain in the ring's center and allow the targets to drop behind you. When a target drops, press the directional control away from the target and hit a punch, kick, or jump kick button. After performing the attack and destroying the target, remain in the same position. The next target should drop behind you.
If you get outside the ring, destroy the current target and repeat the process. If you start moving around too much, you'll get out of position and won't be standing in front of targets facing the opposite directions. Destroy a target and allow the next to drop behind to begin the process again.
Upgrade #3 - Ground Attacks
Info: When opponent is knocked down, move toward opponent and press kick for super stomp, punch for elbow drop, and jump kick for slamming flip.
Objectives: Perform 12 ground attacks. Survive session.
Once again you have 58 seconds to complete the task. Dummies appear on the ground. Perform ground attacks to defeat them and move on to the next. The super stomp (stand next to the dummy and press kick) is the fastest of the three moves. All dummies appear on the ground and are viable ground attack targets so keep super stomping, elbow dropping, or slamming flipping to finish the session and receive the upgrade.
Upgrade #4 - Combo: Tiger Sweep
Info: When opponent is dazed, enter button combo: kick, jump kick, kick.
Objectives: Perform 5 tiger sweep combos. Survive session.
You have 58 seconds to complete this session. This is your first chance to learn a new finishing move combination to use when you've stunned an enemy. To use the combo, you must first stun the dummies during the trial. Punch or kick the dummies until stunned then press the kick, jump kick, kick sequence to perform the tiger sweep combo. The wooden dummies have more exclamation points so punch or kick each until stunned before using the tiger sweep combination.
Upgrade #5 - Combo: Tiger Claw
Info: When opponent is dazed, enter button combo: punch, kick, jump kick.
Objectives: Perform 5 tiger claw combos. Survive session.
You have 58 seconds to complete the trial. Stun the dummies and wooden dummies then unleash the tiger claw combo by pressing the punch, kick, and jump kick buttons in succession. You can stun the dummies with standard punches and kicks. Remember that the wooden dummies require more damage to stun.
Upgrade #6 - Combo: Leaping Tiger
Info: When opponent is dazed, enter button combo: jump kick, punch, kick.
Objectives: Perform 5 leaping tiger combos. Survive session.
You have 58 seconds to complete the task. Punch and kick the dummies and wooden dummies to stun them then perform the jump kick, punch, kick combination to unleash the leaping tiger maneuver. The fifth dummy lands on the ground and can not be attacked with a leaping tiger. Instead, perform a ground attack to destroy the dummy so another drops. Stun that sixth dummy and perform the leaping tiger to receive the upgrade.
Upgrade #7 - Combo: Dragon Kick
Info: When opponent is dazed, enter button combo: kick, jump kick, kick, jump kick.
Objectives: Perform 6 dragon kick combos. Survive session.
You have 58 seconds to complete the session. Punch and kick the dummies and wooden dummies to stun them then perform the kick, jump kick, kick, jump kick combination to use the dragon kick move. When the wooden plank drops down, destroy it quickly with any attack then move on to the next dummy. Complete six dragon kick combos to receive the upgrade.
Upgrade #8 - Combo: Dragon Fist
Info: When opponent is dazed, enter button combo: punch, kick, jump kick, punch
Objectives: Perform 6 dragon fist combos. Survive session.
You have 58 seconds to complete the season. Punch and kick the dummies and wooden dummies to daze them then perform the punch, kick, jump kick, punch combination to unleash the dragon fish move. The second dummy dropped is on the ground. Finish it off with a ground attack (you can't do a dragon fist on it) so you can move on to the next dummy. The fifth dummy is also on the ground; destroy it quickly to move on to the next.
Upgrade #9 - Combo: Flying Dragon
Info: When opponent is dazed, enter button combo: jump kick, punch, kick, jump kick.
Objective: Perform 6 flying dragon combos. Survive session.
You have 58 seconds to complete the task. Punch and kick the dummies and wooden dummies to daze them then perform the jump kick, punch, kick, jump kick combination to use the flying dragon move. When a dummy appears on the floor, use a ground kick to destroy it before moving on to the next dummy.
Driving Upgrades
The 24/7 facilities that offer driving upgrades provide a variety of vehicular maneuvers to use during race and pursuit missions. For instance, peeling out can get you off to a quick start and downshift boost can give you a momentary burst of speed.
Below is a quick reference list for the driving maneuvers and how to perform them.
- Peel Out: Hold accelerate and brake then release brake.
- Rapid Stop: Move left, right, or down and double tap brake and hold.
- P.I.T. Maneuver: Ram rear car corner.
- Downshift Boost: Down plus double tap accelerate.
- 90 Turn: Left or Right then accelerate plus hand brake.
- FWD Switchblade: Left or Right then double tap hand brake.
- Back Switchblade: Left or Right then double tap hand brake while in reverse.
- Two Wheels. Left, Right, Left then double tap accelerate or Right, Left, Right and double tap accelerate.
- Nitro Boost: Up plus triple tap accelerate.
Upgrade #1 - Peel Out
Info: While stopped, press the accelerate button plus the brake button then release the brake button. Peel out allows the car to turn in place, and to take off quickly from a stop.
Objectives: Beat the clock to the finish line. Avoid obstacles (3). Perform at least 1 peel out.
Get the "peel out" out of the way at the starting line. You'll know you accomplished the move successfully when Kang shouts in excitement. Once you've completed the one peel out, you can concentrate on finishing the course in time (you have 1 minute, 29 seconds) and avoiding the obstacles. Beware of the pedestrians that pop out from the ground (note the lines in the ground as you approach). Hug either wall to avoid them. A barrier drops right before the finish line. You can perform the peel out here if you failed to earlier and zoom quickly to the destination to receive the driving upgrade.
Upgrade #2 - Rapid Stop
Info: While moving forward, move the directional control left or right or back and double-tap and hold the brake button. Turning left or right creates a barrier. Rapid stop allows blocking of pursuit subjects.
Objectives: Beat the clock to the finish line. Avoid obstacles (3). Perform at least 1 rapid stop.
You have 1 minute, 29 seconds to complete the course. Start down the first section and be prepared to rapid stop at the turn ahead: a row of pedestrians appears. Round the corner and perform a rapid stop when the barrier drops down. Remember you only have to perform one to meet the mission requirements.
As you continue along the course, beware of the pedestrians that pop up in the middle of the route. The first batch appears after a series of turns. The pedestrians pop up just beyond the barrels that line the path. These obstacles appear at the perpendicular (to your car) lines in the floor so be ready for them. The pedestrians near the end of the course actually move along the line. Hug the wall and avoid striking the pedestrians.
Upgrade #3 - P.I.T. Maneuver
Info: Hit escaping car from the rear side, at about 45 degrees, to cause it to spin out. P.I.T. (precision immobilization technique) can disable a car without destroying it.
Objectives: Beat the clock to the finish line. Avoid obstacles (3). Use P.I.T. to disable drone car.
You have 1 minute, 29 seconds to reach the finish line. However, you now have another task to worry about: you must perform the precision immobilization technique on the drone car. Follow the drone car at the first stage of the mission. The drone car smashes through some of the obstacles and provides a safe path for you to move through. As you catch the drone car, push into its rear panel at as close to a 45 degree angle as possible. The drone car will spin out. Finish the course and beat the clock to complete the task successfully. You must catch the drone car before it reaches the finish line.
Upgrade #4 - Downshift Boost
Info: While moving forward, move the directional control down and double-tap the accelerate button. Shifting into a lower gear provides momentary burst of acceleration.
Objectives: Beat the clock to the finish line. Avoid obstacles (3). Perform at least 1 downshift boost.
You have 1 minute, 29 seconds to complete this trial. Perform the downshift boost during the first straight section to get it out of the way. For the remainder of the course, concentrate on reaching the finish line on time. If you need additional bursts of speed, downshift boost during the other straight sections. After the crowded straight section (littered with barrels and signs), beware of the pedestrians that pop up from the ground. These pedestrians move from side to side. Slow down as necessary and steer around the obstacles.
Driving Upgrades - cont.
Upgrade #5 - 90 Turn
Info: Press the accelerate button plus the hand brake button and turn in the desired direction. Allows negotiation of tight turns by sliding car into turn.
Objectives: Beat the clock to the finish line. Avoid obstacles (3). Perform at least 1 90 Turn.
Once again you have 1 minute and 29 seconds to complete the course. The turns in this course are very tight, which are ideal for your new maneuver, the 90 degree turn. Navigate as many of these turns with your new move as possible. Try not to overdo it or you'll smash the police car into the opposite wall. If you have trouble, complete at least one turn then just work on finishing the course in the allotted time.
Upgrade #6 - FWD Switchblade
Info: While moving forward, double-tap the hand brake button and turn in desired turn direction. Allows quick turnaround to face pursuing enemies or sudden direction change.
Objectives: Beat the clock to the finish line. Avoid obstacles (3). Perform at least 1 FWD switchblade.
You have 1 minute, 29 seconds to complete the trial. Drive forward and note the closed barrier on the left. Drive just to it and perform the FWD switchblade maneuver to face the barrier. It opens. Continue through the course and perform the same maneuver at each barrier you reach. If you just smash into the barrier, it won't open. And don't perform the move too soon. Get level with the barrier before turning in. Don't worry if you overshoot the barrier a few times. You should have plenty of time to reach the finish line if the rest of your driving is sound.
Upgrade #7 - Backward Switchblade
Info: While moving backward, double-tap the hand brake button and turn in desired direction. Allows a car in reverse to rapidly turn itself around.
Objectives: Beat the clock to the finish line. Avoid obstacles (3). Perform at least 1 back switchblade.
The clock reads 1 minute, 29 seconds. Now you must follow the course until you reach barriers marked "Reverse," at which point you must perform the backward switchblade to enter through the blocked path. Note that on the third straight section, the barrier is already removed. No need to reverse when you spot the sign ahead. Instead, just turn to the right and go down the next pathway.
Upgrade #8 - Two Wheels
Info: Quickly move left, right, left, then double-tap the accelerator button to get up on left wheels. Quickly move right, left, right, then double-tap the accelerator button to get up on right wheels.
Objectives: Beat the clock to the finish line. Avoid obstacles (3). Perform at least 1 two-wheel.
Finish the course in 1 minute, 29 seconds. At the start, move toward the obstacles and crash through the middle barrel (it's only one down). Navigate the rest of the course carefully. Perform at least one two-wheel maneuver before reaching the finish line. The straight sections are your best opportunities. Note that the course is rather short. You could race to the edge of the finish line, back up, and perform the two-wheel maneuver there. As soon as you hit it, get across the finish line before time expires.
Upgrade #9 - Nitro Boost
Info: While moving forward at high speed, move the directional button up and triple-tap the accelerator button. Nitrous oxide injection provides momentary top speed.
Objectives: Beat the clock to the finish line. Avoid obstacles (3). Perform at least 1 nitro boost.
You have 1 minute, 29 seconds to complete the course. Perform the nitrous boost on the first straight section if possible. That way you can concentrate on completing the course in the allotted time. There are additional straight sections and using the boost will certainly help you complete the course in time. This is one of the easier driving tests.
Chapter 4 - Bonus Cruisin'
Complete episodes 1, 2, 3, 4, 5, 6, 7, alternate 5, and alternate 7 with 100% success to unlock the "Bonus Cruisin'" stage. During this bonus stage, you can leisurely solve crimes, earn points and badges, and visit the 24/7 facilities to acquire those fighting, shooting, and driving upgrades. The green icons on the mini-map indicate special bonus areas. Visit the shooting bonus upgrade to unlock new guns that inflict greater damage and hold more ammunition; visit the fighting upgrades to learn new grapple moves; and visit the driving upgrades to street race for the right to acquire an array of new, faster vehicle.
If you fail to complete an episode, you're sent to crime patrol. You'll have to solve a number of crimes to move onward and you won't be able to go to the bonus stage until you go back and successfully complete the failed missions.
Shooting Upgrades
Weapon: .40 Revolvers
Specs: 8 bullet capacity; 4 shots per second
Objective: Survive gun course to obtain weapon.
To be awarded the new weapon, you must survive the target dummies and reach the end of the gun course. These dummies pop up behind the barriers and along the sides of the course. Fortunately they fall fairly quickly to your bullets but they also fire back with tennis balls (that inflict a surprising amount of damage!).
The key to surviving these gun course segments is movement. Keep moving! If you stand still, you're an easy target for the tennis balls. Move side to side while keeping the dummy targets on screen. After destroying a set of dummies, reload your weapons before proceeding forward. Get to the course end to receive the upgrade. You don't need to shoot every dummy, just survive. You can also move forward, let the dummies pop up, then retreat and use precision targeting to shoot them from a safe distance.
Weapon: .45 Pistols
Specs: 10 bullet capacity; 5 shots per second
Objective: Survive gun course to obtain weapon.
This is a similar task: survive the target dummies and reach the end of the course to receive the bonus gun upgrade. The dummies pop up from behind the barriers and along the upper balconies of the wall. Keep moving to avoid being pelted by the dummy tennis balls.
Don't stand still, keep the targets on screen, and press the fire button rapidly. You don't have to destroy every single dummy. Just avoid taking shots and get to the course's end alive. Four target dummies pop up around the destination marker so be prepared to run to the finish, eliminate them, or even back up and use precision aim to finish the remaining dummies off.
Weapon: .50 Pistols
Specs: 12 bullet capacity; 8 shots per second
Objective: Survive gun course to obtain weapon.
Survive the target dummies and reach the end of the course to receive the final bonus gun upgrade. Watch for the dummies to appear from behind the barriers and in the balconies along the upper edges of the left and right walls. The dummies fire tennis balls that can inflict a significant amount of damage in a short amount of time. Get to the end of the course in one piece to complete the task successfully and receive the final gun upgrades.
While battling the dummies, the key to survival is to keep moving to the left and right while ensuring the targeted dummy remains on your screen. Keep firing rapidly to destroy all targeted dummies. You could also wait for a dummy to appear then back up out of range and use precision aim to destroy the dummy.
Fighting Upgrades
Grapple: Whirlwind Throw
Info: Test your skill against kung-fu master Chop Tao to gain his signature grapple move. To perform the new grapple, approach opponent then press: grapple, punch, jump kick.
Objective: Defeat all opponents.
This is similar to the many fighting encounters in the game. You must defeat all opponents to receive your new grapple maneuver. Any finishing moves you have learned thus far can be used here. Punch, kick, and jump kick your opponents until they are stunned then perform a finishing move. Use your ground attacks, running attacks, and back attacks--anything you have unlocked to defeat the enemies.
Grapple: Arm Buster
Info: Test your skill against wrestling champ Mr. Nice to gain his signature grapple move! To perform the new grapple, approach opponent then press: grapple, punch, kick.
Objective: Defeat all opponents.
This is similar to the various fighting missions during the game. You must defeat all of the opponents in the dojo to be awarded the new grapple move. Mix up your punch, kick, and jump kick attacks. Stun them by striking through their exclamation points then perform one of your finishing moves to inflict heavy damage. Use everything in your arsenal. Finish off all opponents, including Mr. Nice (who looks like an old Randy Savage with a pirate patch), to gain the upgrade.
Grapple: Dirty Boxer
Info: Test your skill against boxing champ Dirty Morales to gain his signature grapple move! To perform the new grapple, approach opponent then press: grapple, kick, punch.
Objective: Defeat all opponents.
Your task is to defeat all of the opponents. Your first three challengers are some moderately challenging kick boxers. Punch and kick to stun them then perform your array of finishing moves. The final opponent is Dirty Morales, a tough boxer. Block his strong punch attacks (and shake off his grapple attempts) and counter with a mix of kicks, punches, and jump kicks (though the low kick works amazingly well). Crush Dirty Morales to receive the upgrade.
Driving Upgrades
Car: '69 Muscle Car
Specs: 0 to 60: 7 seconds. Top Speed: 140 mph. Horsepower: 350 hp.
Objective: Beat current champ to obtain car.
You must win the street race to unlock the first car, a '69 muscle car. You start the race in whichever car you were in at the time. So if you are in your default convertible, you'll begin in that car; but if you managed to jack a fast sports car, you get to use it instead. Repair whatever car you are in before attempting the race. Make your way to the green indicator marked on the mini-map. Be the first to arrive to win the race and receive the new car.
Car: '01 Roadster Car
Specs: 0 to 60: 4 seconds. Top Speed: 177 mph. Horsepower: 450 hp.
Objective: Beat current champ to obtain car.
Win this second street race to unlock the second car, a '01 roadster car. You can use your unlocked muscle car for the race or jack a fast civilian car to use instead. Be sure your car is repaired (either by parking in a garage or using a gas station) before starting the race. Utilize the mini-map to race toward the green indicator. Arrive at the finish line first to receive the new vehicle.
Car: '03 Sports Car
Specs: 0 to 60: 4.5 seconds. Top Speed: 180 mph. Horsepower: 400 hp.
Objective: Beat current champ to obtain car.
Win the final street race to unlock the last car, a '03 sports car. You can use any previously unlocked vehicles in the race (the roadster absolutely flies) or any jacked civilian vehicle. Repair your car, if heavily damaged, before entering the race. Utilize the mini-map and race to the green indicator. Place first and unlock the final car.
Chapter 5 - Cheats and Secrets
The streets of Los Angeles are a dangerous place. If you can't handle the pressure with your fighting, shooting, and driving skills you may need to resort to every seasoned cop's last resort: cheat codes. This section provides cheat codes for all three consoles and also includes secrets, such as how to unlock Snoop Dogg's Dogg patrol mode.
PlayStation 2 Cheats
Enter the map screen and press Up, Right, Down, Left, Up, X to unlock all garage cars.
Enter the map screen and press R1, L1, Up, Right, Left, Down, L3, R3, X, Square to unlock Snoop Dogg Patrol.
Enter the map screen and press Left, Right, Left, Right, X to unlock all driving upgrades.
Enter the map screen and press Up, Down, Up, Down, X to unlock all fighting upgrades.
Enter the map screen and press Right, Left, Right, Left, X to unlock all shooting upgrades.
Xbox Cheats
Enter the map screen and press R1, L1, Up, Right, Left, Down, L3, R3, A, X to unlock Snoop Dogg
Enter the map screen and press Up, Right, Down, Left, Up, A to unlock all upgrades.
Enter map screen and press A, Black, X, Y to reveal Nick's coordinates. Enter again to toggle off.
GameCube Cheats
Enter the map screen and press Left, Right, Left, Right, A to unlock all driving upgrades.
Enter the map screen and press Up, Down, Up, Down, A to unlock all fighting upgrades.
Enter the map screen and press Right, Left, Right, Left, A to unlock all shooting upgrades.
Enter the map screen and press R1, L1, Up, Right, Left, Down, Z, Z, A, Y, X, Y to unlock Dogg patrol.
Character Models (All Consoles)
Change Nick Kang into other models by entering specific letters on your license plate. Enter the letters, highlight "OK" and press L1 + R1 + X.

HAWG - A biker
JASS - An S&M donkey
PHAM - A butcher
M1K3 - A commando
BRUZ - A boxer
B00B - A female punk
TFAN - A gangster
TATS - A tattooed lady
MNKY - A male punk
J1MM - A corpse
PIMP - A pimp
FATT - A police officer
5WAT - A S.W.A.T.
B00Z - A bum
HARA - A worker
MRFU - A gambler
FUZZ - Johnson the officer
B1G1 - The Chief
ROSA - Rosie
HURT_M3 - Rosie, scantily clad
Secrets
There are three endings in True Crime: best, poor, and average. If you can manage to unlock all three endings, you unlock a special bonus movie that proves once and for all that Masterson loves to boogie. Finish the game through episode eight, alternate episode five, and alternate episode seven to unlock all three endings.
Another secret are the Dogg Bones. There are 30 Dogg bones scattered around Los Angeles. Find all thirty and unlock the Snoop Dogg patrol! When you find the first bone, the other 29 appear on the city map. Here's how to find a first bone and get you started:
Enter downtown Los Angeles and get on Broadway. Go northeast until you reach 1st street. Just beyond first, enter the park on the left toward Hill. Find the hovering, rotating bone near some of the shrubbery.

Go to the episode select screen and select Snoop Dogg's head to activate Dogg Patrol. You'll be shown the city map; you can select your area for patrolling. You get a special car (press left and right on the directional pad for fun) and must try and solve as many crimes as you can in one hour.
Got a news tip or want to contact us directly? Email news@gamespot.com
Join the conversation