Tom Clancy's Rainbow Six: Lockdown Walkthrough
Another group of terrorist has another plot to blow up the world, and it's up to the fearless commandos of Rainbow Six to stop them. GameSpot's Walkthrough to Rainbow Six Lockdown will guide you through all of the game's single-player missions.
Design: Collin Oguro
The Rainbow Six series of games has undergone quite a few changes since its inception. The first game, which debuted on the PC over seven years ago, was an intensely difficult game that almost focused more on the strategic aspect of planning insertion paths into buildings than it did on the actual tactical combat aspect of actually executing those plans, with the second game, Rogue Spear, following a similar layout. Rainbow Six 3 marked the first major split in the series, with the PC version still using a mission-planning screen to determine how your operatives moved throughout the various levels of the game, while the console versions dispensed with the multiple teams and mission planning, and simply plopped you down into a level with a single squad of teammates and an objective or two. Although Rainbow Six 3 for consoles played much more like a standard FPS than its big brother on the PC, it was still a respectably solid game in all respects.
If you played one of the console versions of Rainbow Six 3, then you should be familiar with the package offered by Rainbow Six: Lockdown. In it, you once again take on the role of Domingo "Ding" Chavez, a team leader in Rainbox Six, as he and his squad of elite soldiers travel the world in an attempt to find and capture the leadership of the GLF, a shadowy terrorist organization that plans to use a nanovirus to attack politically sensitive targets. It's a tough job, but if anyone can do it, it's you.
GameSpot's Game Guide to Rainbow Six: Lockdown focuses on a walkthrough for the single-player portion of the game. There's obviously a lot of multiplayer content to explore, including the pervasive PEC mode for Xbox Live, but we'll leave you to experience that for yourself. Enjoy!
General Tips
Use Your Scanner
Whether you have a heart scanner (Xbox) or motion sensor (PS2), you should get used to using it early and often. The scanners are one of the biggest gameplay changes to Rainbow Six: Lockdown, and can greatly ease your passage through the levels by giving you a heads-up on incoming enemies.
Although the scanners don't have a good battery charge on them, you can make up for this by simply not using them for too long at a time. All you need to do to ensure almost limitless use of the device is to pulse it; just tap the button, then tap it again. The wave will go across the screen once, lighting up any enemies in the area. If you need to see if any of them are moving, tap the button again, and see if any of the silhouettes have changed position. There's really no need to keep the device on for more than a second or two at a time if you use this method.
Shoot Through Materials

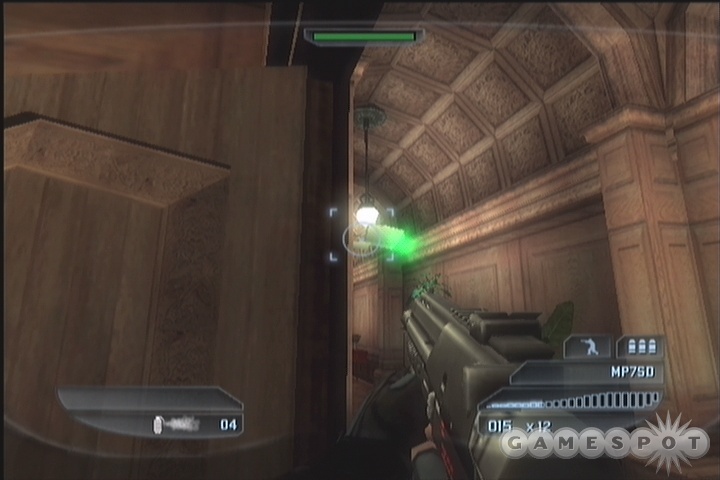
Keep in mind that most weapons will be able to punch through wooden doors and crates and hit enemies on the opposite side of the obstacle. This is true of most of the weapons in the game, save for the silenced weapons; they lack the requisite muzzle velocity to penetrate obstacles, so if you try to do so, you'll just wind up wasting ammo. If you have a high-powered weapon, though, you can get some cheap kills by firing through doors and even thin wooden walls.
Of course, you won't be able to actually see anything on the other side of these obstacles; that's where your scanner comes in. If you happen to use your scanner and pick up on someone standing still, then pop a few rounds at their silhouette through whatever obstacle lies between you. Depending on the type of obstacle, you might get lucky and land a hit or two.
Know Your Loadout
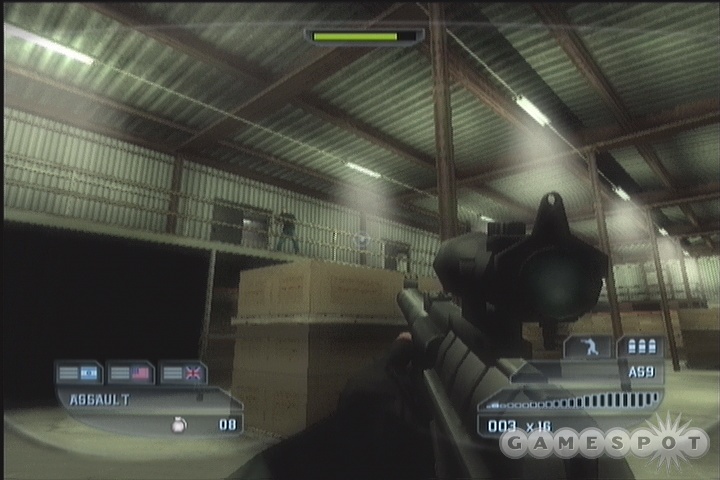
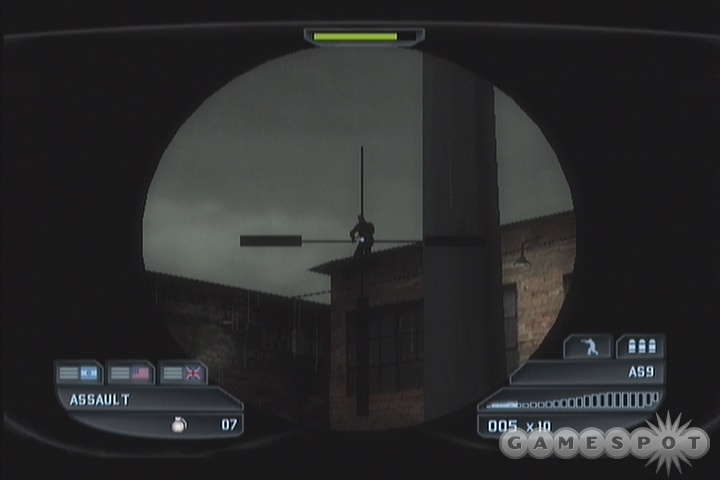
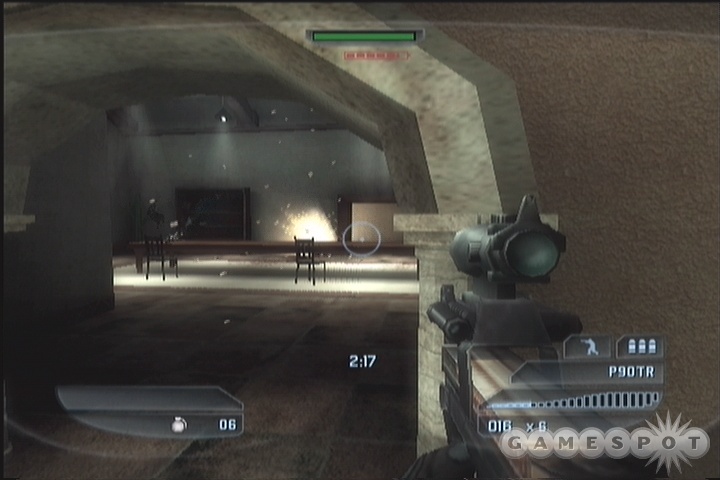
One of the good things about Lockdown is that you get to choose your weapon and grenade loadouts before each mission, although, if you don't want to, you can just go with whatever the game auto-selects for you. A bit of trial and error may be required before you happen across a weapon that's right for you, but you can always go through the first mission a few times, trying out different weapons, until you find something you like. As you'll note in the screenshots in this guide, we almost always went with the redoubtable P90, as it has a large clip size (helps to reduce the chance of having to reload during combat), decent accuracy, and great power. Although it's not super-precise when fired in single-shot mode, it can still kill people a good ways away if you fire in short bursts, especially if you have the default aim-helping online. If not, you may want to use an assault rifle, such as the G36C or the A59; these generally have better accuracy when fired in semi-automatic mode.

Also note that you can unlock the formidable OICW when you get 250 Intel points, which will take two or three missions with the corresponding Intel Briefcases. Actually, it's not that formidable. It's not all that precise and doesn't seem to do all that much damage, and has less ammo than most weapons; you're better off with the P90 in most situations, although you may want to give your teammates OICWs. They won't be able to shoot any straighter, but at least your death squad will sound cooler when you're busting rounds.
Grenades are also configurable. We're cold, hard killers, so we usually went with eight frag grenades (you can assign them to both slots if you want), but you'll also have an assortment of other rounds to choose from, from flashbangs (useless) to stun grenades (mostly useless) to white phosphorous rounds (also mostly useless). Smoke grenades may be useful in some situations, such as in tight corridors, as it'll usually prevent enemies from shooting at you through the smoke, while you'll be able to see through the cloud with your heat vision. Breach charges can also be useful, especially if there are three or more enemies on the other side of a door. Frags are your best all-around grenade, as they have a decent radius of effect and are usually instant kills when an enemy is too close.
My Way Or The...Well, Just My Way
We don't mean to disparage the hard-working members of Chavez's team, but we hope it's not too insulting to speculate on what particular kind of illegal drugs they're smoking before they go out on a mission. Although the enemies you're facing off against aren't exactly marksmen, they also probably didn't spend a decade in training before being sent into the field. Your team members did, however, and they apparently have absolutely nothing to show for it, because they are terrible, horrible shots, on par with your average Star Wars stormtrooper. Couldn't hit the broad side of a barn if they were standing 20 feet away from it. On most missions, you're going to find that the average accuracy of your teammates will hover around five percent. Just thoroughly execrable at what they do, except when it comes to getting themselves shot. They're absolutely on the ball when it comes to taking a bullet or two.
So, yeah, get used to going through the bulk of each mission by yourself. Since you can actually aim your weapon at the enemies, you probably won't miss your teammates all that much, but you'll still want to bring them up to your position every now and again. Since it doesn't matter whether they die or not, save for the purposes of your after-mission score (they'll just magically reappear for your next mission), feel free to send them into rooms crowded with enemies as human target dummies, while you sit back and snipe away at enemies that take the bait.
Walkthrough
A couple of notes here. The first is that this walkthrough was written on the Xbox version of Lockdown. There are some differences between the Xbox and PS2 (and presumably Gamecube) versions of the game, including different sensor items and some minor differences in architecture and level design. The PS2 version, in particular, actually has two additional levels over the Xbox version, for a total of 16 missions instead of 14. Curious!
Also note that there are five Intel Briefcases in each level. Each of these, when found, will give you a stash of intel points to unlock new cheat codes and objets d'art. We didn't manage to find all five briefcases in every single level (we never got below four, though), but it doesn't matter overmuch; you don't need to find every single briefcase to get enough points to unlock all of the cheat codes in the game.
Mission One: Operation Deadline
Pretoria, South Africa - March 29th, 7:00 AM.
Uh oh. A "rebel army" has somehow managed to lay siege to Pretoria, the capital of South Africa, without anyone seeing it coming. To make matters worse, the President's been kidnapped - by ninjas. Are you a bad enough Rainbow Six squad to rescue the President?
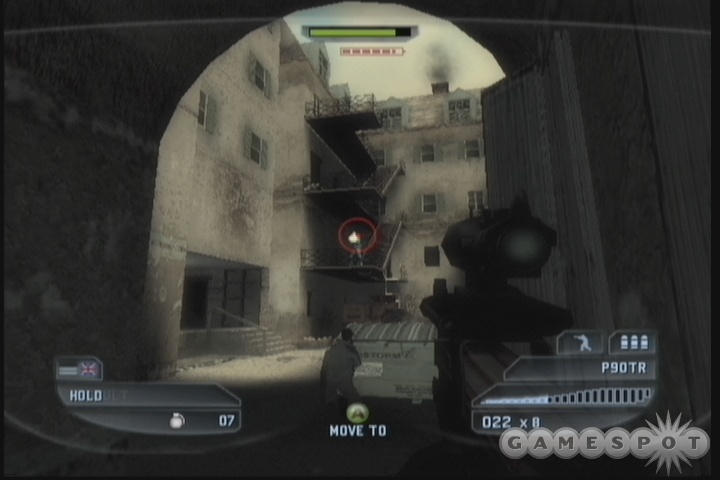
Your initial insertion here will be on the third floor of a parking garage near the bank where the President is being held captive. In order to reach him, you'll need to travel down through three levels of the parking garage, cross the street to the bank, then clear the bank of any hostiles before finally reaching the vault to save the president.
Parking Garage / Courtyard
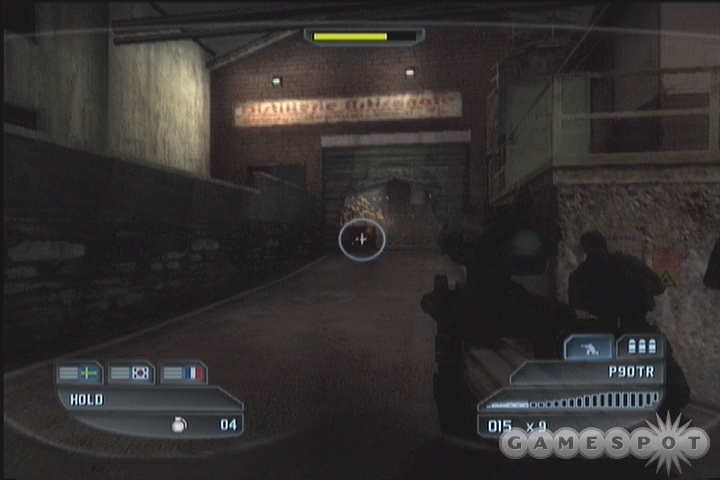
The parking garage is going to give you a good refresher course on squad-based tactics. The buttons available to you will vary based on your version of the game, but you'll have plenty of time to get used to them, and you'll only be facing off against one or two enemies at a time. In general, you'll want to move your squad separately from yourself, which will allow you to play leapfrog; if your squad is moving, then you should be still, and watching the path ahead of you, and vice versa. Try to stay on the opposite side of the garage from your squad, to give you different angles of attack on any foes that pop out from the shadows. You'll need to use your nightvision goggles if you want to see anything in the dark. There will be one foe coming out of the door at the bottom of the ramp here, so try to watch for him and peg him when he walks out. The first Intel Briefcase is also located here, near the shaft of light streaming underneath the locked door leading up, near where you first begin the level.
After taking down the first tango and heading downstairs, you'll come to another level of the parking garage. This one is a bit more populated than the first, though, so stay frosty and keep your squad behind a car. You can sneak up the left side of the garage if you want to snipe some of the targets yourself, but be careful and quick if you choose to do so. The second Intel Briefcase is here, this time on a ramp leading down, near the door through which you enter the area.
After busting through the third and lowest level of the parking garage, you'll reach the courtyard, arguably the deadliest part of this mission if you neglect your basic safety rules. You may have to play a bit more recklessly than you'd like during this portion of the fight, so be careful. Proceed slowly out into the alleyway, and wait for your team to pick off any targets that they're firing at before moving on ahead. The third Intel Briefcase is here, near the payphone just around the corner from where you exit the parking garage. After moving your team out to the corner across from the telephone, you may be able to lure more of the enemies out to you by walking out towards the fountain, but you'll be exposing yourself to fire, so send in your team first if you wish. In addition to the extra soldiers coming from across the courtyard, there'll also be enemies in two open windows on your side of the fountain, so be mindful of fire from your rear.
When you clear the courtyard (your control officer will somehow be able to tell when you've done so and let you know), you can move on to the checkpoint and warp over to the second half of the mission.
Bank
Gain Access To the Bank Building
The first street here is devoid of enemies, so go ahead and walk forward towards the door on the right side of the road, being mindful of the enemy within. After making your way through the passage beyond, you'll be on another side street near the bank. This is where another courtyard-esque fight will occur. If you bring your squad a bit out into the street, they'll begin firing on the half-dozen foes further down the road, but you'll need to watch out for enemies coming from the surrounding area. There's be one enemy with an RPG in one of the buildings near you, and another enemy with a machinegun will attempt to snipe at your teammates from atop one of the buildings above where you came out into the street. When you've killed everyone else, a single target will pop open the bank doors and come towards you, allowing you to pop him and head into the monetary institution.
Inside the bank, you can find the fourth Intel Briefcase by taking an immediate left and entering the office there. With that done, head back around to the central portion of the bank, using your heartbeat sensor to scout ahead for enemies. You'll have many more foes in the bank's reception and teller areas, but if you combine your heartbeat sensor with your zoomed view for your primary weapon, you should be able to tell precisely where everyone is and shoot them, even through plant foliage or the like. If they're standing still, then don't hesitate to bank in a flashbang or something similar to give yourself time to move into position.
After killing all of the foes in the reception area, it'll be time to move up to the second floor through the doorway at the rear. Keep using your heartbeat sensor to check for enemies, and you'll eventually reach a pair of doors in a single hallway. If you open one while simultaneously issuing a go code for the squad to open the other, you'll be able to ambush the foes on the other side from two sides. The fifth and final Intel Briefcase is in one of the cubicles up here, near the far exit from the area.
All that remains now is one last area. If you can clear the stairs down to the vault, then proceed slowly towards the president, killing anything that pops up on your heartbeat monitor, then you should be able to clear the mission relatively swiftly.
Mission Two: Operation Backlash
Amsterdam, The Netherlands - May 12th 11:10 AM.
Backlash is going to be a primarily up-close-and-personal mission for your squad (barring the introductory sniping session), so you'll probably want to equip Ding with something suitable to the task, such as a shotgun or an SMG. You can probably leave your squad members' weapons alone, but feel free to examine them and shift around whatever you like if you so choose. Also, feel free to refer to this as Operation Bloodbath, if you wish.
As mentioned, though, this mission is going to start with a good-length sniping section where you have to control Dieter as he provides cover for your four-man squad as they make their way towards the police station. Initially, you won't be able to move at all, as you'll be firing from an incredibly steady helicopter. On the first screen, be careful of the enemy in the lower-left corner of the screen, as well as the enemy with the RPG in the building at the far end of the canal. While you're in the helicopter, sniping won't be too difficult; so long as you hit the enemies as they appear and before they get too close to your squad, they shouldn't take any damage at all. Just watch for movement and watch where the tracers from your squad's fire goes to find the enemies.

Eventually, you'll land on top of a building and will be able to move around a bit, but not so much that you'll cut yourself off from view of the streets below. You don't technically have to move if you don't want to, but you'll probably want to reposition a little bit to keep your squad in view when they start moving. They'll come under heavy assault from multiple positions, but in most cases, they shouldn't be in any real danger so long as you quickly take down whatever shoots at them. Eventually you'll run out of targets, and your team will reach the police station.
Police Station
There's a small firefight going on in the room just beyond where you first enter this building, involving a few cops on the other side of the door, so be careful when you're heading in. You'll probably want to head in through the open door to your right rather than clearing to the left, unless you wish to flash+clear, as you'll be in a bad position to deal with the numerous soldiers on the other side.
When you reach the next corridor, check the room on the inside of the corner (there are two closed doors leading into it) to find the first Intel Briefcase. Nearby, you'll find the stairwell leading to the second floor; you'll be asked to secure the armory on that level. It's a bit late for that judging by the firepower some of these terrorists are bringing to bear, but we'll humor the old man for now. Just be careful as you move around, as most of the enemies here are packing either machineguns or assault rifles that can bring down a squad member in just a second or two of sustained fire.
Take extra precaution when you go through the door at the top of the stairwell; two enemies lie beyond, both with good lines of sight on the doorway. You may just want to hold your team back from the door, open it yourself, then wait for the enemy that crosses the room to get out of sight before sniping out the one in front of the door, then head inside.
There are a couple of ancillary rooms that lie between you and the armory, each with an enemy or two inside. Check for wooden doors, and if you can see the enemies on the other side with your heartbeat scanner, fire through the door to kill them. After clearing them out, head to the armory, which lies down a nearby corridor. You'll know you're there when you hear chatter about snipers being on the rooftops. There are four or five enemies inside, so a standard clearing action is contraindicated; anyone who goes through that door straight off will probably be full of bullets pretty quickly. It's better to hold your team back, scan for heartbeats, and fire through the door at anything that's standing still. Alternately, you can open the door yourself, then bank in a frag grenade off of the door. That'll take out a couple of them, allowing you to scan for the rest and use the doorway as cover while you lean around and take them out one by one.
More Prison
With the armory clear, you'll be asked to head up to the third floor. Is there no end to this madness? There are two exits from the armory, one which leads into a long, open hallway, and one through a door leading to a darkened corridor. It's better to take the dark corridor, as it'll take you halfway along the other hallway, which itself is being watched over by an apparently angry enemy helicopter that'll continually strafe the area from outside. You'll need to dash to the far end of the hallway yourself, then bring your squad up just after the chopper completes a strafing run if you don't want them all to get liquified.
Around the corner here, you'll come to a pile of rubble in the middle of the hall. If you have a weapon capable of hitting enemies at a distance, then you can probably get a couple of relatively easy kills here, just by shooting down the hall towards the foes at the other end. Through the nearby door, you'll note that the stairs leading up to the third floor have been blocked as well, but this time by an explosive charge that goes off as you near them. That's just rude.

Start clearing out the rest of the offices in the area around this; the second Intel Briefcase is in one of them, lying on the floor near a desk. After passing through a small exterior passage and killing yet more members of the small army of terrorists, you'll come to a metal door with two more soldiers within. It's pitch black inside, so if you want to take these guys out, be sure to use a flash+clear or a breach, and go in with your nightvision goggles on. Shortly thereafter, you'll be forced to climb up a ladder and enter the ventilation shafts to reach the third floor of the police building.
Prison
Your teammates won't be able to follow you immediately; you'll need to power up the lift in order for them to come up, as apparently they're too dignified to crawl through ventilation shafts. There's only one opponent between you and the control panel, though, so immediately shoot him down and use the panel to open the doors in front of and behind you.
When you reach the first set of steps, check around for the third Intel Briefcase on the floor. When you reach the top of the steps, you'll come to an observation deck that gives you a view over the entire central portion of the prison wing. If you have a weapon that can fire from range, use your scope and your heatvision goggles to find and kill all of the enemies here. Your squad can do this job decently enough if you position them in front of some of the windows.
When the area's clear, move around to the far stairwell and head through to the next room. There are two exits, an upper and a lower, but they both come out to the same room, so pick your favorite, scan for enemies, and pass on through to the other side. You'll wind up near the prison control room, so initiate lockdown protocols by using the panel there.
With the prison locked down, one of the nearby doors will open, leading to the roof of the building. Head outside, take out the terrorists on the railings above, then move across to the roof of the restaurant nearby. You can snipe out a few more terrorists by shooting at them from the skylights before heading down the ladder nearby to reach the interior of the restaurant, where the fourth Intel Briefcase is waiting for you on one of the tables.
If you pass through the restaurant, you'll come to its kitchen. The first set of doubledoors that you find are made of metal, but you do seem to be able to shoot through the grated windows in them, so snipe anyone you can see before wrapping around at the end of the hallway and finishing the rest off.
When you pass through the meat locker beyond this room, you'll come to a storage room with a couple of enemies within. You'll spot some more heartbeats in the observation room above this area, but be careful whom you shoot; you're getting close to the hostages. After wrapping around through the loading docks, you'll come to a set of steps leading up to the single hostage of the level. You'll need to be careful to avoid hitting him while taking out the terrorists; a flashbang before charging in would be a wise decision. With the hostage rescued, your job will be done.
Mission Three: Operation Dragon Hammer
Edinburgh, Scotland - June 10th, 4:30 PM
Dragon Hammer is going to start out as a solo mission, and one in which your goal is to avoid detection by any of the enemies or security cameras in the area. Your mission won't automatically fail if you do get spotted, but you'll still want to stay out of sight as much as possible. The default loadout here is fine, as both of your weapons will be suppressed to help combat noise pollution, which is a leading cause of stress between residential neighbors in Britain, especially in the urban centers like Edinburgh and London. If you must kill someone, please be sure to use a silencer - your neighbors will thank you for it.
In actuality, you'll have a few seconds after getting spotted before the alarm goes off, so you'll have a buffer zone in which to work; just shoot whomever spots you before they manage to set off the alarm, and you'll be fine. Most of the enemies here are going to appear one at a time, so you won't have too many problems killing them quickly. Just remember that security cameras don't show up on heartbeat sensors, obviously enough, so be careful when heading into a hallway and get ready to shoot out any camera that might spot you. Also note that your silenced MP75D can't shoot through wooden doors, so you'll have to open them up if you want to blast someone.
After you enter the building, you'll note that there are a few exits from the first room. The security room is immediately above the entrance, but you won't be able to enter there just yet. Instead, head through the rightmost exit and work your way through the offices to find the first Intel Briefcase. Most of these rooms are off of a large set of hallways, replete with overhead lighting and security cameras. Be very careful when you pass through the hallway, and pop any cameras before they can trip the alarm.
You'll soon come to a metal detector. In order to disable it, you'll need to enter the room next to it and use the computer there. When you're past the detector, take a right, kill the opponents in the computer room there, and use the computer to shut down the security system. You'll gain one soldier as backup after you do so, so start back towards the entrance to the building; the security room will now be unlocked and enterable. There will be new enemies between you and the entrance, though, so be on guard.

When you reach the security room, a quick heartscan will reveal that there are five people within. Two of these are hostages, while the other three will be terrorists. Two of the terrorists will pace back and forth in front of the door, while the last one sits by one of the hostages, so check your fire before you go crazy! It's probably best to open the door and go in by yourself, as your teammate has a tendency to get pwned if you send him in by himself.
Debating Chamber
After freeing the hostages, you'll learn that the terrorists have armed a bomb in the Parliamentary debating chamber. You only have four minutes to reach it and disarm it, so you'll need to move quickly.
The first section of the level is linear, so dash along the hallways, killing as you go, until you reach a staircase. There are going to be a lot of enemies here, so take your time and kill them from the cover of the door, watching out for grenades that they might throw. When it's clear, head down to the bottom of the steps to find another Intel Briefcase. There's yet another Intel Briefcase at the top of the steps, near which you'll find a hallway leading to another metal detector. If you don't want to waste time deactivating it yourself, tell your teammate to do it, then bust on through the library and up the steps to the upper level observation rooms. Go into the observation rooms directly across from the top of the stairs, where another Intel Briefcase is to be found inside one of the rooms there.
Now, these observation rooms overlook the debating room itself, so if you go to one of the windows, you'll be able to pop a cap in the two soldiers that are guarding the bomb. You may want to leave your teammate at one of these balconies while you go down and flip off the bomb, as getting close to it will trigger the appearance of eight or so enemies, intent on killing you and presumably re-arming the bomb. The mission will automatically end when all of them are dead, so get behind cover and do your best to kill all of them. You might want to save your game before heading towards the bomb, as this last little part can be kind of difficult.
Mission Four: Operation Ricochet
Edinburgh, Scotland - June 10th, 7:30 PM
Well, the endless droves of terrorists have apparently spawned a little offshoot, as another small army of your foes managed to escape the Parliament building and made it all the way to Scotland University, where they're holed up inside some empty buildings with their hostages. It's up to you to rescue them; your mission will start with another Weber sniping mission.
University Exterior
As Weber, you're going to have to protect your squad from the sniper fire that'll be coming from all around the interior of the university parking lot, which is apparently completely enclosed and is, of course, the perfect spot for a small squad of counterterrorist agents to be ambushed on all sides. The decision to insert from here was tactically inept, but hey - you get a chance to shoot at people!
Anyway, the two biggest threats here are the RPG troopers. There are two of them here, with one on the top of the left building and one on the balcony in the right corner. They'll each come at different times, of course, but if you don't manage to pop them before they unload on your team, your squad will take some pretty grievous injuries. You may want to save after killing the first, then reload if you don't manage to shoot the second, as he's tough to hit due to his distance.
East Wing
When you reach the inside of the building, you'll have command of a full squad again, so use them to open the door nearby and head into the library. After you finish off the enemies that come at you initially, you can move forward and up the stairs to explore a bit. There are more enemies in a few of the corner rooms here, so use your heartbeat sensor to check for signals before opening doors all willy-nilly. A real fun aspect of the upstairs battle in the library is the way that enemies can magically appear behind you even though you've cleared out the entire area, and it's a real blast to have to restart due to the game being incredibly cheap. Enjoy!
The first Intel briefcase is in one of the two rooms on the far side of the library, near the exit on the ground floor. When you've cleared out the library, keep moving on into the locker areas. You'll come to a staircase; head upstairs and clear out the upper rooms before returning down below and doing the same down there. The sightlines are generally better from the upper doors, and you'll be able to easily fire down on any terrorists on the bottom. Your goal is theoretically to search for hostages; what you really have to do is kill everything that moves on both levels before you're cleared to move on. When you do so, you'll be ordered to move to the basement and cut power to the building.
To reach the basement, enter the room with the scaffolding and find the door there. The second door you come to is wired to blow; you'll have to sneak up to it and disarm the tripwire if you don't want to instantly die when you head through. To do so, check the door with your infrared scope, then sneak slowly towards the doors and point your reticule at the emitter portion of the laser, where it comes out from the door jam. When you get close enough, you'll get a context-sensitive option to disarm it, so go ahead and take it out before proceeding through.
The second Intel Briefcase is located in the small computer room that you first enter just after entering the boiler room, where there's a dead hostage. Move on from there until you reach the power switch; after you flip it, the lights will dim, and you'll have to make it back to the tripwire door to move on to the west wing. Without the lights, though, it'll be dark, and what's worse, the enemy will set up a little ambush for you near the gas canister. One of these, at least, will likely blow, making it difficult for you to see; use your heat vision and scope to at least get a bit of definition on the enemies before shooting at them. Your teammates have much better vision here than you do, so you may also want to send them ahead to pop a few caps.
West Wing
Move up the stairs and back into the locker area to reach an auditorium, which is where your path branches from the one you took before. After killing the enemies in the theater, leave through the top exits to find the third Intel Briefcase.
The next library you reach will have been barricaded by the terrorists, as you learn when you enter. Rather than exposing yourself to fire, switch your weapon to single-shot mode and start sniping away at the enemies from the doorway. Some of these guys, especially the ones on the ground floor, are quite accurate with their weapons, so you may want to bring in your team to set up behind one of the doorways to provide some cover fire for you while you snipe away at the machinegunners. You can also duck beneath some of the bookcases to line up a grenade throw if you want to try and take out the gunners indirectly.
When you've cleared out the enemies, head down to the far end of the library, and the barricade should automatically detonate. Move into the halls beyond, checking the two doors in the first corridor, and eventually you'll come to the cafeteria, where the fourth Intel Briefcase is lying on a table. After you get past the principal's office, you should start picking up a large number of responses to your heartbeat scanner. Start out by entering through the first door on your left, where the last Intel Briefcase is being held.
There are two entrances to the hostage room; one near the briefcase, and one in the other hallway. The hallway door is tripwired, so be sure to disarm it if you plan on using it. Since this is obviously the end of the mission, you can set up your team to perform a flash+clear on one door while you go through the other. The room is darkened, so be sure to go through with your nightvision on.
Mission Five: Operation Chimera
Olivet, France - June 27th, 12:05 PM
Factory
Well, the GLF has somehow managed to squirrel away one of their training facilities underneath a factory in France. Your goal here is to infiltrate the factory, shut down the security system, make your way into the training substructure, find the cell leader, kidnap him, and escort him to the extraction point.
After navigating through a through corridors, you'll come to an exterior loading dock with a number of enemies inside. Set up your team so that they can fire from the doorway, then sweep to the left and take out anyone else that remains. The first Intel Briefcase is in one of the trucks here, so walk up the ramp and grab it before moving on.
The next exterior area is going to be a bit more challenging than the first, due to the way that the terrorists have set up a choke point for you. When you head up the ramp towards the factory, the gate will close, and enemies will pop up all over, including on the roof of the building on the far side of the gate. It's best to move forward until you trigger the appearance of the smoke grenade in the street, then quickly back away, perhaps while firing on the gentleman on the roof. When the enemies have taken their positions, you can creep up along the wall and take them down one by one. If the smoke grenade has worn out when you get ready to shoot the two guy on the far side of the gate, you might want to refresh it and use your heat vision to shoot through the mist at them, as they're accurate and powerful shooters.
In order to bypass the semi-closed door here, shoot the explosives just on the other side, which will destroy the gate and let you move on. After passing through one factory area, you'll come to another distillery; you can find the second Intel Briefcase near the top of the first set of steps here. You'll have to head through an office to move on, but watch out for the suppressing fire; one of the soldiers on the walkways will just start unloading into the room. Wait for him to reload before moving out and popping him. Be careful when climbing the ladder beyond, as more soldiers will appear in the room below; after killing them, you'll be able to move on to the compound proper.
Compound
You'll come under fire almost immediately here, but if you keep your team where they begin the level, they should be able to handle themselves fairly well. When you head into the next corridor, scan the far door with your heatvision to pick up a tripwire.
After passing over the rafters, you'll come to a ladder leading down. You might want to save your game here, as your team can get stuck and become unmoveable if you take fire while they're climbing down, and if that happens, they'll be useless for the rest of the mission. It shouldn't matter too much, as there's only one more ladder to climb down, when you reach the elevator shaft. Shortly thereafter you'll be in the wine cellar. Kill the enemies within, grab the Intel Briefcase in one of the side rooms, then hit the arrow to move on. If your team did get stuck, they'll be warped up to meet you in the next sublevel.
Terrorist Camp

One thing to note about this area is that many of the doors are tripwired, so be sure to check each one with thermal vision before heading through. Immediately after killing the first two soldiers, you'll be able to head through to the left or the right at the fork. If you head left, then the three soldiers to the right will come after you, so you might want to clear out that room, but if you head to the left, then you'll be able to check the small rooms in the larger cave-like area for the fourth Intel Briefcase.
The rest of this area is mostly just a morass of small rooms, with a few more tripwired door. You'll know you're near the exit from the dorms when you reach a long, earthen hallway that exits onto the firing range. When you reach it, open the door, chuck in a frag grenade, and kill off anyone else from the doorway before entering the door on the right side of the hall to reach the fifth and last Intel Briefcase. Nearby, you'll come to a quasi-official tactical room simulation, with plywood walls separating a series of small rooms. Obviously enough, this is a perfect place for enemies to set traps for you, so try to snipe them through the walls if possible, and don't neglect to look for a tripwire in the open doorway before heading in. When you're through that area, you'll find Murgen and end the mission.
Mission Six: Operation Breakpoint
Calais, France - July 11th, 10:30 PM
Damn you, terrorists. Why won't you just give up? It seems that, despite the deaths of hundreds of the lower-level members of the shadowy terrorist army, they just keep coming, and are indeed in the planning stages of a major operation. In this mission, you'll have to break up an arms deal and kidnap the dealer and the buyer. A twisted web we weave, indeed.
The initial sniper fight won't be overly difficult, as there's only one RPG trooper to deal with. He will appear on the balcony to the right of your little roost, but he can pop up in a couple of different places, so you might have to reload a couple of times before you track him down. Beyond that, if you can kill the enemies here fairly quickly, then your team should get through unscathed.
Warehouse Complex
Move through the first warehouse, and you'll come to an exterior area where a pair of doors lead into another warehouse. If you set your team up to enter through the lower door, you can move through the upper yourself and set up a crossfire to deal with the enemies within.
You'll find the first Intel Briefcase behind one of the trucks in the second exterior area, so grab it and proceed into the third warehouse, but be careful, as it's one of those places where a bunch of enemies will spawn as soon as you walk through the door, and to make matters worse, more enemies will keep spawning until you finally reach the door on the far side of the floor and bust through. After you are through, though, you'll get a new objective, which is to secure the dockmaster's office.
In the darkened warehouse, kill the enemies and head into the small office in the rear to find the second Intel Briefcase. Save your game after you get it, though, as the game will fall back on the unbelievably cheap tactic of transporting your team into the next room and surrounding them with enemies as soon as you open up the far door of the office. It makes no sense and is in no way fair, but you'll have to kill everyone nonetheless if you want to move on.
Container Yards
After moving down the alleyway, head into the unfinished building and start killing a whole bunch of terrorists. When you move up the stairs, check the rooms for the third Intel Briefcase before sniping out more enemies from the window. Down the nearby stairs, you won't be able to miss the fourth Intel Briefcase, as it'll be sitting on a crate directly in your path.
Soon afterwards, you'll get a radio communication from the GIGN team, indicating that they're in the container yard, which you'll soon come across. There are plenty of guys up on the shipping containers in this area, so don't forget to look up when using your heart scanner. When you move into the shipping yard, one of the cranes will explode and fall onto the shipping containers, making a small path for you to follow. An RPG trooper will be waiting for you near the end of the containers, so kill him and his friends before examining the far end of the yard for the fifth Intel Briefcase.
In the next large exterior area, you'll come across the remnants of the GIGN forces, who've come under a point-blank assault from the terrorists. Sweep into the area, kill the terrorists, and you'll finish the mission.
Mission Seven: Operation Leviathan
Calais, France - July 11th, 1:00 AM
Your first task as Weber here will be to clear the deck of enemies, and also save the hostages that are being used as human shields. This is pretty simple to do; just shoot the guys near them, and they'll run off back into the ship. Of more pressing concern is the RPG that'll appear on the upper deck; find this guy and pick him off before he blasts your copter with a grenade. You do die a pretty ragdoll death if you let him hit you, though. Your call.
After the team lands, you'll have to keep them covered while they move along the exterior of the ship, while also worrying to death about more RPG soldiers. Save every 20 kills or so. This mission is pretty difficult due to the fact that the helicopter continually moves while you're sniping, forcing you to adapt to the movement of the chopper itself while you aim. If it helps, you can make sarcastic comments to the pilot, like "Oh, no, that's fine - keep moving the chopper. I'm only trying to save the world here," or something like that, but it won't really help, since you'll really only be talking to the cold logician's mind of your console or PC's internal processing unit, and until Skynet comes on line, it won't be able to understand what you're saying, and even then, all it'll want is to kill you. It won't be personal, it'll just be one part of the inevitable tide of progress as the computer hive-mind becomes the dominant life-form on Earth.

Well, that was a digression. Anyway, shortly after the second RPG soldier goes down, your soliders will be inside the ship and ready to take over.
Bridge
The terrorists have taken over the bridge, and are keeping the captain alive in there, so you can't just go in blasting away; you'll have to do it all subtle-like. Well, no; you actually will have to go in there blasting away. We recommend opening one door by yourself, setting your team up on either side of it to fire in, then going through the other door and clearing out the rest of the soldiers you see there. After you clear the bridge, the captain will tell you to head for the engine room, so you'd best beat your feet. There are two paths from the bridge, but they both lead to the same dining room.
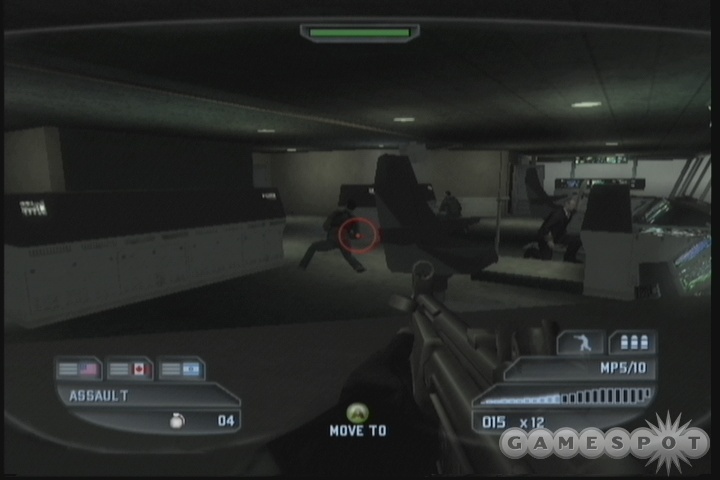
There are plenty of enemies in the dining room, as you'll be able to see through the windows, so you'll probably want to hang back and lean in around one of the doorways before bothering to bring your squad in; they'll likely just get wounded if you move them in first. When you're through the dining area, you'll come to a long hallway with Shadow Watch arcade games in it. Obviously enough, if you want to keep people on a cruise ship entertained, you give them arcade versions of old, turn-based strategy X-Com clones. Down the hall from these arcade games is the first Intel Briefcase; pass the entrance to the shopping area to find it.
After passing through the curiously empty mall area, head down the steps to reach the lower level, where there's another bar. This one's for the poor people, we guess. The second Intel Briefcase is behind the bar here, so you'll have to find the door leading to that area to pick it up.
When you hit the next exterior area, be careful about firing down the little covered walkway; there's another hostage in your path that can easily get plunked if you fire too loosely. With him secure, you're just a couple of kills away from the car garage.
Engine Room
You've only got five minutes to get from the car garage to the engine room, so get going! The door leading down is at the end of the garage, so set your squad up where they'll be able to fire on both sides of the central divider, then start picking off soldiers yourself. The third Intel Briefcase is behind one of the cars on the left side of the area, so grab it before you head downstairs.

When you reach the top of the steps, you'll have to head down and enter what appears to be a small residential area. This place is crawling with enemies, so feel free to use a frag or two to clear them out before moving in. Shortly thereafter, you'll come to a door guarded by two terrorists; kill them and enter the engine room beyond. The first bomb is located here. Yeah, that's right, the first bomb. As soon as you disarm it, you'll learn about another one in the cargo room. Your timer will refresh to five minutes, so you'll have a new lease on life.
On the stairs down to the lower floor, find the fourth Intel Briefcase on the middle steps. The door immediately beneath that has a tripwire in front of it, however, so be very careful when approaching it. Perhaps even more obnoxious if the fact that you'll likely be able to spot an enemy pop into existence when you actually pass through the door; get ready for a mini-ambush when you do so.
Keep moving on, and your control will eventually tell you that the bomb is near your position. Be careful when moving into the next room, though, as there are walkways above you, with at least one enemy up there. Since you're close to the end of the mission, you may want to just send in your team to hide behind the first set of shelves; they should be able to cover the enemies while you head to the right and find the last Intel Briefcase behind one of the crates in the little alcove there. You'll be pretty damn close to the bomb at this point, and you should have plenty of time to track it down and disarm it.
Mission Eight: Operation Lowlife
Marseilles, France - August 7th, 8:00 AM
Oh, what a cheesy way to start a level! While Price manages to actually hide a bit at the outset, you'll find yourself in the middle of the line of fire of a dozen or so enemies, most of whom will be coming out of the door on the catwalks above your position. If you feel the need to hide, get underneath the raised car before chucking a grenade up there. If you're lucky, neither you nor Price will suffer any debilitating injuries before you wipe them all out. Before heading across the garage to the exit, head up the stairs near where you start and enter the office nearby to find the first Intel Briefcase.
You'll have to head through a small exterior area to continue your pursuit of the KGB operative, but you'll eventually find yourself in the warm, loving confines of another city street that's completely surrounded by buildings and comes to three dead ends. Those are so popular in cities around the world, and for good reason; they weed out the stupid drivers, who can get stuck in these places for hours. Anyway, there are a couple of civilians wandering around in here, looking for a bullet to stop with their spleen or their spine, or perhaps even one of their eyes, so you'll have to rescue them. If you don't snap to it, an RPG round will probably kill one of them, so push Price behind the dumpster in front of the gate and start shooting the explosive barrels (also popular in many metropolitan areas, especially those with densely-situated populations) to kill the enemies, so long as there aren't any tourists nearby.
Keep moving until you come to a pair of enemies on a fire escape. Kill them both, then climb the ladder to reach the second Intel Briefcase. Nearby, you'll come to a bar/theater/place/thing/establishment. Inside the box office, the third Intel Briefcase has been shoddily hidden. From there, it's a short climb up some stairs and down a few ladders before you reach the second part of the mission.
Urban Squalor
After your first kill here, you'll come to a set of market stalls with numerous civilians in the area. This would be a good time to send in Price first, when you scout out a good location for him to move to. Kill the enemies, protect the civilians, blah blah blah; you know the drill. What you might not know is that the fourth Intel Briefcase is hidden inside a pitch-black corridor across from the offshoot corridor you're supposed to follow to leave the market.
Keep following the trail until you come to a road where the operative caused one heck of a car wreck. Head up into the alleyway, but instead of going into the building there, check around the dumpsters to find the fifth Intel Briefcase. Congratulations.
When you finally reach the KGB contact, you'll be forced to keep him alive until you can wring the intel you need from him. After the short cutscene, he'll automatically move up the stairs in the building near his position and hide behinda couch. Leave Price outside to deal with any terrorists coming up the road, and park yourself inside the same room as the contact to blast anyone coming through the door. After a couple dozen kills, the mission ends.
Mission Nine: Operation Sandstorm
Malzir, Algeria - August 19th, 12:15 PM
Well, the briefing for this certainly makes it sound dangerous. Better pack your bullet repellant. For once, at least you don't start with a sniper mission; that'll come along later.
Your goal here is to investigate a gun-runner's apartment, find some intel, and extract. You'll reach the apartment just after you start the mission, and will be able to extract the info you need from the suspiciously non-secured computer within. After you nab the intel, you'll have to start leaving the building via the door nearby, which leads out to a large, open courtyard. Apparently everyone but your gunrunner had studio apartments, because most of the other doors here lead to little cell-like rooms. One of them, just above the stairs leading down, holds the first Intel Briefcase.
From there, you'll have to make your way down through the building towards the exit on the lowest level, inside the courtyard. You're not going to have a lot of cover while you're moving around on the balconies or in the courtyard itself, and you'll come under fire from multiple elevations, but you're still dealing with some pretty crappy shots, so you should be able to survive without too many problems. You'll come out to a set of market stalls soon enough; again, watch for enemies above you. You'll find the second Intel Briefcase in a small alleyway near the second set of stalls. The third Intel Briefcase is shortly beyond that, underneath a sniper's roost which is used by a dastardly foe to blow up a van with an RPG. Grab it, then start heading towards your secondary extraction point. You'll find the exit at the end of one of the nearby alleyways.
Secondary Extraction Point

Whatever weapon you're using, you'll probably want to shift it over to single-fire mode before leaving the building that you begin this section in, as you'll have to be doing some pretty long-range shooting in the next open area. Kill off the two snipers that you can see (feel free to send your soldiers down to behind the van for the one that's farthest away), then move into the van itself to trigger the next wave of enemies. The most dangerous one here will be an RPG soldier that actually pops up on the building behind the van; you'll have to move back and take him out yourself. Other than that, you can stay inside the van and fire from its windows to kill most everyone else.
Coming out of the van will be even more fun, since you'll be spawning in multiple tangos all around the square. You'll probably want to save your game while you're still in the van, send your squad up somewhere ahead of you, then leave and take cover as soon as you hear control spouting off about where you should go. When that occurs, you'll have to take out a few waves of enemies before you can make it to the far side of the square and escape into the alleys.
After passing through the next set of small rooms, you'll come to a longer corridor where you can either head left or right. Head right first, pass through the door, and check the balcony for the fourth Intel Briefcase. The fifth Briefcase is actually on the other side of the hallway, up a set of stairs, but be careful before grabbing it, as there's an enemy just outside the window near it that'll pound you when he spots you. There are actually three or four of them, to be exact; use the opportunity to take them all out before grabbing the last briefcase and moving down to the street below.

Unfortunately, the secondary extraction point is likewise a no-go for your team, so you'll just have to make do with the tertiary point. Luckily, you actually have a tertiary extraction point - that's called planning. Anyway, from here on in, it's just a run-n-gun through the streets until you reach the third point. When you do, it's Weber's turn to take over and keep you under covering fire.
Sniper Time
Well, you know the drill by now - look for RPGs, keep your teammates safe, etc. Unfortunately for you, if any of your team members got banged up in the first two sections of the mission, they're much more likely to die here, which automatically ends the mission. Also, Ding doesn't seem to be capable of being much more accurate in his directions than "up there!" or "somewhere down low!" Save your game after every few engagements if you have a wounded soldier; it'll be easier to reload than have to start the sniping mission over from the beginning.
Mission Ten: Operation Archer
Djaskra, Algeria - August 20th, 11:30 PM
Well, at least there won't be a sniping section of this mission - Weber's been kidnapped and taken to an enemy stronghold. Despite the stern warnings of your commanders, and the fact that none of you really seemed to like Weber to begin with, you're going to risk a court martial by going in on foot and getting your man back. Luckily for you, you have the presence of mind to wait for darkness before charging into town, making it easier for you to avoid detection. You have the advantage of stealth and nightvision over the terrorists, so make the most of them. The AS9 that's given to you by default should work well here, but you'll probably want to replace your smoke and flash grenades with something with a little more...oomph. Unfortunately you're going to have to rely on all your guile to stay undetected here; as soon as you're spotted, the terrorists will kill Dieter. Well, actually, you'll have a couple seconds to kill whomever spots you before this happens, but still, do your best to stay out of sight. Also note that the distance for detecting which doors can be opened and which can't seems to have been shortened up a bit, so get right on top of doors to learn which ones work and which are just for show.
In a delightful nod to non-linearity, there are actually two paths you can take at the beginning of the level. You can either take a left and head up into the three-story building at the end of the path there (watch for the laser beam when you're about to hit the roof), or head straight and into the alleys and homes there. Both of these paths will lead you to the same place, a small square section of exterior space where you'll find the first Intel Briefcase. When you have that, make your way to the pile of rubble in the street, on the opposite side of the rubble from the car. There'll be a little alcove on one side of the passage with a pair of doors in it; these doors conceal the path leading on.

When you emerge into the next exterior area, you'll be standing across from a large, fortress-like house. Take out the guards nearby, disarm the tripwire on one of the doors, enter the basement, and find Weber! He's being interrogated when you find him, so kill the interrogator and follow Weber to the underground passages beneath the house to escape this level.
Caves
Well, now that you've got Weber back, you'll have someone else on your side, and you won't have to worry about automatically losing if you get spotted. When you reach the waterfall, stand on the jutting outcrop and snipe away at the enemies on the far side of the lake; it'll just be fewer foes for you to deal with later on. After passing around the lake, grab the second Intel Briefcase in the small room at the bottom of the next ramp up. Beyond that, this isn't an overly difficult sequence; just check for enemies before moving ahead and shoot them from a distance before encountering them. A few of them will wipe themselves and each other out with grenades, saving you the trouble.
Village
Time for you to get Weber out of Dodge, or, in this case, some other little hell-hole of a town. In order to make it to your rendezvous, you'll need to pacify the buildings between you and the chopper point. Begin by leaving the cave, then taking a hard right and heading towards the building in the corner of the valley; the third Intel Briefcase is inside. The fourth is nearby, at the top of a small ramp leading into a small cave.
Passing through the larger cave below, you'll come to another area of the camp, which includes a makeshift prison. This is where things can get rather rough; there are numerous foes in the area, so go slowly but surely through the buildings, killing anything that you see. When you reach the extraction point, which is in the middle of the cafeteria area off to the side, you'll have to defend yourself and your team against another wave of tangos before your chopper comes in for the rescue. We found it easiest to do so if you just parked your team on top of the building near the extraction point and let them fire from there. They might not manage to actually hit anything, but they'll be safer up there than they would be on the ground. When enough of the enemies die, or you wait long enough, your ride will appear and ferry you on home for the requisite chewing-out by your commander. "Well, you disobeyed numerous direct orders to stand down, conducted an illegal military operation on foreign soil, almost got your entire squad killed...good work, Chavez!"
Mission Eleven: Operation Catalyst
Catalan Bay, Gibraltar - August 22nd, 1:45 AM
The noose is drawing tighter, and you seem to be closing in on your goal of locating the main cell of the GLF and finally eliminating them. For now, you've tracked a weapons shipment to Catalan Bay on Gibraltar. It would seem to be a fairly densely populated area to enshroud a terrorist base in the necessary aura of secrecy, but what do we know.
After making your insertion via the water, you'll come up to a factory-like building. This is probably where they construct their clone army. You did know that you've been fighting clones, right? I mean, a terrorist organization solely looking to redress the wrongs committed against the Third World? That doesn't exactly sound like an ideology that could entice thousands of men to drop everything they're doing, leave their families behind, and risk life and limb while fighting elite anti-terrorist forces, does it? There has to be some other motivating factor. Maybe they get free beer every payday, or something.
Well, whatever their reasons, these terrorists have chosen...poorly, at least when it comes to choosing a vocation, so you'll just have to steamroll over them and find the weapons. Kill everyone in the boathouse, then move on to the factory. There are actually two entrances to the factory; one is in the boathouse itself, near the exit to the trucks, and one is just beyond the trucks, up the ramp and through a small room. It's probably easier to go in through the boathouse entrance, as you'll have a wider field of view and will be able to spot enemies that much more easily. Be careful of the enemies on the rafters, and those that are too far for your heart scanner to hit.
The first Intel Briefcase is located in the office on the second floor of the factory floor, just above the makeshift firing range. After you grab it, move on via the door on the ground floor, then move through the next little storage area, killing everyone you spot. The interplay of shadows and brightly-lit areas can make it difficult to see; you may want to use your squad to move ahead of you, or just rely on your heatvision as best you can.
Around the corner from the exit, you'll come to a secretarial pod. The office nearby has the intel, but in order to enter it, you'll first need to secure the building, so head upstairs and start your bug hunt. Nothing too difficult up here; just a bunch of guys crouching behind desks, waiting for their inevitable demises. The second Intel Briefcase is in one of the offices, just to the left of the exit from the top of the stairs.
When you get the signal that you've secured the area, return to the bottom of the stairs, frag+clear the door, then grab the intel from the computer there to end this part of the mission.
Sniper Fun!
Well, as a twist on the normal formula, you'll have a bit more pressure on you this time. If any of the soldiers under Chavez are spotted, they'll be killed instantly. There are also three security cameras around the area, which will raise the alarm if they happen to spot Chavez & Co. So, to keep your goons safe, you'll need to shoot out all of the security cameras, as well as any troops that you see moving towards the squad. 
The three security cameras are the criticalities here. Two of them are easy to spot; one's outside the gate, and one's on the guard house just inside the mansion's walls. The third is a bit more difficult to see. It lies on the house itself, off to the left, just beyond the left end of the little set of Roman arches in the yard. This last one is a very difficult shot, but even if you hit it, it doesn't really matter, as the same group of enemies seem to spawn whether or not the alarm goes off. There are two from the left and two from the right, most of whom will be easy to spot, save for a sniper that appears on top of the guard tower.
Getting past this section will undoubtedly require a bit of patience and restarting, if only because of the cheap one-hit kills. Getting through it should only take a few minutes altogether, though, so it's not a lengthy time investment. You'll probably want to make a save game just before your squad reaches the third camera, whether it's on or not, just so you don't have to replay through the entire thing over again if someone manages to get shot.
The House
You're back into the you-get-spotted-and-you-lose-the-game territory here, so move slowly, shoot enemies through doors whenever possible, and watch for security cameras. At the beginning of the level, you'll have two doors to choose from. Take the rightmost door, kill the camera, then head through the nearby door into the meat locker to find the third Intel Briefcase.
The only way out of the little office complex you begin in is through the laundry room, where the steam will fog up your goggles a bit. Don't let it interfere with your ability to shoot the camera just beyond where the steam ends, though, or it'll trip the alarm. Unfortunately, a short distance beyond there, the alarm will automatically be tripped for no apparent reason. When this occurs, you'll have three and a half minutes to disable the alarm from the house's bedroom, or...something bad will happen. You'll probably want to save your game as soon as the timer starts clicking down, as it's going to be tight here.
Your path is fairly circumscribed here, as each time you might think you actually have a choice as to where you can go, you'll likely run into either a makeshift barricade or a door that doesn't open. It seems that Mr. Vanderwaal could use a quality carpenter or locksmith, because wherever he or his agents go, it seems like they leave a massive number of unopenable doors in their wake. Anyway, when you reach a long table in what appears to be a dining room, check one corner of the area for the fourth Intel Briefcase, then keep killing your way into Vanderwaal's bedroom, where you'll be able to magically open a safe you don't know the combination for. Inside, you'll find a computer which opens the door to VDW's office...which is all the way back at the top of the staircase. You'll need to head back double-time to go through the doors and find another computer, which will open the shutter that's closed off the office and let you head inside to retrieve the documents from the computer.
When you finally do manage to breach the office, blow away all the enemies there before h4xx0ring the computer to end the mission.
Mission Twelve: Operation Red Scythe
Barcelona, Spain - August 22nd, 11:45 AM
The GLF has made their move, and are planning to unleash their virus at one of those world summit meetings that seem to be constantly happening in games that involve terrorists. Of course, it's up to you to go in, kill the terrorists, find the virus, disarm the bombs, and rescue the princess before the timer's up. Ten minutes people, let's gogogo! (Keep in mind that this is a very generous time limit; you'll probably find the bomb with a few minutes to spare).
After pacifying the soldiers in the entrance/foyer area, start making your way through the museums, being careful of tripwires cast across the doors leading on. Although the terrorists think that hiding behind these priceless vases from ur-history might protect them from the patriotic might of your bullets, the joke's on them - you failed art history, and can't tell the difference between indescribably unique works of art and Pottery Barn clearance items! Ignorance is strength! Kill everything that moves.
You'll come up to a security room soon enough, with a highlighted computer panel on one of the desks. Disabling it is as simple as holding down a button, but you might want to break off early, because as soon as you start to work it, a bunch more enemies will pop out, and they'll be quite angry, for whatever reason. Make sure your team is nearby when you go to work, kill the enemies, then patch in the uplink. Unfortunately, it won't work, so move on out to the next set of corridors. If you take right turns when they're available, you should come to a small conference room with the first Intel Briefcase.

When you hit the courtyard, you'll come to the satellite uplink (isn't it the cutest little thing?), as well as the second Intel Briefcase, just nearby it. Grab one and disable the other, then head through the door that opens up. Shortly thereafter, the ominous music clues you into the presence of something bad, and indeed, the suspiciously specific intelligence that you receive indicates that the Legion virus is being stored in a nearby room. If you shoot the canisters it's in...you die. Keep your team back away from the door when you go in, shoot the enemies yourself, then bring your team up when you start to disarm the bomb, as doing so will, again, cause a number of enemies to start coming your way. A good place to park your team is directly underneath the windows of the translator's booth. When they're in position, click on the bomb for a split second, then turn around and aim down the hallway you came through. After taking out the two soldiers there, clear out any others in the area before disarming the bomb for real.
When the bomb's been eliminated, head down one of the hallways that's opened up to reveal the exit to the next part of the level.
Hostage Search
Time to get started on the old hostage search, now that you've removed the threat of sudden death. Say what you will about the GLF, they surely are inspired, what with their dastardly plot to set off a bioweapon bomb inside a building that they have no hope of escaping from. It would've been a pretty pyrrhic victory, to wipe out the world's leaders on television, but only to die themselves. Can't say it makes much sense.

Anyway, head up the stairs and up through the small corridors and rooms that reside on the second floor. Just past the metal detectors, you'll come to the first major hostage, held in a room with other hostages and a bevy of terrorists. Sending your squad in first will probably wind up getting one or two of them killed, so prime them for a flash+clear on the door nearest the hostages, then open the door farther down the hall yourself. When you've taken out a couple of the terrorists, give the go code to your team and hope that they can finish the job. If you have any stun grenades, now's the time to use them.
When you've rescued the hostages, move on into the next hallway and open both closed doors there to find the third and fourth Intel Briefcases. From there, all that's left to do is head to the roof of the building and slaughter any remaining enemies up there. And you're done!
Mission Thirteen: Operation Citadel
Cala Brescana, Menorca - August 23rd, 6:00 AM
You've tracked Vanderwaal to a castle on the island of Menorca. Say what you will about this guy, but he obviously has some pretty good capitalization behind him, what with his obviously expensive taste in real estate and large outlays for personnel and equipment. Maybe he had an IPO recently or something. Good on him, anyway.
Your first goal here is to find and disable the security in the control room. Be careful when you approach the first door, though, as the enemies beyond might drop a grenade at your feet. You might want to keep your team back a bit while you go into the room, or just open the door and wait for the enemies to move in front of it, as they should do shortly thereafter.

After climbing down the ladder, you'll find the control room, but you won't be able to access it right away. Instead, you'll have to head down the hall and enter a larger computer room there. The enemies within are precise and deadly, so you'll want to handle them yourself, by leaning around the doorframe and popping them from there. Beyond this room, you'll find two exits, one at the top of a set of steps, and one below. They both lead to the same place, though, the server room, so don't fret overmuch on which one to choose. It's probably a bit easier if you go through the bottom door, as the upper one won't afford you much protection from enemy fire. Your first salvo here will spawn in more enemies, so be ready for more foes than the small number that show up on a scan.
You can reach the control room from either the door underneath the balcony and the second-floor office or via the door around the corner from the servers; both lead to roughly the same area. When you find the restroom, though, search around for another small room nearby to find the first Intel Briefcase.
When you're ready to move on, enter the control room and start working the panels there. There are two keyboards you'll need to manipulate and, as you may suspect, using them will trigger the appearance of numerous enemies on all sides of the room, so you may want to save before heading in, if possible. When they're taken out, move on to the exit nearby.
Bio-Lab
The first hallway you'll be in here will have a few tripwires scattered about, so be on your toes when moving along. You'll come to the door that leads on shortly after you start exploring, but if you keep on disabling tripwires, you'll be able to find the second Intel Briefcase at the end of the hall.
After moving into the room with the large fan in it, destroy the red barrels near the far door before opening it; if you don't, the fire that comes in through the doorway may wind up blowing them, leading to a quick end to your mission. Also be careful when leaving through that door, as you'll face a small ambush of four soldiers when moving through the hall here.
When you've cleared out the storage room beyond the corridor, keep moving until you come across...a gas leak?!? Oh noes, they've discovered that we're weak to gases! Whatever shall we do??? Oh, right...we have gas masks on. So, it's no big deal. The gas will obscure your vision if you get too close to one of the clouds, though, so stick near the doorway and let your squad go to town on your enemies.
Soon enough, you'll come to the bio-lab, where Pauly Shore dwells. Finally, someone you actually want to kill. Just inside the first secured door leading to the lab, you'll find the third Intel Suitcase behind some office desks. In the lab itself, there's obviously going to be more enemies waiting for you, so use grenades if necessary to clear them out. You will have to kill them all, since your objective is to secure the lab before moving on to the barracks, the exit to which you'll find on the second floor.
Barracks
Time to teach these terrorist scrubs that their medical plan doesn't cover severe subdural hemorrhaging...from bullets. Seriously, hopefully they were well paid for their efforts, considering that Chavez alone has probably killed a few thousand of them.
After moving away from the opening area, start capping fools through the doors with your sensor technology. The first four tangos here can all be killed through the doors, assuming you have a weapon strong enough to punch through wood. When you reach the long hallway, though, you'll need to be careful that you don't wander into the fire of the two machinegunners from across the way. Wait for them to reload before peeking your head out of one of the windows and taking them out.
When you reach the bunks, examine the small rooms on the outside of the large sleeping area to find the fourth Intel Briefcase. There's probably one more soldier in the hallway behind the barracks; kill him to secure the area, and receive a new task, to secure the hangar. Geez lousie, secure this, secure that. Yes sir, Mr. Bossypants.
The hangar in question is large. Very large. The distance between yourself and your enemies will make it difficult to hit them with automatic fire, so you might want to switch over to burst or semi-auto mode while taking it on. If possible, move your squad down to the bottom of the steps just inside the door, and direct them towards the large crates at one end of the hangar, where they'll be able to fire on anyone they spot. As soon as you're detected as being inside the hangar, numerous other enemies will start to appear from doors all over the place, so kneel behind some cover and start returning fire!
When the smoke clears, poke around in the side rooms to find the fifth Intel Briefcase. It's on the left side of the helicopter (looking at it from the front side), in the room with stairs leading up to it. Be sure to grab it before you sweep through the rooms behind the chopper and finish off the rest of the enemies, because the mission ends when you do so.
Mission Fourteen: Operation Lockdown
Cala Brescana, Menorca - August 23rd, 9:00 PM
Dungeon
Well, you've crushed Vanderwaal's operation completely. Thousands of his men have had their lives snuffed out at your hands. You've cost him millions, ruined his plans. How does he react? He threatens to release Legion in the middle of Europe, where it'll kill millions of citizens. That'll show you.
After killing the first few soldiers here, you'll come to a fork in the path. Take the right path until you come to a small torture chamber. Kill everyone within and grab the first Intel Briefcase. Take note of the fact that most of the enemies in these corridors are highly mobile, so you should expect them to come to you when you start making noise.
Anyway, this whole area eventually wraps back around to the fork in the road, and beyond. Use your motion or heartscanner to find new targets for yourself, and you'll eventually come to another torture chamber; kill everyone here to complete the "Secure the Dungeon" objective. You'll find the second Intel Briefcase in one of the smaller rooms off of the big one, as well as a set of steps leading up to the spooky corridors of the castle itself. More medium-distance firefights will break out here, so peek around corners and scan for enemies at every turn. Soon enough, you'll find the path leading on to the enclosed courtyard.
Courtyard
Sniping time! Despite the ominous overtones of the message from Six, you can't run away like a baby, no matter how much you might want to. Instead, you'll just have to bust out the scoped rifle and start popping caps in the bad boys. The shooting isn't terrifically hard, though, since most of the enemies will be fairly close. If you're lucky, the first RPG soldier will blow himself up by shooting his rocket at his feet.
Eventually, you'll hear something about a sniper in a tower somewhere. The problem here is that this guy is hard to spot, mostly because he might actually get stuck firing at the floor, preventing you from seeing his tracers (and also preventing him from damaging your team). He's in the building directly across from the middle window in your little chamber of fun, above the walkway that the enemy soldiers keep coming out onto. Another soldier may appear there a bit later on, so be sure to scan that building if you ever get into a situation where you have a large number of soldiers coming at you without any dialogue from your team.
Bio-Lab
Immediately after entering the level here, you're going to come across a few lab areas replete with soldiers. You're going to have to be very careful about using grenades here, though, as some of the canisters in the area are filled with Legion, and that's not something you necessarily want to have coursing through your bloodstream. Unfortunately, there'll be an unavoidable leak in the third room; just stay far away from it when moving in, or wait for it to disperse before proceeding. That's actually a good rule of thumb for your daily lives, as well: if you can't see a deadly virus floating around as a large pink cloud in the air, that means it's not there at all, and you don't have to worry about it.
Eventually you'll reach a set of steps leading up. Go ahead and head upstairs into another large, open area. After killing all of the soldiers here, check the small alcoves around the area to find the third Intel Briefcase. After moving up to the third floor, you'll come to a banquet hall with a grand staircase. Wipe out the enemies here, then search to the right of the top of the staircase for the fourth Intel Briefcase before making your escape.
Castle Exterior
Shortly after starting this segment of the mission, you'll run into Vanderwaal, who'll pelt you with an RPG round and a bunch of machine gun fire. Ignore him for now, and instead bust your way into the nearby room, around the corner, to find the fifth Intel Briefcase. Start working your way through the small rooms on the side until you reach the central area of the castle. This is where things can get a bit messy.
When you do finally reach the next exterior area (just after you get another RPG round in the face), start taking guys out from the wooden walkway, then move your team down to the lower level around the central landing platform, where the bomb is. All of the stairs up to the platform are blocked, save for the one on the far side, so you'll have to perform a complete 360 degree arc around the platform to reach them. Of course, there'll be enemies in your way, so if you're running low on health, send your team forward to flush out anyone in your path, rather than run into certain death yourself.
The platform will have a couple more enemies on it, most likely, so again, send your squad up the river to take a bullet for you rather than deal with the mess of combat. When everything's dead and no more bullets are flying, disarm the bomb. Vanderwaal will appear on the parapet nearby, just waiting to be shot down. One bullet to the head, and he'll go tumbling over the wall, leaving the world that much safer. Hooray for democracy!
Got a news tip or want to contact us directly? Email news@gamespot.com
Join the conversation