The Lord of the Rings: Return of the King Walkthrough
Middle-Earth has put their trust in you--with our help, you won't let them down.
Design By Collin Oguro
Peter Jackson's trilogy of films based upon the wildly popular Lord of the Rings books by J.R.R. Tolkien has taken off and become extremely popular, both inside the circle of fantasy fans, as well as in the mainstream. Capitalizing on this popularity, all sorts of products have sprung up that are based on the movies, one example of which is the game you're reading about right now.
The Lord of the Rings: The Return of the King loosely mirrors the events of the movie by the same name. In it, you'll play as several members of the Fellowship of the Ring--including Gandalf, Aragorn, Legolas, Gimli, several Hobbits, and more--as Frodo attempts to carry the One Ring to Mount Doom and destroy it once and for all. During your travels, we'll be by your side, providing insight into your characters' strengths and weaknesses, as well as those of your enemies (including a breakdown of the numerous combo moves that your characters will unlock); tips for each of the game's fifteen movie-inspired levels; general strategies that apply to all characters and situations; and finally, information on how to cheat your way through the game for those of you who enjoy a different sort of challenge.
Middle-Earth has put their trust in you--with our help, you won't let them down.
Table of Contents
Walk-throughEnemy Tips
Heroes and Upgrades
Aragorn and Faramir Upgrades
Hobbit Upgrades
Gandalf Upgrades
Gimli Upgrades
Legolas Upgrades
Cheats
General Strategies
Crowd Control
If you are being faced with a large number of weaker enemies, and don't have time to squeeze off ranged shots, then chances are you won't have time to worry about most combos either. As a result it is imperative that you focus on speed attacks, and unless you need to take out the occasional shielded enemy, forsake your fierce attack. This will knock back enemies quite expediently and allow you a little bit of personal space as you whack away at the nearby enemies. Also remember that keeping your back against a wall will help quite a bit, for even when you are constantly laying down swift attacks you will be vulnerable from behind.
If at any point you start to take serious combat damage, quickly use your Jump Back button, and run backward through a portion of the level. Often you may find that you have left a potion behind which may be useful, and even if not, having a moment of peace might help your nerves, and thereby your reflexes.
Another more daring option is to start jamming the parry button, which generally works fairly well, and has the added benefit of raising your skill meter all the while. Time it right, and you can end up with a barrage of perfect kills. Time it wrong, and be overrun and knocked down.
Checkpoints are Your Friend
If you manage to reach a checkpoint with even one sliver of health remaining, then you have made it. In fact, if you're near death and in the middle of a battle, one of the best things that you can do for yourself is to sprint for the checkpoint, if possible, and let them kill you after you reach it. The reason for this is because even if you die after reaching the checkpoint, you will still be able to resume your mission at the checkpoint - with full health to boot.
Hero Immortality
When you are fighting with your compatriots they will, in general, be completely invulnerable. In other words, any time you need a little bit of an extra hand you will simply be able to pull back behind them, let them take the brunt of the beating, and pelt your attackers with ranged attacks. Just keep in mind, whenever you are the human player, you are also the primary target, and the enemies will more than just occasionally slip by your allies in search of your blood. Lastly remember, regardless of how many hits your allies can take, they dish out very few, so you will still need to be responsible for the bulk of the enemies.
Save That Potion
Quite often you will find potions that are just sitting out in a level, and when you come to them, you will often not be very hurt at the time. If you don't need them right that instant, it is best to ignore them. Remember that on most levels you can go back the way you came, and so those potions may be used at a later time, when you have a greater need. Potions that enemies drop should always be used immediately, as they will disappear after a short while.
Breaking Shields at a Distance
Surprisingly, many characters can actually break enemy shields from a distance with their ranged attacks. They just need to charge their ranged attacks first. If you see a shielded enemy in the distance, take the time to charge up a shot or two and see if you can break it. Every little bit helps, after all.
Also, shields only protect the bearer if the ranged attack hits the shield. If you catch a shielded enemy with his back to you, open up on him.
Fierce Preparation
Often you will see a group of enemies approaching, and have a short amount of time to prepare. When this happens it can often be quite advantageous if you stop and power up your fierce attack, providing you have obtained one of the fierce attack upgrades. This works especially well if you are Gimli, Aragorn, or Faramir once you have their upgraded attacks, as they will send out a ring of fireballs and toast the oncoming enemies.
Enemy Tips
The Dead and the Living
While the dead soldiers will fight largely like their living counterparts, there is one key difference that you should be familiar with at all times. That is, the dead soldiers will often suddenly drift backwards with little warning, just when you're about to whack them, whereas most living opponents will stand their ground until the last minute. Try to get the deadites backed up against a wall or other obstacle whenever possible.
Melee
Melee troops will, in almost all situations, come straight at you and begin attacking relentlessly until you are dead. When being confronted by a large number of melee troops at lower levels, it is always best if you are able to take them out, or at the very least wound them, with ranged shots first. Higher-level characters can just hack away at unshielded melee enemies, and their combos will help them tear through the hordes as though they were butter, and our hero a hot knife.
Shielded
Shielded enemies fight in much the same way that normal melee enemies do, except that some form of armor protects them. Typically this comes in the form of one large shield that the user holds up in front of them, however it can also come in the form of heavy bracers, a breastplate (or bellyplate), or simply two halberds that the wielder is able to hold in front of themselves. When confronted by a shielded enemy you will first need to break away the shield that the enemy is defending themselves with by using a fierce attack, before other, more swift attacks may be used. Ranged attacks will rarely work head-on against shielded enemies.
Ranged
Ranged enemies operate in a much different way, as opposed to melee or shielded melee troops. Instead of rushing at you and attacking you with brute force they will hold back, sometimes in places where you are unable to reach, and pick away at you with arrows. Fortunately, when you get quite close they will often be unable to keep shooting as fast as when you are at a distance, and as a result you can dispatch them easily up-close. When you are unable to reach a ranged foe, however, you will need to use a ranged attack of your own to kill them, and fortunately it usually only takes one or two shots. Be careful though, and learn the pattern of their attacks, as ranged troops when in groups can take you down fast if you aren't able to avoid all of their shots.
Note that parrying nearly always blocks incoming ranged attacks. You can quickly advance to perfect mode against a group of ranged attackers by parrying for awhile, if you have no other enemies to worry about.
Spiders

Spiders come in all sizes, from tiny little spiders, to medium-sized ones that are near the size of a Hobbit, larger spiders that are almost as big as a man, to the mother of them all, Shelob. Fortunately you will not need to ever actually fight the tiny little spiders; they are merely scattered by fire, but the others can put up quite a fight. Most spiders that you will encounter both take more hits to put down, as opposed to the humanoid enemies, and will bounce back harder. If you are able to use the Final Judgment move, then it is best to dispatch them one by one with that, unless they attack you in packs of five or more--rapid speed attacks work well in that situation.
Trolls and Champions
The various champions that you will encounter, as with the trolls, are all capable of taking quite a bit more damage than regular enemies. Several of the Uruk-Hai champions are also shielded and will require numerous fierce blows before you will be able to attack them with speed attacks. Some champion enemies (and all trolls) can be taken out from afar with ranged attacks.
Fell Beasts

Fortunately, you will only need to defeat one fell beast throughout the course of your adventures, though you will also need to avoid one with the Hobbits. That said, you will never be attacked by one (unless you should prove unable to avoid the fell beast when playing through Escape from Osgiliath), but you will need to destroy one. When you do face the fell beast, simply shoot at it as quickly as you are able until it finally falls.
Mûmakil
Mûmakil (Oliphants loaded with enemies) can prove far more dangerous than fell beasts, as they are able to plague you with a fairly continual volley of fiery arrows. Additionally, the only way to take them down would be to either plug them with a siege engine, or to fire your own ranged shots at them. Since siege engines are few and far between, when Mûmakil are faced, it is best to begin unloading ranged attacks on them, but make sure to continually dodge around or parry, as if you stay in place for too long, you will be taken down quite quickly.
Heroes and Upgrades
As you complete levels and gain experience points, you'll have the opportunity to upgrade your characters by purchasing combo moves and other upgrades. Some of the upgrades are Hero-specific, but many are available to all the game's characters; these Fellowship Upgrades show up in the second column on the upgrade screen. In general, if an upgrade is available as a Fellowship Upgrade, you should purchase the Fellowship version rather than the Hero-specific version. More often than not, you'll receive a substantial discount, and on the higher-leveled upgrades, that can be a big deal.
It is worth noting that these combos are extremely important. While you'll be hard-pressed to earn a good rating in most of the levels if you just hack away blindly, effectively using combos will return a hefty reward by making it much easier to go on regular killing sprees of the excellent and perfect variety. You'll then earn more experience, allowing you to purchase even better combos and upgrades.
Eventually, you will likely wind up with enough points to purchase every upgrade available to your Heroes, but some should have a higher priority than others. We've given our thoughts on relative importance in this section.
Fellowship Upgrades
Fellowship Upgrades can be purchased for your entire party, or for an individual. When purchasing Fellowship Upgrades it is important to always purchase them for the entire party, however, and not for individual members. If you cannot afford to purchase one for the entire party at that time, but you can afford to get it for one individual, then hold off and wait for the end of the next level. You're wasting points otherwise.
Orc Bane
| Individual Cost | 5000 | |
| Fellowship Cost | 8000 | |
| Level Available | Aragorn and Faramir | 2 |
| Frodo, Samwise, Merry, and Pippin | 2 | |
| Gandalf | 2 | |
| Legolas | 2 | |
| Gimli | 2 | |
| Moves | Parry, Killing Move | |
| Description | Parry successfully, then instantly kill an attacking Orc | |
| Recommendation | If you're someone who just wants to get good with one or two combo moves then you may wish to look at the more universally useful moves, such as Final Judgment. If, on the other hand, you are someone that likes to have a move for each situation, then this is a great way to kill Orcs fast. |
Orc Hewer
| Individual Cost | 1000 | |
| Fellowship Cost | 3000 | |
| Level Available | Aragorn and Faramir | 2 |
| Frodo, Samwise, Merry, and Pippin | 2 | |
| Gandalf | 2 | |
| Legolas | 2 | |
| Gimli | 2 | |
| Moves | Speed, Speed, Fierce | |
| Description | This attack will do major damage to all surrounding enemies. If there are several baddies around you, this is a great way to quickly move your Skill Meter up and rack up Excellent or Perfect kills. | |
| Recommendation | If you're looking for a quick way to take out multiple unshielded enemies, then this is a good early selection. |
Final Judgment
| Individual Cost | 5000 | |
| Fellowship Cost | 8000 | |
| Level Available | Aragorn and Faramir | 2 |
| Frodo, Samwise, Merry, and Pippin | 2 | |
| Gandalf | 2 | |
| Legolas | 2 | |
| Gimli | 2 | |
| Moves | Speed, Physical, Killing Move | |
| Description | Final Judgment, while it may have one more step than, say, Orc Bane, is an excellent move for quickly dispatching almost any single enemy in the game, and at least any standard enemy you can find. | |
| Recommendation | This is definitely a safe buy, and should be purchased for the entire Fellowship. |
Strength of Stone
| Individual Cost | 5000 | |
| Fellowship Cost | 15000 | |
| Level Available | Aragorn and Faramir | 3 |
| Frodo, Samwise, Merry, and Pippin | 3 | |
| Gandalf | 2 | |
| Legolas | 3 | |
| Gimli | 3 | |
| Moves | N/A | |
| Description | This upgrade raises the health of your Hero(es). | |
| Recommendation | This should be one of your first purchases, if not your very first, considering most players have surpassed Level 2 after their first mission. |
Fellowship Upgrades - cont.
Rising Revenge
| Individual Cost | 10000 | |
| Fellowship Cost | 20000 | |
| Level Available | Aragorn and Faramir | 3 |
| Frodo, Samwise, Merry, and Pippin | 3 | |
| Gandalf | 3 | |
| Legolas | 3 | |
| Gimli | 3 | |
| Moves | Speed Attack | |
| Description | This ability will allow you to attack as you stand up after being knocked down. | |
| Recommendation | This is another ability that should be purchased as a Fellowship Upgrade as soon as you're able--it is indispensable when knocked down and surrounded. |
Balrog's Gambit
| Individual Cost | 5,000 | |
| Fellowship Cost | 8,000 | |
| Level Available | Aragorn and Faramir | 4 |
| Frodo, Samwise, Merry, and Pippin | 4 | |
| Gandalf | 4 | |
| Legolas | 4 | |
| Gimli | 4 | |
| Moves | Speed, Physical, Fierce | |
| Description | This combination will initially hurt, knock down, and strike an enemy a second time. | |
| Recommendation | With Final Judgment you already have a move that will kill in three blows, and Warrior Bane will allow you to kill quite a few in only two. Additionally, since the combination of moves that are required for this combo aren't likely to be pressed accidentally when you're simply slamming at enemies, this just isn't a very necessary move. |
Warrior Bane
| Individual Cost | 7000 | |
| Fellowship Cost | 10000 | |
| Level Available | Aragorn and Faramir | 5 |
| Frodo, Samwise, Merry, and Pippin | 4 | |
| Gandalf | 5 | |
| Legolas | 5 | |
| Gimli | 5 | |
| Moves | Parry, Killing Move | |
| Description | This move will allow you to parry, then instantly kill a man-sized enemy. | |
| Recommendation | If you have been looking for something a little quicker and easier to perform than Final Judgment, then this is definitely a good move to pick up. It will allow you to dispatch most enemies that you come across with only two button presses, instead of three, and does not specifically target just Orcs. |
Strength of Iron
| Individual Cost | 5000 | |
| Fellowship Cost | 15000 | |
| Level Available | Aragorn and Faramir | 5 |
| Frodo, Samwise, Merry, and Pippin | 5 | |
| Gandalf | 5 | |
| Legolas | 6 | |
| Gimli | 5 | |
| Moves | N/A | |
| Description | Further raises the health of your Hero(es) (requires Strength of Stone). | |
| Recommendation | Being another one of those abilities that will simply increase your health, this is an easily recommended upgrade. Purchase it for the Fellowship. |
Dark Deliverance
| Individual Cost | 7000 | |
| Fellowship Cost | 11000 | |
| Level Available | Aragorn and Faramir | 5 |
| Frodo, Samwise, Merry, and Pippin | 5 | |
| Gandalf | 5 | |
| Legolas | 5 | |
| Gimli | 5 | |
| Moves | Fierce, Speed, Speed, Fierce | |
| Description | Effective for rapidly dispatching shielded enemies. | |
| Recommendation | Since most moves that you have had so far don't work on shielded enemies, this can be an important early upgrade, as it will enable you to begin doing serious damage to shielded enemies. |
Shield Cleaver
| Individual Cost | 7000 | |
| Fellowship Cost | 11000 | |
| Level Available | Aragorn and Faramir | 6 |
| Frodo, Samwise, Merry, and Pippin | 6 | |
| Gandalf | 6 | |
| Legolas | 6 | |
| Gimli | 6 | |
| Moves | Fierce, Fierce, Physical, Fierce | |
| Description | Use on a powerful foe to smash their shield, knock them to the ground, and strike. | |
| Recommendation | Shield Cleaver is similar to an upgraded version of Dark Deliverance, and will still target only one enemy. You may wish to ignore this upgrade, focus on others, and pick up the next upgrade that targets shielded enemies. |
Fellowship Upgrades - cont.
Bane of Sauron
| Individual Cost | 9000 | |
| Fellowship Cost | 12000 | |
| Level Available | Aragorn and Faramir | 7 |
| Frodo, Samwise, Merry, and Pippin | 6 | |
| Gandalf | 7 | |
| Legolas | 7 | |
| Gimli | 7 | |
| Moves | Parry, Killing Move | |
| Description | Parry, then instantly kill an attacking Uruk-Hai. | |
| Recommendation | The Bane of Sauron is effectively an upgraded version of Warrior Bane, and if that is a move that you make use of even occasionally, then this is a good upgrade to purchase, as it should be more effective at taking down stronger enemies, including the more powerful Uruk-Hai. |
Lightning Strike
| Individual Cost | 7000 | |
| Fellowship Cost | 11000 | |
| Level Available | Aragorn and Faramir | 8 |
| Frodo, Samwise, Merry, and Pippin | 8 | |
| Gandalf | 8 | |
| Legolas | 8 | |
| Gimli | 8 | |
| Moves | Speed, Fierce, Speed, Speed | |
| Description | A series of quick and powerful strikes that will take down one or more unshielded enemies. | |
| Recommendation | If for no other reason than the fact that this is a relatively easy combo to simply stumble upon, let alone use purposefully to take down groups of enemies, this is an upgrade that is worth getting. |
Killing Zone
| Individual Cost | 10000 | |
| Fellowship Cost | 20000 | |
| Level Available | Aragorn and Faramir | 8 |
| Frodo, Samwise, Merry, and Pippin | 8 | |
| Gandalf | 8 | |
| Legolas | 8 | |
| Gimli | 8 | |
| Moves | N/A | |
| Description | Increases the amount of time during combat that you remain in Perfect mode. | |
| Recommendation | Because of the huge boost that a character receives when they are in Perfect mode, to both their damage output and their scores, this is an upgrade that should be purchased for the Fellowship the very moment that it becomes available. |
Strength of the Fellowship
| Individual Cost | 5000 | |
| Fellowship Cost | 15000 | |
| Level Available | Aragorn and Faramir | 6 |
| Frodo, Samwise, Merry, and Pippin | 7 | |
| Gandalf | 8 | |
| Legolas | 8 | |
| Gimli | 7 | |
| Moves | N/A | |
| Description | Further increases your health (requires Strength of Iron). | |
| Recommendation | This is the final upgrade that will increase the health of an individual Hero, or of the entire Fellowship, and should be purchased as soon as it is available. |
Helm's Hammer
| Individual Cost | 12000 | |
| Fellowship Cost | 20000 | |
| Level Available | Aragorn and Faramir | 9 |
| Frodo, Samwise, Merry, and Pippin | 9 | |
| Gandalf | 9 | |
| Legolas | 9 | |
| Gimli | 9 | |
| Moves | Fierce, Fierce, Fierce | |
| Description | A deadly combination to shatter enemy shields and strike again. | |
| Recommendation | The final combination designed to be targeted toward shielded enemies should be purchased the moment it becomes available. At the end of the game you will need to stave off entire hordes of shielded enemies, and the boost that relying upon the Fierce attack like this will give you, when using Helm's Hammer, can be a huge benefit. |
Swift Justice
| Individual Cost | 12000 | |
| Fellowship Cost | 20000 | |
| Level Available | Aragorn and Faramir | 10 |
| Frodo, Samwise, Merry, and Pippin | 10 | |
| Gandalf | 10 | |
| Legolas | 10 | |
| Gimli | 10 | |
| Moves | Speed, Speed, Speed, Speed | |
| Description | A fast combination that is deadly against unshielded enemies. | |
| Recommendation | Swift Justice, like Helm's Hammer, is an upgrade that should be purchased as soon as you are able. When facing unshielded enemies, Swift Justice will add quite a bit to your attacks since it will allow almost every hit to be part of a Combo. Upper-level Heroes can slice through weak enemies with ease using Swift Justice. |
Aragorn and Faramir Upgrades
While you will be unable to play as Faramir until you have completed the quest set forth in the game, he is usable after completion of the main game. The upgrades purchased here must, unfortunately, be purchased for each human individually, and will not affect both just by purchasing them once.
Ranger Fury
| Cost | 4000 |
| Level Available | 2 |
| Moves | Fierce |
| Description | A devastating attack that causes lightning damage. |
| Recommendation | Ranger Fury, as with all other Fierce-only moves, can be quite powerful, but charging it can take a short while. If there are other upgrades that you want to purchase when this is available, purchase them first. |
Gondorian Sword Master
| Cost | 3500 |
| Level Available | 3 |
| Moves | Special |
| Description | Increase damage and get to perfect mode more quickly with this special ability. |
| Recommendation | Once you pump up the humans' special ability all the way you will be able to hit Perfect mode quite quickly, and this is the first step along that path. |
Dunedain Arrows
| Cost | 5000 |
| Level Available | 3 |
| Moves | Ranged |
| Description | These blessed Elven arrows cause additional damage. |
| Recommendation | Aragorn and Faramir are already good bowmen, but with these arrows they will be able to take out a great many enemies with only one hit. |
Wilderness Rage
| Cost | 5000 |
| Level Available | 4 |
| Moves | Fierce |
| Description | A more devastating attack that sets enemies on fire (requires Ranger Fury). |
| Recommendation | This is an upgraded version of Ranger Fury, and it should be purchased after every other ability available to you has been purchased. |
Rivendell Arrows
| Cost | 5500 |
| Level Available | 6 |
| Moves | Ranged |
| Description | These arrows emit a lightning arc on impact (requires Dunedain Arrows). |
| Recommendation | This will increase the damage of the ranged attack of your Human of choice even more. |
Wrath of Numenor
| Cost | 7000 |
| Level Available | 6 |
| Moves | Fierce |
| Description | A most devastating attack that emits a ring of fireballs (requires Wilderness Rage). |
| Recommendation | This attack, an upgraded version of Wilderness Rage, is actually more useful than the previous ones, and should be considered after you make the Rivendell Arrows upgrade. |
Kingmaker
| Cost | 7000 |
| Level Available | 7 |
| Moves | Special |
| Description | Increase damage and reach perfect mode even faster (requires Gondorian Sword Master). |
| Recommendation | This upgrade will allow Aragorn or Faramir to hit perfect mode almost immediately when using their special ability. |
Mithril Arrows
| Cost | 7000 |
| Level Available | 8 |
| Moves | Ranged |
| Description | These magical arrows set your enemies on fire (requires Rivendell Arrows). |
| Recommendation | These are the most powerful arrows that Faramir or Aragorn are able to possess. |
Strength of the Evenstar
| Cost | 5000 |
| Level Available | 10 |
| Moves | N/A |
| Description | Permanently increase your health (requires Strength of the Fellowship). |
| Recommendation | This upgrade should be purchased immediately for maximum health for Faramir and Aragorn. |
Sword Mastery of Kings
| Cost | 25000 |
| Level Available | 10 |
| Moves | Speed |
| Description | Increases the damage of your speed attack. |
| Recommendation | With all of the increases to the damage done by the fierce attack, it is about time to have an increase to the speed attack's damage. Purchase this upgrade as soon as it is available. |
Frodo, Samwise, Merry, and Pippin Upgrades
While you will be unable to play as Merry or Pippin until you have completed the main quest, they are unlocked after completion of your quest. The upgrades purchased here must, unfortunately, be purchased for each character individually, and will not affect all four just by purchasing them once.
Cloak of Haldir
| Cost | 3500 |
| Level Available | 3 |
| Moves | Special |
| Description | Increases the time that a Hobbit is hidden by using his Elven Cloak. |
| Recommendation | If you plan on using the special move that is available to the Hobbits at all, then this upgrade is a definite must. |
Poison Blade
| Cost | 4000 |
| Level Available | 3 |
| Moves | Fierce |
| Description | A devastating attack that causes continuing damage. |
| Recommendation | This upgrade can be quite handy if you like to attack enemies once, then run away and hide and let them die. Purchase it after the Cloak of Haldir upgrade. |
Cloud of Shadow
| Cost | 5000 |
| Level Available | 5 |
| Moves | Fierce |
| Description | Generate a poison cloud that causes continuing damage (requires Poison Blade). |
| Recommendation | This upgrade is a further version of the Poison Blade upgrade, and should be purchased after you obtain Poison Daggers. |
Poison Daggers
| Cost | 5500 |
| Level Available | 5 |
| Moves | Ranged |
| Description | Each dagger that hits a foe causes continuing damage. |
| Recommendation | This is another upgrade that should be purchased as soon as possible for each Hobbit, as it will allow them to do damage over time with their ranged attacks. |
Cloak of Celeborn
| Cost | 7000 |
| Level Available | 6 |
| Moves | Special |
| Description | Increases the time that a Hobbit is hidden by using his Elven Cloak (requires Cloak of Haldir). |
| Recommendation | Again, this is an upgrade that is pretty much necessary if you intend to use the special ability of the Hobbits. |
Morgul Daggers
| Cost | 7000 |
| Level Available | 7 |
| Moves | Ranged |
| Description | The most damaging Ranged attack available to the Hobbits. |
| Recommendation | Morgul Daggers is an absolute must to upgrade to if you use your ranged attacks at all (and we all do...) |
Halfling Strength
| Cost | 5000 |
| Level Available | 8 |
| Moves | N/A |
| Description | Permanently increases your health (requires Strength of the Fellowship). |
| Recommendation | This is another one of those upgrades that you absolutely need to obtain if you intend to use Hobbits much at all. |
Cloud of Rage
| Cost | 7000 |
| Level Available | 9 |
| Moves | Fierce |
| Description | A most damaging poison cloud that continues to cause damage (requires Cloud of Shadow). |
| Recommendation | Cloud of Rage is an even stronger version of Cloud of Shadow, and is surprisingly useful; purchase it when it becomes available after all Fellowship upgrades have been obtained. |
Baggins Strength
| Cost | 5000 |
| Level Available | 10 |
| Moves | N/A |
| Description | Permanently increases your health (requires Halfling Strength). |
| Recommendation | Allowing the Hobbits to take an even greater beating than before; this upgrade should be purchased the moment it is available. |
Cloak of Galadriel
| Cost | 10500 |
| Level Available | 10 |
| Moves | Special |
| Description | Increases the time that the Hobbit is hidden by using their Elven Cloak (requires Cloak of Celeborn). |
| Recommendation | This is another upgrade that most certainly should be made when available. |
Strength of the Gaffer
| Cost | 25000 |
| Level Available | 10 |
| Moves | N/A |
| Description | Increases the damage of all sword attacks when attacking an enemy from behind. |
| Recommendation | When used with the Elven Cloak, this ability allows the player to cause serious damage to an unsuspecting enemy. |
Gandalf Upgrades
Fog of War
| Cost | 4000 |
| Level Available | 2 |
| Moves | Fierce |
| Description | This attack invokes an expanding fog cloud that knocks enemies from their feet. |
| Recommendation | Gandalf's first fierce-only button attack is more useful than many others, and can be quite helpful when dealing with multiple enemies; purchase it as soon as it becomes available. |
Light of the Pilgrim
| Cost | 5000 |
| Level Available | 3 |
| Moves | Ranged |
| Description | This lightning bolt projectile causes increased damage. |
| Recommendation | Since he never needs to notch an arrow, Gandalf's ranged attacks are some of the best ranged attacks available; upgrade them as soon as you can. |
Wizard's Power
| Cost | 3500 |
| Level Available | 3 |
| Moves | Special |
| Description | The magic shield causes increased damage and persists longer. |
| Recommendation | As good as Gandalf's ranged attacks are, his shield almost makes him impenetrable. The only downside is how short the duration is. Nonetheless, his shield should be given priority over his ranged attacks; upgrade this first. |
Wrath of Anor
| Cost | 5000 |
| Level Available | 4 |
| Moves | Fierce |
| Description | A more devastating attack that creates a ring of lightning (requires Fog of War). |
| Recommendation | As with Fog of War, Wrath of Anor is a powerful fierce-only attack and can strike at multiple enemies at once. |
Light of the Forges
| Cost | 5500 |
| Level Available | 5 |
| Moves | Ranged |
| Description | This magical projectile lights enemies on fire (requires Light of the Pilgrim). |
| Recommendation | Continue upgrading Gandalf's ranged attacks with this edition; shortly he will be able to shoot through enemies. |
Flame of Udun
| Cost | 7000 |
| Level Available | 6 |
| Moves | Fierce |
| Description | A most devastating attack that creates a ring of flame that sets foes on fire (requires Wrath of Anor). |
| Recommendation | This fierce-only attack is most devastating, as not only does it affect multiple enemies, but it will also cause them damage over time, which can be quite helpful if you are in the process of being mobbed. |
Power of the Palantir
| Cost | 7000 |
| Level Available | 7 |
| Moves | Special |
| Description | The magic shield deflects enemies further and persists longer (requires Wizard's Power). |
| Recommendation | One step away from the best shield upgrade possible, this should definitely be obtained as soon as you can. |
Enchantment of the Heavens
| Cost | 10500 |
| Level Available | 10 |
| Moves | Special |
| Description | The magic shield knocks enemies to the ground and persists longer (requires Power of the Palantir). |
| Recommendation | While the shield enhancement this provides is most excellent, obtain Light of the Valar first, then Enchantment of the Heavens, as the projectile passing through multiple enemies will be of more assistance, more often. |
Light of the Valar
| Cost | 7000 |
| Level Available | 10 |
| Moves | Ranged |
| Description | This projectile of pure light passes through multiple foes, setting them aflame (requires Light of the Forges). |
| Recommendation | As much as the extra firepower provided by Power of the Istari is quite helpful, it is better to get your ranged attacks to affect as many enemies as possible first. Just remember to get them lined up in order to do maximum damage when using the attack that this provides. |
Power of the Istari
| Cost | 25000 |
| Level Available | 10 |
| Moves | N/A |
| Description | Increases the damage of your ranged and devastating Attacks. |
| Recommendation | This upgrade should be purchased last once you reach Level 10; however it will prove of a huge assistance and enable your ranged and fierce attacks to be quite potent indeed. |
Gimli Upgrades
Dwarven Fury
| Cost | 4000 |
| Level Available | 2 |
| Moves | Fierce |
| Description | A devastating attack that causes lightning damage. |
| Recommendation | The first upgrade for Gimli alone, Dwarven Fury may not be very compelling early on, but once you continue down this upgrade path you can send out a ring of fireballs, which can be quite potent when you need the firepower. |
Lonely Mountain Lore
| Cost | 3500 |
| Level Available | 3 |
| Moves | Special |
| Description | Increase damage and get to perfect mode more quickly with this special ability. |
| Recommendation | Let's face it--Gimli is most certainly not the best ranged Hero, and even in close combat he simply isn't as capable as many of the others. As a result, his special ability is quite necessary to boost his damage, and anything that does that is important. |
Mountain Rage
| Cost | 5000 |
| Level Available | 4 |
| Moves | Fierce |
| Description | A more devastating attack that sets enemies on fire (requires Dwarven Fury) |
| Recommendation | Continuing along the vein of Dwarven Fury, Mountain Rage will begin to become more useful, and should be purchased as soon as it's available. |
Erebor Axes
| Cost | 5000 |
| Level Available | 5 |
| Moves | Ranged |
| Description | These enchanted throwing axes cause additional damage. |
| Recommendation | There is one more upgrade to Gimli's ranged attacks, and both it and this one are needed just to allow him to do reasonable damage with ranged attacks. |
Wrath of Moria
| Cost | 7000 |
| Level Available | 6 |
| Moves | Fierce |
| Description | A most devastating attack that emits a ring of fireballs (requires Mountain Rage). |
| Recommendation | Dwarven Fury and Mountain Rage finally pay off in Wrath of Moria, which allows Gimli to hit multiple enemies with one shot and do even more damage. This upgrade should be purchased immediately. |
Axe Mastery of Kings
| Cost | 7000 |
| Level Available | 7 |
| Moves | Special |
| Description | Increase damage and reach perfect mode even faster (requires Lonely Mountain Lore). |
| Recommendation | Again, anything that boosts Gimli's special ability should be purchased immediately. |
Moria Axes
| Cost | 5500 |
| Level Available | 7 |
| Moves | Ranged |
| Description | These enchanted axes emit a lightning arc on impact (requires Erebor Axes). |
| Recommendation | Gimli's final upgrade for his ranged attack, Moria Axes will allow Gimli to do ranged damage that is on par with other characters mid-way through their ranged upgrades. Gimli will still take quite a bit of time to pull off ranged attacks, as his speed will remain unchanged. |
Strength of Gloin
| Cost | 5000 |
| Level Available | 8 |
| Moves | N/A |
| Description | Permanently increases your health (requires Strength of the Fellowship). |
| Recommendation | The first of two health upgrades that are available only to Gimli, this will enable Gimli to do some serious tanking, taking the damage away from other members of the party and allowing them to focus more on ranged attacks. |
Dwarven Axe Mastery
| Cost | 25000 |
| Level Available | 10 |
| Moves | Fierce |
| Description | Increases the damage of your Fierce attack. |
| Recommendation | While chances are you will be focusing more on speed attacks than fierce attacks, this upgrade should be purchased as soon as you are able to, after you purchase Strength of Khazad-dûm. |
Strength of Khazad-dûm
| Cost | 5000 |
| Level Available | 10 |
| Moves | N/A |
| Description | Permanently increases your health (requires Strength of Gloin). |
| Recommendation | The final upgrade to Gimli's health, this should be purchased immediately in order to allow him to last even longer in battle. |
Legolas Upgrades
Mirkwood Arrows
| Cost | 5000 |
| Level Available | 2 |
| Moves | Ranged |
| Description | These blessed Elven arrows cause additional damage. |
| Recommendation | As one of the best ranged heroes available, the ranged upgrades that Legolas has available to him should always be purchased as soon as they are available, to capitalize upon one of his major assets. |
Light of Lothlorien
| Cost | 3500 |
| Level Available | 3 |
| Moves | Special |
| Description | Increase damage and get to Perfect Mode more quickly with this Special Ability. |
| Recommendation | Because the special ability that Legolas uses enables him to dish out much more damage, and reach perfect mode faster, any upgrade that enhances that ability should be purchased immediately. |
Elven Fury
| Cost | 4000 |
| Level Available | 4 |
| Moves | Fierce |
| Description | A devastating attack that causes lightning damage. |
| Recommendation | Unlike Gandalf's fierce ability, Legolas' does not do any serious damage against more than one enemy, even after you power it up, and often it is faster to just use speed attacks. As a result I do not recommend upgrading this unless you have a lot of experience to spare (which you eventually will). |
Lothlorien Arrows
| Cost | 5500 |
| Level Available | 5 |
| Moves | Ranged |
| Description | These arrows emit a lightning arc on impact (requires Mirkwood Arrows). |
| Recommendation | As with any time Legolas' ranged attack can be enhanced, this upgrade should be purchased immediately. |
Arrows of the Valar
| Cost | 7000 |
| Level Available | 7 |
| Moves | Ranged |
| Description | These magical arrows set your enemies on fire (requires Lothlorien Arrows). |
| Recommendation | Instead of just doing more damage, this upgrade will cause a bit of damage over time, and should be purchased as soon as you can it. |
Galadriel's Gift
| Cost | 7000 |
| Level Available | 7 |
| Moves | Special |
| Description | Increase damage and reach Perfect Mode even faster (requires Light of Lothlorien). |
| Recommendation | The final upgrade to Legolas' special ability, this will allow you to hit perfect mMode almost instantly. |
Elrond's Rage
| Cost | 5000 |
| Level Available | 8 |
| Moves | Fierce |
| Description | A more devastating attack that sets enemies on fire (requires Elven Fury). |
| Recommendation | The second and final Fierce attack upgrade that is available to Legolas, Elrond's Rage still takes entirely too long to execute for too little benefit. Pick this up if you are looking for an upgrade to spend experience on, but not before you have everything else available to you at this point. |
Mithril Arrows
| Cost | 10500 |
| Level Available | 9 |
| Moves | Ranged |
| Description | These arrows penetrate and set on fire all enemies in their path (requires Arrows of the Valar). |
| Recommendation | With this upgrade Legolas will not only be able to set enemies on fire, but he will also be able to shoot through enemies. Definitely purchase this upgrade as soon as you can. |
Elven Bow Mastery
| Cost | 25000 |
| Level Available | 10 |
| Moves | Ranged |
| Description | Fire two arrows at two targets with a single shot. |
| Recommendation | The final key in turning Legolas into a complete ranged monster is Elven Bow Mastery. With this ability you will not only be able to fire two different arrows at two different targets at the same time, but they will also each have the benefits that your arrows had before, that is, they will be able to go through enemies and set them on fire. With this upgrade alone Legolas can hold off hordes of enemies, so long as he has enough arrows to keep going. |
Walk-through
In this section we'll give an overview of each of the game's fifteen levels, including which heroes are available for use on each mission, which hero(es) we recommend for the most effective Orc-eradicating, and a walk-through of the level itself.
The game is divided into three paths--The Path of the Wizard, The Path of the King, and The Path of the Hobbits; you may play the Paths in any order, and your choice of heroes is dependent on which Path the current level belongs to. We recommend you tackle the three Paths simultaneously rather than one at a time, as in this way your heroes will benefit from Fellowship Upgrades purchased by the other Heroes. The game starts you off without any delay at Helm's Deep, on the Path of the Wizard.
As you complete each level, your performance will be summarized, and bonus experience points will be given, depending on how well you did--mostly fair, good, excellent, or perfect kills. You can then trade your experience points in for new hero upgrades. See our combo move section for information on these moves, as well as advice on which to buy when. If you perform poorly on a level and finish with a Fair rating, we recommend you go back to your saved game and play it again before continuing on--the latter levels are much more forgiving with higher-level characters, and you won't be very powerful come the end of the game if you're routinely finishing with Fair ratings. Also, on levels which have more than one Hero available for use, you can re-play the level with the Heroes you passed by during the first run through the area. Feel free to do so if you'd like to vary your choice of Heroes along the Path of the King, as you'll need higher-leveled characters come the last few missions.
While you had to choose your difficulty level at the beginning of the campaign, if you find yourself having too difficult or too easy a time, you can change your choice at any time in the game's options menu. Note also that as you progress, shining stars open up around the map, allowing you to view DVD-style extras such as actor interviews and production images from both the game and movie.
The Path of the Wizard
On this Path, your only choice is Gandalf the White. You'll begin in Helm's Deep, and travel to Isengard and Minas Tirith.
Helm's Deep
Available Heroes: Gandalf the White
After a short introductory cinematic video, Gandalf rides into Helm's Deep with reinforcements, and the game begins. As you have your way with the Orcs on the ground, Gimli will shout out tips on the basic controls, before you are called up to the wall to continue the defense. Head to the ladder leaning against the wall, and climb up to the top of the wall. Stand behind Legolas to avoid being pelted with arrows (Legolas is invincible for the duration of this level--why take the flak when you can pawn it off on him?), and launch some magic love at the enemies up ahead.
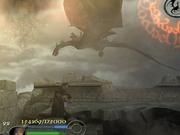
When they're dead, Aragorn calls for your help back on the ground. Follow Legolas to the rope hanging from the wall, and slide down it with your Action key. It seems the enemy is attempting to drive some explosives toward the gate to the city proper. Thankfully, there are a few ballistae loaded with flaming goodness aimed at the explosives. Fire them off with your Action key. It doesn't matter which order you set them off, the third will always be the killing blow, so you might as well run down the line and set them off in order to save time.
After the advancing explosives are destroyed, Gandalf will send the baddies running for their master with an impressive display of power, and the level will end. It's fairly easy to obtain an excellent rating for this level, but its relative shortness minimizes its impact on your overall experience, so feel free to settle for a rating of good if you don't feel like starting over. See the section on combo moves for advice on how to spend these points.
The Road to Isengard
Available Heroes: Gandalf the White
Gandalf makes his way to Isengard with the intent of helping the Ents cleanse the area of Saruman's evil. Nearly immediately, you'll be cut off from the Ents by a fallen tree. Continue around to the right. You'll want to fire away at the explosive-laden carts before you near them for some easy kills. Continue onward until you come to a checkpoint. You'll note that the conditions in the valley below are less than welcoming, what with all those big, heavy Ents walking around. Head down, and a special objective will appear--you and the Ents have to kill a set number of enemies before you can continue. In reality this plays out more along the lines of letting the Ents do the majority of the work, while you stay out from underfoot. Stay toward the right side of the valley, and you'll generally have a pretty good view of incoming Ents.

Once the requisite Orcs are dispatched, continue onward through the newly-opened path. You'll be attacked by a couple of melee enemies and several more that deem it necessary to pelt you with fiery arrows. This is a good time to point out that all the heroes in the game are capable of acting like a Jedi and parrying away incoming projectiles with ease. At times it's easier to dodge the arrows and then return fire, but successfully parrying raises your skill meter, making it easier to garner more impressive kill ratings. In this way, you can sometimes finesse what would have been a fair into a good, excellent, or perfect kill by parrying away some incoming fire, then immediately taking all the shooters down with rapid ranged attacks. Continue on, and before long Saruman's tower Orthanc will come into view, and you'll be rewarded for your efforts thus far with another checkpoint.

Keep moving, and knock out the explosive cart. You'll be assaulted by easily-dispatched Orcs, but the true danger is on the other side of the water, where many enemies are firing flaming arrows at you. Thankfully, there's a well-placed explosive cart underneath each one. Use your Ranged attack to take each tower down, and keep on truckin'.
Continue across the bridge and enemies will assault you from both left and right. Take them out, and run down to the right, and you'll be treated to perhaps Gandalf's best line of the game. At the bottom you'll find an Ent attempting to take down the supports holding back the flood of water that we all know is destined to rush toward Isengard. Eliminate the enemies accosting him, and then alternate between firing away at the support and removing any replacement archers from consideration. You can safely fire magic away without worry, as incoming enemies will drop replacement ammo. Once the support is removed, enjoy the show.
Minas Tirith - Top of the Wall
Available Heroes: Gandalf the White
This level is about as frenetic as they come. Gandalf finds himself atop the wall surrounding Minas Tirith, against an onslaught of evildoers bent on sacking the city--and they're armed with siege machinery. For this mission, don't worry about taking out enemies. Your fight is with the overrun meter in the top-right of your screen. As the enemy erects ladders onto the wall, you must quickly knock them down with your physical attack button. If the overrun meter turns completely red, you lose the mission. Thankfully, adjacent to the timer is a rudimentary map of the wall, and incoming enemies are highlighted for you. Worry about the ladders, and smite only those enemies that impede your progress.

During the lull between attacks, hover around the center of the wall to minimize your time to respond to new threats. After awhile, the wall will be assaulted by much larger machinery, and these can't be removed with a simple push. Fire a volley of magic at them, and they'll go down. Survive long enough to destroy several of these, and one will forcefully make it to the wall and start unloading baddies. (The event is scripted, and will happen no matter how well you do.) Meanwhile, more Orcs will begin battering the main gate. Eliminate the mass of Orcs surrounding you on the wall, and the defenders will begin to head down to the courtyard. Follow them down. When you reach the gate, the Orcs will breach, and the level will end.
Minas Tirith - Courtyard
Available Heroes: Gandalf the White
This is an exceedingly simple level, in that it's not much of a level at all. You have one simple task: hold the courtyard of Minas Tirith until a set number of residents flee to safety. This, you will find, is not so simple a task after all.
For the first wave of enemies, stay near the stairway where the citizens of Gondor are fleeing. You'll have several guards here to help you stem the tide. After the citizen count reaches fifty or so, enemy archers will appear; be ready for them, and take them out with your ranged attack from behind the cover of the statue in the center of the courtyard.
At one hundred safe civilians, the enemy will kick it up a notch and start sending bad guys strong enough to merit their own health bar. Should you need them, there are health potions hidden in crates on the outer edge of the courtyard.
After 150 civilians are safe, a few trolls decide to make an appearance. Use the burning spears to take them out quickly, or move in for a pummeling if you're feeling adventurous and would like to try for some perfect kills. Once all 200 civilians are safe, the city retreats, and the mission ends.
The Path of the King
On this Path, you'll have the choice of controlling any of the three remaining warriors of the Fellowship--the Dwarf Gimli son of Gloin, the Elf Legolas, and the returning human king, Aragorn son of Arathorn--as they travel from the underground tomb of the dead, through the southern gate of Minas Tirith, over Pelennor Fields, and finally as they join up with Gandalf at the Black Gate of Mordor . Overall, most of the Heroes in this game fight in a similar fashion, much more than is realistic--for example, Samwise can take out Orcs in melee nearly as well as Aragorn can--but who said this was a simulation? The bottom line is that you should choose the character you most would like to play, and stick with that character for the long haul--you'll want to have one of these three characters at level ten by the time you reach the Black Gate.
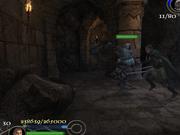
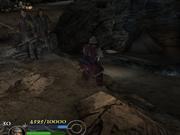
Paths of the Dead
Available Heroes: Aragorn, Legolas, Gimli
This place doesn't look very inviting, does it? Our three heroes sure don't think so. Begin by heading forward through the mist. Those spirits floating around will soon take physical form and attack your party. Send them back to the Shadow, and continue forward. You'll be attacked again, but this time you can use the nearby spears to take several of them out in one strike apiece. Continue onward into another section of the walkway shrouded in mist, and more specters will attack. Eliminate them and exit the mist. Next you'll come upon a fork in the road, with archers ahead and melee enemies to the left. Take down the archers and head to the left.
This way leads upward. Smite the enemies up here, grab the experience bonus, and use your Action button to drop the boulder on the unsuspecting baddies below before heading back down and continuing onward. Keep on forward until you come to a chasm. By their comments, it's obvious that no one in your party has very good perception--the winch will lower the bridge across the abyss. Take out the archers from afar before heading over.
In the ensuing mist you'll pass a checkpoint, and as usual, there is a big fight awaiting just past the checkpoint. The floating spirits will wait until they can surround you to attack, so be ready. After they're dispatched, run up the ramp to the right and grab the healing potion, then continue on to the left. The ghosts in the next area will make their displeasure at your appearance known by toppling the stone columns and filling the small maze with steel-wielding enemies. Work your way through, and head onward into more mist. At the other end is a bone ladder, which--surprise, surprise--you'll have to climb to continue on. At the top is another unexpected turn of events--more spirits just waiting to attack. Once they're sent back to the depths, their big, dual-wielding brother will emerge. Parry his attacks until you sense an opening, then hit him with a fierce attack followed by speed attacks. When he begins to strike again, parry and repeat. After he falls, continue onward. Knock over the statue, and you'll come to 'the main gate.' Unfortunately, it's locked. Follow the ramp to the left and under the fallen statue. Dispatch the spirits, and turn the winch. Advance through the gate, and you'll come to a large cavern, with dozens of spirits walking around (Why not fly?).
Sprint across the bridge, and your path will be blocked until you defeat a set number of enemies. Your companions are invincible, so use that to your advantage by staying by their side; try to keep them between you and your enemies. If you have completed any of the levels on the other Paths and purchased the Orc Hewer upgrade, this is a great time to use it; the first half of the enemies are unshielded, and you can tear them up pretty quickly with the Hewer combo. Once you've met the required kill count, finish your sprint across the bridge to complete the level.
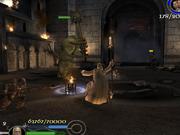
The King of the Dead
Available Heroes: Aragorn, Legolas, Gimli
As Aragorn continues his quest to obtain help against the advancing hordes of Sauron, he clashes with the King of the Dead, and must force him to yield before him and pledge his allegiance to Strider's cause. Right off the bat, the dead king makes it quite clear that he has no intention of bowing before the returning king of the living.
This battle will span several phases, in general alternating between attacking the king directly and knocking off his minions. First, he will float toward you. As he advances, you can get a ranged attack or two in. Parry away his strikes, then rush in and attack. Repeat until you've hit him a few times and he retreats. He'll summon in a few weak melee spirits. You'll have no trouble taking them out from afar, which the king won't take too well. He'll come at you again. Use the same strategy as before to get in a few hits without taking any damage yourself, and he'll retreat once more, this time summoning four archers on ledges out of reach. Toss your ranged artillery of choice at them while dodging or parrying their arrows, and they'll fall just as quickly as the previous spirits. If you run out of ranged ammo, more will automatically spawn in behind the boulder at the bottom portion of the level.
Once the archers are gone, the king attacks once more. Hit him a few more times, and he'll retreat back to his starting location and show off an amazing case of halitosis. Hide behind a boulder as he calls forth the wind, then sidestep out from cover and launch some ranged attacks at him in-between bouts. Again, if you run out of ammo, more will be waiting behind the lowermost boulder. After he takes a few arrows, he'll retreat yet again and call forth more minions, in this case spirits bearing shields--as with all shielded enemies, you'll have the most success with your fierce attack. When they go down, His Highness will advance at you again. Fight him off, and this time you'll get to deal with archers and shielded spirits at once. Take a page out of the king's book and retreat behind the lowermost boulder. You'll then be able to concentrate on the shield-bearers without worrying about incoming arrows.
The king will attack once more, then retreat and pull out another volley of wind attacks. You'll want to hide behind the lowermost boulder, as the others will be destroyed by the end of this attack. After another round of close combat, the king retreats and calls forth his nastiest minions. (Note: at this point you should have him down to nearly no health, if you haven't killed him already) Use the lower boulder once more as cover from the archers, and you shouldn't have an inordinate amount of trouble. After the king finally falls, his entire stronghold will begin to collapse--be ready to run. This next section is one of the most difficult in the game, and it can quickly become quite frustrating if you don't approach it methodically.
You'll meet back up with your two companions, and will be on the move immediately. Follow your friends, and shortly a large group of enemies will form up and attack, blocking you off from the other members of the Fellowship. Thankfully, none of them is very strong, and they'll go down fairly easily. Continue on as soon as you can (and we mean as soon as you can, or you'll quickly find yourself buried).
Keep moving along the linear path, and in a short while you'll be beset with enemies once more, and these are a bit of a challenge. Parry often, and deal out fierce blows when you can until the shields are no more and/or you get one of the extremely strong enemies backpedaling, then dish out whatever you can. Stay toward the bottom of the area, away from the spawn point, to avoid getting surrounded. When they're all a little bit more dead then before, continue on. You'll travel through another curiously misty area, before catching up to the other Fellowship members once again. Not a moment too soon, as it happens, for there are more spirits arriving, and they're not here to have a drink. Stay with the others to ensure you're not the only target, and hack away. Try not to dilly-dally, as an avalanche is coming if you're not fast enough. After they're all dead, run through the exit and complete the level.
The Southern Gate
Available Heroes: Aragorn, Legolas, Gimli
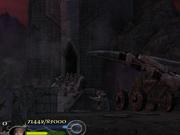
After securing the services of the King of the Dead, the warriors of the Fellowship advance to the Southern Gate. Shortly after advancing toward the unbelievably poorly-guarded gate, you'll be set upon by an ambush of enemies, so be ready. You can fight out here as long as you want if your goal is to gather some experience. When you're ready to advance, fire the left two catapults, and a way over the wall will be created. Firing the lone catapult to the right will soften up the wall-walking defenders.
Once you've climbed the ladder onto the wall, hide behind your invincible buddies and eliminate the adjacent defenders. Once they're down, a Mûmakil will approach, bearing cargo in the form of servants of Sauron who are less than pleased to see you. Fire a volley of ranged attacks at them, and they'll go down in a display of fireworks. In a less-than-subtle hint, the game will highlight the nearby winch for you. Indulge the developers and pull it, but not before tipping the nearby burning coals to sear anyone unfortunate enough to still be waiting by the gate. You'll need to pull the winch several times to fully open the gate. Once it's completely ajar, more evildoers will come forth to block the entrance. Show them some burnin' love from the cauldrons you just practiced with, and they'll go down.
Return to ground level, and either practice your smiting to gain some more experience, or sprint through the gates to end the level.
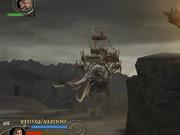
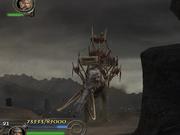
Pelennor Fields
Available Heroes: Aragorn, Legolas, Gimli
After advancing through the Southern Gate, our fearless party finds themselves at Pelennor Fields, in the midst of a gigantic battle--incidentally, this is the centerpiece of the third movie in the trilogy. It's time to kick some butt. If you have Legolas up to a decent level, his quick-release sharp-shooting will come in handy.
As the level begins, the goal is simply to aid the forces of good by taking out as many enemies as possible, so have at them! As usual, remain near your companions so as to divert some enemy attention from yourself. Once you've defeated the set number of enemies, a Mûmakil will begin to charge the field--right toward Eowyn and one of our vertically-challenged friends. You'll automatically charge the hillside overlooking the battlefield, where the developers were once again kind enough to place some ballistae and war pikes for use against the invading creatures. You'll also hit a checkpoint. As with Gandalf's earlier mission atop the wall at Minas Tirith, we are no longer concerned with run-of-the-mill enemies, unless they impede our progress of taking down the larger baddies. Sprint toward the left-hand side of the screen to get a look at the Mûmakil. If there's a pike or ballista near the Mûmakil, toss/launch it; otherwise begin throwing ranged attacks. You need to take them down as quickly as possible.
As the first Mûmakil falls, immediately sprint back toward the ramp down to the battlefield, as another will follow, and this one's too far from this hill for your attacks to reach it. (When the game cuts to show an advancing Mûmakil, look closely and you can see which side it's closest to--the ordering is random.) Run across the field and up the ramp on the other side, and repeat the process of taking the beast down. Once this second animal bites the big one, stay on this hill but move to your left, toward our endangered friends. The Witch King will appear and begin attacking them. Your job is to convince him that that's a bad idea, and your ranged attack should do the trick from here. If at any point you notice yourself running short of ranged ammo, more constantly spawns in at the top of the ramps. Next comes another Mûmakil, then the Witch King once more. One more Mûmakil, then a third attack by the Witch King. A fifth Mûmakil, then another showing by the Witch King (sick of this pattern yet?). A final Mûmakil, once last battle with the King, and then things will begin to look grim--for a moment.
Help arrives, and the mission is complete.
The Black Gate
Available Heroes: Aragorn, Legolas, Gimli, Gandalf
For the first time thus far, the main Fellowship members are not invincible--in point of fact, you'll find that they are your greatest weakness on this mission.
The level opens with a duel between Aragorn (or whomever you are playing as) and a masked enemy, outside the Black Gate of Mordor. Parrying will not avail you, as this enemy's powerful attack will knock you from your feet anyway. Nor will simple fierce bullrushing tactics work. Your best bet is to come flailing at him with combo moves; he'll go down fairly quickly, but you are going to take some damage during this fight. After he falls, Sauron's army emerges from behind the Gate, and you receive a checkpoint.

Your goal at this point is simply to keep the adjacent members of the Fellowship alive. Six waves of enemies will come at you, and each of your friends will have a tough time of it--thankfully, they heal rapidly, so if you get to them in time and clear their immediate area, they'll recover so that you can tend to another member of the company. Be sure to use the weaponry around you--the burning coals and spears can diffuse a difficult situation quickly. Also, keep tabs on any uber-enemies that arrive (the ones with their own health bars), and take them out quickly--they will gravitate toward members of the Fellowship, and drain their health reserves.
After the first two waves of enemies, they will start coming from all sides rather than a single bottleneck, so keep a watchful eye on the health of your companions. Again, the key here is to take out the powerful enemies quickly, while spending the rest of your time defending whichever Fellowship member needs you most.
Defeat the advancing hordes, and the Ringwraiths will arrive. As all familiar with the books or movies know, fire is their weakness. You can take them down in melee, but ranged attacks, burning coals, and searing spears will serve you much more effectively. Get a spear in them, and ensuing regular attacks will do severe damage. Down them all, and you'll win the mission.
The Path of the Hobbits
On this Path, you'll play the role of Samwise Gamgee as he looks out for his Ring-bearer and friend, Frodo Baggins. This Path begins in Osgiliath, continues through Shelob's Lair, and finishes in Cirith Ungol.
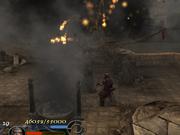
Escape from Osgiliath
Available Heroes: Samwise Gamgee
Sam's journey begins as he flees Osgiliath with Frodo and Gollum. Your path in this level is fairly straightforward; head across the courtyard and up the stairs. Eliminate the Orcs in your path, and the wall will explode inward, allowing you to continue. Follow Gollum up the rubble, and a Nazgul will appear, along with a timer. Whenever Frodo is out in the open, the timer ticks down. Find him some cover, and your time returns to normal. Thus, your goal is to move quickly, dispatching enemies only when necessary.
Continue across the rooftop and down the ladder to the right on the other side. Proceed outside, and jog through the carnage and up the stairs into the building across the way. Climb the rubble once again, and imagine that the Orcs have come between you and second breakfast to aid your fury. Head outside and you'll hit a checkpoint. Climb the ladder, and you'll see the reason that you were given a checkpoint--the Nazgul has returned. Speed is of the essence. Sprint across the roof and into the tower. Let the timer count back to zero, and eliminate any enemies within reach before heading back out and sprinting the rest of the way across the roof.
Descend the ladder, and you'll find respite from the Nazgul once more. Climb the stairs, and send the bell tumbling down for a double-whammy--dead Orcs and a newly-created exit. Head through it, and the Nazgul is back again. Sprint across the roof for your toughest challenge yet--the path across is riddled with Orcs, and isn't as straight as the previous two. Make your way to the enclosed area across the roof and to the left, and let the timer count back down to zero. This next run is a long one; sprint out the other side of the enclosure, and continue pushing toward the next safe area, ignoring baddies whenever possible. Descend both ladders, and you'll find yourself in the city's sewers.
Keep moving forward, eliminating Orcs as they come at you. After a short while, you'll meet a decidedly anti-social Orc, carrying a rather large hammer. Take his friends out before you make him mad if possible, as he's tough enough for our little Hobbits on his own. Parry his blows, then pummel him with Fierce attacks until he starts taking damage, then switch to Speed attacks and combos to take him out before he can regain his balance and swing that hammer again. Once he's down, drink up and use the winch to lower the gate. Head through and out into the exterior of Osgiliath.
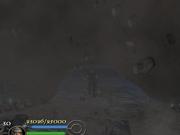
Shelob's Lair
Available Heroes: Samwise Gamgee
As you enter this level, Frodo will be captured, and it's now Sam's job to find him. This level is a bit of a maze, so follow along closely. Follow the spider along to the left until you reach a dead end. Kill the spiders here. Your killing move will come in very handy in this level, as the spiders tend to get knocked on their back quite easily. After these spiders are dead, head back out, and this time head to the right. Follow this path around to the left, until you see a mass of tiny spiders. Walk past them to the right, and continue on until the path splits again. Make a left u-turn toward the next mass of spiders. Quickly run around the spiders for a full health potion.

Head back out and around to the left, and you'll see yet another bunch of arachnids. You'll be assaulted once again, and the path will come to a T. Head left to find an Orc fighting off two spiders. Kill all three and turn around, following the path to the right this time. Another dead end, causing Sam to complain. Backtrack to the mass of spiders, and this time head toward the light, to the left. You'll come to two torches, one on either side of a black mass of spiders completely covering the ground. Pull an Indiana Jones and make them disperse by throwing a torch at them. Run through them, and you'll come to a seeming dead-end. Put the attacking spiders out of their misery, and then toss the torch at the web blocking your way.
Pass through, and you'll come upon several Orcs commiserating. Use the fire all around this area to quickly dispatch them, then continue on through the only other tunnel. You'll come upon mixtures of Orcs and spiders. Continue to use fire to your advantage, and keep moving forward. When your perspective changes, you'll see that you have two choices--continuing onward toward the bottom of the screen, or taking a turn to the left past the torch. Take the way of the torch, and you'll see archers across a chasm--eliminate them to save yourself some trouble later on, then continue down the other path. It's another Orc party, and again you're provided with implements of fire to aid you. Instead, however, head up the small path to the right. After taking out a couple of evildoers, you'll see a nice stash of boulders that you can drop on the Orcs below. Do so, and continue on.
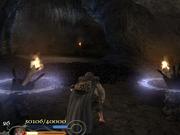
You'll come to a bridge, get your first glimpse of Shelob, and be rewarded with a checkpoint. Keep moving, and after eliminating some more arachnids, you'll come to the scene shown in the picture--an incredibly large mass of tiny spiders. Use the torches to create a path, and run through them. This next area is a bit tricky; you'll need to toss a torch into the web at the far end of the room, then skirt around the spiders to the left to make it through.
Ahead are--you guessed it: more spiders. You'll have a choice between going left or right and up, either way through spiders. Begin by going to the right. Toss the torch at the far end toward the web, and head back down. Make your way past the first mass of spiders, and be prepared to parry a lot of incoming arrows. Once you've killed the archers, step through the second and third masses of spiders. Follow the tunnel to another checkpoint. Prepare yourself before stepping out into the open, as you're about to get up close and personal with Shelob.
As is the case with most boss characters in Return of the King, be ready to do a lot of parrying. You won't have much success with your fierce attack against Shelob, so parry until you get an opening while she's close, then open up with speed attacks. Once you've hit her a few times, Shelob will run away and send in a few of her minions. Dispatch them, and as soon as the last one is down, run away from where Shelob is waiting--she'll jump down and try to crush you under her considerable weight. Her children will come at you in increasing numbers each time, so you'll want to take them out quickly--one fierce attack to knock them over, then a killing move to finish them.
After you repeat this cycle several times, you'll deal Shelob a particularly nasty wound, and she'll head for the hills. Some Orcs will come take Frodo away, and the mission will end.
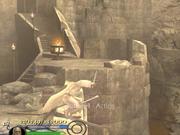
Cirith Ungol
Available Heroes: Samwise Gamgee
This is a fun level, in which our little Hero Samwise Gamgee takes on eighty Orcs that lie between him and his master, Frodo. If at any time you find yourself overwhelmed, use your special ability to cloak yourself and regroup. While cloaked, you can use your killing move to attempt to backstab an enemy, as well.
As you begin, you'll be crouched in hiding as a group of enemies talks amongst themselves. Draw a few toward you with throwing knives, then tip the flaming coals in their path for some help. After you've dispatched the ground-level crew, Sam will complain that he can't find the way up, even though it's glowing at him. Use the winch to lower the ramp, and continue upward.

You'll come to a courtyard--toss the fiery spear, then charge down the stairs, killing everything at the foot of the stairs. You'll note that everyone's enjoying a nice old-fashioned brawl, so if you're not in a blood lusting mood, don't continue charging ahead just yet. Tiptoe around, and use the flaming coals scattered about, as well as your throwing knives, to aid you in your strikes. Clear out this courtyard, noting that if you release the winch holding up the ramp quickly, you can garner an easy perfect kill as everyone fighting underneath it is crushed.
Head into and clear the other courtyard before continuing up the ramp, as you're likely not up to the required number of kills just yet. You'll want to avoid getting caught in the middle of the melee at all costs, however. Once you've reached your kill goal, head up the ramp in the main courtyard, then up the ladder to the roof. Take out the thugs, then drop the barrels on the lower-level quarrelers for another perfect kill.
Head up the next ramp, and the remaining defenders will flee to the tower. They've massed in the center of the bridge, incidentally right underneath the location where a troll-sized crossbow is aimed. How quaint. Take down the crossbow's hammer-wielding guard, and launch its payload. Advance into the tower for a checkpoint. It's Frodo! Unfortunately, he's guarded by an Orc on some sort of high-octane version of speed. Fight him for a little while, and you'll realize this isn't going anywhere. In an homage to Crouching Tiger, Hidden Dragon, use the weaponry surrounding you and start tossing spears at him, until he falls. Tend to Frodo, and the mission will end.
The Crack of Doom
Available Heroes: Frodo Baggins
For the first time, you'll take control of the ring-bearer, Frodo Baggins, as he attempts to destroy the One Ring once and for all at the Crack of Mount Doom. Unfortunately, Gollum has other plans. As we rejoin our Heroes, Gollum has just stolen the ring from Frodo. Let's get it back. This is an exceptionally short level, but it's a bit tricky, as well.

Gollum is wearing the One Ring, so he cannot be harmed by Frodo or Sam. Thankfully, you're in Mount Doom, so if we can knock Gollum (and his precious) off solid ground and into the fires, you can kill two birds with one stone. Since Gollum can't be harmed, parry his blows and work him toward the edge, then either hit him with a fierce or physical attack when he's not ready, or wait for Sam to do the same. Once he loses his balance , hit him hard again, and he'll fall, hanging on by his hands. Use your killing move to knock him off. He'll find a way back up, but he'll be damaged. Potions will begin to drop from the ceiling, as well. Simply repeat the process a few times, and finally Gollum, and the ring, will be destroyed. Congratulations--you've beaten the game.
Or have you?
Bonus Levels
After completing the game, several bonus items will unlock--a couple of DVD-style extras, cheat codes, playable Heroes, and an insanely-difficult level.
Palantir of Saruman
Available Heroes: All
After beating the game, you're able to play any of the previous levels as any member of the Fellowship, save Boromir--you get his brother Faramir instead. We highly, highly recommend taking a level 10 character into the Palantir, unless you'd like a real challenge. If you have a friend handy, taking these levels in co-op mode will ease some of the pain.
Saruman's Palantir consists of twenty waves of increasingly difficult enemies, in a small, misty area--with no Checkpoints. And when we say 'increasingly difficult,' we mean 'this level is nearly impossible to beat.' If you find yourself having an inordinate amount of trouble in Saruman's Palantir, you can ease your way through it by getting yourself some extra uses of your special ability. Use the ability right off the bat, and then let it recharge by letting the last enemy on each wave of attackers live and chase you around (it's especially easy with archers, as they'll just stand where they are and keep launching arrows. Hide behind the cover at the center of the level, and go get yourself a drink.). Good luck--you will need it!
Palantir of Sauron
Available Heroes: All
The Palantir of Sauron level will unlock after you have raised one Hero from each Path to level ten or higher. Similar in form and feel to the first Palantir level, you'll face twenty waves of Sauron's minions. As with Saruman's Palantir, hold off on dispatching the last member of each wave to maximize your special ability.
Cheats
After beating the game, several cheat codes are unlocked.
PC
Start a mission, then press ESC to pause the game. Hold LCtrl, LShift, and LAlt, and input any of the following codes on the numeric keypad:
- Restore Health - 7755
- Perfect Mode - 5964
- Always Devastating - 6869
- All Upgrades - 8967
- Infinite Missiles - 7795
- Invulnerable - 7578
- Targeting Indicator Mode - 9587
- Gandalf's Level 4 Attacks/Abilities - 6874
- Aragorn's Level 4 Attacks/Abilities -- 8769
GameCube
Start a mission, then pause the game by pressing START. Hold the L and R buttons, and input any of the following:
- All Upgrades - D-pad up, down, Y, B
- Targeting Indicator Mode - D-pad down, X, D-pad up, B
- Restore Health - B, B, X, X
- Perfect Mode - X, D-pad down, Y, A
- Invulnerable - B, X, B, D-pad up
- Infinite Missiles - B, B, D-pad down, X
- Always Devastating - Y, D-pad up, Y, D-pad down
PlayStation 2
Start a mission, pause with START, then hold L1, L2, R1, and R2 all at once, and enter any of the following:
- All Upgrades - Down, Up, Triangle, Square
- Targeting Indicator Mode - Up, Circle, Down, Square
- Restore Health - Square, Square, Circle, Circle
- Perfect Mode - Circle, Up, Triangle, Down
- Invulnerable - Square, Circle, Square, Down
- Infinite Missiles - Square, Square, Up, Circle
- Always Devastating - Triangle, Down, Triangle, Up
Xbox
Start a mission, pause with START, hold L and R, and input any of the following:
- All Upgrades - Up, Down, Y, X
- Targeting Indicator Mode - Down, B, Up, X
- Restore Health - X, X, B, B
- Perfect Mode - B, Down, Y, A
- Invulnerable - X, B, X, Up
- Infinite Missiles - X, X, Down, B
- Always Devastating - Y, Up, Y, Down
Got a news tip or want to contact us directly? Email news@gamespot.com
Join the conversation