The Elder Scrolls V Skyrim Walkthrough
Stop right there criminal scum. Our The Elders Scrolls V Skyrim Walkthrough provides strategies for the main quest, crafting tips, and secrets about guilds.

- Storyline Walkthrough: How to complete the main quest and powers you'll gain
- Guild Walkthrough: A walkthrough for the Companions, Dark Brotherhood, and other guilds
- Daedric Walkthrough: Complete objectives for Daedric Princes for special gear
- Crafting: Learn about potions, forging, and magical enchantments
- Xbox 360 Achievements: Boost your Gamerscore with a huge list of Achievements
- PlayStation 3 Trophies: Gain new Trophies for your collection
What's New:
- February 13 2011: It's been some time but we are going back and checking out the Thieves Guild.
- February 10 2011: Xbox 360 Achievements and PlayStation 3 Trophies have been added to the guide.
- November 21 2011: Version 1.2. More Daedric quests and crafting tips.
- November 15 2011: Version 1.1. We've updated the first few quests about the Civil War in Skyrim, Companions, Dark Brotherhood, Mage's College, and Daedric Gods.
- November 11 2011: Version 1.0 of the The Elder Scrolls V Skyrim Walkthrough is here. We are starting our walkthrough with the main storyline begging to end, but will continue to update with all major guilds and the war in Skyrim. Check back later for more info.
Unbound
Marvel Rivals - Official Loki Character Reveal Trailer | The King of Yggsgard Remnant 2 - The Forgotten Kingdom | DLC Launch Trailer Stellar Blade - Official "The Journey: Part 2" Behind The Scenes Trailer | PS5 Games Fortnite Festival - Official Billie Eilish Cinematic Season 3 Trailer Dead by Daylight | Tome 19: Splendor | Reveal Trailer Starship Troopers: Extermination - Official "The New Vanguard" Update 0.7.0 Trailer 2XKO - Official Illaoi Champion Gameplay Reveal Trailer Destiny 2: The Final Shape | Journey into The Traveler Trailer Solo Leveling: Arise - Character Gameplay Teaser #15: Seo Jiwoo Genshin Impact - Character Demo - "Arlecchino: Lullaby" Goddess Of Victory: Nikke | Last Kingdom Full Animated Cinematic Trailer Metaphor: ReFantazio The King’s Trial Trailer
Please enter your date of birth to view this video
By clicking 'enter', you agree to GameSpot's
Terms of Use and
Privacy Policy
First you'll need to make a character. What kind of hero do you want? Each race has different base skills and a special power, but with enough hard work you can master most anything.
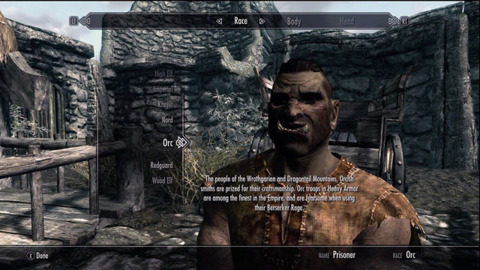
Redguards, Nords, and Orcs have an advantage in close range combat. Redguards specialize in one-handed, Nords Two-handed, and Orcs in Heavy Armor. There are rogue type races: Argonians have lockpicking, Khajiit sneaking and Wood Elf Archery. For slight magical advantages Imperials have Restoration, High Elves have Illusion, Half Elves Conjuration, and Dark Elves Destruction.
We picked a hearty Orc melee-caster and while we mainly used close range combat, we mixed up some other skills that will hopefully assist any build.
Marvel Rivals - Official Loki Character Reveal Trailer | The King of Yggsgard Remnant 2 - The Forgotten Kingdom | DLC Launch Trailer Stellar Blade - Official "The Journey: Part 2" Behind The Scenes Trailer | PS5 Games Fortnite Festival - Official Billie Eilish Cinematic Season 3 Trailer Dead by Daylight | Tome 19: Splendor | Reveal Trailer Starship Troopers: Extermination - Official "The New Vanguard" Update 0.7.0 Trailer 2XKO - Official Illaoi Champion Gameplay Reveal Trailer Destiny 2: The Final Shape | Journey into The Traveler Trailer Solo Leveling: Arise - Character Gameplay Teaser #15: Seo Jiwoo Genshin Impact - Character Demo - "Arlecchino: Lullaby" Goddess Of Victory: Nikke | Last Kingdom Full Animated Cinematic Trailer Metaphor: ReFantazio The King’s Trial Trailer
Please enter your date of birth to view this video
By clicking 'enter', you agree to GameSpot's
Terms of Use and
Privacy Policy
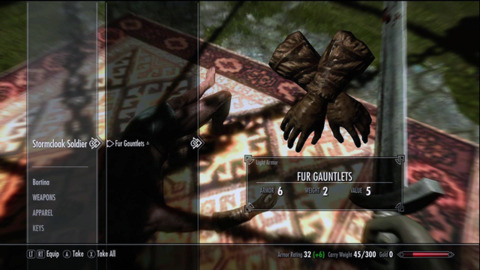
When you first gain free control of your movement you'll just be following NPCs: first a Stormcloak soldier that will teach you the basics of running and jumping. Second will be Hadvar who will brief you on the basics of combat. The latter will release your prisoner bindings and take you into a small armory. Search both chests in the room to uncover some Imperial Light Armor and a one-handed Iron Sword. Don't worry if you want to specialize in magic or two-handed weapons. You'll get those soon enough; in fact if you go into your magic menu you'll always have simple flame and healing spells you can wield.

After Hadvar opens the gate you'll fight against two rather simple Stormcloak soldiers. Strategy is rather minimal here. Block their attacks and countering with a normal blow will work fine. If they do guard use a power attack to stagger them. Take out the one with a two-handed sword first and stronger damage dealers always pose a greater threat. If you are going to play as a two handed-character it's a good idea to loot his sword.
Keep following Hadvar and he'll lead you to another encounter two more easy Stormcloak soldiers. After killing these enemies, be sure to grab any spare potions from the nearby barrels. When ready, move on and you'll come to a battle between the Legion Torturers and two more Stormcloak Soldiers. In most cases your allies will deal with the enemies before you get a chance to attack. You'll want to read the books laying around the tables and many published novels will raise your skill points. Additionally search the nearby sack to gain a few lockpicks.

If you're going the mage or rouge build you'll want to open up the cage on the left. The lockpicking mechanics are the same as in Fallout 3: You'll need to adjust the lockpick into a certain position before moving the lock with your dagger. If you get some resistance (and vibrations on consoles) stop turning your knife and readjust the lockpick's placement. Inside the cage are a few gold coins, a poition of Minor Magika, a Tome of Sparks (Destruction) and a dead mage. Loot his corpse if you want to look the part of a caster.
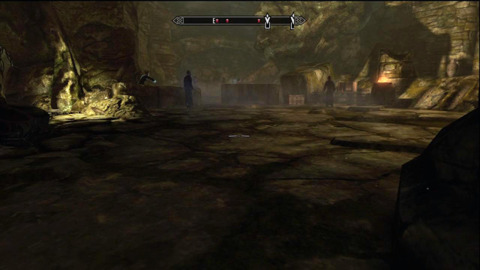
Even though there aren't any other actual good treasure behind any of the other cells and caged doors, if you want to boost your lockpick skill take the time to unlock any cage you find. Either way talk to the younger Torturer Assistant and he will follow you shortly as well. Despite how intimidating he looks, this fellow will die rather quickly, so not need to get attached. Head down the next hall for a fight with four more Stormcloaks. Two are below in the water, while the other two are above on the bridges. Split up from where ever Hadvar goes and clear out the enemies. You might notice some multicolored goo on the floor. This is highly flamable, so if you use your flame magic you can start a blaze. Be careful with this strategy, as this fire can harm anyone including allies.
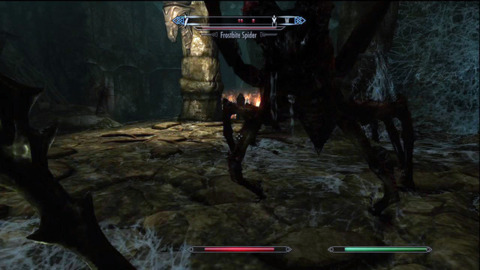
Once the Stormcloaks are dead, continue down the path to encounter three small and two large Frostbite Spiders. They can easily poison you, so it's a good idea to have your healing spell or some healing potions handy. Another good alterative is to let Hadvar go in sword swinging. This will give you enough leeway to attack the enemies from behind.

Continue to the left and you'll find a sleeping bear. Hadvar will now hand you a bow and a few amount of arrows. You should now crouch into a sneaking position to keep from being detected. It's up to you if you want to sneak by or snipe down the bear. If you go for the latter, let Hadvar get into melee range and tank the bear. With his health and strong sword the bear isn't much of a problem.
Continue further and you'll find the exit. If you were unhappy with your racial choice or ability scores you'll have one last tiem to change your character and appearance. Congratulations on escape the Vault…er Helgen.
Before the Storm
Marvel Rivals - Official Loki Character Reveal Trailer | The King of Yggsgard Remnant 2 - The Forgotten Kingdom | DLC Launch Trailer Stellar Blade - Official "The Journey: Part 2" Behind The Scenes Trailer | PS5 Games Fortnite Festival - Official Billie Eilish Cinematic Season 3 Trailer Dead by Daylight | Tome 19: Splendor | Reveal Trailer Starship Troopers: Extermination - Official "The New Vanguard" Update 0.7.0 Trailer 2XKO - Official Illaoi Champion Gameplay Reveal Trailer Destiny 2: The Final Shape | Journey into The Traveler Trailer Solo Leveling: Arise - Character Gameplay Teaser #15: Seo Jiwoo Genshin Impact - Character Demo - "Arlecchino: Lullaby" Goddess Of Victory: Nikke | Last Kingdom Full Animated Cinematic Trailer Metaphor: ReFantazio The King’s Trial Trailer
Please enter your date of birth to view this video
By clicking 'enter', you agree to GameSpot's
Terms of Use and
Privacy Policy
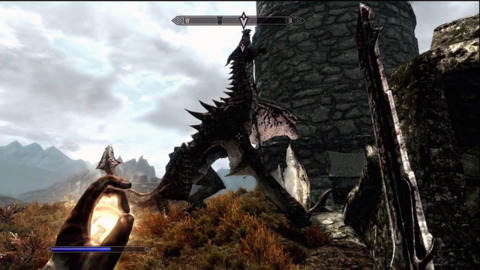
Hadvar will suggest traveling to Riverwood and meeting his uncle Alvor. If you're going to continue the storyline, this will be your next destination. However, if you really want you can simply leave this for later and explore the rest of Skyrim. Going to Riverwood is a good idea either way as you can learn more about the Legion and gain your first companion. Head down the hill and follow the path to eventually get to the small town.
The encounters on the way to Riverwood are random. You might see nothing or may have to fight your way there. For the most part you'll only face basic wolves. For a melee character they shouldn't be much a problem. Still, if you want you can run back to Hadvar and have him deal with whatever enemies you come across. Still, it's much better to deal with enemies yourself as it will grant quick skill ups in both your offensive and defensive abilities.
In Riverwood, Alvor's house will be the first on the left. Talk to the smith as he sits down for dinner or works his forge. Ask for supplies you can take and you can further inform him about what happened in Helgan. Pick this dialogue option to learn about Whiterun and Jarl Balgruuf. Whiel the storyline tells you to go here. It's worth it to further explore Riverwood to gain a follower and take care of a later task.
Marvel Rivals - Official Loki Character Reveal Trailer | The King of Yggsgard Remnant 2 - The Forgotten Kingdom | DLC Launch Trailer Stellar Blade - Official "The Journey: Part 2" Behind The Scenes Trailer | PS5 Games Fortnite Festival - Official Billie Eilish Cinematic Season 3 Trailer Dead by Daylight | Tome 19: Splendor | Reveal Trailer Starship Troopers: Extermination - Official "The New Vanguard" Update 0.7.0 Trailer 2XKO - Official Illaoi Champion Gameplay Reveal Trailer Destiny 2: The Final Shape | Journey into The Traveler Trailer Solo Leveling: Arise - Character Gameplay Teaser #15: Seo Jiwoo Genshin Impact - Character Demo - "Arlecchino: Lullaby" Goddess Of Victory: Nikke | Last Kingdom Full Animated Cinematic Trailer Metaphor: ReFantazio The King’s Trial Trailer
Please enter your date of birth to view this video
By clicking 'enter', you agree to GameSpot's
Terms of Use and
Privacy Policy
You can choose to recruit either Sven or Faendal. Either option is fine as they are both mainly archers with a daggers to back them up. We went with Faendal, but Sven works just as well; additionally Faendal can improve your archery skills if you pay him. They are both pining for the affections of Camilla Valerius and will each ask you to deliver a fake nasty letter to Camilla. Take the letter to Camilla who will either be walking around town or inside her brother's shop. Give the letter and lie about who penned the vulgar note. Return back to the real author and they will join you as a follower. Don't worry about outfitting them just yet, as you probably don't have enough equipment to use yourself. Besides, you'll be gaining plenty of armor very soon.

Since you may have just been in Valerius's shop, talk to the elder brother Lucan to learn about a missing golden claw. You can leave this job for later, but it's worth it to complete it now. Lucan will point you towards Bleak Falls Barrow which will now be placed on your map. If you want, talk to Camilla again and she will lead you out of town and point you towards the barrows. Head out of Riverwood and head out to recover the Golden Claw.
The Golden Claw
Marvel Rivals - Official Loki Character Reveal Trailer | The King of Yggsgard Remnant 2 - The Forgotten Kingdom | DLC Launch Trailer Stellar Blade - Official "The Journey: Part 2" Behind The Scenes Trailer | PS5 Games Fortnite Festival - Official Billie Eilish Cinematic Season 3 Trailer Dead by Daylight | Tome 19: Splendor | Reveal Trailer Starship Troopers: Extermination - Official "The New Vanguard" Update 0.7.0 Trailer 2XKO - Official Illaoi Champion Gameplay Reveal Trailer Destiny 2: The Final Shape | Journey into The Traveler Trailer Solo Leveling: Arise - Character Gameplay Teaser #15: Seo Jiwoo Genshin Impact - Character Demo - "Arlecchino: Lullaby" Goddess Of Victory: Nikke | Last Kingdom Full Animated Cinematic Trailer Metaphor: ReFantazio The King’s Trial Trailer
Please enter your date of birth to view this video
By clicking 'enter', you agree to GameSpot's
Terms of Use and
Privacy Policy
Head up the mountain to the north to gain access to Bleak Falls Barrow. The encounters along the way are random, but you can expect to fight a bandit or two, especially ones that could be hiding in the towers up towards the Barrow. At this point it's a good idea to have your healing spell in your left hand or at least ready to switch to by favoriting it. And of course Faendal sniping your enemies will help loads early on. It takes a lot of a follower to outright die, so feel free to let your sidekick take all the punishment. We were lucky enough to gain a suit of Iron Heavy Armor and a new greatsword (Which we handed to Faendal); even with some randomness it's likely that you'll gain the same equipment to outfit yourself and your comrade.
Eventually you'll reach Bleak Falls Barrow proper. Here will be three more bandits, likely with two-handed axes or ranged bows. If you haven't used on yet it's a good idea to whip out your shield. Shields are great for absorbing damage and staggering enemies. A successful block will stagger an normal attack. However if the enemy uses a power attack it will break your guards. This also holds true for when you fight a defending enemy. You can also block with a two-handed weapon or while dual-wielding, but isn't nearly effective as a shield.

You'll likely still be level 1, so most of the enemies will still be weak. A few swings of your weapon and shots from your follower will be enough to clear most encounters inside and around the Barrow. With that said, after clearing out the three enemies, enter the door on the right to enter inside the Barrow. There will be two bandits within the first room. You have enough time to sneak and get in a free hit or two. However, unless you made a Khajiit or already trained before entering your sneaking may be too low to get by these guards.
The loot on the bandits isn't anything great, but the nearby chest has some goodies inside. It has a novice lock on it, but you should hopefully still have plenty of lockpicks from Helgan to easily bust it open. Inside the chest is some gold, souls gems, and a Scroll of Hysteria. We personally never use scrolls as they are one time use. But what's great is you can sell scrolls to other casters for a nice sum of gold.
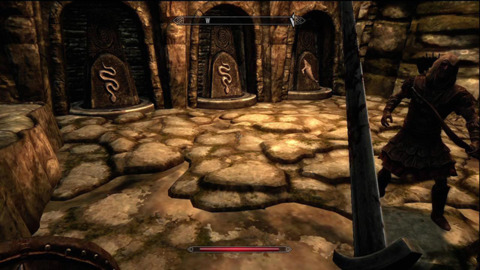
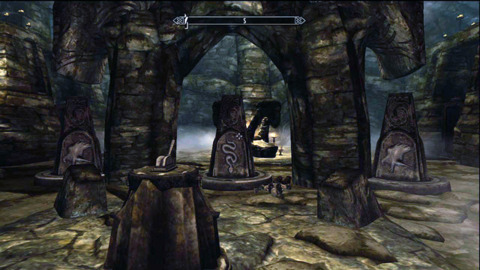
Continue down the path and you may notice various urns and pots sitting around. Most of these are empty, so however your crosshairs over them before needlessly interacting with them. There are a few poitions sitting around the bookshelves, so be sure to grab them. Once you've looted anythign you need, head down the hall and Kill the Bandit Outlaw. There will be a puzzle ahead and the answer is on the pillars overhead. Or rather was up there, the middle symbol has collapsed on the ground. However, since it's the only one dislodged it's still easy to figure out. Mover over to the pillars on the left and rotate them so that from left to right they show a snake, a snake, and last a fish.
This will open a gate leading to the basement. As you enter through there will be more petty soul gems and chest to loot. However, expect to be interrupted as Skeevers will emerge from below. These are large rats and are easily killed. For the real battle head down the spiral stair case and slash through the webbing on the left. This will reveal the Wounded Frostbite Spider. It's a large version of spiders you might have already fought. Its poison is even more deadly, making it very important to have a healing spell on the ready.

The easiest way to heal up is to simply run back out the entrance as the spider is too big to follow you. Faendal or whatever companion you have will also make this battle rather simple. After the spider is dead, move left to find Arvel stuck in some webs. Free from the webbing and continue to slice him to bits. He's the one with the Golden Claw and would simply flee or attack you than hand over the treasure. It simply saves time to bash his skull in and loot the warm corpse. Continue down the path and you'll face undead Draugrs. These enemies are susceptible to fire if you feel like switching to Destruction magic, but aren't that hard anyway.
You should be careful about traps in the area, there is a spike gate just ahead that will spring is you step on the pressure point. Traps like these will do serious damage if they hit you in the heat of combat. If you've already killed the enemy, you can likely heal the damage quickly before moving on. You'll face three more Draugrs. They have basic armors and weapons so there still isn't much to worry about. Their Ancient Nord weapons aren't that great so there isn't much reason to loot them unless you simply want some different gear. Up ahead will be a swinging set of blades. Remember back to Helgan where you sprinted out? If you haven't been using sprinting, now is a good time to start again. The sprint is fast enough to get by traps like that.
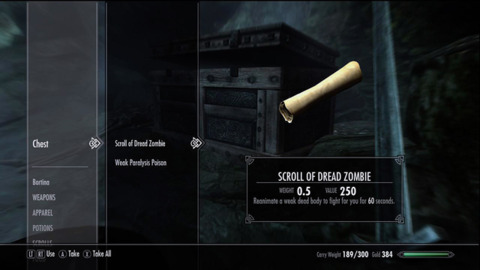
Head down the next few halls and slice through three more Draugr. At the end of this hall will be a chest that will possibly contain more stamina potions and arrows. Pull the chain near the chest and it will open the gate headed towards outside. There will be two more chests: one to the right as you exit that might have another sellable scroll and possibly leather armor. Kill another Draugr and head down the icy path on the east to reach the second chest. This chest has a novice lock and may contain a Scroll of Dread Zombie and a Weak Paralysis Poison. Once done looting, head back up the ice spiral and into the next cave to the north.
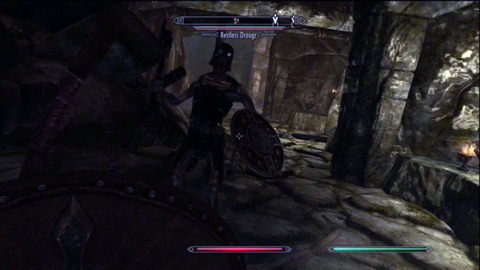
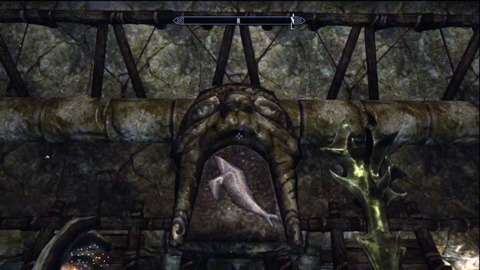
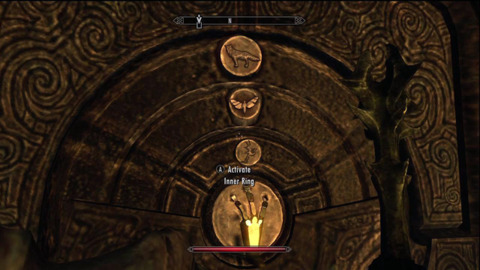
Here will be a Restless Draugr, a stronger version of the undead you've faced so far. It's a good idea to have both a shield and healing spell on the ready. The Restless has way more health and his two-handed sword can do some heavy damage. Block his blows as best as you can and heal up when you take too much damage. Your follower may be the main source of damage from this fight as you keep yourself healthy. Through the next door will be two more Draugr: one melee one at the bottom floor and an archer above. This are the normal Draugr, so they are fairly weak. Climb up the stairs on the right and loop around left until you come to the bridge. Soon you'll come to a door with a clawshaped keyhole and several rings. Look at the claw in your inventory and it will show you the code: Bear, Butterfly, Owl. Set up this combo and place the claw in to unlock the door.

Move down the path and you'll arrive at a tomb. On the wall will be a flashing dragon word that will teach the first shout: Unrelenting Force. You most likely can't use this yet. Though if you took the time to kill a dragon you can learn and equip the shout. Learning the word of power for the shout will also revive a Draugr. This enemy is even stronger than the Restless you fought earlier. His attacks are strong enough that you might want to switch to a ranged spell or a bow. If your follower has a brutal two handed weapon and some armor they might be able to take the boss a little better than yourself. As long as you have some distance and make use of your shield you can resist the brunt of the damage and easily counter.
Loot the Overlord to gain the Dragonstone (Which was the real prize here) and you can also take his Cold Ancient Nord Battle Axe which can deal extra frost damage to health and stamina. Loot the area for a petty soul gem, Weak Frenzy Poison, a Tome of Conjure Familiar and up to eighty gold. Head up the stairs on the left to unlock the exit. Stop along the way to loot another chest with a Garnet, extra gold and lockpicks. Now you're free to return to Skyrim's overworld and can fast travel to River wood.
Deliver the Golden Claw to Lucan and receive your reward. With the Dragonstone in hand, you'll be more then ready for Whiterun.
Dragon Rising
Marvel Rivals - Official Loki Character Reveal Trailer | The King of Yggsgard Remnant 2 - The Forgotten Kingdom | DLC Launch Trailer Stellar Blade - Official "The Journey: Part 2" Behind The Scenes Trailer | PS5 Games Fortnite Festival - Official Billie Eilish Cinematic Season 3 Trailer Dead by Daylight | Tome 19: Splendor | Reveal Trailer Starship Troopers: Extermination - Official "The New Vanguard" Update 0.7.0 Trailer 2XKO - Official Illaoi Champion Gameplay Reveal Trailer Destiny 2: The Final Shape | Journey into The Traveler Trailer Solo Leveling: Arise - Character Gameplay Teaser #15: Seo Jiwoo Genshin Impact - Character Demo - "Arlecchino: Lullaby" Goddess Of Victory: Nikke | Last Kingdom Full Animated Cinematic Trailer Metaphor: ReFantazio The King’s Trial Trailer
Please enter your date of birth to view this video
By clicking 'enter', you agree to GameSpot's
Terms of Use and
Privacy Policy
Travel to Whiterun, which is northwest of Riverwood. Apparently the guards are charging for entrance, so you can either pay, talk your way in, or can state you're there to see the Jarl. The middle options are good if you want to practice your speech skills. Once inside, head to the main keep, Dragonreach. Talk to the Jarl and state what happened in Helgan. He will instruct you to meet with the court wizard Farengar. The court wizard will ask you to gain the Dragonstone from Bleak Falls Barrow. What luck, we already did that quest (and hope you did as well, but if not you can check for details in the Golden Claw section). Give the Dragonstone to Farengar and you'll get word that a dragon is attacking the Western Watch Tower.
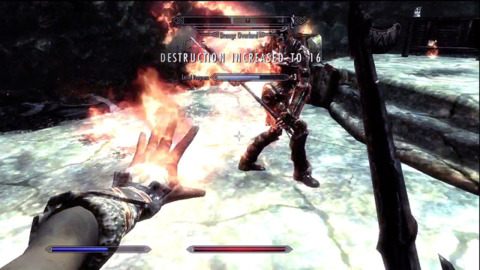
Head outside and follow Irileth towards the tower. This is your first dragon fight and at this level it can be tough. You have enough aid from the Whiterun guards and any follower that this isn't flat out impossible. You'll notice that the dragon mainly flies, so that means it's time to resort to magic and archery. This is much easier to do if you get to the top of the tower and have a better vantage point. The amount of arrows pelting the dragon will eventually ground it. At about the 50% health mark it will stop flying, taking this back to a ground battle. If you're hearty melee character like our Orc, you can go in close and bash it. It's easier to attack from behind as it will have to turn or move about if it wants to use it's deadly bite. You aren't completely safe while attacking it's rear though. The dragon can actively flail its tail as it bites one of your allies. Always be ready to switch to a healing spell and run away if you are taking too much damage. The Whiterun guards will help keep the dragon distracted long enough.
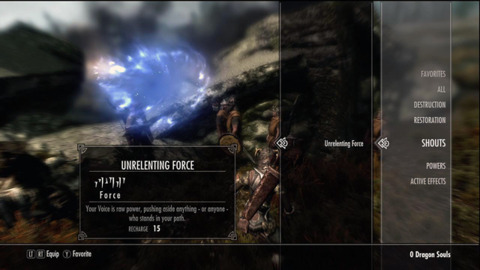
Soon enough the dragon will meet its end and you can absorb its essence. You can combine the word of power from the Barrows and the dragon soul to fully learn Unrelenting Force. Show off your shout to the Whiterun guards and they will declare you Dragon born. Return to Jarl Balgruuf and report what happened. You'll hear a call from the Greybeards, meaning it's time to head to High Hrothgar. Before leaving, you can also recruit Lydia as a new follower, though you'll need to dump anyone you're already partnered with.
The Way of the Voice
Marvel Rivals - Official Loki Character Reveal Trailer | The King of Yggsgard Remnant 2 - The Forgotten Kingdom | DLC Launch Trailer Stellar Blade - Official "The Journey: Part 2" Behind The Scenes Trailer | PS5 Games Fortnite Festival - Official Billie Eilish Cinematic Season 3 Trailer Dead by Daylight | Tome 19: Splendor | Reveal Trailer Starship Troopers: Extermination - Official "The New Vanguard" Update 0.7.0 Trailer 2XKO - Official Illaoi Champion Gameplay Reveal Trailer Destiny 2: The Final Shape | Journey into The Traveler Trailer Solo Leveling: Arise - Character Gameplay Teaser #15: Seo Jiwoo Genshin Impact - Character Demo - "Arlecchino: Lullaby" Goddess Of Victory: Nikke | Last Kingdom Full Animated Cinematic Trailer Metaphor: ReFantazio The King’s Trial Trailer
Please enter your date of birth to view this video
By clicking 'enter', you agree to GameSpot's
Terms of Use and
Privacy Policy
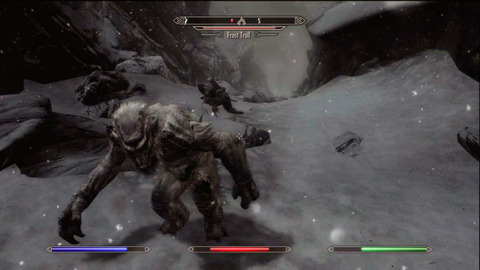
High Hrothgar is at the top of the huge mountain to the south, just east of Riverwood. This rock is massive, and most of the terrain is too inhospitable to climb. However, there is an easy clear path on the outskirts of Ivarstead. This small village is on the south eastern side of the mountain. You'll need to come here if you want reach the top of High Hrothgar. The pilgrimage up these steps in long and many random encounters can occur. If your lucky only wolves may attack. In some cases you might face a stronger tiger, which is still manageable with your follower. The worst situation is if you face a random Frost Troll. This enemy is very powerful at this point and has fast regenerating health. Fire is your best option here, but that's still being generous. If your level is too low, you can drag the troll all the way back to Ivarstead and let the guards kill it for you.
The Frost Trolls don't scale with you, so if you come back at a higher level they will be much easier. Overall their AI is really clumsy and you can get them stuck on walls or have them simply leap off the cliff as they pursue you. Either way, once clearing a path through whatever enemies you encounter you'll be at the top of High Hrothgar. Inside the sacks at the base of the stairs are mainly vegetables and a few potions, including cure poison. Regardless if you pick up the offers, enter inside of High Hrothgar.

Inside the Greybeards will help you master your Unrelenting Force. Listen to the instructions they give and follow suit. You'll mainly be pushing around spirits that the Grebeards summon to the center of the room. Next the Greybeards will take you outside and teach you the Whirlwind Shout. This is a quick dash, even faster than your sprint. Use it to get passed traps and other obstacles. Talk to the Greybeards again and they will instruct you to recover the Horn of Jurgen Windcaller. It is located in Ustengrav, far north near Solitude.
The Horn of Jurgen Windcaller
Marvel Rivals - Official Loki Character Reveal Trailer | The King of Yggsgard Remnant 2 - The Forgotten Kingdom | DLC Launch Trailer Stellar Blade - Official "The Journey: Part 2" Behind The Scenes Trailer | PS5 Games Fortnite Festival - Official Billie Eilish Cinematic Season 3 Trailer Dead by Daylight | Tome 19: Splendor | Reveal Trailer Starship Troopers: Extermination - Official "The New Vanguard" Update 0.7.0 Trailer 2XKO - Official Illaoi Champion Gameplay Reveal Trailer Destiny 2: The Final Shape | Journey into The Traveler Trailer Solo Leveling: Arise - Character Gameplay Teaser #15: Seo Jiwoo Genshin Impact - Character Demo - "Arlecchino: Lullaby" Goddess Of Victory: Nikke | Last Kingdom Full Animated Cinematic Trailer Metaphor: ReFantazio The King’s Trial Trailer
Please enter your date of birth to view this video
By clicking 'enter', you agree to GameSpot's
Terms of Use and
Privacy Policy
If you've only walked so far, it's a long trek northwest to reach Jurgen's tomb in Ustengrav. You can possible find a wagon and hitch a ride to Solitude, but even if you do it might cost you a bit of gold. Either way you'll eventually make it to the tomb by traveling the wilderness or paved roads. The dead bandit here might some extra lockpicks that can come in handy later. The barrels mostly just have vegetables and flowers, mainly only good if you want more crafting/cooking materials. For now, just enter Ustengrav.
Inside are three Necromancers and two bandits. The mages only have robes, so they are easily to plow with melee attacks. However, they have good range with their spells, so you'll need to use sprinting or whirlwind sprint to get in close. There ice spells are probably the worst and they can slow down your movement, turning a sprint into a crawl. Be on the ready to quickly heal while your follower distracts the necromancers. The bandits aren't anything new, but can be a nuisance while you concentrate on the casters. If you want sneak a little and try to get a jump on at least one enemy.
Once the baddies are cleared, head down the tunnel on the left to enter a three way battle between more mages, undead Draugr, and yourself. The Draugr are a little tougher than the casters, so beat on them while the mages cause distractions. The undead even have a few casters of their own, making it very important to kill any that start to use ice or shock spells.
Continue down the path and sneak into the nooks on the left. Inside the chests, urns, and desk are healing potions, stamina potions, flawless garnets, Aversion to Frost, and a hide shield of Dwindling Shock-this can block up to 40% of shock damage. Once gaining the treasure, continue down the hall to fight another three undead: one ice caster and two more melee enemies. Sneaking can certainly help if it's high enough, but if you do get spotted go for any magic caster first. With them dead, head up the steps northeast and arrive on the second floor.
There will be a chest on the right containing more potions. Continue to the left across the bridge and descend into the depths of Ustengrav. The depths are much more open than the above floor, but there are still tight corridors. There will be a fire floor trap ahead, which can be crossed with use of sprinting or whirlwind sprint. Your follower isn't nearly as fast, so expect them to take some damage. Another few Draugrs will stand in your way, but it's mostly more of the same. Kill them and descend down to lower floor. Explore the small rooms around here to collect even more healing potions. Now move south and you'll find two leavers that will open a gate leading to a chest. Before you can collect the loot though, more enemies will revive.
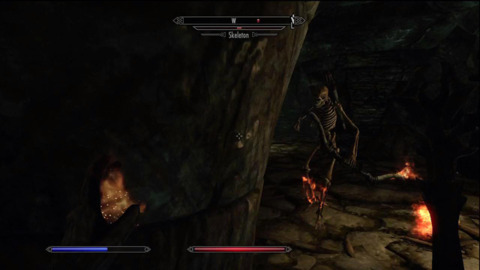
Kill the undead and return back to the gate. Inside you can grab a Dwarven bow and and Arcane Enchanter that you can use to boost or degrade various weapons you've collected. Once done in here, head west and then north to reach another open area. There are several undead Skeleton archers here, meaning you should switch to a bow or spell. If you have some kind of turn undead spell or weapon you can switch to those as well. If you want to deal with the enemies directly, take the stairs on the far west side. You can also use this to drop down on the enemies below. Once the enemies are dead, head across the bridge to the east.
There will be three runes on the ground here. Before using these, take the stairs on right and kill the skeleton archer above. You can also grab a few potions and jewels inside the urns around here. Head back down and touch all of the stones and quickly whirlwind sprint through the opened gates. You'll come to another fire trap floor, but this time it also contains frostbite spiders. Because of this your normal dash is more practical, allowing you stop and kill the spiders. Still, try to move as much as possible to avoid being scorched.
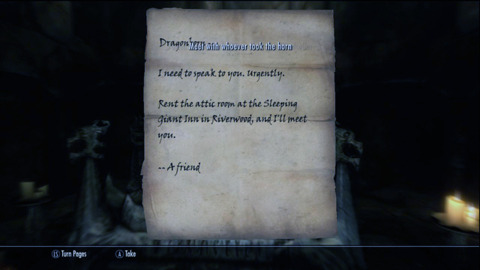
In the next area you'll finally make it to your bounty the Horn of Jurge…hey there is no horn here! There is only a note asking you to rent a room at the Inn in Riverwood. Head through the door on the east to find a staff of familiar, scroll of Mayhem, a steel mace, and plenty of gold. Head out the left to find the exit. Now it's time to get back to Riverwood.
A Blade in the Dark
Marvel Rivals - Official Loki Character Reveal Trailer | The King of Yggsgard Remnant 2 - The Forgotten Kingdom | DLC Launch Trailer Stellar Blade - Official "The Journey: Part 2" Behind The Scenes Trailer | PS5 Games Fortnite Festival - Official Billie Eilish Cinematic Season 3 Trailer Dead by Daylight | Tome 19: Splendor | Reveal Trailer Starship Troopers: Extermination - Official "The New Vanguard" Update 0.7.0 Trailer 2XKO - Official Illaoi Champion Gameplay Reveal Trailer Destiny 2: The Final Shape | Journey into The Traveler Trailer Solo Leveling: Arise - Character Gameplay Teaser #15: Seo Jiwoo Genshin Impact - Character Demo - "Arlecchino: Lullaby" Goddess Of Victory: Nikke | Last Kingdom Full Animated Cinematic Trailer Metaphor: ReFantazio The King’s Trial Trailer
Please enter your date of birth to view this video
By clicking 'enter', you agree to GameSpot's
Terms of Use and
Privacy Policy
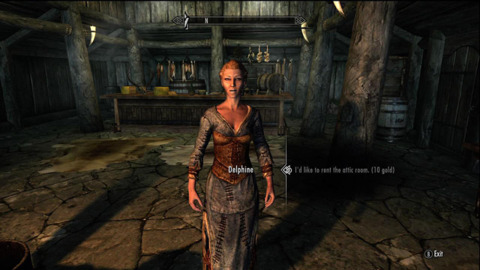
Head to the Sleeping Giant Inn within Riverwood and request to stay in the attic room. Turns out there isn't an attic room, but sleep in the room you get anyway. Delphine will wake you in the morning and inform you of why she left the letter. She also has the Horn of Jurgen Windcaller and will hand it to you. It's now time to track down another dragon, this one is located in town of Kynesgrove in the far east.
This means quite a bit of walking from place in Riverwood. It's good to travel this great distance as the eastern route passed the Valtheim Towers can lead to some great treasure. Along the various riverside shrines, people will leave down pieces of armor. During our pilgrimage to Kynesgrove we recovered a few pieces of Steel Plate armor, great for any warrior or paladin build. Still be careful of random encounters such as saber toothed cats and bears. Your best shield and heavy armor are always a good means of defending yourself during these unexpected fights.
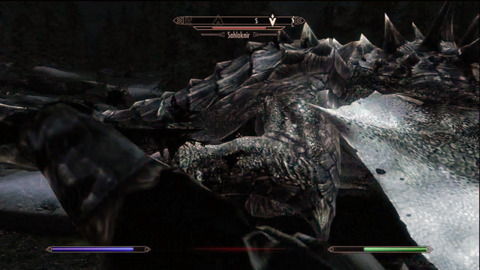
Anyway, you'll reach Kynesgrove and will have to do battle with another dragon Sahloknir. Delphine will be on your side, along with whatever follower you have. This fight is nearly the same as your dragon fight near Whiterun. You might have less help, but Delphine is tough enough to make the fight easy. As before, attack from behind when you can. We also liked making use of whirlwind sprint, to get close to Sahloknir whenever he lands.
Marvel Rivals - Official Loki Character Reveal Trailer | The King of Yggsgard Remnant 2 - The Forgotten Kingdom | DLC Launch Trailer Stellar Blade - Official "The Journey: Part 2" Behind The Scenes Trailer | PS5 Games Fortnite Festival - Official Billie Eilish Cinematic Season 3 Trailer Dead by Daylight | Tome 19: Splendor | Reveal Trailer Starship Troopers: Extermination - Official "The New Vanguard" Update 0.7.0 Trailer 2XKO - Official Illaoi Champion Gameplay Reveal Trailer Destiny 2: The Final Shape | Journey into The Traveler Trailer Solo Leveling: Arise - Character Gameplay Teaser #15: Seo Jiwoo Genshin Impact - Character Demo - "Arlecchino: Lullaby" Goddess Of Victory: Nikke | Last Kingdom Full Animated Cinematic Trailer Metaphor: ReFantazio The King’s Trial Trailer
Please enter your date of birth to view this video
By clicking 'enter', you agree to GameSpot's
Terms of Use and
Privacy Policy
Once the dragon is dead, head back to Riverwood and talk to Delphine. If you fast traveled she might not be back yet as she manually walks the entire way back from Kynesgrove. If she's not there just wait. A whole day should be enough. But if not check your map and see where the quest marker points to get an idea of where Delphine could be. Once talking to the Blade, it's time to head to the Thalmor Embassy in Solitude.
Diplomatic Immunity
Marvel Rivals - Official Loki Character Reveal Trailer | The King of Yggsgard Remnant 2 - The Forgotten Kingdom | DLC Launch Trailer Stellar Blade - Official "The Journey: Part 2" Behind The Scenes Trailer | PS5 Games Fortnite Festival - Official Billie Eilish Cinematic Season 3 Trailer Dead by Daylight | Tome 19: Splendor | Reveal Trailer Starship Troopers: Extermination - Official "The New Vanguard" Update 0.7.0 Trailer 2XKO - Official Illaoi Champion Gameplay Reveal Trailer Destiny 2: The Final Shape | Journey into The Traveler Trailer Solo Leveling: Arise - Character Gameplay Teaser #15: Seo Jiwoo Genshin Impact - Character Demo - "Arlecchino: Lullaby" Goddess Of Victory: Nikke | Last Kingdom Full Animated Cinematic Trailer Metaphor: ReFantazio The King’s Trial Trailer
Please enter your date of birth to view this video
By clicking 'enter', you agree to GameSpot's
Terms of Use and
Privacy Policy
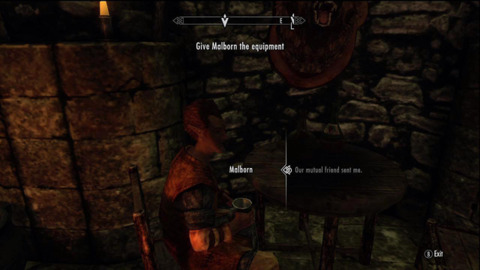
Solitude is far off to the northwest. You can get there pretty easily by fast traveling to Ustengrav. Inside Solitude, head over to the Winking Skeever and talk to Malborn. He'll smuggle in equipment into the party, so give him whatever you normally use. Don't worry, he's not just bluffing and will actually bring the gear back. After meeting with the contact, exit outside and Delphine. Change into the clothes she gives you and talk the wagon to the party.
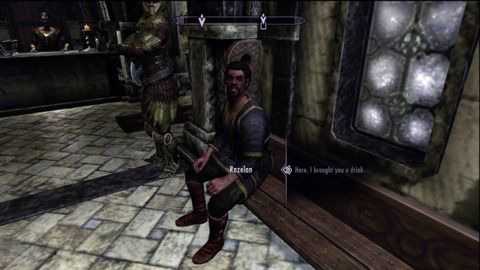
Once the wagon arrives, give the letter to the guard to get inside. After chatting for a second with Ambassador Elenwen, talk to Razelan sitting on the bench. Turns out he needs a drink and you need a distraction. Head over to one of the waitresses and grab a drink. Take this over to Razelan and ask him to make a scene. With the party distracted, move over and speak with Malborn at the bar. He'll lead you passed the kitchen and give you your gear. Hopefully you brought in whatever you normally need. Now it's time to get sneaking…if you have the skills anyway. Any bulky armor will easily give away your position. Your best bet is to wait until the guards are done conversing and move to their own stations.
Just in case, make sure both healing spells and items are readily available. The guards mainly use fire magic, making fire resist a must on your shield or amulet. All of the enemies are elf casters or melee-casters. If you're a spellslinger yourself, be aware that the elves will often switch from fire to shock which can drain your magika quickly. Be sure to have some time of melee weapon backed up in case you can't cast anymore. If you use light armor, steal a set of elven armor from the guards. Despite it looking like plate, elf magic has actually made it rather light weight.
Once getting passed (or more likely killing) the guards, head up to the second floor. The loot in these rooms isn't anything to write home about, so either pinch a few coins or just continue outside through the northern door. There will be two more light armored guards that may use bows or magic swords. There is also a Thalmor Wizard that can switch among ice and lighting. This caster is much worse, so take him out first. Once the enemies are dead, head through the door in the courtyard to enter the inner embassy. You'll have to two more guards, another mage, and some random drunk named Gissur. Due to the sheer number of enemies and their constant magic spam, have quick potions read at all times.
When the area is clear, search the shleves for frostbite venom and potions of haggling. Head into the small room in the northwest and loot the chest. You'll find the quest items Dragon Investigation and Interrogation Chamber Key. You can also pick up Dossiers on Delphine and Ulfric if you want some interesting reading. Head down the stairs on the north and use the key to get inside. There will be another elf guard and down below a lightning caster named Rulindil. The soldier isn't anything new, and even though Rulindil has more health, he can be taken down by rushing him with whirl sprint and hitting him with melee attacks. Switch your shield or other resist items if you need protection from the elements he switches to. When the mage is dead, loot him for some Poison potions, a spell tome of Conjure Flame Atronach, and a ring of minor Destruction among other less helpful items.
Open up the chest to the north to gain the Dossier on Esbern. Now just to the left will be a cage holding Etienne Rarnis. Talk to him and find out what he knows. More guards will appear along with Malborn. It's too late for your alley and he'll quickly be dead. However, the guards have the key to the exit, so get ready to fight two more spellswords. At level 10-11 they won't be much of a problem to a good mace thrashing. Still be sure to have good fire protection and healing spells handy. After getting the ket, return to Etienne and move towards the exit. If you're unlucky you may encounter a Frost Troll in the small cave leading out. There is an enough space to simply run by though, as even at this point a troll's health regeneration is a pain to deal with. Get to the hole ahead and re-meet with Delphine. Your next assignment is located in Riften.
A Cornered Rat
Marvel Rivals - Official Loki Character Reveal Trailer | The King of Yggsgard Remnant 2 - The Forgotten Kingdom | DLC Launch Trailer Stellar Blade - Official "The Journey: Part 2" Behind The Scenes Trailer | PS5 Games Fortnite Festival - Official Billie Eilish Cinematic Season 3 Trailer Dead by Daylight | Tome 19: Splendor | Reveal Trailer Starship Troopers: Extermination - Official "The New Vanguard" Update 0.7.0 Trailer 2XKO - Official Illaoi Champion Gameplay Reveal Trailer Destiny 2: The Final Shape | Journey into The Traveler Trailer Solo Leveling: Arise - Character Gameplay Teaser #15: Seo Jiwoo Genshin Impact - Character Demo - "Arlecchino: Lullaby" Goddess Of Victory: Nikke | Last Kingdom Full Animated Cinematic Trailer Metaphor: ReFantazio The King’s Trial Trailer
Please enter your date of birth to view this video
By clicking 'enter', you agree to GameSpot's
Terms of Use and
Privacy Policy
Riften is in the far southeast. Due to its great distance it's probably best to find a wagon and pay the fee to get there quickly. Your goal is to find Esbern, but you only have one lead: a man named Brynjolf. This character can be found outside in the market during the day, and most likely in the tavern at night. Speak to him and he'll inform you about the thieves guild hideout under Riften. It seems the guild is protecting Esbern for now and you'll need to travel to the underground Ratway Warrens.
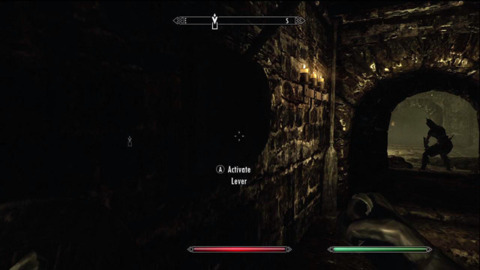
Inside, expect to be attacked by two named brutes Hewnon Black-Skeever and Drahff. One uses an axe and shield while other is an archer. Despite being named NPCs they die quickly like any other thug. They may also have a bit more gold and jewels to loot than normal bandits. There are alternate routes, but as they all require very high lock picking, from here head southwest and you'll locate a booby trapped door. Stand back a few inches and open the door to avoid being stabbed. Once through the door continue south and fight through a few weak Skeever and Gian the Fist; as his name implies he's unarmed so not much of a problem. After the fight there will be an alchemy lab to the east if you want to mix some more potions, otherwise keep following the objective marker southeast. Kill the weak Lowlife in the next room and head north to lower the exit draw bridge--you won't be taking this escape just yet, but it will save time later on. Backtrack east and you'll come into the Ragged Flagon.
For future reference, the Ragged Flagon is the thieves guild hideout and we will cover it in later sections. For now head over to the Flagon bar and talk to Vekel the Man. Ask him about Esbern but he isn't very willing. If your speech is high enough you can persuade him, but there is also the option of paying for info or brawling fist-vs-fist. If you've been going one handed brawling Vekel is the easiest and cheapest option. After the fight head east into the deeper Ratway Warrens.

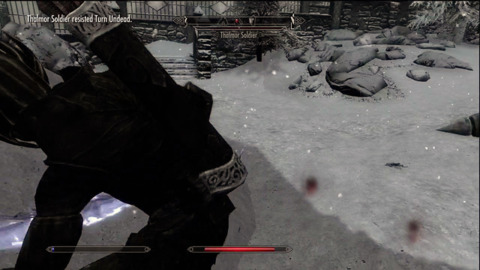
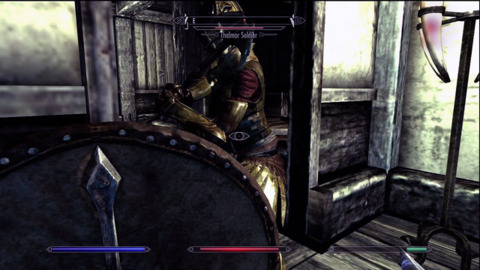
Get ready to face a lighting Thalmor Wizard, and two Thalmor Soldiers. They fight exactly like the ones you encountered in Solitude, so use the same tactics. However, it also helps to make sure you follower has a good bow. With this you can drop down below and pummel the soldiers while your follower snipes from the higher ground; alternately you can be the sniper, but the follower's AI is poor enough that they probablly won't drop down to the lower floor.
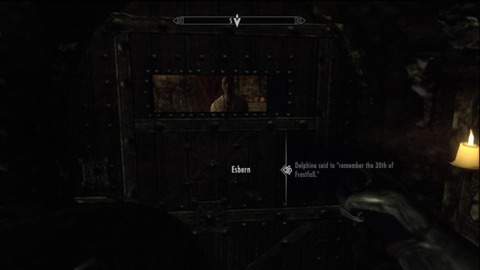
Once the enemies are dead, head south and you'll come to two chests: one with gold and lockpicks and the other closed tight with an apprentice level lock. We only found gold inside, but it still might be worth opening to train up your lockpicking skills. Return back to the main dungeon room and journey south to the next floor of the warrens. Pick the next lock on the left to get into the main holding cells. You may be attacked by either Hefid the Deaf or Knjakr if you get to close to them, but they are too poorly equipped to be a threat. On the the hand Salvianus is completely passive: you can outright steal his belongs and he won't even try and defend himself. But you're not here to mess with the other patrons. Head up to the top room and speak with Esbern. Mention Delphine and quote her about "remember the 30th of Frostfall". Once you say you're Dragonborn, Esbern will join your side.
Start your exit out and you'll have to fight two more Thalmor soldiers. Esbern is a helpful caster and even Salvianus might assist in fighting the Thalmor. Watch out though, Esbern isn't a full companion and might get in a fight with whatever follower is already in your party. Simply exit the room and both sides should be peaceful again. Now just exit out the Warrens and return to Riverwood.Once Esbern and Delphine meet you'll have your next goal: Find the Sky Haven Temple.
Alduin's Wall
Marvel Rivals - Official Loki Character Reveal Trailer | The King of Yggsgard Remnant 2 - The Forgotten Kingdom | DLC Launch Trailer Stellar Blade - Official "The Journey: Part 2" Behind The Scenes Trailer | PS5 Games Fortnite Festival - Official Billie Eilish Cinematic Season 3 Trailer Dead by Daylight | Tome 19: Splendor | Reveal Trailer Starship Troopers: Extermination - Official "The New Vanguard" Update 0.7.0 Trailer 2XKO - Official Illaoi Champion Gameplay Reveal Trailer Destiny 2: The Final Shape | Journey into The Traveler Trailer Solo Leveling: Arise - Character Gameplay Teaser #15: Seo Jiwoo Genshin Impact - Character Demo - "Arlecchino: Lullaby" Goddess Of Victory: Nikke | Last Kingdom Full Animated Cinematic Trailer Metaphor: ReFantazio The King’s Trial Trailer
Please enter your date of birth to view this video
By clicking 'enter', you agree to GameSpot's
Terms of Use and
Privacy Policy
Getting to Sky Haven Temple is a long journey southwest. No town is all that close so you can't depend on a wagon. Soljund's Sinkhole is about the closest location to the temple, but that's not really near anything. So get ready for a long walk or grab a horse to make the journey faster. Beacuse you'll most likely arrive on foot expect to by attacked by just about anything along the way. If you want to prevent being sidetracked, just bolt out of these random encounters.
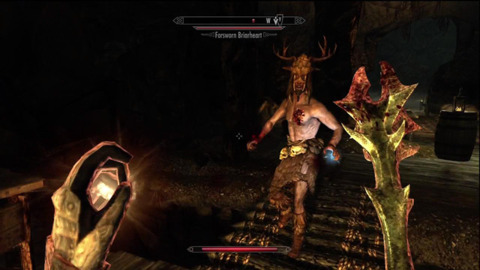
To get into Sky Haven Temple proper, you will need to fight through Karthspire. You will mostly be fighting Forsworn: they are mostly barbarians that use hide armor and crude weapons. Some of them have lighting and ice magic which can make such casters more of a problem. However, Delphine and Esbern will hopefully still be by your side, making these encounters manageable. The Forsworn being wild people means most of their gear is junk not worth looting. Head northwest, up the stairsand turn the pillars so that each of them has the dragon reborn symbol: the circular heart shape.

In the next room the floor will contain fire traps and more symbols. Keep walking along the dragon reborn symbols to stay safe. You can also jump across safe pressure points instead of just walking. Pull the chain ahead to completely disable the trap and lower the next bridge. You'll soon come to a stone head where nothing will seem to happen at first. Wait for Esbern to finish his speech and then activate the blood seal just before the head. Through the next room, wait for Esbern and Delphine to finish their dialogue and then examine the mural on the north wall. Talk to Delphine again and she will admit that you'll need the Greybeards help. Return to High Hrothgar for now.
The Throat of the World
Marvel Rivals - Official Loki Character Reveal Trailer | The King of Yggsgard Remnant 2 - The Forgotten Kingdom | DLC Launch Trailer Stellar Blade - Official "The Journey: Part 2" Behind The Scenes Trailer | PS5 Games Fortnite Festival - Official Billie Eilish Cinematic Season 3 Trailer Dead by Daylight | Tome 19: Splendor | Reveal Trailer Starship Troopers: Extermination - Official "The New Vanguard" Update 0.7.0 Trailer 2XKO - Official Illaoi Champion Gameplay Reveal Trailer Destiny 2: The Final Shape | Journey into The Traveler Trailer Solo Leveling: Arise - Character Gameplay Teaser #15: Seo Jiwoo Genshin Impact - Character Demo - "Arlecchino: Lullaby" Goddess Of Victory: Nikke | Last Kingdom Full Animated Cinematic Trailer Metaphor: ReFantazio The King’s Trial Trailer
Please enter your date of birth to view this video
By clicking 'enter', you agree to GameSpot's
Terms of Use and
Privacy Policy
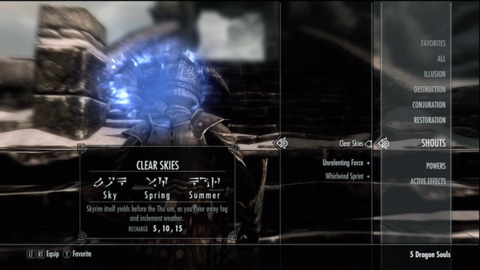
Return back to High Hrothgar. If you haven't already, give the Greybeards the Horn of Jurgen and you will finish up your training. But the real business here is to talk to Arngeir and discover how alduin was defeated. The Greybeard will tell you about Paarthurnax. Head outside to the courtyard and the Greybeards will teach you the Clear Skies Shout. You can use this to clear massive ice storms that will be in your way as you ascend up towards the Throat of the World.
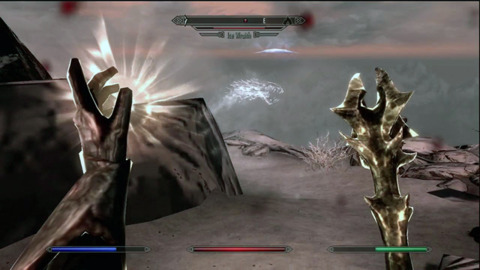
Now head up south and climb the mountain further. Everytime a snow storm hits, use Clear Skies to avoid taking steady damage. The trek up the mountain is calm for the most part. There is the possibility to encounter hostile Ice Wraiths along the way through. These creatures are fast and can slow you down with their various ice attacks. It's highly recommended to use your flame spell to easily hit the enemy, as both melee and archery has a higher chance to miss such wily targets. As long as you have a follower, the enemies shouldn't be that tough.
Once at the Throat of the World speak with Paarthurnax. It appears that you need to locate an Elder Scroll, but the leader of the Greybeards has no idea where it is. It will also teach you Fire Breath which you can use to "greet" him. Before leaving, talk to Paarthurnax again and he can boost one of your words of power, such as Unrelenting force or fire breath. We personally went with the Fus upgrade. Still head back down the mountain and speak with Arngeir. He will suggest going to the Mage's College in Winterhold.

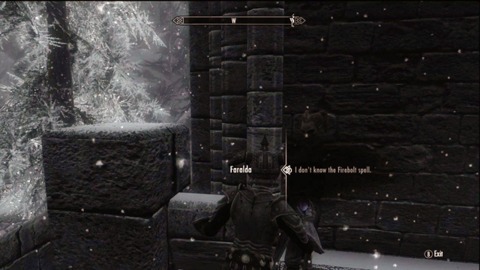
Winterhold is far off in the northeast, making it preferable to hail a wagon as far as you can. Even upon arriving in Winterhold, the gate to the college will be locked. To get inside you'll need to legitimately join up with this guild. Locate Faralda to join up. She will most likely be standing near the entrance walkway to the college, but if not try waiting. She'll want you to cast Firebolt on the tile in front of the entrance. If you don't know Firebolt yet, she will sell you a copy (what a scam). Once a member of the college and inside head to the Arcanaeum within the halls.
Speak with Urag gro-Shub and he will give you a book on Elder Scrolls written by Septimus Signus. It's best to seek out this author to find the Scrolls location.
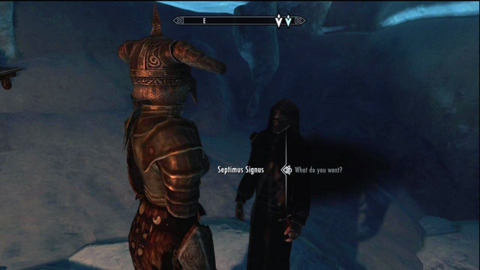
Signus' Outpost is even further north of the College. Because you're already on such a steep hill, it's not practile to go straight north. Instead head down to the waters below the city and traverse towards the north. The encounters along the way are random, but mostly expect to fight Horkers and maybe Ice Bears. When you finally meet Signus, it appears he's completely off his rocker. He will at least give you a magic cube and sphere before pointing you towards Alftand where the Elder Scroll is.
Elder Knowledge
Marvel Rivals - Official Loki Character Reveal Trailer | The King of Yggsgard Remnant 2 - The Forgotten Kingdom | DLC Launch Trailer Stellar Blade - Official "The Journey: Part 2" Behind The Scenes Trailer | PS5 Games Fortnite Festival - Official Billie Eilish Cinematic Season 3 Trailer Dead by Daylight | Tome 19: Splendor | Reveal Trailer Starship Troopers: Extermination - Official "The New Vanguard" Update 0.7.0 Trailer 2XKO - Official Illaoi Champion Gameplay Reveal Trailer Destiny 2: The Final Shape | Journey into The Traveler Trailer Solo Leveling: Arise - Character Gameplay Teaser #15: Seo Jiwoo Genshin Impact - Character Demo - "Arlecchino: Lullaby" Goddess Of Victory: Nikke | Last Kingdom Full Animated Cinematic Trailer Metaphor: ReFantazio The King’s Trial Trailer
Please enter your date of birth to view this video
By clicking 'enter', you agree to GameSpot's
Terms of Use and
Privacy Policy
Alftand is southwest of Signus' Oupost. You can get there a little bit faster by fast traveling back to Winterhold. Along the way expect to fight mostly Ice Wraiths and maybe a Bear or Troll. Either way you'll eventually reach the mountain's ridge. The entrance to the glacial ruins is down the stairs and across a few bridges. Once inside head north and you should hear two Khajiit talking to one another. Don't worry it seems they are passed a blocked off wall, so they won't actual attack. Continue ahead to loot some broken Dwarven Spiders. They run on Soul Gems so if you're looking for more feel free to raid the broken machines. The gate to the north is jammed, so go around the western route.
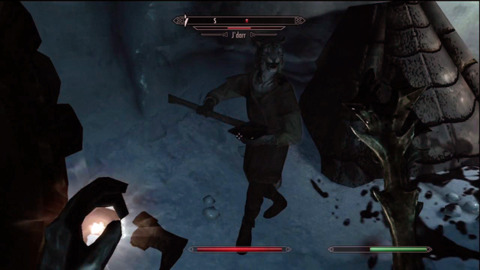
It seems that not all of the robots are disabled and a few will spring to life. Don't worry, the spiders are essentially the robotic version of wolves: complete fodder that dies easily. Once the spiders are destroyed keep going west. You'll notice a torch on the ground. Shortly after this marker you will come across one of the Khajiit, J'darr. He's killed the other catman and is looking to take you down too. He is poorly armored and only has a woodcutter's axe so not much of a threat. Take the healing potions off his body after the encounter. As for the dead J'zhar, he has a lockpick to add to your collection.
Once ready, keep going north and you'll face a new enemy: Dwarven Spheres. These things are really fast and will often get right in your face. Your follower equipped with a ranged weapon or spell will help immensely here. You'll also want to have your shield and healing spell ready to recover whatever damage you take. We perfered to use ice as a means to slow down the machines, but mostly stuck with melee attacks as the opponent would not backdown. Once the Spheres are dead, keep going north and you should see some rising platforms on the left side. Jump across theses and you can gain acess to a few treasures: a flawless emerald, draught of strength, some soul gems, and gold.
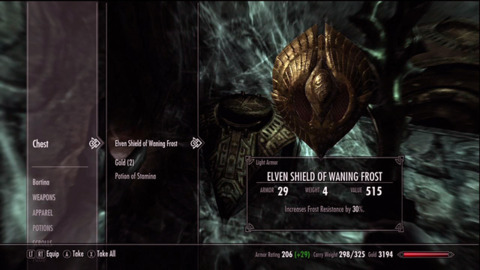
Drop back down and continue your way down the halls. In the next room will be a gate with a novice lock. Passed this is an Apprentice locked chest with an Elven Shield of Waning Frost and a Potion of Stamina. There is also an Adept locked chest, but we only received junk inside. Once done here, exit out and take the stairs to the west. Fight a few more Dwarven Spiders and loot the side rooms for potions. Heading east will take you to the upper level where pistons will be jutting back and forth out of the walls. These are easy to avoid, but you can also use them to push down any more spiders you come across. Once the enemies are dead, continue east to enter the Animonculory.
In here head north and grab the Falmer Shield, Falmer Helmet, and more potions. Head east, kill a few more spider and you'll come across the corpse of Endrast. There isn't much on his person, but you can read his hournal and grab some nearby lockpicks. Now return west to battle a lone Dwarven Sphere. Continue ahead and you may notice the floor is covered with oil. As before you can use your flame spells to ignite the area and harm anything that passes by. But at this point most likely all threats will be cleared. Up the next ramp will be a trap triggered by pressure points. Walk on the far sides of the ramp or jump over the tiles to avoid springing the trap. However, any follower might spring it anyway after you've passed it.
Continue north, destroy another spider, and open a novice chest to gain a Ring of the Minor Knight, which will help with heavy armor skills. Now backtrack out of this nook and walk down the spiral pathway. There will be an Apprentice locked door to the east. Passed this are more spiders and several chests. We looted a Iron Battleaxe of Diminishing, Dawrven Helmet, Stamina potion, and draught of resist Shock. Exit out the room and leap down west to find the body of Yag gra-Gortwog. She has nothing of real intrest on her, but has dropped a potion and has some arrows and a Falmer axe in her.
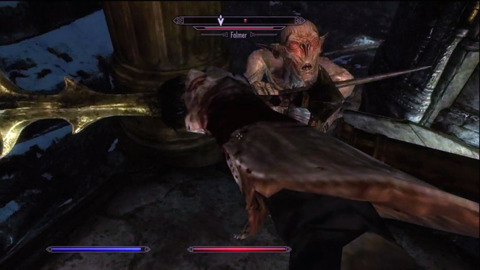
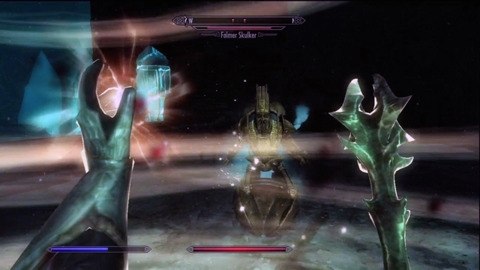
Further to the west is another spider and chest where we gained gold, a Petty Soul Gem, Reverent Steel Sword, Ruby, and Scroll of Bane of the Undead. Trun back east and you'll do battle with feral elves: the Falmer. They strike fast and have access to some pretty potent magic. However, their defenses are power. You'll want to get the rush on them quickly with your strongest weapon, spell and shout. We liked using our Fire Breath to damage several enemies at once. rying to parry or be otherwise defensive is not ideal when fighting these Mer. Continue down into the next room to find an alchemy station. Use this to build more potions or simply use up all those materials you've collected. Further down will be three more Falmer and several open jets of fire. If you position yourself right, the Falmer will stand in the fire while you bash them to death. Once they are dead, head east and through the next door.
You'll start by facing off against three more Falmer and a frostbite spider. Due to the large numbers, try to lure out the enemies one at a time. As always take out the spell casters first followed by the slower melee using enemies. Through the next room will be two more Falmer: let your followr take one while you kill the other. Head up the stairs on the left to find a switch what will open the gate to the southwest.
Marvel Rivals - Official Loki Character Reveal Trailer | The King of Yggsgard Remnant 2 - The Forgotten Kingdom | DLC Launch Trailer Stellar Blade - Official "The Journey: Part 2" Behind The Scenes Trailer | PS5 Games Fortnite Festival - Official Billie Eilish Cinematic Season 3 Trailer Dead by Daylight | Tome 19: Splendor | Reveal Trailer Starship Troopers: Extermination - Official "The New Vanguard" Update 0.7.0 Trailer 2XKO - Official Illaoi Champion Gameplay Reveal Trailer Destiny 2: The Final Shape | Journey into The Traveler Trailer Solo Leveling: Arise - Character Gameplay Teaser #15: Seo Jiwoo Genshin Impact - Character Demo - "Arlecchino: Lullaby" Goddess Of Victory: Nikke | Last Kingdom Full Animated Cinematic Trailer Metaphor: ReFantazio The King’s Trial Trailer
Please enter your date of birth to view this video
By clicking 'enter', you agree to GameSpot's
Terms of Use and
Privacy Policy
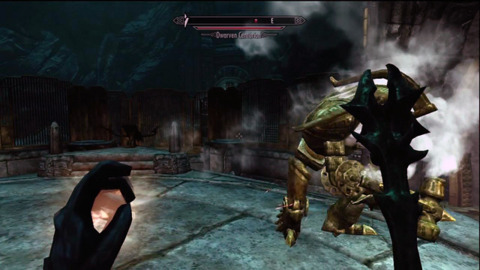
Passed this gate you will now face a Dwarven Centurion. He has a good amount of health, but his melee attacks aren't that bad when blocked with a shield. What can be a problem is his steam blast, which can penetrate your defense and cause huge damage. The tactic we stuck with was to hit the Centurion with fire breath before retreating and quickly healing up. Once at max health we'd charge in and hit it while having our shield on the ready. Be sure to check the chests to the west for more gear, such as a Steel Warhammer of Dismay.
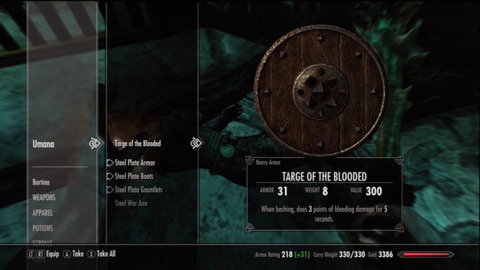
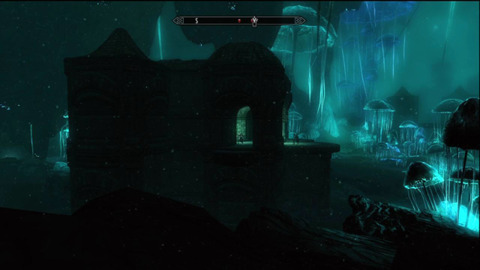
Move west and you'll meet to spite filled warriors: Sulla Trebatius and Umana. They will try and kill one another, and you should use this time help out both in their efforts. Umana has a nice set of Steel Plate Armor, so if you have none or want a second set, pry it from her cold dead hands. Once both enemies are dead, activate the mechanism in the center to form a new stair case leading down to Blackreach. As you neter, off in the distance will be a Dwarven Shpere, and if you are fast enough it can be sniped with the ballista you start near. What's nice in this area is that you can let the Dwarven machines fight it out with the native Falmers. This will distract all of your enemies and allow you to easily sweep up the weakened survivors.
To the southwest will be a building housing a few Falmer archers. If you can, peck them off from afar with a bow or spell. Alternatl, have your follower distract the enemy while you sneak or barge up to the top. You'll want to get to the top of the building anyway, as you will be able to loot a Tome of Frostbite, Necklace of Major Wielding, and Imperial Bow of Embers. After collecting these, head southwest and enter the Tower of Mzark.
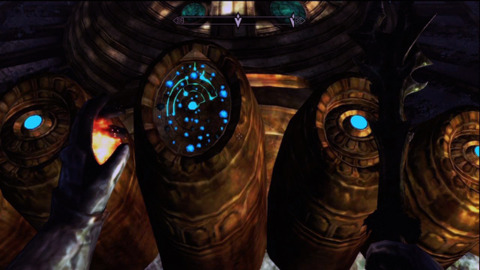
At the very top place thebalnk lexicon cub inside the Lexicon Receptacle. Tap the second button four times so that the lexicon opens, the third button twice, and the far left fourth button once. Take both the Elder Scrolls and Runed Lexicon. The exit out to Skyrim is below. With the Elder Scroll recovered, head back to Paarthurnax at High Hrothgar.
If you want, you can stop by and give Signus the Runed Lexicon. This will give you a side objective to take blood samples from every type of elf, including wild ones and the mutated Orcs. You'll most likely find each elf to kill by continuing the main store instead of hunting randomly.
Alduin's Bane
Marvel Rivals - Official Loki Character Reveal Trailer | The King of Yggsgard Remnant 2 - The Forgotten Kingdom | DLC Launch Trailer Stellar Blade - Official "The Journey: Part 2" Behind The Scenes Trailer | PS5 Games Fortnite Festival - Official Billie Eilish Cinematic Season 3 Trailer Dead by Daylight | Tome 19: Splendor | Reveal Trailer Starship Troopers: Extermination - Official "The New Vanguard" Update 0.7.0 Trailer 2XKO - Official Illaoi Champion Gameplay Reveal Trailer Destiny 2: The Final Shape | Journey into The Traveler Trailer Solo Leveling: Arise - Character Gameplay Teaser #15: Seo Jiwoo Genshin Impact - Character Demo - "Arlecchino: Lullaby" Goddess Of Victory: Nikke | Last Kingdom Full Animated Cinematic Trailer Metaphor: ReFantazio The King’s Trial Trailer
Please enter your date of birth to view this video
By clicking 'enter', you agree to GameSpot's
Terms of Use and
Privacy Policy
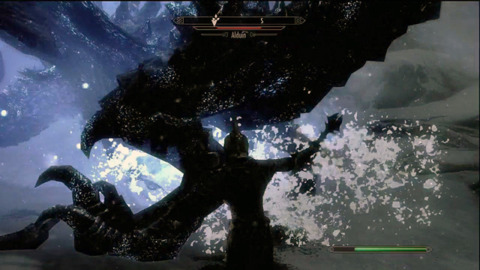
Once at the top of the Throat of the World, stand in the center and use the Elder Scroll from your item menu. This will teach you the powerful Dragonrend shout, that will force any dragon to the ground for a short amount of time. After learning this, Alduin will attack. The lord dragon has more health than most other dragons you've faced, but your new Dragonrend shout will make things very easy. Plus Paarthurnax will keep Alduin busy for the most part. Along with a follower to distract the dragon, you can use the same tactic of standing behind and slashing at Alduin's tail and legs.
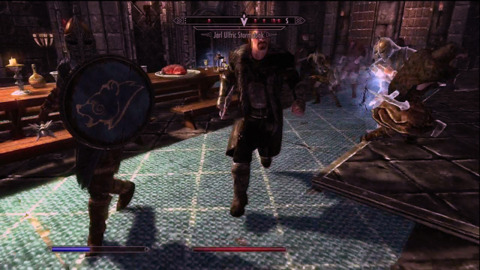
After the fight is over, talk to Paarthurnax about Dragonreach and he will tell you it can be used to catch a dragon. Head to Whiterun and talk to Jarl Balgruuf. He is uneasy to help you while the war is raging on. If you actually did take the time to quell the war he might be more understanding. But for us a negotiation was required between the Legion and Stormcloaks. Return to High Hrothgar and speak to the Greybeards. They will agree to host the negotiations, but it's up to you to convince Ulfric and Tullius. Head to Solitude and Windhelm to speak with each of the leaders. You might need to be careful if you already joined the war effort or are wanted in either city. Just like town guards, the military leaders will attack criminals. If you've violated the law, pay the court a fine or serve your sentence. Your stolen goods are now forfeit.
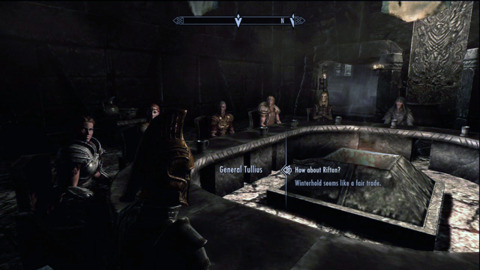
Once convicting both sides, return to High Hrothgar and mediate the terms of the agreement. It's your choice about how things play out. Do you want to allow the Thalmor to bear witness? Will you give up Riften or Winterhold? Maybe the Stormcloaks need to pay. Whatever you decide on the terms, some kind of temporary piece will begin. Esbern will inform you about a new shout to call down the dragon Odahviing.
However, Esbern also requests that you slay Paarthurnax to continue the support of the Blades. This is completely optional and really doesn't help at all. However, the fight with Paarthurnax is still easy if you make use of the Dragonrend shout to force him down to the ground. His attacks are only on par and his health isn't too great. For our playthrough, we left him alive.
The World-Eater's Eyrie
Marvel Rivals - Official Loki Character Reveal Trailer | The King of Yggsgard Remnant 2 - The Forgotten Kingdom | DLC Launch Trailer Stellar Blade - Official "The Journey: Part 2" Behind The Scenes Trailer | PS5 Games Fortnite Festival - Official Billie Eilish Cinematic Season 3 Trailer Dead by Daylight | Tome 19: Splendor | Reveal Trailer Starship Troopers: Extermination - Official "The New Vanguard" Update 0.7.0 Trailer 2XKO - Official Illaoi Champion Gameplay Reveal Trailer Destiny 2: The Final Shape | Journey into The Traveler Trailer Solo Leveling: Arise - Character Gameplay Teaser #15: Seo Jiwoo Genshin Impact - Character Demo - "Arlecchino: Lullaby" Goddess Of Victory: Nikke | Last Kingdom Full Animated Cinematic Trailer Metaphor: ReFantazio The King’s Trial Trailer
Please enter your date of birth to view this video
By clicking 'enter', you agree to GameSpot's
Terms of Use and
Privacy Policy
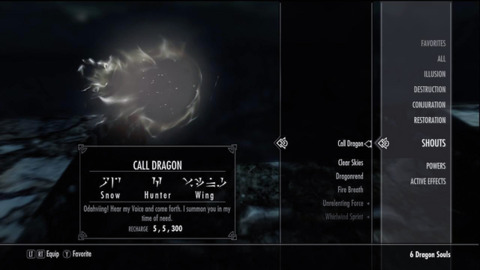
With your Call Dragon Shout learned, head to Dragonreach and tell the Jarl you are ready to set up the trap. Head outside and use your shout at full force. This means holding down the shout button until you use a maximum shout. This will summon up Odahviing. You have plenty of support from the Whiterun guards, the Jarl, and his housecarl. Once the dragon's health is depleted, his life bar will fully restore. It's time to lure him into the trap. Move back towards the door you entered and the Whiterun guards will trap Odahviing.
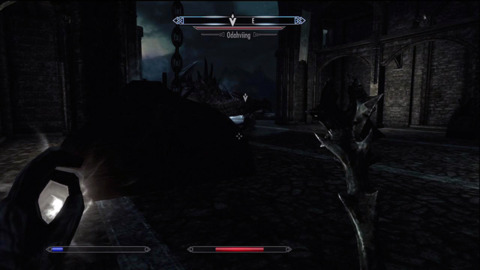
Speak with the dragon and agree to release him. Tell the guards of your choice or open the trap yourself by pulling the chains on the second level. Speak to Odahviing and he will fly you to Skuldafn. A word of warning: this is a one way trip and your follower will not come with you. Make sure you have all of the gears, potions, and spells that you think you'll need. Because you will have no follower, make sure that you can survive alone in a fight with a dragon. If you want, go out hunting for wild dragons and test your soloing abilities. If you find yourself dying, it's probably best to wait on this one time trip. But once you're ready, take the flight to Skuldafn.
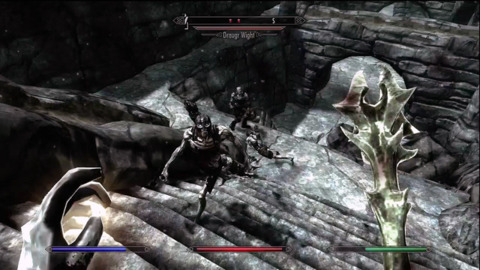
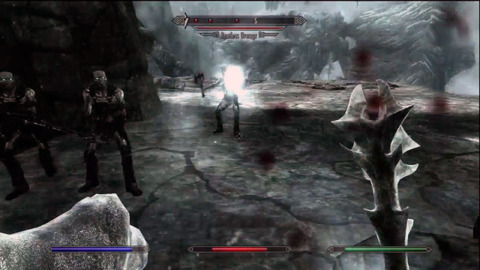
Right as you arrive you'll be attacked by Draugr and a fire dragon. Obviously the weaker undead should be killed off first, mainly concentrating on the casters and archers before the melee warriors. Your Dragonrend shout and plenty of fire resistance are still the best option for taking on this first dragon. If you need to, always retreat and heal up quickly. Once these are dead, move down south to reach an ice dragon. Don't move up further as otherwise even more undead will emerge. But if they do arrive, kill the undead quickly. The Restless and Wights are much tougher tanks than the normal Draugr, so leave them for after you've gotten the normal undead.
Continue to the southeast and up into the tower. The chest up here will have a Dwarven Warhammer and some extra Orcish Arrows. Exit back out and kill two more Wights wielding greatswords. Making use of your shield and countering will work wonders on these two handed enemies. Now head up the steps ahead and engage with three more Draugr archers and a Wight with a two-handed axe. As mentioned before, a good shield will make this fight go by smoothly. Once the enemies are dead, move inside the temple.
The passage on the left is filled with arrow traps, so you will need to sprint or Whirlwind sprint to get by them. What's nice though, is you can drag enemies back into this trpa and let them take damage from the barrage of bolts. Fight through another five Draugrs to reach another snake-while-bird puzzle. For this one stand on the northern end and face the backside of the puzzle. Arrange them as three birds to open the right door with a chest inside. Place them as bird, snake, bird to open up the passge leading deeper into the temple. Inside the chest we got a lockpick, a potion of stamina, and potion of water breathing.
Head back the other way and down the other opening. A few more spell-sword undead will be in the bottom floor, so be ready with some good magic and ice defense. Through the next path will be some Frost bite Spiders that can poison, but are easily killed. Keep healing favorited to recover from any poison you take. In the next room will be two Draugr archers and another stone puzzle. The answer from left to right is while, snake, bird. Be sure to loot the chest on the lower eastside for a Steel Plate Helmet before exiting.
You'll face off against two more Restless Draugr archers, but with your shield up or even speedy movement, it will be easy to get by them. Head across the second floor bridge due west and you'll come to a spiral staircase. Watch out, the floor is covered in oil and the enemy will toss down flame pots. Trigger the ambush, but move away quickly. Once the fires cool, head up the steeps and kill two more undead. Pull the leaver to the east to unlock the gate leading onward. You'll next face the Draugr Overlord. He has access to the Unrelenting for and uses a strong Ancient Nord Greatsword of Cold. Make use of both your shield and healing spells to combat him. Despite the Overlord's extra health it will still die without much of a hitch. Take his sword and the claw off his body to get the upcoming code: wolf, butterfly, dragon. This will unlock the door leading to the next chamber.
You can learn the Storm Call shout from the wall here along with many potions laden around the chamber. The door on the left will lead to the outside roof. Two more greatsword Draugr Wights and a Restless Draugr spell-sword. Take out the caster first before switching to a shield. It's best to get the enemies in a rythm so that you can block both of them without being inturpted. Or if you want, give that Storm Call shout a try to clear out everyone.
Marvel Rivals - Official Loki Character Reveal Trailer | The King of Yggsgard Remnant 2 - The Forgotten Kingdom | DLC Launch Trailer Stellar Blade - Official "The Journey: Part 2" Behind The Scenes Trailer | PS5 Games Fortnite Festival - Official Billie Eilish Cinematic Season 3 Trailer Dead by Daylight | Tome 19: Splendor | Reveal Trailer Starship Troopers: Extermination - Official "The New Vanguard" Update 0.7.0 Trailer 2XKO - Official Illaoi Champion Gameplay Reveal Trailer Destiny 2: The Final Shape | Journey into The Traveler Trailer Solo Leveling: Arise - Character Gameplay Teaser #15: Seo Jiwoo Genshin Impact - Character Demo - "Arlecchino: Lullaby" Goddess Of Victory: Nikke | Last Kingdom Full Animated Cinematic Trailer Metaphor: ReFantazio The King’s Trial Trailer
Please enter your date of birth to view this video
By clicking 'enter', you agree to GameSpot's
Terms of Use and
Privacy Policy
There will be another Wight as you move east. He will be standing near a ledge, so if you wish, bash him and have him fall to his demise. Up the steps will be a Nahkriin slowly lurching towards the portal to Sovngarde. You'll want to rush this ghoul quickly before it can reach its destination. If you're fast enough to stand in front of the Nahkriin it won't even attack and won't be able to reach the magical staff, making it helpless. But if the Nahkriin closes the portal and grabs the staff it will be come a powerful Destruction and Conjuration caster.
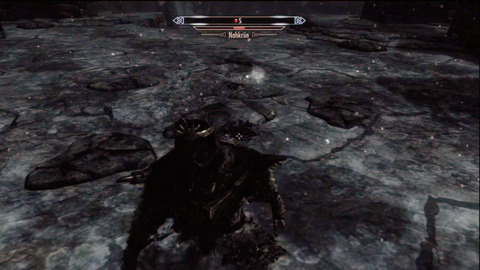
Use wards to block his magic and quickly sprint right in fornt of him. If you're lucky Najkriin will mostly use magic with long casting delays, leaving him open to quick slashes. Still be ready to heal quickly with potions and spells. After the fight loot the dead spirit for the great caster Nahkriin heavy mask and the staff to reopen the portal. Place the staff down on the marker to enter Sovngarde.
Sovngarde
Marvel Rivals - Official Loki Character Reveal Trailer | The King of Yggsgard Remnant 2 - The Forgotten Kingdom | DLC Launch Trailer Stellar Blade - Official "The Journey: Part 2" Behind The Scenes Trailer | PS5 Games Fortnite Festival - Official Billie Eilish Cinematic Season 3 Trailer Dead by Daylight | Tome 19: Splendor | Reveal Trailer Starship Troopers: Extermination - Official "The New Vanguard" Update 0.7.0 Trailer 2XKO - Official Illaoi Champion Gameplay Reveal Trailer Destiny 2: The Final Shape | Journey into The Traveler Trailer Solo Leveling: Arise - Character Gameplay Teaser #15: Seo Jiwoo Genshin Impact - Character Demo - "Arlecchino: Lullaby" Goddess Of Victory: Nikke | Last Kingdom Full Animated Cinematic Trailer Metaphor: ReFantazio The King’s Trial Trailer
Please enter your date of birth to view this video
By clicking 'enter', you agree to GameSpot's
Terms of Use and
Privacy Policy
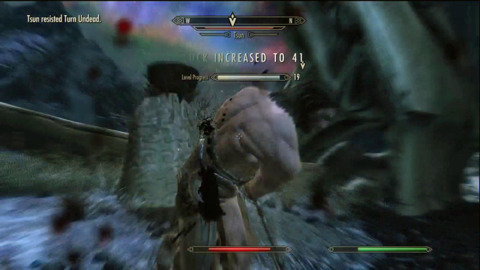
Head down the path and speak with the spirit ahead, who will in turn point you towards the Hall of Valor. Travel through the mists, but be careful: Alduin is hiding about and flying around and could possibly strike if you're too hasty. Your goal is straight down the path and a little to the west. Here, talk to Tsun and tell him of your plans. He will only let you enter the hall if you pass a test of strength in one-on-one combat. You don't need to deplete much of his health to win. In fact, using just fire breaths boosted with fus was enough to make the guard yield.
Once Tsun grants you access, cross the bridge and head into the hall. Speak you to Ysgramor and he will point you towards the heroes who banished Alduin so long ago. Speak with Gormlaith, Felldir, and Hakon. They will head outside and ready themsleves for the final fight. Follow them outside and back into the mist. Use Clear Skies three times as they instruct and the final battle with Alduin will start.
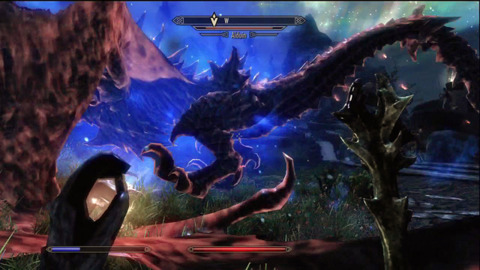
Gromlaith is about the only range support you have, so consider switching to magic, archery, or simply summon more help via magic. Your main job though is to use Dragonrend shout to bring Alduin to the ground. Once the dragon lord is down on the ground both Felldir and Hakon will deal a large amount of damage with their two handed weapons. Let Hakon tank Alduin while you attack from the rear. Alduin can switch elements, but mostly sticks to fire based spells. Have plenty of resist and healing to stay at high health throughout the fight. With this being four-on-one things should be over shortly.
Talk to Tsun and he will teach you Call Valor. This shout will let you summon heroes to your side for a short amount of time. A weak shout will bring Gromlaith, a medium shout for Felldir, and a maximum shout for Hakon. Request to return to Skyrim once you're satisfied. Congratulations, you've completed the main storyline of The Elder Scrolls 5 Skyrim. As a bonus you can now summon Odhaviing with the Call Dragon shout anything you're outside. This will make future side quests much easier. Speaking of side quests, there is still plenty to explore in the massive country of Skyrim.
Joining the Legion or Stormcloaks
You've got your own problems being Dragonborn and all, but for the rest of Skyrim war looms in the horizon. You can choose to take sides in this civil war by joining either the Legion in Solitude or Stormcloaks in Windhelm. The majority of events and fight are either identical or take place within the same area. However, there are still a few unique situations for members of either camp.
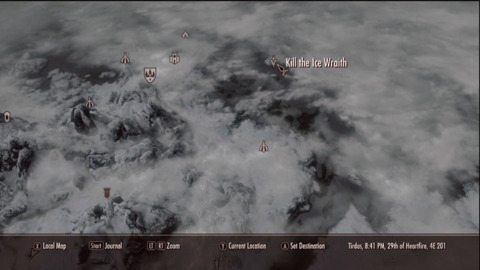
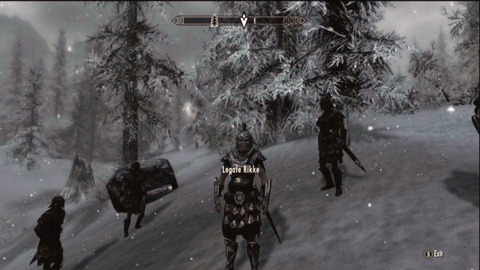
To join up, head to the respective headquarters and talk to the second in command: Legate Rikke in Solitude or Galmar Stone-Fist in Windhelm. Both of them won't simply let you in; you need to prove your worth. Galmar's task is the easier of the two: head to the Serpent Stone in the far northeast and kill a single Ice Wraith. You can easily fast travel to Winterhold and walk a short distance to find this location.

The slightly tougher battle is Rikke's assignment of clearing Fort Hraggstad, which sits west of Solitude. The majority of enemies here are low defense Bandits. For the most party, a single follower is all you need to quickly wipe out the enemies in the courtyard. It helps even more if you can conjure up a summon or Call of Valor a hero to your side. Otherwise Fire Breath is well suited to stun the crowds of enemies. After clearing out the courtyard you'll also need to kill the Bandits inside the Prison on the right of the entrance, as well as anyone inside the main fort. The hardest enemy you'll encounter will probably be the Bandit Chief who wears steel plate armor. It's best to let your follower tank this enemy while you attack from behind.
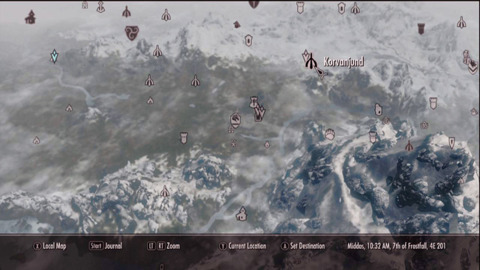
After completing either task, join up with your faction and take an oath of service. Congratulations, you just failed joining the other side (as the game will note for you twice). Anyway your first task for either is to recover the Jagged Crown. Yup, this mission is the same for both Legion and Stormcloak members. Head over to Korvanjund, which is south of the Dwarven Labs at Alftand and Tower of Mzark.
Meet up with Rikke/Galmar and they issue your orders to storm the ruins. You have enough allies that you don't need to worry too much about the opposing forces. Try to go for the far off archers while your allies distract the close range fighters.
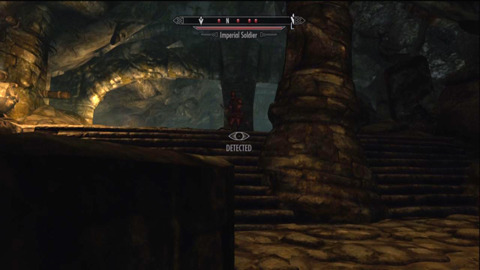
Inside the temple the enemy forces won't have spotted you just yet. Take this time to sneak and get in at least one critical hit or shot. For the most party, stay with your faction and don't charge too far ahead. As a clustered team, you can quickly overpower smaller groups of Legion/Stormcloak enemies.
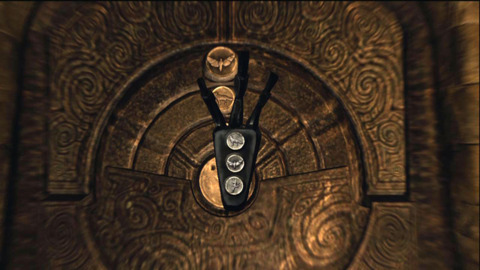
Inside the Halls of Korvanjund most of the enemies will be undead Draugr, but there are still a few wartime enemies wondering about. Not north through the second level and to the west will be a chest behind a swinging puzzle. You can dash through or use Whirlwind sprint to get by easily. We only found potions inside, but master thieves might have better luck. Return north and you'll come to an Ebony Claw laying on the ground. Line up the circles ahead in the order of wolf, butterfly, and dragon to move forward.
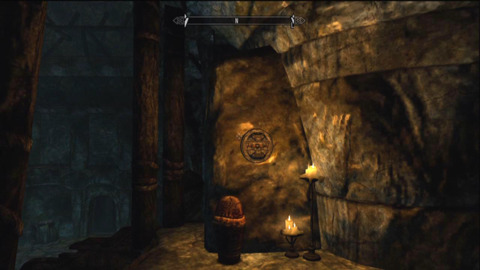
For this next area, the main gate is locked. Head through the northern door to reach the second level and hit the switch on the other side of the room. This will open the gate, but also summon more undead enemies. Concentrate on clearing the weaker enemies before taking on the stronger Restless Draugrs. Your allies should make short work of most of the enemies either way. Once the room is clear, head through the main gate.
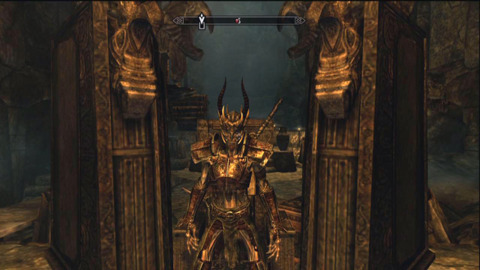
In this area is the Draugr Deathlord. He hits very hard and has a shout that can disarm you. To avoid this stun him quickly with your own Unrelenting Force or Fire Breath. Also let Rikke/Galmar rush in and take tanking duty. If you attack the Deathlord fast enough, you can weaken him or out right kill before his calls in support from his Scourges. These enemies will eventually enter, but if the Deathlord is already dead they can be dealt with quickly.
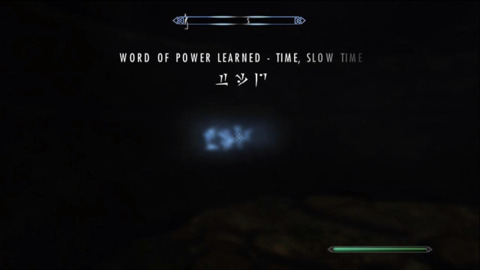
Loot the Deathlord to gain the Jagged Crown. Before exiting the temple head south and you'll gain a new world of power: Time. This word of power can be used to make the Slow Time shout, which isn't very useful as it slows you down as well. Once done inside, head to your army's capital and delivery the Jagged Crown to Ulfric/Tullius.
Battle for Whiterun
With the Jagged Crown retrieved the Legion/Stormcloak will have an upper hand. Either way Ulfric will feel that it's time to launch an attack on Whiterun. As a member of the Legion you'll need to defend the city, but as a Stormcloak you will be among the attackers. If you're a member of the Legion first head to Whiterun and ask Balgruuf to allow the Legion to take position within the city.
Your first task is to see if peace can be made before the battle. Take Balgruuf/Ulfric's axe to the other leader, but of course the other will outright reject the offer. Head back and get ready for the invasion of Whiterun.
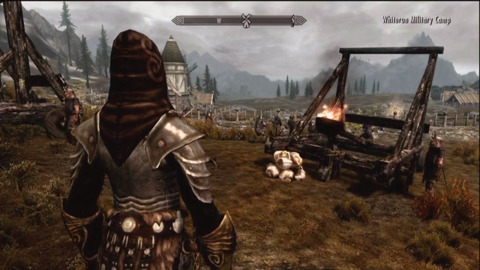
As a defending Legionnaire you'll have a huge advantage. You start near Dragonreach and have plenty of barricades to keep the Stormcloaks out. Head outside of the city and meet the enemy face to face in the open field. You'll already have lots of support from Whiterun Guards and Imperial forces. To make things even easier use a powerful shout such as Call Valor, Call Storm, or Call Dragon. If you have none of these, Fire Breath and Unrelenting Force are also great for stunning crowds. Stick by your allies and you'll have plenty of support to clear out the invading forces before they can make it into the city.
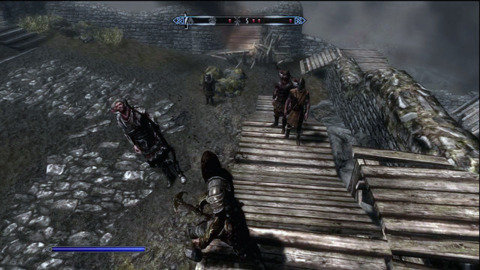
For the Stormcloak version you'll start on the outskirts of the city and will need to reach inside Dragonreach. Stick close to Galmar and/or Ralof as you advance; they are both very strong and can't die during the fight. Whiterun Guards are weaker than Legionnaires so take them out first. Your first objective is to head to the top of the front gate and open the drawbridge. This will involve smashing down the wooden barricades and climbing up the broken wall to the south. Make sure to have Stormcloaks near you as the drawbridge leaver is guarded by a powerful Legion General. However, if you move quickly and hit the leaver, the general and remaining enemies may glitch and become docile ragdolls.
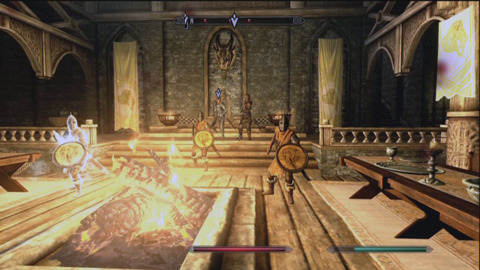
The defenses inside the city walls are even thinner than the front gate. Let your allies deal with the few guards while you smash down the remaining barricades up to Dragonsreach. Inside you'll have to face Balgruuf, Irileth and a few more guards. The Jarl is the biggest challenge of the group as both steel armor and an enchanted sword. If you can, let Galmar take the brunt of the damage while you strike down the enemy. After the fight the Jarl will be exiled and Whiterun will be in the hands of the Stormcloaks.
Proving Honor
The Companions are one of the many guilds within Skyrim. Think of them as the Fighters Guild of previous Elder Scrolls games, but with an added twist. Several members of the Companions will force themselves as followers during these quests, but after finishing the whole storyline you can recruit whichever member you like. Additionally, many of the members are potential spouses after completing all Companion quests; on that note, many members can also permanently die after the storyline is finished.
Enter Jorrvaskr on the east side of Whiterun. Head down to the basement where you can speak to Kodlak. To test your worth Vilkas will take you outside and teach you a few things about power strikes. Afterwards, head up the hill and give Vilkas' sword to Eorlund. Inrun, the smith will have you deliver a shield to Aela back in the basement. Now after this fetch quest you'll be able to take jobs from Farkas.
The tasks Farkas assigns you depend on what you've already done within the world. Two of the more minor ones are "Hired Muscle", a simple task of fist brawling Aldis in Solitude. The second task may be "Trouble in Skyrim", where you must kill the vampires inside the Broken Fang Cave west of Whiterun.
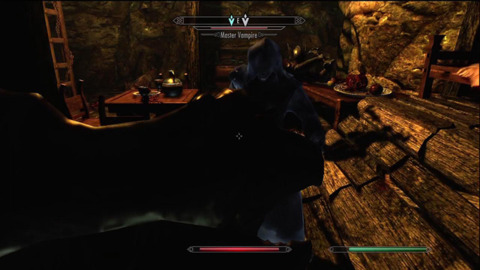
Broken Fang Cave is a very small dungeon, but there is a Master Vampire inside. If you're less than level ten, you might have problems taking this enemy by yourself. If you don't have one already, get a follower such as Sven or Faendal from Riverwood. The Master Vampire can quickly drain your stamina, but it's still a good idea to block his attacks with a shield. As long as you have a follower supporting you, the battle shouldn't be too bad. If you contract vampirism and don't want it, you can cure disease at this early stage. You'll probably want to get rid of vampirism anyway, as the Companions have a conflicting power waiting for you.
Either after completing these two tasks, or if you already did them before hand, Farkas will join you as a follower (though you can't trade equipment). Head over to Dustman's Cairn which is northwest of Whiterun; Redoran's Retreat and Silent Moon Camp are both nearby if you can fast travel. Inside the dungeon you'll mostly be fighting undead Draugr in the first few rooms. As with most battles, let your new friend Farkas tank while you attack from behind or heal up.

Head east and you'll come to a a leaver in a small room. You'll be trapped inside and Farkas will be attacked by a group called the Silver Hand. Farkas can take care of himself as he's actually a werewolf. Wait for Farkas to kill the enemies and he will open your cage. Keep moving along the quest marks and you'll come into a three way battle among yourself, the Silver Hand, and undead. For the most part let the two group of enemies fight each other, as if both attack you at once you're pretty much dead. Try to keep Farkas as healed and protected as possible, as his current gear is inferior to most of the stronger Silver Hand members. The sheer number of foes is the biggest problem during this encounter, so if you can don't arouse attention to yourself or summon up more allies with conjuration.
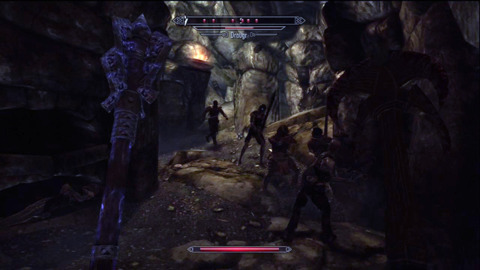
After clearing the fight, head east and after several doors you'll enter a long hall. On the left hand side will be a chest containing the Dustman's Cairn Key. Use this new key to open the door to the north. Destroy a few Skeevers and a large Frostbite Spider to move into other deepest ends of the halls. In here you can gain both the Inferno word of power to upgrade Fire Breath and the Wuuthrad fragment. Undead Draugr will now attack. As before be defensive and attract little attention. Farkas and any summons you have should charge the main bulk of enemies as you pick off the weaker stragglers.

For your hard earned work you'll be inducted into the Companions. But to gain the true power of the Companions speak with Skjor. Head below Eorlund's undeforge at night and meet with Aela and Skjor. This will unlock the werewolf form and the next Companions quest.
Innocence Lost
Marvel Rivals - Official Loki Character Reveal Trailer | The King of Yggsgard Remnant 2 - The Forgotten Kingdom | DLC Launch Trailer Stellar Blade - Official "The Journey: Part 2" Behind The Scenes Trailer | PS5 Games Fortnite Festival - Official Billie Eilish Cinematic Season 3 Trailer Dead by Daylight | Tome 19: Splendor | Reveal Trailer Starship Troopers: Extermination - Official "The New Vanguard" Update 0.7.0 Trailer 2XKO - Official Illaoi Champion Gameplay Reveal Trailer Destiny 2: The Final Shape | Journey into The Traveler Trailer Solo Leveling: Arise - Character Gameplay Teaser #15: Seo Jiwoo Genshin Impact - Character Demo - "Arlecchino: Lullaby" Goddess Of Victory: Nikke | Last Kingdom Full Animated Cinematic Trailer Metaphor: ReFantazio The King’s Trial Trailer
Please enter your date of birth to view this video
By clicking 'enter', you agree to GameSpot's
Terms of Use and
Privacy Policy
If you're like the GameSpot editors you enjoy murdering people. But enough about our personal lives, you're reading this because you want to join The Dark Brotherhood. Well sorry, they don't take any geek off the street; you got to be good with the steel if you know what I mean. And what I mean is you need to pretend to be a Dark Brotherhood member and steal their jobs.

First head off to Windhelm and break into the Arentino home. It's locked by a simple Novice lock. Meet up with Aventus and he will ask you to kill Grelod the Kind over in Riften's Honorhall. Fast travel over there and enter the orphanage.
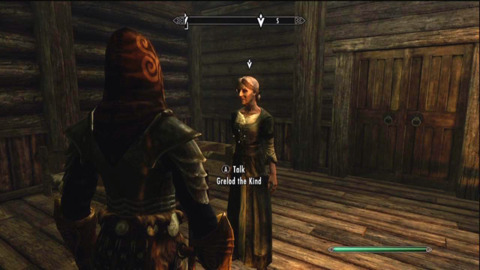
Inside you'll see Grelod talking among the children. Go ahead and murder her any way you like. It doesn't have to be clean as the children inside want Grelod dead as well. Our personal favorite is to order your follower to do the dirty work. Either way head back to Aventus to report your deeds.
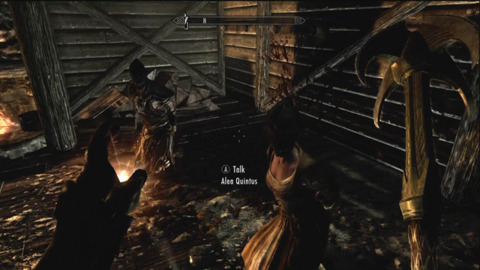
Now, head to the streets of Riverwood and wait until getting a letter from the Brotherhood. You can now rest inside and you'll be casually abducted by the assassin Astrid. She will ask you to kill one of the three captives: Alea, Vasha, and Fultheim. It doesn't really matter who you take out, Astrid just wants someone dead. Yes, one or more might be innocent but who cares, chop them all and let Talos sort them out.

With the murder done, Astrid will tell you where the Dark Brotherhood hide out is: just west of Falkreath. Head there and at the main entrance answer "Silence my Brother". Talk to Astrid inside and she will give you some new murder clothes: Shrouded light armor. Head down to the north and meet your new family. On the left hand wall you can also pick up the Kill word of power that can be used for the Marked for Death shout.
Under Saarthal
You'll come to the Mage's College over the course of the main storyline missions. However, you can travel over to Winterhold at a sooner time if you wish. As covered in the "The Throat of the World" section, locate Faralda and cast a Firebolt spell at the entrance. She will sell you a copy if you don't know this magicka yet.
When you first enter the Hall of Elements you'll meet Tolfdir and the rest of the new recruits. The scholar will teach and improve your abilities with the basic defense spell Lesser Ward. This is a simple lesson: just put up the ward to block your teacher's incoming attacks. After this time for a field trip at the ruins of Saarthal, which is southwest of the college.
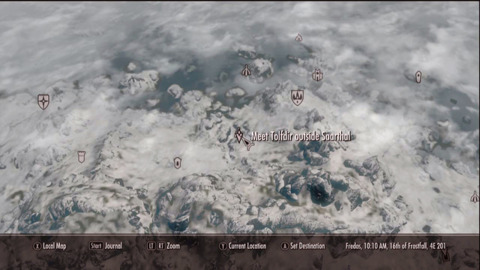
Head inside the ruins and let Tolfdir give is lecture. Once he's done, head to the upper levels and speak with Arniel Gane. This mage will ask you to collect the four artifacts scattered around. The HUD marks will show each of the locations, but you may also want to take out a torch to more easily find the ones laying in darkness. The last item will be the Saarthal Amulet, but picking it up will spring a trap caging you inside. Equip the amulet and you'll be able to break the back wall with any destruction spell, even the basic Flame.
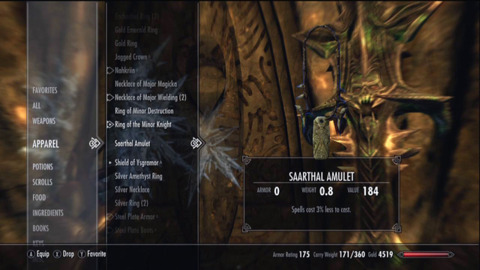
Once freed head west and wait for Tolfdir. You'll see a short vision before a few undead Draugr attack. These are basic enemies, so any magic or weapons should be fine. Plus Talfdir is a master caster and can easily kill the enemies for you. After the fight, talk to your teacher about the vision you saw and head deeper into the dungeon. You'll do battle with another group of minor undead. After they are killed, pull both chains to the north to open up the next area.
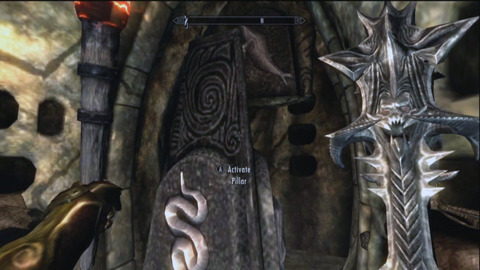
There are a few more undead to fight, but nothing really new. Head up to the second floor and through the door on the east. Here will be another snake/bird/whale puzzle. The solutions are behind each pillar, though it may be too dark to see. In this case take out a torch or cast a light spell to see each symbol behind the pillars.
In the next room head up the stairs and do battle with the Draugr Scourge. He has a bit more health than the other undead, but can easily be handled with the support of a follower or a summon conjuration. In this next zone will be several magical traps. The easiest way to get by is to use Whirlwind Sprint to avoid the shock. You can also nudge your follower into the trap so they take the damage instead. Directly after this you'll need to complete the puzzle in a specific order: place the top left pillar to a whale, the bottom left as a snake, the top right to a bird, and last the bottom right to a fish.
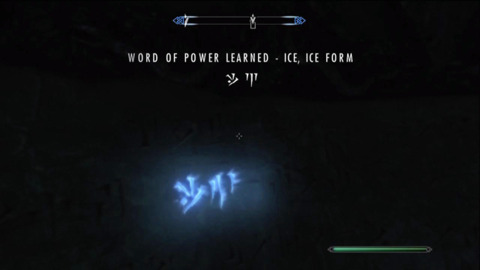
Head through the door and face the undead Jyrik Gauldurson. This enemy is completely immune to your own attacks, but Tolfdir will arrive and weaken the undead. Once he does, Jyrik will die pretty quickly. Search the orb and talk to your teacher once again. Before leaving you'll be able to get a new word of power near the end wall: Ice Storm. Otherwise return back ot the Mage's College and report what happened to the Arch Mage.
A Chance Arrangement
To join the Thieves Guild you'll need to travel to their home turf in Riften and speak to Brynjolf. This liaison to the pilchers can be found in either the town square or in the Bee and Barb pub, depending on the time of day. Brynjolf will ask you to steal Madesi's Ring and make Brand-Shei the fall guy.
Having a little bit of Sneak and Lockpicking will help this quest along, but you can always reload if the numbers roll against you. During the day time talk to Brynjolf in the town square and he will setup a distraction. Even though his speech can eventually end there is no time limit as the crowd won't disburse until you've completed or failed the objective. Your first task is to loot Madesi's ring from the lockbox inside her nearby stall. The ring itself will only appear after singling Brynjolf to start the distraction; you can't loot the ring beforehand.
With the ring in hand, walk to the stack of boxes behind Brand-Shei and enter sneak mode. As long as you remain in hidden status, no one will catch your crime. Pickpocket Brand and instead of taking items, place the ring into his inventory. If you succeed the guards will take away Brand and Brynjolf will reward you. If you fail to plant the ring you'll miss out on a few Septims, however you can still join up with the guild.
Taking Care of Business
Regardless if you succeeded or botched the initial Thieves quest, Brynjolf will ask you to meet with him at the Ragged Flagon. The Flagon is the same pub visited in the main storyline quest, so check that section for tips against the enemies inside.
Brynjolf will task you with collecting debts from three different marks: Bersi Honey-Hand, Haelga, and Keerava. You can do them in any order, and as a bonus the final target will always surrender their Septims without any trouble.
Bersi is inside the Pawned Prawn. You can be convinced to give up his money by destroying the urn right in front of him. You can also opt to brawl with him. Of course there is the option to straight up kill Bersi and loot his body, though this won't go over with the guild.
Keerava is inside the Bee and Barb. The easiest way to convince the lizard lady is to talk to Talen-Jei, who is also typically inside the pub. You can have him talk to Keerava for you and she will give you the money once you speak to her. Alternately you can brawl or kill Keerava, though the guild isn't keen on murder.
Haelga is inside Haelga's Bunk house. The fastest way of getting her money is to loot the statue near her counter. Be sure to hide while doing this or you might rack up a bounty. With the statue in hand confront Haelga to gain her gold. Like the other two victims you can also brawl or kill them.
Once you have the loot from all three patrons, return to Brynjolf for your next task. You are officially in the guild and can speak to Tonilia for a Thieves Guild Outfit. This set of gear will provide extra carrying capacity, sneak, pickpocket, and lockpicking success. You can also enter the exit the Flagon through the back entrance in Riften's cemetery.
Loud and Clear
Speak with Brynjolf and he will lead you into the Cistern of the Ragged Flagon. You'll be introduced to Mercer Frey who has new tasks for you. Your goal will be to Goldenglow Estate, which is slightly north-west of Riften. Before leaving have a handy fire spell ready or go and buy a few torches.
The estate is surrounded by water, allowing you to sneak by most of the guards by swimming to the outer shores and into the lightly guarded bee hive collection. If you're lucky a dragon may also appear, which will of course grab all of the guards' attention as they simply ignore you. Take out your torch or fire spell and burn down three and only three hives. You might get caught at this point, so either fight it our or run to the nearby sewer entrances.
Now you'll need to get into the estate yourself. You can pick the lock behind the house which is at expert level, or you can even barge through the front. However, this method will very likely get you spotted, so prepare to fight off the simple guards. Once inside the estate, sneak or fight your way to the second floor and locate the main bedroom where Aringoth awaits. If you really want to avoid the possible mercenaries wear light gear, muffle your movements and use a slow time shout if you have it.
Either way you'll need to get the key off Aringoth. The guild would highly prefer that you pickpocket it from him, though you can also use the brutal approach of killing Aringoth and looting his body. You can also loot the room for some good treasure, including the Queen Bee Statue sitting near the owner's bed. Once you have the key by either means head down into the basement. Once again kill or sneak by the guards down here. If you really want to be careful use a potion of invisibility or use the hilarious cheat of placing wide baskets over the mercenaries' heads. Out of sight out of mind for these creepy fake digital guards. Then is also the option of just outrunning the enemy, as the world will stop around you as you break open the safe.
Regardless of how you get into the basement, head to the quest marker and unlock the safe with your key. This safe cannot be picked so you will need the key from Aringoth. With your bounty collected return to Beynjolf in Riften for a reward.
The House of Horrors
Marvel Rivals - Official Loki Character Reveal Trailer | The King of Yggsgard Remnant 2 - The Forgotten Kingdom | DLC Launch Trailer Stellar Blade - Official "The Journey: Part 2" Behind The Scenes Trailer | PS5 Games Fortnite Festival - Official Billie Eilish Cinematic Season 3 Trailer Dead by Daylight | Tome 19: Splendor | Reveal Trailer Starship Troopers: Extermination - Official "The New Vanguard" Update 0.7.0 Trailer 2XKO - Official Illaoi Champion Gameplay Reveal Trailer Destiny 2: The Final Shape | Journey into The Traveler Trailer Solo Leveling: Arise - Character Gameplay Teaser #15: Seo Jiwoo Genshin Impact - Character Demo - "Arlecchino: Lullaby" Goddess Of Victory: Nikke | Last Kingdom Full Animated Cinematic Trailer Metaphor: ReFantazio The King’s Trial Trailer
Please enter your date of birth to view this video
By clicking 'enter', you agree to GameSpot's
Terms of Use and
Privacy Policy
Scattered around the world are Daedric Lords that will each give you quests and rewards for being their servants. Most of these require a specific level to start. Molag Bal's quest can be started at level one and though somewhat random, will typically be rather easy.
Hitch a wagon to Markarth in the far south west of the map. Here head to the abandoned house and wait until Vigilant Tyranus arrives. Agree with the man and enter the strange house. You'll soon hear the Molag who will order you to kill Tyranus. If you want the rewards of this mission do so and kill the man. Next head down to the basement and listen to Molag's next order: Find Logrolf the Willful and bring him to the Daedric prince.
Logrolf can spawn in a few different bandit camps, so the difficulty of recovering him can be a bit random. For use he was at Bruca's Leap Redoubt, which is south of Solitude. In other cases he may be at Deepwood Redoubt, but the former is much easier to deal with. kill any Forsworn casters or fighters that are protecting the mark. Now you can free Logrolf by persuasion, intimidation, or simply pay him.
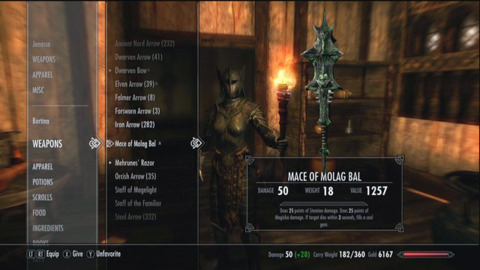
Now head back to Markarth and into the abandoned house. Molag will capture Logrolf and order you to beat the man into submission. Beat up Logrolf until he surrenders to the Daedric Prince. Afterwards kill Logrolf anyway and Molag Bal will reward you with his own mace. This nice weapon is very powerful (starts at 16 base damage and will quickly scale upwards), damages stamina, magicka, and can even fill soul gems.
Alchemy
Alchemy is one of the three crafting skills your character can train in. Many different potions and poisons can be made with different ingredients. The simplest recipes only have a single effect, while more complex creations can yield more bonuses or even negative side effects.
First you'll need to gather up various ingredients that can be found in many locations: mushrooms in caves, fish from rivers, wild plants, and even the body parts of defeated enemies. Each of these ingredients have four effects which start off hidden. You can discover what these effects are by ingesting the compound (and receive the benefits/impairments); low level Alchemists will only learn the first of the four properties, but those with the Experimenter perk can learn additional effects. You don't actually need to know the effects before brewing a potion.
As you experiment with ingredients each successful potion will reveal the hidden effect used. If none of the ingredients used have any matching effects the crafting attempt will result in failure. However, as long as there is even one match a potion or poison will be made. This bonus will be stronger if you add in a third ingredient that also has this property. For example adding Juniper Berries and Namira's Rot will yield a Regenerate Health Potion. If you added in Garlic the Health Regeneration would be stronger. However, if you instead used a Luna Moth Wing the potion would have the side effect of Damage Magicka. The Purity perk will remove the negative effects from potions and positive effects from poisons.
You will skill up faster experimenting with new ingredients instead of relying on known recipes, even if the resulting potion is the same. If you're skilling up and want to gain some profit as well, consider making potions out of Hanging Moss, Bear Claws and Eye of Sabre Cat. This combination will yield potions that have five expensive properties: Fortify Health, Fortify One-Handed, Restore Stamina, Damage Magicka and Damage Magicka Regen.
Among the most expensive and sought after single effects include Invisibility and Slow. For Invisibility it's best to start with an Ice Wraith Tooth to create a "pure" Invisibility potion, as the secondary ingredient won't matter. However, other combinations will have benefits or handicaps. Luna Moth Wing and Vampire Dust will add Regenerate Health on top of Invisibility, but Luna Moth Wing with Chaurus Egg will add Damage Magicka. For the Slow effect Deathbell, Large Antlers, Salt Pile, and River Betty will all yield a Slow poison; but using the flower and fish together will add in Damage Health.
Because of the sheer amount of possible creations we've listed out each of the 92 ingredients and their four effects. There are 52 possible effects so be sure to cross reference each ingredient so that you'll be satisfied with all bonuses and negatives.
| Ingredient | Source/Location | Primary Effect | Secondary Effect | Tertiary Effect | Quartary Effect |
|---|---|---|---|---|---|
| Abecean Longfin | River Fish | Weakness to Frost | Fortify Sneak | Weakness to Poison | Fortify Restoration |
| Bear Claws | Bear | Restore Stamina | Fortify Health | Fortify One-Handed | Damage Magicka Regen |
| Bee | Beehive | Restore Stamina | Ravage Stamina | Regenerate Stamina | Weakness to Shock |
| Beehive Husk | Beehive | Resist Poison | Fortify Light Armor | Fortify Sneak | Fortify Destruction |
| Bleeding Crwon | Mushroom | Weakness to Fire | Fortify Block | Weakness to Poison | Resist Magic |
| Blisterwort | Cave | Damage Stamina | Frenzy | Restore Health | Fortify Smithing |
| Blue Butterfly Wing | Butterfly | Damage Stamina | Fortify Conjuration | Damage Magicka Regen | Fortify Enchanting |
| Blue Dartwing | Dragonfly | Resist Shock | Fortify Pickpocket | Restore Health | Fear |
| Blue Mountain Flower | Mountain Flower | Restore Health | Fortify Conjuration | Fortify Health | Damage Magicka Regen |
| Bone Meal | Draugr | Damage Stamina | Resist Fire | Fortify Conjuration | Ravage Stamina |
| Briar Heart | Forsworn | Restore Magicka | Fortify Block | Paralysis | Fortify Magicka |
| Butterfly Wing | Butterfly | Restore Health | Fortify Barter | Lingering Damage Stamina | Damage Magicka |
| Canis Root | Near Rocks | Damage Stamina | Fortify One-Handed | Fortify Marksman | Paralysis |
| Charred Skeever Hide | Campfires | Restore Stamina | Cure Disease | Resist Poison | Restore Health |
| Chaurus | Caves and Cellars | Weakness to Poison | Fortify Stamina | Damage Magicka | Invisibility |
| Chicken Egg | Chicken Nest | Resist Magic | Damage Magicka Regen | Waterbreathing | Lingering Damage Stamina |
| Creep Cluster | Roads | Restore Magicka | Damage Stamina Regen | Fortify Carry Weight | Weakness to Magic |
| Crimson Nirnroot | Dwemer Dungeons | Damage Health | Damage Stamina | Invisibility | Resist Magic |
| Cyrodilic Spadetail | River Fish | Damage Stamina | Fortify Restoration | Fear | Ravage Health |
| Daedra Heart | Daedra | Restore Health | Damage Stamina Regen | Damage Magicka | Fear |
| Deathbell | Swamps | Damage Health | Ravage Stamina | Slow | Weakness to Poison |
| Dragon's Tongue | Roads | Resist Fire | Fortify Barter | Fortify Illusion | Fortify Two-handed |
| Dwarven Oil | Dwemer Ruins | Weakness to Magic | Fortify Illusion | Regenerate Magicka | Restore Magicka |
| Ectoplasm | Ghosts | Restore Magicka | Fortify Destruction | Fortify Magicka | Damage Health |
| Elves Ear | Plants and Houses | Restore Magicka | Fortify Marksman | Weakness to Frost | Resist Fire |
| Eye of Sabre Cat | Sabre Cat | Restore Stamina | Ravage Health | Damage Magicka | Restore Health |
| Falmer Ear | Falmer | Damage Health | Frenzy | Resist Poison | Fortify Lockpicking |
| Fire Salts | Flame Atronach | Weakness to Frost | Resist Fire | Restore Magicka | Regenerate Magicka |
| Fly Amanita | Caves | Resist Fire | Fortify Two-handed | Frenzy | Regenerate Stamina |
| Frost Mirriam | Plants and Houses | Resist Frost | Fortify Sneak | Ravage Magicka | Damage Stamina Regen |
| Frost Salts | Frost Atronach | Weakness to Fire | Resist Frost | Restore Magicka | Fortify Conjuration |
| Garlic | Farms and Wilderness | Resist Poison | Fortify Stamina | Regenerate Magicka | Regenerate Health |
| Giant Lichen | Rivers | Weakness to Shock | Ravage Health | Weakness to Poison | Restore Magicka |
| Giant's Toe | Giant | Damage Stamina | Fortify Health | Fortify Carry Weight | Damage Stamina Regen |
| Glow Dust | Wispmother | Damage Magicka | Damage Magicka Regen | Fortify Destruction | Resist Shock |
| Glowing Mushroom | Caves | Resist Shock | Fortify Destruction | Fortify Smithing | Fortify Health |
| Grass Pod | Crass Spikes | Resist Poison | Ravage Magicka | Fortify Alteration | Restore Magicka |
| Hagraven Claw | Hagraven | Resist Magic | Lingering Damage Magicka | Fortify Enchanting | Fortify Barter |
| Hagraven Feathers | Hagraven | Damage Magicka | Fortify Conjuration | Frenzy | Weakness to Shock |
| Hanging Moss | Vegetation | Damage Magicka | Fortify Health | Damage Magicka Regen | Fortify One-Handed |
| Hawk Beak | Hawk | Restore Stamina | Resist Frost | Fortify Carry Weight | Resist Shock |
| Hawk Feathers | Hawk | Cure Disease | Fortify Light Armor | Fortify One-Handed | Fortify Sneak |
| Histcarp | River Fish | Restore Stamina | Fortify Magicka | Damage Stamina Regen | Waterbreathing |
| Honey Comb | Beehive | Restore Stamina | Fortify Block | Fortify Light Armor | Ravage Stamina |
| Human Flesh | Falmer | Damage Health | Paralysis | Restore Magicka | Fortify Sneak |
| Human Heart | Falmer | Damage Health | Damage Magicka | Damage Magicka Regen | Frenzy |
| Ice Wraith Teeth | Ice Wraith | Weakness to Frost | Fortify Heavy Armor | Invisibility | Weakness to Fire |
| Imp Stool | Mushroom | Damage Health | Lingering Damage Health | Paralysis | Restore Health |
| Jarrin Root | Plant | Damage Health | Damage Magicka | Damage Stamina | Damage Magicka Regen |
| Jazbay Grape | Guardian Stones | Weakness to Magic | Fortify Magicka | Regenerate Magicka | Ravage Health |
| Juniper Berries | Juniper Tree | Weakness to Fire | Fortify Marksman | Regenerate Health | Damage Stamina Regen |
| Large Antlers | Deer | Restore Stamina | Fortify Stamina | Slow | Damage Stamina Regen |
| Lavender | Plant | Resist Magic | Fortify Stamina | Ravage Magicka | Fortify Conjuration |
| Luna Moth Wing | Luna Moth | Damage Magicka | Fortify Light Armor | Regenerate Health | Invisibility |
| Moon Sugar | Beastman Merchants | Weakness to Fire | Resist Frost | Restore Magicka | Regenerate Magicka |
| Mora Tapinella | Dead Trees | Restore Magicka | Lingering Damage Health | Regenerate Stamina | Fortify Illusion |
| Mudcrab Chitin | Mudcrab | Restore Stamina | Cure Disease | Resist Poison | Resist Fire |
| Namira's Rot | Caves | Damage Magicka | Fortify Lockpicking | Fear | Regenerate Health |
| Nightshade | Graves | Damage Health | Damage Magicka Regen | Lingering Damage Stamina | Fortify Destruction |
| Nirnroot | Lakes | Damage Health | Damage Stamina | Invisibility | Resist Magic |
| Nordic Barnacle | Underwater | Damage Magicka | Waterbreathing | Regenerate Health | Fortify Pickpocket |
| Orange Dartwing | Dragonfly | Restore Stamina | Ravage Magicka | Fortify Pickpocket | Lingering Damage Health |
| Pearl | Clams | Restore Stamina | Fortify Block | Restore Magicka | Resist Shock |
| Pine Thrush Egg | Nests | Restore Stamina | Fortify Lockpicking | Weakness to Poison | Resist Shock |
| Powdered Mammoth Tusk | Giant Camp | Restore Stamina | Fortify Sneak | Weakness to Fire | Fear |
| Purple Mountain Flower | Mountains | Restore Stamina | Fortify Sneak | Lingering Damage Magicka | Resist Frost |
| Red Mountain Flower | Mountains | Restore Magicka | Ravage Magicka | Fortify Magicka | Damage Health |
| River Betty | River Fish | Damage Health | Fortify Alteration | Slow | Fortify Carry Weight |
| Rock Warbler Egg | Nests | Restore Health | Fortify One-Handed | Damage Stamina | Weakness to Magic |
| Sabre Cat Tooth | Sabre Cat | Restore Stamina | Fortify Heavy Armor | Fortify Smithing | Weakness to Poison |
| Salt Pile | Merchants | Weakness to Magic | Fortify Restoration | Slow | Regenerate Magicka |
| Scaly Pholiota | Caves | Weakness to Magic | Fortify Illusion | Regenerate Stamina | Fortify Carry Weight |
| Silverside Perch | River Fish | Restore Stamina | Damage Stamina Regen | Ravage Health | Resist Frost |
| Skeever Tail | Skeever | Damage Stamina Regen | Ravage Health | Damage Health | Fortify Light Armor |
| Slaughterfish Egg | Underwater | Resist Poison | Fortify Pickpocket | Lingering Damage Health | Fortify Stamina |
| Slaughterfish Scales | Slaughterfish | Resist Frost | Lingering Damage Health | Fortify Heavy Armor | Fortify Block |
| Small Antlers | Elk | Weakness to Poison | Fortify Restoration | Lingering Damage Stamina | Damage Health |
| Small Pearl | Clams | Restore Stamina | Fortify One-Handed | Fortify Restoration | Resist Frost |
| Snowberries | Bush | Resist Fire | Fortify Enchanting | Resist Frost | Resist Shock |
| Spider Egg | Spider Lair | Damage Stamina | Damage Magicka Regen | Fortify Lockpicking | Fortify Marksman |
| Spriggan Sap | Spriggan | Damage Magicka Regen | Fortify Enchanting | Fortify Smithing | Fortify Alteration |
| Swamp Fungal Pod | Swamp | Resist Shock | Lingering Damage Magicka | Paralysis | Restore Health |
| Taproot | Spriggan | Weakness to Magic | Fortify Illusion | Regenerate Magicka | Restore Magicka |
| Thistle Branch | Thistle Plant | Resist Frost | Ravage Stamina | Resist Poison | Fortify Heavy Armor |
| Torchbug Thorax | Torchbug | Restore Stamina | Lingering Damage Magicka | Weakness to Magic | Fortify Stamina |
| Troll Fat | Fat | Resist Poison | Fortify Two-handed | Frenzy | Damage Health |
| Tundra Cotton | Mountains | Resist Magic | Fortify Magicka | Fortify Block | Fortify Barter |
| Vampire Dust | Vampires | Invisibility | Restore Magicka | Regenerate Health | Cure Disease |
| Void Salts | Atronach | Weakness to Shock | Resist Magic | Damage Health | Fortify Magicka |
| Wheat | Farms and Merchants | Restore Health | Fortify Health | Damage Stamina Regen | Lingering Damage Magicka |
| White Cap | Mushrooms | Weakness to Frost | Fortify Heavy Armor | Restore Magicka | Ravage Magicka |
| Wisp Wrappings | Wisp Mother | Restore Stamina | Fortify Destruction | Fortify Carry Weight | Resist Magic |
Xbox 360 Achievements
| Achievement Name | How to Earn | Reward |
|---|---|---|
| Unbound | Complete "Unbound". | 10 G |
| Bleak Falls Barrow | Complete "Bleak Falls Barrow". | 10 G |
| The Way of the Voice | Complete "Complete the Way of the Voice". | 20 G |
| Diplomatic Immunity | Complete "Diplomatic Immunity". | 20 G |
| Alduin's Wall | Complete "Alduin's Wall". | 20 G |
| Elder Knowledge | Complete "Elder Knowledge". | 20 G |
| The Fallen | Complete "The Fallen". | 20 G |
| Dragonslayer | Complete "Dragonslayer". | 50 G |
| Take Up Arms | Join the Companions. | 10 G |
| Blood Oath | Become a member of the Circle. | 10 G |
| Glory of the Dead | Complete "Glory of the Dead". | 30 G |
| Gatekeeper | Join the College of Winterhold. | 10 G |
| Revealing the Unseen | Complete "Revealing the Unseen". | 10 G |
| The Eye of Magnus | Complete "The Eye of Magnus". | 30 G |
| Taking Care of Business | Join the Thieves Guild. | 10 G |
| Darkness Returns | Complete "Darkness Returns". | 10 G |
| One with the Shadows | Returned the Thieves Guild to its former glory. | 30 G |
| With Friends Like These… | Join the Dark Brotherhood. | 10 G |
| Bound Until Death | Complete "Bound Until Death". | 10 G |
| Hail Sithis! | Complete "Hail Sithis!". | 30 G |
| Taking Sides | Join the Stormcloaks or the Imperial Army. | 10 G |
| War Hero | Capture Fort Sunguard or Fort Greenwall. | 10 G |
| Hero of Skyrim | Capture Solitude or Windhelm. | 30 G |
| Sideways | Complete 10 Sidequests. | 20 G |
| Hero of the People | Complete 30 misc. objectives. | 10 G |
| Hard Worker | Chop wood, mine ore, and cook food. | 10 G |
| Thief | Pick 50 locks and 50 pockets. | 30 G |
| Snake Tongue | Successfully persuade, bribe, and intimidate. | 10 G |
| Blessing | Select a Standing Stone blessing. | 10 G |
| Standing Stones | Find 13 Standing Stones. | 30 G |
| Citizen | Buy a house. | 10 G |
| Wanted | Escape from jail. | 10 G |
| Married | Get married. | 10 G |
| Artificer | Make a smithed item, an enchanted item, and a potion. | 10 G |
| Master Criminal | Bounty of 1000 gold in all nine holds. | 20 G |
| Golden Touch | Have 100,000 gold. | 30 G |
| Delver | Clear 50 dungeons. | 40 G |
| Skill Master | Get a skill to 100. | 40 G |
| Explorer | Discover 100 locations. | 40 G |
| Reader | Read 50 skill books. | 20 G |
| Daedric Influence | Acquire a Daedric Artifact. | 10 G |
| Oblivion Walker | Collect 15 Daedric Artifacts. | 30 G |
| Dragon Soul | Absorb a dragon soul. | 10 G |
| Dragon Hunter | Absorb 20 dragon souls. | 20 G |
| Words of Power | Learn all three words of a shout. | 10 G |
| Thu'um Master | Learn 20 shouts. | 40 G |
| Apprentice | Reach level 5. | 5 G |
| Adept | Reach level 10. | 10 G |
| Expert | Reach level 25 | 25 G |
| Master | Reach level 50. | 50 G |
PlayStation 3 Trophies
| Trophy Name | How to Earn | Trophy Type |
|---|---|---|
| Platinum Trophy | Earn all 50 standard trophies. | Platinum |
| Unbound | Complete "Unbound". | Bronze |
| Bleak Falls Barrow | Complete "Bleak Falls Barrow". | Bronze |
| The Way of the Voice | Complete "Complete the Way of the Voice". | Bronze |
| Diplomatic Immunity | Complete "Diplomatic Immunity". | Bronze |
| Alduin's Wall | Complete "Alduin's Wall". | Bronze |
| Elder Knowledge | Complete "Elder Knowledge". | Bronze |
| The Fallen | Complete "The Fallen". | Bronze |
| Dragonslayer | Complete "Dragonslayer". | Gold |
| Take Up Arms | Join the Companions. | Bronze |
| Blood Oath | Become a member of the Circle. | Bronze |
| Glory of the Dead | Complete "Glory of the Dead". | Silver |
| Gatekeeper | Join the College of Winterhold. | Bronze |
| Revealing the Unseen | Complete "Revealing the Unseen". | Bronze |
| The Eye of Magnus | Complete "The Eye of Magnus". | Silver |
| Taking Care of Business | Join the Thieves Guild. | Bronze |
| Darkness Returns | Complete "Darkness Returns". | Bronze |
| One with the Shadows | Returned the Thieves Guild to its former glory. | Silver |
| With Friends Like These… | Join the Dark Brotherhood. | Bronze |
| Bound Until Death | Complete "Bound Until Death". | Bronze |
| Hail Sithis! | Complete "Hail Sithis!". | Silver |
| Taking Sides | Join the Stormcloaks or the Imperial Army. | Bronze |
| War Hero | Capture Fort Sunguard or Fort Greenwall. | Bronze |
| Hero of Skyrim | Capture Solitude or Windhelm. | Silver |
| Sideways | Complete 10 Sidequests. | Bronze |
| Hero of the People | Complete 30 misc. objectives. | Bronze |
| Hard Worker | Chop wood, mine ore, and cook food. | Bronze |
| Thief | Pick 50 locks and 50 pockets. | Silver |
| Snake Tongue | Successfully persuade, bribe, and intimidate. | Bronze |
| Blessing | Select a Standing Stone blessing. | Bronze |
| Standing Stones | Find 13 Standing Stones. | Silver |
| Citizen | Buy a house. | Bronze |
| Wanted | Escape from jail. | Bronze |
| Married | Get married. | Bronze |
| Artificer | Make a smithed item, an enchanted item, and a potion. | Bronze |
| Master Criminal | Bounty of 1000 gold in all nine holds. | Bronze |
| Golden Touch | Have 100,000 gold. | Silver |
| Delver | Clear 50 dungeons. | Silver |
| Skill Master | Get a skill to 100. | Silver |
| Explorer | Discover 100 locations. | Silver |
| Reader | Read 50 skill books. | Bronze |
| Daedric Influence | Acquire a Daedric Artifact. | Bronze |
| Oblivion Walker | Collect 15 Daedric Artifacts. | Silver |
| Dragon Soul | Absorb a dragon soul. | Bronze |
| Dragon Hunter | Absorb 20 dragon souls. | Bronze |
| Words of Power | Learn all three words of a shout. | Bronze |
| Thu'um Master | Learn 20 shouts. | Silver |
| Apprentice | Reach level 5. | Bronze |
| Adept | Reach level 10. | Bronze |
| Expert | Reach level 25 | Bronze |
| Master | Reach level 50. | Silver |
Got a news tip or want to contact us directly? Email news@gamespot.com
Join the conversation