The Elder Scrolls IV: Shivering Isles Walkthrough
"As flies to wanton boys, are we to the gods." Find out just how true that is in GameSpot's Walkthrough for The Elder Scrolls: Shivering Isles!
Design: Randall Montanari
It's been almost a year since The Elder Scrolls: Oblivion launched its way onto our Xbox 360's and PCs. It immediately garnered significant critical acclaim, and wound up winning GameSpot's award for Best RPG of 2006. Since it's been released, though, it's also been the subject of plenty of modifications, both from its fan community and from its developers. While some of the addons were seemingly designed solely to annoy people (hello, horse armor!) there were also plenty of new and meaningful additions to the game, including an entirely new faction with new quests to complete.
Now, though, Bethesda has released the first full-fledged expansion to Oblivion, and it's available for download over Xbox Live or on PC; you can also buy a boxed retail copy of it, as well. In it, a portal opens up in Cyrodiil, where Oblivion takes place, and leads you into the Shivering Isles, a land that's run by the god of madness, Sheogorath. He's worried about an impending invasion by the forces of order, and asks you to help him break out of a cycle that's been reoccuring for millenia.
GameSpot's Game Guide to Shivering Isles will guide you through the main quest of the game. Enjoy!
General Tips
Alchemy In The Isles
If you're already advanced in your alchemy skills when you enter the Shivering Isles, you'll find a whole host of new ingredients to play around with here. That's good, since most of the ingredients from Cyrodiil won't appear at all! You may find the odd bonemeal on a corpse or the usual assortment of fruits in people's cupboards, but for the most part, you'll have to deal with a whole new set of ingredients.
Here's a few recipes to get you started. Most of these ingredients will assume that you have an Expert level in Alchemy, and we're further going to assume that you only use ingredients from the Shivering Isles. If you bring in a load of plants from Cyrodiil, expect to have a much broader array of choices here. We're just going to deal with a few damaging potions; there are plenty of ways to make Restore Fatigue and Restore Health potions with these ingredients, especially if you get yourself up to Master alchemy and can make potions with one ingredient.
Bone Marrow + Letifer Orca Digestive Slime = Damage Health / Damage Magicka
Black Tar + Scalon Fin = Damage Health / Shock Damage
Bone Marrow + Rot Scale = Damage Health / Paralyze
Madness Ore and Amber Equipment
As you adventure around the Shivering Isles, you’ll note the appearance of two new kinds of substances: madness ore and amber. Madness ore often drops off of veins in some of the more structured ruins in the world, and off of grummite enemies. Madness matrices are generally found either on grummites, or in chests in grummite lairs. Amber and amber matricesis found on gnarl enemies, or on amber roots in gnarl lairs. Matrices are going to be somewhat rare unless you go exploring quite a bit.
Note that these armors are probably going to be the best armor you can find in the game, but if you have already maxed yourself out with an 85% armor rating (which is definitely possible if you’ve been using heavy Daedric armor and a shield), you’re unlikely to get much benefit from having a new set forged.
Note, however, that crafting a weapon or piece of armor when you possess the appropriate matrix will allow you to make a magical piece of equipment. You can’t choose the enchantment that gets built into the equipment, so some of them might not wind up being worthwhile to you. The magical equipment will also have the exact same weight and armor or damage stats as the normal equipment will, but with the simple addition of an enchantment of some sort. In some cases these are going to be useful enchantments, but for the most part you'll probably want to get the basic kinds of armor and use those with enchantments to custom make a set of armor to suit your needs.
When you find madness ore or matrices, bring them to Cutter's Weapons in Crucible to get them forged. Amber can be brought to the Missing Pauldron in Bliss.
Into The Shivering Isles

When you first load up your copy of Oblivion with the Shivering Isles installed, not much will really seem different. You may, after a bit of warping around, get a quest marker, though, pointing you towards a strange door which has appeared in Nibon Bay, near Bravil. If you look on your map, you should see the marker just north of the L in "Bravil" there. If you don't get the quest to go investigate, feel free to head out into the water and look around for yourself. Finding the island will allow you access to the new content.
When you do reach the strange door, speak to the guard outside and wait for him to kill the man who exits. After that, a few sentences will come out of the door's mouth, at which point you'll be able to enter it.
Into The Fringe
After speaking to the man at the table and agreeing to help his lord, Sheogorath, you'll enter The Fringe. You'll need to pass through the Gates of Madness to complete the first part of your eventual quest.
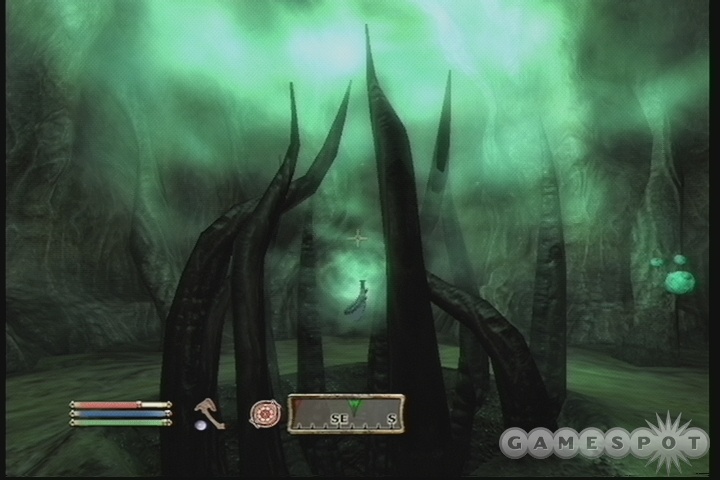
Now, when you hit the trail, you're going to be able to explore as much as you like. There are some new monsters in your path (whose toughness will likely scale to your level), as well as plenty of new alchemical ingredients. There are a couple of dungeons nearby, as well as a small town, called Passwall, which is populated by people who entered the Fringe with the hopes of bypassing the Gates of Madness, but who have never been able to do so.
Quest: Through The Fringe of Madness
Your goal here is to get beyond the Gatekeeper and through the gates to reach the true Shivering Isles. Unfortunately, the Gatekeeper is a hideous beast that kills a group of adventurers as you approach it. You won't be able to bypass it yourself, in your current state. If you question the gentlemen standing nearby, you'll learn of a man named Jayred who might be able to help. If you question some of the townspeople, you'll also be referred to Relmyna Verenim, a sorceress who lives in the Wastrel's Purse inn.
Relmyna should be the first person you talk to. She has some interesting things to say about your tongue, but if you walk into her room, you can read the letter she's written to Sheogorath, which sits on her desk. Apparently Relmyna is the creator of the Gatekeeper, and visits it every day at midnight. Relmyna will also tell you about her apprentice, Nanette Don, who apparently wanders the outside of the village in the morning. If you can find Nanette, and either bribe or persuade her above a 70 point relationship, she'll make more explicit the inference you should've gained from Relmyna's letter: Relmyna's tears agitate and harm the Gatekeeper.
Jayred Ice-Veins has another approach in mind. He wants you to get him into the Temple of Flesh and Bones, where he can see the body of a previous Gatekeeper. He believes that making arrows out of the Gatekeeper's brother will allow him to harm it. You're going to need both those arrows and some tears of Relmyna if you want to take down the Gatekeeper.
Tears of Relmyna: To obtain the tears, simply show up at the Gatekeeper's position shortly after midnight. You'll see Relmyna speak to the beast, then walk away. She'll leave a handkerchief on the ground. Pick it up will net you a few vials of poison; poison that will only work on the Gatekeeper.
Bone Arrows: You can obtain the bone arrows by speaking to Jayred and guiding him into the Temple of Flesh and Bones. After picking the lock, help him kill off the skeletons in the area, and Jayred will then make a few Gatekeeper Bone Arrows after you wait for a few hours.
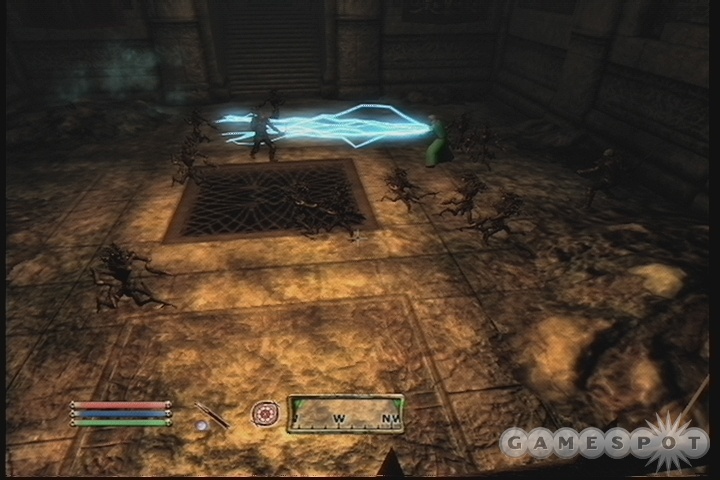
When you have both items, tell Jayred to follow you and head up to the Gatekeeper. If you're an archer, you can dose your arrows with Relmyna's Tears and start firing away; otherwise, poison a melee weapon with the Tears and hit him to start a poisonous reaction that will soon kill the beast. Grab the Key to Dementia and the Key to Mania from the body.
At this point, you can choose which door you wish to enter through, either the door to Mania or the door to Dementia. This doesn't affect too much, although you will not immediately be able to move from one side of the island to the other. You do, however, get a new Greater Power, depending on your choice. If you get the Blessing of Mania, it will let you cast Frenzy on a group of foes in front of you, but it might not affect enemies if you're already too high of a level. Blessing of Dementia, on the other hand, will let you Demoralize enemies and attempt to cause them to run away. Neither of these are particularly overpowerful, but they may be helpful at some point.
Getting To Sheogorath
After you get through the Gates of Madness, you can feel free to explore the Shivering Isles if you like, but your main goal should be to get to Sheogorath and continue the storyline. He resides in New Sheoth, a city on the eastern side of the island, where most of the decent shops are located, to boot.
New Sheoth is divided into two sections, much like the Isles themselves. Bliss is the relatively cheerful part of the city, with the Missing Pauldron shop that will forge your Amber into new weapons or light armor, whereas Crucible is a somewhat dank part of town, where Cutter’s Weapons will turn your madness ore into new equipment. For more details on these items, see the Madness Ore & Amber chapter of the guide. Other houses and citizens dot the city, and you’ll be able to pick up a few new quests if you ask around.
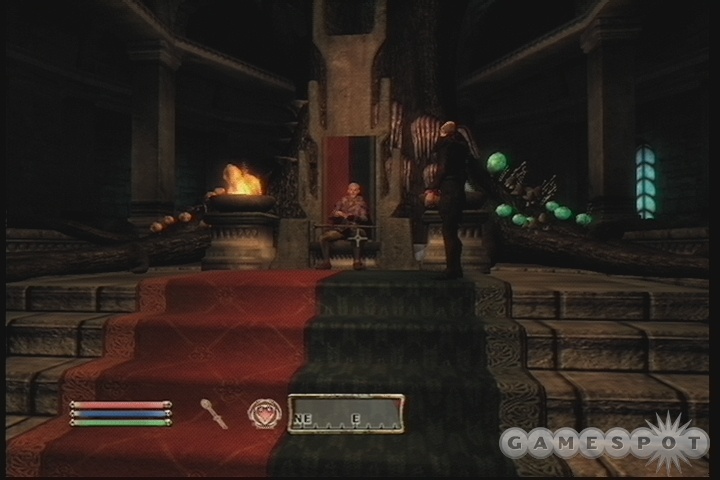
When you reach the palace in New Sheoth, find the throne room and speak to Sheogorath, who’ll give you a new task.
Quest: A Better Mousetrap
Feel free to inquire with Haskill about this quest if you’re unsure of what to do. The long and short of it is that you’re going to have to go to a place called Xedilian, find three of the focus crystals that have been lost in the ruins, and return them to their resting places. That will let you head to the center of the ruins and retune a soundwave that the structure is using to cause adventurers from Cyrodiil to want to come to the Shivering Isles.
Xedilian is located in the southern section of the Isles. It’ll be marked on your map when you receive the quest, so head that way and find the dungeon. There’s a small town nearby if you wish to buy or sell anything, but your goal is to reach Xedilian itself.
Xedilian Interior
When you reach Xedilian, push the pushbutton to the right of the first door to open your path, then start following the hallways to reach the green marker on your map. There’ll be some doors you can’t open yet, so don’t worry about them. Just keep on passing through until you reach a few Grummites. The shaman here has a crystal staff, the tip of which is the first Focus Crystal you need. Kill him, loot the staff, then affix the crystal to the nearby Judgment Nexus to move on.
After moving on a bit, you’ll find a button near a couple of doors. Hit it to drop the floor out from under you. Another shaman is nearby, with another Crystal; you know the drill. After killing the shaman and affixing the second Focus Crystal, you’ll be able to move on to the Halls of Judgment. The third and final shaman is near the entrance to this area, so kill it and light up the last Judgment Nexus.
Attenuate The Resonator
The Resonator of Judgment is guarded by another pair of Grummite warriors and a shaman. Kill them, then activate the Resonator. You won’t be able to escape through the halls you took already; instead, a teleporter will open up to the right of the Resonator.
Take that to meet up with Kiliban Nyrandil. If you read the manual to Xedilian and thought that you would be subjected to the tests in the dungeon, then be prepared for a pleasant surprise; instead of being the testee, you’re going to be the tester.
Offing the Adventurers
At this point, a group of adventurers will begin entering the dungeon. Your goal is to either kill them off or drive them mad. Each of the three traps (as described in the Manual of Xedilian) has either a dementia resolution (the orange buttons) or a mania resolution (green buttons). Essentially, the orange buttons will drive them mad and the green buttons will kill them.
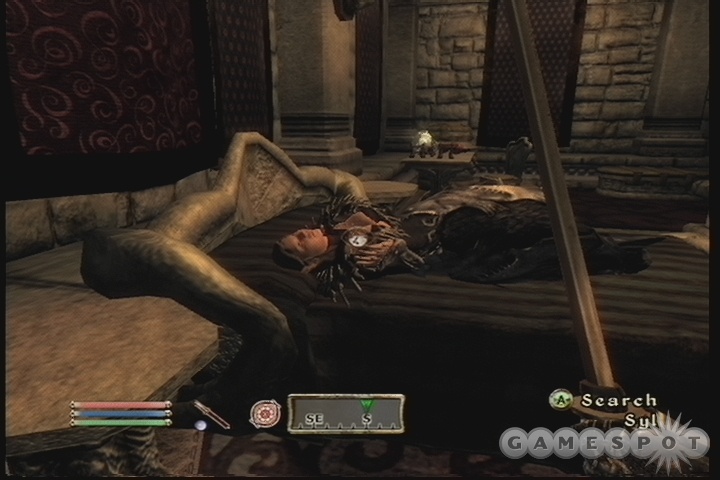
No matter which way you kill off the adventurers, you’ll gain the Duskfang/Dawnfang weapon when they die and you return to the beginning chamber. You’ll also be attacked by a few Knights of Order, a group of beings that apparently want to shut down Sheogorath’s little party here. Those evildoers! Or good-doers…or…something. Be sure to loot their bodies to obtain the Hearts of Order that they drop; they’ll allow you to open the crystal chests you may or may not have discovered around the Isles.
Anyway, the Duskfang/Dawnfang. If you read the book, you’ll know what it does. If you’re too cool for reading, though, basically all you need to know is that it gets stronger as you kill more people. If you kill people at night, the blade gets stronger during the day, and vice versa. Enjoy!
Back to Sheogorath
Return to Sheogorath, and more details of the plot fall into place: you’re to stop Greymarch, which is apparently the millenial time when the forces of Order wipe out the realm of Madness. Before you can do so, though, Sheogorath wants you to understand his realm a bit better, and thus tells you to speak to his two lieutenants, the Duke of Mania and the Duchess of Dementia. You can speak to them in any order; they can be found in the House of Mania and the House of Dementia, the doors to which can be found near Sheogorath’s throne.
Duke of Mania Quest: Addiction
Speak to the Duke of Mania, Thadon, and he’ll tell you all about a little tryst he apparently had with a member of a member of Syl’s court, Syl being the Duchess of Dementia. Apparently, the Chalice of Reversal, which Thadon adores, was lost during the affair and locked away someplace. He’ll ask you to find it for him, but won’t tell you where it is.
Find an Argonian woman named Wide-Eye who wanders around the House of Mania. She’ll tell you of a place called Dunroot Burrow, which is apparently guarded by Elytras. If you get her up to a high relationship, she’ll tell you about a Felldew poison which the Elytras drop. Apparently, eating it will cause you to experience drug-like effects, but is the only way to enter Dunroot Burrow, which is where the Chalice is hidden away.
If you head to the Burrow, you’ll find an Elytra Hatchling outside. Kill it, then imbibe the Felldew it carries (find it amongst your alchemical ingredients and press A to eat it). That will let you enter the Burrow.
Into The Burrow!
Now, as the Felldew effects wear off, and they’ll do so quickly, you’ll begin to feel the effects of withdrawal from the drug. That’ll hit you for a five point drain to your luck, intelligence, strength, and agility. After a bit more withdrawal, the effects will spread to your willpower, speed, and endurance, and then they’ll start increasing in severity. The last stage will knock off 15 of your hit points to boot. You need to get more Felldew to get back to your normal self, at least until you can find the Chalice. Other elytras here will drop it, so pick it up as you go along and eat it. If you’re a burly character that can survive the drawbacks, it’s not really necessary to worry about them. Eating a single Felldew will remove the effects entirely and start you back at full strength, at the beginning of withdrawal.
Fight your way through the elytras until you reach the Kelp Fen and head through it. If you’re an alchemist, you may want to collect the Flame Stalks that you see; they’re a 0.1 pound Restore Health potion if you can make potions with one ingredient, and they can be combined with some other ingredients to add Flame Damage to some of your Damage Health poisons. Keep heading through the dungeon until you reach the Sanctum of Decadence. Inside you’ll find a few Felldew addicts, as well as the Chalice of Reversal. It’s possible that grabbing the Chalice first will reverse these guys’ addiction and make them not hostile to you, but we simply killed them, grabbed the Chalice, and exited the area.
Return to Thadon
There’s an Obelisk of Order outside the exit here, and a new Priest of Order who’s watching over it. You can’t kill the Priest while the Obelisk is activated, so if you wish, you can shut it down. Do so by killing three Knights of Order and looting the Hearts of Order off their bodies. Place three of them into the Obelisk by walking up to it and activating it, then quickly kill the Priest of Order while the Obelisk is shut down, or he’ll simply open it up again.
Bring the Chalice back to Thadon to end the quest.
Duchess of Dementia Quest: The Lady of Paranoia
Although Sheogorath intimates the Syl can be difficult to speak to, you should be able to find her on her throne in the morning of most days, around 11:00, and perhaps throughout the rest of the day. She wants you to help expose a plot against her, and tells you to speak to Herdir, in the dungeons below. He’ll tell you what she wants: you need to speak to people in Crucible, and discover who conspires against Syl.
Basically, your goal here is to speak to someone — anyone — about the conspiracy. If the topic Conspiracy stays gold after speaking to them, then you can have Herdir torture them to find out what they really know.
You can start with Kithlan, although numerous people will probably point you in the same direction. If you have Herdir torture Kithlan, he’ll point you towards Anna, the young woman who roams the ground of the House of Dementia. Her position will also appear on your compass. She’ll point you Ma’zaddha, a catman who lives in Crucible. Unfortunately, when you torture him, he’ll refuse to offer up any info.
Torturous Intervention
If you wander around torturing people, you’ll find that many of them won’t respond to torture, because they don’t know anything. One person who does, however, is Bhisha, another cat-man who wanders the city streets. He will tell you that Ma’zaddha meets with an enforcer named Nelrene at night behind the shops in Crucible.
Find a place to wait until after midnight and do so, then sneak up on the green marks on your compass to overhear their conversation. That’ll give you your own proof of a conspiracy. You’ll have to talk to Ma’zaddha again when the two are done talking; he’ll cave in, and tell you to meet him the next day at midnight for more information. Torturing Nelrene won’t help you at all.
We Barely Knew Ye…

Wait a day and head to Ma’zaddha’s house at midnight. He’ll be dead, but you’ll find some keys on his body. Head upstairs and open his cabinet to find a swor of Nelrene’s and a note explaining the plot. Bring that to Nelrene, who’ll likely be standing guard in the House of Dementia, and you’ll have enough evidence to confront Muurine, the mastermind behind the plot. Speak to her, and she’ll confess without much difficulty. Speak to Syl in the morning, and she’ll warp Muurine into the torture chambers and ask you to join her down there. Syl will kill Muurine, and give you a new bow, the Ruin’s Edge, which casts a random spell effect on the target. You can also loot Muurine’s body for some keys.
Quest: The Cold Flame of Agnon
Now that you’ve experienced all there is to know about the two Houses of New Sheoth, Sheogorath will bestow upon you a new quest. The flame that burns above New Sheoth has been snuffed in anticipation of the coming Greymarch, and it’s up to you to travel to a place called Cylarne and retrieve the Flame of Agnon, which can relight the torch.
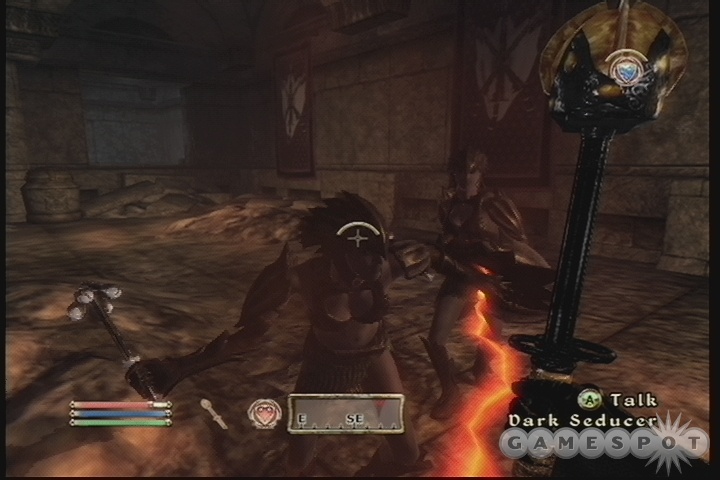
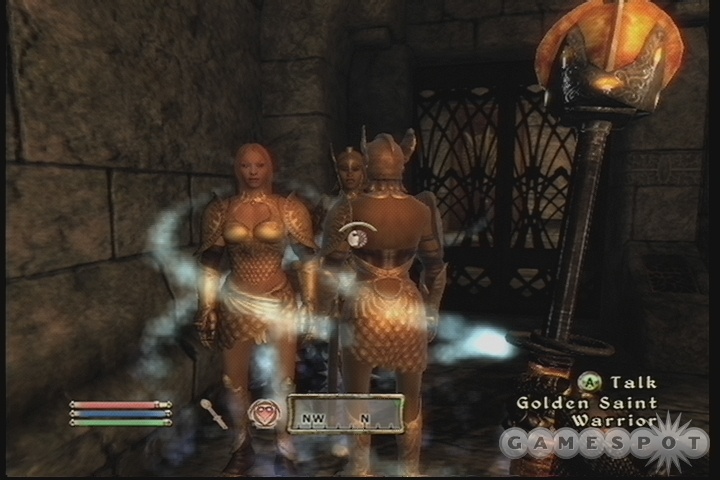
Head to Cylarne and speak to the two guards in the courtyard. Apparently, in order for the Flame to be relit, one of the factions will have to sweep out the other from their perch. The Dark Seducers hold the Altar of Despair, deep within the ruins, while the Golden Saints hold the Altar of Rapture, which is out in the open in the exposed ruins.
The Dark Seducers know that the Saints are about to attack them, and have set up a defensive perimeter to withstand their assault, while the Saints are indeed looking to attack the Seducers with the reinforcements they’ve brought. Both sides wish to control both of the altars, and both of them wish to have your aid to wipe out the other. You will have to decide which one of the factions you wish to aid. Choosing a side shouldn’t have any permanent effect on your standings elsewhere, although that’s difficult to judge at this point. You may simply wish to align yourself with whichever faction rules the side of New Sheoth you’ve been spending more time in.
Starting Off…

Regardless of whom you want to help out, the first thing you’ll want to do is head into the underground section of the ruins and find Ulfri, leader of the Seducers. If you agree to help her out, you can tell her that you wish to speak to the leader of the Saints first, which she’ll interpret as you wanting to find out their battle plans. Speak to Mirel and Kaneh, the leaders of the Saints, at this point. Kaneh is in charge, and insists on leading her forces down the main path into the underground lair. If you return to Ulfri with this knowledge, you can tell her that you’re going to set a trap for the Saints, which will cause all of the Seducers to reposition themselves in the Underdeep.
Now, if you wish to help the Seducers, return to Kaneh and tell her to take her soldiers into the Underdeep. If you want to help Kaneh, you can tell her to simply attack as she normally would; since the entire group of Seducers will be underground and thus won’t be able to defend the main passage that Kaneh will be attacking from.
Helping the Help…ful
If you agree to bring Kaneh into the Underdeep after Ulfri has trapped it and sent all of her troops down there, you’ll have to follow them in. As soon as the Saints realize that it’s a trap, they’ll turn on you; you’ll have to kill all of them, including Kaneh, to complete the mission. This is complicated, since there are a lot of them, and the Dark Seducer distractions are placed fairly far between. Lead the Saints further into the area to allow the Seducers to knock them around with their traps before finishing the Saints off.
Aiding the Saints is a bit easier. Whether you lead them through the unguarded Underdeep at first, or instruct the Seducers to switch positions, then take them through the main passage, the Seducer guards will be spread out and relatively more easy for the mass of Saints to pick off.
Returning The Flame
Regardless of your choice, you need to wipe out all of the members of the faction opposing the one that you sided with. If you do so, the leader of your allied faction will light the flame, allowing you to walk into the Flame of Agnon in the ruins and pick it up for yourself.
With the Flame in your possession (switch to a third-person view to ensure that it’s on you), return to the Sacellum in New Sheoth. You’ll be able to light the torch there on either the Mania or the Dementia side. The Dementia reward is the Raiment of Intrigue, a shirt that will fortify your Sneak, Security, Speed, and Luck stats; perfect if you rarely engage in combat. The Mania reward is the Raiment of Arden-Sul, which in our case fortified Intelligence and Willpower, and also imbued us with permanent Resist Paralysis (30%) and Shield (19%) effects. Both of these are simple shirts, and will replace whatever armor you’re wearing, if indeed you are wearing armor.
Quest: Ritual of Accession
If you report to Sheogorath (he may appear in the pews of the Sacellum after you light the flame), he’ll tell you to become the sovereign of either the House of Mania or the House of Dementia. Speak to both of the priests in the Sacellum to learn their specific rituals of Accession. For Mania, you’ll have to get Thadon to eat three pieces of a poisonous substance named Greenmote; for Dementia, you’ll have to cut out Syl’s heart. Whichever task you perform, you’ll need to bring an object from the body back to the Sucellum to complete the ritual. You can only choose one of the two options; when you do so, speak to Sheogorath to get the party started.
Mania: Taking Down Thadon
If you speak with the priest of Mania, he’ll point you towards Wide-Eye, one of the women who works for Thadon. If you speak to her, she’ll relatively easily spill the beans…some of them, anyway. If you pursue all of her conversation options (this might require a bit of bribery or persuasion), she’ll tell you that she performs a special errand each day at noon.

Wide-Eye should be marked on your compass, so wait around until it’s almost noon, then follow her into the Palace Grounds. She’ll flip a secret switch on one of the statues here, then descend into the Greenmote Silo. You need to follow her down in order to steal some of the Greenmote that you’ll use to overdose Thadon.
Now, being caught in the Silo is a bounty-laden offense, and there are Golden Saints sneaking about, so this isn’t necessarily the safest place to be if you haven’t been increasing your Sneak skill at all. If you still have them, or ever obtained them at all, equip items like the Ring of Khajiiti or the Gray Cowl of Nocturnal (or even the Raiment of Intrigue, if you obtained that) to increase your ability to move around down here without being spotted, and be sure to take off any heavy or light armor boots that you’re wearing to deaden the amount of noise that you make. Stick to the shadows, reach the interior of the silo, and grab a few Greenmotes from the large pile there before making your way back to the Palace Grounds.
Doctoring Dinner
Keeping your stealth equipment on, move into the House of Mania and enter the Duke’s Quarters. More Golden Saints patrol here, and in tight quarters as well, so if you had a hard time sneaking around before, you might want to bring some kind of invisibility spell or something along for the ride. Sneak past the Saints and doctor Thadon’s Wine, which is the large bottle on the shelves, and his Meal, which is on the table. Both of these are found in the northeastern room here.
With that done, return to the ballroom, wait until 8 PM, then watch Thadon keel over. Search his body for his blood, and don’t forget to loot him to obtain the Diadem of Euphoria, which will improve your Speechcraft, Fortify your Magicka, and let you Resist Magic to a small degree. Bring the blood back to the Sacellum and place it in the altar to become the Sovereign of Mania.
Dementia: Carving Up Syl
If, on the other hand, you want to take down Syl, the priest of Dementia will refer you to Anya Herrick and Kithlan, two of her advisors. You can speak to either of them, as you like. Kithlan will require some persuasion or bribery to get him to a point where he’ll agree to talk with you about replacing Syl. He’ll give you a House Dementia Key, which will let you enter the areas of the House that are off limits to you. If you can repeat the process of Anya, she’ll agree to clear out the interior gardens of a couple of the Elite Dark Seducers.
Equip yourself in whatever stealth equipment you have, and you might be able to sneak past the Seducers and reach Syl’s quarters; if not, you’ll probably have to fight them. Regardless, get into Syl’s quarters and examine the body on the dead. Looks like someone got here before you?
The Chase
Well, not really. Kithlan will appear and tell you that the body is simply a decoy, and that Syl is escaping through some hidden tunnels outside in the gardens. Loot the room thoroughly before heading out, then turn left from the door and click on the bust of Sheogorath in the gardens to find a hidden tunnel system. Xirethard is going to be the sight of a few challenges, including some Dark Seducer ambushes, but if you make your way through the tunnels, you’ll eventually reach the Depths.
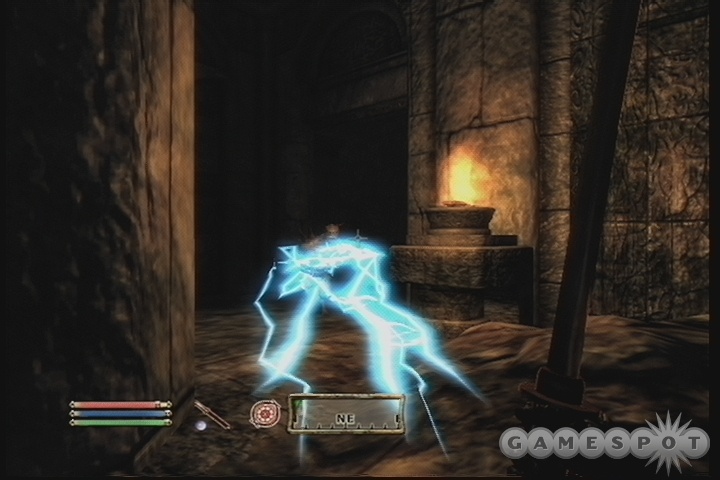
In the depths, move into the circular room with the two archers and kill them. There’s a pushbutton on one of the small pedestals here, near the urn; find it and hit it. Keep moving on through the hallways from there until you find a metal door; Syl lies beyond. Kill her and the two Royal Guards here, then loot Syl’s heart from her corpse. She drops Nerveshatter, a hammer that hits with both shock damage and imbues its target with a weakness to shock damage.
You can escape either by backtracking, or exiting through the Subterrene section of the ruins here. Regardless, return to the Sacellum and place Syl’s heart on the dias there. That will let you become the Duke of Dementia.
Quest: Retaking the Fringe
Whichever House you take over, you’ll witness the resignation of the other House, as well. You’ll net the Ring of Lordship (with stats that are either randomized or which change based on which House you support), and will get a new quest from Sheogorath when you talk to him.

Head back to the Fringe at this point and return to Passwall. Grakendo Udico there will fill you in on the situation. (The name of this fighter, as well as whether the team will be Dark Seducers or Golden Saints, will depend on the choices you've made thus far.) She and her men have been holding off the Knights of Order, but won’t be able to hold out much longer, since the Spire in the center of town seems to be spitting them out in endless waves. You’ll need to help her fight off a few of them if you wish to get her ideas on how to proceed. You have to face off against three waves of three soldiers apiece. If you’re a spellcaster, it might be difficult to hit the Knights instead of the many Dark Seducers in the area, so you might want to simply summon in creatures to help out here. Fighter characters shouldn’t have any problems taking the brunt of the damage from the knights, so long as you can take a Restore Health potion at some point. If you have trouble, feel free to issue orders to the various knights as you see fit. You may want to place them all on the frontlines, or have them all shoot arrows, or something similar, depending on your strengths and weaknesses.
When the knights are dead, Udico will tell you to travel into Xeddefen, a set of ruins on the southern side of the Fringe, in the hopes of finding the source of the Spire’s power and knocking it out.
Xeddefen
You may have explored Xeddefen when you first arrived in the Isles, but its previous Grummite inhabitants have been replaced with Knights and Priests of Order. One of the priests near the entrance will have a Xeddefen Key on his body, but you probably won’t need it if you have a high lockpick skill or the Skeleton Key from the original game. Head through the first section of the ruins to reach the Fane. There are a couple of gates here that won’t open, but you should be able to find a door leading to the Great Chamber.
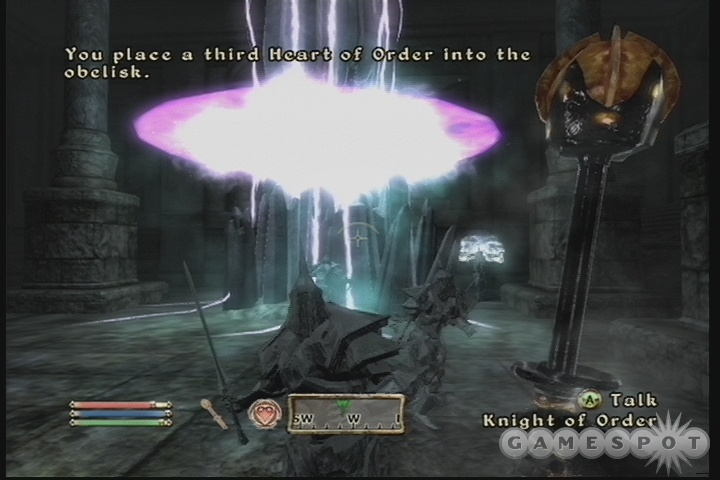
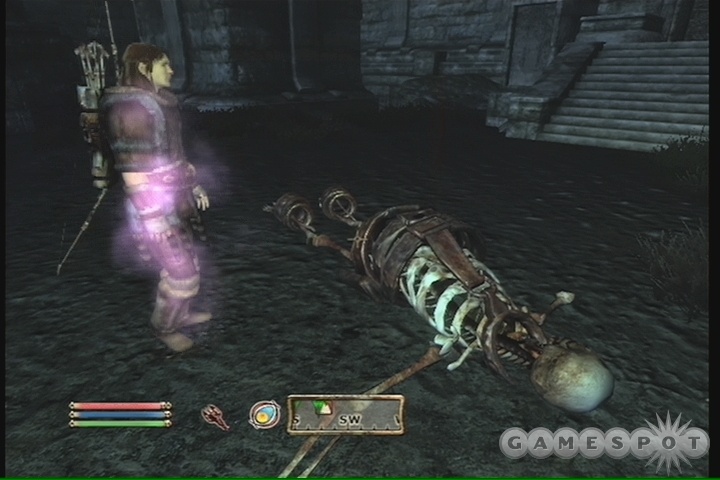
Inside the Great Chamber, you’ll run into Shelden, former leader of Passwall. He apparently attempted to escape from the knights by hiding in Xeddefen…but wound up right in the middle of them! Invite him to accompany you, and he’ll do so, providing a bit of a distraction to the knights that you encounter. He can’t die, so don’t worry about him. Just get to the Obelisk and plant three Hearts of Order into it. If you don’t have enough, kill some Knights and take them off their bodies. Don’t forget about the crystal chest here on the ground.
Anyway, after plugging three crystals into the Obelisk, it’ll crush, and the whole place will start coming down around you. No need to kill a priest to keep it shut; it’s down for good. Just focus on getting the heck out of dodge. You cannot backtrack here; you’ll have to take a path through the newly-opened Felles section of the dungeon to escape. Get there and start heading northwest through it. There’ll be plenty of Knights of Order, so do your best to avoid them or jump over them instead of wasting your time fighting them off. Jump and dodge your way through the remaining section, then get back to Passwall to speak to Udico, who’ll tell you to return to Sheogorath.
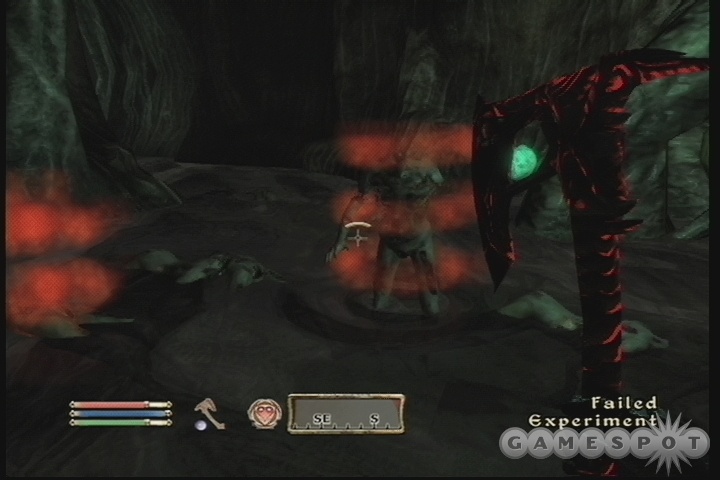
Quest: Rebuilding The Gatekeeper
Now that the Fringe is partially secure, Sheogorath wants you to shore up the defenses by building another Gatekeeper. You’ll have to track down Relmyna again to get her help; she resides in a place called Xaselm now. Get there and head through the first area to reach the Experiment Chambers.
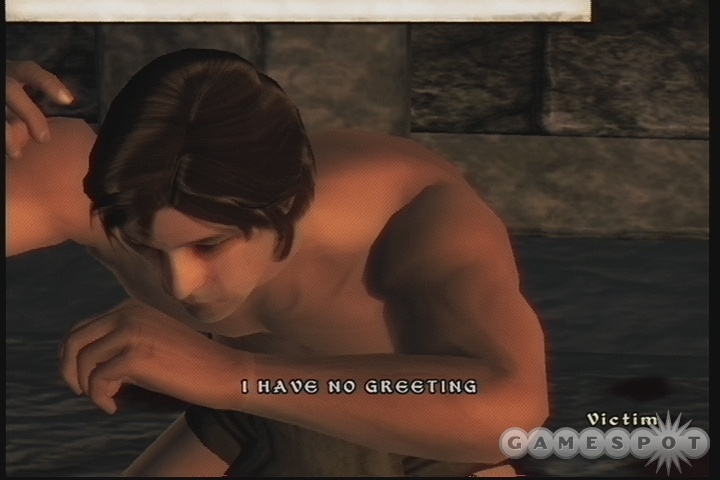
The Experiment Chambers are filled with devious traps and experiments that Relmyna has been running on the beasts of the Isles, and not a few humans, to boot. Feel free to explore and read her scrolls if you like, or simply keep to the hallways until you find the Sanctum of Vivisection. You might want to save your game before speaking to Relmyna.
Regardless of your choices in speech here, Relmyna will command you to return to the Gardens of Flesh and Bone and find a few ingredients for the next Gatekeeper. Before you leave, you can feel free to pester her about the victims here. If you continually agree to be tortured in their stead, Relmyna will bust you with a bolt of pain that apparently permanently drains you of five points to a lot of your base attributes. You also get the Manacles of Pain, which drain your Intelligence and Endurance in exchange for a boost to your Strength and Willpower. Not really worthwhile, in other words, unless there’s some other effect that we missed.
Into The Gardens
Head to the Gardens and enter. Not much to see here, save some undead. Keep moving until you reach the second area. Neither of the two ingredients that Relmyna requires here are difficult to find, but you may want to thoroughly explore the northern area of the level before dropping down to grab the Dermis Membrane, as it will be impossible to return to that section of the level when you fall down.
It’ll be really difficult to ensure that you thoroughly explore the Caverns of Susurration, which consist of numerous tunnels that overlap each other on your map. Your goal here is obviously to follow the green breath the flows through the tunnels, as it will lead you to the Essence of Breath pickup spot, but feel free to explore a bit in addition to that if you like. When you get the Essence of Breath, the only other path available will lead you to the eloquently named Natatorium of Wound Bled Tears. The switch to open the door leading to the Blood Liqueur is directly across from the door, on the bottom of the small dias with the chest on it. Grab it, then follow the compass markers to escape from the dungeon.
Return to Relmyna
If you escape from the Gardens and return to Relmyna, she’ll ask you to head into her storage area and pick out some body parts for the new Gatekeeper. It’s a relatively mild form of customization, as far as we could tell, but feel free to pick out what you like. The thing to remember here is that you'll later be able to touch the new Gatekeeper and get some of its powers for yourself, so try to choose anything that you would want to have active on your own character.
Relmyna wants to travel back to where you first slew the Gatekeeper, so travel back there — no need to keep pace with her, you can warp ahead — and speak to her there. After adding all the ingredients to the pool there, stand back and witness the summoning of the new Gatekeeper. After it appears, you can watch it take out the forces of Order that appear. Then get back to Sheogorath.
Quest: The Helpless Army
After you speak to Sheogorath, a messenger will arrive from his army. The faction you get the messenger from, either the Dark Seducers or the Golden Saints, may depend on the choices you’ve made thus far in terms of which faction you’ve been supporting. We received a Golden Saint messenger, personally, so that’s all we can describe here. The faction that you receive the request from will likely be the opposite of whichever one you became the Duke of; if you took over the Mania group, then it’s likely that you’ll be sent to aid the Dark Seducers.
Anyway, the messenger relates the fact that Sheogorath’s army is under siege by the forces of Order, and requests that you go and assist them. Agree to that, then travel to Brellach, the Golden Saint stronghold. When you arrive, speak to Issmi, who tells you that the captain of the Golden Saints has been captured and is being held captive inside Brellach.
Into Brellach
Enter Brellach with the Saints on your side and start fighting through the forces of Order as you come across them. Don’t forget that you can block and talk to an opponent to yield if you accidentally zap them or hurt them in some fashion. Your Golden Saint charges will fight alongside you, and heal themselves after each fight, so they shouldn’t be overly difficult to keep alive.
Plumb the depths of the fort until you come to the Halls of Reverence. (You’ll notice a large chime hanging from the ceiling in the first area here, near some crystal doors; smash it to break the doors and reveal a crystal chest.) There’ll be a locked door here that’s seemingly impassible, but if you walk up the steps behind it you’ll find a switch for it near an urn. Eventually you will come to Staada, who’s encased in a crystal prison. Find the chime up the steps nearby and ring it to smash the crystal and free her.

With Staada in tow, head on to the third section of the dungeon, where you’ll be interrupted by the sound of all of your Golden Saints toppling to the ground. Apparently the Wellspring has been dammed; it’s up to you to get the waters flowing again so that the Saints can be reborn. Head through the zone in front of you and reach the Font of Rebirth. The Font itself is guarded by four or five Knights, so feel free to use your Summoning powers (you should be able to summon a Flesh Atronach and a Dark Seducer) if you have trouble defeating the enemies.
Destroying the crystal on top of the Font will require you to ring four chimes in the corners of the room. These apparently have to be rung fairly quickly, so you probably won’t be able to stealth around to them and ring them that way without alerting the guards. Still, if you get to them quickly enough while avoiding the guards, you can probably resurrect all of the Golden Saints in the area, who’ll finish off the Knights for you. You’ll get a pretty nice set of Golden Saint heavy armor for completing this quest, but keep in mind that the chestpiece actually takes off your boots, greaves, and gauntlets as well. Probably not worth keeping, in other words.
Quest: Symbols of Office
When you return to Sheogorath, he’ll exit the scene to make way for Jyggalag. All is not lost, however; there’s still a chance to stop the Greymarch if you manage to reconstruct the Staff of Sheogorath. Haskill will point you towards a library of Order in a place called Knifepoint Hollow, where you may be able to gain some clues.
Knifepoint Hollow should be indicated on your map. You can get there somewhat easily by leaving New Sheoth from the northern exit, crossing the bridge, then walking up the slope to the left and proceeding along the ridgeline and attempting to get to the area from the east.
Knifepoint Hollow
Near the entrance to the Hollow, you’ll see a doorway in an area to your left that you have to drop down to reach. That leads to the Chantry. Nothing of import there, but near the end of it you’ll find a small chapel that the Zealots here are using. A hidden button on one of the posts will lead to some random treasure.
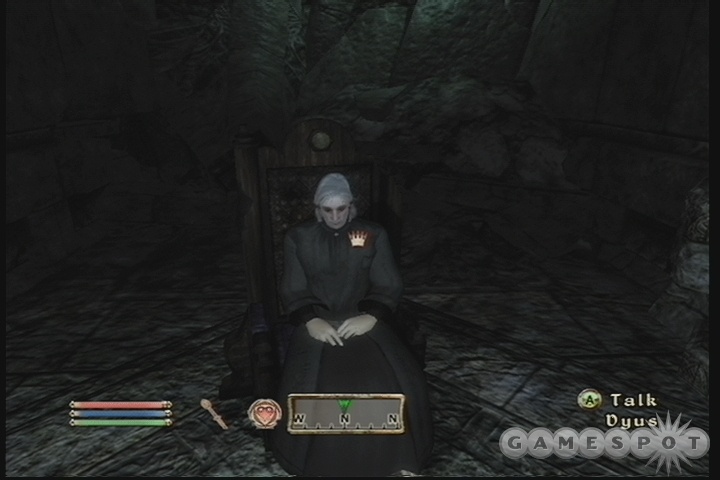
When you crack open the crystal door here in the Hollow, you’ll find Dyus, a seer character who holds the secrets to reconstructing the Staff of Sheogorath. He asks you to retrieve two items for him: the Eye of Ciirta, in the Howling Halls, and a Branch from the Tree of Shades in the ruins of Milchar.
The Howling Halls
The Halls are located south of New Sheoth, atop a large ridgeline; it’s easiest either to approach from the direct north or south, although you can climb up from the village of Dustwallow if you have that waypoint marker.
Kill the apostle inside the doorway and nab his Howling Chamber Key. Now, if you wish, you can grab one of the Apostle’s Robes off of this guy’s body, or on the bench nearby, and wear that to avoid having the other Apostles be hostile to you. You can feel free to talk to the other Apostles nearby, if you like, but eventually you’ll want to head into the Congregation Chambers.
If you have your robes on at this point, the worshiper named Ra’kheran will speak to you. He wants to help you kill Ciirta, but he’ll only do so if you can bring him three Apostle’s Daggers that some of the other apostles here carry. If you do so, he and his group will assassinate Ciirta.
It’s up to you whether or not you wish to take Ra’kheran up on his offer. Ciirta can be a difficult kill solo, although with your summoning powers you probably won’t have any problems with her. If you agree to Ra’kheran’s plan, grab three daggers (the three apostles in the first area of the dungeon that you just entered from should all have them), bring them to him, and wait for him to enter Ciirta’s chambers. (If you can't find enough daggers, you can kill the cultists that actually wear them on their hips to find more.) While Ra’kheran and Ciirta talk, you should be able to sneak attack and kill Luminary Kaz. When the fight is joined, help kill Ciirta, then grab her Eye from her body.
If you don't want to help Ra'kheran, feel free to sneak around the base and kill off the cultists with sneak attacks. Heck, even if you do help him, you can do this after Ciirta's dead. It's fun!
Milchar
You can find the entrance to Milchar in the ruins on the hill southeast of the small village of Hale. Find the large tree that grows there; you'll see the root system below it. Head into the Nexus area and save your game!
It's important that you save your game before you enter the Grove of Reflection area here, for a couple of reasons. When you do enter it, the game will instantly create a copy of yourself that you're going to have to fight. If you go in at full power with a lot of equipment, this fight can be all but unwinnable. We personally went in as a day-four vampire with a ton of poisons and scrolls on us, and we got crushed by our reflection.
What you want to do here is find a tree stump or treasure chest near the Grove of Reflection and dump almost all of your equipment into it, being sure to include your poisons as well. When you're completely naked, head into the Grove of Reflection, and you'll get a quest notice reading "I've arrived in the Grove of Reflection…." At this point, the game will generate your shadow copy of yourself. This is a permanent copy, so if you leave the Grove and come back, it will still remain the same. (If you're a vampire, you may want to head to Hale during the night and feed before entering the room to prevent your copy from having the advanced stats that you do.)
Shadow Boxing
Thus, what you want to do here is leave the Grove, get all of your equipment back, then re-enter the Grove your normal self. With this done, you can drop down and activate the green stone in the middle of the pool here. Your shadow self will appear nearby and attack you.
Now, your shadow has access to all of the spells and equipment that you had on you when you first entered the Grove of Reflection, so spellcasters might have a harder time here than other classes will. Our fighter character, though, was able to face an opponent with no armor on and who could cast nothing more impressive than Summon Scamp, so this wasn't too difficult a fight for us. Regardless, if you approached this correctly and managed to unequip yourself before entering the area, you should be able to take down your foe without too many problems.
With the shadow dead, you can nab a Screaming Branch by jumping up to the tree at the rear of the room. With that done, press the button on the stone wall in this area to find a teleport back up to the Nexus.
Return to Dyus
With the Eye and the Branch, return to Dyus and he'll create for you the Incomplete Staff of Sheogorath. All that's left is to dip it into the Font of Madness in the throne room in New Sheoth.
Quest: The Roots of Madness
In order to clear the Font of the taint of order, you'll need to head down into the Fountainhead below the throne room (there's a doorway behind the tree) to reach where Order is poisoning the waters.
There are plenty of Gnarls in this area, as Haskill has stated, but many of them are friendly to you, or at least tolerate your presence. The friendly Gnarls will remove the Order taint on the root doors here, allowing you to bypass them. If you come to an Order-tainted door, look around for a Gnarl Chrysalis and activate it to spit out a new Gnarl. Eventually the Gnarl, or one of its kind, will open the doorway and let you move on. There are also a few corrupted pools in this area; kill the Priests of Order who dwell nearby and grab the Shards of Order that they carry to both cleanse the pool and let you break through any Order-tainted doors that you see. You can also use these on the crystal-encrusted tree stumps in the area to unlock their treasures, but you probably won't be finding anything too useful.
Head into the Pools of Mania and Dementia and kill the groups of Priests around the large crystal clusters there to cleanse the Font of Madness. Either Syl or Thadon will appear in one of the pools, so kill them as well to finish your job and return to Haskill to complete your little quest.
Quest: The End of Order
After activating the Font of Madness and obtaining the Staff of Sheogorath, you'll be told of an Obelisk that has activated on the Palace Grounds. Your job? Go out there and clean up the mess.
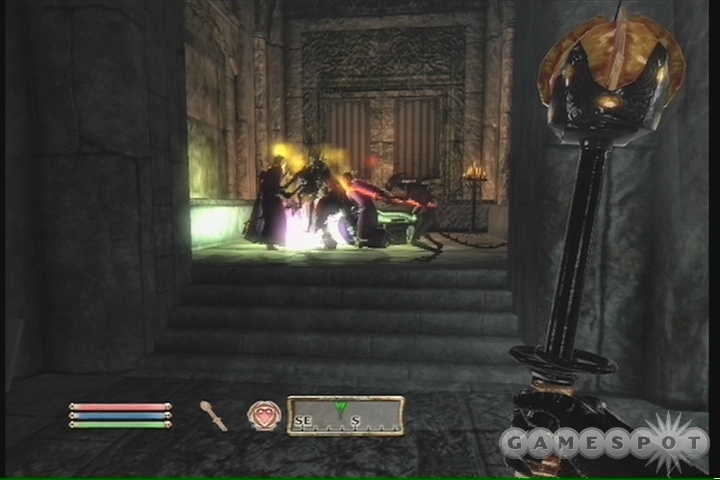
As soon as you enter the courtyard, one of the Obelisks will be active. No secret to what you need to do here; throw down and put three Hearts of Order into it to shut it down, then kill the Priest nearby to seal it shut. While you're doing so, another Obelisk will appear across the way, so repeat the process on it as well. You may find it helpful to use the Staff of Sheogorath here; it'll freeze all of the people around you in place as you walk up and insert the Hearts into the Obelisks.
After both of the Obelisks are sealed, Jyggalag will suck up all of his Knights and Priests into the sky and manifest himself onto the ground, resulting in a one-on-one fight between you and the God of Order. He'll occasionally zap you with lightning, but apart from that, he'll mostly be content to whack you with his sword. He was no problem for our fighter character; we simply popped a Restore Health potion and went toe-to-toe against him with a Perfect Madness Axe with the Damage Health enchantment, and he died after a few good whacks. However you might deal with a single tough character, feel free to bust out the chops here; use poisons, summons, or whatever else you might've been saving for a special occasion.
When Jyggalag dies, he'll give you a lengthy speech and leave you to run your kingdom. You can find Sheogorath's outfit on the throne, and will be able to speak to Haskill to deal with other minor emergencies around your realm, such as bandit or animal attacks on the towns. These aren't full-fledged quests, so they won't appear as such.
Got a news tip or want to contact us directly? Email news@gamespot.com
Join the conversation