The Chronicles of Riddick: Escape From Butcher Bay Walkthrough
Richard B. Riddick is as hard as they come, but even the best of us need help at times. Our guide to The Chronicles of Riddick: Escape from Butcher Bay includes general tips, a full walkthrough, full lists of collectibles, and locations for the packs of smokes.
Design by Collin Oguro
Butcher Bay is the toughest triple-maximum security prison in the entire universe. Escaping from the prison’s dark tunnels, vicious guards, even more psychotic inmates, and yet still worse subterranean creatures is impossible...unless your name is Richard B. Riddick. Starbreeze and VU Games’ The Chronicles of Riddick: Escape from Butcher Bay masterfully blends first-person shooter action and stealth elements in one of the best Xbox games to date.
This GameSpot game guide to The Chronicles of Riddick: Escape from Butcher Bay includes:
- General Strategies: This section offers general tips on surviving The Chronicles of Riddick: Escape from Butcher Bay.
- Weapons and Combat: This section compiles Riddick’s available firearms and hand-to-hand combat weapons and provides tips for implementing each.
- Walk-through: Look here for complete walk-throughs for all missions and objectives. You’ll also find tips on optional paths, evading guards, and finding packs of smokes.
- Packs of Smokes: This section reveals the name and location of all packs of smokes, which unlock collectibles in The Chronicles of Riddick.
- Collectibles: Check this section for the full list of unlockable collectibles in The Chronicles of Riddick.
Table of Contents
General StrategiesWeapons and Combat
Walk-through
Aquila Territory and Infirmary
Mainframe and Prison Yard Riot
The Pit, Pope Joe's Den, Dark Tunnels, and Showers
Guard Quarters and Tower
Feed Ward
Work Pass, Mine Entrance, and Security Checkpoint
Upper Mines and Cargo Transport
Mining Core
Tower 19 and Container Routerl
Crash Site and Abandoned Equipment Center
Central Storage and Loading Docks
Fuel Transport through end of game
Collectibles
Chapter 1 - General Strategies
This section provides some general tips for surviving your escape from Butcher Bay prison.
- Many sections of The Chronicles of Riddick can be played using either stealth techniques or full on weaponry. Usually if you have a firearm that will be the preferred tactic but it never hurts to save ammunition for later or keep yourself healthy and out of firefight situations. When you enter a new area, be patient and watch the movement of the guards. Often they’ll move far away from your current location allowing you to enter sneak mode and maneuver by. Occasionally the guard will move to a particular spot and stop--perfect opportunity to sneak up behind and perform a neck break!
- Most lights in the game can be shot. This becomes extremely important later in the game when you lack formidable weaponry. Shoot out lights to create darkness. You can use Riddick’s eyeshine ability (once received) to navigate dark hallways and circumvent clueless guards. Look for other dark places, such as behind crates or in corners to hide and wait for guards to move away before attempting to reach your destination. And don’t forget to enter sneak mode!
- If you’re trying to pass an area using stealth and guards spot you, sometimes the best option is to just run--especially if you lack weaponry. If it’s just one guard, you could charge him and perform a lethal move but it’s likely that you will suffer some damage in the attempt. If there are more guards then you’re likely to sustain several hits if attempting to fight off them both. Instead just run deeper into the level or retreat. Separate the guards from each other and find an opportunity to take them out again. Or you can just run past them and into the next section without engaging them.
- There are four health stations in the game. These increase your maximum life by one block. You’ll find the health stations within these checkpoint sections: Infirmary, after defeating Abbott in the interrogation room (at the end of the Tower 17 sequence in the Feed Ward), finding Valya’s secret chamber (get the code from him first), and Loading Docks. All of these locations are outlined in the mission walk-throughs. The health stations are definitely worth seeking out and help keep you alive later in the game.
- Remember the location of the NANOMed health units you encounter. If you don’t use the machine’s regeneration benefits the first time, return after sustaining damage to mend your wounds. Maintain a supply of cartridges to restore a health unit to full capacity for repeat trips during difficult sections.
- If you have sustained minor damage to one of your health blocks, retreat and take cover. A few seconds of rest and the block may return to full health. This can be even more useful in a hand-to-hand fight as it essentially provides extra health to absorb enemy blows during the battle.
- Inflict additional damage on enemies by scoping out explosive barrels. These have been a first-person shooter staple since the days of Doom and they’re just as deadly in the Riddick universe. Shoot explosive barrels from a safe distance and inflict blast damage to any enemies within the explosion’s radius.
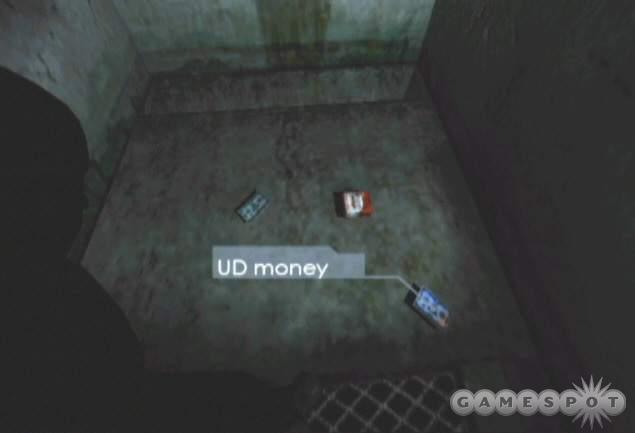
- After disabling (or killing) a guard, search around the corpse for dropped ammunition, mission items (like keycards), or UD money, the game’s currency. Spend your UD money wisely. You’ll have a few chances in the game to spend your cash. If you’re collecting packs of smokes (which unlock collectibles like concept art, trailers, and other bonuses) then you’ll want to save up and purchase smokes from a variety of characters in the game, such as Booger in the Prison Yard and Gomer in the Feed Ward. These events are covered in the mission walk-through section of this game guide.
Chapter 2 - Weapons and Combat
This section offers tips and strategies for using The Chronicles of Riddick’s firearms and engaging in hand-to-hand combat.
Gun
The Chronicles of Riddick gun is essentially a pistol and has all the limitations and benefits as such. It’s not very powerful but more accurate at long-range than the assault rifle. Unless you’re out of shotgun and assault rifle ammunition, don’t expect to use the gun too often except in certain circumstances (such as a brief stretch later in the game when it’s all you have). Aim for head shots for the best results.
Shotgun
The shotgun offers the best damage potential at close-range. But attempting to use the weapon at long-range is little more than a waste of ammunition. When using the shotgun, wait until you’ve approached the target at close-range (which won’t be difficult in The Pit, a great section for the shotgun). You should also use the shotgun to drop an enemy riot guard. Shoot the riot guard in the back of the head several times at close-range with the shotgun. Until you receive eyeshine, use the shotgun’s flashlight to see in dark places.
Assault Rifle
The assault rifle possesses a high rate-of-fire but at a price--it’s relatively inaccurate at long-range, especially in full automatic mode. Don’t keep your finger on the trigger. It wastes ammunition; fire in burst rounds to increase accuracy. Also, look out for explosive barrels. Fire at barrels from long-range with the assault rifle; a detonation creates an explosion large enough to kill any enemies within the blast radius.
Tranquilizer Gun
The tranquilizer gun is a multi-purpose weapon. Its greatest feature is limitless ammunition. You can use it as much as you want without worry of exhausting its internal battery or other power source. But the tranquilizer gun does have an unwieldy reload time after each shot, which can pose problems in a firefight. You’ll use the tranquilizer gun primarily to shock and temporarily disable guards. Once you score a hit, the guard slumps over in shock. He’ll get back up eventually; if you want to knock him out permanently, move over to the guard and stomp on his head. You’ll have to use the stomp if you want to recover any items off of the guard.
You should also use the tranquilizer gun to shoot out lights. The tranquilizer gun is your primary weapon at the time of its use. Therefore it’s important to remain out of sight as much as possible in order to get the first shot off at guards. Blast out lights using the tranquilizer gun to create shadows to move and hide within. Each time you enter a new area, scan for lights and blast them. Toggle your eyeshine ability to see in the dark and navigate around threats and hostiles. You can also use the tranquilizer gun to temporarily disable laser security traps.
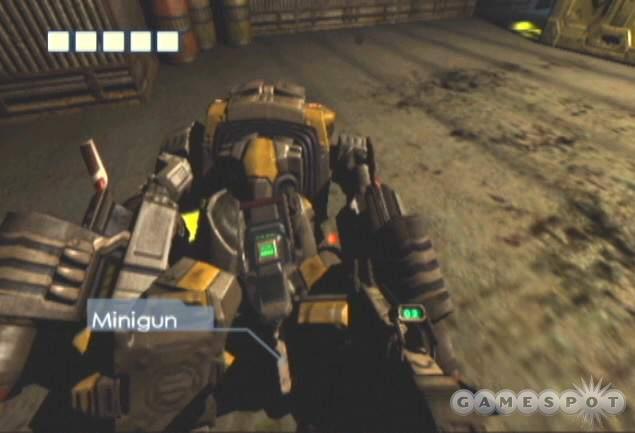
Minigun
You’ll be able to recover a minigun from the riot guards later in the game (starting with the Central Storage level). It’s an impressive weapon--high damage potential, extreme rate-of-fire, and an enormous quantity of ammunition. But like all good first-person shooter weapons, its strengths are offset by several weaknesses. First, when you fire the minigun, it takes a few seconds to get going. During this time you can suffer damage from your target. Second, you can’t change weapons while carrying the minigun. If you want to use the shotgun, you’ll have to drop the minigun completely. Not a major problem since you can pick it right back up! Finally, and most importantly, the minigun significantly impairs your movement speed.
The minigun makes short work of nearly everything in its path. Use it against any riot guards encountered after you’ve recovered the first minigun. Subsequent riot guards also carry miniguns; switch out to maintain full ammunition (though it’s unlikely you’d actually exhaust the supply).
Hand-to-Hand Combat
Hand-to-hand battles play a key role in The Chronicles of Riddick. Plus there are a few extra weapons to enhance your combat ability. Knuckledusters are essentially brass knuckles to add some damage to the power of your fist; shivs (and other assorted sharp objects, like screwdrivers, knives, and scalpels) are cutting tools that increase your rate of attack; and the club offers high damage potential at a slower attack rate and the ability to block incoming hand attacks.
The following list offers some tips on successfully beating down your opponent with fists and hand-to-hand weapons.
- The moves are the same for the fists and knuckleduster. But when you’re wearing the damage enhancing knuckles, perform more right punches so you gain the damage increase with each connected strike.
- The right-left combination can keep an opponent off guard and unable to retaliate. This works particularly well against Abbott when you face him later in the game. Hit with a jab (controller up) then connect with right and left repeated strikes (controller right then left then repeat). You’re faster using a shiv so the quick combination is even better.
- If you’re having trouble surviving fights, try hit and run techniques--especially against enemies using shivs or clubs. Move in, back off as the enemy swings then charge in with a jab and combination.
- The lethal move can be your best ally in a hand-to-hand fight. Don’t neglect it! Hold left trigger and when your opponent swings, press right trigger to grab and perform the move. For instance, if a guard swings his gun at you, perform the lethal move and Riddick forces the guard to shoot himself! Yes, that’s lethal.
Chapter 3 - Walk-through
This section provides complete walk-throughs for all Chronicles of Riddick missions. You’ll find specific instructions on completing objectives, finding optional objectives, using shortcuts, and locating all pack of smokes.
Escape
Objective: Escape from Butcher Bay
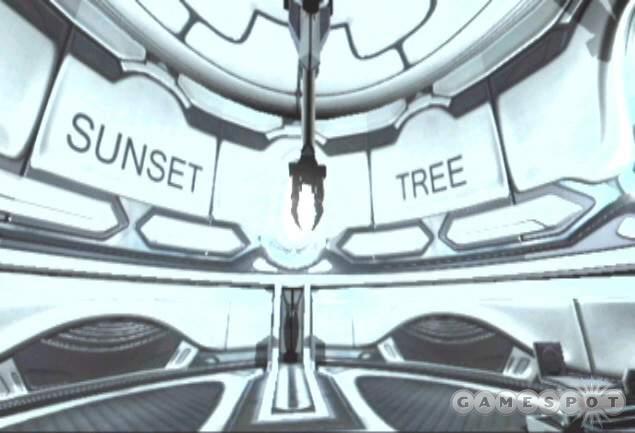
Walk to Johns and speak with him. After the conversation, Johns leaves to speak to another guard. Approach Lambert and listen--he says you should take the opportunity to take out Johns! Sneak up behind Johns using stealth mode and snap his neck. Chaos ensues. You’re under fire within seconds. Quickly turn around and drop into the hatch Lambert opens.
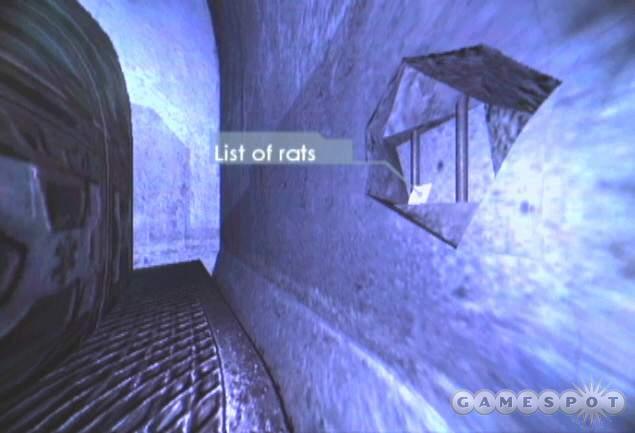
Drop into the corridor and hop over the barrel. Descend the next ladder. There’s a pack of smokes on the ground. These are hidden throughout the game and unlock particular collectibles (such as artwork, trailers, etc). Each is numbered from 1 to 59. Crouch and snag the pack #35 of smokes.
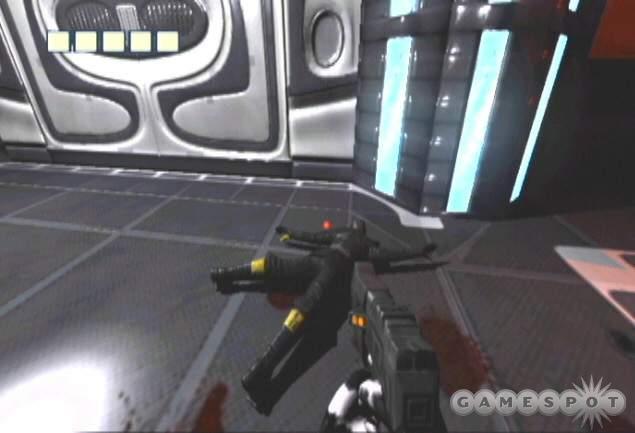
There’s a technician below. Run up behind him. He’ll turn around and prepare to fight. Pummel him with punch combinations. Pick up the security card. Don’t bother with the assault rifle. Use the keypad to open the door. Drop in stealth mode inside the darkness and wait for the guard to pass. Sneak up behind him and drop him with a neck break move.
Grab the vent tool dropped by the guard. Drag the body in the dark tunnel to complete the objective. Go to the right into the next room; there are stacks of crates to the left. Search behind the crates on the right side. You’ll have to crouch to get through the narrow tunnels. Drop into a crawlspace below the crates and find some money and pack of smokes #1. Return to the room.
Climb to the top of the crates and use the hangrail to traverse the room. There’s a vent at the far side. Open it and crawl inside the shaft and bust through the grating at the other end. The room contains a health unit and a med cartridge. Pick up the cartridge on the ground and use it to replenish the health unit. If you’ve been injured, use the health unit.

Go left from the station into the next room. Sneak up on the guard. When he turns around, disarm him. Now you have a weapon (other than your fists of course)! Search the table for pack of smokes #6. Climb the crates to the right of the table and grab the railing. Shimmy right and pull yourself up. Go left down the corridor to the elevator and use it.
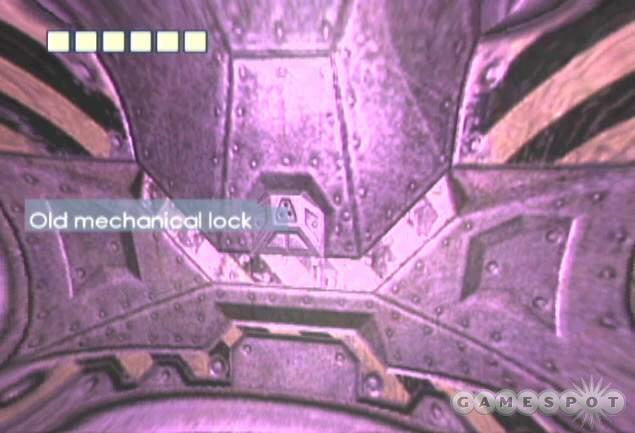
Move out the next door and spot the guard patrolling ahead. The guard patrols to the right and remains stationary. Sneak up behind him and crack him with the weapon. Take the ladder down into the sewers and look around to the right. Break open the lock with a shotgun round.
Sewers are dark so switch on the shotgun’s flashlight. Move slowly down the tunnel. A guard patrols ahead. Take him down with the shotgun. Check behind him for a group of barrels. Spot these throughout the game. Shoot the barrels to cause an explosion that kills the nearby guard.
Follow the next path to the right and blast more guards. Always search guard bodies for ammo and other supplies, such as money! Continue to battle through the corridor. Don’t shoot barrels too close! Move to the light at the end of the tunnel to conclude the level.
Prison Yard
Objective: Find the weak spot of Butcher Bay.
Exit your cell and speak with Barber who tells you to speak with Mattsson. Move right from your cell and down the hall toward the courtyard. Speak with Jack and Coyne. They tell you to speak with Haley--he’s also in the courtyard.
Objective: Talk to Haley.
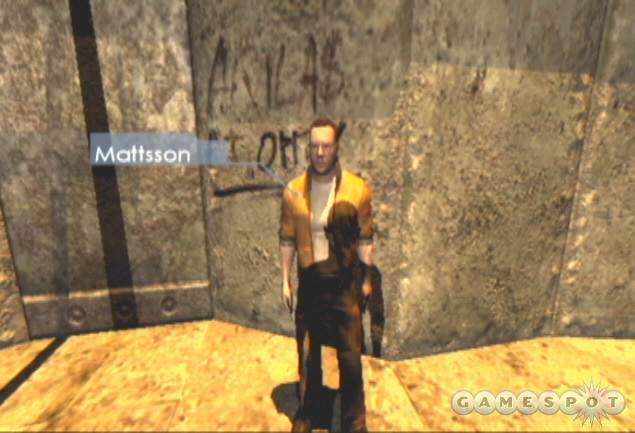
Enter the courtyard and talk to Mattsson. He has a shiv for you hidden in a bunk inside cell A-40. Return to cell A-40. Mattsson set up an ambush. Turn around and defeat the two cons one at a time with your fists of fury. Return to the courtyard and press Mattsson.
Find Haley in the courtyard and speak with him. He’ll help you but you’ll have to dispatch Rust, the resident big man on campus. Return to your cell A-34 and gain the shiv from Mattsson (though it doesn’t last long) and also meet Rust as well as Abbott, another new nemesis for Riddick. New objective: getting rid of Rust is your only option.
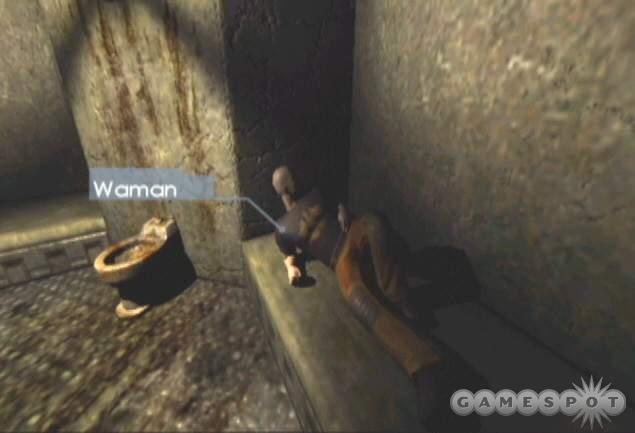
Talk to Barber on the way out of your cell. He suggests finding a weapon. Go into A-37 and speak with Waman. Accept to do his favor. He wants Molina dead.
Objective: Help Waman by killing Molina.
Cross the hall into cell A-38 and beat Molina to a pulp. After he falls, snag the knuckleduster. Now you have a weapon! Equip it, which increases your punch damage. Return to Waman and receive a reward, pack of smokes #25.
Exit the cell to the left and move to the far gate. Speak with Shabby and receive a piece of paper with a code on it--operates a door inside the infirmary. Shabby offers it as a reward for killing Molina.
Return toward the courtyard. Exit through the far passage toward cell blocks 11-30.
Aquila Territory
Arm your knuckleduster and get ready to brawl! Round the corner and battle the first two cons. One fights while the other runs. Crush the con with your knuckleduster enhanced fist. Continue down the hall and beat down your next competition. Be sure to search bodies for money. On your way down the hall, search cell A-28 for pack of smokes #58.
Peek around the next corner and avoid the fire extinguisher. Fight the next con--he’s got a shiv. Do hit and run attacks. Lure him into swinging with the shiv then bash his face in. Grab the shiv when the con falls and equip it.
Avoid the bomb around the next corner then battle the two guards one at a time. One has a shiv so keep your distance between attacks. Perform lunges and left right combos to cut these idiots. Continue down the hall to encounter Rust. He’s got a shiv too. Hit and run is the strategy here--lunge, cut, retreat, and repeat.
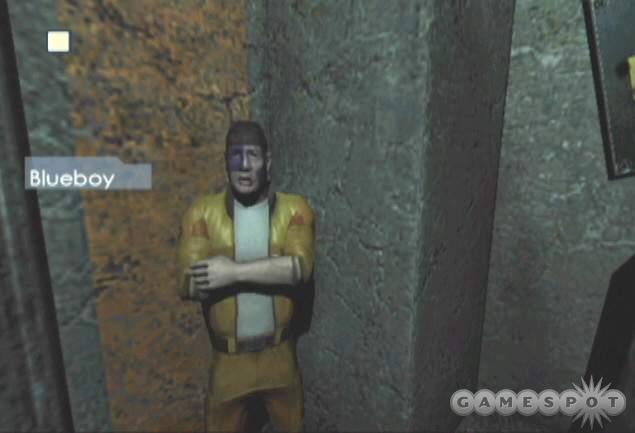
Once he’s dead, put away the shiv. Guards have arrived. Don’t mess around with them--the guards aren’t too personable. Retrace your steps back to the courtyard. On your way, talk to Blueboy and receive pack of smokes #57. Also, find Moondog in cell A-11. Talk to him and receive pack of smokes #59.
When you arrive in the courtyard, talk to Booger standing behind the gate near Haley. Purchase his pack of smokes #26. You should have the money if you’ve collected it all to this point. Talk to Haley. He points you toward the infirmary.
Return to the cell corridor and go to the far gate. Talk to Bulder behind the gate. He can get you into the infirmary if you’re hurt (if you have sustained damage in the fights against Rust and his men). If not you’ll need to start a fight and get injured. Move through the open gate and go left into the infirmary.
Infirmary
Enter the infirmary where you’re told not to move. When the guard walks away from you, enter sneak mode and move in behind the guard. Snap his neck! Pick up the security code. Another guard runs in. Equip the shiv and cut him up. Since you talked to Shabby earlier, you can open the door in the infirmary’s left corner. Inside you’ll find pack of smokes #12 and a scalpel (replaces your shiv if you want). It’s also a dark room to stash those guards.
Heal using the health unit on the back wall. Use the keypad on the door in the back left corner. A guard bursts through. Be ready with your shiv. Heal up again if necessary. Move through the door into the next room. There’s a health station in the back. This rejuvenates your health and also increases your life by one block. Use it then ascend the ladder on the right.
Follow the only hall around to the right. Hide behind the crate in the dark balcony overlooking the infirmary. Let the guard pass and take him out with a neck break. Enter the far door then sneak into the service hatch on the right.
The next hallway is tough. A guard with a flashlight patrols the left side. Hug the left wall while in sneak mode and stay out of the light to remain undetected. Scurry past into the crawlspace when the light disappears. After turning to the right in the crawlspace, wait for the guard standing on the grate to turn around then continue through to the next ladder and service hatch.
Sneak up to the next guard and drop him. Drag him behind the crates. Go around to the right side and spot the guard. Sneak up behind him when the spotlight moves away. Drag the guard into the dark then cross the balcony while avoiding the spotlight. Use the keypad on the other side.
Go into sneak mode and spot the patrolling guard in the hallway ahead. You can move in behind him and disable the guard or just avoid him. Enter the last door on the left toward the mainframe.
Mainframe
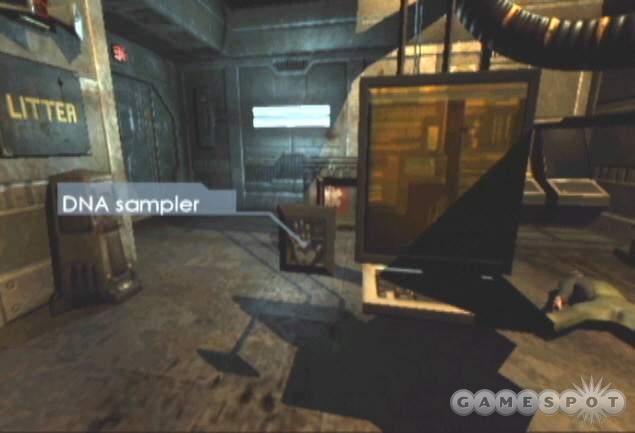
You’re looking for the DNA databank computer. Move out onto the catwalk and look at the ground below to spot the tech. Go to the end of the catwalk while in sneak mode and hop onto the ledge. Drop onto the crates below when the tech looks away. Sneak up on the tech and disable him. If he catches you then pummel him with punches or your shiv. Use the DNA sampler console to give a sample.
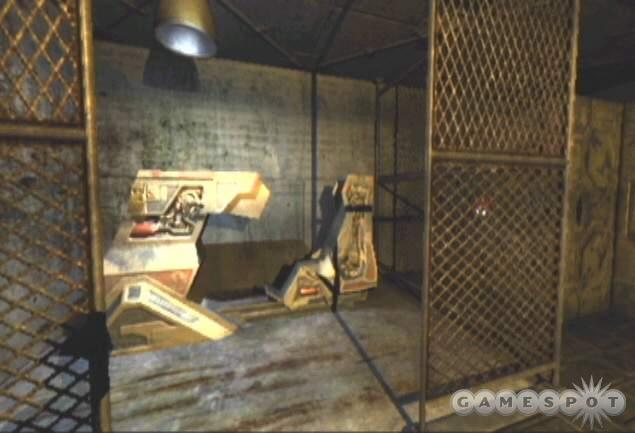
Not a good move but a required one. Quickly grab the assault rifle from the ground on the right side of the console. Hide on the wall to the left of the DNA console. When the guards move in, blast them with the assault rifle. More are on the way through the door so be ready when it opens. Snag dropped ammo. When shooting through the open door, hit the barrels to cause a damaging explosion. Search the bodies for money and a second gun.
Navigate the dark hallway and find the health unit on the right. Bust the debris to the right of the health unit and hop through the hole. Shoot the patrolling guard and grab his shotgun. Find the service panel near the crates. This deactivates the fan above. Climb the crates and move through the disabled fan.
Go into sneak mode and start along the catwalk to the left. There are enemies below. Shoot them before they detect you if possible. Otherwise they’ll shoot down the catwalk. Finish them off when you land. Turn around and head down the dark hallway. Spot the doorway to the right. Shoot the patrolling guard inside and snag his supplies.
The large supply area on the left side contains several guards high on the catwalk. Shoot out the light near the health unit to create some darkness. Inch out from behind the corner and fire at the guards on the catwalk. Use the health unit after the battle. Climb the crates to reach the catwalk and acquire dropped ammo and pack of smokes #13.
Watch for any additional guards arriving below. Drop down and move through the unexplored hallway to find a guard near a service hatch. Blast the guard with your assault rifle. Open and enter the service tunnel. Use the valve ahead to disable the gas.

Shoot down the hall and blast the guards in the dark distance. Don’t go too far forward or suffer damage from grenade explosion. Crush the guards and gather their ammo. Enter the hole on the right side. Hide behind the crate on the right. Keep your flashlight off. A guard comes down the hall and won’t see you if you’re hidden. When he gets close, shoot him.
Stay in the dark on the right side of the hall. A second guard enters to see what’s happening. Let him pass by and either ignore him or disable him. Continue down the hall and find another health unit. Start through the doorway to the health unit’s left side.
Faint whispering clues you in--there are guards waiting for you inside. This is a tough battle. Stay along the left wall and dodge the grenades hurled in your direction by moving either left or right. Blast the guard hiding behind the crates on the right. Two more guards hide behind crates on the left side. Remain at a distance and target their exposed body parts. If they roll out from behind the crates, blast them. A final guard stands inside the dark corner on the back left side. Remain behind the cover of the crates and take him out when he’s exposed.
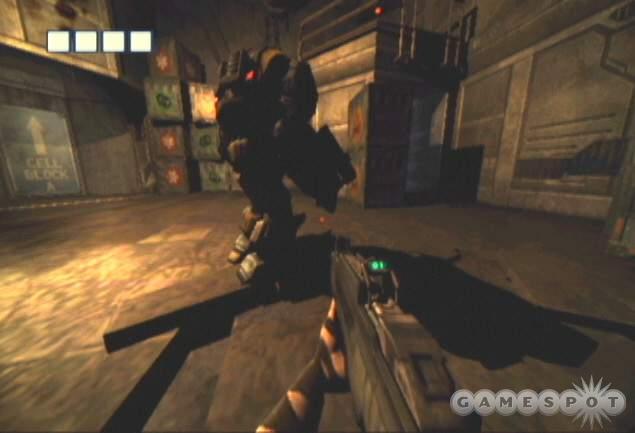
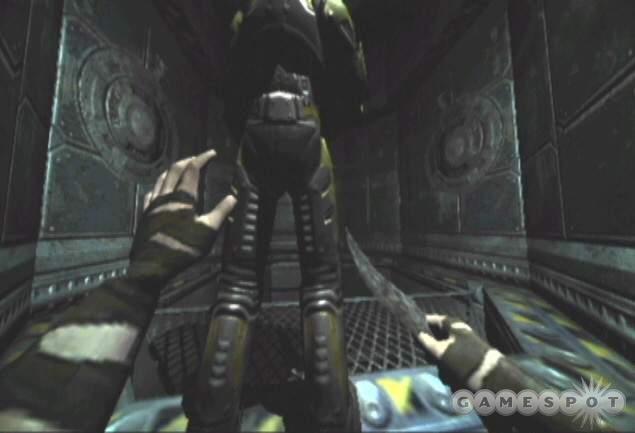
This cues the arrival of the riot guard. Your feeble weapon won’t be able to dent his front armor but he does have a weak spot. You must blast the back of his head with the shotgun at close-range to disable the riot guard. It’s not an easy task but killing the riot guard nets pack of smokes #27. Hit and run techniques can work here. Get in behind the riot guard, blast him, and then move away. Hide in a corner and wait for him to turn around and repeat until he’s down. You can circle around the dark corner or use the crates to duck behind.
If you want to avoid him, wait for him to move away from the elevator he rode down on then scamper to the elevator and use the button. Go through the door and back toward the cell block.
Prison Yard Riot
Move through the door. Spot a dark staircase on the right, a valve up ahead, and a heath unit around the corner. Use the valve first then use the health unit if necessary. Descend the staircase.
Switch on your flashlight and watch the con below get blasted. Fight your way to the bottle of the stairs. Wall-mounted turrets pose the biggest challenge in this section. They’re small so tough to shoot and inflict a lot of damage in a short amount of time. Don’t forget to return to the health unit and replenish your health if necessary. Find the first turret on the right hand wall. Shoot in its direction to destroy the weapon.

Run across the hall and snag ammo. Return to the intersection and peer right. More turrets fire from the left and right walls. Another guard maneuvers from around the corner; take him down and advance down the hall. As you near the corner, destroy a turret on the right side. Move slowly through here so you aren’t pelted by turrets. One guard may carry a med cartridge. Return to the health unit and use it if necessary. You can also shoot out lights to help provide cover. Shoot the guard and turrets down the next hallways as you move toward the courtyard.
In the last room (with "AQ" on the wall), shoot the turret on the right side before facing the gate on the left. It’s locked. You’ll have to find a radio and trick the guards into opening the gate. Retrace your steps toward the beginning of the section at the first intersection at the bottom of the stairs. Turn right and spot the gate. Wait until it opens and the guards advance.
Shoot the guards and grab the radio transmitter. Riddick uses the transmitter to fool the guards. The gate is now unlocked--time to head to the pit! Return through the previously locked gate and watch the cinematic preceding the next section.
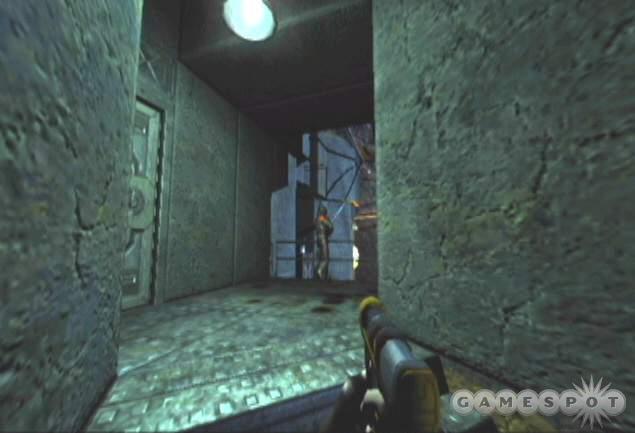
The Pit
Objective: Get out of the Pit.
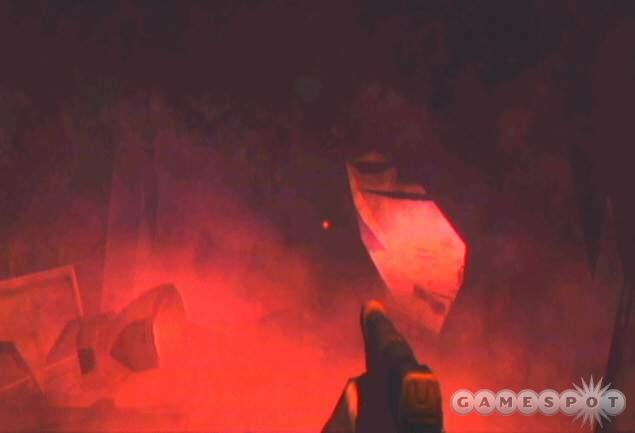
A warning indicates that your flashlight will only remain active for six minutes. That’s an important fact but there are creatures lurking in the pit--dangerously fast creatures called dwellers. It’s best to work quickly through the pit. This keeps you a step ahead of the dwellers (though you’ll encounter them no matter what) and the six minute deadline. Also be on the look out for explosive barrels. Shoot barrels near dwellers to explode your enemies.
From the start position, move through the hall and around the right corner. Quickly drop into the hole. Go left then around the corner to the right. If you encounter any creatures, blast them with the shotgun. Check behind you periodically to ensure no creatures have caught up with you.
Move all the way down this hall to the intersection at the back. Turn left and around the next left corner and find the valve handle in the rear corner. Continue to be on the look out for dwellers. You’re likely swarmed by this point. Aim the shotgun at close-range to ensure dweller slaughter.
Retrace your steps back to the intersection where you turned left. Turn right then take the first left up the staircase. Take the first left and turn left into the next hallway. Go all the way to the end of the hall and find a path to the left. Find the broken gate terminal at the end of this hall. Use it to place the valve handle and use it to open the gate.
Cross the catwalk and continue to shoot the dwellers. As you follow the sole corridor, check down a short hall on the left for pack of smokes #15. Follow the main hall into the next section.
Pope Joe’s Den
Follow Pope Joe onto the lift then follow the strange preacher to his den. He offers to help you but only if you’ll find his blessed voicebox. Grab flares from the box; useful if you lose the flashlight and need illumination. There’s also a health unit if you need it. Return to the elevator and use the controls.
At the bottom, go down the left hallway. Follow it into a room containing a couple dwellers (shoot the barrel!). Spot the hole on the right side. Through the hole you’ll find pack of smokes #16 and a health unit cartridge.

Return to the room and go right. Find the blessed voicebox in the back corner. It’s a radio. When you grab it, the dwellers emerge. Fight your way back to the elevator and return to Pope Joe’s den. As a reward you receive eyeshine, the ability to see in the dark.
Dark Tunnels
Objective: Find the exit into "Pigsville," the guard quarters.

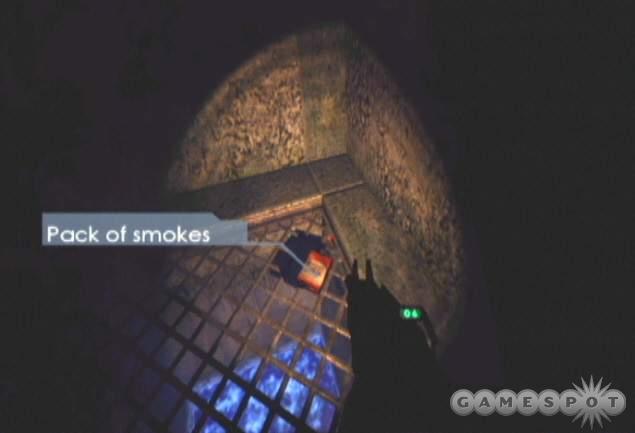
Use eyeshine to illuminate the tunnel and keep it on. Move out and face the right tunnel. Spot the dwellers in the distance. Blast them when you move within shotgun range. Continue moving straight down the hall until you encounter an area to the left with a barrel. Go toward the barrel then left. Shoot more dwellers ahead. Check the area on the left (near the fence) for pack of smokes #28. Look on the right side and find the ladder. Ascend the ladder to the top and into the next section.
Showers
Objective: Get to the Spaceport Hangar.
You can turn off your eyeshine in this well-lit shower. However, be ready to toggle it on in darkness. Move toward the shower exit quietly in sneak mode. You can hear a guard in the first stall on the left. Don’t bother him or he’ll come out (like don’t turn out the lights!). Continue down the hall and find the light switch just outside the locker room.
Switch off the lights and a guard will come turn them back on. Hide and use eyeshine to see when the guard comes out of the locker room. Disable him with a neck break. Drag his body into the darkness if necessary. One more guard patrols the locker room with a flashlight. Sneak up behind him when he moves away and take him out with a silent neck break.
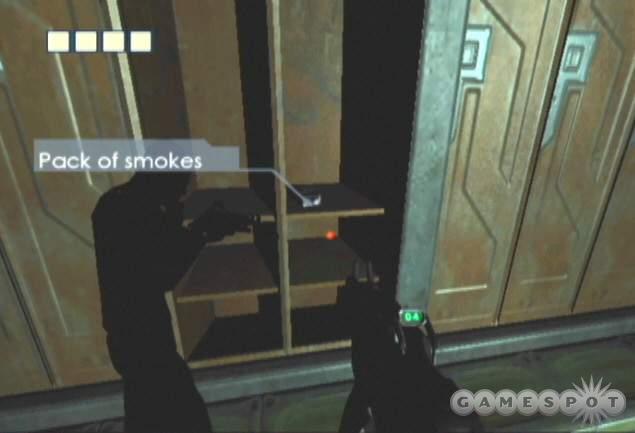
Search lockers for money, a pack of smokes #29, and a guard casual outfit. Put on the civilian clothes. If you didn’t cause a commotion and are wearing the guard clothes then the other guards patrolling the section won’t bother you and you won’t set off alarms--a good thing! Otherwise be prepared to fight your way out.
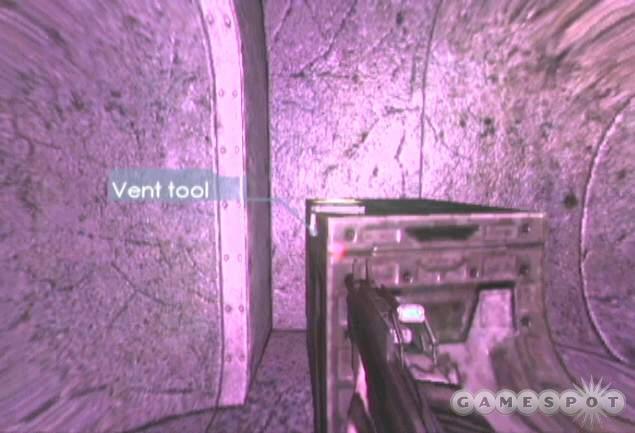
Exit the locker and go right. You could go left as the right route isn’t mandatory but it nets you a vent tool which can be used to gain supplies from the guard supply room. Use the health unit on the back wall. Turn left and move through the room and past the clueless guards. Jump down the hole in the back left corner of the room. Find the vent tool in the room’s center.
Go to the other side and open the vent hatch. Toggle eyeshine on to see in the dark shaft. Navigate to the ladder and go up. Continue through to the grate. Push out and drop into the next room. You’re back in the previous room but now with a vent tool. Exit (the health unit is on your left) and go right. Move into the guard’s quarters.
Go through the hallway on the right. Pass the guys harassing their friend in the elevator. In the next room, go around the center section and through the narrow hallway. There’s a guard standing post here; it’s Adenoid and he’s in front of a guard supply room.
Continue around to the right. There are two guards here. One sits down in the far right alcove and the second patrols the hallway. When both are facing away, jump over the railing on the left side. Flip on eyeshine and maneuver to the vent. Open it and crawl through.

Drop through the grate and into the supply room. Grab the light guard armor and weaponry. Search the left side of the room for pack of smokes #30. Use the keypad to exit the front door. With light guard armor on, Adenoid won’t bother you.
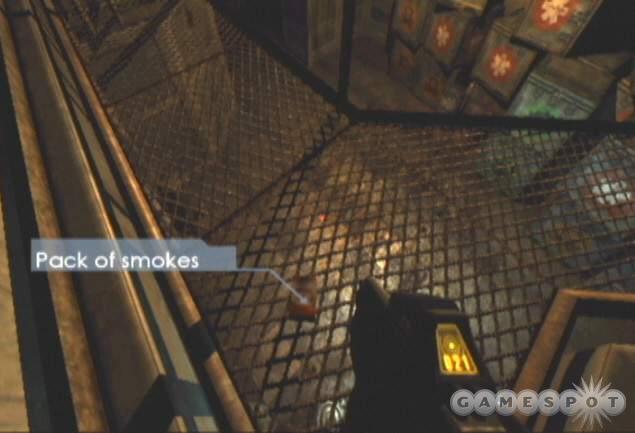
Return to the previous alcove with the sitting guard. Use the retinal scanner. It doesn’t work which sets off the nearby guards. If you hide in the darkness on the left side near the litter, the guards won’t see you. Use sneak mode. Once the guards pass, race down the hall on the right and into the next section.
Guard Quarters
You need eyes for that retinal scanner--Riddick prefers the eyes of his nemesis, Abbott. You’re in the guard quarters so orders are to look for Abbott’s quarters. Walk around the corner and find Jenkins on the right side near the shopkeeper. Jenkins gives you some stuff, including a bottle of liquor. It’s a good haul cause someone in here will buy it.
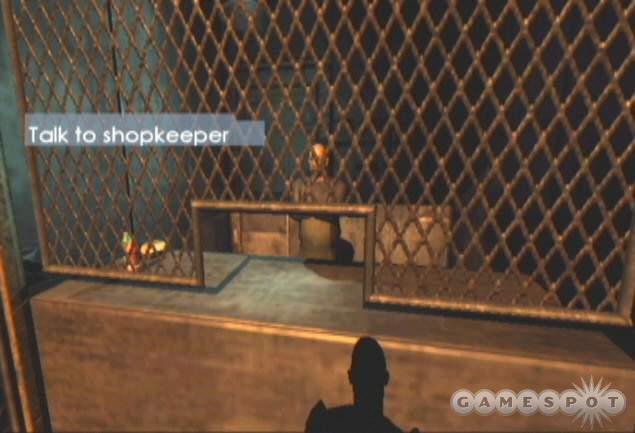
Talk to the shopkeeper. Ask him where Abbott is. He’s got a package for Abbott and gives it to you for delivery. He also sells other items, including shotgun and assault rifle ammo for 20 UD, a combat knife for 50 UD, and light guard armor for 130 UD. If you’re collecting smokes, purchase them from the shopkeeper. You can score pack of smokes #33.
You can also get some more info about Abbott from other guards around. Look like the delivery routine may pay off. Go to the lift in the back and use the button to ride up.
Exit the lift and go right. Find Chancellor in the hall and talk with him. You can sell him the booze for 50 UD. Plus he gives you pack of smokes #31. Return to the lift area and go the other way. Continue all the way across the balcony and into the quarters.
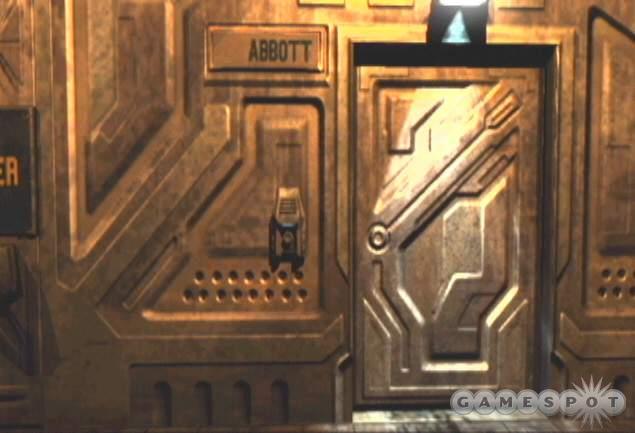
Approach the intersection. There’s a health unit to the right if you need it. Go left. Follow it all the way to the very back corner where you find Abbott’s apartment.
Objective: You have found Abbott’s apartment. Find a way to convince Abbott to open up the door for you.
You have the way to get inside: the package from the shopkeeper. Ring the doorbell and select "I’ve got a package". He’ll let you inside.
Abbott
Arm your assault rifle and prepare for a firefight. The charade doesn’t last long; Abbott opens fire as soon as you enter his apartment. Strafe to the left for some cover as you blast Abbott with the assault rifle. Keep him targeted and annihilate him until the cut scene interrupts the action.
Tower 17
Objective: Get down to the mines.
Exit the holding cell. Go into the adjacent cell to the right. Flip the bunk and grab pack of smokes #5 underneath. Exit the area through the door to the far right. Walk to the elevator, which automatically starts a descent.
Tower 17 Base
Exit the elevator and speak with Rael. He points you in the right direction: talk to Dogbone for info on getting down to the mines. Enter the next door and descend the stairs into the Tower 17 arena.
This is a non-linear section that can be completed in a variety of orders. Plus, there are many optional missions you can choose to complete (many of which reward you with a pack of smokes). There are also two ways to complete the area’s primary objective. This walk-through will outline how to complete both routes.
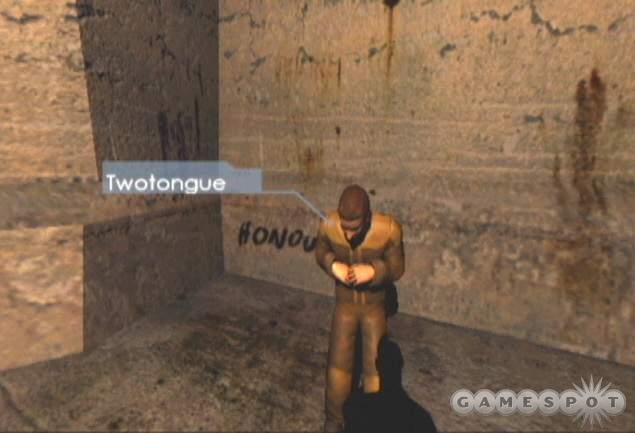
Dogbone is to the left. He’ll outline to two paths: kill Bam in the fight ring or find a way into the drug interrogation room and beat the snot out of Abbott. For fights you’ll talk to Centurion; for drugs talk to Twotongue. Both paths net some packs of smokes but if you want to maximize your smokes, you’ll need to complete the fight path and complete most of the drug path. Just follow this walk-through!
Objective: Fight in the ring.
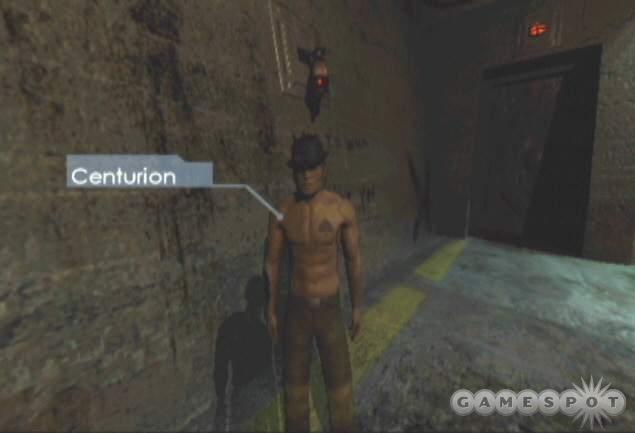
Speak with Centurion. You have to fight to prove yourself. Go into the ring. He says to go challenge Harman. Go to the gate to the recreation area and speak with Harman. This initiates the fight. Return to Centurion and speak with him to start the fight. It’s a straight-up brawl versus Harman. Pummel him with your fists to complete the battle. You receive some UD for a successful beat down.
Speak with Centurion again. He points you to the next victim: Baasim, located in the recreational courtyard. Proceed into the recreational area.
Note the guard across from the recreational area. If you need health during the ring fights, talk to the guard and he’ll let you use a health unit in the room for 10 UD. Save this bonus for as long as possible. You will likely need a boost in the later fights.
Recreational Area
The prisoners’ recreational area is split up into four sections labeled A, B, C, and D (marked on the doors and on the insignia in the room’s center). Move to section B and find several cons.
In section B, talk to Pink; he sells some smokes. Purchase pack of smokes #56 for 10 UD off of Pink.
In section B, speak with Jamal-Udeen. You may have to leave the recreational area and return. You can only talk to him when he’s not praying. Speak with him as soon as you see him not praying to receive an optional quest (with a pack of smokes reward).
Optional Objective (Jamal-Udeen): Kill all Blueskins.
In section C, speak with Gulag. He mentions the two guys in section A (Cricket and Asif). Apparently they’ve stolen a red tube from Gulag and he wants it back.
Optional Objective (Gulag): Find Gulag’s red tube.
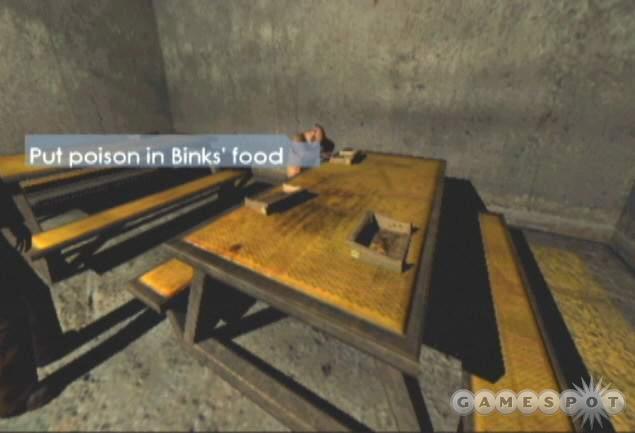
In section C, speak with The Nurse. He wants to collect a debt. It’s Binks inside the Feed Ward. He wants you to poison Binks’ food.
Optional Objective (The Nurse): Help collect Nurse’s debt.
In section C, speak with Wilkins. He just wants to know if Jagger Valance is still alive. Agree to check on that fact when you reach the mines.
Optional Objective (Wilkins): Get Wilkins info on Jagger Valance.
In section D, speak with Twotongue. Not only does he sell the drugs you need for that mission path but he also sells packs of smokes. But he won’t deal unless you solve his mission. He also has a problem with Cricket and Asif in section A. They have an injector of his. He also wants you to waste Baasim in the ring.
Objective (Twotongue): Get drugs.
Return to section B and find Baasim. You must defeat him to complete either of Dogbone’s paths (fight your way or get caught with drugs). So time for another fist fight! Speak with him to initiate the challenge then return to Tower 17 and speak with Centurion to initiate the battle.
Baasim fights solely with fists so it’s another weaponless brawl. Complete your combinations and block his incoming shots. Don’t go outside the ring for long or risk losing the fight. Upon winning the fight you receive pack of smokes #18. Speak with Centurion for your next fight: Sawtooth, who’s in the Feed Ward.
Feed Ward
Speak with Cuellas at the Feed Ward entrance. He’s looking for a list of snitches. Offer to help him out.
Optional Objective (Cuellas): Find the snitch-list.
You’ll encounter Motor in the hall on the right side leading into the Feed Ward. He wants to avenge Harman’s beat down and starts a fight. Crush him and pick up the poison. Georgie is in the hall on the left side and sneaks a peek at the interrogation room.
Gomer stands in the hall near Motor. He and Monster handle the trade in the Feed Ward. Gomer sells smokes. If you’re collecting packs of smokes then purchase #7 for 10 UD, #8 for 15 UD, #9 for 20 UD, #10 for 25 UD, and #11 for 30 UD.
Go into the mess hall area and find the table with Sawtooth. Check the trays nearby for Binks’ plate. Use the poison grabbed from Motor’s body to poison his food. Return to the Nurse for your reward: pack of smokes #32 and interest-free loans if you need money for fights or drugs.
Speak with Sawtooth in the mess hall to initiate the battle. Return to Centurion to begin the fight.
Sawtooth fights dirty: he’s using a shiv. Don’t hang in close for too long or suffer the cuts. Move in, score a combo punch, and back out and repeat. Stay within the fighting circle to avoid Centurion’s disqualification. Defeat Sawtooth and receive pack of smokes #19. Also pick up the discarded shiv.
Speak with Centurion for your next battle: he sends you to search for Cusa in the recreational area. He’s in section D. Speak with him to initiate the fight then return to Centurion to begin the fight.
Sawtooth’s shiv will certainly help against the brawler Cusa. Jab him with the shiv repeatedly and throw in some right-left combinations to cut the brawny convict down to size. You’ll receive pack of smokes #20 as a reward.

Solving Gulag and Twotongue’s Missions: Return to the Recreational Area. Time to solve a mission or two. In section A, speak with Cricket. He offers to sell you a shiv for 30 UD. Take him up on the offer. You need to pay him the money so his buddy Asif will go hide it. Asif takes the money into the Feed Ward. Casually follow him.
He walks to the back of the Feed Ward. If he stops, just back off and wait for him to resume course. He puts the cash in a loose panel in the back room of the Feed Ward. When he leaves, open the panel and take out Gulag’s red tube, Twotongue’s injector, and some UD money.
Return to the Recreational Area and go into section C to find Gulag. Speak with him to return the red tube. You receive pack of smokes #3 as a reward.
Proceed into section D of the Recreational Area and speak with Twotongue. You’ll return his injector and he’ll give you pack of smokes #55 as a reward. You can also now trade with him and complete the drug path if you desire.
Speak with Twotongue again to see what he offers. He now wants a single moth. These moths flutter around the Recreational Area. Catch the moths by moving underneath them and when they descend close enough, press the action button to catch. If you want to complete the drug path then purchase the drugs. Either way, you may want to take the time to purchase Twotongue’s other pack of smokes. He’ll sell them for 10 moths. Catch ten of them and return to Twotongue to purchase pack of smokes #22.
If you’re taking the fighting path, return to Tower 17 and speak with Centurion to engage in the final battle against Bam. If you want the drug route, purchase drugs from Twotongue and go to the guards standing in section A of the Recreational Area.
If you’re completing the fight route, use the health unit behind the guard (at a cost of 10 UD) if necessary. Arm your shiv and battle bam. Jab him with the shiv to push him away. Don’t stick in close. Use combinations with the shiv to slice and dice Bam into submission.
You’re taken to Abbott and must face him in a one-on-one battle. He’s a fierce beast with lots of stamina--it isn’t an easy fight. You will have use of the shiv, however. But Abbott uses a club.
Hit and run and combination attacks are keys to the battle. Move in and let Abbott swing his club. Back off quickly to avoid the blow then move in with a shiv jab. This technique isn’t perfect, though; Abbott can swing twice in succession, which may score a blow. You can also use your agility to maneuver around Abbott and away from the front of his club. Attack Abbott’s side with the shiv then back off and repeat. Right-left combination attacks also prove extremely powerful. Get a good rhythm going--right, left, right, left, right, left, right, left repeat until crushed! If you have portion of a health box, retreat and wait for it to replenish in full. It’ll provide some extra stamina--you’ll need every sliver!
Once Abbott has been beat down, grab his security card and his club if you wish. Use the keypad to exit the room. Exit and go forward. Find the health station. Sit inside to regenerate your health and gain an extra block. You’ll spot Georgie on the other side. He offers to distract nearby guards for 50 UD. Save your cash!
Go around to the right and exit using the keypad. You’re back in the Feed Ward. Go to the mess hall and speak with Monster. He’s one of the Feed Ward traders. You can purchase a shiv, club, or vent tool from him. You already have weapons but you need that vent tool. Purchase the vent tool for 15 UD.
Return to Tower 17 and speak with Centurion if you completed the ring fight path. He has a pack of smokes reward for your effort. He hands you pack of smokes #21.
Return to the Recreational Area and into section D. Speak with Flores about the mines for some information. Go to the back of section D and move through the door toward the Work Pass area.
Work Pass
Move to the left side of this new area and speak with Shurik. Don’t worry about the riot guard; he won’t bother you if you keep in line. He forgot his glasses in the mines. Agree to help him out if you wish.
Optional Objective (Shurik): Bring back Shurik’s glasses from the mines.
The center door in this area is a small control room containing a med cartridge and a pack of smokes. But the riot guard won’t appreciate you breaking in with your stolen keycard. Wait until the riot guard looks away if you want to use the keypad to enter this room. Find pack of smokes #34 inside. When you leave, peer out of the door and wait until the riot guard looks away or he’ll open fire.
Go to the door on the right side. Use the keypad to unlock the door. Enter sneak mode and creep inside the room. Hide behind the tall crates ahead. There are several guards in here but there’s a problem with the lights. Perfect opportunity for sneaking around with the eyeshine!
When the lights are out, sneak up the stairs on the right side of the stack of crates. With eyeshine on you can see the guards facing the other way. Go toward the right corner and spot the loose panel. Open it and find some UDs inside as well as half of the snitch-list that Cuellas is looking for (Solving Cuellas’ Mission Part 1).
Look back at the room’s center and the guards. Once the lights switch off again, scurry across the room in sneak mode to the opposite staircase. Go into the right corner near the grating and hide behind the crates. You can open this grate and find some UD money inside. When the guards aren’t looking and the lights are out, hug the wall to the opposite corner of this platform and find the other grate. Crawl inside. This can be a tough section since you don’t have weapons. If you’re spotted, get quickly to the exit grating and scamper through.
Navigate the vent shaft, climbing the ladder, and rounding corners as necessary. Continue until you emerge on top of an elevator. Don’t drop inside--there are guards! Stay on the top of the elevator into the next section.
Mine Entrance
Objective: Find Jagger Valance.
Watch the guards exit below. Instead of dropping down inside the elevator, leap onto the top of the ventilation shaft and find the hatch. Open it up. Go right and follow the shaft to the grate. Look through the grate and wait for the guard to move away. Bust out of the vent.
Use the stack of crates for cover as you navigate toward the left side of the hall. Wait for your opportunity to use sneak mode to get behind the guard and break his neck. Drag him into the dark ventilation system. Go down the hall until you spot the vent shaft overhead. Use it and navigate the vent system. When you reach an intersection, take the left path to find pack of smokes #38. Don’t bust out the grate here cause it just leads back to the previously explored hallway. Continue through the unexplored shaft to the grating. You should spot crates ahead.
Duck into sneak mode within the stack of crates. Look out to the right and spot the guard. He’s standing over a fan system. Walk up behind him and push him into the fan. Back out and use the service panel in the room’s center to disable the lights and fan. Search around the crates for some money then go to the fan and drop down onto the blades.
There are guards at the bottom. Work quietly and wait until they move away. If you’re seen, just run! Go through the door and toward the next section and just ignore those pursuers.
Security Checkpoint
Go through the large door. Spot the guard in the distance. This is a tough area, particularly because you have no weapon and can’t use the assault rifle discarded by disabled guards. When all else fails and you are seen: run!
Sneak along the left side of the large area and stick behind the crates and darkness in the corner. The right side of the area contains a riot guard and a couple normal guards. None will greet you with open arms so do your best to remain out of sight and in the dark shadows.
There are two routes through this area: an upper and lower route. Both have their difficulties. For the upper route, go to the back corner behind the crates. When the guards are talking and looking away, hop up onto the ledge in the corner. Stick along the left side and maneuver underneath the hangrail ahead. Cross it to the far side and drop down onto the crates.
Pull yourself up onto the crates then hop over the high railing to the upper catwalk. If you want a nearby pack of smokes, jump to the middle section overlooking the room below and use your eyeshine to find pack of smokes #39. Return to the catwalk and go down the stairs into the upper mines.
Upper Mines
Note about the mines. You’ll encounter the same moths you found inside the Recreational Area. If you want another pack of smokes from Twotongue, collect each moth you find until you have 20. If you can’t quite get to 20, you can get more in the Recreational Area when you return but get as many as you can.
Arriving from the upper catwalk, enter sneak mode, move forward and hug the left wall. You can see guards on the opposite catwalk so move carefully to avoid detection. Go around the left corner and continue along the catwalk. When you spot crates below you to the left, drop down and hide in the shadows.
Move out to the left and look for any nearby guards. If you spot a guard, disable him and drag him into the shadows. Move across to the crates on the other side. Stick within the shadows. Wait for the guard to pass and scamper to the back corner to find a narrow path on the right side. Go up the stairs and through the doors.
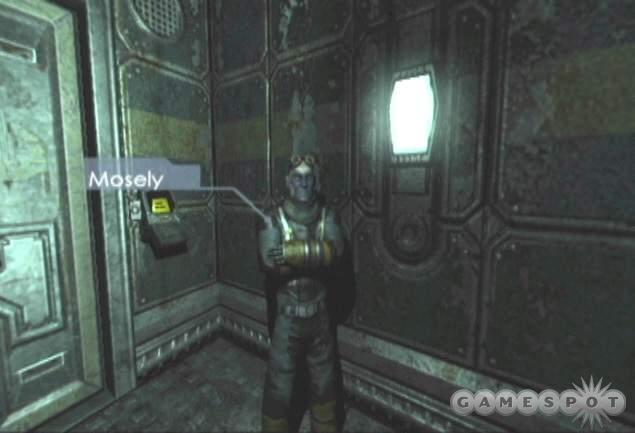
Cross the catwalk hugging the left wall. Enter sneak mode and move through the next door on the left. As you move into the hall, spot a guard with his back turned to the left. Sneak up on the guard and disable him with a neck break. Speak with the other guy: a blueskin named Mosely.
Turn around and creep around the left corner toward the next door. Peer down the hall and wait for the guard to move to the balcony on the right. Sneak behind the guard and disable him. Snag the security card. Look in the right corner of the balcony for pack of smokes #40.
If you want to recover Shurik’s glasses for his mission, they’re nearby.
Solving Shurik’s Mission: Exit the balcony and go right through the next door. Quietly approach the next balcony ahead in sneak mode. There are guards and miners below. Go to the left side of the balcony and wait for the guard to turn away. Slide down the ladder and take cover behind the crates. When the guard looks away, sneak up and disable him. If you’re caught in action, fight him hand to hand. Try and grab his weapon and disable him.
Speak with the miner here named Quintana. He inquires about Shurik; apparently Shurik’s glasses are nearby. Walk over to the crates in the corner and climb up to the top. Grab the glasses off of the top crate.
Return to Mosely and use the keypad to open the door behind him. Move forward into the next section.
Cargo Transport
Move along the right wall to find a pack of smokes on the ground. It’s pack of smokes #42. Utilize the health unit here if necessary. Face the lift system to the left of the health unit. Note the lights going up and down, which indicates the path of the lift. Hop on the lift going down.
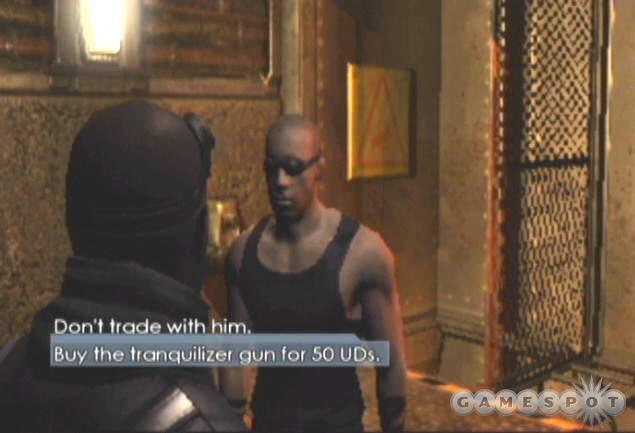
At the bottom speak with Armadaro. He has a tranquilizer gun and he’ll sell it for a paltry 50 UD. Finally a weapon! The great news is that the tranquilizer gun has unlimited ammunition and can also shoot out lights and laser traps. Things just got a bit easier. Continue through the door and into the next section.
Mining Core
Walk forward and through the door. A guard patrols ahead of you. He walks to the edge of a railing and stops. Enter sneak mode and move forward and behind the guard. Shoot him with the tranquilizer gun to knock him out then stomp on his head to finish him off. You can also shoot out the lights to provide cover! There’s a health unit in the same hall if you need to mend wounds.
The next room contains a technician and a patrolling riot guard and perhaps another regular guard. This is one of the toughest stretches in the game. There are two routes into the room. You can hop over the railing and drop onto the crates or go down the stairs across from the health unit. Either way, it’s best to wait until the riot guard moves away from the room. Watch his movements from the railing and wait for him to move away to the left.
The darkness behind the crates provides ideal cover. Drop down onto then behind the crates. Lure the tech close (he’ll run at you if he sees you) and shoot him with the tranquilizer gun. Drag his body into the darkness. You should also wait to see if you spot any regular guards and take them out while the riot guard has moved away. Take out lights while you’re at it!
The service panel on the opposite side deactivates the turret defenses. Not a bad idea if you can get there. If you are spotted by the riot guard, just take cover. If you are collecting smokes, jump over the railing to the right of the panel. Go left and find pack of smokes #4 in the dark corner.
Return up over the railing by climbing on top of the crate. If any guards have been alerted from the noise (such as the riot guard spotting you), shoot them from long-range with the tranquilizer gun. If you’ve been spotted, don’t bother trying to combat the riot guard. Just run to the right and through the tunnel. Hide in corners and allow the guards to come toward you and disable them with the tranquilizer gun. You can also shoot out the lights in the hallway to provide cover.
When you reach the area with the catwalk on the upper left side, hide in the darkness by the crates on the right. Remain there and disable any other nearby guards with the tranquilizer gun--even if you can’t reach them and finish them off. Shoot out any lights you spot, including those above the catwalk.
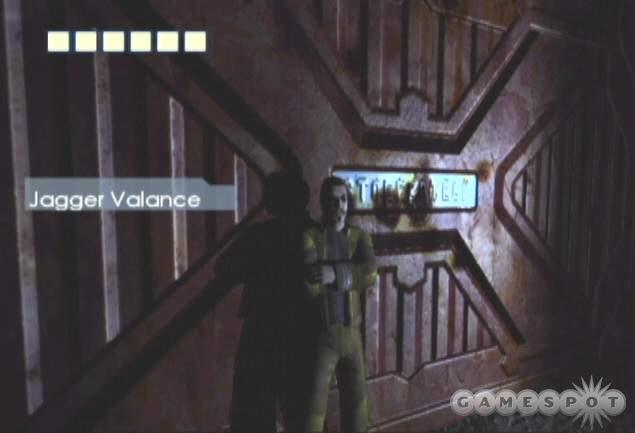
Solving Wilkins’ Mission: Go behind the crates at your current position and find Jagger Valance. Speak with him. He’ll help you--but for a price.
Objective: Help Jagger Valance.
He wants you to get a package for him; it’s located in a gas-filled room past the rock crusher. He also gives you a code to the gas-filled room; it’s placed in your inventory.
You can get to the rock crusher using force--primarily the tranquilizer gun--or through stealth. Using force, just make sure the riot guard is well away from the area before you start tagging regular guards with the tranquilizer gun. Move around the miners on the right corner of the area and continue to the opposite side to find the rock crusher. It may not be worth the commotion it causes.
For the sneak route, return left from Jagger and peer out from behind the crates. Keep in the darkness and in sneak mode. Look for patrolling guards (and that riot guard is probably still around). Spot the valve across from your position. When the coast is clear, run up to the valve and use it. A ladder lowers to your right. Ascend the ladder to the catwalk. Move in sneak mode to the end of the catwalk. Leap up to the ledge on the left. Shimmy all the way around to the right until you’re over the room containing the rock crusher.
Look down and wait until the guards are moved away and drop down. Arm the tranquilizer and shoot them quick, especially if they’ve detected you. Back into a corner so you can ensure no guard is behind you then pelt any incoming guard.
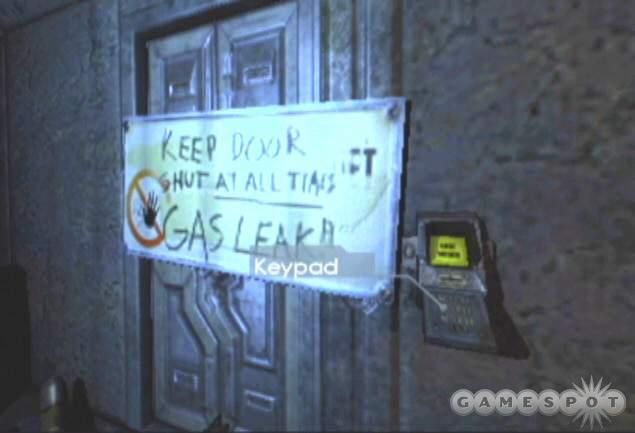
Go down the hall to the right and through the door. Guards patrol the intersection ahead. Hide in a dark corner in the room containing the barrels and wait for a guard to move past. Creep in sneak mode into the intersection and shoot the remaining guard. There’s a health unit here if necessary. Approach the door down the hall. That’s the gas-filled room. Use the keypad then duck and crawl inside. Climb over the crates ahead of you and maneuver to the back of the room to find Jagger’s package. There’s also a med cartridge amongst the rubble.
Return to Jagger Valance. Shoot out all lights with the tranquilizer gun to better conceal yourself in darkness. When you return to the main room, hug the left wall and go to the left side of the crates to find pack of smokes #41. Keep on the far left side over the rail system and you’ll reach the miners. Depending on how you treated the guards earlier, there may or may not be some remaining. Sneak past in the darkness or plug a guard with the tranquilizer gun. Go behind the crates to reach Jagger.
Objective: Get a bomb from Jupiter.
Jagger tells you to see Jupiter in Tower 19. He can get you a bomb. He gives you a code for the elevator and directions toward Tower 19.
Retrace your steps all the way back to the Cargo Transport level. It is ground you’ve already covered so there may be guards still patrolling. Shoot out lights and take your time, especially if there’s a riot guard around.
Face the lifts and use the one on the right. Ride it up. Get off at the middle floor to complete some optional missions.
Solving Jamal-Udeen’s Mission and Cuellas Mission Part 2: When you move through the door, you’ll encounter three blueskins--including Mosely. He’s not so friendly this time. The other two are Alonzo and Void. Defeat them. You have the tranquilizer gun so an easy way is to run away from them, turn around, and shoot them with the gun. Stomp on their heads to finish the blueskins off. When you stomp on Void’s head, he drops the second half of the snitch-list that Cuellas is searching for.
Return to Cargo Transport and go to the top floor. Move through the door ahead. Time for another little tangent for a pack of smokes. Go around to the right and find the stack of crates. Climb them. You should be able to see the top of the vent shaft that runs along the ceiling. Jump onto the shaft and return toward the other side of the room. Drop onto the shaft where the two pieces are separated.
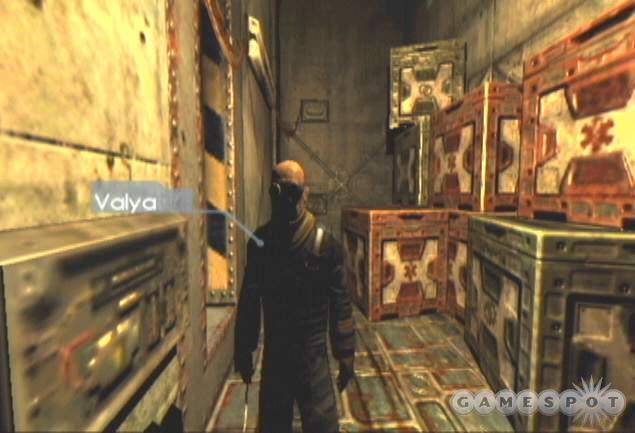
Follow it to a vent shaft and drop inside. Enter sneak mode and exit to the right side. Spot the guard ahead. Sneak up and kill him. Speak with Valya. He gives you the code to his chamber.
Optional Mission (Valya): Find Valya’s secret chamber.
Return through the vent shaft and back to the previous room. Drop off of the shaft and use the vent hatch near the floor. Navigate the new shaft. You emerge out of the shaft into what looks like a precarious chasm. Drop off to the right side. Then turn around and look down to find another landing spot. Drop down and move into the new vent shaft.
Solving Valya’s Mission: Navigate this shaft until you find a vent hatch above you. Climb out. You’re back at the elevator. Drop inside the elevator and exit through its main door. Maneuver across the large expanse. Arm the tranquilizer gun so you can disable the two guards that will impede your progress. Use the keypad to open Valya’s chamber. Inside find a health station and, on top of the stack of crates, pack of smokes #37.
Return to the elevator and hit the keypad to ascend. Exit the lift. Now you can return to the prison area and complete some of your quests for their rewards. Exit the lift to the left. Bust through the grate at the back corner of the room to find pack of smokes #36.
Climb onto the crate to the left and grab onto the ledge. Spot the riot guard below. Shimmy to the left side and use the hangrail above. Traverse to the opposite side from the riot guard and drop down. You’re now inside the Work Pass area. You can even see the riot guard and Shurik below. Drop behind the riot guard then walk up to Shurik (the riot guard won’t bother you). Talk to Shurik to return his glasses.
Return through the door and back into the Recreational Area. Speak with Twotongue and purchase pack of smokes #23 for 20 moths (if you need more, find them throughout the Recreational Area). Continue through the area and find Wilkins and talk to him to complete his mission. You receive some UD money as a reward. Talk to Jamal-Udeen to finish off the blueskins mission. He’ll hand you pack of smokes #24 as a reward. Go to the Feed Ward and speak with Cuellas to complete his mission.
Return into Work Pass and enter the door on the far right (Power Central). There’s a guard in the back right corner of the room. Take him out from long-range with the tranquilizer gun. Use the nearby keypad to enter the door into Feed Ward Emergency Ventilation.
Enter the vent hatch on the right and start navigating the tunnel. Arrows and writing inside the shaft point the way. Move toward the Feed Ward. Drop through the grating and go into sneak mode. A guard patrols this hall. Sneak up behind him and eliminate the guard with the tranquilizer gun. Or you can avoid him and enter the door on the right side of the hall.
Time for a brief pack of smokes hunt. At the intersection, go left and quickly use the grating. Crawl inside the vent shaft. Follow it to a right turn and go through. Emerge out into another hallway. Go to the right and grab pack of smokes #43. Return through the vent to the room with the intersection.
You may spot guards patrolling the room. Deal with them with your tranquilizer gun. Don’t forget you can shoot out lights as well. Go to the right side of the hall and use the service panel to disable the area’s lights. Continue to the left and disable more guards. Shoot out the lights with the tranquilizer gun.
Hug the left wall until you reach a split in the path. A guard patrols to the right. Take him out. Continue along this path and eliminate any additional guards. Locate the vent hatch in this area and crawl inside. Follow the arrows toward Tower 19.
Tower 19
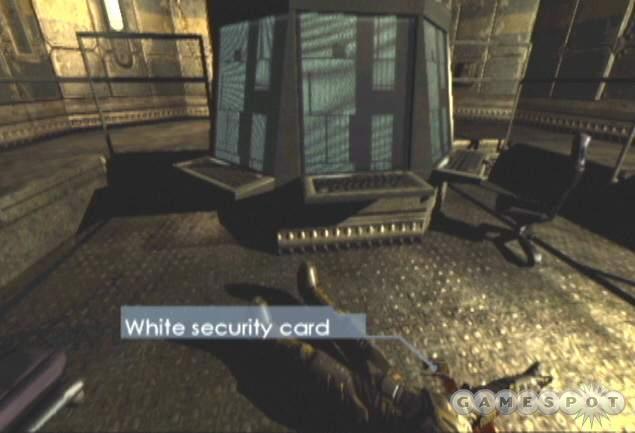
You need to find Jupiter to continue Jagger’s mission. Move through the vent and drop down through the grate. You enter a computer room with a guard inside. Drop him with the tranquilizer gun and stomp him. Grab the white security card he drops. Use the computer terminal, which unlocks the cell doors. There’s also a health unit in the room if you need mending.
Go to the keypad to the left of the health unit and use it. Go through the open passage to the right. You enter the cells. Walk out onto the platforms and find Jupiter. Speak with him to receive the bomb.

Objective: Go back to the mining core and plant the bomb.
Jupiter doesn’t last long when the guards arrive. Take cover in a cell. To escape this seemingly insurmountable situation, wait for the descending crate to appear outside the platform. Jump onto the crate to initiate the cut scene.
Container Router
Your ride comes to a stop quickly. A couple guards prepare to inspect below. As soon as it’s possible, drop off the left side of the container and run to the open hatch. Drop inside and avoid the guards. Toggle eyeshine and shoot the guard in adjacent room with the tranquilizer gun. If you’re collecting smokes: climb the ladder and emerge on the opposite side of the router. Find pack of smokes #44 on the ground. Return to the tunnel.
Follow the dark passage to the ladder. Climb up. Beware of the patrolling guard at the top. Wait for him to pass then sneak up behind him and take him down (or just use the tranquilizer gun). If you’re collecting smokes, take the ladder on the opposite side all the way to the bottom. Crawl through the short tunnel and find pack of smokes #45.
Climb the ladder to the top and bust through the grate. Follow it to another grate and bust out. Spot the guard below. Drop onto the dark crate and remain in sneak mode. The guard moves away. Stay in the dark and shoot the guard using the tranquilizer gun. Continue around the hall to the ladder. Climb it. Break open the grate on the left and go inside. Alternatively you can just jump the gap ahead toward the sign.
Navigate the vent to the next grate. Look out for the nearby guards. Break open the grate and use the tranquilizer gun to disable any nearby guard. There’s a turret around to the left. If you set of the alarm, use the switch just in front of you to disable the system and the turret.
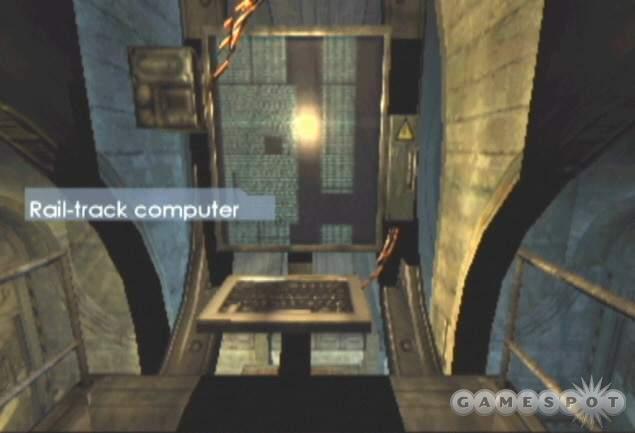
Move through the hall marked Control Station A. Disable the guard with the tranquilizer gun and stomp him to recover the red security card. Use the nearby health unit. Walk out onto the catwalk and use the rail-track computer. The results aren’t promising. You’ll need to find another track.
Exit the catwalk. If you’re collecting smokes, climb the crates and grab hold of the high ledge. On top you’ll find pack of smokes #46.
TIP: Now there’s a fantastic shortcut that you can use it that will get you all the way back to the gas-filled room to plant the bomb. It cuts off a lot of gameplay. This walk-through includes the normal route but if you want to try the shortcut then follow these instructions. After getting the red security card, go use the keypad to activate the lift. Send it down. Drop on its rooftop then drop to the ladder and climb back up to the previous floor. Go around to the other side using the grate and vent tunnel. Use the keypad again to call the elevator up to your current floor. As it comes up, hop on its roof. Look up and you’ll spot a vent hatch. Use it. Follow the vent to the mining core. Drop down and you’re just outside the gas-filled room.
Walk to the keypad and use it. Walk onto the adjacent lift and go down. Move to the next keypad and go through the open door. Find the next keypad and use it as well. Arm your tranquilizer gun and disable the patrolling guard. Move through the narrow passage and disable a second guard. Move into the hall and find the vent shaft on the ceiling. Climb onto the crate then jump to the shaft.
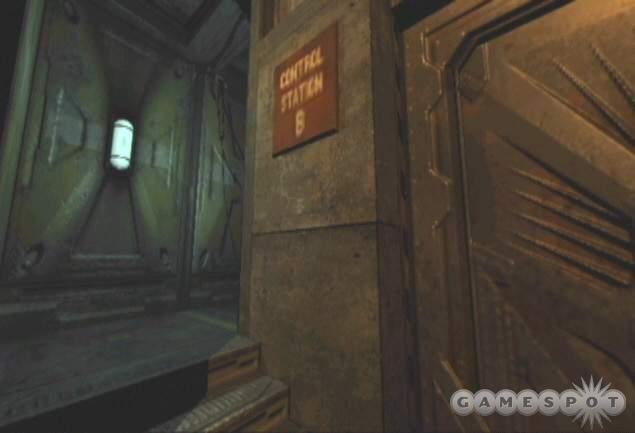
Navigate the tunnel and find pack of smokes #48. Climb the ladder at the end and follow the shaft to another vent hatch. Open it and exit. Descend the ladder. Hide in the dark and wait for the patrolling guard to appear. Don’t forget to shoot out the lights too. Disable the guard with the tranquilizer gun. Go right and into the area marked Control Station B. Eliminate the tech near the controls.
Unfortunately the track lacks power. You’ll have the find the power generator. Exit the station and use the keypad to open the door on the left. This hallway is trapped. Shoot out the light on the left wall to spot the laser trap. If you shoot the trap with the tranquilizer gun, it will be temporarily disabled. Hide behind the crates and take out the patrolling guard.
If you’re collecting smokes, climb to the top of the crates and use the vent hatch. Follow it to an exit and a small catwalk. Grab pack of smokes #47. Drop down and into the hall. This hall is trapped too so use eyeshine to see the laser traps and use the tranquilizer gun to disable them. Eliminate any guards in the hall then use the keypad to open the far door. Note the sign on the wall: backup generator.
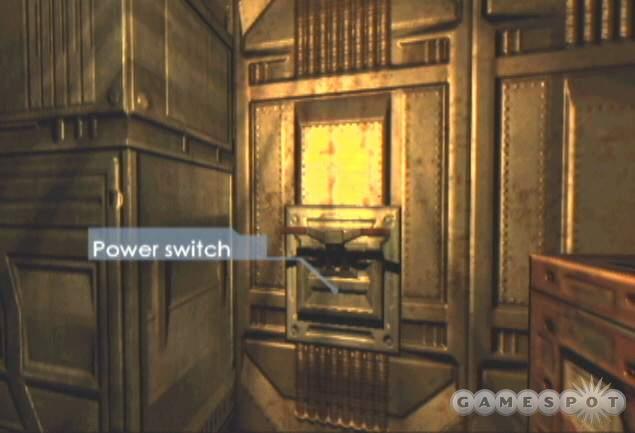
Duck in darkness and spot the patrolling guards outside. Shoot them from long-range with the tranquilizer. Move up and stomp on the guards to finish them off. Jump down to the rail system on the left side. Descend the ladder toward the backup generator. Use the power switch. Work your way back to Control Station B. Don’t forget about the laser traps in the hallway. Shoot them with the tranquilizer gun to disable them. If you set one off, just keep running!
Once inside Control Station B, use the rail-track computer again. The track is activated. Return again to the rail system you were just at. Watch the big crates move from the laser fence toward the hole. Move in behind the crate as it advances toward the hole. Jump onto the crate and descend.
As the crate stops, jump to the lit ledge. Go inside the grating. Follow the shaft toward the mining core.
When you drop out, you’re back in familiar territory. It’s the mining core where you met Jagger Valance. Beware of any remaining guards still around, particularly the riot guard. Shoot out lights to help create cover and work to the rock crusher. Go down the right hall and toward the gas-filled room that Jagger pointed you toward. Once inside, climb over the crate and move to the back of the room. You automatically plant the bomb and move into the next section.
Crash Site
After the extended cut scene, face the lone guard. Run at him and grab his weapon to disable him quickly. Exit onto the rail and go around to the right. Keep moving down until another cut scene appears. Your bomb has unleashed something menacing. Move into the hole and drop down into the next section.
Abandoned Equipment Center
Objective: Get to the Spaceport Hangar.
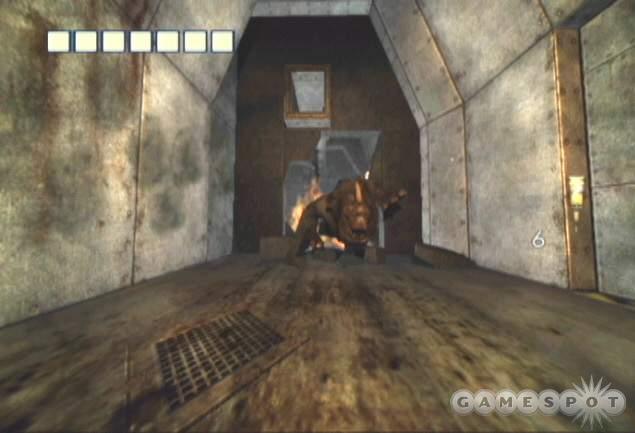
Walk forward and pick up the shotgun as well as the grenades. Save your grenades! Don’t use them for now. But the shotgun will certainly prove invaluable. Go around to the right and snag another shotgun. Follow the creature into the pit. Prepare for combat. You encounter several smaller beasts. Expect to battle these throughout the upcoming levels.
Go up the ramp on the left side then pull up to the ledge. From the ledge, go up the hill to the right. Snag more shotgun ammo near the crates. Climb onto the crate and spot the ledge on the right. Hop over. Spot the sign pointing to the security gate. Unfortunately the gate requires some sort of key--which you don’t have.
Turn around and proceed down the ramp. Be ready to fire on those creatures as you go. Fire at close-range and try not to waste ammunition. You’ll need it! Follow the tunnel to the next open room. Go up the ramp on the left. Snag the vent tool off of the crate ahead. Turn left and jump up to the overhead vent hatch.
Navigate the vent to the grating. Bust it open. Drop into the room. Use the service panel on the left to toggle on the overhead lights. Combat the creatures that enter from the vent shafts (both forward and behind). Crawl through the tunnel to the right of the service panel. This next room contains the drill. Unfortunately it lacks power. You’ll have to find a cell. The room also contains a health unit but you’ll need a cartridge.
Exit through the passage behind the drill. Follow it toward the broken bridge. Pick up the ammo on the ground as well as the toolroom key. Hop onto the debris on the back wall and use the overhead wire to cross the broken bridge. Drop down on the other side and procure more ammo.
Move into the tunnel and go right. You’ll end up in a previously explored area. You’re heading back to the security center’s locked door. Go up the ramp, the ledge, the hill, and back to the stack of crates. Plenty of creatures will be here as well. Go onto the crates and hop over the ledge to the security door. Use the toolroom key and enter. Grab grenades on the right side of the next hallway. There’s also a health unit if needed.
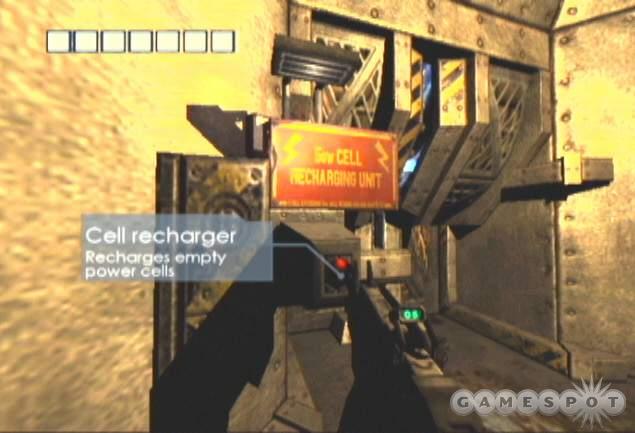
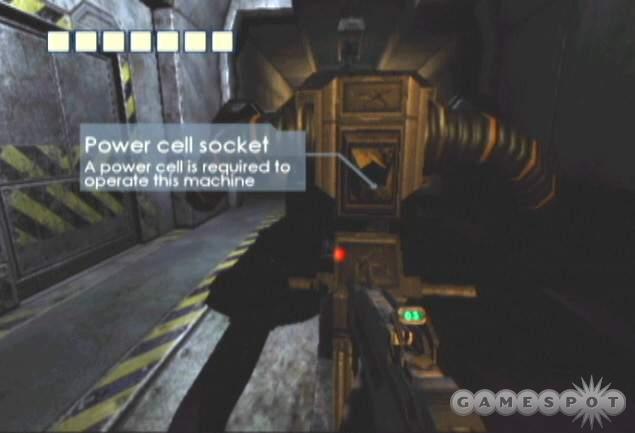
Crawl under the door then use the service panel to switch on the lights. Beware of beasts entering the room. The power cell regenerator is in this room but you lack a good power cell to regenerate. Move through the tunnel opposite the recharger. Kill more beasties.
If you’re looking for pack of smokes, jump onto the crate then onto the roof. Go toward the other side and find pack of smokes #49.
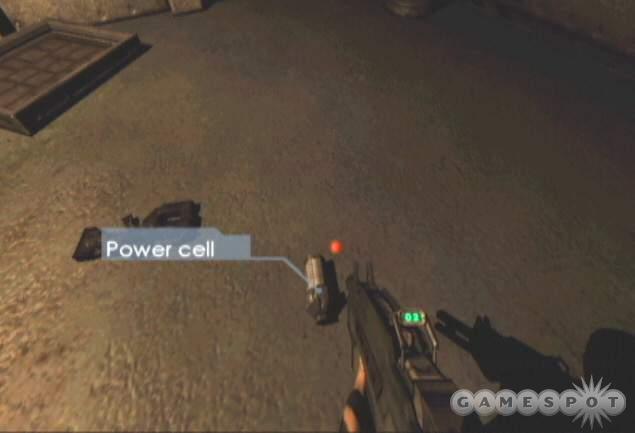
Continue through the tunnel into the room with crates. Enter the next room and find the power cell on the ground. There’s also an assault rifle prototype to add to your arsenal. Search the open crate for pack of smokes #50. Return to the cell charger. Use the charger to power the cell.
Return to the security gate and go down the ramp. Go to the left side and to the vent hatch you used earlier. Follow the shaft until something interrupts you--a beast from below destroys the shaft. Fall into the room and arm your grenades. If you haven’t used any and collected them all you should have more than enough.
Run across the room and turn around. Toss grenades at the monster. Once it’s dead, search the hole for pack of smokes #51.
Exit the room through the tunnel and return to the drill. Place the power cell into the drill then switch the machine on. Go through the opened passage and crawl through to the right. Defeat more small creatures as you work up the hill. Go into the vent shaft to the left and into the next section.
Central Storage
Exit the shaft onto the ceiling and spot the guards engaged below. Cross to the other vent and keep going. Bust out the grating at the end and step onto the small ledge. Grab the hangrail above and traverse to the adjacent ledge. Drop down. For a pack of smokes, ascend the ladder. Go to the far left side of the fans to find pack of smokes #52. Return to the ledge.
Go through the next tunnel. Keep going through until you pop out of a hatch. A guard fights the critters in the next room. Blast him while his back is turned. Fend off any remaining critters. Snag the med cartridge.

There are two doors here and two paths. For maximum firepower and enjoyment, go through the door opposite the vent shaft. You’ll enter a storage room with tons of crates. A couple guards battle creatures inside. Defeat the guards and creatures. Grab any discarded ammo or weaponry. Move toward the forklift. Leap up to the crate to the forklift’s left. Turn toward the room’s center and run and grab hold of the crate on the forklift. Just jump to it and you will automatically grab hold. Pull up and leap to the next set of crates along the opposite wall. Go to the right and into the vent.
Navigate the vent and drop out onto the floor below. Fight off more beasts. Go through the door and into the tunnel on the left. Drop down the hole at the end. Descend the ladder to the very bottom. Follow the tunnel to another warehouse room containing a riot guard fighting off a gang of creatures. While the creatures distract the riot guard, maneuver up behind and shoot the riot guard’s back of the head with the shotgun. Keep circling around the riot guard and pelt its rear flank with shotgun shells. Your reward for the effort: the riot guard’s minigun! Finish off any remaining creatures in the room.
Exit via the door on the back corner (with the blue hue). There’s a health unit inside. Continue around the hall and into the next tunnel. There’s another riot guard! The minigun makes quick work of it. Switch miniguns for more ammo and keep moving. Enter the door at the tunnel’s end into the next area.
Loading Docks
The next room contains defensive turrets moving along the ceiling. It’s not an easy area, particularly if you snagged the minigun from the previous level. You’ll move slowly and it’s hard to take out the turrets quickly. Your best option is to scamper quickly to the left and avoid the turrets completely. You may suffer some damage but it’s worth not messing with the emplacements. Get around the crates on the left side for cover. You’ll encounter creatures and guards--mow them all down.
Move into the door on the left toward the elevator. Slaughter the guard standing nearby. Hit the button and go into the elevator. Exit and follow the only path while mowing down guards and creatures. Reach a room with a health unit and another elevator switch. Ride the elevator.
Exit and approach the next door. More guards populate the docks. Crush them with your weaponry. Return up the lift and use the health unit if you need it. Walk through the fence to another elevator button. Press it.
Ride to the top. There’s a riot guard waiting for you. Shoot out all the lights to help provide cover so you can get a beat on the riot guard. If you’re using the minigun, the riot guard requires little effort. If you don’t have the minigun, use the darkness to sneak by the riot guard. Enter the door on the left in the back corner.
Two guards stand at the top of a short staircase. Toss a grenade if you have anymore or just demolish them with your weaponry. Go left at the top of the stairs. There’s a room on the right side with several guards. Annihilate them with a grenade or the minigun. Go inside and use the health station. Resume course down the hall to a brightly lit storage room.
Shoot the guards inside (including those on the catwalk above). Use the crates to reach the catwalk and recover pack of smokes #53. To get up there you’ll need to drop the minigun temporarily. Return down and go through the fence onto another elevator. Press the button. Once again, shoot out lights as you near the top.
Obliterate or sneak past the next riot guard at the top. Follow the hall around to the left and through a narrow corridor. Emerge into a guard station. Shoot the guards inside. If you have a cartridge you can use the health unit inside. Press the door button on the left inside the station (if you’re facing out of the station). Exit and move toward the next section.
Fuel Transport
Trouble lurks on the other side of the door. It’s a heavy guard. To defeat this enemy, utilize the pillars throughout the room for cover. Drop the minigun and equip the shotgun. Put a pillar between you and the heavy guard to stay out of its line of fight.
There are fuel tanks being transported throughout the room. Look toward the ceiling and watch them slide by on rails. When a tank moves above the heavy guard, shoot the tank. It drops and explodes near the heavy guard. Repeat until the heavy guard falls. Maintain your position behind a pillar. If the heavy guard adjusts left or right adjust with it to remain behind cover.
Once the heavy guard explodes, cross the room and move through the large door toward the next section.
Hangar
Exit into the hangar area. If you carry a minigun, this section isn’t very difficult. There’s a riot guard on the left side just past the crates and another in the back right corner. Crush them with the power of the minigun or sneak past using the crates for cover. A trio of enemies stands guard near the spacecraft at the end of the hanger. Eliminate them and work your way onto the open craft.
Exercise Area
Objective: Escape from Butcher Bay.
Things aren’t looking up in this prison exercise yard. But you’ve escaped before--you can escape again! Move around the yard until you pass out. When you come to, another inmate has joined you. Watch how he’s put back into the chamber. Another one comes out and you pass out. When you regain consciousness, walk over and use the cryobox. You awaken in the next section.
Cryo Pyramids
Turn around and grab the club if you want. Defensive sentry bots are about to attack you. Get on top of a pyramid to avoid them. Your goal is to get through the open door inside this room (it’s the one the larger security bots come through). It’s the door across the room opposite your start position. Ascend the pyramid to the left of the door. Hide there while the larger bots exit and fire at you. Drop down and quickly move through the open door into the next section.
Facility Control
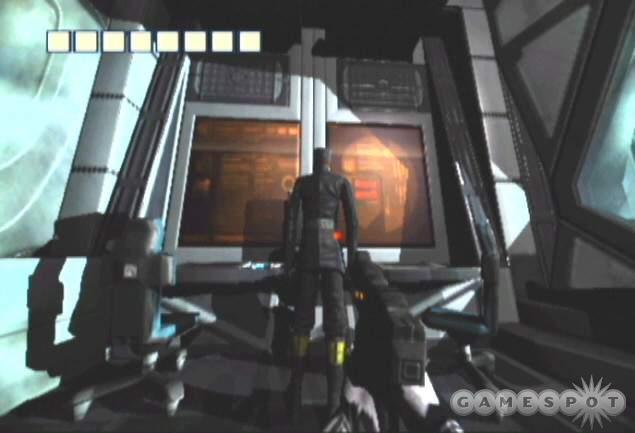
Exit into the next chamber and go right. You become trapped. A hatch opens in the floor releasing sentry bots. Drop inside the hatch. Quickly navigate this misty hall to its end. Don’t fight. Grab the ledge at the other side. There’s a guard in the next area. Disable him or punch him out--whatever--and grab his gun and cartridge. There’s a health unit nearby.
Fall through the other hatch and navigate the tunnel. There are sentry bots inside but now you have a gun. Leap out of the hatch at the other side. Go up the staircase. Move left at the top and enter sneak mode. Go behind the guard at the console and knock him out. Use the console to open the doors below. Enter the side room on the left side for a cartridge and pack of smokes #54.
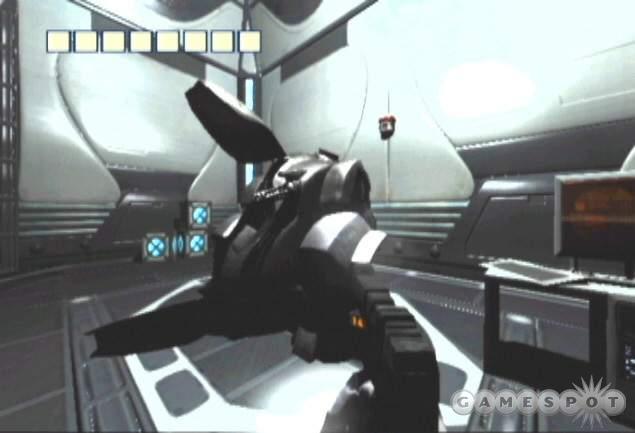
Retrace your path back through the underground tunnels including the misty one. Climb out and spot two security bots in the distance. Run past them. Your weaponry won’t be enough to fight them toe-to-toe. Go around the corner to the right and enter weapon storage. Locate an unoccupied heavy guard in the back corner. Oh, it’s beat down time! Enter the heavy guard!
You’re basically invincible now with incredible firepower from the primary minigun and secondary missiles. Obliterate the security bots inside the room and work your way to the right side to the elevator. When the door opens, crush the other heavy guard. It’s not even a contest. Ride the elevator into the next section.

Corporate Office
Exit the lift and run the gauntlet through the hall. It’s a linear path and full of destruction. Mow down the feeble guards that attempt to block your path and take out any security bots that appear. Crush, crush crush! Work your way into a room on the left. Finish off the bots and enter another elevator.
Take Off Platform
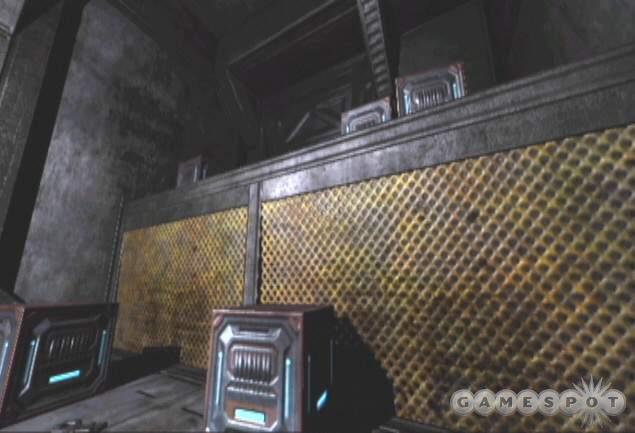
Exit the left and turn left. Obliterate more hapless guards. Enter the adjacent room. A heavy guard appears from the right side. Blast it under the might of your own firepower. You automatically exit when it’s clear. Use the crates to get up to the ledge and find pack of smokes #2. Move next to the door button and find pack of smokes #14 on the ground.
Use the door button and run out onto the landing area. Don’t turn back--there are far too many enemies on your tail. Keep moving until the cut scene.
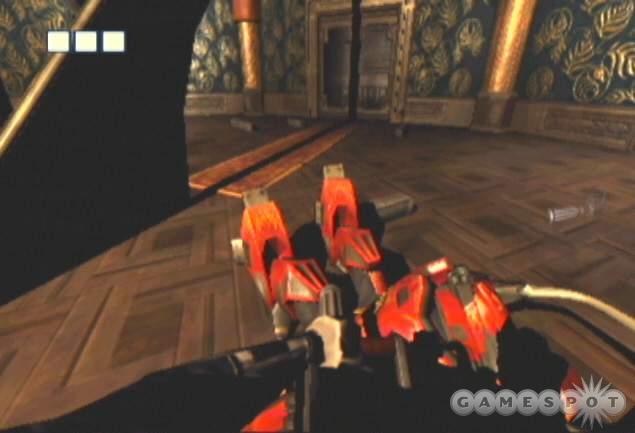
Time for the final battle against Hoxie’s personal guards. Quickly go to the back of the desk and pick up the shotgun. There are two mechanized guards and each possesses its own cloaking device. Use the pillars for cover and watch for the muzzle flash to let you know the location of each guard. Concentrate on a single guard. Once one falls you can use its minigun to crush the other.
Chapter 4 - Packs of Smokes
Packs of smokes are hidden throughout the game. Find a pack of smokes to unlock a collectible. The following table reveals all 59 packs of smokes, its name, level location, and brief description on where to find them. Note that the level names used in this table follow the walk-through used in this game guide. At times in the game you make a return to previous levels; but to avoid confusion, the level names used below follow the walk-through in order.
| PACK OF SMOKE NUMBER | NAME | LOCATION | DESCRIPTION |
| #1 | Hogdahls Finest | Escape | In a crawlspace behind the crates in the room with the hangrail. |
| #2 | Candy Candy | Take Off Platform | Use the crates to reach the ledge in the last room. |
| #3 | Carls Blend | Recreational Area | Return the red tube to Gulag. |
| #4 | Swift | Mining Core | In the recess area to the right of the service panel controlling the rail defenses. |
| #5 | Charlies | Tower 17 | Underneath the bunk in the holding cell. |
| #6 | Desert Air | Escape | On the table in the room where you acquire your first firearm. |
| #7 | Dog Smokes | Feed Ward | Purchase from Gomer. |
| #8 | Black Death | Feed Ward | Purchase from Gomer. |
| #9 | Charlies CC | Feed Ward | Purchase from Gomer. |
| #10 | Pirate | Feed Ward | Purchase from Gomer. |
| #11 | Roulette | Feed Ward | Purchase from Gomer. |
| #12 | Dr. Filur | Infirmary | Inside the dark treatment room. Get the code from Shabby in the Prison Yard. |
| #13 | Alundo Classics | Mainframe | On top of the catwalk in the crate-filled supply room. |
| #14 | Space Cowboy | Take Off Platform | Near the door button. |
| #15 | Mount Noir | The Pit | Inside a side tunnel just before Pope Joe’s Den. |
| #16 | OP | Pope Joe’s Den | Inside the hole in the wall just before Pope Joe’s blessed voicebox. |
| #17 | Sensai | Feed Ward | Receive from Cuellas for obtaining the snitch-list. |
| #18 | Yoyall | Tower 17 | Defeat Baasim in a ring fight. |
| #19 | Starlife | Tower 17 | Defeat Sawtooth in a ring fight. |
| #20 | Clemens | Tower 17 | Defeat Cusa in a ring fight. |
| #21 | Noname | Tower 17 | Receive from Centurion for completing the ring fights. |
| #22 | Painful | Recreational Area | Purchase from Twotongue for 10 moths. |
| #23 | Cone Puffs | Recreational Area | Purchase from Twotongue for 20 moths. |
| #24 | Five Fingers | Recreational Area | Receive from Jamal-Udeen upon completing his mission. |
| #25 | Voodoo | Prison Yard | Receive from Waman after killing Molina. |
| #26 | The Counts | Prison Yard | Purchase from Booger in the courtyard after killing Rust. |
| #27 | The Beetle Blend | Mainframe | Killing the riot guard. |
| #28 | Caravan | Dark Tunnels | In an alcove on the left across from the ladder to Showers. |
| #29 | Yups | Showers | Inside the lockers. |
| #30 | Q | Showers | Guard supply room. |
| #31 | Gronkos Box | Guard Quarters | Trade booze with Chancellor. |
| #32 | Old Timer | Recreational Area | Complete The Nurse’s optional mission. |
| #33 | Guards | Guard Quarters | Purchase from shopkeeper. |
| #34 | Red Frog | Work Pass | Inside the control room. |
| #35 | Bloss | Escape | On the crates just above the technician. |
| #36 | Tiny Tims | Mining Core | Inside a grate at the top of the elevator. |
| #37 | Sicher | Mining Core | Inside Valya’s secret chamber. |
| #38 | Rolles Rok | Mine Entrance | Inside the ventilation shaft. |
| #39 | Norquist | Security Checkpoint | Upper catwalk in the first room of the section. |
| #40 | Space Jockey | Upper Mines | On the balcony with the sharpshooter near Mosely. |
| #41 | Jimboro | Mining Core | Behind the crates just outside the rock crusher. |
| #42 | Addictive M | Cargo Transport | In the first room of the level across from the lifts. |
| #43 | Iron Lungs | Mining Core | On the way to Tower 19. |
| #44 | CA Alderholm | Container Router | On the opposite side of your entrance. Must use underground passage to reach. |
| #45 | 20 Musketeers | Container Router | At the bottom of the ladder inside the crawlspace near the first patrolling guard. |
| #46 | Robot Smokes | Container Router | Near the top of the crates by the rail-track computer. |
| #47 | 68th | Container Router | Through a vent shaft near Control Room B on route to power generator. |
| #48 | Maestro | Container Router | Inside the vent shaft toward the substitute rail. |
| #49 | Mummy | Abandoned Equipment Center | On top of the tunnel opposite the cell recharger. |
| #50 | Count Gunther | Abandoned Equipment Center | Inside the crate near the power cell. |
| #51 | Cloud No 17 | Abandoned Equipment Center | Inside the hole left by the huge beast. |
| #52 | Enfermo | Central Storage | Near the fans after the ladder. |
| #53 | Graes | Loading Docks | Inside the brightly lit storage room on the catwalk. |
| #54 | Gawd | Facility Control | Inside the office near the security console. |
| #55 | Lungbusters | Recreational Area | Return the injector to Twotongue. |
| #56 | Yoshimi | Recreational Area | Purchase from Pink. |
| #57 | MBryo | Aquila Territory | Talk to Blueboy after killing Rust. |
| #58 | Hobibs | Aquila Territory | In cell A-28. |
| #59 | JR Grass | Aquila Territory | Talk to Moondog in cell A-11 after killing Rust. |
Chapter 5 - Collectibles
Recover packs of smokes to unlock concept art, trailers, and other items in Chronicles of Riddick’s collectibles section. The following table reveals each collectible and its corresponding pack of smoke.
| COLLECT | PACK OF SMOKE |
| Cigarette List | #14 |
| Game Concept Art 01 | #27 |
| Game Concept Art 02 | #23 |
| Game Concept Art 03 | #28 |
| Game Concept Art 04 | #45 |
| Game Concept Art 05 | #3 |
| Game Concept Art 06 | #20 |
| Game Concept Art 07 | #48 |
| Game Concept Art 08 | #44 |
| Game Concept Art 09 | #46 |
| Game Concept Art 10 | #24 |
| Game Concept Art 11 | #10 |
| Game Concept Art 12 | #29 |
| Game Concept Art 13 | #49 |
| Game Concept Art 14 | #50 |
| Game Concept Art 15 | #43 |
| Game Concept Art 16 | #4 |
| Game Concept Art 17 | #15 |
| Game Concept Art 18 | #52 |
| Game Concept Art 19 | #5 |
| Game Concept Art 20 | #18 |
| Game Concept Art 21 | #38 |
| Game Concept Art 22 | #13 |
| Game Concept Art 23 | #40 |
| Game Concept Art 24 | #25 |
| Game Concept Art 25 | #26 |
| Game Concept Art 26 | #36 |
| Game Concept Art 27 | #41 |
| Game Concept Art 28 | #32 |
| Game Concept Art 29 | #21 |
| Game Concept Art 30 | #39 |
| Game Concept Art 31 | #30 |
| Game Concept Art 32 | #35 |
| Game Concept Art 33 | #55 |
| Game Concept Art 34 | #53 |
| Game Concept Art 35 | #58 |
| Game Concept Art 36 | #57 |
| Game Concept Art 37 | #11 |
| Game Concept Art 38 | #37 |
| Game Concept Art 39 | #19 |
| Game Concept Art 40 | #54 |
| Movie Concept Art 01 | #54 |
| Movie Concept Art 02 | #16 |
| Movie Concept Art 03 | #2 |
| Movie Concept Art 04 | #59 |
| Movie Concept Art 05 | #51 |
| Movie Prop 01 | #31 |
| Movie Set 01 | #7 |
| Movie Set 02 | #8 |
| Movie Set 03 | #9 |
| Movie Set 04 | #34 |
| Movie Set 05 | #56 |
| Movie Set 06 | #12 |
| Movie Set 07 | #33 |
| Movie Set 08 | #47 |
| Movie Set 09 | #22 |
| Movie Set 10 | #42 |
| Movie Still 01 | #6 |
| Riddick First Playable 1 | #43 |
| Riddick First Playable 2 | #36 |
| Riddick First Playable 3 | #41 |
| Riddick First Playable 4 | #47 |
| Riddick Prototype 1 | #26 |
| Riddick Prototype 1 | #1 |
| Riddick Prototype 2 | #59 |
| Riddick Prototype 3 | #31 |
| Riddick Prototype 4 | #21 |
| Starbreeze Technology Demo | #14 |
| The Chronicles of Riddick Combo Trailer | #1 |
| The Chronicles of Riddick Movie Teaser | #17 |
| The Chronicles of Riddick Novelization | #15 |
Got a news tip or want to contact us directly? Email news@gamespot.com
Join the conversation