Tenchu: Wrath of Heaven Walkthrough
This comprehensive walkthrough to Tenchu: Wrath of Heaven includes general strategies, item lists and tips, mission walkthroughs and cheat codes.
Design by Katie Bush
Activision's Tenchu: Wrath of Heaven, the third game in the Tenchu series, combines stellar graphics, exquisite level design, and harrowing stealth-based gameplay that lives up to the standards set by the series. Tenchu: Wrath of Heaven offers three playable characters, 27 single-player missions, dozens of ninja items and abilities, and a multiplayer mode--and this GameSpot Complete Game Guide covers everything!
The GameSpot Complete Game Guide to Tenchu: Wrath of Heaven includes:
- General Strategies--This section provides general strategies for consistent success in Tenchu: Wrath of Heaven. Here you'll find tips on remaining stealthy and using combat techniques when a direct battle becomes necessary.
- Items and Abilities--This section covers items and abilities for all three Tenchu: Wrath of Heaven characters: Rikimaru, Ayame, and Tesshu. You'll find item descriptions and strategies, the locations of hidden items (such as the stone of power and Rikimaru's and Ayame's alternate weapons), and a full description of all the abilities and how to unlock them.
- Rikimaru Mission Walk-Throughs--This section covers mission walk-throughs for Rikimaru. The walk-throughs include briefings, objectives, and a proven solution for completing the mission. You'll find specific tips for handling particular guards and discover the location of hidden items.
- Ayame Mission Walk-Throughs--Covers mission walk-throughs for Ayame.
- Tesshu Mission Walk-Throughs--Covers mission walk-throughs for Tesshu.
- Bonus Mission Walk-Through--Provides a mission walk-through for the bonus mission Through the Portal.
- Multiplayer Strategies--This section provides general multiplayer strategies for versus and cooperative game modes.
- Cheat Codes--Reveals Tenchu: Wrath of Heaven cheat codes, including those for unlocking missions, layouts, and characters and for restoring health.
Table of Contents
General StrategiesItems and Abilities
Rikimaru Mission Walk-Throughs
Mission 2: Gohda Castle
Mission 3: Limestone Cavern
Mission 4: Ronin Village
Mission 5: Amagai Castle
Mission 6: Cemetery
Mission 7: Bamboo Forest
Mission 8: Buddha Temple
Mission 9: Tenrai Fortress 1
Mission 10: Tenrai Fortress 2
Mission 2: Echigoya
Mission 3: Gohda Castle
Mission 4: Cemetery
Mission 5: Ronin Village
Mission 6: Amagai Castle
Mission 7: Buddha Temple
Mission 8: Limestone Cavern
Mission 9: Tenrai Fortress 1
Mission 10: Tenrai Fortress 2
Mission 2: Gohda Castle
Mission 3: Buddha Temple
Mission 4: Limestone Cavern
Mission 5: Cemetery
Mission 6: Ronin Village
Multiplayer Strategies
Cheat Codes
Chapter 1--General Strategies
This section provides general strategies for consistent success in Tenchu: Wrath of Heaven. Here you'll find tips on remaining stealthy and combat techniques for when a direct battle becomes necessary.
One With the Shadows
It's certainly possible to play Tenchu as a straight-up action game--just rampage through the villages, rooms, and tunnels within each mission without a care in the world about remaining hidden or preventing enemy guards from detecting your presence. But Tenchu isn't that type of game. There are significant rewards for remaining stealthy and eliminating enemies using stealth. Remain undetected during a mission and you'll unlock a special item or fill the kuji meter (by accumulating stealth kills) to unlock a special ability. Here are some tips on remaining stealthy and avoiding direct combat whenever possible.
In outdoor levels, strive to remain on rooftops. You're much harder to detect on rooftops and above patrolling guards. Combine the height advantage with crouching and you're virtually undetectable. You can traverse rooftops to avoid guards completely or wait until they approach below you then drop down and execute a stealth kill.
You're much harder to detect when crouched. If you've been spotted but not identified as a threat, then try crouching immediately. More often than not, the ki meter will return to unaware. If the ki meter remains on spotted, roll to the left or right (hit X while crouched and press the left analog stick left or right) to maneuver close to a wall or object to avoid detection.
When dropping off a rooftop or ledge, perform a quiet drop by pressing the crouch button (R1) as soon as you land.
Observe enemy patrols. Often they patrol back and forth and remain stationary to look in a particular direction for a short period of time. Don't attempt to approach a guard that's standing still (unless he never moves). Wait until the guard actually begins to move away from you before approaching. If a moving guard is standing still, he may turn around in your direction before you can execute the stealth kill. It's much safer to wait until he's walking away from you.
If you are detected, strive to execute a stealth kill. Simply hide from the pursuing enemy by ascending to a rooftop or a ledge or by hiding in another room. You receive more points for a stealth kill (20 points) than for a normal kill (5 points). If you're striving to achieve a high score to unlock the special items, stealth kills are extremely important.
The type of stealth kill you perform depends on how you approach the enemy. For instance, approaching the enemy from behind executes a different stealth kill than approaching the enemy from the side, above, or the front. Tesshu also has a unique stealth kill when using one of his items, the kumihimo. You also receive more kanji for the kuji meter depending on the type of stealth kill.
Observing a guard's patterns can be tough if he's around a corner or on a higher ledge. The goal is to remain undetected. When approaching a corner, use the wall-to-back maneuver to hide against the wall and peer around the corner. If there's a guard on a higher ledge, grapple to the ledge and hang onto the side. You can shimmy back and forth undetected. Wait until the guard moves away from you before pulling up and attempting a stealth kill.
Running haphazardly through rooms and tunnels is a dangerous habit if you're attempting to remain undetected. Approach each corner and door carefully. Don't round a corner until you've peered around it and checked for guards. Opening doors is particularly dangerous, because a guard could be inside the room, facing the door. As soon as you open it, he could spot you. Crouch when opening the door and be prepared to immediately roll to the right or left (whichever is the quickest route to a hiding spot).
It's possible to use stealth to kill enemies without approaching them--by using your ninja items. For instance, the blowgun can be used against an enemy unaware of your presence for a stealth kill. You aren't awarded a full kanji for the meter, but it keeps you at a safe distance. Stealth kills from a distance are particularly useful if there are multiple guards in the area and it would be difficult to approach one without the other seeing. You can also use Tesshu's special bamboo gun, shuriken, mines, arrows, and other ninja items to remain out of sight of the enemy and still inflict a killing blow. Note that ninja items don't necessarily kill in one shot.
Many other items help you remain hidden and dispatch guards with ease. For instance, the poison rice. Drop the poison rice and watch a hungry guard walk up in search of a meal. Sneak up when he walks to the rice and bends down to grab it. Many of the special, unlockable items help you maintain stealth. To unlock these items, complete missions with grand master status (primarily through remaining completely undetected throughout the entire mission). For more on items, check the items and abilities section of this guide.
When Combat Is Necessary

Combat is a definite necessity in the game. Even if you manage to elude all guards, you must still contend with the mission's boss (if applicable). Combinations are key to combat. When you press the square button multiple times in succession, your character will perform a consecutive string of punches, kicks, and weapon combos. Your characters also have additional abilities that can be added to combos, including Rikimaru's shoulder thrust and Ayame's somersault kick. Further, rotating your left analog stick 360 degrees during a combo can add another type of attack.
If an enemy or boss blocks your initial combo strikes, consider jumping away before finishing the combo string or evading after a couple of deflected blows (press R2 and X and move in a direction). At a combo's complete conclusion, your character is left vulnerable to a counterattack or a grab, which can inflict significant damage. It's often better to remain at a distance and move in once the enemy provides an opening for your combo strike (such as after the enemy attempts an attack).
Don't forget your ninja items should combat become necessary. Drop caltrops, which both hurt and distract your enemy. While the enemy hops around and addresses his injured foot, initiate a combo attack for easy damage. Toss shuriken for additional damage or drop a grenade at your enemy's feet.
When deciding to combat guards and other enemies scattered around levels, be very careful on levels that feature bottomless pits. It's quite easy to get knocked off a ledge or even run off the ledge by accident when attempting to battle a foe in a tight area. Ninja rebirths do not work when you plummet to your death. Consider retreating to a safer place and battle the enemy there, or even just bypass the enraged foe and continue on in the mission.
Inflict a bit of extra damage after knocking down an opponent by approaching close and pressing the attack button while the enemy remains on the ground. You have to be quick, but each character has his or her own attack against a downed opponent.
Chapter 2--Items and Abilities
This section covers items and abilities for all three Tenchu: Wrath of Heaven characters: Rikimaru, Ayame, and Tesshu. You'll find item descriptions and strategies, the locations of hidden items (such as the stone of power and Rikimaru's and Ayame's alternate weapons), special unlocked items, and a full description of all the abilities and how to unlock them.
Rikimaru's and Ayame's Items
This section covers descriptions and tactics for items available to Rikimaru and Ayame. Some of the items are available to both characters, and some of the items are unique to each character. You'll also find descriptions and tactics for items that are unlocked by achieving grand master status during missions. Additionally, this section includes the locations of hidden items, including the stone of power, Rikimaru's fugaku sword, and Ayame's dokuto poison blades.
Shuriken--A deadly thrown weapon. It's possible to toss shuriken at a foe and remain undetected, but it takes several shuriken to defeat an enemy. They're most useful as added damage potential against bosses and against a troublesome animal.

Blowgun--Deadly when used properly. Strike a completely unaware enemy with the kuji for a stealth kill (though it doesn't add as much kanji as a regular stealth kill). Against alerted enemies, the kuji poisons any struck enemy. The poison drains health over time but does wear off.
Caltrops--Scatter to injure pursuers. You toss caltrops behind you, even when standing. You can toss them in the path of an unaware guard. While he hops on one leg and tends to his injured foot, sneak up behind him and perform a stealth kill. Caltrops can be used on some bosses. Initiate a combo attack if the boss happens to step on a caltrop.
Smoke Bomb--Generates smoke to obscure and confuse opponents. Enemies are blinded by a smoke bomb and disoriented for a short period of time. Capitalize on the disorientation with a combo attack or a stealth kill.
Grenade--Explodes on impact. It's tough to score damage unless you hit an enemy directly. If you drop one on the ground, attempt to lure the enemy nearby. Grenades are also useful as added damage potential against bosses.
Poison Rice--Causes temporary paralysis when eaten. Drop the piece of rice within view of or within the path of an enemy. He'll walk over to it, bend over, pick it up, and then eat it. If the guard eats the poison rice, he'll be temporarily disabled, providing a perfect opportunity for you to execute a stealth kill. But it's better to approach and attack the guard when he's walking to the rice or bending over to pick up the rice. If the guard fails to eat the rice, you can pick it up for another use. Poison rice is particularly useful around corners or for guards patrolling on a floor below you. You can't use poison rice on the undead or the mechanical enemies that populate the castle.
Mine--Explodes when stepped on. Drop a mine in a guard's path and watch the destruction, though it may take two to eliminate a foe.
Sticky Bomb--Detonate with the R3 button. Toss this shuriken-like weapon, and it will embed itself in an enemy or boss. When desired, push down the right analog stick to detonate the bomb. Sticky bombs are most useful against bosses, since you should be attempting to avoid combat most of the time. Throw one on a boss, and when he's low on health, detonate the sticky bomb to finish the job. They are especially effective against Onikage's second incarnation--prevent him from using that healing potion!
Tiger Trap--Clenches the feet of fools. You plant it like a mine, but when an enemy steps on the tiger trap, it doesn't explode. Instead, the enemy becomes stuck in the trap. Upon trapping the enemy, execute him with a stealth kill or just ignore him.
Tetsubishi--Hook and pull guards closer to you. You most likely won't use this very often. Tesshu has a similar item (one that's unlocked by achieving grand master status) that actually combines the pull with a stealth kill.
Colored Rice--Use this rice to mark a trail on your map. Drop rice to denote where you've been on a level. Check the map so you won't backtrack accidentally to that area. You could also use colored rice at an intersection so you can explore one route then return back to the colored area on the map to explore the alternative.
Strength Potion--Increases attack strength for a limited time. This potion is useful against bosses or if you're up against multiple guards. It's a one-time-use potion; once you drink it, the potion is gone.
Poison Antidote--Stops the effects of poison. Some guards use kujis, which can be particularly deadly if you're out of health power-ups and you're low on health. Counterattack the poison effects by using the antidote. If possible, escape from or kill the guard carrying the kuji before using the antidote. If not, he could shoot you again, and you'll be poisoned all over again!
Healing Potion--Restores health. Drink a healing potion when you're low on health; it restores you to full health. There's another, smaller healing potion found only during missions. This power-up (a wide object with a black dot) restores only 30 hit points.
Ninja Rebirth--Restart from where you die. Carry a ninja rebirth, and should you die during the mission, you will automatically restart at that position. The ninja rebirth does not work, however, if you fall down a pitfall to your death. You can carry only one rebirth at a time, but multiple rebirths can be stored on the item selection screen.
Stone of Power--Raises strength when used. The stone of power is a hidden item that serves the same function as a strength potion but is always active. Just place the stone of power in your inventory to gain its effects. You'll find the stone of power in the Amagai Castle mission (mission five for Rikimaru and mission six for Ayame). It's just before an exterior area--a catwalk or bridge area with red fences (for Ayame, it's just after, because Ayame goes through the level in reverse). Before going onto the catwalks as Rikimaru or just after crossing the catwalks as Ayame, press against the wall that's around the corner just before this exit. You'll enter a room where the ceiling descends. The stone of power is in the center of this room. You can equip the stone of power for other missions. Exit the room using the secret wall doors above the etched floor.
Muramasa (Rikimaru Only)--Uses life to kill the undead. This is provided to Rikimaru in mission six. The muramasa is the only weapon that can kill the undead, but it also slowly drains Rikimaru's life--it won't kill him, but it will drain his health to one point. You can replenish his health by attacking the undead. Stealth kills replenish health faster.
Fugaku (Rikimaru Only)--A sword with stronger attacks. This is a third, hidden weapon for Rikimaru. The fugaku is stronger than his standard weapon. Combine it with the stone of power for even more damage. You'll find the fugaku in Rikimaru's eighth mission. After hopping over the short fence and dropping down adjacent to the large pit, turn left and grapple to the ledge above (just to the right of the pillar). From this tight alcove, look at the end of the pit and see the two red boxes. Grapple over to them. Search the boxes. One contains some small health power-ups, and the other contains the fugaku. Return to where you started by using your grappling hook.
Kasumi and Shizuku (Ayame Only)--Uses life to kill the undead. These are recovered in Ayame's fourth mission. Like Rikimaru's muramasa, these swords drain Ayame's life when equipped but are the only weapons to damage the undead.
Dokuto (Ayame Only)--A sword with a poisoned blade. This is Ayame's third weapon. Ayame suffers poison damage upon equipping the dokuto (the effect wears off after a short period of time). Don't equip it if you're low on health and you don't possess a poison antidote or health power-up. The dokuto also inflicts poison damage on the enemy. Locate the dokuto in Ayame's seventh mission. You'll reach an intersection that leads forward or to the right. The right path goes to the small fence and the large pit. Instead, go forward. Be very careful traversing this area. It's a giant pitfall. Use your grappling hook to zigzag back and forth to each ledge. Go around the corner to the left. It's a dead-end, but look down on the middle ledge to find a wooden bridge and a path. Drop down onto the bridge then walk around the corner to the box. Search the box to find Ayame's dokuto.
The following items become available upon achieving a grand master rating during a Rikimaru or Ayame mission. The item will be available only for the character that achieved the rating (though both can achieve the rating in their respective missions).
Super Shuriken--Fires eight shuriken simultaneously. Because it fires more shuriken, the super shuriken inflicts more damage. Use it against an unaware foe if you're attempting to remain stealthy. The super shuriken is useful in a pinch if you've been detected and need extra firepower against multiple enemies. Save it for boss characters too.
Exploding Arrow--An arrow with an explosive tip. A direct hit causes serious damage, but it's also possible to inflict splash damage with a near miss. Like the super shuriken, the exploding arrow is handy when you've been detected and are engaged with numerous enemies. But if you're a stealth player, save the weapon to use against bosses.
Chameleon Spell--Temporarily disguises you as an enemy. You can carry three of these spells at a time. It lasts longer than invisibility, but you lose the spell after scoring just one stealth kill. You can use the grappling hook during this spell.
Dog Bone--Calls Semimaru to aid you. Semimaru is a powerful attack dog that can eliminate numerous enemies upon his calling. He's best used against a group of enemies, especially a group that's tough to avoid using stealth techniques.

Invisibility Spell--Turns you temporarily invisible. It's a short-lived spell, but you can kill multiple enemies through stealth while it lasts. You can carry two invisibility spells at once, and you can't use the grappling hook during the spell.
Fire Spell--Close-range fire attack spell that burns in all directions. Cast this if you're trapped in a corner by multiple enemies or a boss. This is not an instantaneous spell, so you may need health power-ups to replenish any damage sustained while casting it.
Ninja Armor--Reduces the damage you take. Equip the armor as added protection. Though you're likely not seeking battles against guards, the ninja armor helps protect you from the tough boss characters, and you can end up saving health power-ups for later use.
Fireworks--Makes enemies look up. Drop the fireworks to create a dazzling pyrotechnic display that guards just seem to love. Don't drop them right in front of you, however, as the guards may detect you. With the guards distracted, score a stealth kill or avoid them completely. Fireworks are best used when there's a tough group of guards that are hard to avoid without detection.
Decoy Whistle--Mimics an animal call to fool enemies. Calm disturbed enemies with the decoy whistle. It will return them to "unaware" status.
Binding Spell--Creates a magical seal that traps enemies within the seal or those that walk into the seal. Place it in the path of enemies, then avoid them completely or eliminate them as desired.
Rikimaru's and Ayame's Abilities
This section provides complete descriptions for all of Rikimaru's and Ayame's abilities. You'll also discover how to unlock each ability.
Shoulder Thrust Combo (available for Rikimaru only; unlocked by gaining nine kanji in Rikimaru's first mission): Push enemies far away using the shoulder thrust combo. To perform a shoulder thrust combo, press the square button twice, then pull the left analog stick in the opposite direction and press the square button a third time. Thrust enemies off cliffs, into pitfalls, or into walls so you can prepare yourself with items or run away.
Somersault Kick Combo (available for Ayame only; unlocked by gaining nine kanji in Ayame's first mission): Kick enemies down using the somersault kick combo. To perform a somersault kick combo, press the square button four times and then pull the left analog stick in the opposite direction and press the square button a fifth time. Use this five-hit combo to kick enemies off cliffs and into pitfalls.
Ninjutsu Block (unlocked by gaining nine kanji in Rikimaru's second mission or Ayame's second mission): Block and push enemies off balance at the same time. To perform a ninjutsu block, press the circle button right when the enemy starts to attack. Enemies will be vulnerable to attacks while they are off balance.
Ninja Vision (unlocked by gaining nine kanji in Rikimaru's third mission or Ayame's third mission): You can see farther with ninja vision. To use ninja vision, manipulate the right analog stick while holding down the L1 button in manual camera mode. Throw items farther and scout out enemy patterns using ninja vision.
Grappling Hook Combo (unlocked by gaining nine kanji in Rikimaru's fourth mission or Ayame's fourth mission): Link combos with the grappling hook. To perform a grappling hook combo, press the triangle button after landing a 360-degree slash combo to pull the falling enemy back to you. Perform continuous combos using the grappling hook combo technique.
Cling to Ceiling (unlocked by gaining nine kanji in Rikimaru's fifth mission or Ayame's fifth mission): Use the cling to ceiling move to avoid being spotted. To cling to a ceiling, hold down the R1 button while grappling up to a flat ceiling. Drop poison rice balls down to lure enemies into position for a stealth kill using the cling to ceiling technique. Beware that you cannot cling to a ceiling for long periods of time.
Feign Death (unlocked by gaining nine kanji in Rikimaru's sixth mission or Ayame's sixth mission): Lure enemies closer to you by pretending to kill yourself. To feign death, rotate the left analog stick 360 degrees, and then press the R1 button. For an easy kill, press the square button when enemies peer over your body. You will need a lot of energy to perform this move. You will lose energy slowly while pretending to be dead.
Wall Kick (unlocked by gaining nine kanji in Rikimaru's seventh mission or Ayame's seventh mission): Jump toward a wall and kick off of it to hit an enemy. To perform a wall kick, jump toward a wall and press the square button when you hit the wall. Use it mainly as a surprise attack against an enemy. Enemies aware of your existence will block attacks coming off the wall.
Ninja Mind Control (unlocked by gaining nine kanji in Rikimaru's eighth mission or Ayame's eighth mission): Use ninja mind control to make enemies attack other enemies. To perform ninja mind control, hold down the R2 button and press up then down on the left analog stick, followed by the square button. You must land the attack in order for the mind control to work. Ninja mind control will wear off after a set period of time. It will only work on one enemy at a time, and it will not work on bosses.
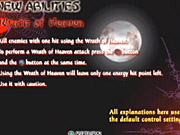
Wrath of Heaven (unlocked by gaining nine kanji in Rikimaru's ninth mission or Ayame's ninth mission): Kill enemies with one hit using wrath of heaven. To perform a wrath of heaven attack, press the circle button and the X button at the same time. Using wrath of heaven will leave you with only one energy hit point, so use it with caution.
Tesshu's Items
Tesshu doesn't have all of the items available to Rikimaru and Ayame. Plus, Tesshu must use money earned and found during the missions to purchase items. In addition to the items below, Tesshu can use the following items, which are also available for Rikimaru and Ayame (the number in the parentheses is the cost of the item): blowgun (480), smoke bomb (200), grenade (300), healing potion (250), poison antidote (150), strength potion (200), exploding arrow (750).
Throwing Needle (50)--A throwing weapon only for Tesshu. Use it to damage enemies from long range. You can remain hidden while damaging and terminating a close foe.
The following items become available upon achieving a grand master rating during a Tesshu mission.
Super Needle (900)--Fires eight needles simultaneously. It's similar to Rikimaru and Ayame's super shuriken. Tesshu can fire multiple needles for increased damage. You can save it for use against tough bosses.
Kumihimo (520)--Kills enemies from a distance. Use it against an unaware enemy to score a stealth kill. If it's used against an enemy whose aware of your presence, the kumihimo won't kill a full-health enemy in one shot.
Magazine (1200)--Use it to lure guards. It's similar to the poison rice, which Tesshu can't use. Place it on the ground and sneak up on a guard that approaches the magazine. Try to get the guard before he grabs the magazine. You'll lose the item and even a chance for the stealth kill if you aren't careful.
Disguise (1200)--Temporarily disguises you as an enemy. It's similar to Rikimaru and Ayame's chameleon spell, and you can carry three disguises at a time. It lasts long, though you lose the disguise after scoring just one stealth kill. You can use the grappling hook while disguised.
Bamboo Gun (1800)--Kill enemies with one shot. A self-explanatory weapon, the bamboo gun terminates a regular enemy in a single shot, even if he's detected your presence.
Tesshu's Abilities
This section covers complete descriptions for Tesshu's abilities. Tesshu's abilities are innate; he possesses them from the beginning of his missions, and these missions do not have to be unlocked first.
Upper Straight Combo: Blow enemies far away with the upper straight combo attack. To perform the upper straight combo attack, rotate the left analog stick 360 degrees and press the square button. Thrust enemies off cliffs, into pitfalls, or into walls so you can prepare yourself with items or run away.
Mimic Animals: Mimic animal sounds to fool enemies. To mimic animals, press the circle button while pressing the R1 button. Fool alerted guards into thinking that you are only an animal.
Power Block: Block and push enemies off balance at the same time. To perform a power block, press the circle button right when the enemy starts to attack. Enemies will be vulnerable to attacks when they are off balance.
Cling to Ceiling: Use the cling to ceiling move to avoid being spotted. To cling to a ceiling, hold down the R1 button while grappling up to a flat ceiling. Drop poison rice balls down to lure enemies into position for a stealth kill using the cling to ceiling technique. Beware that you cannot cling to a ceiling for long periods of time.
Feign Death: Lure enemies closer to you by pretending to kill yourself. To feign death, rotate the left analog stick 360 degrees and then press the R1 button. For an easy kill, press the square button when enemies peer over your body. You will need a lot of energy to perform this move. You will lose energy slowly while pretending to be dead.
Enrage: Raise attack strength for a limited period of time. To use enrage, press the circle button and the X button at the same time.
Chapter 3--Rikimaru Mission Walk-Throughs
This section covers mission walk-throughs for Rikimaru. The walk-throughs include briefings, objectives, and a proven solution for completing the mission. You'll find specific tips for handling particular guards and discover the location of hidden items. These walk-throughs cover the first layout only. The location of guards will be different for subsequent layouts.
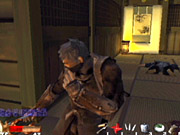
Mission 1--Echigoya
Buds of evil flower in the darkness as the land of Lord Gohda experiences a short springtime of peace. The fruits of corruption taste sweet to Gohda's statesman, Nasu, when Echigoya's son, Tokubei, invites him to the renovated Echigoya estate for dinner. Tokubei plants the seeds by loaning money to innocent villagers and then, when payments aren't met, abducting their daughters to sell them as slaves. Nasu is asked to "overlook" the process. You must punish the evil merchant.
Punish the Evil Merchant!
Objectives: Find the key to open the gate. Enemies will become alert when they spot dead bodies. Hunt for ninja rebirth items.
You begin just outside a building that essentially serves as a wall between you and an inner courtyard. You could patrol this outer perimeter and find several guards or take the quick route to the inner courtyard by using your grappling hook to climb onto the building's roof. Select your grappling hook and ascend to the roof. Remain crouched and face the center of the inner courtyard. Spot the patrolling guard down below. When he's moving away from you, perform a stealth drop onto the ground, then approach the guard from behind and perform a stealth kill.
Enter through the door behind the guard's patrol route. As you search this building, you're shown three guards having a grand ole time. These guards are enjoying themselves so much they may neglect the key that's resting on the floor near them. You need this key to open a locked gate into the next area. But there's a way to bypass these three guards, the key, and the gate.
Continue to search this building, and grab the health power-up and grenade from the back room. Search the back corner of this room for a secret tunnel that takes you into the next area and beyond the locked gate. If you wish to remain in the area and get the key for the locked gate, continue to follow this walk-through (remaining in the area also provides many more stealth-kill opportunities). One reason to bypass the rest of this area is to avoid being detected. The guards at the key will see you.

Exit the building and go right. Hug the adjacent building wall and peer around to the right. There's a patrolling canine nearby. Wait until it's moving away, then dispatch the guard dog. Go down the right corridor. There's a ramp on your left; a guard armed with a bow stands on the top or patrols up and down the ramp. Use your grappling hook to move up the ramp, and then dispatch the archer guard. Look below and spot a second guard near the locked gate. Drop behind him quietly and perform a stealth kill. If you're looking for another stealth-kill opportunity, retrace your steps back near where the dog stood and check the path to the right. Wait until this guard moves away from you and then eliminate him.
From the locked gate, go right, and when you reach the end of the path, peer to the right. You'll hear the jovial guards. Quietly sneak up behind the nearest one and perform a stealth kill. The other two guards will engage. Instead of fighting, flee and leap onto a roof. Wait until they give up their pursuit, then drop behind one and perform a stealth kill. Repeat with the last guard, then grab the key. If it's not in the room, search the guards' bodies. Return to the locked gate with the key. Unlock the gate and proceed into the tunnel.
Peer around the first corner and wait for the guard to move away. Approach him from behind and terminate the guard with a stealth kill. Traverse the corridor, moving carefully around each corner. The next guard stands at the top of a slightly higher level. Wait until he moves away, then pull up onto the level. Terminate him with a stealth kill.
Follow the corridor and continue to round corners carefully. There's a geisha at the corridor's end. Do not kill the geisha--if you do, you'll lose all stealth kills up to this point! Avoid detection by moving along the right side of the room when she's walking away. Use your grappling hook and aim for the upper right side of the room. Ascend to the upper level. Grab the shuriken in the room's corner, then use the grappling hook above you to ascend to the highest level. This is the area that you'll reach if you take the secret passage mentioned earlier.
A guard maintains his post across the courtyard, and a second patrols the path to your left (he'll soon approach). When the guard to the left moves away, approach and eliminate him with a stealth kill. To get the guard by the door, leap onto the roof and drop down behind him. You'll find another guard on the far side of the courtyard--on the other side of the four buildings in the area's center.
Your goal is to get inside the structure beyond where the stationary guard maintained his post. Use your grappling hook to ascend onto the roof above where this guard stood. There are several ways into the building, but perhaps the easiest can be found while you stand on this roof. Face the building and spot the opening below the windows. Grapple over to the ledge and crouch into this opening and into the structure.
Traverse the rafters and drop down inside the room. Exit the room and carefully move through the corridors; consult your map if you get lost. Go immediately left and quietly approach the guard standing in the next hallway. Eliminate him with a stealth kill. Return and go to the right. Quietly peer into the left room and spot another guard. Finish him off with a stealth kill.
In the next hallway, go into the first room on the left. Drop down and terminate the guard inside. Cross the room and look up and to the right. Use your grappling hook to reach the upper level. Search the box then go right. Approach the door at the end to begin the first boss fight.
Tajima doesn't play fair--he carries a gun along with his sword. Stay out of reach of his sword and perform combo attacks to finish him off. Back off if he continues to block. When he swings with his sword, block, then counter with your own combo. He's not too tough, especially if you can avoid being shot with his gun.
Exit through the far door and go left. Peer around the next corner and eliminate the guard quietly. Follow the corridor and keep to the right. At the next intersection, go left and eliminate the guard at the end of the hall. Look left and leap onto the trunk. Look up with your grappling hook and ascend. Go down the left hall and watch out for the guard in the alcove on your right.
Continue down the corridor through a couple of doors. Drop down quietly through the hole and eliminate the guard with a stealth kill. Go to the left and drop down for the mission's final confrontation.
Nasu has two guards, so there are three enemies in the area to eliminate. Tackle the guards first. Be ready with a health power-up just in case you sustain heavy damage. Quickly terminate the guards using combo maneuvers (and your shoulder charge if you acquired it during the mission). Send Nasu into a corner with several shoulder charge combos and finish him off to complete the mission.
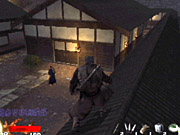
Mission 2--Gohda Castle
Echigoya's last words were as informative as they were deadly. There is a traitor within the castle of Lord Gohda--a man wearing glasses and named Hamada. You must dispose of the traitor and return to Lord Gohda. But be careful. Gohda's guards do not know of your existence, and they will greet you as an intruder. You must not kill any of Gohda's guards.
Execute Hamada and Return to Lord Gohda!
Objectives: Hamada is on the first floor. Do not kill Gohda's guards. Proceed with silence and caution.
Turn left and cross the room. Snag the smoke bomb in the room's corner. Drop down into the large hole and search the box for a ninja rebirth. Go right and peer outside into the alleyway. There's a guard that patrols the far side. Wait until he's gone, then drop down and leap into the first room on the right. Another guard patrols here. Wait until he moves around you. Go past him until you drop down into another alley. Turn left and enter the first room on the right. It's Hamada. Approach him to automatically kill him.
Search the room for a health power-up and grab the key left behind by Hamada. There's a secret passage in the back of Hamada's room that lets you bypass this section of enemies. Take the passage or head outside to earn some stealth kills.
You're now free to kill the guards--now ninjas. Crouch and quietly approach the room's exit. Move until the door opens, then spot the ninja's location outside. Wait for an opportunity to sneak up on him for a stealth kill. Go right until you can peer down a left hall. Terminate this ninja with a stealth kill. Go down this hall and peer around to the left. Another ninja patrols this exterior area. Wait until he moves away and terminate him.
Crouch and duck under the structure on the right. Move until you automatically stand up. Here's the locked door. Stand below the door and use the key. Duck quickly because there's a ninja inside. Wait for him to move away, then hop inside and eliminate him.
Go up the staircase. There's a ninja at the top and to the right. Wait for an opportunity, and then eliminate him with a stealth kill. Follow the walkway and reach a room with another ninja. Peer around the corner and terminate the ninja with a stealth kill. Search the room across from this area for a health power-up. Return and cross the room. Descend the staircase in the far corner.
Look out for a guard in the first alcove on the left. Search right--here's where the secret passage from Hamada's room led. Continue through the corridor and encounter another ninja patrolling a larger room. Cross the room and terminate another guard in the far hall. Go up the next staircase and through the door on the left. There's a guard on the far side of the room. Wait until he moves away, then terminate him with a stealth kill. Continue through the only available corridor and eliminate the ninjas encountered along the way. When you reach the exterior balcony (the overlook is to your right), you're almost to the stairs. Descend the staircase. Maneuver through the brightly lit corridor until the mission concludes.
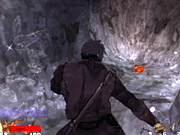
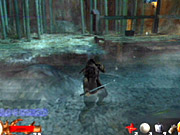
Mission 3--Limestone Cavern
The timing of the ninjas' attack and retreat made it evident that the purpose of the surprise ninja attack was to keep you from reaching Lord Gohda. The crystal residue found on the clothing of the ninjas indicated that they had come from the limestone caverns. The rumor within the realm was that the sword of the deceased Lord Mei-Oh, the Shichishito, lies at the heart of the caverns and is attracting evil powers to it. You must go to the limestone caverns to find the Shichishito sword.
Find the Shichishito Sword!
Objectives: Watch out for pitfalls. Use the grappling hook wisely. Look up when lost.
You begin in a small alcove. Immediately turn around and search the box to gain a ninja rebirth. Turn back around and approach the edge of the alcove. Spot the guard maintaining his post in the tower. You can perform a running double jump onto this tower. Do so when the guard faces away from you. Perform a stealth kill. Immediately crouch and peer to the left. Two more guards patrol below. Wait until the nearest faces away. Drop down and approach him. Terminate him with a stealth kill. Finish off the other guard, then maneuver down the corridor to the far left.
Follow the tracks around the corner. Snag the smoke bomb on the ground to the left. Hop up onto the hill on the right. Follow the tunnel slowly. Listen to the conversation in the next room. When it concludes, the two guards walk away from each other. Drop down onto the track and stealth-kill the guard on the right. Maneuver back around to the left and eliminate the other guard. If either guard spots you, return to the previous corridor and wait for them to end their pursuit.
Drop down and continue down the next corridor. Move quietly as you approach its end; a guard patrols the far tunnel. Wait until this guard moves away and eliminate him with a stealth kill. At this intersection, go to the right. Ascend slowly up the ramp until you see a guard's head. Wait until the guard faces to the right, then use the grappling hook to traverse the pitfall and land behind the guard. Land quietly, then terminate the guard with a stealth kill.
Maneuver down the tunnel until you reach a ledge. There's a guard patrolling below. Wait until he faces away, then drop down. Hide behind the columns if necessary, then eliminate the guard with a stealth kill. You've reached a crossroads.
You can explore the left and right tunnels down here to reach an area by the ocean. You'll find several opportunities for stealth kills here as well as some items, such as poison rice and grenades, and a shortcut to the later stages of the mission. Move very carefully through these areas--it's wiser to attempt this section after you've already beaten the level. There are bottomless pits (called pitfalls). If you fall, you die, and you must restart--even a ninja rebirth won't save you. Use the grappling hook to traverse all the holes and chasms. When you reach the exterior, use the grappling hook to reach the platform on the left side, then jump down into the alcove to the left. Retrace your steps by using your grappling hook to traverse the distances.
The route to the mission's conclusion lies above you. After dropping off the ledge and terminating the guard, look up and spot a higher level. You should be able to see a guard patrolling this level. Grapple up behind the guard and eliminate him with a stealth kill. Move around the path to the right and note the next guard in the distance. Wait until he moves off to the right. There's a pitfall (though not a long drop) in the middle of the path. Use the grappling hook to traverse the pitfall, then sneak up behind the guard.
If you continue beyond the pitfall, you reach a ledge. There's a guard to your far right (he'll spot you if you aren't careful). Don't attempt that jump. Instead, leap forward and drop down when the guard here is facing away from you. Terminate him with a stealth kill. You can go through the passage here to score a couple of stealth kills (if you're careful) and reach a ledge overlooking the ocean. Turn left and use your grappling hook to reach the far ledge with the guard. Terminate him, then drop down below.
Dropping down the pitfall is an alternate route to that far guard. Drop down and go right. Eliminate the guards you encounter. Turn right when you reach the ledge and drop down.
Crush the guard down here and follow the corridor to the right. Bust some barrels on the left to expose a hole in the wall. Crawl through it and snag the health power-up inside. Return out of the hole and eliminate the guard around the left corner. Follow the tunnel to the ledge. Look down and spot the water and girders. These winding pathways can be confusing, so check your map periodically to make sure you're headed in the right direction.
Drop down. There are many guards in this area, and it's tough to remain quiet enough to stealth-kill them all. Move slowly to the left and wait for the nearest guard to look away from you. Cross these wooden walkways to the far right side. Take cover behind the columns and perform stealth kills on the guards you encounter along the way.
In the far corner, leap up onto the ledge. When the guard turns away, pull yourself up and eliminate him. Enter the next chamber. Grapple up to the walkway when the guard isn't looking. Eliminate him with a stealth kill. Walk along the walkway into the available tunnel. Maneuver through into the larger room. Search the box for a ninja rebirth, then drop down into the room's center to activate the next boss encounter.
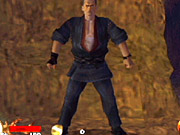
You face Onikage--twice! His first incarnation isn't particularly tough. Keep your distance (about sword's length) and use combos and your shoulder charge if available. Have health power-ups ready to mend any wounds. Onikage "dies" the first time, after you deplete him of his 100 health. After an intriguing cutscene, Onikage returns tougher than ever. He now has 150 health and tougher attacks, and he can even replenish his health with a power-up.
Avoid getting close to Onikage. He'll grab you, inflict significant damage, and replenish his own health in the process. Use combo and shoulder attacks and keep your distance. Apply heavy pressure when Onikage is near death (sub-50 health), or he'll use a health power-up and return to 150. Defeat Onikage's second incarnation to complete the mission.
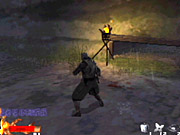
Mission 4--Ronin Village
The ninja that assassinated Nasu and saved Lord Gohda was not the real Rikimaru but his shadow. The Azuma ninjas had shadows that would replace them when one was thought to be dead. One year ago, Mei-Oh fled into a portal when he was fatally wounded. The true Rikimaru appeared out of the same portal. Lord Gohda's daughter, Kiku, has been kidnapped. A letter was left saying she will be taken to Amagai's castle in a neighboring state. You must go to Amagai's castle and bring her back. To get there you must first pass through a Ronin village.
Cross the Ronin Village!
Objectives: Hurry to the gate of Amagai's castle. Never spill the blood of the innocent. Crawl into holes by using stealth.
You begin just in front of a bridge. Look carefully and see the guard in the distance; he's facing away from you. Move quickly to the guard and peer down the path. Wait for the other guards to look away, and then perform a stealth kill. If you are seen, leap onto the rooftops and wait for the guards to end their pursuit, then sneak up on them as well. Slowly make your way around each building and hunt down the remaining guards. There are several opportunities for stealth kills in this area. Beware of guard dogs! Hug the fence and locate the small hole in the wall. That's the exit. Crouch and crawl through the hole and into the next area.
Emerge out of the hole. Spot the guard in the distance. Go immediately right and wait for the opportunity to continue right and eliminate the nearest guard with a stealth kill. There's also a guard dog patrolling the lower area, so you must move quickly to avoid detection. Use your grappling hook to ascend onto the roof of the nearby building (or just jump up onto the roof). Move crouched over the roof and drop down behind nearby guards. Perform a stealth drop (crouch when you fall) to land quietly.
Walk across the roof to the far left of the area. Another guard patrols across the path ahead. Wait for him to go left, then sneak up behind him and perform a stealth kill. Another guard patrols to the left of this structure. Hide along the left corner and wait for him to walk away from you, then eliminate him. Approach the gate between the two large barrel-like structures to enter the next area.
You've entered a small area with more of those barrel-like structures. Use your grappling hook to ascend to the top of the nearest barrel. A couple of guards patrol the area below. Remain on the barrel until you can drop down behind one of the guards without the other seeing. Drop down quietly; press the crouch button when you land. Dispose of both guards using a stealth kill. Approach the far gate to enter the next zone.
You've entered the Ronin village. Use the rooftops to your advantage. Stick to the rooftops and you can avoid detection. If you need more stealth kills (for instance, to receive this level's special ability, the grappling hook combo), then drop down on the unsuspecting guards and perform stealth kills. You'll spot the exit gate to the far right. A guard maintains post in front of the gate. Avoid jumping into the torches or you'll suffer damage.
Slowly move up the left side of the gate and wait for the guard to look away. Move up behind him and perform a stealth kill. Approach the gate behind him to complete the level. If you prefer quickness or are heavily wounded and lack health power-ups, just run to the gate. Even if you alert all of the guards in the area, the mission ends successfully once you reach the gate.
Mission 5--Amagai Castle
Amagai's castle seems abandoned by people but is populated by strange mechanical robots. Use haste but be careful. You must rescue Princess Kiku.
Rescue the Kidnapped Princess!
Objectives: Stay alert for traps. Press your back against walls to open trap doors. The enemy is not human.
Quickly dodge to the left or right to avoid the mechanical guard patrolling at the end of the wall. Wait for the guard to move away, then sneak up behind it and perform a quick stealth kill. Look up and to the right. Use the grappling hook to ascend to this upper level. Watch your step and don't fall into the lava below. Leap across to the adjacent ledge, then turn left and leap down to the path on the far side of the room.
Cross this path to the right and turn right to spot another upper path. Use the grappling hook to reach this upper path. Leap to the far bridgelike surface and listen carefully to the guard patrolling below. Peer down and wait until the mechanical guard moves away and to the left. When it does, drop down and perform a stealth kill. Wait for the guard to be along the left side when you drop down. If you drop down along the right wall, a trap activates and impales Rikimaru with spears. Don't move back into this area after killing the guard.
Move through the passage beyond the dead mechanical guard. Floor traps populate the next hallway. Jump over this path to avoid the traps. If a trap does activate, jump forward quickly to avoid falling to your death (and to avoid a required level restart). Hug the left wall and peer inside the room to the left. There's a tough mechanical enemy inside. These guys fire projectile weapons and perform a devastating spin maneuver that can inflict significant damage, particularly if you're trapped in a corner.
Wait for this creature to face away from you. There's a second danger nearby. The doorway is rigged with a trap (note the spikes at the top of the doorway). Trigger the trap by moving in and back out of the doorway quickly. When the spikes are rising back up to the doorway's top, enter the room and sneak up on the creature. Perform a stealth kill if possible.
Continue down the available path and hug the right-hand wall. Another mechanical guard (thankfully an easier one this time) patrols through the next doorway. Wait until it moves away from you, then sneak up behind it and perform a stealth kill. Enter the path and go around the corner to the right. Use the grappling hook to cross the chasm, then ascend the staircase on the right. Don't go all the way to the top.

Another tough mechanical spinner waits at the top. Remain crouched and hidden near the top of the stairs. Wait until the enemy looks away from you, then move up and perform a stealth kill. Look up and grapple to the path above you.
Note the etchings near the walls up here. You've reached the first trap door area. Rikimaru must put his back to a wall to activate a trap door that leads to a new area. You notice many etchings, but only one is the trap door. To find it, pull yourself up onto this path. Note the light on your right. Move forward and enter the alcove on your immediate right (past the light). The correct wall is the one on the far left of this alcove. Put your back against the wall to enter a new area.
You'll immediately hear a guard nearby. Enter the area and peer down the hallway to the right of your start position. Wait for this guard to walk away, then approach it and perform a stealth kill. After killing it, return to the hall and enter the next path on the right. Follow this corridor as it bends around to the left. Beware of floor traps in this hallway. There's a doorway to your right at the end; a guard waits inside for you to approach. When he turns around, perform a stealth kill.
Cross this room and search the box for a grenade. Drop down into the nearby hole. Spot the etching on the ground. It's another wall door. Put your back against the door to enter a new area.
Walk to the end of the hall and look up and to the left. Grapple up into this alcove to procure a health power-up. Return down into the hall and look up and to the left of your start position to find the exit path. Grapple up into this path and quickly hide behind a wall. There are two routes up here. One contains a smoke bomb and the other a tough mechanical foe. Wait until the mechanical enemy moves away from you, and then perform a stealth kill. Do not enter the room with the smoke bomb--it's bait for a punishing trap.
But you must move through this room. Here's the safe route. Enter the doorway of this room and look up and to the left. You'll spot an upper path--that's your destination. Grapple up to this path to avoid the room's trap. As you grapple, a large gear blocks the room's exit, and grenades bounce into the room. If you grappled successfully, you avoided these dangers. If you fall into the room, quickly grapple up to this upper path.
Before going into the trapped grenade room, leap over to the other side and use the walls over the etchings to enter a secret room. Grab the health power-up in here, but watch out for the guard patrolling the area.
Drop down to the right. Cross the room and avoid the holes in the floor. Ascend the ledges ahead. When you pull up, wait for the guards to move away before ascending. Climb the staircase, and you'll hear another mechanical guard above you. Use the grappling hook and hold onto the edge of this ledge. Wait for the guard to move away, then perform a stealth kill.
Jump or grapple up to the next ledge. Watch out for a tough mechanical spinner in the next hallway. Look down the hall to the left and note the holes in the floor. Grapple over this area to avoid the fire trap. Proceed down the next hall and peer to the right down the corridor. Sneak up on the mechanical guard.
You'll spot an exterior area; it's a catwalk or bridge area with red fences. Before going out, press against the wall that's around the corner just before this exit. You'll enter a room where the ceiling descends. The stone of power is in the center of this room. You can equip the stone of power for other missions. It works like a strength potion by increasing your strength throughout a mission as long as it's equipped. Exit the room using the secret wall doors above the etched floor.
Move through the catwalk with the red fences. Beware of a mechanical archer guard at the end. Stealth-kill the foe. Look up and grapple to the upper route.
Don't fall off the edge. You'll die if you plummet into the gears below. Look up and to the right to spot another upper route. Use the grappling hook to reach the path. The next corridor contains massive blades that can disrupt your grapple. Note the guard on the far side of the room as well. Wait until the guard turns away, and time your grapple across the room carefully. You can survive the blades, but it's not wise to drop down into the room's recess. Eliminate the far guard. Grapple over to the stairs across the room. Ascend the stairs into the upper castle room and to the boss encounter.
It's Dr. Kimaira, and he's kidnapped the princess. The doctor has invented some sort of contraption to assist him in combat--he calls "her" Maihime. You must fight the combination of Kimaira and Maihime (150 health total). Avoid getting trapped in a corner by Maihime's spin attack. Keep her at a distance and perform your attack combos. When Maihime bends over, be prepared to jump to the side and avoid her charge. Use your items (any grenades, shuriken, and so on) to inflict additional damage. Rikimaru succeeds in rescuing princess Kiku once the doctor and his contraption are defeated.
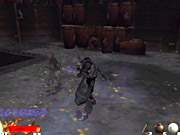
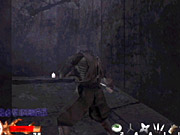
Mission 6--Cemetery
Ressai explains that there are two ways to repair the Izayoi sword. One way is to try to fix it with the steel Ressai has on hand. The other way is to mix in the steel from another sword that is as strong as the Izayoi, such as the Shichishito. However, mixing in the steel from the Shichishito sword may have an effect on the power of the Izayoi that you cannot predict. The heavens have given you a choice. Now choose wisely.
Retrieve the Steel for Ressai!
Objectives: Kill the undead with the Muramasa sword. Using the Muramasa will lower your energy, but it will not kill you. Find the steel and return to the swordsmith.
You're given a choice at the beginning of this mission to use the steel from the Shichishito sword or to not use any new steel. Either choice is essentially correct and has no direct effect on gameplay. The choice affects cutscenes. Make your choice and begin the mission.
As you start the mission, heed the warnings in the briefing objectives. You possess a new sword beginning in this mission (the sword is optional for subsequent missions). This Muramasa sword is effective against the undead--the exact enemy that populates this mission. The catch is that your health slowly drains while you're using the sword. To replenish your health, inflict damage against the enemy--stealth kills replenish the most health. So, you must work quickly to keep your health replenished. There are two more things to keep in mind. The sword won't drain your health to zero; it drains it to one health point, so if you're near death, just don't get hit. And finally, don't bother with other weaponry (shuriken, grenades) against the undead. Use only the sword.
There's an undead beast patrolling the path ahead of you. Wait for him to move to the left, then sneak up behind him and perform a stealth kill. Move around to the left side and spot another warrior on a higher ledge. Leap onto this ledge, sneak down the path, and kill the undead archer from behind.
Leap over the structure the archer stood on and follow the interior path. Approach the edge of the path and wait until the undead warrior below walks away from you. Drop down and eliminate him with a stealth kill. Continue through the tunnels and peer around each corner looking for another undead warrior. Wait for the right opportunity--when the warrior walks away from you--to approach and score a stealth kill.
Proceed until you're near another ledge. There's an undead archer to the left. Peer around the corner, and when he's facing away, approach him and perform a stealth kill. Drop down and follow a similar tunnel around to the left and outside. Prepare for battle.
As soon as you walk outside, undead creatures flood the area. Attempt to battle the beasts one at a time. Use the structure in the area's center to maneuver around and attack pursuers. Leap onto the roof if necessary; some of the creatures will follow. But you must balance offense and defense. While you don't want to be ganged up on, you still must attack often, because the Muramasa sword is draining your health. After defeating the creatures, cross the area through the opening in the wall and drop into the hole.
Proceed down the hallway. Spot the undead archer patrolling at the end of the hall. He's actually on the other side of the area. A second archer patrols the ledge closest to you. Move down the hall and hug the right wall. When the nearest archer turns away, perform a stealth kill. Grapple over to the far side when the second archer walks away from your landing point, then approach and eliminate him with a stealth kill.
Drop down between the two ledges and grapple up onto an upper level adjacent to the ledge you just dropped from. Follow the tunnel until you spot the exterior. There are numerous undead guards outside--the nearest is to the left. Hug the right wall and peer around the corner. When this guard moves away, eliminate him with a stealth kill. Retreat to the hall or use the trees as cover. Look for the opportunity to eliminate the next-nearest undead. If you are spotted, return to the hallway and wait until the guards end their pursuit, then return and wait for the stealth-kill opportunity. Another undead warrior patrols the top of the hill. Hug the left or right wall, use the trees as cover, wait until the warrior faces away from you, and then approach him for the stealth kill.
Move into a familiar-looking hallway. Peer around the next corner and take out the next guard with a stealth kill. Drop down off the ledge and hop up onto the next path. You'll encounter a new enemy: a disembodied head. Eliminate it and proceed through the hall. Traverse the tunnel until you spot the exterior again. It's the cemetery.
The stone wall to the right provides good cover to take out the closest undead warrior with stealth. You'll spot additional guards patrolling inside the cemetery toward the right side. There's a new danger within the cemetery--hands popping out from the earth and grabbing your ankles. Move quickly to the right side of the cemetery. Stick close to the walls, and the undead archer won't see you. Pull yourself up onto the ledge behind the archer and perform a stealth kill. Ascend to the top of these ledges and use the grappling hook to maneuver over the wooden fence. Enter the hallway lit with a purple hue.
Proceed through this hallway. Look around each corner in search of patrolling guards. Wait for them to walk away from you, then approach them for a stealth kill. Follow the sole path through the hallway. There are some dead ends, but just consult the in-game map if you get lost. You'll eventually reach a ledge overlooking a room filled with red liquid--presumably blood. There's a guard patrolling below. Drop quietly down from the ledge and eliminate the guard with a stealth kill.
Maneuver through the blood and look up on the other side of the chamber. Grapple to the upper ledge. Traverse the next hallway carefully and peer around each corner in search of undead guards. You'll reach another exterior area. Run forward and take cover behind the stone. Peer around the right corner of the stone to spot a patrolling undead warrior. Eliminate him. If you need additional stealth kills, seek out the remaining guards in the area. If you're low on health, then ascend the area's center and run quickly to the exit door to quickly end the level.
Mission 7--Bamboo Forest
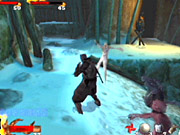
Ayame, another member of the Azuma clan, is imprisoned for attacking Lord Gohda. She was arrested by Gohda's guards while she was running into the bamboo forest. She explains to you that she is being framed and that the imposter had fled into the bamboo forest. The imprisoned ninja would rather face the penalties of death than to have a fellow ninja break her out of prison. Go to the bamboo forest and find Ayame's imposter. But use caution. The forest is infested with ninja demons and Shikigami spirits.
Find Ayame's Imposter!
Objectives: Avoid Shikigami spirits at all costs. Use the hot water spring to your advantage. Be careful of werewolves.
There's a ninja demon across the path from your start position. Use the fence to the right as cover. Wait until he approaches, then sneak up and perform a stealth kill. Be wary of a second demon on a nearby ledge. Don't let him see you while you eliminate the first. Wait until the second turns around. With his back turned, climb onto the ledge and eliminate him.
Continue across the snow-covered path until the next clearing. There's a Shikigami spirit to your left and a demon ninja patrolling below. Wait until the spirit hovers away from you, then hop down and eliminate the ninja (make sure its back is turned for a stealth kill). It's best to avoid the spirits if possible. They're tough to kill and have a variety of punishing attacks that can strike at close and medium range.
Another demon ninja hides behind a fence to the left. Maneuver over carefully and crouch near the ledge underneath the fence. When the demon moves away, hop up and perform a stealth kill. Use the ledges here to hop over the fence on the far left of this alcove; you'll find a health power-up resting in a hidden corner. Exit the corner by using your grappling hook to traverse the fence.
Turn left at the turn and hop up onto the ledge. You'll spot the exit path up here. Take this tunnel until you reach the next exterior area. You can use the hot spring here to replenish health or, if you're healthy, just turn left and crouch. Maneuver through the tight tunnel and into the next area.
You're just below a bridge, and Shikigami spirits hover about the area. Ascend to the top of the bridge and eliminate the patrolling spirit. Scamper to the far end of the bridge and wait for the demon ninja to walk away from you; terminate him with a stealth kill.
Look into the wide clearing and spot another demon perched on a ledge in front of you. When he's looking away, leap to the ledge and perform a stealth kill. From the ledge, turn left and leap to the adjacent ledge. There's a box here containing a ninja rebirth. A couple of spirits patrol below. Ignore them and return to the bridge.
Drop down underneath the bridge and take a new tunnel route. Eliminate the patrolling ninja with a stealth kill. Venture through the tunnel until you reach the staircase. Ascend the staircase until you're just below a hole leading to the exterior. There's a wolf patrolling above. Wait for it to turn away, then eliminate it. Use the nearby fences for cover against the nearby spirits. Search near the hole for a box containing a health power-up.
Proceed through the unexplored path. Peer around corners in search of spirits. Avoid them by taking the high route on the ledges forming the path. Just use your grappling hook to reach the ledge. Continue forward until you reach what looks like a snowman standing at an intersection. Beware of the spirit that patrols to the left.
You can take either path left or right from the snowman. Both include their share of enemies and dangers. The left path begins with ledges and fences providing ample cover against the ninja demons that patrol the walkways. Search the alcoves for hidden items, including a grenade. The right path also includes a pitfall, so move cautiously through the narrow paths, and use your grappling hook to traverse the pit and remain on the higher ledges if possible. The two paths eventually meet at the same point, just before the mission's boss encounter.
You must battle the Ayame imposter to complete the mission. Beware of her medium-ranged shuriken attack, and stick close, implementing your combinations. Block her strikes and immediately counter with a combination to inflict heavy damage. Use caltrops and shuriken for added damage. Defeat her to complete the mission.
Mission 8--Buddha Temple
Counsel Sekiya informs Lord Gohda that Tenrai's army has taken over the Buddha temple. Disguised as a temple located on the border of Gohda's realm, the building itself was designed as a fortress to guard the land of Gohda from invading armies. Tenrai's plan was to keep you occupied in the bamboo forest, while keeping the real Ayame in prison so his army could start his attack. Lord Gohda cannot send in his army to take back the temple, because it is a holy ground, and doing so would also be a sign of vulnerability to his neighboring states. You must infiltrate the temple and execute the leaders of the enemy's army.
Infiltrate the Buddha Temple!
Objectives: To fall is to die, do not fall. One of the pitfalls is a hidden path. Many paths lead to the temple.
This is a challenging level. Numerous paths can make the journey confusing, and the plentiful pitfalls make surviving equally as difficult. Ninja rebirths won't save you if you fall to your death in a bottomless pit, so watch your step around each and every corner. This walk-through will highlight some of the alternate paths, but it primarily provides a quick, proven route through the temple and to the boss encounter.
Turn a bit to the right and you'll see the guard around the corner. Wait for him to walk the other way, then sneak up behind him and perform a stealth kill. Grapple up to the ledges above your position. Hop to the middle ledge and crawl through the opening against the wall. Emerge out of the hole. You have a couple of possible routes here.
You could drop down all the way to the ground. Hide behind a pillar and take out the patrolling monk with a stealth kill (an easy addition to your nine stealth kills). There's also a health power-up down here. Grapple back up one level and go left. Leap over the platforms and wait for the guard on the far path to walk away from you. Terminate him with a stealth kill. Follow the path around to the right and spot the staircase lit by candles. Search the dead-end path near the staircase to locate a health power-up. Ascend the staircase. You'll reach the top, a large area populated by guards and columns. Wait for the opportunity to eliminate the nearest guard--on the left--with a stealth kill. Use the columns as cover and return to the staircase upon each successful stealth elimination.

An alternate route can also take you to the column room. Instead of dropping down after crawling through the tight tunnel, hop up and go to the right. Eliminate the guard here and ascend the staircase. Wait patiently at the top and terminate another guard with a stealth kill. Cross the room and drop down the hole on the far side. Wait until the guards move away before landing. Go forward and to the ledges overlooking a chasm. Leap to the adjacent ledges, or use your grappling hook to reach the other side. You're at the column room.
No matter how you get here, you want to go to the left side of the room. Look up at the left corner to find another ledge with a patrolling guard. Grapple up and eliminate the guard. Go right and enter the opening. Grapple up to the ledge above you. Hang on the ledge and wait for the guard on this level to walk away from you. Pull yourself up and eliminate the guard.
Walk until you reach a ledge. Look down and to the right to see a landing point. Jump down and search the box for some shuriken. Grapple up to the unexplored ledge across the chasm. Terminate the guard patrolling here and add to your stealth kills.
Go right and look up to find the next path. Grapple up. You can go straight or right at this intersection. Wait for the monk to walk away from you down the right path, then terminate him with a stealth kill. Go beyond the monk and drop down. Walk right and look for the path above your position. Move very carefully around here--there's a pitfall nearby. Note the fence blocking the path. Don't jump over the fence or you'll fall to your death. Instead, hop on top of the fence, then carefully edge your way off and drop down to the ledge below.
Now your goal lies in the tunnel behind you, but there's a valuable weapon on the far side of this pit. Get there by looking up and to the left. Grapple to the ledge above (just to the right of the pillar). From this tight alcove, look at the end of the pit and see the two red boxes. Grapple over to them. Search the boxes. One contains some small health power-ups, and the other contains a special sword, the fugaku. Return to where you started from by using your grappling hook.
Walk through the tunnel until you reach the hole in the wall. Crouch and squirm through the hole. In the next shaft, grapple up to the very top--to the exterior. Hang onto the top edge and wait for the nearby guard to turn away. Eliminate him with a stealth kill. Ignore the bear nearby, especially if you're attempting to remain stealthy. Instead, look up and find the path into the temple above you. Grapple up.
In the first room, grapple up to the next floor. Walk forward and grab the small health power-up from the corner. Go right. You're on some platforms overlooking a room below. Drop down to initiate the boss battle.
You're up against a couple of opponents here--Kagura and her pet giant and then Tatsumaru. Ignore Kagura's giant. Focus your damaging attacks on Kagura--once she's dead, the giant is dead as well. Kagura has a habit of teleporting around the room. Keep your distance from the giant and pursue Kagura. Tatsumaru implements powerful combination attacks and blocks well. Use block liberally and counter with your own combos after parrying Tatsumaru's attack.
Mission 9--Tenrai Fortress 1
Two days have passed since the battle at the Buddha temple. The moon is full and the fog has lifted. Rikimaru, you must go to Tenrai's fortress and defeat Tenrai.
Assassinate the Evil Tenrai!
Objectives: Beware of martial arts experts. Use all your stealth skills to your advantage. Bring the wrath of heaven to Tenrai.
Move forward and against the left wall--there's a demon around the left corner. When he turns and walks away, eliminate him with a stealth kill. Return to the path and maneuver around the debris on the right side. Crouch behind cover and wait for a second patrolling demon to walk to the left. Take it out with a stealth kill.
Cross the pillar to the far side of the area. Drop down between the ledge and the building's roof and grab a health power-up. Return to the rooftop and quietly drop down behind the nearby guards and eliminate them.
Continue through the unexplored path. Look out for the martial arts expert around the corner to the left (climb onto the center wall and drop down behind her). Proceed into a large area with wooden walkways.

You can avoid or battle these guards. Wait for the nearest demon at the end of the walkway to move left, then approach him from behind and eliminate him. Go right and take out the demon in the alcove. Start ascending the ledges in the corner and eliminate the female guard as you proceed up. Continue along the right wall and wait for the monk at the end to turn away. Walk up and eliminate him with a stealth kill.
Ascend the stairs to the right and move cautiously through the tunnels. Pause at each corner and peer down the hall. Eliminate the monk guards you encounter by waiting for the opportunity to score a stealth kill. You'll reach a room with a couple of columns--two monks patrol, one ahead and one to the right. If you are forced to fight, avoid getting trapped in the corner, or you'll suffer the monk's spinning kick. The monks also use a projectile attack.
Go right and search an alcove for a smoke bomb. Go around the far left corner of the room and take out the demon. Ascend the staircase and crouch near the top. Wait for the monk to look away and either bypass him or eliminate him. Look up and to the right and grapple to the upper level. Scamper quickly to the wall in front of you to duck under the monk's vision. When he looks away, take him out.
Maneuver through the next series of tunnels and take out the monks and demons along the way. Search the left side of the path for a small health power-up resting on some boxes. Drop off the ledge on the right side of the route and take out the female guard. Leap up the ledges in the corner, then drop down to the floor below. Go around the tower and the hole to a second tower. Look at the top of the second tower for a health power-up. Ascend the ledges in the corner.
Move around the corner to the left and avoid or eliminate the monks. Grapple up to the door at the far end of the path to meet the mission's boss--it's Onikage! This boss resembles Onikage's second incarnation. Don't let him replenish his health with power-ups. When you have him near death, keep the pressure on with combos or damaging items, such as a grenade or sticky bomb.
Mission 10--Tenrai Fortress 2
Assassinate the Evil Tenrai!
Objectives: Beware of martial arts experts. Use all your stealth skills to your advantage. Bring the wrath of heaven to Tenrai.
Walk forward and grapple to the upper level on the right. Drop down off the next ledge and peer around the right corner. Eliminate the monk when he's walking away. Continue around the corner and defeat another monk. When you reach a ledge that requires a jump, look up and to the right to see another path. The route splits here, but both end up in the same place.
Take the ground route. Leap onto the ledge and spot the pit ahead of you. Wait for the monk to look away, then cross the pit and eliminate the monk. Search an alcove on the right side of the path to locate a health power-up. Continue into a wider room with alcoves along a central wall. Monks hide in the alcoves, so avoid them to avoid detection. Proceed down the exit path along the left side of the room.
Grapple up to the upper ledge when necessary and follow the tunnel into a room with pillars of varying height. Use the grappling hook to traverse the pillars. Leap onto the far ledge behind the monk and perform a stealth kill. Continue right and carefully cross the ledges. Keep to the left, and you'll reach the intersection of the two main paths. Continue left to proceed deeper into the level.
The upper route faces similar dangers. Follow the snug hallway and eliminate the enemies as you go. You'll reach a ledge overlooking a pit. Leap down along the right side of the chasm to land on the ledge below. Grapple up to the area on the left. Move through the narrow path and drop down again. Turn right and grapple up to the adjacent columns. When the ninja turns away, grapple over behind him and eliminate him. Proceed to the intersection where the two routes meet.
Proceed to the ledges and pull yourself up. Wait for the monks above to walk away, and then avoid or kill them. Go up the stairs and turn right to find the next path. Inside the bright red room, walk to the top of the stairs on the left, then grapple to the path on the upper right.
On the new path, go right and cross the pit. Eliminate the demon on the far side. Remain on this upper route with successful jumping and grappling techniques. Continue through the tunnel toward the upper left area of the map. Approach the large door to reach the final boss encounter.
Time to battle Tenrai. There are two primary attacks to watch out for. Tenrai fires a wide stream of spikes and also creates a thin spiked ground attack directly at you. Dodge the ground attack and jump over the spike stream. Get in close when the opportunity arises and use combo attacks to eliminate Tenrai.
Tenrai's second incarnation is more of a brawler--and there's good reason, because he can't be damaged. Pound on Tenrai with a few successful blows, and a cutscene interrupts the action. When the battle resumes, you can damage Tenrai. Use your combo techniques and any available weapons and items to eliminate this second incarnation of Tenrai.
One more battle remains. Tenrai emerges with another full batch of health, but your attacks should be more than enough to whittle his health down quickly and defeat the boss once and for all.
Chapter 4--Ayame Mission Walk-Throughs
This section covers mission walk-throughs for Ayame. The walk-throughs include briefings, objectives, and a proven solution for completing the mission. You'll find specific tips for handling particular guards, and you'll discover the location of hidden items. These walk-throughs cover the first layout only. The location of guards will be different for subsequent layouts.
Mission 1--Bamboo Forest
A villager erupts into tears in front of town officials. He explains that his daughter was taken as payment for a loan that he could not repay. Other village girls have been disappearing in the night as well. Witnesses come forth with news that the village girls have been taken to the temple in the bamboo forest. Because of the temple, the bamboo forest is considered a holy ground not to be disturbed by the government or the police. Lord Gohda has no choice but to send you into the bamboo forest for silent justice.
Rescue the Village Girls!
Objectives: Consult the map when lost. Enemies will become alert when they spot dead bodies. Hunt for ninja rebirth items.
You begin at the top of a bridge. Look at the terrain below and spot a guard patrolling around his small camp. When he walks away, drop down silently and eliminate him with a stealth kill. This first part of the walk-through is optional and provides some easy stealth kills and the location of the hot spring, which can heal your wounds.
Walk underneath the bridge below your start position and enter the small tunnel (crouch to move through it). When Ayame stands up, don't move forward or you'll fall down a pitfall. To reach the far side and cross the pitfall, you must shimmy across the rail on the right side. Jump up to it and maneuver across the pit.
Head through the opposite tunnel and grab the grenade along the way. Peer around the left corner and wait for the guard outside to turn away. Eliminate him. Follow the path around to the right then to the left up the incline. Grapple up to the top of the block and wait for the guard on top to look away before killing him with a stealth move. Drop down on the other side.
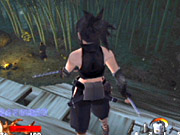
Peer around the corner to the right and wait for the opportunity to eliminate the next guard quietly. Go around to the left (the right turn here leads to a dead end). Terminate the guard patrolling the clearing. Remain on the high ledge and drop down behind a second guard to the left. Enter the tunnel attached to the high ledge. Follow the tunnel to an exterior; this is the hot spring. Use it, then crawl through the tunnel to the left and return to the bridge. Look underneath the bridge for a box containing shuriken.
Another optional area: Maneuver to the top of the bridge and cross to the far side. You'll spot the path to the left. Sneak up on the nearest guard and terminate him. Remain on the high pillars and drop down behind a second guard.
Return to the bridge and go underneath, this time opposite of your start position. Follow the tunnel, searching the alcoves for a box containing a ninja rebirth. When you spot two guards ahead, go through the path on the left. Listen to their conversation and wait for it to conclude. When the guards walk away, eliminate each with a stealth kill.
Locate the staircase and ascend. Hop out of the hole and back outside. Maneuver down the path and sneak up on the guard dog. Continue along the path until you reach what appears to be a snowman at the base of an intersection. Beware of a guard patrolling the right path. Grab the shuriken in the box in front of the snowman.
You can go either left or right from the snowman to reach the mission's boss encounter. Move cautiously through the right path and beware of the pitfall. Grapple or jump over the pitfall to cross it. Approach the door in the final area to battle the mission's boss.
You're up against Tajima, and he carries a gun along with a sword. Don't get trapped close or he'll hit you into the air and use his gun to inflict heavy damage. Jump in with combo attacks, then retreat. Counter with combos off of a block and use any items you're carrying (such as shuriken found during the mission) to assist in the fight.
Mission 2--Echigoya
The mention of Echigoya's name by Tajima in the bamboo forest was proof that Tokubei had inherited the family business after his father was killed. You must infiltrate the Echigoya estate and punish the evil merchant.
Execute the Evil Merchant!
Objectives: Trust your ki and avoid being spotted. Find items to help you on your mission. Archers can see farther than other guards.
You begin on an exterior wall overlooking an inner courtyard. Drop down to the right and pick up a box containing a health power-up. There's no guard patrolling down below. It's fairly easy to remain on this roof and eliminate the guards in the area. Go left (note the geisha below, but don't kill her) and around to the right until the roof ends just before a stone ramp formation. Grapple up to the formation. Don't drop down, or a nearby guard dog may detect you.
Ascend the ramp, then drop down behind a guard below (he's at a locked gate you'll need to bypass later). Return to the rooftops and seek out the guards patrolling the inner area. You can avoid the locked door altogether by entering the building within the courtyard you started near. Enter this building and find a tunnel in the back room. Maneuver through the tunnel to bypass the gate into the next area.
If you decide to go the gate route, you'll need a key. Exploring reveals three jovial guards protecting the gate's key. Go to the opposite side of the courtyard to find their building. Sneak up on the nearest guard and perform a stealth kill. Flee, and when the other two end their pursuit, sneak up and stealth-kill them. Grab the key and go to the gate. Unlock the gate and proceed through.
Continue through this tunnel and stop at each corner to look for guards. You'll find a couple of guards in conversation. Hide around the corner, and when the nearest moves toward you, perform a stealth kill. Eliminate the other when he's walking away.
Enter the room at the end of the tunnel. Search the box on the crate for a ninja rebirth. Grapple to the ledge above and take out the guard. Snag the health power-up in the corner. Ascend out of the hole and into the next area. Going through the secret tunnel by passing the gate would send you into the structures in the center of this area.
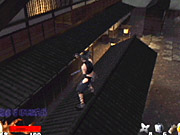
Scamper to the center structures and either stealth-kill the nearby guards or avoid them. Ascend to the rooftop and leap over toward the main, tall building on the other side of the wall. There are a couple of routes inside the building, but the nearest is along the windows. Grapple here and crawl inside the structure.
Enter the building and drop down. Move slowly through the hallways and peer around each corner in search of guards. Go right after exiting the initial room and follow the hall until you reach a longer hallway with a door on the left. Enter this door and drop down into the room when the guard isn't looking. Cross the room and look up and to the right at the end. Grapple up.
Follow the hallway until you spot the small tunnel ahead. Look to the right for a health power-up. Crawl through the tunnel, then hop onto the chest at the end of the hallway. Grapple to the ledge above.
Traverse more hallways and be cautious not to alert the guards. Search one of the rooms for a box containing a ninja rebirth. The same room is the exit into the boss area. Drop down on the other side to automatically reach the boss. It's the evil merchant Nasu. Defeat Nasu with your combination attacks (use the somersault kick, if mastered from the previous mission). The task isn't quite complete after defeating Nasu.
Exit the room by grappling up. In the next room, locate the ledge above and grapple up. Cross the hallway and drop down near the chest you stood on earlier. Crawl through the tunnel. Go forward and through a winding tunnel until you reach a staircase. Descend the stairs to complete the mission.
Mission 3--Gohda Castle
Lord Gohda nods quietly as you report to him regarding the three jewels that Echigoya spoke of. However, he makes no mention of it and asks you to forget the incident and the conversation. A few months later, a treacherous incident occurs. Hamada, one of Lord Gohda's men, takes Lord Gohda hostage and demands that the Jewel of Virtue be brought to him. Timed with Hamada's acts of treason, the mysterious band of ninjas attacks the castle and takes over every floor. You must hurry to rescue Lord Gohda and dispose of the traitor.
Assassinate the Traitor Hamada!
Objectives: Use the poison rice to lure enemies. Avoid simultaneous confrontations. Crawl into openings by crouching and moving forward.
There are several ways into the castle. The easiest bypasses a lot of ninjas. From the start position, stick to the right and maneuver through the corridors. Peer around each corner and beware of the patrolling ninjas. Continue up the right side of the area and enter a room on the right. Go to the back corner of this room (grab the grenade on the way) to find a secret passage into the castle. You could also search the nearby rooms and grab items, such as a smoke bomb.
If you choose not to use the secret route, prepare for plenty of ninja encounters. Another route would be to move forward from your start position. Follow the corridor right then left and into a larger clearing with a tree and a recess below. Drop down into the recess and crawl underneath the structure. Remain ducked when you pop out on the other side. Terminate the nearby guard carefully, grab the health power-up, and then enter through the unlocked door.
Enter the room and ascend the stairs on the right. Peer around the next left corner to wait for the female guard to turn away. Go around to the right and eliminate the ninja in the next room. Go to the back of the room and down a staircase.
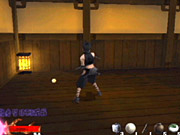
A ninja waits in the room at the bottom of the staircase, so be cautious. The room on the left is where the secret passageway connects. Instead, go through the doorway just to its right. Follow the left hall and eliminate the female guard in the next room with a stealth kill. Grab the small health power-up from the stand on the right. Eliminate the ninja in the next hall, then ascend the nearby staircase.
Go to the next door and open it carefully--a ninja patrols the room. Eliminate him, then continue through the halls and rooms. You'll traverse a balcony overlooking the estate. There are ninjas and female guards throughout these halls, so take each section one at a time and peer around each corner before exposing your location to the guards.
Descend the staircase into the brightly lit room. Search an alcove on the right for a ninja rebirth. Cross the area to the door and face off against Hamada. Beware of his charge attack. When Hamada raises and points his sword in your direction, he's about to charge. Back up or jump away, and prepare to counter his maneuver with your own combination.
Mission 4--Cemetery
The mysterious voice that came out of the dead body of Hamada called himself Tenrai. Gohda is shocked that Tenrai knew of the three secret jewels. Long ago, the jewels of heaven, earth, and virtue had given the Gohda family the power to control the realm. Two of them were stolen by thieves in the past. The one left hidden in Gohda's possession is the Jewel of Virtue. With the Jewel of Earth in Tenrai's possession, Gohda must find the Jewel of Heaven before Tenrai gets his hands on it. But before that, Gohda must prepare for other attacks by Tenrai. Seeing him control Hamada's dead body made it evident that Tenrai is a master of spiritual powers. Lord Gohda knew that he would need to have weapons of equal spiritual strength to fight back if Tenrai ever attacked again. Gohda's family diaries spoke of Yoto swords that were so spiritually powerful that his ancestors had to seal the swords in a shrine in the cemetery to keep the swords from taking the lives of their owners. To get to the shrine, now an old house, one has to break five sealing stones within the cemetery. You must go to the shrine in the cemetery to retrieve the Yoto swords. But be careful, the spirits blocking your path cannot be hurt by normal swords.
Retrieve the Yoto Swords!
Objectives: Destroy the stone seals to open doors. Normal blades do no harm to the undead. Beware of the big shadow in the garden.
This mission includes a mix of undead and living enemies. Undead enemies should be avoided completely because your weapons can't inflict damage on them. Maintain stealth and move past them without detection. From the start position, walk around to the left and grab the health power-up off the ground. Hop off the ledge to the power-up's right. There's a single undead guard patrolling below. Avoid him by scampering around to the right using the trees as cover.
Descend the ramp. If you continue forward and drop off the ledge, you'll find the first sealing stone. Destroy it. Beware of a ninja guard to the left and an undead guard near the stone. Go beyond the sealing stone and into the far tunnel. A ninja patrols around the first right corner. Wait for him to walk away, then eliminate him with a stealth kill.
At the intersection, go right to find a smoke bomb and return left to eliminate the patrolling ninja. Proceed through the tunnel until you reach a ledge overlooking a room filled with blood. Drop down once the undead guard below maneuvers to the far right. Grapple up the other side. Avoid the small undead guard in the next hallway.
Go left at the intersection. Drop down behind the ninja guard and kill him quietly. Search the box for a ninja rebirth. Grapple up the far side of this recess when the undead archer at the top isn't looking. Follow the hallway to its conclusion--a second sealing stone. Destroy it, then go right and outside.
Take out the ninja guard nearby. Grapple to the top of the fence and drop behind the undead archer when he's not looking. Go left and contend with the ninja guard if necessary. Destroy the third sealing stone nearby. Climb up onto the center platform and grab the grenade and smoke bomb if you wish.

Go around to the other side of the exterior area and find the tunnel. Turn around a couple of right corners and spot the disembodied head below. When he's under you and facing the wall, drop down and grapple across. Proceed through the tunnel until you reach another exterior area.
This is a small clearing with plenty of trees for cover. Hug the right wall and maneuver down to the next tunnel. Avoid contact with enemies by hiding behind the trees and waiting until the enemies move away from you. Destroy the fourth sealing stone on the right side of this clearing, then escape through the tunnel.
Traverse this tunnel, being wary of ninja guards around each corner. When you reach its end, look up to find the exit hatch. Grapple up and back outside. Look nearby for a box containing a ninja rebirth. Walk toward the house and destroy the fifth and final sealing stone. Approach the house's front door to complete the first task of the mission.
Ayame succeeds in unseating the Yoto swords. The Yoto swords drain energy from those who wield them unless they are fed blood. When Ayame takes both into her possession, she feels the earth tremble.
Battle the immense giant. Monitor your health carefully because the Yoto swords drain your hit points. Be prepared to use a health power-up if necessary. Be aggressive against the giant. You'll have an easy time pulling off combinations, but beware of his counters at the end of your combos. Consider jumping away after two or three hits, then restarting your combinations from the beginning. Defeat the giant to complete the level.
Mission 5--Ronin Village
Two months pass since retrieving the Yoto swords. Lord Gohda had sent all of his men to find the Jewel of Heaven before it fell into the hands of Tenrai but to no avail. An old sage named Zennosuke, who lives in a red house in the Ronin village, was rumored to have information regarding the whereabouts of the Jewel of Heaven. Tenrai's men also have heard of this rumor and are already at the Ronin village. You must go to the Ronin village and meet Zennosuke.
Go to the Red House of Zennosuke!
Objectives: Zennosuke lives by the gate to Amagai's castle. Enemy ninjas appear to be after Zennosuke. Crawl into holes by using stealth.
The goal in this first, small village is to reach the far wall and crawl through a short tunnel into the next area. You can either move quickly to this tunnel or take your time within the village to eliminate its guards and grab a few items in the process. Stick to the rooftops, because it keeps you out of sight from the guards below. There's a female guard on the building ahead. Grab onto the roof, and when the guard moves away, pull up and eliminate her with a stealth kill. As you move through the village, don't attack the geisha or the villager. Search near the bridge adjacent to a dumpster to find a health power-up. Look near one of the houses and by a fence for a grenade and a smoke bomb.
Crawl through the tunnel into the next area. Though you can't see any guards here, it doesn't mean they aren't there. Remain crouched as you emerge from the tunnel, and beware of patrolling guards to the right and another ahead of you. Your goal is to reach the far left corner of this area, but it's possible to explore the other areas for additional stealth kills and items. Look on the rooftop to the right for a smoke bomb, and search the interior courtyard (near the left wall) for a box containing a ninja rebirth.
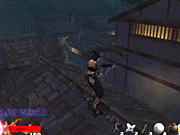
Go to the left corner and through the door. You'll enter the next area. It's a small area containing barrel-like structures. There are a couple of guards patrolling the grounds, but the easiest way through is to grapple on top of the barrel-like structures and traverse them to the right. Drop down next to the door and exit into the final area. If you need the kills, then drop down behind each guard and perform a stealth kill.
In the next area, turn right and follow the wall until you can peer around the corner to the left. There's the red house from the mission briefing. Eliminate any ninja guards nearby and approach the red house to begin the boss encounter.
Your first battle is against Tesshu. He's a tough fighter and blocks well. Fortunately, you must inflict only a small amount of damage on him to end the battle. Tesshu stops fighting and provides some nuggets of information before departing. When you regain control, approach the house to the left of the red house to initiate a second boss battle. It's against Rikimaru--actually, an imposter. Battle the tough adversary using combinations until he's defeated.
Mission 6--Amagai Castle
Caught by Kimaira, you wake up in a cage. As you prepare for your escape, the guard in front of you suddenly shrieks in pain. Tesshu had followed Kimaira there. After seeing that you can escape by yourself, Tesshu tells you that Zennosuke mentioned a secret jewel being hidden in the eye of the statue in the Buddha temple. Then Tesshu disappears.
Escape From Amagai Castle!
Objectives: Beware of traps. Press your back against walls to open trap doors. Use haste to escape.
The mission opens with a boss encounter. You must battle a mad inventor known as Maihime, who is clothed in a vest of wooden armor. Beware of the enemy's spin attack. Don't get trapped in a corner. Dish out a five-hit combination, then back away with a quick jump. The good news is that you'll have plenty of health power-ups and ninja rebirths (if available from the item selection screen) to survive the encounter; however, keep in mind that you have an entire mission to complete!
In fact, you must complete the mission in less than 20 minutes. After defeating Maihime, Kimaira sets off a timer that will release poisonous fumes throughout the castle. You must escape the castle within the time limit to survive. If you played Rikimaru's castle mission, then you know the layout--you're essentially following Rikimaru's route in reverse. The enemies within the castle aren't human; they're made of wood. Be especially careful around the smaller mechanical foes--don't get trapped by their spin attack, and don't remain at long range for too long or you'll suffer from their projectile and grenade assaults.
Scamper down the staircase. There's a guard on the other side of the pit. When his back is turned, drop down into the recess and grab the ninja rebirth in the left alcove. Grapple up and hold onto the ledge where the guard stands; pull yourself up when he's looking away. Terminate the guard. Avoid the giant blades beyond the guard. Cross the pit.

The next rooms are tougher. If you fall, you die, so be careful near the edges. When you reach the ledge, look down and to the left. Spot the path below you. Jump down and hug the left wall so you land on solid ground. In the next room, wait for the mechanical guard to move right, then jump down along the left wall with a quiet landing. Kill the guard.
Maneuver through the catwalk to the left; stay wary of guard positions and look out for the smaller mechanical guard patrolling here. When you're back inside the castle, press against the wall that's around the corner just after this exit. You'll enter a room where the ceiling descends. The stone of power is in the center of this room. You can equip the stone of power for other missions. It works like a strength potion by increasing your strength throughout a mission as long as it's equipped. Exit the room using the secret wall doors above the etched floor.
Follow the hall left and take out the mechanical guards. When you reach a dead end, look right to find a ledge to pull up on. Eliminate the smaller mechanical foe. Grab the health power-up in the right alcove. Move quickly to avoid the floor trap.
Explore this level and eliminate the lurking guards. Don't drop down the left pit or you'll enter a deadly spear trap. Grapple out if you get stuck inside. Look down to find a staircase below your position. Drop down and terminate the mechanical archer lurking nearby.
Drop down and to the left. Pick up the grenade and the smoke bomb. The exit is on the other side and near the ceiling. Grapple up to this path and eliminate the patrolling guard. Fall down the right side (the left side is a trapped room that fills with grenades). It's a long fall, but you'll survive. Terminate the guard down here, then maneuver into the niche in the far corner. Note the etchings on the floor. It's a secret wall. Put your back up against the wall to enter another area.
Cross the hall to the far side and grapple up to the high alcove. Grab the sticky bomb inside. Drop back down and go to the other side. You'll see two paths. One leads back to the trapped room; the other leads to another secret wall door. Put your back against the wall on the etchings to the left to enter a new area.
Quietly move to the doorway and wait for the small mechanical foe lurking around the corner to turn away. Perform a stealth kill. A second guard patrols around the left corner. Eliminate it, then move to the far wall. It's another secret wall. Go back against the wall to enter the next area.
Turn right and peer down. When the guard looks away, drop down and eliminate him. Descend the staircase. A guard stands on a ledge on the other side of a trapped pit. Grapple over when he's walking away and eliminate him with stealth. Watch to the left. One of those smaller, spinning mechanical enemies lurks in the room. When he's walking away, terminate him. Approach the exit doorway and allow the spikes above to slam down. As they rise, exit. Jump through the next hall to avoid the floor traps.
You'll spot a health power-up ahead, but a spear trap protects it. Eliminate the patrolling guard. Grapple up to the platforms above. A guard patrols the path over the lava divide. When he's walking left, jump down quietly and terminate him.
Cross to the right. Grapple up to the left ledge and grab the health power-up. Leap over to the right ledge and down. Exit the castle to complete this stage of the mission.
As you turn the last corner, Onikage's voice fills the room. He sees you and you stare back. From behind you, Rikimaru walks up to your side.
You have a choice here. You can fight Onikage or let Rikimaru battle the boss. The choice has no direct effect on gameplay or the success of your overall task. If you choose to fight Onikage, beware of his close-range attack, which drains your health. Nail him with combos, then back away to prepare for another attack. When Onikage's health gets low, he'll use a health power-up. Attack relentlessly when his health is low. If you kept the sticky bomb found within the castle (or have one in your inventory), toss it on Onikage and detonate it when he's low on health.
Mission 7--Buddha Temple
According to Tesshu, the Jewel of Heaven is hidden in the eye of the statue inside the Buddha temple. Ganda, one of Tenrai's lords of darkness, is already at the Buddha temple with his men. Go to the Buddha temple and execute Ganda, and then retrieve the Jewel of Heaven.
Retrieve the Jewel of Heaven!
Objectives: The jewel is in the eye. To fall is to die, so do not fall. One of the pitfalls is a hidden path.
This mission, like Ayame's previous mission, begins with a boss battle--against Ganda, one of Tenrai's lords of darkness. Ganda's attacks are powerful, particularly at close range. Let Ganda mount an assault, and as he reloads the attack, move in for a five-hit combination. Once it completes, jump away quickly to avoid his grabs and devastating throws. Defeat Ganda to complete the first stage of the mission.
You're just outside where Rikimaru began a similar mission. A guard lurks around the right corner. Wait until he's moving away before approaching him for a stealth kill. Eliminate the second guard when he's facing the opposite direction. Grapple up to the middle beam and crawl through the tunnel. On the other side, wait for the guard to face away before exiting and attempting a kill.
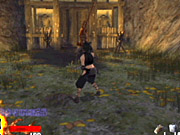
You can drop down from here for additional kills and even a health power-up, but the quicker route to your goal is down the right-side hallway. Take out the guard and ascend the staircase around to the left. Grab the grenade in the next room. Cross the room and wait at the next ledge for the guard below to look away. Drop down and execute the guard with a stealth kill. Go left to the platform. A room with columns lies in the distance, and a bear patrols the grounds. Use your grappling hook to remain on the upper girders. Cross the room to its left end. It's an upper ledge. Should you fall off the girders, use the grappling hook to reach the path.
Walk right and grapple into the shaft. Continue until you reach the edge of a chasm. Leap down to the platform below, then grapple to the ledge on the far side. Pull up and search the box for some shuriken. Go right and grapple up to the path. There's a monk patrolling the right path. When he turns away, approach and eliminate him. A second monk is found around the corner to the left.
You're at an intersection. The goal lies to the right, but a special item--Ayame's poisoned swords--can be found if you go straight. Head straight and be very careful traversing this area. It's a giant pitfall. Use your grappling hook to zigzag back and forth to each ledge. Go around the corner to the left. It's a dead end. But look down on the middle ledge to find a wooden bridge and a path. Drop down onto the bridge, then walk around the corner to the box. Search the box to find Ayame's poisoned swords. Although she'll suffer some poison damage for equipping them, the swords can be used to poison enemies (they'll eventually die after being poisoned). Don't equip them if you're low on health and lack a health power-up or poison antidote to mend your wounds.
Go right from the intersection. Go down this path and drop down behind the guard below. Take him out. Grapple up to the high ledge on the right. A short fence blocks the route. Don't jump too far over the fence--it's a pitfall. Jump on top of the fence, then carefully move on the other side. You'll drop down on a ledge below. At the bottom, turn around and eliminate the two nearby guards. Go down the path and crawl through the narrow tunnel.
Look up. Grapple up the girders and enter the high alcove. Look up again to find the exit to the exterior, which lies just outside the temple. Eliminate nearby guards and grab the health power-up from the top of the shack on the left if you wish. Go around the far side of the temple and enter the back door.
Grapple up and over the ledge ahead. Drop down and eliminate the monk. You're now at the bottom of the Buddha statue. Grapple up the wooden walkways until you reach the very top of the statue. Approach the eye to complete the objective.
Mission 8--Limestone Cavern
With two out of three jewels in Tenrai's possession, Lord Gohda decides that his only chance of winning is to conduct a surprise attack. Gohda's men are sent across the land to find out where Tenrai is hiding. After a few days, the men gather information that Tenrai has set up a fortress on a nearby island. Any boats would be easily spotted, but a surprise attack could be conducted through a tunnel from within the limestone caverns that connects the island to the mainland. During the process of gaining this information, Gohda loses half of his army, and Sekiya, his adviser, is taken hostage by the enemy within the limestone caverns. You must go to the limestone caverns and rescue Counsel Sekiya. Princess Kiku, Lord Gohda's daughter, hands you her sister's bells for good luck.
Rescue Counsel Sekiya!
Objectives: Watch your step, and beware of pitfalls. Look to the heavens when lost. Use items to your advantage.
You begin below an elevated track. If you played the Rikimaru Limestone Cavern mission, then you should know your current location. Turn left and grapple up to the track. Cross it and drop down behind the demon guard patrolling the left passage. If you wish, you can go up the hill to the right and return to where Rikimaru began the level (by a waterfall). It's a dead end, but there are several guards to eliminate along the way, which is especially useful if you're going for nine stealth kills.

Proceed down the left passage to move toward the objective. At the intersection, go right and follow the corridor to the incline. There's a pitfall here and a demon guard on the other side. Grapple behind the demon when he's looking away and eliminate him with a stealth kill. Eliminate the female guard around the next corner. When you reach the ledge, look down and note the guard's patrol pattern. When he moves left, drop down and terminate him with a stealth kill. A couple more guards lurk nearby; use the pillars as cover, then eliminate them with stealth kills.
Enter the cavern center and look up and to the left. Grapple to the upper path. Follow the walkway around to the right and terminate the guards in your path. Drop down into the pit (it's a short fall) and go right. Grapple over the pit and eliminate the female guard that patrols this route. Continue to the ledge (another female guard maintains a post on the left side of the ledge). Ignore or kill her, then jump right across the chasm and to the path far below. Just leap against the wall and drop straight down. It's a far drop, but you'll survive. Walk into the doorway (with the barrels) and approach the jail cell to complete your first task.
Sekiya thanks you for rescuing him. He also informs you that you will need to find a box of explosives to blast an opening in the wall that blocks the path to Tenrai's fortress.
Destroy the Wall That Blocks the Path!
Objectives: The box of explosives is in a prison cell. The wall is in the deepest area within the caverns. Use the explosives in front of the wall.
Turn left and check out the additional barrels against the wall. Bust them with your weapon and expose a small tunnel. Crawl through the tunnel into an adjacent cell. Grab the box on the floor--it's the explosives.
Exit the cell and go left up the staircase. Continue along the path until you reach a ledge. Drop down into the area below. Grab the small health power-up on the crate at your landing point. Maneuver through this area filled with wooden planks. Keep to the left. Watch out for the spirits hovering about the chamber and watch your step if you explore the other areas of the room--there are pitfalls! Reach the room with an elevated walkway and grapple up to the top.
Follow the unexplored path to a large chamber. Be cautious as you enter; there's a guard inside. Clear the room and then move to the large boulder in the far corner. Use the box of explosives in front of the boulder. Don't place it too close or Ayame will pick up the box again. Place it about two or three steps back from the boulder to complete the objective.
Leap away from the box to avoid the explosion. Exit the chamber to initiate the boss encounter. After a sad reunion with Sekiya, Ayame must battle Kagura and her large wolf. Ignore the wolf. As soon as Kagura dies, the wolf vanishes with her. Get close to Kagura and punish her with five-hit combinations. Defeat her to complete the mission.
Mission 9--Tenrai Fortress 1
After the battle with Kagura, you return to Lord Gohda to report about the situation regarding the tunnel and about Sekiya. Lord Gohda thanks you for your courage and decides to hold a strategy meeting with his men. He returns a few hours later. The plan is to first send you in to kill the leader from the inside. You must infiltrate the fortress and eradicate the enemies from within.
Assassinate the Evil Tenrai!
Objectives: Beware of martial arts experts. Use all your stealth skills to your advantage. Bring the wrath of heaven to Tenrai.
Proceed forward and cross the collapsed pillar. Drop down on or behind the house (grab the health power-up from the house's roof). Observe the ground floor and wait for the opportunity to drop down behind the demon guards. Continue through the passage. As you round corners, climb onto each ledge at each corner to hide from the guard on the other side. Drop down behind the guard and eliminate him with a stealth kill.

Round the last corner into the area with wooden walkways. Your goal should be to hug the wall on the right and go all the way to the back right corner. Move slowly and eliminate any guards that obstruct your path. The first demon guard patrols the nearest walkway. Eliminate him or wait until he moves left before you scurry around to the right. As you move along the right wall, look down to spot a box resting on a ledge below you. Search the box for a ninja rebirth.
In the right corner, terminate the monk, then ascend the staircase. You'll encounter a series of monks here. Wait until they're walking away before approaching and terminating them with a stealth kill. Walk beyond the huge cannons and around the next corner. You'll spot another monk here. When he walks away, take him out with a stealth kill.
At the next corner, grab the small health power-up off of the crate. Continue until you reach a dead end. Look up to discover the path above. Pull yourself up and take cover; there's a demon guard on the right side. Go along the ledge and take a left at the far edge. Cross the wooden bridge.
Proceed through another series of winding tunnels. Demons and undead guards lurk around nearly every corner. When you drop down into the larger chamber, go right. Grab the health power-up in the corner and leap up the stone blocks in the right corner. Drop down onto the tower and go left. Avoid the undead guard and bypass the second tower. Stay out of the trench to avoid another undead guard. A monk patrols the last room. Grapple over him or eliminate him with a stealth kill. Approach the door to initiate the boss encounter.
Ayame battles Tatsumaru; he's particularly adept at combinations, so use your block carefully. Initiate your own combinations after blocking Tatsumaru's attack. Avoid corners in case Tatsumaru manages to connect with his combination. Keep your distance to avoid his high close-range damage. Defeat him to complete the mission.
Mission 10--Tenrai Fortress 2
Assassinate the Evil Tenrai!
Objectives: Beware of martial arts experts. Use all your stealth skills to your advantage. Bring the wrath of heaven to Tenrai.
Grapple up to the path above and sneak up behind the monk. Eliminate him with a stealth kill. Drop down and beware of a second monk around the next left corner. Approach the next ledge--a monk patrols on top--and pull yourself up when the monk looks away. Terminate the guard with a stealth kill. This is actually an intersection. You can continue along this path or turn around and spot a higher route.
Continue along this path and check an alcove on the right for a ninja rebirth. Remain on the right side of the next room and ascend the ledge in the right corner. An undead guard patrols the next hall. Avoid him and the monks around the corner. The next room contains a series of pillars. Grapple to each pillar and ascend to the top of the room. Go right and leap carefully off the pillar tops and proceed to the left.
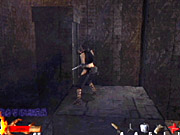
The intersection near the level's start meets on this point. If you're lost, just continue left and up the ledges. Terminate the demon and monk patrolling here. Ascend the small staircase and look up and to the right at its top. Grapple to this new route. In the colored room, ascend the staircase on the left and look right. Again, grapple up to the new route.
Face left in the next area and traverse the high walkway with double jumps and the grappling hook. Be extremely careful in this area because one fall with no floor underneath will mean death and a mission restart. Proceed into the final room to face off against Tenrai.
Time to battle Tenrai. There are two primary attacks to watch out for. Tenrai fires a wide stream of spikes and also creates a thin spiked ground attack directly at you. Dodge the ground attack and jump over the spike stream. Get in close when the opportunity arises and use combo attacks to eliminate Tenrai.
Tenrai's second incarnation is more of a brawler--and there's good reason, because he can't be damaged. Pound on Tenrai with a few successful blows, and a cutscene interrupts the action. When the battle resumes, you can damage Tenrai. Use your combo techniques and any available weapons and items to eliminate this second incarnation of Tenrai.
One more battle remains. Tenrai emerges with another full batch of health, but your attacks should be more than enough to whittle his health down quickly and defeat the boss once and for all.
Chapter 5--Tesshu Mission Walk-Throughs
Activate the Tesshu missions by completing both the Rikimaru and Ayame campaigns. You can also unlock the Tesshu missions by entering a cheat code (revealed in the cheat codes section of this guide). One notable difference in the Tesshu missions is that instead of simply selecting his inventory items, Tesshu must purchase them. Tesshu starts with a sum of money and accumulates more from accomplishing missions. You can also find money throughout missions, collected from dead enemies and from hidden boxes.
Mission 1--Echigoya
When the law fails to serve justice, you can buy justice. Underground groups offer assassinations at reasonable prices, but they only take on missions that they agree would serve justice. This is the story of Tesshu Fujioko, a doctor by day, a hired assassin by night. It was a warm spring evening when Tesshu was ordered to murder Nasu and Echigoya. Both were guilty of kidnapping village girls and selling them as slaves to neighboring states. The families of the daughters felt that the officials would not punish Nasu, because he was a high-ranking statesman. Both Nasu and Echigoya must be killed, not just one of them.
Assassinate Nasu and Echigoya!
Objectives: Avoid the front gate. Both Nasu and Echigoya must be killed. Beware: A shadow is after Nasu.
You begin just outside this small village. There are guards in front of you, so it's wise to grapple onto the adjacent structure. Traverse the roof to remain out of sight and drop behind the nearby guards if you wish or simply ignore them. The easiest, and quietest, way to proceed would be to drop down into the left courtyard and enter the first building ahead (watch out for the guard to the left, however). If you recall, in the Rikimaru and Ayame missions this building offered a shortcut into the next area.
If you decide not to use the shortcut, then remain on the rooftops to eliminate the guards below. Move to the far left portion of this area to locate the gate leading into a tunnel that connects to the next area. You don't have to acquire a key in order to unlock the gate--it's already unlocked. Search the area near the ramp (adjacent to the exit gate) for a box containing some throwing needles. There's also a small health power-up in the room that contained the three jovial guards in Rikimaru's and Ayame's missions.
Traverse the tunnel connecting to the next area. Two guards patrol the initial part of the tunnel; move carefully around each corner. You'll reach a room with a guard on the left. Wait until he turns away, then eliminate him with a stealth kill. Grapple up and out of the area using the shaft above you.
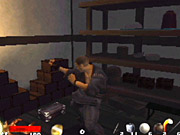
A guard patrols around the buildings to the left. Remain crouched until he turns away, then approach him from behind and terminate him. Hide near the buildings and eliminate another guard in the garden area to the far left. Grab the health power-up in the area, then return to the buildings. Search these buildings, as they contain boxes of money, which Tesshu uses to purchase equipment for each mission. Use the crawl space to maneuver between unlocked and locked buildings to find more boxes. Exit and traverse the rooftops to bypass the guards. Go to the far right side of the central building. Maneuver down the back alley to the back door to enter the center building.
Go through the hall to the first door. Open it and hide from the guard. When he's turned away, punish him with a stealth kill. Exit out the other door and into the long hall. Take note of the locked door on the right--you need to find the key for it. Go to the far door and eliminate the guard inside the next room. Go left, right, and then left again to find Echigoya. Tesshu automatically eliminates Echigoya. Search the body to find the key.
Return to the locked door and use the key to enter. Drop down into the recessed area and kill or ignore the sleeping guard. Walk to the end of the room and grapple to the higher path. Proceed through the hall and up the stairs. Sneak through the halls and rooms until you reach the small tunnel near the floor. Check the left room for a smoke bomb.
Crawl through the tunnel and hop on the chest at the end of the next hall. Grapple up. Move through the next door. Watch the alcove to the right; wait for the guard to turn around before scampering past. Move through the halls, taking out any remaining guards you sneak up on, then drop down off the final ledge to automatically end the mission.
Mission 2--Gohda Castle
Nasu was killed by another assassin. This truly bothered Tesshu. He could not sleep well that night. Tesshu's curiosity regarding Gohda's ninjas escalated because Zennosuke kept telling him to forget about it since crossing swords with the Azuma ninjas was the same as suicide. But Tesshu was still angry that he could not collect his fee because Rikimaru got to his target first. Ignoring Zennosuke's advice, Tesshu sneaks into Gohda's castle to find Rikimaru and prove to himself that he is the better assassin.
Teach Rikimaru a Lesson!
Objectives: Stay in the shadows and trust your ki. Rikimaru is far inside the castle. Stay hidden and do not alert the guards.
You're currently underneath a structure, and a guard lurks just outside. The quick way to the castle is under this structure. Move through the crawl space and exit near a path that takes you toward the castle. An alternate route lies within the halls outside this structure. If you recall Rikimaru's mission, Hamada's room contains a passage into the castle that bypasses a lot of ground. You'll find it on the right side of the map.
If you do explore these rooms, proceed to the southern edge of the map and look in the room to the left (when Tesshu enters this area). You'll find a health power-up and a box containing throwing needles. But there's another reward nearby. Look in the right corner of this room for a higher room above. Grapple up into the room and grab the two boxes of money. Guards lurk throughout these rooms, so move with extreme care and caution if you're striving to leave as many guards undisturbed as possible.
Either go under the structure or use the secret passage (look further down in this mission walk-through for where that passage exits). From underneath the structure, open the door and dodge to the right if the guard inside faces you. Eliminate him when he's turned away. Ascend the staircase on the right. At the top, approach the corner on the left and eliminate the guard when he's looking away.
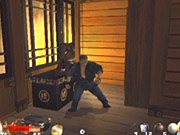
More dangers lurk to the right; another guard occupies this room. Eliminate him and find the staircase in the back corner. Descend. Go into the left room and terminate the guard inside. Search the right-hand room for a box of money. This is also the room where the secret passage connects. Return out and proceed the other way. Terminate the guard in the next hallway, then ascend the next staircase.
The remainder of the level involves following the sole, twisting path to the goal. Guards lurk around nearly every corner, so it's important to crouch and peer around every corner (use the wall-to-back maneuver). Use stealth kills on each guard. Descend the final staircase into the brightly lit chamber. Approach the door to battle Rikimaru. Beware of Rikimaru's smoke bomb. Use Tesshu's combination attacks (including his special combo and block maneuvers) against Rikimaru.
Mission 3--Buddha Temple
Six months after Tesshu's failure to kill Nasu, Tesshu takes on a new order for the murder of Ganda, the head of a new religious cult that has taken over the Buddha temple on the border of Gohda's realm. Ganda was guilty for taking part in the plan to sell village girls to neighboring states as slaves, but he slipped through the legal cracks because of his religious profession.
Rendezvous With Senkichi by the waterfalls!
Objectives: To fall is to die, so do not fall. Beware: The cultists are strong. Make a path safe--there is no safe path.
The mission opens with a boss battle--against the enormous Ganda. The best tactic is to remain at a distance and approach only after Ganda swings his staff or mounts an attack. Perform a combination, then immediately retreat and allow Ganda to open himself up for another assault. Avoid remaining at close range for too long or you'll suffer Ganda's punishing grab and throw maneuvers.
Tesshu kills Ganda, and he must now rendezvous with Senkichi by the waterfalls near the bottom of the Buddha temple's garden.
You begin the next stage of the mission on the wooden catwalks adjacent to the Buddha statue. Go left and exit the room. Having played both Rikimaru's and Ayame's mission in the temple, you'll recognize that you are completing this mission by following their route in reverse. Exit the temple by crossing the catwalks, defeating the guard patrolling the hall, then dropping down by the exit door.
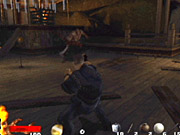
You're on part of the temple roof. Wait for the guard below to walk away, then drop down and leap into the hole in the floor. Fall down the shaft and grab the health power-up at the bottom. Crawl through the tunnel. Terminate the guard on the other side.
Follow the hall to the ledge overlooking a massive pit. Look up and to the left. Grapple onto the ledge to the left. Grapple near the middle or Tesshu can't hold on (look closely and you'll see the pillar obstructing Tesshu's grip). Your goal lies up and to the left. Grapple there to continue on. If you're daring, there are some boxes of money on the far side of the pit. Use the grappling hook and double jumps to reach the money and return.
Grapple up to the short fence. Follow the hall and grapple up to the next path. Terminate the monk patrolling around the next corner. Go left and crouch on the girders. Drop down behind the guard below and perform a stealth kill. Cross the platforms over the pit and grapple to the next path on the right.
Eliminate the guard in the next hallway. Drop down to the area overlooking the garden. Turn right and run into the garden to complete the objective.
Mission 4--Limestone Cavern
For Tesshu it was a big surprise to see Jinnai, a former member of Muzen, the same underground organization that Tesshu belonged to. When Tesshu awoke, he was in a prison cell. All of his tools for his midnight job had been confiscated. Tesshu must get his tools and escape.
Escape From the Limestone Cavern!
Objectives: Recover your equipment first. Watch your step and beware of pitfalls. Stay in shadows and use the ki meter.
You're hidden from a guard on the right. Slowly maneuver up close and eliminate him with a stealth kill. Go beyond this guard and drop down off the next ledge. Hide against the wall on the right; there's a ninja lurking in the hallway. Note the barrels against the wall. Don't break them until you've killed the sleeping guard around the corner. Go right from the sleeping guard and search the cells in the corner for Tesshu's equipment--a key.

Exit the cells and go left then right until you reach a ledge overlooking a damp area filled with wooden walkways. Drop down onto the walkways. Beware of the ninjas lurking throughout the chamber. Stick close to the left wall and maneuver into the far corner of the chamber. You'll find an elevated walkway here. Grapple to the top of the walkway. Grab the smoke bomb on top of the walkway.
Remain on the walkway and proceed down the available exit. Defeat a ninja along the way. Enter a wider chamber. Eliminate the archer guard inside. Grapple over to the chamber's other corner and exit through the tunnel to complete the brief level.
Mission 5--Cemetery
A cold shiver went down Tesshu's spine. It was intuition, a gut feeling that something truly bad was about to happen. Tesshu hated himself for feeling these things in advance. Tesshu must hurry to the house in the cemetery because Senkichi will be waiting for him there to hand him his payment for his services.
Go to the House in the Cemetery!
Objectives: Use haste, because Senkichi needs you. Jinnai is after Senkichi. Beware of Jinnai's men.
Go down the staircase to Tesshu's left and, after descending, hug the right wall. Drop off the ledge and spot the tunnel ahead. Scurry into the tunnel. Traverse the tunnel. This should look like familiar ground after beating both Rikimaru's and Ayame's cemetery mission. Be cautious as you move around each corner and wait until the guard walks away before attempting a stealth kill. Maneuver through the room filled with blood. Drop off the ledge when the guard moves to the left. Grapple up to the path on the other side of the room.
You'll reach an intersection within these tunnels. Either route ends up in the same place. You'll eventually exit into the exterior. There's a wooden fence on your left. Jump and hold onto its top and leap over to the other side once the nearby guards move away. Drop down and cross the center ledges; the next tunnel lies just on the other side and to the left.
This next familiar tunnel also features its share of guards. Grab a health power-up from a ledge on the right side. Grapple out at the end of the tunnel into a small courtyard littered with trees. Use these trees as cover against the present guards. When the guards move away, sneak by and to the next cover or just approach them from behind and execute a stealth kill. Proceed into the next tunnel.
Maneuver carefully through this tunnel and peer around each corner in search of the next guard. When you drop down into the recess, keep to the left and grapple up to the ledge. Look up at the end of the tunnel and grapple out. Approach the hut to complete the mission.
Mission 6--Ronin Village
Senkichi is dead. Tesshu knew that it had to be Jinnai, because Jinnai was the only one who knew about the secret handoff point for payment. Zennosuke would know what to do. Tesshu rushes to the Ronin village to meet with Zennosuke. The town is infested with Jinnai's men.
Return to Zennosuke!
Objectives: Go to the red house by the gate. Do not show any mercy to Jinnai's men. Crawl into holes using stealth.
Turn immediately left and drop down off the ledge. Maneuver to the left side of the building (the red building that is your goal) and slowly move to the corner. There's a guard in front of the building. Sneak up and terminate him. Enter the building to complete the first part of the objective.
After concluding the conversation with Zennosuke, hug the left wall as you proceed toward the exit. You can explore a hole in the left wall and grapple up to the waterfall to find a couple of throwing needles. Move cautiously along the left wall and ascend a staircase that leads to the exit door.
The next area contains large barrel-like structures. These provide excellent cover if you plan to traverse the area on the ground, but it's also possible to grapple to their top and cross the area without touching the ground. There are several guards on the ground level. Terminate them if you wish or just avoid them completely and enter the next area.
Grapple onto the building in front of you. Drop down behind the ninja to the left and terminate him. Another guard patrols near the wall to the left. Avoid him by going around to the right or sneak up on him and execute a stealth kill. Grapple onto the rooftop that provides a barrier between this outer zone and the inner courtyard. Crouch and cross the rooftop all the way to the far left. Look around for ninja guards. If any lurk nearby, drop down and execute them quietly. Drop down into the sewer and crawl through the hole on the left. If you've alerted any guards, they booby-trap the crawl space with grenades; make sure there are no alert guards before moving there.
You've entered the small village at the beginning of Rikimaru's and Ayame's similar level. There are no enemies in the area, except for the boss encounter. Before moving to the village's center, explore the left side to find a health power-up.
Explore the center of town to find Ukyo Jinnai. He possesses an unexpected range with his sword. Maintain a wide distance unless you're closing in for a combination. Use the rooftops if you possess any damaging items. Leap up to a safe height and damage Ukyo from above. Avoid remaining too close or Ukyo can inflict large damage with his grabs. Defeating Ukyo is just the first of two boss battles to conclude Tesshu's missions. You must also battle his brother, Sakyo. It's a similar battle. Beware of Sakyo's long sword range. Jump away after landing a combination. Defeat Sakyo to conclude Tesshu's missions and to unlock a bonus mission titled "Through the Portal," which is selectable from the main menu.
Chapter 6--Through the Portal Mission Walk-Through
Unlock the bonus mission, Through the Portal, by completing Rikimaru's, Ayame's, and Tesshu's missions. You could also use the appropriate cheat code revealed in the cheat codes section of this game guide. Select Through the Portal from the game's main menu. You play as Rikimaru and aren't offered an item selection screen; instead, you're automatically provided with one health power-up, three caltrops, three shuriken, and one poison rice.
Bonus Mission--Through the Portal
When the castle collapsed, the only way to escape was to jump into the portal that Meiah fled into. Inside the portal is a separate universe--a world in which a large biotech pharmaceutical company created a deadly disease and sold the cure for a large profit. Many civilians could not afford the cure and died. The government's auditing of accounting procedures led to the unveiling of fraud, but the CEO bribed his way out of jail. You must punish the evil CEO.
Walk forward to the edge of the chain-link fencing on your left. There's a security guard around the left corner. Wait until he walks the other way before approaching him and performing a stealth-kill move. He could also be patrolling up the staircase; wait for him to come down if he's there. Ascend the staircase and wait for the next guard to move away from you. Approach him from behind and terminate him. Go left and into the doorway. Terminate the nearest guard that patrols around the right staircase. A second guard patrols on the left side around the wall. Go around this wall and outside. Look left while on the catwalk and drop down behind the guard below.
Turn around and spot a guard across the path; he lurks on the other side of a fence. You can't get through this fence, so look up and to the left to discover a high ledge. Grapple up to this ledge. Drop down onto the pipes and go right. Locate the small tunnel here. Crouch and crawl through. The tunnel leads into a parking garage.
There are three guards inside the garage. Use the columns as cover against the guards. Hop out and perform a stealth kill when a guard gets close. Your goal is to reach the upper catwalk; use your grappling hook to get there. Go right on the catwalk and crawl through another vent shaft.
Drop down inside the office lobby and eliminate the guard behind the desk. Walk around to the far side of the lobby and take out the second guard before approaching the elevators.
After ascending in the elevator, maneuver left around the corner and eliminate a final guard in front of the CEO's door. Enter the CEO's office.
The CEO uses a sword, a projectile attack, and a variety of punishing close-range grabs and throws. When he launches his fireball, dodge to the left or right, then quickly approach him and perform a combination. Block his sword attacks and avoid remaining within close range for extended periods or you will get grabbed. Don't forget to use your shuriken and caltrops (if saved from the beginning of the mission). You have only one health power-up and no rebirths. Use caution when approaching closely and jump away after a failed combo attack.
Chapter 7--Multiplayer Strategies
This section covers general multiplayer strategies for both versus and cooperative game modes.
Versus
Tenchu: Wrath of Heaven's competitive multiplayer mode offers much more than just the three playable characters from the single-player game. It's possible to play as many of the enemies and even some of the bosses. The roster of characters includes Rikimaru, Ayame, Tesshu, Tajima, Nasu, Hamada, Jonin Red, Jonin Blue, Chibot, Kunoichi, Kagura, Kenpo Bouzu, Semimaru, Jinnai, Onikage, Ninja Dog, Tatsumaru, and Mr. D CEO (the boss from the Through the Portal bonus mission). Not all of the characters are available from the beginning. Unlock them using the cheat code (unlock all characters), or defeat the particular boss in the single-player game.

Many of the enemy and boss attacks and maneuvers mirror those in the single-player game. Most of the characters feature combo strings similar to those of the three single-player characters. For instance, pressing square multiple times in succession will initiate a combination. You can also throw in a 360-degree spin attack by rotating the left analog stick 360 degrees during the combination.
When you're close to your opponent, press the circle button to initiate a throw or grab. Pressing X and circle at the same time initiates another of your character's special moves. For instance, the CEO launches his fireball, and Onikage does a powerful jump kick. Don't forget your roll maneuvers (hold down R1, then press X and a direction). Also, holding down R2 and pressing jump can be a useful maneuver; your character will jump forward, twist around, and land facing the back of your opponent.
Beware that there are artificially controlled enemies on some of the maps. If you decide to engage, make sure your versus opponent isn't in the area, or you may get ambushed. The artificially controlled enemies can drop useful items (such as small health power-ups), so it's worth the effort to engage them, but just monitor your surroundings carefully and take note of your opponent's location. On the flip side, you can always ambush an opponent that attempts to battle the artificially controlled enemies! Use your special items, like the exploding arrow or shuriken, to ambush your opponent from long range.
Since it's a split-screen mode, it's fairly simple to keep tabs on your opponent's location and tactics--just look to the other side of the screen. Therefore, camping will likely be a failing strategy. If you're hiding on a roof, your opponent can just stay away. Or if you're ducked behind a corner, your opponent can ascend to the rooftops. Keep moving and be unpredictable. Make your opponent pay for too much screen watching. While he's staring at your screen attempting to gauge your location, maneuver behind him and fire an exploding arrow or initiate a punishing combination or grab.
Items are also scattered throughout the map. Scoring an extra health power-up can be extremely useful, but there are even more devastating items around the map that can be used to inflict heavy damage on your opponent. Speaking of health power-ups, you're provided with health power-ups to begin the fight. Don't let them go to waste. Optimize their potential by using a power-up when you're very low on health (the large health power-ups replenish your health to a full 100 points).
Cooperative
In Tenchu: Wrath of Haven's cooperative mode, you can only select from the three playable single-player characters: Rikimaru, Ayame, and Tesshu. The characters will work together to complete one of six different missions. The maps are similar to the versus maps but offer specific mission objectives, which include:
Village: Retrieve all of the scrolls that are hidden in the enemy village. The guards are after the scrolls too. Defeat guards who already have a scroll in their possession. Battleground: Lord Gohda has been wounded on the battlefield. He won't survive another hit. Guard Lord Gohda and escort him to the safe area. Castle: Stealth-kill all enemies. Do not alert guards. Infiltrate the castle and kill everyone quietly. To be seen is to die. Cavern: It is time for the ninja test. Earn points by killing enemies. You need 240 points to pass. Simultaneous stealth kills earn extra points. But first, you must drink this poison. Fortress of Evil A: The enemy is preparing to attack Lord Gohda's castle. Exterminate all enemies as quickly as possible. Fortress of Evil B: Use your ninja abilities to defeat all of the bosses.

In cooperative missions, when one player dies, the mission is failed. As the game mode's name clearly suggestions, you should work together--cooperatively--to succeed, especially in a mission like Cavern, where your health is slowly decreasing and you're awarded extra points for simultaneous stealth kills.
Assisting your teammate is also extremely important, particularly if one player is outnumbered in battle. But it's even more useful in a mission like Fortress of Evil B, where you're up against waves of Tenchu boss characters. Though you could each engage separate bosses, battling the same boss together could inflict damage faster and eliminate the threat that much quicker.
Chapter 8--Cheat Codes
Let's face it: Even the most honorable ninja cuts corners sometimes. This section provides that cut. Here are some cheat codes for Tenchu: Wrath of Heaven, including health restore, unlock all characters, and unlock bonus missions.
Unlock Tesshu and All Characters--In order to unlock Tesshu as a playable character, you must beat the single-player game as both Rikimaru and Ayame, or you can just enter the following code at the main title screen: L1, R2, L2, R1, right, left, L3, R3. This code also unlocks the multiplayer characters.

Unlock All Missions--Having trouble on a mission? Use this code to unlock all missions so you can skip forward. At the mission selection screen enter: L1, R1, L2, R2, right, square, L3, R3.
Unlock all Layouts--You can access a new layout after beating a mission. But you can also enter this code to unlock all of the layouts. At the mission selection screen enter: R3, L3, R2, L2, R1, L1.
Unlock Through the Portal--You can unlock the bonus Through the Portal stage by beating the single-player game with Rikimaru, Ayame, and Tesshu or by entering the following code at the main title screen: L1, Up, R1, down, L2, right, R2, left.
Unlock Demo Level--Here's another bonus level; it's the level used in the demo version. At the main title screen enter: up, down, right, left, X, X, X.
Health Restore--During the single-player game, pause and enter the following code to restore your health to its full capacity: up, down, right, left, square, square, square.
Unlock Items--Need access to all the ninja items? At the item selection screen, hold down R1 and L1 and enter the following code: up, square, square, left, square, square, down, square, square, right, square, square.
Add Items--Need more of your available items? Enter the following code at the item selection screen while holding down R2 and L2: square, square, square, up, left, down, right.
Third Language Option--An adept ninja will eventually unlock a third language option: B-Sides. Go to the option menu and select "sound." Go to language and move through the options. If a third option (other than English and Japanese) reads "???????" then you haven't unlocked B-Sides. Rumors are you must achieve grand master status in all standard enemy layouts for all three characters to unlock the secret language. Once you've unlocked the language, select B-Sides and listen to the new dialogue. Things have certainly changed!
Got a news tip or want to contact us directly? Email news@gamespot.com
Join the conversation