Star Wars Knights of the Old Republic II: The Sith Lords Walkthrough
Fans of the original KOTOR certainly have their hands full with the sequel, which packs in an even longer campaign that will again, test their affinity for the light or dark side of the Force. This walkthrough includes a full campaign walkthrough, as well as chapters detailing all of the game's colorful characters and Force-related powers.
Design by James Cheung
Barely a year after the original Knights of the Old Republic came out for the Xbox, we have its sequel, Knights of the Old Republic 2: The Sith Lords. As the subtitle implies, all isn’t exactly well in the Old Republic, as the Jedi have gone to ground in the hopes of luring out the Sith that have struck against them with impunity. It’s a dark time, as the unsteady Republic attempts to hold itself together in the wake of a civil war and domestic unrest. Into this shaky situation steps you, a former Jedi who has given up all attachment to the Force.
The primary new features of KOTOR2 include:
- The ability to reach level 30.
- New Prestige classes for high-level play.
- An increased ability to influence your teammates and their relation to the Force.
- New Jedi Powers and Feats.
In addition to all this, though, you’ll be treated to an engrossing (and long) story that can easily be played through many times. In fact, it’s basically impossible to see everything there is to see in one play-through; certain characters will refuse to join your party unless you act a certain way or are of a certain sex, meaning that you’ll need to play through at least twice just in order to obtain all of the various party members (12 in all).
In GameSpot’s unofficial guide to KOTOR2, we’re going to bring you an exhaustive look at the game, including details on character creation, tips on how to play with all of your teammates, a look at the mini-games, and, of course, a complete walkthrough.
Table of Contents
Character GenerationParty Members
Walkthrough
Peragus-II
Telos
Nar Shaddaa
Onderon
Korriban
Dantooine
Return to Dxun
Pursuing Your Destiny
Glossary
Character Generation
Before you begin your adventure, you will need to create the character that will become your alter ego in the world of Knights of the Old Republic 2. Those of you who are familiar with previous BioWare RPGs, such as Neverwinter Nights, will feel right at home with the character creation process, since it strongly resembles the D&D character creation that we all know and love.
Quick Character vs. Custom Character
If you wish to simply jump into the game with a minimum amount of hassle, you’ll want to create a Quick Character. This option lets the game decide your character’s attributes and results in a well-balanced, if somewhat generic character. You’ll still be allowed to select your character’s sex, class, in-game portrait, and name.
If you’re used to pre-made characters, such as are found in most console RPGs, by all means select a Quick Character and jump directly into the game; they’re not handicapped at all when compared to a Custom Character. On the other hand, selecting the Custom Character option will give you access to a much broader array of customizations and allow you to select your player character’s (or PC for short) attributes, skills, and Feats, in addition to the cosmetic choices required of Quick Characters.
Classes
If you played through KOTOR1, then you’ll be pleased to know that in KOTOR2, your character will start the game as a Jedi; no need to level up as a Scoundrel, Scout, or Soldier before you finally unlock your Force Powers. (Your party members will still level up as members of these classes, unless they are or become Jedi.) At the beginning of the game, then, you’ll be asked to choose between one of three classes.
Jedi Guardian
The Jedi Guardians are those Jedi who aren’t afraid to take out their lightsaber when the situation demands it. They shouldn’t be thought of as warriors, since "wars not make one great," after all. Indeed, the life of a Jedi Guardian should be dedicated to peace, the minimization of bloodshed, and serene meditation on the meaning of the Jedi Code.
Kidding, of course. Guardians are meant to kill, kill, kill; that’s what they’re good for, and that’s what you’ll be able to do with relative ease if you choose to upgrade your character to this class. Guardians are not as strong in the Force as the other Jedi classes, but are much more powerful when it comes to wielding a lightsaber, and are more physically resilient as well. A Guardian is roughly analogous to a Soldier.
The Jedi Guardian’s class-specific Feat is Force Jump, which is a combat-oriented Feat that allows a Jedi to cover massive amounts of ground and deliver a powerful blow when combat begins. The Jedi Guardian is also the only class that is allowed to obtain Lightsaber Specialization, which gives each lightsaber attack +2 damage.
Vitality: +10 per Level
Force Points: +4 per level
Feat Progression: Levels 1, 3, 6, 7, 9, 12, 13, 15, 18
Skill points progression: (2 + Intelligence Modifier) / 2
Jedi Sentinal
The Sentinel class is supposedly a balanced, diplomatic class, involved in settling conflicts between parties and arbitrating grievances through negotiations. Given the nature of KOTOR, though, most of a Jedi Sentinel’s negotiations will be of the aggressive variety, but not to worry; Sentinels are quite adept at handling themselves in combat.
The Jedi Sentinel’s unique Feat is probably the most useful of the three: as a Sentinel increases in level, he or she will become increasingly resistant to Mind-Affecting attacks, such as attacks that cause fear, or stun your character. Without spoiling the game overmuch, this turns out to be much less useful in KOTOR2 than it was in KOTOR1, but can still come in handy in certain spots.
In all, Sentinals are a great, balanced choice for players that want to engage in melee combat while still retaining enough Force Powers to use them when appropriate.
Vitality: +8 per Level
Force Points: +6 per level
Feat Progression: Levels 1, 3, 5, 7, 9, 11, 13, 15, 17, 19
Skill points progression: (4 + Intelligence Modifier) / 2
Jedi Consular
Jedi Consulars seem to fit into the mold of the "crazy old wizard," since they are much more adept at channeling the Force than are the other two classes. They don’t gain any special Force Powers when compared to the other two classes, but do gain Force Powers at a slightly more rapid pace than do Guardians and Sentinels, and will have a deeper pool of Force Points to draw upon when they need to unleash their Powers in combat. They spend less time training for physical combat, however, and so are not going to be as appropriate as front-line combat troops. A good example of a Jedi Consular, albeit a dark side example, is the cronish Emperor Palpatine from Return of the Jedi.
The Consular’s unique Jedi Feat is Force Focus, which lends a bonus to the DC of their Force Power attacks. Since this is a passive Feat, it is always active, and will help your characters stun or incapacitate their opponents.
In addition to the normal Force Power that’s gained at every level-up, Consulars also gain an additional Force Power at levels 5, 9, 13, and 17.
Vitality: +6 per Level
Force Points: +8 per level
Feat Progression: Levels 1, 3, 6, 9, 12, 15, 18, 21
First level Skill points: (4 + Intelligence Modifier) * 4
Skill points progression: (2 + Intelligence Modifier) / 2
Prestige Classes
KOTOR2 adds a new twist to the choice of classes. After your character hits level 15, you’ll be able to speak to Kreia to choose a new Prestige Class. These offer new abilities that aren’t available to the normal Jedi classes, and will let you continue along the gameplay path that you’ve chosen, or shift play styles. A character that’s been a Consular may suddenly decide to become a Weapons Master, for instance; it’s up to you. Each Prestige Class will have its own unique Feats.
Jedi Weapon Master
Jedi who choose to perfect the use of weaponry will become Weapon Masters. Weapon Masters gain the Inner Strength and Increase Melee Damage feats, which both help them to decrease the amount of damage that they take and to increase the amount of damage that they dish out.
Jedi Watchman
If you want to take a balanced approach to the game, and participate in both lightsaber and Force-based combat, than the Watchman class will likely be right up your alley. Unfortunately, the unique feats to this class are kind of useless; you get to use Force Camouflage, which will let you enter Stealth Mode without having a stealth field generator on, and Sneak Attack, which is essentially the same thing as the Scoundrel talent of the same name. The latter feat can be handy when combined with Force Powers like Stasis Field.
Jedi Master
If you’re strong with the force, then Consulars will want to shift over and become Jedi Masters. Masters gain Enlightenment, which will help you convince other party members to shift towards the Light Side themselves, as well as Inspire Followers, which will enable you to temporarily buff your teammates’ attack and damage rolls.
Sith Marauder
Some Sith just like to bust out their lightsabers and kill a whole mess of people; the Marauder class is ideally suited for this form of gameplay. With it, you’ll gain Fury, which will let your character enter a vicious rage that’ll improve your health and combat abilities at the cost of a Defense penalty, and Increase Combat Damage, which will let you dish out even more hurt on enemies.
Sith Assassin
As with Jedi Watchmen, Sith Assassins are able to use Stealth without having to use a Stealth Field Generator. They also obtain the Sneak Attack feat, which lets them deal extra damage to enemies that aren’t aware of an incoming attack or are unable to defend against it.
Sith Lord
The most devestating Force-using Sith are known only as Sith Lords, including Crush Opposition, which will enable you to strike fear into the hearts of anyone that opposes you, as well as Corruption, which will enable you to more easily sway the Force alignments of your teammates.
Attributes
Attributes govern your character’s innate physical and mental resources. The bonuses and penalties associated with high or low attributes will affect your character’s combat acuity, skill usage, and the efficacy of your Force Powers. If you choose to create a Quick Character, your Attributes will be distributed automatically, but if you wish to create a Custom Character, you’ll be able to choose all of your vital statistics individually using a pay-for-points system.
An unmodified character is initially a tabula rasa, and is, in fact, slightly below average in each attribute. In order to increase your attributes, you’ll have to buy each additional point using a pool of 30 purchase points. The initial increases to a skill are on a one-for-one basis, but as you progress towards the upper limit of your initial attributes (during character creation, no attribute can be raised above 18), each additional point begins to cost more; purchasing a stat of 15 or 16 will each cost your character 2 purchase points, while the elite stats of 17 and 18 will each cost 3 purchase points.
Luckily, you aren’t going to be shackled by your initial attribute allotment for the rest of the game: your character will gain one extra point to allocate to any attribute every time you gain a level that’s a multiple of four. So, upon reaching level four, you gain an attribute point, and again at level eight, level 12, and so on. These points are simple additions to an attribute; you can raise a score of 18 to 19 just as easily as you can go from 10 to 11.
All of your attributes possess the same bonuses and penalties associated with high or low scores, as shown on the following table.
| Attribute Rank | Modifier |
| 8 - 9 | - 1 |
| 10 - 11 | 0 |
| 11 - 12 | + 1 |
| 13 - 14 | + 2 |
| 15 - 16 | + 3 |
| 17 - 18 | + 4 |
| 19 - 20 | + 5 |
| 21 - 22 | + 6 |
| 23 - 24 | + 7 |
| 25 - 26 | + 8 |
In addition to the extra attribute points you get at your level-ups, you will also occasionally come across items that will add to one or more of your attributes. Some of these, such as stimulants, are merely temporary boosts, but many items can be equipped to lend a constant bonus to a statistic as long as they are worn. You should be sure to distribute these items where needed among your NPC friends; a Soldier probably won’t have much use for something that gives a bonus to Intelligence, but a Scoundrel party member would most certainly benefit from it.
Strength
If you’re planning on putting your lightsabers to heavy use in KOTOR, then you’ll want to boost your Strength score to a decent rank when you create your character. (Maybe; see the Dexterity section below for a more detailed look at the way Strength works with lightsabers and Jedi characters.) The modifier that you gain from Strength is applied to the attack roll and damage of a melee weapon, meaning that a character with high Strength will find it both easier to hit an opponent and easier to inflict large amounts of damage. If you plan to focus on ranged weaponry, however, you shouldn’t need many points in Strength; there are no Strength requirements for any items in KOTOR, and since your inventory is unlimited in size, you don’t need to have a high Strength to carry loot around.
Dexterity
Dexterity in KOTOR was pretty much a required stat for most characters due to the way it (perhaps as a bug) added its modifier to your attack roles with lightsabers automatically, which should’ve happened only with your Strength modifier. In KOTOR2, though, it apparently doesn’t automatically do this, although you can still take the Finesse: Lightsaber Feat to mimic this effect, which will again make Dexterity one of the most desirable stats for most Jedi characters.
A high Dexterity modifier also affects your attack rolls with ranged weapons, and is also applied to your Defense, making you more agile in battle and thus less likely to be shot or hit with an enemy weapon. Your Dexterity modifier may be reduced or even eliminated if you wear heavier suits of armor that restrict your ability to dodge, so you should be sure to check your Defense before and after you put on new threads to ensure that they actually benefit you. (In KOTOR1, the armor restriction only affected your Defense; in KOTOR2, it now properly applies to all of your Dexterity modifiers, including those for ranged attacks, making it even more important to not wear armor that will restrict you overmuch.) The Dexterity modifier is also applied as a bonus to your Reflex saving throws, allowing you to more easily escape serious injury from situations that call for quick moves, such as a nearby explosion.
The balancing of Dexterity and Strength will be critical for lightsaber-intensive characters. In most cases, the attack roll of a melee weapon is determined in part by the Strength modifier, but with lightsabers and the Finesse: Lightsabers Feat, the game will use the higher of the Strength and Dexterity modifiers to add to the attack roll, so that if your character has a Dexterity of 16, and a Strength of 15, then the attack roll modifier for a lightsaber would be the +3 from the Dexterity. The Strength modifier would still be applied to the damage rolled, however.

Where this becomes important is in the consideration that many of the Jedi Force Powers require your character to not be wearing armor. While the many varieties of Jedi Robes offer some light protection, and some Force Powers themselves will boost your Defense, your character will still generally lag behind your more heavily-armored party members in terms of Defense. Luckily, KOTOR2 eases this penalty a bit by including some forms of light armor that don’t restrict the use of Force Powers, giving your character a few extra points of Defense without restricting their abilities, but you’ll still be low Defense when compared to characters like Atton and Mandalore.
You can probably see where we’re going with this: if your Jedi character has a high Strength, but low Dexterity, he or she will deal quite a bit of damage, but will either have to wear armor to survive combat, and forgo the use of the many useful Powers that are armor-restricted, or wade into combat with a low Defense. If you possess a high Dexterity, but a low Strength stat, then you’ll be able to go a bit longer in combat without having to resort to the Cure Power or medpacs, but will deal less damage on the whole than a character with high Strength.
Want a hint? Go with Dexterity. You may not be a melee powerhouse in the earliest portions of the game, but you’ll be able to use any ranged weapon with ease, even without a Focus Feat, and you’ll have the advantage of a very high Defense when wearing light armor. You can still pump your Strength score at character creation, perhaps by under-boosting Constitution and making the difference in Vitality back later on with the Toughness Feat. If you want very specific advice, a 16/16 or 14/16 split (or even a 12/16 split) between Strength and Dexterity at character creation will make the game quite survivable for most characters, and when you become a Jedi, you’ll be able to cast off your armor for the Jedi Robes without any qualms, especially if you devote the first two attribute additions to Dexterity.
Also note that if you plan to become a Jedi Guardian, you’ll be able to use the Lightsaber Specialization Feat. Since this gives all of your lightsaber attacks +2 damage, it essentially takes the place of four points of Strength for lightsaber specialists. (And really, how many Guardians are going to be using long swords?)
Constitution
The hale and hearty Guardians of the Republic benefit most from a healthy Constitution, seeing as how it simply increases the amount of Vitality you gain after each level-up. More Vitality is obviously important to characters that see a fair amount of battle, but keep in mind that the benefits of a high Constitution can be emulated by the Toughness Feats. Rather than expending valuable attribute selection points to gain an extra hit point per level, you may wish to reserve those points for an attribute that more directly affects your character, and simply allot one of your Feat slots to Toughness or its upgraded brethren. This especially holds true for Guardian characters, who will gain more Feats than either of the other two classes. A high Constitution also affects your Fortitude saving throw, allowing you to more easily fight off the effects of poison and other harmful physical ailments, or avoid them altogether.
One noticeable difference between KOTOR1 and KOTOR2 are the way the new game handles implants. In the previous game, you had to acquire a feat in order to use implant items; in KOTOR2, though, the implants your character can use is entirely dependent on his or her constitution score. If you have a constitution of less than 12, then you won’t find any implants that will actually be useable by your character.
Intelligence
Some people just don’t feel like getting singed by blaster fire every time they step out for a cup of java juice at the cantina. Fortunately, a high Intelligence score can make combat skills almost irrelevant, since your Intelligence modifier both increases the number of points you can spend on skills, and applies itself to those skills that are most useful for evading battle: Repair, Computer Use, and Demolitions.
Wisdom
Wisdom is usually associated with sagacious Jedi Masters, such as Yoda. (Speaking of Yoda of Dagobah moreso than the Clone War-era Yoda, of course.) As such, your Wisdom score will be important if you intend to rely on the power of the Force more than the speed of your lightsaber. Your modifier here will increase your Force Power reservoir and make it easier for you to resist enemy Force Powers. In addition, high Wisdom will make your Force Powers more difficult for your enemies to defend against. Your Wisdom modifier, in addition to adding Force Points, is also used to modify your Will saving throw, which improves your chances of resisting an enemy’s Force Powers.
Charisma
Jedi radiate a sense of internal power that can greatly affect those around them. For that reason, a high Charisma will become fairly important after your character becomes a Jedi, when the modifier for the skill starts to apply to certain Jedi-specific Feats and Force Powers. Even before you feel the calling of the Force, a charismatic individual will have much greater success in Persuading others to see his or her side of an argument.
Charisma and Wisdom aren’t exactly created equal, though, especially for characters that intend to use Force Powers as their prime means of affecting the game world and their enemies. If you’re planning on playing a Jedi Consular who can wield Force Powers with ease, you’ll definitely want to increase your Wisdom stat at the expense of Charisma. Even though both of them add their modifier to the DC of a Force Power attack, a high Wisdom score also increases the amount of Force Points your character possesses, as well as your Will saving throw.
Skills
Your character’s proficiency in KOTOR’s skills will to a large extent determine the path you take through the game. Most Guardian characters will use skills only rarely, since most skills are related to non-combat activities, so Guardians will generally have to rely on the talents of NPC teammates to make their way past obstacles. There’s never a guarantee that you’ll have an NPC along with the right skill when you need it, though, so the choices you make with your PC’s skills will still have a great impact on your experience as you play KOTOR. Sentinals, and especially Consulars, will need to hone multiple skills to make up for their lack of raw combat ability.
The number of skills characters get to choose depends on their class, as well as their Intelligence modifier. Consulars (along with Scoundrels, for non-Jedi characters) are the most skillful of the KOTOR classes, with Sentinals coming close behind, while Guardians, rarely the smartest people in the galaxy, lag far behind. You’ll be able to select a few skills when you create your character, and you’ll get to further enhance your knowledge at each level-up.
Skills, like most everything else in the game, are based upon simulated rolls of a 20-sided die, so even a high level of proficiency in a skill won’t always protect you from failure. Most skill-related tasks in the game are assigned a Difficulty Check (DC) of a number usually between 10 and 30, with higher numbers representing the more challenging scenarios. When you make a skill check, you take your rank in that skill, add or subtract the appropriate modifier for the governing Attribute to find your modified skill rank, and then, depending on the circumstances, the game either adds a random number between one and 20 to that rank or simply adds 20 to determine whether or not you succeeded at your task.
The difference between the dice roll and the simple addition of 20 is known as the "take 20" rule: if your character has a theoretically unlimited amount of time to pick a lock, for instance, then their chance of success are going to be much better than that of a character who’s attempting to pick the same lock while dodging blaster fire. For the purposes of the game, Demolitions and Security are the only two skills that are consistently subject to the "take 20" rule, so if you wish to disable a mine, or pick a lock, you’ll want to make sure you make your attempt outside of combat.
If the final number that the game generates is equal to or above the DC of the task, then you’ve accomplished your mission; if it’s below, then you failed in some way. Some tasks will allow you to try them multiple times; many, most notably those relying on the Persuasion skill, are one-time-only opportunities.
It’s important to consider, when making a character, that not all classes are equally adept at all the skills. A Guardian is not going to be as useful as a Consular when you’re confronted with a locked door, and by the same token, you probably wouldn’t want a Consular looking you over when you need to have a combat wound treated. These congenital deficiencies are represented in-game by the notion of "cross-class skills." Each class has certain skills that they excel at; these are listed in the Class profiles section. These skills are purchased with skill points at a one-to-one ratio. Unfortunately, the cross-class skills, i.e. those that your character just wasn’t trained in, are difficult to learn, and are thus much less efficient to improve, requiring two skill purchase points for each single-point upgrade to the actual skill. (There are new feats that will let you convert cross-class skills into class skills, though, and these can occasionally come in handy.)
Lastly, there is a limit to how high you can raise your rank in a skill. For class skills, this limit is your experience level plus three, resulting in a maximum limit of rank four when you begin the game. For cross-class skills, the limit is half of the limit for your class skills, rounded down, so that, at experience level 4, your upper limit for a cross-class skill would be rank three (experience level four + three equals seven, divided by two is three and a half, which is rounded down).
Computer Use
Modifier: Intelligence
Class skill: Sentinal
Luckily, apparently KOTOR comes before the time in the Star Wars universe when a Scomp Link interface like the one R2-D2 possesses was necessary to hack into computer systems. As such, your human character will be able to droidishly override the default programming of computers you encounter along your adventure, provided you have the skill necessary to use the computer "spikes" which act as disposable hacking tools. Each task that can be accomplished with a given computer requires a certain number of spikes, but the Computer Use skill reduces the number of spikes necessary for a job by one for every four points of proficiency you possess in the skill. Unfortunately, this makes Computer Use a rather point-hungry skill to upgrade, since you won’t necessarily see any benefit from adding less than four skill points, so this is a skill you may want to consider going all-in on, and pumping as high as possible, or simply avoiding it and hoping you have a l33t NPC teammate along when you really need one.
In KOTOR2, Computer Use is made more handy than in the first game, but it’s still probably not something you need to worry about for your main character, unless it’s a class skill and you’ve got plenty of points to allot. When you get Bao-Dur in your party, he’ll be able to easily handle any Computer-related problems. Computer use does come up a lot more often in conversations, especially with droids, but will rarely be mission-critical for your character to have.
Demolitions
Modifier: Intelligence
Class skill: Guardian
Every so often, you’ll encounter traps in KOTOR. Sometimes you won’t see them coming, in which case a high Demolitions rank won’t be very helpful, but if you do manage to spot a mine in your path (using the Awareness skill), you’ll need to have some measure of Demolitions proficiency in order to disarm it. You can set a mine that you have bought or found by making a check against the DC of the mine, which is either DC 15, DC 20, or DC 25, with the higher difficulties being, of course, the most powerful mines (which are usually used to guard the most valuable locations and items). When you wish to disarm a mine, you add five points to the DC of the task; if you want to both disarm the mine and recover it so that you can use it later, you’ll need to add 10 to the DC. Luckily, mine disabling falls under the "take 20" rule: if you have a theoretically unlimited amount of time to perform an action, you’ll be able to assume that your roll on the DC check is always a 20, the best possible result. This means that, when you attempt to disarm or recover a mine when your party is not in combat, you’ll stand a pretty good chance at doing it. Unfortunately, the high DC of the more difficult mines still makes Demolitions another skill that’s unwieldy for dabblers; if you don’t have a high enough Intelligence modifier to give you a reasonable chance of succeeding on a DC of 25 or more, you may wish to leave the bomb squad heroics to your teammates. They won’t mind a bit.
Thanks to the fact that you’ll sometimes be taking control of party members individually, you may actually find yourself occasionally using the Demolitions skill to take down tough enemies, as opposed to the first KOTOR, when it only came in useful at the very end of the game. Luckily, you can now lay mines during combat, so that a weak character can start dropping mines, backing up, and wait for their opponents to trip them as they run over them. Repeating this method a few times can be a great way to perservere in some of the game’s tougher solo battles. As with KOTOR, this can be quite a help for physically weak characters before the final battle.
You don’t find quite enough mines to make this a consistently viable approach to combat, though, and while your teammates cannot accidentally trigger your own mines, they do seem to take a peculiar kind of glee in running towards your opponents and attacking them before the enemies walk over your mine field. In order to properly use mines, then, you’ll need to: be able to spot your enemies from a distance away (or have died and reloaded, and thus know where they are or which door they’re behind); go into solo mode and plant the mines with your other party members far enough away so that they don’t spot the enemy and go hostile; get one of the enemies to spot you; then run back across the mines and wait for your foes to blow themselves up. In short, it’s often a little more work than it’s worth, but it when it does work, it can sometimes single-handedly win a difficult battle for you.
In KOTOR2, Demolitions will also come in handy when you come across a damaged container or door. These can’t be opened by bashing or Security; instead, they can only be blown open by using a mine on them. Truthfully, though, after you escape the first mining station, you’ll almost never come across a damaged container or door ever again, meaning that you shouldn’t increase your Demolitions skill just to have this ability.
You cannot use the Demolitions skill unless you’ve achieved a skill rank of at least one. Skill increases from equipment doesn’t count, either; you’ll need to actually give yourself a point at a level-up to use it.
Stealth
Modifier: Dexterity
Class skill: Sentinal
Completely and totally useless. Sorry! You can, and most likely will, easily get through the game without ever using this ability, even despite the fact that you can lay mines while running around all invisible-like; mines aren’t all that great on their own, and forcing your character to boost another nearly useless skill in order to lay traps for enemies that you’ll usually be easily defeating anyway isn’t exactly a good career path. There are two spots on Nar Shaddaa where you can use Stealth to access a quest pointer, but Kreia can easily use her stealth ability to achieve these without ever increasing her skill allotment to this ability. You may want to have one character boost their Stealth stat for use with the workbench, but beyond that, you’ll never really need it.
Awareness
Modifier: Wisdom
Class skill: Consular, Sentinal, Guardian
Awareness allows all of the classes in the game a chance to spot mines that are in your path, or expose an enemy that has entered Stealth mode. Spotting mines is fairly handy, since you can recover and sell them for extra cash, but seeing Stealth characters won’t be a consideration for your party, since the only enemies that you encounter that are capable of Stealth are apparently immune to Awareness.
In KOTOR2, one of the new features of Awareness is its ability to open up new conversation options, allowing you to pick up on subtle clues in a character’s speech and drive towards the topics that they’re avoiding. This is never required, but can come in handy nonetheless; still, though, this isn’t going to be the highest priority skill for any character.
Persuade
Modifier: Charisma
Class skill: Consular, Sentinal, Guardian
Having a good blaster at your side won’t always get you where you need to go; in fact, since you’re unable to indiscriminately cut down the foolish peons who block your way, you may sometimes find that a silver tongue will gain you access to hidden areas and optional quests more reliably than brute force. Persuasion is a dialogue-based skill, and isn’t useful in every situation, but the ability to win people over with sheer charm will often open up new options and better quest endings for a persuasive character, or allow you to avoid combat with a tentative or gullible opponent. Luckily, this is a much easier skill to level up than in the first KOTOR, where it was a class skill for only one class; in KOTOR2, all Jedi characters will find it a class skill.
Keep in mind that only your main character can use Persuade, since they’re the one you’re going to be using in conversation. Also note that you can sometimes mimic the effects of Persuade with the Jedi Power Affect Mind, but that Persuade will generally allow for more subtlety and will appear as an option more often.
Repair
Modifier: Intelligence
Class skill: Consular
In the first KOTOR, Repair was mostly useful for reactivating droids that you stumbled across and forcing them to attack your enemies, whom in most cases you could easily destroy yourself anyway. In KOTOR2, it’s more useful as a skill check when trying to interface with damaged equipment, as you’ll rarely find any disabled droids in this game. In the cases where you can use the Repair skill to fix something, though, it works similarly to the Computer Use skill in that the difficulty of successfully Repairing a damaged machine or droid is not based on the use of a DC check. Rather, the Repair skill merely reduces the number of parts required to repair a broken droid, allowing you to save one part for every four ranks you possess.
Repair also governs the amount of Vitality that your droid NPCs gain when they use Repair Kits on themselves to recover from damage, and will also get you more components from items when breaking them down at a workbench. It’s thus a good idea to maximize this skill for all of your droid characters, and to keep it topped off for Bao-Dur as well, if you don’t make him into a Jedi.
Security
Modifier: Intelligence
Class skill: Sentinal
Security is the euphemism for "lockpicking" in KOTOR; characters with at least one point in Security can attempt to disable the many locks that you’ll encounter throughout the game, with higher skill required for more difficult locks. This skill doesn’t necessarily require equipment, although you will encounter lockpicks (excuse me, "security tunnelers") throughout the game, which can add a positive modifier to a lockpicking attempt. All of these Spikes are one-use-only, unfortunately, and are removed from your inventory after you add their modifier to an attempt to breach Security (whether the attempt was successful or not).
Of the three tech-oriented skills, Security will generally be the most desirable. Again, the game has been carefully crafted to ensure that you never have to have a character with a high Security rank in your party, through the use of keys and passcards and such, but most areas will have numerous locked stashes of items that you will miss out on without at least one character with sufficient Security to open them. On the other hand, you will be able to make do without Security if the locked item is susceptible to Bashing; to see if this is possible, use the d-pad to cycle up or down from the "Open" command on your action menu. If the attack icon appears when you have a locked item in your reticule, you can simply hack it open instead of picking the lock. Unlike in KOTOR, though, bashing containers in KOTOR2 will often break items inside, leaving you with piles of junk where you might’ve obtained something terrifically useful had you the acumen required to open the chest. For this reason alone, it’s usually worthwhile to have someone in your party with a good Security skill; Bao-Dur usually makes a good choice.
Treat Injury
Modifier: Wisdom
Class skill: Consular, Sentinal, Guardian
The best armor in the galaxy won’t prevent your character from taking damage every once in a while. You have a finite amount of Vitality, and this precious commodity does not recover by itself over time; you’ll either need to find a doctor to repair your wounds, or consume a medpac to gain back your health. The Treat Injury skill simply adds itself to the amount of Vitality you would normally gain from a medpac; this amount can be further increased by using advanced medpacs or life support packs.
Players who intend to become Light Jedis would do well to keep in mind that the Cure and Heal Force Powers essentially replicate the effects of medpacs, and have the bonus of being reusable, since your Force gauge will gradually replenish itself over time. If you plan to focus on using Force Powers, you may want to tough out the early sections of the game without over-investing in Treat Injury if the skill will become less useful when you gain the ability to Heal yourself with the Force. On the other hand, Soldiers and those who wish to become Dark Jedi will probably want to pump their Treat Injury skill quite a bit, since it will heal them more than their Force Powers will usually be able to.
Feats
Encompassing a broad variety of specific abilities, Feats are used to further specialize a character, largely through customizing the way you conduct yourself during combat. While not all Feats are combat-oriented, the majority are, and your choices here will determine what weapons and armor your character can use, as well as any special attacks they can use during battle.
Feats can be upgraded; once you possess both a basic Feat and whatever prerequisites are required, and obtain a Feat purchase point at a level-up, you may advance that Feat to the next level, which allows you to obtain more bonuses to the special ability that the Feat affords you. Some Feats, such as Armor and Weapon Proficiencies, are cumulative, but most are not, so that achieving the second level in a Feat replaces the bonuses that the first level gave you, rather than having them add together.
Passive Combat Feats
For the money, Feats that are passive in combat are usually more desirable than those that require activation. Although you can always pause at any time you wish, combat can still become a bit hairy and complex with multiple combatants. Since passive Feats are always active, working behind the scenes to make your characters better warriors, they ease the burden of micromanagement somewhat.
If you’re the type of person who likes to micromanage your PC and let your other party members do as they wish, then you might want to ensure that your NPC party members are selecting passive Feats when they level up, rather than letting the game decide to give them active Feats. NPCs will use Feats as part of their default AI, but not necessarily. It’s usually a good idea to load up on the passive Feats that match your character’s preferred weapon or weapons, and save the active Feats for later in the game.
Weapon Proficiencies (Blaster Rifle, Blaster Pistol, Heavy Weapons, Melee Weapons)
Since combat is such a core aspect of the KOTOR gameplay, every character will want to pick a weapon type (if not two) and advance its proficiency to its second rank. Even if a simple +1 to hit doesn’t sound impressive, you have to consider that, over the course of the game, your characters will engage in thousands of rounds of combat, so even a five percent larger chance to connect with a weapon will add up to a large savings in combat time, not to mention medpacs, since some enemies will undoubtedly die before they can deal damage to you due to your improved accuracy.
The third ranks of weapon proficiencies, called weapon specializations, are a unique case, since they are only available to characters of the Soldier class. When a character specializes in a weapon, he or she adds two damage to the total damage dealt on the blow.
For those of you planning to use the ol’ laser sword later on, after you find the parts required to make one, keep in mind that the bonuses gained from advanced ranks of Melee Proficiency do not apply to lightsabers; that weapon has its own proficiency that you’ll need to advance in. You can actually begin investing in Lightsaber Focus or Specialization before you obtain one, and have those set aside until the happy day arrives.
| Rank | Prerequisites | Effect |
| Proficiency | Level 1 | Allows use of weapon type with no penalties |
| Weapon Focus | Level 4 | Attacks with weapon type gain +1 attack |
| Weapon Specialization | Level 8 | Successful hits with weapon type gain +2 damage |
Armor Proficiency
A piece of body armor cannot be used by a character unless they have a Proficiency for armor of that weight class. Pretty simple, really. All Jedi Classes start with only the Light armor proficiency, but keep in mind that heavier armor generally reduces or negates the Dexterity bonus to Defense, so if you have a high Dexterity stat, you may as well find a great piece of Light armor and use that. Also note that many Force Powers are not useable while you are wearing armor. Since Feats are somewhat precious commodities as it is, it’s probably for the best that you use the default proficiencies that your character starts with, rather than buying a proficiency for higher-level armor that might not be useful later in the game.
Note also that many pieces of head armor will require certain armor proficiencies to use, thus greatly restricting the kinds of equipment that characters without any armor proficiencies (such as Kreia and Visas) can use.
| Rank | Prerequisites | Effect |
| Light | Level 1 | Allows use of Light armor |
| Medium | Level 1 | Allows use of Medium armor |
| Heavy | Level 1 | Allows use of Heavy armor |
Two-Weapon Fighting
You might as well just call this "Dual lightsabers," because that’s probably all anyone will want to use it for. Two-Weapon Fighting gives you the opportunity to wield a weapon in each of your hands with a reduction to the normal penalty. Although you can use this Feat in conjunction with dual Blaster Pistols, it’s most beneficial, or perhaps just cooler, to use it with dual melee weapons, of which, of course, the lightsaber is the most famous example. Unfortunately, the attack penalties are still absolutely horrendous at the first level, so unless you want your enemies to think that you got weapons training from Greedo, you’ll probably want to stick with a single weapon until you reach the second rank of this Feat. Note that the use of a "balanced" weapon in your off-hand slot can reduce the attack penalty of your main-hand weapon, so be on the lookout for balanced swords and pistols during your travels. Lightsabers are not balanced; you’ll need to use a Short lightsaber in the off-hand if you want to reduce your main-hand penalty.
Note that dual-bladed weapons also require the Two-Weapon Fighting Feat to use properly. With the new upgrading system in Knights of the Old Republic 2, it can sometimes be more beneficial to invest a single dual-bladed lightsaber with all of your best crystals, rather than dilute your resources by giving all of your dual-wielding Jedi two sabers apiece.
Also note that Kreia cannot take the Two-Weapon Fighting feat.
| Rank | Prerequisites | Effect |
| First Rank | Level 1 | Attack penalties: -6 (main hand) / -6 (off-hand) |
| Improved Rank | Level 4 | Attack penalties: -4 (main hand) / -4 (off-hand) |
| Master Rank | Level 8 | Attack penalties: -2 (main hand) / -2 (off-hand) |
Conditioning
Conditioning adds a bonus to every saving throw your character makes. Saving throws are used to reduce or negate damage from certain sources, such as explosives and harmful Force Powers. A single +1 to saving throws is unlikely to have an immediate impact on your chances of survival, but it will average out to a greater likelihood that a character will live through a powerful attack somewhere along the line.
| Rank | Prerequisites | Effect |
| First Rank | Level 1 | +1 to all saving throws |
| Improved Rank | Level 4 | +2 to all saving throws |
| Master Rank | Level 8 | +3 to all saving throws |
Toughness Toughness has two separate effects, depending on the rank that you advance it to. The first rank and the third rank each cumulatively add one to your Vitality total for each level of your character; if you achieved the first rank of this Feat upon reaching level 12, for instance, your character would instantly gain 12 Vitality, and would gain an extra health point at each level-up thereafter. The third rank doubles the point bonus, meaning that if you achieved the third rank of this Feat at level 12, you’d still possess the 12 extra Vitality from the first rank, but also instantaneously gain another 12 points. Every time you leveled-up from then, you’d gain two points of Vitality.
The second rank differs from the first and third in that it reduces the damage you take when hit with an exceptionally powerful blow. When you take over 20 points of damage, all the damage from the 21st point and above will be reduce by 10%. Thus, if you took a single massive blow for 100 points of damage, you would take the first 20 damage as normal, then would get a 10% reduction on the remaining 80 points, which would convert it to 72, for a total of 92 points. Not tremendously impressive, especially since you won’t be taking these kinds of massive blows very often, but it does come in handy at times, and will let you achieve the important third rank of the ability.
This Feat is of somewhat universal utility; it fits almost any character, since everyone takes damage. It’s perhaps most useful for the aforementioned melee fighters, since they will be the ones who will generally be targeted by the most enemies during any given fight, but everyone with a Feat to spare could do worse than to grab a single rank of Toughness.
| Rank | Prerequisites | Effect |
| First Rank | Level 1 | Adds 1 Vitality per level (retroactive) |
| Second Rank | Level 4 | When you take 20 or more damage, the damage from 21 and above is reduced by 10% |
| Third Rank | Level 8 | Adds 1 Vitality per level (retroactive) |
Scoundrel’s Luck
As you might’ve guessed from this Feat’s name, it is only available for the Scoundrel class. (So where’s the Feat called Scout’s Honor?) To compensate for the Scoundrel’s discomfort when wearing medium or heavy armor, Scoundrel’s Luck simply adds a bonus to Defense that is always active, even when the character is wearing no armor. This is an automatic Feat that Scoundrels gain for free upon hitting the appropriate level.
| Rank | Prerequisites | Effect |
| First Rank | Level 1 | +2 to Defense |
| Second Rank | Level 6 | +4 to Defense |
| Third Rank | Level 8 | +6 to Defense |
Dueling
If you fancy your character to be the model of the traditional Jedi, or perhaps one of Han Solo’s progenitors, then the Dueling Feat will be right up your alley. It’s something of an alternative to the Two-Weapon Proficiency, but instead of reducing penalties, Dueling simply takes a good thing and makes it better. If you use a single-handed weapon (such as a lightsaber, sword, or blaster pistol), and keep your off-hand free, then the Dueling Feat will add a bonus to both your attack and Defense. You won’t deal any extra damage, but you will last longer in battle and will be able to more easily strike your opponents. This Feat is one that you’ll want to consider giving to your Jedi NPCs as soon as you get an opportunity; few of them will have enough spare Feats to excel in Two-Weapon Fighting, so a single lightsaber and this Feat is a good compromise between Defense and offensive capabilities.
| Rank | Prerequisites | Effect |
| First Rank | Level 1 | +1 to attack and Defense |
| Second Rank | Level 4 | +2 to attack and Defense |
| Third Rank | Level 8 | +3 to attack and Defense |
Sneak Attack 1
Only Scoundrels, Jedi Watchmen, and Sith Assassins can use the Sneak Attack Feat, and indeed get a new rank in it for free at every few level-ups; it corresponds roughly to the Backstab attack of a Thief character in traditional Dungeons and Dragons. When you successfully hit with a Sneak Attack, you add damage to the blow, but there are conditions. Since it’s a Sneak Attack, you have to ensure that your quarry either doesn’t know the blow is about to arrive, or simply can’t do anything to defend himself. It can be applied when you are attacking an enemy from behind, if your target is stunned or immobilized, or if the Scoundrel is in Stealth Mode. Since attacking automatically brings you out of Stealth Mode, you’ll only get one shot at a Sneak Attack before your target is alerted to your presence. Of course, if you kill him or her in one blow, you won’t have to worry about that.
The most useful application of Sneak Attack comes in conjunction with Force Powers that stun opponents; since these Powers are cheap and generally quite effective, you can have one of your party members stun an opponent, while your Scoundrel proceeds to wipe them out with just a few hits.
| Rank | Prerequisites | Effect |
| First Rank | Level 1 | Adds 1-6 damage to a successful hit |
| Second Rank | Level 3 | Adds 2-12 damage to a successful hit |
| Third Rank | Level 5 | Adds 3-18 damage to a successful hit |
| Fourth Rank | Level 7 | Adds 4-24 damage to a successful hit |
| Fifth Rank | Level 9 | Adds 5-30 damage to a successful hit |
| Sixth Rank | Level 11 | Adds 6-36 damage to a successful hit |
| Seventh Rank | Level 13 | Adds 7-42 damage to a successful hit |
| Eighth Rank | Level 15 | Adds 8-48 damage to a successful hit |
| Ninth Rank | Level 17 | Adds 9-54 damage to a successful hit |
| Tenth Rank | Level 19 | Adds 10-60 damage to a successful hit |
Precise Shot
The Precise Shot series of Feats will help your blaster-oriented characters deal extra damage when they successfully hit an enemy. Pretty simple concept, really; for each rank they obtain here, they’ll add damage to a hit.
| Rank | Prerequisites | Effect |
| First Rank | Level 4 | Adds 1 damage to a successful hit with a ranged weapon. Jedi will face a -2 penalty to their deflection roll |
| Second Rank | Level 8 | Adds 2 damage to a successful hit with a ranged weapon. Jedi will face a -4 penalty to their deflection roll |
| Third Rank | Level 12 | Adds 4 damage to a successful hit with a ranged weapon. Jedi will face a -6 penalty to their deflection roll |
| Fourth Rank | Level 16 | Adds 6 damage to a successful hit with a ranged weapon. Jedi will face a -8 penalty to their deflection roll |
| Fifth Rank | Level 20 | Adds 8 damage to a successful hit with a ranged weapon. Jedi will face a -10 penalty to their deflection roll |
Close Combat
Prerequisite: Level 4
One of the main weaknesses of characters that use ranged weapons is the fact that they suffer from large Defense penalties when engaged by an enemy with a melee weapon. The Close Combat feat can reduce these penalties somewhat, allowing your characters to more easily defend themselves when engaged at close range, but it’s worth pointing out that you can easily negate these penalties altogether by giving your ranged characters a melee weapon in their off-hand slot and setting them up with the Ranged AI setting, which will automatically switch them between the two weapons as appropriate.
| Rank | Prerequisites | Effect |
| First Rank | Level 4 | Character gets +1 to attack a target at close range; melee attackers get only +4 to attack instead of +6 |
| Second Rank | Level 8 | Character gets +2 to attack a target at close range; melee attackers get only +2 to attack instead of +6 |
Dual Strike
Dual Strike rewards your characters for sticking together by increasing their attack rolls while they target the same character. As such, it’s something that’s best used on a character that isn’t your main character; someone like Visas can make good use of this if they’re in your party a lot. Your main character, however, will have to face their toughest challenges alone, rendering this ability useless when it’s needed most.
| Rank | Prerequisites | Effect |
| First Rank | Level 1 | Character gets +2 to attack a target that another party member is attacking |
| Second Rank | Level 4 | Character gets +4 to attack a target that another party member is attacking |
| Third Rank | Level 8 | Character gets +6 to attack a target that another party member is attacking |
Stealth Run
Prerequisite: Level 4
There’s only one rank for this Feat. When taken, your character will be able to run while stealthed. Most characters with Stealth won’t be getting a huge amount of Feats to pass around, and probably won’t even be using the Stealth ability all that often, making this a relatively useless ability to have.
Regenerate Vitality Points
Prerequisite: Level 4
When taken, this feat will let your character more quickly regenerate Vitality points after being wounded.
Finesse: Melee Weapons
Prerequisite: None
Although most characters will add their Strength modifier to their attack rolls when wielding melee weapons, characters that take this Feat will be able to add either their Strength or Dexterity modifiers, whichever is higher.
Class Skill Modifications
There are a number of these Feats, such as Class Skill: Stealth, Class Skill: Demolitions, and so on. When taken, they’ll allow your character to adopt a new skill as a Class Skill, and thus let them spend skill points more easily on them at each level-up. So long as you maintain a balanced class (i.e., take Bao-Dur along wherever you go), you shouldn’t have to expend your precious Feats here, but Guardian-class characters may want to nab Security.
Active Combat Feats
While passive Feats remain working in the background of the game all of the time, active Feats require player input during a battle before they’ll be used. These generally allow you to perform an attack that is enhanced in some way, although they will also carry a temporary penalty. There is no activation cost for active Feats, so you can use them and abuse them as much as you like, though working around their penalties will require some strategy depending on your foe.
Critical Strike
Stunner! The primary benefit of Critical Strike is that it has a good chance of stunning an enemy for a short duration on a successful melee attack (and only melee attacks; Critical Strike doesn’t work with ranged weapons), if they fail a saving throw. That saving throw, however, is checked against a DC that consists of the attacker’s experience level plus the attacker’s Strength modifier, so at low levels, you won’t stun an opponent more than 1 time out of three at best. Once you gain 10 levels or so, and gain bonuses to your Strength through implants or other items, you will stand a much better chance of incapacitating opponents.
In addition to the stunning effect, Critical Strike doubles the chance that a hit will result in the possibility of a critical hit. If a weapon would normally perform a critical hit on a roll of 20, for instance, a Critical Strike will increase that range to 19-20. For best results, try to use this Feat with a weapon that already has a critical range of 19-20; the range will be increased to 17-20, giving fully 20% of your attacks the chance to see their damage doubled if they connect. At higher ranks, this Feat triples or even quadruples the chances of a critical strike, meaning that, at Master Rank, a weapon with a natural critical chance of 19-20 will have a 80% probability of a critical hit for each attack. (Note that, due to the mechanics of the critical hit, this doesn’t necessarily mean that 80% of your attacks will do double damage. See the glossary entry for "critical hit" to get a bit more in-depth on this topic.) Against some powerful foes, the critical range will actually exceed the range needed for a hit, meaning that 100% of your successful hits will have a chance for double damage.
The drawback is that, when you use a Critical Strike, your Defense is lowered by 5 points for a few seconds. This is obviously a substantial penalty, which balances the powerful effect of Critical Strike, and should make you wary of using this skill when dealing with multiple enemies, since they’ll have a much better chance of hitting you and causing massive Vitality damage.
| Rank | Prerequisites | Effect |
| First Rank | Level 1 | Chance to stun enemy; doubles critical strike range |
| Improved Rank | Level 4 | Chance to stun enemy; triples critical strike range |
| Master Rank | Level 8 | Chance to stun enemy; quadruples critical strike range |
Sniper Shot
Sniper Shot works exactly the same as Critical Strike, except that it only works with pistols and other ranged weaponry. Also, when calculating the chance that the target will be stunned, the DC is calculated by your character’s level plus the modifier of their Intelligence attribute, instead of the Strength stat.
| Rank | Prerequisites | Effect |
| First Rank | Level 1 | Chance to stun enemy; doubles critical strike range |
| Improved Rank | Level 4 | Chance to stun enemy; triples critical strike range |
| Master Rank | Level 8 | Chance to stun enemy; quadruples critical strike range |
Flurry
Sometimes quantity counts more than quality; at least, that’s the premise behind Flurry, which substitutes two poor attacks for one regular attack during a single round. Instead of taking a single attack during a round, Flurry allows you to make two attacks, each with a penalty to your attack number, and also lowers your Defense for three seconds, so that one of your opponents will usually get in a cheap shot. Like Critical Strike, Flurry is only available for melee weapons.
Flurry is the active combat Feat to increase to its highest rank. At low levels, you’ll want to have your character pursue passive Feats that are always active, but when you begin looking for a useful active Feat, this is the one that you’ll almost always want to max out. Critical Strike has its uses, but the Defense penalty is a tremendous drawback, while Power Attack is, well, fairly useless in most cases. Flurry is just plain better than either of those Feats when you compare all of them at their highest ranks. More attacks is a surefire way of increasing the rate that you deal out damage, and the attack penalty at the second and third ranks is negligible, as is the Defense penalty. Once you hit the third rank, especially, you will be able to essentially replace your regular attack with a queue full of Flurries. (Note that Guardian characters that achieve the Juyo form may be better off with Critical Strike instead, since that form also grants you an extra attack per turn.)
Note that Flurry is only good for one extra attack per turn; if you use two weapons at once, the weapon in your main hand will be granted the extra attack, so that you’d have a total of three attacks during a round. However, you can combine Flurry with Force Speed to gain even more attacks, so that a character with two weapons, Master Flurry, and Master Force Speed will have an incredible five attacks per round.
| Rank | Prerequisites | Effect |
| First Rank | Level 1 | Two attacks per round, both at -4 attack; -4 Defense for three seconds |
| Improved Rank | Level 4 | Two attacks per round, both at -2 attack; -2 Defense for three seconds |
| Master Rank | Level 8 | Two attacks per round, both at -1 attack; -1 Defense for three seconds |
Rapid Shot
Rapid Shot is essentially the same as Flurry, except that it only works in conjunction with blasters or other ranged weapons.
| Prerequisites | Effect | |
| First Rank | Level 1 | Two attacks per round, both at -4 attack; -4 Defense for three seconds |
| Improved Rank | Level 4 | Two attacks per round, both at -2 attack; -2 Defense for three seconds |
| Master Rank | Level 8 | Two attacks per round, both at -1 attack; -1 Defense for three seconds |
Power Attack
Power Attack has been increased in efficacy in KOTOR2, although it’s still an ugly sister when compared to Flurry and Critical Strike. When used, it’ll let you add a set amount of damage to your attacks, and will also let you deal extra damage when you land a critical strike. (If a weapon would normally deal two times the normal damage on a critical strike, then it’ll deal triple damage with a Power Attack critical hit.) It also has a chance to knock back enemies. All told, though, Power Attack is still not worth sinking your Feats into if you have the ability to invest in another Feat instead.
| Rank | Prerequisites | Effect |
| First Rank | Level 1 | +3 damage per hit; -3 attack penalty; critical multiplier is increased by 1; critical hits will knock back opponents if they fail Fortitude save |
| Improved Rank | Level 4 | +7 damage per hit; -3 attack penalty; critical multiplier is increased by 1; critical hits will knock back opponents if they fail Fortitude save |
| Master Rank | Level 8 | +12 damage per hit; -3 attack penalty; critical multiplier is increased by 1; critical hits will knock back opponents if they fail Fortitude save |
Power Blast
Power Blast is essentially the same as Power Attack, except that it can only be used with a ranged weapon.
| Rank | Prerequisites | Effect |
| First Rank | Level 1 | +3 damage per hit; -3 attack penalty; critical multiplier is increased by 1; critical hits will knock back opponents if they fail Fortitude save |
| Improved Rank | Level 4 | +7 damage per hit; -3 attack penalty; critical multiplier is increased by 1; critical hits will knock back opponents if they fail Fortitude save |
| Master Rank | Level 8 | +12 damage per hit; -3 attack penalty; critical multiplier is increased by 1; critical hits will knock back opponents if they fail Fortitude save |
Passive Skill Feats
Some Feats simply add bonus points to skills. These are not bad purchases if you simply can’t find something worthwhile on the Feats list, especially for Soldiers, who will usually have very few skill points to allocate at each level-up, and who gain Feats at a more rapid pace than the other classes. Scoundrels and Scouts should usually be fine with the number of skill points they get at each level-up. The exception to this rule is for NPC party members; if you’re the kind of player who tends to micromanage your PC and lets the other party members act on their own, you may want to give them more of these passive skills instead of loading them up on active combat Feats that require you to manually switch over to the character and queue up an action. Note that these Feats are definitely not cumulative; the bonuses you gain from the Second Rank replaces the bonus from the First Rank, instead of adding to it, as does the bonus from the Third Rank. These additions allow you to exceed the maximum skill rank that’s imposed by your experience level.
Caution
Caution gives a bonus to Demolitions and Stealth. If you really enjoy using your Stealth skill to wander into an enemy position and set mines, then this might be something you’ll need; most characters will want to stay away from this Feat, though.
| Prerequisites | Effect | |
| First Rank | Level 1 | Adds +1 to each skill |
| Second Rank | Level 4 | Adds +2 to each skill |
| Third Rank | Level 8 | Adds +3 to each skill |
Empathy
Empathy boosts Persuasion, Awareness, and Treat Injury.
| Prerequisites | Effect | |
| First Rank | Level 1 | Adds +1 to each skill |
| Second Rank | Level 4 | Adds +2 to each skill |
| Third Rank | Level 8 | Adds +3 to each skill |
Gear Head
For the techies among your party, Gear Head benefits the Repair, Security, and Computer Use skills.
| Prerequisites | Effect | |
| First Rank | Level 1 | Adds +1 to each skill |
| Second Rank | Level 4 | Adds +2 to each skill |
| Third Rank | Level 8 | Adds +3 to each skill |
Jedi Feats
Jedi characters, including your PC, will get to choose from a few Feats that are specific to the Jedi classes. In addition, each individual Jedi class will get a Feat unique to it.
Jedi Sense
Jedi are renowned for their ability to recognize and adapt to the various threats that surround them in a battle situation, and are thus generally much more adept at defending themselves in a fight. The Sense abilities, which you gain automatically as your Jedi character gains levels, simply add a bonus to your Defense rating, helping to compensate for a Jedi’s characteristic lack of armor. Note that, should your one of your characters have been a Scoundrel before becoming a Jedi, this addition is cumulative with Scoundrel’s Luck.
| Prerequisites | Effect | |
| First Rank | Jedi Level 1 | +2 to Defense |
| Second Rank | Jedi Level 7 | +4 to Defense |
| Third Rank | Jedi Level 13 | +6 to Defense |
| Fourh Rank | Jedi Level 19 | +8 to Defense |
Force Focus
The indomitable will of a Jedi Consular can greatly affect the efficacy of his influence on weaker minds, and Force Focus is the gameplay extension of this rather nebulous concept. Since Consulars are much more in tune with the Force than are the other classes, their Force Powers are generally considered to be much stronger and more difficult to resist. Thus, upon gaining skill in wielding the Force, they are able to channel some of their learnings into their Powers, reducing the chances that an enemy will successfully make a saving throw. Like the other class-specific Feats, this is a passive skill that is always working in the background.
| Prerequisites | Effect | |
| Force Focus | Jedi Consular Level 1 | +2 to DC of Force Powers |
| Improved Force Focus | Jedi Consular Level 6 | +3 to DC of Force Powers |
| Master Force Focus | Jedi Consular Level 12 | +4 to DC of Force Powers |
Force Jump
When a Jedi decides to instigate battle, the results are usually something their opponent will remember for awhile. Of course, not all Jedi are temperamentally suited to aggressive acts, so only Jedi Guardians will be capable of pulling off a Force Jump, which catapults them towards a distant enemy, and allows the Jedi to cover the intervening ground in the blink of an eye. All Jedi Guardians gain additional levels in this Feat automatically when they reach the appropriate level.
In practical terms, Force Jump gives the Jedi’s first strike in battle a bonus to hit and to damage. Juhani, or the PC if you’re a Guardian, will use this Feat automatically every time the conditions apply (you’re using a regular attack, and the enemy is more than ten meters away). Sometimes it’s not necessarily a good thing to have a single Jedi wandering into the midst of a group of enemies by themselves, however, so you might want to cancel this Feat’s use by selecting an active combat Feat or Jedi Power for that Jedi to use; Force Jump won’t activate in these circumstances.
Note that Force Speed will interact with this Feat quite favorably; if Juhani or your PC has Master Force Speed and Master Force Jump, they will get three attacks after they leap, each at +4 attack and +4 damage.
| Prerequisites | Effect | |
| Force Jump | Jedi Guardian Level 1 | Jumping attack; +1 to attack and damage on first strike |
| Improved Force Jump | Jedi Guardian Level 6 | Jumping attack; +2 to attack and damage on first strike |
| Master Force Jump | Jedi Guardian Level 12 | Jumping attack; +4 to attack and damage on first strike |
Force Immunity
Jedi Sentinels are reliant on their personality to resolve conflicts, and to bring together parties in discord so that resolution to their problems can be achieved. This focused determination lends them great mental stability, and protection against many of the mind-affecting afflictions that would cause a less disciplined individual to panic. Like the other class-specific Feats, this is always active.
| Prerequisites | Effect | |
| Immunity: Fear | Jedi Sentinel Level 1 | Jedi is immune to all Fear attacks and effects |
| Immunity: Stun | Jedi Sentinel Level 6 | Jedi is immune to all Stunning attacks and effects |
| Immunity: Paralysis | Jedi Sentinel Level 12 | Jedi is immune to all Paralysis attacks and effects |
Jedi Defense
Although all Jedi are trained in the proper use of a lightsaber upon initiation into the Jedi Order, it’s a simple matter of fact that some of them are more adept at wielding the blade than others. What’s more, it’s one thing to put your fencing skills to the test; it’s another thing entirely to become proficient at using a lightsaber to defend yourself against the nigh-endless number of overeager fools with blaster rifles looking to make their name by taking out a Jedi.
Thus, Jedi Defense is a Feat that can be pumped in order to give your character an edge when dealing with ranged attackers. Every time your Jedi is attacked with a ranged blaster attack, he or she will have a chance to deflect the blaster shot, or even reflect it back at the attacker (which you’ll no doubt discover if you ever attempt to use a Blaster Rifle to take on a Dark Jedi Master). All Jedi have a rudimentary ability to perform this kind of deflection, so that everyone picks up Jedi Defense at their first level, but with practice, a Jedi can become much more adept at this skill, thus increasing not only the chance that they’ll escape from an attack unharmed, but also turn the attack back upon the attacker. This skill relies on a dice roll that is compared to the opponent’s attack roll.
This Feat’s main drawback is that it is not useful in every situation; when taking on Mandalorians, you might save your character a bit of Vitality, but when in combat with melee opponents, it’s not going to be too helpful. Even Sith Troopers usually resort to melee combat when you close in on them. This isn’t necessarily a bad Feat, but something like Flurry is more likely to be useful in every combat situation.
| Prerequisites | Effect | |
| Jedi Defense | Level 1 | Able to block incoming blaster fire |
| Advanced Jedi Defense | Level 4 | +3 to your opposing roll |
| Master Jedi Defense | Level 8 | +6 to your opposing roll |
Weapon Proficiency: Lightsaber
Simple enough; increasing this lets your Jedi strike more accurately and deal more damage with a lightsaber, much like all of the other weapon proficiencies. Note that Lightsaber Specialization is only available to Jedi Guardians.
| Rank | Prerequisites | Effect |
| Proficiency | None | Allows use of weapon type with no penalties |
| Weapon Focus | None | Attacks with weapon type gain +1 attack |
| Weapon Specialization | None | Successful hits with weapon type gain +2 damage |
Finesse: Lightsabers
Prerequisite: Jedi
As with Finesse: Melee Weapons, this will let Jedi add either their Strength or Dexterity modifiers to their attack rolls while using lightsabers, instead of defaulting to the Strength. Since Jedi are much more needful of Dexterity than Soldiers are, this is going to be a worthwhile Feat for almost any Jedi character to have.
Regenerate Force Points
Prerequisite: Level 4 Jedi
When taken, this feat will let your character more quickly regenerate Force points after they’ve been expended. When combined with one of the Force Focuses, Consular-type characters can easily restore points as they’re spent.
Jedi Powers
Oh, baby. Knights of the Old Republic has what is, hands-down, the best integration of Force Powers into a Star Wars game we’ve seen yet. If you’ve seen it in the movies, you can probably do it; if you haven’t seen it in the movies, well, you can probably do that, too.
While lightsabers might give your Jedi a slight edge in battle, you’re going to need to call upon your Powers to deal with the really beastly fights. Hell, since your Force Points recover so quickly outside of battle, you’ll be able to use your Powers in every fight along the way. As you unlock the more advanced Force Powers, your enemies will become tough enough to withstand quite a bit of damage, thus actually requiring you to use Powers just to give yourself enough of an edge to actually win.
Powers are sorted into light side, dark side, and neutral classifications. No Power is ever off-limits to you; you’ll still be able to pump Force Lightning, even if you’re the most virtuous of light side Jedi, but your unfamiliarity with the energies required to summon such harmful effects will take its toll on you; you’ll be forced to use more Force Points than would a Dark Jedi. On the flip side, light side Jedi will burn fewer Force Points when using a light side Power than would a neutral or Dark Jedi. At its most extreme, this effect will save you 30% on your friendly Force Powers, but using Powers from the other side of the Force will cost you 50% more than they normally would. Force costs remain constant when you upgrade a Power, so previous iterations of a Power will be erased from your combat menu once you do achieve a new rank.
Neutral Powers
Force Push
Force Cost: 10
Push and its derivatives don’t deal much damage, but are useful for stunning and incapacitating your enemies. The higher two levels will enable you to quickly and easily knock down opponents, while often rendering them stunned for a round or so afterwards. Even though most powerful opponents won’t be stunned or knocked over by this Power, you can still render their lower-level goons as numb as the typical audience at a Michael Bay film, leaving you free to gang up on the bossman. Sadly, like that same audience at the Michael Bay film, they will awaken with a powerful desire to kill, so keep an eye on the stunned ones, and be sure to activate the Power every other turn or so.
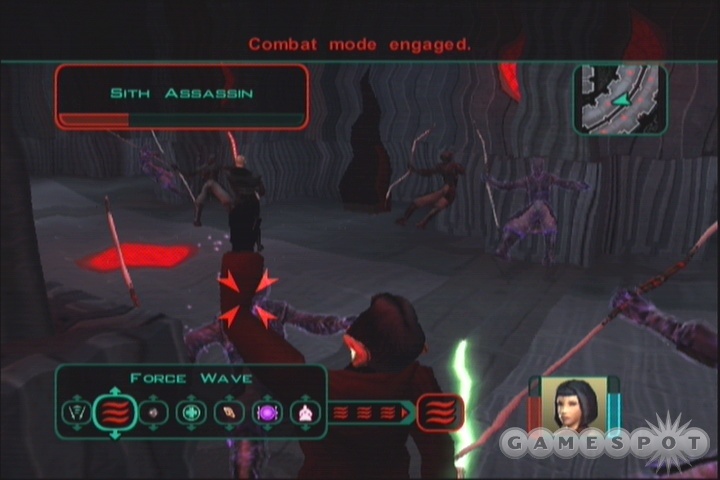
Force Wave, in particular, becomes massively handy at higher levels of gameplay, since it will almost always clear out any nearby enemies and quickly stun them. If you’re playing through as a Light Side Consular / Jedi Master, it’ll be one of the few sources of direct damage against your opponents, although not much of one. (It deals damage equal to 150% of your character level.)
| Rank | Prerequisites | Effect |
| Force Push | Level 1 | Target is thrown, stunned, and takes damage Save versus Reflex: No stun, half damage |
| Force Whirlwind | Level 9 | Target is trapped in a vortex, takes damage; other enemies are Pushed away Save versus Reflex: No immobilization or damage, but other enemies are still Pushed |
| Force Wave | Level 15 | All nearby enemies are repelled, take damage, and are stunned Save versus Reflex: No stun, half damage |
Force Suppression
Force Cost: 25
Restricted By Armor
We’ll be frank and say that you’re going to be encountering very few real Jedi or Sith in your travels, and those that you do come across don’t seem to often use the powers that Force Suppression can strip away. As such, you’ll probably want to invest your power points in powers that are a bit more utilitarian.
| Rank | Prerequisites | Effect |
| Force Suppression | Level 9 | Removes first and second ranks of Speed, Aura, Valor, but only the first rank of Energy Resistance and Force Resistance. No save |
| Force Breach | Level 15 | Removes all ranks of Speed, Aura, Valor, Energy Resistance, and Force Resistance. No save |
Throw Lightsaber
Force Cost: 20
While throwing your lightsaber around might sound like a good substitute for a ranged attack for Jedi, in truth, the range restriction means that it will only be useful if your character is standing a ways away from his or her target, which means that this Power is usually worse than useless in a duel. The damage is decent enough, but not so overwhelming that you would be better using this Power than, say, reserving the Force Points for an emergency Cure.
In the first KOTOR, this power could come in handy for characters who were attempting to stick to ranged weapons, as it would allow them to throw lightsabers to bypass a Dark Jedi’s blaster deflection abilities, but the number of Sith you’ll be facing off against in KOTOR2 is drastically reduced, rendering it less useful.
| Rank | Prerequisites | Effect |
| Throw lightsaber | Level 1 | Attacks one target more than five meters away; deals 1-6 damage for every two levels of your character |
| Advanced Throw lightsaber | Level 9 | Attacks three targets more than five meters away; deals 1-6 damage for every two levels of your character |
Burst of Speed
Force Cost: 20
Restricted By Armor
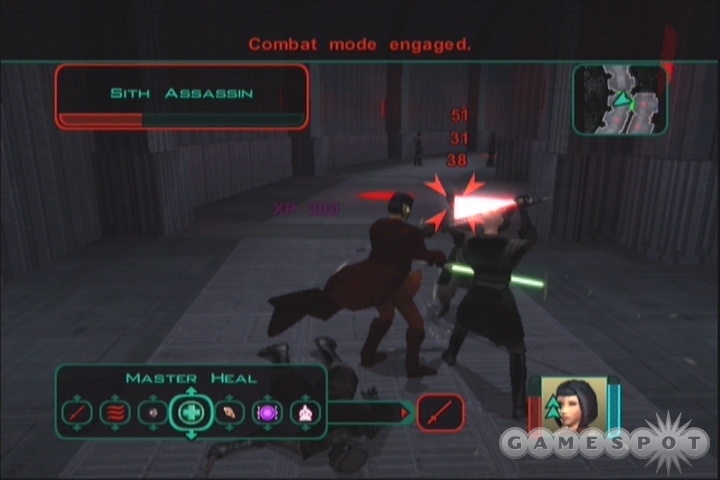
Every character should get Master Speed; it’s just that simple. If all it did was allow you to travel through KOTOR’s massive outdoor levels and towns at twice the speed, it’d probably still be worth spending a Feat on. As it is, it doesn’t just reduce your travel time; it also gives you a Defense bonus, and, most importantly, gives you free, unpenalized extra attacks per turn. All other things being equal, there’s nothing you can do to your character to make him or her more powerful in combat that’s quite as efficacious as adding more attacks per round; that’s why Flurry and Rapid Shot are so useful, and that’s why it’s difficult to imagine why any Jedi wouldn’t want to get Burst of Speed up to its third rank as soon as possible. Although it only lasts for 36 seconds, that’s about as long as most normal encounters will last anyway, and against Jedi, it’s a simple matter to queue up another Speed once the first one fades away. Just be sure you don’t attempt to activate Speed while another instance is already active; this just wastes your Force Points, since you can’t extend an active Speed by using the Power again.
| Rank | Prerequisites | Effect |
| Burst of Speed | Level 1 | Double movement speed; +2 to Defense |
| Knight Speed | Level 9 | Double movement speed; +4 to Defense; 1 extra attack per round |
| Master Speed | Level 15 | Double movement speed; +4 to Defense; 2 extra attacks per round |
Force Resistance
Force Cost: 20
Restricted By Armor
This is another of the limited-use Force Powers. Force Resistance gives you a decent chance of resisting the effects of an opponent’s Force Powers when they attempt to use them on you; assuming both the attacking and defending Jedi are of the same level, the attacking Jedi’s Force Powers only have a 50% chance of working; if they fail, then they have no effect, although the attacking Jedi will still be drained of his Force Points. Force Immunity gives the defending Jedi an even greater chance of beating back the tides of an opposing Jedi’s Force Powers. Again, though, encounters with Jedi are much more rare in KOTOR2 than they are in KOTOR, making this even less useful than in that game.
| Rank | Prerequisites | Effect |
| Force Resistance | Level 9 | Opposing Jedi must make a roll of d20 + his level vs. DC of 10 + your character’s level, or his Force Powers have no effect |
| Force Immunity | Level 15 | Opposing Jedi must make a roll of d20 + his level vs. DC of 15 + your character’s level, or his Force Powers have no effect |
Energy Resistance
Force Cost: 10
The world of KOTOR is not a safe one, by any stretch of the imagination; in addition to the numerous hostile characters looking to bring your party low, you’ll also have to contest with fire and other elemental attacks that may cut through your defenses, if you’ve only been planning for melee combat with other Jedi. Energy Resistance is meant to be a bit of a bulwark against these forms of attack, since it actually renders your character partially immune to the effects of fire, ice, electrical, and sonic attacks. The first 15 points of damage that your character would take from one of these sources is ignored; the rest is dealt as normal. You’ll be encountering far, far more energy-based damage than any of the types that Energy Resistance protects you from, rendering it less than compelling, although it can help ward off the special attacks of some droid enemies. The beneficial effects of this Power last for a full 120 seconds, so it’s fairly easy to keep it on all of the time with a minimum of fuss, if you’re in an area where you have to deal with environmental damage.
| Rank | Prerequisites | Effect |
| Energy Resistance | Level 1 | Entire party ignores first 6 points of cold, fire, electrical and sonic damage ignored |
| Improved Energy Resistance | Level 9 | Entire party ignores first 12 points of cold, fire, electrical and sonic damage; party immune to poison and disease |
| Master Energy Resistance | Level 17 | Entire party ignores first 20 points of cold, fire, electrical and sonic damage; party immune to poison and disease |
Affect Mind
Force Cost: 0
"These aren’t the droids you’re looking for...move along." Now that we’ve gotten that very much obligatory quote out of the way, let’s talk about Affect Mind, which is the Jedi equivalent of the Persuasion skill, though both a bit more limited and a bit more powerful.
Like Persuasion, Affect Mind opens up new conversation paths; you’ll be able to dominate other people into feeling what you want them to feel, or force them into revealing information that they would otherwise wish very much to conceal. The catch, for the light side, at least, is that these conversation paths are often interpreted as an act of aggression, and thus will wind up shifting you towards the dark side, even if you’re working towards the greater good. Persuasion, on the other hand, will never shift you in either direction, though it’s generally more difficult to use Persuasion than it is to use Affect Mind. Persuasion and Affect Mind don’t always overlap; sometimes you’ll be able to Persuade someone of something that Affect Mind won’t have an option for, and vice versa.
Affect Mind, especially at its second rank, will almost always succeed, but even it has its limits, and if your subject is asked to do something that it would normally find repulsive or endangering, then you’re likely to fail in your attempt. Also, like Persuasion, this Force Power is only available to your PC; giving it to your other party members is a waste.
| Rank | Prerequisites | Effect |
| Affect Mind | Level 1 | Allows you to use the Force to Persuade the weak-minded, opening up new conversation branches |
| Dominate Mind | Level 6 | More powerful version of Affect Mind |
Force Body
Force Cost: 0
Force Body seems to be primarily intended as a method for Jedi Guardians to bypass the restrictions placed on them by their low amount of Force Points, as it lets you pay the costs for your Force Powers by paying an equal amount from your Force pool and from your health pool. The very fact that you have to invest your precious Power selection points into Force Body in order to use it works against it, though, as you’re more likely going to want to select actual Powers that are actually useful to you. Still, though, if you find yourself consistently running out of Force Points in long battles, then this ability may be useful to you.
| Rank | Prerequisites | Effect |
| Force Body | Level 1 | 50% of Force Point requirements come from health, 50% from FP. Lasts 30 seconds |
| Improved Force Body | Level 9 | 40% of Force Point requirements come from health, 40% from FP. Force powers cost 20% less than normal |
| Master Force Body | Level 15 | 30% of Force Point requirements come from health, 30% from FP. Force powers cost 40% less than normal |
Battle Meditation
Force Cost: 35
Restricted By Armor
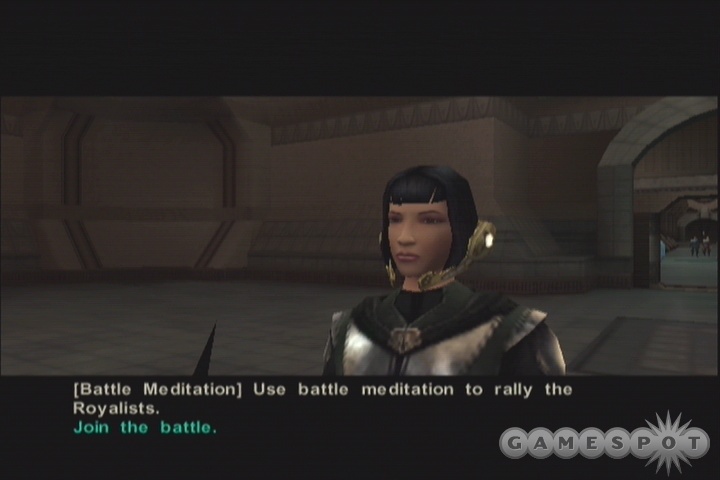
Although an expensive Power, Battle Meditation is generally going to be worth the cost, as it’ll let any Jedi become a mini-Bastila and use the sheer focus of their mind calm and boost the morale of all party members. When activated, the entire party will get bonuses to their attack rolls, damage, and will saves, making it a useful counterpart to Force Valor, if you also have that ability. Although it only lasts for 20 seconds, its effects are powerful enough to generally ensure that you’ll gain the upper hand on a foe, if not destroy them outright, during that interval. What’s more, it can also have an adverse effect on opposing forces at the upper levels.
Since Battle Meditation only lasts for 20 seconds, though, you’re likely not going to want to have your primary character continually use it during battle. It’s best to give it to a secondary character, such as Kreia, and then set them to the Jedi Support AI model, which will let them cast it automatically when needed.
| Rank | Prerequisites | Effect |
| Battle Meditation | Level 6 | All party members get +2 to attack rolls, damage, and Will saves. Their rate of Vitality regeneration is also boosted |
| Improved Battle Meditation | Level 12 | All party members get +2 to attack rolls, damage, and Will saves. Their rate of Vitality regeneration is also boosted Nearby foes get -2 to attack rolls, damage, and Will saves if they fail a Will save |
| Master Battle Meditation | Level 18 | All party members get +4 to attack rolls, damage, and Will saves. Their rate of Vitality regeneration is also boosted Nearby foes get -4 to attack rolls, damage, and Will saves if they fail a Will save |
Force Deflection
Force Cost: 0
Force Deflection lets your Jedi characters deflect blaster bolts back at their attackers, should they not be wielding lightsabers, in which case they automatically deflect blaster shots without needing to invest Powers in the ability. There are almost no situations in which you’d want to have one of your Jedi running around without a lightsaber, though, making this power only useful if you’re a Jedi with a blaster, which isn’t going to occur too often. Even Consulars are generally going to be better off using a lightsaber than a ranged weapon, given the fact that you can add +Wisdom crystals to them, so invest here only if you’re willing to give up on all the benefits that carrying a lightsaber gives you.
| Rank | Prerequisites | Effect |
| Force Deflection | Level 6 | Allows you to deflect blaster bolts while not using a lightsaber |
| Force Redirection | Level 12 | Allows you to deflect blaster bolts while not using a lightsaber. Also allows you to reflect bolts back at the shooter, and gives you a blanket +3 to deflection attempts |
Mind Trick
Force Cost: 20
No Effect on Droids
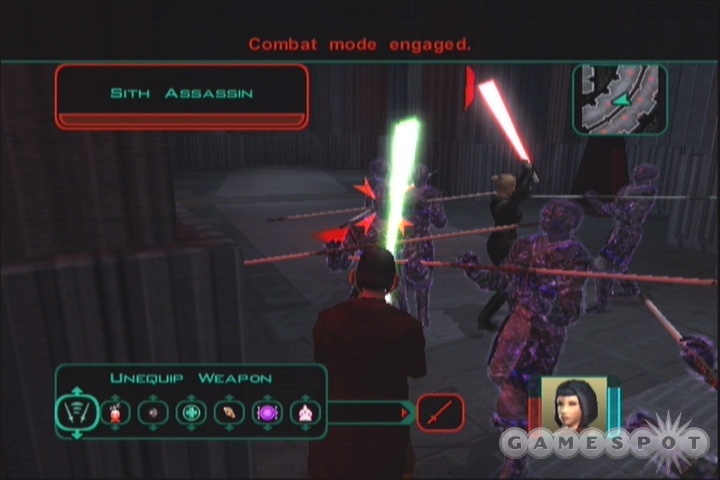
Although Mind Trick might bring to mind images of Obi-Wan sneaking around the Death Star without being detected, for a combat-oriented game like Knights of the Old Republic 2, the ability to avoid encounters generally isn’t a desirable one; most of your experience will be coming from combat, so bypassing enemies will actually weaken you in the end. That said, the second rank of this power, Force Confusion, can be pretty fun to use, as it’ll let you convert a single enemy to your side and force him or her to fight against their former teammates. It can be a kick to watch a Sith Lord slaughter his apprentice, but even so, it’s probably not worth investing two Force Power points in order to gain the ability to do so. Although entertaining, it’ll rarely be the deciding factor in a battle, and you’ll wind up having to wait for the effects to wear off before you can kill your target. Only the main character can select Force Confusion, but any other Jedi can obtain Mind Trick.
| Rank | Prerequisites | Effect |
| Mind Trick | Level 1 | If subject fails a Will save, it will not attack you unless you get very close |
| Force Confusion | Mind Trick, Any Prestige Class | If subject fails a Will save, it will be forced to fight on your side of a battle for 30 seconds. |
Light Side Powers
Heal
Force Cost: 25
No Effect on Droids
Utility is a blessed thing, and Cure is perhaps the most useful of all of the light side Force Powers. The concept is simple: trade Force Points to heal Vitality of all of your non-droid party members. Simple is generally powerful, though, and it’s definitely so in this case. Since Force Points regenerate so quickly in KOTOR, you can quite easily use Cure to heal your entire party after every battle, provided you give yourself a short resting period between conflicts. During battle, Cure will automatically be used by the party members that are not under your direct control, provided they have sufficient Force Points; this will probably save your life a few times, provided you actually do the smart thing and give your teammates the Cure Power.
A new addition in KOTOR2 is the inclusion of a Master Heal rank for the power, which will let you heal up your teammates much more easily than you could before. In addition to extra vitality restoration, the upper level of the power will let you "cure" your teammates of any stun effects that happen to be afflicting them, making it exceedingly handy when dealing with enemies that can stun you.
| Rank | Prerequisites | Effect |
| Heal | Level 6 | All party members are healed for 5 points + Charisma modifier + Wisdom modifier + level of Power’s character |
| Improved Heal | Level 12 | All party members are healed for 15 points + Charisma modifier + Wisdom modifier + level of Power’s character; eliminates poison in all party members |
| Master Heal | Level 18 | All party members are healed for 15 points + Charisma modifier + Wisdom modifier + 2xlevel of Power’s character; eliminates poison and stuns in all party members |
Force Aura
Force Cost: 15
Restricted By Armor
Another of the light side’s myriad defensive-oriented Powers, Aura is probably not quite as useful as some of the others, except for Guardians and Jedi who are intent on always being in the thick of things. Its main drawback is that it only affects the character that uses it; it offers a pretty powerful benefit, but isn’t meant for team players. If you breed one of your Jedi NPCs, or your own character, to be the prime battle workhorse at melee range, though, the Defense modifiers, which stack with those of Jedi Sense, can make you virtually untouchable by all but the most powerful opponents. The short duration of the power (20 seconds), though, makes this an all-or-nothing kind of Power; if you want any ranks, you might as well get all three, and be sure to keep it active when you need it.
| Rank | Prerequisites | Effect |
| Force Aura | Level 1 | +2 to Defense and saving throws |
| Force Shield | Level 6 | +4 to Defense and saving throws |
| Force Armor | Level 12 | +6 to Defense and saving throws |
Force Valor
Force Cost: 20
Restricted By Armor
This power is roughly congruous to Force Aura, except that it is a bit more general in application and affects all of your party members. For the 20 second duration of the Power, Valor will increase the attributes (Strength, Dexterity, etc.) and saving throws of all party members by a few points. Higher saving throws are nice, but the real benefit comes with the higher attributes. Each time an attribute hits an even number, you gain an extra +1 to every modifier that relies on that attribute. Thus, the +5 to all attributes that you gain from the third rank of Valor will mean that essentially every action you can perform will get a +2 or +3 modifier to it, whether it’s an attack, a damage roll with a melee weapon, a Defense check, a skill, or a Force Power. Most Force Powers, in fact, rely on both your Charisma and Wisdom modifiers, so that a Force Wave initiated when under the influence of Master Valor will get either a +4 or +6 to the DC. Heck, the bonus to your Constitution alone will result in an immediate increase in Vitality equal to at least two or three times your current level.
This is a great skill to initiate just before a tough battle, or when you have a single powerful foe cornered and are dueling to the death.
| Rank | Prerequisites | Effect |
| Force Valor | Level 1 | Entire party gains +2 to all attributes and saving throws for 20 seconds |
| Knight Valor | Level 9 | Entire party gains +3 to all attributes and saving throws for 20 seconds |
| Master Valor | Level 15 | Entire party gains +5 to all attributes and saving throws for 20 seconds |
Stun
Force Cost: 20
No Effect on Droids
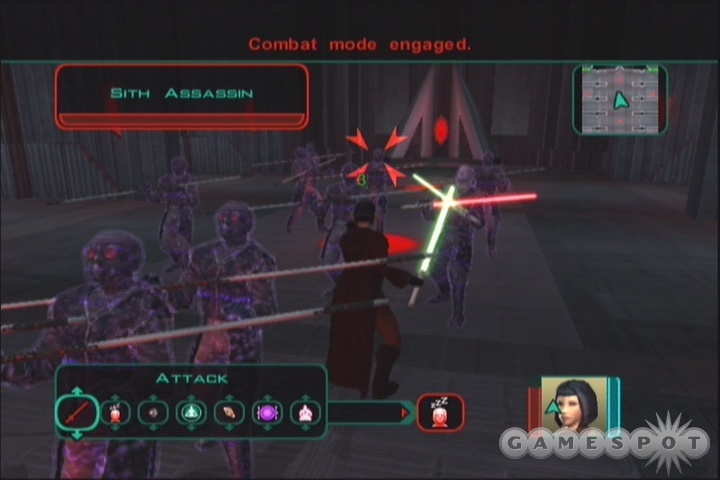
Fittingly, the light side has few Powers that inflict direct damage upon an opponent, instead focusing on disabling an opponent’s defenses, allowing your characters to more easily damage or kill the enemy. Stun fits into this philosophy well; if the enemy fails his or her saving throw, they’ll lose any Dexterity bonuses to Defense, and Sneak Attacks from your Scoundrels or Watchmen/Assassins will always work (assuming the attack hits), no matter from which side of the target they originate. Even so, Stun doesn’t make the jump into area-effectiveness until the third rank, so you might want to stick with Force Whirlwind for large groups until you access Stasis Field at level 15. Stun does not work on droids; they get their own special Stun Droid power.
| Rank | Prerequisites | Effect |
| Stun | Level 1 | Target is stunned for nine seconds Save versus Fortitude: target is slowed instead of stunned for the duration |
| Stasis | Level 9 | Target is stunned for 12 seconds Save versus Fortitude: target is slowed instead of stunned for the duration |
| Stasis Field | Level 15 | All nearby enemies are stunned for 12 seconds Save versus Fortitude: target is slowed instead of stunned for the duration Restricted by armor |
Stun Droid
Force Cost: 10
Since you don’t run across quite as many droids as you do human opponents during your journey, it makes sense that Stun Droid would wind up being a bit more powerful than the regular Stun Power, but you could make the case that it actually goes a little too far: once one of your characters accesses the third level of Stun Droid, even the biggest and baddest of the mechanical monstrosities won’t threaten you again. You see, unlike Stun, Destroy Droid offers no saving throw to the stunning effect itself, so that anytime you use this Power on a droid, it will have no choice but to shut down for a short period of time, while you and your teammates will, of course, be trying not to get flying metal in your eyes while you rip said droid to pieces. What’s more, the Power penetrates droid energy shields, rendering even the most powerful opponents to so much scrap metal for you to demolish.
Bottom line: you’ll probably want to get at least one character to the third rank in this skill, preferably your PC if you’re a Consular, just so you’ll always have it available. At the second and third ranks, the power is area-effect, enabling you to shut down a whole group of droids, turn to attack the human opponents, switch back to stun the droids again, and so on. Fights against droids alone are even more ridiculous; just queue up three Destroy Droids and almost any droid in the game will be dead by the time you need to queue anything else, since there’s significant direct damage on top of the stunning effect.
| Rank | Prerequisites | Effect |
| Stun Droid | Level 1 | Target is stunned for 12 seconds; takes damage equal to character’s level Save versus Fortitude: no stun, half damage |
| Disable Droid | Level 6 | A group of targets is stunned for 12 seconds; all targets take damage equal to character’s level Save versus Fortitude: no stun, half damage |
| Destroy Droid | Level 12 | A group of targets is stunned for 12 seconds; all targets take 1-6 damage per character’s level Save versus Fortitude: half damage |
Force Barrier
Force Cost: 20
If you intend to engage in melee combat, then Force Barrier is a power that’s going to come in quite handy for you, as it lets your character shrug off a good portion of the damage that they’ll be taking from enemies with slashing, bludgeoning, or piercing attacks (which encompasses almost every kind of attack save for those from blasters). Although it won’t help you against Jedi or Sith (since lightsabers deal energy damage), it can help you survive when mobbed by sword-wielding foes, or when you’re forced to duel with a single powerful non-Jedi opponent.
| Rank | Prerequisites | Effect |
| Force Barrier | Level 1 | Resists the first four points of piercing, bludgeoning, and piercing damage from each attack |
| Improved Force Barrier | Level 9 | Resists the first eight points of piercing, bludgeoning, and piercing damage from each attack |
| Master Force Barrier | Level 15 | Resists the first 15 points of piercing, bludgeoning, and piercing damage from each attack |
Revitalize
Force Cost: 50
No Effect on Droids
Another new skill that’s really not worth bothering with, Revitalize will let you revive comrades that have fallen in battle, allowing them to fight again. Although this sounds like a great ability on paper, it’s worth noting that the KOTOR games aren’t really all that difficult to begin with, meaning that you’ll rarely be forced to bring anyone back from the dead, and even when teammates do keel over, they’ll come right back to life if the rest of your party manages to survive the fight. What’s more, almost all of the really difficult challenges in the game have to be faced solo, meaning that Revitalize won’t work at all for those. Also, the only characters likely to have enough spare Powers to invest in Revitalize will be Consulars/Masters/Lords, who will usually be the weakest characters in a fight, and thus the most likely to die first, which will prevent them from using it. To sum up: avoid this Power.
| Rank | Prerequisites | Effect |
| Revitalize | Level 9 | Brings nearest fallen ally back to life with 5% of total Vitality points |
| Improved Revitalize | Level 15 | Brings two fallen allies back to life with 5% of total Vitality points |
| Master Revitalize | Level 21 | Brings two fallen allies back to life with 10% of total Vitality points |
Dark Side Powers
The insidious and malevolent Powers of the dark side will be off-limits to players that are role-playing a light side character. You’ll still be able to use them, sure, but you’ll be hitting a significant Force Point penalty every time you do so when compared to comparably priced Powers from the light side of the Force. If you do play a light side character, you’ll want to let Jolee be your quasi-Dark Jedi for the duration of the game; since he’s relatively neutral on the Force alignment scale, he can use the Powers of either side without penalty, and since he’s a Jedi Consular, he’ll have a deeper well of Force Points than any other of your party members.
Drain Life
Force Cost: 20
Restricted By Armor
No Effect on Droids
To reflect the dark side’s selfish and destructive nature, characters of an evil bent will not be easily able to heal themselves through the Force; instead, they’ll be required to steal the life from their enemies to revivify themselves, like a vampire. The life gain is decent, but combat-oriented Dark Jedi may still want to let their light side party members Cure them every now and again, as the damage range is 10 - 40. Even a Heal from a 20th level light side Jedi probably won’t restore 40 Vitality, but it will always restore at least 30 health; if you’re in a heated battle and need to restore your life, on the other hand, Drain Life might restore just 10 Vitality, which is almost never going to be sufficient. In short, it’s a bit too unpredictable.
At its second rank, against multiple enemies, Death Field has a much better chance of getting you back a high amount of Vitality, since it gives you life equal to the highest amount of damage that’s dealt. Still, though, it’s worth noting that this ability is the same as it was in the first KOTOR, while an extra rank was added to the Heal power available to Light Side characters. For this reason alone, you’ll likely want to have Kreia along if you’re going through the game as a combat-oriented Dark Jedi, as she’ll be able to Heal you without associated Force Point penalties, due to her alignment neutrality.
| Rank | Prerequisites | Effect |
| Drain Life | Level 9 | Target is dealt 1-4 damage for each level of the Dark Jedi (up to level 10); Dark Jedi gains that much Vitality Save versus Fortitude: half damage |
| Death Field | Level 18 | All targets within a ten meter radius are dealt 1-4 damage for each level of the Dark Jedi (up to level 10); Dark Jedi gains that much Vitality Save versus Fortitude: half damage |
Shock
Force Cost: 20
Restricted By Armor
Now we’re getting down to it. Of the dark side’s Powers, Shock and its upgrades is the only intended to deal massive amounts of damage to a large number of opponents. While the other Powers can sometimes affect large groups, they are intended to simply weaken your foes or make them easier to kill; Shock’s reason for existence is to deal the killing blow itself, and kill it does, especially at its highest rank. Unfortunately, there is no stunning effect associated with the damage, so even though you’ll likely kill a few opponents with a high-level Shock, you’ll still have to deal with fully mobile foes afterwards. Even Light Side Consulars and Jedi Masters will want to pick up a few ranks here, as they can easily absorb the extra Force Point cost, due to their huge reservoirs of same, and it’ll allow them to deal direct damage, which they’re otherwise not very good at.
One thing to note about Shock is that the restriction on maximum damage from the first KOTOR has apparently been removed, allowing you to deal much more damage to large groups of enemies. It’s not uncommon for high-level Masters and Lords to dish out 140 or so damage to every target in a room with Force Storm.
| Rank | Prerequisites | Effect |
| Shock | Level 1 | One target takes 1-6 damage per level of Jedi. Save versus Will: half damage |
| Force Lightning | Level 9 | All targets up to 16 meters away in front of character take 1-6 damage per level of Jedi. Save versus Will: half damage |
| Force Storm | Level 18 | All enemies within 10 meters of a single target take 1-6 damage to both Vitality and Force Points per level of Jedi. Save versus Will: half damage |
Fear
Force Cost: 10
No Effect on Droids
Fear is one of the dark side’s more potent effects, although it may not appear so on the surface. Fear is a counterpart to the light side’s Stun Power, though it is marginally weaker, since the dark side’s emphasis is on destruction, rather than mere stunning effects. The main difference is that Fear’s upper ranks Feature area-effect stuns at a distance, meaning you can use Horror or Insanity on your enemies before closing in, whereas Stasis Field works best when you are surrounded by enemies. If you can hit a few of your opponents with Insanity before closing to lightsaber range, you’ll be able to divide and conquer that much more easily; another good use for the distanced stunning effect is to pair it up with grenades, which are difficult to use against many Jedi enemies, since they will run towards you as soon as you’re spotted. The fact that there is absolutely no effect if the targets make their Will save is an obvious strike against this power, though.
| Rank | Prerequisites | Effect |
| Fear | Level 1 | A single target is overcome with fear (stunned) for six seconds. Save versus Will: no effect |
| Horror | Level 6 | All enemies within five meters of target are overcome with fear (stunned) for twelve seconds. Save versus Will: no effect |
| Insanity | Level 12 | All enemies within ten meters of target are overcome with fear (stunned) for twelve seconds. Save versus Will: no effect |
Wound
Force Cost: 15
No Effect on Droids
Wound is one of the dark side’s weaker powers at low levels, due to the somewhat tepid damage, short duration of the stun effect, and the fact that it’s only capable of targeting one opponent. Once you reach Kill, however, you’ll obtain a fairly decent method for eliminating wounded opponents. Since the damage dealt by Kill is based not on random dice rolls, but on the opponent’s maximum Vitality, it will always kill an opponent outright if used when that enemy is at less than half of their maximum health (unless, of course, they make their save). The fact that you can use any rank of this Power while wearing armor is also a plus.
| Rank | Prerequisites | Effect |
| Wound | Level 1 | Target is stunned and takes two-thirds of the attacking Jedi’s level in damage every two seconds for six seconds Save versus Fortitude: No effect |
| Choke | Level 9 | Target is stunned and takes two-thirds of the attacking Jedi’s level in damage every two seconds for six seconds, and takes a -4 penalty to Strength, Dexterity, and Constitution for 24 seconds Save versus Fortitude: No effect |
| Kill | Level 12 | Target is stunned for six seconds and takes damage equal to half of their (the target’s) maximum Vitality Save versus Fortitude: No choking effect, take damage equal to attacking Jedi’s level |
Slow
Force Cost: 15
No Effect on Droids
Getting tired of Powers that are decent only at their highest rank? Unfortunately, you find no respite in Slow, which is another Power that affects only a single target and has no effect on the lower ranks if that target succeeds in his or her saving throw. The actual effects of the spell on the first two ranks are somewhat laughable: very few common enemies will last 21 or 30 seconds in combat against your party, even if their stats are unaffected by Slow, and the more powerful enemies are exactly the ones that will usually make a saving throw in a crunch. Plague, the third rank, is somewhat more useful, if only because there is no saving throw, which makes it slightly more useful against bosses (at least, those that don’t activate Force Immunity as soon as your fight begins).
| Rank | Prerequisites | Effect |
| Slow | Level 1 | Single victim takes -2 penalty to Defense, Reflex saves, and attack rolls for 30 seconds Save versus Will: no effect |
| Affliction | Level 6 | Target is drained of one point from each attribute every three seconds for 21 seconds, and is slowed Save versus Fortitude: no effect |
| Plague | Level 12 | Target is drained of one point from each attribute every second for 12 seconds, and is slowed No save possible Restricted by armor |
Drain Force
Force Cost: 5
Restricted By Armor
Drain Force is something of a Force-based equivalent to Drain Life; when used, your Jedi will attempt to suck the Force from a nearby opponent and add it to his own Force Point reservoir. Whether you find this of any use or not depends on your character; if you’re playing a Sith Lord or Assassin, you’ll likely have more than enough FP to use any Force Powers you wish, but if you’re going through as a Marauder, then you may need the extra boost from Force Drain. Like Force Body, though, this is purely a supplementary power, and will have to be matched up with Powers that have actual effects to be useful.
| Rank | Prerequisites | Effect |
| Drain Force | Level 1 | Transfers 10 Force Points from target to player Save versus Will: Only half the points are transferred |
| Improved Drain Force | Level 9 | Transfers 20 Force Points from target to player Save versus Will: Only half the points are transferred |
| Master Drain Force | Level 15 | All nearby enemies are drained of 30 FP Save versus Will: Only half the points are transferred |
Force Scream
Force Cost: 15
No Effect on Droids

Force Scream is essentially a neutered version of Shock that deals less damage, but also throws in the possibility of reducing your opponent’s stats for a short period of time. In combat, the extra damage afforded by Shock and Lightning will almost always be preferable to the theoretical stat penalties from Scream, especially since your opponents will avoid all stat penalties if they make a saving throw, as boss-style enemies almost always will.
| Rank | Prerequisites | Effect |
| Force Scream | Level 1 | Deals 3-18 damage and reduces all stats by 2 for 30 seconds for all opponents in front of character Save versus Will: Half damage, no stat reduction |
| Improved Force Scream | Level 9 | Deals 5-30 damage and reduces all stats by 4 for 30 seconds for all opponents in front of character Save versus Will: Half damage, no stat reduction |
| Master Force Scream | Level 15 | Deals 7-42 damage and reduces all stats by 6 for 30 seconds for all opponents in front of character Save versus Will: Half damage, no stat reduction |
Lightsaber and Force Forms
One of the new inclusions to KOTOR’s gameplay in KOTOR 2 are the various Lightsaber and Force Forms. Each character will automatically learn three different lightsaber forms and one force form during their adventure. After you obtain a Prestige Class from Kreia, you’ll be able to gain a few more forms.
Lightsaber Forms
Shii-Cho
Obtained: Level 7
Attack: +1
Defense: +3 (all enemies), -3 (current enemy; these are cumulative, meaning you have a net +0 Defense against the current enemy)
Makashi
Obtained: Level 8 (Guardian), 10 (Consular), 12 (Sentinal)
Attack: +3
Blaster Bolt Deflection: -5
Save versus Force Powers: +2
Soresu
Obtained: Level 10 (Guardian), 12 (Consular), 8 (Sentinal)
Defense: +2 (current target only)
Blaster Bolt Deflection: +4
The following four Lightsaber Forms can only be learned by Guardians, Sentinals, Watchmen, Weapon Masters, Assassins, and Marauders. They’re unavailable to Consulars, Lords, and Masters.
Ataru
Obtained: After first (Guardian, Weapon Master, Marauder) or second (Sentinal, Assassin, Watchmen) Jedi Master encounter.
Defense: -2 (all enemies), +5 (current target, resulting in net +3 Defense against current target)
Blaster Bolt Deflection: -4
Shien
Obtained: After first (Sentinal, Assassin, Watchmen) or second (Guardian, Weapon Master, Marauder) Jedi Master encounter.
Attack: +2
Defense: -5 (current target only)
Blaster Bolt Deflection: +2
Critical multiplier: +1 (if a weapon would critically hit for 2x damage, it will do 3x damage with Shien, etc.)
Niman
Obtained: After third Jedi Master encounter (Sentinal, Watchmen, Assassin only)
Attack: +1
Defense: +1
Blaster Bolt Deflection: +1
Save versus Force Powers: +1
Juyo
Obtained: After third Jedi Master encounter (Guardian, Marauder, Weapons Master)
Defense: -4 (all enemies), +2 (current target, resulting in -2 net defense against current target)
Attacks per round: +1
Critical Hit Attack Modifier: +4
Save versus Force Powers: -4
Force Forms
All characters will gain access to Force Channel, which will let you regenerate your Force Points a bit more quickly. Only Consulars, Sith Lords, and Jedi Masters are able to obtain the subsequent forms; this is a trade-off for their inability to use the advanced lightsaber forms.
Force Channel
Obtained: Level 12 (Guardian), 8 (Consular), 10 (Sentinal)
FP Regeneration: +50% (outside of combat only)
Force Power Damage: +3 (this is plus three points, not percentage)
Save versus Force Powers: +2
Force Potency
Obtained: After first Jedi Master encounter
Force Power damage: +30%
FP cost of all Force Powers: +20%
Force Affinity
Obtained: After second Jedi Master encounter
FP Regeneration: Allowed during combat. (This is almost entirely useless, as if your character is able to access this power, then he or she will by definition have a huge FP pool and will rarely scratch the surface of it during most of the game’s short battles.)
Force Mastery
Obtained: After third Jedi Master encounter
Duration of Force Powers: +50%
Opponent’s saves versus Force Powers: -2
Save versus Force Powers: -4
FP cost of all Force Powers: +20%
Party Members
There are no fewer than 12 different potential party members in KOTOR2, of which you’ll be able to recruit 10. Some characters will be inaccessible to you based on the sex of your main characters, while others will choose to side with you or not depending on what Force alignment you’ve chosen.
How to Steal Souls and Influence People
One of the intriguing new aspects of Knights of the Old Republic 2 is the inclusion of a system that will let you bend your teammates to your will. If you become a truly evil character, then you can expect the alignments of your teammates to adjust accordingly. If, on the other hand, you treat everyone you meet with kindness and respect, then you can expect the fellow travelers aboard the Ebon Hawk to become more oriented towards the Light Side of the Force.
This was all true in KOTOR as well, of course, but in KOTOR2, there’s a more fleshed-out system of influence that you can use to attempt to coax your team members along the path that you’ve chosen for them. In most cases, you won’t have to worry too much about this, but some party members can become Jedi. For these party members, you’ll have to talk to them constantly and attempt to gain influence over them until they trust you enough to allow you to train them in the ways of the Jedi. Check back to these character descriptions over the next couple of weeks to learn more about each character’s path to the Force.
Kreia
Initial Stats
Class: Jedi Consular
Strength: 10
Dexterity: 16
Constitution: 16
Intelligence: 14
Wisdom: 16
Charisma: 12
If you could take that annoying undergraduate who liked Ayn Rand just a bit too much and put her into a video game, then Kreia would probably be the result. This wizened Jedi is a wearingly cynical, and encourages you at every opportunity to act only in your own self-interest, and will chide you every time you happen to help people with problems, or even if you happen to take notice of them.
Still, though, Kreia has really good starting stats, and, like Jolee in the original KOTOR, will have an easier time skirting the difference between the Light Side and Dark, allowing her to more easily access powers from either side of the fence without incurring penalties. As a Consular, she’ll be able to more easily overpower enemies with her Force Powers and will have a much larger pool of Force Points to use, making her a natural choice for the Jedi Support AI setting.
In combat, Kreia is naturally suited for wielding a lightsaber in one hand. Although her Defense won’t be so hot, she will rarely be the focus of much enemy attention (that honor will fall to your main character), allowing her to skirt the edges of battle, striking enemies that are occupied with other characters. You’ll want to occasionally flip over and manually control her, though, if only because she won’t usually use her most powerful Force Powers unless explicitly instructed to do so.
Attributes: Since Kreia’s most useful feature will be her ability to use Force Powers to full effect, you’ll want to continually increase her Wisdom whenever possible. Luckily, this is one of the easiest stats to increase via equipment and lightsaber crystals.
Skills: Unless you’re crazy, you can avoid boosting Stealth completely. You shouldn’t need to boost Repair very much, either, unless you’re going to constantly keep her in your party. Treat Injury is likely your best bet here, if only so that Kreia can make implants and other items at a workbench; she’ll obviously be relying more on Heal in combat than medpacks.
Feats: As a Consular, Kreia’s Feat progression will be somewhat stunted, but she should still be able to get one once every third level or so. Since we had her outfitted with a lightsaber, Dueling and Toughness were natural choices, but you can browse through the tree and see what you want her to have.
Force Powers: Kreia will have no shortage of powers to choose from here. Because of the Force Bond between the main character and Kreia, you can let her level up the self-buffs that are available, such as Speed and Armor, and let her use those, since they’ll affect herself and the main character at the same time. If you wish for her to use abilities in combat, then level up things like Fear and Shock. Light Side characters will probably want to have Kreia focus on the damaging Dark Side powers, due to the difficulty of bending her alignment too far from the middle of the road.
Bao-Dur
Initial Stats
Class: Tech Specialist
Strength: 14
Dexterity: 10
Constitution: 14
Intelligence: 15
Wisdom: 14
Charisma: 10
Bao-Dur will be a welcome addition to any party, if not for his combat skills (although he’s decent in a fight), but for his pure technical acumen. His unique Tech Specialist class allows him to access almost every technical skill as a Class Skill, meaning that you can continue to level them up without having to invest double points in them at each level up. He’ll also have a much larger number of skill points at each level up, making it easy to keep him maxed out in all the relevant skills.

In this sense, Bao-Dur isn’t all that much different than a droid, but his simple ability to be healed by the Heal Force Power makes him more desirable in a party than any droid. He also packs the decent Unarmed Specialist Feat, which will help him dish out a bit of pain while wading into battle with nothing but his fists. If you keep him unarmed, be sure to check around for gloves that add to his Physical damage, or that add other kinds of damage while he’s unarmed. While unarmed, he’ll also be able to use his lightning fist to overwhelm the energy shields that enemies use, dropping them in one blow.
In addition to his combat and field tech abilities, Bao-Dur will be able to upgrade your droid party members on occasion, giving them valuable stat boosts. Since he’ll usually be taking up a slot in your party that might normally go to a droid, though, this might be less useful than you imagine.
If you gain a tremendous amount of influence over Bao-Dur, you can attempt to train him as a Jedi; he’ll wind up as a Jedi Guardian, and will be quite handy at wading into battle with sabers blazing.
Attributes: You’ll probably want to pump Intelligence once, if only for the increased skill points at each level-up, then start dishing the rest of your points into Strength.
Skills: Heck, what can’t Bao-Dur learn? As a Tech Specialist, he’ll be able to easily upgrade Computer Use, Demolitions, Awareness, Repair, and Security, all of which are needed in the field. Know him, love him, keep him progressing in everything he can. You might actually wind up having too many points, and will have to start dispensing them into cross-class skills.
Feats: As an unarmed specialist, one of Bao-Dur’s initial weaknesses is his lack of health; you’ll want to get him a rank of Toughness as soon as possible to offset this. If you’re planning on turning him into a Jedi Guardian, then Two-Weapon Fighting or Flurry would also be a good investment.
Atton Rand
Initial Stats
Class: Scoundrel
Strength: 12
Dexterity: 16
Constitution: 14
Intelligence: 10
Wisdom: 10
Charisma: 12
Atton Rand is the latest in a long series of extended universe Han Solo wannabes, following in the footsteps of Dash Rendar, Carth Onasi, and the like. As with Carth Onasi, the feeble blaster-specialist of the first KOTOR game, you likely won’t be keeping Atton in your party any longer than is absolutely necessary; the game just doesn’t have much room in it for people who are merely good at using blasters, especially when their only really useful skill is Security. Sorry Atton, but you’re getting the boot, at least after you obtain the services of Bao-Dur, who can usually match Atton’s damage output while bringing a much broader array of skills to the table.
If you’re fond of Atton, for whatever reason, then he can still be a decent contributor in combat, especially if you outfit him with a pair of blaster pistols (of which you can find plenty of powerful examples later in the game) and let him take on foes from a distance.
If you use Atton a lot, in fact, and manage to either boost up his morale or mercilessly crush his self-esteem, you can eventually convert him into a Jedi Sentinal.
Attributes: Dexterity is your only real choice here; whether you’re using Atton for his proficiency with blasters or intend to shift him over to a Jedi class, it’ll come in handy.
Skills: Security and Demolitions are going to be Atton’s primary focus, with Awareness coming in in third place.
Feats: As with most combat-oriented characters, you’ll want to get Atton’s Two-Weapon Fighting Feat up to its Master level as soon as possible, along with one of the active combat feats for him to use. If you’re not planning on making him a Jedi (or probably even if you are), then giving him Heavy Armor Proficiency will let him use a bunch of armor that would otherwise hang around in your inventory.
Visas
Initial Stats
Class: Jedi Sentinal
Strength: 12
Dexterity: 18
Constitution: 12
Intelligence: 10
Wisdom: 12
Charisma: 15
Although you might not imagine it, this blind Sentinal will be one of your best offensive threats throughout the game, especially if you’re playing as a Consular. As a Sentinal, she’ll also be able to wield a few Force Powers when needed, but she’ll really excel only after you complete her ascension to the top of the Two-Weapon Fighting Feat and get her a couple of lightsabers to use. After that’s complete, she’ll be one of your ace front-line fighters, able to deal out an incredible amount of punishment while avoiding the blows that come her way, thanks to her huge Dexterity bonus.
The only characters who might not want to use Visas all that much will be Guardians, who can usually do the combat damage required by themselves just fine; having two offensively-minded Jedi in the party can lead to a diluted supply of lightsaber crystals. Sentinals and Consulars will appreciate having another powerhouse along, though, especially since Visas is the only character besides Kreia who will actually join your party as a Jedi; everyone else will have to be coaxed and prodded along the long road to Forcehood.
Attributes: Visas has a lot of Dexterity, but you’ll want to give her more of it, especially after investing in the Finesse: Lightsabers feat. Since she can’t wear even light armor (unless you upgrade her with the relevant feat), she’ll need plenty of Dexterity to avoid blows. Alternately, if you’re a Guardian, you can start buffing her Wisdom to improve her abilities to channel the Force Powers at her disposal.
Skills: Visas doesn’t bring much to the table when it comes to skills. Awareness and Treat Injury are your only real options here.
Feats: Obviously enough, Finesse: Lightsabers should be the first item on your docket, followed by Two-Weapon Fighting and Flurry for even more fun.
Force Powers: Whether you go Light Side or Dark, Master Speed is critical for Visas, as well as Storm. Although it might appear weird for a fully-Light Visas to run around Storming people to death, it shouldn’t take too much Force for her to achieve, since she’ll rarely be using anything else.
G0-T0
Initial Stats
Class: Expert Droid
Strength: 10
Dexterity: 17
Constitution: 12
Intelligence: 16
Wisdom: 10
Charisma: 10
G0-T0’s primary gameplay abilities make him something of a Dark Side T3-M4; neither character will probably be getting much use in your adventuring parties, but if you feel compelled to bring a droid along on your adventures, then G0-T0’s bleakly controlling personality will make him more palatable for Dark Side adventurers.
As with T3, G0-T0’s primary claim to fame are his skills at Repair, Computer Use, and Security. He’s no great shakes at combat, although his Dexterity enables him to easily land shots with dual-wielded blasters if you use him a lot.
Attributes: You’ll want to push either Dexterity, if you plan on using G0 in combat, or Intelligence, if you instead prefer to use his skills at a workbench.
Skills: As with T3, G0’s skill set revolves around Repair, Computer Use, and Security, all of which are fairly useful while you’re running around.
Feats: Obviously enough, Two-Weapon Fighting will be critical for G0 - he’s not going to be much use to you in a fight if all he can use is a single blaster.
T3-M4
Initial Stats
Class: Expert Droid
Strength: 10
Dexterity: 15
Constitution: 14
Intelligence: 16
Wisdom: 10
Charisma: 10
One of the few characters to return from the original KOTOR, T3-M4 has apparently lost all of the experience he built up over the course of his adventures with Revan. That’s a shame, supposedly, but even if he began the game at level 20, he probably still wouldn’t be tremendously useful to you, if only because his battle prowess is restricted to blaster pistols, albeit dual blaster pistols if you train up his Feats.
T3 is probably a bit better than G0-T0 to have along, if only because he has a couple of infinite-use items: the Shock Arm and the Renewable Shield (obtainable on Nar Shaddaa). The Renewable Shield is perhaps the better of these, as it’ll let him be completely invulnerable to blaster fire so long as the shield holds out - and when it drops, you can just use it again.
Attributes: As with G0-T0, either Dexterity or Intelligence will be your boosts here, depending on what role you want T3 to play. We personally never had him in our party after we picked up Bao-Dur, who pretty much outclasses the droids in every way, but hey - maybe you’ll take a liking to the little guy.
Skills: Computer Use, Repair, and Security. These are really all you can give him, unless you want to devote a feat to make something else a Class Skill.
Feats: Both Toughness and Two-Weapon Fighting are good uses of T3’s feat allotment, with Gear Head and the other skill-improving feats being worthwhile choices if you don’t intend to use T3 in battle.
HK-47
Initial Stats
Class: Combat Droid
Strength: 16
Dexterity: 16
Constitution: 10
Intelligence: 14
Wisdom: 12
Charisma: 10
Although HK-47 is in pieces at the beginning of the game, the mechanical assassin that we all knew and loved in the first KOTOR is just a few parts away from being restored back to his normal, loving self. Of course, it’ll take a while for you to assemble all of the parts (you’ll find them on various HK-50 model Assassin droids that you meet along the way, as well as in the inventories of various merchants if you happen to pass them by on the droids), but when you do, HK will be ready to exact vengeance on all the meatbags that might cross him.
HK, as befitting an assassin droid, is much more capable of dishing out damage in combat than either G0 or T3, but still suffers from the drawback of being unhealable by the Heal Force Power. We hate to dwell on this, but this really does make droids difficult to choose over a flesh-and-blood party member, especially when all HK really has to offer is some nice ranged weapon abilities. Still, if you want to bring a droid along, this is probably the one; give him your nastiest ranged weapon possible and let him go to town.
Attributes: Dex, Dex, Dex. This is really the only stat that makes any sense to increase for HK-47.
Skills: As with Soldiers, HK can really only use Demolitions and Awareness, although he is capable of utilizing Repair as well. This last should be his primary focus, as it’ll help increase the healing power of construction kits.
Feats: Get HK-47 Specialized in Blaster Rifles as soon as possible, and then start working on either Rapid Shot or Sniper Shot and get those maxed out.
Mira
Initial Stats
Class: Scout
Strength: 10
Dexterity: 16
Constitution: 12
Intelligence: 14
Wisdom: 11
Charisma: 10
This spunky little bounty hunter is somewhat reminiscent of KOTOR’s Mission character, save for being a bit more softspoken. She has the same complicated relationship with Wookiees as Mission did, though, which will help to set up some of the drama on Nar Shaddaa. Mira will only join you if you’ve pushed your character towards the Light Side of the force by the time you encounter her on the smuggler’s moon.
In combat, Mira relies on her ranged abilities to deal damage. Her free Precise Shot feat will help out in this regard, which is useful, since her little Wrist Launcher thing is pretty much useless in the late game; ammo is tough to find (save for the rockets), and even when you do use it, enemies will almost always make their saves. Her ability to let your party step over mines without setting them off is sometimes handy, but only when your teammate’s AI is too stupid to know not to run over them on their way to an enemy. Even then it’s only marginally handy; far better to just Stealth up to the mines and recover them with her Demolitions skill.
So far as combat goes, Mira is fairly adept at ranged combat, and packs a good suite of skills to draw from, making her a decent substitute for Bao-Dur if you don’t like using him (albeit without Repair and Computer Use). If you gain or lose enough Influence with Mira, you’ll be able to shift her into a Sentinal role in the party.
Attributes: Dexterity is the obvious key here; if she’s going ranged, then it’ll help her hit, and if she becomes a Jedi, then it’ll help her avoid the blows that come her way.
Skills: Mira is one of the few characters that you’ll want to increase Stealth with, as the whole Stealth + Demolitions bit can be amusing to try out once or twice. Difficult fights in this game are few and far between, though, so this is really more of an entertaining diversion than it is a real powerhouse move.
Feats: Depending on your preferences, you may want to give Mira Stealth Run, Weapon Focus: Blaster Rifle, increased Armor Proficiencies, or perhaps outfit her for dual blaster pistols with Two-Weapon Fighting.
Hanharr
Initial Stats
Class: Scout
Strength: 20
Dexterity: 13
Constitution: 20
Intelligence: 10
Wisdom: 12
Charisma: 8
Hanharr is something of a Dark Side counterpart to Mira, and will only join your party if you have done enough evil acts to earn yourself the attention of the Dark Side of the force. If you have, however, he’ll join your party instead of Mira on Nar Shaddaa; you can’t have both of them along for the ride.
Although Hanharr carries around two swords, the first thing you’ll notice is that he doesn’t even have the first rank of Two-Weapon Fighting. If you intend to use him in melee combat, which is where he excels, then you’ll have to get him up in that feat as soon as possible. When you do, though, you should find that he can outdamage pretty much anyone in the game thanks to his massive strength.
Hanharr’s huge Constitution score will also help him use the high-level implants that your other characters likely won’t be able to. If you happen to use Hanharr a lot, be sure to keep him outfitted with the best implants that Bao-Dur can possibly make.
Attributes: If you’re happy with Hanharr’s Strength score, then you might want to start pumping his Dexterity. Since he can’t wear armor, he’ll need a modifier of more than +1 to help him avoid damage from incoming blows.
Skills: Hanharr’s not going to be a character you’ll want to use for his skills; Awareness and Demolitions are easily enough found on any other given character, although Repair can come in handy in a pinch.
Feats: Again, Master Two-Weapon Fighting is non-negotiable here; get Hanharr up and running with a pair of swords, or a dual-bladed weapon, then get him up to snuff with Flurry or Critical Strike.
Mandalore
Initial Stats
Class: Warrior
Strength: 15
Dexterity: 12
Constitution: 15
Intelligence: 12
Wisdom: 12
Charisma: 12
Mandalore’s the only Soldier-class party member you’ll find in the game (unless you’re playing as a female character, in which case you’ll also get the Disciple). This alone doesn’t make him so special, but he can be an effective character in melee combat, especially for Light Side players who skip out on Hanharr. If your main character is a Guardian, though, then you probably won’t have much use for Mandalore in battle, as anyone with a lightsaber is likely going to be much more deadly than this guy, even if you do pump his strength obscenely high.
One of Mandalore’s custom characteristics is that he never takes off his specialized armor, which can be annoying, since you’ll likely find some better heavy armor lying around. Be sure to put the best upgrades into his armor to buff it out a bit.
Attributes: Although Strength is going to be your likely recipient for most of the normal stat upgrades, be sure to use at least one of them to get Mandalore up to level 16; this will let you use higher-tier implants than he normally would be able to.
Skills: As a soldier, Mandalore doesn’t have much to offer in the way of skills. Be sure to continually buff out his Treat Injury, which will let him heal himself and other party members efficiently.
Feats: As with most any melee-oriented character, you’ll want to get Mandalore up and running with Two-Weapon Fighting and Weapon Specialization: Melee Weapons as soon as possible, mixing in either Flurry or Critical Strike as you see fit.
Handmaiden
Initial Stats
Class: Soldier
Strength: 14
Dexterity: 16
Constitution: 14
Intelligence: 10
Wisdom: 10
Charisma: 14
The Handmaiden will join your party only if your main character is a male; if you are, then she’ll automatically pop up on your ship after you leave Telos. Like the Disciple, she makes either an excellent Soldier or an excellent Jedi, but unlike the Disciple, she will morph into the Jedi Guardian school of thought after the proper training, making her an ideal companion for male Consulars.
Attributes: If you’re going to leave the Handmaiden as a Soldier, then you’ll need to start boosting her Strength to correspond with her unarmed combat abilities. Jedi Handmaidens will need Dexterity more, however.
Skills: As a Soldier, the Handmaiden won’t have much to offer you in terms of skills. Treat Injury, Awareness, Demolitions; the usual bunch.
Feats: Since the Handmaiden will almost certainly be focusing on melee combat, be sure to get the Handmaiden Two-Weapon Fighting and either Flurry or Critical Strike (or both of them).
Disciple
Initial Stats
Class: Soldier
Strength: 14
Dexterity: 16
Constitution: 14
Intelligence: 10
Wisdom: 10
Charisma: 14
This golden boy will only join your party if your lead character is female; the resultant chemistry is enough to set Atton on edge, though, leading to some amusing commentary from HK-47 on the nature of love. As a Soldier, the Disciple is obviously handy in combat, but he’s perhaps even more useful to you as a Consular. If you’re going as a Light Side character and dislike using Kreia due to her warped outlook on the universe, try bringing the Disciple back to the Ebon Hawk as soon as possible (without levelling him up) and converting him into a Jedi Consular; he’ll be an able addition to a group of melee-oriented characters. If you’re already a Consular or Sentinal, though, you may want to level the Disciple up with ten extra levels of Soldier or so, to easily give him Two-Weapon Fighting and Master Flurry before you shift him over to Jedidom.
Attributes: If you intend for the Disciple to remain a soldier, then Strength will likely need boosting; if you want him to be a Jedi, then you’ll likely want to start working on his pitiful Wisdom score, since he’ll be turning into a Consular and thus will likely be using Force Powers fairly often.
Skills: As with most soldiers, the Disciple can’t use much beyond Awareness, Demolitions, and Treat Injury. Pick one and stick with it, as you won’t be getting more than one skill point per level-up.
Feats: As mentioned, you might want to level up the Disciple as a Soldier to get him some of the nice melee combat Feats, then start working on things like Finesse: Lightsaber and Regenerate Force after he makes the leap.
Walkthrough
Prologue
Prologue Mission: Save the Ebon Hawk
Prologue Mission: Heal the main character
T3-M4 is the only conscious soul aboard the Ebon Hawk, and it’s up to him to restore power to the ship so that it can dock with the Peragus mining station. This little prologue acts as an introduction to KOTOR 2’s interface for neophytes; if you played KOTOR then you can safely skip it.
To begin with, leave the cockpit and head into the communications area. You’ll find a computer spike in a storage cylinder there with which you can spike the computer nearby to open the door to the main hold. Beyond that door, you’ll come to the Ebon Hawk’s little meeting area; search the body for a locker key, as well as the droid corpses for parts. Don’t worry about the banging on the blast door here; there is someone on the other side, but you won’t be able to reach them during this tutorial.
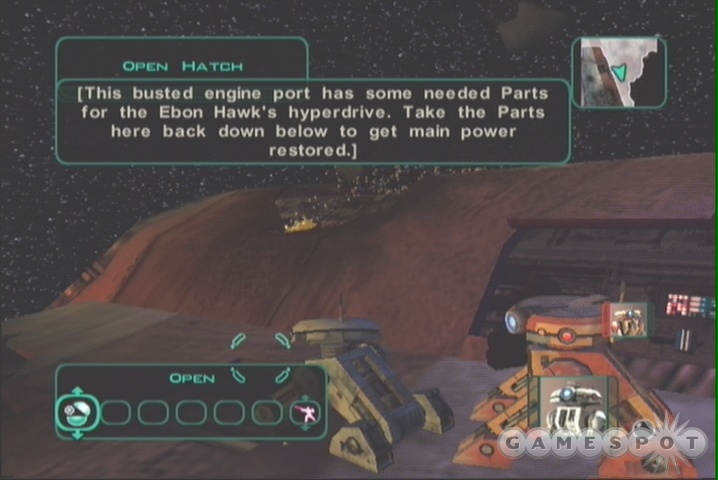
After you’ve looted the bodies, bang open the footlocker on the far side of the room (it’s not the locker that matches the key you found on the body). You’ll find a couple of computer spikes inside the chest, as well as a couple of broken items - it appears that bashing things open can actually break stuff inside the chest now! No more wantonly sabering every chest you see, in other words, but we’ll deal with that can of worms when we come to it.
Your first goal here is to complete the Bonus Mission and heal the character you just generated. If you open up the Low Security Door off of the Main Hold, you can get to the Medical Room, where you’re lying in state for the moment. Use T3-M4 to open the cylinder next to the bed, grab the medpac within, and "talk" to yourself in order to apply it. That’s all you need to do to ensure that you’ll survive until you hit Peragus. Well, actually, you don’t even need to do that, but it couldn’t hurt!
Prologue Mission: Repair 3C-4D
In the tradition of disposal RPG tutorial characters, you can find 3C-FD in the Cargo Hold and add him to your party by using one of the parts that you found on the droid corpses in the Main Hold. You can also find a Field Survival Pistol and some droid armor by examining the crates here; the latter is located in a locker which is unlocked by the key you found on the body earlier. Obtaining the Field Survival Pistol will also trigger a basic combat tutorial featuring the awesome might of targeting drones, so dispatch them after equipping your pistol. If you examine the crates from which the drones originated, you’ll find some Security Tunnelers in one which you can use to open the other.
Now that you have all of that junk, head up to the hull of the ship via the lift opposite the Medical Room. On the Starboard side of the hull, open up all of the hatches and the Engine Port to find multiple Parts, and use one of them on the Exposed Wiring to open up the starboard dormitory. On the Port side, you can recover a pair of mines, and retrieve a third from the impacted Proton Missile. After interfacing with all of the objects up here, you should have enough Parts to repair the hyperdrive, so head back inside.
Prologue Mission: Garage Access
Before you repair the hyperdrive, though, there’s one last area to explore. If you maneuver T3-M4 to the Inner Garage Door and park him there, you can switch over to solo mode (Back button), then use 3C-FD to slice into the security terminal in the Main Hold. From there, select Close Outer Garage Door, then Open Inner Garage Door, then flip back over to T3 to check out the garage and the Starboard dormitory. There is a workbench here, but for now, all you can make is a repair kit with which to repair T3.
Now that you’re ready to move on, use one of the mines that you obtained on the hull to blow open the Engine Room. All you need to do is place it on the door and back away; it’ll automatically detonate after a few moments, giving you access to the Hyperdrive. The Hyperdrive can be jerry-rigged to full power by using a mere five parts; you should have plenty more than that after all your running around, so fix it up and head back to the cockpit. The Galaxy Map here will get you to Peragus.
Peragus II
Unfortunately, the cutscene revealing the survival of HK-47 is just that; a cutscene. For now, we can only wonder - and rejoice - at the prospect of another game filled with meatbag references.
Bonus Mission: Medical Bay Murders
Bonus Mission: Recent History
When you finally take control of your main character, you’ll be in an unfamiliar medical facility. Your journal indicates that you were unconscious for the duration of your trip aboard the Ebon Hawk, so there isn’t much you can do for now save wander around. The first room you’ll come to will be the Medical Lab & Lab Station, where there’s a security terminal. Using it, you can get an idea of what happened to the station if you access the logs - seems that HK-47 has been talking the other droids in the area into doing naughty things. You can also use it to open the morgue door, and can even access the medical storage bay if you have a few points in Security.
Head into the morgue bay and grab the plasma torch off the corpse there - this will wake up Kreia, who apparently was aboard the Ebon Hawk with you. This conversation doesn’t reveal much, but it will begin your journey towards the light or dark side of the Force, should you wish it to. Answer cruelly (e.g. "Leave me alone, or you’ll wind up like the rest of these corpses!") to start down the path of evil; being civil and polite will start you towards the light side. Of course, these are only minor influences; your major steps towards corruption or salvation will come later on, so don’t feel too worried about choosing a path at this point. You can easily reverse your course should you wish to.
Mission: Recover Ebon Hawk
Anyway, Kreia won’t join you at this point, instead choosing to sit around and "rest her mind" or some such. Thanks, Granny. You have that plasma torch, though, with which you can cut through the damaged door nearby (using the Bash command). In the room beyond, you’ll find a Vibroblade on a corpse, so equip that just in case you run into any enemies. Given that there are corpses scattered around, it seems like a pretty good bet that you’ll do so.
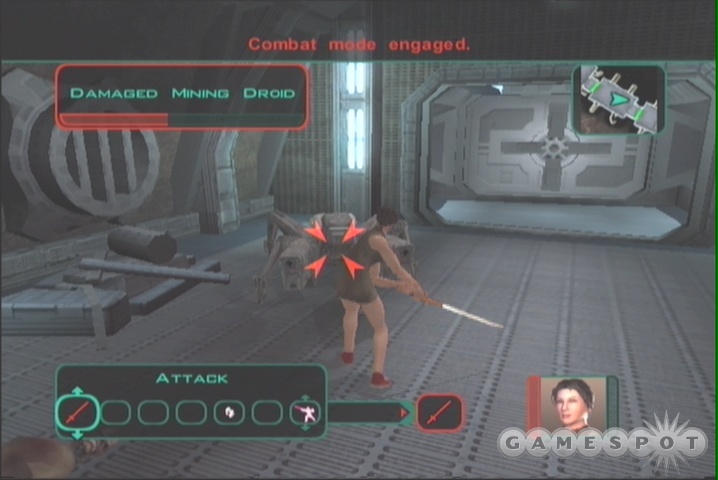
The Damaged Mining Droids in the next room are easy to defeat; they have -4 Dexterity penalties to both their attack rolls and defense, so you should be able to chop through them without a problem. Keep moving until you come to an emergency hatch; it’s sealed shut and won’t open, so you’ll need to find an access panel to force it. Unfortunately, the panel in the Security Room nearby won’t let you through, but it does have a bit of backstory built into it, should you access the logs. Do so, and be sure to listen to the one titled "administration console maintenance." You’ll learn of a little backdoor the security chief has built into the administration computer in the Communication Blister.
As Kreia notes, you should save your game before heading into room beyond, as there are a few droids inside waiting for you. They’re still the same old Damaged Mining Droids, though, so you shouldn’t have too much trouble, and even if you due, you’ll probably hit a level-up during this fight, giving you a full health restoration.
After levelling up, open up the footlockers here, bashing them if you don’t have enough Security. Inside you’ll find a Stealth Field Generator. Anyone can equip this, but it’ll only be useful to you if you have a point in Stealth. If you do, you can activate it to bypass the multiple droids in the Communications Blister and get to the Administration Computer, but you probably won’t want to, as they’re still not very difficult to kill and you’ll get plenty of XP for offing all of them. Don’t miss the pair of droids at the top of a ramp, as well.
After all of the droids are dead, h4xx0r the Administration Computer and flip the override switch; this will let you access the prison. Inside you’ll meet Atton, a roguish sort who’s been locked up on "trumped-up charges." Vague explanations aside, you’ll need to chat with him for a bit before unlocking him (which isn’t optional). As before, your choices here can turn you towards a side of the force, so tread lightly.
Bonus Mission: Galactic History
When you’ve got Atton following you around (he won’t join your party just yet), head back to the Administration Computer. Atton will tell you that you need to get access to the hangar bay to steal a ship, but unfortunately, you won’t be able to do that from there; if you bug him, though, you should be able to access the "check administration logs" and the "access comm system" options for the computer. The administration logs are just more backstory, but if you access Hangar Bay 25 on the comms, you can reach T3-M4, whom you will take control of.
Rescue Main Character
After T3 comes online, you can feel free to wander around his starting area; there’s a few things to look. He appears to have been reconfigured a bit since the last time you controlled him, as his armor is missing and he’s been upgraded to a Mining Laser, which will do good damage to the Mining Droids that you’re going to be fighting agains.
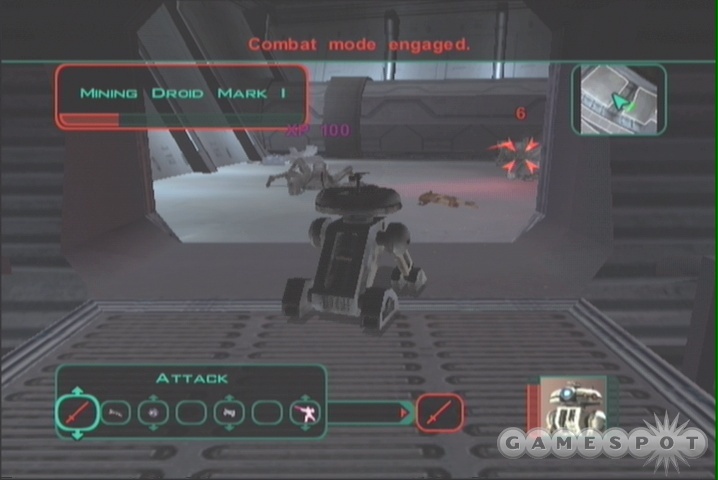
To begin with, head south to the Hangar Control Terminal to examine the console there. It’s been sabotaged, and you have no repair parts, so grab what you can from the footlockers and make your way back to the exit to the Fuel Depot. There isn’t much you can do down there save loot bodies, so grab everything you can; on one of the humans, you’ll find some Sonic Mines; a broken droid will also have a Droid Ion Blast Mark I, which you’ll want to equip into one of T3’s special weapon slots.
When you return to the Hangar Bay, you’ll be accosted by two Mining Droid Mark I’s. These guys have shields and as such will be a bit harder to deal with than the Damaged Mining Droids of yesteryear. Still, you should have the requisite tools to dispose of them: the Ion Blast Mark I will drop their shields, allowing you to blast them with impunity, or you can just use an Ion Grenade on them to kill them immediately.
In the Storage Room here, you’ll find a Sealed Door; use one of the Sonic Mines on it to blow it open. Poor 3CFD is dead, it seems, but you will be able to find some Parts in one of the containers here, which you can use to repair the control panel overlooking the Ebon Hawk. There are a bunch of options on it, so feel free to fool around with a bit; you might want to save your game beforehand in case you run out of Computer Spikes. The important things to do now are to attempt a repair of the emergency sub-systems, which will reroute them to a terminal in the Fuel Depot. You can then use your Computer skill to open the blast doors to the Fuel Depot. Wander down the now-open hallway, dispatching the Mining Droids (make sure they have shields before you use your Ion weapons on them!) and back to the Fuel Depot.
The only thing you can do in the Fuel Depot is use the terminal to open the door blocking the main character’s progress to the docking bay. Do so, and reap your reward!
Rescue T3-M4
Well, one character gets rescued, another one needs to be; seems we’re playing a zero-sum game here. Regardless, all you can do is head through the now-opened blast door into the emergency hatch that’ll hopefully get you to the hangar. To begin with, you’ll have to traverse the Mining Tunnels. Atton will quickly offer to help you by sending you tips based on what he’s reading on the sensors; if you’d prefer not to have any interruptions, feel free to ask him to keep the channel clear. Heck, you’ve got our guide anyway, don’t you?
In the first room, you’ll find some clothes - finally - along with some miscellaneous other equipment that will help you detect and deactivate the many sonic mines in the area. Besides the miscellaneous corpses and broken droids, your only companions here will be a whole lot of hostile droids; you’d be well advised to use an energy shield charge before you wade into battle. These guys are still working with a significant accuracy penalty, though, so you shouldn’t have too difficult of a time ripping through them. Even the shielded ones will fall to a couple blows from your vibroblade. You might want to save your game beforehand anyway, though. You can also try to stealth your way by them if you have any stealth abilities.

Eventually you’ll run into some superheated gases; you’ll need to activate your Mining Shield in order to pass through without getting badly burnt. If you have the Burst of Speed Jedi power, that’ll also help to cut down the damage that you took. Keep working your way through, though, until you reach the Central Mining Core. What you need to do on the computer here is shut off the containment fields; this will let you reach the turbolift leading down to the hangar, but it will also free all of the droids that were previously penned up. If you wish, you can hack them so that they don’t attack you, but hey - they’re pretty much just easy experience at this point, so you should probably keep them hostile and just kill them all. What you can also do is have them mine the sealed doors, which will open up a passage to the southeast, which will eventually lead to a corpse with some decent stuff on it, including a Cardio-Regulator. Don’t worry about Atton’s warning about the rising heat levels; you’re not on a timer or anything, so feel free to explore.
When you’re done looking around, head for the turbolift exit to the east of the main terminal. (The damaged cylinder can only be opened with a high demolitions skill, so don’t worry about it if you can’t blow it.)
Mission: Voiceprint Protocol
After heading up to the Fuel Depot, you’ll run across an HK protocol droid, but one which is apparently not HK-47 after all, due to his inability to recognize the Ebon Hawk. (Unless he’s perhaps had a memory wipe at some point in the time between this game and the first.) Interrogate him thoroughly to learn about the miners in the dormitory; in order to reach them, you’ll need to use a voiceprint code to access an airlock leading to the exterior of the asteroid, but the only one who can speak the code is dead. Hmm....
In order to proceed out the airlock, you’ll need to grab a Sonic Imprint Sensor from a container in the room opposite HK’s, which will let you record the maintenance officer’s voice from any holologs that you can access. This will undoubtably lead to an RIAA lawsuit, but heck; you’re fighting for your life here. Before you move on, though, you can use the workbench here to upgrade or create items, if you wish; if you rooted around downstairs, you may have picked up a Basic Ionite Edge which you can apply to your vibroblade to allow it to deal extra damage to droids, which will obviously come in handy. If you have some Repair skill, in fact, you can actually make a Long Sword from some components first, then use the Ionite Edge to upgrade that for an even better weapon. Heck, you can even make other edges and cells with the workbench, then implant those, depending on your choice of skills. Play around with it a bit and see what happens!

The extra damage v. droids will come in handy in the next hallway, where numerous baddies are waiting for you, including a couple of bipedal Mark II’s that will need a bit more persuading before dying than the spider droids will. Heck, you can even use your plasma torch to cut through the broken door here if you want to fight another Mark II; there doesn’t seem to be anything else in there worth mentioning.
If you scout around a bit, you’ll find a maintenance station near the turbolift to the administrative level. If you use it and access the logs, you can get around a third of the voice samples you need for the voiceprint, as well as a bit more of the backstory about how the HK unit was able to corrupt all of the droids on the station. You can actually get the second part of the code by speaking to HK again; if you thoroughly search through his conversation options, you can eventually get him to play back the maintenance officer’s last words, which are good for another third of the code.
Moonwalking
After checking around thoroughly down here, head into the turbolift to reach the administration level. The next bit of the sonic code can be found here, back at the security station you used earlier, so grab it, then head back down to the fuel depot and use the Sonic Sensor on the maintenance station to unlock the door leading to the airlock. Grab the space suit from the locker by the airlock, then head outside.
Luckily for all of us, Obsidian has drastically increased the speed with which you move while you’re in the space suit, so you can head outside at a pretty good jog. Avoid the mining vents and get back to the observation deck’s window to talk to Atton. One gets the sense that the incoming ship features one extremely unpleasant customer, if the cutscene is any indication....
Regardless, your path here leads onward to the Dormitories. What you need to do here is start cutting through more dastardly droids; you’ll come across a few that are listed as being fire suppression models soon enough. These guys will try to put out the fire that burns inside you by encasing you in carbonite, which deals pure damage. If you can get into the Workbench area (directly west of where you entered the level), either with your Security skill or a Security Tunneler, then you should be able to find some insulated gloves that will help you resist the cold. If you can get the underlays from one of the locked lockers, you can also upgrade the miner’s uniform with the environmental protection, which may let you avoid all of the carbonite damage outright, especially when paired with the gloves.
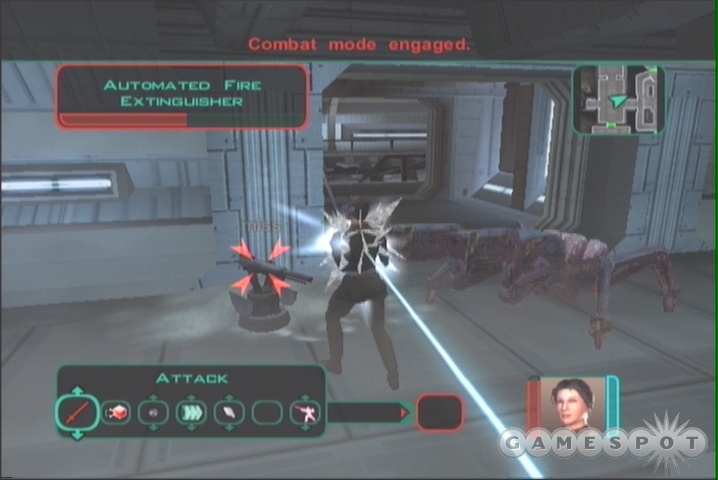
If you walk north until you reach the Shift Assignment Console, you’ll be able to repair it with a single part. Using it, you can cancel the dormitory emergency lockdown, which will unlock the door across the hall and give you access to the dormitories. Both of them are filled with poison gases at the moment, but you can slice into the computer to vent those gases elsewhere, if you wish. If you don’t want to use your slices, it’s not really too much to worry about, although having something like Force Speed will help you dash through the gases and search the dorms without taking too much damage. You should have plenty of medpacs to heal the damage, and you’ll also regenerate naturally over time. If you wish, you can follow the path of the hallway around to the east; in the room to the north of the Cafeteria, you’ll find a breath mask that will cut down on the damaging effects of the gas.
First off, head into the western dormitories and access the Log Terminal near the entrance. You can check the subspace transmission that was made from here, if you wish, and when you search the Administration Officer’s corpse nearby, you’ll also be able to check his hololog. The rest of the rooms here contain miscellaneous items; the damaged door only contains 74 credits and a medpac, so skip it if you don’t want to give up a mine to get in.
Mission: Turbolift Lockdown
Anyway, the hololog will give you the first few parts of a keycode that you’ll need to unlock a turbolift that apparently leads back to the administration level. This will eventually become a bit of a mathematical puzzle, as appeared every so often in KOTOR, but for now, all you have are three unconnected digits, so leave it alone for the moment.
The eastern portion of the dormitories are similar in layout to the western; the key items here are the logs from the mine foreman and the dock officer. One of these is located in a Refresher in one of the rooms, so don’t miss it. There’s another damaged door here you can blast open with a mine, should you have one; within, you’ll find a few grenades and miscellaneous other items. The logs can be inserted into the terminal in the western dormitory and played back.
When you’re ready to move on, head back to the Cafeteria. If you killed the robots here earlier, check their remains; one of them probably dropped a considerably cool pair of Infiltrator Gloves which will give big bonuses to your Security and Computer Use skills. In the southern room here, you’ll come to the turbolift, along with the corpse of Coorta, who was apparently double-crossing the miners on behalf of HK, and whom was in turn betrayed by the droid. You can examine the turbolift camera logs to get a nice visual display of all of these events, and can even use Coorta’s log back on the dormitory terminal to play back his original contact with HK, but the latter is just for your edification.
Anyway, the turbolift code puzzle should be fleshed out in your journal at this point. You only have three numbers, but you have all of the flashcodes which correspond to the numbers.
| Symbol | Number |
| ... | 3 |
| -X.. | 17 |
| -... | 13 |
| X | ??? |
| X.. | ??? |
Just from elementary deduction, we can find that a dot is equal to one, a minus symbol is equal to ten, and an X is equal to five. Thus, the full code is 3, 17, 13, 5, 7. Since the code was reversed by HK to prevent Coorta from leaving the dormitories, you’ll need to enter 7, 5, 13, 17, 3 into the console to open the turbolift. You can smash through it for the same effect, if you wish, but you won’t earn any experience. You only get 250 experience for going through the whole puzzle, in fact, which is only a couple of droid’s worth, so it’s no great shakes, but dammit, this is a game guide, so we’re being thorough!
Back to Administration
As soon as you reach the administration level again, Kreia will join your party, and you’ll be able to immediately level her up to boot. She fulfills something of the Jolee role from the first KOTOR, in that she’s definitely more of a Force Power-using character than a lightsaber powerhouse, if she even had a lightsaber (which she doesn’t). In fact, she has no equipment at all, so get her a Mining Laser or Blaster Pistol for the moment, then run back to Atton, who’ll also join up. Save your game before running back to Atton, though, as you’re about to be in for something of a boss fight.
HK-50, as the droid reveals his designation to be, can be pumped for information before he finally deigns to fight you; apparently he’s something of a bounty hunter, and was attempting to incapacitate you by pumping your kolto tank with sedatives until he could effect your transferral off the station. (By asking him about this, you can finish off the Medical Bay Murders bonus mission.) Eventually, though, you’ll have to challenge him to a duel of sorts; you’ll have Atton and Kreia on your side, while HK will use a set of floating mines to protect himself. At the beginning of the fight, switch everyone over to blasters and shoot the mines, then close in on HK himself with your vibroblade and go to town. You can also use Ion grenades, if you have any, for more widespread damage. When you deal as much damage as HK can take, he’ll initiate his self-destruct mechanism, so back away before he blows, then retrieve all of the items off of his body.
The Harbinger
Now that you’ve bypassed that threat, you can head down to the docking clamp, which was previously locked, and enter the Harbinger’s Command Deck via the door to the west of where you defeated HK. Your goal now is to get to the Harbinger’s bridge to get its asteroid drift charts so that you can escape the field, then to access its fuel line to make it back onto the station, hopefully performing something of an end-around past the security fields in the fuel depot level.
During the initial conversation here, you’ll get your first intimation of how your conversation choices can affect your influence with your teammates. Put most simply, the closer your personality matches that of a party member, the more likely you are to gain influence over that member. For now, Atton and Kreia are ciphers to you, but as you get to know them better, you’ll be able to judge how to respond to them to gain influence (if you even want to). If you’re subservient to Kreia, and tell her that you’ll attempt to be more mindful of the present, you’ll gain points with her, which may be useful later on.
Your arduous journey to the bridge will begin when you head through the door to the west of your starting point. Through it, you’ll find...the bridge. Well, that was easier than it sounded. You can either repair or slice the navicomputer here to obtain the drift charts for the asteroid field, so you’re set on half of your objectives. Now all you have to do is make your way through to the fuel line. Unfortunately, there are Sith Assassins roaming this deck, invisible until they begin attacking you. Most of them will have significant dual-wielding penalties, though, so you should still have a big advantage in combat for the moment.
After getting the field charts, though, head through the southern door leading from the bridge. This is one gigantic dead end that winds up near the escape pods, but there are still items to retrieve and Sith to kill for experience, so clear everything out before returning to where you entered the level and busting through the security doors. If you can’t open them, then Atton should be able to get past. Scout out the rest of the level, then find the exit to the Crew Quarters and head on down.
Crew Quarters
You’ll run across your former quarters soon after you enter this level; search around for an armband as well as a medical pad. You’re unlikely to be able to access the room across from it with anything less than a security tunneler, which is kind of a crapshoot; you might find a longsword inside, or you might find a medpac, or anything in between. The tunneler is likely going to be worth keeping over whatever’s inside.
When you reach the fork in the path, head north and go through the medical bay’s door. You can get a bit more backstory here; apparently a Sith Lord was brought aboard, having been thought dead (amazing how pesky these Jedi can be), and subsequently rampaged throughout the ship when he regained consciousness, along with his invisible cohorts. You can heal any wounds you have here and pick up a few items from the chests, but you’ll eventually need to move on to the east and down to the Harbinger Engine Deck.
Harbinger Engine Deck
Atton will pipe up as you enter this level; if you want to gain influence, listen to him closely and respond politely, then save your game. Darth Sion will quickly appear, but Kreia will tend to him, leaving you and Atton to fend for yourselves for the meantime. To begin with, head through the security doors to the east and slice or repair the console here to give you access to the ion engines. If you then head north, you can find a workbench with which you can upgrade the long sword you may’ve obtained earlier with new edginess. Finally, a long sword for my generation!
From this area, it’s a straight shot to the engines, where you can use a terminal to open a hatch leading out to the fuel line.
Fuel Depot
After reactivating T3-M4, you’ll be able to grab the Hangar 25 Control Conduit from the stash near the mine. (Note that a character with a high Computer skill can attempt to "repair" T3-M4 by talking to him. If successful, you can boost his Intelligence a bit, and will gain influence with him. Also, don’t forget to periodically ask him for computer spikes.)
Your goal after you get the Conduit is to travel around in the lower level of the fuel depot and either deactivate or destroy the remaining sonic mines; there are plenty of them around, but they should be disableable (if that’s a word) with Atton, or you can just walk through them to set them off, then heal yourself afterwards. When they’ve all been disabled, the Emergency Field Station will let you access the upper levels, from which you can take a turbolift to the Docking Bay.
After you make your way to the main control terminal in the Docking Bay, you can use the Control Conduit on the terminal to open up the door to the hangar. You’ll have to wander down a well-mined path to reach the ship, but if you’ve been building up Atton’s Demolitions skill, you should be able to recover most of the mines in your path. At the bottom of the ramps, you’ll come to a sealed decontamination chamber. Apparently it’s been modified to become a contamination chamber, as there’s a bunch of noxious gases on the far side. If you use T3 to hack the computer, you can shut off the gases, but it’ll cost you most of your spikes, most likely, and not give you too much experience. A better bet is to just bash the console to open the door and then run through. You’ll take light damage, sure, but that’s no big deal. You can even equip a breath mask if you wish to avoid the minor amount of hurt that’ll be coming your way.

When you reach the Ebon Hawk, check around the hangar for some items on the broken droids, then save your game and hop aboard. You’ll have to attempt to repel the Sith infiltrators from boarding the ship by using the turret. If you have trouble shooting the Sith with the turret, try reversing the Y-axis in the Gameplay Options menu; depending on your preferences, you may find this option to be a bit more natural.
Some Sith will naturally get past you and into the ship; the exact number will depend on how proficient you were with the turret. If you’re looking for numerous kills, try shooting the explosive barrels scattered around the hangar; if you’re just going for experience, though, you might actually want to let all of the Sith hit the loading ramp of the ship, then fight them off inside. You’ll get a lot of experience for doing so, as well as a chance for extra items.
After all the Sith are dead, you’ll be able to finally escape the system. Watch your responses to Atton here; if you want to stick to the light side, you’re going to have to sound as concerned as possible about the people that might theoretically be on the station. The conversation that ensues in hyperspace is also a good chance to get your force alignment up or down, if only slightly, so read all of the conversation options before picking one. You’ll wind down most of your active quests here, and can polish off the last one by talking to Kreia and interrogating her about the Mandalorian Wars.
Bonus Mission: Rebuild HK-47
After speaking with Kreia, the door in the Main Hold will revert from a Blast Door to a Low Security Door, which you should be able to get through if you have any Security skills at all. Inside you’ll find HK-47, who was apparently damaged at some point in the past. He’ll need four parts before he can be repaired, of which you only have the Vocabulator, assuming you picked it up off of HK-50’s body after you killed him. The rest will have to wait, for the moment, but at least you can get the quest into your logbook.
After speaking to Atton again, use the Galaxy Map to get yourself to Telos. Your description of your lightsaber during the conversation here apparently does affect its appearance later in the game, so pick something that sounds cool.
Telos
Mission: Ebon Hawk’s I&D
Mission: Arrested!
You may remember Telos as the planet that got royally pwned by Malak in the first Knights of the Old Republic game. It wasn’t quite a butt-kicking on the level of a Death Star attack, but they did a pretty good job of bombing the planet back to the stone age with their fleet of ships in orbit. It appears that the Telosians have decided to rebuild, and have constructed a massive space station from which to control the efforts. It’s here that you’ll find yourself when you land; you’ll be quickly thrown in prison due to the events back on Peragus, such as the fact that it doesn’t exist anymore.
Bonus Mission: False Batu
Soon enough, you’ll be accosted by one Batu Rem, who seems to think that he can take on all of you at once without a problem. Not the brightest star in the bounty hunter galaxy, this one, so take him down with your bare hands. You’ll wind up in a more comfy apartment after killing the assassin, so hey - it all worked out!
Mission: The Caller
Mission: Czerka Calling
After your transferral, you’ll soon be chatting with Moza, one of the Ithorians who are running the planetary restoration project on Telos. Agree to speak to his priest/leader, then head back to bed; soon enough, the devious Czerka will call you up, offering you a deal similar to that of the Ithorians. You don’t have to decide between the two now; feel free to accept them both.
Mission: High Stakes
When you’re finally let out of your house arrest, you can feel free to wander around the area. You can pick up a new mission in Apartment Complex A; speak to Harra there to learn about his long lost girlfriend, whom he gambled away in a game of pazaak. We’re obviously treading in the waters of a decent, civilized people here. Regardless, offer your services, if you wish, and move on. Note that most of the areas in Citadel Station have Information Stations that will let you download the full maps for them, which is helpful. You can also use them to warp between each Station, which will help you avoid running through multiple areas when you’re forced to backtrack.
Your first goal here should be to get your items back. To do so, head to the Entertainment module through the exit in the long corridor here, then work your way through that area. Outside the Cantina, you’ll come across a Sullustan that’s about to get totally wailed on by a couple of mercenaries; you can either help the Sullustan for light side points, or let the mercs do their thing unhindered. Regardless, your goal is the TSF Station map point on the western side of the area.
Mission: Ebon Hawk: Stolen!
Cue the dramatic music, because it appears that your ship has gone missing from the impound dock! Oh noes! Luckily for you, your inventory items are safely stowed in the TSF office here, so grab them from the lockers and reequip your characters. Now, if you want, you can initiate a new cutscene revealing your ultimate foe by speaking to Kreia and discussing the meaning of mercy with her - the cutscene should immediately follow. If it doesn’t, don’t worry; it’ll pop up eventually, letting you know that you have more Dark Jedi on your tail.
Now, if you want to resolve the High Stakes mission, you can do so in the Casino. You’ll find Doton Het here; this is the guy whom accepted the girlfriend in place of cash for the gambling debt. He’s asking for 2,000 credits, which you might be able to afford, but a better plan is probably to buy a bunch of Pazaak cards and attempt to win her back from him! You can buy Pazaak cards both in the merchant back in the Entertainment Module and from Mebla Dule in the bar itself. Concentrate on the dual-value cards and the cards with values in the two, threes, and fours. If you’re looking for tips on the game, check out section on KOTOR2’s mini-games; if you feel confident that you know the rules of the game, then save your game and challenge Doton to a game! He’ll ask you to put up a 1,000 credit bet yourself; if your pazaak purchases dropped you below this limit, then you might have to sell some items to one of the merchants in the Entertainment Module to get up above it.
When you’re ready to take on Doton, save your game, play him, then reload your game and repeat the process if you lose. After you win, you can either take Ramanna right back to Harra (although she seems reluctant to go), or just rent her right back to Doton and come back for her earnings later. Ouch! If you do bring her back to Harra, you can either set Ramanna free, or force her to stay with the guy who sold her into slavery. The choices that will lead to dark side or light side shifts should be obvious....
After that’s done, you can get back on the main quest track here. First up, head to the Czerka offices (located off of the Residential Module East). If you speak to the administrator here, she’ll ask you to steal a droid that’s being delivered to the Ithorians and deliver it to Czerka instead. Don’t worry about shifting towards the dark side just by listening to her; you can choose to think about it and walk away without any harm done. The same goes for the Ithorians; you can talk to them by traveling to the Residential Module West and walking into their compound there.
After hearing both of the offers, you’ll need to make a choice as to which group you wish to help. Whichever you choose, you’ll have to make it back to Entertainment Module and enter Dock Module 126 from the shuttle there.
Czerka Branch
If you’re going Dark Side, then you’ll want to play through the Czerka branch of the Citadel Station missions.
Replacement Restoration Droid
If you choose to side with the Czerka, speak to Jana Lorso in their offices and agree to retrieve the Ithorian droid from their hangar in the docking bay. She’ll give you credentials that will get you inside the hangar, so head on over and fight off the thugs that arrive - apparently some insurance on the part of Czerka, just in case you got cold feet about betraying the Ithorians. You’ll be able to take the droid back to Czerka after the fight, and will also obtain a modified blaster that will open up the Suspicious Goods side quest.
The Exchange
Now that the Czerka have a handle on operations in Citadel Station, they wish to...amend their previous business relations with the Exchange. In effect, Lorso wants you to kill the local Exchange boss, one Loppak Slusk. As mentioned, the Exchange compound is heavily guarded, so the only way in will be through an inside contact. Head to the Cantina and speak to Luxa, who’s waiting by the bar. Unfortunately, you won’t be able to just talk to her and immediately gain access to the Exchange, as you would in the Ithorian branch of missions here; instead, you’ll have to run a few tasks for her.
Arms Dealing: Luxa’s first task involves you acting as a courier; she needs to deliver a crate of weapons to a pair of smugglers, and wants you to make the exchange. You can find the medical facilities in the Residential Module West, so head on over there and step up to the Communications Terminal within. You’ll be asked to head back over to Residential Module West, and meet your contact in apartment B3.
Before you can gain access to B3, you’ll have to dismiss your party members via the Party menu, accessible by pressing start. Do so, then enter the room, where you will, predictably enough, be ambushed by the putative weapons dealers. You’ll need to kill them both before returning to Luxa; check their bodies for your very first Bowcaster. Feel free to keep the credits that you picked up when she asks for them; Luxa’ll take your insouciance in stride, and offer you your next mission.
Opo Chano: You can find old Opo in the apartments on the eastern side of Residential Module East. He honestly doesn’t seem to have the credits he owes, which is too bad, because your primary options are to either repay the loan yourself or kill him. If you’re allying yourself with the Exchange, you’re probably not going to be too concerned by the Dark Side shift involved with killing him, so whip out your sword and strike him down before returning to Luxa, who will finally get you into the Exchange compound after you agree to kill Loppak.
Luxa & Loppak: Head over to the Exchange compound in Residential Module East and get the guard there to let you in. You’ll need to either Persuade the doorwoman here to get you in further, or just tell her you don’t have an appointment and kill the Gamorreans that she’ll summon. Heck, you can even kill her afterwards, if you wish. If you check around, there’s an Ithorian locked up in the Holding Cells; there aren’t many opportunities to earn any Dark Side points with him, so feel free to leave him alone. If you wish, you can use the security terminal in Loppak’s room to set the dude free, but this won’t earn you any points one way or another.
For now, though, work your way around to the southeast and track down Loppak; when you find him, you’ll soon be met by Luxa as well, for one big happy family reunion. You’ll need to kill everything that moves here (and, in the case of the turrets, some things that don’t move), but if you pick your conversation options correctly, you might be able to focus on one group at a time. No need to worry too much about it, though, as even with both groups fighting you at the same time, you shouldn’t have too much trouble picking everyone off.
Czerka Under Attack: When the Exchange has been thrown into disarray by your little games, you can return to Czerka, only to find that they’re being assaulted by a group of mercenaries. All you can do at this point is start wading your way through the baddies and attempt to cut your way back to Jana Lorso, who’ll be negotiating with the leaders of the brigands. This last fight can be rather tough, so we’d recommend that you save your game before entering it. Regardless, you’ll need to cut them down before hassling Lorso for your reward money, and then informing her of your handling of the Exchange. She’ll get you a shuttle down to the surface, which you can access by heading back to the Docking Bay.
Ithorian Branch
Mission: Replacement Restoration Droid
After reaching the dock module, speak to the Ithorian in the hallway to be passed through to their hangar. After you meet up with the Ithorians within, the predictable ambush will occur, leaving you and your party to face off against a group of Thugs. They should be relatively easy to dispatch, so kill them off and take possession of the droid. You’ll also find a modified weapon on the thugs, which will lead to the mission entitled Suspicious Goods. This can lead into a pair of side missions, depending on whom you decide to speak to about it.
When you have the droid, though (you’ll need to speak to it), you’ll automatically warp back to Residential Module West. You’ll receive a pair of Jal Shey Perception Gloves as a reward, as well as the opportunity to take on a second quest, one called Ithorian Diplomacy. In order to complete it, you’ll need to travel back to the Residential Module East and attempt to enter the Exchange compound. Of course, you’ll be refused - even killing the guard is no help, although it is amusing - so instead, head into the Entertainment Module.
In the Cantina, speak to Luxa, the woman at the bar that’s flanked by Gamorrean guards. She’ll offer to get you into the Exchange compound in exchange for you killing her boss. If you’re horrifically intent on sticking to the goodie-two-shoes route, you can refuse to become an assassin, in which case she’ll suggest that you merely run him off the station; whichever path you choose to take, you’ll want to take her up on the offer and then head back to the Exchange base and stroll on in after talking to the guard there.
The receptionist here will likely tip off the guards to your presence, in which case you’ll have to kill a few Gamorreans in order to enter the base. After they’ve fallen, head through the western door to examine a trapped Ithorian; you won’t be able to free him just yet (and don’t have to, if you don’t want to), but keep him on your mind nonetheless. It’s to the east that you’ll come across Loppak Slusk, the Quarren headmaster of the Exchange base here. Of course, he’s surrounded by bodyguards, so drop all of them before you stroll in to talk with the big man.
After you arrive in Slusk’s room, Luxa will follow you, apparently having followed in the wake of your little carnage-fest. Now, you can play the little Mexican standoff here however you like, but if you want our advice, you should first attempt to insist that you don’t want to fight anyone; this will turn Luxa hostile to you. After killing her, you can either let Loppak live or, better, kill him as well and loot everyone’s corpse. You don’t take a Dark Side hit from killing Loppak.
Before you leave Loppak’s room, hack into the Security terminal and let the Ithorian out of its cage. Head back to Habat for your reward, and one final test.
Mission: Czerka Mainframe
Habat wants you to hack into the Czerka mainframe and obtain evidence of their corruption, but as we just learned, sneaking into heavily defended compounds isn’t the most peaceful of pastimes. Still, he wishes you to avoid bloodshed as much as possible (snicker), so head down to the cantina and talk to his contact. If you wish, you can try to Persuade Habat into giving you money for a bribe, which might be handy, because it’ll otherwise cost you around 1,000 credits.
After you make it down to the cantina, speak to Corrun Falt and maneuver through his conversation tree until you reach the "So how do I get in?" option. This will bring up a few Persuade options; if you don’t have the Persuade power, then you won’t be likely to bring him down below that 1,000 credits that he’s asking. If you managed to get Habat to help defray the costs, then it shouldn’t be too bad. Regardless, Corrun will tell you to speak to Opo Chano in Residential Module East. In yet another case of vice gone bad, Opo Chano will refuse to help you due to the fact that his Czerka contract helps him pay off his gambling debts. If you can get the credits he owes, though, perhaps there’s something he can do after all....
Return to Habat at this point and he’ll rather credulously believe your little story and give you the requisite credits to pay off Chano. In retrospect, you probably should’ve asked him for five thousand, but the 2,500 credits you’ve obtained are enough to get Chano off the hook, after which he’ll give you his credentials. With them, return to the Czerka Offices and get B-4D4 to follow you outside. You’ll automatically return to the Ithorian clan compound, where the droid will be modified to follow only your commands.
After taking control of B-4D4, walk on back to the Czerka offices and speak to Jana Lorso, who will give you access to the mainframe. Inside, you’ll have to talk one of the utility droids into going berserk so that you can download the files that you need. Oh, B-4D4, you sooo crazy!
When you have the Czerka memory pad and have deleted all traces of your intrusion from the computer, it’s time to book it back to the Ithorian palace. When you regain control of your main character, speak to Habat again to get a small Force Point boost, as well as the right to travel down to the surface of the planet with the Ithorian’s shuttle.
Mission: Ithorians Under Attack!
As you head to the shuttle down to the surface, the Ithorians will radio you and let you know that they’re under attack. Helping them is optional, honestly, but you can get plenty of experience for doing so, so warp back to their compound and head in, chopping through all of the mercenaries that you see.
Save your game before heading in, as there are plenty of baddies to deal with. You’ll probably be flying solo at this point, due to the fact that your party was split up when you took over B-4D4, but you can easily warp in your teammates via the Party menu; just click A to add them to your party, then hit start again to exit the menu, and they should pop right in. You’ll still want to exercise a good deal of caution during the fights, though, as the sheer number of foes can overwhelm your healing abilities. It’s definitely a good idea to equip an energy shield on your main character and activating it before heading in, as it’ll suck up a good deal of the blaster fire damage that you’ll be taking. Also, get used to activating any Force buffs, like Knight Valor or Knight Speed, before opening up doors, as it’ll let you get right to the killing without having to use them on the first round of battle.
After penetrating back to the main open area of the compound, get to the Vivarium and take the Ithorian Passkey from Moza; this will let you access Habat’s quarters, where he’s squirrelled away with more Mercs. After saving him, you can either pressure him for a reward (boo!) or stoically accept the fact that the experience you picked up from the kills was reward enough (yay!).
Down To The Surface
Whether you choose to pass through the Ithorian or Czerka branch of the Telos quests, you’ll eventually be allowed to shuttle down to the surface of Telos, so hop aboard your shuttle and get going! Of course, nothing is quite as simple as that, so you’ll find yourself taking fire and getting shot down before you can reach the surface. Luckily for you, though, Bao-Dur is waiting to pull you from the wreckage.

After equipping Bao-Dur (you can probably let him whack away with his bare hands, thanks to his Unarmed Specialist training), gear up and start exploring the planet. Your first stop will actually be just to the southwest of your crashed shuttle; if you track down the set of mines and clear them (Bao-Dur should have no problems with this), you can find a hidden mercenary cache which seems to usually contain a decent Jedi Robe for you to wear. Further south, you’ll come across some actual mercenaries, but you should be able to close to combat range before they spot you, allowing you to chuck in a frag grenade or two (assuming you have any) to weaken them up before heading in and slaughtering the lot.
Make your way down the path until you reach the beach, where you’ll come to the main group of mercenaries. (There’s also a bag on the far western end of the sand that you can search through, although it probably won’t contain much.)You can attempt to skirt around them, if you wish, but they really aren’t that difficult to kill; just use any Force Power buffs you have, activate energy shields for everyone, then charge in and lay waste. After they’re dead, you’ll be able to more safely explore the area. If you check the area to the southwest of their position, you can find their second cache; there are other miscellaneous bags on the map, as well, so scout around a bit before moving on to the next zone.
Before you can proceed to the Czerka Excavation Site, though, you’ll have to bypass a mine field that’s watched over by a pair of heavy turrets. There won’t be much you can do here to prevent your teammates from running pell mell through the mines to get to the turrets when they open fire, so you might want to either send in Bao-Dur in solo mode to try and clear a path, or just use energy shields on everyone (to protect them from the turret fire) and running through the mines, then healing immediately afterwards while taking down the turrets.
Czerka Excavation Site
Another similar trap will await you at the Excavation Site, where a Mercenary Droidmaster will sic her battle droids on you while hiding behind some frag mines. Your best bet here is to just run through the mines and take whatever damage comes your way before cutting all of your foes down; they guard the path to the excavation site itself.
The initial battle with the Mercenary Leader is going to be quite tough, and unfortunately you can’t buff yourself and charge right in, as there’s a bit of a conversation ahead of it that will drain the time from your short-term buffs (although you’ll probably want to activate your energy shields ahead of time, since they last for a couple of minutes). Both the Leader and the Veteran will use melee shields, but you should be able to easily deal with them by using Bao-Dur’s Shield Breaker ability (he’ll need to be weaponless to use it), which can drop them instantly, assuming it hits.

The main problem here is the way that another mercenary waits near the main group; after you kill the initial four enemies, your teammates will probably run over to him and start wailing on him as well, then chain from that guy to yet another large group of foes. All of this is not really survivable, so you’re going to have to either extract them from battle (which is nearly impossible), or ensure that they don’t get within view of the last group of enemies. This can be done by giving both of your teammates ranged weapons, and manually controlling the main character so that he or she doesn’t charge in (or by using a ranged weapon on your main character, as well). This will hopefully let you avoid alerting the second group of enemies, and give you some time to rest up before heading back that way and taking them on. If you’re careful, you should be able to kill all of them without drawing the ire of the turrets or soldiers on the landing platform, but save your game after the first group of foes nonetheless.
Your ultimate goal here is to fight your way onto the landing platform, where Bao-Dur will be able to examine a console and determine that the Ebon Hawk is most likely to be found at Telos’s polar icecap. In order to get there, though, you’ll need to get into the underground military base and find a shuttle, so find the exit near the platform and move on.
Old Military Base
The Old Military Base is a trap-ridden series of corridors; there are numerous droid defenders and poison gas vents scattered around, so be on your guard; if you have any Breath Masks or poison-immunity Implants still hanging around your inventory, now would be a good time to equip them. You’ll also find Disable Droid to be quite handy here, so if you haven’t obtained it yet, you might want to get up to it when you level up, if possible. You’ll also need to use Bao-Dur’s incredible arm to bash through the force fields that block your passage from time to time; he’s the only one that can get you through these points.

After you run across your first military droids, check around for an Administrative ID Card in one of the nearby bags; if it’s actually there, it’ll let you access the terminals without having to slice into them. Your first really difficult fight here will come shortly after, in the room with the Workbench and Lab Station, as two military droids and four turrets will actively desire to turn you into swiss cheese as you enter. You’ll definitely want to keep energy shields up and keep all of your characters targeted on the same target as you pass from droid to droid and shut them all down permanently.
Immediately after the workbench room, you’ll come to a shuttle, but you’ll need to both get the ignition codes for it and open the hangar doors before you can take off for the pole. Start your quest by bashing the force field in front of the shuttle; the terminal in the room here will let you shut off all of the gas vents on the level. If you then scout around in the Control Room nearby, you’ll learn that you’ll have to reactivate the base’s reactor before the bay doors can be opened. If it isn’t one thing, it’s another!
Keep searching through the base, and you’ll eventually come across a member of a Czerka salvage team. If you escort him back to the entrance of the base, you’ll earn some Light Side points, but there isn’t any material reward for his rescue, and it’s kind of a pain in the butt anyway (he can’t keep up with you very well, so you’ll have to constantly stop and start), so feel free to leave him behind.
Next up is the droid repair station, where another posse of military droids will assault you. Dispatch them, then use the terminal near the locked door to the destroy the rest of the baddies behind the glass; this way, they won’t come back to haunt you later. From there, you should have a straight shot to the reactor, which you can activate at the terminal. There’s also a damaged HK droid to the south of the reactor, but it doesn’t appear able to do much beyond blow up after you repair it. This doesn’t appear to be related to the ongoing quest to restore HK-47’s functions, so don’t bother interacting with this guy unless you like seeing stuff blow up.
Your next goal is to get the ignition codes for the shuttle; these are located in a footlocker in the security room off of the droid repair room, which you can now access thanks to the opening of all of the doors. After that, you’ll have to return to the hangar and kill off the Tank Droid that’s been released. Of course, such things are easier said than done; it is a tank, after all.
The Tank’s most devastating attack is a flamethrower which can deal up to sixty damage in one shot. Your best bet here is to use one character for melee attacks, and load him or her up with all of your heat-reduction equipment, such as armor with a Environmental Underlay, Insulated Gloves, or an Arkanian Energy Shield. Or all three! Your other characters should sit back and use their ranged weapons and support abilities to try and deal extra damage to the beast. If you’re using Kreia, she should also have at least one rank of Energy Resistance, which can help at least a little bit. Although it may seem as though you’re putting all your eggs in one basket, using all of this tech should let you easily overpower the Tank Droid, after which you’ll be free to travel to the polar regions. Don’t forget to check all of the boxes and lockers in the Tank Droid’s room before you head out, though.
Telos Polar Plateau

It just isn’t your week, it seems; every time you get onto a ship, you wind up getting blown to pieces. Luckily, you’ll get to your destination before you get shot down this time, but you’ll have to face off with no fewer than three HK-50 model assassin droids as soon as you crawl from the wreckage. If you don’t have Disable Droid, activate your energy shields and try to get in close to finish them off; if you do, though, just spam it on the center droid, where it’ll arc to the other droids and hopefully stun all of them while your teammates deal the real damage. Be sure to check all of the remains for another HK part before looking around. Bao-Dur lies unconscious by your shuttle; he’ll live, but you’ll have to bring Atton along for the time being. Head for the small mound of snow to the southeast of your shuttle and head inside.
Polar Plateau Interior
Mission: Lost Jedi
After being accosted by the Jedi guardians, surrender your weapons and get ready for a couple of cutscenes; the second will lead into a lengthy conversation with Atris, one of the Jedi which cast you out of the Jedi Order after the Mandalorian Wars. This is an exchange fraught with implication, as it’ll flesh out your backstory and determine the tenor of your dealings with Atris, so role-play it as you think your character would behave. If you’re going for the Light Side, try to be apologetic and subservient, while Dark Side characters should obviously be as rude and dismissive as possible. No matter what your actions here, Atris will refuse to return your lightsaber to you and send you packing, with your friends in tow. If you don’t have much in the way of the Security skill, bring along Bao-Dur after unlocking him from the force cage; he’ll help you rifle through all of the locked canisters in the base, allowing you to loot the Handmaidens for all that they’re worth. You might even find a lightsaber crystal!
Before you head back to your ship, speak to the woman labelled "Handmaiden" in the Entrance Chamber (as opposed to the numerous Handmaiden Sisters). She’s seemingly intrigued by your enigmatic relation to the force, and you’ll be able to chat her up, if you wish. If you treat her right, she’s likely to join you on your journey, if you’re a male. (You’ll have to wait for her to appear on the Ebon Hawk, though.)

When you’re back on the Ebon Hawk, you’ll be treated to another cutscene, featuring the Jedi Players and yourself as you’re expelled from the Jedi order. You’ll also get a list of the various Jedis that have gone missing, as well as their assumed current locations. A couple of scenes with Bao-Dur will then follow; he’ll offer to teach you how to construct a new lightsaber (after you find the pieces for it), and will then be able to upgrade T3-M4 with a permanent +2 Consistution bonus.
After all of that, you’ll be able to wander the ship and interact with your fellow passengers, if you wish. If you can, try to get Kreia into sharing her backstory; it may be difficult to coax out of her, though, especially if you have a low Wisdom score. You can talk to everyone else, as well; when you’re ready to move on, though, head to the Galaxy map and select your first destination. As in the first KOTOR, you can select one of a number of planets. For the moment, since it’s been the place that has come up most often, select Nar Shaddaa.
Side Quests
Suspicious Goods
After you find the modified pistol in the Ithorian docking bay, you can either earn some Light Side or Dark Side points, depending on what path you choose to follow.
If you’re aiming to take the moral high ground, show the blaster to Lieutenant Grenn in the TSF Station in the Entertainment Module. He’ll ask you to track down the source of the blaster modifications; this can be easily done by talking to Samhan Dobo, one of the two merchants elsewhere in the Entertainment Module. You can string him along by asking to join him in the smuggling operations; he’ll eventually ask you to track down three items scattered around the station. Promise him that you’ll retrieve them, but then head back to Grenn, who’ll just give the items to you and ask you to lure Dobo into a trap. Return the items to Dobo, escort him to the docking bay, then fight him to wind down the quest. You’ll get 500 credits as a reward for bringing him in.
The Dark Side version of the quest is a bit more involved. If you actually want to help Dobo in his smuggling operations, head to him instead of Grenn after you find the blaster.
Bounty Hunting
If you speak to Lieutenant Dol Grenn in the TSF Station (in the Entertainment Module), he’ll offer you some credits in exchange for running some bounties for him. These are optional missions, and they don’t carry much in the way of alignment shifts, but if you want some credits, feel free to take them.
Batono: Seems like the TSF has been conducting an investigation into the smuggling that’s going on aboard Citadel station, and one of their officers disappeared while digging around Docking Bay 3. Head over there and speak to the Twi’lek outside the Czerka facilities; he’ll point you towards Jana Lorso, back in the Czerka offices.
If you speak to Lorso, she’ll point you towards the Ithorian compound, and offer you her own reward for information leading back to Batono. Go and speak to Habat; you’ll have to Persuade him to tell you about Batono, but this seems to be automatically successful, even if you don’t have the Persuade power. Habat will in turn send you to the apartment compounds on the eastern side of the Residential module.
When you meet up with Batono, you’ll have to escort him out of the residential module past a pair of mercenaries that will attempt to stop you. They won’t be able to, of course, and you’ll automatically be warped back to Grenn, where you’ll earn your reward for rescuing Batono. If you’re going for Dark Side points, you can also bring him back to the Czerka offices, where they’ll "deal" with him in their own special way.
TSF Bounty: Escaped Criminals: In the wake of Batu Rem’s attack on the prison where you were being held captive, two other criminals managed to escape as well. There aren’t any clues as to their whereabouts, but you can safely narrow your search down to either the Exchange or the Czerka compounds, those being the sorts of places where the criminal element is likely to congregate. In truth, they’re in the Czerka offices, speaking to Lorso, but there’s nothing you can do to prevent their escape. All you can do after accosting them is report back to Grenn and either lie and say that you killed them, earning yourself a small reward, or tell the truth about their escape and hope to deal with them on the surface of the planet.
False Batu Rem: If you head over to the Czerka docking bay in Citadel Station’s docking facilities and question the Duros guard about Batu, you can attempt to Persuade him to tell you about the identity of the assassin. (Even if you don’t have the Persuade power, Kreia will help you convince the guard to spill his guts.) For a measly 25 credits, you’ll learn that the false Batu came from Nar Shaddaa. That’s all you can learn for the moment, so report your findings to Grenn.
Nar Shaddaa
Ebon Hawk ID Signature
After landing on Nar Shaddaa, you’ll be able to get a bit more info on the planet from Atton, who’ll also tell you that it’d be a good idea to change the ID of the Ebon Hawk, after which you’ll be accosted by the Toydarian dockmaster. Anyone who watched The Phantom Menace should remember that these guys are immune to Force effects, so don’t attempt to Force Persuade him, or he’ll make you pay for the right to land your ship. Otherwise, you can probably get off scot-free by either using normal Persuasion techniques or just by intimidating him. You’re likely to get a bit of a Dark Side hit here, but not a significant one.
Your ultimate goal on Nar Shaddaa is to track down Master Zez-Kai-Ell, but how to do so isn’t immediately clear; luckily, you do have some ancillary objectives that you can complete in the meantime. In order to gain information on why the Exchange has issued a bounty for Jedis, you’ll need to "cause trouble," or at least draw a bit of attention to yourself so that the Exchange takes notice of you and begins to track you down. There are plenty of little mini-quests to perform here that will let you either show the Exchange that you’d be a valuable ally (if you’re a coldly calculated Dark Side character) or that you’re mad as hell, and you’re not going to take it anymore (chaotic Dark Side characters and most Light Side players). Acting to thwart the Exchange whenever possible is the easier path to take, and you’ll often be able to do so in either a Dark Side or Light Side fashion.
Note that, after you cause enough trouble, a gang of thugs will eventually appear at the landing pad and take over your ship. If you still have quests to pursue, then attempt to solve as many of them as you can before heading back towards the ship and taking it back; this event will propel you towards the end-game of the planet’s quests, so you’ll want to wind up any loose ends before you take them on.
Since there are so many different events that occur, we’ll break them down into zone of origin. Since you’re already in the Refugee Landing Pad area, this would be a good place to start.
Refugee Landing Pad
First up, we’ll deal with a few events that aren’t listed as quests in your logbook, but will nonetheless influence your dealings with the Exchange.
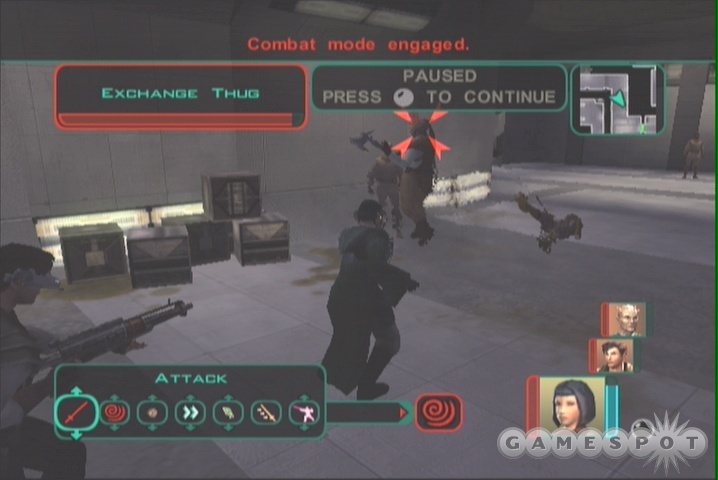
1: Around the corner from the landing pad, you’ll come across a familiar sight: goons intent on roughing up a more-or-less innocent bystander. Since you’ll need to learn a bit more about the Exchange and their reason for issuing a bounty on Jedis, so kill the bandits, then ask or intimidate the bystander to glean more info on the Exchange. The other refugees in the area can be bribed into offering up more information, for the low low cost of five credits apiece. If you pay both of them, pump them for all of their intel, then walk into the swoop shop nearby, you’ll overhear one of them reporting you to a mysterious figure. Hmmm...interesting.
2: If you walk to the northeastern corner of the central pit here, you’ll stumble across Rutum, a man who’s apparently in hock to the Exchange and tells the thugs that are hassling him that you have the money that he owes. If you want Light Side points, offer to pay off his debt; if you’re of a more sinister bent, Force Persuade the goons to give you all of their credits and jump into the pit nearby. The simplest way to deal with the problem, however, is to just tell them to back off; they’ll attack you, you’ll win, Rutum will tell you that the Exchange will be angered, and you’re done.
3: On the southern side of the pit, a man accosts you and accuses you of possessing a ship (the Ebon Hawk) that was stolen from him years ago. This event isn’t immediately finishable, so just tell him "You’re not taking the ship," and he’ll walk away, muttering threats. You won’t take a Dark Side hit for being so blunt.
4: If you walk into the closed room in the southeastern corner of the area, you’ll come across a bit of a shipping dispute. The groups involved will begin fighting (that Trandoshan has a pretty cool-looking axe, eh?), and then turn on you. Kill them all and loot the bodies and the canisters nearby.
Those are all the non-quest events in the Landing Pad area. Moving on to the quests themselves:
The swoop shop is going to be your first port of call on the Ebon Hawk signature quest. If you speak to Tienn Tubb, the proprietor of the shop, he’ll tell you that in order to change the ID signature, you’ll need to have either a transponder card from another ship, or a blank transponder card and a new ID signature. He won’t tell you how to track these items down, though.
Droid Retrieval: On your way out of the shop, Tubb’s protocol droid will give you another quest. His immediate predecessor, IT-31, was apparently destroyed and then bought as scrap by a junk dealer named Kodin. You’ll need to track down this Kodin, retrieve the droid, and bring it back to the shop so that some valuable plans can be extracted from his memory core.
You can find Kodin to the northeast of the swoop shop. It’s probably worth taking a little bit of a Dark Side hit by intimidating him into giving up IT-31, but whether you buy the droid back or talk Kodin into it, you’ll be able to talk to IT-31 and send him back to the swoop shop. Return there and talk to TT-32 for a sizable experience reward and an infinite-use energy shield for T3-M4 (if you asked for one earlier).
Trade War: Two merchants in the Landing Pad area are going head to head over the sparse pool of customers for their wares, and both are eager to gain an upper hand over the other. Oondar is the guy who’ll start you out on this bonus mission, while Geeda is his counterpart in commerce. Light Side characters will likely want to side with Geeda, while Dark Side players will probably have more in common with Oondar, but save your game before you talk with them, as one of them will stop selling items to you after this quest is over. Oondar sells the better items, for what it’s worth, and will refuse to sell to you if you speak to Geeda first, so be sure you drop by to look at his wares before talking to her. He’s got some frankly ludicrous items on hand, such as the Tal Shey Meditation Gloves and a Tech Specialist Belt that’ll make Bao-Dur go "ooooh," but you probably won’t have enough cash to buy them at the moment. If you want, feel free to hold off on doing this quest until you’ve more thoroughly explored Nar Shaddaa, then come back, buy what you want, and then pick a side in the trade war.
Anyway, when you’re ready to move on, speak to Oondar and promise to check out Geeda. He’ll offer you a discount on your purchases if you out and out kill her; guess what side of the Force this’ll align you with? If you want to spar a bit more, get Geeda to match his discount, then return to Oondar, who’ll tell you that the Exchange will blacklist you with all merchants if you refuse to deal with Geeda. Your ultimate choice will come when you then return to Geeda; you can either stand with her, or tell her to get packing. If you do choose to stick by her, she’ll eventually gain new and powerful items as you unlock more trade opportunities for her on other planets, but the choice is yours. Whatever you choose, return to Oondar and tell him of your decision to raise your profile with the Exchange.
Lupo’s Advantage: If you head to the swoop bar in the northwestern corner of the area, you’ll come across Borna Lys, a well-informed Twi’Lek who’ll fill you in on why no one’s racing swoops anymore. It seems that Lupo, the proprietor of the track, has constructed himself an unbeatable droid that no one wishes to race against, so that no one is betting on any of the races anymore. Borna, however, has a plan to destroy the droid, but you’ll need to succeed with either a Repair, Persuade, or Force Persuade roll in order to get her to give you the access codes to the droid’s little locker.
Hopefully you’ll be able to get one of them to go off, after which you can access the droid’s cage. Use Bao-Dur to do this; he should be able to complete an Awareness check and examine a module on the droid to show that it’s making odd transmissions. This isn’t necessary for completing the mission, but it does tie into the larger overall story on Nar Shaddaa. Regardless, Bao-Dur should be able to easily sabotage the droid, allowing you to prompt Lupo to sell the bar to Borna, who’ll reward you with an easy 2,000 credits.
(If you’re interested in some more cash, speak to Modo and take him up on his offer to race. You don’t need to be particularly good at swoop racing to come in first; any time appears good enough to earn you first place and an easy 500 credits. If you have Force Persuade, it might be worth the slight Dark Side hit required to convince him to cough up an extra 1750 credits.)
That’s the last of the quests in the Landing Pad.
Entertainment Promenade
1: Immediately after entering the smallish Entertainment area, speak to Kallah-Nah, a little Bothan information broker near the door. If you give this guy five credits, he’ll give you some pointers on how to act in the nearby Cantina, including a subtle hint that sometimes stealth will let you overhear conversations that you shouldn’t be privy to.... He can also increase your reputation with the Exchange, but he’ll require 2,000 credits to do so. This isn’t really necessary, so keep your cash.
Vogga The Hutt: To test out Kallah’s little stealth idea, head into the Cantina here and use Kreia’s stealth ability to sneak up on the Trandoshan thugs. They’ll tip you off on how to best get an audience with Vogga, one of the major Hutt crime bosses on the planet. One important note here is that you shouldn’t attempt to speak to Vogga until you pick up the Vogga’s Horde quest that you can acquire in the Docks district. After you do so, this quest, Vogga’s Dancers, and the Vogga’s Horde quest will all become intertwined, so read the walkthrough for the Vogga’s Horde quest in the Docks chapter for a complete rundown on what happens.
If you don’t wish to perform either the Vogga’s Horde or Vogga’s Dancers quests, then you can track down Vogga’s little empire on the northern side of the Docks. You can gain an audience by insisting that you need to speak to him about Goto, one of the Exchange’s big bosses on Nar Shaddaa. After interrogating him for a bit, he’ll give you a new quest (which can be found in the Docks section of this walkthrough).

Vogga’s Dancers: If you speak to the Twi’Lek near the bartender, he’ll ask you to help him find a dancer that will satisfy Vogga’s needs. If your main character is female, you can feel free to take the job; otherwise, you’ll need to bring the Handmaiden in as a party member and offer up her services. Note that, again, you shouldn’t actually agree to be a dancer until you’ve gotten the Vogga’s Horde quest in the Docks and have purchased the Juma Juice from the bartender nearby. After you do so, this quest, Vogga the Hutt, and the Vogga’s Horde quests all become intertwined. We’ll deal with these quests in the description for the Vogga’s Horde quest in the Docks.
Pazaak Den Password: If you attempt to enter the Pazaak den here, you’ll be rebuffed, since you don’t know the password. Kallah-Nah mentioned that he’s been in there before, though, so speak to him and flip him a few creds for it. Now you can get in. About as simple as a quest can be!
Your ultimate goal in the Pazaak Den is to flush out and beat The Champ, a near-mythical pazaak player who only chooses to face proven opponents. In order to reach him, you’ll have to defeat or otherwise find a way to get past three lesser players.
S4-C8: This droid only plays pazaak because of a faulty memory core; it’s actually quite bad at the game. You can try playing it over and over again at 100 credits a go for some more cash, but the only way to eliminate it as a contender is to either use your Repair or Computer skill to fix the memory core problem and convince him not to play anymore. If your main character can’t do it, bring in T3-M4 to effect the repairs.
Dahnis: Dahnis is the only player of the three that’ll sell you cards, but she does have the impressive +/-2 card, which is worth its weight in gold in our opinion. Buy at least that one, and whatever else you need to round out your deck, before taking her on.
Dahnis’s interest in pazaak is apparently more social than monetary; she uses it to meet men. If your main character is a male, she’ll happily lose to you and get out of your hair; otherwise, you’ll need to bring in Bao-Dur or Atton for her to throw a game to. After you do, though, she’ll automatically lose.
Geredi: Geredi is something of a wanted man in certain circles; if you spoke to the thugs waiting outside the Pazaak den, then you can tell him that someone’s waiting for him outside. The thugs will, of course, kill him, which will earn you some Dark Side points. If you’re unwilling to take this route, then you’ll have to actually beat him in Pazaak, but that shouldn’t be a big deal, as you can just make a one credit wager and keep playing until you beat him three times (total, not necessarily in a row).
The Champ: The Champ can be Persuaded not to play you, if you’ve managed to build up that skill a ways; you can either attempt to talk him into losing because it’ll be more fun than winning all the time, or emphasize that he can only have fun with pazaak if he’s alive to play it; this latter will obviously get you some Dark Side points. If you haven’t built up your Persuade skill, you’ll have to beat him three times in order to complete this little chain of quests. He has some really bizarre cards that will exploit the fact that filling up your side of the board with cards will net you an automatic win; sometimes he’ll actually win games in which you have a 20 and he has a negative amount of points, as bizarre as it may sound. Still, he isn’t impossible to defeat, especially if you bought extra cards back on Citadel Station.
When you Persuade or defeat the Champ, he’ll give you a Tie Breaker card that’ll let you win any ties in which it’s played. You’ll gain a lot of notoriety with the Exchange. This will finish off the quests you have in the Entertainment district, for the moment.
Refugee Sector
1: The Exchange Thugs at the doorway leading from the Landing Pad will attempt to milk you for credits. You can either pay up or intimidate/persuade them to get out of your way, or just kill them. This last is usually the best choice, so go ahead and slice them down.
Now, there are a bunch of quests available to you in the Refugee Sector, most of which will be obtainable via the refugees themselves, whom can be found by heading down the ramps to the left of the entrance. Be careful not to go too far, though, or you’ll find yourself in Serroco territory, and you don’t want to be there just yet. Pretty much all of the named NPC’s in the refugee slums will give you new quests, so wander around and speak to everyone. If Atton isn’t in your party, you’ll also likely be offered information on him by a pair of Twi’Leks.
Will Work For Fuel: Odis will ask you to hook him up with anyone looking for a pilot. Unfortunately, he doesn’t have a pilot’s license, which is an obvious problem for a pilot. Thankfully, the Lunar Shadow crewmen in one of the rooms in the Flophouse in the Docks sector are looking for a pilot to replace their drunken captain; if you explore their conversation tree, you should be able to bring up Odis’ name and suggest him, netting you an easy conclusion to the quest.
Seeking Passage: Kahranna reveals to you that she and her family want to leave Nar Shaddaa. Apparently living in a slum isn’t quite what she expected from life, but unfortunately, she doesn’t know anyone who can get her off-planet. That’s where you come in.
This is a long-term quest, in that you won’t be able to complete it until you’re almost done with everything else on Nar Shaddaa. When you come back planetside after going through Goto’s ship, you should be able to speak to Fassa in the docks section, who will agree to ship Kahranna and her family off-planet.
Sold To The Hutts: Nadaa will tell you that her daughter, Adana, has been kidnapped by one of the Exchange overseers because Nadaa couldn’t pay a debt. One wonders why anyone ever loans anyone else money in the Star Wars universe; everyone seems to be a deadbeat! Anyway, you’ll have to track down Adana and free her from Saquesh in order to annoy the Exchange.
Adana is located in a room sealed by a Security Door in the Exchange compound, in the southwestern corner of the area. It’s best to get her out after dealing with Saquesh as part of the Refugee Woes quest; if you kill him and all of the Exchange thugs in the area, then it’ll obviously be easier to get her out of the makeshift prison and back to her mom.
Plague Carrier: Geriel, near the entrance to the slums, has some sort of infectious disease. You can either convince him to kill himself, if you’re a Dark Side player, or attempt to Treat Injury on him if you’re not worried about being infected yourself (and you shouldn’t be, since you can’t pick anything up from him). If you help him out, you’ll get a lightsaber crystal for your troubles, and you can probably pick up influence with Bao-Dur if he’s in your party.
Refugee Woes / Serroco Thugs: If you speak to Hussef, in the middle of the slums, he’ll give you the main quest for the area. In order for the refugees to spread out and live more comfortably, you’ll need to "convince" either or both of the Exchange and Serroco groups to give them more freedom of movement.
To begin with, leave the commons via the north exit and head to the east until you reach the entrance to the Serroco area; try to convince the guards to let you through without any bloodshed. If you can’t, you’re going to have a bit of a tough time inside their little compound, as you’ll probably have to fight the leader (unless you’re adept at Persuade and Force Persuade).
Assuming you can get through the guards, then you’ll have a few options at your disposal when you make it into the compound. If you want to actually help out the Serrocos, then speak to their leader and offer your services against the Exchange. It’s pretty easy to make a misstep in this conversation and wind up in a major firefight, though, so your best bet is to just say "I’d like to help you guys out," which will prompt the leader to end the conversation (but not open fire on you).

When you’re able to walk the area freely, you can take advantage of the Seroccan’s gullibility by killing them all. These peeps are bad guys, so you’re not going to be taking a Dark Side hit for doing so, but you will get plenty of experience and items. Technically you could’ve done this just by killing the door guards and then running through willy-nilly, but the leader here is a tough cookie to crack, and it’s worth getting close to him for the chance at a bit of subterfuge. You see, if you have the ability to move freely, then you can bring Bao-Dur into your party and have him set a bunch of mines at the feet of the leader and the veterans that surround him. If you do so, then head up and goad him into a fight, then you should be able to severely weaken the leader and his goons before the fight even begins, as all of the mines will detonate as soon as they become hostile. You’ll probably take a bit of a Dark Side hit from telling him straight up "I just want to kill you," so if you’re going Light Side, try to provoke the issue by failing a Persuade roll.
After the leader and his thugs are dead, you can use Bao to recover any unexploded mines, then sweep through the rest of the compound and kill any remaining Seroccans. There are also plenty of random items in the cargo containers scattered around, but you’ll need a good amount of Security to get in; again, Bao will be ideal here.
When the Seroccans are dearly departed, you can shift your attention to the Exchange on the western end of the area. You can reach their compound by maneuvering through the tunnels on the southern end of the quad; when you start running into Exchange Thugs, you can either walk through them to get to Sequash, or start opening up containers to provoke them into attacking you. Your best bet will be, again, to just ignore the guards and make your way directly to Sequash. He won’t automatically engage you in conversation, so you’ll be able to easily get up close to him, lay your mines at his feet, and then attempt to cheese him off. Saquesh can take a whole lot of damage, so you’ll want to get as big of an advantage before the fight begins as possible!
After Saquesh is dead (or after you’ve managed to convince him to leave the refugees alone, if it’s even possible), you’ll gain another sizable experience bonus and will have automatically wrapped up the Refugee Woes quest.
Docks
To begin with here, speak to Fassa, the dockmaster here. He works for Vogga, but isn’t doing much, as Vogga has decided to suspend shipments in the wake of a string of hijackings by the Exchange. He’s not so helpful at the moment, so you’ll need to get on his good side. Before you start working him, though, find the door behind him and head into the Flophouse. There are a bunch of different apartments here, so start busting down doors to talk to the occupants and steal their stuff. Even Jedis have to engage in petty burglary now and again! We need items, precious items!
Vogga’s Horde: You’ll run across a couple of thugs in the first room; use Kreia or another character to stealth up to them to hear their plan for robbing Vogga, the local Hutt boss. In order to bypass both him and his kath hounds, you’ll need to put the whole lot to sleep. It’ll involve somehow infiltrating the Hutt’s chambers with a trained dancer, and spiking the hounds’ water dish with juma juice, but hey, you’re pretty resourceful!
After you overhear the thugs, return all the way back to the Cantina in the Entertainment Promenade and buy the juma juice from the bartender there, then speak to the Twi’Lek nearby. Either your main character (if you’re a female) or the Handmaiden will have to become a dancer in order to get yourself into Vogga’s chambers successfully (you’ll want to have Bao-Dur along if you’re not a Security specialist). After you’re in, though, Vogga will quickly fall asleep, like the man that he is; you can then spike the kath hounds’ dish with the juma juice and send them off to sleep, and bust through the security door to access Vogga’s vault. There actually isn’t a whole lot inside, but you should find a lightsaber emitter fixture, at least. This will wind up both the Vogga’s Horde and Vogga’s Dancers quest; if you also have the Vogga the Hutt quest (and you almost certainly do), you can wake Vogga up and start talking about Goto to finish that one off as well.
New Fuel Source: After you interrogate Vogga the Hutt and inquire about his dealings with Goto, he’ll offer to ship fuel to Telos if you take care of the Exchange’s meddling ways with regards to his shipping business. In order to complete this deal, though, you’ll need to finish off Goto. Since you’re going to do so anyway, it’s a win-win situation. After you finish the section of the game that takes you to Goto’s ship, return to Vogga and speak to him to wind this quest up.
Fassa’s Freighters: If you speak to Fassa on the docks and thoroughly explore his conversation tree (ask him what’s wrong with the pylons), he’ll tell you about his problems with the pylons and using them to assign priority to incoming freighters. You have to complete the conversation in order to get permission to assign the priorities yourself; you might even have to talk to him a couple of times, if you wind up getting an "access denied" message when you use the consoles in the pylons. (This quest is also much easier to complete after you finish off the Overtaxed Ithorian quest, which will let you activate all three of the pylons simultaneously. Otherwise, you’ll have to use the terminal near Fassa to turn them on once at a time.)
The ID signatures for the three freighters are corrupted on the terminals, so you’ll need to visit each pylon in turn in order to get a full signature for each ship. After you’ve gotten all of them (you’ll need to write them down if you actually hope to compare them according to the arcane rules laid out by Fassa), use one of the pylons and assign them priority in this order: Silver Zephyr, Alakandor, Toorna’a Profits. That’ll wind down the quest, netting you a small experience gain. Speak to Fassa to receive a random item as a reward.
Wayward Captain: The Lunar Shadow Crewmen in one of the rooms here are worried about their captain, who entered the Jekk’Jekk Tarr bar and failed to come out. Unfortunately, the bar is filled with poisonous fumes, which aliens apparently enjoy, but which will kill you right quick if you attempt to enter. The easiest way to complete this quest is to just offer up Otis’ services as a pilot; you should’ve met him in the Refugee Sector if you poked around in the slums enough. If you do so, they’ll hire him on, and you’ll be able to wind down both this quest and Otis’ quest without a problem.
Experiment In Delivery: If you speak to the Bith scientist in one of the rear rooms here, he’ll tell you about a mysterious signal that someone is apparently sending out across the entire planet. You can coax a bit of information out of him if your main character has a good amount of Repair and Wisdom, but it isn’t necessary; all the Bith wants you to do is retrieve a package from a courier who’ll meet you in Pylon 3.

If you then head to Pylon 3, you’ll discover the courier, but only his corpse - he’s apparently been killed by someone attempting to curtail the Bith’s research. You’ll immediately be attacked by the formerly docile cleaning droid nearby, so kill it (and be sure to grab the good loot on its body) before returning to the Bith, who himself has been killed, leaving only an arm behind. The datapad reveals that the Bith’s own droid was the killer here, but the droid itself has seemingly disappeared, leaving you at a dead end. That’ll end the quest - it won’t be until later that you’ll find out why the Bith was killed.
Overtaxed Ithorian: Lasavvou here has apparently been prevented from leaving the planet for failure to pay his docking fees. He showed up with a load full of cryogenic power cells, but the person he was supposed to sell them to never showed, and without the money from the sale, he can’t pay the taxes, and is thus stuck moonside until someone happens to rescue him from his predicament. Guess who gets the job?
Anyway, this is one easy quest to resolve: just talk to Fassa, the dockmaster, who’ll offer to let Lasavvou leave in exchange for a few of his power cells. If you return to the Ithorian with the news, he should reward you with a power cell of your very own. Every Jedi’s dream, obviously. You can use the power cell in the terminal near Fassa to restore power to all of the pylons, which will wind down the quest called...
Power Shortage: Heck, you don’t even need to get this mission to finish it off. If you take the power cell that you got from Lasavvou and insert it into the terminal near Fassa, you’ll be able to restore power to all of the pylons and net yourself a bit of experience at the same time.
Intergalactic Reunification: Lootra, in one of the rearmost rooms of the Flophouse, asks you to inquire about his wife Aaida, whom he was split from during the refugee crisis. Whether you ran into her during your previous adventures in the Refugee Sector or not, you won’t be able to resolve this little crisis right away; you’ll need to speak to her again in order to do so. If you do return to her, you’ll need to clear out a path through the Exchange thugs in order for her to escape - if you killed them all earlier like we told you to, this should occur automatically. She’ll run off back to Lootra in the Flophouse, so return and speak to him. If you treat him kindly, then he’ll give you a Lightsaber Focusing Lens Fixture, which should be the last bit of the puzzle required to make your own lightsaber! Woot! If you don’t have all three of the pieces need, though, don’t worry; as you have multiple opportunities to obtain them.
Landing Rights
If you’ve managed to complete all of the quests outlined above, then you should be greeted with a short cutscene when you return to the Landing Pad area, wherein a group calling themselves the Red Eclipse take over your ship as retaliation for having taken over their landing bay. This will probably occur well before you complete all of the quests, in point of fact, but you don’t want to head back to the landing pad immediately, as this event will propel you forward and will make it difficult to complete some of the quests you already have. The quests you probably can’t complete before doing this event are New Fuel Source, Seeking Passage, and Ebon Hawk ID Signature; if those are the only quests you have active on Nar Shaddaa, then you’ve pretty much cleaned the damn place out. If you’ve managed to obtain all of the fixtures required for a lightsaber, then head back to the swoop shop and talk to Bao-Dur while you’re near the workbench; he’ll make a sweet laser sword for you with the parts you have, after which you can use the workbench to upgrade it further.
Lightsaber or no, head down to the docks and start slicing and dicing the Red Eclipse foos. There are plenty of them, so be sure not to overextend yourself; you’d be wise to head down with full health and Force reserves, and perhaps after having activated energy shields for your characters. You will get a bit of a breather after you clear out the landing pad, so rest up before heading into the Ebon Hawk for the rest of the mission.
Another large group of baddies will, of course, be waiting for you inside the ship; you’ll need to deal with six to eight simultaneous foes here, so make use of powers like Horror and Force Whirlwind to shut down multiple enemies simultaneously. You should again be able to rest for a moment after this initial melee, so save your game and start sweeping through the rest of the ship, saving the cockpit for last.
When you reach the security room, you’ll be faced off with Cahhmakt, the vicious Trandoshan leader of the gang, who, coincidentally, has apparently killed Vhek, the man who accused you of stealing the Ebon Hawk earlier, which nicely winds down that little plot cul-de-sac without any need for action on your part. Cahhmakt can be a difficult foe - he’s got 29 Defense - but since you can gang up on him after you’ve killed the rest of his gang and rested, you should be able to overpower him to take back the ship, or lay mines at his feet before talking to him and letting those do the difficult job.
Attack of the Sith
Even after Cahhmakt is dead, though, you still have one last intruder to deal with (maybe - if Visas doesn’t show up now, she’ll show up later). You’ll automatically be thrown into mortal combat with Visas, one of the Dark Jedi you’ve likely seen in a previous cutscene. It’s just the main character versus her; you don’t have any teammates to back you up. What’s more, she’s packing a lightsaber, so you’re going to be in for some hurt if you’re not wearing an Energy Shield. If you do have one, though, activate it (and don’t forget to flip over to the Makashi Lightsaber Form, which gives you a bonus against Jedi) and start wailing on her as best you can; you only need to knock her down to half strength in order to "win."
Visas will shortly collapse, so escort her to medbay. If you didn’t grab a lightsaber before coming out this way, Visas’s lightsaber will conveniently break after you beat her, dropping a Lightsaber Emitter Fixture, which, if you didn’t get one as a result of the Vogga’s Horde quest, will hopefully let you make a lightsaber for yourself. If you did manage to make a lightsaber for yourself, though, you’ll obtain another one here, as Visas will hand over hers instead of the Fixture.
If you speak to Visas after this little encounter - she can be found in one of the dormitories - you can get a little more info on her backstory and start the delicate process of turning her back to the Light Side, or further corrupting her. Apparently, her Master - the masked Sith who’s roaming space in a broken-down capital ship - was able to snuff out her entire planet’s population merely by manipulating the Force. Obviously someone you should be looking forward to meeting!
Anyway, with Visas on the team, anyone who’s playing as a Consular will finally have some much-needed muscle to send into battle. You should be able to instantly level her up to level 12 or so, depending on how far along the experience tree your main character has gotten. Feel free to outfit her as you see fit; we found it profitable to go ahead and give her Master Two-Weapon Fighting, Master Flurry, and Weapon Finesse: Lightsaber as her Feats, and levelled up some of the Dark Side powers that she had access to.
Meeting the Exchange
Now, if you cleared out all of the earlier quests before doing the Landing Rights quest, then you should be thrust into another little set of dramatics as soon as you leave the ship. As you leave, be sure to bring Atton along, and as soon as you hit the Landing Pad, equip him with the best gear you have, paying special attention to his armor. He’s going to be doing a little fighting on his own pretty soon, and you’ll want to have him properly outfitted. After the Exchange contacts you, you’ll be forced to proceed solo, and won’t be able to add anyone to your party, so this is your last chance to get him outfitted; you might want to spend a feat and get him up to Heavy armor proficiency if you haven’t already, as it’ll help him in the upcoming fight.
As you make your way towards the docks, Atton will come up to you and offer some luck; if you thank him for his concern, he’ll give you some free medpacs as well, so bonus! After heading into the Docks, though, Mira will show up and warn you that your friends might be in danger, and indeed they are....
The Attonic Bomb
After your conversation with Mira, you’ll find yourself filling the shoes of Atton, who’s cooling his heels in the Cantina. Unfortunately, he won’t have much time to enjoy the juma juice, as the Twin Suns will soon come along and attack him! These twin Twi’leks are going to be very difficult to surmount for Atton alone, as they both have energy shields and will attack with dual vibroswords. This isn’t one of those fights that you’re supposed to lose to propel the story along, either; you have to win. Actually doing so is easier said than done, though.
The first aspect of a win here comes in the form of your equipment; you’re going to want Atton to have the beefiest set of armor he can possibly equip. If you have a set, then Krath Heavy Armor (which actually requires a Medium armor proficiency) or Flex Heavy Armor will do nicely; if not, pick whatever will give you the highest Defense bonus, taking into account his Dexterity as well. Beyond that, you’ll definitely need to equip a Mandalorian Melee Shield. You should’ve picked up a few of these by now; they’ll help protect you from the vibroblade damage of the girls. Since the girls are energy shielded, you’ll probably have to use a vibrosword of your own to take them down; if you do choose to go the melee route, pump Atton full of drugs in the form of Adrenal Strength and Stamina to let him hit more often and take more hits.
Unfortunately, even all of these steps will leave you unlikely to win in a straight battle between yourself and both of the girls. Your initial goal should therefore be to run! If you look around, you’ll spot a Quarren sitting at a table in the southwestern corner of the bar; if you can wedge yourself in between himself and the wall, you may get lucky and force the girls to take you on one at a time. If that’s the case, then you should be able to finish them off with a Vibro Double-Blade (if you have one) or a Disruptor Rifle (again, if you have one; these weapons punch through shields). If you’re really lucky, then you may be able to confuse one of the girls into standing still a ways away from you, in which case you can just fire away at them with a Disruptor Rifle until they die. This is really the best way to go, if you can pull it off, as one of the girls will use medpacs on herself after she’s knocked down far enough, but it won’t always be possible.
Subterfugin’
Regardless of your tactics, you’ll have to beat both of the girls before Atton can escape the bar and get back to the ship. When you do so, you’ll come across the leader of the Zhug group of bounty hunters, but before you have the satisfaction of routing the lot of them, you’ll shift back to the main character, who’s been incapacitated by Mira, who impersonates you in order to get into Jekk’Jekk Tarr.
Inside JJT, feel free to look around for a bit (after levelling Mira up, of course); you can find plenty of chemicals in the chemical dispensers scattered around the bar’s varied rooms. If you head east, though, you’ll eventually find the Private Lounge. Mira won’t be able to do anything save get stunned and subdued; hers wasn’t the most brilliant plan ever. Regardless, her gambit will have drawn Zez-Kai Ell out of hiding; he’ll set out towards Jekk’Jekk Tarr with the intent to rescue her, and invites you to follow him.
When your main character reaches the bar, you’ll pick up a new force power: Breath Control. This will prevent you from being incapacitated by the bar’s poisonous atmosphere, but you’ll still have to deal with all of the rowdy patrons. It’s here that the game can become rather difficult for Consulars, especially if you haven’t constructed a lightsaber yet, as there are a whole lot of baddies between yourself and the Exchange bosses. What you’ll need to do is work your way into one of the corner stalls, kill all of the baddies inhabiting it, then use it as a little resting area in which to restore your Force points and health (don’t forget to flip yourself over to the Force Channel Form in order to get your Force back more quickly while you’re waiting). After you’re healed up, you can start picking off the rest of the bar inhabitants. If you’re lucky enough to have gotten to level 15, then you can just start pounding them with Stasis Field, Force Wave, or any other of your awesome crowd-control abilities; otherwise you’ll have to proceed slowly, killing a few, retreating, then repeating the process. If you wish, you can just fight your way to the Quarren, or you can clean out the entire bar for extra experience and loot.
The Secret Lair
After you get close to Visquis’ private lounge, he and Hanharr will retreat to the network of tunnels underneath the bar, forcing you to give chase. Do so, and head into the Jekk’Jekk Tarr Tunnels. Your minimap doesn’t function here, forcing you to navigate on your own, but you can easily reach the exit of the tunnels by taking every left turn you spot. There aren’t any enemies down here, unless you count the multiple mines scattered around; if you have a good amount of Demolitions skill, then you should be able to gather a pretty sizable horde of frag mines. Regardless, you’ll eventually reach the door, at which point the focus shifts to the interior of Visquis’ little base, where Mira and Hanharr are set to duel.
This part of the game is one of the first where your alignment proves to be a significant deciding factor. If you’ve gone Light Side, then you’ll control Mira; if you’re Dark Siding, though, then Hanharr will come under your control. Hanharr has a bit of an easier time here than Mira, since he’s a big beefy Wookiee with dual-wielded swords. Just run up to Mira and start bashing away!
If, on the other hand, you’re allying with the Light Side, then Hanharr is a tough opponent for Mira to take on alone, but defeat him you must, so you’ll need to use every trick you have at your disposal. To begin with, you’ll obviously need to outfit Mira with whatever equipment you happen to have available, with a Mandalorian Melee Shield probably being a necessity.

To begin with, you can take advantage of the fact that Mira doesn’t trip mines by walking over them and forcing Hanharr to follow you. He won’t take damage from many of them, save the poison ones, but if you’re lucky he’ll fail a save or two. After those are gone, try to outrun him and pick up the items from the numerous corpses scattered around; included on these, you should find a couple of poison darts which Mira will be able to fire with her little Batman-issue wristlauncher. More poison for Hanharr makes Mira a happy girl.... After all this, you should be able to activate your melee shield and go to town with whatever melee weapon you picked out for Mira. If you get down to half health or so, use a medpac or two and get back to the killing, and Hanharr will fall eventually.
Don’t be scared of the influx of Kath Hounds that immediately ensue; although they’ll charge you and attack in one large group, they’re apparently incapable of actually damaging you. Finish them off, then search the bodies inside their cages to find the key that’ll get you out of this madhouse. Be sure to heal yourself up, though, as you’re going to have to force your way through a number of Ubese Bounty Hunters before you can let the main character through the sealed door that currently blocks his or her passage.
To do so, first fight your way through the guards at the upper end of the ramp leading from the arena, then head north into the Sparring Room. It’s tough for Mira to deal with multiple enemies at a time, so feel free to lay down mines (which you can now do during combat) as they whack away at you, then walk backwards a bit so that they walk over them. You only need to clear out two rooms here: the Sparring Room, and the room immediately to its west. In the latter room, you’ll find the Escape Hatch; activate the panel nearby to let the main character into the lair. The only reason you wouldn’t want to do this immediately is if your main character has no Security skill; there are a number of lockers and such scattered around, many of them behind security doors, that only Mira will be able to open in this case. Keep in mind that Mira only has four Security herself, so if you can boost your main character’s skill up to this level or higher with items, then you can feel free to let him or her in immediately.

After your Jedi comes storming in, kill the rest of the Ubese Bounty Hunters and grab all of the items before heading down into the arena to face Visquis. There isn’t anything you can do to influence the events of this little scene, so talk when necessary, but you’ll still wind up being captured by Goto. The ensuing conversation between Mira/Hanharr and Atton will give you an idea as to how to rescue...yourself. Or something.
T3-M4 And The Droid Warehouse
In order to infiltrate the droid warehouse, T3-M4 will have to be sold into slavery, so to speak. Luckily, the game doesn’t bother with all that messy exposition; it goes straight from intimating what needs to be done to showing you that’s the plan’s already been put into execution. You’ll find yourself taking over as T3-M4 when you next gain control of a character, having already been sold into service at Vogga’s. After you take over, check around the droid warehouse for item containers; we managed to find a totally wicked Droid Molten Cannon in one of the boxes here.
After speaking to C7-E3, then conferring with C6-E3 nearby, then talking to C7 again, you’ll manage to goad C7 into attacking you, leading to a droid catfight. C7 is easy to take out, despite his droid kung-fu; everyone knows that protocol droids are wusses, save for perhaps 4-LOM, but he won’t come around to the Star Wars universe for a few thousand years. C6 will then open the door leading to the inner warehouse. Inside, you’ll find a communications droid that’s apparently transmitting all of Vogga’s shipping information to Goto, without even realizing it.
Droid Warehouse Door
You’re unable to deal with the droid for now, so instead head to the door on the far side of the room and attempt to open it up. If you’re interested in trying to puzzle through the code yourself, you should be able to get most of the way by tracking how to move the 1 from its initial position to its final position. (For those of you who just want the answer, and there’s no shame in that!, the code is: center block counter-clockwise, left-most block counter-clockwise, right-most block clockwise.)
The droid inside the room will quite helpfully offer to upload the transponder codes for all of Vogga’s freighters to T3’s memory core, and will also give him a blank transponder card. Say what you will, but T3 is one hell of a persuasive droid. Or maybe all of these other droids are just retarded; guess you could look at it either way.
Another group of HK Assassin Droids will attempt to take out T3 as he makes his way out of the droid workshop, but he’s not going to stand still for that! You should have the Droid Renewable Shield equipped and ready to go, so use it to block all of the damage that they deal while you finish them off at your leisure. Be sure to grab the HK Chassis from one of the corpses before moving on. You can then escape the warehouse and return to your party members to effect the next phase of your dastardly plot. T3 will rule this galaxy by the end of the game, if it’s up to him.
Taking The Fight To Goto
Anyway, after this, you’ll automatically be sent to Tienn Tubb’s shop, where he’ll retrofit the Ebon Hawk with a new transponder code. It doesn’t matter whether you pick one of the codes you obtained from the droid workshop or not; you might be able to even use the Silver Zephyr’s, if you wish. Either way, you’ll have to choose two party members to go up to Goto’s ship and rescue the main character. You’ll probably want to send up Visas, if just for the muscle; your second character can be anyone you choose. We highly recommend that you bring along T3-M4, though, as he’ll be able to obtain an upgrade here, and his completely reusable shield will protect him from most of the droids that you’ll be facing off against. Heck, he’s probably preferable to Visas, when it comes right down to it. If Kreia has either Force Storm or Destroy Droid, then she might be preferable to Visas here, as you’re going to be facing off against a whole lotta droids.
When you find yourself aboard Goto’s ship, use T3 to access the faulty droid in the first room and download the Shutdown program. Hopefully you have a computer spike or two - although it’s not necessary - as you’ll be able to use the Security Console nearby and download another program, entitled Overload. (You can also then Slice the computer to "Upgrade droid combat algorithms", which will give T3 a permanent +1 Dexterity boost.) You can cycle through the cameras if you wish to check out the formidable droid defenses on Goto’s ship; you’re going to need to find a way around them if you want to rescue your friend.
To begin with, head through the door nearby to encounter a corridor full of floating mines. You can’t engage these guys in melee combat, at least not if you want to live through the battle, so use Lightning, Destroy Droids, or ranged weapons to blow them all to hell. The next room over holds one of the droid commanders. Try to walk up to the door in solo mode and draw him back towards the first room here; if you engage him where he stands, a couple of maintenance droids will come in and heal him, forcing you to deal with them before you can kill the commander; either way you go, though, the commander will drop the access codes for the Goto containment system.
Now that you have that, use the console nearby. The Programs Library option will let you upload both the Shutdown and Overload programs to the central database; if you then unlock the containment system with the Unlock Restricted System option, you’ll be able to shut them down and unlock all of the holding cells on the ship. To access them, head directly east from the commander’s room until you reach the Cells. You’ll find another damaged utility droid here; if you let T3-M4 talk to it, you’ll get the access codes for the turret system, so head back to the console and Overload them. (You actually need to attempt a Shutdown on them first, which will fail, then Overload them in order for it to actually work.)
Anyway, Overloading the turrets will cause them to go haywire and target any nearby droids, which should cause a huge melee in the corridor leading up to the Audience Chamber (which should be on your map). If you stick near the Cells, you’ll be able to hear the sounds of battle through the walls. After they die down, have T3-M4 go into solo mode, activate his Renewable Shield, and then just have him run towards the Audience Chamber as quickly as he can go, ignoring any droids that happen to fire on him. Once he unlocks the door to the Audience Chamber (it won’t open until all nearby turrets are dead), you’ll free your main character and add another cog to your little machine of death.
FREEEEEDOOOM!
Now that you’ve freed your main character, you should be able to move through the droid armies much more easily. To begin with, check the terminal in the Audience Chamber to nab the access codes for the Power Distribution system, then head south; on the opposite side of the ship from the first set of cells, there’s another set, where you’ll be able to check out another droid who has the Reset program. You can use this in conjunction with the other programs to fritz around with the turrets in the Exterior Defense room, but we found it easier to just go ahead and blast through them all with Destroy Droid and Force Lightning.

After you access the rooms that the turrets were guarding, Goto will lay down a bunch of mines in your path, and deadly ones, to boot. "But I don’t have the access code for the mines yet," you say. This is where it gets a bit tricky, because the only place you can actually get the codes is from one of the droids on the other side of the mines! In order to nab them, you’ll have to lure him back with some blaster fire, wait till it’s on the other side of the minefield, then kill him and grab the codes. You can use them on one of the consoles to shut down the minefield. (In theory, at least; we used the Shutdown program on the mines and they stayed active. If this occurs, just run through them and use Heal to get yourself back into shape. It’s perhaps best just to Overload them anyway; this will make them explode when the droids walk across them, saving you a bit of precious combat fatigue.)
After you make it past the Interior Defense and onto the Bridge of the ship, you’ll have to open the Plasteel Cylinder in one corner to gain the final access codes. It requires a high Security to access, though, so use T3 to bust it open. You can use it to shut down any remaining droids on the ship (although you’ve likely killed them all). What you really need to do, though, is access the Bridge Command Console, use the Power Distribution system to shift all systems to secondary power, then Shutdown the power. This will drop the ship’s cloaking device, and also shut down the sealed hatch that prevents you from getting back to the Ebon Hawk. You’ll have to fight your way back to your ship, of course, including through the Twin Suns, but you should be able to make it without any problems. Be sure to save your game before you exit to your ship, and be sure that your main character is outfitted for a fight, especially if you’re of a Dark Side bent.
When you’re safely stowed back aboard the Ebon Hawk, you’ll find a gift waiting for you: a droid, apparently sent by Goto to keep you company on your quest. You have no choice but to accept G0-T0 into your party, so do so, then head back to Nar Shaddaa to meet up with Zez-Kai Ell.
Old Masters
Your conversation with good old Zez can take a few forms, depending on how you wish to respond to him. Whether you’re of the Dark or Light Side, you’ll likely want to pump him for information before your terminate the conversation. He’s got a lot to say, about you, about the threat that faces you, about the bond between yourself and Kreia, so be sure to talk to him before you either attempt to goad him into battle or end the conversation.
If you’re going strong with a Light Side alignment, then you likely won’t have to battle against Zez; he’ll teach you a new lightsaber or force regeneration technique and then head off to Dantooine until you can convince the other lost Jedi to join him. If you’re less than pure, though, you’ll have to either spar with or kill him. He can be difficult to defeat, but not overweeningly so; even with a Force-focused Consular, we managed to overpower him without too many problems. The "secret," as it were, is to activate the most powerful energy shield you currently own, then wade into battle with a lightsaber while using any Feats or Force Powers that give you extra attacks, such as Master Speed or Flurry. The energy shield will protect you from any damage that you might take from Zez’s lightsaber, while you should be able to steadily wear him down with your own blows. Don’t forget to switch over to the Contention lightsaber form, which will help you out in Jedi duals. If you’re truly deficient in the arts of combat, though, you’ll have to deal with pure-damage abilities like Force Wave or Lightning to whittle his health down.
After the fight is over, you will have picked up a new lightsaber form (if you’re a combat-oriented class) or a new force-regen form (if you’re a Consular). Whichever the result, you will be free to wind up your business on Nar Shaddaa after defeating Zez or convincing him to join you on Dantooine.
Loose Ends
You still have a couple of active quests that you can dispense with now that Goto’s out of the picture. To begin with, speak with Fassa and have him ship the family from Seeking Passage off the planet; he’ll do so as a favor to you. If you didn’t wind down the Will Work For Fuel quest, he’ll also hire on Odis. You can also speak to Vogga the Hutt to wind down the New Fuel Source quest; he’ll agree to start shipping fuel to Citadel Station.
When you’ve wrapped up everything that’s in your logbook, return to the Ebon Hawk and start schmoozing with your new guests. If you didn’t take the time to speak with Visas earlier, you can do so now, and G0-T0 and either Hanharr or Mira should be aboard as well. Speak with all of your new friends to earn influence and learn about their backstories. Kreia may also be able to initiate you into one of the new Prestige classes at this point, as well, so speak to her to check out your options.
This would be a good time to give your party a good shakedown, equipment-wise. You likely have a bunch of equipment on a bunch of different characters, which isn’t really an ideal way to play the game; it’s best to have all of your best stuff on the characters in your party. Thus, it might be helpful to leave your ship and strip everyone down to the bone so that all of your stuff is in your inventory; this will make it easier to keep the best equipment handy, rather than have it on some random guy back in your ship just when you need it most. The only exception to this is probably armor; since you can’t change armor in combat, you might want to just pick a good piece of armor for each character and have them wear it permanently.
Likewise, this is also a good time to find a workbench and start breaking down and creating items. Although there’s a workbench in the Ebon Hawk, only the main character can use it; the same goes for T3-M4. If you’ve been assiduously building up your skills, then you might be able to create some good stuff, but you’re unlikely to have the blanket kind of proficiency that Bao-Dur does. If you bring him over to the workbench in the swoop shop, near your ship, you should be able to have him make almost anything at this point, especially if you have items like a Czerka Utility Belt or Infiltrator Gloves to equip him with. Your lightsabers, should you have any, should be your first priority for upgrading, followed by any other equipment that your main character might be using.
Now that you have a more fleshed-out party, you should be able to more easily navigate the various challenges of the myriad other planets. You can pick any of the three that you wish at this point. Dantooine and Korriban will both be familiar to players of the first KOTOR, so for now, we’ll stick with the second new planet and head over to Onderon.
Onderon
Trouble follows you across the galaxy, as it is wont to do, and as soon as you arrive in Onderonian space, you’ll find yourself under attack from numerous other vessels. You can either choose to fight (which will net you a pittance of experience, on the order of 100 XP per ship for six targets), or just have Atton land the ship on Dxun, one of the moons of Onderon. Even if you choose to fight, you’ll still be forced to land.
Dxun - Jungle Landing
Find The Outpost
Alternate Route To Onderon
When you’re safely on the ground, you’ll learn that Dxun is the place where the Mandalorian War started. Obviously a good omen. Your long-term goal here is to find some way to get to Onderon; for the moment, though, head from the ship and start making your way towards the nearby outpost.
The first area of note is the Ship Wreckage, located in a little cul-de-sac immediately to the east of your ship. You can find some parts and and components in the wreckage here and, if you have appreciable Repair and Computer skills, will be able to slice into the computer of the downed ship and overload the nearby droids, which will kill off any animals in the vicinity. This is expensive to do (in terms of using up your computer slices), and the fauna of Dxun really isn’t too tough to kill, so it’s best just to leave the droids alone and use your saber or other weapons to fend for yourself.

After travelling through the jungle for a bit, you’ll run across the Zhug Ship, which has crashed in the aftermath of the space battle you yourself just fled. Don’t feel too bad, though, as the ship just happened to contain some bounty hunters that are gunning for you! You’re unlikely to be able to talk them out of their pursuit of you, so just kill them. You’ll probably want to use some kind of energy shield for the fight; although the Zhugs aren’t physically powerful, the rear blaster-wielders can deal upwards of 30 damage with each shot from their rifles. Still, they won’t be able to stand against your might for long, so wipe them out, grab any items that they drop, then head into the Jungle.
Dxun - Jungle
Shortly after you enter the Jungle portion of Dxun, you’ll run across a dead Mandalorian near a Dxun Cache. Where one Mandalorian dies, others follow, and sure enough, you’ll quickly run across an encampment of the dreaded foes. They’ll offer you a choice: come with them to meet their leader, or resist and enter into a fight to the death! If you decide to fight, you’ll eventually be rounded up and be given no choice but to head to the Mandalorian fortress; since there’s no Dark Side or Light Side alignment shift involved, we say just go ahead and kill a few of them for a bit of extra experience. If your main character is a Consular, or you have Kreia along, you should be able to stun the lot of them with Insanity, Force Wave, or Stasis Field and then proceed with the killing. You won’t be able to loot the bodies, but you should be able to take a few of them down before you’re shepherded into the main camp.
Scout Hunt: This quest can only be accepted after you enter the Mandalorian Ruins and speak with Mandalore there. You’ll eventually get a bunch of quests, then return to the Jungle to complete them. When you do, track down Kelborn, who’s standing around in a small clearing to the southwest of the camp exit. He’ll tell you of a third ship that landed on the moon, which apparently sent out scouts to search around, and ask you to kill any of them that you see. Reticence aside, agree to his plan and start scouting around yourself, sticking to the western side of the jungle.
There are two groups of scouts to kill (don’t worry about alignment shifts; these guys are also apparently looking to kill you), so find them both before returning to Kelborn. He’ll report your help to Mandalore, and also give you permission to face him in the Battle Circle.
Dxun - Mandalorian Ruins
Anyway, as mentioned, you’re eventually forced into meeting with Mandalore, who doesn’t really seem to have any clear idea as to why he wanted to speak to you. He offers to shuttle you off the moon, if you wish, but you’ll have to prove yourself to him, first by accessing the Dxun Cache you passed by earlier. He also wants you to ask around the camp and see if there’s anything you can help with there. As with the whole get-the-attention-of-the-Exchange bit on Nar Shaddaa, there are a bunch of mini-quests for you to try out, but you won’t have to exert quite as much effort here as you did back on the previous planet. Before you head out, you might want to speak to Kex to sell/buy items; he has a decent assortment of military surplus on hand.
An Explosive Situation: As mentioned, Mandalore will ask you to set off some explosives that have been rigged to one of the cache entrances in the jungle, but it all sounds a bit too easy. If you actually head out to the cache (in the far northwestern corner of the Jungle), you’ll find a detonator. It actually works - the explosives open the Mandalorian Cache - but it also attracts the attention of a bunch of jungle beasts. Kill them all before heading into the Cache. You may want to have Mira, Bao-Dur, or another character with high Demolition skill in your party before you head in - there are a bunch of mines inside.
After you clear the mines, you’ll need to find some way to move the droids out of the way, as they block your path to the many containers in the room. If you have a high level of Computer skill, you can examine the Droid Foreman and attempt to use the codes on his datapad to command all of the droids to move, but the easiest way to be rid of them is to bash one. The rest will all wake up and attack you, and although they have strength in numbers, they’re fairly decrepit, letting you take them all out with a few Force Waves or Destroy Droids. When they’re dead, grab the items in the boxes, ignoring the impossible to open ones, and head back to Mandalore to report your success.
Tech Assistance: Zuxa is apparently the camp’s main technician, but he’s still just a Mandalorian. He probably doesn’t know the difference between an alluvial damper and a horizontal booster! You’ll have to give him a hand with his repairs if you want to get in good with Mandalore.
There are two parts of the base that urgently need repairs: the broken wires near Zuxa, and the telemetry computer on the northern end of the base. Your main character can repair either of them, so long as you have enough Repair Parts and Computer Spikes, but it’s best to let one of your more technically-oriented characters do the deeds, if only to save on resources. When you report your progress to Zuxa, he’ll put in a good word with Mandalore for you and theoretically give you back some Parts and Spikes (these don’t appear in the feedback menu, though).
Trouble With Cannoks: Zuxa’s primary goal is to get one of his relays up and running again, but one of the parts he needs has been eaten by a cannok! Oh, Zuxa, what ever will we do with you?
As Zuxa mentioned, you’ll need to head into the jungle and kill cannoks until you find the phase-pulse converter. The position of the cannoks may be random, or it may not; we happened to find the first in the northwestern corner of the map, near the Mandalorian Cache, the second in the southeast, near the zakkeg, and the third just to the southeast of the Mandalorian Sentries. If it’s random, though, just kill all of the cannoks in the zone and check their bodies; you’ll probably be killing them anyway, if only for experience, so this shouldn’t be too difficult. After you have all three pieces, bring them back to Zuka, who’ll give you a sizable reward, if you accept it, as well as tell Mandalore about your contribution.
Missing Mandalorian: Xarga will tell you of a Mandalorian soldier that wandered into the southern jungles and failed to return. He wants you to field-strip the body and return anything worthwhile to him in the base.
Kumus, the missing soldier, is actually quite alive, and is standing on a ridge in the northeastern corner of the Jungle map. Apparently all of his ammo was eaten (!) and he’s been trapped atop his little perch for the last couple of days. He asks you to help him out; you can either choose to do so by killing the nearby beasts and letting him down off of the pillar, or kill him by using the detonator. The alignment implications for these actions should be fairly obvious. If you want to help him, you’ll need to talk to him after you kill the beasts, but he can be difficult to target; try getting up close to his ridge and using your trigger buttons to cycle through targets until you find him.
(If you’re interested, you can also learn the mostly useless Beast Trick Force Power in the little clearing directly to the south of Kumus’ position. If you walk up to the Boma there, Kreia will give you the power gratis, whether she’s in your party or not.)
When you get back to camp, speak to Xarga again to wind down the quest. You can either keep silent about Kumus’ incompetence, or rat him out, with the appropriate alignment shifts.
Zakkeg Challenge: The Mandalorian Guard Captain near the southern gate doesn’t think you’re tough enough to kill one of the zakkegs that roams in the jungle, but you know that you’re strong - like an ox! All you need to do to prove your worth here is bring back a body part from one of the zakkegs.
You can find the zakkeg in the extreme southeastern corner of the Jungle. Davrel will be there as well, if you chose to spare him when he offered you a deathmatch outside of the Mandalorian camp. You can speak to him to start the fight, or just wade in and start wailing on the thing. The zakkeg is going to be one of the more heavily-armored enemies you’ve encountered thus far in the game, with an insane 36 Defense ranking, so you may find yourself having to resort to Battle Meditation, adrenal strength mods, or even offensive Force powers just to actually hit the thing. Still, though, with the power of the Jedi at your disposal, you should be able to defeat the zakkeg without anyone dying.
When the beast is done, grab its ear and any loot from the corpses in the vicinity, then hand the ear into the Guard Captain for your reward.
Battle Circle: If you speak to Davrel, one of the soldiers near the Fight Club on the northern side of the camp, he’ll tell you about the Battle Circle, which is intended to give neophyte Mandalorians a taste of battle before heading out for the real thing.
If you wish to fight, speak to the Sergeant near the ring. Anyone, no matter what kind of character you’ve created, should be able to proceed a few matches into the tournament, but Consulars will be crippled by the fact that you won’t have much HP and you won’t be able to use your Force Powers, and you’ll often be asked not to use your lightsaber.
If you’re willing to bend the rules a bit, though, then you can actually get away with a bit of cheating here. The trick is that, if you have buffs active on yourself before speaking to the sergeant, then manage to quickly navigate his conversation menu and get into battle before they wear off, then you’ll retain them into the fight, even if they’re Force Powers. Master Speed and Force Barrier are both excellent choices here, as they last long enough to be retained into the fight. Adrenal Strengths will also easily carry over into battle, but you do lose buffs at the end of a round, so you shouldn’t use up your stimulants unless you really need that edge. We’ll resist the temptation to make a BALCO joke here.
Round 1: You’ll need to take on Davrel mano-a-mano, using nothing but your fists. You can’t use items to heal yourself, or Force Powers, so overwhelm him with your karate stylings and move on.
(Davrel won’t forget his humiliating defeat at your hands. After you leave to return to the Jungle, he’ll appear and challenge you to a fight to the death. If you wish, you can take him up on his offer and kill him; Light Side characters may instead wish to ask him to accompany you on your hunt for the Zakkeg, which will let you brush off his offense without decapitating him.)
Round 2: Zex, the quartermaster, is your next challenger. Since you get to choose the rules, you can make them as restrictive or permissive as you wish. You still shouldn’t have a problem getting past him, even if you go hand-to-hand again.
Round 3: Tagren is a much tougher opponent than the previous two foes, especially if your main character suffers from low Strength, as he has an insane 34 Defense. You’ll definitely want to try and use both Force Speed and Force Barrier, if possible, as well as an Adrenal Strength before the fight begins to give yourself the extra edge you need.
After the third round, the Sergeant will forbid you from participating in any more fights until you’ve proven yourself in front of one of the champions. You can do so by running into the Jungle and completing the Scout Hunt quest that Kelborn gives you. When you do so, return to face off against Kelborn in the circle.
Round 4: Kelborn is a bruiser, no doubt about it, and refuses to fight with anything other than swords. If you’re a powerhouse character yourself, you can likely win, but characters with low HP will have to either beat him down quickly with special melee attacks or use Force Barrier before the fight begins to avoid most of the damage that he deals.
Round 5: No need to use any powers before the fight begins, as Bralor wants to fight you while you’re at the top of your game; your Force Powers, lightsaber(s), and items are all permissible. He, on the other hand, will be using merely his fists, which begs the question of how precisely Mandalorians choose to commit suicide; rushing into battle against a Jedi with nothing but armor on seems to be decidedly bullheaded.
Not to say that Bralor is a pushover; far from it. He can attack twice per turn with his fists, with each attack dealing up to 25 damage (although it’ll rarely get above 15 or so). If you have Force Barrier, then it’s a no-brainer for this fight, as it’ll cut the damage you take from all of Bralor’s attacks. Don’t bother with offensive Force Powers, as he’ll almost always resist them. Instead, use Force Speed and a lightsaber to chop him down to size, with Life Support Kits healing you up when needed. If you don’t have any ranks in Force Barrier, though, this can be quite a tough fight, so save your game beforehand.
For defeating all of the contestants in the Battle Circle, you’ll gain a bit of favor with Mandalore, and the Shyarn, a nice little sword. It’s no lightsaber, obviously, but it’ll work well as an off-hand weapon for any dual-wielders.
The Price Of Passage: After you complete some or all of the above quests, report back to Mandalore and he’ll offer to take you to Iziz. Before you can head out, though, a veritable flock of Sith assassins appear. Flock? Heck, it’s their whole damn army! You’ll need to clear out most of the interior of the Mandalorian Ruins before Mandalore will take you to Iziz, so charge up those lightsabers and get to work.
Onderon - Iziz Spaceport
Immediately after landing, level Mandalore up as far as he’ll go and equip him with goodies. You can’t change out his armor, but he should still make a devestating melee fighter, or ranged fighter, or fighter pilot, or anything else you want, depending on how you level him up.
In the small square beyond the docking bay, you’ll run across Margar, a merchant with some decent items for sale, and a beast-rider that’s looking to ship random beasts to Telos to aid in the restoration project there. If you speak to this last fellow, he’ll inform you that the entire city is full of caged beasts due to the blockade; you can probably see where this is going to wind up. Sure enough, one of them breaks out of its cage after your conversation, and you’re forced to kill it. If you want to gain some Light Side points, refuse his reward; he’ll give it to you anyway, but you’ll still have done the Right Thing. If you attempt to walk into the Merchant Quarter, you’ll be questioned by a guard, but it should be a simple matter to get past him.
Starport Visa: As soon as you leave the docking bay, you’ll be given a Starport Visa and told to hang onto it; apparently they’re quite valuable. Doesn’t seem like much of a quest, now does it?
After you reach the inside of Iziz, though, you’ll realize why this is a quest: apparently the visas are a hot commodity, and you’ll be able to either put yours to good use, or sell it for a bunch of cashola. There are a few people looking for one, including Gormo, Sakarie, and Xaart in the Cantina, and Tolas and Terlyn near the entrance from the spaceport. Each will have their own special need for the visa, and their own special rewards. If you’re going Light Side, then Terlyn and Xaart will be the likely recipients of your visas; if Dark Side, then Sakane and Gormo are more likely buyers. Even if you are going Light Side, you still might want to sell one of the visas to Gormo, as he’ll pay a substantial amount of credits for it.
Sakarie offers up perhaps the most unique reward for your visa: a Qixoni lightsaber crystal. When used in a lightsaber, it’ll increase your damage by +5 and give you +1 to Force regeneration, but can only be used by Dark Jedi. Dealing with her will also give you a significant Dark Side alignment shift. If you’re going Dark Side, then you’ll definitely want to grab it from her. (The weapon she offers up is a Rodian Death Blade, and despite the cool name, isn’t likely to replace the other melee weapons you’ve found thus far.)
You will be able to find a couple more starport visas in your travels. After running around for a bit, you’ll be attacked by a Twi’lek bounty hunter, who will be carrying one on his corpse. It’s a personalized visa, though, not an open one, which means that you can’t resell it at the moment. If you bring it to Kiph, one of the Twi’leks in the cantina, he’ll be able to slice it so that it’s an open visa, but it’ll cost you 500 credits. Bakkel, the leader of the Cantina thugs in the Cantina Rats quest, will also have an open visa for you to use. After you give both of these visas away, you’ll finish off the quest.
Onderon - Merchant Quarter
Immediately after you arrive in this section of the city, you’ll come across a journalist being hassled by some of Vaklu’s troops. You can choose to intervene if you wish, or simply let them cart off the reporter for interrogation. This isn’t a quest, but your actions do shift you to one side of the force or the other.

Another event is obtainable by talking to Ponlar, a revolutionist agitant berating a crowd in the northeastern corner of the area. By now, you should’ve gotten the drift that Queen Talia = Light Side and General Vaklu = Dark Side, and you’ll be able to make your opinions more well known here. If you speak to him, then come back (you may have to leave the area and then return), Ponlar will start to incite a riot; you’ll almost certainly not be able to Persuade him out of this course of action. Lay your fledgling loyalties on the line, and either spur him on or put him down.
Master of the Palace: Mandalore’s doctor contact, Dhagon Ghent, is situated in the Merchant Quarter. Actually, the quest description here is a little misleading - he’s actually in the Western Square. If you head over there, you’ll get some shocking news - Ghent has been arrested...for murder! Insert dramatic music here.
After learning of his arrest, return to the Market Quarter and speak to Captain Riiken, who’ll fill you in on Ghent’s arrest and give you the Doctor’s Alibi quest.
A Doctor’s Alibi: In order to clear Ghent’s name, you’ll need to do your best Jessica Fletcher imitation in the Iziz Cantina. First off, speak to Panar near the holodancers to learn the Ghent made a pass at Captain Sullio (the woman who was murdered). She publicly rejected him, poor guy.
Nikko, the pazaak player, will refute this story, and tell you that he was the first person to reach the scene of the crime - the junk heap outside the cantina. If you head outside and examine the junk, you’ll notice a headless droid nearby. Hmm.... Return to the bar and talk to Bahima, the Bith bartender, who’ll tell you that his serving droids are often destroyed by the rowdier elements of the slum district. He’ll point you back to Nikko, but neither of them have any hard information. If you talk to Panar, though, he’ll mention that 1B-8D would be a logical point of sale for anyone looking to fence scavenged droid parts.

Talk to 1B and buy the parts that he has for 25 credits, then return to Kiph in the cantina. (1B also has an HK Processor that you’ll be able to use to fully repair HK-47 when you return to the Ebon Hawk, so be sure to buy it!) He’ll be able to extrapolate the droid’s last moments from the memory core, which you should then show to Nikko. Although the transmission doesn’t show the face of the killer, it will provide evidence that it couldn’t have been Ghent. You can use it to persuade the authorities to release Ghent, although the major in charge of the investigation will seem quite reticent about doing so.
Ghent isn’t immediately able to get you a meeting or contact with anyone inside the palace; apparently all of his files were looted from his office during his incarceration. In order to get them back, you’ll need to take on the Cantina Rats quest, listed in the Western Square section below. When you do have them, save your game, finish off any other quests in the area (the only one that might still be active will be Starport Visas) and talk to Ghent again to set up a meeting with the Jedi Master. As he says, this may result in your banishment from Iziz, so you’ll want to make a save in a new slot before doing this.
Iziz - Western Square
As soon as you enter this section of the city, you’ll likely be accosted by a bunch of bounty hunters, so wipe the futuristic floor with them. Such is the life of a Jedi, slaughtering massive numbers of enemies without so much as a drop of remorse. Oh well.
In addition to the quests here, you can find 1B-8D, a merchant droid whom you can "repair" to sell you items at his base cost (this will require a good amount of Repair skill, obviously), as well as Dhagon Ghent’s place, and the entrance to the Cantina.
Cantina Rats: After you wind down the Doctor’s Alibi quest, Ghent will ask you to retrieve some of the files - er, "encrypted holodisks" - that were stolen from his offices. Bakkel, in the Cantina, is the new owner, and she’ll give them over after you speak to her. Well, you’ll pick them up off her corpse, anyway - there doesn’t seem to be any way to avoid a fight here. She also has another Open Visa for the Starport Visa quest.
Iziz - Cantina
This place is full of scum and villainy, so it’ll probably be right up your alley. Although no quests are obtained here, you’ll need to enter in order to complete some of the quests you pick up elsewhere. You can also play Pazzak with Nikko, or enter in the swoop races by talking to the Quarren prioprietor.
Escape From The Merchant Quarter: After the Cantina Rats quest, Ghent will put you in contact with one Master Kavar, but your rendezvous in the Cantina won’t last long; Vaklu and his thugs will attempt to take you into custody, so you’ll have to fight your way out. (If Visas is along for the ride, she’ll ask to kill some of the bystanders, which makes for a good opportunity to pick up some Dark Side points.)

After you reach the Merchant Quarter proper, you’ll learn that Vaklu has been keeping the regular army in the dark regarding his plans for you. Regardless, you’ll have you chop your way through a few commoners and the defensive turrets until you can get back to the landing pad. All you can do now is return to Dxun; you won’t be able to wind down the quests here until game events have progressed a bit further. Regardless, you’ve obtained a new party member, and have the parts required to finish off the assembly of HK-47. Before you leave Dxun, though, you can now hack through the Security door near where Mandalore was stationed previously (you’ll need someone with at least 25 Security, though, or a Security Tunneler) to find some random items in the containers there.
When you reach the Ebon Hawk, take some time to talk with your party members again (Kreia may be able to give you some more teachings in the way of the Force), then activate HK-47 with the part you bought from 1B. If you talk to him, you can learn a bit more about what happened to him in the interval between KOTOR1 and KOTOR2, albeit not much - he’s apparently taken some damage to his memory core. If you wish to learn a bit more about the situation, leave the ship and then return for an interesting little cutscene - apparently even T3-M4 has has his secrets.
Now, you can choose either of the remaining planets to visit. We went with Korriban for its Sithy goodness, but as per usual, the choice is yours.
Korriban
Korriban is an ancient site of power for the Sith, and indeed, just a few years ago, there was a large Sith Academy here. In the aftermath of the Revan/Malak conflict, though, the Sith here were wiped out - supposedly.
Korriban - Valley of Dark Lords
The Valley of Dark Lords is the site of four tombs, within which reside the bones of powerful Sith who’ve been long interred in the salty ground. If you approach them, Kreia will fill you in on a bit of the backstory of each lord, if you wish, but you can’t enter them. Kreia herself won’t actually join you on the surface of Korriban; she instead chooses to remain on the ship and communicate with you via your Force Bond.
The ground here is also littered with Sith corpses of the past few years. You can loot these guys, if you wish, but doing so will spawn in two or three Hssiss apiece. These creatures of the Force are able to enter stealth mode, and are a decent challenge, but if you’ve gone through all of Nar Shaddaa and Onderon (or as far as it’s been possible to do so), you should be able to take them down.
Traces To Ashes: Both yourself, Kreia, and Visas can feel the power of the Sith presence here. It’s unlikely that they’d be able to leave it well alone, even after the students of the Academy were killed during the Sith infighting. Kreia advises you to check out the ruins of the Sith Academy and see what’s what. This quest is completed concurrently with the Trapped quest within the Sith Academy; if you follow our walkthrough for that, you’ll wind down this quest as well.
A Hidden Power: As you progress towards the Sith Academy, Kreia will warn you about a Shyrack Cave that appears off the path - she’ll likely tell you not to enter, but what the hey, you’re a grown-up. Head on in and start poking around. The first screen of the cave is filled with beasts; you shouldn’t have a problem clearing them out, and there are some decent items to be had on the Sith Corpses and in the Ceramic Jars (we were actually lucky enough to nab a Tech Specialist Belt in one of the jars, but all the items here are random; good luck).
Anyway, if you explore the cavern thoroughly, you’ll come across another portal, leading further in. Kreia will again attempt to warn you off. We managed to successfully get through with a 16 Consular / 5 Jedi Master, but you can probably get through it a bit earlier if you’re a more combat-oriented character. You have to head through the Sith trials alone; the whole thing is apparently intended to echo Luke’s failure in the cave...but you have no intention of failing, do you? (Still, save your game before you head in - if you find yourself unable to complete the trials, continue with the other quests on Korriban and come back later.)
Test 1: Your first challenge within the cave involves none other than Malak himself, but a phantom Malak from the past, before he got all facemashed and metally. Your answers here will decide your Force alignment shift. If, after all that you’ve learned, you choose to join Malak and embark on the Mandalorian Wars (again), you’ll take a severe Dark Side hit; if you choose to stand with the Council and reject his call to arms, you’ll go Light Side. If you just choose to goad him into a fight immediately by telling him to draw his lightsaber, you won’t take any alignment shift at all. Whichever you choose, you’ll have to fight against Malak, Bastila, and four other Jedi. Fun.
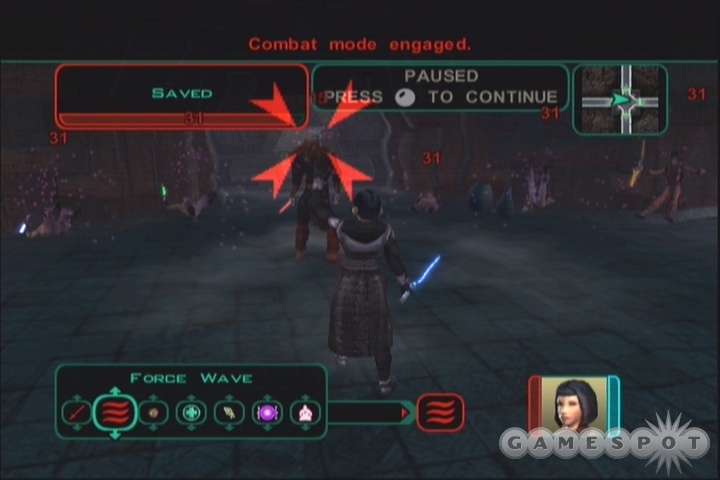
Obviously enough, an area-of-effect power like Force Wave is going to be an ideal opener to this fight. Malak is the key to this little scene - when he’s defeated the rest of your opponents fade away - but you’ll have to survive long enough to kill him. If you can Force Wave or Stasis Field the grunts, which should be easy, since they all have -100 penalties to their saving throws), you should be able to isolate Malak and start wailing on him. He’s not difficult to damage, but he will bust out huge lightsaber swings that can hit you for up to 60 damage a shot, so you’ll want to activate some kind of energy shield - an Echani Dueling Shield would be ideal, if you have one - before he gets the chance to overpower you, then use your Force Speed to gain some extra attacks and start beating him down. As said, he’s not difficult to hit, so long as you’re not a pure Force-user who’s been neglecting all of your combat skills, so slice him down to size before exploring a bit more.
One thing you might notice about this Secret Tomb is that your health and Force Points don’t automatically regenerate. This will make life fairly difficult for Consular-type characters, so try to conserve your powers as much as possible, sticking to Speed to get you extra attacks and Force Wave to stun your enemies. Every class can use Medpacs, so the beefy lightsaber wielders shouldn’t have a problem cutting down the enemies in the area, which mostly consist of Shyracks.
To begin with, head down the corridors north and south from Malak’s position to find some goodies, then start heading east to find another quest. The Jedi Entombed quest isn’t too difficult to finish up if you just make a point of seriously searching for clues within the many corridors of the Secret Cave. Beyond the arm, though, you’ll have to fight off a dozen or so Shyracks, which can again be difficult for non-combat oriented characters, as you likely won’t have enough Force Points to Wave or Lightning them all to death. (If you want to try, though, be sure to run to the far side of the room before doing so to ensure that all of them are on you.)
Test 2: In the second test (you can tell a test is oncoming via the crackling sparks outside the doors), you’ll have to decide whether or not you want to sacrifice a bunch of soldiers to push through a minefield. You can either order them ahead (Dark Side) or tell them that you’ll take care of the mines yourself. If you have a good amount of Demolitions skill, you may be able to remove them; otherwise, you’ll have to just run through them and medpac yourself when you take damage. The only way to trigger the next event is to clear all of the mines, which precedes an influx of Mandalorians. If you cleared the mines yourself, then you should have plenty of help from the soldiers while killing them; otherwise, you’ll have to take them on solo.
After you clear the second test, check the rooms north and south for items, then press on to the east, where you’ll face a hssiss. If you head south from there, you can wrap up the Jedi Entombed quest by grabbing the datapad from the dead Jedi, but this will spawn in a pair of hssiss, so be ready for battle first.
Test 3: Eventually, you’ll run into Kreia. Well, a fake Kreia, at any rate, who’ll challenge Atton and some of the rest of your phantom party members to a fight. If you’re going Dark Side, you can pick sides here, but if you abstain from making a choice and insist on the phantomness of the lot, then you’ll avoid an alignment shift, but will have to fight everyone. This is actually a bit easier than the fight with Malak, though, as, again, only Kreia is really important to the event, so Wave everyone else away and concentrate on her.
Test 4: After facing off against Kreia and Co., you’ll come to a ramp leading downwards towards a door, behind which you’ll come up against Darth Revan. This is kind of a cheesy "test," though, since you pass it no matter whether you defeat Revan or not. You do get an extra 1,000 XP for beating him, but he’s quite difficult, as he uses two lightsabers with only small attack penalties. If you want to stand a chance against him, activate an Echani shield before opening the door, as well as any useful Force Powers, like Speed.
Anyway, as mentioned, you pass the test whether or not you defeat Revan, so don’t sweat it too much. As a reward for your tenacity, you’ll obtain Ludo Kressh’s War Sword and Armband. The sword isn’t all that impressive, but the armband will be handy for Dark Side characters. After you loot the place, you’ll be able to use the door at the rear of the tomb to return to the Shyrack cave, from whence you can return to the Valley of the Dark Lords. Yay!
Korriban - Sith Academy
The good old Sith Academy is where all the little evil boys and girls formerly went to learn their dubious ways. Now, though, it isn’t home to much more than stray animals, Sith assassins, and Darth Sion, he of the lotion-requiring complexion. This is where most of the Traces to Ashes quest will fall in line.
Trapped: As soon as you enter the Academy, you’ll be locked inside. Joy. In order to get out, you’ll need to go through some of the Sith’s automated training programs.
To begin with, you’ll need to find a datapad detailing how to actually sign yourself up as a new recruit. It’s located in a footlocker in the southwestern corner of the base, and will enable you to access the Student Terminal which’ll be marked on your map (after you look around a bit, of course). When you use the terminal, it’ll unlock the Library for you, as well as give you the option of taking a written test. Boy, tests are fun!
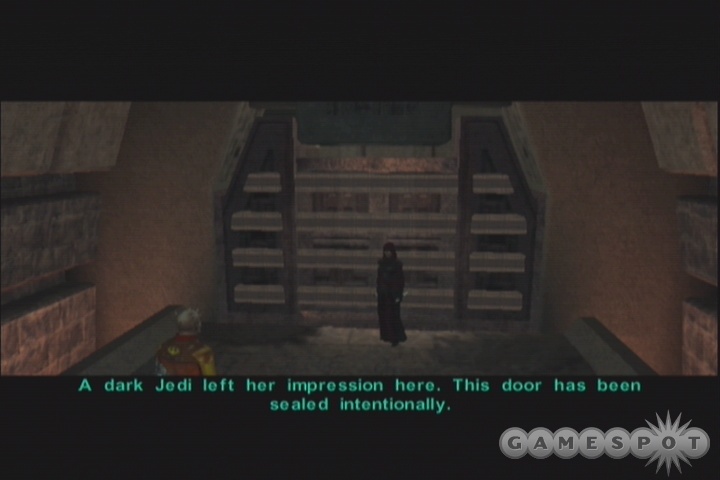
Visit the Library and grab whatever items you can find there. The only goodies of note are some Thorium Charges located in a lockbox (if you attempt to bash it open, they’ll blow, leaving only a lot of pain behind). You can use these charges to open the Sealed Door on your map; they’ll apparently destroy one of the Sith holocrons beyond the door, but there doesn’t appear to be any other way to open the door. Regardless, there’s precious little actual information for the test here, but since you’re reading a strategy guide anyway, we’re betting you’re not really interested in tracking down all the relevant info before taking the test, so here’re the answers. Cheater.
Question 1: Freedon Nadd
Question 2: Twenty.
Question 3: Gizka.
Question 4: I always lie.
Question 5: Passion - strength - power - victory.
After you polish off the questions, you’ll gain access to the training room. Inside, access the panel to start a training sequence. Due to a computer error, you’ll find yourself embarking on the training sequence for level 16 Sith, instead of level two students, but hey; it’s just more tuk’atas, and nothing you shouldn’t be able to handle. You can’t actually pass the test - you’ll fail because you take too long, no matter how long you take - but you’ll gain access to the disciplinary room, where the corpse of Lonna Vash awaits. Unfortunately, you’re too late to kill or persuade this Jedi to join you; all you can do is read her little datapad and use her access code on the nearby computer to unlock the front door. Note that this will lead to an encounter with Darth Sion, so if there’s anything else you planned on doing here, such as using your Thorium Charges on the sealed door, do it before you unlock the door.
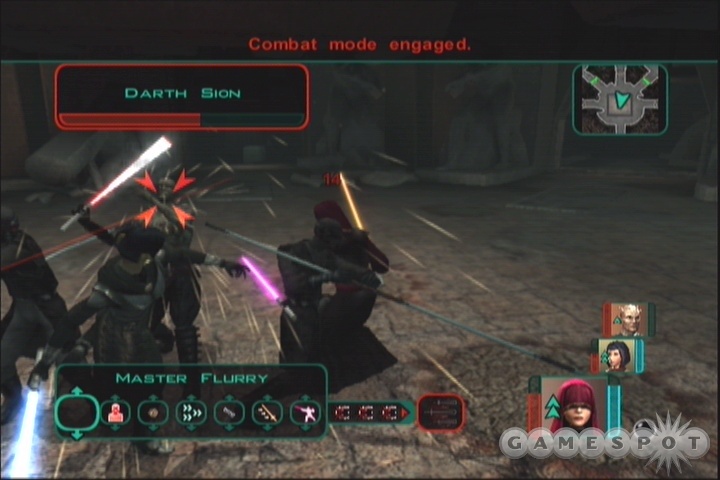
After you do unlock the door, though, and return to the main hall of the academy, Sion will be there, along with a couple of disciples. He’ll answer a few questions for you, but you’ll eventually be forced into a fight that you can’t win - Sion has the ability to completely restore his health for free, so...yep, pretty much unbeatable at this point. Cheap, but effective! All you can really do is try to wail on him for a bit until Kreia links up with you and tells you to run - you’ll automatically leave the Academy at this point, and finish off both the Trapped and Traces to Ashes quests as well. Nothing else you can do on Korriban at this point, so head back to the Ebon Hawk and take off.
When you return to the ship, you’ll probably have a message waiting for you from Kelborn, who’ll tell you that Kavar wants you to return to Onderon. If you wish to do so, feel free, but your journey can also wait until after you get through Dantooine, so that’s what we’ll do.
Dantooine
Dantooine, former home of a Jedi Academy, has seen hard times since the days of Revan and Malak. Malak was responsible for the destruction of said academy; the resulting civil war has left deep misgivings for the Jedi among the populace. Due to the planet’s distance from the core of the Republic, it’s also been the settling point for many out-of-work mercenaries, who grate on the nerves of the agrarian commoners. It’s a volatile situation here, and the appearance of your Jedi isn’t going to make things any better...
Dantooine - Khoonda Plains
As soon as you exit the Ebon Hawk here, you’ll be accosted by a woman who tells you that it’d be best to quickly finish your business and get off the planet - they don’t cotton none to Jedi here on Dantooine. Other encounters in the docking area include a Pazaak-playing Ithorian named Pato Ado, a battered protocol droid (characters with high Repair skill may be able to help repair some of the damage), and a skittish man who’ll run off if he learns that you’re a Jedi, reportedly to "tell the others." Now that doesn’t sound too ominous.
After you’re done talking to the people in this area (of which there are precious few), head into the Khoonda to get your initial quests.
Sensor Search: If you speak to Saedhe on the eastern side of the plains, at the Crash Site, he’ll explain that he’s looking for atmospheric sensors that were apparently lost after a courier happened to crash his swoop bike. He’s not quite sure that the whole thing was an accident.
Anyway, you can find the sensors inside the kilrath cave nearby; they’re in a pile of rubble right near the entrance. Return them to Saedhe for your reward. You can talk him up to 4,000 credits fairly easily, all for just a few seconds of legwork!
Defense of Khoonda: After you find Master Vrook and help him escape from the mercenaries’ clutches, you’ll encounter Azkul outside the Kilrath cave. He’d like your help in sabotaging the defenses of the Khoonda in preparation for their assault. You can either choose to help him (Dark Side) or rebuff him and instead strengthen the defenses (Light Side).
Whatever you decide to do, return to the Administrator and retrieve the Khoonda keycard from her; this will let you into all of the security doors inside the facility. You can also speak to Zherron nearby and ask him what needs to be done; this will unlock the Droids, Recruiting, Side Door, Traps, Militia Medic, and Gun Turrets quests for you. You can do any of these that you wish for extra experience, but if you’re at full power, you’re probably going to win this fight no matter what happens. So feel free to skip all of them if you wish.
Militia Medic: First off, visit the Medical Lab on the northern side of the Khoonda and either use your Treat Injury skills on the soldiers there or have someone Repair the medical droid to get all of the soldiers fixed up. This is a Light Side exclusive quest; if you’re attempting to sabotage the defenses for Azkul, skip it.

Droids: Next up are the defense droids. These guys are located in the northeastern corner of the base, and are apparently all malfunctioning, the silly guys. Regardless, Bao-Dur should be able to get them all back on their feet with no muss or fuss; you can also modify them to be much more effective in battle, if you wish. If you’re going Dark Side, then use the terminal nearby to modify them to target only friendly targets. You’ll also find Akkare’s Hydrospanner inside one of the droids, which leads into a little side quest. You can begin it and finish it by speaking to him later.
Gun Turret: The control panel for the exterior turrets are found in a room opposite the main militia headquarters; if you slice into the terminal there, you can access their targeting parameters. For some reason, they’re currently set to target both friendlies and hostiles; adjust them so that they only target hostiles to make the ensuing fight a bit easier.
Traps: If you wish, you can bolster the minefields on either side of the Khoonda (after heading outside) with extra mines. If you’re Dark Side, you can recover or disarm all of the mines out there. This probably isn’t worthwhile for Light Side characters, as you’ll be able to easily beat back the attackers regardless of the mines.
Side Door: The Side Door of the building, located on the exterior of the Khoonda, can either be hacked open or sealed shut. If you open it, it can’t be shut afterwards, but you will be able to access a huge amount of military supplies within. Since this doesn’t give you a Dark Side penalty, and the security of the building is still going to be in your capable hands, we recommend opening the door and looting the place no matter what. If you’re attempting to sabotage the base defenses anyway, then you get the bonus of a huge amount of swag.
Recruiting: Both Akkere and Suulru can be recruited to fight for the cause if you help them out. Suulru will only join if you retrieved his modulator from Jorran, while Akkere will join up if you blackmail him with the hydrospanner you found in one of the defense droids. If you happened to save Jorran’s life in the Enclave, then he may wish to sign up as well. This is a Light Side-only quest, so if you’re attempting to sabotage the station, skip it.
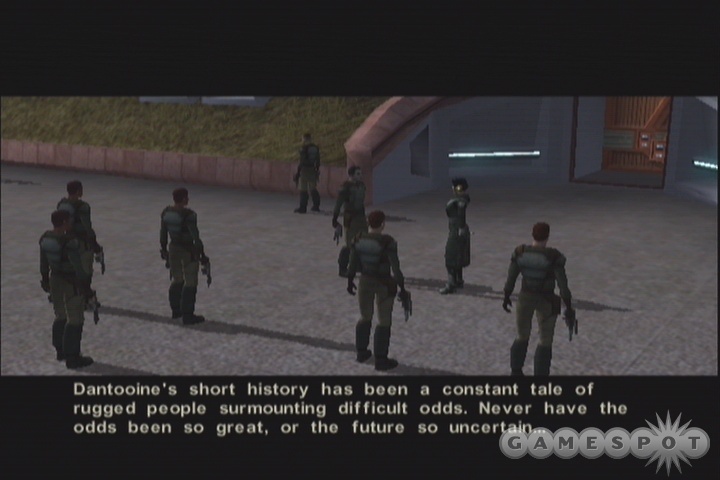
Finalize the Defenses: After you’ve done everything you can to strengthen or weaken the defenses of the base, talk to Zherron and tell him that you think you’re ready for the attack. You’ll wind up outside of the base, where Zherron and yourself will have to finalize the plans for the base defense. If you’re decent at Persuasion, ask for a chance to talk to the men; you’ll be able to pick your speech to either bolster their resolve or completely terrify them.
When the final battle is joined inside the Khoonda, you’ll have to either join with Azkul or fight against him as a final test of your alignment. If you went heavily Light Side here, and managed to activate the droids and do the rest of the sub-quests, you should have plenty of friendly soldiers around to help you take down the mercenaries. Azkul himself isn’t so bad, either, especially if you got the droids online, and Master Vrook will also participate in the battle, making it something of a pushover. (You may start out here as the only member of the party; if this occurs, take advantage of the auto-pause by heading to the Party Screen and adding your other two favorite members back in before the melee is joined.)
If, however, you went the Dark Side route, you’ll need to return to Azkul after you’ve dug up all the mines and disabled the exterior turrets to begin the assault. Azkul will have no trouble penetrating the base with your help, and will kill Adare, sending the fledgling prospects of a new government on Dantooine right into the toilet. Unfortunately for you, Vrook won’t be very happy with this development and will attack, in what’s going to be your toughest challenge yet.

Consulars / Sith Lords will, as usual, have a distinctly difficult time in this battle, due to the fact that your force powers will pretty much never work on Vrook. Luckily, though, he may appear in battle with only a single-bladed lightsaber when facing off against Force-oriented characters; he normally comes in with dual-bladed dealiemabob that would end your fight even more quickly. On the plus side, he won’t use offensive Force powers very often, so you won’t need to worry about anything but lightsaber damage. Said damage is enough to cause you problems, though, because he can crit you for around 80 damage per hit and will sometimes Flurry for extra attacks. You’ll need to change up your equipment before this fight (meaning before you talk to Azkul and tell him to start his attack); look for any items that give you immunity or resistance to energy damage and equip those.
When you’re set for a battle, try to use Echani Dueling Shields, and keep reactivating them as they drop, while trying also to keep Master Speed activated for extra attacks. Vrook will often use Healing on himself, so you’ll have to deal even more damage than you normally would, but your priority in the early portions of the battle should be to keep yourself alive and let him wear himself down. Since you don’t have any teammates in this battle (even though they’re standing right next to you, they apparently think that this is your fight alone), you’ll have to use your own abilities to keep your health up. Don’t hesitate to use Life Support Packs as needed.
Whether Vrook joins you or dies, whether Azkul succeeds in killing Adare, you’ll be able to finally leave the florid plains of Dantooine behind for the moment.
Dantooine - Khoonda
Although the Khoonda is a bit more populated than the exterior zone that surrounds it, you won’t have much more of a fan club here - these people seem to be genuinely resentful of the Jedi that lived here before. Whether you come to make piece or put them to the sword is up to you, but you’ll need to get some quests first.
Lost In The Shadows: If you speak with Administrator Adare, you’ll learn that Master Vrook has recently been on Dantooine, and indeed passed into the sublevels of the former Jedi Enclave, but has not returned yet. In order to find him, you’ll need to access the Enclave ruins - she’ll give you permission - and head underground.
Relics of the Past: If you wish to look around the Enclave Ruins, speak to Adare. She’ll give you permission to head inside. This quest will be polished off automatically in the course of your explorations on Dantooine.
Redemption: Adare will fill you in on the damaged reputation of the Jedi on Dantooine. If you wish to improve on that reputation, you’ll have to work on building bridges with the local community, who view both the Sith and the Jedi with distrust.
Cave Crawling: If you speak to Zherron, the leader of Dantooine’s militia, he’ll ask you to clean out a cave full of kinrath on the southeastern side of the Khoonda Plains. Easy enough to do at this point in the game; the kinrath shouldn’t be any kind of problem for you by now.
When you reach the entrance to the Crystal Cave, head on in and start poking around. You’ll notice a mercenary that appears to be walking past the kinrath without incurring their anger. Leave him be for now - you can apparently bug him into standing still and not responding if you attempt to talk to him before he reaches his destination. Instead, explore the cave; you’ll eventually wind up in a concentration of crystals in the northeastern corner, where a bunch of kinrath hatchlings will attack you, along with their Matriarch, a bad momma that can do plenty of damage with her attacks. If possible, use Wave or Storm to blast as many of the targets as possible, then gang up on the mama kinrath and saber her to death before smashing all of the eggs in the cavern and checking all of the crystal formations for lightsaber crystals.
After the kinrath matriarch is dead and you have all the items that you can carry, you can now attempt to speak to Arhnell, the Twi’lek mercenary wandering around. If you act all nice like, he’ll reveal that the kinrath don’t attack him due to the fact that he’s extracted a pheremone gland from one of the beasts that allow him to appear as another kinrath to them. If you’re particularly devious, you might be able to convince him or Force Persuade him into handing his gland over - insert your own jokes here, kids! - then leaving him to the mercy of the now-hostile kinrath. There doesn’t seem to be a way to get the gland from him without incurring Dark Side points, but it doesn’t matter overmuch, since you should be able to handle them easily by this point in the game.
You can wrap up the quest by returning to Zherron and giving him the good news. He’ll reward you with a bunch of credits.
Farm Equipment: If you talk to Suulru, in one of the corridors near the receptionist, he’ll give you a sob story about how the scavengers stripped down one of his moisture vaporators and sold it back to him. It didn’t work, and now they want him to pay again for one of its key parts.
The scavenger that fleeced Suulru is actually in the Enclave Sublevel, barricaded in a room due to the influx of beasts there. If you free Jorran from his makeshift prison, he’ll initially refuse to talk about the transaction, preferring to return to the scavenger camp up top, but you can kill him immediately and grab the part Suulru needs from his body. If he does return to the camp, you’ll either need to intimidate him into giving you the modulator, or buy it back from him for 500 credits. However you get the modulator, return it to Suulru and you’ll receive a small reward.
Changing of the Guard: Berun Modrul believes that Zherron has been provoking the mercenary population of Dantooine in the hopes that they snap and flagrantly break the law, apparently in the hopes of expelling from the planet once and for all. He asks you to turn up any evidence of his suspicions and bring it back to him. So far as we can tell, this quest wraps itself up when you actually do uncover evidence that the mercenaries are planning to attack the Khoonda
Dantooine - Enclave Courtyard
The Enclave Courtyard is home to both the mercenary groups - located in the east - and the scavengers. There are a couple of mini-events in the mercenary camp, where you can convince some Mandalorians to travel to Dxun if you kill their leader (you’ll need to have Mandalore in your party, obviously), and take down a rather flippant mercenary who’ll give you some lip. The only real NPC merc here, Dopak, will talk with you, if you wish, but doesn’t have much of interest to you in general.
More information can be found at the salvager camp, to the south of the entrance to the Jedi ruins. The head honcho her, Daraala, will also sell you some of the Jedi salvage she’s collected from the enclave, incuding some decent lightsaber crystals. Her inventory of crystals appears to be randomized when you first speak to her, so you might want to save your game before talking to her and then reload if she’s not selling anything you’re interested in.
The last group of people you’ll encounter here will be a bunch of salvagers running out of the Enclave Sublevel as you approach it. You only get two questions here before the salvagers run off, so make the most of it. You apparently can’t get an actual quest here, so don’t worry if you don’t find out too much from these guys - all will be revealed inside the Enclave.
Ghosts to Rest: Daraala wants you to find the bodies of two salvagers that died in the sublevel of the Jedi Enclave and return them to her so that she can give them a proper burial. Of course, she’s not telling the whole truth, as you’ll discover if you talk to Jorran in the Enclave Sublevel, or after he escapes to the camp - she’s apparently trying to make a play for a claim that the dead salvagers made.
After you find the second scavenger corpse, you can either leave the will intact, in which case your only reward for the quest will be some credits, or you can alter the will so that it specifies you as the next of kin, in which case you’ll gain the credits and some items, including a lightsaber. This latter course of action does give you a minor Dark Side hit, but it’s loot! And everyone loves loot, right?
Dantooine - Enclave Sublevel
You enter here near the Garden, and, as everyone was telling you, you’ll soon discover that the whole place is overrun with Laigreks. Like most beasts, though, you should be able to chop your way through them with relative ease. There are a few areas of interest here:
1: To the north of the entrance, you’ll find a room where Jorran, the last salvager, is camped out. After you kill off the laigreks in the area, tell him so and he’ll come out. If you ask him about previous groups of scavengers ("What were you doing down here?" - "Why were you down here if it’s so dangerous?" - "Almost anybody?"), he’ll tell you that Daraala doesn’t really care about the scavenger’s bodies - she just wants their personal effects to lay claim to items that they retrieved from the Enclave earlier. He also has the modulator for Suulru’s Farm Equipment quest, but the only way you’ll get it now is to kill him and search the body. If you’re unwilling to do that, he’ll head back to the scavenger camp. If you ask him if he found anything, you can attempt to buy his finds off of him - they’ll include a Lightsaber, a Superior Diatium Energy Cell (+4 Energy damage), and a randomly colored lightsaber crystal.
2: In the southeastern corner of the map, you’ll find the Power Relay Station, which controls access to the Storage room nearby. In order to open the door, you’ll have to slice into the console here and set it to overload; give it a ten second timer, run away, then run back into the storage room when it blows. You’re unlikely to find anything really leet within, but hey - it’s loot.

3: The two scavenger corpses required for the Ghosts to Rest quest can both be found here. One is located in the suite of rooms in the northwestern side of the area, while the other lies in a pit in the middle of the southern corridor. When you find the second corpse, you’ll also find a will, which indicates that one of the dead salvagers left all of his possessions to the other dead salvager. What a mess!
4: After you bust into the Jedi Archives, you’ll encounter the Disciple. You’ll need to pump this guy for all the information you can possibly gain about Jedi Master Vrook. He won’t give you any quest information, but if your main character is female, he’ll join the party, and can eventually be trained in the Jedi ways, if you gain enough influence over him. Elsewhere in the archives you’ll find a datapad leading to the Lost In The Shadows quest.
Lost In The Shadows: After you locate the datapad detailing Vrook’s abduction by the mercenaries, you can head straight for the Kilrath cave to investigate, but not before Gerevick and a group of thugs attempt to rob you. Slice them down, then head out of the Sublevel to return to the surface.
After making your way to the Kilrath caves, slice through the mercenaries holding Vrook hostage and let him go; he’s hardly happy to see you, but we’ll let his rudeness go for the moment - Ed Asner gets a free pass on this one. He’ll let you know that the mercs on Dantooine have made a secret deal with the Exchange and are planning to attack the Khoonda! Rut-row! With his intel, and the datapad from the mercenary leader you just killed, head out of the cave onto the Khoonda Plains.
When you exit the cave, you’ll finally meet up with Azkul, the mercenary leader, who’ll ask you to help him defeat the Khoonda. This is a pretty obvious junction point; if you’re going Dark Side, you can help him out, but Light Side characters will want to either pretend to join him, or simply refuse his offer and kill all of his men. This will lead you into the Defense of Khoonda quest, found in the Khoonda Plains section above.
Back To Dxun
Now that you’ve resolved the Jedi situation on three of the four planets available to you, it’s time to return to Onderon and finish off the troubles there. You should’ve gotten a message by now telling you that you can return to that planet; if you wish, though, you can also use this time to gallivant about the universe, finishing up any loose quests. For instance, you can recruit the Mandalorians in the Flophouse on Nar Shaddaa if you approach them with Mandalore in your party; if you sided with Geeda in the merchant quest on Nar Shaddaa, she will also have some new items open to you thanks to your efforts on Dantooine.When you’re ready to get moving on with the quest, though, return to the Mandalorian Camp on Dxun. You’re going to soon be forced to make two groups of three party members each, so you may want to spend a bit of time upgrading weapons that you’ve been neglecting before you leave the Ebon Hawk, lest you wind up with an underpowered group.
After speaking with Kelborn, you’ll learn that the Sith have allied themselves with General Vaklu, and are reinforcing his troops from their base on Dxun. You’ll need to send a group into the Sith base there while your main character leads the charge into the Queen’s palace. The important thing here is to make sure that each group has a powerful melee character (Visas, Mandalore, or one of your Jedi teammates), someone who’s capable of healing (the Disciple or the Handmaiden, perhaps), and someone with a good suite of skills (Mira, Bao-Dur, T3-M4). Kreia can’t be assigned to the group that’ll head into the Sith base, and neither can your own character, but everyone else is fair game. We personally went with Visas, Mira, and Mandalore, but again, so long as you have the bases covered, you should be all right.
Dxun - Jungle Tomb
Your first major challenge in the tomb will be a little minefield that’s watched over by a perimeter sensor. The idea here is to get to the sensor and either plant a detonation pack on it or disable it manually, but to do so, you’ll need to have a character with both high Stealth and Detonation skills. If you don’t have a character with both, you’ll probably want to just walk forward recovering the mines until you notice Sith soldiers incoming, then dash ahead through any remaining mines and take them out quickly. You can disable the sensor after the first group of soldiers have been defeated.
Next up is the Turret Power Generator, to your left in the first clearing. If one of your characters has a high Repair skill, they can rewire the generator and force it to explode - yay! (You might not want to, though, as you’ll soon be able to turn the turrets to your cause.) Nearby, there’s a Sith base camp. If you eliminate the soldiers here (and you won’t have much choice), you’ll be able to slice into the security terminal and activate Operation Foothold, which will flip all of the turrets outside the tomb area so that they attack friendly targets, such as all the Sith soldiers milling about. Sit back and watch the experience rack up during the ensuing firefight, then move in and take out any survivors. You’re going to be dealing with your first Dark Jedi Apprentices here, so be sure you’re ready for a fight and save your game before heading in. What’s worse are the appearance of two Sith Lords just before the entrance to the inner tomb; be sure you have any relevant Force Powers or shields activated before opening the door.
Dxun - Sith Tomb
Freedon Nadd’s tomb is, of course, overrun with baddies, so start swinging away with your melee-oriented characters. To begin with here, head to the east at the first branch of the corridor; this’ll take you down to a droid workshop. After clearing out all of the droids, investigate the pool of Dark Side energy on the floor; you can either choose to bask in it, if you’re a Dark Side character, or attempt to negate it, if you’re going Light Side. (This is dangerous, though, as you’re not guaranteed success if you attempt a Willpower roll.) You should earn a temporary stat boost either way.
The ancient machine here can be unlocked with a bit of mathematical tomfoolery; the correct sequence is multiply, subtract, add, multiply. When you power up the console, you’ll obtain a few lightsaber crystals, which you can insert into your weapons with the nearby workbench, if you wish. You can also have your high-Repair character reactive the war droid her for a few repair parts. Another ancient console awaits you on the western side of the entrance; if you choose to replace the "C" component, you’ll get even more crystals. There’s also a medical droid nearby which you can repair; it’ll follow you around and heal you when you take damage.
After you reach the barrier blocking you from entering the inner crypt, explore the eastern and western passageways and use the terminal at the end of either one to open the door to the inner tomb. You’re going to have to take down two groups of Sith soldiers before you can approach the area where the Sith Lords are conducting their little ritual - and nothing good ever comes of those. When you clear out the second group of soldiers, then, save your game and activate energy shields before heading into battle.
The ensuing battle takes place between your party and an opposing party of Siths, including a Sith Master and two Sith Lords. Your party’s leader - whomever you chose back when you spoke to Kelborn - will take a lot of damage on the first turn, which is why it’s important to have your most powerful energy shield activated on him/her before the battle begins. A Verpine Prototype Shield is ideal, if you’ve found one before now; you can use it before you walk up to the Sith, activate a Power or simply attack on the first turn, then reactivate it on the second turn to forestall any more damage. This will hopefully let you break up the attackers a bit and finish them off before they can wipe you out. Don’t worry if your main character falls; you can still win the fight even if a member or two of your party is out of commission at the end, so long as you manage to kill off all of the Sith first.
After the Master and Lords are done for, search their corpses and the tomb of Freedon for items, then speak to Xarga to begin the next leg of your quest. If you wish, you can strip your characters of weapons and armor now, so that the characters assaulting Onderon will have them at their disposal.
Onderon - Merchant Quarter
Your main character and Kreia are required characters for this leg of the journey, and they should provide most of the battle chops that you’ll need to survive, so feel free to pick anyone else you wish to bring along, provided that you have adequate equipment for them. After you land in the Merchant Square, you’ll be attacked by a squad of troops, so wipe them out, then search their bodies before moving on to the Sky Ramp. (Note that the identity of your attackers here will depend on your choice of sides in your previous adventures on Onderon - if you allied yourself with Vaklu, you’ll be fighting off troops loyal to the Queen; if you’re more of a Talia follower, then Vaklu’s soldiers will attempt to prevent you from protecting her.)
Onderon - Sky Ramp
The enemies here are going to be exceedingly weak compared to your current powers, so use your area-of-effect abilities like Lightning Storm, Force Wave, and Insanity to disable them or kill them outright. When you reach the Turret Tower, ignore it for the moment and head across the square to the Barracks, where you can find more soldiers and some lockers with items in them, then return to the Turret Tower, where you can disable the force fields that block your passage (and perhaps use the turrets to shoot down enemy ships, as well, although the only effect this seems to have is a small experience bonus for you).
After dropping the shields, you’ll have to fight your way through a few more soldiers before you can reach the Throne Room, but reach it you will. There’s also another force field in your way, but you can bash it with a lightsaber to bypass it.
Onderon - Royal Palace
The Royal Deadline: The Queen’s interior chambers are under assault by the Sith, and there won’t be much you can do to reach them until you take care of the slicer that’s manipulating the palace’s security systems. In point of fact, you shouldn’t even attempt to access any terminals until you’ve taken care of the slicer, as you may wind up accidentally disabling them. Save your game after you talk with Vaklu, then head south and round the corner until you reach the end of the corridor. The door there will take you to the Primary Security Complex, where you’ll meet the hacker that’s been disrupting your efforts - Kiph, from the Cantina. After dealing with him as you see fit, use the console to open the force cage that’s holding Riiken - he’ll tell you to get the master override code from the terminal, so log in again and grab it.
Start making your way back to the intersection leading to the throne room, then head north. Be sure to stop into the Royal Museum for a bit of looting; there should be a completely killer Ossus Keeper Robe that’ll suit Kreia exceptionally well. (+2 Cha, +4 Int, and +4 Wis on a single item? Quite the haul.)
Before you head into the West Security Complex, proceed to the end of the northern hallway and open up the storage room there using the code 66 - 45 - 39. You only get one shot at this - if you fail, the terminal locks up completely - so be sure to enter the right numbers! There’s some neat loot, including a Kaiburr Crystal (assuming it’s not random), which’ll give you +3 Wisdom and +3 Constitution, as well as +3 regeneration, when inserted into a lightsaber.
When you have that bit of business taken care of, head to the West Security Complex and use the terminal there to enter the primary access code, which will give you access to the throne room. (If you’re going Light Side, then be sure to tell Kadron that you have the code as soon as the conversation prompt comes up - if you choose something else, you can apparently get stuck, as it won’t reappear.)
Obviously enough, you’ll want to save your game before heading into the throne room.
Dark Side: If you sided with Vaklu, you’ll have to face off against Master Kavar in one-on-one combat. He’s the least combat-oriented of all the Jedi Masters you’ll have to face off against in the game, but will use his Force Powers to good use by stunning you to keep you off-guard. If possible, use Force Immunity to give yourself an edge against his powers, or equip items beforehand that’ll prevent you from being stunned, if you have any. Beyond that, the traditional Master Speed + Lightsaber combination should help you slice and dice your way through this guy.
After he’s dead, you’ll help Vaklu will assassinate Queen Talia and pay you off, automatically returning you to Dxun.
Light Side: After you breach the outer vestibule of the Throne Room, you’ll have to quickly eliminate the Drexl Larva before you can reach the Queen. It’s a toughie, as it has 42 Defense and can damage all of your characters at once, but you should still be able to Master Flurry your way through it without too many problems.
When you reach the Throne Room, you’ll need to either join the fight against the regicides, or use Battle Meditation to rally the troops. (This last option might not be available to all characters.) When Kavar comes in, search the remains for any items, then walk up to the Queen and Vaklu. You’ll need to fight off Vaklu and his men in order to save the queen, so try to eliminate the men first with Insanity, Stasis Field, or something similar, then concentrate all your firepower on Vaklu.
After the rogue general falls, you’ll be able to either support the Queen in her decision to execute him, or attempt to talk her into granting him a trial. After that little melodrama is over, you can discuss the situation with Kavar - he’ll teach you a new Form and leave for Dantooine. After returning to your ship, you’ll likely want to make your way back to Dantooine as well, although you can feel free to make any side trips that you wish. If you had Geeda’s New Trade Routes quest on Nar Shaddaa, you should be able to complete it now. She’ll sell you an HK Pacifist Chip, should you wish to have one; if you install it in HK-47, he’ll gain bonuses to his Wisdom, Awareness, and Treat Injury abilities. This would also be a good time to make one last massive Workbench visit and have Bao-Dur break down and rebuild as many components as possible before upgrading everything you use regularly.
Pursuing Your Destiny
The chain of events that you’ve set in motion - whether you’ve decided to gather the Jedi or slay them - will start accelerating at this point, and will eventually culminate in your realization of your fate. To begin the domino effect, talk to Kreia aboard the Ebon Hawk, then warp out to Dantooine and head to the Jedi Enclave’s upper level, located on the southern end of the Enclave Courtyard. Before you head in, save your game, and make sure that you’ve unequipped Kreia and the rest of your party members, especially those that you don’t use very often.
Dantooine - Rebuilt Jedi Enclave
Time for some drama! When you reach the Enclave’s upper level, you’ll be forced to go on alone. Obviously enough, what happens now depends on your choices throughout the game. If you went Light Side and asked the Jedi to assemble here, then here they’ll be, waiting for you. If you chose the Dark Side, though, then you’ll have an interesting conversation with Kreia instead. Regardless of your choices, though, you’ll have to take off to Telos and head for Atris’ makeshift Jedi Academy.
Telos - Secret Academy
Judging by the conversation you witness between Atris and Kreia, you can probably guess that not all is right with the inhabitants of the Academy, including their master. You’ll have no choice but to confront Atris in mano-a-mano combat. If you’ve been a particularly bad boy, she may have even fallen to the Dark Side and changed her name to Darth Traya, but in either case, she shouldn’t be a particularly difficult foe to defeat. She’ll likely try to open with Force Powers, so take the first couple of turns to activate Powers of your own before wading in, sabers blazing. After you smack some sense into her, you’ll be able to either kill her, or spare her life.
Citadel Station - Suburban
Your problems on Telos aren’t over yet, though. It appears that Darth Nihilus, Visas’ erstwhile master, has finally revealed his presence with an attack on Citadel Station. It’s up to you to make it to his ship and defeat him, while also ensuring that the entire station doesn’t crash into the planet as it runs low on fuel.
Fuel Sabotage: This is a bonus mission, but it jibes well with your stated goal of reaching the docking module, so what the hey; might as well kill two birds with one stone. You can obtain it by speaking to Major Riiken, who’s standing near Zherron at the exit from the TSF compound. Fight your way through the nearby Sith before heading into Module 082 and, from there, accessing Entertainment Module 081.
After entering Module 081, you’ll encounter an injured TSF soldier; if you use Treat Injury on him, he’ll follow you and help you take down the numerous Sith Commandos in this section of the station. The Sith responsible for sabotaging the station’s fuel supplies can be found in the TSF Station, so be sure to head there and kill them all before taking the Shuttle to Ravager. When you’re ready to head out to the belly of the beast, make your party (be sure to bring along Visas) and talk to Mandalore by the exit.
Ravager - Command Deck
Destroy The Ravager/Defeat Darth Nihilus: With the help of the Mandalorians, you’ll have no problems getting aboard the Ravager’s command deck. Mandalore himself will be a mandatory party member for a bit, so equip him, if he’s not already outfitted, then head south and start exploring the ship. You should be able to find the areas for the proton cores without much problem - you’ll automatically be alerted by the Mandalorians when you reach one, and they’ll also appear as dots on your map as you run around. After you set the third core, though, one will detonate prematurely, forcing you to find or make a new one.
In the middle of all this running around, you may run across Colonel Tobin, one of the traitors from Onderon, now swooning under the influence of Nihilus. You can kill him, if you wish, or Persuade him to renounce his ways by mentioning the fate of Onderon and convincing him to detonate your proton cores after you leave the vessel. Either way it doesn’t have a material impact on the mission, but sparing his life may help you gain influence with Visas, should you even need any more by this point.
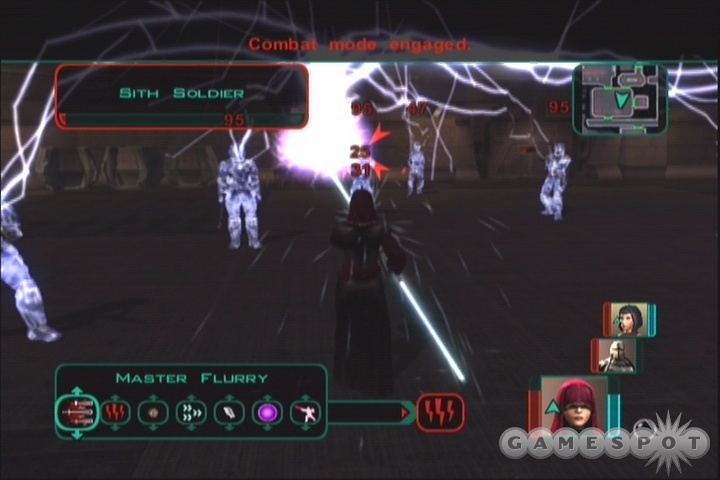
Anyway, after that third proton core is set, you’ll need to grab another one. If you head to the Maintenance Bay on this level, you’ll be able to use the console there to seal the missile bays, then override the launch sequences, which will let you retrieve another proton core from the missile. You can then bring it to the fourth bomb site and activate it.
Now, despite the fact that you’re ready to destroy the entire ship, you have no choice but to track down Nihilus and take him out as well, apparently just out of spite. He’ll die when the ship blows anyway, but you apparently want him to be really dead, so it’s off to the Bridge for a duel. Before you head down, though, let Visas explore her cell in the southeastern corner of the area and meditate on her journey.
The Bridge
All that stands between you and Nihilus are a gaggle of Sith, including a few Dark Jedi. Kill them all, search the various lockers for items, and save your game when Visas points out that you’re nearing the bridge.
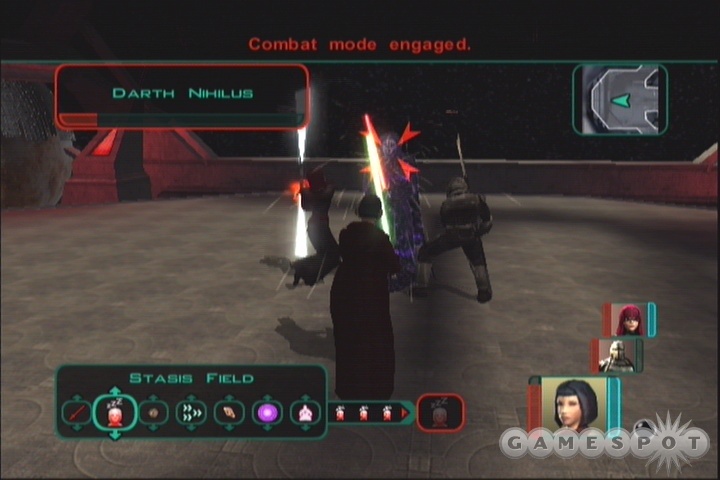
Darth Nihilus is...really not all that difficult to beat, surprisingly. He likes to stun people, but he can only stun one party member at a time, allowing your other characters to gang up on him and quickly deal damage; he has a relatively crappy 33 Defense (compared to Atris’ 40), so almost everything you throw at him will hit. If you’re a Master or Lord, you might even be able to get some Force Powers off on him, although he does have an automatic modifier of 43 or so against most offensive powers. After half of his life points have been sapped, ask Visas to disrupt the link between Nihilus and the Ravager, which will stun him, allowing you to easily finish him off.
Visas will want to look upon Nihilus’ face; if you let her do so, ask her to bring back his mask. You can’t wear it, but Light Side or Dark, it’ll boost your maximum Force Points. After doing so, return to where you docked with the Ravager and get the hell out of there - she’s gonna blow! Again, before you take the shuttle back to Citadel Station, be sure to unequip all of your teammates - you’re going to be flying solo from now on, and you don’t want to be caught needing a crucial piece of equipment that you accidentally left attached to someone else.
After a final conversation with good old Carth Onasi, it’s time to meet your maker. You’ll automatically head off to Malachor V to catch up with Kreia, now fully Sithified and evilllll.
Malachor V
Your journey across the exterior portions of Malachor V will be uneventful - there are various Storm Beasts around, but they won’t be a serious challenge for you. Explore thoroughly, then head down into the Malachor Depths, which, oddly enough, look exactly the same as the surface.
In the Depths, all you can really do is explore and look for the entrance to the Sith temple here. There are some events that will occur during your looking-around, such as a duel with a Greater Storm Beast after you find the Storm Beast Pen area - this guy can be exceedingly difficult to beat if you can’t quickly deal damage, mostly because of the fact that he can deal upwards of 170 damage (not a typo) on a normal hit, and is resistant to the propelling effects of Force Wave. If you’re a Jedi Master / Sith Lord, your best bet may be to lock him down with a Stasis Field or Insanity (or perhaps try Beast Trick), and then slice him with a Master Speed lightsaber attack.
Two Men Enter, One Man Leaves
After you enter the temple, you’ll shift back to the final resolution of the Mira / Hanharr drama. Or not; this may only occur if you went Light Side. Regardless, you’ll need to defeat your opponent in order to move on. In our case, we had to level up Mira and quickly get her outfitted at the outset of the fight to take on Hanharr who is, as ever, a bruising machine. You should have some potent weapons on your side, though, so equip Mira with the best stuff you have, including a Mandalorian Power Shield, which will protect her from Hanharr’s slashing damage. Any other equipment you have that’ll give you resistance or immunity to slashing damage will come in handy.

If you didn’t turn Mira into a Jedi, then you’ll have to dig deep into your bag of tricks to defeat Hanharr. As usual, the fact that you can lay mines in the middle of battle will probably come in handy, and you should hopefully have some nice Deadly mines by this point in the game to use. Your Treat Injury skill should also be nice and high, and even if it’s not, you should have plenty of Life Support Packs from your looting of the Ravager. Wear Hanharr down with explosives, then finish him off with a good sword attack, boosting yourself with a Hyper-Adrenal Strength if necessary.
Mass Shadow Generator: After Hanharr goes down, you’ll take control of...Bao-Dur’s little remote friend. Bet you never saw that coming, eh? Bao-Dur asks you to activate his mass shadow generator to heal the damage caused to the planet. What the MSG is, or how it’s supposed to work, is apparently on a need-to-know basis, and you don’t need to know.
Anyway, your goal here is to find and activate four energy cores from crashed Republic ships in order to activate the generator. Conveniently enough, there are exactly four such ships planetside; two on the Surface, two in the Depths. If you did a good job of exploring while your main character was running around, then they should be marked on your map already, so just head to each, prime the core, then wait for further instructions after you’ve activated all of them.
Malachor V - Trayus Academy
The students at the Sith Academy don’t take too kindly to your presence, no matter what side of the Force you hold allegiance to. If you’re a combat-oriented character, take them on in small groups; Masters and Sith will want to round them all up, including the six situated by the northern doors, before incapacitating them with Insanity or Stasis Field and killing them all via Storm or Force Wave. There are plenty more Sith soldiers standing around in the Academy waiting to be killed, so nab them all and then start looting their remains (although there won’t be many items left around). We personally found Force Wave to be devestating here, since its effect travels through walls, allowing you to damage as many as a dozen enemies (if not more) at a time.

There are two offshoots to the Academy: the Trayus Crescent and the Trayus Proving Grounds. We recommend that you fight through both of them, as there are hordes of Sith just itching to give you the Life Support Packs and miscellaneous other items that they’re carrying around. You’ll need to kill them, of course, but hey - you’re basically a Jedi God by this point in the game, so hit the ground running and start punching people so hard that their whole families die. The only place of note in either of these areas is the workbench in the Proving Grounds; you’ll have one last chance to upgrade your gear before you head into the final duels.
Darth Sion
Both the Proving Grounds and the Crescent will lead back into the northern wing of the Academy, where Darth Sion awaits. Despite his recommendation that you go up and die on the surface of the planet, you can’t avoid a fight here. You can, however, get an advantage on the aloe-needing Sith by attempting to Persuade him that he’s been a presence in your head, or some such. You can actually do this multiple times during the fight; success will reduce his Constitution, Wisdom, and Will saves, making it easier for your force powers to affect the baddie.
In truth, Sion shouldn’t be a very difficult dual, no matter what kind of character you rolled up, if only because he’ll almost never attack more than once per turn. So long as you have a powerful shield up, such as a Verpine Prototype Shield, you shouldn’t have any trouble dishing out damage to him. Although he does have one of the highest Defenses you’ve seen yet (45), you should still be able to hit him without any problems, if you’ve been consistently levelling up. If you’ve been going through the game as a pure Consular-type character, then you should also be able to consistently hit him with Stasis Fields or Insanity to stun him (his base modification to his roll is around 35 for these), then use either Force Wave or Lightning Storm to deal massive damage. (Note that he can’t be stunned by Force Wave, but that he will take damage from it.)
You’ll need to "kill" Sion no fewer than four times to actually defeat him; he’ll completely restore his health after it’s knocked down the first few times. After the fourth death, though, he’ll die for real, allowing you to loot his corpse and head into the Trayus Core to face off against Kreia.
Malachor V - Trayus Core
You can feel free to question Kreia as much as you like before battling her - she has no earth-shaking revelations for you, but may flesh out a bit of the backstory. As with all such tense conversations, though, it’ll end when the flaring of sabers and a duel.
Darth Trayus
Sith Lords and Jedi Masters will first notice that their powers are relatively useless here, as Darth Traya has a base save mod of almost 60, depending on what power you use on her, and you’re unlikely going to be able to match that. She, however, will have no problems whatsoever with her Fear and Force Wave powers, leaving you stunned or insane and completely vulnerable to attack. If at all possible, try to switch out your equipment to leave you immune to these kinds of effects. A Nerve Amplifier Belt, which makes you immune to Stun/Fear/Horror, or something similar, is really pretty much a requirement for this fight. If you don’t have one, then try equipping something like a Force Mask or Jal Shey Belt to give you bonuses to your resistance against Force Powers.
If you can protect yourself from her Force Powers, then you have a shot at defeating Traya. You’re able to prepare for the fight while still on the walkway leading up to her; the final conversation won’t trigger until you’re actually fairly close by. If you’re a Demolitions expert, then this is obviously the time to lay down everything in your arsenal. Well, you can actually only lay down 15 mines at a time, so pick up the 15 most deadly constructions you have underneath the arch. During the ensuing fight, you can lure her over the mines and dish out some unblockable damage to her - even if she saves she’ll still take a considerable beating. If you haven’t skilled up in Demolitions, then you can still take advantage of the calm before the storm by activating long-lasting effects, like an energy shield, Energy Resistance (Trayus loves to use Force Lightning), and Hyper-Adrenal Everything. You can get through the conversation with Trayus in as little as two responses (your opening remark, then "You shall pay for all your lies and betrayals."), which will only minimally drain the timers on your two-minute buffs. When you’re ready, walk up to Trayus and get busy.
As mentioned, Trayus will attempt to use Force Wave, Stasis Field, Lightning, and Fear on you, and probably other powers if you give her the chance. If you’re lucky, though, you’ll be able to convince her to concentrate on her lightsaber attacks by sticking close to her. Of these, she only has one per round, although she can sometimes critically hit you for over a hundred damage, so it’s not something to be shrugged off. Still, though, even Consular-type characters should be able to outdamage her in a straight-up duel, thanks to Master Speed. If your shields drop, reapply them and get back to work slicing her health down; she’s got plenty of it, but she should be beatable even by weak characters. The X factor here is her Stasis Field attack; there isn’t any equipment that can protect you from it, so far as we know, and it’s almost impossible to resist. If she manages to lock you down with it, your fight is probably over, as you’ll be unable to do anything for three rounds, which gives her plenty of time to deal extra damage. If you have a huge pool of HP, then you may be able to recover, but Consular characters will usually be dead by the time they break free.
After you take Kreia’s health almost down to zero, the fight will pause for a moment and enter its second phase. In said phase, you’ll be attacked by three floating lightsabers at the same time. Your tactics here will depend on your character; offensively-minded characters will need to start concentrating on one of the lightsabers and hope to kill them all before they wear you down too far. Force-users will want to try Stasis or stunning them with Force Wave before using Lightning Storm to deal with them en masse. A combination of these approaches might be best; if you can actually stun them, then even soldier/guardians should be able to dish out a good beating on all three sabers with a Thermal Detonator or a Plasma Grenade.
When the three lightsabers have all been defeated, you will have finally defeated Trayus. She’s gracious in her defeat, and will even read the future for you, should you wish to hear it, after which the game just kind of ends. For us, at least, there wasn’t any choice whether or not to activate the Mass Shadow Generator, but you may have a different result if you went through heavily Dark Side oriented.
Mini-Games
Pazaak
Pazaak is KOTOR’s primary mini-game, and will be one of your greatest cash resources, assuming you have a little luck and the patience to reload your game when you hit a bad string of losses.
Tips
The rules of the game are fairly basic; check your Completed Quests entries in the menus to get the basics down. You can also hit up Atton for a tutorial any time you’re on the Ebon Hawk.
High-stakes Pazaak will require a good deck. Unlike in KOTOR, though, the only real way to acquire Pazaak cards in KOTOR2 is to buy them, and there are few enough places to do that. You can buy cards from a player in the Cantina on Citadel Station, one of the Rodian merchants on the same station, a player in the Cantina on Nar Shaddaa, and an Ithorian player near the landing pad on Dantooine, and perhaps in other places as well. It’s more difficult to find enough cards to make a side deck fully constructed of the valuable flip cards (cards that read as +/-1 or +/-2, for instance), but should you find them, these should always go into your deck.
Luckily, one of the more annoying aspects of Pazaak in KOTOR has been amended; the computer-controlled player will no longer always go first. This will greatly help you balance out the chances of an early bust, so, well, hooray for Obsidian. Assuming you and your opponent have evenly-matched decks, you’ll no longer be at an automatic disadvantage when facing off against a computer player, since you will now take turns going first in a match.
Since the computer will always do its damndest to match or beat your score, you’ll know that your initial score will have to be at or near 20 in order to win; unless your opponent busts by a huge margin, he’ll almost always find a way to hit a 19 or 20 during the first few games, especially if he knows that you’re sitting on an 18.
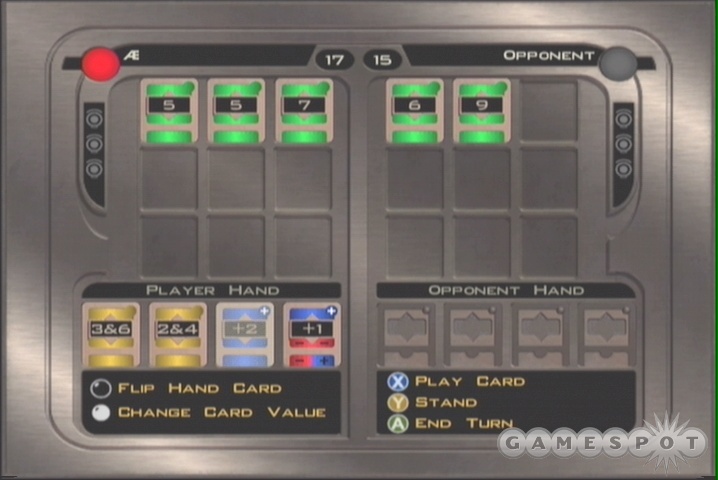
If you get lucky and begin a game with a few low cards, you’ll find that the computer will always stay on an 18 or better, and will usually play a card in order to hit 19 or 20. If your opponent has no more cards in his hand, he’ll stay on anything better than 16, which gives you a pretty big margin for error. As we’ve said, though, there’s no way to consistently ensure that your opponent draws higher cards than you, so you’ll generally need to attempt to get to 19 or 20 and stay there, and hope your opponent can’t match up or do better than you.
The third rule of Pazaak is: the first game is important, but less important than the last. You’ll want to try and ensure that you have something in your hand when you get to match point; hoping for a natural 20 is rarely a viable game strategy. If you find yourself constantly running out of cards in the third round or later, you’ll probably be better off if you play more conservatively in the first round or two. Try to hit to as close to 20 as you can manage, then let the computer waste its cards trying to beat your score. Even if you wind up going in the hole, card advantage becomes much more important as the game goes on, so if you can goad the computer into wasting a card or two to tie a score of yours in the middle of the match, you’ll be stronger towards the end game.
For our money, the best side deck consists of three +/-2 cards, three +/-4 cards, and four +/-3 cards, although the numbers of each card doesn’t matter as much as the fact that they’re there: if you don’t have enough +/-3’s, replace those slots with other double-sided cards, not a +3 or a -3. Any double-sided card is generally preferable to a single-sided card, though this is less true of the extreme ends of the double-sided types. A +/-6, for instance, should be scrapped in favor of a +3, just because, due to the way the cards hit the table, you’re more likely to find a use for it.
It’s rumored that some of the Pazaak players will give you a unique reward for winning a certain number of times in a row; most of these rewards are extra cards.
Swoop Racing
You’ll be able to race swoop bikes on Nar Shaddaa, Onderon, and Citadel Station. These are twitch games, no doubt about it, so casual RPG players may find these challenges a bit out of their league. Those that do choose to partake in a little high-speed racing will find themselves greatly enriched, in a monetary sense, if they succeed in conquering the courses.
If you intend to fulfill the ancient prophecy and bring balance to the swoop tracks, you’ll need to master a few basics of the game, namely:
- Don’t hit obstacles.
- Develop a line from booster pad to booster pad and stick with it.
- Hit the A button only when required.
The first tenet is obvious: if you hit an obstacle, you will never be able to get the time required to win, at least at the highest level of competition, since they will usually knock at least a second off of your time, and your margin of error is going to usually be down to the tenths of a second. Obstacles are bad; avoid them.

This leads into the second rule. As random as the placement of the booster pads may seem, there are definitely lines that need to be followed and planned out for each race track; this is as true for swoop racing as it is for any track in Gran Turismo. Occasionally you may swerve to hit a booster pad, only to find that obstacles are in your way, and that you’re out of position for a pair of booster pads on the opposite side of the track. This isn’t something you can magically know ahead of time, however, so you’ll need to take advantage of the practice runs that are available on each track. It can help to actually go as slow as possible for a couple of the runs, to see how the booster pads are laid out and where the obstacles are placed. The tracks look a lot different at high speed, though, so run them as fast as you can for a dozen repetitions or so, and you’ll be well on your way to mastering the course.
Last, but not least, you should develop an instinct for when to shift gears. You can madly tap away at the A button if you want, but every time you try to shift when your bike isn’t ready, you’ll take a small speed hit. If you wait too long to shift, however, you’ll essentially be giving away speed to your competitors. You won’t be able to take your eyes off the track while you’re racing, so you should develop a habit of keeping the acceleration meter in the lower part of your field of vision, and hitting the shifter right when it first becomes available.
Glossary
For those of you who aren’t familiar with PC RPGs or the d20 combat system, this Glossary will hopefully provide you with a small reference that you can refer to while reading this guide, or playing the game, when you encounter a term or acronym that’s unfamiliar to you. While the d20 system has been greatly improved since the days of Advanced Dungeons and Dragons 2nd Edition (you won’t see any THAC0’s, for instance), the system is still fairly hardcore when compared to the rules of most console RPGs.
Attack
Also known as the attack roll, attack bonus, or to-hit roll.
In order to damage an opponent in combat, you must first successfully hit them, and the attack number of your characters determines their chances to do so. The attack number, which is displayed on your character’s equipment screen, depends on a number of factors, including a character’s level and class, their Dexterity attribute, the type of weapon used, and what special Feats you’ve selected. This positive number is what is added to the random number the game generates to determine whether or not your character hits their opponent.
For instance, suppose two of your characters both attack an opponent with a Defense of 15. One of your characters has no attack bonus, while the other character has an attack bonus of +10. Since your attack roll needs to match or exceed the Defense of your target to land a hit, the first character will need to roll a natural (unmodified) 15 or better, while the latter character will only need to roll a five or better (since five plus 10 is 15).
Damage Resistance (DR)
Damage resistance is quite handy in KOTOR, since it can reduce or eliminate the amount of damage a character takes when an enemy successfully attacks him or her. Damage resistance is usually gained through the use of an item, such as an energy shield, and (whether the game tells you this or not) is represented by a number, such as (5/- vs. Fire). The number before the slash is the amount of damage that is ignored; in this case, the first five points of damage from every fire-based attack would be ignored by the character, so that, if an attack was supposed to deal 10 points of fire damage to your whole party, that character would only take five, while the other characters would take full damage. The value after the slash normally represents the kind of weapon that can overcome the damage resistance, but, for the purposes of KOTOR, you won’t have to worry about your DR being overcome.
Difficulty Check (DC)
A Difficulty Check is often required when you attempt to use a Force Power or a skill, or make a saving throw. This translates the conceptual difficulty of a task into a number that can be matched to a die roll generated by the game.
To illustrate by way of an example, assume you have a character with a Security skill of 10 that is attempting to pick a lock during the middle of a battle. The lock is rather intricate, so the DC is set to 25, meaning that your character must roll a 15 or higher to succeed in the lock-picking attempt.
Defense
A character or monster’s Defense rating is an aggregate of any bonuses from armor, their Dexterity attribute, and any Feats or Force Powers that are active. Every character in the game has a base Defense of 10, to which the aforementioned factors are added to form that character’s overall Defense. See the Attack listing above to get a brief example of how Defense works in combat.
Note that the Defense score of your characters does not reduce the damage they take; it merely makes them more difficult to hit. Should an enemy’s attack roll exceed your Defense, the damage calculation takes place without regard to your Defense score.
Non-Player Character (NPC)
NPCs are characters that are controlled by the computer. Since KOTOR only allows you to control one party member at a time, your teammates are, technically speaking, often considered to be NPCs, but for the purposes of this guide, we’ve attempted to reserve the "NPC" term for characters that are never under your control, such as townsfolk, combat opponents, and merchants. Your teammates will usually be referred to as, well, teammates, or party members.
Player Character (PC)
This term is used to refer to the character that you created at the beginning of the game; the character that is always in your party and is the focal point for the story that unfolds in KOTOR.
Saving Throw
A saving throw is what represents your character’s ability to escape harm, or, failing that, minimize it through defensive actions. Every threat that forces your character to make a saving throw will have its own unique Difficulty Check.
There are three different kinds of saving throws: throws for Will correspond to a character’s ability to resist mental intrusion and mind-affecting attacks; throws for Fortitude represent a character’s natural resistance to poison and physical harm; and throws for Reflex test a character’s ability to avoid the brunt of explosive damage by diving out of the way.
For instance, assume a Thermal Detonator is thrown into a room where two of your characters are standing. Some damage from the explosion is inevitable for both characters, but one of them has a much higher Dexterity than the other, giving them an advantage when it comes to quickly moving out of range of the explosion. The DC check of a Thermal Detonator is 15 against a character’s Reflex save. The less dexterous member of your party rolls a 10, which is unmodified by Dexterity, meaning that that character will take the full 60 points of damage from the Detonator. The other character rolls a 10 as well, but adds his Reflex bonus to the save, which just happens to be +5, meaning that he quickly finds cover before the explosion and only takes half damage.
Got a news tip or want to contact us directly? Email news@gamespot.com
Join the conversation