Shadow of the Colossus Walkthrough
16 Colossi are all that stand between you and your dreams. Are you strong enough to defeat them all? GameSpot's guide to Shadow of the Colossus will help you complete your journey.
Design: Collin Oguro
Shadow of the Colossus is the new game from the creators of Ico, a haunting and ethereal adventure/platforming game that came out over four years ago. Although Shadow of the Colossus isn't a sequel to the earlier game, it does share some of the same aesthetic and gameplay sensibilities, dropping you into a world that you're not really intended to understand. In it, you play as an unknown soldier, tasked with finding and killing 16 Collosi that roam the land, in order to appease the spirits that inhabit a shrine. In so doing, you hope to be able to bring a woman back to life. But why? And who is she? Will you ever find out?
Unlike most adventure games, Shadow of the Colossus involves more brainpower than monotonous killing of hundreds of enemies; indeed, except for the Colossi, the land is utterly devoid of life. Each of the Colossi has different attacks and weaknesses, though, so figuring out how to approach them and attack them is just as difficult as actually delivering the killing blow.
If you're stumped, though, you'll be happy to know that GameSpot's complete Game Guide to Shadow of the Colossus is here to help. In it, we have a complete walkthrough for the game, including hints and tips (and video) for each of the 16 Colossi that you're going to go up against. Enjoy!
Walkthrough
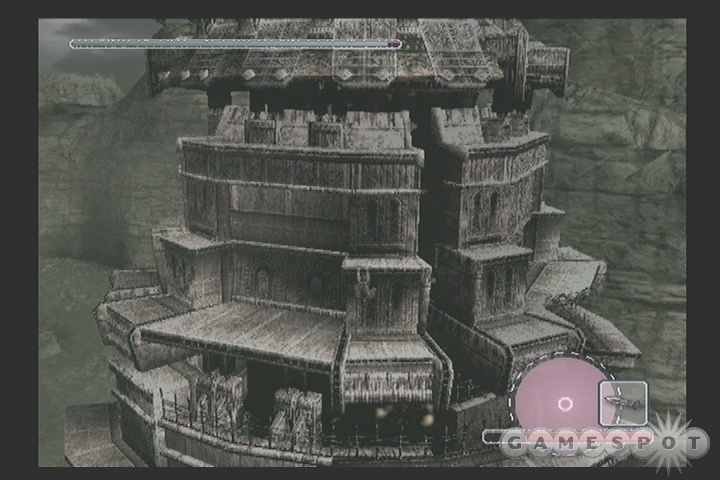
Shrine of Worship
The Shrine of Worship is where you begin the game. The nameless hero arrives on his trusty steed, with a seemingly dead girl in tow. After a bit of banter with the spirits that reside inside the Shrine, he'll learn what he needs to do in order to restore the girl to life: find and kill the 16 Colossi that roam the land. These colossi are incarnations of smaller icons within the Shrine itself, and killing them will destroy their icons, and give the hero the power required to restore his friend.
After the lengthy opening cutscene, you'll finally get the ability to run around with your character a bit, so you should definitely take the time to get used to the controls. There'll be a little jumping puzzle that you'll have to get through shortly, but for now, you can learn how to run around, jump, and so on and so forth.
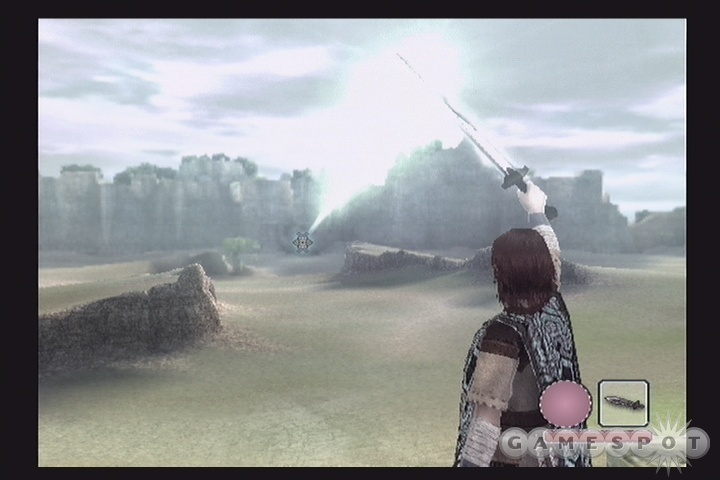
When you're ready to go after your first prey, walk out onto the sunlit platform near the dias where your friend is lain and press the O button; this will raise your sword and let the sunlight focus on it. It'll light up a portion of the valley beyond, indicating where your first target is. To reach it, you'll need to use your horse, so climb aboard with the triangle key and start moving out, using the X button to speed the horse up.
When you reach the ruins far to the south, you'll get a cinematic view of your surroundings. There's no way to bring your horse up the cliff obviously, so you'll just have to climb up - this is the jumping puzzle we were talking about earlier. Almost all of your actions here can be performed with the triangle button (for jumping), the R1 button (for hanging on to vines and cliff edges), and the left analog stick, which will let you point yourself in the direction you need to jump.
To begin with, jump onto the vines near the bottom of the area, and use your R1 button to hang onto them. You can climb up with your left analog stick, or you can press and hold the triangle button to charge up another vertical jump. After that, it's pretty much cake; the only other difficult action involves jumping up to a ledge, using the stick to shift your position around the pillar the ledge is on, then jumping off in a different direction. To jump from one ledge to another, hold down R1 and the triangle button, tilt your stick in the direction you want to jump, then let go of the triangle button while still holding down the R1 button.
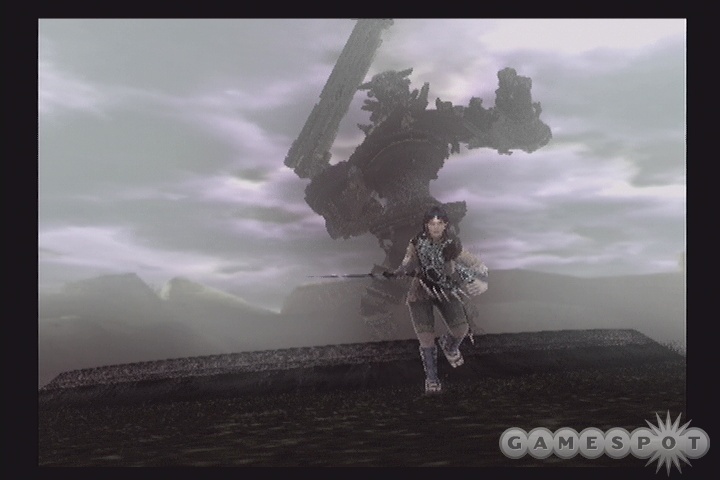
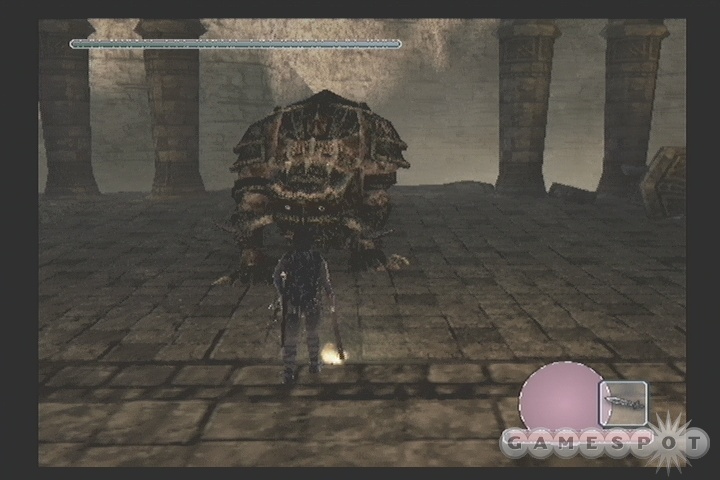
First Colossus - The Ogre
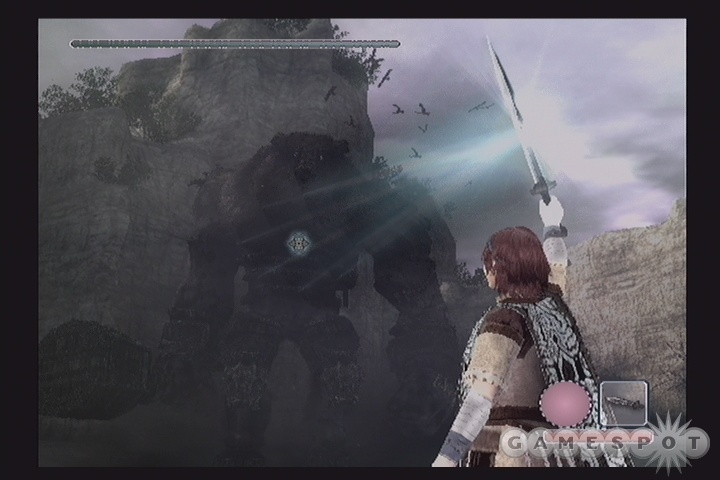
When you reach the first Colossus, you're obviously going to be in for a bit of shellshock; these suckers are big. This guy's not the biggest one, but he's definitely a sight bigger than most of the foes you've fought in any other video game of late. There's not much to do here get busy!
First off, from long distance, you can use your sword and the O button to focus light on the enemy, revealing its "vitals." Since you're going to need to use your sword to kill the beast anyway, you're probably going to be able to spot the monster's weakspots when you're crawling around on it, but seeing the vitals now will at least give you a vague idea on where to go.
Attacks
Feel free to walk around the colossus a bit to get an idea of how it'll try to damage you. It has three primary methods of dishing out the hurt. The first two involve its feet. Obviously enough, if you get stepped on, you're going to take damage, but the force of the colossus' footsteps are enough to damage you slightly if you're even nearby the area where its feet hit the ground. The damage from these little earthquakes is minor, however. It can also raise its foot up into the air and pound the ground with a larger shockwave blast that'll cause you to stumble. Again, minor damage.
The third, and most devastating attack, involves the massive club that the colossus wields. If you stand still for too long, you'll see the colossus rear back with its club and bring it down onto your head, causing a severe amount of damage. Luckily, though, this attack is extremely slow, so you should be able to avoid it fairly easily just by running to either side and using an R1+triangle dash jump at the last second.
Killing It
Taking down the colossus is actually a bit easier than you might think, at least when you know how to proceed. The key thing is getting at its vitals and hitting them with your sword. You can do a minor amount of damage to the beast by hitting it with your arrows in the face, but actually killing it in that manner is probably impossible, or at least impractical; it's much better to just climb the thing and pop it in the head with your sword.
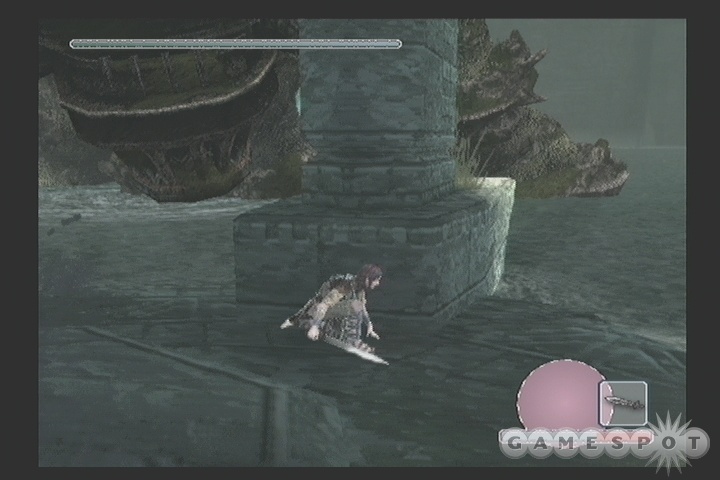
Yeah, you heard us; you're going to need to climb all the way up to the top of the colossus and stab it. Stab it hard. Its primary weak spot is directly on top of the beast's head, so you're going to have a bit of climbing to do. To begin with, try to circle around the colossus until you reach its rear side; you should be able to see tufts of hair just above its left hoof. When the hoof is level with the ground, dash up to it and jump + grab to hang on.
From here, climbing is just like climbing a cliff, albeit a cliff that moves. As the colossus strides about, you won't be able to move your hero, and in fact might be reoriented a bit due to all the swinging about. Just hang on with your R1 button until things settle down a bit; when the foot is firmly planted on the ground, you'll be able to move as you like.
Now, there is a small dark spot on the leg of the colossus; this is its first weak spot. Technically you can probably stab anywhere in the fur to wound the beast, but you might as well go for the good shot here. When you reach the spot, tap your square button, then tap it again after a second to stab the beast and hamstring it a bit. This won't do much damage to it, but that's not the goal; what really happens is that the leg will drop for a second and the monster will almost let its knee hit the ground, making the calf a horizontal platform for a moment or two. During this time, you have to let go of your hold, stand up, then quickly jump up above the armor on the thigh of the beast and grab a hold of the fur near its...well, near its butt.
The Ascent
When you're above the thigh, you'll have to quickly reach the platforms on the colossus' back before your grip meter runs out and you fall off. Climbing is going to be difficult to do with the movement of the monster, so just use jumps to move up and to the left until you reach one of the ledges that connects to the platform. When you're on a ledge, scooch your way over to the right until you reach the platform, then jump onto that and let your grip meter replenish before moving on. It's difficult to get knocked off of the platform here due to the guardrail on its edge, but keep your finger on the R1 button just in case.
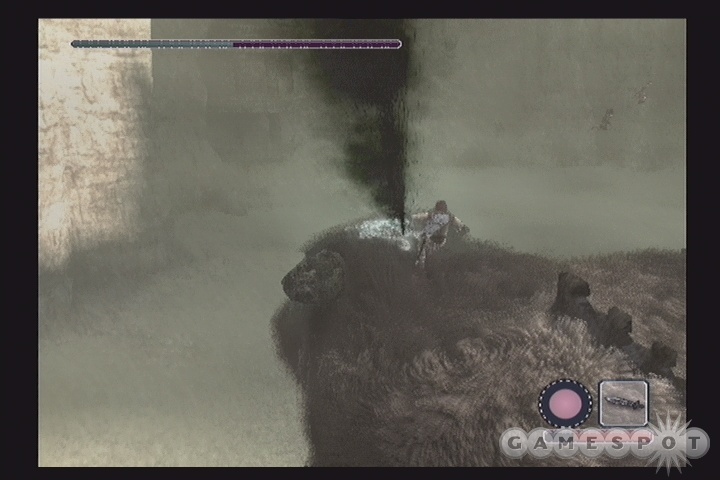
From the platform, you should have a straight shot up the colossus' spine, and from there, to its head. On top of the head, you'll see a small symbol, indicating the beast's primary weak spot, and it's here that you want to slam your sword in over and over until the colossus dies. If all goes well, this will only take a few stabs, but the colossus will usually try to flip you off of its head by doing a bit of headbanging. Although this looks like a pretty severe motion, you can hang on if you just keep holding that R1 button. If your grip meter starts to deflate, then you might need to let go while the beast is standing still; you can stand upright on its head to let your meter restore itself, but you'll need to be gripping the fur to stab the weakspot.
After four or five good, solid blows, the colossus will keel over dead, and you'll shortly find yourself back in the Shrine, being told about your next foe.
Second Colossus - Seaside Cave
The second colossus is to the north of the Shrine, in the F3 map square. To find the cave it dwells in, head to the northwest of the shrine and find the earthen bridge that leads over the canyon there. On the northern end of the bridge, there'll be a path leading down to the cave. It's sealed for the moment, but as soon as you edge yourself up to it, the second colossus will bust out for you to kill.
Attacks
To be honest with you, this guy shouldn't really be hitting you at all; this is a quadraped beast that seems content to stamp around on its hooves, and doesn't have anything really comparable to the first colossus' club attack, from what we've seen. However, if you stand directly in front of the beast, it will rear up on its hind legs and attempt to smash you with its front hooves. All of the hooves will damage you as per usual, if you get too close to their impacts.
Killing It
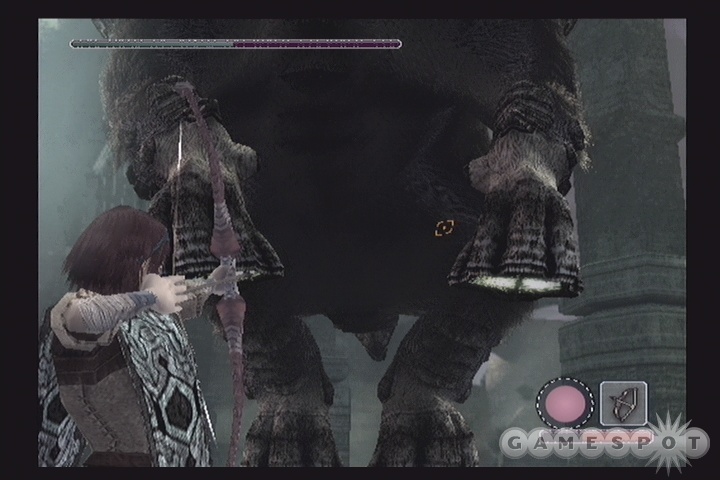
Seaside has no easily-reached tufts of fur, so in order to climb it, you'll need to find some way to cripple it temporarily. Searching for weak spots will reveal vitals on their hooves, but they seem to be pretty well armored...
In fact, the weak spots here are on the bottom of the beast's hooves, and are going to be difficult to hit. What's more, it has two vital spots for you to attack with your sword, one on its head and one on its rear, so you can expect to do a bit of maneuvering on the beast's back if you want to take it down.
To cripple the beast, stand in front of it and wait. Just wait for a few seconds.... When the beast gets your scent, it'll rear up on its hind legs and start its little stomp maneuver; when its hooves are in the air, you'll have plenty of time to draw back an arrow with your bow and hit one of the hooves, preferably the one that's raised higher in the air than the other. A direct shot on the weak spot here will cause the hoof to fall to the ground and buckle out to the side. If you head to the joint, you should find yourself able to jump up to the fur and start pulling yourself up.
After climbing to the head, you'll find the first vital point. A few stabs from your sword will let you reduce the colossus' health down to half, at which point the vital spot will disappear. At this point you'll have to head for the spot on the rear and stab that as well to finish the beast. There are two methods of getting there, the simplest of which is probably to just jump off the beast and attempt to shoot an arrow at the weak spot on one of its rear hooves. This is more difficult to do than hitting the hooves at the fore, since the rear hooves don't raise very high, but is doable.
Alternately, you can climb onto the bones along the beast's spine and use them to perform a bit of a horizontal shimmy to reach the rear of the colossus. This involves hanging onto the bones and moving around them until you can jump off onto a platform large enough to stand on. This isn't too difficult to do, so feel free to go this way if you don't want to jump off the colossus.
Third Colossus - Sleeping Giant
Follow the bridge you used to cross the canyon to reach the second colossus, but pass the ramp leading down to the beach. Your sword should orient you towards a darkened ravine nearby. When you reach the end, you'll discover a large (large!) stone structure suspended above the middle of a lake. Your horse can't go too far into the water, so you'll have to dismount and swim across until you reach the end of the submerged path, and climb from there. You should be in square E2 at this point.
The jump at the top of the ramp is difficult; you'll have to jump diagonally from the ramp to the nearby pillar and hold onto the ledge there. From there, you'll need to hop from the pillar to the structure. Regardless of where your camera's pointing, you need to hold down on the stick to jump directly away from the pillar you're on.
Attacks
The Sleeping Giant has two main attacks, both of which will come out when you're standing in front of it. If you're close to its feet, it'll take its sword/arm and stab it into the ground near where you're standing, doing severe damage if you're caught under it or nearby. If you stand further away, though, it'll bring the sword up over its head and smash it into the ground lengthwise, hurting you if you're under the sword, and knocking you off your feet if you're anywhere nearby. You can avoid both of these attacks by just staying behind the beast.
Killing It
If you're just looking for a hint on how to proceed, here it is: your path here will involve the metal plate at the center of the plateau. It'll also involve letting the beast unleash its overhead slam attack.
If you need more detail, then here's what you do: in order to climb the beast, you'll need to stand well away from it so that it pops out the slam attack, where the flat of the sword hits the ground. If you run away from the impact zone, you should be able to avoid getting knocked down; if you then quickly run back to the sword before it gets picked up again, you can climb onto the fur of the Sleeping Giant's right arm and start your ascent from there. It's difficult to reach the fur before the sword gets retracted from the ground, so if you're having trouble staying on the sword when it's lifted up, hold down the R1 button and walk off one of the edges of the sword while you're still on level ground. You'll be able to hang onto the edge and pop back up when things are stabilized.
Unfortunately, though, the fur will initially be blocked by a large piece of armor on the arm. In order to knock the armor off, you'll have to stand on the metal block in the center of the plateau and let the Giant take a swing at you. If you dodge the blow, the sword should hit the metal, and the resulting vibration will knock the armor off of the arm and let you complete your ascent.
When you reach the elbow of the first arm, you'll need to get onto the platform there and jump across to the chest area, where the first weak spot is hidden away. The platform around the chest will enable you to recover your grip power when you run low, so feel free to drop down to it when you need to. The Giant will shake you pretty hard when it wants you off, so you'll just have to hang on for dear life and get your shots in when you can.
After half of the creature's life has been taken off, the first weak spot will disappear, and you'll have to return to one of the arms and start your ascent to the head to finish it off. If you can jump back to the sword arm, you should be able to climb up through the armpit area; otherwise, you can just drop off and climb up the sword again. When you reach the head, note that there's a standing area on the nape of the beast's neck. Use that to recharge your grip meter, then get up on the top of the head and start stabbing away. A few good shots, and the beast should topple over dead.
Fourth Colossus - The Horse
Your sword should reveal that your next colossus is located to the southeast of the Shrine. Head through the dusty canyon there, and you'll come to the graveyard where the colossus dwells relatively quickly. Note the four cave entrances; these lead into a little subterranean area. The colossus itself dwells a bit further on into the valley, in square G5, so find it and get it riled.
Attacks
The horse only has one primary attack: a vicious set of jabs into the ground from its forward pincer. If the first one knocks you down, the next two can be difficult to avoid, so be sure not to get in the path of the beast if you can't help it.
Killing It
In order to kill the Horse, you first have to reach its vital spot. Unfortunately, there's no fur or climbing spots anywhere on its four pincer-like appendages, so there's nothing to jump to or climb on to get to its back. Whatever shall we do?
As you may surmise, the answer does indeed lie in the subterranean portion of the valley, so you'll need to lure the behemoth back on top of the caves in order to ascend it. As a hint, keep in mind that if the beast sees you drop off the edge of one of the small hills, it'll think you're at the bottom of the hill, even if you happen to move elsewhere.
Give up? Well, what you need to do here is stand atop one of the hills above the cave entrance and wait for the Horse to start moving towards you. When it's picked up your position and is coming in for the kill, drop off the hill and run into the cave, heading towards either of the two nearest cave exits. When you reach the exit, gingerly step back out into the light and look around towards the hill that you dropped down from. Wait for the Horse to start blindly stabbing at the ground - it still thinks you're there, remember? - then start running for its hind legs. Stop between them, and after the third pincer strike hits, you should notice the horse drop its carapace down while it looks around for you. A small platform will appear, just at the edge of your vertical jumping range, so run up to it, stand still, then jump straight up and grab hold.
From there, it's a relatively simple matter to get to the head of the beast and finish it off. There's a little pouch on the top of its head, so even though it'll be tough to set up for strikes, you shouldn't have to worry about falling off. Strike it as many times as required to kill it, and you'll be whisked back to the Shrine of Worship.
Fifth Colossus - The Bat
You'll need to head almost directly east from the shrine and proceed along a cliff path to reach this colossus. Don't miss the save point on the edge of the cliff.
When you reach the lake area, hop off your steed and swim forward. There's a small gap you can actually swim under, so hold down the R1 button to submerge yourself and swim through. In the middle of the little closed-in water area, there's a pillar; step onto the submerged walkway and jump up to the top, where a set of stairs leads to where you'll encounter the Bat colossus.
Attacks
The Bat only has one attack, where it'll swoop down and attempt to batter you with its body. As with previous bosses, this attack will do severe damage to you if it hits you, but will also be the key to defeating the behemoth.
Killing It
Well, before you can even think about killing the Bat, you're going to have to get to it. Doing so is fairly tough. Begin by swimming across the channel towards one of the many pairs of pillars in the moat here. Each of these pillars has a few stepping stones suspended in the water between them; these will be the key feature to killing the beast. You can't climb to the top of any of the structures in the area, if that's what you're thinking, but you won't need to. When you find a set of stepping stones, try to get onto one closest to a pillar, if it's a set of three. Sets of four are more difficult to use properly, as you'll see shortly.
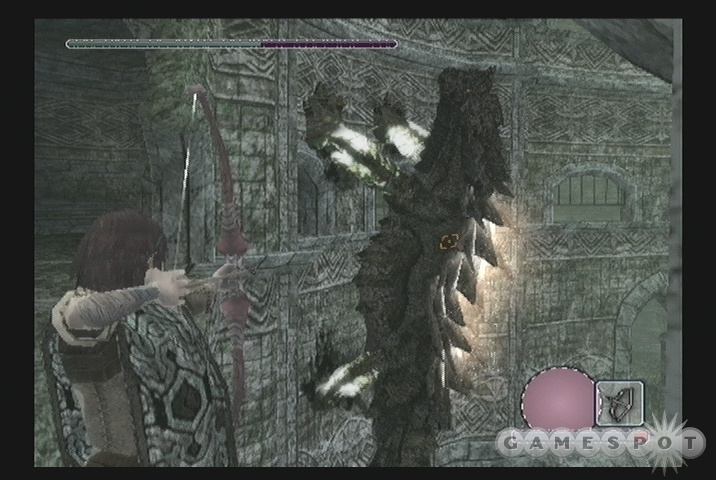
Although you might've used your bow and arrow from time to time, it wasn't required to beat any of the previous colossi. For the Bat, though, you'll need to use it. When you're on some form of solid ground, equip the bow, hold down the L1 button to lock onto the Bat, and let an arrow fly with the square button to get the Bat up into the air. While it's flying, try to peg it with a few more arrows to make sure that it's good and mad; when you notice it start to bank towards you, switch to your sword and get ready to jump.
There are two tufts of fur on the front side of the bat's wings, on either side of the head. If you're lined up with the head, then you'll take massive damage from the ramming, but if you're lined up with one of the tufts, then you can jump just before the Bat impacts you and grab hold to get swept off your feet and up into the air.
When you're actually on the bat, you'll have to engage in a bit of wing-walking to get to two of the vital spots, as there are two of them on the ends of each wing, but not enough fur to hold onto in the interim. When the Bat's flying level, you should be able to stand up and walk over to the weak spot and give it a good stab.
After dealing a bit of damage to the Bat's wings, you can go for the killing blow by walking down the beast's spine and hitting the final vital spot just above its tail. A few whacks at it, and the colossus will take its final dip into the ocean, and you'll be getting warped back to the Shrine of Worship.
Sixth Colossus - Temple Giant
The Temple is located to the southwest of the Shrine. You'll need to pass through a forested area, then a cave to reach it; you should come out to a wide-open plain, where the Temple will be built into a cliff face across the way. There's another save point to the northeast of the Temple, so feel free to take advantage of it before heading inside. You'll find the Temple in square D6 of your map.
When you enter the Temple, you'll find yourself in a large underground vault. Feel free to just jump from the top of the area down to the bottom below; you should survive, and meet the Temple Giant soon enough.
Attacks
As per the usual deal, this bipedal colossus will either smash you with its feet or attempt to whack you with his hand attack. Nothing you haven't seen before, but this guy is deceptively quick for his size, so be careful when you're caught out in the open.
Killing It
If you're looking for a hint, we've got one word for you: facial hair. Well, that's really two words, but it's an emphatic two words.
As you might surmise, killing the Temple Giant isn't that hard - it's just a matter of finding out how to climb up onto his body. His legs are of no use to you, being covered in armor, and although there are fur patches on his wrists, it's difficult to get to them after he pounds his fist into the ground. You might be able to jump up onto his wrist from one of the many platforms in the area, but it's a difficult jump to make, and all of the platforms will eventually be destroyed as the Giant moves around, leaving you incapable of getting onto it...or is it?
In fact, if you look around the pit that you're in, you'll notice that there are some pillars on one end, with a small shadowed area underneath. What you have to do here is catch the colossus' attention, walk into the shadows, and wait for it to approach you. Like the Horse colossus earlier, it won't know where you are, but instead of attacking, it'll bend over for a good peek underneath the platforms, allowing you to jump onto its beard. From there, you need to climb up onto its head, where the first vital spot is located. After gaining back a bit of strength by standing on its back, pop the head spot, then crawl down its back and destroy the vital point there to finish the beast off.
Seventh Colossus - Thunder Ripple
These guys are getting farther and farther away from you; this guy is all the way up in D1. To reach it, follow the arched path that you took into the Shrine in the opening cutscene all the way to the north until it reaches the cliff there, then head west until you reach what appears to be a ruined ampitheatre suspended over a lake. When you reach the walkway, jump out onto the central tower, then dive into the water to meet the Colossus.
Attacks
The Thunder Ripple (his friends tried to name him Porkchop, but he was having none of it) doesn't have many attacks that he can really use on you while you're on the central tower; most of his attacks involve danger to you only when you're in the water. He is, however, the first colossus that can deal significant damage to you while you're attached to him, thanks to the electrical spires on his back. You'll need to be careful while you ride him, then, but we'll save that for the attacking section.
Killing It
Thunder Ripple is a difficult guy to pin down - his line of sight prohibits him from seeing things that aren't in the water, so he'll ignore you if you stand on the spire. Reaching him will thus involve a bit of swimming.
Indeed, all you really need to do is park yourself down in the water by the edge of the walkway leading up the tower and just wait for the monster to notice you - when it manages to spot you, you'll hear a deep rumbling sound from the lake, and you'll know that it's on its way.
Ol' Thunder has three electrical spires on its back, so you'll know that actually attaching yourself to him will be rather difficult. Indeed, when it surfaces, the first spire will usually be submerged enough to not hurt you, but the next two will do a bunch of damage if you're in the water nearby. Unfortunately, the tail whips up just after the third spire passes by, making it difficult to both avoid the electricity and grab hold of the tail - unless you're not in the water when Thunder passes by.
The best way to first get onto Thunder's back is to wait in the water at the bottom of the tower and swim around until you hear the colossus groaning at your presence. When you get the signal that the colossus is approaching, get up the walkway a bit, and wait for the beast to pass by. When the third spire submerges, quickly jump down into the water and try to get in front of the tail before it pops up and out of the water, all while holding down the R1 button to ensure that you grab on when it moves past.
If you do manage to grab a hold of the tail, then you're going to have to hang on for dear life for a few seconds, as you'll initially be underwater, and you can't move while you're submerged. You also can't let go of the tail, or you'll fly off and float back to the top of the lake. Just hang on until you finally come up for air, then let go and start running up towards the beast's head. You'll have to hang on during the submerged portions of the level, get back up and run when you're abovewater, and repeat that process a few times before you reach the first spire.
Few enough of the colossi thus far have had actual weak spots (as opposed to vital spots), but Thunder does; he has a weak spot just behind each spire. In order to avoid getting shocked when the spires submerge, you need to run up behind them, latch on, and stab the weak spot before you dip into the water; doing so will disable the spire and prevent it from shocking you. Getting the first two spires in this manner is pretty easy, but the third one, near the beast's head, will be tougher to reach. If you lose your grip after killing the first two, though, it's a lot easier to get back on the beast. Since the last two spires are the ones that shock you when you're floating in the water, and they'll both have been shut down during your traverse of the creature's back, you'll be able to just float in the water, wait for the beast to notice you, and then just sit still until the tail comes up to you again and grab hold.
When the third spire is finally disabled, it's a relatively simple matter to reach the nearby vital point and kill the beast. Just be sure not to let go of the hair while you're underwater, and get your stabs in when you can.
Eighth Colossus - Wall Shadow
You'll need to pass through a canyon to the southeast of the Shrine to reach Wall Shadow. You'll come to a placid-looking set of ruins near a lake inside the canyons; when you do, dismount Ahro and enter through the door.
After some rudimentary jumping puzzles, you'll reach a huge cylindrical area that's open to the sun at the top. If you take the stairs down to the bottom of this area, you'll encounter Wall Shadow, a vicious lizardlike colossus that's one of the more difficult foes you've encountered thus far.
Attacks
Wall Shadow's primary attack is, of all things, a projectile attack! That's the first time you've seen one of those thus far, to our recollection. What happens is that, when you stand in front of Shadow, he'll power up a charge from his mouth, then rapidly shoot out a few bolts of energy which will impact, then cause damage to you if you remain in their area of effect. To avoid taking a massive amount of damage, then, be sure to do a dashing roll away from the beast's front side when it starts charging up. If you stand too close to Shadow's rear side, it can also swipe you with its tail for massive damage.
Killing It
Upon first glance, you'll notice something odd about Wall Shadow: it appears to have no real weak spots to speak of. Its hard shell will prevent you from doing much damage to it, and even approaching it is dangerous due to the way it moves. What gives? Well, maybe you need to flip it over somehow and see what lies underneath...
To do so, climb back up the stairs to the second level of the ruins, so that you can look down on the creature as it crawls around the bottom of the cylinder. When you're above it, whip out your bow and arrow and fire a few shots into its back. You should notice a bit of a pained reaction from the colossus, although you won't do any damage. When you get its attention, though, it'll decide that it's time to come get you, so it'll start climbing the walls until it reaches your level, and will start preparing to fire away with its breath weapon.
Fortunately for you, you still have your bow and arrow out, so when it reaches a stasis point on the wall, whip out an arrow and fire two of them into two of its legs, where they're lit up. When you hit two of them within ten seconds of each other or so, the creature will lose its grip and fall back down to the bottom of the cylinder...on its back.
At this point, you should be able to figure out what to do. You need to jump from the second level down to the bottom of the cylinder (yeah, you'll take damage, but you'll save a bunch of time), climb up on to the beast (easiest to do from its chin or its tail), find one of the two vital spots, and pound it with your sword.
At your quickest, you'll probably only be able to get in two sword strikes before the beast rolls back over and you have to repeat this process, making this a lengthy fight, but one that's definitely winnable when you know what to do.
Ninth Colossus - Dry Lake Sleeper
Getting to the dry lakebed can be fairly tough. It's in square D3, to the eastnortheast of the Shrine. You'll know you're headed in the right direction when you see the huge cloud of black smoke on the horizon. To reach the lakebed itself, approach from the east and follow the cliff near the prayer shrine south until you find a ramp leading down. This path should take you from E3 to D3; if you get near C3, then you've missed your exit. There's a large cave on the lakebed that, when entered, will reveal the Sleeper.
Attacks
As was the case with the last colossus, the Sleeper has a projectile attack which emanates from its mouth. Unforunately for you, these move too quickly to dodge if you're on foot - you'll need to stay on your horse for much of the start of this fight. It will also try to pound you with its two front feet if you get too close, a la the Seaside Cave colossus. Stay away from the beast and you should be all right.
Killing It
You don't need to use this colossus' attacks against it; you need to use the environment. Note the geysers in the plains near the cave.
To attack the Sleeper's weak spots, you of course need to find a way to get atop it. Doing so will be rather complicated, though; you need to goad the Sleeper atop one of the geysers on the lakebed, then hope that the geyser goes off underneath the Sleeper. If it does, the colossus will awkwardly bend a couple of its feet inward, allowing you to charge underneath it and fire arrows at the weak spots on the soles of its feet. Only two of the feet will be hittable, but that's all you need to hit; if you pierce both weak spots that are available to you, the beast will buckle over and fall on its side.
Unfortunately, the fur section of the beast is going to be on its back, which will usually roll away from you. If you're quick, you can run around the length of the Sleeper and reach its fur, but if your horse is around, climb on and go for the quicker ride to the fur.
When you're firmly attached to the beast's belly, you need to climb up to the "top" of the beast (which is actually one side of it, since it's already laying on its side), then move towards its back while waiting for it to stand up. Shifting from the side to the back while the beast moves will be difficult; you can either hold onto something and hope that you can reach the back when the beast is upright, or just stand up and hope that you get flipped up onto the back while it performs its standing animation.
If you can actually manage to get onto the back of the beast while it's upright, then killing it is a relatively simple matter. It only has one vital point, on its head, so run up there and start getting stabby. If you need to recharge your grip meter, return to the chitinous portion of the back. It'll try and shake you off, but you have plenty of land mass to roll with.
Tenth Colossus - Earthshaker
The Earthshaker is located due west of the Shrine, all the way over in square B4. There's a shrine near the edge of B4 and C4, so save your game there, then go into the cave nearby to reach the cave where the colossus is located.
Attacks
The Earthshaker only has one attack to speak of. If you stand anywhere on the sandy area, it'll eventually come around to your position and bust up through the sand to deal some serious damage to you. Two hits from this attack and you're dead. You can avoid it entirely, however, by staying on the rocky area around the large pillars scattered around the arena.
Killing It
This is one of the more perplexing colossi to beat, especially if you don't have a game guide to help you out, wink wink. Earthshaker has no discernable weak spots, deals significant damage to you if you attempt to get to the fur on its back as it moves, and spends most of its time underground to boot. Eye don't see what we’re gonna do. Maybe our horse has an idea.
Alright folks, hope you've been practicing your archery skills, because you're going to need them here. If you hop onto Ahro after evading the Earthshaker's first attack, then you'll be able to build up a good amount of speed; your horse, going at top speed, will be just as fast as the Earthshaker is when it's chasing you. That's a pretty good thing, since it'll allow you to get in front of the colossus while you run across the arena.
When you're out in front of the colossus and have a good amount of space between you and the far wall of the cave, whip out your bow, hit L1 to lock onto the boss, then shift around until you're aiming your bow at its head. You'll need to let go of L1 at this point to gain some fine control, so do so, then start firing your arrows at its eyes. The eyes are oversized, so they're big targets, but they do move around really quickly, so you'll be forgiven if you require a bit of time before you can land an arrow in the right spot.
When you do hit an eye, you'll immediately know you've hurt the beast, as it'll start corkscrewing through the sand. Break off from leading it by heading off to the side, then wait for it to hit the far wall. After its impact, the back will arch up into the air, letting you dismount and start the fur-climbing that you've come to know and love. There are two vital spots on the back of the beast, so you'll probably have to go through the archery section of the fight at least twice, but when both of them are dead, you'll have won the fight once and for all.
Colossus Eleven - Flame Guardian
The lake that the Flame Guardian overlooks is in map square F1, directly north of the Shrine. Follow the elevated bridge's pillars to the north, and you'll eventually come across a large canyon in the ground. On the east side of the canyon, you'll find the altar you were referred to; there's a stone path leading down into the canyon, so dismount and start your descent. The beginning of the path is near the border between F1 and G1.
Attacks
The Flame Guardian is by far the smallest colossus you've yet encountered, being perhaps twice the size of your horse, albeit a fair bit wider. Its favorite attack is a straightforward charge attack, where it'll try to ram its head against you; dodge-jump to either side to avoid this. If you stand right in front of it, it'll also often try to slash at you with one of its first claws. The first attack oddly doesn't deal a huge amount of damage to you, but it will stun you for a good long while.
Killing It
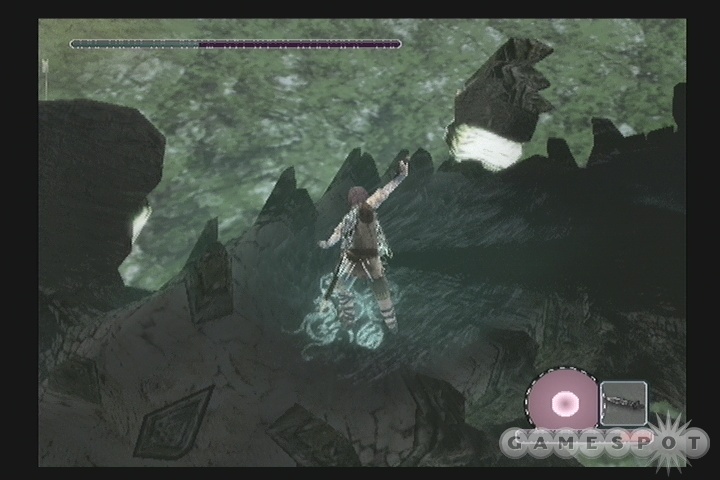
In order to hurt this guy, you'll first need to find a way to access its vital points, which are currently covered by its shell. In order to do that, you'll need to take advantage of its fear of fire. Guess it's not much of a Flame Guardian.
Anyway, the sequence of events here is kicked off by you climbing atop one of the four large braziers in the Guardian's lair and waiting for the beast to come after you; it'll charge the brazier and ram it with its head, knocking down a wooden ember from the fire, which is big enough for you to pick up. Hop down to the floor and grab the ember by holding the R1 button, then climb back up to the top of one of the braziers and attack the fire there to set the end of the ember alight. Try to do this on one of the braziers closest to the edge of the cliff.
Now that you have your flaming pyre of justice, do the only smart thing left to you and run up to the beast and start waving the ember in its face. Position yourself so that the colossus is between you and the cliff face, then start walking slowly towards it, staying far enough away to avoid its claw attack. If you can back it up far enough before the ember goes out, you'll be able to back it off the cliff, where it'll fall down and crack the shell on its back, exposing its weak spot.
At this point, all you have to do is go after the colossus and start attacking its weak spot. We chose to drop down to the canyon below and try to hop on the Flame Guardian's back, but that's not really the optimal way to go, since it's very difficult to get onto the back, and it'll shake you violently while you're on it. If you just wait for it, it should start running back up the path and jump down to the brazier area again.
When it returns to its old haunting grounds, the Guardian's back will be well exposed; it's just a matter of getting onto it. The key here is, once again, the braziers. Climb onto one of them, wait until the Guardian is about to charge, then jump onto its back and hang on for dear life. Since the Guardian doesn't have a lot of room to run, it won't be able to shake you easily, and you'll be able to unleash some pretty devastating strikes. After a couple rounds of this, the beast should be dead.
Colossus Twelve - Silent Thunder
Silent Thunder's lair is located in square G2. To reach it, head east from the Shrine, cross the land bridge heading north, then take another land bridge past the Half Moon Canyon save point until you reach a small forested area. Heading west from there will lead you to another canyon path, which will eventually terminate near a waterfall. You can't bypass the large stone in your way, but you can jump onto the nearby pillar and scoot around the handhold on it to reach the other side of the walkway. That won't continue for long, though, and you'll need to jump into the water and swim underneath the bridge to reach the structures in the north end of the lake before Silent Thunder reveals itself.
Attacks
Silent Thunder, as befits a creature of its nomenclature, attacks primarily with a lightning attack that emanates from the two horns on its head. These can do serious damage, and are almost impossible to dodge when you're in the water. If you're quick, though, you can dive under the surface of the water (R1 button) to avoid the damage from these attacks.
Killing It
Note the presence of three large structures in the lake, each with a lower level that you can swim onto, and a higher platform above them. You'll need to get to one of these structures and hide behind one of the pillars underneath to prevent the lightning strikes from hitting you; if you wait long enough, Thunder should approach the structure and get relatively close - this is when you make your move.
In order to scale Thunder's body, you'll have to get behind him and climb up his shell from the rear. This is going to be difficult to do, though; although he's slow, he's huge, and it'll take a bit of time to swim from front to rear. You swim faster when you submerge yourself with the R1 button, so hold that down and try to make a beeline for his rear side. He'll pivot as you swim past him, so you'll need to swim a bit farther than you would if he stayed still, and even when you do reach the fur on his back, you might wind up grabbing hold of it under the waterline, where it'll be impossible for you to climb up. If you're lucky enough to get a good hold of the fur above the water, though, you'll be able to start your ascent.
You need to crawl all the way up Thunder's spine until you reach his head. Unfortunately for you, there aren't any vitals in sight here, but there's still something to whack. If you notice the glowing teeth-like protuberances on the top of the beast's head, try hitting one with your sword. You'll be rewarded with an immediate shift in the creature's velocity. That's right, with nothing but your sword, you'll be able to steer the colossus anywhere you want to go. We're going to Vegas in style, baby!
Well, no, you can't actually leave the lake, thanks to the bridge, which is too narrow for the colossus to fit through. Instead, steer it back towards one of the structures, whacking it as you see fit to get it to take the correct path. When you're close enough to one of the top platforms, jump off and land on it, then hide behind the central rise to prevent any incoming laser beams from damaging you.
Eventually, the creature will take its front legs out of the water and place them on the platform. When it does, jump out underneath its head and grab hold of the fur on its belly, then quickly crawl down and start hitting the vital spot there. You'll only have enough time for one or two hits before the beast submerges and you need to repeat the process, so make sure they're solid hits! After a few sequences of this, you'll kill the beast and move on.
Colossus Thirteen - Traildrifter
The Traildrifter is located in square E6. To reach it, you'll have to travel from the shrine to the eastern boarder of E5, travel west through the forest there, then wrap around to the south to reach the desert. If you poke around in the desert for a bit, the colossus will pop up out of the sand.
Attacks
Are there any? We didn't happen to take any damage during our fight with the Traildrifter, as it serenely floated along in the air above our heads, without appearing to notice us. You can still get hurt if you fall off its back, or run into it when it hits the ground, but this is relatively easy to avoid.
Killing It
We hope you're ready to feel like Indiana Jones, because the "fight" with the Traildrifter will definitely get you in the right mood for it. If you're just looking for a hint, a pretty easy one to guess is that this fight will require a bit of work with your bow.
One of the difficulties here lies in actually following the Traildrifter; it moves so quickly that it can be difficult to get into a point where you can actually hit it with your arrows. As you might surmise from looking at the creature, you're going to be aiming at the white bulbs on its underside; you'll need to hit the bulbs in the midsection and the bulb all the way at the rear in order to wound the beast and cause it to drop down to the ground. Ride your horse and try to get in front of the colossus. When you notice that it's about to give you a flyby, whip out your bow and take aim.
After you've hit all three rows of bulbs, the Traildrifter will drop down to the sand and begin refilling them. So, apparently it's loading itself down with sand to enable it to fly...makes sense. Anyway, this is your chance to strike! In order to get onto the beast's back, you'll need to get onto your horse, speed up towards the front of the beast, ride alongside the wings that are dragging in the sand, and jump from your horse onto the wings and latch on. (We told you this would make you feel like Indiana Jones.) This is going to be a difficult jump to manage, especially if you get unlucky and the colossus starts to turn before you're ready; you might want to check the videos on this page for an example of a good jump.
The Traildrifter has three vital points, spaced out along its back. You'll probably have to jump onto it at least three times to get them all, as it will eventually plunge into the sand when you start to hurt it, but once you get the basics of jumping from the horse to the wings, you should be able to polish it off in short order.
Colossus Fourteen - Destruction Luster
The fourteenth colossus on your hit list is located in square C2. To reach it, head west from the Shrine, cross the bridge into the large plain there, then head north on the border between C3 and D3 until you reach the valley there. Follow it northwest to the northern edge of C2, then wrap to the southwest along the path with the pillars on either side until you reach a cave. Walk through the cave to reach the colossus; you'll need to poke around a bit in the ruins before he appears.
Attacks
The Destruction Luster is almost identical in form to the Flame Guardian. As such, its primary attack involves charging at you and hitting you dead-on with its head. It is a bit better at nabbing you when you try to dodge out of the way, though, so your best bet to avoid this attack is simply to not be on the same surface as the Luster.
Killing It
If the last colossus made you feel like Indiana Jones, then the Luster is going to make you feel like the Prince of Persia; this is about as close as you're going to get to classical platforming in Shadow of the Colossus.
For the first section of this fight, you're not going to be able to hurt the colossus; you can only aggravate it with your arrows. Since you can't actually wound it, you'll need to figure out how to do so. As with the Flame Guardian, you need to find a way to expose its vital spot to your swordplay. To begin with, hop on the overturned pillar near where you begin the fight, and jump from there to the nearby platform; thus begins the platforming.
This sequence of jumps isn't overly difficult. There's only one path that you can follow, and you can't be knocked back to the beginning of the area like you can in some game's jumping puzzles. What you basically need to do is jump onto the standing pillars, climb to the top of them (by repeating jumps), then fire arrows at the beast to get its attention when you're standing at the summit. That'll cause it to ram the pillars, which will tip them over onto their sides. If you then run along the sides of the pillars, you should be able to jump onto another pillar, and so on and so forth. If you follow the path that's available to you, you'll come to a larger structure with handholds set into it. You won't be able to jump all the way up to the top of this structure; you'll need to shimmer around the side of the structure and jump from there to avoid the platforms.
When you reach the platform near the suspiciously weak-looking wall, you'll have to break it by goading the beast to ramming your pillar. When the wall's smashed, you'll enter another little courtyard area, underneath where you first entered this little abattoir. There's a faux brown ladder on one side of this area, so jump up and climb to the upper platform here. There's a pillar that sticks up through the ground and pierces the platform; if you stand on top of it and fire an arrow at the beast, it'll ram the pillar, destroying it and causing the platform to fall on the colossus' back, thus exposing its vital spot.
After this point, it's all gravy. Return to one of the overturned pillars from before, such as the one that smashed through the wall, hop on top, fire an arrow at the beast, then use the R1 button to hang on while the Luster comes along and rams the pillar. It'll be temporarily stunned by the impact, allowing you to stand up and jump over to its back and stab its vitals. A few repetitions of this will finish the beast off for good.
Colossus Fifteen - Fallen Sentry
The penultimate colossus is located in square G1, to the north of the Shrine. If you follow the elevated bridge to the north, then head east from where you fought the Flame Guardian, you'll see a pretty distinctive ruined castle. Head inside, climb the large stairs, then walk the length of the field beyond to meet the Fallen Sentry.
Attacks
As per the biped colossus mode, the Fallen Sentry will either try to smash you with its sword, or stomp you with its feet if you're especially close to it. Also as per usual, taking advantage of these attacks will let you defeat the beast.
Killing It
Like with the Destruction Luster, you're going to need to make use of the way the Fallen Sentry's interactions with the environment in order to wound it. First you'll need to use its stomp attack, then its sword attack.
If you want a more specific answer to the puzzle here, begin by standing near one of the staircases on either side of the middle area of the field. You can't jump up to the staircase from the platform beneath it; it's just too high for you to reach. Fortunately for you, the Sentry's foot stamping ability can actually bend the platform and raise one end of it into the air, enough for you to clear the jump. Just stand at the bottom of the stairs, wait for the colossus to try and stomp you, then dodge out of the way and quickly make it back to the platform to jump up.
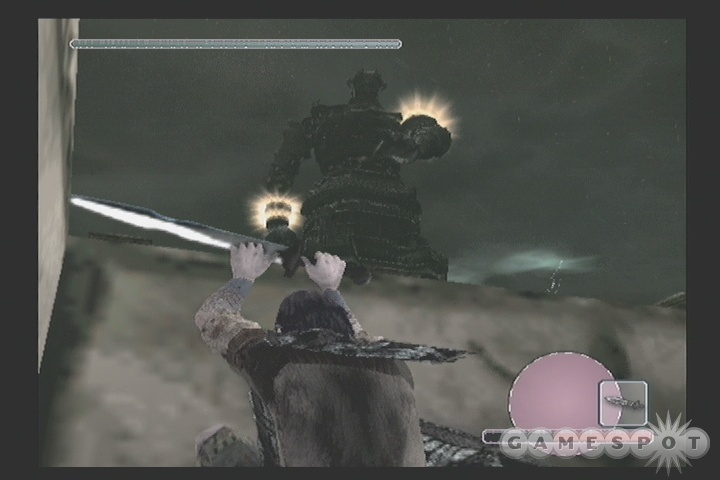
When you reach the second level of the area, where there are a number of columns, you'll come to another dead end. In order to proceed on your ascent, you'll have to stand still for a bit until the Sentry takes a swing at you with his sword. This should knock out a bit of the ceiling area here, as well as knock a column over, allowing you to climb to the uppermost level of the cliff.
Now that you've completed your climb, walk out onto one of the suspended walkways, but take a good look at it; you should notice a very subtle shading difference in the surface of the walkway. This denotes where the walkway will fragment when the giant takes a swing at you, and swing he will; be sure you're on the part of the walkway that's not going to get broken!
After the walkway is busted, stand on the edge of it and wait for the giant to approach. If you equip your sword here, you should be able to spot the primary vital spot atop his head, so get stabby and start wearing down the beast's health.
Unfortunately, you won't be able to kill the Sentry just by stabbing its head; you'll need to find another vital spot in order to destroy it completely. To do so, crawl down its right arm (the one holding the sword), and find the weak spot on it, just above the elbow. Stabbing this weak spot will cause the beast to drop its sword, and reveal the vital spot in the palm of its hand.
To reach this final vital spot, you'll need to stand in front of the Sentry, causing it to attempt to smash you with its hand. If you dodge the hand smash, you'll be able to walk up to the palm and latch onto it as it's rising back up into the air. After a couple of stabs you should finish the colossus off. Congrats!
Colossus Sixteen - The Final Colossus
To reach the last colossus, head down to the tip of the world in square F8. You'll need to follow the canyon to the southwest of the Shrine of Worship, then proceed south across the plains until you find the entrance to another canyon. You'll find that it's blocked by a huge set of doors with a beam of light coming out of them; stand on the platform nearby and focus the light back into the porthole to open the doors. There's a save spot inside the canyon here, near the set of stairs leading up; be sure to save your game before moving on.
Take the horse up to the top of the stairs. There's a platform leading across to the central structure here. It'll collapse as soon as you jump to it, leading to an instant death if you do it alone; if you stay on your horse, though, and make the jump while riding it, you'll be able to clear the gap. Unfortunately there's no way to avoid the events that ensue. Is the girl really worth this?
You'll need to start making your ascent of the structure now. There are four ridges that run along the wall here; climb up them, then walk along until you spot a likely-looking stone to climb and get busy. You'll come to a dead end eventually, when you hit a platform where it starts raining. You'll notice a pair of pillars on either side of the platform, though. Climb them to come face to face with your final foe.
Attacks
You'll discover as soon as you walk towards the colossus here that, well, daddy's angry, and he's not going to spare the rod. The primary attack of this colossus involves a massive energy projectile that deals significant damage and knocks you down if you're caught in the blast. The projectile moves exceedingly quickly, so your only real chance to avoid it is to stay behind cover. You can also dash-dodge behind barricades to avoid the effect.
Killing It
Luckily for you, there are barricades set up at the top of the first ramp; you can dash + dodge from barricade to barricade and avoid the ill effects of the fire. Even if you take a bunch of damage, you're going to be able to rest in the various tunnels. To reach from area to area, you'll need to dive into the holes in the ground; the tunnels beyond will connect you to the next little platforming area. There's an area of barricades, one of jumping and hanging, and then another barricades area before you finally reach the bottom of the colossus and are able to begin your ascent. If you took any damage during the approach, you can rest here and regain it, but you shouldn't really need to, as the bulk of your job from now on is pure climbing.
There are a number of different valid paths up the colossus; you can go up the front, or up the back, or one of the sides. None of these are particularly difficult to figure out; if you can't head straight up, find a platform that'll let you walk around a bit until you find another handhold and head up via that.
When you reach the creature's waist, you'll have to circle around to the small of its back to find the large weak spot there. After latching on and stabbing the weak spot, the colossus will reach around and try to scratch the itch, so to speak; at this point, you'll need to hold down your jump button and press down on your left analog stick to line up a jump from the back to the hand of the arm that's coming your way.
Shortly after jumping to the hand, the arm will start to retract up to the creature's front side, where it'll look at you as if you were a vaguely interesting insect. When the hand levels out, you need to quickly get onto its topside and run up the arm to the next patch of fur there, where you'll find another weak spot. Hitting this one will cause the other arm to wrap around and get close to you; another backwards jump and you'll attach to the second hand.
You're almost up top at this point. You need to do two things at this point. One is to stab the hand that you're attached to. Doing so won't harm the beast, but it will cause it to level out the hand for a moment. At this point, you can get on top of the hand, whip out your bow, and quickly fire an arrow at the almost invisible weak spot on the creature's shoulder. Doing so will bring you around to the shoulder, and from there, you can jump to the neck area of the colossus.
Climb onto the head and get stabby! Of course, for the game's final boss, and a creature with only one vital spot to boot, you can expect the colossus here to really give you a struggle, and you'll definitely have a hard time holding on for stabbing. After each good blow, the creature will whip its head around for a good 20 or 30 seconds, and there'll be little you can do but hold on. This makes the fight more tedious than really adding any severe difficulty to it, so if you have a few minutes to hang on, you should eventually be able to finish the guy off.
The Endgame
We’re not going to spoil any spoilericious surprises of the endgame, save to say that the two sequences here, while allowing you to control yourself, apparently aren't "winnable." There's not much you can do to affect the outcome of the game, so if something seems really hard to avoid, it probably is.
After beating the game for the first time, and watching through to the end of the credits, you'll be rewarded with two new game modes: Hard mode and Time Attack mode. Completing either of these will allow you to unlock new items and weapons for your character.
Got a news tip or want to contact us directly? Email news@gamespot.com
Join the conversation