Rome: Total War Walkthrough
Friends, Romans, Countrymen. Lend this Rome: Total War walkthrough your eyes and you'll have a full set of statistics for all combat units, strategies for taking on the imperial campaign, and walkthroughs for all historical battles.
Design by Marty Smith
Controlling the unruly masses, dealing with a demanding Senate, expanding the empire for profit and glory, and commanding veteran and rookie troops on the battlefield: all in a turn’s work for Rome: Total War’s ambitious leader. Rome: Total War is the third Total War game from developer Creative Assembly and, like its acclaimed predecessors, the game combines turn-based empire-building with real-time strategic warfare. This unofficial game guide offers unit statistics, detailed battle strategies, tips on managing your settlements, walk-throughs for historical battles, and cheat codes.
Table of Contents
Factions and UnitsArmenian and British
Carthaginian and Dacian
Egyptian and Gallic
German and Greek
Macedonian and Numidian
Parthian and Pontic
Scythian and Seleucid
Spanish and Thracian
Imperial Campaign
Temples
Barracks, Stables, and Missiles
Trade, Weapons, Naval, and Health
Farms, Roads, Mines, Academies, and Amphitheatres
Managing Settlements, The Governor
Population Growth and Public Order
Income, Infrastructure, and Integration
Senate Missions and Agents
Telamon and Gergovia
River Trebia, Asculum, and Carrhae
Cynoschephalae, Teutoburg Forest, and Sparta
Chapter 1 - Factions and Units
This section reveals statistics for units from each faction in the game, including playable and non-playable factions. The list below describes each statistic and how its affects on each unit.
- ATK: Attack. The unit’s base damage.
- CB: Charge Bonus. The unit’s bonus damage due to charge attacks.
- WT: Weapon Type. The unit’s base weapon type.
- TD: Total Defense. The combination of the unit’s armor, defensive skill, and shield statistics. The higher the number, the better the defense.
- ARM: Armor. The unit’s armor strength; the higher the number, the greater the armor strength.
- DS: Defensive Skill. A unit’s skill in defending itself.
- SHD: Shield. A unit’s shield strength, which helps determine its ability to defend itself from frontal attacks.
- HP: Hit Points. Number of strikes the individual unit can sustain.
- RC: Recruitment Cost. The cost to recruit the unit.
- UP: Upkeep. The cost in maintaining the unit.
- MISC: Miscellaneous. The unit’s various abilities affecting strengths and weaknesses in combat.
Roman Units
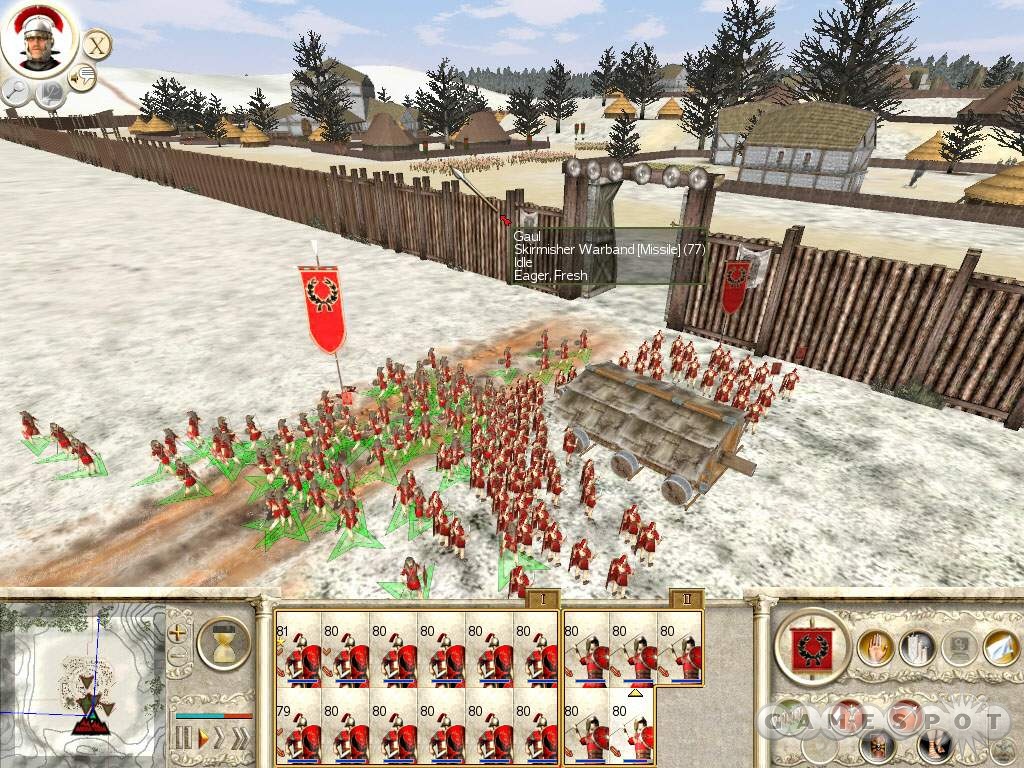
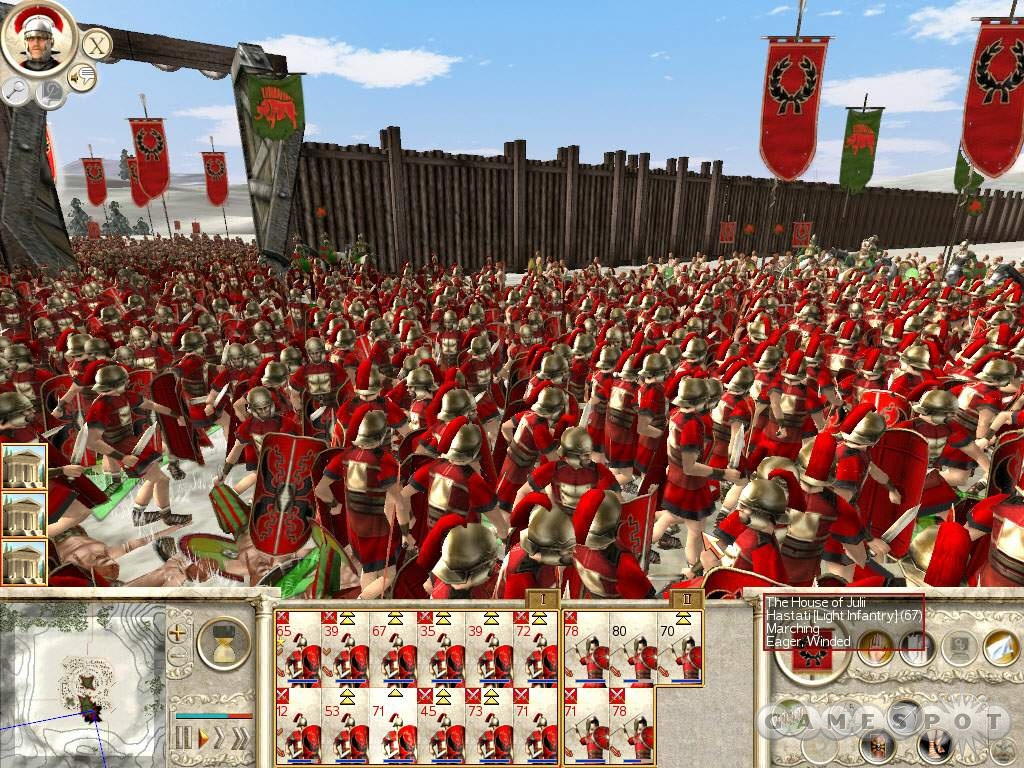
These units include the three family factions (Julii, Brutii, and Scipii) as well as the S.P.Q.R. faction (Senate and People of Rome). The roster includes legionary infantry and supporting auxiliary troops but limited cavalry.
| Unit | ATK | CB | WT | TD | ARM | DS | SHD | HP | RC | UP | MISC |
| Arcani | 12 | 4 | Light | 15 | 7 | 6 | 2 | 2 | 900 | 160 | Can hide anywhere, good morale, very good stamina, fast moving |
| Archer Auxilia | 4 (melee), 9 (missile) | 2 | Missile | 7 | 3 | 4 | 0 | 1 | 430 | 170 | Combat bonus in woods, long range missiles, can use flaming missiles, good stamina, fast moving, can sap |
| Auxilia | 5 | 5 | Light | 16 | 7 | 4 | 5 | 1 | 430 | 170 | Bonus fighting cavalry, combat bonus in woods, good stamina, can sap |
| Ballistas | 53 (vs. troops), 24 (vs. buildings) | 0 | Light | 10 | 7 | 3 | 0 | 1 | 320 | 100 | Missiles can impale several men, long range missiles, can use flaming missiles, can’t hide |
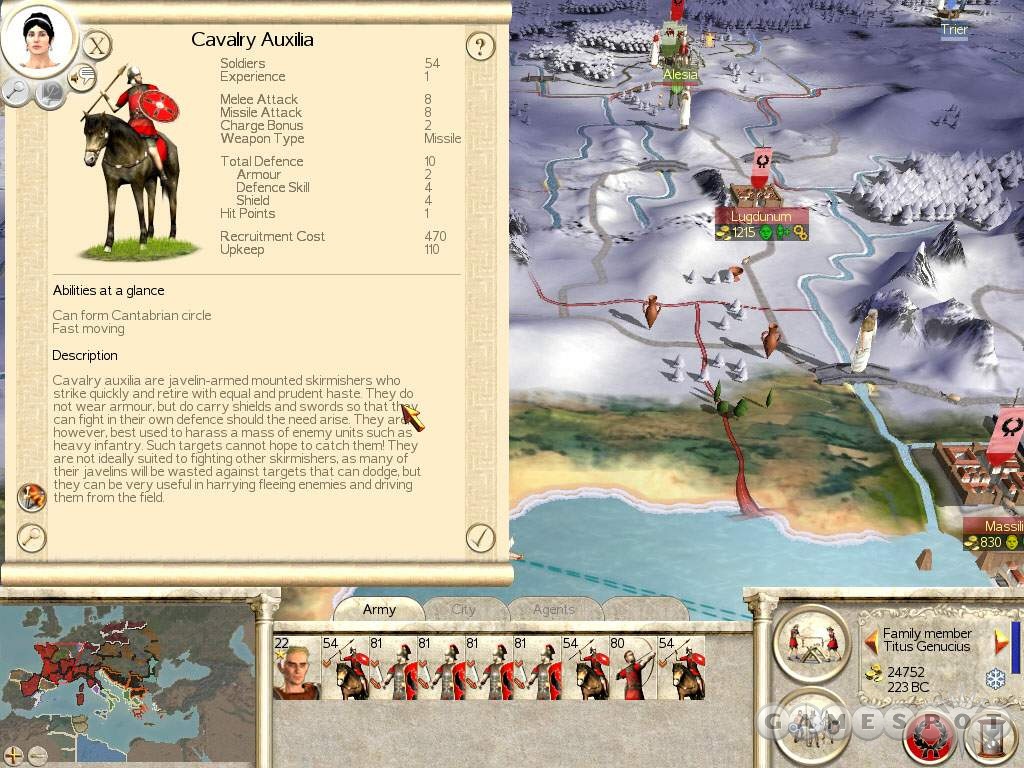
| Cavalry Auxilia | 7 (melee), 7 (missile) | 2 | Missile | 9 | 2 | 3 | 4 | 1 | 430 | 170 | Can form Cantabrian circle, fast moving |
| Early Legionary Cohort | 9 (melee), 13 (missle) | 4 | Heavy | 17 | 7 | 5 | 5 | 1 | 610 | 210 | Can form testudo, javelins thrown before charge, good morale, good stamina, can sap |
| Early Legionary First Cohort | 9 (melee), 13 (missile) | 4 | Heavy | 17 | 7 | 5 | 5 | 1 | 1010 | 310 | Eagle inspires nearby troops, can form testudo, javelins thrown before charge, good morale, good stamina, can sap |
| Equites | 7 | 7 | Light | 12 | 3 | 5 | 4 | 1 | 390 | 110 | Can form wedge, good stamina |
| Hastati | 7 (melee), 11 (missile) | 2 | Heavy | 14 | 5 | 4 | 5 | 1 | 440 | 170 | Javelins thrown before charge, can sap |
| Heavy Onagers | 63 (vs. troops), 110 (vs. buildings) | 0 | Light | 10 | 7 | 3 | 0 | 1 | 1050 | 120 | Area attack, very long missile range, can use flaming missiles, can’t hide, inaccurate against troops |
| Incendiary Pigs | 7 | 2 | Light | 4 | 3 | 1 | 0 | 1 | 260 | 50 | Frighten elephants, fast moving |
| Legionary Cavalry | 9 | 9 | Light | 22 | 12 | 6 | 4 | 1 | 790 | 140 | Can form wedge, good morale, powerful charge, good stamina |
| Legionary Cohort | 9 (melee), 13 (missile) | 4 | Heavy | 22 | 12 | 5 | 5 | 1 | 740 | 210 | Can form testudo, javelins thrown before charge, good morale, good stamina, can sap |
| Legionary First Cohort | 9 (melee), 13 (missile) | 4 | Heavy | 22 | 12 | 5 | 5 | 1 | 1220 | 310 | Eagle inspires nearby troops, can form testudo, javelins thrown before charge, good morale, good stamina, can sap |
| Light Auxilia | 5 (melee), 7 (missile) | 2 | Missile | 7 | 2 | 3 | 2 | 1 | 290 | 170 | Can hide in long grass, bonus vs. elephants and chariots, combat bonus in woods, good stamina, fast moving, can sap |
| Onagers | 53 (vs. troops), 70 (vs. buildings) | 0 | Light | 10 | 7 | 3 | 0 | 1 | 1050 | 120 | Area attack, very long missile range, can use flaming missiles, can’t hide, inaccurate against troops |
| Peasants | 1 | 1 | Light | 1 | 0 | 1 | 0 | 1 | 100 | 100 | Poor morale, can sap |
| Praetorian Cavalry | 12 | 9 | Light | 22 | 11 | 7 | 4 | 1 | 840 | 240 | Can form wedge, good morale, powerful charge, good stamina |
| Praetorian Cohort | 12 (melee), 16 (missile) | 4 | Heavy | 23 | 12 | 6 | 5 | 1 | 810 | 320 | Can form testudo, javelins thrown before charge, good morale, good stamina, can sap |
| Principes | 7 (melee), 11 (missile) | 2 | Heavy | 16 | 7 | 4 | 5 | 1 | 490 | 170 | Javelin thrown before charge, can sap |
| Repeating Ballistas | 33 (vs. troops), 0 (vs. buildings) | 0 | Light | 10 | 7 | 3 | 0 | 1 | 460 | 160 | Missiles can impale several men, can’t hide, ineffective against walls and buildings |
| Roman Archers | 3 (melee), 7 (missile) | 2 | Missile | 2 | 0 | 2 | 0 | 1 | 180 | 170 | Combat bonus in woods, can use flaming missiles, fast moving, can sap |
| Roman Cavalry | 7 | 7 | Light | 15 | 6 | 5 | 4 | 1 | 520 | 110 | Can form wedge, good stamina |
| Samnite Gladiators | 14 | 4 | Light | 14 | 7 | 7 | 0 | 2 | 720 | 260 | Excellent morale, may charge without orders, very good stamina, can sap |
| Scorpions | 43 (vs. troops), 0 (vs. buildings) | 0 | Light | 10 | 7 | 3 | 0 | 1 | 380 | 100 | Missiles can impale several men, very long range missiles, can use flaming missiles, can’t hide, ineffective against walls and buildings |
| Town Watch | 3 | 4 | Light | 7 | 0 | 2 | 5 | 1 | 150 | 100 | Poor morale, can sap |
| Triarii | 7 | 7 | Light | 17 | 7 | 5 | 5 | 1 | 500 | 210 | Bonus fighting cavalry, good morale, can sap |
| Urban Cohort | 14 (melee), 18 (missile) | 4 | Heavy | 24 | 12 | 7 | 5 | 1 | 860 | 320 | Can form testudo, javelins thrown before charge, excellent morale, very good stamina, can sap |
| Velites | 5 (melee), 7 (missile) | 2 | Missile | 7 | 2 | 3 | 2 | 1 | 270 | 170 | Can hide in long grass, bonus vs. elephants and chariots, combat bonus in woods, fast moving, can sap |
| Wardogs | 12 | 2 | Light | 3 | 2 | 1 | 0 | 1 | 680 | 50 | Frighten nearby enemy, fast moving |
Armenian Units
The Armenians feature horse archers, including armored cataphract archers, but boast few infantry types.
| Unit | ATK | CB | WT | TD | ARM | DS | SHD | HP | RC | UP | MISC |
| Archers | 3 (melee), 7 (missile) | 2 | Missile | 2 | 0 | 2 | 0 | 1 | 190 | 170 | Can use flaming missiles, fast moving, can sap |
| Armenian Legionaries | 7 (melee), 11 (missile) | 2 | Heavy | 16 | 7 | 4 | 5 | 1 | 500 | 220 | Javelins thrown before charge, good stamina, can sap |
| Cataphract Archers | 9 (melee), 10 (missile) | 3 | Missile | 22 | 18 | 4 | 0 | 1 | 1140 | 140 | Can form Cantabrian circle, good morale |
| Cataphracts | 7 | 15 | Heavy | 23 | 18 | 5 | 0 | 1 | 890 | 140 | Can form wedge, good morale, powerful charge |
| Eastern General | 10 | 16 | Heavy | 24 | 18 | 6 | 0 | 2 | 1310 | 90 | Can rally nearby troops, good morale, powerful charge, good stamina |
| Eastern Infantry | 3 | 4 | Light | 10 | 3 | 2 | 5 | 1 | 330 | 150 | Bonus fighting cavalry, poor morale, can sap |
| Heavy Spearmen | 7 | 6 | Light | 17 | 7 | 5 | 5 | 1 | 460 | 170 | Can form phalanx, bonus fighting cavalry, cap sap |
| Hillmen | 5 | 5 | Light | 9 | 3 | 4 | 2 | 1 | 290 | 170 | Can hide in long grass, may charge without orders, good stamina, fast moving, can sap |
| Horse Archers | 3 (melee), 7 (missile) | 2 | Missile | 2 | 0 | 2 | 0 | 1 | 440 | 110 | Can form Cantabrian circle, fast moving |
| Onagers | 53 (vs. troops), 70 (vs. buildings) | 0 | Light | 5 | 2 | 3 | 0 | 1 | 740 | 120 | Area attack, very long range missiles, can use flaming missiles, can’t hide, inaccurate against troops |
| Peasants | 3 | 2 | Light | 3 | 0 | 3 | 0 | 1 | 120 | 100 | Poor morale, can sap |
| Peltasts | 3 (melee), 6 (missile) | 2 | Missile | 4 | 0 | 2 | 2 | 1 | 180 | 170 | Can hide in long grass, bonus vs. elephants and chariots, fast moving, can sap |
British Units
The Britons feature fanatical barbarian infantry units plus swift charioteers.
| Unit | ATK | CB | WT | TD | ARM | DS | SHD | HP | RC | UP | MISC |
| Barbarian Peasants | 1 | 1 | Light | 4 | 3 | 1 | 0 | 1 | 150 | 100 | Warcry improves attack, expert at hiding in woods, combat bonus in woods or snow, poor morale |
| Barbarian Warlord | 13 | 8 | Light | 1 | 0 | 1 | 0 | 5 | 1010 | 140 | Can rally nearby troops, special attack, combat bonus in snow, frighten nearby enemy infantry, excellent morale, can’t hide, good stamina |
| British Heavy Chariots | 13 | 8 | Light | 1 | 0 | 1 | 0 | 3 | 580 | 190 | Special attack, combat bonus in snow, frighten nearby enemy infantry, excellent morale, may charge without orders, fast moving |
| British Light Chariots | 10 (melee), 14 (missile) | 7 | Missile | 1 | 0 | 1 | 0 | 2 | 440 | 170 | Special attack, can form Cantabrian circle, combat bonus in snow, frighten nearby enemy infantry, excellent morale, may charge without orders, fast moving |
| Chosen Swordsmen | 13 | 5 | Light | 17 | 7 | 5 | 5 | 1 | 680 | 210 | Warcry improves attack, expert at hiding in woods, combat bonus in woods or snow, excellent morale, may charge without orders, good stamina |
| Druids | 13 | 5 | Light | 14 | 7 | 5 | 2 | 1 | 480 | 90 | Chanting inspires nearby troops, expert at hiding in woods, combat bonus in woods or snow, excellent morale, very good stamina |
| Head Hurlers | 12 (melee), 17 (missile) | 6 | Missile | 2 | 0 | 2 | 0 | 1 | 400 | 130 | Expert at hiding in woods, effective against armor, combat bonus in woods or snow, may charge without orders, good morale, fast moving |
| Slingers | 3 (melee), 4 (missile) | 2 | Missile | 4 | 0 | 2 | 2 | 1 | 150 | 170 | Expert at hiding in woods, combat bonus in woods or snow, fast moving |
| Swordsmen | 10 | 5 | Light | 12 | 3 | 4 | 5 | 1 | 460 | 170 | Warcry improves attack, expert at hiding in woods, combat bonus in woods or snow, may charge without orders, good morale |
| Warband | 7 | 7 | Light | 10 | 3 | 2 | 5 | 1 | 420 | 200 | Warcry improves attack, expert at hiding in woods, combat bonus in woods or snow, may charge without orders |
| Warhounds | 14 | 4 | Light | 3 | 2 | 1 | 0 | 1 | 610 | 40 | Frighten nearby enemy, combat bonus in woods or snow, fast moving |
| Woad Warriors | 13 | 6 | Light | 4 | 0 | 2 | 2 | 1 | 380 | 130 | Warcry improves attack, expert at hiding in woods, combat bonus in woods or snow, may charge without orders, good morale, good stamina, fast moving |
Carthaginian Units
The Carthaginians include a flexible selection of all troop types, plus powerful elephants.
| Unit | ATK | CB | WT | TD | ARM | DS | SHD | HP | RC | UP | MISC |
| Armored Elephants | 7 (melee), 10 (missile) | 11 | Missile | 19 | 16 | 3 | 0 | 15 | 2670 | 590 | Special attack, bonus fighting cavalry, frighten nearby enemy, good morale, animals may run amok, can’t hide |
| Elephants | 5 | 11 | Cannot be upgraded | 12 | 10 | 2 | 0 | 12 | 1230 | 280 | Special attack, bonus fighting cavalry, frighten nearby enemy, good morale, animals may run amok, can’t hide |
| General’s Bodyguard | 12 | 9 | Light | 18 | 11 | 7 | 0 | 2 | 1040 | 80 | Can rally nearby troops, good morale, powerful charge, good stamina |
| Heavy Onagers | 63 (vs. troops), 110 (vs. buildings) | 0 | Light | 3 | 0 | 3 | 0 | 1 | 930 | 110 | Area attack, very long range missiles, can use flaming missiles, can’t hide, inaccurate against troops |
| Iberian Infantry | 7 | 2 | Light | 8 | 2 | 4 | 2 | 1 | 240 | 170 | Can sap |
| Libyan Spearmen | 5 | 5 | Light | 16 | 7 | 4 | 5 | 1 | 400 | 170 | Bonus fighting cavalry, can sap |
| Long Shield Cavalry | 9 | 8 | Light | 13 | 3 | 6 | 4 | 1 | 510 | 140 | Can form wedge, good morale, powerful charge |
| Onagers | 53 (vs. troops), 70 (vs. buildings) | 0 | Light | 3 | 0 | 3 | 0 | 1 | 720 | 110 | Area attack, very long range missiles, can use flaming missiles, can’t hide, inaccurate against troops |
| Peasants | 3 | 2 | Light | 3 | 0 | 3 | 0 | 1 | 120 | 100 | Poor morale, can sap |
| Poeni Infantry | 9 | 7 | Light | 18 | 7 | 6 | 5 | 1 | 540 | 210 | Can form phalanx, bonus fighting cavalry, good morale, good stamina, can sap |
| Round Shield Cavalry | 7 | 2 | Light | 8 | 2 | 4 | 2 | 1 | 300 | 110 | Can form wedge |
| Sacred Band | 12 | 8 | Light | 23 | 11 | 7 | 5 | 1 | 710 | 270 | Can form phalanx, bonus fighting cavalry, good morale, powerful charge, good stamina, can sap |
| Sacred Band Cavalry | 12 | 9 | Light | 18 | 11 | 7 | 0 | 1 | 780 | 340 | Can form wedge, good morale, powerful charge, good stamina |
| Skirmishers | 3 (melee), 6 (missile) | 2 | Light | 4 | 0 | 2 | 2 | 1 | 180 | 170 | Can hide in long grass, bonus vs. elephants and chariots, fast moving, can sap |
| Slingers | 3 (melee), 4 (missile) | 2 | Missile | 4 | 0 | 2 | 2 | 1 | 150 | 170 | Fast moving, can sap |
| Town Militia | 3 | 4 | Light | 7 | 0 | 2 | 5 | 1 | 150 | 100 | Poor morale, can sap |
| War Elephants | 7 (melee), 10 (missile) | 11 | Missile | 16 | 13 | 3 | 0 | 15 | 2410 | 490 | Special attack, bonus fighting cavalry, frighten nearby enemy, good morale, animals may run amok, can’t hide |
Dacian Units
The Dacian roster features barbaric close-combat infantry, including falxmen, but very little cavalry.
| Unit | ATK | CB | WT | TD | ARM | DS | SHD | HP | RC | UP | MISC |
| Archer Warband | 3 (melee), 7 (missile) | 2 | Missile | 5 | 3 | 2 | 0 | 1 | 270 | 170 | Expert at hiding in woods, combat bonus in woods or snow, can use flaming missiles, fast moving |
| Ballistas | 53 (vs. troops), 24 (vs. buildings) | 0 | Light | 5 | 0 | 3 | 2 | 1 | 230 | 100 | Missiles can impale several men, long range missiles, can use flaming missiles, can’t hide |
| Barbarian Peasants | 1 | 1 | Light | 4 | 3 | 1 | 0 | 1 | 150 | 100 | Warcry improves attack, expert at hiding in woods, combat bonus in woods or snow, poor morale |
| Barbarian Cavalry | 9 | 9 | Light | 10 | 3 | 3 | 4 | 1 | 400 | 90 | Combat bonus in snow, can form wedge, may charge without orders, powerful charge |
| Barbarian Noble Cavalry | 10 | 10 | Light | 15 | 6 | 5 | 4 | 1 | 600 | 160 | Combat bonus in snow, can form wedge, may charge without orders, good morale, powerful charge |
| Barbarian Warlord | 13 | 10 | Light | 16 | 6 | 6 | 4 | 2 | 940 | 110 | Can rally nearby troops, combat bonus in snow, excellent morale, powerful charge, good stamina |
| Chosen Archer Warband | 10 (melee), 12 (missile) | 5 | Missile | 11 | 7 | 4 | 0 | 1 | 700 | 180 | Expert at hiding in woods, combat bonus in woods or snow, long range missiles, can use flaming missiles, good morale, good stamina |
| Chosen Swordsmen | 13 | 5 | Light | 17 | 7 | 5 | 5 | 1 | 680 | 210 | Warcry improves attack, expert at hiding in woods, combat bonus in woods or snow, excellent morale, may charge without orders, good stamina |
| Falxmen | 13 | 7 | Heavy | 10 | 3 | 7 | 0 | 1 | 500 | 170 | Warcry improves attack, expert at hiding in woods, combat bonus in woods or snow, may charge without orders, good morale, fast moving |
| Naked Fanatics | 13 | 6 | Light | 7 | 0 | 2 | 5 | 1 | 430 | 130 | Warcry improves attack, expert at hiding in woods, combat bonus in woods or snow, may charge without orders, good morale, good stamina |
| Onagers | 53 (vs. troops), 70 (vs. buildings) | 0 | Light | 5 | 0 | 3 | 2 | 1 | 730 | 110 | Area attack, very long range missiles, can use flaming missiles, can’t hide, inaccurate against troops |
| Warband | 7 | 7 | Light | 10 | 3 | 2 | 5 | 1 | 420 | 200 | Warcry improves attack, expert at hiding in woods, combat bonus in woods or snow, may charge without orders |
| Warhounds | 14 | 4 | Light | 3 | 2 | 1 | 0 | 1 | 610 | 40 | Frighten nearby enemy, combat bonus in woods or snow, fast moving |
Egyptian Units
The Egyptians feature good spearmen and foot archers along with swift cavalry and chariots.
| Unit | ATK | CB | WT | TD | ARM | DS | SHD | HP | RC | UP | MISC |
| Bowmen | 3 (melee), 7 (missile) | 2 | Missile | 2 | 0 | 2 | 0 | 1 | 250 | 250 | Combat bonus in deserts, can use flaming missiles, fast moving, can sap |
| Camel Archers | 3 (melee), 7 (missile) | 2 | Missile | 2 | 0 | 2 | 0 | 1 | 420 | 110 | Can form Cantabrian circle, combat bonus in deserts, scare horses, good morale |
| Desert Axemen | 10 | 5 | Heavy | 18 | 11 | 5 | 2 | 1 | 560 | 210 | Combat bonus in deserts, good morale, can sap |
| Desert Cavalry | 7 | 3 | Light | 11 | 3 | 4 | 4 | 1 | 540 | 170 | Effective against armor, combat bonus in deserts, can form wedge, fast moving |
| Egyptian Chariots | 12 | 7 | Heavy | 1 | 0 | 1 | 0 | 3 | 660 | 330 | Special attack, combat bonus in deserts, frighten nearby enemy infantry, good morale |
| Egyptian General | 12 | 9 | Light | 13 | 6 | 7 | 0 | 2 | 830 | 80 | Can rally nearby troops, combat bonus in deserts, good morale, powerful charge, good stamina |
| Heavy Onagers | 63 (vs. troops), 110 (vs. buildings) | 0 | Light | 3 | 0 | 3 | 0 | 1 | 930 | 110 | Area attack, very long range missiles, can use flaming missiles, can’t hide, inaccurate against troops |
| Nile Cavalry | 9 | 8 | Light | 13 | 7 | 6 | 0 | 1 | 570 | 140 | Combat bonus in deserts, can form wedge, good morale, powerful charge |
| Nile Spearmen | 7 | 6 | Light | 13 | 3 | 5 | 5 | 1 | 360 | 170 | Can form phalanx, bonus fighting cavalry, combat bonus in deserts, can sap |
| Nubian Cavalry | 9 | 8 | Light | 10 | 0 | 6 | 4 | 1 | 420 | 140 | Combat bonus in deserts, can form wedge, good morale, powerful charge |
| Nubian Spearmen | 5 | 5 | Light | 8 | 0 | 3 | 5 | 1 | 230 | 100 | Can form phalanx, bonus fighting cavalry, combat bonus in deserts, poor morale, can sap |
| Onagers | 53 (vs. troops), 70 (vs. buildings) | 0 | Light | 3 | 0 | 3 | 0 | 1 | 720 | 110 | Area attack, very long range missiles, can use flaming missiles, can’t hide, inaccurate against troops |
| Peasants | 3 | 2 | Light | 3 | 0 | 3 | 0 | 1 | 120 | 100 | Combat bonus in deserts, poor morale, can sap |
| Pharaoh’s Bowmen | 9 (melee), 14 (missile) | 4 | Missile | 13 | 7 | 6 | 0 | 1 | 680 | 330 | Combat bonus in deserts, long range missiles, can use flaming missiles, good morale, good stamina, can sap |
| Pharaoh’s Guards | 12 | 8 | Light | 19 | 7 | 7 | 5 | 1 | 620 | 330 | Can form phalanx, bonus fighting cavalry, combat bonus in deserts, good morale, powerful charge, good stamina, can sap |
| Skirmishers | 3 (melee), 6 (missile) | 2 | Missile | 4 | 0 | 2 | 2 | 1 | 180 | 170 | Can hide in long grass, bonus vs. elephants and chariots, combat bonus in deserts, fast moving, can sap |
| Slingers | 3 (melee), 4 (missile) | 2 | Missile | 4 | 0 | 2 | 2 | 1 | 150 | 170 | Combat bonus in deserts, fast moving, can sap |
Gallic Units
The Gauls boast strong, close-combat infantry but very limited cavalry.
| Unit | ATK | CB | WT | TD | ARM | DS | SHD | HP | RC | UP | MISC |
| Barbarian Cavalry | 9 | 9 | Light | 10 | 3 | 3 | 4 | 1 | 400 | 90 | Combat bonus in snow, can form wedge, may charge without orders, powerful charge |
| Barbarian Noble Cavalry | 10 | 10 | Light | 15 | 6 | 5 | 4 | 1 | 600 | 160 | Combat bonus in snow, can form wedge, may charge without orders, good morale, powerful charge |
| Barbarian Peasants | 1 | 1 | Light | 4 | 3 | 1 | 0 | 1 | 150 | 100 | Warcry improves attack, expert at hiding in woods, combat bonus in woods or snow, poor morale |
| Barbarian Warlord | 13 | 10 | Light | 16 | 6 | 6 | 4 | 2 | 940 | 110 | Can rally nearby troops, combat bonus in snow, excellent morale, powerful charge, good stamina |
| Chosen Swordsmen | 13 | 5 | Light | 17 | 7 | 5 | 5 | 1 | 680 | 210 | Warcry improves attack, expert at hiding in woods, combat bonus in woods or snow, excellent morale, may charge without orders, good stamina |
| Druids | 13 | 5 | Light | 14 | 7 | 5 | 2 | 1 | 480 | 90 | Chanting inspires nearby troops, expert at hiding in woods, combat bonus in woods or snow, excellent morale, very good stamina |
| Forester Warband | 11 (melee), 15 (missile) | 8 | Missile | 8 | 3 | 5 | 0 | 1 | 960 | 200 | Can hide anywhere, combat bonus in woods or snow, long range missiles, excellent morale, can use flaming missiles, very good stamina, fast moving |
| Naked Fanatics | 13 | 6 | Light | 7 | 0 | 2 | 5 | 1 | 430 | 130 | Warcry improves attack, expert at hiding in woods, combat bonus in woods or snow, may charge without orders, good morale, good stamina |
| Skirmisher Warband | 6 (melee), 9 (missile) | 4 | Missile | 3 | 0 | 1 | 2 | 1 | 220 | 130 | Can hide in long grass, bonus vs. elephants and chariots, combat bonus in woods or snow, fast moving |
| Swordsmen | 10 | 5 | Light | 12 | 3 | 4 | 5 | 1 | 460 | 170 | Warcry improves attack, expert at hiding in woods, combat bonus in woods or snow, may charge without orders, good morale |
| Warband | 7 | 7 | Light | 10 | 3 | 2 | 5 | 1 | 420 | 200 | Warcry improves attack, expert at hiding in woods, combat bonus in woods or snow, may charge without orders |
| Warhounds | 14 | 4 | Light | 3 | 2 | 1 | 0 | 1 | 610 | 40 | Frighten nearby enemy, combat bonus in woods or snow, fast moving |
German Units
The German roster includes axemen and specialist infantry with limited selection of cavalry.
| Unit | ATK | CB | WT | TD | ARM | DS | SHD | HP | RC | UP | MISC |
| Axemen | 11 | 7 | Heavy | 9 | 3 | 4 | 2 | 1 | 450 | 170 | Warcry improves attack, expert at hiding in woods, combat bonus in woods or snow, may charge without orders, good morale |
| Barbarian Cavalry | 9 | 9 | Light | 10 | 3 | 3 | 4 | 1 | 400 | 90 | Combat bonus in snow, can form wedge, may charge without orders, powerful charge |
| Barbarian Noble Cavalry | 10 | 10 | Light | 15 | 6 | 5 | 4 | 1 | 600 | 160 | Combat bonus in snow, can form wedge, may charge without orders, good morale, powerful charge |
| Barbarian Peasants | 1 | 1 | Light | 4 | 3 | 1 | 0 | 1 | 150 | 100 | Warcry improves attack, expert at hiding in woods, combat bonus in woods or snow, poor morale |
| Barbarian Warlord | 13 | 10 | Light | 16 | 6 | 6 | 4 | 2 | 940 | 110 | Can rally nearby troops, combat bonus in snow, excellent morale, powerful charge, good stamina |
| Berserkers | 19 | 8 | Heavy | 5 | 0 | 5 | 0 | 3 | 840 | 120 | Warcry improves attack, combat bonus in woods or snow, frighten nearby enemy infantry, excellent morale, may charge without orders, powerful charge, very good stamina |
| Chosen Archer Warband | 10 (melee), 12 (missile) | 5 | Missile | 11 | 7 | 4 | 0 | 1 | 700 | 180 | Expert at hiding in woods, combat bonus in woods or snow, long range missiles, can use flaming missiles, good morale, good stamina |
| Chosen Axmen | 18 | 9 | Heavy | 6 | 0 | 6 | 0 | 1 | 580 | 200 | Warcry improves attack, expert at hiding in woods, effective against armor, combat bonus in woods or snow, excellent morale, may charge without orders, powerful charge |
| Gothic Cavalry | 13 | 10 | Light | 19 | 9 | 6 | 4 | 1 | 790 | 190 | Combat bonus in snow, excellent morale, can form wedge, may charge without orders, powerful charge |
| Naked Fanatics | 13 | 6 | Light | 7 | 0 | 2 | 5 | 1 | 430 | 130 | Warcry improves attack, expert at hiding in woods, combat bonus in woods or snow, may charge without orders, good morale, good stamina |
| Night Raiders | 14 | 8 | Heavy | 10 | 3 | 2 | 5 | 1 | 540 | 130 | Warcry improves attack, combat bonus in woods or snow, frighten nearby enemy infantry, may charge without orders, good morale, powerful charge, good stamina |
| Screeching Women | 11 | 7 | Heavy | 1 | 0 | 1 | 0 | 1 | 320 | 130 | Screeching dismays enemy, expert at hiding in woods, combat bonus in woods or snow, good morale |
| Skirmisher Warband | 6 (melee), 9 (missile) | 4 | Missile | 3 | 0 | 1 | 2 | 1 | 220 | 130 | Can hide in long grass, bonus vs. elephants and chariots, combat bonus in woods or snow, fast moving |
| Spear Warband | 8 | 8 | Light | 11 | 3 | 3 | 5 | 1 | 510 | 200 | Can form phalanx, expert at hiding in woods, bonus fighting cavalry, combat bonus in woods or snow, may charge without orders, powerful charge |
| Warhounds | 14 | 4 | Light | 3 | 2 | 1 | 0 | 1 | 720 | 60 | Frighten nearby enemy, combat bonus in woods or snow, fast moving |
Greek Units
The Greeks offer many hoplite phalanxes (including spartans) and missile support but limited cavalry choice.
| Unit | ATK | CB | WT | TD | ARM | DS | SHD | HP | RC | UP | MISC |
| Archers | 3 (melee), 7 (missile) | 2 | Missile | 2 | 0 | 2 | 0 | 1 | 190 | 170 | Combat bonus in woods, can use flaming missiles, fast moving, can sap |
| Armored Hoplites | 9 | 7 | Light | 22 | 11 | 6 | 5 | 1 | 640 | 210 | Can form phalanx, bonus fighting cavalry, good morale, good stamina, can sap |
| Ballistas | 53 (vs. troops), 24 (vs. buildings) | 0 | Light | 3 | 0 | 3 | 0 | 1 | 220 | 100 | Missiles can impale several men, long range missiles, can use flaming missiles, can’t hide |
| General’s Bodyguard | 10 | 16 | Heavy | 17 | 11 | 6 | 0 | 2 | 1020 | 130 | Can rally nearby troops, good morale, powerful charge, good stamina |
| Greek Cavalry | 7 | 7 | Light | 8 | 3 | 5 | 0 | 1 | 330 | 110 | Can form wedge |
| Heavy Onagers | 63 (vs. troops), 110 (vs. buildings) | 0 | Light | 3 | 0 | 3 | 0 | 1 | 930 | 110 | Area attack, very long range missiles, can use flaming missiles, can’t hide, inaccurate against troops |
| Heavy Peltasts | 5 (melee), 7 (missile) | 2 | Missile | 11 | 3 | 3 | 5 | 1 | 350 | 170 | Can hide in long grass, bonus vs. elephants and chariots, combat bonus in woods, fast moving, can sap |
| Hoplites | 7 | 6 | Light | 16 | 6 | 5 | 5 | 1 | 440 | 170 | Can form phalanx, bonus fighting cavalry, can sap |
| Incendiary Pigs | 7 | 2 | Light | 1 | 0 | 1 | 0 | 1 | 140 | 50 | Frighten elephants, fast moving |
| Militia Cavalry | 6 (melee), 6 (missile) | 2 | Missile | 6 | 0 | 2 | 4 | 1 | 340 | 110 | Can form Cantabrian circle, fast moving |
| Militia Hoplites | 5 | 5 | Light | 8 | 0 | 3 | 5 | 1 | 230 | 100 | Can form phalanx, bonus fighting cavalry, poor morale, can sap |
| Onagers | 53 (vs. troops), 70 (vs. buildings) | 0 | Light | 3 | 0 | 3 | 0 | 1 | 720 | 110 | Area attack, very long range missiles, can use flaming missiles, can’t hide, inaccurate against troops |
| Peasants | 1 | 1 | Light | 1 | 0 | 1 | 0 | 1 | 100 | 100 | Poor morale, can sap |
| Peltasts | 3 (melee), 6 (missile) | 2 | Missile | 4 | 0 | 2 | 2 | 1 | 180 | 170 | Can hide in long grass, bonus vs. elephants and chariots, combat bonus in woods, fast moving, can sap |
| Spartan Hoplites | 16 | 8 | Light | 17 | 3 | 9 | 5 | 2 | 1220 | 460 | Can form phalanx, bonus fighting cavalry, excellent morale, powerful charge, very good stamina, can sap |
Macedonian Units
The Macedonians feature hoplites and pike phalanxes plus powerful cavalry.
| Unit | ATK | CB | WT | TD | ARM | DS | SHD | HP | RC | UP | MISC |
| Archers | 3 (melee), 7 (missile) | 2 | Missile | 2 | 0 | 2 | 0 | 1 | 190 | 170 | Combat bonus in woods, can use flaming missiles, fast moving, can sap |
| Ballistas | 53 (vs. troops), 24 (vs. buildings) | 0 | Light | 3 | 0 | 3 | 0 | 1 | 220 | 100 | Missiles can impale several men, long range missiles, can use flaming missiles, can’t hide |
| Companion Cavalry | 10 | 16 | Heavy | 17 | 11 | 6 | 0 | 1 | 760 | 240 | Can form wedge, good morale, powerful charge, good stamina |
| General’s Bodyguard | 10 | 16 | Heavy | 17 | 11 | 6 | 0 | 2 | 1020 | 130 | Can rally nearby troops, good morale, powerful charge, good stamina |
| Greek Cavalry | 7 | 7 | Light | 8 | 3 | 5 | 0 | 1 | 330 | 110 | Can form wedge |
| Heavy Onagers | 63 (vs. troops), 110 (vs. buildings) | 0 | Light | 3 | 0 | 3 | 0 | 1 | 930 | 110 | Area attack, very long range missiles, can use flaming missiles, can’t hide, inaccurate against troops |
| Levy Pikemen | 6 | 5 | Heavy | 5 | 0 | 3 | 2 | 1 | 310 | 150 | Can form phalanx, bonus fighting cavalry, poor morale, very long spears, can sap |
| Light Lancers | 7 | 15 | Light | 5 | 0 | 5 | 0 | 1 | 370 | 140 | Can form wedge, good morale, powerful charge, fast moving |
| Macedonian Cavalry | 9 | 8 | Light | 17 | 11 | 6 | 0 | 1 | 690 | 140 | Can form wedge, good morale, powerful charge, good stamina |
| Militia Hoplites | 5 | 5 | Light | 8 | 0 | 3 | 5 | 1 | 230 | 100 | Can form phalanx, bonus fighting cavalry, poor morale, can sap |
| Onagers | 53 (vs. troops), 70 (vs. buildings) | 0 | Light | 3 | 0 | 3 | 0 | 1 | 720 | 110 | Area attack, very long range missiles, can use flaming missiles, can’t hide, inaccurate against troops |
| Peasants | 1 | 1 | Light | 1 | 0 | 1 | 0 | 1 | 100 | 100 | Poor morale, can sap |
| Peltasts | 3 (melee), 6 (missile) | 2 | Missile | 4 | 0 | 2 | 2 | 1 | 180 | 170 | Can hide in long grass, bonus vs. elephants and chariots, combat bonus in woods, fast moving, can sap |
| Phalanx Pikemen | 8 | 6 | Heavy | 13 | 6 | 5 | 2 | 1 | 580 | 250 | Can form phalanx, bonus fighting cavalry, very long spears, can sap |
| Royal Pikemen | 9 | 7 | Light | 17 | 6 | 6 | 5 | 1 | 690 | 360 | Can form phalanx, bonus fighting cavalry, good morale, good stamina, can sap |
Numidian Units
The Numidian arsenal boasts light desert infantry and good cavalry, including camel-mounted specialists.
| Unit | ATK | CB | WT | TD | ARM | DS | SHD | HP | RC | UP | MISC |
| Archers | 3 (melee), 7 (missile) | 2 | Missile | 2 | 0 | 2 | 0 | 1 | 190 | 170 | Can use flaming missiles, fast moving, can sap |
| Desert Infantry | 7 | 6 | Light | 13 | 3 | 5 | 5 | 1 | 390 | 200 | Bonus fighting cavalry, combat bonus in deserts, good morale, good stamina, can sap |
| General’s Bodyguard | 12 | 9 | Light | 18 | 11 | 7 | 0 | 2 | 1040 | 80 | Can rally nearby troops, good morale, powerful charge, good stamina |
| Long Shield Cavalry | 9 | 8 | Light | 13 | 3 | 6 | 4 | 1 | 510 | 140 | Can form wedge, good morale, powerful charge |
| Numidian Camel Riders | 9 | 8 | Light | 13 | 3 | 6 | 4 | 1 | 520 | 140 | Combat bonus in deserts, scare horses, good morale, powerful charge, good stamina |
| Numidian Cavalry | 6 (melee), 9 (missile) | 3 | Missile | 8 | 0 | 4 | 4 | 1 | 420 | 130 | Can form Cantabrian circle, good morale, good stamina, fast moving |
| Numidian Javelinmen | 3 (melee), 6 (missile) | 2 | Missile | 4 | 0 | 2 | 2 | 1 | 180 | 170 | Bonus vs. elephants and chariots, fast moving, can sap |
| Numidian Legionaries | 7 (melee), 11 (missile) | 2 | Heavy | 16 | 7 | 4 | 5 | 1 | 500 | 220 | Javelins thrown before charge, good stamina, can sap |
| Onagers | 53 (vs. troops), 70 (vs. buildings) | 0 | Light | 3 | 0 | 3 | 0 | 1 | 720 | 110 | Area attack, very long range missiles, can use flaming missiles, can’t hide, inaccurate against troops |
| Peasants | 3 | 2 | Light | 3 | 0 | 3 | 0 | 1 | 120 | 100 | Poor morale, can sap |
| Slingers | 3 (melee), 4 (missile) | 2 | Missile | 4 | 0 | 2 | 2 | 1 | 150 | 170 | Fast moving, can sap |
Parthian Units
The Parthians feature excellent cavalry, including horse archers and powerful armored cataphracts but weak infantry.
| Unit | ATK | CB | WT | TD | ARM | DS | SHD | HP | RC | UP | MISC |
| Archers | 3 (melee), 7 (missile) | 2 | Missile | 2 | 0 | 2 | 0 | 1 | 190 | 170 | Can use flaming missiles, fast moving, can sap |
| Cataphract Camels | 7 | 15 | Heavy | 23 | 18 | 5 | 0 | 1 | 940 | 140 | Combat bonus in deserts, scare horses, can form wedge, good morale, powerful charge |
| Cataphracts | 7 | 15 | Heavy | 23 | 18 | 5 | 0 | 1 | 890 | 140 | Can form wedge, good morale, powerful charge |
| Eastern General | 10 | 16 | Heavy | 24 | 18 | 6 | 0 | 2 | 1310 | 90 | Can rally nearby troops, good morale, powerful charge, good stamina |
| Eastern Infantry | 3 | 4 | Light | 10 | 3 | 2 | 5 | 1 | 330 | 150 | Bonus fighting cavalry, poor morale, can sap |
| Hillmen | 5 | 5 | Light | 9 | 3 | 4 | 2 | 1 | 290 | 170 | Can hide in long grass, may charge without orders, good stamina, fast moving, can sap |
| Horse Archers | 3 (melee), 7 (missile) | 2 | Missile | 2 | 0 | 2 | 0 | 1 | 440 | 110 | Can form Cantabrian circle, fast moving |
| Onagers | 53 (vs. troops), 70 (vs. buildings) | 0 | Light | 5 | 2 | 3 | 0 | 1 | 720 | 120 | Area attack, very long range missiles, can use flaming missiles, can’t hide, inaccurate against troops |
| Peasants | 3 | 2 | Light | 3 | 0 | 3 | 0 | 1 | 120 | 100 | Poor morale, can sap |
| Persian Cavalry | 9 (melee), 10 (missile) | 3 | Missile | 10 | 6 | 4 | 0 | 1 | 780 | 140 | Can form Cantabrian circle, good morale |
| Slingers | 3 (melee), 4 (missile) | 2 | Missile | 4 | 0 | 2 | 2 | 1 | 150 | 170 | Fast moving, can sap |
| War Elephants | 7 (melee), 10 (missile) | 11 | Missile | 16 | 13 | 3 | 0 | 15 | 2410 | 490 | Special attack, bonus fighting cavalry, frighten nearby enemy, good morale, animals may run amok, can’t hide |
Pontic Units
The Pontic roster includes a flexible army of light infantry, phalanxes, heavy cavalry, and chariots.
| Unit | ATK | CB | WT | TD | ARM | DS | SHD | HP | RC | UP | MISC |
| Archers | 3 (melee), 7 (missile) | 2 | Missile | 2 | 0 | 2 | 0 | 1 | 190 | 170 | Can use flaming missiles, fast moving, can sap |
| Bronze Shields | 10 | 7 | Heavy | 14 | 6 | 6 | 2 | 1 | 690 | 360 | Can form phalanx, bonus fighting cavalry, good morale, good stamina, very long spears, can sap |
| Cappadocian Cavalry | 7 | 15 | Heavy | 23 | 14 | 5 | 4 | 1 | 820 | 140 | Can form wedge, good morale, powerful charge |
| Chariot Archers | 9 (melee), 13 (missile) | 6 | Missile | 1 | 0 | 1 | 0 | 2 | 1060 | 330 | Special attack, can form Cantabrian circle, frighten nearby enemy infantry, good morale |
| Eastern General | 10 | 16 | Heavy | 15 | 9 | 6 | 0 | 2 | 940 | 80 | Can rally nearby troops, good morale, powerful charge, good stamina |
| Eastern Infantry | 3 | 4 | Light | 10 | 3 | 2 | 5 | 1 | 330 | 150 | Bonus fighting cavalry, poor morale, can sap |
| Hillmen | 5 | 5 | Light | 9 | 3 | 4 | 2 | 1 | 290 | 170 | Can hide in long grass, may charge without orders, good stamina, fast moving, can sap |
| Onagers | 53 (vs. troops), 70 (vs. buildings) | 0 | Light | 5 | 2 | 3 | 0 | 1 | 740 | 120 | Area attack, very long range missiles, can use flaming missiles, can’t hide, inaccurate against troops |
| Peasants | 3 | 2 | Light | 3 | 0 | 3 | 0 | 1 | 120 | 100 | Poor morale, can sap |
| Peltasts | 3 (melee), 6 (missile) | 2 | Missile | 4 | 0 | 2 | 2 | 1 | 180 | 170 | Can hide in long grass, bonus vs. elephants and chariots, fast moving, can sap |
| Phalanx Pikemen | 8 | 6 | Heavy | 16 | 6 | 5 | 5 | 1 | 470 | 170 | Can form phalanx, bonus fighting cavalry, very long spears, can sap |
| Pontic Heavy Cavalry | 9 (melee), 9 (missile) | 3 | Missile | 14 | 6 | 4 | 4 | 1 | 630 | 140 | Can form Cantabrian circle, good morale |
| Pontic Light Cavalry | 7 (melee), 7 (missile) | 2 | Missile | 7 | 0 | 3 | 4 | 1 | 370 | 110 | Can form Cantabrian circle, fast moving |
| Scythed Chariots | 15 | 8 | Light | 1 | 0 | 1 | 0 | 4 | 920 | 210 | Special attack, frighten nearby enemy infantry, may charge without orders, good morale, animals may run amok |
Scythian Units
The Scythians include master horsemen and archers but almost no melee infantry.
| Unit | ATK | CB | WT | TD | ARM | DS | SHD | HP | RC | UP | MISC |
| Archer Warband | 3 (melee), 7 (missile) | 2 | Missile | 5 | 3 | 2 | 0 | 1 | 270 | 170 | Expert at hiding in woods, combat bonus in woods or snow, can use flaming missiles, fast moving |
| Axemen | 11 | 7 | Heavy | 9 | 3 | 4 | 2 | 1 | 450 | 170 | Warcry improves attack, expert at hiding in woods, combat bonus in woods or snow, may charge without orders, good morale |
| Barbarian Cavalry | 9 | 9 | Light | 10 | 3 | 3 | 4 | 1 | 400 | 90 | Combat bonus in snow, can form wedge, may charge without orders, powerful charge |
| Barbarian Peasants | 1 | 1 | Light | 4 | 3 | 1 | 0 | 1 | 150 | 100 | Warcry improves attack, expert at hiding in woods, combat bonus in woods or snow, poor morale |
| Barbarian Warlord | 11 | 17 | Heavy | 14 | 9 | 5 | 0 | 2 | 980 | 110 | Can rally nearby troops, combat bonus in snow, excellent morale, powerful charge, good stamina |
| Chosen Archer Warband | 10 (melee), 12 (missile) | 5 | Missile | 11 | 7 | 4 | 0 | 1 | 700 | 180 | Expert at hiding in woods, combat bonus in woods or snow, long range missiles, can use flaming missiles, good morale, good stamina |
| Head Hunting Maidens | 10 | 6 | Light | 11 | 6 | 1 | 4 | 1 | 600 | 140 | Effective against armor, combat bonus in snow, can form wedge, may charge without orders, good morale, fast moving |
| Onagers | 53 (vs. troops), 70 (vs. buildings) | 0 | Light | 5 | 0 | 3 | 2 | 1 | 730 | 110 | Area attack, very long range missiles, can use flaming missiles, can’t hide, inaccurate against troops |
| Scythian Horse Archers | 3 (melee), 7 (missile) | 2 | Missile | 5 | 3 | 2 | 0 | 1 | 540 | 110 | Can form Cantabrian circle, combat bonus in snow, good stamina, fast moving |
| Scythian Noble Archers | 10 (melee), 11 (missile) | 5 | Missile | 12 | 9 | 3 | 0 | 1 | 880 | 170 | Can form Cantabrian circle, combat bonus in snow, good morale, good stamina |
| Scythian Noble Women | 7 (melee), 11 (missile) | 5 | Missile | 9 | 6 | 3 | 0 | 1 | 650 | 130 | Can form Cantabrian circle, combat bonus in snow, good morale, fast moving |
| Scythian Nobles | 8 | 17 | Heavy | 13 | 9 | 4 | 0 | 1 | 630 | 170 | Combat bonus in snow, can form wedge, may charge without orders, good morale, powerful charge |
| Warhounds | 14 | 4 | Light | 3 | 2 | 1 | 0 | 1 | 720 | 60 | Frighten nearby enemy, combat bonus in woods or snow, fast moving |
Seleucid Units
The Seleucids include a powerful selection of phalanxes, heavy cataphract cavalry, and elephants.
| Unit | ATK | CB | WT | TD | ARM | DS | SHD | HP | RC | UP | MISC |
| Archers | 3 (melee), 7 (missile) | 2 | Missile | 2 | 0 | 2 | 0 | 1 | 190 | 170 | Combat bonus in woods, can use flaming missiles, fast moving, can sap |
| Armored Elephants | 7 (melee), 10 (missile) | 11 | Missile | 19 | 16 | 3 | 0 | 15 | 2870 | 590 | Special attack, bonus fighting against cavalry, frighten nearby enemy, good morale, animals may run amok, can’t hide |
| Cataphracts | 7 | 15 | Heavy | 23 | 18 | 5 | 0 | 1 | 890 | 140 | Can form wedge, good morale, powerful charge |
| Companion Cavalry | 10 | 16 | Heavy | 17 | 11 | 6 | 0 | 1 | 760 | 240 | Can form wedge, good morale, powerful charge, good stamina |
| Elephants | 3 | 10 | Cannot be upgraded | 12 | 10 | 2 | 0 | 12 | 1250 | 270 | Special attack, bonus fighting cavalry, frighten nearby enemy, animals may run amok, can’t hide |
| General’s Bodyguard | 10 | 16 | Heavy | 17 | 11 | 6 | 0 | 2 | 1020 | 130 | Can rally nearby troops, good morale, powerful charge, good stamina |
| Greek Cavalry | 7 | 7 | Light | 8 | 3 | 5 | 0 | 1 | 330 | 110 | Can form wedge |
| Levy Pikemen | 6 | 5 | Heavy | 5 | 0 | 3 | 2 | 1 | 310 | 150 | Can form phalanx, bonus fighting cavalry, poor morale, very long spears, can sap |
| Militia Cavalry | 6 (melee), 6 (missile) | 2 | Missile | 6 | 0 | 2 | 4 | 1 | 340 | 110 | Can form Cantabrian circle, fast moving |
| Militia Hoplites | 5 | 5 | Light | 8 | 0 | 3 | 5 | 1 | 230 | 100 | Can form phalanx, bonus fighting cavalry, poor morale, can sap |
| Onagers | 53 (vs. troops), 70 (vs. buildings) | 0 | Light | 3 | 0 | 3 | 0 | 1 | 720 | 110 | Area attack, very long range missiles, can use flaming missiles, can’t hide, inaccurate against troops |
| Peasants | 1 | 1 | Light | 1 | 0 | 1 | 0 | 1 | 100 | 100 | Poor morale, can sap |
| Peltasts | 3 (melee), 6 (missile) | 2 | Missile | 4 | 0 | 2 | 2 | 1 | 180 | 170 | Can hide in long grass, bonus vs. elephants and chariots, combat bonus in woods, fast moving, can sap |
| Phalanx Pikemen | 8 | 6 | Heavy | 13 | 6 | 5 | 2 | 1 | 580 | 250 | Can form phalanx, bonus fighting cavalry, very long spears, can sap |
| Scythed Chariots | 15 | 8 | Light | 1 | 0 | 1 | 0 | 4 | 980 | 160 | Special attack, frighten nearby enemy, may charge without orders, good morale, animals may run amok |
| Silver Shield Legionaries | 9 (melee), 13 (missile) | 3 | Heavy | 22 | 12 | 5 | 5 | 1 | 710 | 260 | Can form testudo, javelins thrown before charge, good morale, good stamina, can sap |
| Silver Shield Pikemen | 10 | 7 | Heavy | 14 | 6 | 6 | 2 | 1 | 730 | 360 | Can form phalanx, bonus fighting cavalry, good morale, good stamina, very long spears, can sap |
| War Elephants | 7 (melee), 10 (missile) | 11 | Missile | 16 | 13 | 3 | 0 | 15 | 2590 | 490 | Special attack, bonus fighting cavalry, frighten nearby enemy, good morale, animals may run amok, can’t hide |
Spanish Units
The Spaniards offer a good mix of fanatic barbarians and organized infantry with some cavalry support.
| Unit | ATK | CB | WT | TD | ARM | DS | SHD | HP | RC | UP | MISC |
| Bull Warriors | 13 (melee), 17 (missile) | 5 | Heavy | 12 | 5 | 5 | 2 | 2 | 1150 | 200 | Warcry improves attack, expert at hiding in woods, javelins thrown before charge, excellent morale, may charge without orders, good stamina, fast moving |
| General’s Bodyguard | 12 | 9 | Light | 18 | 11 | 7 | 0 | 2 | 1040 | 80 | Can rally nearby troops, good morale, powerful charge, good stamina |
| Iberian Infantry | 7 | 2 | Light | 8 | 2 | 4 | 2 | 1 | 240 | 170 | Warcry improves attack, can sap |
| Long Shield Cavalry | 9 | 8 | Light | 13 | 3 | 6 | 4 | 1 | 510 | 140 | Can form wedge, good morale, powerful charge |
| Naked Fanatics | 13 | 6 | Light | 7 | 0 | 2 | 5 | 1 | 430 | 130 | Warcry improves attack, expert at hiding in woods, combat bonus in woods or snow, may charge without orders, good morale, good stamina |
| Onagers | 53 (vs. troops), 70 (vs. buildings) | 0 | Light | 3 | 0 | 3 | 0 | 1 | 720 | 110 | Area attack, very long range missiles, can use flaming missiles, can’t hide, inaccurate against troops |
| Peasants | 3 | 2 | Light | 3 | 0 | 3 | 0 | 1 | 120 | 100 | Warcry improves attack, poor morale, can sap |
| Round Shield Cavalry | 7 | 2 | Light | 8 | 2 | 4 | 2 | 1 | 300 | 110 | Can form wedge |
| Scutarii | 9 (melee), 13 (missile) | 4 | Heavy | 12 | 5 | 2 | 5 | 1 | 430 | 140 | Warcry improves attack, expert at hiding in woods, javelins thrown before charge, may charge without orders |
| Skirmishers | 3 (melee), 6 (missile) | 2 | Missile | 4 | 0 | 2 | 2 | 1 | 180 | 170 | Can hide in long grass, bonus vs. elephants and chariots, fast moving, can sap |
| Slingers | 3 (melee), 4 (missile) | 2 | Missile | 4 | 0 | 2 | 2 | 1 | 150 | 170 | Fast moving, can sap |
| Town Militia | 3 | 4 | Light | 7 | 0 | 2 | 5 | 1 | 150 | 100 | Warcry improves attack, poor morale, can sap |
| Warhounds | 12 | 2 | Light | 3 | 2 | 1 | 0 | 1 | 520 | 50 | Frighten nearby enemy, fast moving |
Thracian Units
The Thracians feature a good choice of hoplite phalanxes and barbarian close-combat specialists but limited cavalry.
| Unit | ATK | CB | WT | TD | ARM | DS | SHD | HP | RC | UP | MISC |
| Archers | 3 (melee), 7 (missile) | 2 | Missile | 2 | 0 | 2 | 0 | 1 | 190 | 170 | Combat bonus in woods, can use flaming missiles, fast moving, can sap |
| Bastarnae | 14 | 8 | Heavy | 6 | 2 | 2 | 2 | 2 | 790 | 130 | Expert at hiding in woods, combat bonus in woods or snow, may charge without orders, good morale, powerful charge, fast moving |
| Falxmen | 13 | 7 | Heavy | 10 | 3 | 7 | 0 | 1 | 500 | 170 | Expert at hiding in woods, combat bonus in woods or snow, may charge without orders, good morale, fast moving |
| General’s Bodyguard | 12 | 9 | Light | 14 | 3 | 7 | 4 | 2 | 770 | 80 | Combat bonus in snow, can form wedge, good morale, powerful charge, good stamina |
| Greek Cavalry | 7 | 7 | Light | 8 | 3 | 5 | 0 | 1 | 300 | 110 | Can form wedge |
| Militia Cavalry | 6 (melee), 6 (missile) | 2 | Missile | 6 | 0 | 2 | 4 | 1 | 340 | 110 | Can form Cantabrian circle, fast moving |
| Militia Hoplites | 5 | 5 | Light | 8 | 0 | 3 | 5 | 1 | 230 | 100 | Can form phalanx, bonus fighting cavalry, poor morale, can sap |
| Onagers | 53 (vs. troops), 70 (vs. buildings) | 0 | Light | 3 | 0 | 3 | 0 | 1 | 720 | 110 | Area attack, very long range missiles, can use flaming missiles, can’t hide, inaccurate against troops |
| Peasants | 1 | 1 | Light | 1 | 0 | 1 | 0 | 1 | 100 | 100 | Poor morale, can sap |
| Peltasts | 3 (melee), 6 (missile) | 2 | Missile | 4 | 0 | 2 | 2 | 1 | 180 | 170 | Can hide in long grass, bonus vs. elephants and chariots, combat bonus in woods, fast moving, can sap |
| Phalanx Pikemen | 8 | 6 | Heavy | 13 | 6 | 5 | 2 | 1 | 580 | 250 | Can form phalanx, bonus fighting cavalry, very long spears, can sap |
Chapter 2 - Combat Strategies
This section offers a collection of combat strategies and battle tactics to utilize in the Imperial Campaign, historical battles, custom battles, and multiplayer wars.
Army Management
An important aspect of the Imperial Campaign mode is efficient army management. This includes fielding appropriate troops, effective positioning on the campaign map, and upgrading and retraining your army to field the best available troops.
A first decision could include how to produce your army. Early in the Imperial Campaign, it’s better to erect your settlements on an economic foundation rather than training your war machine. Like anything else, training your military requires money. Early in the campaign it’s wiser to use that money to build structures that generate even more money. As time passes in the Imperial Campaign, your decision to focus on economy early will result in much more income per turn--which will result in much more freedom to train any desired army as the campaign progresses.
Since you train one military unit per turn in each settlement, don’t always construct every military structure at each settlement. Generating all of your infantry, archers, and cavalry units from the same settlement isn’t very efficient. You won’t train an army very quickly this way. Instead, focus particular settlements on certain unit types. Focus one settlement on training cavalry by building a stable there; or focus another settlement on archers by constructing a practice range there. A barracks is wise at many of your structures so you can train town watch to help "police" the town. A small garrison is good for keeping public order higher. Remember though that if you want to retrain a cavalry group to replenish units, the settlement must contain a stable. So build necessary structures along the front line so you aren’t wasting turns retreating well into your provinces just to retrain.
In general you want armies to consist of a mixture of unit types--some cavalry, some ranged units, and some infantry units. Since each unit type bears its own strengths and weaknesses against other unit types, it’s important to have each on hand so you can most effectively counter what the enemy fields against you.
Use rally points to position created units toward your main army; another reason is so you don’t forget units you’ve created and leave them inside town and unused in your primary force.
Utilize spies to gather information about enemy armies and defenses. Because counters are so important, you can use the information gathered to train specific unit types or to merge armies to better battle the specific foes.
Build watch towers or use small armies to scout along your provinces to spot enemy troop movement. Keep your primary army mobile so you intercept any advancing foe or protect any vulnerable settlement on your province’s edges. Remember that if you have two different armies adjacent to an enemy army, reinforcements will be provided; though the reinforcements (those units you didn’t move to attack with) will be controlled by the computer unless you lose a majority of your other forces.
Keeping an army positioned inside a settlement can certainly aid in its defense if you’re attacked and it can add to your public order but it’s not effective in intercepting other forces as your empire grows larger. Also, parking a large army in a town seems to add to that town’s level of squalor, which is tough to combat if it grows out of control. Plus the upkeep cost is a big downside. A handful of cheaper, less needy town watch can serve the same public order purpose as long as you monitor enemy movement near that settlement.
Specific soldiers lost from a unit group can be retrained from a settlement’s population if that settlement contains the corresponding structure (for example, you’ll need a stable to retrain a cavalry group). Also, as you add structures that improve weaponry and armor (primarily a blacksmith but there are temples that offer bonuses to weapons and armor), you can retrain the forces to upgrade their weapons and armor. Note that if you’re using the retrain option to refill a unit’s soldiers, the new soldiers won’t have the same experience level as the grizzled veterans that remained from the previous battles (if applicable at least). Obviously it’s important to protect your experienced units as much as possible so they aren’t refilled with rookie troops.
Capable Leadership
Though not required to command an army, a capable general can increase the potency of your soldiers. Any named character can become a general but it’s wise to be selective and choose a named character with some "stars" under the command statistic that you can build upon.
As you continue through the Imperial Campaign, new named characters will be added to your roster. When you’re notified of an impending wedding, scan over your daughter’s suitor and gauge his potential as a future general before giving your blessing. Deny your daughter if her possible husband isn’t up to your standards and rate another potential named character some turns later.
Note that named characters also gain an entourage. These characters provide bonuses to your named characters and can actually be exchanged between named characters. You may want to convert a general into a governor and add some management bonuses or perhaps the named character is about to perish--he takes his entourage with him so it’s wise to trade off those bonuses before you lose them.
Like a governor gaining management skills through prolonged management, a general builds his command statistic through successful battles. Therefore it’s important to keep your general intact through each battle so you build his command statistic and improve his ability to influence your troops. A general does this by strengthening the skill and morale of the troops during the battle; your soldiers fighting near the general receive the biggest boost.
Obviously it’s wise to keep your general as safe as possible, though your general and his bodyguard’s are more than capable fighters. Don’t use your general unit against counter forces. If possible gain the largest advantage possible when sending your general unit into battle; for instance, use a flanking maneuver to hit an enemy’s rear side or battle enemy forces already engaged with other ally units.
A general’s death is like toppling dominos. It affects the morale of your troops and will cause your forces to rout much faster than if your general was present and healthy. Likewise, eliminating an enemy general can turn a battle’s tide in your favor or just quicken the inevitable. This is why taking care of your general is important. You might be winning the battle then all of a sudden you carelessly lose your general, causing your troops to panic. If you do survive the battle, you may incur many more losses than you would have otherwise. Plus if your general dies in battle, he can’t reproduce and continue that family line.
Fighting the Smart Fight
It’s important to remember that Rome: Total War battles aren’t simply about numbers. Obviously it’s to your advantage to have more troops than the enemy you attack but if you don’t fight the smart fight, those numbers can dwindle very quickly. Conversely, you could be far outnumbered by a computer-controlled enemy and still emerge victorious if you fight the smart fight and use counter unit situations properly.
There are some generalities you can make about unit types, though it’s best to read each description to discover their true strengths and weaknesses. But in general, archers are best used against slower moving infantry; cavalry are best used against weakly armored ranged units; and infantry are best used against cavalry units. Specifically, though, it’s spearmen that counter cavalry; infantry can hold its own against cavalry but spearmen are true counters. Heavy cavalry are generally best used against lighter cavalry.
Protect your ranged units against a cavalry rush by keeping infantry and spearmen units close. Cavalry can decimate an archer line with very little effort. On offense you should look for an opportunity to rush ranged units with your cavalry groups. Avoid remaining within range of enemy archers unless you’re setting up an attack. On the flip side, inflict as much damage from a distance as possible. Weaken your enemy’s infantry or cavalry units from long-range with your own ranged attack.
Elephants are fierce adversaries. Units like war dogs and incendiary pigs can help counter elephants; both of these smaller animals frighten the elephants and can cause the large animal to run amok and even crush its own ally forces. Spearmen, the counter to cavalry, also work against elephants (preferably surrounding the beast) and even skirmishers can prove effective. In skirmish mode, ranged units can attack and retreat to keep ahead of the enemy elephant.

Use unit groupings to help keep track of counter groups. For instance, place your general and his bodyguard in one group, so you can recall the squad quickly and maneuver them toward your fighting soldiers to help boost morale (or to even engage the enemy). Place cavalry in another group to set up a flanking maneuver. Set your ranged units in another group to easily switch targets or recall them to retreat from charging attackers.
Avoid battling counters. Don’t charge cavalry at a group of spearmen or leave archers alone against approaching cavalry. Also watch how the enemy sets up its forces. If enemy reinforcements begin behind you, don’t sit still and wait to be surrounded. Move from the middle or mount a faster attack against one group to avoid fighting both.
Setup and Position
The Total War battle engine isn’t like a typical real-time strategy game. You don’t simply rubber band select all of your units, click on the enemy unit, and watch the fight unfold. How you setup and position your units before and during the battle has a huge effect on the outcome. Proper positioning can help you win battles where you’re outnumbered; improper positioning can cause you to lose battles where you outnumber your opponent.
Unit types--and fighting the smart fight--dictate positioning. Don’t leave ranged units away from your main army or they’ll be charged by a cavalry group. Don’t keep your own cavalry back behind your forces while enemy ranged units pelt your infantry without consequence.
A flanking maneuver, where you attack an enemy’s rear side, is very, very powerful. This can’t be stressed enough. Shields protect units from the front leaving the rear far more unprotected. Further, when you attack an enemy’s rear side, that enemy is usually engaged from the front. This means your flanking attackers can assault unopposed.
Cavalry are optimum flanking units because of their increased speed. Engage enemy spearmen from the front with infantry then assault their flank with cavalry. Send war elephants into the flank of an engaged enemy and watch the troops fly. Attacking units from the side or rear should be high priority during battles.
Keep unit groups spread as battle becomes imminent. Don’t clump yourself into a small group. It may work in some real-time strategy games but it will only get your army surrounded in Total War. Spread your forces so you have options on how to better position your units as the enemy approaches but keep them close enough together so you can adjust unit groups over into flanking or counter moves.
Note that you can also spread or tighten individual soldiers by using loose or tight formations. Toggle to loose formation when under archer fire; toggle to tight formation when preparing to engage in melee combat. Utilize terrain in your setup and position as well. Higher ground is notably important for ranged units.
Watch friendly fire! It’s possible to slay a lot of your own infantry with your own archers if you’re firing arrows into a big skirmish. Check where your archers target and try to avoid too many self-inflicted wounds.
Even though an enemy is in retreat doesn’t mean the battle is over. Use cavalry units to chase down fleeing soldiers. Any enemy that escapes the field of battle returns to an army on the campaign map. This army might get retrained or merged with another force and you’ll have to deal with them again. If you’ve won the fight and have the enemy in retreat, finish the job. But don’t pursue if you need help elsewhere. Use those troops to aid any allies in need before committing to a chase.
Street Fight
Becoming a conqueror will require battles around and within enemy settlements. Though you may be able to "siege" most settlements (starve them until they eventually give up), it will often become advantageous for you to assault the settlement before reinforcements arrive.
In the Imperial Campaign, as you advance tiers and build new ranges, you’ll gain access to siege weaponry, which can be used to bombard gates, walls, and wall defenses. Early on, however, you can build battering rams to knock down those gates or use spies to infiltrate settlements (spies have a small chance of opening that gate for you).
It’s possible to use ranged units to fire over small walls and at the enemies within the settlement. Careful moving ranged units close to wall defenses, however; just as it’s possible to shoot the enemy, it’s possible to be shot from here as well. As you advance technologically, fire siege weaponry over settlement walls to bombard tightly packed unit groups. Weaken those defenders before pushing through.
You can break apart the gate and even sections of the wall to provide several entrances into the settlement. Settlement entrances are fierce chokepoints. Using a few entrances can help get squads inside the settlement quickly so you can aid groups at other entrances. Fighting along the streets is similar. The roads are narrow so be careful how you lead the charge. Don’t lead with ranged units only to get charged by cavalry. Maneuver other groups along other streets so you can surround enemy forces and use the chokepoints to your advantage.
Formations, Abilities, and Morale
Preset formations position your troops into columns or various lines and can even sort troops by type. You can place your cavalry up front, infantry up front, or ranged units up front. Against an approaching enemy, at least in general, it’s wise to place shorter-ranged missile units in front (like velites) and longer ranged in the rear (to protect them better).
Infantry make up the bulk of your middle line while cavalry units protect the corners and prepare to capitalize on flanking opportunities. Keep your general behind your forces so he’s not rushing into battle first against counter units. Position him near fighting allies to help boost their morale.
Some units feature special abilities that improve their attack or even lower morale against enemy troops. For instance, firing flaming arrows at enemy troops can cause their morale to lower. Some cavalry can use the form wedge ability, which when used can split apart enemy groupings as the cavalry charges through. Certain infantry contain the testudo ability; activate this ability to cause the infantry to use their shields to form a turtle-like shell as protection against projectiles.
Morale has a significant effect on how your troops perform in engaged battles. Fortunately you have the means to affect morale both positively for your forces and negatively against the enemy’s troops. The close presence of your general has a positive effect on your troops’ morale while your general’s death crushes your troops’ hopes. Conversely, the presence of the enemy general lowers your troop morale while eliminating or routing the enemy general increases morale.
Other events positively affecting morale include outnumbering your enemy, causing enemy units to rout, using animals, and numerous special abilities (fire arrows, war chants). Other events negatively affecting morale include being outnumbered by enemy troops, having some of your men surrender, and being on the other side of animal units or special abilities.
If morale dips too low, the troops are routed and retreat to save their lives. Generals help rally routed troops by moving close while other routed forces might recover on their own after a hearty retreat. Though it’s often important to wipe out every unit, including those fleeing the battle, it’s even more important to concentrate on the enemy units still fighting to their death. Allow routed troops to run off and shift your confident attackers to remaining battles. You can chase down those troops after aiding your fellow troops in their engagement.
Chapter 3 - Imperial Campaign Tips
This section provides tips specific to Rome: Total War’s Imperial Campaign mode. This includes a rundown of the Roman’s settlement structures, their requirements and benefits, and efficient ways to manage a settlement’s population, public order, and income. For combat tips specific to the Imperial Campaign, check out the Combat Strategies section of this game guide.
Settlement Structures
You’ll shape your capital and conquered settlements with a series of structures like markets and military buildings as well as enhancements like roads and public baths. These structures affect the types of military units you can produce, your people’s happiness and order, and your settlement’s income generated through trade and taxation.
This section covers the Imperial Campaign technology tree for the Roman family factions: Julii, Brutii, and Scipii. The charts reveal the building name, city level required (population determines the city’s size level, which determines available structures), any other prerequisites, and the buildings primary benefits. Note that each new benefit doesn’t erase prior benefits. For instance, the Governor’s House enables the training of peasants. Future government structures still allow the training of peasants in addition to their new benefits.
Government
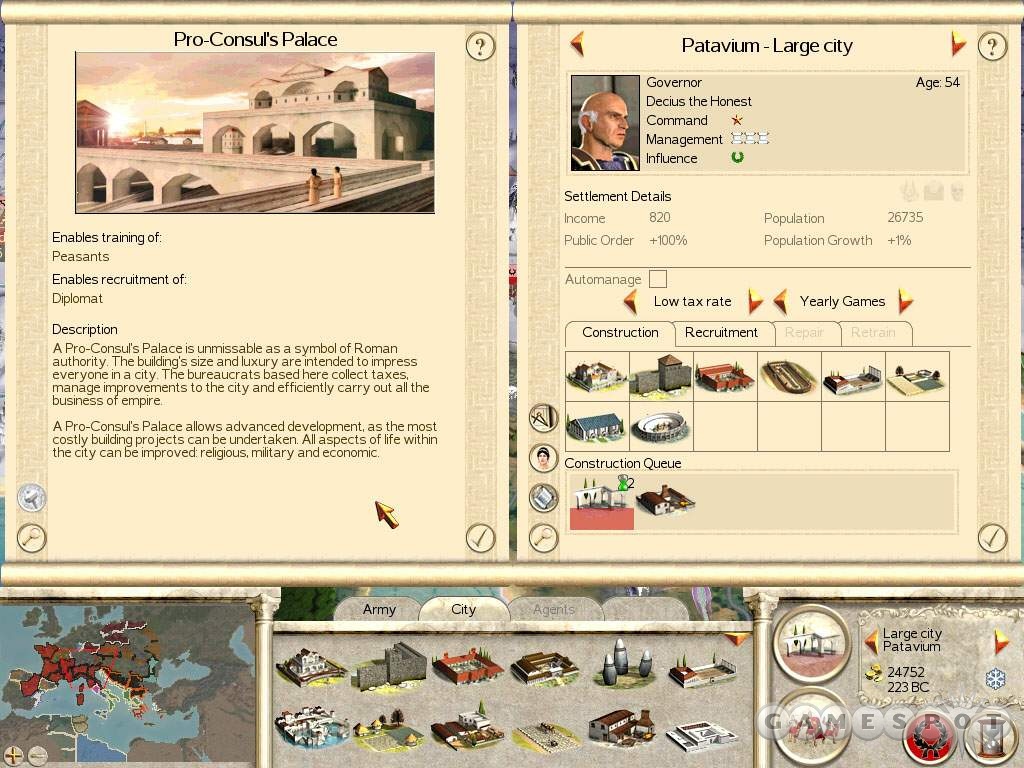
Upon reaching the required population level, build the next government structure to open up the Roman tech tree and its newly available buildings. For example, when you reach the population requirement for a large town, build the Governor’s Villa to open up all other large town required structures throughout the tech tree (though some may carry other prerequisites). The Governor’s Villa is also required for the recruitment of the diplomat, which is used to negotiate with or bribe other factions.
| Building | City Level | Benefits |
| Governor’s House | Town | Enables training of peasants. |
| Governor’s Villa | Large Town | Enables recruitment of diplomat. |
| Governor’s Palace | Minor City | N/A |
| Pro-Consul’s Palace | Large City | N/A |
| Imperial Palace | Huge City | Provides improved General’s bodyguards. Enables training of praetorian cohort. |
Walls
Protect your settlements with wall defenses. The wall defenses appear on the battlefield map should your settlement become attacked. The attacking faction must contend with your wall’s defenses before engaging your troop defenders inside the settlement in close-range combat. The added wall defenses can also help your settlement hold out longer against a siege. The longer your settlement can hold out, the longer you have to maneuver an army to aid in the settlement’s defense (or to train more soldiers inside the settlement to prepare defense). Note that each new wall type further increases your settlement’s defensive strength in addition to any new benefits.
| Building | City Level | Benefits |
| Wooden Palisade | Town | Extra wall defenses. |
| Wooden Wall | Large Town | Reinforced gates. |
| Stone Wall | Minor City | Boiling oil. |
| Large Stone Wall | Large City | Iron gates. |
| Epic Stone Wall | Huge City | Extra wall defenses. |
Temples
Each Roman family features a unique set of three different temples. Each temple provides a settlement with benefits that can enhance public happiness, population growth, public order, or aid your military personnel with experience and better weapons and armor. Note that each settlement can only have one type of temple. For example if you are playing as the Julii family and build a shrine to Ceres in your settlement, you won’t be able to build a Shrine to Jupiter in that same settlement.
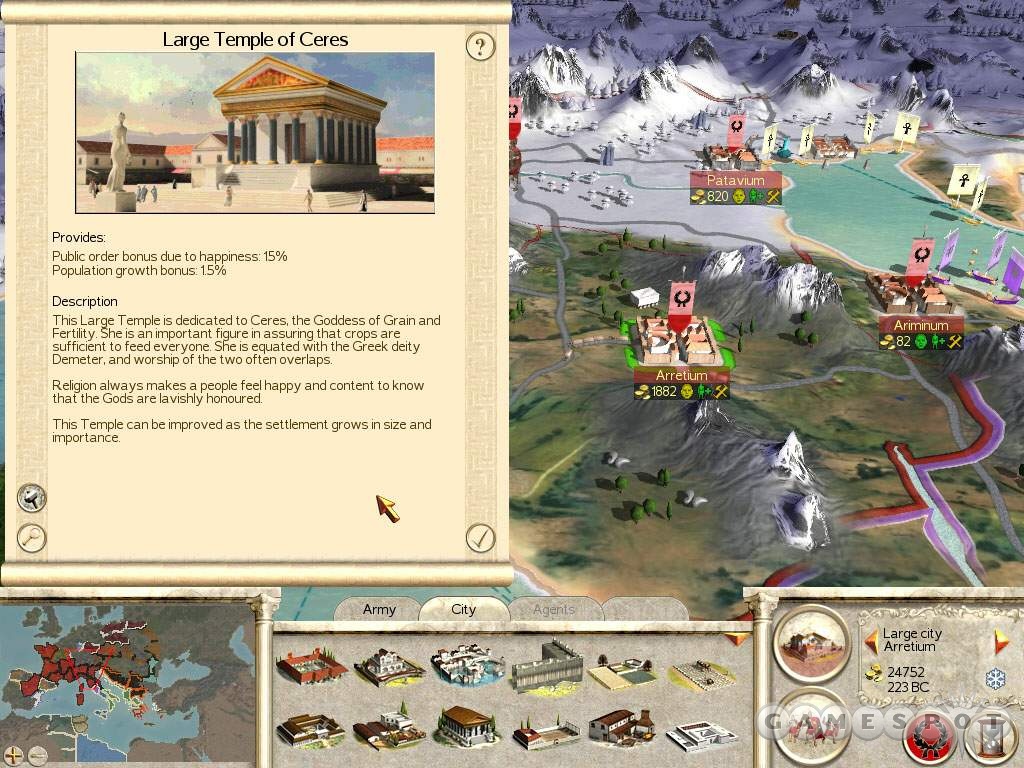
Use a temple to enhance various facets of your settlement. For instance, Scipii players can mold their military-focused settlements with the Vulcan temples, which enhance weapons and armor for military units trained at that settlement. Brutii players can do the same with Mars temples, which enhance experience for military units trained at that settlement. The Neptune temple in the Scipii family requires a port; the two largest temples in the line provide unique naval vessels to help the Scipii better control the seas.
Julii Temples
The following chart lists the temples available to the Julii family: Ceres, Bacchus, and Jupiter.
| Building | City Level | Benefits |
| Shrine to Ceres | Town | Public order bonus due to happiness: 5%; population growth bonus 0.5% |
| Temple to Ceres | Large Town | Public order bonus due to happiness: 10%; population growth bonus 1% |
| Large Temple to Ceres | Minor City | Public order bonus due to happiness: 15%; population growth bonus 1.5% |
| Awesome Temple to Ceres | Large City | Public order bonus due to happiness: 20%; population growth bonus 2% |
| Pantheon (Ceres) | Huge City | Public order bonus due to happiness: 35%; population growth bonus 2.5%; public order bonus due to law: 10% |
| Shrine to Bacchus | Town | Public order bonus due to happiness: 10% |
| Temple to Bacchus | Large Town | Public order bonus due to happiness: 20% |
| Large Temple to Bacchus | Minor City | Public order bonus due to happiness: 30% |
| Awesome Temple to Bacchus | Large City | Public order bonus due to happiness: 40% |
| Pantheon (Bacchus) | Huge City | Public order bonus due to happiness: 50%; population growth bonus 1%; public order bonus due to law: 10% |
| Shrine to Jupiter | Town | Public order bonus due to happiness: 5%; public order bonus due to law: 5% |
| Temple to Jupiter | Large Town | Public order bonus due to happiness: 10%; public order bonus due to law: 10% |
| Large Temple to Jupiter | Minor City | Public order bonus due to happiness: 15%; public order bonus due to law: 15% |
| Awesome Temple to Jupiter | Large City | Public order bonus due to happiness: 20%; public order bonus due to law: 20%; enables training of arcani. |
| Pantheon (Jupiter) | Huge City | Public order bonus due to happiness: 35%; public order bonus due to law: 10%; enables training of arcani. |
Brutii Temples
The following chart lists the temples available to the Brutii family: Juno, Mercury, and Mars.
| Building | City Level | Benefits |
| Shrine to Juno | Town | Public order bonus due to happiness: 5%; public health bonus: 5% |
| Temple to Juno | Large Town | Public order bonus due to happiness: 10%; public health bonus: 10% |
| Large Temple to Juno | Minor City | Public order bonus due to happiness: 15%; public health bonus: 15% |
| Awesome Temple to Juno | Large City | Public order bonus due to happiness: 20%; public health bonus 20% |
| Pantheon (Juno) | Huge City | Public order bonus due to happiness: 25%; public health bonus: 25%; increase in tradable goods; experience bonus to troops trained: +2 |
| Shrine to Mercury | Town | Public order bonus due to happiness: 5%; increase in tradable goods. |
| Temple to Mercury | Large Town | Public order bonus due to happiness: 10%; increase in tradable goods. |
| Large Temple to Mercury | Minor City | Public order bonus due to happiness: 20%; increase in tradable goods. |
| Awesome Temple to Mercury | Large City | Public order bonus due to happiness: 30%; increase in tradable goods. |
| Pantheon (Mercury) | Huge City | Public order bonus due to happiness: 25%; increase in tradable goods; public health bonus: 10%; experience bonus to troops trained: +1 |
| Shrine to Mars | Town | Public order bonus due to happiness: 5% |
| Temple to Mars | Large Town | Public order bonus due to happiness: 10%; experience bonus to troops trained: +1 |
| Large Temple to Mars | Minor City | Public order bonus due to happiness: 15%; experience bonus to troops trained: +2 |
| Awesome Temple to Mars | Large City | Public order bonus due to happiness: 20%; experience bonus to troops trained: +3; enables training of arcani. |
| Pantheon (Mars) | Huge City | Public order bonus due to happiness: 25%; experience bonus to troops trained: +3; morale bonus to troops trained: +1; increase in tradable goods; public health bonus: 10%. |
Scipii Temples
The following chart lists the temples available to the Scipii family: Vulcan, Saturn, and Neptune.
| Building | City Level | Benefits |
| Shrine to Vulcan | Town | Public order bonus due to happiness: 5%; upgrades light weapons: +1 |
| Temple to Vulcan | Large Town | Public order bonus due to happiness: 10%; upgrades light weapons: +1; upgrades heavy weapons: +1. |
| Large Temple to Vulcan | Minor City | Public order bonus due to happiness: 15%; upgrades light weapons: +1; upgrades heavy weapons: +1; upgrades armor: +1. |
| Awesome Temple to Vulcan | Large City | Public order bonus due to happiness: 20%; upgrades light weapons: +1; upgrades heavy weapons: +1; upgrades armor: +1; experience bonus to troops trained: +1. |
| Pantheon (Vulcan) | Huge City | Public order bonus due to happiness: 25%; upgrades light weapons: +1; upgrades heavy weapons: +1; upgrades armor: +1; experience bonus to troops trained: +1; public order bonus due to law: 10%. |
| Shrine to Saturn | Town | Public order bonus due to happiness: 5%; public order bonus due to law: 5%. |
| Temple to Saturn | Large Town | Public order bonus due to happiness: 10%; public order bonus due to law: 10%. |
| Large Temple to Saturn | Minor City | Public order bonus due to happiness: 15%; public order bonus due to law: 15%. |
| Awesome Temple to Saturn | Large City | Public order bonus due to happiness: 20%; public order bonus due to law: 20%; enables training of arcani. |
| Pantheon (Saturn) | Huge City | Public order bonus due to happiness: 25%; public order bonus due to law: 25%; upgrades light weapons: +1; upgrades heavy weapons: +1; upgrades armor: +1; enables training of arcani. |
| Shrine to Neptune (requires port) | Town | Public order bonus due to happiness: 5% |
| Temple to Neptune | Large Town | Public order bonus due to happiness: 10% |
| Large Temple to Neptune | Minor City | Public order bonus due to happiness: 15% |
| Awesome Temple to Neptune | Large City | Public order bonus due to happiness: 20%; enables training of corvus quinquireme. |
| Pantheon (Neptune) | Huge City | Public order bonus due to happiness: 25%; public order bonus due to law: 10%; upgrades light weapons: +1; upgrades heavy weapons: +1; upgrades armor: +1; enables training of decere; enables training of corvus quinquireme. |
Barracks
Add a barracks to your settlement to train melee-based soldiers. As your settlement grows (and required government structures are built), construct the next type of barracks to train even more powerful types of melee-based infantry to add to your town’s defense or to your mobilized army. The barracks can train different types of infantry depending on pre-Marius (pm) or after Marius (am) reform.
| Building | City Level | Benefits |
| Barracks | Town | Enables training of town watch. |
| Militia Barracks | Large Town | Enables training of hastati (pm) or auxilia (am) |
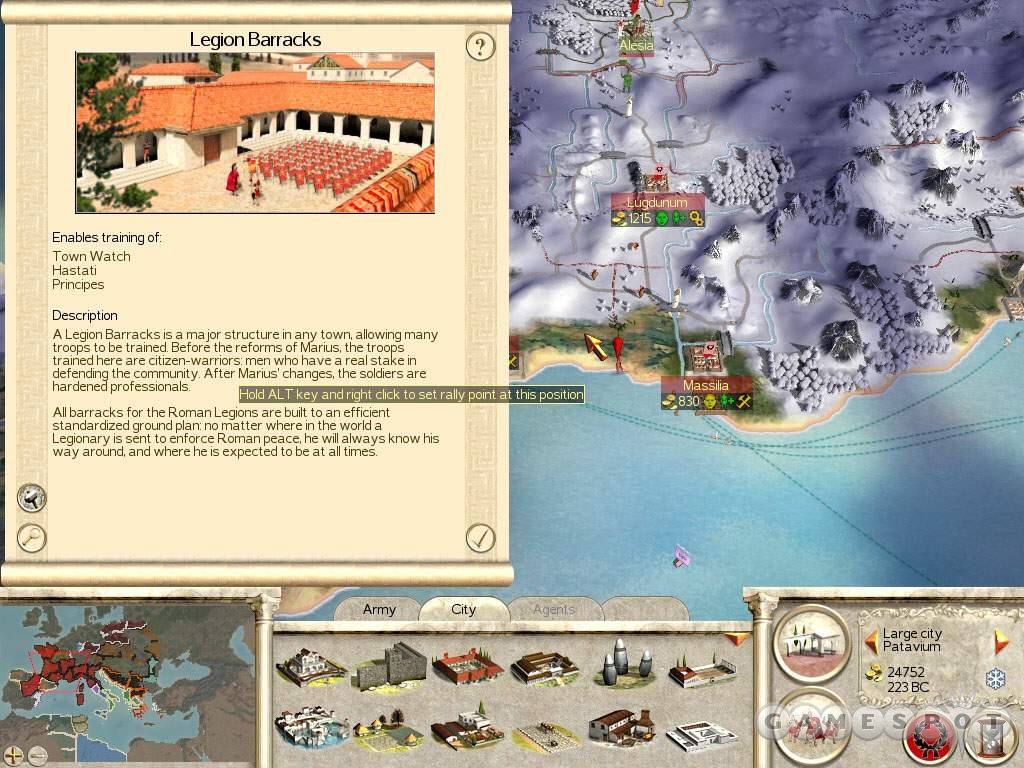
| Legion Barracks | Minor City | Enables training of principes (pm) or early legionary cohort (am) |
| Army Barracks | Large City | Enables training of triarii (pm) or legionary cohort (am) |
| Urban Barracks | Huge City | Enables training of urban cohort |
Stables
Construct a stable in your settlement to produce cavalry units for addition in your armies. As your settlement grows, construct the next type of stable to train even stronger types of cavalry in both pre-Marius and after Marius reform conditions. The stable is also the prerequisite for the wardog and incendiary pig unit types (used to strike fear into enemy soldiers as well as tough-to-battle elephants). Note that the Hippodrome and Circus Maximus stables also allow races to be held, which aid in increasing your settlement’s public order due to happiness--increase race frequency (though at a cost) to increase settlement happiness.
| Building | City Level | Benefits |
| Stables | Large Town | Enables training of wardogs and equites (pm) and roman cavalry (am) |
| Cavalry Stables | Minor City | Enables training of cavalry auxilia (pm) and roman cavalry (am) |
| Hippodrome | Large City | Enables training of legionary cavalry and incendiary pigs. Allows races to be held. |
| Circus Maximus | Huge City | Enables training of praetorian cavalry. Allows races to be held. |
Missiles
The missile line of settlement structures enables the training of ranged-units. Like barracks and stables, as your settlement grows, construct new ranges to add stronger ranged-based soldiers (both pre- and post-Marius reform additions). Also, once you reach the Archery Range and above you can begin to produce siege weaponry beginning with the ballista.
| Building | City Level | Benefits |
| Practice Range | Large Town | Enables training of velites (pm) and light auxilia (am) |
| Archery Range | Minor City | Enables training of roman archers (pm) or archer auxilia (am) and ballistas |
| Catapult Range | Large City | Enables training of scorpions and onagers. |
| Siege Engineer | Huge City | Enables training of heavy onagers and repeating ballistas. |
Trade
Increase your settlement’s income with the addition of the trader structure and its subsequent enhancements. To gain the most from your trader structure, you should also construct roads, paved roads, and highways as availability arises. The trade structures also provide a small boost to your settlement’s population growth. The forum, available at the minor city level, also enables the recruitment of the assassin, which can be used to terminate enemy (or even ally) leaders in armies or towns as well as wandering diplomats. Note also that trade structures are the prerequisites for other buildings, such as blacksmiths, health, academies, and amphitheaters.
| Building | City Level | Benefits |
| Trader | Town | Increase in tradable goods; population growth bonus: 0.5% |
| Market | Large Town | Increase in tradable goods; population growth bonus: 0.5%; enables recruitment of spy. |
| Forum | Minor City | Increase in tradable goods; population growth bonus: 0.5%; enables recruitment of assassin. |
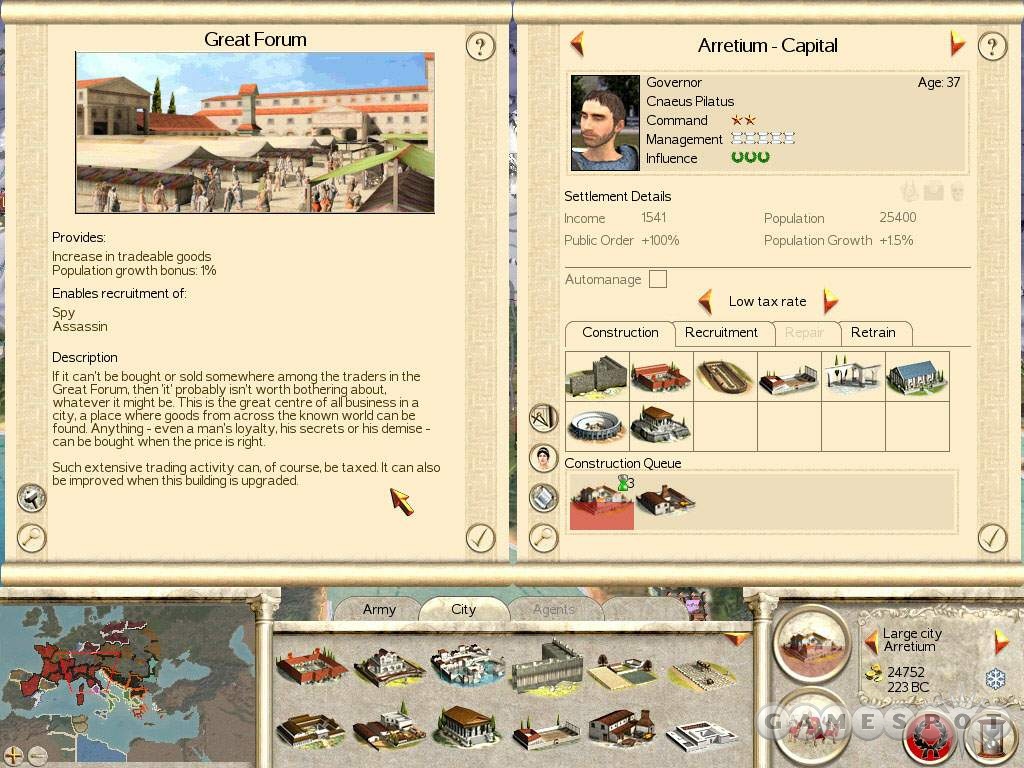
| Great Forum | Large City | Increase in tradable goods; population growth bonus: 1% |
| Curia | Huge City | Increase in tradable goods; population growth bonus: 1%; public order bonus due to happiness: 10% |
Weapons
The weapons-line of structures enhances your melee, cavalry, and ranged units weaponry and armor. After adding a blacksmith, armourer, or foundry to your settlement, retrain present soldiers to receive the enhanced weapons and armor. Your settlement must have a trader to build a blacksmith; a market to build an armourer; and a great forum to build a foundry.
| Building | City Level | Prerequisite | Benefits |
| Blacksmith | Large Town | Trader | Provides upgrade to light weapons +1; upgrade to heavy weapons +1 |
| Armourer | Minor City | Market | Provides upgrade to light weapons +1; upgrade to heavy weapons +1; upgrades to missile weapons +1; upgrades to armor +1 |
| Foundry | Huge City | Great Forum | Provides upgrade to light weapons +2; upgrade to heavy weapons +2; upgrades to missile weapons +2; upgrades to armor +2 |
Naval
The naval structures offer two primary benefits. Build the port, shipwright, and dockyard to enable the training of naval units, the bireme, trireme, and quinquireme. Utilize your naval fleet to protect your ports and trade lanes and, conversely, to disrupt your enemy’s (or ally’s) ports and trade lanes. Blockading an adversary’s port can significantly reduce the affected city’s income. But the naval structures are also essential to generate income via sea trade. Each new naval structure increases the number of trade fleets available from that settlement. Upgrade each settlement in the trade route to maximize income for each of those settlements.
| Building | City Level | Benefits |
| Port | Large Town | Provides trade fleets available: 1; enables training of bireme. |
| Shipwright | Minor City | Provides trade fleets available: 2; enables training of trireme. |
| Dockyard | Large City | Provides trade fleets available: 3; enables training of quinquireme. |
Health
The public health structures, as you might expect, help keep your citizens healthy. After building a trader in your large town, get the sewers up and running to receive the initial public health bonus. Constructing the health structures as you reach new population levels can help keep the unhealthy limitations to your population growth more under control.
| Building | City Level | Prerequisite | Benefits |
| Sewers | Large Town | Trader | Provides public health bonus: 5%. |
| Public Bath | Minor City | Market | Provides public health bonus: 10%. |
| Aqueduct | Large City | Forum | Provides public health bonus: 15%. |
| City Plumbing | Huge City | Great Forum | Provides public health bonus: 20%. |
Farms
Feed your citizens with the construction of farms. These additions help support larger populations and also generate income. The more population you support, the quicker you can reach a new city level and better structures; the more income you generate, the sooner you can construct newly available buildings and the better support you can provide to your troops.
| Building | City Level | Benefits |
| Land Clearance | Town | Improved farms and food production: +1. |
| Communal Farming | Large Town | Improved farms and food production: +2. |
| Crop Rotation | Minor City | Improved farms and food production: +3. |
| Irrigation | Large City | Improved farms and food production: +4. |
| Latifundia | Huge City | Improved farms and food production: +5. |
Roads
Improved roads allow your troops and your trade routes to move farther per turn. Better trade routes essentially means more income for your settlement; basically the trade route can move faster per turn, which means it can conduct more trade per turn as to increase your settlement’s trade income. Don’t hinder your trade operation with shoddy roads. Upgrade your roadwork as you upgrade your trade to keep the income flowing.
| Building | City Level | Benefits |
| Roads | Town | Improved roads and trade. |
| Paved Roads | Large Town | Improved roads and trade. |
| Highways | Minor City | Improved roads and trade. |
Mines
If you control a settlement in a province that contains a resource that can be mined then your settlement can build mines! Its construction is a no-brainer. Construct the mine in an available settlement to increase that settlement’s income.
| Building | City Level | Benefits |
| Mines | Town | +200 to mining income. |
| Mines +1 | Large Town | +350 to mining income. |
Academies
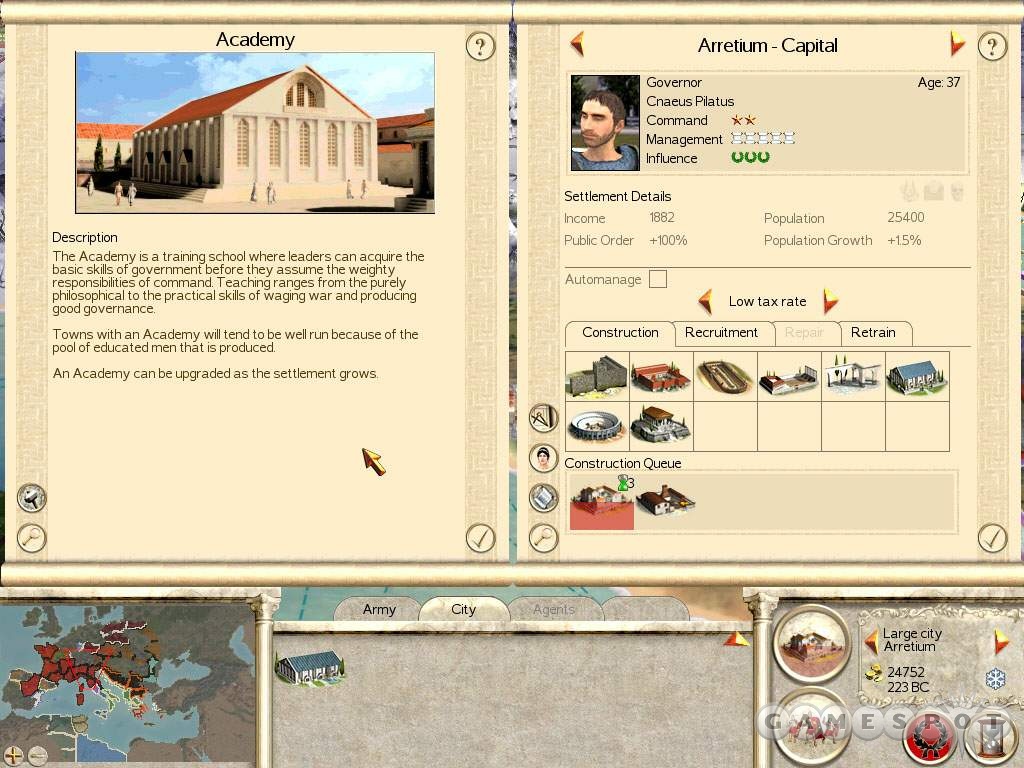
Construct an academy to increase the skills of present named characters in the particular settlement. For example, building an academy in a settlement will begin to give your governor better skills that increase his ability at management. The greater education also improves bonuses applied to your named characters as they add retinue and other traits.
| Building | City Level | Prerequisite | Benefits |
| Academy | Minor City | Market | Improves skills of generals. |
| Scriptorium | Large City | Forum | Improves skills of generals. |
| Ludus Magna | Huge City | Great Forum | Improves skills of generals. |
Amphitheatres
The amphitheatre structures increase your settlement’s public order due to happiness with the inclusion of gladiator games. You can increase game frequency to further boost happiness at some financial expense. Note that the amphitheatres also enable the training of samnite gladiators for each of the three Roman families.
| Building | City Level | Prerequisite | Benefits |
| Arena | Minor City | Market | Public order bonus due to happiness: 5%; allows gladiatorial games to be held; enables training of samnite gladiators (Brutii) |
| Amphitheatre | Large City | Forum | Public order bonus due to happiness: 10%; allows gladiatorial games to be held; enables training of samnite gladiators (Julii) |
| Coliseum | Huge City | Great Forum | Public order bonus due to happiness: 15%; allows gladiatorial games to be held; enables training of samnite gladiators (Scipii) |
Managing Settlements
There are many variables that contribute to an efficiently managed settlement. You must maintain public order; doing so could contribute to population growth while neglecting could contaminate your city with growth-stumping squalor. You must adjust tax levels to keep your citizens happy and population growing while still generating the income necessary to fund new settlement structures and your war machine. You must build a network of trade, construct farms, and generate other income to create a profitable economy for the long haul. And of course you must consider military structures to bolster your town’s defenses and to train an army to conquer new settlements and begin the process a new.
Combat is also a big part of the Imperial Campaign. For specific battle tactics for use in the Imperial Campaign, proceed to the Combat Strategies section of this game guide.
The Governor’s Role
Named characters (can also be known as family members) are turned into governor’s upon entering a new ungoverned settlement. Also note that a settlement’s governor can change. You may turn one into a general and lead an army out of the settlement and into battle while moving in another family member to the settlement to begin a career as the town’s new governor. It’s better to utilize a governor than not. A settlement with no governor seems to suffer from corruption, which affects your bottom line taking away from the settlement’s gross income.
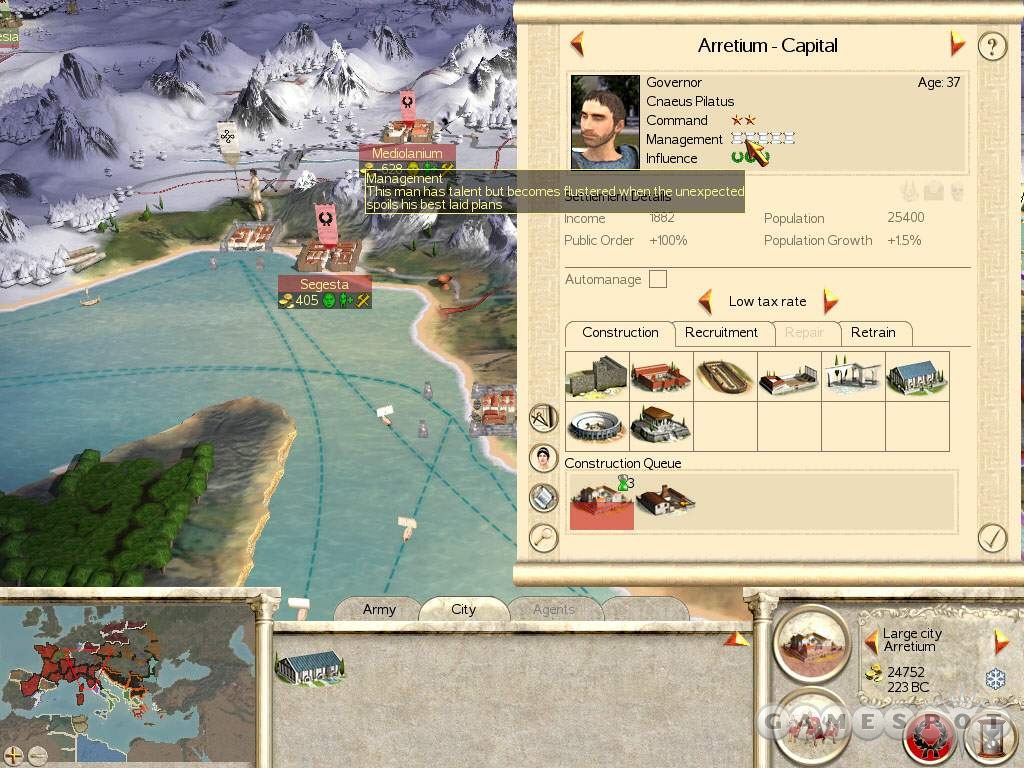
The governor is not simply a figurehead, however; even if you’re the one calling the town’s shots, the governor’s prowess still has its effect on the settlement’s general stability. Three principle statistics mold any named character: command, management, and influence. Of the three, management is the most important statistic for an effective governor. He’ll improve this statistic over time--if, with your help, he’s managing an efficient settlement--and can be further improved with the help of academies later in the settlement’s history.
You do have some control over the new named characters that join your family. From time to time you’re notified that one of your daughter’s has chosen a husband. You’ll be able to scan over his statistics and if you deem them not worthy of your empire, you can refuse your blessing and force your daughter to choose again. As you peruse these new suitors, consider their management statistic as your main priority for governorship with influence being a second priority (it helps increase public order). Command is the primary statistic for an effective general.
As with any named character, a governor gains an entourage of other characters that provide specific bonuses. You don’t have to stick with the same entourage and can actually trade these with other named characters. Maximize your governor’s potential by gathering the best entourage available. There might not be better bonuses but it’s important to check.
Settlements don’t require governors but expect governed settlements to flourish more in general. You can have an equal amount of control over a non-governed settlement or just turn the settlement’s build policy on autopilot by cycling through military, cultural, growth, and the other construction priorities. Conversely you can have as little control over a governed settlement as well by toggling the AI management and allowing your computer-controlled governor handle all the work. The better the management statistic, the better he’ll perform in his auto duties.
As your role of "assistant governor" be sure to check a settlement’s details page frequent to see what is affecting your settlement’s population growth, public order, and income. Use the information to make necessary adjustments to counter problems.
Affecting Population Growth
You’ll likely quickly notice the first way to control your settlement’s future: taxation. It’s easy to adjust your settlement’s taxes and just as easy to notice its immediate effect. In general, higher taxes mean smaller population growth; higher taxes also contribute to citizen unrest, which affects public order. But higher taxes also generate more tax income from your population. On the opposite side, lower taxes mean larger population growth and less citizen unrest (at least due to taxes!) but less tax income generated from your population.
In the long run, it’s not to your advantage to increase your settlements’ populations as quickly as possible. It’ll certainly get you into the higher tiered structures faster but it won’t matter if you don’t have the economy to support them. In fact, fast population growth can adversely affect a settlement through squalor (more on this later). Check the settlement details page to see what’s affecting your population growth both positively and negatively.
To succeed in the long term, it’s wiser to concentrate on building each settlement’s economy to its fullest potential before worrying about population growth or even conquering new settlements. Keep your tax rate relatively high to curb population growth, though not at the expense of public order. Use the tax income to begin construction of the tier’s important structures; once in place you can begin to focus on growing your population. Focus on public order-boosting and economic structures.
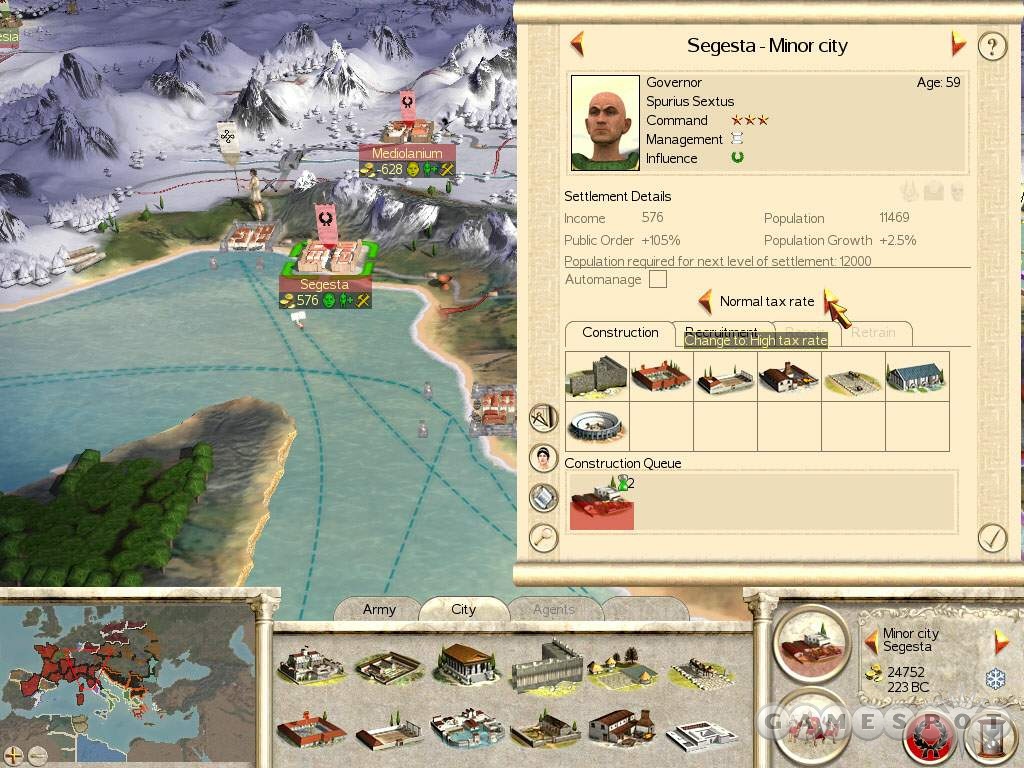
If you do want to increase population growth, you can do so by lowering taxes, which as an immediate effect. If you are the Julii family, construct a shrine to Ceres (and its subsequent upgrades through the tiers) to receive a bonus to population growth. Increase your cities happiness (by increasing public order) through sewer structures, temples, farms, trade, etc. Examine the settlement details to see what’s adversely affecting public order and counter it. As the city grows, you can increase happiness with races and games as well as increasing the frequency of races and games. The better your farming system, the more population you’ll attract.
As you conquer new settlements, you can increase population throughout your other settlements (at least those with governors) by enslaving the population of your newly conquered settlement. This disperses population throughout your other settlements. After doing so make a quick scan of each settlement’s details to see the effects of the influx of new citizens.
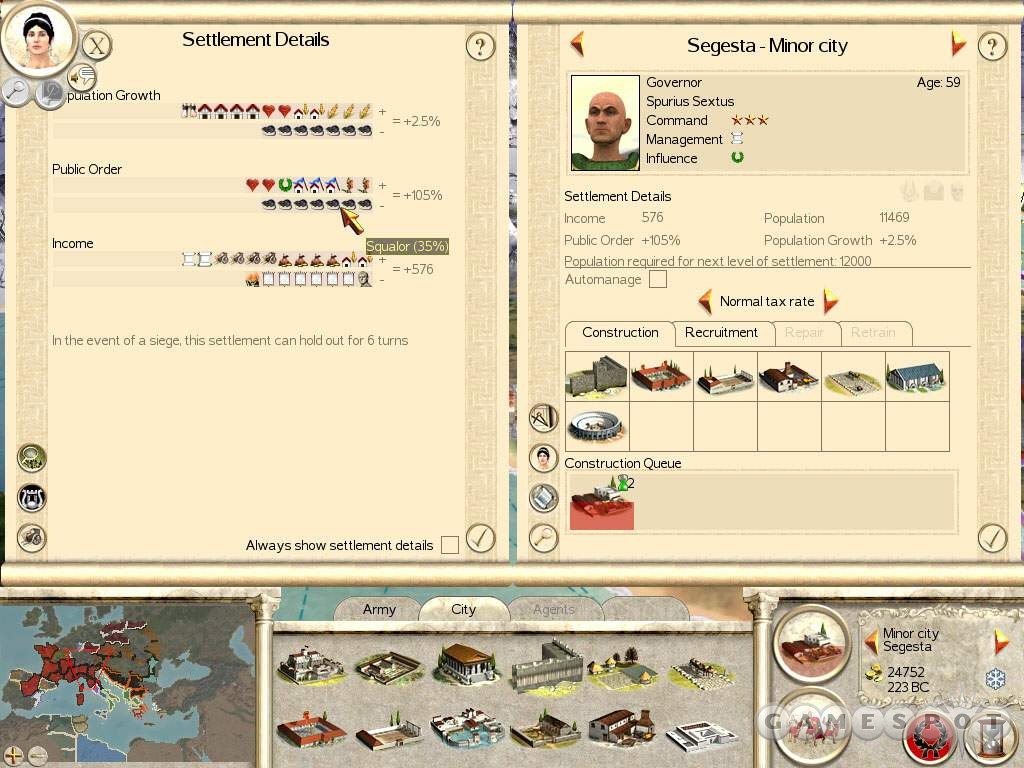
Squalor is a problem that arises from essentially too much population without the necessary infrastructure support. It’s basically inevitable for larger cities. Too many people mean that some are living in squalor, which affects your population growth and more importantly your public order. As stated before, it’s best to grow slowly. Concerning yourself with money over population growth will allow you to put the structures in place to help adequately support a higher population (build the sewer line early too). If you find squalor a problem in the future, then curb growth completely with higher taxes. Counter the hit to public order with increased games or races or other means. You could also relocate some of your population through training and moving them to another settlement.
Something that can "kill" population growth is the plague. If you have a settlement infected, remove any infected members from the town and it may recover over several turns. It’s possible to infect other settlements with the plague so be careful moving units into other towns during these events. On the same note, though, you may want to utilize the plague as a devious tactic against enemy settlements. It is possible to infect the enemy. Try sending an infected spy into an enemy settlement. Be sure your settlements have the public health structures, which you should have built early on. These can help curb the plague quicker.
Maintaining Public Order
Public order relates to your settlement’s level of happiness. The higher your citizens’ happiness, the greater your public’s order; the lower your citizens’ happiness, the greater your public’s disorder. Public order can affect population growth and even income so it’s important to keep your citizens happy. Numerous variables can affect your citizens’ happiness. Don’t forget to monitor the settlement details frequently to see what’s making your populace happy or angry.
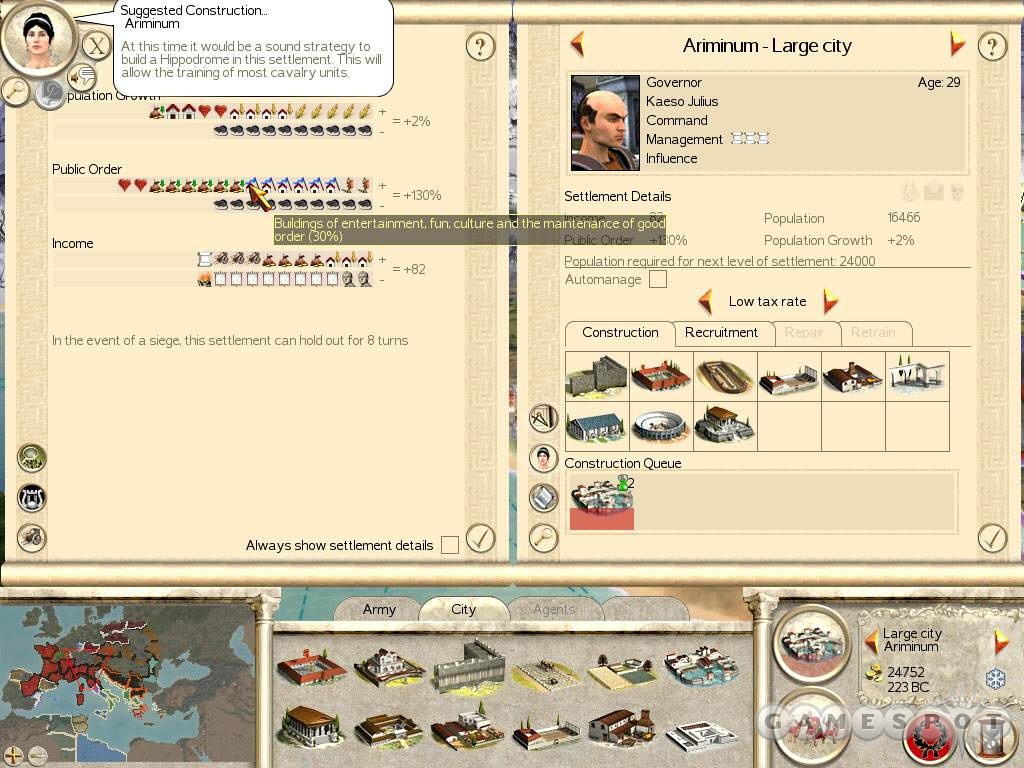
- Higher taxes lower public order while lower taxes raise public order.
- A garrison (even just a handful of town watch) can increase public order. The lack of any garrison and defenses can lower public order. Don’t overdo a garrison, however. It’s not cost effective and seems to increase squalor in the long haul if you keep a large army garrisoned for extended term.
- Increased public health adds to your public order. Increase health by adding sewers, and subsequent enhancements, to your settlement.
- A governor’s high influence rating can increase public order.
- If a settlement is a far distance from the capital, it can lower public order.
- Entertainment activities (games, races) can increase public order. The frequency of the activities can also affect public order.
- Many temples have bonuses to public order. Be sure each of your settlements benefits from a temple. Choose wisely since each settlement can have just one type of temple (for instance you can’t have a shrine to Ceres and a shrine to Jupiter in the same settlement).
- A population boom can actually enhance public order.
- Cultural differences can lower public order. For instance, if you occupy captured settlements from a different faction, the cultural differences between your leadership and the occupied citizens lead to public disorder. You can affect this by exterminating new settlements upon capture or even moving armies into the settlement and disbanding as well as eliminating buildings, particularly temples it seems, from the prior regime.
- Cultural buildings, such as trade structures, enhance public order.
Generating Income
The foundation of your imperialistic war effort will be your income. Just as there are numerous factors that affect population growth and public order, there are many variables that adjust a settlement’s income. As stated previously in this section, it’s wise to think economy first. How you develop your settlement from its inception can have long term effects on its viability as an economic cornerstone to current and future expansion efforts. Neglecting income-producing structures and trying to pumping out military buildings and trained soldiers will hinder expansion and defenses in the long term.
The primary structures generating income will be farms, trade, ports, roads, and mines. Plus, you’ll generate a large portion of income from taxation. Farms generate income as well as allow your settlement to support a greater population (the more food, the more people your settlement can support), which in turn generates greater tax revenue.
The trade line of structures (trader, market, forum, great forum, curia) are not only prerequisites for other important buildings (such as sewers) but they’re vital for your settlement’s economy. Each new trade structure increases your settlement’s tradable goods. To complement your trade structures, build roads early and upgrade to paved roads when available. Roads increase trade efficiency and also allow you to move units quicker through the province. Utilize diplomats to visit nearby factions and negotiate trade rights to generate as much trade income as possible for your settlements. Early on this can be extremely helpful in generating additional income.
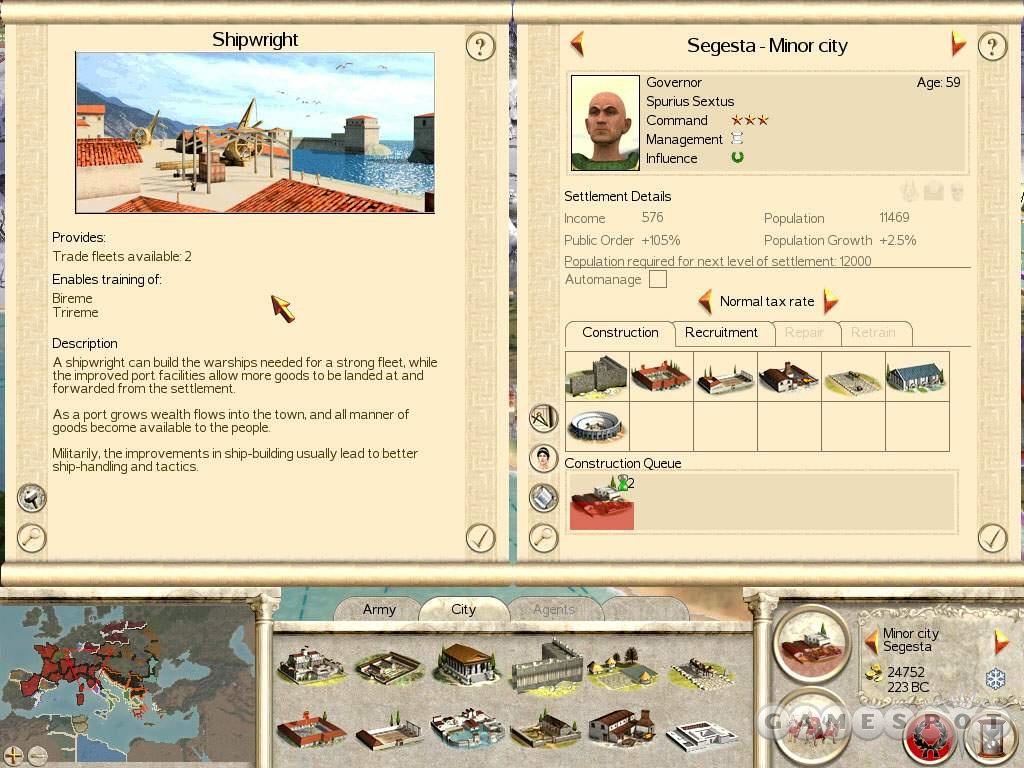
Don’t neglect ports either. Each new port upgrade opens up an additional naval trade lane. Open up ports at each applicable settlement to maximize the number of naval trade lanes available to your faction. Defend your ports with naval units, which you’ll also need to blockade enemy ports (often at the Senate’s request).
Adjusting your settlement’s taxation rate alters generated income. As stated previously, the higher the tax rate, the greater the public disorder. But it’s certainly possible to maintain order with a high tax rate. Use this tactic early in the game to concentrate on your settlement’s economic infrastructure (building farms, roads, trade, and ports and upgrading when available). Maintain the tactic as long as you can maintain public order. Check your settlement details to gauge what’s needed to curb unrest. Don’t neglect sewers, temples, a small garrison and other easy means of increasing order.
Some provinces feature mining areas; in these provinces, construct a mine and the mine +1 upgrade to increase mining income generated from the province.
Structural Decisions
The primary concerns for each settlement are population growth, public order, and income. As you’ve seen in this section, there are numerous variables affecting each of these concerns. Many of these variables result from the types of structures you decide to build in each settlement.
As illustrated throughout this chapter, it’s wise to mold your settlement’s infrastructure before concentrating on population growth or worrying about advanced structures and units. Consider the settlement decisions you make early on and how they’ll affect the settlement long-term. Ushering in a weak governor will mean smaller growth, a more inefficient economy, and possibly unrest (or at best, the need to constantly balance out growing disorder).
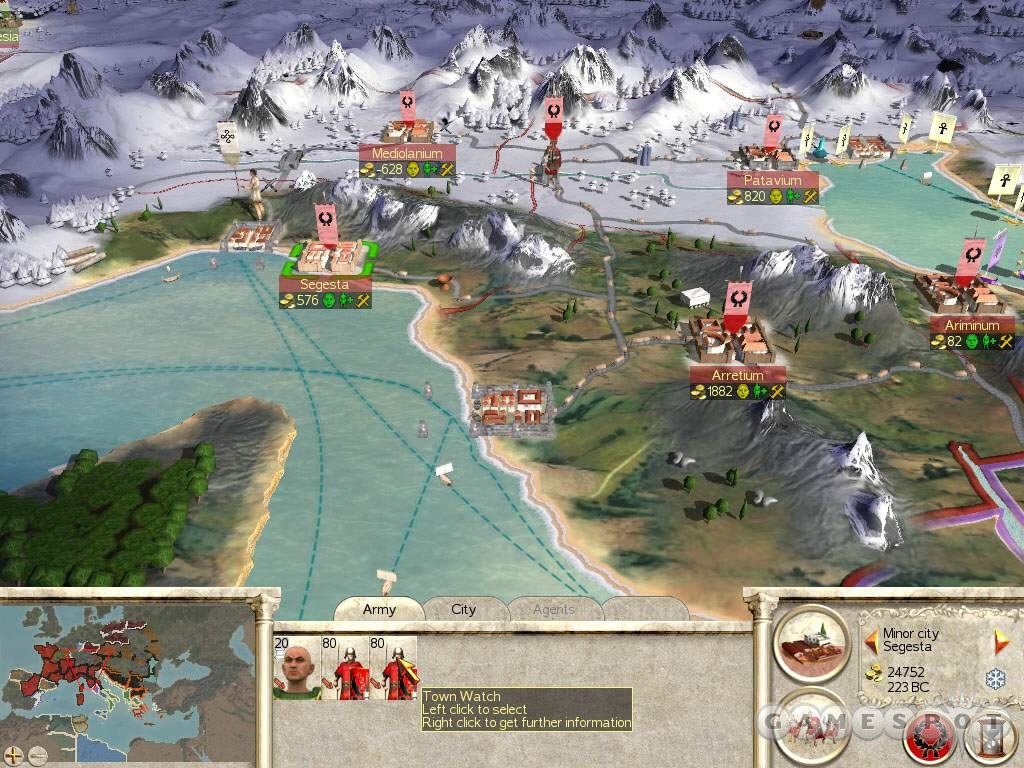
Focus on your economy and public order before your military. Construct advancements in roads, farms, ports, trade, sewers, and temples. You may want a barracks in each settlement to create town watch as a small garrison (which helps maintain public order). Too much military, however, affects your bottom line and also seems to affect order and population-hampering squalor.
Integration
As you expand your empire through new provinces, move your capital from your initial starting point toward the center of your empire. If you keep the capital at its original location, your outer provinces will lose some public order based on their distance from the capital. If you move your capital, you can counter these effects.
When you conquer a new settlement you have three choices on how to deal with its current population. Although it’s a military decision, it’s also an economic decision.
You can occupy the settlement, which retains its population. The advantages are you could already be at higher tier structures; plus greater population means greater tax income. However, the disadvantages are the population isn’t used to your culture and the differences can result in reduced public order. Also, the higher population can lead to more squalor if the settlement doesn’t have the proper infrastructure.
Next you could choose to enslave the population. This spreads population through other conquered settlements as long as the settlement contains its own governor. Use this to increase pop at other settlements as you’re looking to advance to the next tier and structure set. If you do this, though, don’t neglect to get the next tier economic and order structures in place.
Finally, you can exterminate the population. This provides excellent income but at the cost of the populace. The disadvantages are you will need to wait for the settlement’s population to return to its previous level. However, the advantages are it’s under your rule so cultural differences won’t become an issue. Also, the growth, with infrastructure in place, should reduce squalor in the long term. It becomes more difficult later in the campaign when you conquer sizable cities. The population won’t simply give in to your new rule. It might be better to exterminate than deal with an unruly city that resorts to riots and virtually destroys any potential profit the city might have provided.
Senate Missions
Whether you select to control the Julii, Brutii, or Scipii family, you’ll still have to deal with S.P.Q.R., otherwise known as the Roman Senate. Periodically you will receive notification that the Senate has asked you to complete a specific mission. Often this will require conquering a particular settlement within a specific number of turns but it can also mean blockading a port or handling specific negotiations with another faction.
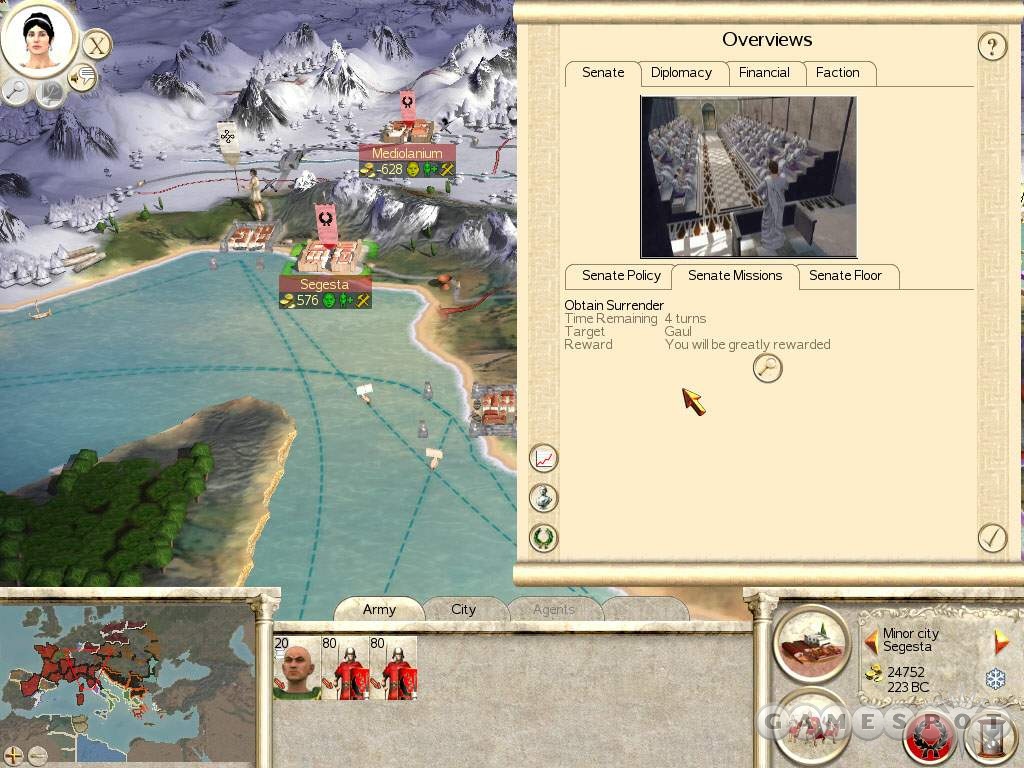
Senate missions aren’t mandatory. Although they do serve to prod you into continuing your empire’s expansion, you technically don’t have to follow Senate orders and can ignore them completely if you wish. Note that you do receive rewards for completing the missions, though. These rewards could include a free unit in your capital or a bundle of funds. Neglecting Senate missions does have consequence. The Senate will begin to look negatively upon your faction and may eventually turn its expansion attention to your lands.
Blockade port missions are fairly easy, though enemy factions do often maintain naval guard around their ports. Don’t get into naval battles unless you have numbers. You don’t actually fight the naval battles so if you’re outnumbered, you’re going to lose the fight. It’s possible to win an outnumbered ground battle because you’re in control and can pull off some crafty tactics but naval battles are fairly straightforward.
If there are enemy ships guarding the port, move your ship close but not next to any of the enemy vessels. Wait a couple turns and the enemy ships may move away from the port. On your next turn, move the ship to the port and initiate the blockade. You don’t have to maintain the blockade to receive the reward. Also note that the Senate will request you to blockade the same port a number of times throughout the Imperial Campaign.
Using Agents
You have three specialty units that don’t wage war with swords, horses, or arrows but they can be equally as potent as any veteran soldier. Diplomats, spies, and assassins are also known as "agents" and feature their own unique abilities that include negotiation, information gathering, and sabotage. Each agent also carries its own structure prerequisite. Build the governor’s villa at the large town level to enable the training of diplomats; construct the market at the large town level to enable the training of spies; and erect the forum at the minor city level to enable the training of assassins.

Diplomats use negotiation as their tool and bribery as their weapon. Utilize diplomats to open negotiations with ally and enemy factions. You can negotiate trade rights to increase your income or you can negotiate an alliance against a common foe. It’s extremely wise to send diplomats around your area and get trade rights early on even if you believe you’ll attack that same faction later in the game. You can also be demanding and order a weaker faction to give up funds or information. Don’t forget to speak with your allies frequently as well--including Roman allies. You’d be surprised what there is to gain from talking with fellow Romans after receiving a Senate mission. You’re all in it together and you may receive multiple rewards for the same task.
Influence is the most important statistic for a diplomat; utilize your diplomat to increase the statistic over time. As you build a highly influential diplomat, you can use him for more nefarious purposes: bribery. Use bribes to steal armies from enemies or to steal named characters, including generals. Obviously bribery requires funds--lots and lots of funds--but if you’ve developed a strong economic structure for your settlements, you should have the funds available to utilize bribing diplomats to accomplish some of the dirty work for you.
Spies are important information gatherers. Use spies to gather information about enemy armies and settlements. Since the counter system is so important in Total War battles, information becomes a weapon. Spies help determine the size (though the approximate size can been gauged from the color fill on the enemy’s flag) and makeup of the enemy army, which helps you prepare your own counter to those enemy forces. Spies can do the same for enemy settlements and can even on occasion open the gate for you if you don’t have siege equipment or don’t want to wait a turn to build a battering ram.
Assassins are another means to create some havoc amongst the enemy armies or settlements without putting your armies in combat danger. You can use assassins to eliminate generals, named characters, or even diplomats wandering around your territory. Assassins become better with experience so utilize them against weak armies or generals and diplomats to build their strength and you can then use your assassin to strike stronger targets. If you use assassins to eliminate all family members from a particular faction, that faction is essentially eliminated.
All agents require a bit more micromanagement and could require more funds than standard military tactics but using diplomats, spies, and assassins effectively can devastate the enemy as equal as any sword.
Chapter 4 - Historical Battles
This section provides walkthroughs and tips for Rome: Total War’s ten historical battles.
The Battle of Lake Trasimene, 217 BC
The formidable Carthaginian General Hannibal has set up an ambush against patrolling Roman Julii forces. Several units of the Julii army attack the Carthaginian "bait" ahead while the remainder of the Julii army waits exposed against the bulk of the Carthaginian ambush emerging from the nearby woods.
You’re on the wrong end of the ambush and begin the historical battle nearly surrounded. The Carthaginians bear a powerful mixed army force, including several dangerous cavalry and spearmen squads that will make your counter moves extremely important.
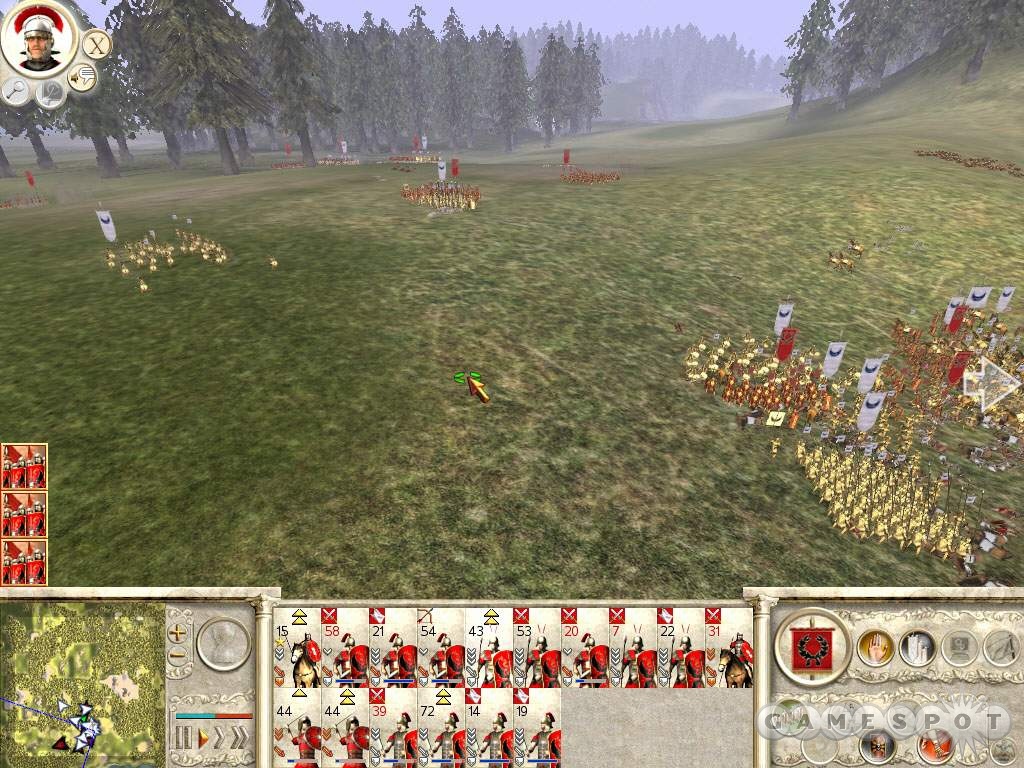
Your first goal is to avoid being surrounded. Pull off your lead infantry away from the "bait" at the front end of the assault. Move them away from the ambushing units emerging from the woods. Your forces at the rear of your patrol should focus on counters. Toggle your triarii spearmen against the approaching cavalry; target your infantry against enemy spearmen; and your velites against approaching infantry. Keep your cavalry units back until the Carthaginians spread somewhat then target the enemy’s ranged units. If you attack with cavalry too early, you’re liable to run into spearmen. Since you’re already outnumbered, fighting against counter units will make an uphill battle even steeper.
Adjust positioning of your forces during the battle so you’re countering the enemy effectively. Don’t allow cavalry to battle spearmen; send infantry against those spearmen and make sure your own triarii are up against any remaining enemy cavalry. Keep your general out of harm’s way until Carthaginian forces split up. Utilize your general’s heavy cavalry group to charge ranged units or to flank infantry. Hit engaged units from the side or rear. Don’t attack too early with your general and certainly don’t leave them along against enemy spearmen. Losing your general in an already outnumbered battle will destroy troop morale.
The Battle of Raphia, 217 BC
In this historical battle you control the Seleucids against an Egyptian army that has managed to lure your general away and into a trap. Immediately select your general’s cavalry unit and order them back toward your main force. Allowing your general to remain in his battle serves little purpose in the larger picture; you need your general with your main force to provide the morale boost during the primary skirmish. When you return your general to your main force, the Egyptian’s cavalry units sent to attack your general will return to the Egyptian’s main lines.
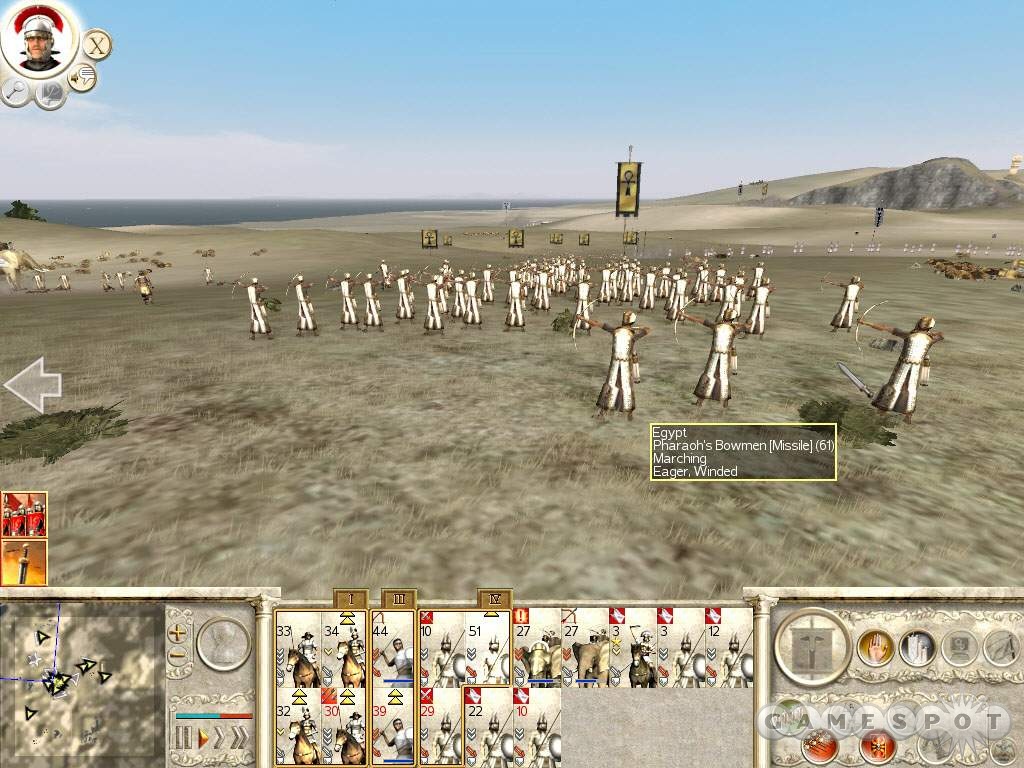
Don’t sit around and allow Egyptian archers to bombard your army, which is nearly devoid of ranged soldiers. Set formation to loose to help counter incoming missiles. Form small groups of cavalry and pikemen to send as counters to approaching Egyptian archers and cavalry units. The Egyptians do contain some of their own spearmen so be careful with your cavalry and don’t get into uphill battles against counter units.
Your war elephants are devastating close-range fighters but can run amok easily if overwhelmed. Keep them with other Seleucid units to remain in a powerful formation of attack. As the Egyptians spread, target cavalry against ranged units, pikemen against cavalry and other spearmen, war elephants against cavalry or even flanking enemy spearmen, and peltasts to bombard any Egyptian units from range. The peltasts become good skirmishers against slow-moving Egyptian spearmen as the tide begins to turn. Protect your general carefully and steer clear of battling spearmen.
As your troops become engaged in battle, move in your war elephants to attack from the side and watch them toss Egyptian soldiers around like dolls. Continually re-evaluate the battle situation to make sure your troops are engaged in advantageous situations. Also, be sure you haven’t neglected any Egyptian archer squads that are sitting there bombarding one of your groups with arrows. Split up your forces as needed to overwhelm remaining Egyptian groups.
The Battle of Telamon, 225 BC
Two armies of Roman Julii forces surround the barbarian Gaul. As instructed in the briefing, the Gaul won’t be able to take on combined Roman forces in a single battle. Not only are the Gaul outnumbered but it’s extremely poor positioning because the Roman forces have effectively flanked the Gaul. Instead you must quickly decimate the Roman forces ahead of you before the approaching Romans from the rear can reach your position and aid their allies in the attack.
Split your forces into specific groupings: add the warhounds to one group to use against enemy cavalry; place the chosen swordsmen in a second group for use against enemy triarii and infantry; group your cavalry units in a third group for flanking moves against enemy cavalry and infantry and for use against Roman ranged units left unprotected; and finally Gaul skirmishers to bombard approaching Romans with projectiles.
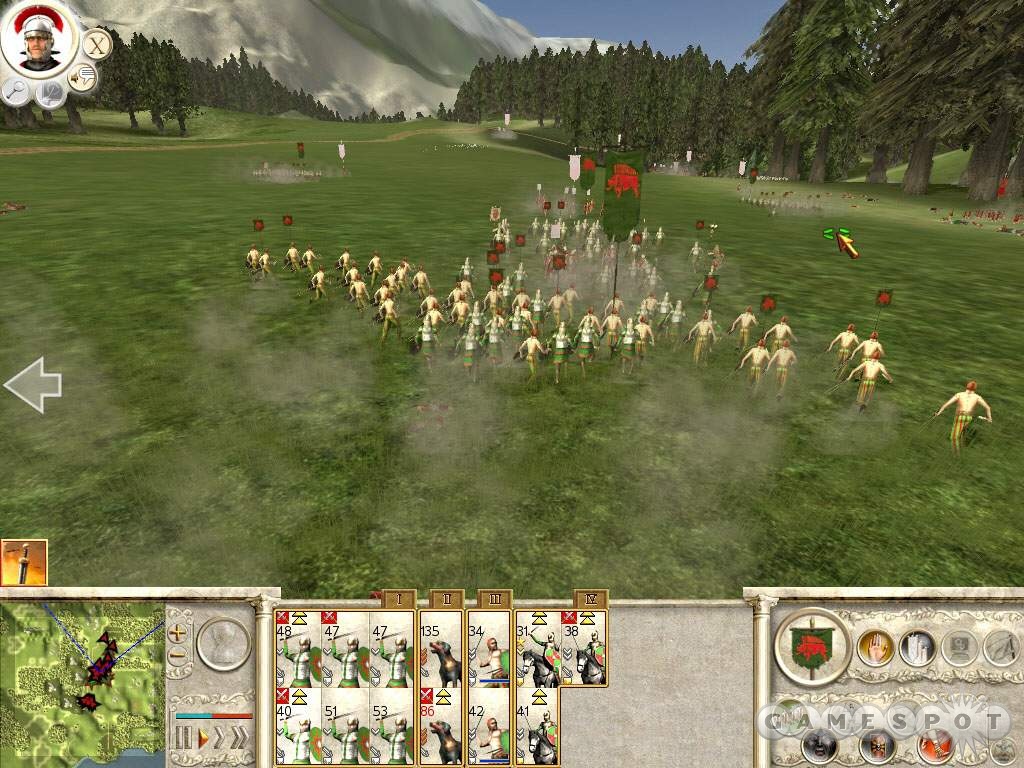
Don’t wait around for the closest Roman army to advance to you. Instead, select your groups and move toward their position. Charge your warhounds against approaching enemy cavalry and use the chosen swordsmen to engage in melee combat with Roman infantry and spearmen. Use the skirmishers to toss projectiles into the bouts but be careful to avoid friendly fire. Keep your cavalry ready to assist the warhounds or infantry units but steer clear of the Roman triarii.
Obviously it’s important to minimize losses because there’s another equal-size Roman army to still fight. Chase down surrendering units; you don’t want any Romans to linger around and return to battle. Scan the battlefield for any groups off to the side, particularly archers still raining damage on your Gaul forces. Send cavalry units to rout them.
With the first Roman army in flight, reorganize your troops and retreat onto the hill on the northern section of the map. The makeup of remaining Roman forces is similar to the first battle so conduct the fight in a similar fashion. The hill should provide some advantage for your remaining skirmishers. Plus you can afford to wait for the Romans to approach this time; since you were flanked earlier, you didn’t have that luxury and had to act quickly. As the Romans approach, make your move with counter units. Use your cavalry effectively to flank cavalry and archers and avoid those triarii.
The Siege of Gergovia, 53 BC
A perhaps overconfident Julius Caesar encountered trouble against crafty Gaul warriors protecting their homeland. On the approach to the Gaul settlement, the Gaul troops surround Caesar’s men. You must manage to hold off the Gaul assault while protecting the battering ram that will demolish the gate into the Gaul settlement. Break down the settlement’s gate with the battering ram and control the town to complete the mission.
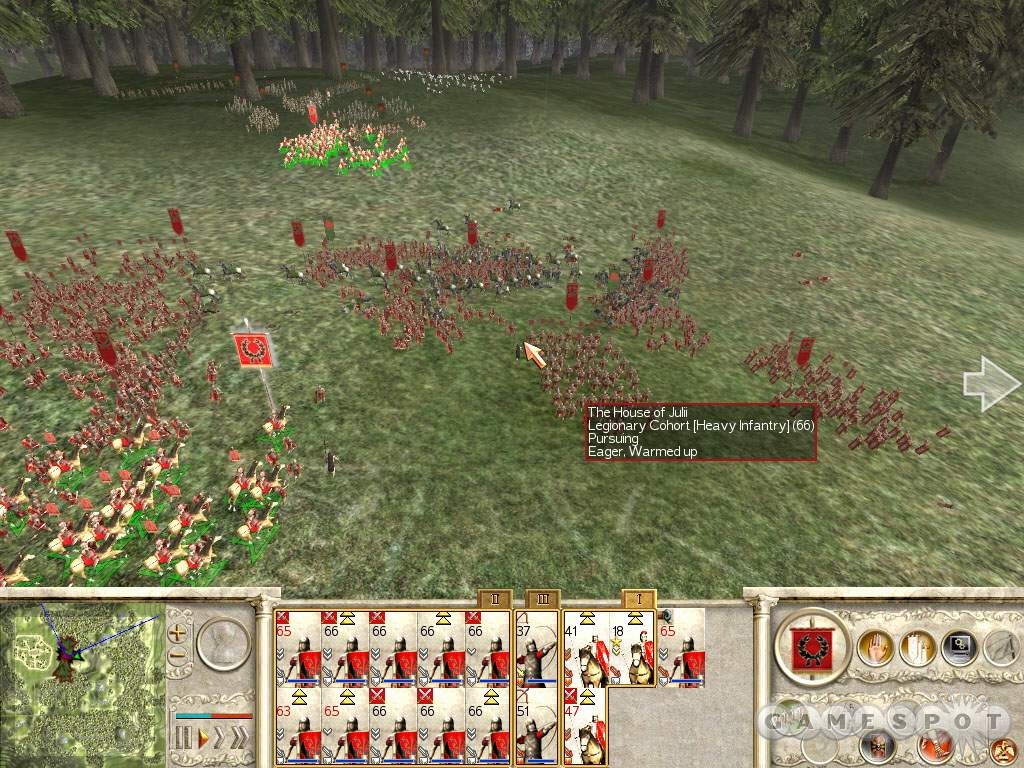
Your troops are out of position and outnumbered but are more powerful than their Gaul counterparts. You possess both legionary cohorts and archer auxilia. Utilize their special abilities to aid in the battle against the Gaul. The cohorts can use the testudo formation, which uses their shields as protection against Gaul ranged fire. The archer auxilia possess flaming arrows; fire them at Gaul heavy cavalry or other enemy units before their charge.
You’re surrounded to the north and south. You could retreat and force the Gaul to position more in front of your troops or you could quickly attack the north or south Gaul. Note that it’s unlikely you can eliminate the northern or southern groups before being flanked by the other. Amongst all this you must also protect the battering ram so you can usher troops inside the Gaul settlement.
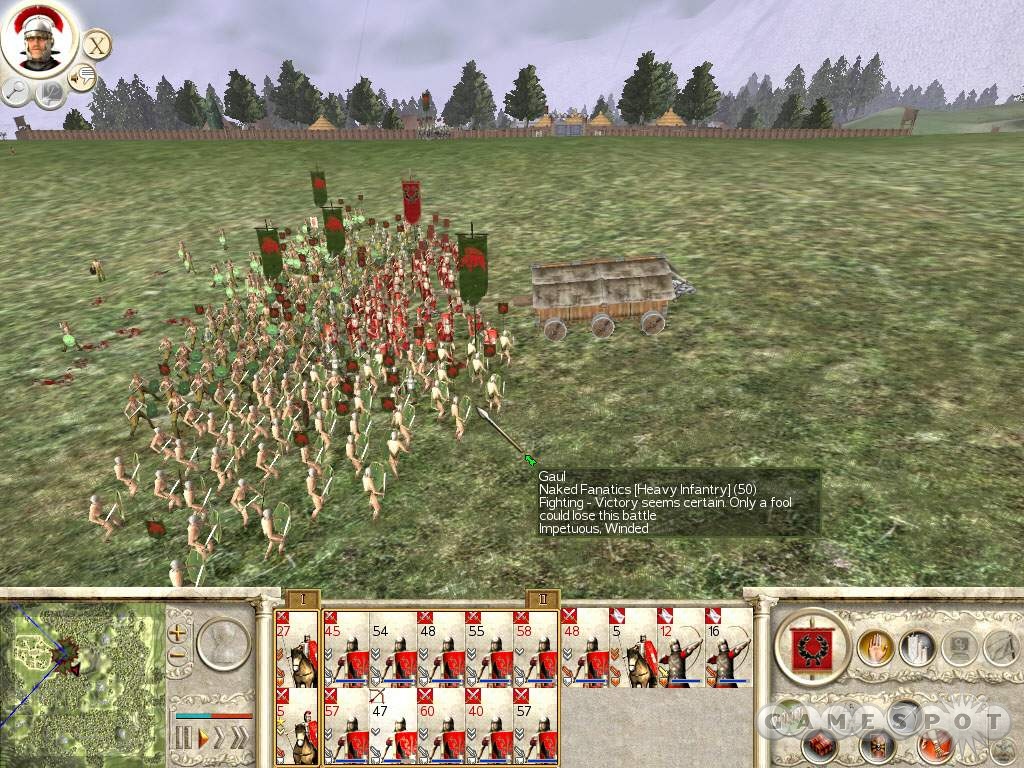
Your troops are strong so your primary battle objective is to avoid, as much as possible, disadvantageous battles. As soon as you see Gaul outnumbering one of your squads, move over your cavalry to flank the Gaul attackers. Watch for the Gaul cavalry to disrupt your archer lines; protect them with cavalry and cohort squads. Once you’ve gained the upper hand outside the settlement, chase down any potential remaining Gaul threats then move the ram to the gate and break it down. Maneuver troops inside, defeat any defenders, and control the settlement to complete the battle.
Battle of the River Trebia, 218 BC
Carthaginian General Hannibal Barca uses an apparent cavalry retreat across the Trebia river to lure Roman forces into a devastating ambush. The stage is set as the historical battle opens. You possess cavalry squads inside woods near the river that are already in flanking position. The key is to wait until the Roman army has advanced far enough to prevent their retreat or, more importantly, their ability to attack the cavalry flankers before your primary army can engage.
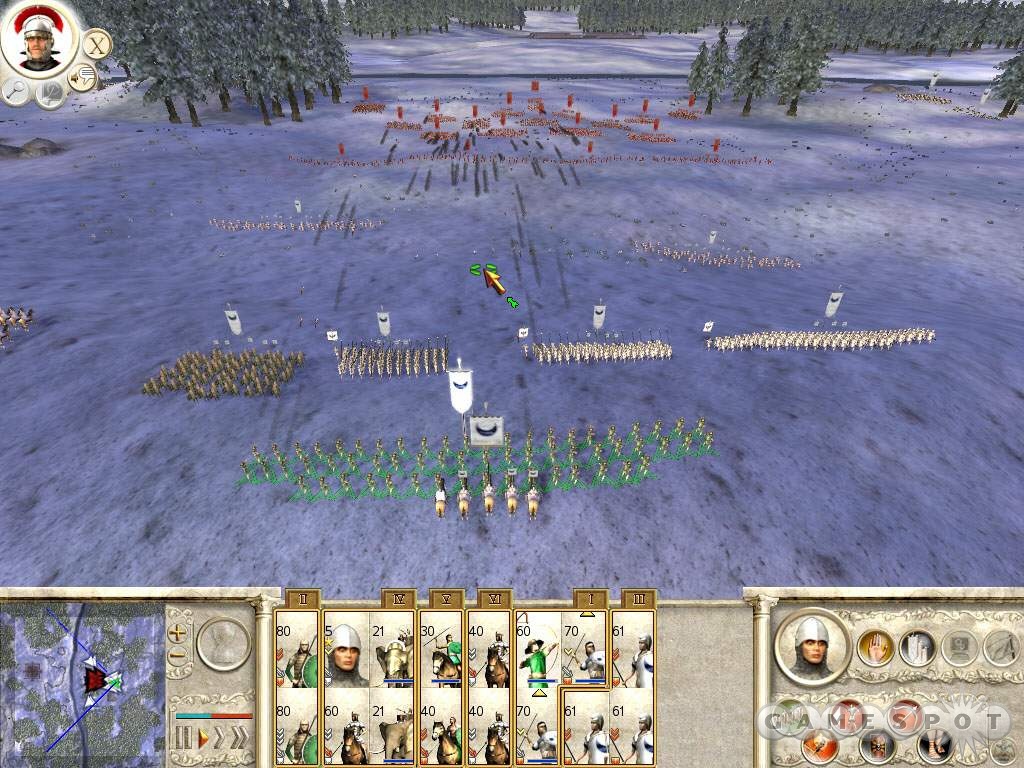
Your position is extremely advantageous. You have Cretan archers and skirmishers ready to assault approaching Roman troops. Use the archers’ flaming arrows. You’ll be able to fire several shots before the Roman army ascends the hill toward engagement. As the Roman army closes in, advance your flanking cavalry behind the Roman forces.
Even though you’ve effectively flanked the Roman forces, you must still fight the smart fight. Avoid sending your cavalry against Roman spearmen unless they’re already engaged with your own infantry units. Charge your elephants in as the Romans engage and watch the bodies fly. Move in your flankers at the moment of engagement to decimate the Roman forces in a perfectly laid trap.
The Battle of Asculum, 279 BC
This historical battle between Senate and the People of Rome (SPQR) and the Seleucids is more straightforward than the previous offerings but still illustrates the most important combat concepts at the heart of Total War. The battle occurs in a large open field; there’s no particular terrain advantage here or a real opportunity to perform a flank maneuver initially. Instead it’s wise to wait for the Seleucids to approach your position and counter the enemy’s move and positioning using counter units.
Separate your units into ranged, infantry, and cavalry units so you can easily target specific counters. Use the velites to bombard the approaching Seleucids upon approach. As the Seleucid’s charge, engage with a counter. Keep your cavalry away from the battle initially. The Seleucids possess plenty of pikemen and your cavalry won’t fare well against those war elephants either.

There’s no reason to be the aggressor until the Seleucids get close. Don’t get into a battle with war elephants away from your main forces. You want the battle to remain close so you can adjust units quickly to battle elephants or pikemen that might be gaining an upper hand. Obviously you want your own spearmen primarily against elephants and enemy cavalry while using your hastate and principes infantry against the Seleucid pikemen. Maneuver cavalry around enemy pikemen to strike the Seleucid missile units.
Ignore routed units initially upon retreat and shift forces to other ongoing battles. Concentrate on downing those war elephants with surrounding pikemen. You’ll have plenty of opportunity to chase down surrendering units to complete the battle.
The Battle of Carrhae, 55 BC
Licinius Crassus leads a legion of the Roman Brutii army against the Parthians--but the Parthians are ready. The Parthian cavalry forces ambush the unprepared Crassus and the Brutii troops and massacre a stray Roman cavalry group. The Parthian ranged cavalry intercept and surround Crassus’ infantry and cavalry forces while the powerful cataphract heavy cavalry charge the trapped Roman forces.
Your Roman early legionary cohorts begin in testudo formation, which protects them against the enemy cavalry archer barrages. Note that as the opening cut scene instructs, the testudo formation also weakens their ability to perform hand-to-hand combat so remember to disengage the formation before fighting the approaching cataphracts.
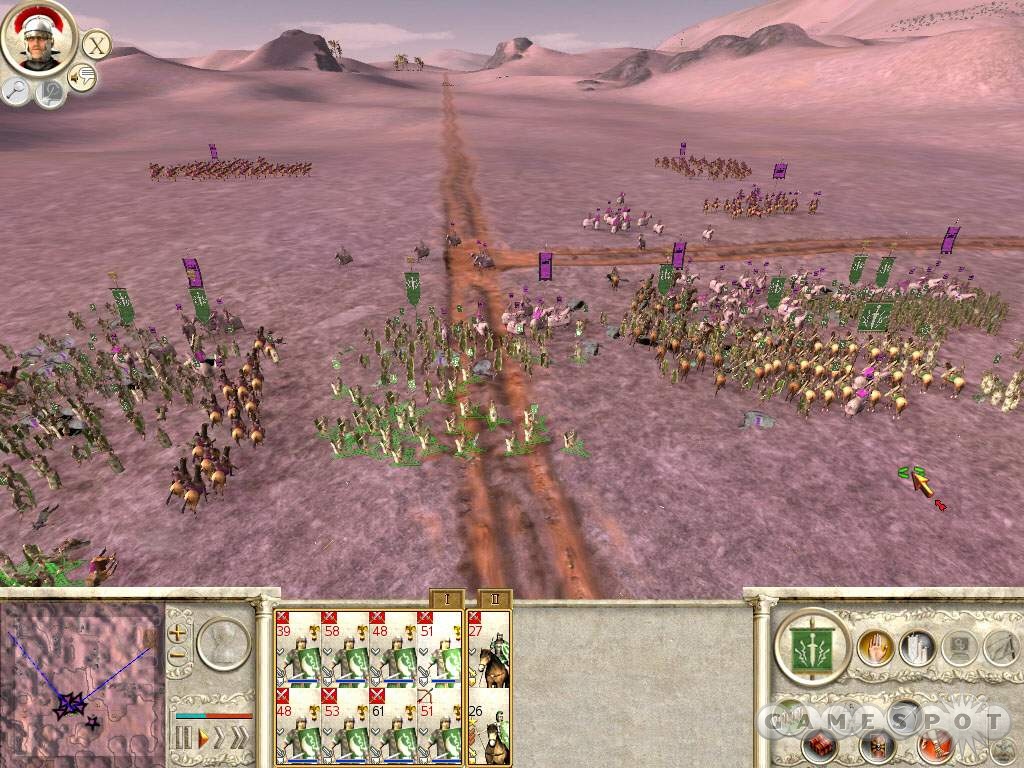
You can use your cavalry units to chase off some of the enemy cavalry archer groups but you can’t afford to chase them too far as you’ll need your cavalry as added muscle against the cataphracts. As the enemy heavy cavalry reaches your forces, envelop them with your cohorts then maneuver your cavalry behind the cataphract. Ignore the archers until you’ve conquered most or all of the heavy cavalry.
Chasing down the cavalry archers will still prove challenging. Eventually you can run them down with your own cavalry but if they continue to flee but not surrender then trap them by moving your infantry into the enemy’s path. Force all enemies to retreat or defeat them completely to win the historical battle.
The Battle of Cynoscephalae, 197 BC
The Battle of Cynoscephalae sees the Roman Scipii forces ambushed by the Macedonians. Fortunately for the Romans, and revealed during the opening cut scene, the Macedonians execute their ambush poorly and provide an opening for the Romans to save their forces. Your initial goal is to attack the smaller Macedonian flank and obliterate it before the larger Macedonian force moves into position.
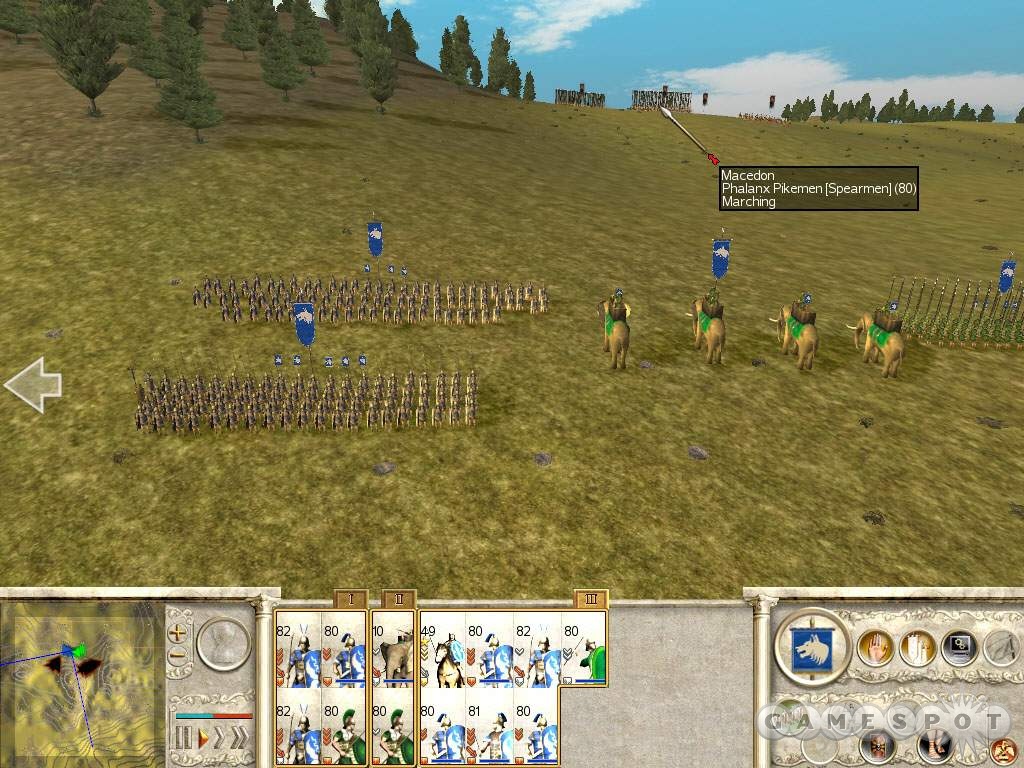
Charge the smaller flank with your units closest to their position. Don’t advance your war elephants or cavalry toward the flank. Both Macedonian armies contain plentiful pikemen. Don’t fight your counter unit! Keep your elephants and heavy cavalry healthy so you can use them to flank engaged Macedonians. Attack the smaller flank using infantry against infantry and spearmen against the cavalry. Maneuver the elephants around the enemy once the Macedonians are engaged. Charge engaged enemies with the elephants. Treat them with care, however; don’t allow the elephants to charge pikemen ready for the assault.
Retreat your other forces away from the approaching Macedonians so you can concentrate on the smaller flank. Once the larger force gets close, begin your engagement. As before, avoid fighting counters specifically your cavalry and elephants away from pikemen. Keep your cavalry and elephants back but ready to charge at the flank of engaged enemies. Focus on non-pikemen forces first. Elephants can thrash engaged enemy infantry. Note that even holding the war elephants back can prove advantageous because the unit does utilize ranged weaponry when not engaged with melee attack. You should also utilize the cavalry group to charge stray enemy missile forces.
The Battle of Teutoburg Forest, 9 AD
Your task in the Battle of Teutoburg Forest historical mission is to escort the Roman forces to the settlement in the southwestern corner of the map. At least 100 men must reach the settlement before sunset for the historical battle to conclude in success. To reach the settlement you’ll have to tackle several groups of ambushing German forces. In fact the battle opens in the middle of an ambush.
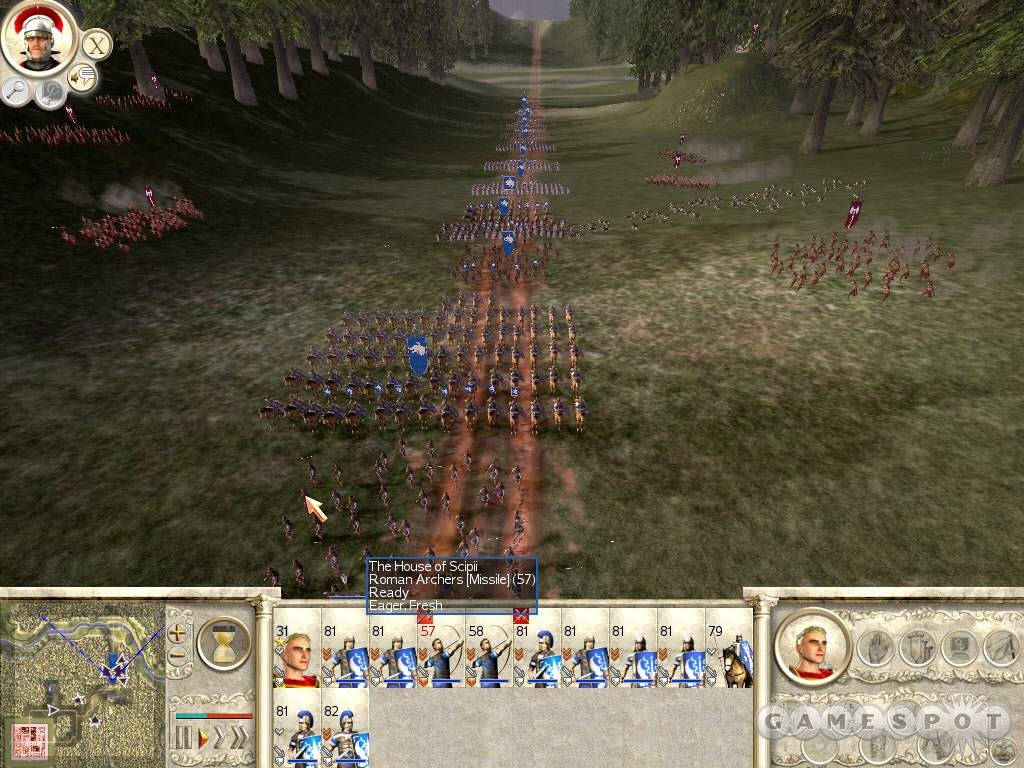
Attacking German forces include a mixture of infantry, archers, and warhounds. You have greater numbers and have the luxury of using multiple squads against single German groups. Although you’ll be under fire from German archers, utilize your cavalry units to repel charging German infantry before chasing down the missile units. You possess your own archers with flame arrows, which can be used to counterattack the archers, though the Germans do possess the terrain height advantage. As your cavalry and infantry groups gain the upper hand, shift them to chase off the German missile groups.
Resume advancement toward the settlement as the German forces are routed and in retreat. You’ll face additional small groups of German ambushers along the road. Counter the charging German forces as you did the previous groups. Save your cavalry to flank engaged Germans while using your infantry against infantry with archer support. As you gain advantage, charge the defenseless German archer units with cavalry and continue toward the settlement.
Maneuver your soldiers to the settlement’s gate and it will open allowing your troops inside. Move at least 100 inside before sunset to complete the historical battle successfully.
The Siege of Sparta, 272 BC
The Seleucids assault the Greeks at the heavily defended (though lacking wall defenses) settlement of Sparta. Onager siege weapons are your primary advantage in the assault. You can safely bombard Greek squads from long-range while keeping your infantry, archers, cavalry, and elephants safe from attack. Inflict as much damage as possible to Greek troops before advancing into the city streets.
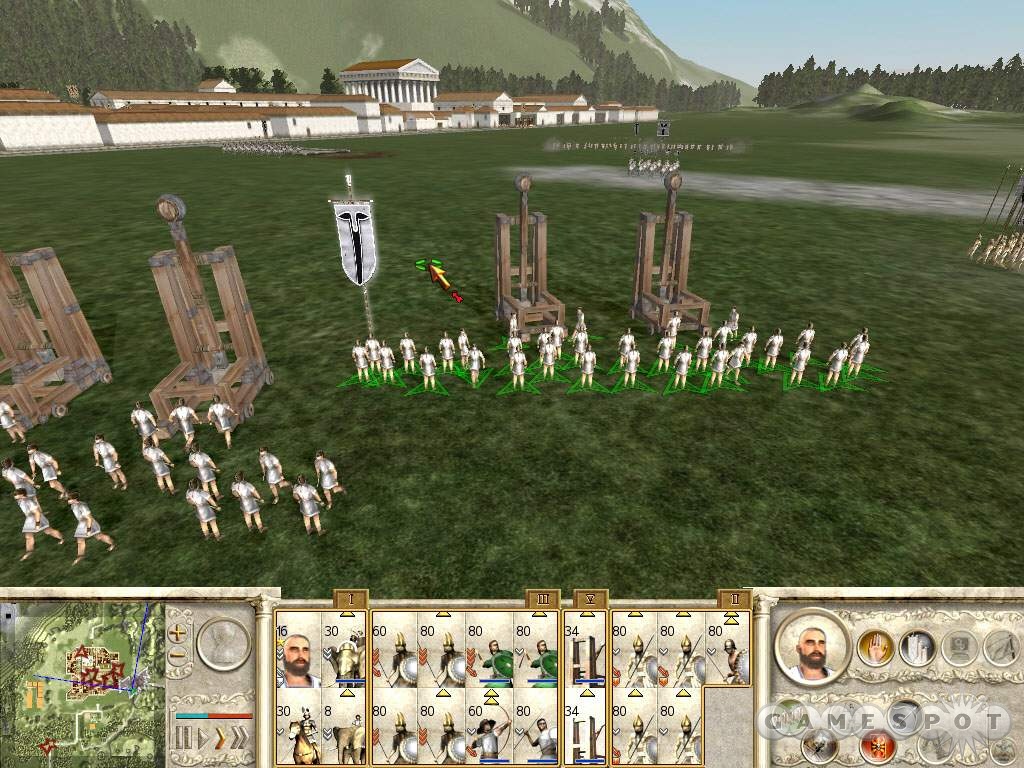
The Greeks employ plentiful pikemen in phalanx formation. Don’t lead the attack with your cavalry or elephants; these powerful units will be extremely important in the long run and will be decimated against ready pikemen. Instead you need to save them to flank engaged enemies, especially during opportunities before you have squeezed into the narrow city streets. Whenever possible lure the Greek unit groups from the narrow streets to more open territory where attacking from multiple sides is more possible.
You can continue to bombard Greek troops as you engage them in the city streets; realize, though, that the onager siege weapons are indiscriminate and inaccurate and it’s very likely that you will inflict damage friendly fire damage. It’s wiser to simply attack approaching Greek troops before they reach your soldiers’ positions. Reach the Sparta center and control the square for the allotted time to complete the historical battle.
Chapter 5 - Cheat Codes
To activate Rome: Total War cheat codes, first open the console by pressing the "~" key. With the console open, enter the following codes to activate the corresponding cheat. Note that some of the cheat codes can only be used once per game.
| Cheat Code | Effect |
| add_money # | Adds # to your reserve. |
| add_population (city name) # | Add a particular population amount to a specific city. |
| auto_win (attacker or defender) | Automatically win a specific battle for an attacker or defender. |
| bestbuy | Reduces the cost of units by 10% in the Imperial Campaign. |
| capture_settlement (name) | Capture a settlement. Enter the name of the settlement in the name value. |
| date (year) | Changes the date where year is the date value. |
| force_diplomacy (accept or decline) | Force certain diplomacy proposals. |
| gamestop | Reduces the cost of units by 10% in the Imperial Campaign. |
| invulnerable_general (name) | Make a particular general invulnerable during battle. |
| kill_character (name) | Exterminate a named character. Enter the character’s name in the name value. |
| move_character (name) (#,#) | Transport a specific character to indicated coordinates. |
| season (summer or winter) | Changes the season to summer or winter as entered. |
| toggle_fow | Toggle on and off the fog of war on the campaign map. |
Got a news tip or want to contact us directly? Email news@gamespot.com
Join the conversation