Quake 4 Walkthrough
Quake 4 possesses the classic id-style multiplayer, wed with one of the best single-player campaigns to ever grace a Quake game. GameSpot's Walkthrough has plenty of tips and hints for both!
Design: Randall Montanari
The Quake series is, alongside Doom and Wolfenstein, one of id software's great contributions to the PC first-person shooter genre. Although the three previous games didn't bear much resemblance to each other, serving mostly as technological marvels around which excellent multiplayer games were made, Quake 4 features unarguably the best single-player experience yet to arrive in a Quake title (thanks to the sure hands at Raven Software being responsible for its development), and is also the first Quake game to be directly tied in to a previous game in the series.
Quake IV a direct sequel to Quake II, which saw you, as a nameless Space Marine, land deep behind enemy lines on the planet Stroggos and attempt to take out their supreme leader, the Makron. In Quake 4, you take on the role of Matthew Kane, one of the Space Marines sent to Stroggos to take advantage of the chaos on the planet after the Makron's assassination. This time, though, you're not on your own; you'll fight alongside numerous other Marines as you attempt to shut down the Nexus, the Strogg communications grid, and attempt to send their forces into disarray.
GameSpot's Game Guide to Quake 4 is going to give you a rundown on all the weapons in the game, a smattering of gameplay tips for multiplayer and singleplayer, as well as, of course, a complete walkthrough for the game. Enjoy!
Weapons
Quake IV has a good collection of classic Quake weapons for you to play around with. Most of the weapons are the same in singleplayer or multiplayer, but the singleplayer weapons will eventually be upgraded with modifications, while the multiplayer weapons won't need to be reloaded.
Blaster
The Blaster is the first weapon you'll wield on Stroggos, but isn't as piddling as you might think at first glance. While it's certainly a weak weapon when compared to almost anything else, it's still quite capable of taking down weaker foes, especially if you click the fire button like a madman; it has no automatic fire capabilities. That said, its rate of fire is excellent, allowing you to pop off simultaneous shots with almost no downtime between them. The blaster also has no ammo requirements, making it a workable sidearm for occasions when you want to preserve ammo.
The blaster also has a secondary firing mode, allowing you to charge up a shot by holding down the alt-fire button, then letting loose with one massive blast of energy. This is rarely going to be worth the time it takes to fire, though, at least not on the higher difficult levels, where you'll be better served by just jamming down the primary fire button and taking people down with a stream of weaker fire.
Machinegun
Although the machinegun is another weapon you'll acquire early on, it's likely going to be one of the weapons you're going to be using the most. There's not much to say about it, really; if you press and hold the attack button, you'll send out a stream of pretty accurate fire at a target, doing good damage. You also don't have to reload very often, allowing you to keep up a stream of fire in a firefight for a long while. Although these don't sound like particularly impressive benefits, the machinegun is powerful enough and accurate enough to be a standby weapon for most of the game. When you consider that it can also be used as a quasi-sniping rifle with its alt-fire, and that it has an underslung flashlight, you'll probably come around to the strengths of the weapon. Know it, love it.
The machinegun upgrade that you eventually obtain will double the clip size of the weapon, allowing you to dish out much more hurt before you have to reload.
Shotgun
The Shotgun doesn't appear until you pass through a few trials by fire, but it'll be a welcome addition your arsenal when you do finally pick it up. It's similar in nature to the shotguns found in most other games, and if you've played Doom III, then it should feel especially familiar. There's nothing exceedingly special about the weapon; you point it at something and a bunch of pellets hit it. Obviously, the closer you are to your foe, the more pellets will connect, and the more damage you'll do. This isn't a weapon to use on something at long distance, in other words.
When you get your Shotgun upgrade, which doesn’t occur until fairly late in the game, you’ll be able to load clips of shells, instead of having to load them in individually. This will increase the ammo capacity to 10 rounds, as well as greatly shorten the reload time on it.
Grenade Launcher
The unpredictability of the grenade launcher can make it a liability in some combat situations, where you may wind up hurting yourself or your AI teammates just as much as the enemy. When you fire a grenade, you'll lob an explosive projectile up into the air with a parabolic arc. If you get good at aiming these, then you can usually place them where you want them with a good degree of precision. Alternately, you can just lob grenades like a crazy person into the middle of a group of enemies and wait for them to detonate. Grenades explode on impact with a target; otherwise they take around four seconds after firing to explode.
One of the best ways to use grenades, since they don't travel very far, is to get the attention of an enemy, then back away from it while laying grenades in their path. You can bounce them off walls to try and lob them around corners, as well. In multiplayer, grenades are best left in the hands of the professionals. If you become a master at predicting the arc of a launched grenade, then you may be able to get a good number of frags with it, but if you're a more casual player then its unpredictability may make it difficult to get frags. On tight maps with a bunch of players, though, it can sometimes be profitable to just chuck grenades all around the map, especially on maps with walkways above lower battlegrounds. Random frags still count!
Also note that you can use grenades for grenade jumping, just like rocket jumping, but it's much more difficult to time the explosion correctly.
Hyperblaster
The hyperblaster is functionally similar to the hyperblaster from Quake II, for those of you who remember it. It's essentially a rapid-fire laser that shoots energy bolts that, all things considered, do pretty decent damage. The bonuses here are a large ammo clip, plenty of overall ammo capacity, and efficient damage dealing. The drawback is that the bolts travel somewhat slowly when you're attempting to hit something at long range, making it easy for your targets to dodge. This is more of a problem in multiplayer than in singleplayer, of course.
Anyway, in multiplayer, you're probably going to want to use the hyperblaster as primarily a defensive weapon. If you find yourself losing the upper hand in a fight, find a corridor to retreat through, and waggle your hyperblaster's beam back and forth across the corridor so that anyone attempting to follow you can't help but take damage. Even opponents with good health and armor will often prefer to simply try their luck elsewhere rather than pursue you through an almost unstoppable stream of plasma. The hyperblaster can still do excellent damage in close-quarters combat, as well, though, especially when paired up with a quad damage mod.
Nailgun

Ah, the nailgun. This delightful little piece of Strogg weaponry fires, well, nails, or at least shards of metal, at your opponents. It does a bit more damage than the machinegun, although its projectiles do travel much more slowly. Like the hyperblaster, then, it's a bit more difficult to actually hit people with, especially over long ranges. Since the machinegun is hitscan, it'll likely be a better weapon for most multiplayer encounters, excepting those that take place at close range.
In the singleplayer game, you'll eventually be able to upgrade your nailgun with extra firing speed and an extra-large clip, and then, later on, actually mod it further to allow you to lock on to enemies with your scope and let the nailgun's projectiles home in on them. After it's fully upgraded, it's a pretty decent weapon for dealing with low-level Stroggs, but is definitely not something you want to be using at anything beyond medium range.
Rocket Launcher
Need anything be said about the rocket launcher? Apparently so. Well, if you've ever played a first-person shooter, chances are you've handled one of these bad boys, and you won't be too surprised by its implementation here. When fired, the rocket launcher launches a rocket. This rocket does a lot of damage. Damage is good.
Seriously, though, rockets are a good way to do a lot of damage in a short amount of time, especially in multiplayer, because of their excellent splash damage. When using a rocket launcher in multiplayer, aim at your opponent's feet, not their chest; you're better off with the good chance of getting splash damage than with the poor chance of hitting your opponent dead-on with a rocket. Most of the time your foes will be dodging so much that an actual hit will be more or less luck-based, but splash damage is relatively easy to come by, provided you have good reflexes and can anticipate your opponent's movements.
Also note that you can perform the antiquated maneuver known as a rocket jump if you practice a bit. Old Quake-series veterans will be right at home here, but for people who've never played one of these games before, here's how it goes: take a rocket launcher, point it at the ground underneath your feet, then press fire and jump at the same time. If all goes well, you should propel yourself well off the ground, enough to reach platforms high above your head. This isn't of much use in single-player, but in multiplayer, you can use it as a way to access upper levels of a map without having to find a jump platform. Of course, it'll take a good amount of your life and armor away when you do it, though.
The rocket launcher mod in single-player will allow you to fire your weapon in three-round bursts, if you like, and will automatically reload. It'll also allow you to steer your rockets if you hold down the zoom key after firing.
Railgun
Ah, the railgun. This weapon, which saw its first incarnation in Quake II, was the model for many futuristic sniping devices in games to follow, but saw perhaps its finest incarnation in Quake III, where it was the bane of noobs and modem players everywhere. While the railgun in Quake IV isn't anywhere near as powerful as the hallowed Q3test version, it still possesses some of the punch that made it famous.
In terms of mechanics, it doesn't get much simpler than the railgun; you point it at something, fire, and if you hit, you do a lot of damage. The railgun is, if not hitscan, then pretty close; this means that it'll travel the distance between you and your target almost instantaneously, making range irrelevant when calculating how far you have to "lead" your target to actually hit him or her. In a game that's full of weapons that require some time to travel between targets, though, this can actually be something of a liability, as it's difficult to shift between leading people with rockets and then aiming directly at them with a railgun. (Lag will often require you to still lead people with the railgun, but by the slimmest of margins.)
The single-player version of the railgun will eventually be modded to let you punch through enemies, which will allow you to hit multiple enemies with one shot. Decent, but you'll still probably use it more in multiplayer (assuming you can get good at aiming it) than in singleplayer.
Lightning Gun
Another weapon (along with the nailgun) that first made an appearance in Quake I), the lightning gun is a simple stream of electrical energy that does a constant and appreciable amount of damage to anything that it touches. Firing it will make for a constant drain of your ammo, and you won't be able to fire it for very long in multiplayer, unless you've been picking up every ammo box you see, but the damage dealt by the lightning gun will usually make it worth using, especially when you have quad damage or know that your target is weakened and can be finished off by just a little more damage. Of course, it won't be able to hit very distant targets, although its range does seem to be a bit longer than it was in Quake III.
In the single-player game, the lightning gun will be modded to allow it to arc from your primary target to other nearby foes, which is helpful when dealing with multiple low-level enemies.
Dark Matter Gun
Quake II and Quake III both had BFGs, and while they weren't always appreciated by players on the receiving end of their fire in multiplayer, they were at least acknowledged as being the most powerful weapons in the game. Quake IV's incarnation of the superweapon, which is now called the dark matter gun, isn't likely to be anyone's first choice of killing instrument in multiplayer, but will be a handy ally in the singleplayer game.
When fired, the dark matter gun will send out a huge bolt of dark matter that will damage anything it passes by, and also exert a bit of gravitational force on them, sucking them towards the bolt while it travels. When it hits an obstacle, it'll explode, dealing heavy damage to anything nearby. This is fantastic in singleplayer, where most of the enemies will charge straight for you and make little effort to dodge the blast. In multiplayer, though, where you'll only get one round for the weapon when you pick it up, it's difficult to use the DMG properly, unless you're on a level playing field with multiple targets in sight. Attempting to aim it at foes above or beneath you will give them ample time to dodge. Perhaps the best time to whip out the DMG is when you're travelling through a tight corridor, although even then, the slow movement speed of the projectile will still often allow your targets to avoid the worst of its effects.
Tips, Hints, and Codes
Singleplayer
Know Your Teammates
Your Marine friends in Quake IV are going to be a big help; with their extra firepower, you'll be able to handle fights that would normally prove to be quite difficult for you. The trick here is knowing when to try and keep them alive, and when to try and hang back and let them do the fighting for you.
It's actually not as tricky as it sounds: if you're fighting alongside someone from Rhino squad, then chances are they're almost unkillable, so you can let them do the bulk of the fighting while you hang back and pick off any enemies that are easy shots. If they're not from Rhino squad, then they'll probably die after a Berserker gets a hold of them, so try to stay out in front and distract any enemies and hope that your teammates manage to keep up and lend you support fire before you die.
What's also important is to note that, when you have a Tech or a Medic in your little band, you'll be able to ask them for refills of armor or health, respectively. To do this, wait until you're out of combat, then click your fire button while you're standing right next to one of these soldiers, and they should hit you back with a refreshing spray of cool, clean energy.
Look Around!
There are all kinds of little hiding spots built into these levels, usually in crawlspaces under stairs or hidden beneath low walls that you can crouch under. Most of these spaces have extra armor, ammo, or health for you, so be sure to peek around for extra supplies whenever you see a likely hiding spot. We'll do our best to point these out for you in the walkthrough, but we're sure we missed a few....
Cheat Codes
There are plenty of codes in Quake IV, most of them familiar to players of earlier Quake engine games. To enter these codes, you need to open the console by pressing ctrl + alt + ~ while in game. Type these into the console, and you should notice the effects immediately. If you want to turn off the effects, type them into the console again!
| Code | Effect |
| give item_health_mega | +100 health up to 200 |
| com_showfps # | 1 to show framerate, 0 to turn it off |
| pm_thirdperson # | 1 turns third-person mode on, 0 turns it off |
| give all | All weapons with full ammo, health and armor |
| com_allowconsole 1 | Allows console opening and closing with just ~ |
| kill | commit suicide |
| give weapon_dmg | Get a dark matter gun |
| give weapon_grenadelauncher | get a grenade launcher |
| give weapon_hyperblaster | get a hyperblaster |
| give weapon_lightninggun | get a lightning gun |
| give weapon_machinegun | get a machinegun |
| give weapon_nailgun | get a nailgun |
| give weapon_railgun | get a railgun |
| give weapon_rocketlauncher | get a rocket launcher |
| give weapon_shotgun | get a shotgun |
| give weapons | get all weapons without any ammo |
| give ammo | give ammo |
| pm_crouchspeed # | How fast you move when crouched |
| pm_speed # | How fast you move when running |
| pm_jumpheight # | How high you can jump |
| quit | immediately exit from game |
| g_fov # | Makes your field of vision wider. |
| give armor | max armor |
| give health | max health |
| killmonsters | remove all monsters and NPCs from current level |
| g_knockback # | Set to 0 to keep monster attacks from knocking you around |
| g_stoptime # | Set to 1 to stop time (can only move around) and 0 to restart time |
| spawn char_marine | summons a marine who'll help fight |
| spawn char_marine_medic | summons a medic who can heal you |
| spawn char_marine_tech_armed | summons a tech who can fight and restore your armor |
| noclip | toggle ability to fly and move through solid objects |
| GOD | Toggle GOD Mode |
| notarget | toggle invisibility |
| pm_runbob # | When set to "0", your character will stop bobbing when you run. |
| pm_walkbob # | When set to "0", your character will stop bobbing when you walk. |
Map Names
If you open up the console, as described above, then type in "map game/mapname" (without quotes), then you'll be transported to the level of your choice. For instance, to warp back to the beginning of the game, you'd type map game/airdefense1 and poof! You're back in the Air Defense Base, just like that.
| Code | Effect |
| airdefense1 | Air Defense Base (beginning of game) |
| airdefense2 | Air Defense Trenches |
| convoy2 | Aqueducts |
| convoy2b | Aqueducts Annex |
| convoy1 | Canyon |
| walker | Construction Zone |
| network2 | Data Networking Security |
| network1 | Data Networking Terminal |
| process2 | Data Processing Security |
| storage2 | Data Storage Security |
| dispersal | Dispersal Facility |
| process1 | game/process1 |
| storage1 | game/storage1 |
| hangar1 | Hangar Perimeter |
| hangar2 | Interior Hangar |
| mcc_landing | MCC Landing Site |
| core1 | Nexus Core |
| hub2 | Nexus Hub |
| hub1 | Nexus Hub Tunnels |
| mcc_1 | Operation: Advantage |
| mcc_2 | Operation: Last Hope |
| building_b | Perimeter Defense Station |
| putra | Putrification Center |
| recomp | Recomposition Center |
| medlabs | Strogg Medical Facilities |
| core2 | The Nexus |
| tram1 | Tram Hub Station |
| tram1b | Tram Rail |
| waste | Waste Processing Facility |
Multiplayer
Know your FOV
Your FOV (short for Field of Vision) setting determines how much of the game world your monitor displays at any given time. Although your eyes in real life can see around 180 degrees without moving your head (if you include your peripheral vision), most games set you at 90 degrees to compensate for the fact that your monitor actually isn't going to be filling up your entire field of vision (with some games, like Halo 2, being even more restrictive than that).
Luckily, if you're looking for every bit of competitive edge that you can get, you can increase your FOV in Quake IV. To do so, open up the console by pressing alt+ctrl+` (the tilde key, located to the left of the 1 key and above the Tab key), then type "g_fov 90". (Without the quotation marks.) This won't actually do anything, since your FOV in Quake IV is already set to 90, but if you want to try increasing it, you can try setting it to 100, 110, or even 140 if you want a real fisheye experience.
Higher FOV settings will allow you to see more action on the edges of your screen, and let you spot enemies that might normally be off-screen to you if you're running with an FOV of 90. Many professional players run with FOVs of 120 or more, but the higher you go, the more distorted your view will become, and it can become a detriment to your gameplay if you go too high. Still, most players will benefit by jumping to an FOV of 100 without seeing too many drawbacks. Try it out and see if it works for you; you can always knock it back down to 90 if you wish.
Unfortunately, FOV settings entered directly into the console aren't saved from game to game, so if you want to use these online, it's best to enter the command directly to your command line. Find the shortcut to Quake IV on your desktop, right click on it, and you should be at the Shortcut menu. If you find the line that reads:
C:\games\q4\Quake4.exe
And add this command to it: +g_fov 110
C:\games\q4\Quake4.exe +g_fov 110
Then you'll automatically switch to 110 FOV every time you boot up the game. You can change that number to whatever you like, of course.
It's All About Instinct
Although Quake IV multiplayer is a much different beast than many multiplayer games that have come out over the past couple of years, in that it lets you actually survive taking a bullet to the head or a rocket to the chest; unlike most hyper-realistic games, battles are going to take a bit of time to play out. There are very few one-shot kills available to you here.
Thus, most battles are going to be won by the player with more experience and the better ability to anticipate enemy movements. If you've ever watched a demo or a movie of a professional Quake III tournament, then you'll know that winning in multiplayer is all about anticipation. Knowing where your enemy is going, how they'll move, where the corridor they're taking heads, and so on.
This isn't so much a tip as it is a warning: getting good at Quake IV will require a good amount of practice and map-learning. Many players of Quake III will have an upper hand on you if you're new to the game, since so much of Q4 multiplayer is based on Quake III. You can still be good at the game if you don't devote three hours a night to practicing your l33t skills, but the more you play, the better you'll get at things like leading with rockets, hitting people with the railgun from far away, hitting people with grenades while they're in midair, and so on.
Practice makes perfect. Until you've put in a good number of hours in the game, you can expect to get knocked around a bit by the old hands. Quake IV is really no different than any other game in this respect, but it does require a much different skillset than most games do, and there are going to be a bunch of Quake III players transferring over with most of their skills intact.
Don't Forget The Strafe Jumping
Strafe jumping is a classic aspect of id gaming, and has been featured in almost all of the Quake engine games (and even before that, you could strafe against a wall in Doom to pick up speed). If you ever watch a demo or a movie of a professional game, you'll notice that most of the players will be hopping around and moving much more quickly than you normally would. This is normally a result of strafe jumping, which allows you to jump while moving forward and pick up a bit more speed.
Strafe jumping is pretty easy to perform, although it takes some getting used to. Instead of just moving forward with your forward movement key, you're going to jump as often as possible while holding down one of your strafe buttons. If you want to move forward, you can alternate strafe keys while you jump, i.e. jump+strafe right, jump+strafe left, and so on, repeating. If you want to bend around a curve, you can just use keep holding down one of the strafe buttons while jumping and moving your mouse.
It can be difficult to make sharp turns while retaining the momentum you gain from strafe jumping, and making a 180 degree turn is almost impossible. It's also worth noting that many of the maps of Quake IV are perhaps a bit less suited to strafe jumping than the more-open maps in Quake III, since they often have more claustrophobic corridors that tend to sap your speed. Still, strafejumping is worth learning, if only to help you get to the powerups more quickly.
Walkthrough
Air Defense Bunker
After things go...poorly for your squad during their descent to the surface of Stroggos, you'll be separated from most of your teammates, and be tasked with finding them by passing through a massive Air Defense Bunker. Get started by talking to the other soldiers near your position; the medic here will be able to heal you. If you pass by other medics in the future, just move your crosshairs over them and press your fire button to request a heal. Handy!
After that, start moving through the bunker, doing your best to stay alive. Fire on the Strogg guards from as far away as possible, since your blaster is more accurate than their weapons, and avoid any explosive barrels that you see, since enemy fire can detonate them and severely damage you. After you lose your first teammate, you'll pick up a machinegun, which will let you much more easily damage the Strogg that are coming after you.
You're restricted to a somewhat straight path here, so just head through whatever unlocked doors you can find, being careful to take down enemies from as far away as possible. Besides the lightly-armed Guard enemies, created from the bodies of fallen humans, you'll also encounter your first Brute, a massive Strogg warrior that chooses to enter into melee combat rather than fire at you from a distance. As you might surmise, these guys are big, hit hard, and take a lot of damage, so back away from them while unloading machinegun rounds into their bodies.
When you reach Badger Squad, you'll be asked to return to the landing site and return with the Medic you passed by there, so double back and start heading back the way you came; you will of course run into more enemies on your way, including an Berserker, another humanoid Strogg with a spike on one hand and a hammer on the other. These guys are also melee attackers, and do severe damage when they hit you, so keep your distance!
When you've reached the medic and are on your way back to Badger, watch for a Brute that pops up out of the ground. When it's dead, drop down into the hole through which it came to find some armor, then flip the switch near the ladder and climb back up to continue on your path back to Badger.
Having satiated Badger's yearning for a medic, you'll finally be freed to leave the bunker, and you'll immediately meet up with Cortez, Rhino Squad's sharpshooter. From there it's a short, uneventful walk to the end of the level.
Air Defense Trenches
This is a fairly short level, so get moving. You'll initially be tasked with moving through the upper walkways of the Bunker, but you'll eventually reach an exterior area near the Trenches. Drop over the railing here to find some armor shards. When you reach Bidwell, you'll get a new objective: he wants you to enter and destroy the aircraft hangars nearby, since the fighters that they're launching are preventing your squad from advancing on and destroying the Air Defense Gun.
You'll have to fight through the Trenches with Morris until you reach the exit, so head on through to the Hangar Perimeter.
Hangar Perimeter
The first baddie you'll encounter here is a Gunner, a large humanoid Strogg that's armed with both a nailgun and a grenade launcher. When he fires his grenade at you, let it go past you, then run forward to avoid the blast.
Soon afterwards, you'll come to Corporal Mahler and his small squad. You'll get a shotgun at this point, but it won't be immediately useful to you, since the next fight takes place in an exterior area, and it won't be able to really hit anything at the distances you'll be working with. Note that there's both a Tech and a Medic in this squad, so whenever you have a chance to pause, get them to repair your health and armor by running up to them and hitting the fire button. Since you can always heal yourself up, be sure to stay out in front and take as much of the enemy fire as you can.
After the short elevator ride, you'll come up to an engine factory. There'll be a Gunner atop the walkway here, so watch for its grenade while you take it down with your machinegun. After that's dead, kill off the rest of the Strogg here, and you'll eventually be told by Mahler to find some way to bypass the reinforced glass nearby. While he's talking, watch out for the Berserker that'll pop up out of the nearby door; if you don't get in front of him, he might kill your medic.
Go through the nearby hangar hear, climb up the ladder, then walk back and flip the switch to extend the walkway above the hangar. Only one part of this switch is actually selectable, so be sure to click the correct spot on it. When the walkway is down, walk over it to reach the engine room again. Drop an engine down and fire it off to blast through the glass.
When you reach the next walkway that has to extend, you'll be accosted by numerous guards on the far platform; use your blaster on them to save your ammo until an Berserker comes your way. There's a ladder on the far end of the platform, so drop down there to find some more ammo and armor, should you need it. From there it's a short walk to the Interior Hangar.
Interior Hangar
Objective: Destroy Strogg Aircraft Hangar
For now, you're still going to have to hang around with Mahler. When you reach the area where the power's out, get ready for an ambush; turrets will pop out of the ceiling and start firing away, and there'll also be guards coming out of the walls. Deal with the turrets first, since they can be easily killed with a bit of fire.
When you're past the ambush, you'll have to round up Rhodes, the demo expert. When he's following you, you'll need to head back to the nearby room with the large blue energy conduits in them; there are two hangar bays off of this larger room that you need to enter and clear of Strogg before Rhodes can lay his charges. Watch out after laying the demo in the first room, as there'll be plenty of Strogg waiting for you in the blue room when you pass through it again.
When both charges are set, follow Rhodes to another room off of the energy room, where the charges will be blown, allowing you to move on to the next level.
MCC Landing Site
Objective: Destroy the Air Defense Gun
You'll have the opportunity to get your health and armor regenerated a bit at the beginning of this level, with your armor repair coming courtesy of Tech Strauss, voiced by none other than Karl Hungus himself, Peter Stormare. What a weird career trajectory this guy has had; he played Hamlet for Ingmar Bergman in the Royal National Theater of Sweden, had a career-making role in Fargo, but now he's content to be minor characters in Michael Bay films and do voices for video games. Will his star ever stop rising?
Anyway, when you're ready for combat, head out to meet up with Voss, who'll supply you with a grenade launcher. Yell "Yeehaw!" at the top of your lungs to scare the Stroggos, if you wish, but it won't work, at least not as well as the grenade launcher will. Eventually you’ll reach a door here (there’s more grenade ammo down one of the side trenches, as well). When you do, you’ll have to hop onto the boxes nearby, climb up, drop down into the hole nearby, and open the door from within.
From there, this becomes one lengthy run-and-gun until you reach the gun control room. When you clear out the Berserker within, you’ll take control of the gun, and be asked to use it to fire at a nearby hangar door; doing so is a pretty simple procedure. Afterwards, you’ll be asked to help clear the landing zone so that more troops can come down and help you out. Doing so entails leaving via a nearby path, returning to the trenches, and heading up to the hangar doors that you just blasted. After you scoot your way through the hangar, hide behind the overturned car near the exit until the Hannibal lands. Board it by heading underneath its rear section and hopping into the platform that lowers.
Operation: Advantage
Objective: Explore the Hannibal
This is a completely non-combat level; all you do here is look around the Hannibal, but there’s a lot of looking to be done and a lot of conversations to overhear. When you’re ready to move on, find the briefing room (the path is fairly linear so it shouldn’t be too hard), sit through the briefing, then head up to the armory to find an Extended Clip mod for your machinegun. With that in hand, return to the docking bay to head out onto your convoy assignment.
Canyon
Objective: Protect the Convoy
After reaching the truck that’ll take you to the convoy, you’ll have to ride a bit until you actually make it to your destination. As per any good FPS rail shooting sequence, you’ll have to do some shooting when you hit a bit of a Strogg roadblock, but you apparently can’t be hurt during this sequence, so there’s nothing to worry about.
When you reach the convoy, you’ll again be asked to mount a vehicle, this time taking the reins of a mounted turret atop one of the convoy’s trucks. The truck itself has shielding which will recharge over time, so unless you’re playing on the General difficulty setting, you shouldn’t have too many problems surviving these fights. Eventually, though, you’ll come to a set of landmines, and you’ll have to protect Rhodes while he gets off of his truck and disables them. You get a checkpoint just before this sequence begins, but it can still be difficult to keep him alive, since Brutes and Berserkers come at him from both sides. Berserkers are definitely the biggest danger here, so take them down first, and focus on the enemies that are closest to Rhodes.
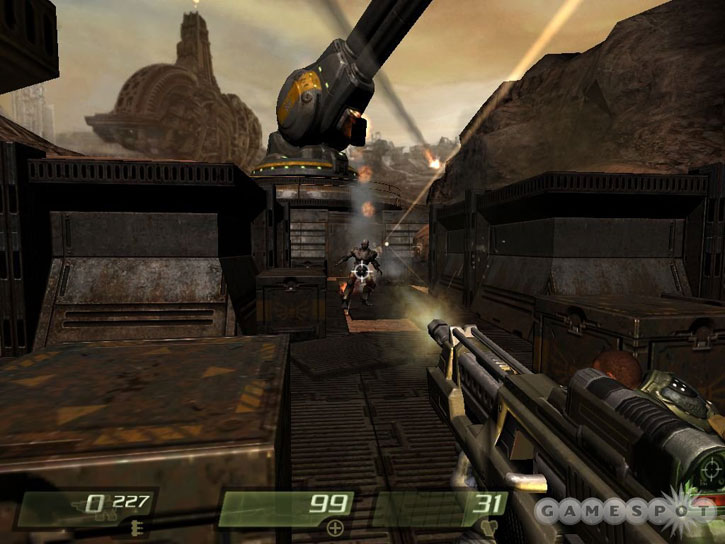
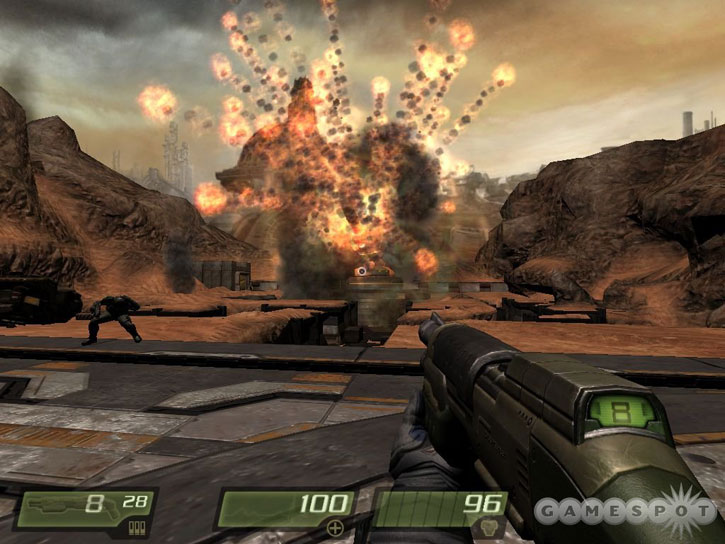
Next up is a fairly difficult sequence, where you’ll be sent into a canyon to destroy the turrets that threaten to take out your entire convoy. There are three different types of turrets that you need to worry about here: wall-mounted machinegun turrets, aerial turrets that are dropped via missile, and missile turrets mounted around the central structure here. You can’t disregard any of these, but the missile turrets are likely going to be the biggest threat. Luckily, you can shoot down the missiles as they track you (they move incredibly slowly), so that’s a bonus. Anyway, you’ll just have to keep rotating the turret to keep track of who’s firing at you, and destroy as many of the turrets as you can. When you reach the end of your little route here, all remaining turrets will be destroyed, so don’t worry if you miss one or two; this section of the game is really more just about your own survival.
Perimeter Defense Station
Objective: Retrieve Engineers and Open Laser Gate
Well, it appears as though you somehow managed to be the last soldier inside the defense station, although you were the first one off the trucks. Apparently there was a team of engineers that also managed to get captured down in the bowels of the facility, and it’s up to you to free them so that one of them can help open a door up near Voss’ location, which hopefully will let Strauss open the laser gate outside the facility so that your convoy can move on.
When you reach the two soldiers that’ll be accompanying you, get ready for a fight, as of course there are plenty of Strogg still in the facility. You’ll have to fight your way through a few groups of them, as well as open up a couple of doors, before you reach the engineer, who comes in all John Wayne, running Strogg over in a cart. Kill any remaining enemies, and you’ll be able to escort the engineer back to where he’s needed.
After a bit of walking (sans combat), you’ll eventually reach the door that the engineer is needed at. He’ll slice through it with relative ease, but unfortunately things will go rather awkwardly for him after that. Anyway, after the lights go down, you’ll be able to crawl around for a bit until you find the controls to the defense grid. Shutting that down will allow your convoys to proceed past the laser grids, including yours. They’re so eager to get going that they’ll leave you behind, with nothing but a hovertank for you to use to rendezvous with them further up the line.
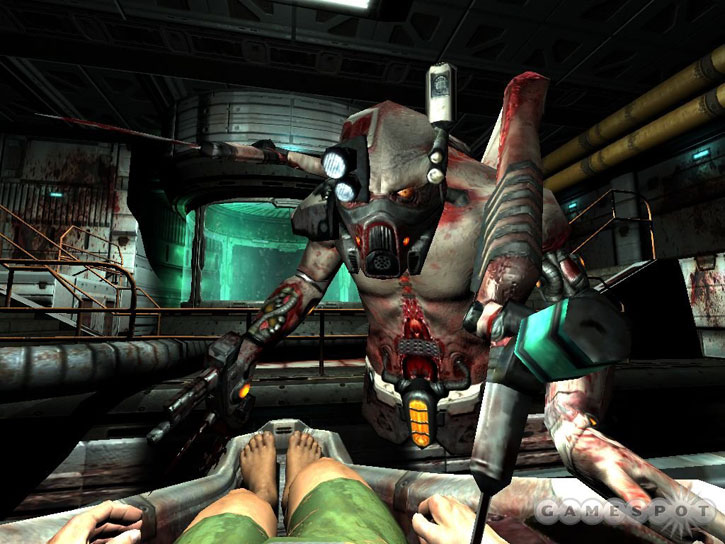
Unfortunately, you’re going to run into a Gladiator on your way out of the facility. Gladiators are big, bad, ugly, mean, and kind of smelly. This guy will be your first encounter with a railgun, as he has one mounted on his shoulder; if it hits you, it’ll do severe damage, so be sure to look for it to charge up and be sure to dodge it. It also has a hand-mounted shield that will deflect your projectiles away from its body. The easiest way to kill the Gladiator is with your grenade launcher. Just fire at an angle from around a corner and attempt to bank grenades off of a wall at it while backing away. If it gets too close, the grenades will bounce off its shields and do major damage to you, though, so if worst comes to worst you can just try and aim your shotgun at its head and hope you finish it off before it gets too close to you.
Aqueducts
You’ll get a rate-of-fire increase and a clip size increase for your Nailgun at the beginning of this level, making it a much more powerful weapon when dealing with multiple weak enemies.
Shortly after that, you’ll start your little Hovertank adventure. Controlling the Hovertank is surprisingly like controlling Kane, except that, in an inversion of your usual expectations, you’ll actually be more agile and nimble when you control the Hovertank. You’ll want to take a few minutes to get used to the controls here, which are a lot like your normal controls. Moving the mouse will shift your viewpoint around, as well as reorient your tank. I.e. it controls both the turret view and the heading of your tank. Your strafe keys will actually cause your tank to strafe, instead of turning on its axis, like they do in many other games. You have both a machinegun and a turret attack, and you can flip back and forth between them by using your mouse wheel.
Anyway, this sequence shouldn’t be too difficult for you, since your shields will recharge themselves fairly quickly when you get out of combat, and none of the enemies that you’re going to face will be able to do severe amounts of damage to you, at least not if you strafe quickly enough to avoid their missile fire. You’ll be facing off against unmanned Flyer enemies, that’ll mostly rely on flinging slow-moving rockets at you, as well as Icarus enemies, which will fire rockets as well as laser weapons. The other enemies here are both turrets; more missile-based turrets will fall from the sky, and you’ll also have to deal with rolling turrets that will plant themselves in one spot and fire on you. Your tank shells will make quick work of most of these enemies.
Aqueducts Annex
Your first foe here is going to be one of your worst. The Harvester is a multiped, spider-like, armored foe, capable of the usual gun turret and missile attacks. If you get too close to it, though, it’ll also strike at you with its legs, causing major damage that bypasses your shields and goes right to your armor. There’s no secret to taking these guys down, really; you just have to hit them with a bunch of shells until they blow up. You can dodge most of their ranged attacks rather easily, but be sure to shoot down the missiles that they launch at you, as they’ll curve back around and hit you from the side if you try to avoid them. Heatseekers are kind of curious that way.
The rest of this level is fairly straightforward; just pause in the tunnels if you ever need to recharge your shields. There are actually two Harvesters waiting for you just before you reach the Nexus Tetranode, your ultimate destination, so use the large blue steel pyre in the middle of the area as a shield against their missile attacks, and fire on them from long range with your shells. Don’t forget that you can zoom in when you’re using the cannon for extra accuracy.
Nexus Hub Tunnels
Now that you’ve reached the hub, you’ll have to try and get into the subbasement of the Tetranode, where your team has been asked to set off its EMP. All of the other convoys have been destroyed, so it’s up to you to strike at the heart of the Strogg communication network.
After a while, you’ll have to break off from the main group and escort Strauss to the temperature control room. You’ll come across another Gladiator here. With the upgrades that you got a couple of levels ago, your Nailgun will work well against it, especially since it can’t be reflected by the Gladiator’s power shield. Kill it and the other Stroggs in the room before moving on. Be sure to constantly ask Strauss for armor fill-ups when you run low.
When you reach the temperature controls, you’ll have to protect Strauss while he overrides the freezing temperatures that block the convoy’s progress. More Icarus (Icari?) will attack you at this point, although these guys don’t have any missile attacks; they’ll just pound you with machinegun attacks. When they’re dead, you’ll have to leave Strauss behind and fight your way back to Voss, where you’ll continue further into the facility.
The major fight with these guys occurs when you get back on the transport path. You’ll have to take down five or six humanoids, as well as another Guardian. If possible, try to stay in front of Voss and the other soldier here; they can do good damage against your foes, and if you can get up front and take cover, most of the enemies will fire at you, letting your teammates expend their ammo while you just sit around and wait for the enemies to do. You might need to fire a few grenades at the Gladiator to hasten its demise.
Afterwards, you’ll be sent into a sideroom to deactivate the forcefield within. In the rooms with the large piping, you can jump onto the pipes and head into a little alcove underneath the upper walkway to find some armor and health; the upper walkway itself leads to a little ammo cache, which is helpful.
When you return to the convoy, things will start to go south right quick. After the Harvester passes by, you’ll be asked by Voss to reach Strauss somehow and help him get to the center of the Tetranode so that he can destroy the facility. It’s a long, linear fight to reach Strauss, with more than a few annoying Icari in your way, but you will find a hyperblaster lying in one of the crawlspaces to bolster your arsenal.
Nexus Hub
The very first small access corridor you come across here has some armor shards hidden beneath it, but those are kind of pointless when Strauss is along, since he can restore your armor at any time you’re not fighting.
After fighting your way through the many enemies between you and the power station, protect Strauss while it activates it and sets it to generate excess power. If you can then return to the Tetranode and disable the emergency shutdown procedures, it’s possible that the resulting energy overflow will result in the destruction of the facility. A Gladiator will appear to harry your progress as soon as Strauss is done with the power station, though; hide behind the control panels and use your shotgun to take it down.
When that’s done, fight your way to the override station, which will require a bit of backtracking to the room where you entered the level. When you reach it, Strauss will send you to find and shut down the coolant pumps. Without coolant, the energy core will overheat and hopefully cause a chain reaction. Note the huge ammo and armor cache near where Strauss parks himself, and outfit yourself as best you can.
After heading through the nearby corridors, which should be uneventful, you’ll come to a large open room with a terminal in the center. This couldn’t possibly be a trap, right? Wrong! As soon as you activate the terminal, the two Tanks that have been waiting in the wings, and which curiously did nothing to stop you from shutting down the coolant pumps, will pop out and begin firing at you. While they are intimidating, they’re not unstoppable; just hide behind the coolant vents that line the room, and strafe out to fire grenades or any of your other weapons at them. They have a number of powerful attacks, so be sure to stay behind cover. However, they can’t follow you behind the pumps, so you should be able to retreat to cover whenever you like to reload or get ready for the next attack run.
Unfortunately, your problems aren’t over when you destroy the Tanks. You won’t have a chance to heal or retreat before the Makron pops out of the far wall and starts firing at you. Now, you can’t defeat the Makron here, but you can definitely die if he hits you too much, and he’ll be almost unstoppable at close range, between his multi-grenade launch and his other projectile attacks. What you have to do here is hide behind the pipes on the far side of the room and fire at him when you have a sliver of body to look at between a pair of pipes; hopefully he won’t be able to fire directly back at you. If you can deal enough damage to him, he won’t die, but rather will unleash an incapacitating attack on you, launching into the next level.
Strogg Medical Facilities
Welcome to a land of happiness and sunshine, cupcakes and laughter, fluffy bunny rabbits and little puppies. All is well, there’s nothing to worry about. Just keep telling yourself that while the Strogg do their thing. This section of the game was a horribly ill-kept sequence, so you probably won’t be too surprised to find yourself Stroggified by the end of it. Fortunately for you, your Rhino Squad buddies will get to you just before your neural implants go online, freeing you from complete slavery at the hands of the Strogg hive-mind. When you do regain control of your body, though, you’ll notice that you have a slightly higher health capacity than before, and that you move much more quickly than you normally would. Yay!
Now that you’re a super-soldier, you’ll be able to really rip up some Strogg. When you split off from the main group with Medic Anderson, get ready for a fight, because you’ll soon be launched into combat with Strogg Medbots, which prefer to attack with melee strikes, but whom can also throw poison grenades that deal small amounts of damage to you over time. Still, they shouldn’t be too difficult to take down due to their charge-ahead movement; just let them come to you and shotgun them in the body.
When you’re past the medical bay (click on the panel near where Anderson was taken to unlock the doors, and grab his machinegun while you’re at it), follow the path until you reach a lift. Take it up, and start fighting your way through the numerous Strogg guards of the facility. You’ll find your first rocket launcher at the top of the lift, which will come in handy against the Gladiator nearby. Just be sure to aim at its feet to bypass its shield and get some splash damage in on the Enforcers near it.
Eventually you’ll reach Voss, who’s stuck behind a door that won’t open. In order to reach him, you’ll have to backtrack past the two soldiers in vats, through the door there, then down the lift. Don’t miss the semi-hidden ladder at the top of the stairs a bit further on, which will let you collect some more armor and rocket ammo. You’ll meet up with Voss shortly thereafter, but it’ll be a quick reunion.
When you reach the room with the Gunners and the two large blocks in the center, you’ll find that there are a couple of paths leading on. If you go past the Medbots in the autopsy room, you’ll find the correct path; the other corridor, leading to a pair of Gunners, will net you another Rocket Launcher. Likewise, in the room overlooking the vat processing machine, head left to get some armor and health before moving on through the right door.
Eventually, you’ll come to a set of crawlspaces where you’ll find a hyperblaster, as well as more ammo for most of your weapons, which should be a welcome sight. Be sure to reload your weapons before heading into the next room, because the Parasite that pops out will have a new trick up its sleeve: it can launch as many as four teleport beacons when it spots you, which will pop out two Humanoids and two Berserkers. Five’s a party, obviously, so strafe around the edges of the room, and try to take out the Berserkers first, preferably with rockets from long range.
Construction Zone
Well, it’s time for you to take out the Walker for a spin; this bipedal mech will encase you in the usual shields and armor you’ve come to expect from a tank, and also give you the machinegun turrets and rockets that you know and love. It’s not as powerful as a hovertank, mostly due to the fact that its shields drop much more quickly and it’s much more slow, but as per usual, if you sit out of combat for a few minutes, your armor and shields will regenerate. Even if your shields do go down, they recharge quickly, and you’ll have plenty of armor to back yourself up with.
Despite the relative ease with which you’ll be blasting your foes, this is still a lengthy level, mostly because of how slow the Walker is. The only real challenge will come near the end of the level, when you have to take on a Harvester. Hide in the bottom of the pit near where the Harvester is stalking, and fire at its legs with your missiles to take it out. When that’s done, you can leave the mech and head out to the exit of the level.
Dispersal Facility
You’ve got a fight against other recently Stroggified humans at the beginning of this level, as well as another Gladiator. You’ll also finally pick up a railgun, although you may be surprised to find that it really doesn’t do all that much damage to your foes, at least not on Hard difficulty. You’ll be better off letting your enemies get close for use with the shotgun, or accurately placing rocket launcher rounds.
Start fighting your way through the facility here, ignoring the Harvester when it appears; just run past it and duck under the crushed portion of the walkway to move on. There’s a difficult sequence of fights a bit later, where you have to take on a squad of Stroggified soldiers in a stairwell full of explosive barrels. Most of the soldiers have shotguns, but one has a hyperblaster, and another packs a railgun. Try to lob grenades off the stairs and hope that a few of them get caught in the explosions, then head down and clear the area out.
Eventually, you’ll reach the facility’s pulmonary station. This is quite literally pulmonary, as it’s a giant heart suspended by cables. You’ll find two switches nearby that control voltage going into the heart; flip them both, and an access hatch will pop open. You can kill the floating mechanics if you wish, but they won’t attack you. Drop down into the hatch and crawl into the pipe to move on.
Recomposition Center
Immediately after you start this level, you’ll come to a holding facility, where a Tech is going to be yelling at you from one of the cells. To free him, find the control panel nearby, click on the 2 icon, then click on the red bars in the center of the panel. Doing so will let you open up the cell, freeing the Tech; he’ll reward you by upgrading your nailgun with seeking rounds, which will lock onto your enemies and home in on them. Awfully nice of him.
Nearby, you’ll come to a storage facility, where the Tech will send you off to activate the barrel maneuvering system so that you can create a path to the exit. If you follow the path available to you, you’ll eventually come across a lightning gun; one more weapon for your already vast arsenal. Thank god you’re not limited to two or three weapons like in most other FPS games these days.
Anyway, when you reach the barrel process control, flip it on; your Tech will inform you that you’ll need to proceed on even further until you reach the sterilization control. The barrel conveyor belt won’t activate until you do so. Fight your way through all of the enemies in your path, including at least one Gladiator, until you get to the control room, then flip the switch to turn on the belt.
On your way back to the Tech, you’ll come across a new foe, whom we’ll call the Nailgunner. Although quite a few enemies use nailguns, this guy’s the first one to actually use homing nails; he can also fire a single large energy blast at you, as well as charge you for a damaging melee blow. He can take a lot of damage, as well, so you might want to fire a few rockets at him while he comes towards you, then take him down with shotgun blasts to the chest.
When you return to the barrel controls, you’re undoubtedly going to be shocked - shocked, I tell you - to discover that your Tech friend has been dragged off by the Strogg. So, you’ll have to use the control panel yourself in order to create your barrelicious escape route. You’ve only got four buttons to press here. The first one (lower right) will lay down a platform for you, which you can then move forward by pressing the up arrow. Lay down a set of barrels with the barrel button, then retrieve the platform by pressing the down arrow.
With all that done, you can jump onto the barrels from your little perch, kill one last Brute, and be on your merry way.
Putrification Center
The beginning of this level is a bit of a platformer; you’ll need to follow the conveyor belts that you arrive on, dodge any moving machine parts, stabbers, cutters, or anything else that might hurt you or knock off, and generally just move forward until you can move forward no more. There are some unorthodox jumps here, as well as a few intriguing dead ends that you can jump onto to find ammo and armor, but if you always look for a new conveyor belt, you’ll eventually reach your destination.
Keep moving through the facility, being watchful of incoming enemies. The Stroggified soldiers will be especially bad here, as their hyperblasters can rip through your health in mere seconds. You will, however, eventually reach the Stroyent Processing Creature, a huge processing house for the chemicals that flow through the facility. In order to move on, you’ll have to kill it.
Unfortunately for you, your weapons can’t damage the creature, so you’ll have to find some way to destroy it with the environment. It also possesses an extremely damaging claw attack, though, so you won’t be able to just run past it. On the lower portion of its little lair, you’ll have to hide behind the pillars near its position, wait for it to attack, then move on to the next pillar, etc. You’ll eventually reach a control panel at which you’ll be able to activate the feeding system, which will bathe the creature in chemicals and cause it to lash out, destroying a nearby window.
Crawl over the window and into the nearby room (there’s a Large Armor Vest underneath the first flight of stairs here), take the lift beyond it, then walk around to the upper section of the Creature room to activate the feeding system again. This time, due to the overload of chemicals, the creature’s stomach will burst open, spilling chemicals over the floor. These chemicals will reveal a passage down into the sublevels here, so drop down and fight your way to the exit.
Waste Processing Facility
Zombie time! The Waste Processing Facility is where the Strogg dump Marines that didn’t quite make it through the Stroggification procedure; they’re much weaker than normal Strogg, but have some unique attacks, such as puking acid all over you. Still, most of these guys can be taken out with your blaster, so save your ammo for the creatures that actually carry shotguns.
Be very, very careful when you get to the section of the level with the numerous scrapers moving around on the floor. The scrapers themselves aren’t difficult to dodge, but when you climb the ladder here, you’ll face a large Strogg Marine ambush from all directions. You’ll want to duck into one of the smaller rooms here and use it as cover while you plunk your foes from long range with your hyperblaster, railgun, rocket launcher, or something else that’s suitable.
After extending the bridge and walking across, you’ll hit a trapdoor that’ll place you in the line of fire with more zombies. Take them out as best you can, then make your way past the acid trap until you meet up with Private Lanier. He says that his squad is regrouping near the entrance to the facility, so join up with him and head out. You’ll have to fight your way through a large number of Marines, most of whom are going to be packing hyperblasters, so use your own hyperblaster on them, since you’ll have a constant supply of ammo for it.
When you reach the end of this little shooting gallery, you’ll come across more Marines that are attempting to get through a laser security grid. You can head through just fine, thanks to your Strogg implants, but as soon as you head through, you’ll run up against Voss, who begs you to run before he kills you. Heh, it’s gonna be the other way around if you have anything to say about it.
Boss Fight: Voss
Which isn’t to say that Voss is going to be easy; he definitely won’t isn’t. Integrated into his little mech suit is a lightning gun, a homing rocket launcher, a Black Hole Generator, and a teleportation device that can summon in multiple Strogg to help him in this fight. He also has shields which prevent damage to his real health meter, and which he can recharge by overloading the power conduits in this room. He’s got three of these recharges, so you’ll need to finish off his shields three times before you can actually kill him. Just before each recharge, he’ll chuck a bunch of teleporters out onto the ground, so you’ll have plenty of enemies to kill instead of just him. Luckily, there are also a few health packs in the arena, so be on the lookout for them when you take damage.
Anyway, the basic sequence of events here is: attack Voss until his shields drop, kill the Strogg he summons in while he regenerates his shields, attack him again until his shields drop, etc. When he has no more power conduits to recharge at, you can unload all of your ammo on him to finish him off. This is a pretty simplified checklist of actions of course, and we recommend that you check out the video on this page for a better idea of how to take him down. We will say that your lightning gun seems to be the most efficient way to punch through his shields, with your hyperblaster or rocket launcher usually best for taking out the Strogg before Voss is done recharging. Any kind of weapon will take down Voss’ health, but if you have any remaining rockets, then that’s probably what you’ll want to use, or grenades if you can launch them into his path while backing away.
So far as avoiding Voss’ attacks, the homing rockets are going to be trouble for you, since they move so much more quickly than other homing missiles have done so thus far in the game. You’re obviously going to have to strafe away from them; it helps to just try and get up next to a wall, around the corner from Voss, as soon as he starts firing them. The Black Hole Generator, though, is going to be more problematic. When it comes out, it’ll attempt to suck you towards it, and if it does so, you’ll take severe damage, with more damage incoming the closer you get to the center. A direct hit is usually an instant kill. There isn’t a lot you can do about this except try to stay as far away from Voss as possible and strafe out of its way; he doesn’t have a distinctive windup animation for this fire, or anything.
When you’re done with Voss, deactivate the security grid and start fighting your way up the stairs beyond. You’ll eventually reach a dropship that’ll take you back up to the Hannibal.
Operation: Last Hope
There are some amusing dialogues when you return to the Hannibal; although most of the Marines you’ve fought alongside after your Stroggification have miraculously not shot you on sight, no one on board the Hannibal seems to recognize you as Matthew Kane, and will treat you as if you’re a Strogg. If you wait around long enough, you’ll even hear the PA announcer say "Security report to Deck 2. A Strogg Warrior has been sighted."
Shortly after your briefing, the Strogg will launch an all-out assault on the Hannibal. You can’t stick around and fight, because you have to go after the Nexus Core. Apparently your attack on the Tetracore was unsuccessful, because the Nexus is still up and running. Since you’re the only Marine with Strogg physiology, it’s thought that you might be able to penetrate the Strogg defenses and shut down the security grid on the three towers around the Core, which might let you enter the Core and disable it for good. Personally, we say take off and nuke the site from orbit; it’s the only way to be sure. Apparently that’s not an option, though, so you’re going in and doing it manually.
Data Storage Terminal
After your "landing" (good thing these pods are made of razor-sharp adamantium, or you’d never be able to punch through those walls), you’ll be inside one of the three terminals that surround the Nexus Core. Start fighting your way through your enemies; there’ll be plenty of them. You’ll eventually come to a door that’s locked shut. To move on, you’ll have to walk back a bit, look for a pipe with flames jutting out of it, then drop down to the pipe underneath it, where the armor is, and follow that. You’ll eventually come to Lt. Hollenbeck, who’ll ask you to take the elevator nearby and head down to restore power to the torso storage devices so that you can power up the door to the hangar, allowing the rest of the Marines to hopefully have a safer landing than you did.
Before you head back down the lift, though, head through the nearby doors and assign a repair bot; it’ll come down and put out the fire in the room below you. With that done, you’ll be able to return to the lift you just took, ride it down, and find the now-unblocked doorway nearby to move on. You’ll come to a storage room where the dark matter gun is being repaired by a trio of repair bots. Kill them to unlock access to the dark matter gun, and use it for yourself. The DMG is much more powerful in singleplayer than it is in multiplayer, so feel free to use it on the Stroggs that ambush you here. Shortly afterward, you’ll meet up with a couple of soldiers who’ve been assigned to help you reactivate the TSD’s, so head onto the lift to finish the level.
Data Storage Security
On your way down to the security system, you’ll receive a welcome upgrade to your railgun, courtesy of the tech that’s accompanying you. After you set down, it’s a lengthy and creepy walk to the control panel you need to reach, albeit an uneventful one until the end, when you spot your first Banshee. These femme fatales possess arm-mounted rocket launchers, as well as the ability to become invisible at will. They’ll fire their weapons shortly after they pop back into view, so stay clear, then pound them with whatever weapon you like. You can use the storage units as cover from her fire. If you get close, they also have claws to slash you with, or a scream attack that’ll temporarily disorient your view.
After reactivating the TSD’s, you’ll have to return to Hollenbeck, but of course reactivating the power will have powered up all the other Banshees in the area. We found that the hyperblaster was generally the best weapon to use on them to kill them before they could vanish, but your mileage may vary. There’s also a Parasite in the area, so watch out for teleporting Strogg!
Data Storage Terminal Redux
When you get back to Hollenbeck, he’ll send you off to open the hangar doors. Unfortunately there’s no button assigned to the "Tell Falcon One To Shut The Hell Up" command, so you’ll just have to listen to her complain every few seconds while you risk life and limb to help them out. It’s a linear path, but just beyond the series of lifts that you have to take, you’ll come across another pair of the very tough flamethrower-wielding Strogg.

Since you don’t have quad damage in the single-player game, this is going to be a tough fight. It might help to try and get close enough to force them into melee, then backing away while they try in vain to hit you. If you can line them up one behind the other, you should be able to use your DMG or railgun to hit both of them at one time. Repeat the process a few times to take them both out, then heal yourself at the heal station before moving on.
The lift here will finally take you to the hangar door control, so pop it open to let Falcon One land. After all that trouble, you might be a little pissed to discover that they’re only carrying one guy, but hey - they say jump, you know?
On your way back to find Rhodes, you’ll come across the Tower Guardian, a massive beast that’s apparently going to protect the towers by smashing up their interiors real bad. You’ll also get a hyperblaster modification from one of the techs in your path, which’ll let your blaster fire bounce of off walls. Cool!
Your mission changes at this point; you’re now tasked with finding the security station at the top of the tower here. Stick close to Rhodes while you move, as he has an upgraded hyperblaster as well, and will be able to chop through most of the enemies you come across. Most of your journey to the roof of the facility will be uneventful, though, and you should be able to reach it, and the security console, without incident. When you do, activate the console, then start back to one of the lifts you passed by earlier. Although it was offline then, it’ll be active now, allowing you to ride it down to the Tram Station.
Tram Hub Station
You’ll have to fight your way through the terminal of the station here, all by your lonesome, to hook up with the remnants of Scorpion squad. Be exceedingly careful when you pass through, though, as when you do meet up with the Scorpions, you’ll have a difficult long-range fight against a number of Stroggified Marines, including a couple with hyperblasters. (Note that there are two doors just before you exit to meet the Scorpions; the other door hides some dark matter cores.) The smart thing to do here is to ignore the Scorpions when you first see them and run over to the far landing pad, which will let you deal with the Marines at close range.
When you’re inside the station, fire your DMG down the hallway here to take out any enemies in your path; just make sure you don’t hit your teammates by accident. You’ll be ambushed by two Berserkers when you take the lift up to the bridge controls, but don’t worry too much if you take damage, since you can just drop back down to the lower level and get yourself recharged by your teammates.
After the bridge has been extended, you’ll have to fight your way across it to reach the Processing Tower. You’ll come to a seeming dead end fairly quickly, but if you jump over some of the railings, you’ll be able to climb onto the infrastructure and start crawling across to the far side. Cortez will pass below you, but won’t notice you, even if you fire at him. You’ll meet up with him soon enough, though, and will be able to fight with him for a bit while you attempt to realign the tram car he was on. Luckily for you, he’s nigh unkillable, and can take down most enemies in one shot, so let him do the heavy lifting while you fight towards the hub controls.
When you finally reach the controls, rotate the car to the left to properly align it. Cortez will then send you off in search of repair bots to fix the tram tracks themselves, which have been damaged. Just for once, we’d like to be the ones to stay back on guard duty, but it appears that you’re only good for hunting and finding.
Construction Site
As you make your way through the construction site, be on the lookout for another Parasite. When you first see it, it’ll withdraw. After the lights go out, kill the Berserkers that drop through the ceiling, then head into the next area to take on the Parasite itself. Your rockets or DMG might help to destroy its teleport beacons before the Strogg are able to warp themselves in.
After passing on for a bit, you’ll come to a seeming dead end. You’ll have to activate the machine press equipment here, which will begin stamping the sheets of metal and placing them on a conveyor belt. If you follow the belt to the end of its path, you’ll be able to jump onto the metal sheets and ride up the lift there to the upper story. The door in front of the lift’s upper end will lead to a suit of armor, while the one off to the right leads on. Just be ready for a Strogg Marine ambush after heading through.
After assigning the repair bots to the tram line, return to Cortez to leave the level and head towards the Processing facility.
Tram Rail
Another rail-shooting mission, except this time we mean it literally. You have two targets here: other tram cars, and airships. The tram cars should probably be your priority, as they’ll come alongside you to let the Strogg on board continually fire if you don’t take them out. The flyers are less of a threat, since most of their missiles will miss you, and they’ll fly by after letting them loose.
After a couple minutes of shooting, you’ll come to the Data Processing Terminal and will be back on your feet again.
Data Processing Terminal
It seems that the Strogg have shut down power to the Data Processing Terminal in order to impede your progress. To reach the roof, you’ll have to find some way to bring power back online.
Despite being powered down, the facility still has some juice left for critical systems, such as the teleporters you’ll see soon after you start your skulking about. These guys will pop in numerous foes for you to deal with, so listen for the distinctive sound and take cover when appropriate. Note that you can shoot the green teleporter orbs above the teleporter pads to destroy them. Most of your enemies will be of the Stroggified Marine nature, but you can also expect some heavier targets now and again.
Soon enough, you’ll come to the power station of the center, which will let you restore the juice to the entire building. Unfortunately, as soon as you try to leave this room, you’ll be ambushed by a number of enemies, including two Banshees, a Parasite, and another flame-throwing Enforcer. If you proceed slowly into the room, you should be able to trigger the first Banshee’s appearance before the rest of the foes; if you get overwhelmed, don’t forget about your DMG, or the old backing-up-while-launching-grenades tactic.
When you finally reach Sledge, you’ll have to find and activate the elevator system to reach the top of the tower. Doing so involves little more than running through a nearby room and flipping a switch, but unfortunately you’ll have to actually wait for the elevator to arrive before you can head on up. Of course, "waiting" is rarely a spectator sport in this game, and indeed, before the elevator arrives, the nearby teleporters will twink on and start spewing out Stroggs. Worse than that, though, are the three Tanks that pop up out of the floor. You’re going to have your work cut out for you here, obviously.
Now, there’s no particular reason why you need to remain near the elevator while it’s dropping down from the roof, and a bunch of reasons why you actually shouldn’t. It’s much more useful to walk down to the bottom of the floor here and circle around the data pumps to the left, so that you’re on the opposite side of the room from the teleporters where the Strogg come in. If you are, then you’ll be able to fire your DMG down the hall to hit the Tank and the Strogg behind them, or just duck and cover while Sledge goes crazy with his hyperblaster. He can take a huge amount of damage (he never actually did die while we ran through this area), so feel free to let him take the lead.
When the three Tanks are dead, the elevator will arrive, but Strogg will continue to pour in through the teleporters, so run for the elevator and hop aboard to move on.
Data Processing Security
Your path to the roof of the Data Processing facility will be impeded around the 2,000th floor of the compound by some misaligned data nodes. Damn those data nodes, they always get misaligned just when you need them. You’ll have to follow the path indicated by the red beam here until you reach the control panel that controls the data nodes, just past numerous Gunners. When you do, rotate it to the right twice to emit the beam (you’ll know you’ve been successful when Sledge congratulates you) and unlock the path back to the elevator.
Along your way, you’ll come to a broken router. After you unlock the router’s guts with the nearby control panel, find the lift on the lower level and take it up to the control room above, where you’ll have control over all eight of the router nodes. You’ll need to manipulate the nodes one by one until the red beam is routed through the area to the far door. Begin with the lower left router, then proceed on to the middle left, middle right, upper right, and upper middle nodes to bend the beam through to the door and unlock it.
One more obstacle lies in your way, as the Strogg will raise a large platform to block the beam of light. You’ll need to ride the lift near the locked door here, fight your way to the platform controls (which are guarded by a pair of Banshees), and lower it again to finally unlock the door leading on. On your way back to the elevator, grab the Large Armor Vest and the medpack under the stairs in the room just beyond the two Banshees.
When you do finally reach the roof, get ready for one heck of a fight, as two Icari (of the missile-launching variety) and a Gladiator will be waiting for you. These guys don’t like to bunch up, so clumping them together for a DMG blast won’t be a workable solution. Try to head down the first path to the right that you can, using your lightning gun to blast the Icarus there, and hope that Sledge follows you and contributes to the cause. The Icari don’t seem to like the lightning gun, although they’re quite resistant to damage in general. Luckily you’ll be able to use the many structures in this area to block the missiles that they fling in your direction.
Data Processing Terminal
On your way down to the Terminal, you’ll run across the Tower Guardian again. One gets the sense that he doesn’t necessarily like what you’re doing to his towers, but he won’t be able to stop you just yet. This is a pretty short level, meant solely to reify your conceptual journey to the Networking Terminal, or somesuch; you won’t have to actually shoot anything here.
Data Networking Terminal
After riding the elevator here, you’ll come across a few members of Raven squad, including a Tech and a Medic. With them in tow, you’ll be able to recharge your health and armor at any time, so keep them alive by staying in front of them. Unfortunately, this is where the action really gets hot and heavy.
When you call down the lift here, it’ll be occupied by a Gunner, and the teleportation systems around the room will start to bring in more Strogg. You’ll have to take out the Gunner first, obviously, then step onto the platform and fire away at the Stroggified Marines until Raven squad can get onto the platform with you. When they’re aboard, hit the lift and start riding it up. Another Enforcer will be waiting for you at the top, though, so be ready for it with whatever your weapon of choice is. You’ll have to handle it while the Ravens deal with the nearby teleporter, but if you wait long enough, the teleporter will stop bringing in Strogg and let you ask the Tech and Medic for a bit of a recharge.
The next couple of rooms will, of course, be filled with more Strogg, but your Raven teammates will be a bit more expendable here, since you’re fairly close to the end. When you reach the Gladiator, take it down, then head through the door it came through to reach a teleporter that’ll take you up near the rooftop.
Data Networking Security
Hmm, you’d think that maybe the Marines would have the common sense required to not destroy the upper reaches of this tower before you complete your utterly critical objective. Apparently not, as the tower here is coming under assault, and is already badly damaged. You’ll have to make your way through the rubble, rushing past the Tower Guardian and crawling under half-busted doors. When you reach a seeming dead-end, find the orange piping that runs under the floor and crouch down to follow it until you reach the elevator leading up to the roof.
Boss Fight: Tower Guardian
You can probably deduce what’s going to happen up here, and indeed, as soon as you step out onto the platform you’re going to come face to face with the Tower Guardian. We certainly hope you weren’t expecting a pushover fight, because this is definitely going to be one of the more difficult challenges you’ve thus faced.
There are roughly three phases to this fight, none of which allow the Guardian to avoid your damage, so try to always be firing on him with something. He’s big, but you’ll have to keep your distance from him if you want to live, and he moves fairly fast, so hitting him with things like the rocket launcher or the lightning gun can be difficult. The most damaging weapon you have will be your dark matter gun, so hopefully you have a good number of shells for it. Otherwise, you can just above your railgun, get close enough to lock on with your nailgun, or try to hit him with rockets when he’s on the ground.
In the first phase of the fight, the Guardian will land on the ground and use two of his main attacks; a shotgun-like barrage of energy bolts from one hand, which do major damage if they hit you or the ground near you, and a homing missile with a large area of effect for its damage. Try to keep the large structures here between you and the Guardian, and pop out whenever your DMG is ready to go to fire it. It won’t impact the Guardian, instead choosing to just pass right through, but it will take off a significant amount of its health each time it passes by.
After remaining on the ground for a bit, the Guardian takes to the air and starts trying to fire on you from above. It becomes harder to use the structures here to avoid its fire when it’s airborne, so keep your distance from it and unload on it with your railgun or machinegun, or, if you think you can hit it, the DMG. Eventually, you’ll deal enough damage to really annoy it, and it’ll stop firing, instead attempting to fly on top of you and use the flames from its jetpack to burn you. Unless you stop moving here, you should only take light damage from the flames, so just backpedal, wait for it to line up with you, then fire your DMG at it.
The final phase occurs when it stops attempting to burn you and focuses instead of dropping to the ground and coming after you. Its new attack at this point involves launching a starburst of missiles which home in on your location from directly above the roof of the building. These things are exceedingly difficult to dodge, but they do come straight down, so try to find a clean line to run and head straight forward when he launches them. When you have a clear shot, hit the Guardian with everything you’ve got, and he should go down eventually.
After activating the final security override, you’ll be able to head into the teleporter one floor down to reach the Core.
Nexus Core
There’s nothing overtly complicated about the initial stages of this level; you’ve just got a whole lot of enemies to kill, and they’ll be coming at you in large groups. When you reach the first lift, activate it and start to ride it down, but be ready for the Stroggs to start busting through the windows and dropping down to meet you. Be ready with something like a hyperblaster or your lightning gun to make quick work of them before they destroy you.
Unfortunately, when you reach the bottom of the lift, you’ll be hit again by two Banshees and a Gladiator. As soon as it hits rock bottom, jump off the lift and head down the stairs on the opposite side of the Gladiator to get some ammo and armor, then use whatever means necessary to kill your enemies, which is the only way to open the door here. As soon as you exit through the door, though, a Parasite will appear, so you may want to have a DMG round ready to go to destroy the teleport beacons before it can launch them.
To reach the elevator, you’ll need to fight your way past a teleport system that can’t be shut down, and never seems to stop shunting in more Stroggified Marines. Luckily, nothing heavier will pop out, but you should still try to preserve as much health and armor through these fights as you can, because you’re going to need as much of it as you can get very shortly.
When you reach the elevator, head inside; after the ride is over, you’ll be launched into a fight with a Gladiator and a couple of Marines. Killing them will spawn in a Banshee, but after she’s dead, you still can’t seem to escape the room. Luckily, the Banshee knocked out a few floorboards when she appeared, allowing you to drop down to the pipes below the room. Fight your way to the security control station, deactivate the security, then return to the elevator room to move on through the unlocked door.
Immediately beyond this door, you’ll come to what is obviously a bit of an abattoir from the looks of it. It’s worse than you might guess, though: first you’ll have to fight off three Enforcers, then three Icari, then two Tanks. Lovely! We recommend that you use your shotgun or hyperblaster on the Enforcers while backing away from them, the lightning gun on the Icari, and your DMG or railgun on the Tanks. There are ammo and health pickups in the area, so as long as you can use the pillars scattered around the room to your advantage, you should be able to survive long enough to kill the defenders here.
You’ll have some pipejumping to do to get beyond the next room here, but there’s always a path leading on; your ultimate goal is the platform at the top of the room. When you get through the corridor filled with railgun Marines, you’ll come to another data storage facility, where yet another large ambush awaits you. At least these guys have the decency to pop out of the same door, all at once, allowing you to DMG them, then follow up with rockets or your railgun. Also note that if you drop down near the ladder by the door you enter, you can crawl your way to a Large Armor Vest.
The Nexus
Well, it was awfully polite of the Strogg to leave you such a large amount of ammo and armor on the walkway leading into the Nexus. They didn’t have to be so accomodating, but hey - they’re just friendly like that.
Makron
Of course, they’re not going to just let you waltz into the Nexus and blow it up, now. First, you’ll have to take down the Makron himself, who’ll appear from the floorboard as soon as you enter the room and start attacking you. With your upgraded weaponry, though, you actually have a shot at killing him this time. Lead off with your DMG, and use the four pillars around the side of the room as cover. It doesn't take much to defeat his first form; just keep hitting him and hide while the DMG is recharging. He has surprisingly little health in this first form, so it should only take four shots to remove the bulk of his health, allowing you to finish him off with shotgun blasts or something else.
After you've "defeated" the Makron, it won't be down for the count, of course. Instead, the upper body will detach from the lower body, recharge itself at the dark matter generators, and begin its attack again, with renewed vigor. Your overall strategy here doesn't change, though; you just need to use the pillars to hide, while darting out and hitting the Makron with all you've got whenever you think you're in the clear. Unfortunately the beast will occasionally stop in midfight to recharge itself at the generators, so be sure to keep up your fire on it while it does so! This isn't like Voss, where he could only recharge himself so many times; the Makron can recharge as much as he likes without a care, so in order to beat him, you'll have to keep hitting him while he restores his health. As per usual, the dark matter gun will do a number on him, so just fire away while he's distracted and recharging. It'll take a lot longer than his previous form did, but he will go down for the count eventually.
The Nexus
After the Makron is taken out, the Nexus Core will finally appear, along with a half-dozen enemies, running the gamut from normal Stroggs to a Gladiator and Banshees. Ignore them as best you can, since you aren't going to be able to find any health or armor upgrades; you can't really afford to waste your health on these guys. In between the death of the Makron and the appearance of the Core, however, you can recharge your health by hopping into one of the four teleporters on the corners of this room and
The Nexus Core is protected by shielding, shielding that's generated from the blue energy emitter directly above it. In order to knock out the shielding, you have to hit the emitter first; that will disable the shield for five or ten seconds, allowing you to fire directly at the Core. And that’s really all there is to it! If you get down on the ground floor here, you'll just have to circle-strafe around the Core, attempting to dodge enemy fire while knocking down the shields (preferably with a rocket), then firing on the core (preferably with the DMG). The Gladiator that's running around might get you with a rail shot or two, so you might want to hit it with the DMG to kill it, but the rest of these jokers shouldn't be able to do too much damage if you're running as fast as you can. Unfortunately you won't be able to recharge your health at the stations up top very reliably, since you'll get hit as soon as you stop to do so.
Anyway, if you can survive long enough to destroy the Nexus, then that's it! You've won! The Strogg have been eliminated! Oh, wait...you have new orders. Well, it looks like that’s all for now, at least until the inevitable expansion pack comes out.
Got a news tip or want to contact us directly? Email news@gamespot.com
Join the conversation