Prototype Walkthrough
Conquer Manhattan with our complete Prototype walkthough, including achievement and trophy lists.
You are Alex Mercer, a shape-shifting, human-consuming, one-man army. And yet, even with these powers, you'll be facing some of the most challenging (or some may say frustrating) missions in any open-world game--and that's where we come in. With our guide at your side, we'll ensure you put your superpowers to good use in order to save Manhattan…and yourself.
Here's what you'll find in GameSpot's Prototype Game Guide:- General Tips: Check out our tips for venturing through the city.
- Walkthrough: Prototype's tough, but we're tougher. Find out how to complete each of the game's missions with our walkthrough.
- Xbox 360 Achievements: Learn how to obtain Prototype's achievements.
- PlayStation 3 Trophies: Want some of those sweet PS3 trophies? Here you go!
General Tips
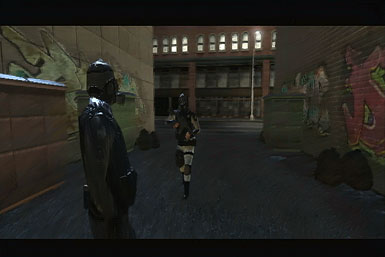
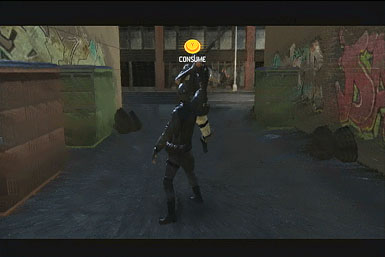
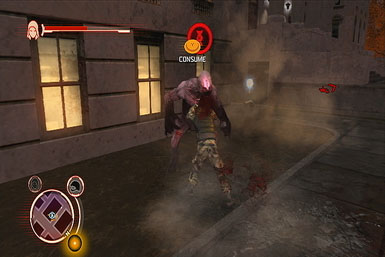
Consuming
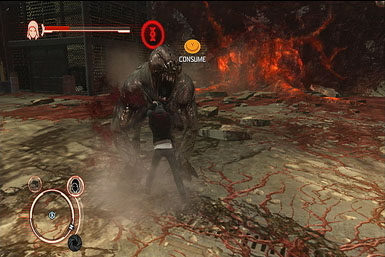
Prototype is built around consuming people. That is, you can consume almost anyone you encounter on the streets by simply grabbing them and tapping the "consume" button. Doing so not only refills your health, but it also allows you to assume that person's identity and use it as a disguise.
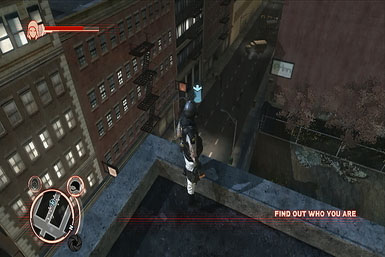
Stealth
One of the key elements to survival in Prototype is using disguises to remain undercover. You'll gain disguises by consuming people of certain types--for instance, if you consume a soldier, you'll be able to assume his identity, allowing you to infiltrate bases unbothered. Now your disguise will remain effective so long as you don't tip off your enemies by attacking or consuming them. Virtually anything else is fair game though, so feel free to run up buildings, glide across the city, and make leaps several stories tall--none of this seems suspicious in this city. New Yorkers...nothing surprises them anymore, huh?
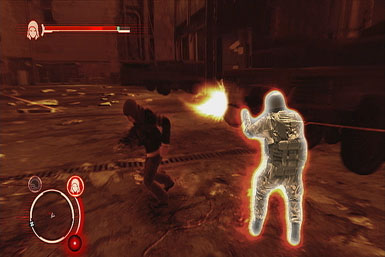
The disguise meter, located just right of the map, displays whether your disguise has been compromised or not. The shutter at the bottom of the meter displays if the enemy can currently see you: if it's open, you're in their sights; if it's closed, you're as good as invisible. If the shutter is open, and the enemy spots you doing something suspicious, such as attacking their friends or using special powers (oddly, climbing walls doesn't arouse suspicion), the meter just above will begin to fill. If it fills completely and turns red, your disguise is no longer effective and the enemy will open fire. To reduce the meter, find a hiding place where the enemy can't see you (such as under a bridge, in a thin alley, etc)! Once there, you can expedite the process by swapping into a non-compromised disguise--if this option is available, a "switch" icon will appear just above the map. To help you stay aware of your surroundings, the mini-map highlights enemies in one of three colors, indicating their awareness level of you. White represents enemies that currently cannot see you, yellow represents those who can, whereas red indicates an enemy who's aware of your presence and will open fire.
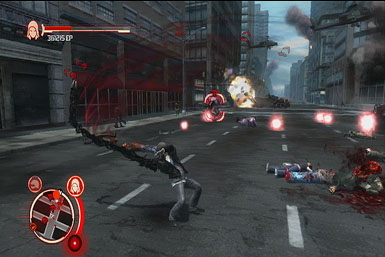
Powers
As you play Prototype, you'll earn evolution points by consuming people, completing missions, killing enemies, and more. You can then cash in these evolution points on the "Upgrade" screen of the pause menu. Here, you can unlock various new abilities or improve your current skills or defensive abilities.
While the skills you choose to upgrade is ultimately up to you, we do have a few suggestions. First, we strongly recommend upgrading your "Survivability" skills first, such as by purchasing Health Boosts, Health Regeneration, and improving your Critical Mass ability. Following that, we also suggest upgrading your sprint speed under "Movement" to increase your chances of escaping the strike teams. Finally, once you unlock the Whipfist power, it's best to purchase its two enhancements, the first of which allows you to quickly take out groups of enemies, while the second makes it immensely easier to skyjack helicopters.
Prologue
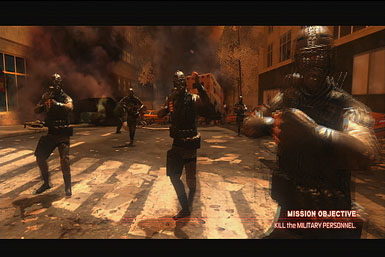
Kill the Military Personnel
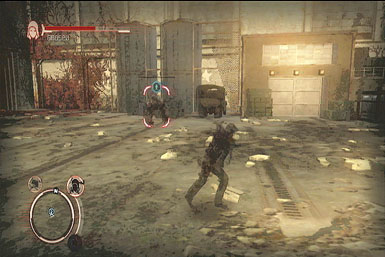
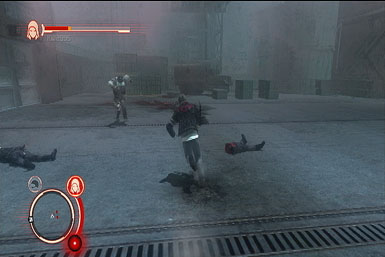
The local military's acting up and need to be taught a lesson. They're all nearby, though they're also marked on your radar (as red dots) if you need additional help to track them down. Now's a good time to try out your basic combat skills: Attack and Special Attacks. Attacks are quicker, but Special Attacks are stronger. Either can be charged by holding down their respective button to unleash a more powerful attack. In addition, the attacks can be linked together in various ways to form combos. Thankfully, these guys are weak (or rather, you're really strong), so it should only take a few attacks to take down each one.
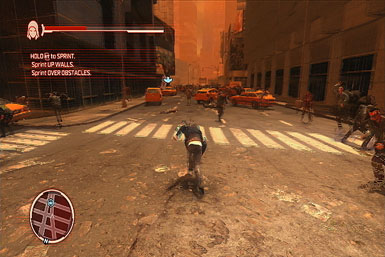
Go to Times Square
Follow the on-screen marker to locate Times Square. To speed up the process, try Sprinting with the Right-Trigger, allowing you to zoom up over obstacles, such as cars and even buildings!
Kill the Military Personnel
Once at Times Square, you'll have to destroy some more military members. Join them on street level and tear them apart using your standard attacks, though your Special 'Claw' Attack is great for groups. Remember to use your radar to track down all the enemies.
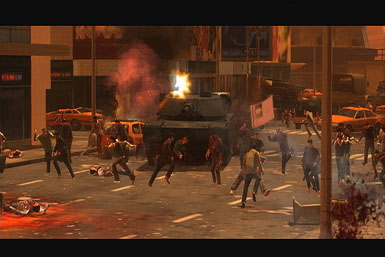
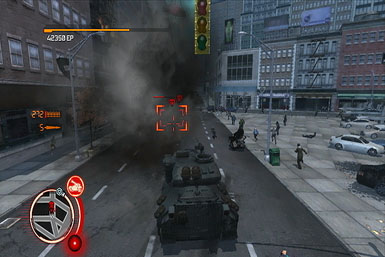
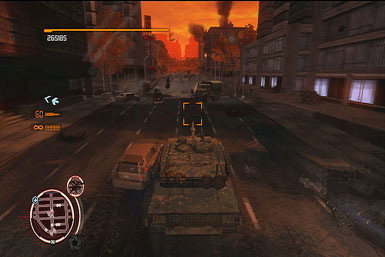
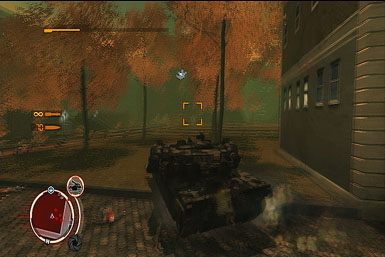
Destroy the Tanks
Afterward, follow the marker on-screen to encounter a group of four tanks. Run up to each one and attack it until it's destroyed--it should only take about two hits each.
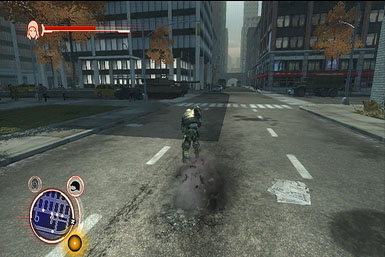
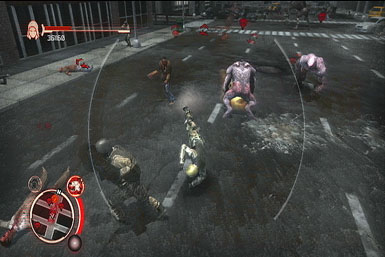
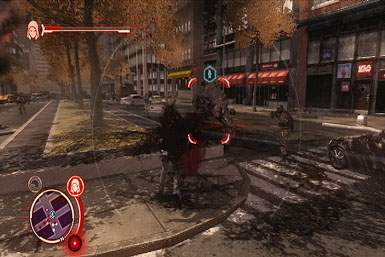
Kill the Hunters
Just ahead in Times Square, a bunch of creatures known as Hunters will storm in. Because there are so many, you may want to try out the lock-on feature (by holding Left-Trigger), allowing you to hone in and focus on a single enemy--standard attacks should work fine for the most part. As for the tanks and other enemies, you can simply ignore them.
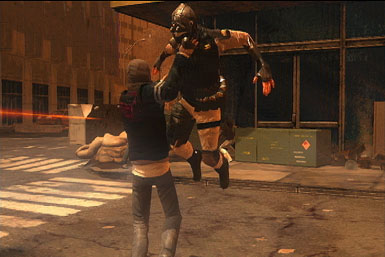
Consume the Commander
Dash up the street to the commander (as marked on-screen), grab him, then consume him by pressing the button shown on-screen. This will conclude your first mission.

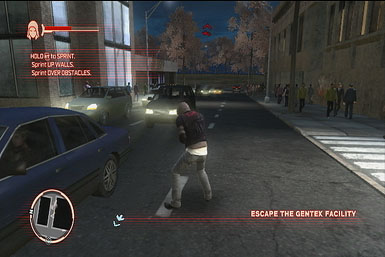
Escape the Gentek Facility
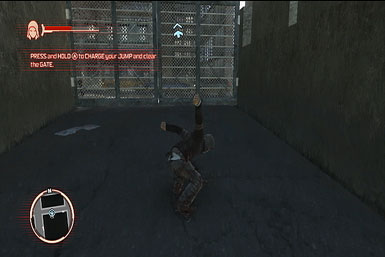
Jump over the Gate to Escape
To escape the facility, perform a charged jump over the gate. To perform a charged jump, simply hold the "jump" button for a few seconds before releasing to increase the height of your jump. Now dart up the street toward the on-screen marker.
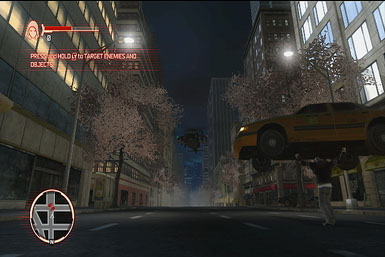
Destroy the Helicopter
After picking up the Taxi, you'll discover that you can use the Right-Stick to switch targets while locked-on. In this case, you should target the helicopter, then toss the Taxi at it by tapping the "Grab/Throw" button, taking it down.

Get to Higher Ground
With the helicopter destroyed, use your Sprint ability to dart up a couple of buildings, as marked on-screen. You can expedite the process by performing charged jumps as you dart up the walls.
Destroy the Helicopters
Once on the roof, some helicopters will swoop in. Grab the nearby air-conditioning blocks and use them to take down the helicoptersl by locking on and throwing them as they swoop by overhead.


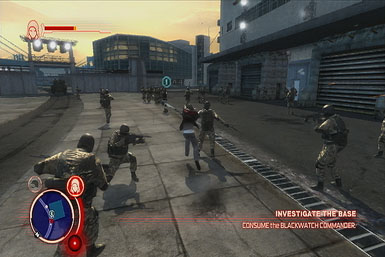
Look for Clues About Your Past
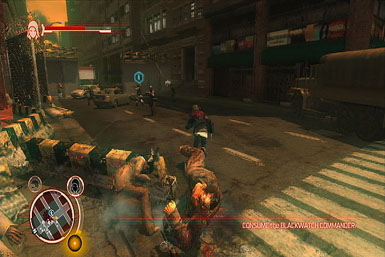
Consume the Blackwatch Commander
Grab the commander as he approaches and consume him. You can now assume his identity at any time either by using the "Power Select" menu, or pressing left on the control-pad.
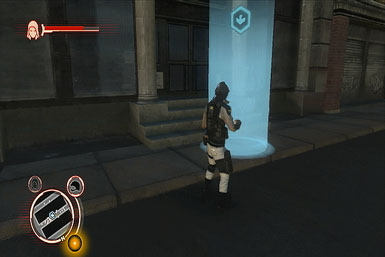
Go to Dana's Apartment // Go to the Overlook to Investigate the Area
Proceed down the street to the rooftop that's marked on-screen. Once there, hop over to nearby rooftop and step into the cone of light to trigger the next sequence.
Enter Dana's Apartment without Raising an Alert
Before dropping to the street, switch into your Commander disguise (press left on the Control Pad) to avoid arousing the enemy. Now drop down and enter Dana's apartment via the cone of light--make sure not to attack the soldiers along the way, otherwise they'll figure out who you are.
Find Out Who Tried to Kill You
Kill Any Marines Attempting to Radio for Support
Head toward the on-screen marker to find your apartment. Once there, take down all of the nearby marines, but be sure to target those radioing in for support first--an icon will appear above their head. If they complete their call, you'll have a lot more than just marines to deal with.
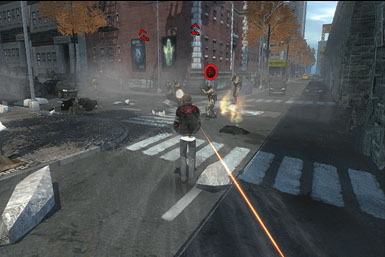

Locate the Agent at the Extraction Point
Locate the agent by following the on-screen marker to the park.
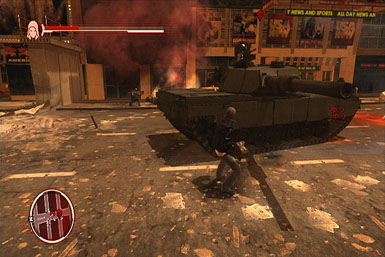
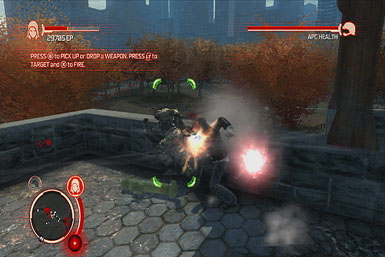
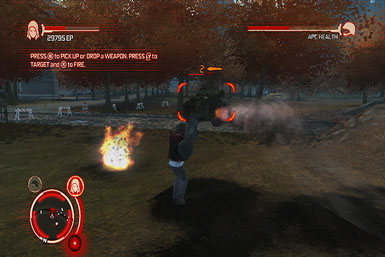
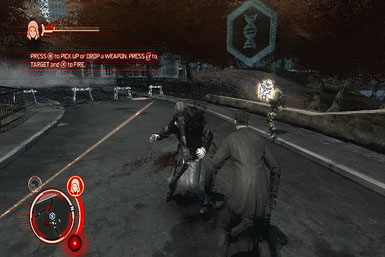
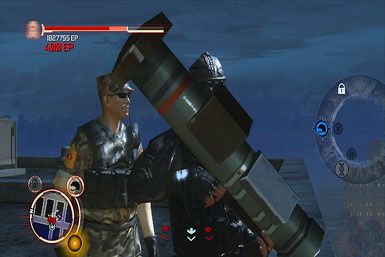
Damage the APC to Force the Blackwatch Agent out.
Listen, you're not nearly as strong as you were in the first mission, so you're going to need some heavy artillery in order to take it down--thankfully, it's close by. Quickly jump on top of the bridge and take down one of the several rocket launching baddies and grab his weapon. How hop down to the tank, lock-on, and let the rockets fly for an easy take down.
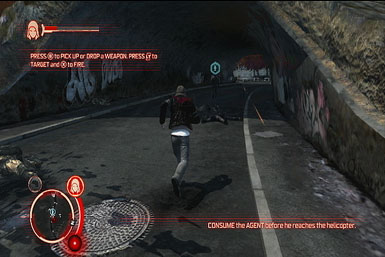
Consume the Agent Before he Reaches the Helicopter
With the tank down, grab and consume the agent (who should be underneath that same bridge) before he reaches the helicopter.
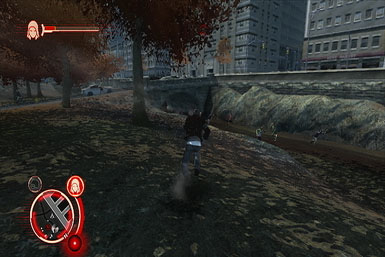
Evade or Defeat Nearby Enemies to Complete the Mission
The easiest way to complete the mission is to hightail it out of there to a hiding place, such as under the bridge to the southwest, and change disguises when there to throw the enemy off your tail, completing the mission.
Behind the Glass
Rescue Elizabeth Greene
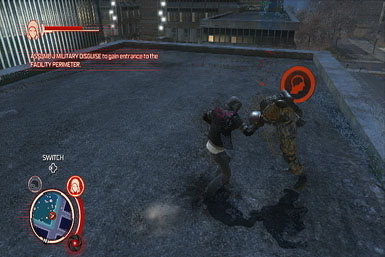
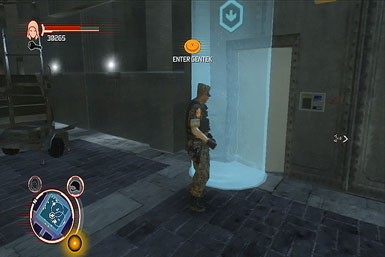
Head toward the Gentek Facility, as marked on your screen. Once there, you'll have to enter the facility undetected. To do so, you'll have to assume two different disguises. First, approach the facility's entrance from ground level to trigger a cutscene involving some military personal rushing out. Consume one of them, then hightail it somewhere hidden to lose the alert that's triggered, such as the building you just descended from (remember to switch costumes when out of sight to expedite the process). Once you're in the clear, assume the military disguise that you just consumed, enter the facility, then head right to find the commander, who'll you'll need to consume in order to enter the building. Once you've consumed the Commander, you'll trigger another alert; leave the facillty to lose the alert, then return in the Commander's disguise and enter the building through the front door.
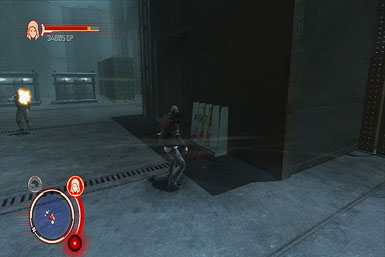
Escape the Hunters
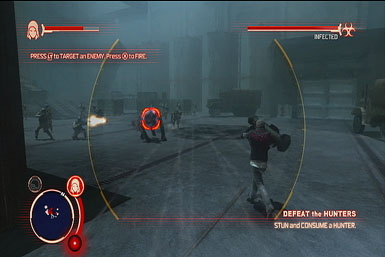
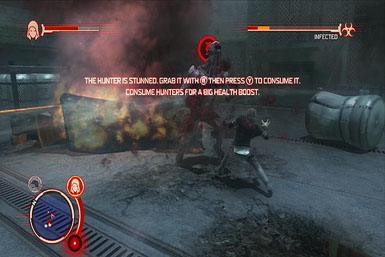
There are far too many Hunters to be fought, so you need to get out of there! Hightail it over to the rooftop as marked on your radar--remember to Sprint! Once there, you'll automatically drop through the skylight into the building. Ignore the soldiers and instead grab a rocket launcher from the rack along the middle of the wall. With it equipped, a Hunter will drop in--lock-on to him and fire all the rockets you've got at him--you'll likely have to grab a second launcher from the rack in order to deal enough damage. After a few hits, he'll become stunned--quickly run up and consume him to obtain his power.
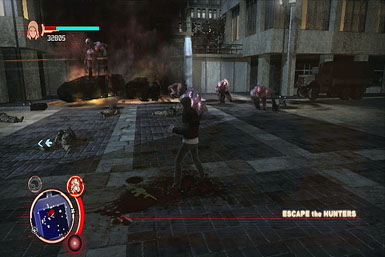
Although you have a nifty new power, it's not enough to tackle the next wave of Hunters who'll drop in. Instead, continue to use the scattered rocket launchers to take them on. As soon as you run out of rockets, run away from the pack and seek another--you can find more on a rack just up the stairs, or from the scattered soldiers (which may be on the ground, or upper levels). If the Hunters get close, perform a roll by pressing the right-trigger to evade them.
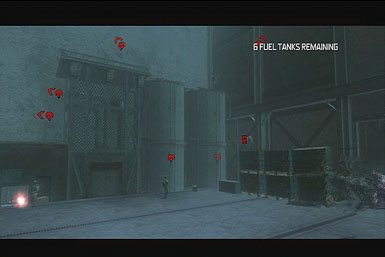
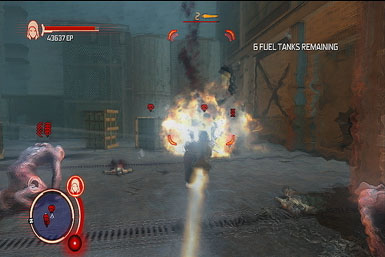
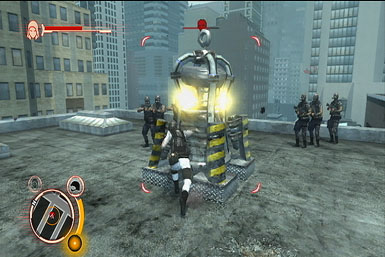
Defeat the Hunters
After taking down a few Hunters, you'll be instructed to destroy the six large cannisters in order to wipe them all out. Again, the easiest way it using rocket lauchers--if you exhausted all the ones from the racks, look for dropped by soldiers on the floor. It takes two rockets per cannister. Make sure to stay on the move and roll to evade the enemies. If you can't locate any more rockets, your claws can destroy the cannisters as well, though this is much less effective. If it comes down to it though, run half up the cannister, then pump the sprint button (in other words, drop a few feet, then run back up before touching the floor) while attacking to remain on the cannister and away from the enemies to inflict damage. Once all six are destroyed, the mission will be finished.
The Wheels of Chance
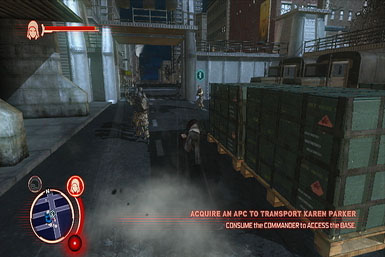
Acquire an APC to Transport Karen Parker
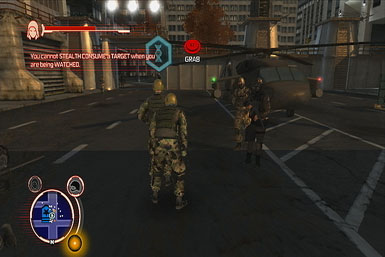
Head to Karen's apartment, via the on-screen indicator. After meeting with her, consume the marked soldier nearby (and make sure you assume his identity) then head toward the military base. Once there, you'll spot a Commander who'll you'll have to consume in order to access the base. As long as you're disguised, you can run right up behind him and stealth consume him (by holding R1/Right Bumper, then grabbing) without triggering an alert--sweet! Now as the commander, you may enter the base. Inside the base, you'll need to consume the marked APC driver in order to gain the ability to drive the vehicle. Get behind the one marked on-screen and stealth consume him as well, then exit outside.
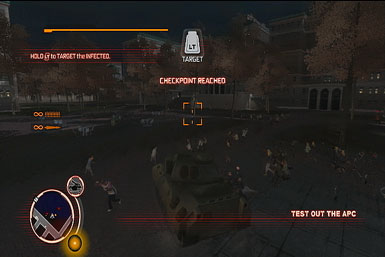
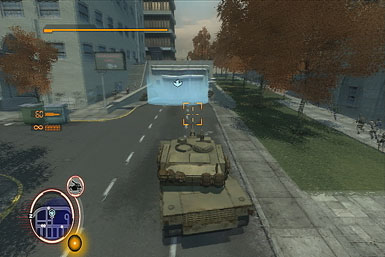
Test out the APC
Outside, hop into the marked APC and drive it to the marked destination. Once there, use its targeting system and try out its weapons on the infected (Right-Trigger for machine gun, R1/Right-Bumper for shells).
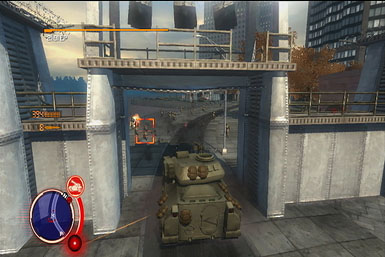
Rescue Karen Parker
With the infected cleared out, head toward Karen's apartment, as marked on the map. You'll have to drive through a closed gate to get to it. Once there, you'll find that it's been transformed into a Hive--target it with your machine gun and shells to take it down (ignore the other enemies--as long as you're quick, they won't have time to deal much damage). With the Hive destroyed, pick up Karen by driving into the blue light, then take her to safety, as marked on-screen. When you reach your destination, you'll have to get out of the enemy's sight to complete the mission--the nearby alley is perfect for this!


A New Order
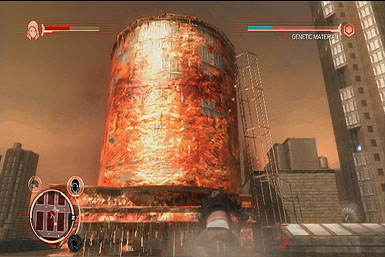
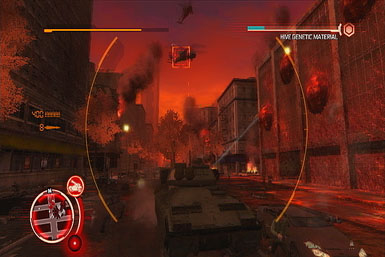
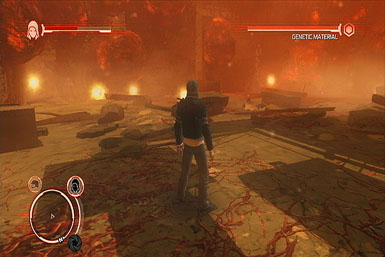
Collect Genetic Material
For the first part of this mission, you'll have to travel from infected water tower to infected water tower (only one is marked on your map at a time) to bust them open and collect their genetic material. But here's the thing: Infected water towers are the birthing ground for Hunters and they'll start spawning the little demons as soon as you get anywhere close. Even worse, if you get too close for more than a few moments, they'll explode, taking the genetic material with it! As such, you need to attack them from a distance by chucking the objects from nearby rooftops into them (remember to lock-on!). Once you've destroyed a tower (takes about three or four thrown objects), make sure to collect the floating genetic material balls before heading to the next tower.
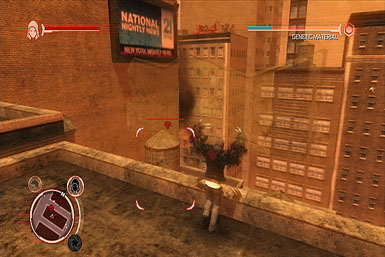
Of course, as you focus on each tower, you'll also be attacked by Hunters. We suggest ignoring them for the most part, unless a whole bunch of them group around you, in which case your special Claw attack can come in handy. In addition, a Strike Team or two may be called during the mission--get to a roof and throw objects at the helicopters to deal with them. Once you've gathered enough genetic material, head toward the Hive, as marked.
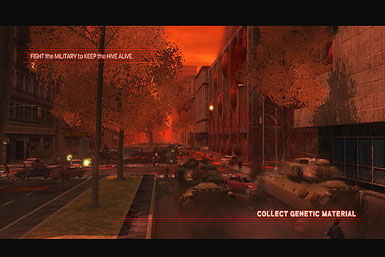
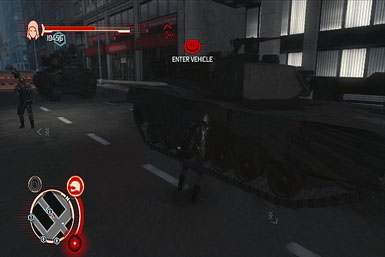
Once at the hive, you'll learn that you need to protect it from the military, as it actually periodically spits out genetic material onto the adjacent road. Now the best way to deal with the military is to hijack one of their tanks (by getting close and tapping the buttons shown on-screen), then locking onto the enemy tanks and helicopters and taking them down with your turret. Unfortunately, genetic material can only be collected while on-foot, so you should exit the vehicle after destroying a few enemy vehicles and sprint around to grab it all. As long as you keep on the move, feel free to ignore the attacking Hunters. Once you've gathered all the visible material, hop back into your tank and protect the hive until more appears. Oh, and if your tank winds up destroyed, simply hijack another.
Open Conspiracy
Investigate the Base
Switch into your soldier disguise to glide into the base without sounding any alarms. Now consume the marked commander, which will alert the enemies to your presence, and quickly hijack the tank by the entrance.
Stop the military from Discovering the Safe House
With the tank in your possession, you'll have to drive around the city, to the points marked on your radar, and take down all of the enemy units in the area. This is actually a pretty simple process; just remember to use your lock-on to quickly aim and switch targets. Because your rocket supply is limited, save them for vehicles. If your tank gets destroyed (which it will), simply hijack another--if none are nearby, head to the next point marked on your radar to find more. However, if you find yourself going up against a helicopter while on-foot, head to a rooftop and chuck something at it to deal with them first before heading onward.
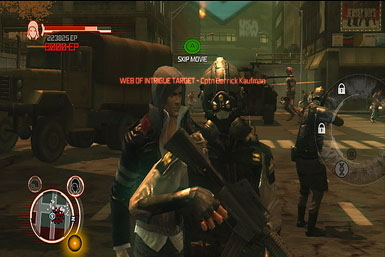
In the Web
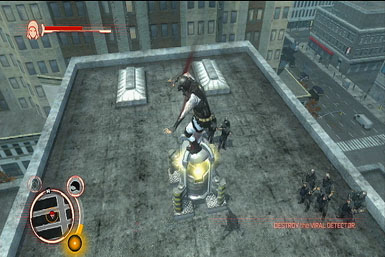
Stop the Military from Discovering the Safe House
You need to destroy 10 detectors scattered about the city. At first they're marked on your radar one at a time, but after destroying a few, they'll all be highlighted on your radar. Of course, each detector is protected by a small squad of soldiers, however, you can approach each one without being fired upon by donning the soldier disguise first--assuming it hasn't been compromised. Of course, the detectors also actively working to ruin your disguise, so you'll want to destroy each one fast. In addition, it's best to position yourself behind them, away from the enemies, so it acts as a shield while you're punching/kicking it to pieces.
As you travel from detector to detector, you'll often gain undesired attention, including that of the Strike Team. As such, it's often best to try and ditch the enemy by travelling at ground-level and looking for a secluded spot--such as alleys or underground tunnels--to swap disguises and lose your pursuers.
The Altered World
Locate McMullen
Proceed to the marked rooftop then hop down and look for a commander just up the street, on the left, that you can stealth-consume. With his disguise in tow, head for the Hive, as marked on your radar.
Bring McMullen to the Site
Once at the hive, you'll have to disable--not destroy--four detectors. They're all close to each other and marked on your radar. Disabling them is easy, just approach one (while disguised as the commander) and press "Y" or "Triangle" when close, which begins the deactivations sequence. Now you only have 5-seconds to press the buttons displayed on-screen--screw it up and the enemies will become aware of your true identity. Normally we'd suggest you run away and hide, but you're really best off just restarting from the last checkpoint via the pause screen. If you're having trouble finding the correct buttons in time, try pressing pause the moment each one appears, giving you a chance to locate the button before you unpause. Although the enemies may become aware of your true intentions after a few deactivations, don't let it detour you--the others are close by, and should be able to be shut off before they deal any real damage. With the four detectors deactivated, lose the alert if you have one, then head to the point marked to call McMullen.


Evade the Military
After calling McMullen, lose the military either by evading or killing them. The easiest way is to evade by finding hiding spot (such as underneath the nearby bridge) and swapping disguises to compete the mission.
Errand Boy
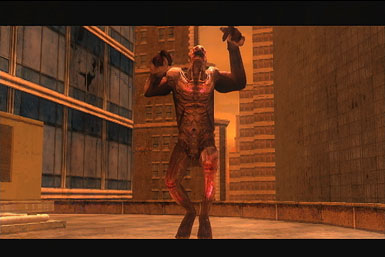
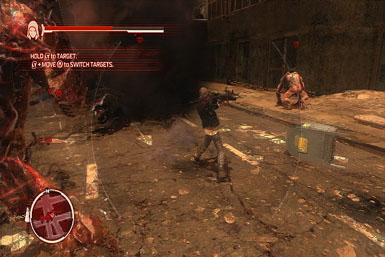
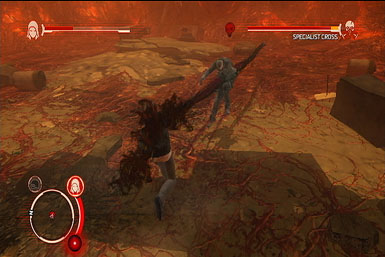
Collect Genetic Material
Head to the Hive as marked on your radar. Inside, collect the genetic material until the specialist appears. Now this guy is actually very difficult (as his name might imply)...that is if you don't have the Whipfist ability. If you don't have Whipfist, get it! It can be found in the "Upgrades" section under "Powers"--it's well worth the cost for this mission and virtually every one after. After equipping whipfist, wait for the specialist to come to a rest when he aims for you (as marked by his laser sight) and then use a whipfist attack to inflict heavy damage. Throughout the battle, some Hunters--and eventually soldiers--will appear. Just hammer on the attack button to quickly take them down before returning your attention to the specialist. Now you may have to dodge some of the specialist's attacks if you don't attack him first, and the combat roll is more than up to the task--just perform several to either side to evade it.
Evade Blackwatch
Either take down or evade the military. As usual, we found it easiest to hide somewhere and swap costumes for an easy victory.
Confessions
Head to the mission start point, watch the cinema...and you're done! Really! Really, really! What more do you want from us?!
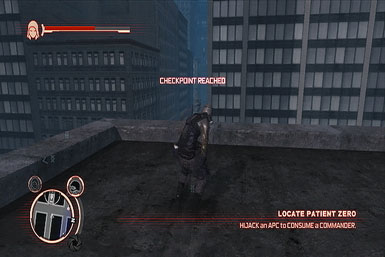
Under the Knife
Locate Patient Zero
Head to the point marked on your map--as long as you don't attack anyone along the way, you won't face any resistance. Once there, you'll learn that you'll need to hijack a tank in order to consume a commander. The closest tank is dead-ahead, but it's guarded by a flying detector. Take it down first, by jumping and kicking the thing out of the sky, then quickly retreat to the rooftop for a disguise change to shake the pursuers off your tail. Once things quiet down, revert to the soldier disguise, drop down, and hijack the tank, sight unseen.
With the tank hijacked, head toward the point marked on the map. Once there, you'll have to destroy all of the enemy vehicles. Of course, you're going to draw their attention as soon as you open fire, and that main road is a deathtrap. As such, venture onto a side street, adjacent to a tank or two, allowing you to open fire and take them out without being attacked by every other vehicle. Once they're down, move up to the corner and use it for cover as you target the remaining vehicles (remember to keep an eye out for helicopters as well). Now, odds are your tank will be destroyed at some point. If that happens, hightail it somewhere out-of-sight (such as an alley), switch disguises to ditch the enemy, then swap back to the soldier when its safe (when you're not being watched), allowing you to hijack another tank without stealthily and resume your killing spree.
Once you've cleared out most of the vehicles, you'll be tasked with hijacking one final vehicle to consume its commander. You should be able to just run up to it and hijack it without issue, but if that poses a problem, you may want to ditch your alert first, as we described before.

The Stolen Body
Get Transport for Ragland
Your first task is to hijack a tank. So put on your soldier disguise then look for one that you can hijack dead-ahead. Now take the tank to the marked area, just up the street, to pick up Ragland.
Get Samples From the Penn Station Corpses
After picking up Ragland, head toward the area marked on the map. As long as you keep a low profile, you'll face no resistance. Once at your destination, you'll have to protect Ragland from a wave of attacking infected for four minutes while he does his thing from within the glass enclosure. If the hunters get close to the glass, they'll start trying to break their way in, so you need to take them down before they can do any damage. For the smaller infected, you're best off grabbing and throwing them for quick kills (or consuming them if you need energy). If a whole bunch surround you, that's where your Knuckle Shockwave power comes in. By tapping Y+B (360) or Triangle+Circle (PS3), you'll unleash a shockwave that'll knock over any nearby foes--the longer you hold it, the wider its radius. This is best used when large amounts of infected are nearby. The Knuckle Shockwave is also useful for tackling the large Hunters--it'll stun them briefly, giving you a chance to get in some quick hits. But make sure to roll to evade their counter-attacks. Just be careful not to use the Knuckle Shockwave too close to the windows, as it can damage them as well.
Once you've held off the infected for the required four-minutes, you'll then have to clear the room of the remaining enemies before he can escape. Tackle them like before, consuming the smaller infected for health.
Return Ragland to the Morgue
Back in the tank, drive toward the morgue, as marked on your map, and drive around the occasional tentacle that pops out of the ground.

Biological Imperative
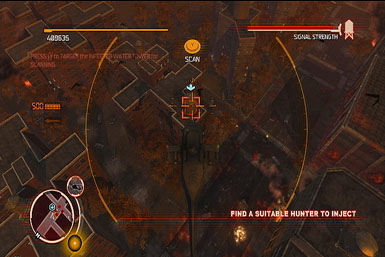
Find a Suitable Hunter to Inject
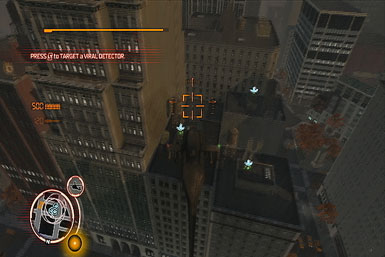
From the get-go, assume the soldier disguise before hopping down to the base and consuming the marked pilot. Although this will tip-off the nearby enemies, go ahead and hop into the nearby helicopter anyway. Now they'll likely blow you to pieces before you can take it anywhere, but luckily you'll trigger a checkpoint as soon as you commandeer the chopper! Fly the helicopter to the marked destination and use its weapons to destroy the three detectors.
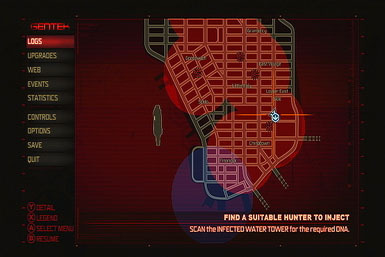
Inject the Parasite Into the Monster
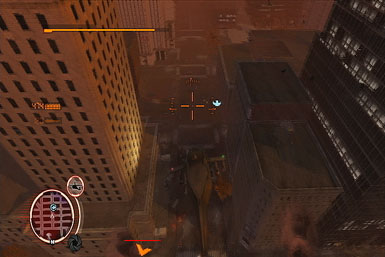
With the three detectors destroyed, it's time to find a specific infected water tower which contains a suitable Hunter. Unfortunately, its location is not marked on your radar, instead forcing you to rely on the "signal strength" meter at the top of the screen--the closer you get, the more it fills. We found its easiest to soar far above the city and only drop down once you're close--or you can just look at the picture of the map we took below, showing its precise location. Once you locate the tower, lock-on to it and scan it by pressing the button shown on-screen, then wait for the scan to complete.
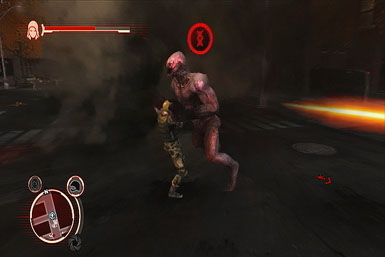
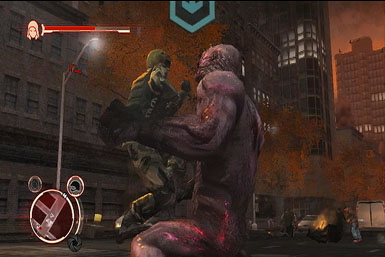
After scanning the tower, the Hunter will escape and drop to ground level. Land the chopper and subdue him with a few attacks, then get close and inject the parasite by grabbing him while he's stunned.
Allow the Hunter's antibodies to Build Up
With the parasite injected, return to the chopper and follow him across town, until the Hunter's antibodies are finished building (a new objective will appear when its time). Land the chopper, subdue him like before, then grab and consume him to complete the mission.
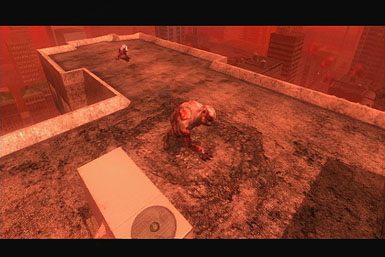
The Door in the Wall
Rescue Dana
Chase after that nasty Hunter who stole Dana! He's marked on your radar at all times, but if you fall too far behind, you'll fail the mission! As such, it's crucial that you sprint the entire way, keeping the target dead-ahead so you're always making headway. If a building gets in your way, jump while sprinting up it to expedite the process, then glide from the top toward the hunter. Don't bother trying to attack him at all, as its futile--just chase after him until he reaches his destination. Now you'll also likely attract the attention of the military as you venture through the city, so be on the lookout for "change costume" icon to appear, giving you a chance to ditch them.

Kill the Hunters
The Hunter will lead you to a street where several of his comrades will attack. Switch to your Whip Fist to easily take them down. If a tank approaches, hijack it and use it to take down any other military vehicles. After a few kills, the original Hunter will once again take off with Dana--chase after him to the building under construction to complete the mission.
First and Last Things
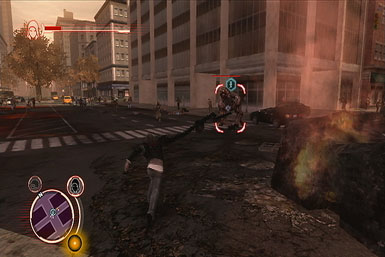
Consume the Leader Hunter
After heading to the area marked on your radar, you'll have to consume the Leader Hunter (he's also marked). The easiest way to do this is to keep your distance at all times and jump around while using the "special" Whip Fist attack to inflict damage at long-range. If the Hunter comes for you, just sprint away and attack again once you've put some space between you and him. Or, if you can hijack a tank, that'll finish the job even faster.
At any rate, once you've depleted most of his health, he'll become stunned, giving you a chance to consume him. Unfortunately, he'll only remain stunned for a brief second or two, before he returns to his rampage, so you have to move fast. If you miss your chance, don't sweat it--a few more attacks will stun him again, so it's best to get close now before attacking, that way you're close enough to consume him before he regains himself.
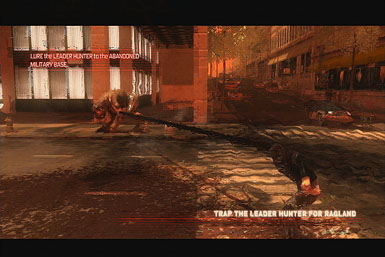
Trap the Leader Hunter for Ragland
After your attempt to consume the leader, follow him to his next destination where you'll have to take on several hunters. Like before, sprint around and use your Whip Fist special attack from a distance. Or, even better, commandeer a tank if one's nearby and use that to easily take them down.
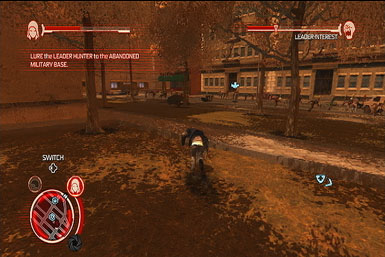
Lure Leader Hunter
You'll now have to lure the main Hunter to the marked location. Now here's the thing: The Hunter's interest level in you is displayed in a meter at the top of the screen. It declines over time, and if it empties completely, he'll stop following you. You can regain his attention by attacking him directly--it should only take an attack or two to fill the meter. As such, you should focus on sprinting toward your marked destination, keeping an eye on the radar to make sure the Hunter doesn't fall behind (he's also marked). If he does fall behind, or the interest meter is running on empty, turn around and use the special Whip Fist special attack to get his attention from a distance, then take off running!
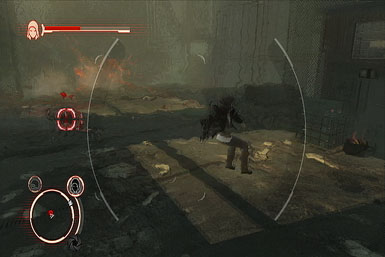
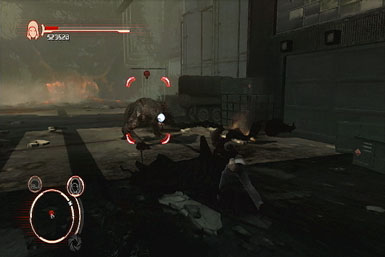
Defeat the Leader Hunter
Once you've lured the Hunter to the destination, you'll have to tackle him man-to-umm, thing. Sprint around the room, keeping distance between you and him, and allow your special whip fist attack to deal the damage.
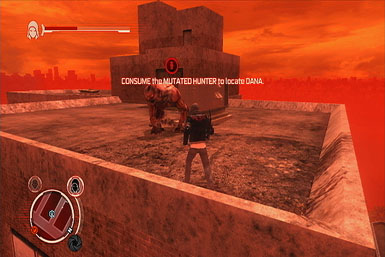
The First Monster
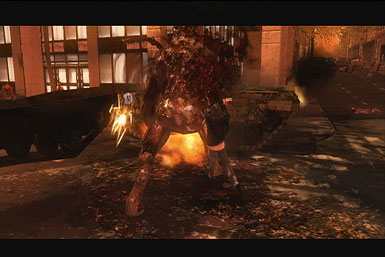
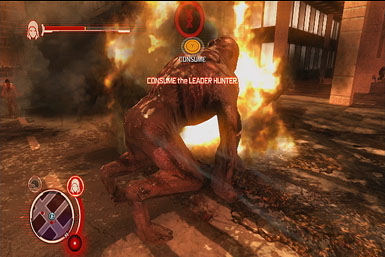
Consume the Leader Hunter
Hop down and enter the building ahead, where you'll find the leader hunter. Attack him a few times with whip fist to stun him, then run up and consume him, which will grant you a new power: Infected Vision.
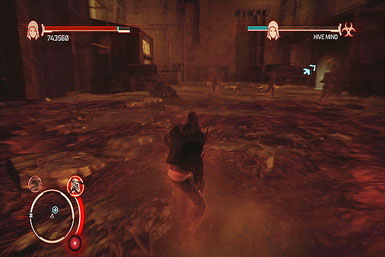
Hook into the Infected Hive Mind
Select your new Infected Vision power to spot an infected carrier among the soldiers--consume him. Doing so connects you to the "infected hive mind," which is slang for "showing where Dana is." Now it only lasts for a short period of time, as the on-screen meter demonstrates, but you can refill it by consuming additional infected people. Now exit the base.
Find Out Where Dana is Being Held
After exiting the base, head toward the military base, as marked on your radar. Once there, you'll have to consume numerous infected soldiers (remember to use Infected Vision) in order to fill the infected vision meter. Of course, the soldiers won't take this lying down, so you'll have to run away and hide every so often and swap disguises in order to not only recover health, but also allow you to get back into the base and consume at least one soldier without being shot at.
Once you've filled the meter, a Hunter that you need to take down will be marked on your radar. You'll find him on a distant rooftop. Like before, stay as far away as you can and use the Whip Fist's special attack to inflict damage from a safe distance--you might even be able to cling to the side of the building and attack him from there. With his health depleted, consume him while he's stunned--he recovers quickly, so make sure you're close when dealing the last few attacks so you quickly grab him.
Making the Future
Rescue Dana from the Core Hive
Throughout the mission, you'll have to follow the marked tank from one location to the next. If you maintain a low profile (that is, don't blow your disguise) you can actually just ride on top of it to each location. Occassionally, it'll come to a stop where you'll have to defeat all of the nearby enemies...and there's a lot of them. We found the easiest way to tackle them is to charge-jump either straight-up, or away from the enemies and launch your special whip-fist attack while airborne (you may also want to charge this to inflict more damage--oh, and make sure to lock-on to them). The Hunters you're fighting suck at countering aerial attacks, and thus you should be practically invulnerable as long as you keep leaping around and using your long-range attack. If an enemy gets close, simply leap away and keep attacking.
Eventually, you'll be instructed to take control of the tank and use it to destroy the Hive--drive to the marked location and fire a few shots at it to do it in.
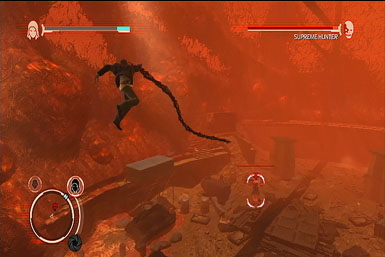
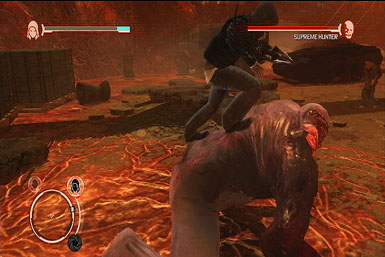
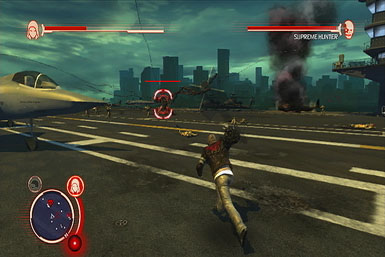
Defeat the Supreme Hunter
It's a fight to the death between you and the Super Hunter. Thankfully, you can employ pretty much the same strategy we suggested in the last mission! Essentially, because the Supreme Hunter sucks at aerial combat, you can simply charge-jump around the room and pummel him while air-borne with the special Whip-Fist attack (which you can also charge to inflict more damage). As long as you continually leap away from him while attacking, he shouldn't be able to lay a finger on you. Also, he may wind up stunned after a few attacks; if this happens, grab him quickly and mash the attack button to inflict some heavy damage.
Before long, some additional hunters will show up, followed by the military. You may want to clear out the initial few (again, by jumping and whip-fisting), but otherwise you're best off sticking to focusing on the Supreme Hunter, although his minions can be killed for health, if need be. As long as you keep repeating the jump-whip fist tactic, he should go down in no time.
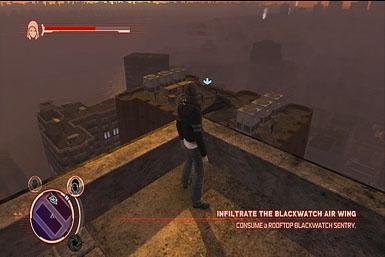
Men Like Gods
Infiltrate the Blackwatch Air Wing
Head to the marked rooftop, then glide down to the helicopter ahead. Quickly consume a pilot before you take too much damage then hijack copter. Because you've caught the enemies' attention, they'll likely blow you out of the sky before you can fly away, but don't sweat it as you'll restart inside the helicopter with no alerts. Fly the helicopter to the marked roof to pick up some soldiers.
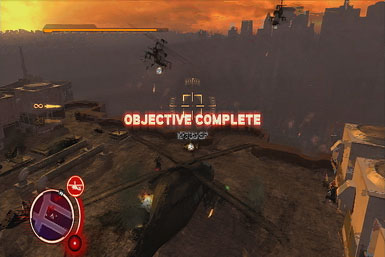
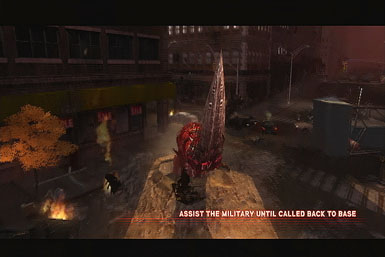
Assist the Military Until Called Back to Base
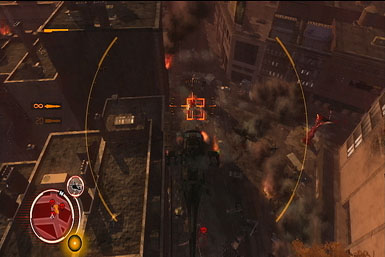
With the soldiers on-board, fly to the marked Hive and destroy it with the helicopters weaponry. Once destroyed, you'll be tasked with taking down a few roaming enemies, which are marked. Target them from a safe distance by hovering above them and locking-on. After killing the marked opponents, land the chopper in the circular beam to deploy the on-board soldiers.
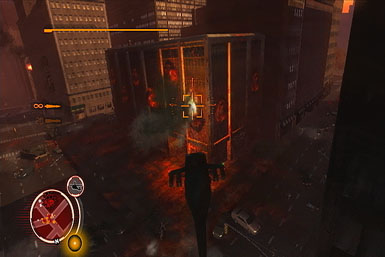
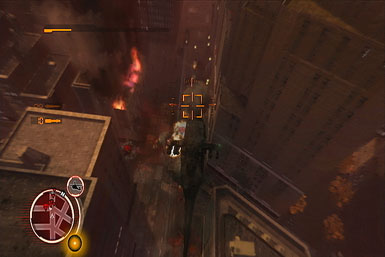
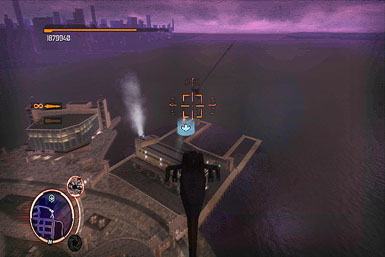
With the soldiers deployed, fly to the next marked area where some tentacles will appear. Hover just above the bordering rooftops, and blast the tentacles while hovering around in a circular pattern to evade the stuff they throw at you. However, be aware that using the right-stick to adjust your aim also changes your lock-on target, so you may want to move around in more of a square, to minimize use of the right-stick. Oh, and if you fly too high, the tentacles may retract into the ground, forcing you to fly lower in order to lure them back out.
Head to the Special Briefing
After destroying the tentacles, touch down in the marked area, then fly to both of the marked destinations to pick up some more soldiers at each, then land at the final marked destination.

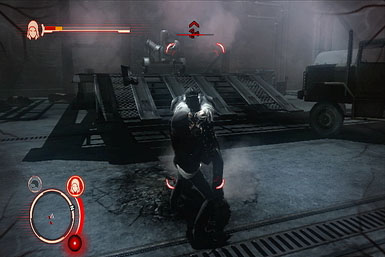
Escape
You're surrounded! And even worse, a Bloodtox Blower to the side is pumping in poisonous air that'll eventually kill you if you don't destroy it. From the get-go, equip Whip Fist, take down a few of the nearby enemies, then go for the Blower--the long-range special Whip Fist attack will take care of it shortly, allowing you to go after the remaining soldiers. We suggest targeting the rocket-launchers first--simply sprint around the room, using your standard Whip Fist attack to take them down. Before long, a Super Soldier will roll in. These guys are stronger than the average enemy and are capable of grabbing you; if this happens, tap the button displayed on-screen to counter them. With the first one down, even more will show up--again, the Special Whip Fist attack works wonders--leap around while using it to evade their attacks. Once you've cleared the room, you'll appear outside--just run away and switch disguises when instructed to complete the mission.
A Dream of Armageddon
Halt the Deployment of Bloodtox
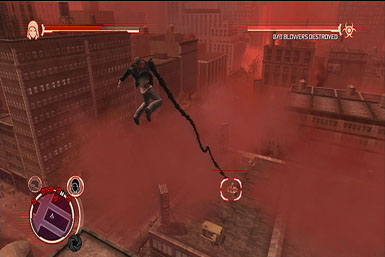
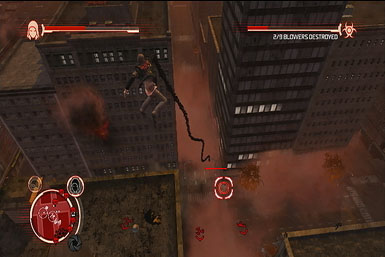
There are nine Bloodtox generators scattered around the city that need to be destroyed. Of course, since they spew poisonous gas, getting close can be problematic. As such, you're best off sticking to the nearby rooftops, overlooking the generators, and using the special Whip Fist attack to destroy them from afar (charge it to inflict more damage). Now sometimes looking over the ledge doesn't give you a clear enough shot to attack, so you may want to try charge-jumping before launching the attack.
As you go about the city, try to avoid attacking enemies so your cover isn't blown. But be on the lookout for Super Soldiers that can see through your disguise--if you notice your disguise meter filling, get away to prevent being seen. If your disguise is compromised, you're best off retreating to a hidden area and swapping disguises to lose the chasers.
Alright, now while our strategy outlined above works for most of the blowers, there is one atop a tall skyscraper that's difficult to target. While you can use a similar tactic from the roof of a nearby building with two water towers (requiring you to jump and Whip Fist attack from below), you're best off running up the building, giving it a few quick melee attacks, then retreating to not only regain health, but lose the attention of the military that you've drawn. Once you've regained some health, repeat the strategy as necessary to take it down.
The World Set Free
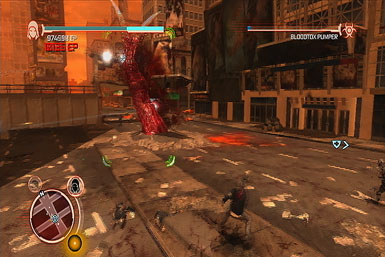
Deploy the Bloodtox Pumper to Times Square
Disguise yourself as a soldier to enter the base ahead and approach the marked commander. Try following him around until you're in a position to stealth-consume him--if you're unable to, consume him anyway, then hightail it out of there to a hiding spot to lose the pursuers before returning. After consuming the commander, head to the lighted area to start the convoy.


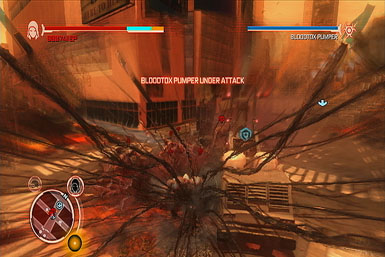
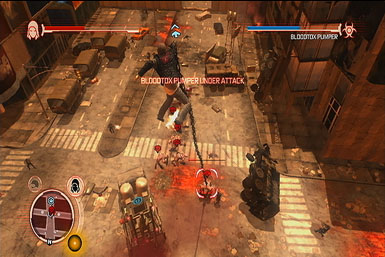
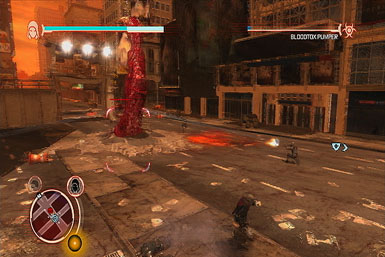
Defend the Bloodtox Pumper
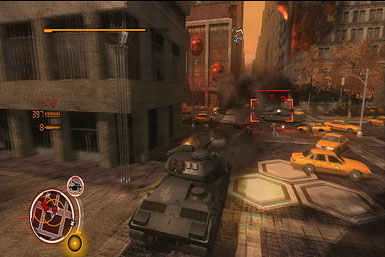
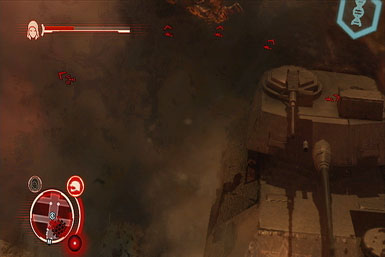
You have to defend the vehicle carrying the pumper as it heads for Time Square. The easiest way to do this is to hijack one of the tanks (don't worry--the military won't attack you for some reason during this mission) and use it to fend off the large tentacles. You can ignore more of the enemies until the convoy comes to a stop, signaling that it's attacking time--remember to use both of the tank's weapons for maximum efficiency.
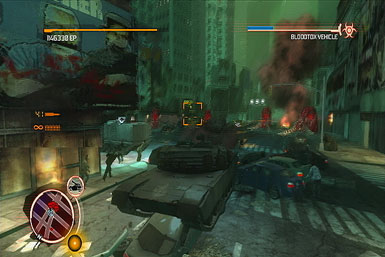
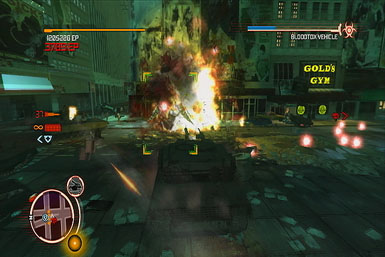
The hardest part of the mission comes at the very end, where you'll have to tackle four tentacles at once. Try and get ahead of the convoy if you can, so you can target them as soon as they pop out of the ground. Get close to each one and blast it, so you can easily target the next. It's all about taking them down quickly before they can inflict any major damage.
Things to Come
Force Elizabeth Greene Out Into the Open
We'll be straight-up: this mission is tough. We strongly recommend that you purchase the Critical Mass Boost upgrades, allowing you to unleash two or three Critical Mass moves, which are crucial for this mission. So here's the deal: you need to protect the Bloodtox unit from several waves of attacking Hunters. Now the Hunters are damn tough and come in large groups, making it near impossible to battle them conventionally. As such, you should begin the mission--and use the time between waves--consuming as many soldiers as you can, filling your health bar completely, which grants access to your Devastator Attacks. As soon as you have it, lure the hunters close together--if they're not already all grouped by the Bloodtox unit, and unleash your Devastator Attack by holding X & B, or Triangle and Circle. This should take them all out completely--or in the case of the Leaders, damage them significantly, giving you time to unleash a second or third Devastator attack, if necessary. After killing all of the enemies in a wave, use the brief time before the next wave to run around and consume more soldiers to regain the Critical Mass power.
Eventually, two tentacles will appear--ignore them until all of the Hunters have been destroyed. When attacking them, evade the objects they throw with a roll to either side, then counter with some special Whip Fist attacks. Killing them should conclude the mission.
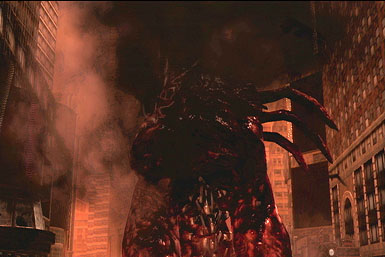
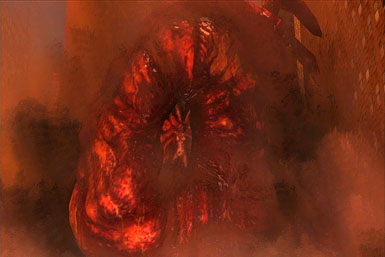
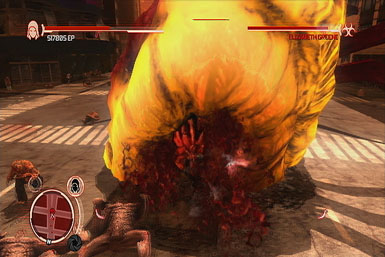
Defeat Elizabeth Greene
Fighting Elizabeth Greene may be one of the most challenging--and confusing--sections of this game. Before you begin, we strongly recommend purchasing all of the Critical Mass upgrades, if you haven't already. In short, Elizabeth consists of four parts: her body, and three appendages. Damaging all three appendages causes her main body to fall over stunned, giving you a chance to inflict some real damage. However, getting to that point is tricky, as her appendages can inflict a lot of damage, and the roaming Hunters can interfere with your attacks.
The best course of action is to first equip the "armor" ability and keep it equipped at all times to minimize the amount of damage you take. Now head down one of the alleys a block or so away from Elizabeth (this way, her attacks can't harm you) and consume as many people/hunters as you can to fill your health bar to unlock the Critical Mass ability. Consuming Hunters is the fastest and quickest way to do this, but you'll have to weaken them first--the Blade ability can get the job done quickly. Once you've gained enough health for Critical Mass, it's time to unleash your Devastator attack. Now you'll have to get close--but not too close--to Elizabeth in order to unleash the attack, but you'll want to stay just out of range of her appendages attacks. Try staying on the outside of the damaged wall that spans the street and unleash your attack from there (again, by holding X & B on 360, or Triangle & Circle on PS3). This will inflict a good amount of damage to each of her appendages. Now if you upgraded your Critical mass ability, you should be able to immediately follow-up with either one or two more devastator attacks. If these attacks weren't enough to stun Elizabeth, return to the alley to consume more enemies to regain the Critical Mass ability.
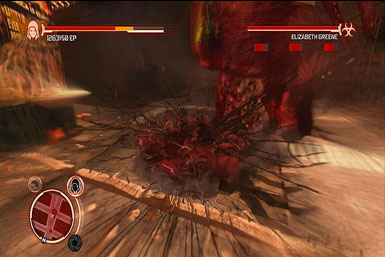

After depleting the health of all of Elizabeth's appendages, her main body will fall over stunned. Equip the Blade power and lay into her open mouth-area to deal some heavy damage. Once she comes to, repeat the strategy above until she goes down for good.

Shock and Awe
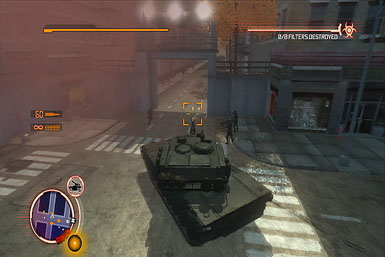
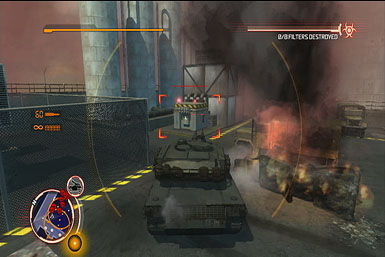
Destroy the Bloodtox Production Facility
Head to the marked area where you'll discover that you need to destroy 8 Filter Units. Since they're obscured by a poisonous fog, trying to destroy them on-foot is suicidal...not to mention the attention you'll draw doing so. Instead, you're better off stealth-consuming one of the soldiers on the street, allowing you to hijack a tank. The tank will protect you from the poisonous gas, allowing you to explore the production facility unfettered, and its weaponry will make short work of the filters. But keep in mind that as soon as you open fire on one of the filters, you'll have the rest of the military on your back, so it's best to locate three or four of them first, so you can quickly travel from one to the next. Now you'll only be able to destroy a few of them before the military busts up your ride. Once they do, quickly escape the facility (as you're now exposed to the poisonous gas) and lose your pursuers by swapping costumes when out of sight. After ditching them, assume the soldier disguise again, hijack another tank, and repeat as necessary until you've destroyed all 8 filters.
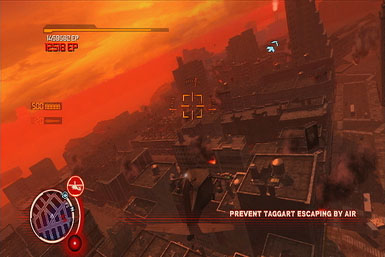
The Last Man
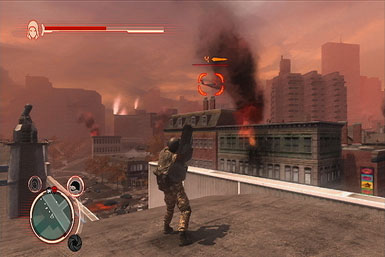
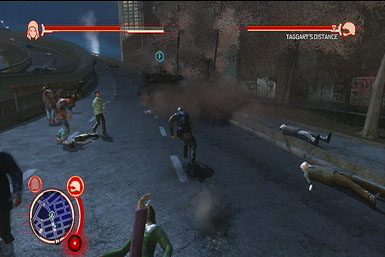
Prevent Taggart Escaping By Air
Head to the marked area, where you'll be tasked with destroying three helicopters. Hop onto the building along the waterfront and stealth-consume the rocket-launching baddies their to steal their weapon. Now fire a rocket at each of the three helicopters taking off nearby to take them down with ease. Before heading to the next marked location, where you'll have to tackle more helicopters, we suggest stealth-consuming another rocket-launching enemy nearby first to refill your rocket supply. Doing so will allow you to easily take down the first few of numerous helicopters ahead. Once you run out of rockets, you're best off chasing after the remaining helicopters and using the Whip-Fist Longshot Grab to hijack them from afar. You can then use the chopper to target the remaining ones attempting to escape. If you get shot down, simply chase it down on foot for another hijacking!
Two Tickets
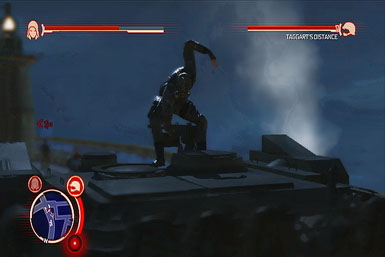
Force Taggart Out into the Open
In order to force Taggart out into the open, you'll have to destroy the building he's currently residing in. The easiest way to do this is to steal one of the tanks (make sure to disguise yourself as a soldier first, so you don't drawn unwanted attention) around the base of the marked building and its weapons to lay into the structure (it doesn't matter where you hit the building). If your tank gets destroyed, hightail it out of there and lose your pursuers before going back for a second tank and doing the same.

Force Taggart to Flee
After destroying the building, Taggart will take off in his tank, stopping a total of three times where he'll be protected by several escort tanks which need to be destroyed. Make sure you keep up as he drives around the city, as you'll fail the mission if you fall too far behind. Once he comes to a stop, however, you'll have to take down the marked tanks protecting him, without damaging the tank Taggart's in. The easiest way to do this is look for a rocket-launching enemy nearby, consume him to gain his weapon, then target one of the tanks from a rooftop (without being watched) and fire all four rockets at it to destroy it. You'll then have to head out to find another rocket-launcher to target the next tank.
Each of the three locations has different places ideal to find rocket-launchers. At the first stopping point, check the nearby rooftops. At the second, look in the nearby parks. For the third, check the street near the tanks themselves. Ideally, you should try and stealth-consume them the soldiers if you can (you may have to follow them around a bit first), but normal-consuming will work too--just make sure to grab the dropped rocket launcher and hightail it out of there to switch disguises and get the military off your tail.
Consume Taggart
Once you've destroyed all the tanks at all three locations, chase after Taggart's tank and hijack it to consume him and complete the mission.
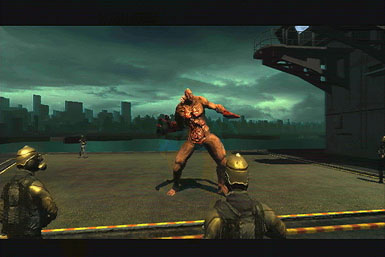
Defeat the Supreme Hunter
Defeat the Supreme Hunter and Stop the Nuclear Weapon
Yup, it's another Supreme Hunter, except this time you have to defeat him before time expires. The best tactic is to purchase all three "Musclemass Powers," if you haven't already, and equip it during the fight. Now run around the arena, using jumps to evade his attacks, and pick up any of the scattered missiles and rockets and chuck them at him (remember to lock-on to him first)--they'll inflict a healthy amount of damage assuming you've upgraded this ability. After a few direct hits, the Supreme Hunter will become stunned--run up and grab him, than hammer away on the attack button to deal some massive pain, before returning to chucking stuff his way.
As mentioned, jumping is generally the best way to evade his attacks, though you'll want to roll out of the way if he gets close. In addition, be sure to watch out for the flailing tentacles during his devastator attack--luckily, it's slow, but keep a close eye on where those tentacles are going! If you need to regain health, consume the scattered soldiers when you get a chance. Just be aware that the amount of soldiers drop significantly after the cutscene which introduces the bomb timer.
Xbox 360 Achievements
Note that there are Spoilers on this list.
| Achievement Name | How To Earn | Reward |
|---|---|---|
| AU | Achieve a rating of Gold or better in all Events. | 40 |
| Brain Trust | Complete all Consume Events. | 20 |
| Cleanup | Kill 15 characters with a single Whipfist attack. | 10 |
| Endless Hunger | Consume 200 characters to boost your health. | 10 |
| Evolutionary Step | Use the Upgrade Menu to acquire an Upgrade. | 10 |
| Gunning | Destroy 20 Helicopters in a single Helicopter flight. | 10 |
| Half-Truths | Complete a mission without causing a single Military Alert. | 10 |
| Hard To Kill | Complete Story Mode in any difficulty without dying. | 60 |
| In Plain Sight | Evade 10 strike teams. | 10 |
| In The Web | Consume 50 Web Targets. | 20 |
| Infiltrator | Infiltrate 10 Military Bases disguised as a Commander. | 20 |
| It's Him! | Patsy 5 military personnel. | 10 |
| Mankind Is Your Mask | Complete 3 missions without causing a single Military Alert. | 40 |
| Misconception | Destroy 25 Infected Water Towers before they hatch. | 20 |
| Nice Guy | Complete the game while consuming 10 Civilians or fewer. | 40 |
| Polymath | Collect all Hint Collectibles scattered across New York City | 40 |
| Pt | Achieve a Platinum Medal in all Events. | 60 |
| Repossession | Seize 50 vehicles from enemy hands. | 10 |
| Return Fire | Catch any object tossed by a Hydra; and throw it back. | 10 |
| Revenge Revisited | Complete Story Mode on hard difficulty. | 60 |
| Self-Deception | Discover what happened to Alex Mercer through the Web of Intrigue. | 20 |
| SME | Gain the ability to drive and fly all vehicles. | 20 |
| Speed Bumps | Run over 500 characters in a single tank. | 20 |
| Streetwise | Collect all Landmark collectibles scattered across New York City. | 50 |
| Surface-To-Air | Shoot down 50 helicopters while driving armor. | 10 |
| The Butcher | Kill 50 characters in 5 seconds. | 30 |
| The Cleaner | Destroy 10 Military Bases or Infected Hives in New York City. | 20 |
| The First Thread | Unlock the Web of Intrigue. | 10 |
| Threat Elevated | Destroy 25 strike teams. | 20 |
| Trail Of Corpses | Kill 53,596 infected. | 30 |
| Unnatural Selection | Acquire all available upgrades. | 40 |
| Web Of Knowledge | Acquire all nodes of the Web of Intrigue. | 60 |
| Wrecking Yard | Destroy 2,000 vehicles. | 20 |
| Children Of Blacklight | You've completed the Supreme Hunter Boss Battle. | 20 |
| Crossing The T | You've completed the Hunter Boss Encounter. | 10 |
| Errand Boy | You've completed the Specialist Boss Fight. | 10 |
| Hope | You've discovered the truth behind Hope, Idaho. | 20 |
| On Instinct | You've completed the Mother Boss Battle. | 20 |
| One Thousand Suns | You've completed the Supreme Hybrid Boss Battle. | 40 |
| Origin | You've discovered the history of Elizabeth Greene. | 20 |
PlayStation 3 Trophies
Note that there are Spoilers on this list.
| Achievement Name | How To Earn | Reward |
|---|---|---|
| AU | Achieve a rating of Gold or better in all Events. | Silver |
| Brain Trust | Complete all Consume Events. | Bronze |
| Cleanup | Kill 15 characters with a single Whipfist attack. | Bronze |
| Endless Hunger | Consume 200 characters to boost your health. | Bronze |
| Evolutionary Step | Use the Upgrade Menu to acquire an Upgrade. | Bronze |
| Gunning | Destroy 20 Helicopters in a single Helicopter flight. | Bronze |
| Half-Truths | Complete a mission without causing a single Military Alert. | Bronze |
| Hard To Kill | Complete Story Mode in any difficulty without dying. | Gold |
| In Plain Sight | Evade 10 strike teams. | Bronze |
| In The Web | Consume 50 Web Targets. | Bronze |
| Infiltrator | Infiltrate 10 Military Bases disguised as a Commander. | Bronze |
| It's Him! | Patsy 5 military personnel. | Bronze |
| Mankind Is Your Mask | Complete 3 missions without causing a single Military Alert. | Silver |
| Misconception | Destroy 25 Infected Water Towers before they hatch. | Bronze |
| Nice Guy | Complete the game while consuming 10 Civilians or fewer. | Silver |
| Platinum Trophy | Platinum Trophy | Platinum |
| Polymath | Collect all Hint Collectibles scattered across New York City. | Silver |
| Pt | Achieve a Platinum Medal in all Events. | Gold |
| Repossession | Seize 50 vehicles from enemy hands. | Bronze |
| Return Fire | Catch any object tossed by a Hydra; and throw it back. | Bronze |
| Revenge Revisited | Complete Story Mode on hard difficulty. | Gold |
| Self-Deception | Discover what happened to Alex Mercer through the Web of Intrigue. | Bronze |
| SME | Gain the ability to drive and fly all vehicles. | Bronze |
| Speed Bumps | Run over 500 characters in a single tank. | Bronze |
| Streetwise | Collect all Landmark collectibles scattered across New York City. | Silver |
| Surface-To-Air | Shoot down 50 helicopters while driving armor. | Bronze |
| The Butcher | Kill 50 characters in 5 seconds. | Silver |
| The Cleaner | Destroy 10 Military Bases or Infected Hives in New York City. | Silver |
| The First Thread | Unlock the Web of Intrigue. | Bronze |
| Threat Elevated | Destroy 25 strike teams. | Bronze |
| Trail Of Corpses | Kill 53,596 infected. | Silver |
| Unnatural Selection | Acquire all available upgrades. | Silver |
| Web Of Knowledge | Acquire all nodes of the Web of Intrigue. | Gold |
| Wrecking Yard | Destroy 2,000 vehicles. | Bronze |
| Children Of Blacklight | You've completed the Supreme Hunter Boss Battle. | Bronze |
| Crossing The T | You've completed the Hunter Boss Encounter. | Bronze |
| Errand Boy | You've completed the Specialist Boss Fight. | Bronze |
| Hope | You've discovered the truth behind Hope, Idaho. | Bronze |
| On Instinct | You've completed the Mother Boss Battle. | Bronze |
| One Thousand Suns | You've completed the Supreme Hybrid Boss Battle. | Bronze |
| Origin | You've discovered the history of Elizabeth Greene. | Bronze |
Got a news tip or want to contact us directly? Email news@gamespot.com
Join the conversation