Prince of Persia Walkthrough
Overcome the Corruption with our Prince of Persia walkthrough. Check it out for level walkthroughs, combat tips, and achievement & trophy lists!
The Persian Prince is back in this complete re-imagining of the series. As the Prince, you'll travel the world with a mysterious girl, Elika, at your side. As you explore the land, you'll have to collect hundreds of "Light Seeds" in order to keep the evil god, Ahriman, at bay. But given the vast landscape, finding your way around isn't always easy--at least, not when you have Ahriman's cronies breathing down your neck, and that's where we come in. We'll help you platform your way through these sprawling worlds and give you the tips you need to defeat Ahriman's dark forces.
Here's what you will find in GameSpot's Prince of Persia game guide:
- General Tips: Learn how to platform and fight like a pro.
- Walkthrough: Check this out for some platforming help and puzzle solutions.
- Xbox 360 Achievements: Hungry for Achievements? Here's how to get them.
- PlayStation 3 Trophies: Want trophies? We've got the info you need here!
General Tips
Platforming
Prince of Persia is unique in that platforming really isn't all that difficult. That's not to say you won't ever miss a jump, but the consequences for doing so are virtually non-existence. You see, whenever you slip, your gal pal, Elika will save you, returning you to the last solid platformer--generally setting you back no more than a few seconds. It's very handy and encourages exploration, so don't be afraid of missing a leap as rescue is but an Elika away.
Jumping
Now although you can't "die" per se, that doesn't mean the game plays itself. When platforming, three of the four face-buttons will come into play at some point or another, with each serving a very specific purpose. The "jump" button is the one you'll be using most often. It serves as the launching point for numerous stylish maneuvers, such as wall-runs and wall-climbs. But what if a single-jump isn't enough? By tapping the "Elika Magic" button during a jump, she'll give you a boost, doubling your distance!
Rings
While running along walls, you'll often encounter "rings" embedded in the surface--you must tap "Use" in order to grab and fling yourself onward, if you fail to do so, you'll fall and Elika will return you to the last platform. Thankfully, the window of opportunity in which you have to press the button is quite generous, so there's no need to perfect the timing.
Power Plates
There are four Power Plates in total which, and each grants a special ability for a limited amount of time, such as a long-jump, a wall-run, or even flight. Two of the four are completely automated, and thus require no user-input after being activated, however, the other two do afford a limited amount of movement--in these case, just dodge the various obvious obstacles and you'll be well on your way to victory.
Light Seeds
So each world has been corrupted, and you must restore life to the land by reaching the "Fertile Ground" at the end of each. Once you have, something called "Light Seeds" will appear all over the land you have just saved. In order to unlock more levels, you'll have to collect a set amount of Light Seeds and return them to the temple. There are 45 seeds per levels, many of which are in plane sight. Furthermore, you only need about half of them to complete the game, so there's no need to go out of your way to find them all, unless you're trying to unlock every achievement or trophy.
Combat
Combat in Prince of Persia is rather unique in that you only have four main attacks (in addition to blocking), but it's how you string them together that matters. A particularly potent combo is to throw your opponent in the air (generally after you've deflected an attack--discussed below), follow-up with a magic attack, perform a jump attack, then another magic attack! There are countless ways to string them together, so have some fun and find what works best for you.
If things get dicey, then you're likely best off blocking, which protects you from most attacks. But if you can time time your block just before an attack connects, you can actually deflect the attack, giving you a fantastic chance to counter.
Walkthrough
Getting Started
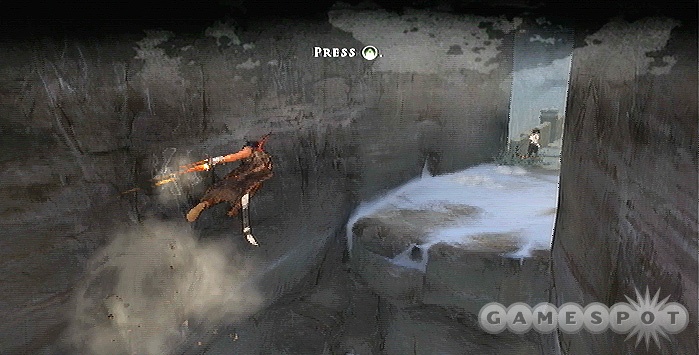
After your lovely encounter with the princess, follow her through the valley, jumping the gaps. When you reach the long chasm, wall-run by jumping toward the canyon walls (there's no need to hold "jump"--one press is enough) then leap before the run ends to cross over to the platforms. If you fall, climb the wall behind you and try again.
Run up the wall ahead and follow the princess across a few more gaps until you're thrust into battle with a few guards. The game will walk you through the basics of attacking and guarding. After the battle, follow the princess up the shaft by running up one wall, then jumping to the other and climbing to the top. Just ahead, you'll have to hop between the canyon walls while wall-running in order to keep up with the princess.

Eventually, the princess will save you after a drastic fall and you'll have to carry her a short ways before she awakens. At which point, you'll have to battle another guard--just hammer on the "Attack" button and only block if you spot him winding up for an attack.
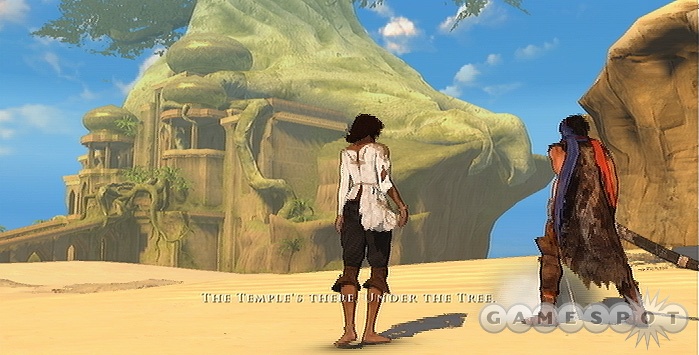
Afterward, talk to the princess to learn of the temple's location, then run up the nearby wall (the taller of the two) and jump to a nearby platform. Now wall-run along a couple more portions to find two more guards you must battle. Once they're down, descend the mountainside by "grip-falling (that is, holding the Right-Trigger).
Chase after the princess up the temple's staircase, then begin jumping up the left wall, using the fissures to support yourself. At the second fissure, move right and climb the adjacent vertical one, then leap to the top. Grab hold of the lever and push it to open the temple's door--now climb down to it by "grip-falling" with the right-trigger.
Inside the temple, you'll find a closed door. Jump onto the lever along the right wall and pull it down to open the way. Drop down to the glowing tree and prepare for a boss fight with the Elika's father, the King. Wait for him to attack, then deflect (by blocking just before he hits you) and counter by using a Gauntlet-attack to launch him into the air and follow-up with a standard Attack. Repeat as necessary.
After defeating the King, he'll slash the glowing tree causing all kind of crazy stuff to happen. Kill the enemy that appears (using methods similar to how you defeated the king), then leap across a couple of platforms. Now wall-run along the right wall and jump to reach a fissure. Follow it to the left, then tap "jump" to wall-run to the ledge.
Follow the path up the ramp where you'll battle another enemy. Now grab hold of the lever right of the locked door to force it open. The floor will begin crumbing, but it's nothing the prince can't handle. Wall-run along the corridor to cross the chasms--at the end awaits a very long gap, but you can cross it with the help of the Princess's magic powers. Tap the "Magic" button when the button-prompts appear on-screen during your jump to clear the span.
King's Gate
Although this level doesn't properly begin until you're a little ways into the cavern, we'll help you up to that point, seeing as you'll have to traverse it anyway. After crossing the desert, use the Prince + Elika jump to cross the gulf leading into the canyon. Run up a couple of walls and follow the fissure around the bend. Dash up the wall and press the "Lift" button when at the ring to fling yourself to the top. Run up a couple more walls, then wall-run along the left wall and use the Ring halfway (by tapping the "Lift" button) to propel yourself to the far ledge.
Take the left path at the detour, jump toward the pole and launch from it to the far side. Run up the wall ahead, using the rings along the way to maintain your upward momentum. Fling yourself across a couple more poles then leap from the jutting wooden plank to cross the gap. After a couple more leaps, grab hold of the vertical fissure in the wall and use it to climb to the top. Cross over a couple more planks then climb the ones embedded in the wall to a fissure and follow it as far as you can. Once you can't follow the fissure any longer, wall-run to the next one and follow it to a wooden platform, where the level begins proper.
Use the planks and the pole to cross to the other side and leap to the hanging column on the right, then to the platform on the opposite side. Grab the vine-covered wall and follow it left and drop to the platform by grip-falling. Leap across a couple more columns then wall-run, using the vines halfway, to make it to the next platform. Climb to the top of the next column and leap to the wooden walkway. Follow it to another column, climb to the top and tap "jump" to perform a "roof-run"--use the ring halfway to continue your roof-run to the far side. After grabbing the following column, rotate yourself around it once to the right, so that your back is facing the subsequent column, then leap to it and cross the span. Perform another wall-run, then climb the vines to the top, where you'll face your first true battle.
After the battle, life will be restored to the nearby land. Whenever this happens, Light Seeds will appear--there are 45 in each level. You won't ever have to find them all to proceed, but you will have to collect enough level-to-level in order to unlock the next set of stages, accessible from the Temple.
The Sun Temple
Perform a Prince + Elika jump to reach the Power Plate ahead and launch from one to the next to land on a platform, where you'll battle an enemy. After he retreats, use the nearby Power Plate to bounce to a far platform, where puddles of Corruption roam the canyon wall. Grab hold of the fissure and wait for the Corruptions puddles to slip past before proceeding--as long as you're patient, you'll have no trouble making it to the next Power Plate.
After a couple of Power Plates, grab hold of the fissure and climb to the top. Jump up the wall then leap to the column behind the Prince. Repeat this as you bounce between the wall and the column until you reach the top-most fissure, which you'll follow to the left (but watch out for more Corruptions puddles). After moving left as far as you can, you'll have to carefully desend the wall by grip-falling, while avoiding the roaming Corruption puddles. There are three all-together, but as long as you don't begin your grip-fall until the top-most corruption puddle slides by on the right, you can begin your slide straight-down without having to maneuver at all.
Now wall-run to a Power Plate on the left, which will eventually bounce you into a wall-run, so be ready to jump to a nearby pillar. Now cross over a couple of poles (using a Prince + Elika jump) to reach the second one then do it once more to reach the fertile land below, where you'll battle the baddie from before once more.
Martyrs' Tower
Hop onto the Power Plate and fly--you'll eventually encounter an enemy who'll lead you into a trap! After the fall, grab hold of the fissure and grip-fall down the shaft. After touching down, wait for the nearby Corruptions puddles to ooze away, then wall-run to a pole, wait for another pool to slither away, then fling yourself to the next wall and run along it to the next fissure. Wait here for another puddle to move aside, then wall-run and jump at the end to grab hold of a pole. Repeat the process to land on a wooden walkway.
Work your way across a few wooden beams. When you reach the one overlooking a long gap, use a Prince + Elika jump to reach a wooden beam on the far wall. Climb it to the top, then wall-run to the right and leap to another pole. Perform another wall-run and jump combo then use the beam to jump across two poles. Now you'll be hanging from a wooden beam with seemingly nowhere to go--follow it to a wall on the right and them jump up it to fight an enemy.
After the fight, climb the wall (nearest to the wooden door you came through on) to a fissure and climb up a couple more, then wall-run to the right to a pole. Swing from it and use a Prince + Elika jump to another pole, then to a wooden beam. Now jump to a fissure in the nearby wall (to the prince's left, assuming he's facing toward the room's center), then wall-run to the right (once the Corruption has moved aside) to a vertical beam you can climb to a platform on the right.
See the giant hole in the center? Jump across to the other side using the beams, then climb the wall ahead to a wooden ledge. Wall-run to the left after the corruption has slipped past and use the ring to continue your run. After a few more jumps, you'll wind up on a beam directly opposite a Power Plate--perform a simple jump to another beam below, then leap to the Plate and fly away. Now you're just a few short hops, skips, and jumps away from the Fertile Grounds.
Marshalling Ground
This level is so simple, it's silly. Just hop onto the Power Plates and fly around, moving the prince to avoid the obstacles. A fight awaits at the end, but it's nothing you haven't seen before.
The Windmills
Dart down the wooden ramp and leap to the Power Plate, the first of many. Get ready to tap the "Use" button to propel yourself using the rings along the way before landing back on solid ground. Jump the next gap to find a pair of covered Power Panels as well as two levers on the floor--yup, it's a puzzle.
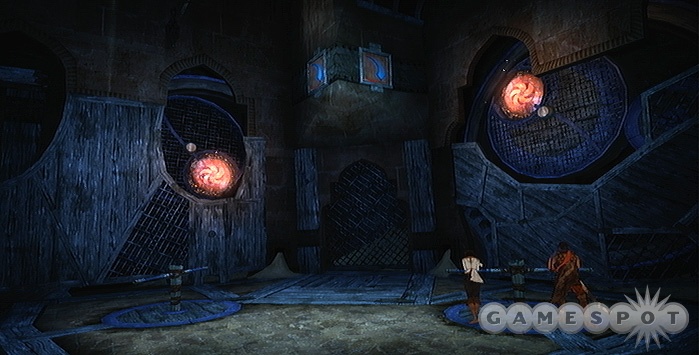
The puzzle's goal is to rotate the grated coverings so that the hole in each exposes the Power Plates they're covering. You can spin the covers counter-clockwise by turning the crank on the right; problem is that it's impossible to uncover both Power Plates without some tinkering--that's what the left crank is for. The left crank changes the speed at which the two covers rotate at (that is, either 1, 2, or 3 notches at a time)--the two icons on the ceiling change to reflect the speed that the covers will spin at, the left icon represents the left wheel and visa-versa. If a red arrow is shown, that means that cover will spin faster than usual, if a blue arrow is shown, it will spin slower. Finally, if nothing is shown, the cover will remain in place. In short, you'll have to adjust the speed of either wheel then rotate them into place--it will take a few tries to solve it. Keep in mind that the covers always rotate counter-clockwise, as long as you can orientate them so they're the same amount of 'notches' away from the Power Plate, you can then solve the puzzle by then setting the wheels to the slowest speed and turning them a notch at a time.
With the puzzle solved, hop onto the left Power Plate and get ready to use a ring during your wall-run. You'll wind up on a wooden walkway--jump to the poles then wall-jump up the shaft when the camera changes angles. Now wait for a pair of of Corruption puddles to move out of the way, then wall-run and jump at the ring to land on a wooden plank. Wait for the giant gear to stop turning, then run up it and leap off to reach a beam above. Now jump to the other side, where another puzzle awaits.
Same deal here, except now you have three Power Plates to deal with. Take your time with it and experiment--you should have it in just a couple minutes. Once it's complete, hop onto the left Power Plate and fly! Now perform a couple of wall-runs and jumps to continue onward. You'll soon come across a balcony covered in corruption--ignore the pole ahead and instead climb the wall using the rings, then leap into the heart of the windmill, where another battle will take place. This enemy's sporting a couple new tricks though. For one, he can enter a state where only your sword attacks are effective. Secondly, if he gets close to Elika, he may knock her down, preventing you from using magic attacks. You can either wait for her to recover by herself, or you can help her get up by going to her side.
Hunter's Lair
After flying between a few Power Plates, you'll be entered into a battle straight away. The basics are the same, only the evil fiend will bust the floor apart twice, dropping you a level each time. Aside from that, the battle is no different than usual.
With the enemy defeated, you'll wind up in some underground cavern. Jump over the Corruption to the slide, then use several Prince + Elika jumps to cross the long chasms. After a few wall-runs (make sure to use Elika's jump when jumping from the second) and another short slide (which you should also use Elika's jump on), you'll wind up in another arena for part two of the battle.
Yup, this battle's more of the same. However, the arena is surrounded by Corruption, and not only should avoid stepping in it, but you should also avoid knocking your opponent into it, as it will energize him, knocking you back. After the battle, use the Power Plates to get outta there!
The Cauldron

Shortly after entering The Cauldron, the "Corruption" will rise to your level, but it rises only when you reach certain checkpoints, and dropping in is no different than falling, meaning you'll be returned to the last main platform.
Work your way across the thin wooden beams and down the slide-slopes (jumping at the end of each one) to work your way through the first section. Eventually you'll reach a couple of suspended columns--jump to the first then climb as high as you can and roof-run to the next column. Now roof-run once more to a ring at the edge of the platform and don't forget to tap the "Lift" button to propel yourself onward. Cross over a few more platforms, then use the Prince + Elika jump to jump the long span and then climb the wall to the wooden plank above. It's now a straight-shot to the fertile land, where a battle awaits.
Machinery Ground
Use the Power Plate to launch into a wall-run and use the ring to continue onto another two plates, which will launch you into a battle arena. This one's surrounded by Corruption, so be careful not to step in it. Furthermore, if you happen to knock the enemy into it, it will kill whatever combo you have going and cause him to reappear behind you. Oh, and be ready to press those face-buttons, as their icon will appear on-screen frequently during his attacks.
After the battle, our hero will be contaminated by Corruption. Here's what it boilds down to: the screen's border turns black…and that's about it, so don't sweat it too much. Leap off the arena toward a ring on the wall which you can climb to a wooden beam. Once on top, climb a few more rings embedded in the left wall to a patch of ivy. Follow it to the left then wall-run to a another ring, then a platform beyond. Now you'll find a quick-spinning cog amongst a pool of Corruption. Wait for it to come to a rest, then use a Prince+Elika jump to dash through the hole.
After passing through the spinning cog, wait for the Corruption along the walls to move aside, then wall-run to a few more rings and jump to a pole. Perform a few more leaps and use the Prince+Elika jump to reach the platform from the last pole. From the platform, perform another wall-run to the ring, which will briefly stop a second spinning cog, allowing you to pass through unharmed to the ivy on the other side. Climb up a few more rings to another ivy patch, then wall-run to another ring and through a third cog.
Okay, so you've got the basic idea by now, so you shouldn't have much trouble following the path. Just a couple more notes: When passing through the 4th and 5th wheels, don't press any buttons after riding the ring just before, as the Prince will automatically resume his wall-run afterward. When you reach a few wooden planks, use a Prince+Elika leap from the last one to the far wall, then grip-fall to the ring below, following the trail to the fertile ground just beyond.
Construction Yard
Wall-run to a series of green power plates, which will have you running up and down walls. Just avoid touching anything along the way and you'll be fine. After touching down, climb the wall with the rings then use a Prince + Elika jump to cross to the next platform.
Yup, it's another puzzle. In short, you'll have to rotate the four platforms so that you can reach the fertile ground in the far corner. Each platform has a lever on it--some of them rotate each platform 90 degrees, while others spin the entire assembly. The trick is to move the platform with the longest beam to the far corner, closest to the Fertile Ground. Once in place, make sure the beam is facing toward any other platform so it can be leapt. Once on it, spin it again so the arm is extended toward the Fertile Grounds, allowing you to jump to it. Now get ready for another battle--try to knock him off the ledge for a quick victory.
The Reservoir
This level is just a series of simple Power Plates--be ready to jump on occasion whenever they toss you onto a slope. Before long, you'll wind up at the Fertile Ground where another battle awaits. This time, the enemy may appear to be covered in corruption on occasion, which indicates he's only vulnerable to magic attacks. So keep a close eye on his appearance to ensure you don't fall victim to his defenses.
Heaven's Stair
Hop onto the Power Plate and prepare for a few basic wall-running sequences. After avoiding the obstacles, you'll be tossed into battle with a regular enemy. After the battle, jump to another Power Plate for another wall-running sequence, which will see you winding up inside the tower. Here you'll have to activate the lift by climbing the four columns one at a time, each leading to a ring--trigger all four to get the lift started. The platforming is pretty basic, so we'll leave this part to you. Oh, and don't worry about keeping track of which walls you've ran up, as the Power Plates will become inactivate once you've triggered their respective ring. Once the lift is activated, hop aboard (it can be found opposite of where you entered) and push the crank to ride it to the top.
After riding the lift, use the column to jump to the other side, then proceed outdoors to find a series of Power Plates that will lead you to the fertile ground, where another enemy encounter awaits you.
The Observatory
Leap over to the green Power Plate to begin a sequence of plate hopping--just be ready to grab several rings along the way. After coming to a rest on a platform, wall-run to a ring, which leads to another Power Plate sequence. Now this one can be a bit tricky, due to a few obstacles you'll have to avoid. Remember, look as far ahead as you can, toward the horizon, and also keep in mind that you shouldn't have to move too much in order to dodge the obstacles. Oh, and return to the center after every dodge so you're ready for the next one. At the end awaits another battle.
After the battle, hop onto another power plate which will eventually launch you to an enemy above. Take him down then wall-run to another pate sequence and get ready to grab a ring. You'll wind up in another battle against a weak foe. Subsequently, use the nearby Power Plate to launch into the level's final battle. You'll face off against your foe in a small arena surrounded by corruption. Use this to your advantage by knocking him into it to cause him to reappear behind you, giving you enough room to launch into a magical tirade against him.
Once he's down, escape the area by wall-running to the nearby power plate, starting another sequence--just be on the lookout for a ring or two that must be grabbed along the way.
The Cavern
After jumping across a few poles and pillars (remember to use the Prince + Elika jump for those long leaps), you'll eventually grab for a column that's actually just an illusion and fall to the fertile ground below. Unfortunately, Elika will be held captive by The Corruption, leaving it to you to free her--but don't worry, even though she's restrained, she can still rescue you if you fall or lose health.
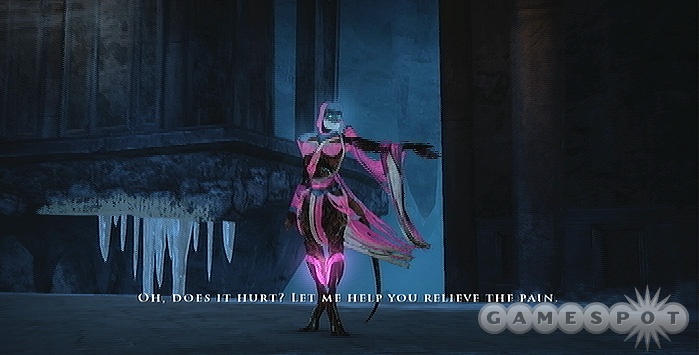
Okay, so now you have to find some way to reach the Concubine. Leap to the pillar behind Elika, then to the ring on the opposite wall. Follow a few more platforms until a wall blocking the path--carefully leap to the beam on the left, just beyond the wall, to reach the Concubine. Get close and slash her with your sword (if she disappears before you can slash her, step away and she'll return)--what?! It's a decoy!
Okay, let's try attacking her again. Return to the fertile grounds, but this time leap to another column in front of Elika. Climb to the top, then head left at the platform and slide/jump down the ramps to meet with the Concubine once again. Try to slash her again to reveal it as yet another decoy. Return to the fertile grounds once more and reclimb the pole behind Elika again and follow the path to give the Concubine one final slash--she will now enage you in battle down in the fertile grounds. Show her what you've got!
Coronation Hall
Hop aboard the Power Plate to the right and fly to your next destination. Upon landing, hop over the corruption and slash the Concubine when she appears. After a couple of misses, look for her down a hall in the back of the room, where you'll soon be trapped within. Soon, a gate will open, leading to a ramp you can slide down. If you fall into the shallow pit at the end, look for a vertical fissure you can grab hold of, then leap to the the next hall. It'll lead into another room containing the Concubine again--slash her again, then climb the ring by the door to a ledge and wall-run to a ring, which will cause a cage to drop. Climb on top of it and jump over the poles and do your usual platforming thing until you reach several columns aligned in a zig-zag fashion--use the Prince+Elika jump to leap from one to the next (she'll automatically realign you toward the next one). Once at the third column, wait for the Corruptions pools on the wall to move aside, then jump toward the ring, then onto a second--this one triggers a column to move. Just wall-run then jump to reach it, then climb it to the fertile ground.
Oh look, another battle, what a surprise. Not much to say aside to keep a careful eye on her appearance so you know which attacks not to use.
Royal Gardens
Wall-run to the yellow Power Plate, which will toss you onto a wall--leap to the opposite wall to find another plate, then one more after. You'll eventually wind up in a large room containing numerous empty floodgates. The goal is to have the water from the two source pools (one on either side of the room) flow into the empty chambers on either side of the central Power Plate. To do this, simply spin the cranks so that the floodgates rotate, causing the water to flow from one to the next. Now each crank only moves the adjacent floodgates, so it may take a try or to to nail it. Remember, do this for most side of the room. Once finished, catch a ride on the now accessible Power Plate to the fertile grounds, where another battle awaits.
Spire of Dreams
Wall-run to the Power Plate and be ready to grab the rings along the way. Upon landing, board the lift and turn the crank to ride it up to the Concubine. Slash her with her sword to cause her to teleport to a nearby platform. You can reach her new location by wall-running along the wall to the ring, then to a column, which you should climb and crawl along the ceiling to another column. From there, leap toward the wall and run along it before leaping to the platform where the Concubine awaits. Now look for her once more just below.
After a third slash, you'll have to chase her up the tower. Follow the same path you did moments before (wall-run to the ring) which eventually leads to a column. Climb it to the roof and follow along it to a ring--continue to follow the path, using the Plates and Rings to continue your climb--keep in mind you'll have to use the Prince+Elika jump often to cross some of the long spans. When you reach the fissure, climb it to the top then follow it right before wall-running and jumping to a nearby platform. Board a second lift and ride it to the tower's top.
Alright, it's another battle with the Concubine--you know what to do.
Royal Spire
Wall-run along the right wall and hop from the fissure to the platform (be mindful of the roaming Corruption!). Now hop over to the central shaft and wall-run up to the Power Plate when it rotates into view. Hop from plate to plate, then to the columns. Use the wall-run to reach the far ones, and keep in mind that you will have to use the Prince + Elika jump at some point to reach a distant Plate. Now step out onto the balcony and wait for the central structure to rotate revealing the Power Plate before leaping to it. It leads to another Plate, which will fling you toward a ledge--use the Prince+Elika jump to ensure you make it!
Step onto the beam and Prince+Elika jump to the plate, and get ready to perform several more throughout this next section. Eventually, you'll reach another lift that'll take you to the fertile ground, where another battle awaits.
The Palace Rooms
You're only a few short Power Panel flights away from this area's final battle. The only slightly tricky part of note is avoiding a pillar during the 2nd flight segment--keep to the far right to evade it.
You'll soon encounter the Columbine again--or her illusions at least--slash them all to make the true one appear. After the battle, head outside and wall-run to the Power Plate, which begins a sequence that'll take you up another floor of the tower, where the second part of the battle awaits. Afterward, head outside for another Plate, which will soon lead you to the third floor.
You'll face an interesting puzzle on Floor 3: Which Elika is the real one? To find out, jump from the tower to have the real one reveal herself and save you. And now it's time to face the Concubine one last time.
After winning, you'll have to escape the area--just use the Power Plate outside and you're good to go.
City Gate
What, you can see the fertile ground already? Ha, fat chance. Get ready to jump as you slide down the ramp toward it, as the walkway will collapse just before the Fertile Ground, veering you off-course. Climb the vines on the wall then cross use the hanging columns to eventually reach it, where a unique battle awaits.
So this baddie cannot be harmed with convention attacks, such as sword slashes or Elika's magic. As such, you'll have to exploit the environment to take him down. Lure him to a ledge, then use Elika's magic once his back is to it to cause him to lose his footing. Now get ready to hammer on whichever button is displayed on-screen to push him off.
Tower of Ahriman
Begin your trek by climbing the central column and climb along the ceiling to a ring, then jump to a Power Plate and climb up the wall it takes you to. When on the walkway, continue up a wall on the opposite side (by the broken guardrail) and perform a jump at the top to reach a second walkway. Head outside and climb a fissure to a ridge above, then wall-run along the right to a wooden platform, where you'll find a ring that can be grabbed, causing panel to lower. Climb the nearby fissure to the lowered panel, then wall-run to the left to a broken section on the left and wall-run again to a platform containing a crank. Spin the crank once to cause the wheel embedded in the wall to turn, creating a ride you can wall-run to. Climb up it, then scale the wall to a fissure and head right then wall-run to another platform, containing another ring.
Grab the ring to cause a couple more panels to lower, then scale across them by starting at the nearby fissure. You'll find another crank on the other side, then press turned, will spin a pairof wheels. Now wall-run to the other side and grab the ring there to lower another pair of panels, then return to the first platform. Now grab hold of the first panel, wall-run to the turned wheel, and climb it to the panel above, then to the second wheel, which leads you to a fissure. Now head right and perform a wall-run and jump to reach a Power Plate, then perform a Prince+Elika leap from the column you land on to reach the fertile grounds.
Okay, it's the rock-guy again. Lure him to the edge, then roll under his legs to get on his other side, then attack him off the ledge (magic attacks are quite effective).
Queen's Tower
Hop aboard the Power Plate to run up the wall, then hop over the corruption for another Plate to begin a really long sequence that will eventually take you to a balcony. From there, wall-run along the wall to a ring, which will take you to another wall-running plate, which leads to the fertile ground.
Rock guy's back and he's not very happy. Even worse, the arena is completley walled off, or at least it seems to be. But thankfully, aftera moment or two, a door will open to the outside, which is where you'll have to knock the rock guy off. The easiest way to do this is to move over to the door, which will lure the rock guy near, then roll around him to the opposite side and use Elika's magic attacks to knock him off.
Tower of Ormazd
Climb up the wall to the power plate, then immediately veer right as you run up the wall to dodge the Corruption. You'll soon wind up in a battle against the Rock Biter again, but this time there are no ledges of which to throw him off. Instead, you're going to have to bash him into the three wooden support columns, found in the corners. Stand by one to lure him near, then roll around him so his back is to the column, then use Elika's magic attacks to knock him into it. Repeat twice more to do him in.
After the battle, climb up the rings in the corner, then jump to a walkway above. Once outside, wall-run to the ring, then to some ivy beyond, which you can climb to a ring, then to a walkway. Wall-run along the wall where the bridge was, then jump from the path to a ring, then up a shaft to another balcony above. Continue along using the rings and ivy to reach the fertile ground further up. Unfortunalty, once there, the rock dude will knock it to the ground. Thankfully, the rubble provides a convenient means of reaching it, and it's nothing you can't handle.
City of Lights
Grip-Fall down to the Power Plate in the lower wall, by the large door. Continue to jump along a few platforms until you reach a fissure--follow it left, then grip-fall to another below once the Corruption has moved aside. Wall-run to a power plate on the left and take it from here--the path is pretty straight-forward, just make sure that any time you come to a rest, don't start moving again until the Corruption has become inactive.
Upon reaching the Fertile Ground, you'll face the Rock Guy once more. This time, you have to knock him into the cage. Stand by it to lure him near, then roll around him so his back is to the cage and knock him inside either with regular or magic attacks.
Warrior's Fortress
Jump over to the Power Plate to begin a long sequence of them--when you reach the 3rd running one, hold the stick to the right to ensure you avoid the obstacle. When you reach the wooden platform, get ready for a few more difficult running-plate sequences. Veer left during the first one and sixth ones. Before long, you'll have your final encounter with the rock dude. Like all the times before, lure him to the Corruption-free part of the ledge, then roll around him and attack him off (magic attacks work great!).
So you beat him, but wait...what's this? He's back, and this time on fire?! Well, don't worry as the fire slowly dwindles his health. All you have to do is evade him for a minute or two. Stay as far away from him as you can and tap the "jump" button constantly to quickly hop/roll away. The arena will begin to crumble and become smaller, but as long as you keep backing away by hopping/rolling, he won't ever reach you.
Tree of Life
Okay, so you've completed all the levels and defeated Ahriman's cronies--what's left? The Tree of Life, of course! Warp to the temple and climb its steps and venture inside where you'll battle Elika's father once more. The basics are the same, but he has more health than usual, so it may take a while. Upon his defeat, Ahriman will finally make his grand appearance, but you won't be battling him directly. Instead, you need to navigate to the three Fertile Ground points in order to take him down. As you venture about, he'll try to hamper your progress with a few attacks. His main attack is a flood of Corruption--these always appear at the same points, when you're climbing ivy by an obstructed Power Plate--as long as you wait by the plate, the ooze won't touch you. He'll also occasionally lunge at you with his claws, but they'll miss as long as you keep moving.
Okay, spoilers ahead! You still reading? After Elika sacrifices herself, carry her to the pedestal outside. Now four trees in the distance will be surrounded by light--venture to each one and slice it with your sword. However, getting to the trees can be tricky. To get to the first tree on the far right, climb the rings in the nearby structure and leap to it. For the second tree (again, from the right), jump to the fissure and follow it around the side, then climb up and jump at highest point to the other pillar, then leap to the tree. For the 3rd tree from the right, climb up the right side, then wall-jump up the shaft. For the final tree (the far left), climb up the rings, follow the fissure, wall-run and jump to the tree.
With the four trees sacrificed, the way into the temple will re-open. Proceed inside and chop the final tree to collect its life energy. Take it to Elika and…well, you'll see!
JapaneseBeat the game, on Arcade Mode, to unlock both Japanese and English voices for all characters.
Prince of Persia PS3 Trophies
Note that there are Spoilers on this list.
| Trophy Name | How To Earn | Reward |
|---|---|---|
| Wallrunner | Completing the Canyon. | Bronze |
| Compass | Use the Compass. | Bronze |
| Explorer | Explore every part of every region. | Bronze |
| Block Master | Block 50 attacks. | Bronze |
| Deflect Master | Deflect 20 attacks. | Bronze |
| Sword Master | Perform 14 hits in one combo. | Bronze |
| Improviser | Use the environment against an enemy. | Bronze |
| Up against it | Win a wall mini-game in combat. | Bronze |
| Ruined Citadel Runner | Run from the Sun Temple's Fertile Ground to the Fertile Ground in Windmills in 5 minutes. | Bronze |
| Vale Runner | Run between the Fertile Grounds in the Construction Yards and Heaven's Stair in 6 minutes. | Bronze |
| Warrior Special | Dodge the Warrior's attacks 20 times in one battle. | Bronze |
| Hunter Special | Deflect the Hunter's attacks 5 times in one battle. | Bronze |
| Alchemist Special | Defeat the Alchemist without using the acrobatic attack. | Bronze |
| Concubine Special | Defeat the Concubine without using grab. | Bronze |
| Light Seeds Finder | Collect 100 Light Seeds. | Bronze |
| Light Seeds Collector | Collect 200 Light Seeds. | Bronze |
| Light Seeds Provider | Collect 300 Light Seeds. | Bronze |
| Light Seeds Locator | Collect 400 Light Seeds. | Bronze |
| Light Seeds Harvester | Collect 500 Light Seeds. | Bronze |
| Light Seeds Hoarder | Collect 600 Light Seeds. | Bronze |
| Light Seeds Gatherer | Collect 700 Light Seeds. | Bronze |
| Light Seeds Accumulator | Collect 800 Light Seeds. | Bronze |
| Light Seeds Protector | Collect 900 Light Seeds. | Bronze |
| Speed Kill | Kill 10 generic enemies before they spawn. | Bronze |
| Throw Master | Throw 10 Soldiers of Ahriman into pits. | Bronze |
| Assassin View | Find the Assassin's view. | Bronze |
| Titanic view | Find the Titanic View. | Bronze |
| In Harmony | 500 coop jumps. | Bronze |
| Precious Time | Take one minute to think. | Bronze |
| Where's that Temple? | Talk to Elika. | Bronze |
| Getting to Know You | Get to know Elika by talking to her. | Bronze |
| Good Company | Learn about the world, and Elika's history. | Bronze |
| Climbing to New Heights! | Find the highest point in the world. | Bronze |
| Sinking to New Depths! | Find the lowest point in the world. | Bronze |
| Speed Demon | Finish the game in under 12 hours. | Bronze |
| Combo Specialist | Find every combo in the game. | Bronze |
| Heal the Land | First Healing. | Silver |
| Royal Palace Runner | Run between the Fertile Grounds in the Royal Gardens and Coronation Halls in 4 minutes. | Silver |
| City of Light Runner | Run between the Fertile Grounds in the Tower of Ahriman and City of Light in 7 minutes. | Silver |
| Light Seeds Master | Collect 1001 Light Seeds. | Silver |
| Saviour of the City of Light | Final Healing. | Gold |
| Be gentle with her | Elika saves you fewer than 100 times in the whole game. | Gold |
| Master | Unlock all trophies. | Platinum |
| Into the Storm… | Enter the Canyon. | Bronze |
| Saved! | Unlock Elika's Saving Ability. | Bronze |
| Now who's the Hunter? | Kill the Hunter in his Lair. | Bronze |
| Death of a Warrior King | Kill the Warrior in his Fortress. | Bronze |
| Death of a Concubine | Kill the Concubine in her Palace. | Bronze |
| Traitor's End | Kill the Alchemist in his Observatory. | Bronze |
| From Darkness… Light! | Reimprison Ahriman. | Silver |
| To be continued… | The End. | Gold |
Prince of Persia Xbox 360 Achievements
Note that there are Spoilers on this list.
| Trophy Name | How To Earn | Reward |
|---|---|---|
| Wallrunner | Completing the Canyon. | 10 |
| Compass | Use the Compass. | 10 |
| Explorer | Explore every part of every region. | 20 |
| Block Master | Block 50 attacks. | 20 |
| Deflect Master | Deflect 20 attacks. | 20 |
| Sword Master | Perform 14 hits in one combo. | 20 |
| Improviser | Use the environment against an enemy. | 10 |
| Up against it | Win a wall mini-game in combat. | 10 |
| Ruined Citadel Runner | Run from the Sun Temple's Fertile Ground to the Fertile Ground in Windmills in 5 minutes. | 10 |
| Vale Runner | Run between the Fertile Grounds in the Construction Yards and Heaven's Stair in 6 minutes. | 20 |
| Warrior Special | Dodge the Warrior's attacks 20 times in one battle. | 20 |
| Hunter Special | Deflect the Hunter's attacks 5 times in one battle. | 20 |
| Alchemist Special | Defeat the Alchemist without using the acrobatic attack. | 20 |
| Concubine Special | Defeat the Concubine without using grab. | 20 |
| Light Seeds Finder | Collect 100 Light Seeds. | 10 |
| Light Seeds Collector | Collect 200 Light Seeds. | 10 |
| Light Seeds Provider | Collect 300 Light Seeds. | 10 |
| Light Seeds Locator | Collect 400 Light Seeds. | 10 |
| Light Seeds Harvester | Collect 500 Light Seeds. | 10 |
| Light Seeds Hoarder | Collect 600 Light Seeds. | 10 |
| Light Seeds Gatherer | Collect 700 Light Seeds. | 10 |
| Light Seeds Accumulator | Collect 800 Light Seeds. | 10 |
| Light Seeds Protector | Collect 900 Light Seeds. | 10 |
| Speed Kill | Kill 10 generic enemies before they spawn. | 10 |
| Throw Master | Throw 10 Soldiers of Ahriman into pits. | 10 |
| Assassin View | Find the Assassin's view. | 10 |
| Titanic view | Find the Titanic View. | 10 |
| In Harmony | 500 coop jumps. | 10 |
| Precious Time | Take one minute to think. | 10 |
| Where's that Temple? | Talk to Elika. | 10 |
| Getting to Know You | Get to know Elika by talking to her. | 10 |
| Good Company | Learn about the world, and Elika's history. | 10 |
| Climbing to New Heights! | Find the highest point in the world. | 10 |
| Sinking to New Depths! | Find the lowest point in the world. | 10 |
| Speed Demon | Finish the game in under 12 hours. | 10 |
| Combo Specialist | Find every combo in the game. | 50 |
| Heal the Land | First Healing. | 30 |
| Royal Palace Runner | Run between the Fertile Grounds in the Royal Gardens and Coronation Halls in 4 minutes. | 30 |
| City of Light Runner | Run between the Fertile Grounds in the Tower of Ahriman and City of Light in 7 minutes. | 40 |
| Light Seeds Master | Collect 1001 Light Seeds. | 50 |
| Saviour of the City of Light | Final Healing. | 50 |
| Be gentle with her | Elika saves you fewer than 100 times in the whole game. | 100 |
| Into the Storm… | Enter the Canyon. | 10 |
| Saved! | Unlock Elika's Saving Ability. | 10 |
| Now who's the Hunter? | Kill the Hunter in his Lair. | 20 |
| Death of a Warrior King | Kill the Warrior in his Fortress. | 20 |
| Death of a Concubine | Kill the Concubine in her Palace. | 20 |
| Traitor's End | Kill the Alchemist in his Observatory. | 20 |
| From Darkness… Light! | Reimprison Ahriman. | 30 |
| To be continued… | The End. | 80 |
Got a news tip or want to contact us directly? Email news@gamespot.com
Join the conversation