Onimusha 3: Demon Siege Walkthrough
International film stars Jean Reno and Takeshi Kaneshiro lend their likenesses to the third edition of Capcom's demon-battling beat 'em up. Our guide includes a full walkthrough and character specific strategies.
Design by Collin Oguro
Capcom's Onimusha: Warlords was one of the company's first attempts to update the gameplay style of Resident Evil and its many imitators to the Playstation 2. In doing so, they chose to de-emphasize the puzzle-solving and survival horror aspects of their earlier titles, and focus on delivering a more action-oriented adventure game, one which would tell the story of Samanosuke Akechi and his battle against the evil Genma demons that were rampaging across feudal Japan. The story continued in Onimusha 2: Samurai's Destiny, which followed another character, Jubei Yagyu, as he attempted to pursue and kill Nobunaga Oda, a powerful human ally of the Genma.
And now, in Onimusha 3: Demon Siege, the adventures of Samanosuke continue. Although nineteen years have passed since the end of Warlords and the beginning of Demon Siege, Samanosuke's whereabouts during that time period go unmentioned; he's simply content to pick up where he left off, as he destroys an entire Genma army in the stunning opening cutscene. Sheer force of might won't be enough to destroy the resurrected Nobunaga, though, as his demon minions have managed to open a time portal to modern-day France, which is soon the site of a demon invasion. Enlisting the aid of a French policeman named Jacques Blanc, Samanosuke and his allies set out to vanquish Nobunaga once and for all.
In addition to the new friends, Onimusha 3 introduces some new technological features, as the entire game is now rendered in 3D, as opposed to the 3D-characters-on-2D-backgrounds of the previous titles. In addition, you're finally able to use the analog stick to control your character, making for a much more accessible combat system.
If you're looking to plumb the depths of Onimusha 3: Demon Siege, then look no further than GameSpot's unofficial guide. Within, you'll find details on all of the playable characters, a complete walk-through, a checklist of weapons and equipment, and information on all of the secret difficulty modes and unlockable mini-games. Enjoy!
Table of Contents
Characters and EquipmentCombat Actions
Enemies
Ako
The Dark Realm
Oni Training
Walk-Through
Arc De Triomphe
Mt. Hiei
Sewers
Kasei
Notre Dame
Undersea Temple
Notre Dame-Michelle
Boulogne Zoo
Mont-Saint-Michel
Lake Biwa
Azuchi Castle
Eiffel Tower
Hannoji Temple
Characters and Equipment
Samanosuke Akechi
This mysterious warrior, who disappeared after defeating the Genma King nineteen years ago, has finally returned to wage war on the Genma army once more. His first engagement is a startling success, as he manages to single-handedly wipe out a Genma Tank and all of its support troops, and kills Gargant, one of Nobunaga's most trusted vassals. But Nobunaga, the new Genma King, remains in power. As Samanosuke approaches Nobunaga's lair, however, he's sucked into a time warp and is rocketed into the future, where he finds himself stripped of his weaponry.
Although Sam is left without his arsenal, he'll soon find new weapons, and possesses a lifetime's worth of combat knowledge to boot.
Normal Sword
Samanosuke's most basic piece of equipment is a simple, nonmagical katana. You will only use this weapon for a brief portion of the game, before you obtain the Tenso swords.
Tenso
The Tenso swords possess holy magic, and attack more quickly than Samanosuke's other equipment, but aren't as powerful. You're more likely to strike and stun every member of a large group of enemies if you use the Tenso, as opposed to one of Sam's more powerful weapons, but you won't be able to kill said enemies quite as quickly.
The Tenso's magical attack affects only one enemy, and discharges multiple holy strikes against your target. Since this attack uses no magical energy unless it actually connects, you're assured of getting a few good licks in, so save your Tenso's magical power for boss fights.
Kuga
Samanosuke's most balanced weapon, the Kuga is slower than the Tenso, and less powerful than the Chigo, but possesses enough speed and power to be useful against both solitary strong enemies and large groups of weak foes. If you can only maximize one weapon, this is probably the one you'll want.
The Kuga's magical power affects all enemies in front of Samanosuke, and creates a powerful beam of compressed air that will cut most of your foes in half. Powerful enemies may only be knocked over by this blast, so be prepared to finish off any stragglers before absorbing spheres. At maximum level, the Kuga sends out two blades of air, which are generally sufficient to kill off anything that they're aimed at.
Chigo
The Chigo axe is Samanosuke's final and most powerful weapon. Although it is by far the slowest tool in Sam's arsenal, a few slices from the Chigo's blade are enough to kill just about any non-boss enemy in the game. The lack of speed does make attacking at close range somewhat dangerous, though, as there's plenty of time for enemies to hit you in between your swings. Luckily, it's nearly impossible to be staggered while you're attacking with the Chigo; you'll still take full damage from any attack that connects, but you'll usually continue on with your attack animation, depending on the severity of the blow.
The Chigo's charged attack differs from those of the other two weapons; instead of a slash or dual-slash maneuver, the Chigo's charged attack turns Samanosuke into a dervish of death, as he'll spin around on his feet, using the axe to slice open anyone nearby. Increasing the level of your Oni Gauntlet will increase the number of revolutions that this charged attack performs.
When you unleash the volcano magic locked within this mighty axe, a miniature eruption explodes at Samanosuke's feet, severely damaging all enemies in a small circle around Samanosuke. At higher levels, the radius and damage of this attack is increased.
Bishamon Sword
The Bishamon is Samanosuke's ultimate weapon, and is hidden away deep within the Dark Realm of the Genma. Although Samanosuke can obtain it during his final trip to the Genma dimension, it isn't of much use to him, as it is inaccessible during the final confrontation with Nobunaga. If you unlock it, which can take an hour or more of Dark Realm exploration, all you'll be able to do with it is travel through the Dark Realm again, exulting in its massive destructive force. And destructive it is; most enemies can't survive more than one or two hits from its blade, and its magical attack (which doesn't require magical energy to use) will strike all enemies around Samanosuke, killing most foes instantly.
The Bishamon is also available in the game's Ultimate Mode. See the section on Game Completion Bonuses for more information on this extra mode.
Onimusha Sword
In order to finally rid the world of Nobunaga's evil, Samanosuke will have to draw on the power of two Oni Gauntlets and all three of his Oni weapons; when these items are forged together, Samanosuke will receive the Onimusha Sword, only usable by the champion of the Oni Clan.
Instead of a magical attack, the Onimusha Sword uses the triangle button for a leaping attack, which will rocket Samanosuke towards Nobunaga and result in a powerful downwards slash. The blade is also capable of normal and charged attacks; you'll need to use all of its powers to defeat the Genma King.
Raizan, Enryuu, Shippuu
Samanosuke also retains the weapons that he's acquired during his 19-year absence, although he'll only be able to use them at the very beginning of the game. These three weapons are at maximum power, allowing you to easily slice through the Swordsmen and 3-Eyes that populate the courtyard of Honnoji Temple, and although they're incapable of charged attacks, they each possess a unique magical ability. Samanosuke loses these weapons after he's forced through time to present-day France.
If you wish to retain these three weapons during your modern adventures, complete the game on Normal difficulties, and obtain the Fire Seal, Thunder Seal, and Wind Seal from the Dark Realms within the game. After starting a new game, the Raizan, Enryuu, and Shippuu will be waiting for Samanosuke when he arrives in France.
Red Armor
Sam's adventures would end fairly quickly if he didn't protect himself, but his suit of Red Armor serves this purpose quite well. Increasing the level of your armor with captured red spheres will help it to better absorb blows.
Oni Gauntlet
Although you may be tempted to sink all of your red spheres into your weapons and armor, you can't neglect the Oni Gauntlet. Increasing its level will let Samanosuke absorb souls more quickly, and, more importantly, will increase the power of his charged attacks.
Arrows
In addition to his swords and other weapons, Samanosuke also possesses a bow, which can be used with a multitude of arrows.
Normal Arrow
Normal arrows do a small amount of piercing damage, and are most useful for killing off weak enemies, such as Archers or Bhaza, or for breaking open sealed Genma containers that are stuck to the ceiling of a room.
Flame Arrow
Flame arrows, predictably enough, burst into flame upon contact with an enemy, engulfing your target in a kind of napalm effect. While this flame burns, your target will take extra damage.
Ice Arrow
When an enemy is struck with an Ice Arrow, it will be frozen into place, in a fashion similar to the effects of Jacques' Hyosai weapon. If the enemy is weak, or simply low on health, you'll be able to smash it into pieces by striking it with a weapon; otherwise, it will simply be knocked to the ground when the ice breaks.
Electric Arrow
Rounding out the elemental trilogy, Electrical Arrows shock a target, causing it to freeze in place for a few seconds. You can use this effect to immobilize large monsters while you deal with any nearby nuisances, or simply to keep a target still while you slash at it with your swords.
Soul Arrow
Although Soul Arrows don't do much damage, they're still useful when faced with a boss: so long as the arrow sticks out of your target, each successful hit will release additional souls. You can use these souls to replenish your health or magical power.
Jacques Blanc
Although Jacques Blanc is a cop with plenty of good years on the Paris police force, he's encountered nothing that could've prepared him for dealing with a demon invasion of France, or being transported back in time to feudal Japan. Still, all things considered, he deals with the change fairly well, and although he's more intent on finding a way back home than with actually killing Nobunaga, his desires are congruent with those of the Oni Clan. Thus, they grace him with an Oni Gauntlet, which allow him to wield Oni weapons and absorb the souls of fallen Genma.
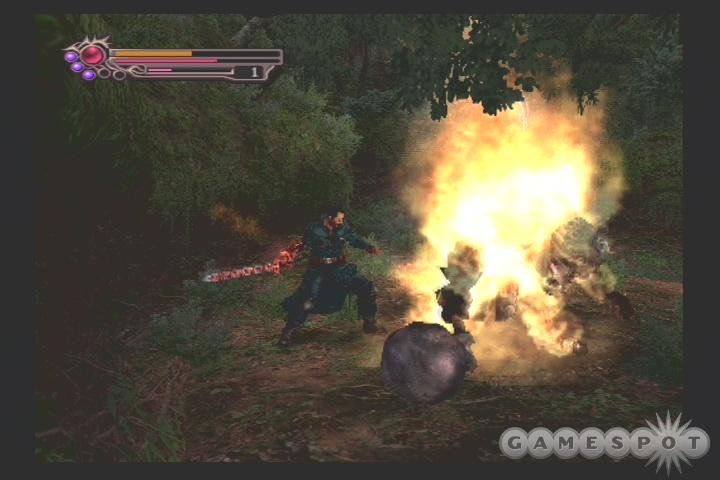
Whereas Samanosuke prefers bladed weapons, such as swords and axes, Jacques is content to use whips and chains to dish out damage to anyone that attempts to stop him from getting home.
Oni Whip
Shortly after Jacques arrives in Japan, the Oni Chieftain grants him the use of an Oni Whip, the weakest of all his weapons. It will suffice until you find a magical weapon, but should be replaced at your earliest convenience.
Enja
Not to put too fine a point on it, but the Enja is essentially a copy of the weapon used by Ivy of the Soul Calibur series. When it's not being actively used, it appears to be a sword, but when Jacques attempts to swing it at an enemy, the individual pieces of the fire-based Enja detach, giving him whip-like flexibility. As with Samanosuke's Tenso blade, the Enja only uses magical energy when it actually connects with an enemy, and, also like the Tenso, is only capable of harming a single foe with its magical attack.
Raisen
This whip-spear is a happy medium when compared to Jacques' other weapons, possessing both a fair amount of speed and enough power to deal with the toughest monsters.
The Raisen possesses lightning magic, and sends out a cone-shaped array of lightning bolts whenever pressed upon to release its magical energy. At higher levels, the width of the cone and the power of the bolts increase.
Hyosai
Jacque's morning star weapon, the Hyosai, is the embodiment of ice magic. When used for normal attacks, though, it can flatten large groups of enemies, thanks to its huge, arcing swing, and also to destroy single opponents, as the normal attack sequence ends with an overhead slam.
When you activate its magical abilities, the Hyosai absorbs ambient energy from Jacques' surroundings, which immediately takes the temperature down to well below freezing. Enemies caught in this zone are frozen solid; many will be destroyed with a single swing of your weapon, although the hardier foes will survive this attack, requiring you to hit them again before they die.
Ultimate Whip
Like Samanosuke's Bishamon Sword, Jacques' Ultimate Whip is found in his final trip through the Dark Realm of the Genma. Unlike the Bishamon, however, the Ultimate Whip can be used in Jacques' final boss fight, which makes it worth seeking out. This super-powered weapon can kill almost anything with a single use of its special slash, which can be activated with the triangle key.
SA Coat
Increasing the level of Jacques' body armor will help him survive the multifarious attacks of the Genma hordes, so try to level it up as quickly as possible.
Oni Gauntlet
In addition to increasing the speed with which Jacques absorbs souls, leveling up his gauntlet will allow him to lasso and throw the larger enemies in the game.
Michelle Obear
Although Michelle is the character that you'll use the least in Onimusha 3, she still possesses a few unique weapons. She cannot charge her attacks, or use magical attacks, but has the benefit of possessing an infinite amount of ammo for her weapons (save the grenade launcher), and can attack from long range. It's worth pointing out that none of the restorative items that she picks up are transferable to any other character, so feel free to use them in a tough spot, if need be, since you don't have to save them for any tough boss fights.
Assault Rifle
Michelle's standard weapon is an ordinary assault rifle. This can fire short bursts of bullets at enemies a fair distance away, and is useful for taking down enemies that haven't spotted you yet.
SPS15 + S
This shotgun can rip through enemies at close range, but is completely ineffectual when targeting enemies more than a few yards away. On the plus side, it can hit multiple enemies at a time, and refires quite rapidly. Use it in tight spots.
SPS15 + R
Michelle does eventually obtain a sniper rifle during her travels, although it isn't quite as useful as her other weapons. If you manage to spot a far-off enemy that hasn't registered your presence yet, you can usually peg it with sniper rounds to kill it from a distance, but the refire rate is slow enough to make this a poor choice for most combat situations.
SPS15 + G
Ah, now we're talking: the SPS15 + G is essentially a bazooka, in that it launches grenades towards the targeted enemy which explode on contact, killing anything within the blast radius. Although larger enemies will take multiple grenades to kill, this is still your best bet for mass carnage.
Grenades
Although Michelle doesn't possess any magical attacks, she can still effect a little crowd control with her grenades. Pressing the triangle button will chuck a grenade towards your nearest enemy; holding down the button will force Michelle to hold the grenade until the timer is just about burnt out, leaving the Genma less time to escape the blast radius. Grenades are great for ripping through groups of grunts, and you should be able to find plenty of them, but you'll want to keep a couple in reserve for Michelle's harder fights. She does face off against pairs of lieutenants at a couple of points in the game, so you'll want to make sure she has a few spare grenades left when this occurs.
Combat Actions
Although the Onimusha 3 manual is fairly thorough in explaining the basic game mechanics, one notable absence is a complete move list. Your characters have a few combat actions that require precise inputs, and are thus not something you're likely to stumble across by accident. Many of these are covered in the Oni Training sessions, but we've compiled a list here.
All Characters
The moves in this list are replicable by all of the playable characters (Sam, Jacques, and Michelle).
Guard
Holding L1 will cause your character to raise their guard, which will prevent most attacks from connecting. Your guard isn't perfect, however; many attacks will cause you to stagger, which will prevent you from raising your guard again for a second or two, while the most powerful enemies and bosses have attacks that will penetrate your guard and damage you whether you're defending or not. Still, you'll want to keep your finger above the L1 button, as proper guarding will save you plenty of health over the course of the game.
Normal Attack
Normal attacks are performed with the square button. Sam and Jacques can string together normal attacks by rapidly pressing the button; what occurs will depend on which weapon you're using. Michelle's weapons are only capable of single attacks.
Uppercut
Each character has a specific attack animation for this move, but they all involve sweeping their weapon up in a vertical slash that usually knocks an enemy onto its back. You can perform this by locking onto a Genma with the R1 button, pressing up on your directional pad, and hitting the square button. This only works at extremely close range.
Charge
If you manage to get a head of steam by running for five or more steps, you can press the square button to ram into an enemy. This will either knock an enemy down or merely stagger them, depending on the character and the type of foe.
Finishing Move
For bonus gangsta points, your character can finish off a Genma that you've managed to knock prone. If you stand over the body of said Genma and press the square button, you'll automatically enter into the finishing move animation; Sam will attempt to stab the enemy, while Jacques and Michelle will use their guns to finish the demon. These attacks often miss if your enemy starts to rise before you get the move off, and leave you open to attack from nearby enemies, so you shouldn't attempt them unless you feel the need to show off.
Kick
Kicking an enemy will either knock it over or simply damage it, depending on the character and the type of Genma. Hold the d-pad down and press square to send out a single kick; Jacques can string together multiple kicks into a combo attack, if he so desires.
Critical Hit
Critical hits are the most difficult combat maneuver to learn. In order to pull one off, you have to hit your attack button the instant before an enemy's attack hits your character; if all goes well, your character will perform the critical hit animation and your foe will be cut in half. You'll get a few Criticals now and again just via luck, but you'll have to practice long and hard before you can pull them off with any consistency.
Deflect Critical
If you want to hit a Deflect Critical, you'll also need to wait until just before an enemy strikes you, but unlike with a regular critical, you'll need to hit your L1 key to raise your guard. If the timing is right, their weapon will clang off of yours, giving you a split-second window of opportunity to hit the square button to start the Deflect Critical. The effect is the same as a normal Critical; your enemy is cut in half instantaneously, and will drop more spheres than it normally would.
Samanosuke and Jacques
Since Samanosuke and Jacques both possess an Oni Gauntlet and Oni Weapons, they possess a few actions that Michelle cannot perform.
Chain Critical
When your character pulls off a Critical or Deflect Critical, you can chain together these powerful attacks by tapping the square button again. If you hit the button in time, your character will dash towards another nearby enemy and perform a critical on that one, as well. You can chain together Criticals until you run out of enemies to destroy, but this is easier said than done.
Charge Weapon
Using the power of their Oni Gauntlets, Jacques and Sam can charge their weapons to deal extra damage. By holding down the R1 button, you'll charge your weapon; it will flash as many as three times, depending on how long you hold down the button and how much you've upgraded your Oni Gauntlet. (Only a maxed-out Oni Gauntlet will let you fully charge your weapons.) Charged attacks have special effects and deal more damage than do normal attacks.
Magic Attack
By drawing upon the elemental power within their weapons via the triangle button, Sam and Jacques can unleash devastating magical attacks upon large groups of enemies. Each time you use a magical attack, you can expect to kill any nearby enemies within range of your attack, but you will drain your weapon's magical energies; restoring it will require you to absorb blue spheres, either from a fallen enemy or a magical fountain, or to use an Oni Med item.
Onimusha Mode
When either Jacques or Sam have absorbed five purple spheres, their sphere meter will pulse with power. At any time after you obtain all of these spheres, you can click on your right analog stick to enter the Onimusha state. While the power of the Onimusha flows through your character, you're invincible, deal far greater damage than normal, and each successful attack will unleash spheres from your targets, which you can suck in to heal any damage to your normal self. The Onimusha can also use a magical attack, which damages everything around you, but this reduces the amount of time that you remain in the Onimusha state. Thus, it's best to hit the triangle button just before you revert back to your normal self.
After the Onimusha state wears off, you'll need to collect five more purple spheres before you can activate it again. If you happen to die while your character has five spheres in his possession, he'll automatically be resurrected as the Onimusha; use this opportunity to dish out as much damage as possible to your enemies, and grab any yellow spheres that pop up, as these will help heal the damage that your normal self has taken.
Samanosuke
Samanosuke's bow and swords give him a few combat options that the other characters don't possess.
Firing Arrows
By holding the R1 button, and then tapping the X button, Sam will let loose an arrow. These arrows will automatically target any flying enemies first, then any archers, and only then will revert to the nearest Genma. If you wish to fire at the nearest demon, rather than a random flying creature, hold the X button down for two seconds and Sam will automatically let loose an arrow at a nearby ground foe.
Charged Attack
When Samanosuke charges up his weapon, and then hits the square button, his swords are capable of dealing much more damage than they normally would. The Tenso and the Kuga both have slashing charged attacks, while the Chigo spins around, striking every enemy near Sam's position. Maxing your Oni Gauntlet's weapon will increase the power of these charged attacks.
Ten-Point Slash
The Ten-Point Slash isn't an incredibly useful technique, but you'll want to master it if you intend to complete the Oni Training sessions. When standing a few feet away from an enemy, you can thrust your sword at it by pressing up on the d-pad and hitting the square button; the moment this attack connects, hit the square button again to start a chain of attacks. If you can hit the square button enough times, you can connect together as many as ten separate sword blows; thus the name.
Jacques
Due to the unique nature of his whip-weapons, Jacques has the most unique fighting style in Onimusha 3. He and Samanosuke play very differently, especially when you attempt to use his charged attacks.

Oni Bind
When Jacques has charged a weapon, he can use it to lasso an enemy with the square button. You need to be fairly close to your target for this to work, but when you connect, the enemy will be temporarily immobilized, and you'll be able to use all of the following Oni Bind moves.
Oni Bind--Shoot
When a target is bound, hit your square button repeatedly to pop a few caps; each bullet will release red spheres from your enemy, making this a good killing move.
Oni Bind--Throw
After lassoing an enemy, press up or down on your analog stick to chuck them into the air and slam them into the ground. This can be done either forwards or backwards, and these enemies will hurt any other Genma that they strike, so take the opportunity to ram your target into his friends, when possible.
You cannot throw large, lieutenant-level targets until you've upgraded your Oni Gauntlet to level two.
Oni Bind--Kick
When you have a Genma bound with your whip, your X button will cause Jacques to rush in and kick the target. This does very little damage, and rarely knocks anything down, so don't bother with it.
Oni Bind--Magic
This technique is awkwardly referred to within the game as an "Oni Bind Bind." When you have a target bound, hit your magic button, the triangle, to send a small charge of magical energy along your weapon and into the Genma. This is usually enough to kill anything that you've captured, and uses less energy than does a normal magical attack.
Throw Object
When Jacques is standing near a rock, pillar, or other object that looks a bit different than the rest of the background, there's a good bet that he can use his whip to throw it at an enemy. You can do this by holding R1, then hitting X; assuming there isn't a Firefly around to mess up your targeting, you'll pierce the object and throw it. You can't control the direction of this throw; the object will land on the opposite side of your body, so you'll want to position Jacques in between the enemy and the object before attempting this maneuver.
Michelle
Michelle only possesses a couple of unique maneuvers.
Shoot Aerial Enemies
If you want Michelle to prioritize a flying foe, use the X button instead of the square button while holding down R1. This will cause her to fire at Bhazas before everything else.
Throw Grenades
In Michelle's case, the magic button (triangle) causes her to throw grenades at her foes. The amount of grenades you have left is displayed above your health bar.
Enemies
Grunts
Most of the enemies that you'll come across in Onimusha 3 are of the grunt variety, in that they aren't very difficult to take down on their own. Unfortunately, you'll usually see three or four of these enemies at a time, and they'll often be paired up with a tougher monster or flying foes. Still, grunts should rarely be dealing much damage to you; so long as you keep your guard up, and use basic battle strategies, you should be able to mow through grunt-level enemies with relative ease.
Swordsmen / Axemen
Swordsmen are the basic skeletal grunts of the Genma army, barely capable of wounding anyone with their swords, and possessing very little health. They cannot block your attacks, so you should have little trouble taking them out. They usually come in groups, however, so be careful to keep your guard up.
Axemen are the more advanced versions of Swordsmen, can deal and take more damage, and will occasionally block your attacks. They're still simple to kill; just press them with repeated normal strikes and they'll fall down with just a few blows.
Archers
Archers are by far the weakest Genma from a defensive standpoint, as all it takes is one hit from any weapon to kill them, but they're not really meant to be much more than an annoyance. Unfortunately, annoy they do, as their arrows will cause Samanosuke or Jacques to stagger when they connect. When staggered, you'll be open to attack from any nearby melee enemies, and when there are numerous Archers in the vicinity, a second arrow will knock you down.
Samanosuke can easily deal with Archers by tapping X while holding down R1; your bow's targeting will automatically lock onto any Archers in the area if you tap it, rather than shoot a nearby melee opponent. Using the same combination of buttons for Jacques will cause him to slash up to the platform where the Archers are hiding away. If the Archers are on the same level as your character, though, you can of course approach them and hit them with your weapons as you normally would, although you'll have to dodge their arrows as you close in.
Generally speaking, Archers should be your first priority in combat. Take them out first, and you won't have to deal with their arrows while also fending off numerous melee opponents.
3-Eyes / Dark Crow / Dark Spider
Filling out the ninja slot in the bestiary, 3-Eyes and their ilk generally prefer to strike with multiple quick blows, rather than go for pure power. As such, their attacks are all relatively easy to block, although in large groups they can quickly surround you and cause you to drop your guard through multiple blows. They do possess one semi-special attack, which they'll whip out at long range: they'll grind their hand-blades together, then dash across the open ground to hit you with both arms simultaneously. Whenever you hear the distinctive grinding sound, start blocking, as an attack will soon follow.
Dark Crows are tougher variants of the 3-Eyes model, with green eyes where the 3-Eyes had red. They're generally similar, save for the fact that they can block and dodge attacks. The most advanced version, though, named the Dark Spider, possesses the unique ability to split off doubles of itself, which possess their own limited amount of health. You'll be able to tell which Spider is the copy by looking for the telltale flickering, but you're generally better off just treating everything as a real enemy and slicing away as fast you can.
Zorm / Gilzorm
Zorm and Gilzorm are basically four-legged equivalents of Swordsmen and Axemen: they're never difficult to defeat, save for the fact that the Gilzorm will occasionally guard against your attacks. They're both notable for being particularly easy to get Deflect Criticals on, however, as both versions will often to resort to telegraphed overhand blows; wait until the last moment before these blows hit before raising your guard, and you should be able to pop off a Deflect Critical without much trouble.
Zagat / Zabiet
In addition to their devestating criticisms of your cooking, Zagats can harm you with their blades, which they curiously carry in only two of their four arms. They'll perform the same grind-and-slide attack as 3-Eyes enemies do, as well as their own special spaz attack, during which they'll spin around on their vertical axis and repeatedly attempt to strike at you. These blows are easily blockable, but if more than one Zagat attempts to use this move on you simultaneously, you'll likely want to move out of the way.
Zabiets are, in what should be becoming a fairly familiar occurrence by now, visually almost identical to Zagats (save for their green eyes), save for the fact that they're a bit tougher and can block your attacks. Zabiets will actually keep their guard up after they successfully fend off a blow, so if you stick with normal attacks, you may find yourself greeted with a clanging sound three or four times in a row. If this occurs, load up a charged attack and use that to defeat them.
Batabone / Batochaika
Batabones are aquatic creatures that will harry you throughout portions of the Sewer level, and in the Dark Realm. Besides their rarity, there isn't much to distinguish them from the other melee-oriented enemies, save for their slashing attack, which they can sometimes link together into a long series of attacks; when this begins, just keep your guard up. Beyond that, they possess no special defensive abilities, so normal or charged attacks will kill them easily.
Batochaikas appear with Batabones in the Sewers, and are the aquatic equivalent of Archers. They possess a single weak ranged attack which is easily blocked, but if it strikes while you have your guard down, you'll stagger and will be open to attacks from the Batabones. Batochaika's are a bit more mobile than their Archer counterparts, but will always appear on the same level as your character, making them fairly easy to kill.
Bazu / Dorabazu
Bazu and Dorabazu are similar in appearance and functionality; they're spiny, reptilian Genma who attack with great cleavers. They move and attack quite slowly, and are easy to kill when they're upright, but their special attack is a pain to deal with. When there's a bit of distance between yourself and them, they'll curl up into a ball and whip across the area to ram into you. You can block this attack, but you'll usually be pressed backwards. Multiple Bazus will often stagger their rolls, and since you can't harm a Bazu while it's rolling, this forces you to wait until they've all struck you before you can begin counterattacking.
Dorabazus have the normal upgrades over their less-effective friends, but they can also roll for a longer period of time, allowing them to hit you thrice before they revert to their upright form. Hold your guard until they stop rolling, and then attack as quickly as possible to kill them before they attempt another roll.
Zolworm
These icky goo-creatures aren't a huge offensive threat, mostly due to their incredibly slow movement. They only possess two attacks, as well: a short jab, and an overhead slam which will knock your character to the floor. Both attacks are easy to avoid if you keep your distance, so stay back, and use charged attacks to whittle away at a Zolworm's health. Charged or magical attacks are your best bet for killing Zolworms; if one is killed with normal attacks, its death will release a host of Geras onto the floor. These parasites will attempt to leap onto your character; although each Gera is only capable of dealing a small amount of damage, they will confuse your targeting while they're attached. So, if one attaches itself, you'll need to either guard until it dies (which happens automatically), or just perform normal attacks, which are auto-targeted. You can easily kill Gera by stepping on them.
Lieutenants
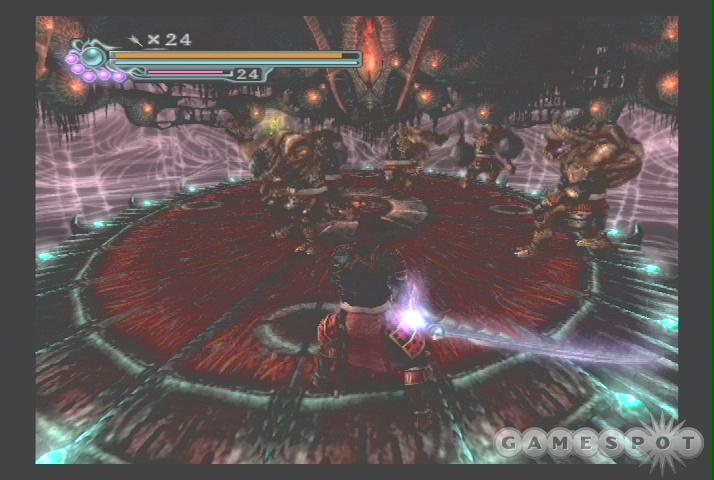
Nobunaga's lieutenants are many and varied, and are much tougher than the cannon fodder that you normally encounter. For most of the game, you'll encounter these enemies one at a time, perhaps with a few grunts, but by the end, and especially in the various Dark Realms that you visit, you'll need to be prepared to take down as many as a half-dozen of these creatures simultaneously. Charged attacks are the preferred method of dealing with lieutenants singly; in groups, don't hesitate to whip out a magical attack, or even to activate your Onimusha state if need be.
Fugaku
Defensively, Fugakus are among the weakest of the lieutenants; they don't have a large amount of hit points, and they aren't capable of withstanding many blows. They counter for this weakness in two ways. First, they've adapted red armor to fit their misshapen bodies; your first attacks will be directed against this armor automatically. After it shatters, you'll be able to attack a Fugaku directly. Secondly, in the spirit of the best defense being a good offense, they use their massive spiked club to prevent you from getting close, by swinging it back and forth across their bodies successively. You can block these attacks, but the first hit will stagger you; the second hit will usually knock you down.
Samanosuke has a harder time dealing with Fugakus than does Jacques, due to his need to get in close to deal damage. Charged attacks are your best bet. A maxed-out weapon with a full charge will generally kill a Fugaku with one attack; lower-level weapons will require multiple attacks, so don't be afraid to dart in, attack, and retreat before they get a chance to swing their clubs.
When facing Fugaku one-on-one with Jacques, a bind followed by gunshots is the best way to easily defeat him, as you can do it from a long way away with minimal risk. If you've upgraded your Oni Gauntlet to level 3, you'll also be able to lasso and throw a Fugaku; the first throw will break his armor, and the second will kill him outright.
The huge swing radius of a Fugaku generally results in them harming any nearby grunts, so, depending on the circumstances, you may want to hold off on killing a Fugaku until he's had a chance to wipe out any other Genma in the immediate area. This is also true of groups of Fugakus; these guys are indiscriminate in their attacks, so groups tend to wind up losing one or two of their members before they get anywhere near you.
Dark Puppet / Fobora
Most of the enemies in Onimusha 3 are somewhat slow on their feet, and this is especially true of lieutenants, but Dark Puppets and Foboras (which are identical, save that Dark Puppets appear in the past, while Foboras appear in modern-day France) are quite spritely, and can move towards or around your character with ease. These animated suits of armor are therefore quite dangerous solo, but usually appear in groups of two. Unfortunately, they possess both sword attacks, and a magical projectile attack; while both are blockable, these attacks can make closing the distance with these foes a chore. On top of that, Dark Puppets and Foboras will both usually block normal attacks.
When paired up with other Genma, Dark Puppets will usually sit back on the periphery of battle and shoot their magical ranged attack at you. If you block this attack at the exact moment before it strikes you, you'll be able to pull off a Deflect Critical, which will usually kill your attacker; if you just block it normally, it will fly off into the air. After you manage to close in on your foe, you can begin whittling away at its health. As mentioned, they'll block normal attacks, so concentrate on charged or magical attacks to kill them quickly. Jacques can't lasso Dark Puppets or Foboras with his whips, so he may have to press through with normal attacks.
Zmoh / Grizmoh
Even though Guildenstern's preparations for Nobunaga's arrival have occupied him for much of the time that he's spent in modern-day France, he's still been able to carry out a few warped experiments on the side. Zmoh and Grizmoh are the fruits of one of those experiments; they're the result of an attempted fusion between Genma and simians. As such, their monkey blood has become suffused with demon energy, which has transformed them from gentle gorillas into rampaging beasts.
Zmoh are strictly brute-force attackers; there's little subtlety in their movements. When they spot you, they'll rush you, and attempt to leap atop your character, which will knock you to the ground. After you've been laid out, they'll usually try to stomp on you with their forearms, so you'll want to quickly roll out of the way if this occurs. At close range, they'll also try to maul you, but you can block this.
The usual dichotomy applies to Zmohs and Grizmohs (which are identical, save that Grizmohs can take a bit more damage before dying); Samanosuke should dart in and out with charged attacks, while Jacques can lasso and flip these enemies until they disintegrate.
Gacha / Dongacha
Gachas and Dongachas are the most physically imposing enemies in the game; these hulking brutes are larger than most anything else in the Genma army, and pack huge maces which they wield with terrible might. You don't want to be anywhere near them when they swing their weapons; although you can usually block their strikes, they almost always throw out two attacks in quick succession, meaning that the second will often knock you down.
As with most of the other enemies, Sam should attempt to dart in with a charged attack, then retreat before the Gacha swings his mace around his body, or simply use magical attacks to deal with groups of these enemies. Jacques can lasso and throw Gachas when his Oni Gauntlet is at level three; until then, hitting them with a charged attack, then rapidly pressing your square button will fill them with lead. You'll have to do this a couple of times before they die, but it's a bit easier than using your normal attacks.
Dordo / Dordio
Of all of the non-boss enemies in Onimusha 3, Dordos and Dordios should be the ones that most inspire you to be cautious. These swordsmen possess more raw power than any other lieutenant or grunt, both in terms of their defensive and offensive capabilities. Their spinning blades can knock your character to the ground quite easily; they'll follow up by attacking you while you lie prone, so roll out of the way as quickly as possible.
What makes these enemies truly dangerous is their sheer range: although their blade is impressively long, they can move quickly enough to increase their effective striking distance to around twice the length of their sword, which often leaves you without a safe spot to stand. If you're in an area with obstacles or corners, try to maneuver yourself behind an obstruction and begin charging up your weapon; when the Dordo gets within striking distance, unleash your attack before retreating again. This tactic can be useful when going one-on-one with a Dordo; when squaring off against two or more, your only real option is to deplete some of your magical energy to affect all of your opponents, and be forewarned that even that might not kill them outright.
In addition to being much more powerful than Dordos, Dordios can fling a slice of energy through the air at your character. This attack is easily sidestepped or blocked.
Miscellaneous Threats
In addition to the usual, run-of-the-mill opponents, Onimusha 3 will also throw a few oddball enemies at you. These guys are generally just aggravating, rather than being real threats, with a few exceptions....
Bhaza
Bhazas are your typical aerial annoyances, incapable of dealing any real damage, and existing solely to confuse your targeting during your encounters. Their attacks consist of a dive-bombing attack, and what can only be described as a trail of vomit, both of which they'll use only if you stand in one place too long. Samanosuke can kill Bhazas by hitting them with an arrow, then slashing them when they fall to the ground; Jacques is best served by using his R1 + X buttons to whip out vertical attacks.
Gajimaro / Babian
Every so often, when you pop open a chest, out will pop a small, living doll, with the item that you should've been receiving strapped to its back. These little dolls will scamper about the area, forcing you to chase it down and give it a few good whacks before it disappears and gives you back your treasure. They're tough to target, so you'll just have to keep hitting your attack key over and over again. On the plus side, each successful hit on one of these characters will release a yellow sphere that you can use to recharge your health.
Gyaran
These cursed demons feed off of the spheres that are released from slain demons. During combat, they'll sit on the edge of the fray, sucking up all of the souls that you release and ingesting them, and occasionally attempting to ram into you in order to suck up your magical energy.
Although the soul-sucking nature of a Gyaran may seem annoying, you can actually use these creatures for your benefit: since you obtain larger bonuses when you absorb many souls at once, you can let them ingest all of the souls from each other creature in an area, then kill the Gyaran, which will release all of the souls that it absorbed, allowing you to absorb them all at once. This will almost always result in a bonus of a few hundred more souls than what you would've obtained otherwise. The only danger here is that Gyarans will occasionally disappear if left alone for too long. If this occurs, then all of the souls that that Gyaran has absorbed will disappear with it. You can prevent this by listening for the distinct, high-pitched sound that accompanies a Gyaran's appearance or disappearance; when you hear this, or see a Gyaran spinning and becoming smaller, smack it with an arrow or weapon to kill it instantly.
Ouija
If you were annoyed by Archers, then the appearance of Ouijas will give you fits, as they're roughly ten times more annoying than those simple ranged attackers. Ouijas have the added ability of being capable of flight, and will swoop around the battlefield on a cushion of magical energy, making them very difficult to hit with normal weapon strokes. Their offensive capabilities consist of two magical attacks, one red, one blue. When these magical attacks constrict around your character, the blue will convert your magical energy into spheres, and will bind you into place momentarily (you can reabsorb the spheres to regain your magic); the red will simply damage and stagger you. You can't block these attacks, but if you spot the ring around your character when it first appears, running in any direction should allow you to escape from its center before it contracts to a point. Doing so will let you evade any ill effects.
To destroy a Ouija, Jacques can use his R1 + X vertical attacks; Samanosuke will probably have to use a single arrow to force the Ouija to teleport down to ground level, at which point the enemy will be easily killed with normal attacks.
Bera
Beras are among the least offensive enemies in the game; these immobile plants are content just to block your path, and will be killed by a single strike from any Oni weapon. If you stand near a group of Bera long enough, they may attempt to whip you with their stalks, but this only does light damage.
Nurabis
While Bera are relatively passive, their cousin the Nurabis is the true monster of the Genma nursery. These creatures, which are always encountered singly, block your path to critical areas, and need to be destroyed before you can proceed. This is easier said than done, however, as they possess the ability to shoot liquid goo from their "mouths," and will sprout numerous Bera-like defender stalks when your character approaches. In general, it's best to open your assault with a magical attack, as Nurabis' possess perhaps the most health of any non-boss enemy in the game, then use charged attacks while darting in and out of range of the defensive stalks.
Ako
Due to the monumental nature of Sam and Jacques' task, the Oni clan has assigned them a guide for their time-twisting adventures. Ako is a delicate-looking Tengu (think fairy), innately capable of time travel, who will flit back and forth between 16th century Japan and modern-day France to assist the two heroes in their journeys.
In addition to picking up items dropped from enemies, opening inaccessible treasure chests, and helping to target enemies, Ako can also have an impact on the game via her assembly of vests, each of which has a different effect when equipped. Ako can change between these vests at any time, even during the middle of combat, so you'll want to mix and match based on the situation.
Of course, everything comes with a price, and Ako's vests are no exception: in order to equip any given vest, you'll need to activate it using objects called Ecospirits. These are found in destructible objects, such as crates, trashcans, and barrels, some of which are fairly tough to spot. There are 37 Ecospirits in the game, and, uncoincidentally, you'll need all 37 if you wish to activate all of the vests; if you miss a single Ecospirit, you'll have to forego the use of one of the vests.
Blue Vest--Two Ecospirits--Mt. Hiei
This is the first vest that Ako will obtain. It allows your character to absorb souls more quickly than they would otherwise. This is a fine vest to equip when your characters haven't managed to upgrade their Oni Gauntlets, but isn't of much use later in the game.
Red Vest--Two Ecospirits--Sewers
Normally, when you kill an enemy, they will occasionally release yellow and blue spheres in addition to the red spheres required to upgrade your equipment, but when Ako dons her red vest, all the spheres that are released will be red. This will increase the amount of red spheres that you can absorb, obviously, but will also increase the bonus spheres you obtain for absorbing massive amounts of red spheres simultaneously (since yellow and blue spheres don't count in this calculation), but you'll have a difficult time recharging your health and magic. Purple Onimusha spheres are not affected by this vest, and are released normally, albeit as rarely as ever.
Green Vest--Four Ecospirits--Notre Dame
The Green Vest is apparently intended solely to aid you in killing off Bhazas. When equipped, your character is able to suck spheres directly out of living monsters; when enough souls have been absorbed, that monster will die automatically. The downside is that this takes too long to be of much use against ground-based enemies, who'll constantly interrupt you with attacks, and that enemies have to be within a fairly short range for it to work. As mentioned, though, this is a fantastic vest to use against Bhazas, as it will kill these weak enemies quite quickly and save you the trouble of having to shoot them down with arrows.
White Vest--Four Ecospirits--Sakai
If you intend to enter the Dark Realm to obtain the items contained therein, you'll want to bring along Ako's white vest and have her equip it in between every battle; when your character stands still, Ako will automatically begin to replenish your life total, saving you from having to rely on yellow spheres and recovery items. Left on her own, Ako will replenish a whole life bar in a couple of minutes, but you can speed up this process by rotating the right analog stick in a clockwise direction. Using the white vest when you need health will help you save your restorative items for the late-game bosses, so whip it out whenever you feel the need to recharge. You will, of course, be interrupted if you're attacked when this vest is equipped, so only use it when you're sure that no enemies are about.
Yellow Vest--Five Ecospirits--Undersea Temple
Ako's yellow vest is well-suited for attacks against normal enemies, as it forces souls out of a foe after each successful hit. Although these souls won't stick around quite as long as souls that appear after an enemy actually dies, they'll help increase your soul absorption multiplier, as well as give you more opportunities to recharge your health and magical power.
Orange Vest--Six Ecospirits--Mont-Saint-Michel
The orange attire of Ako's allows you to get a peek at your enemy's health; their life bar will appear underneath them after you attack. In addition, Ako will flash at the precise moment that you're able to connect with a critical hit. Neither of these abilities will have much of a direct effect on your efficacy in battle, so you're usually best off with a more proactive vest, like the Yellow or Purple vests. When fighting bosses, however, the ability to monitor their health can help you decide when to hit your magical attacks or Onimusha state.
Purple Vest--Six Ecospirits--Mont-Saint-Michel Dark Realm
Ako's purple vest is her most useful attire, as it cuts down the cost of your magical attacks to half of their normal magical drain, thus allowing you to discharge said attacks twice as often as you normally would. The utility of this should be often; use it when you need to clear out a massive group of lieutenants or grunts, or against bosses. The purple vest is also useful in the final pair of Dark Realms, where you'll face off against monstrously difficult enemy groupings.
Black Vest--Eight Ecospirits--Oni Training: Critical
Talk about your love it or hate it effects: Ako's black vest turns every attack that your character lands into a critical hit...at the cost of half of your life points per hit. You can't drop below one hit point from this effect, but if an enemy gets a single lucky shot in, you could find yourself reloading. If you intend to use the Black Vest, you'll need to make sure you only activate it in an area where there aren't any surprises waiting; using it near Archers, for instance, is a one-way ticket to disasterville. Luckily, every critically-hit enemy will drop yellow spheres when it disintegrates, giving you an opportunity to recharge your health.
The Dark Realm
There are three entrances to the world of the Genma in a game played on Normal difficulty: one in the Undersea Temple, one in Mont-Saint-Michel, and one just before the final battle at Honnoji Temple. Each of these entrances can be used by either character, resulting in six separate dungeons, each of which possesses some kind of critical item.
The Dark Realm is heavily defended, of course, and will be the site of some of the game's tougher fights. It's structured as a series of challenges; your character will need to kill all enemies in a room before you're able to exit to the next room, or leave the Dark Realm altogether. To make matters more confusing, each dungeon has multiple paths that you can take, and it isn't always clear which one leads to the treasure and which to a series of pointless battles. (You can find maps of each of the harder Dark Realm visits at the appropriate places in the walk-through.)
There are a few ground rules for the Dark Realm that you should be aware of before you enter. First, the bonuses for absorbing red spheres is severely reduced. Whereas you can normally obtain up to a +1000 bonus for absorbing a truly massive number of souls at the same time, packing in the same number of souls in the Dark Realm will only result in a +500 bonus. At smaller amounts, the penalty is actually increased, so that you'll often be getting only 20 to 40 percent of the soul bonus you'd obtain if you were absorbing souls outside the Dark Realm. This prevents you from using the first few rooms of each Dark Realm as a source of practically infinite red spheres; you'll still need to charge your weapons and equipment primarily with souls you capture in the "real" portions of the game.
Secondly, you can leave the Dark Realm any time you wish, via the pillar of white light that appears in every room when you kill that room's inhabitants. You can re-enter a Dark Realm by speaking to the gatekeeper again, but all of the rooms that you previously cleared out will be repopulated with enemies. Since you retain all of the items that you picked up, however, you can explore one branch of a Dark Realm, exit, save, then re-enter the Realm without having to worry about needing to do the whole dungeon in one go.
Oni Training
Throughout the game, you'll come across scrolls that detail certain combat techniques; if you take this scroll to a Protective Mirror, you'll be able to train in that technique. Successfully completing a training challenge will net you an item; completing them all unlocks a mini-game at the end of the game.
Guard
The Guard training sessions teach you how to hold down the L1 button. Don't laugh; it's pretty tough. Well, no, no it isn't. A sphere will pop out each time you successfully block an attack. You'll need to collect 15 spheres at each level before you can move on. Deflecting an attack by hitting L1 just before it lands will net you two spheres, but this is never necessary.
Beginner: Zorm, Swordsmen
Intermediate: Bazu, Archer
Advanced: Gacha
The Advanced level is the only mildly difficult one. Gachas generally attack twice before slacking off, so keep holding your guard button down until you're sure that you're in the clear.
If you complete this training as Sam, you'll obtain an Herb; if you do it as Jacques, you'll get some Salve.
Archery
The Archery test isn't all that much more difficult than the Guard training, although the Advanced level can be tricky. Your primary targets will be the flying Bhaza; just hold your R1 key and tap on the X button as fast as you can to fling arrows around.
Beginner: Bhaza
Intermediate: Bhaza, Zorm
Advanced: Bhaza, Zagat
The Zagats are quick, and will generally jump in and attack you if you attempt to concentrate solely on the Bhazas. Thus, you should instead use your arrows to pick away at the Zagats by holding down the X button until Sam aims at one of the ground foes, then let go of the button to shoot an arrow at it. This will break up their attack animation, should they be approaching you. Keep moving, and take potshots at the Bhaza if you get underneath them for an easy sphere pickup.
Only Samanosuke can take Archery training, as he's the only one with a bow; he'll obtain Medicine when he finishes.
Draw Weapon
Your task here is to strafe around your enemies with the R1 button and attack them from behind. By far the easiest way to do this is to kill everyone off and then wait for new targets to arise from the circle in the middle of the ring; slash away as they teleport in and you should get plenty of spheres in no time.
Beginner: Zorm, Swordsmen
Intermediate: Gacha
Advanced: 3-Eyes, Zagat
Either Sam or Jacques can take Draw Weapon training. Sam earns an Herb, Jacques a box of Salve.
Charged Attack
The first two levels of this training exercise are about as simple as they come, as your charged attacks will kill your enemies fairly quickly, allowing you to collect their souls without any trouble. The Advanced training pits you against two Gachas, however, which require quite a few strokes to kill, and whom attack quickly enough to prevent you easy access to the spheres which pop when you do successfully hit them. Depending on your abilities with the blade, you may just want to hit them repeatedly and wait for them to die until you absorb the spheres; you'll give up on a lot of spheres this way, but you'll spend less time exposed. If you continually have trouble with it, try again after you've unlocked more weapons and have upgraded your Oni Gauntlet fully.
Beginner: Zorm, Swordsmen
Intermediate: 3-Eyes, Zagat
Advanced: Gacha x2
After finishing this training, you'll obtain Medicine.
Oni Bind-Throw
Only Jacques can attempt the Oni Bind-Throw training, as he's the only character with weapons capable of the Bind-Throw technique. In order to accomplish a bind throw, use the R1 button to charge your attack, press the square button to lasso an enemy, then press forwards or backwards on the analog stick while hitting square again to throw your target across the ring.
Beginner: Swordsman
Intermediate: Bazu, Swordsman
Advanced: 3-Eyes
Your reward for completing this training session is a Medicine.
Oni Bind-Bind Move
The Bind-Bind move is accomplished by lassoing an enemy with your weapon, then hitting your triangle button to infuse your attack with a small amount of magical energy. Unfortunately, you'll begin each round of these training sessions without any magical energy to speak of; you'll need to kill your opponents with normal attacks and absorb the blue spheres that they drop before you can attempt the bind-bind technique.
Beginner: Swordsmen
Intermediate: Fugaku, 3-Eyes
Advanced: Gacha, Fugaku
Your reward for completing this training session is a Medicine.
Deflect Critical
Of all of the methods of obtaining a Critical hit, Deflect Criticals are the easiest. Well, there are only three, so that's not so impressive, but still, your Critical learning curve has less of a slope if you master the basics of getting Deflect Criticals first. In order to successfully obtain a Deflect Critical, you have to press your guard button (L1) a split-second before an attack connects with your character, and then hit your attack button before the white flash completely fades away. The best way of learning the timing is through blunt-force practice; observe the ways that each enemy attacks and try to learn when the best time to hit the guard button is. Alternately, you can try to just tap the L1 button over and over again, as rapidly as possible, in the hopes that you might be able to get a lucky deflection, but even this is more difficult than it sounds.
Beginner: Swordsman, Zorm, Bazu, Batabone
Intermediate: 3-Eyes, Zagat, Zolworm, Fugaku
Advanced: Dark Spider, Zabiet, Dordo, Zmoh
Your reward for completing this training session is a Power Jewel. Either character can attempt this training, so you'll need to decide which character will make the best use of the Jewel. When in doubt, consider that Samanosuke has the much tougher fight at the end of the game.
Critical
Completing the Critical training session is a long and often incredibly frustrating task, since you can only inflict a Critical hit by leaving yourself open to attack. Instead of attempting to deflect the enemy's blows, a normal Critical forces you to sidestep their attack completely and finish them off with a single devestating blow. The problem is that this training session throws a dozen different enemies at you, each with their own unique attack patterns; since the timing for a Critical hit relies on split-second precision, you can expect to be practicing each level of training for quite a while before you successfully pass.
Beginner: Swordsman, Zolworm, Zorm, Bazu
Intermediate: 3-Eyes, Fugaku, Gacha, Zagat
Advanced: Dordo, Zmoh, Dark Puppet, Fobora
You obtain Ako's Black Vest for completing the Critical training. You need this vest to get the game's extended ending.
Chain Critical
The Chain Critical training is actually a bit easier than the Critical training is, thanks to the fact that you can start a chain reaction of critical hits via a Deflect Critical. Getting a Chain Critical requires you to begin with a Critical, then continue hitting the attack button before the flash on the screen dies away; with any luck, you'll be able to kill everything in the area. Again, use Deflect Criticals on enemies whose attack patterns you're familiar with, and use those to start a chain with the tougher foes. Two of these tiers feature Zorms and Gilzorms, whom are the easiest monsters to get a Deflect Critical against; the Intermediate level is often the most difficult of the three.
Beginner: Swordsmen, Zorm
Intermediate: Bazu, Zmoh
Advanced: Gacha, Gilzorm
The reward for completing this tough training session is an Oni Jewel.
Ten Slash
The Ten-Slash technique is performed as follows: have Samanosuke stand a distance away from the enemy, and press R1 to lock on, then hold up on your d-pad and the attack button. This will cause him to thrust his weapon at the Genma with a stabbing motion. (You're too close if this results in a vertical slash.) After the stab connects, hit the square button once more at the moment it hits to cause another blow to land; you can string attacks together in this manner to effect a full Ten-Slash technique. Getting the timing for this attack down is more difficult than it sounds; it's easiest if you use the Kuga.
Beginner: Gilzorm
Intermediate: Zmoh
Advanced: Zabiet
This final Oni Training session can only be attempted by Samanosuke. For completing it, he obtains a Wood Charm.
Walk-through
Before you begin, don't forget to reset the violence options in the options menu. Should you desire red blood and full gore, as all red-blooded Americans do, you'll need to manually set these parameters in the options menu; by default the game is set to green blood and low gore.
Also, it's worth pointing out before you begin your adventure that your characters will be picking up a whole hell of a lot of restorative items during their travels. Herbs, First Aid Kits, Secret Meds, and the like all act to restore your health, but you should be forewarned that you'll likely need a healthy supply of these at the end of the game. Wherever possible, restore your health by absorbing yellow spheres from enemies or via Ako's White Vest, rather than using your inventory items. Samanosuke, in particular, has a particularly devilish end boss, so be sure to keep him well-stocked with healing items as the game winds down.
Honnoji Temple
You'll begin Onimusha 3 with a rather powerful setup, as Samanosuke at the outset possesses all three of his elemental swords from Onimusha: Warlords, each of which has been completely powered up. This won't last, obviously, so enjoy your equipment while you possess it. The Enryuu that you're equipped with by default is a somewhat ponderous weapon, so you may want to switch to the Raizan or Shippuu to more swiftly kill your foes.
You start off in the midst of a major firefight between your troops and a gaggle of Genma Swordsmen and Archers. The Archers are the more annoying of the two, so make your way to the rear of the area and finish them off with arrows of your own before proceeding to wipe the floor with the remaining Swordsmen. After busting through the wooden barriers on the stairs, chop your way through the 3-Eyes and Swordsmen to reach another courtyard, where a Gacha is holding off another group of human warriors. You have an unlimited amount of magic, thanks to the overflowing fountain in the corner of the courtyard, so get up close to the demon and use your Triangle key to kill him off in a couple of hits, before heading to the fountain to recharge. (Hold your O button down, and you'll draw in magic energy from the fountain, as you would with souls dropped by monsters.)
There're two chests in this courtyard, one containing a map of the temple, and the other containing an herb. (The herb chest is underneath the stairs.) Another Gacha awaits at the top of the stairs, so repeat the magic attacks, recharge your meter, then save your game before heading through the doors behind the second Gacha.
Boss Fight--Ranmaru Mori
You'll see Ranmaru again later in the game, thanks to the time-traveling aspect of the storyline, but for now, you can dish out a swift and satisfying death with a minimum of effort. Since you've recharged your magical energy, you should be able to use your weapons' magical attacks to penetrate his defenses. You'll have the combined magical attacks of your three weapons, so switch between them as they run dry of magical power; Mori should fall, with a rather comical look on his face, in no time. Lesson one: Don't fight badasses with nothing but a sword and enthusiasm.
If you're looking to practice the game's fundamentals, then you can attempt to take Mori down with Deflect Criticals. Since Mori telegraphs all of his blows, either with cries or with exaggerated windups, it's not difficult to deflect the blows with your R1 button at the last possible second, then use your Square button to pop a critical off. He'll go down in three hits if you choose this route.
The cheesiest and easiest way to off Mori is to enter Onimusha mode by clicking your right analog stick. He'll die with just a couple of hits from your supercharged state. You won't retain your purple souls after this fight, so you may as well use them up here.
Arc De Triomphe
This section begins with a brief period of Jacques control. His Model 90 submachinegun can chew through the Genma at long range, so fire away until they all fall. You may have to walk away from Philippe in order to flip the screen.
The Streets of Paris
After Samanosuke appears, you'll find that you've lost all of your maxed-out swords and equipment, and have been left with only your "Normal Sword," which is about as exciting as it sounds. It's a long trip back to buffedness, but you'll get there eventually. (If this is your second play-through, and you obtained the three Seals from the Dark Realm in a previous game, your three weapons from Warlords are lying in this alley waiting for you.) You can begin by busting the crate near the save point to find some salve. Mmm...salve. Save your game, and note that the Protective Mirrors now allow you to Enhance your weapons or Train; if you wish, you can start boosting one of your weapons or items, or train to acquire another restorative. Completing all of your training in a skill will net you another health-restoring item, so it's a good idea to put up with the sometimes-frustrating exercises before the end of the game. You don't have to train now, of course; you'll have the option to train at any save point.
After Jacques and Phillipe disappear, Sam finds himself squaring off against a few waves of Zorm. Zorm are tremendously easily to kill with Deflect Criticals, so long as you time your guard right. DC's are easiest to pull off if you wait for the Zorm to attempt their overhanded, jumping strike; just hit your guard right before it connects, then tap your square key for the easy kill. Criticals net you more spheres to collect, which will help you charge up your items more quickly, so they're definitely worth mastering.
More Zorm await you at the bottom of the nearby stairs, so take your time and get your critical kills if you wish. On the streets underneath the Arc, though, you'll have to use your Bow to bring down the flying Bhaza. If you want to conserve arrows, try hitting a Bhaza with a single shot, then finishing it off when it hits the ground with three quick strikes. After the Bhaza are gone, you can take down the Zorm, grab the treasure from the two chests, then walk down one of the longish corridors formed by the walls of the Arc to find another chest which contains Salve. If you're particularly keen-eyed, you'll note another chest hidden away behind the chain fence near the doorway in the Arc itself; you won't be able to obtain its contents just yet.
The Arc's Interior
When you've looted all of the chests, hit X while standing near the Eternal Flame thingamabob to unlock your first "real" weapons, the Tenso Swords. They'll automatically be equipped, so head back outside for a lengthy cutscene that introduces you to Michelle, Jacques' girlfriend.
After the first portion of the cutscene is ended, you'll be introduced to the Zagat enemies. Zagats are difficult to Deflect Critical, due to their odd movements and fluttering attacks. Best just to press the offensive and take them down quickly. After the next cutscene ends, grab the Observation Tower key from the floor of the stairwell, then make your way through the Zagats and Zorm that clutter the stairs themselves.
The Observation Level of the Arc has more Zorm. Make your way around the smashed exhibits, grabbing the Banquet Book, until you reach the pedestal that glows red. There are a crapload of Red Spheres inside this pedestal; you can go ahead and absorb them if you wish, but you'll get a better bonus if you attract the two nearby Zorm over to you and get a simultaneous Deflect Critical on them. Their spheres will mingle with those of the pedestal, giving you as many as 500 extra charge points.
You can backtrack now to the puzzlebox in the room. These puzzleboxes are a fixture throughout the game; in order to unlock them and obtain the contents, you'll have to shuffle the tiles so that the energy on the left side of the field can reach the right side of the field unobstructed. You have an unlimited number of tries on these boxes, and there's no time limit, so feel free to dally with them all you wish. In the case of this box, the correct combination is (upper left--middle left--lower left). When you unlock the box, you'll get a Power Jewel, which you can use right away to obtain a higher hit point total. There's also a Tengu Chest in here, which, again, you won't be able to gain access to until later in the game.
Near the stairs leading to the roof there's a save point; you should take this opportunity to expend any Red Spheres you've obtained, and use them to charge up one of your items. Your Oni Gauntlet should be your first priority, as boosting it to level 2 will let you draw spheres in more quickly, as well as obtain higher charge levels for all of your weapons. If you're just shy of a full level, you can exit and reenter the Observation Level to respawn a few enemies; the same applies if you're looking for one more Purple Sphere to hit Onimusha status, which can be useful on the upcoming boss.
Boss Fight--Brainstern
After Guildenstern teleports off of the Arc, Samanosuke will be forced to deal with the toy he leaves behind: a gigantic robot named Brainstern. As we're still fairly early in the game, Brainstern isn't massively difficult, but he can knock your health down quite a ways if you're not conscientious about keeping your guard up.
To begin with, he'll fire off a few rounds from his Gatling guns; these are easily enough avoided by running out of his forwards view vector, but they can be guarded against if you get caught in the line of fire. Brainstern will bust out the Gats whenever you attempt to retreat from the fight, so you'll need to stay relatively close to him.
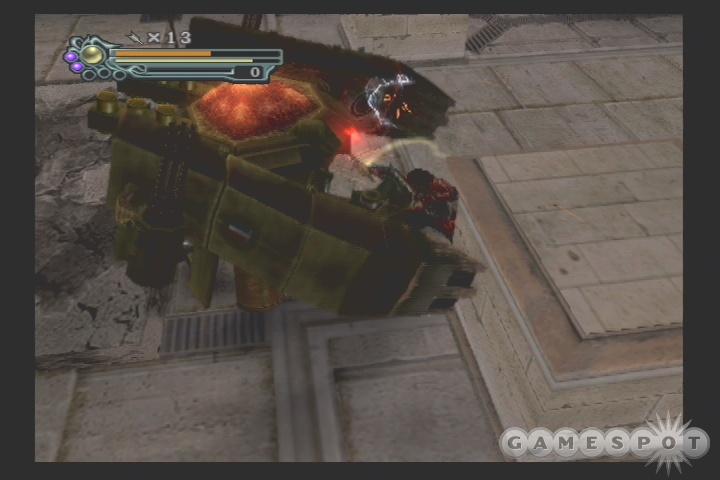
After you close the distance, you'll need to start banging on the Brain's "arms," such as they are. They each have a couple of panels which can be knocked out, thus discharging a flood of spheres; use your magical attack on the arms, and then recharge your magic meter with the spheres that issue forth. Brainstern's movement pattern during this time will consist of him rising up off the ground, and then landing before shooting missiles into the air; you can spot where the missiles will land by checking the ground for shadows. You'll obviously want to avoid such shadows, but so long as you get beside or behind Brainstern while they're in the air, you shouldn't have many problems. Watch out for his punch attack, though; in general, it's best to avoid dilly-dallying about in Brainstern's frontal quadrant.
When both of Brainstern's arms have been destroyed, he'll resort to brute force in order to kill you. Instead of flying to new spots from which to launch missiles, he'll simply hover above the ground and rotate what remains of his limbs in order to slice and dice you. He can coast above the ground at about the same speed at which you run, so, well, run away! There's enough room to maneuver about atop the Arc, so you shouldn't have much trouble avoiding him, providing you get a head start. (Just start running when he jumps up into the air, and you should be fine.)
You can finish off Brainstern by attacking his central section when he recovers from spinning. If you have any magical power left, this would be a good time to use it up. If you don't manage to kill him before he takes off again, run like hell and repeat the process when he comes to a stop.
Mt. Hiei
Wandering in Confusion
After travelling through the time displacement, Jacques awakes to find himself in the primeval forest of Mt. Hiei, although he doesn't know this just yet. Save your game, then head down the path a ways until you come across your son, Henri.
The Gacha that appears here may seem intimidating, but he's not all that difficult to kill off with your new Oni Whip. The Whip can stun enemies when you lasso them, giving you a few seconds in which to whip them further, so charge it up with your R1 button, then attack as normal to tangle up the Gacha. As he's stunned and immobile, hit your square button a few times to unleash a flurry of attacks, then repeat the stunning process. You'll need to do this around 20 times to kill the beast, but you should be able to do so without taking any damage.
After you make your introductions with the hideously annoying Ako, you'll be able to further try out your Whip on the Swordsmen that appear. Make your way through them into the next area, where you'll face more Swordsmen. You'll note that the spheres that appear on their bodies get sucked into a floating sphere; this is a Gyaran, and will steal all of the spheres that you release, until you kill it and take them back. If you wait until you kill everyone in the area before killing the Gyaran, you'll get to acquire all the souls at once, thus obtaining a larger bonus. Don't worry about the plants that block your passage here; you'll be able to come back later and kill them.
The Teammate
You'll come across Samanosuke before long. Er, a Samanosuke; this fellow is apparently an earlier version of the Samanosuke who appeared in Paris not so long ago. He's uncontrollable, although he will fight alongside you for the meanwhile.
When you regain control of Jacques, you can check out the ruined temple for some goodies. First off, destroy the crates up the stairs behind you for an Ecospirit (when Ako says "Jacques, here!", press X to grab the item), and an Herb. The other side of the temple contains a Scrl: Throw that'll add the Throw ability to your Training menu, and Ako's Blue Vest. You won't be able to equip Ako with the vest until you obtain another Ecospirit, though. The rear of the temple also hides a Tengu chest containing another Herb, so let Ako retrieve it before moving on.
Find the Mirror
After Sam and Jacques reach the Stupa Tower at the top of the hill, you'll split up. Jacques' path takes him to the mountainside, where you'll come across your first Oni Fireflies. After you open the chest, check out the scroll that pops up, move around until the Firefly turns green, then use your R1 and X keys to jump across the ravine. Firefly transport is all done automatically, so there's no need to worry about falling into the water.
Bust the chest near the waterfall to find your path up and over the water. On the far side of the river, you'll find a Map of Mt. Hiei, a Scrl: Dokan, and the Bronze Mirror. There's also another Tengu chest containing Medicine, so grab it before you head back to the Stupa Tower at which you and Sam split up. After you kill off the Genma, use the Bronze Mirror at the statue (via the Item tab of your pause menu) to unlock Jacques' Enja Weapon.
Enter the Temple
Before killing off the nearby plants with your Enja, you should backtrack to the previous plant barrier that you were forced to bypass earlier. After killing all of its defenders, grab the Gate Key and begin heading back to the Stupa Tower. On your way there, though, you'll have an opportunity to grab an Oni Jewel, which increases your maximum magic reserve; when you kill off the enemies at the ruined temple, one of the Bhazas will drop an Oni Firefly. Ride it to the top of the temple to find the Jewel, then use it immediately to activate its effect.
When you reach the Stupa Tower, you can proceed through the plant barrier onto the main temple, or walk down to the cliffs and backtrack to face a couple of Gachas to earn a few more red spheres. The path past the plant barrier is laden with more plant enemies, so slash them with your whip to unlock their spheres; you should be able to almost completely recharge your health and magic here.
You'll meet up with Samanosuke outside the temple; your Gate key unlocks the doors here, beyond which more 3-Eyes await. Kill them off, then smash the box near the gate to unlock another Oni Firefly. Climb up to find another scroll, as well as a second Ecospirit and some Medicine. Since you now have two Ecospirits, you can use them to power up Ako's Blue Vest and equip it. This will let you suck in souls more quickly.
The temple's courtyard is filled with slop and 3-Eyes; avoid the goo that descends from the pustules suspended above the pathway, as it depletes your health. There's another puzzle chest outside the doorway, which contains a Power Jewel. (Upper left--middle left--middle--lower middle.)
Now that you've reached the door to the boss fight, you should take the opportunity to save and enhance your weapon or Oni Gauntlet. If you're just under the threshold to reach Level 2, you can either backtrack and flip screens to respawn more Genma, or take Samanosuke and wander the screens of Mt. Hiei to gain more red spheres. The upcoming boss fight is much, much easier if you upgrade your Enja to level 2; this can take ten minutes or so of fighting, but the 3-Eyes aren't much of a threat, and you'll have Sam to help you, so flip screens until you get enough souls. You'll also be well-served by filling your purple spheres so that you can enter the Onimusha state during the fight. When you're ready to proceed, save your game and pass through the door.
Boss Fight--Marcellus
Marcellus possesses a shield that'll protect him from most of your attacks, so your first goal is to destroy the shield. Marcellus mostly attacks with his sword while he still retains his shield, but his attacks are fairly easy to avoid so long as you keep your distance. Note the Firefly in the center of the room; if you get too close to Marcellus, or notice that he's winding up a swing, you can use the Firefly to jump out of harm's way.
You'll need to blast Marcellus with a fair number of attacks to destroy his shield. Begin by using your magic attacks on him; you probably won't be able to use more than two attacks at this point, even with a full magic meter. After your magic, you'll have to peck at the shield until it bursts. The easiest way to do this is to charge up the Enja with the R1 key and stab the shield. You can do this from a fair distance away, so keep repeating the stab until the shield pops. You'll occasionally hit Marcellus' body with your stab; when this occurs, use your X key to run in for a kick, then quickly use R1+X to jump away from the danger zone.

When the shield breaks, Marcellus will morph into his badass form, which attacks more often, has a wider range of attack, and is capable of dealing more damage than the shield form. Most of his sword swings are still targeted towards his front quadrant, but he also has a monstrous electrical attack that affects most of the room. When you see him start to charge up his sword, wait for his downswing to begin, then use the Firefly to jump off of the floor before it becomes charged. Beyond that, you'll need to just keep your distance from Marcellus in general to avoid getting badly mauled by his swipes.
Finishing Marcellus' second form off requires similar tactics to that of his first form; charge your weapon, dart in and stab, then back away. If you have a full Onimusha charge waiting for you, then repeat this action until your health bar drops to around one-quarter of a full charge. When you're near death, activate Onimusha mode, then go to town at point-blank range. As you slash away at Marcellus, he'll unload a massive number of spheres, of all colors, so absorb them after every other set of slashes. By the time your Onimusha state ends, you should have absorbed enough spheres to completely recharge your health and magic, so use your magic attacks to finish Marcellus off. If he's still not dead after all that, you'll have to resume the charge-and-stab method of attacking until he finally falls.
Sewers
Optional Items
After the cutscene here, Michelle will ask you to accompany her into the sewers. Before you head out that way, though, grab the First Aid Kit from the Tengu chest near the doorway leading to the Observation deck, then head back up inside the interior of the Arc itself to face off against a few more Genma. The other previously-inaccessible Tengu chest now reveals a few Flame Arrows. There is also a pair of Gachas on the Arc's roof, along with a tougher, purple Gacha; these guys are optional, and don't guard any kind of special items, but can drop a ton of spheres if you kill them in quick succession. The easiest way to do this is to weaken them up with arrows and charge attacks, then enter into Onimusha mode to finish them off. Again, though, they're optional, and will pound you if you don't know what you're doing, so save your game before heading up there. Chthonic Explorations
When you're ready to move on, head back down the steps, proceed to the street underneath the Arc, and then go down the stairs to the subway-stationesque area. Grab the Sewer Key from the dead soldier and unlock the nearby door.
The sewers, as you may expect, are a dank place, populated by Zolworms; these sluggish foes are relatively easy to kill, but dissolve into smaller enemies that leap onto you when you pass by. In order to prevent the smaller enemies from appearing, kill the Zolworms with charged attacks, or let Michelle use her gun or grenades.
The doorway here leads into the first control room, where you'll have an opportunity to save your game. Do so, let Michelle reactivate the power, and grab the Memo To Chief that's flashing on one of the consoles. After you've activated the power, the drawbridge outside the room will be lowerable, so drop it and move on.
Find the Iron Handle
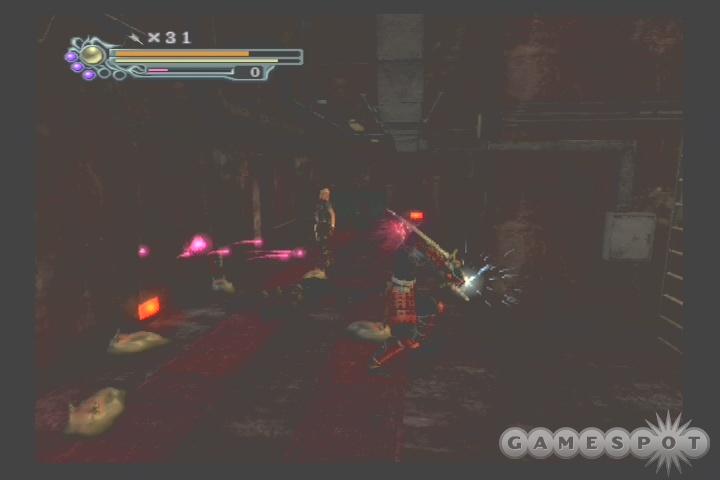
The next room contains more Zolworms, so clean them out, then check the semi-hidden hallway at the very top end of the room for a couple of treasure chests. The first chest contains a Babian, a smallish doll that will attempt to escape with the Salve that the chest contained if you don't kill it quickly - don't be afraid to use arrows on it. After you take it out, smash the barrel in the janitor's alcove to reveal another chest, containing Ako's very handy Red Vest. If you don't have enough Ecospirits to activate the vest, you can find one by shooting the small creature hanging from one of the pipes on the other end of the room.
When you climb the ladder, you'll find a Worker Memo along with a Scrl: Ch Attack that opens up another training session at the save points. Examine the machine here to discover that there's something missing--you'll need to find the handle before you can activate power for this room. The Worker Memo also indicates that there's some kind of puzzle in the vicinity; if you want to go back to the first control room to count the chairs, monitors, and cassette decks, feel free, but we'll go ahead and tell you that the code is 314. Enter this number on the locked door below to proceed through.
The room beyond the door contains another puzzle box, which contains an Oni Jewel. (First row, third tile--second row, third tile--second row, second tile--second row, first tile--first row, first tile.) The mucky water below contains a number of Batabones and Batochaikas; these enemies aren't much stronger than the usual foes that you face, but they can be difficult to spot in the water, so proceed with caution and protect Michelle if she comes under fire. Grab the Iron Handle at the top of the ladder, and don't miss the Tengu chest at the far end of the water.
Now that you have the Iron Handle, you can return to the room with the many Zolworms and use the handle on the machine near where you obtained the Worker Memo document. This will unlock the gate below, so head down, kill the Zolworms, and flip the power for the next bridge. You can reach the bridge by exiting through the nearby door. Activate it and save your game.
This Makes No Sense, Capcom
Your further progress down the sewers is blocked off by a wall of garbage--a delightful problem, and one that the sewer maintenance crew has apparently decided to deal with by suspending a gigantic concrete ball from the ceiling. See, when you cut the ball's chain, it'll fall to the ground, and you can push the ball through the sewer line to clear the path. The logic involved is on a higher plane than we mere mortals can comprehend, so just do it, but first, climb down into the water and let Ako grab the Tengu chest among the garbage. Don't worry about the "special lock" box; you'll have to come back for it later.
After cutting the chain and heading down to the water, Michelle will get a distress call on her radio and magically know that the soldiers from whom it came are trapped at the far end of the sewer, so get crackin' with the ball-pushing. Genma will attack you as you attempt to push the ball, and with the camera setup being as it is, you won't be able to see them until they're almost on top of you. The trick here is to just keep holding down your R1 button; this will let Sam lock on to any enemies that come near, and you'll be able to unleash a charged attack, kill them, and get back to pushing within a couple of seconds. So long as you stay relatively close to Michelle, she'll push on her own, but if you wade too far back, she'll come to assist you. The problem is that you're on a timer here; if you can get the ball to the end of the tunnel within a set amount of time, you'll receive a bonus item, but if you're too late, you'll come up empty-handed. So long as you stick close enough to Michelle to keep her pushing, you should do fine. There are two other things to note here, though. The first is that acidic brown water, the origins of which we won't theorize, will periodically pour down from the ceiling of the passage and burn Sam if he's underneath the flow. Watch the top of the screen for indications that a flow is about to start, and move to the other side of the passage. The other thing to watch out for is a ladder leading up to a treasure chest, which contains an Oni Med Lvll 1. You can come back for this later if you miss it.
When the ball has reached its destination (you'll know you're close when the camera shifts its viewpoint), you'll either find corpses or a single living soldier, who'll give you a Small Key. The Small Key opens the gate in front of the treasure chest, which contains a Power Jewel. There's also another one of the small Genma creatures hanging from a pipe nearby, so shoot it with an arrow to obtain an Ecospirit. Lastly, if you climb back into the water and push the ball to the very end of the passage, you'll uncover a Secret Med health restorative.
After all this travelling, you won't have to deal with a boss fight at the end of this chapter. Just climb the ladder to enjoy some thrilling cutscenes about domestic discord.
Kasei
Scavenger Hunt
Jacques and Samanosuke arrive in the town of Kasei, and quickly decide to split up to look for clues. As this is indeed a human-populated town, you won't have many fights in your immediate future, so you should begin by hunting for items, of which there are quite a few scattered about.
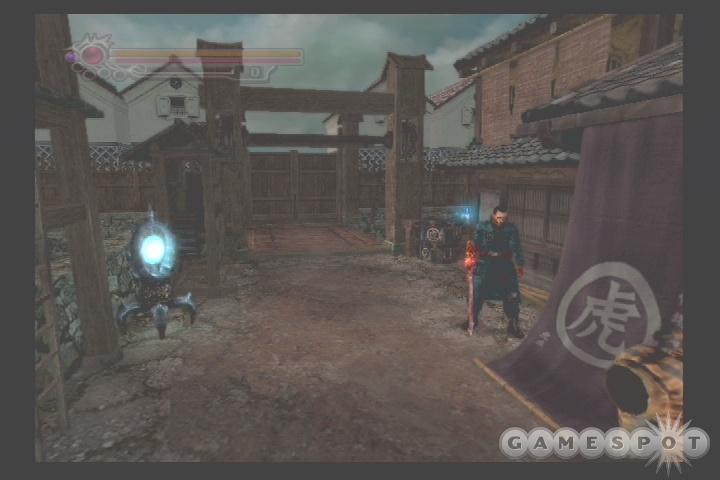
To begin with, knock off the heads of the tigers near the entrance to the store to reveal an Ecospirit, then destroy the vase that's obscured behind the nearby purple sign to release a Firefly. Climb the ladder next to the save point to find a map of Kasei, then ride the Firefly out to the beach to find a puzzlebox. (Middle right--middle--lower middle--lower right--middle right.) Grab and use the Oni Jewel that you receive before heading back to the boardwalk.
Next, head across the small drawbridge near the mirror to reach the docks. There's an Herb on one of the piers, and the Toraya Order document next to the stevedore. After nabbing those items, head through the doorway near the stacked boxes to find two more Ecospirits, a red sphere pedestal, and another puzzle box. (Middle square--middle left--upper left--upper middle--middle square--middle right.) Your just reward for opening it is a Power Jewel.
Call the Better Business Bureau
When you've pilfered everything you can find, head back to the shop near the save point and enter the doorway between the tiger statues. Do not talk to the proprietor just yet; he'll kick you out when you attempt to make small talk. Instead, use your Enja to smash the barrels inside the shop; this will unlock yet more Ecospirits. There's a Tengu chest that's accessible when you stand next to the shopkeeper, so grab the Oni Med Lvl 1 from it, then head through the back door to find Ako's White Vest. There's also a Jubei Rumor lying on the shopkeeper's counter, so grab it before speaking to him. He'll quickly ask you to leave the store after you show him the Wristwatch you picked up at the beginning of this chapter. Apparently he watched the Popcopy training video once too often.
After you leave the store, there'll be a new NPC on the boardwalk outside. Speak to the kid sticking his head into the barrel near the town's entrance; he'll offer to trade you whatever's inside for "something sweet." Walk down the steps near the entrance to find a watermelon vendor. You'll have to trade him your Rolex for a watermelon to give to the kid; it's not a great deal--they're not even those nifty square watermelons they sell in Tokyo--but you'll need the Oni Firefly that's inside the kid's barrel. After the Firefly is released, flip up to the upper balcony of the shop and enter through the window. You'll learn a bit more about the odd goings-on in Sakai, and you'll be able to pick up the Blacksmith Key as well.
Invasion
When you leave the shop, you'll come face to face with a Genma horde that have apparently arrived via the harbor. After clearing out the boardwalk, head back down past the watermelon vendor's area (don't miss the herb in the small chest at the end of his road) and back towards the blacksmith's shop. The Fugaku outside the blacksmith is tough to kill with normal attacks, so stay out of his weapon's swing radius, and finish him off with magic attacks or magical bind attacks. You'll find the Bind Move scroll outside the blacksmith's shop, and Jacques' Raisen weapon inside.
When you head back through the smith's doors, you'll have another large group of enemies to kill off. If you let the Gyaran absorb the souls that your foes drop, however, you can easily gain a bonus of three or four hundred souls by killing it last. You'll need plenty of souls, too; it'll be best if you can get the Raisen to level 2 before you exit the town, so switch between Ako's Red and White vests to gain souls, and then regain your health.
When you've managed to boost your Raisen to level two, hit the docks again; you'll now be able to unlock the door with the blue lock, due to the thunder magic of your weapon. After doing so, find the Hideyoshi Rumor and Time Lab 1 documents inside. You'll regroup with Sam afterwards, so clear out the docks and head up the now-unobstructed stairway nearby.
Boss Fight--Heihachi
Heihachi attacks with a spear, and can repel most attacks, but for once, Samanosuke will stay with you during a boss fight, allowing you to double-team and overwhelm your opponent fairly easily. Actually landing an attack can be fairly difficult, so try to let Sam do most of the work, while you use your R1 button to strafe around Hei and attack from his rear or the sides. The best time to attack is when he swings his spear; if you can get a bind on him, quickly use a magical bind attack to deal extra damage. If you want an extremely quick resolution to the fight, enter Onimusha mode and beat him down.
Genma on the High Seas
After leaving Samanosuke behind, and arriving on the Genma ship, kill off the Swordsmen and Fugaku on the deck, then slash around until you unlock the Firefly. Ride it up to the crow's nest of the ship to find another puzzlebox which contains a Power Jewel. (Upper row, first tile--middle row, first tile--middle row, second tile--middle row, third tile--bottom row, third tile.)
If you head through the door on the ship's deck, you'll obtain the Genma Notice and a map of the ship, although the latter won't do you much good, since you're already in the second-to-last explorable area of the vessel. After you head down the stairs, destroy the painting, then open the chest to reveal another of those annoying run-away dolls. This one moves awfully fast, but Jacques can deal with it by charging up his Raisen with the R1 button, then using his X key to slash at the ground. After ten hits or so, the doll will fade away, leaving behind the Wheelhouse key.
Inside the wheelhouse, you'll find the ship's logbook inside a treasure chest, near a red-soul pedestal. The puzzlebox here contains a Wood Charm. (Upper row, first tile--upper row, second tile--upper row, third tile--middle row, third tile--middle row, second tile--upper row, second tile.)
Notre Dame
Sepulchrous Loot
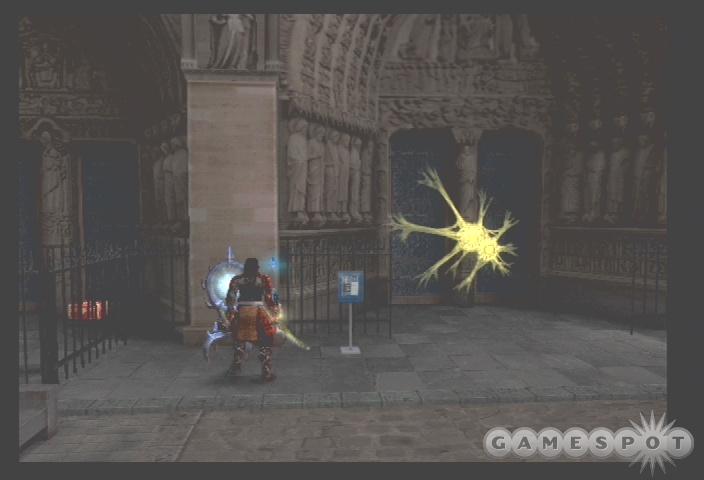
After you regain control of Samanosuke, he'll be outside of the Notre Dame cathedral. Grab the Deflect Critical scroll by the doorway, smash the garbage can for another Ecospirit, and then head down the manhole to grab the Oni Med Lvll 1 from the sewers, if you missed it while pushing the big ball earlier. If you haven't gotten Sam's Tenso swords to level two yet, you'll need to fight around in the sewers until you obtain enough spheres to upgrade it; you won't be able to bust the lock on the cathedral's door until you do. (You can spot another chest outside the cathedral, but won't be able to access it; Michelle will pop it open later on.)
After clearing out the church, stick your nose into all the little nooks and crannies to find some items. You should be able to locate a First Aid Kit, a Salve, and Ako's Green Vest in the various chests, along with two Ecospirits in the smashable vases. There's also a Tengu chest near the red-sphere pedestal, which contains a few Ice Arrows. After grabbing everything there is to find, press the red button on the altar to reveal a passageway leading to the cathedral's underbelly.
The first room you enter has a couple more item-creatures hanging from the ceiling, so blast them with arrows to obtain an Ecospirit and an Herb before reading the plaque. The plaque's inscription refers to the puzzle upstairs, but you won't be able to obtain the "shining ornament" until you proceed a bit further into the Genma's dungeon.
The next room contains an oh-so-original spinning-blade trap. Note which way the blades travel, then follow them along the corridor until you come to a "sinister skull" switch. Hit it to deactivate the blades, but watch your back, as a few Bazu will begin appearing as you do so. If you want easy criticals on these guys, maneuver yourself so that they do their spin-attack while they're on the opposite side of the puzzlebox, and all you'll need to do is tap the square button for the critical hit. The puzzlebox, by the way, contains an Oni Jewel. (Middle row, third tile--middle row, second tile--bottom row, second tile--bottom row, third tile--bottom row, fourth tile--middle row, fourth tile.)
The Wind Weapon
In the next room, kill off the Bazu before looting the area--you should be able to find an Herb and an Ecospirit in a couple of bag-creatures on the ceiling, as well as a map of Notre Dame and a Dark Parchment in the treasure chests. If you smash the lighted display near the doorway, you'll also be able to grab an Anti-Dark Charm, which will be needed to obtain Sam's wind weapon.
Now that you have the Anti-Dark charm, you can return to the cathedral's main hall and cleanse the four statues that have been corrupted by darkness. The process is simple: stand next to one of the statues, and hit your O key to have the Oni Gauntlet suck all of the dark energy away. You'll need to do this in order, so proceed from the statue that has one set of votive candles lit to the statue with two lit sets, and so on. If you hit the statues in the wrong order, you'll get hit with lightning and will have to start over. After you cleanse all of the statues, Sam will be able to grab his Kuga sword from the dragon statue.
The Teleporter
Now that you have your air weapon, you can return to the catacombs to unlock the blue door near the Anti-Dark Charm. Do so to face off against another spinning-blade trap. You can't disarm this trap, however, so wait for the second blade to pass you by before moving after it, hiding in each alcove along the corridor for another chance to move. You'll eventually hit a save point, so enhance your Kuga, if you wish, and recharge your magic powers at the well before moving on to find the Rope Ladder. There's also a puzzlebox in the final alcove here. (Second row, fourth tile--third row, fourth tile--third row, third tile--third row, second tile--second row, second tile.) It contains a Statue Charm.
Head back to the previous room and use the Rope Ladder on the pit near where you found the Dark Parchment. You'll pick up a Gold Skull in the bottom of the pit, which not uncoincidentally unlocks the door near the save point, so backtrack again, save your game, and head through.
Guildenstern, in all his insidious evilness, really does have something to show you: a working time machine. His plot? Apparently his intentions were to lure you into the bowels of the cathedral, have you kill off hordes of his minions, only to gloat about his invention and kill you by setting loose two slightly tougher monsters on you. You can kind of see why he's the sidekick and not the master planner. At any rate, the Dordos that he unleashes are not all that difficult to kill. You have a full charge of magic from the well outside the door, so use it to easily defeat the beasts, then grab the Time Lab 3 book from the floor along with the Electric Arrows from the nearby Tengu chest before activating the teleporter.
Undersea Temple
Davy Jones' Locker
The Undersea Temple area is the site of the inevitable time-puzzles, wherein Jacques' past actions affect Samanosuke in the future, as they both explore the same area, save that they're 500 years apart time-wise. As you might remember from your manual, Jacques' actions in the past see their effects last through to Sam's future explorations, but the opposite is not true; things Sam does have no effect on Jacques. Sam can send objects back in time, via Ako, but we'll get to that in a minute. First off, explore the ship, and track down the Oni Med Lvll 1 on the prow; if you walk up the steps you should see it flashing behind some rope.
The next chamber on possesses a few doorways, a Protective Mirror, a magic-recharge station, and a new object called a Time Folder. The Time Folder is the object that you'll use to trade objects between Sam and Jacques, but leave it alone for now. (You can pick up the Tablet: Timefold to get an inkling of how it works.) Instead, walk up the steps to the central altar and grab the Yellow Disc from the yellow-colored pillar. This is the first key object that you'll need to send back in time, so use the Time Folder, select Store, select the Yellow Disk, and hit Warp to send Ako back in time to meet up with Jacques.
The Future Frenchman
Jacques' surroundings are more or less identical to Samanosuke's, save for the better condition of the structures and the ship near your starting point. There's nothing aboard the ship, so head on into the next room and save your game.
If you're not overly concerned with time, this is an excellent opportunity to get more red spheres for Jacques' weapons, armor, and Oni Gauntlet. The room containing the ship sees numerous enemies spawn in each time you enter it, including one or two Fugakus, which drop numerous spheres when killed. Since you have the magical recharge shrine near the Protective Mirror, it doesn't take very long to blast through your enemies with magical attacks, grab the spheres that they drop, and repeat the process until you've gained enough spheres to power up one of your items. If you haven't already done so, now would definitely be a good time to take the SA Coat or the Oni Gauntlet to level two; if you're really patient, you can even go back and forth enough to max out all of your items. If you can't sit still long enough to achieve that, maxing out the Oni Gauntlet and one of your weapons will at least turn you into an offensive juggernaut. Use Aki's Red Vest to increase the amount of spheres that you harvest from each trip.
When you're prepared to proceed, use the Yellow Disk on the yellow pillar to raise the stairs leading to the door. The room beyond is flooded, as it was in Samanosuke's time, but you can fix that. Begin by riding the Firefly up to the Archers and killing them, then examine the odd symbol on the wall. Although the game claims that the dragon has no left horn, it's actually its right horn that is missing, but irregardless, you're going to need to track it down before you can get rid of the water.
Guildenstern's lab contains the Scrl: Critical, as well as an Ancient Slab and Time Lab 2 in a chest. After Mori comes and goes, kill off the Genma and ride the green elevator up to the library, where a map of the Sea Temple awaits. In order to unlock the next area, you'll have to use the Ancient Slab on one of the bookshelves here and figure out some basic arithmetic. Five times four plus three plus one minus two will get you the desired results.
After you've unlocked the Firefly in the chest, you can ride it up to the second floor of the library to obtain the Oni Tortoise file, a Medicine from the Tengu chest, and the L Dragon Chest. Before heading back to the dragon seal, though, you may want to walk down the hallway opposite the Firefly chest to reveal an odd character who'll offer to transport you to the Dark Realm. Dark Realm trips allow your characters to unlock powerful items after fighting hordes of enemies; in this case, Jacques can obtain the Thunder Seal by wading through a few rooms of mostly simple enemies. Health spheres are in short supply in the Dark Realm, though, so you might want to save your game before heading through the portal. Note that this Dark Realm trip is not accessible after you leave the Undersea Temple, so you'll want to do it now if you plan on doing it at all. The Thunder Seal object isn't immediately useful, but will unlock a new weapon for Samanosuke on subsequent play-throughs of the game.
On your way back to the dragon seal, you'll come across your first Dark Puppet. These animated suits of armor can be fierce opponents, so zap it with a magic attack and be done with it. When you've inserted the L Dragon Horn into the seal, head back to the room with the save point, save your game, and send Ako back to the future, along with any Arrows that Jacques might've picked up during his travels.
The Waters of Time
Sam's weapons and armor can be upgraded via the same repetitive ship runs as you might've done with Jacques earlier, although your progress will be slower due to the lack of Fugakus in the future. At any rate, since Jacques inserted the Yellow Disk in the past, it's still in the pillar of the future, allowing Sam to access the door and bypass the now-unflooded room, grabbing the Secret Med in a chest here in the process.
Guildenstern's lab is in a state of disrepair similar to the rest of the temple of the future. Due to the passage of time, however, the barrier protecting the pedestal here has fallen, allowing you to nab the Blue Disk.
Boss Fight--Ranmaru Mori
Ranmaru's body has seen better days, but the infusion of Genma power has turned him into a much more powerful fighter than you saw at the beginning of the game. His strikes inflict more damage, and he possesses a ball of energy that he can fling as a projectile attack. All of his attacks are blockable, however; so as long as you keep your finger over the L1 button, you should do alright.
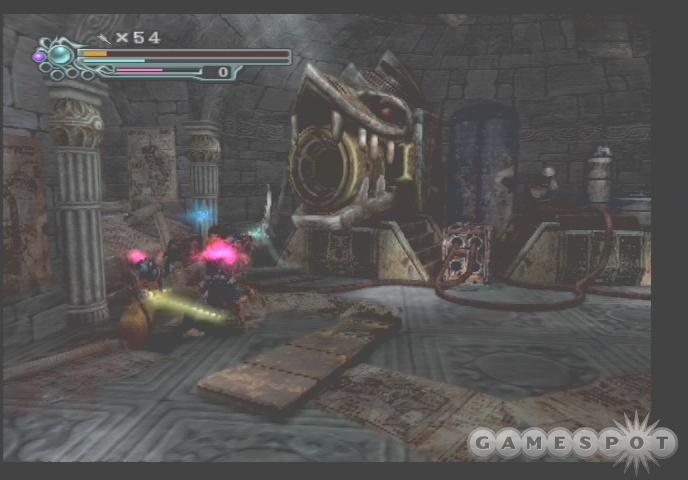
So far as defenses go, Mori is primarily concerned with avoiding your attacks, which means that he'll jump over most normal slashes. Charged attacks have a better shot at hitting him, so use them when he attempts to close in on you. Each time you hit Mori, he'll discharge some of the Genma energy that's presumably preserving him, which he'll then attempt to immediately reabsorb. Whilst he's sucking the spheres back into himself, he's completely vulnerable, so press the attack during these times with magical attacks or normal slashes. He'll fall fairly quickly.
Undersea Temple - cont.
The Blue Room
Now that you have the Blue Disk, send it back to Jacques and have him insert it into its slot. The first corridor you come across through the blue door is chock to the gill of enemies, so you may want to use the thunder magic of your Raisen weapon to clear a path to the next door.
When you reach the piston room, take the nearby elevator and have Ako grab the Soul Arrows from the Tengu chest. Jacques can't destroy any of the crates, so return back to the piston room and take the steps leading to the doorway. Although it isn't immediately apparent, the room beyond is actually the docking room, where you first discovered yourself when you entered the Undersea Temple. Use the Fireflies to jump up past the broken staircase and open the puzzlebox for another Oni Jewel. (Third row, first tile--third row, second tile--third row, third tile--second row, third tile--second row, second tile.)
The nearby Fireflies will let you access Jacques' third and final weapon, the mighty Hyosai. Don't worry about the nearby Fireflies just yet; the Hyosai is the ice weapon that you need to unlock the door in the piston room, so backtrack until you reach it. After it's unlocked, you'll find that the room beyond is impassible to Jacques, so you'll need to warp back to Samanosuke in order to proceed.
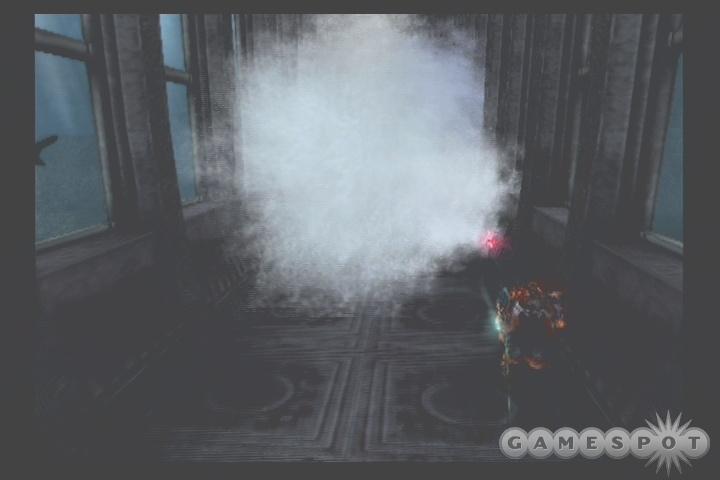
Sam finds himself in a bit of Indiana Jones-esque drama as he walks down the first underwater corridor past the blue door, however. The glass that holds back the seawater cracks and eventually breaks, forcing you to run for the far door as quickly as possible. If you're using the analog stick to control Sam, you'll need to watch out for the camera flip near the end of the corridor, as it'll force you to change from pushing down on the stick to pushing up. So long as you don't stop running, though, you should be able to reach the door before you get crushed by the influx.
The next room contains a couple of Dordo, along with Sam's Sea Temple map and the Chain Critical scroll. Since Jacques unlocked the door here in the past, you'll be able to pass through, and since there's no power in the future temple, the pistons won't be firing, allowing you to pass through and pick up the Firefly Wings.
Passing back into the room at the top of the stairs, you'll come across more Bhaza. Kill them off, then destroy the crates that Jacques couldn't bypass earlier to reveal another Dordoaha. Kill it, grab the R Dragon Horn, and use it on the seal in the room with the broken elevator to clear the path back to the Time Folder.
By now, your task should be relatively clear. Jacques needs the Firefly Wings, while Sam needs to activate the power in the temple of the future. Thus, you'll need to time warp the Wings back to Jacques, who'll take them to the piston room and use them to reactivate the broken Firefly beyond the ice-locked door. (You'll need to use the Fireflies above the ship in order to reach the piston room, as the blue door is now locked off.) After Jacques uses the Wings, he'll grab the Power Crystal from the engine, which he can then send back to Sam (again, you'll need to use the Fireflies above the ship to reach the Time Folder), who can then reactivate the temple's power in his time.
The black mist that covers the blue door persists into Samanosuke's time, but he still possesses the Anti-Dark Charm, and can thus suck away the mist with his Oni Gauntlet. After you reach the power room, you can insert the Power Crystal into the temple's power core, but this will reactivate all of the pistons, thus forming a dashing puzzle. Gauging the appropriate time to move through each piston isn't difficult, but judging your distance accurately is, so do your best, and let Ako's White Vest heal you up when you reach the safe zones between each piston, if necessary.
The Red Door
When you escape from the piston room, take the nearby elevator to grab another Ecospirit and Sam's final weapon, the mighty Chigo axe. Use it to cut a swath through the enemies between yourself and the save point, then head back through the yellow door to reach the previously inactive elevator. The red door in the library can now be unlocked, thanks to Sam's possession of the Chigo; inside, you'll find another file, Ako's Yellow Vest, and the Red Disk that unlocks the third door in the central chamber.
Before you head through the door, though, you'll probably want to send Samanosuke through to the Dark Realm, via the same gatekeeper that Jacques used. If you do, it's best to train at least one of Sam's weapons up to its maximum level; better still, get both a weapon and the Oni Gauntlet maxed out for the easiest killing. Sam's prize for besting the Dark Realm is the Thunder Seal, which will become his Shippu weapon in subsequent games.
After you send the Red Seal back to Jacques, have him insert it into the pillar, but then warp back to Samanosuke, who can fiddle with a puzzlebox behind the red door in his time to obtain a Power Jewel. (Fourth row, second tile--third row, second tile--third row, third tile--second row, third tile--second row, second tile--second row, first tile.)
Now that Samanosuke has his Power Jewel, warp back to Jacques, save your game, and head through the red door to meet up with the guard dog that Mori mentioned earlier. As with most boss fights, you'll be best served by entering the dog's chamber with a full set of purple spheres, so hit the ship until you obtain them.
Boss Fight--Gertrude
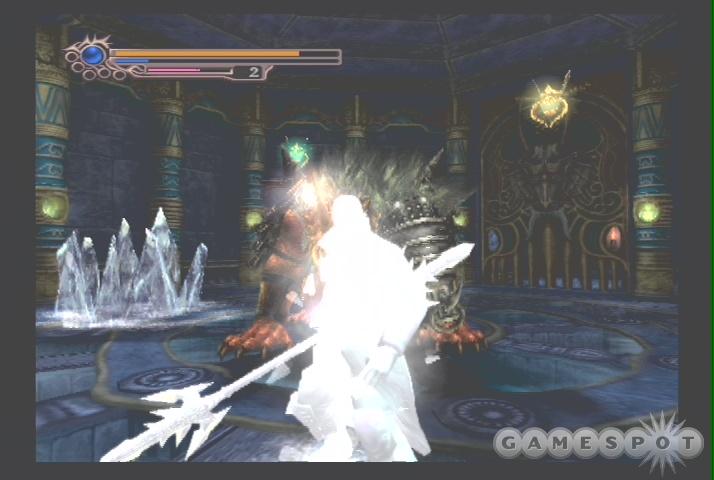
Gertrude primarily attacks with her two heads' elemental attacks. One turns Jacques into an ice sculpture; you'll need to rotate your left analog stick as quickly as possible to break out of this before the dog gives you a good whack. The other head's lightning attacks are fairly easy to dodge; just look for the yellow flashes on the ground and avoid them. The dog as a whole also has a very damaging charge attack that it'll often whip out whenever you're frozen. Try to vary up your location by periodically using one of the Fireflies near the ceiling to dash around the room.
Actually damaging Gertrude is the difficult part of the fight, as both of its heads are protected by helmets. The only head you need to worry about is the head with the golden helmet, as when that helmet is destroyed, the fight is over. Your weapon will automatically lock on to whichever head you're closer to, however, so you'll need to get on the dog's right side before you can actually hit the correct helmet. After you start connecting with the golden-clad helmet, start using your magical attacks (you can also use your magical bind attacks if you can lock onto the golden helmet with your weapon) or your Onimusha form to pound the helmet until it falls off.
The Great Escape
When Gertrude finally breathes its last, a short flight of stairs are all that separates Jacques from the exit, which comes in the form of a mysterious Genma train. Send Samanosuke through the red door to witness him "exit" the temple as well.
Notre Dame--Michelle
After Sam and Jacques have both exited the Undersea Temple, you'll finally have an opportunity to control Michelle, who'll be searching through Notre Dame in pursuit of Henri. You begin outside the cathedral, armed with a Shotgun; this weapon is only useful at extremely close range, so stick to your Assault Rifle for now. After killing off all of the enemies, grab the Soul Bracelet from the chest; this object will let you capture spheres from the fallen foes. Although Michelle has no need of red spheres herself, any that she capture will be transferred to Samanosuke later on.
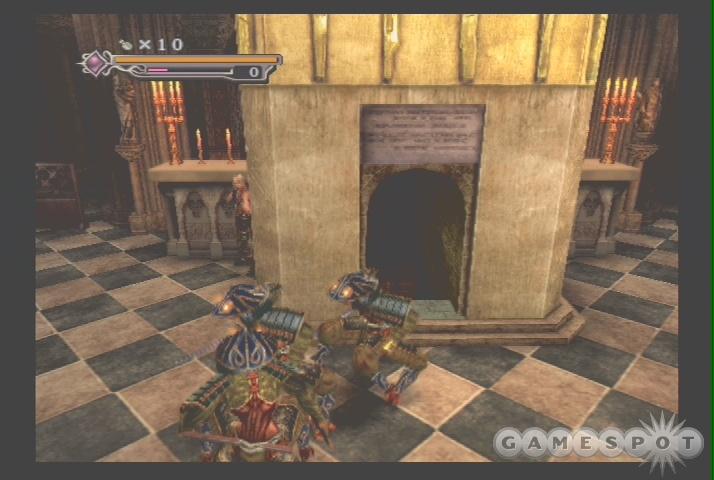
Before heading into the church, you can backtrack through the sewers to open the previously unopenable box near where the gigantic stone ball was suspended. It contains ten grenades, which are handy, but is guarded by more of the aquatic monsters that populated the waters earlier, so it's probably not worth the trip.
The layout of Notre Dame is the same as when Sam traveled through earlier, and there are no new items or treasure chests to worry about. Make your way down to Guildenstern's laboratory, kill the two Dordos with grenades, and grab the Paris Report to end this short excursion.
Boulogne Zoo
It Was a Monster Mash
Note the stairs near your starting point here; a chest near the souvenir stand contains an easily-missable First Aid kit, so grab it, then use your Assault Rifle to take down the Bhazas that are swooping around. As you try to close on the Protective Mirror, you'll run across your first Zmoh. These awkward-looking enemies are essentially big bears, in that they'll run up to you and attempt to smash you into the ground. You'll want to put a little distance between yourself and the first Zmoh, so if possible, lead it back to the souvenir stand and use the steps as a choke point to pelt it with shotgun rounds. (As a note, if Michelle still possesses enough restorative items to give her a safe margin of error in the coming firefights, you may want to avoid picking up the Salves and First Aid Kits in this area. Sam will be coming through here later, and will see more opportunities to use them in the late game.)
After the first Zmoh is dead, smash the garbage can near where you began to find an Ecospirit, then grab the Zoo Flyer near the boat launch and the box of grenades near the steps. Another Zmoh is likely waiting for you near the grenades, but whatever triggers his movement is apparently bugged, as you can sit back and use your Assault Rifle to kill him off from a distance without having him react. If you haven't already figured it out, Ako's Yellow Vest is particularly good when paired up with Michelle's Assault Rifle, as each individual round will let loose a sphere; if you use that weapon on the Zmoh, pause after every other volley to collect around 150 spheres, with a 150 sphere bonus.
When you've bested the Zmoh, head up and over the bridge it was guarding to find the monkey house. You'll need to kill off all the Bhazas here if you don't want them to pester you, and this involves a certain amount of blind firing, so let Ako lock onto them for you and use your Assault Rifle to kill them off. A Zmoh will pop out of one of the cages when you descend, so switch over to the shotgun to kill it off before letting Ako pop open the Tengu chest in the bottom corner of the screen, near the blue railing, to find a First Aid Kit.
The Zmoh atop the cages nearby unfortunately isn't targetable until he jumps down, so stick with the Shotgun and approach him until he hits the ground, then take him out. Grab the Ecospirit from the garbage can before heading inside the nearby building.
The building in question is powerless, and thus, the interior is unlighted. In a pinch, you can use your Shotgun's muzzle flare to light the way, although it isn't a very complicated path to maneuver. You will need to take down two more Zmoh before you can exit, but these appear one at a time, so you shouldn't have any troubles there. Let Ako get another First Aid Kit from the Tengu chest before exiting. You won't be able to do anything with the Oni-locked door, but remember its location.
The next exterior portion of the zoo is filled with Bazus, so listen for the sound of their rolling attack and guard at the appropriate times. These guys spawn in near the doorway through which you came, so you may just want to flip to your Shotgun, get cornered near the treasure chest (which contains a First Aid Kit), and let them come to you. Two or three shotgun blasts at close range are all that's required to take down a Bazu, and when they're grouped, they'll all be hit by any given shot.
Before entering the monkey house, grab the Ecospirit from the trashcan (it's in one of the corners of the area, near the stone habitat) and the Map: Zoo.
The top floor of the monkey habitat contains yet another cleverly-concealed Ecospirit in a trashcan, along with a Mecha Demon 1 file. The bottom of the pit here, however, is where the real goods lie. You'll note the four levers affixed to chains near the ladder; these control the descent of the four containers near the top of the ceiling. The left and mid-right containers hold Zmohs which will attack you on sight, whilst the mid-left and right containers reveal a Boat Key and an SPS 15+R, which is essentially a sniper rifle, as it trades rate of fire in for range. Use it if you wish, but in most cases, the shotgun or the assault rifle will still be preferable.
Boulogne Zoo - cont.
The Animal Research Center
Now that you have the key, fight your way back to the boat launch (near the Protective Mirror) and use the key to activate the sightseeing boat. Another maudlin interlude occurs, punctuated only by a short attack on the boat; best to keep your Shotgun equipped before you start out.
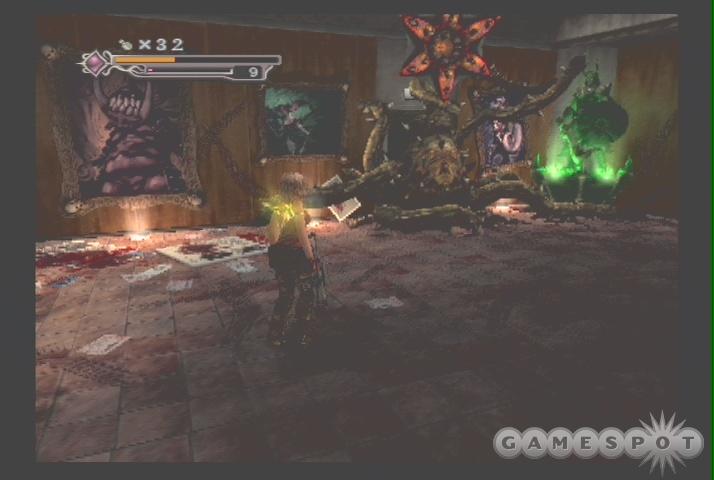
There's another save point in front of the Animal Research Center, so hit it, then grab the First Aid Kit from the Tengu chest near the doors before heading inside. More Bazu await, so head in with your Shotgun active; after killing them off, you'll have to deal with the monstrous Nuraubis that's blocking the doorway. Given that you have a long-range weapon, though, you won't even have to figure out how it attacks; just sit back by the door and fire off rounds until it dies. (If you're using the Yellow Vest, you can fit in three shots before the spheres start disappearing, so fire three times, absorb the spheres, and repeat until the Nuraubis is dead.) You can also obtain a Secret Med and two Ecospirits from the chest and the genma bags in the room.
After you come across Henri and Samanosuke in the basement, you'll be forced to kill off two Zmohs at the same time. Feel free to use a few grenades if you find this too challenging. Before you flip the switch to unlock Henri and Sam, though, grab the SPS 15+G from one of the Zmoh cages. There's also an Ecospirit in the corner of the large room here, inside one of the creature-containers on the ceiling.
Back to Samanosuke
After Henri and Michelle's loving reunion is so hilariously interrupted by Guildenstern, you'll regain control of Samanosuke. Michelle's Soul Bracelet lies on the floor near the cages; Sam can use this in his inventory screen to pick up all of the red spheres that Michelle absorbed during her wandering. Unfortunately, the door leading to Guildenstern is locked, so you'll need to backtrack through the zoo to find the key, which is located inside the Oni-locked door inside the darkened building near the monkey habitat. Before you go, however, save your game and use the red spheres that Michelle picked up to power-up one of your items, if possible.
When you get the Lab Building Key, return to the Lab and use it unlock the door in the lobby. You'll need to take down a new Dordo enemy, which is a palette-shifted version of the Dordo with even longer range and more power. Chop it up with a magical attack.
As per usual, you might want to recharge all of your purple spheres before you head into what's almost certainly going to be a boss fight, so you may want to run around a bit before heading through the door. Inside the little genma lab, you'll find a Ten Slash scroll, the Mecha Demon 2 book, and a puzzlebox containing an Oni Jewel. (Third row, fourth tile--second row, fourth tile--second row, third tile--second row, second tile--third row, second tile.)
Boss Fight--Guildenstern
As you may have noticed, Guildenstern is a fairly hands-off kind of dude, preferring to let his sinister creations do the dirty work of killing Samanosuke rather than take part directly. As such, when forced into conflict by Sam inside the Animal Lab, he'll attempt to battle you with a pair of blue Dark Puppets which are re-raised by Guildenstern each time you inflict lethal damage to them. They're swift and dangerous enemies, but they will drop spheres each time they die, thus hopefully giving you a chance to regenerate your health a bit.
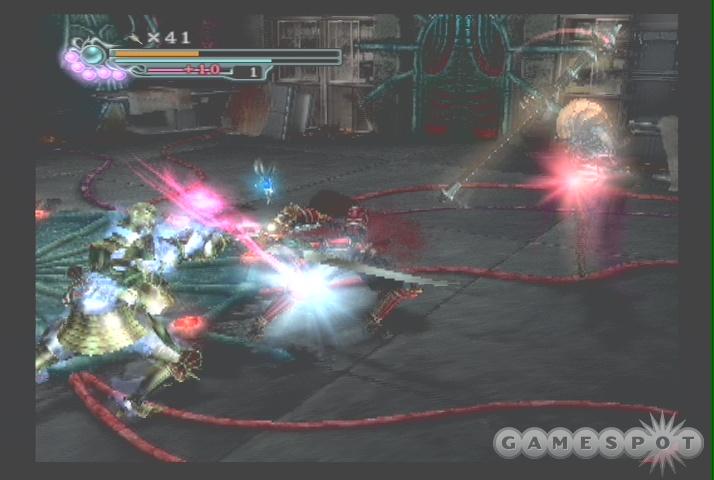
Guildenstern himself can only be hurt when he attempts to raise a Dark Puppet, or when he flings one of his energy balls at you. You'll know that he's vulnerable when his chest glows red; if this occurs during a Dark Puppet raising, he'll usually float down to the floor, allowing you to get at least one swipe in. Otherwise, it'll occur while he's still airborne, so use an elemental-powered arrow to damage him and interrupt his action.
Although Guildenstern starts the fight off by pitting you against a single Dark Puppet, he'll eventually raise both of them to fight you. You probably won't have many opportunities to attack Guildenstern while his minions are crowding you, so press the attack on them, using either charged attacks or magic attacks to drop them, then hit Guildenstern as he attempts to raise them.
After you deal a substantial amount of damage to Guildenstern, he'll flip a bloody timepiece elsewhere in the room; this is when you should press your attack. Kill off both of his minions, then flip into Onimusha mode and attempt to get as many strikes in as you can before the timer runs out, using magical attacks after that. When you deal enough damage to Guildenstern himself, he'll fall to the ground and die.
Mont-Saint-Michel
Although you begin the Mont-Saint-Michel chapter of the game in control of Samanosuke, he won't be able to proceed very far into the castle before he runs up against a couple of locked doors. If you wish, you can examine the beginning street to find the Ranmaru Book and an Ecospirit before warping Ako back to Jacques.
Apparently that Genma train was making a run through the well-traveled 15th century Japan--France Chunnel, as Jacques finds himself in the past's version of Mont-Saint-Michel. He's quickly confronted by Heihachi, who has himself been covering some territory.
Boss Fight--Heihachi
Heihachi is, again, impervious to most normal attacks, but you should find yourself with three weapons full of magical energy when you begin this fight, so use them all and Hei should withdraw fairly quickly. You can also try to Deflect Critical his swings, but this will probably cause you to lose a bit of life. Better to just expend your magical energies; you'll be hitting a magical recharge station shortly, anyway.
Opening the Main Gate
After the fight with Heihachi, a few Bhazas will appear, one of whom clutches a Firefly. Kill them all, then grab the Ecospirit from the crate in front of the train before riding the Firefly up to another chamber of the castle. Inside, you'll find a terrorized worker, who'll give a name to the creature that was attempting to order Heihachi: apparently your new foe is Vega Donna, and somehow runs the castle operations. We can't have that. Grab the Map near the door.
You'll also notice another trap-puzzle here. The shredding machine is controlled by the four unlit torches around the magical pool, so equip your Enja and use its magical attack to light them. It's best to light three of them, then wait until the shredder is traveling upwards before hitting the fourth. It'll take a few tries before you lock the shredder into place so that you can walk underneath it; when you do, though, you'll be able to grab the Main Gate Key from the chest within. The trap will reset, though, forcing you to hit another torch to freeze it permanently. The trap moves more quickly when you're inside of it, so hit the torch just as the shredder is coming into contact with the ground, and you should be able to free yourself.
Now that you have a Main Gate Key, you'll need to find some way to send it forward in time to Samanosuke. Moving on through the next door, you'll come to an open area where another civilian is being harassed by more Genma. Kill them off, and he'll reward you with an Herb. You'll find another Time Folder nearby, so send the Main Gate Key to Samanosuke.
More Item-Hunting
With the Main Gate Key, Sam can open the door at the end of the road, so head through to have your first encounter with the supremely annoying Ouija enemies, which use ropes of energy to bind Samanosuke. The blue energy will drain almost all of your magical power (although you can reabsorb it if you're quick enough), while the red energy will merely injure you. After you notice the energy begin to circle Sam, run away from the center; it'll follow you, but you should be able to escape in time. You can either attempt to use arrows on the Ouija, or kill off the ground troops, then attempt to hit them as they scurry near ground-level. Grab the Ecospirit and Sam's map to M-S-M before moving on.
The Nurabis at the end of the next street guards the Sun Crest, which unlocks the gate in the street with the Protective Mirror. Unfortunately, you don't have Michelle's weapons to take down this foe from long range, but you should be able to dash in, use a charged attack, and run away before it manages to get an attack off. Repeat this a few times until the monster dies, and claim your prize.
When you've obtained the Sun Crest, return to the main street and use it to unlock the gate, beyond which you'll find an Ecospirit in a trash can and the Red Eye Stone. There's also a red sphere pedestal (kill the Gachu, then absorb its spheres while standing next to the pedestal for an even larger bonus), a Tengu chest on the balcony, and a puzzlebox. (Second row, third tile--first row, third tile--first row, second tile--second row, second tile--third row, second tile.) You'll nab another health-bar-extending Power Jewel from the puzzlebox, so open it before sending the Red Eye Stone to Jacques.
Mont-Saint-Michel - cont.
Very Puzzling
Now that Jacques has the Red Eye Stone, he can pass through the double doors near the Time Folder to uncover the next puzzle he'll need to solve. Insert the Red Eye Stone into the one-eyed statue. Pressing on the statue will slide the nearby stone to reveal a tile-puzzle; you need to press the tiles in a certain order, and depress all of the tiles on the board, in order to light up one of the nearby animal statues. You'll need to do this three times before you can proceed, but it's not so difficult once you know what to do.
The key to solving the puzzle lies in the diagram on the stone, which shows a star, the sun, and the moon, with arrows pointing from the sun, to the moon, to the star; you're going to need to step on the tiles in this order to avoid failing the puzzle. (Failure involves getting knocked backwards off the tiles for light damage; you can fail multiple times without needing to worry overmuch about the health consequences.) After you slide the stone back, you'll need to blaze a trail from the first sun tile, to a moon tile, to a star tile, to a sun tile, and so on. If you start with a sun tile, you'll usually only face one possible fork in the path, and a little trial and error will quickly show you which path to follow. The stone only stays retracted for 15 seconds, so you'll need to move quickly; if Jacques' walking pace is too slow for you, click your R1 button down to speed him up. After you maneuver through the puzzle three times (the tiles change position after each successful solution), the steps in the alleyway below will thunder up to your position, allowing Jacques to proceed down.
Actually, now that the stairs have been raised, you can send Ako back to Samanosuke, who can pass through the doorway on the stairs, but first, let Jacques travel along until he unlocks a couple of Fireflies. These let him access a small alcove where a Nurabis guards a Power Jewel. Also, the doorway at the bottom of the stairs leads to a courtyard, where another hidden Firefly (inside the wooden crate) leads to Ako's Orange Vest. Now, head back to the save point and save your game, but before sending Ako back to Samanosuke, let her heal you up with the White Vest and head back to the long staircase. As you travel down, you'll note a doorway on your left that you bypassed before; this will lead to another opportunity to enter the Dark Realm.
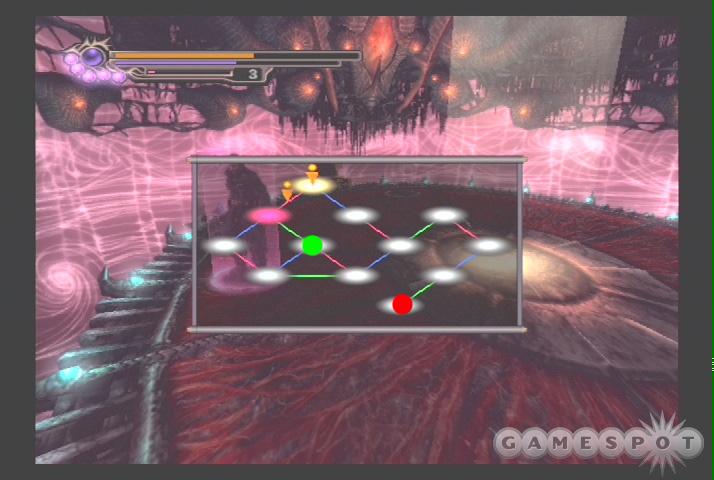
The Dark Realm here is noticeably more difficult than the ones accessible via the Undersea Temple. It's longer, for one thing, and more enemies will warp in during each fight, making it difficult to get attacks off without getting hit yourself. You do have Ako's White Vest, though, which can completely heal you after each fight, if you have the patience to let it do so. Explore thoroughly, and you should find the Green Orb (which will become important later), Medicine, and the Fire Seal. You'll also note a chest in the first room of Jacques' Dark Realm that's sealed with a purple mist; you won't be able to access it just yet.
Sam's Turn
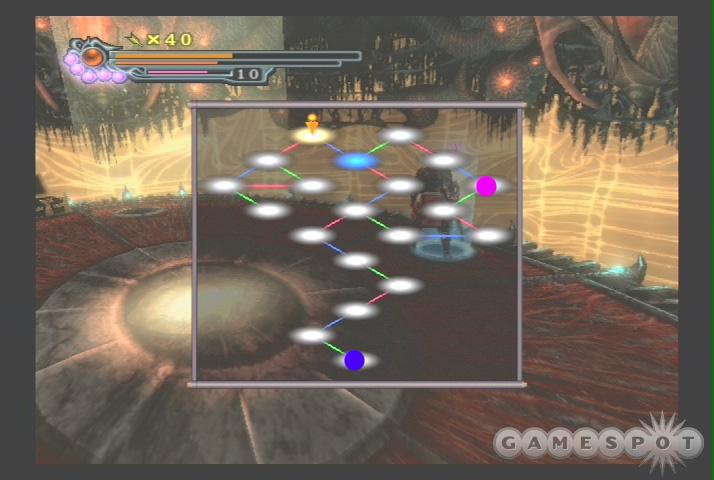
After Jacques completes his Dark Realm trip (or not--don't forget that these excursions are entirely optional), you can send Ako back to Sam (along with the Green Orb) and let Sam enter the Dark Realm, after first saving the game. In his first room, you'll find a chest sealed by green mist, so use the Green Orb to unlock it and thus obtain a Wood Charm. Elsewhere in the labyrinth, you'll come across a Purple Orb, a few different Medicines, and Ako's supremely useful Purple Vest. In fact, when you hit the room containing the Purple Vest, it'll be immediately behind your starting position, so grab it, activate it with six Ecospirits, and equip to Ako before using magic power to take down the very tough assortment of Grizmohs and Dark Puppets; the Purple Vest lets you use magic powers at half the cost, which should enable you to easily kill off most of your enemies before you even need to switch weapons.
After you escape from the Dark Realm, send Samanosuke through the doors farther down the stairs to find the device that Guildenstern apparently used to send Sam and Jacques through time: a much larger Time Folder. Pick up the Time Lab 4 book near the portal, then step through to find yourself in a warped version of the Arc De Triomphe.
The layout of the Arc shouldn't be difficult to remember, but the fight atop it can be, as you'll face off against two Ouijas, two Gachas, and a Dongacha. The easiest way to deal with these guys is to charge in with your Chigo axe and use its magical effect once or twice; the Ouijas should die off almost immediately, whereas the second blow should kill everything else. If you're running low on magic, the ever-handy charged attacks should do the trick. When you're ready to leave this strange alternate dimension, grab the Red Key from the treasure chest and leave via the portal that opens.
Mont-Saint-Michel - cont.
The Emancipation Jacqueslamation
Send the Red Key back in time to Jacques; he'll need it to free a whole mess of slaves from the iron rule of Vega Donna. With it, you can unlock the door near where you picked up the Power Jewel earlier, behind the iron grate door. Inside, a group of slaves are busy pushing a wheel, no doubt to further their mistress' nefarious cause. After Jacques frees his kinsmen, you can obtain a Medicine by smashing the wheel's spokes and opening the chest.
Upon leaving the room, Jacques obtains another key from Heihachi, of all people. The Triangle Key opens up the locked door near the train at the beginning of the level, but before you can backtrack, you need to protect the two slaves on the staircase from the Genma that are attempting to kill them. Since you'll be passing right past the magical fountain in a minute, just use your magical attacks on the Genma to quickly deal with them, and you'll obtain an Herb and an Oni Med Lvl 1 for your troubles. There's another slave through the doors at the bottom of the stairs, with another Herb, and yet another slave packing an Oni Med Lvl 1 near the Protective Mirror. After saving, hit the Dark Realm here one last time to unlock the purple chest for another Wood Charm.
Plantastic!
Now that most of your business is taken care of, backtrack to the beginning of the level and use the Triangle Key on the door near the train; you should be able to discover the Genma Plant and another Tengu chest within. The Genma Plant is meant to be placed within one of the plots of earth outside the door, next to the existing, smallish plant. If you then warp back to the future, the plant will have grown up the side of the wall, allowing Samanosuke to climb down into the train station.
In Sam's future train station, he'll come across two Ecospirits hidden away in trash cans, along with a First Aid Kit inside a Tengu chest across from where the train was originally. Inside the nearby room Sam'll run across an item smorgasbord, as there are two Ecospirits, a Medicine, and an Iron Gear inside the various containers. The Iron Gear is what you need to open the large gates near the Protective Mirror, so grab it and send it back in time to Jacques.
The Iron Gear should be placed in the gear shaft to the left of the barred door; this will allow the other gears to catch, thus letting you pull the lever nearby to finally open the door to the Monastery. Ouijas and a Nurabis wait for you inside; if you're not eager to face a Nurabis at point blank range, hit it with magic until it dies, then backtrack to the magic fountain, refill, and return. Inside the monastery, you'll find a Secret Med and Vega's Diary. After heading downstairs, control will automatically revert to Michelle.
Henri, the Psychic Kid
Someone really needs to give Henri a good talking-to, because that whole reverse-fannypack look just isn't doing it. Although he's totally dorkified, he is kind of psychic, and realizes that his father's in trouble almost before it happens, give or take five hundred years. Thus, it's your job, as Michelle, to guide him to the monastery so that he can help his dad out.
Most of your journey is fairly easy, but you will be forced to deal with a Dongocha just before the long set of steps leading to the monastery. The SPS 15+G makes short work of it. You'll reach Samanosuke outside the monastery; be sure to save your game before heading inside.
A Dordio awaits near the Time Folder's power source, but you should be able to use the pillars as cover to protect yourself from its attacks while charging up your own weapon. After it falls, grab the Time Lab 5 book and head downstairs.
Henri's mystical powers apparently include his being really good at playing Simon, as the next little puzzle involves memorizing a steadily longer string of input codes in order to unlock the door in Jacques' time. The number of commands you need to remember begins at three and ends up at 12, so you'll need to have a fairly good memory to complete the sequence; to make matters more difficult, there's a timer bar that gives you an idea of how long it'll take Jacques to succumb to the poison gas that's filling the room. You'll have enough time for multiple attempts, should you fail to input the code correctly, but, luckily for everyone, the code is the same each time you play through, allowing us to just tell you what it is. The directional commands should be entered with the D-Pad, by the way.
First Lock: Up, Down, Triangle
Second Lock: Up, Down, Triangle, X, O
Third Lock: Up, Down, Triangle, X, O, Down, Up
Fourth Lock: Up, Down, Triangle, X, O, Down, Up, Square, Left, X
Fifth Lock: Up, Down, Triangle, X, O, Down, Up, Square, Left, X, X, Right
Oddly enough, Samanosuke and company are apparently completely uninterested in what actually lies behind the door that they just unlocked; apparently they're more than happy to let Jacques investigate and report back when they all meet up later.
After some videoconferencing gone horribly awry, Sam finds himself near the entrance to Mont-Saint-Michel. There's a fairly difficult boss fight coming up, so you'll want to save your game, then backtrack up to the monastery to obtain all five purple spheres, should you not already have that many. You'll also probably want to have all of your weapons' magical meters fully charged; you can increase the chances of getting blue spheres by inflicting Deflect Criticals on the green-eyed Gilzorms that populate the steps leading up to the monastery. If at all possible, get your Chigo Axe and the Red Armor to level three. When you're fully girded for battle, save your game again and head back to the parking lot.
Mont-Saint-Michel - cont.
Boss Fight--Gertrude
Gertrude has gotten a bit tougher than when you first fought her with Jacques; she may even force you to use a few Herbs to survive the fight. If you have a full complement of magical energy for all of your weapons and five purple spheres, though, you should be able to eke out a win.
Although Gertrude can no longer strike with lightning attacks, she'll still occasionally spit out her ice blast, which spells double trouble for Sam, as she'll usually follow up with her new charge attack, which can quickly take off most of your health bar if she connects multiple times. If she knocks you to the ground, she'll usually follow up with a bearish forepaw stomp for even more damage, so you'll want to quickly roll out of the way if you're prone. These three attacks together make her one of the most formidable opponents you've yet faced.
To top things off, Gertrude is more or less immune to normal attacks, thanks to the armor that's covering her body and her right head. The armor itself can be destroyed, however, and that's what you'll want to do. You'll need to use Sam's Chigo Axe to deal most of the damage to the armor, and it can take plenty of it. Unfortunately, the armor on the head is itself immune to damage until the rest of the armor is destroyed, so you'll need to pop off the armor on the body before focusing on the head. Since most of your attacks will automatically target Gertrude's head, you can see how this can be a problem.
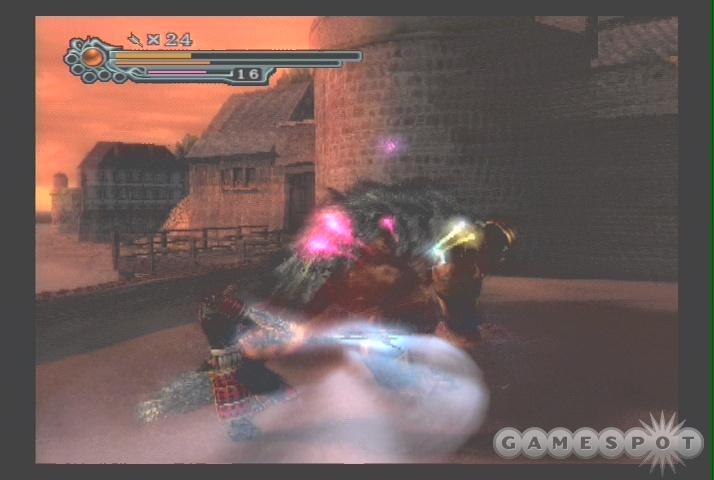
Thankfully, Gertrude will expose her flank to you when she attempts to charge; if you can charge up your weapon with the R1 button while she's preparing her charge (she'll stomp her feet like a bull), and then strafe out of her way when she rushes you, you should be able to hit the X button to have Sam do a rapid set of spins that will crack the armor on the side of her body. You'll need to do this repeatedly to actually destroy the armor; you'll know you've gotten a piece when a bunch of spheres float away. Gertrude charges rather quickly, though, so you'll want to be strafing even before she comes at you; it's best to start near a wall, then strafe away from it, to ensure that you have plenty of room to maneuver with.
If you can't quite get the hang of strafing, then you can use magical attacks to stun Gertrude for a short while. After a magical attack hits her, she'll keel over and plop down on the ground, giving you a few seconds to attack the armor on her flanks. You'll obviously want to use Ako's Purple Vest before you inundate Gertrude with magical attacks, though, because you'll run through your magical energy rather quickly otherwise.
When you've cleared off most of Gertrude's armor, you can go for the kill with your Onimusha form by chopping off the rest of her armor and then attacking the head. Her head can actually only be harmed by Onimusha or magical attacks, so if you don't manage to kill her before your Onimusha state runs out, absorb all of the spheres in the air and start blasting away with magical attacks. If you run out of magical energy before she dies, you'll be forced to use Oni Meds to bring it back up, as you simply can't hurt her with normal attacks.
Jacques Escapes
After that nasty bit of business, you'll retake control of Jacques, who's been waiting for Ako in the basement of the monastery. The first room you come across after leaving the trap room contains a Fortress 1 book, which details some kind of Genma flying fortress, along with an Ecospirit trapped inside a crate.
As it turns out, the Genma fortress has actually been underneath Jacques' feet all this time; the massive creature was the cause of the trembles that Jacques' been experiencing for the last few segments of play. At this point, things are out of your hands; Vega Donna will take the fortress into the sky, but Jacques will come along for the ride. After the trip, you'll find yourself in Lake Biwa.
Lake Biwa
Just Like Old Eskimos
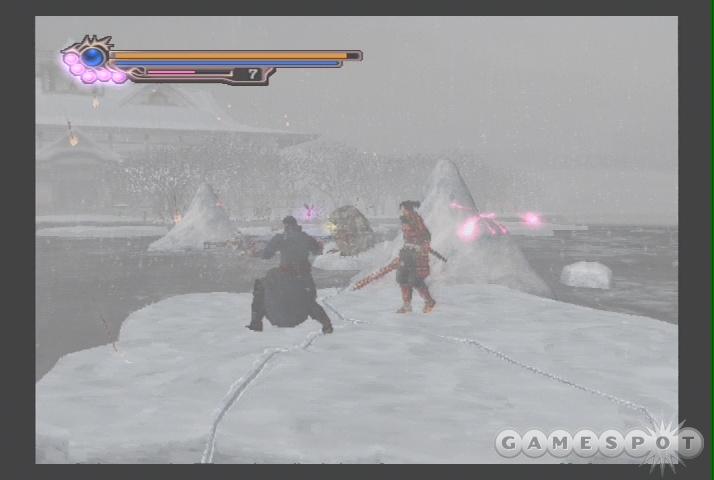
Before Jacques and Samanosuke can enter the Oni Mansion, they first need to cross the frozen lake that lies between it and them. The lake crosses aren't difficult, for the most part, but you will need to proceed fairly quickly. Jacques and Sam will be moving aboard ice floes, and, since you control Jacques, you'll need to use your weapons to latch onto Fireflies in order to maneuver your floe so that it doesn't impact the icebergs in the lake. Your floe can survive a few iceberg impacts, but it will eventually crumble, instantly killing both of you; this obviously doesn't make for fun times, so you'll want to use your Hyosai weapon to quickly kill off any enemies that jump aboard your little block of ice. To complicate matters somewhat, the Fireflies that you need to use are stored within containers that your floe will brush up against, so keep an eye out for any crates and destroy them straightaway.
After the first floe-traveling segment, you'll be able to let Ako nab the nearby Tengu chest, which contains a Medicine. Another chest with the Biwa map is nearby. After proceeding up the ice on foot, you'll come to a fork in the road, as you'll be forced to choose between a floe on the left and a floe on the right. You can't backtrack after making your choice, so it's a bit of a bind. Luckily for you, we're here to tell you what occurs, no matter what: the leftmost floe leads to a Medicine, while the rightmost floe leads to a Secret Med. Thus, head right and grab the more powerful restorative. You'll need to kill off a Grizmoh, then ride the Firefly that was attached to its tail to find the Secret Med, then hop back on the Firefly to finally reach the final ice floe.
The last ice race is substantially more difficult than the first two, both because the margin for error in hitting the Fireflies is smaller, and due to the fact that archers on the mansion's walls will be constantly flinging flaming arrows at you. The arrows are actually more of an annoyance than any big danger, due to their low damage, but all the same, try to avoid them as best you can, as their stunning effect may render you unable to latch on to a Firefly before you hit an iceberg. The most difficult Firefly to get is the first one, as it's attached to a Grizmoh; best to use a magical or magic-bind attack on it to kill it quickly. Bhazas hold a couple more Fireflies later on, so don't forget that Jacques can easily hit flying opponents by hitting X instead of square when attacking.
Oni Mansion Sightseeing
Samanosuke lags behind Jacques just enough to get trapped outside the mansion after the portcullis closes--which is pretty convenient, as it leaves you with all the dirty work of figuring out how the heck to get to the Oni Army Orb, which is incredibly fun to say out loud.
Begin by picking up the Oni Mansion document, which gives you the vaguest possible clue about how to maneuver through the castle. The trick lies in the Fireflies which are mounted on the ceiling; these color-coded creations open specific gates within the castle, so that pulling a red Firefly opens all red gates. The trick is that gates only stay open for a few seconds after you pull the cord, meaning that you'll have to move fairly quickly. In a larger area, this could all lead to a fantastic amount of trouble, but the Oni Mansion is not very big, and thus isn't all that difficult to maneuver through.
In the first room, pull the red cord and run through the gate, proceeding through successive rooms until you hit the treasure chest, which contains a Gajimaro, another of the annoying little chest-dwellers that are tough to hit. Killing it with your X button will force it to drop a Medicine, so grab it, then pull the blue cord. This will cause a Fugaku to spawn in, who will be succeeded by two more after you kill it; you'll need to kill everything to forge a safe path through the castle. When that's done, head back to the blue cord and pull it once more. From there, walk two rooms south, pull the red cord, then walk south to the mansion's initial room and head east through the hopefully-still-open blue gate. The treasure chest here will reveal a Firefly, which will somehow zoom through the wall and suspend itself over the pit to the north.
Said pit won't be accessible right away, as the blue gate will most likely have closed by now. No matter--continue on to encounter another Fugaku who stands over the Oni Army Book. Pick it up, then smash the scroll on the wall to reveal a Secret Med and a red sphere pedestal.
Now that you've unleashed the Firefly, you're ready to exit the maze. First, hit the blue cord near the smashed scroll and backtrack into the mansion's first room. Pull the red cord here, head one room north, then head one room east and fly over the pit. A yellow cord lies on the opposite side, so pull it, then swing back across the pit and run all the way back to the room where you obtained the Medicine from the chest. Pull the blue cord here, head south one room, then proceed through the blue gate to the east, followed by the yellow gate to the north, to reach the exit, which is concealed behind another scroll. Phew.
In the basement of the mansion, you'll face off against a pair of Dongachus; by now, you should have the Oni Gauntlet safely at level three, so lasso them up and throw them at each other to kill them fairly easily. One of them will drop another Firefly, which you can use to jump over the barrier. Before you grab the Oni Army Orb, let Ako discover the Tengu chest near the dog statue for another Medicine. After you do obtain the Oni Army Orb, Jacques and Sam head off for Azuchi Castle in the last little interlude before the endgame begins.
Azuchi Castle
Storming the Gates
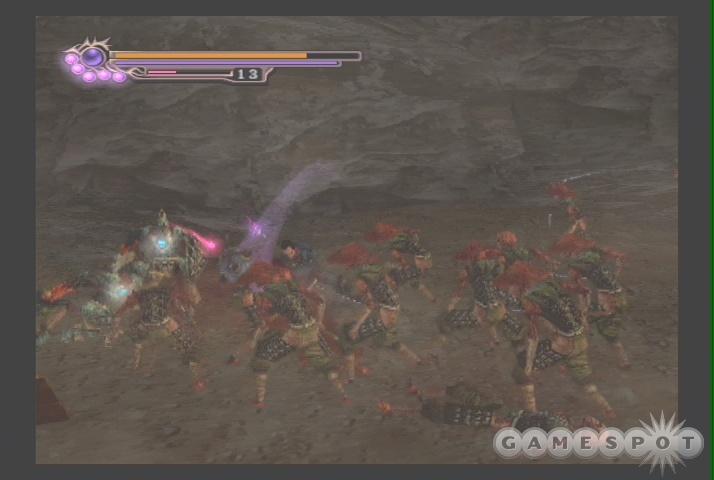
The exterior of Azuchi Castle is the scene of one of the game's most entertaining set pieces. As the Oni Army assaults the castle, Jacques has to wade through the Genma defenders in an effort to reach the castle proper. The first part of this battle pits half a dozen Oni warriors against as many as a dozen Genma Swordsmen at a time; you can get into some pretty hairy firefights if you choose to participate. The Hyosai weapon will annihilate your enemies, and if you rapidly press the attack button no matter what's going on, you'll get your fair share of Criticals and Chain Criticals as well. The Genma spawn as long as you stay in the area, so feel free to wander around chopping up skeletons for as long as you like. If you have any remaining upgrades to do, this is a great place to absorb spheres, particularly if you equip Ako's Yellow Vest.
The next two areas are very straightforward, with only a few Firefly jumps impeding the straight-line progress. There's a Medicine near the third doorway, which leads to the castle itself, but apart from that, there are no other items in these areas.
Sneaking About
There aren't all that many enemies inside Azuchi Castle, probably thanks to the fact that Heihachi's been killing them all. Grab the Fortress 2 document before saving your game and heading up via the elevator here. A few Dark Spider enemies await you near the chest containing the map for the castle, so kill them off before heading outside.
A Vassal Book and another puzzlebox wait for you on the bloodied roof of the castle. (First row, second tile--first row, third tile--second row, third tile--third row, third tile--fourth row, third tile.) Use the Oni Jewel from the puzzlebox before riding the Firefly up to the second part of the roof, where an unpleasant surprise awaits you in the form of another Marcellus. This one isn't a boss fight, technically speaking, but he's just as difficult as he was the first time you encountered him. Don't feel too bad if you need to use Onimusha mode to take him down: your magical attacks, assuming you're at full charge on all of your weapons, should be sufficient to deal with the real impending boss.
After passing through the yellow window, head down the steps to grab an Oni Med, then save your game at the Protective Mirror.
Boss Fight--Vega Donna
Vega Donna isn't an offensive powerhouse--although her attacks do an appreciable amount of damage, they're almost all completely blockable, save for the maneuver where she leaps up and grabs onto the wall like Spider-Man, and then propels herself across the room. You can avoid this attack by simply avoiding the center of the room while she's priming herself to shoot. Apart from that, her ground attacks mostly consist of standard slashing techniques, all of which can be blocked so long as you keep your guard up. She'll also try to get up into the rafters and fling around; when she's up there, stay directly beneath her and block the knives and the purple binding attack that she uses. She will occasionally split off an illusory double of herself, but again, all attacks are easily blockable.
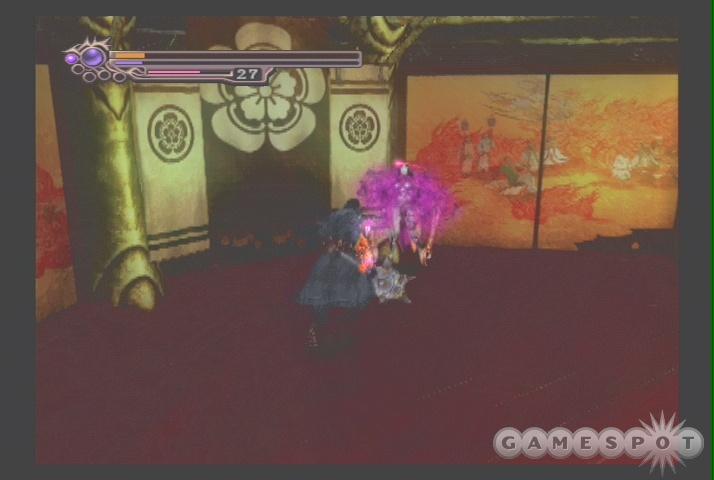
Actually harming Donna is a bit more difficult than blocking her attacks, as she's quite lithe, and will jump or otherwise dodge most of your normal attacks; even charged and magical attacks stand a pretty poor chance of hitting her. You can use this to your advantage, however, as she'll periodically attempt to hit you with her freeze-ray while she's on the ground floor, and if you can manage to block the purple blob, it'll reflect back to her and freeze her for a few seconds, thus giving you enough time to get an attack or two in. She does this very rarely on her own; the best way to encourage her to plop one off is to equip your Hyosai mace and hit the square button once, and only once, when she's nearby. She'll almost certainly dodge the spiked ball as it crashes into the ground, but, on the assumption that you'll be stringing together attacks, she'll usually jump back a bit and attempt to paralyze you. If you only hit the attack button once, you should have plenty of time to get your guard up before the binding attack hits. After she's frozen, rush in and use your magical attack.
The binding-reflection trick should be used until you run out of magical power for your Hyosai and Raisen. (You'll need to quickly switch between these two to use the Raisen's lightning attack after you paralyze Vega Donna, and don't forget to use Ako's Purple Vest to cut down on the magic costs.) Your Enja whip can be used without having Donna paralyzed, as its magical attack will only consume mana if it actually hits; whiffs don't penalize you in any way. When all of your magical energy has been used up, flip Ako over to the Orange vest; if Donna's near death, and you have a fair amount of health left, you can start flailing about with your Hyosai to finish her off. Otherwise, try using charged attacks on her while you have her paralyzed, and she'll die soon enough.
Eiffel Tower
The Ascension
Fittingly enough for a game that lavishes attention on its whips and swords, Samanosuke's adventures in the modern age will culminate in a trip to the world's largest phallic symbol. You'll begin inside an elevator room, where you'll find a First Aid Kit and an Oni Jewel inside the game's final puzzlebox. (First row, third tile--first row, fourth tile--second row, fourth tile--second row, third tile--third row, third tile--third row, second tile.) After you've accessed everything, and saved your game, use the blinking red lights outside and inside the elevator to get going. You won't be able to travel very far before you get ambushed by Genma, but after you kill them, you can use yet another blinking red light to extend a ladder which will lead you to the tower's exterior walkways.
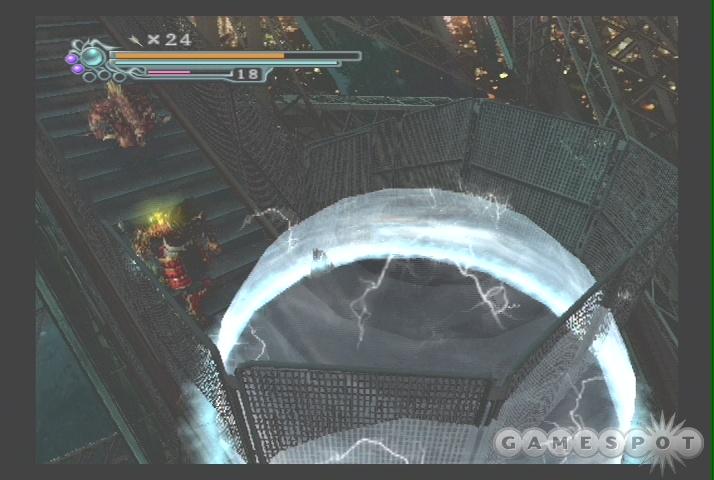
As soon as you reach the walkways, head down the stairs to find a Tengu chest containing an Oni Med, then claw your way past the Dorabazus on the stairwells until you reach the top. You'll notice that the Time Folder is warping space-time on the stairs; small rifts will periodically appear on the platforms. If you get trapped in one of these, you'll be warped back to the beginning of the stairs, so be careful not to let the Dorabazu's rolling attack knock you into one.
After you kill the Dordio on the top of the stairs (a fully-charged attack from your Chigo should do the trick), you'll be met with an unpleasant blast from the past, in the shape of Brainstern; apparently the evil that Guildenstern does lives on after him. To make matters a bit more complicated, the Time Folder machinery will periodically open small pockets of energy on the platform; if you step on one when it reaches full size, you'll take damage and be stunned. All in all, though, Brainstern isn't nearly as difficult to kill as when you first encountered him; fully-charged Chigo attacks should be able to deliver the smackdown fairly efficiently.
When Brainstern implodes, you'll need to eliminate the pockets of energy; you can do this by destroying the big blue eye-thing that's pulsating near where the elevator would've arrived, had it not been sabotaged. You can only hurt the eye when its shutters open, so use that window of opportunity to smack it until it's destroyed, then grab the Eiffel Tower Map from the treasure chest before hitting the next group of pathways to the top of the Tower.
Onwards and Upwards
Spatial rifts will continue to harry you as you proceed upward. The first area will also throw a few Zmoh and Bhazas at you. You can safely ignore the Bhazas, so long as you don't stay in one location for too long, but you'll want to use your Chigo to quickly destroy the Zmohs before they smack you into the...stuff that the Genma have constructed walkways out of. Speaking of which, you'll come to a fork in the path near the entrance; the leftmost Zmoh guards a Secret Med, so nab it before moving on.
A horrendous fight with a Ouija and a Dongacha precedes the next areas that actually contain items. In fact, the platform beyond those enemies contains a First Aid Kit, a Secret Med, a bundle of Soul Arrows in a Tengu chest, and the Time Lab 6 book, so feast from the cornucopia before activating the elevator, which will reveal a Dordio when it arrives. You should have enough obstacles to avoid his attacks, so let your Chigo do the talking.
The Protective Mirror at the top of the elevator presages a boss fight, so nab all of the souls from the soul pedestal, save your game, and head up to face Ranmaru one last time.
Ranmaru Mori
Ranmaru hasn't been much more than an annoyance during the game, and doesn't overcome that label now. Which is to say, he's fairly easy to beat, even if you don't use your Onimusha form. He's fairly similar to Vega Donna, in that his attacks consist mostly of normal slashes, with a blockable ranged attack thrown in for good measure. He also possesses an unblockable melee attack which turns his sword red, but which has a lengthy wind-up; if you see him preparing this attack, slash at him and he should negate it in favor of jumping away.
Also like Vega Donna, Ranmaru can avoid most of your normal attacks, so you'll have to rely on magical and charged attacks to damage him. You can actually swing away at him until you get a lucky hit, at which point he'll release spheres into the air; when he pauses to reabsorb the spheres (which he does much more quickly than when you encountered him in the Undersea Temple), you can hit him with a charged or magical attack. He can fairly easily dodge the Chigo's magical attack, so use Ako's Purple Vest in conjunction with the Tenso and Kuga weapons to dish out the most damage. After you exhaust your magic, use Ako's Orange Vest to gauge Ranmaru's remaining health, and adjust your plan accordingly. In most cases, you'll have dealt enough damage to finish him off with charged attacks, so do so, and gear up for the game's final level.
Hannoji Temple
A Cop on the Edge, Three Days From Retirement, With Nothing Left To Lose, etc.
Now that Jacques and Samanosuke have finally arrived back at the beginning of their story, it's time to conclude that story and defeat Nobunaga. You'll begin by wading through the same assortment of foes that Samanosuke faced alone at the beginning of the game; take this opportunity to collect purple spheres, as you won't have any opponents to fight in the courtyard ahead. Don't be afraid to use magical attacks--the magical well near the Protective Mirror is still fully functional.

After Jacques defeats Ranmaru (which happens automatically), you can free a Firefly to find a Secret Med atop the temple. You'll also note that the Dark Realm gatekeeper is suspended above the Protective Mirror; if you sit below his position for a second, he'll drop down and offer Jacques one last chance to enter the mysterious otherworld. There's nothing so mundane as an inert orb awaiting you inside, however: if you plumb the depths of the Dark Realm at Honnoji Temple, you'll come across eight Blue Orbs, along with a few restorative items. If you grab all of these Blue Orbs, exit the Dark Realm, then re-enter it, you'll be able to use all eight of them in conjunction to unlock the treasure chest in the first room. This chest contains the Ultimate Whip, which is, well, Jacques' ultimate weapon. This final Dark Realm trip contains some very, very tough enemy configurations, including a final room containing a Marcellus surrounded by Gilzorm, but if you actually plan on unlocking the Ultimate Whip, you can feel free to use all of the restorative items in your inventory, as that weapon makes Jacques' upcoming battle with Nobunaga extremely easy.
As a note, even if you don't intend to obtain the Ultimate Weapon, you should still enter the Dark Realm and fight around until you have five purple spheres for your Onimusha mode; it'll make the fight with Nobunaga that much easier.
Boss Fight--Nobunaga
Nobunaga combines many of the most aggravating aspects of earlier bosses into one terrible gestalt. The first thing you'll notice is that he can dodge pretty much any attack, regardless of whether it's normal or charged; the dude's pretty agile for someone who's been dead as much as he has. He also has some pretty powerful attacks, including a couple that are unblockable. In addition, he can land critical hits, so keep your guard up.
You have two basic attack plans.
Option A: If you didn't obtain the Ultimate Whip, you can still fight with the knowledge that you'll finally be able to use your restorative items without fear of needing them later; this is the final fight of the game, after all. Ako's Green Vest doesn't work on Nobunaga: it'll consistently show him at full health, so don't trust it. Instead, equip her Purple Vest and blast Nobunaga with every magical attack you can muster, using any Oni Meds you've obtained along the way. It's probably best to use these on the Enja weapon, as it doesn't penalize you for missing your target.
If you completely run out of magic, and can't kill him with your Onimusha mode, you'll have to resort to normal attacks. Very few of these will actually connect with him, as Nobunaga has supernatural evasion abilities.
Option B: Use the Ultimate Whip and hit the triangle button six times when Nobunaga is within range of its attack. Easiest. Fight. Ever.
The Endgame
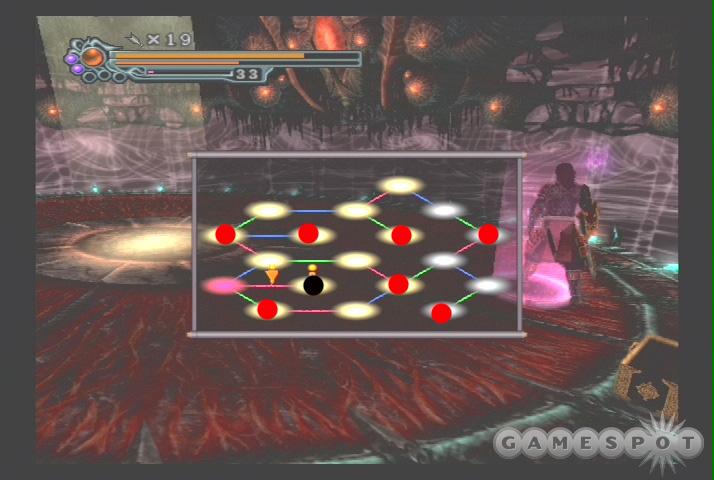
After Jacques' cutscenes conclude, you'll find yourself controlling Samanosuke outside Honnoji Temple. The Dark Realm entrance is accessible, and leads to the final trip into that dimension for Samanosuke. If you wish, you can traverse through, obtain eight Red Orbs, and unlock the Bishamon Sword, Samanosuke's ultimate weapon, but unfortunately, this weapon isn't accessible during the final battle, so there isn't much point. There are a couple of Secret Meds within the Dark Realm, however, which may of help to you in the final battle.
As a note, Samanosuke is about to obtain the Onimusha Sword, which he'll use during his final fight with Nobunaga. This sword obtains its power based on how far you've upgraded your normal weapons: if you've raised them all to their maximum levels, then the Onimusha Sword will be fully powered; if not, it will be less effective against Nobunaga. If you fight through the Dark Realm and obtain the Bishamon Sword, you should be able to use it to make a few more trips through the Dark Realm and obtain enough red spheres to max out all of your weapons. This is optional, but the final fight is much more difficult with an underpowered Onimusha Sword.
Boss Fight--Nobunaga
First Form
Nobunaga's first form, which Jacques fought against, is no match for Samanosuke, who fights him as the Onimusha during the battle. This Onimusha state doesn't end, and Nobunaga can't hurt you, so whack away until your opponent falls. Of course, having an end boss that can't hurt you would be kind of anti-climactic, so after you kill him the first time, Nobunaga will change shape into Uber Demon Genma Boss of Doom!!
Second Form
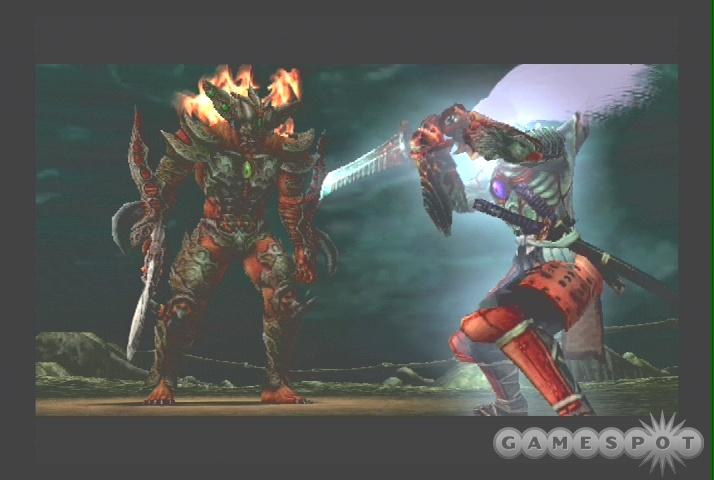
Beyond the frightening visage and all that, what really makes Nobunaga a threat in the early portions of the fight is the fact that he's invulnerable. The four small pods that he summons completely protect him from attack, but that shouldn't stop you from trying. First off, though, recognize the attack patterns of the pods: they'll alternate between shooting snowballs at you (easy to dodge with lateral movement) and frickin' laser beams (very tough to dodge, especially when they all fire in unison). You'll know when the orbs are about to fire; they'll spread out from Nobunaga into a line stretching across his body. When this occurs, back away from Nobu and get ready to run side-to-side. You will take damage during this segment of the fight, so you'd better hope that you retained enough restorative items to withstand the beating; you'll need even more later on, though, so save them as a last resort.
In addition to the attacks from the orbs, Nobunaga himself will slash at you with his sword when you get close to him, but you'll just have to suck it up, because attack you must. Although you can't hurt him, his orbs can be injured by your attacks; use your triangle key in-between the orb's offensive maneuvers to jump at Nobunaga. The orbs will move to intercept your attack, so hit the triangle key once more at point blank range to hit them again; you'll notice that they release multi-colored spheres when you connect. You'll need to absorb these spheres until they fill up your Onimusha meter. This isn't a one-to-one ratio, however; you'll need around fifteen spheres to fill up all of your sphere slots. When this occurs, you'll be able to destroy the orbs with your attacks, so get cracking.
Of course, one doesn't get to be the Genma King without a bit of planning for contingencies, so Nobunaga will immediately release another four orbs immediately succeeding the destruction of the first group. The same attack tactics apply; hit, absorb, hit, absorb, destroy. Again, try not to use too many restoratives. If things move too fast for you to handle, feel free to think of this as a practice run; you can always reload your game from the Protective Mirror and try again.
Third Form
Nobunaga doesn't change appearance after the second set of orbs get blasted, but he does whip out an entirely different set of attacks. The lightning and tornado attacks are fairly easy to dodge, but the fire attack does a good job of chasing you down. If possible, move laterally away from Nobunaga, then charge in towards him while the fire's on your tail; this will hopefully give it enough time to die out before it catches you. Hit Nobunaga with whatever attacks you can muster between his magical attacks, and he'll eventually drop his sword and start using his fists.
Fourth Form
In his final form, Nobunaga will attempt to pummel you with twin punches, fireball projectiles, and a charge attack. All of these attacks are incredibly deadly, but you can rest assured that this is the final part of this battle, so feel free to whip out all of those restorative items that you've been hoarding since the beginning of the game. There isn't much strategy involved here; you just have to avoid Nobunaga when he attacks, heal yourself before you die, and attempt to hit the Genma lord whenever possible. When you deal enough damage, Nobunaga will finally perish.
After the final cutscene and the credits, however, another cutscene will play, revealing what could be the setup for a future installment of Onimusha, should Capcom decide to make one. PS3 launch title, anyone?
Bonuses
Beating Onimusha 3 opens up new mini-games, difficulty modes, character costumes, and more. This section details each of these unlockables, and how to obtain them.
Ranking
After you complete Onimusha 3 on Normal mode and watch the credits, a ranking screen will appear. Your performance will be judged in five categories. These rankings are mostly just for fun, although obtaining a perfect "S" ranking will unlock a new costume for Michelle.

Each category can contribute as many as ten points or as few as one point to your overall grade for the game. The grades for each category are determined by adding together your performances as Samanosuke and Jacques; you don't need to worry if you felt that you were a bit "better" when you played as your favorite character.
Play Time
If you can complete the game in under six hours, you'll receive ten points towards your overall grade. Six points are earned for a total time between six and eight hours; every three-hour increment beyond the eighth hour will further reduce the number of points you earn, down to a minimum of one point for a play time of seventeen hours or above.
Souls
This tallies up the number of souls that you've collected during the game. Any total between 145,000 and 170,000 will net you six ranking points; 170,000 or more will get you the full ten points.
Defeated
You'll have the opportunity to kill a whole heck of a lot of Genma during Onimusha 3, as evidenced by this category. If you manage to kill between 2,000 and 2,300 Genma, you'll earn six points; if you can clear 2,300, you'll gain ten points. You can boost your score in this category by wading through the hordes of demons in the first area of Azuchi Castle.
Criticals
This is one of the most difficult areas in which to increase your score, if you're not particularly adept at getting critical hits. This tallies up Criticals, Chain Criticals, and Deflect Criticals. If you have a hard time pegging Criticals, try using Ako's Orange or Black vests to boost your score. You'll need 600 or more to get a full ten points, and even reaching 500 for six points will be a chore.
Dark Realm "Obtain Item" Points
This category rewards you for thoroughly exploring the various Dark Realm dimensions that are scattered throughout the game. There are six Dark Realms, each of which contains a powerful item; if you obtain all six of these items, you'll receive the full ten ranking points in this category. If you miss even a single item, you'll be knocked back to six ranking points.
The six items are Ako's Purple Vest, the Wind Seal, the Fire Seal, the Thunder Seal, the Ultimate Whip, and the Bishamon Sword. These last two are more important to your grade than are the other items; if you skip the final two Dark Realms at Hannoji Temple, and don't obtain either of the ultimate weapons, you'll be reduced all the way down to three ranking points in this category. It's best to get everything.
The Final Grade
Since you can obtain a maximum of ten points in each category, your maximum score is a 50. On Normal difficulty, obtaining a score of 41 to 50 will earn you a grade of "S," which unlocks Michelle's rather risqué hidden costume. (You'll have the pleasure of watching her fend off Genma dressed in nothing but a bath towel.) The easiest way to do this is to take your sweet time playing through the game; if you manage to obtain ten points in every category except for Play Time, then you'll have 40 points in the bag, meaning that you're a lock for 41 points, considering that Play Time cannot contribute less than a single point to your total.
Titles
In addition to your final grade, you can also obtain a few special titles on the final ranking screen. These are intended to reward you for accomplishing certain tasks within the game; obtaining all Tengu Chests will give you an "Explorer" tag, for example, while killing over 3,000 enemies will get you the "Offensive" reward. There are other titles available, as well, for tasks such as saving only once throughout the game, killing at least 40% of the enemies you encounter with critical hits, completing the game in under five hours, and taking no more than 5,000 points of damage throughout the game. As with the rankings, these are just for fun.
Extended Ending
The game does have a rather abrupt ending, but you can unlock a longer version of the final cinematic by finding all of Ako's vests during your playthrough. The toughest one to find is the black vest, which is obtained by beating the Critical Oni Training; if you can get this one, then you should be able to find all of the rest.
Extra Costumes
There are four unlockable costumes in Onimusha 3. After you unlock one of these costumes, it'll be available to you via the Special Features screen on the main menu.
Samanosuke
Sam has two extra costumes. His first costume, a western cowboy outfit, becomes available after you beat the game on Normal difficulty. The second, a panda suit, requires you to complete all of the Oni Training challenges in the game, then to finish the game and beat the Oni Training mini-game that's unlocked, about which more comes later on.
Jacques
As Sam gets a western-style outfit, Jacques' unlockable costume is in the style of a Japanese peasant. You can unlock it by completing the game a second time, on any difficulty, while Samanosuke wears his cowboy outfit.
Michelle
As mentioned, Michelle's secret outfit is unlocked by getting a rank of S over the course of the game.
Difficulty Levels
If you want to play through Onimusha 3 without all that messy "challenge" getting in the way, let your character die three times within a single level and choose to reload your last save point. This will unlock Easy mode. If, however, you wish to ramp up the difficulty, you can choose to play on Hard mode after you complete the game on the Normal setting. Hard mode also contains a couple of new Dark Realms for you to explore: Jacques finds an entrance to the Dark Realm immediately before the hole leading to the Oni Army Orb in Lake Biwa's mansion, while Samanosuke can find a gatekeeper on the Eiffel Tower, near the last elevator before the save point which immediately precedes the Ranmaru boss fight.
Beating the game on Hard unlocks the Critical gameplay mode, which, when activated before you start a new game, will cause most of your attacks to deal zero damage. The only way in which you'll be able to kill your enemies will be with Criticals or Deflect Criticals. Needless to say, this mode is an extremely challenging one, so you'll want to have the critical timing down for every enemy in the game before you attempt it.
After beating the game with Critical mode enabled, you'll have unlocked yet another difficulty level, entitled Devilish mode. If you can actually manage to beat the game on Devilish difficulty, you can count yourself among the elite Onimusha players. Now try combining Devilish difficulty with Critical mode for a real challenge....
Last, but not least, if you unlock and complete the Oni Training mini-game after beating the game, you'll unlock Ultimate mode, which is essentially a cheat code. Ultimate mode gives both Samanosuke and Jacques unlimited magic power for their weapons, automatically maxes out all of their equipment as they find it, lets them use the Bishamon Sword and Ultimate Weapon from the beginning of the game, and stocks their inventories full of restorative items. Someone, somewhere, will find a way to lose the game while playing Ultimate mode, but actually managing to die will probably take you longer than completing the game with all of the advantages that you gain in this mode.
Adventures of Heihachi
As the events in the game prove, Heihachi isn't such a bad fellow, and, in fact, he's willing to fight for the forces of good should the situation dictate. Although he seems to follow the orders of the Genma clan, he doesn't bear Samanosuke or Jacques any ill will, and in fact eventually fights alongside them.
The Adventures of Heihachi mini-game is unlocked after beating the main game on Normal difficulty, and gives a bit of clarity to an encounter that Jacques has with Heihachi in the Undersea Temple. It's a chance to play around with another character for a short while.
Heihachi's quest begins in the town of Sakai, shortly after Samanosuke and Jacques defeat him at the port. Since the town is still under siege by Genma, Heihachi is asked to help defend the townsfolk by traveling to the blacksmith shop to request that the smith repair the drawbridge that connects the dock to the town.
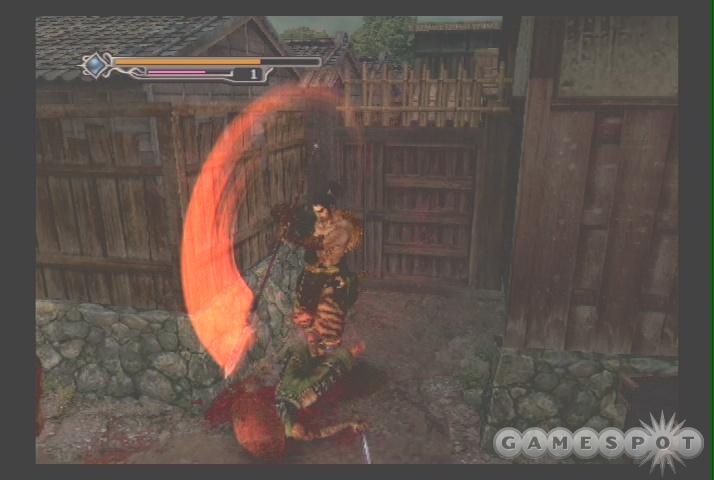
Heihachi's controls are identical to those of the other characters, although some of his attacks may differ. Work your way through the town until you reach the blacksmith, who'll give you a packet of Oni Dust. Read the Blacksmith Memo to learn that the dust must be ignited to activate a portal that leads to the "monster fortress." The fire burning in the nearby forge is obviously the next part of the puzzle, so use the Oni Dust while standing next to it to be transported to the Underground Fortress.
Inside the fortress, you'll need to travel from Guildenstern's laboratory all the way to the blue doorway, through the long, glassed-in corridor (don't bother fighting Gertrude; just ignore her attacks), and into the piston room. You'll be set upon here by Dark Spiders; kill off your attackers until one of them drops a Crimson Stone. This will automatically set you back on the path to Guildenstern's laboratory. Note that the timer at the top of the screen indicates how much time you have until the teleport back to Sakei fails; avoid killing anything in your path unless you have plenty of time left.
Ranmaru Mori awaits in the laboratory, but you can walk past him and into the beam of light without incident if you wish. If you do choose to fight, you'll be hard pressed to deal enough damage to kill him before time runs out, but the reward is usually a Secret Med.
After you've given the blacksmith the Crimson Stone, he'll ask you to retrieve a bucketful of water from the wharf. This is waaaay on the other side of Sakai, down the steps near the ramp that Jacques blasted off of on his motorcycle. In order for the water to be useful to the blacksmith, however, you need to get back to him with at least 90% of a full bucket. Since enemies will cause you to spill water when they hit you, you'll want to avoid as many enemies as you can until you reach the exterior of the blacksmith shop.
When you do reach the blacksmith's courtyard, though, you'll be faced with a whole slew of Bazu and Dorabazu, with a Zmoh and a Nurabis thrown in there for good measure. You'll want to lure as many enemies as you can into the small alcove near the doorway before striking them down, being careful not to receive any blows; after they stop spawning in, you can dart in to the Nurabis with your R1 + X spear stab and dash out before it can attack you. If you spill any water on your trip, turn around and head back to the wharf to get some more. Each successive trip back to the blacksmith shop becomes a bit easier; after the second spill, the Nurabis disappears, letting you make a beeline towards the door.
After you obtain the Gear from the blacksmith, run back to the drawbridge and place the gear into the mechanism near Samanosuke. This will trigger the appearance of two Dongachas; if at all possible, let Samanosuke deal with these beasts while you concentrate on the Swordsmen and Axemen in the area. When all of the enemies are destroyed, the Adventures of Heihachi mini-game comes to an end.
Oni Training Mini-Game
If you complete all of the Oni Training exercises that are available at the Protective Mirrors in the real game (itself quite a task), an Oni Training mini-game will become accessible in the Special Features menu. None of the included tasks are quite as challenging as the Critical training sessions in the real game, which is good, as you'll need to complete all eight training sessions to unlock Samanosuke's second hidden costume.
Running Attack
All that's required here is for you to use your character's running attack on an enemy, so run around until you've taken five steps, then run towards an enemy and press the square button. A soul will pop up when you connect.
Beginner: Archer
Intermediate: Dorabazu
Advanced: Dark Spider, Zabiet
Upward Attack
The Upward Attack mentioned in the name of this game is the slashing attack that can only be performed at close range. When standing next to an enemy, lock onto them with the R1 button, then hold up on your d-pad and press attack to instigate a vertical attack. This is the only attack that will release souls in this training session.
When attacking Bhaza, you'll need to use your arrows to wound them and bring them to the ground before you can pull off the slash.
Beginner: Axemen, Gilzorm
Intermediate: Bhaza
Advanced: Gajimaro, Babian
Oni Jump Attack
Jacques can perform a slashing attack when he faces an enemy as he comes down from a Firefly jump. In order to get souls here, you'll need to maneuver so that the Genma are on the opposite side of the Firefly, then jump across the ring; you should attack automatically.
Beginner: Gacha
Intermediate: Fobora, Dark Puppet
Advanced: Zmoh, Grizmoh
Finisher
Finishing moves are accomplished by knocking your enemy to the ground, standing over their bodies, and stabbing them with the square button. In most cases, this can be done by swinging away with normal attacks, then using a finishing move when your enemy is on the ground, but you may want to try your vertical slash or kicking moves to knock down your foes more easily.
Beginner: Gilzorm, Axeman
Intermediate: Zabiet, Dark Spider, Dorabazu
Advanced: Fugaku, Ouija
Kick-Wall Slam
You can kick your enemies by pressing the d-pad down, then hitting your attack button. The goal here is to perform this move close enough to the wall that your target is propelled into it. You may want to just let your enemies surround you as you guard near one of the walls, then kick them away until only one is left; get behind this foe and kick him into the wall repeatedly to get your souls.
Beginner: Swordsman
Intermediate: Gilzorm, Axemen
Advanced: Zabiet, Dark Spider
Final Charged Attack
You'll need to press and hold the R1 button until the Chigo is at maximum charge before you can actually obtain souls from your enemies. This doesn't sound complicated, but the enemies will become quicker and more powerful as you proceed, so be prepared for a bit of frustration, especially on the Advanced tier.
Beginner: Gilzorm, Axeman
Intermediate: Gacha
Advanced: Zabiet, Dark Spider
Oni Bind Slam
Jacques can damage enemies by Binding their friends and then smashing the Genma into each other with his lasso-whip. For this training session, you'll only receive souls if you manage to lasso a Genma, then hit one of its compatriots with it as you fling it through the air. Try to group your enemies together, then use the forward throw technique to knock them all over at once.
Beginner: Dorabazu
Intermediate: Fugaku, Axemen
Advanced: Dongacha, Gajimaro, Babian
Shoot Back
If you can master the principals of a Deflect Critical, then you should be able to pass this final test. Many enemies in the game use projectile attacks, but only a few of those attacks can be deflected back at the Genma from which they originated. In this session, you'll need to keep your guard down until the instant before a projectile is about to strike you, then bring it up, which should deflect the ball of energy back to your opponent. You'll take a lot of damage before you get the timing down.
Beginner: Nerofobora
Intermediate: Dark Puppet
Advanced: Ranmaru Mori
Genma Puzzle Space
If you manage to solve all of the puzzleboxes in the game, you'll unlock another mini-game which lets you test your puzzle-solving skill against puzzles based on the locked chest from each Onimusha game. The Onimusha 3 puzzles should be familiar to you by now, but the rules for the other two kinds of games are not given. To bypass the locks for the Onimusha 1 chests, you need to rotate the sets of numbers so that the top row reads 1-2-3-4, while the bottom row reads 5-6-7-8. For the Onimusha 2 chests, you need to slide the tiles so that the center of the pattern contains the circular design.
None of these types of puzzleboxes is particularly easy; even the Onimusha 3 boxes have been ramped up in difficulty when compared to the boxes that you encounter in the main game. You don't obtain any items or any more unlockables for completing the Genma Puzzle Space; it's just for fun, and Ako will rank you on your performance at the end, based on how many times you failed to successfully complete a box. (If you use the O button to cancel out of a puzzle, it doesn't count as a failure.)
Oni Target Practice
The Oni Target Practice mini-game becomes available as a reward for a successful play-through of the game. This arcade shooting game is fairly simple, in theory; using Sam or Jacques, you'll need to destroy Genma containers as they flit by in front of your character. Sam uses his bow and arrow to shoot the containers, whereas Jacques uses his pistol. Each character has identical controls, but moves and shoots a bit differently; try them both out to figure out which character you prefer using. Each container will drop a number of souls; collect these souls with your Oni Gauntlet. Completing this mini-game with either character will unlock Ultimate Mode in the main game.
Container Types
There are a few different types of Genma containers that appear in the Oni Target Practice game.
Green: You'll see more green containers than you will any other sort. These typically move more slowly than the other containers, but only possess one soul apiece. You should attempt to hit as many of these as possible to keep your combo going.
Blue: Blue containers generally move faster than the green ones do, but contain more souls.
Red: These containers, in addition to containing souls, explode when hit, allowing you to get chain bonuses.
Purple: Purple eggs transform you into the Onimusha when destroyed. The Onimusha state doesn't last very long, but while it's active, you have unlimited ammo, and missed shots don't reduce your combo counter to zero. Fire away!
Steel: These containers are the toughest of the bunch, and require two shots to open, but contain the highest number of souls. If possible, try to use the red containers to destroy the steel containers when one is convenient; you'll save ammo this way.
Chains and Combos
Attaining a high score isn't a matter of just shooting away at whatever comes along, however. In order to proceed deep into the game (there are eight rounds total), you'll need to absorb ever-higher numbers of souls, and to accomplish that, you'll have to learn how to make combo, and how to chain container explosions together.
Comboing is simple to explain, but difficult to do well. Your combo meter goes up each time you manage to successfully hit a target with a projectile; if you miss, even once, your combo goes down to zero. When your combo meter changes color, you'll gain more souls from each container.
You can chain your attacks by destroying multiple containers with each shot. This is accomplished either via simply hitting two or more containers as they pass in front of each other, or by triggering a red container's explosion when it's near multiple other containers. Chains will increase the number of souls that each container involved in the chain drops.
Scores
In a fashion similar to the end-of-game summary, your skill at Target Practice is judged after every round. Obtaining the minimum amount of souls necessary to complete a round will get you a C ranking, and will net you 30 more rounds of ammunition. By exceeding the minimum requirements, you can obtain a B, A, or S ranking, each of which grants you ten extra ammunition than the previous rank; an S rank, for instance, will get you 60 extra ammo. Ammo carries over from round to round, and isn't restored automatically, save for the bonuses you get from your ranking; if you run out of ammo, your game is essentially over. If you don't manage to get the minimum amount of souls required to beat a round, you lose, obviously enough.
As mentioned, there are eight rounds total, consisting of four relatively easy rounds which initiate you into the game, and four more difficult rounds. The fifth round is generally considered to be the most difficult, due to the speed with which the containers move, so you'll probably have to play through the first four rounds many times before you finally memorize the movement patterns of the fifth round's containers; said memorization will greatly improve your chances of victory.
As a note, the souls released by containers will disappear if you don't collect them quickly enough. If you consistently find yourself missing out on souls due to the frenetic pace of the game, you may want to try taping a small object to your O key to force it to stay depressed during the game; this should automatically revert you to soul-sucking mode when you're not performing any other actions. You don't gain soul bonuses for getting lots of souls at the same time, so absorb souls at every opportunity.
Got a news tip or want to contact us directly? Email news@gamespot.com
Join the conversation