Need for Speed Underground Walkthrough
Our guide will help you live your life a quarter-mile at a time, with tips on all 112 races, general driving strategies, a full list of cars and mods, and cheats.
Design by Collin Oguro
Introduction
Need for Speed: Underground breaks from the super-car tradition of its predecessors and takes a more down-to-earth tack with its cars. You won't find any Porsches or Lamborghinis in this game. Instead, you'll take ordinary, entry-level to midrange vehicles and customize their look and performance with off-the-shelf modifications, making your ride truly yours. You'll take your baby Underground, racing in the dark of night against others who also treat their vehicles as members of the family.
To help you along the way, we've prepared this guide. In it, you'll find hints and tips relevant to racing in general, quick tips and information on each of the game's 112 Underground mode challenges, notes on each of the game's base and unlockable vehicles, upgrades, and tracks, and of course cheats for those of you who prefer to eschew the unlocking route and just go at the game as you please. Also included are lists of what is unlocked when in the appendix.
Enjoy the guide, and we hope we can help you shave that extra second off your time!
Table of Contents
Underground ModeChallenge Tips
Race 3-8
Race 9-14
Race 15-23
Race 24-32
Race 33-42
Race 43-52
Race 53-62
Race 63-72
Race 73-82
Race 83-92
Race 93-102
Race 103-112
Upgrades
Tracks
Inner City and Stadium
National Rail and Market Street
Terminal and Port Royal
Liberty Garden, Broadway, Lockup, and Bedard Bridge
1st Ave Truck Stop, 7th & Sparling, 9th & Frey, and Spillway
14th & Vine, Highway 1, Main Street, Commercial
Drift Tracks 1-8
Unlockables
Underground Mode
Racing games don't require a walk-through in the traditional sense, but this incarnation of Need for Speed presents the player with a veritable campaign in its Underground mode, requiring a huge number of choices to be made. To aid you in your quest to rise up the city rankings, we've primed this walk-through of sorts. In it, we'll detail the goal and composition of each of the 112 Underground challenges, give tips on how best to leave your opponents in the dust, and let you know what you'll receive upon completion of each stage.
Before we begin, we'd like to point out that if at any time you find yourself having difficulty with a particular challenge, you can remove upgrades from your car (say a speed/acceleration upgrade that is causing you to have trouble handling the course without crashing). This will downgrade your opponents as well, and will not cost you any money (you can re-upgrade after the race with no penalty). Between this fact and the ability to modify the game's difficulty level with each challenge, you should have no trouble advancing through the campaign with the help of this walk-through.
There are five kinds of challenges in Need For Speed: Underground.
Circuit
This is your standard multi-lap race. The first one to pass the finish line a set number of times wins!
Sprint
Sprint races are shorter versions of Circuit races. Instead of heading around a track multiple times, a Sprint race will see you traveling from one point of a course to another, generally across a section of the track that's somewhat longer than a single lap from any contemporaneous Circuit races. Since the computer won't have much of a chance to utilize their catch-up skills (if that option is enabled), you should take advantage of the middle section of the race to try and knock them into obstacles or rub them up against the track barriers.
Tip: If you spin out or otherwise lose control of your vehicle, your first task will obviously be to get your car headed in the right direction. If you're in the lead, however, you should also try to keep an eye on your opponents; if you can manage to swerve into their path, you'll be able to transfer some momentum from their vehicle to yours, giving you a bit of a boost as you begin your acceleration curve. This works best if you've already pointed yourself in the right direction, but even if you're still heading backwards, misery does love company, so try to make them wreck as well.
Knockout
In a Knockout race, there's no prize for second place, simply because there is no second place. While there are multiple cars on the track at the starting line, the car in last place will be eliminated from the race after each lap. Thus the name. Other than this little caveat, Knockout races play similarly to Circuit challenges.
Tip: Wall-grinding can be your friend. If you're alongside a car and can push them into the wall, you'll take a very moderate speed loss in comparison to them, so long as you ensure that you don't hit the wall yourself.
Drift
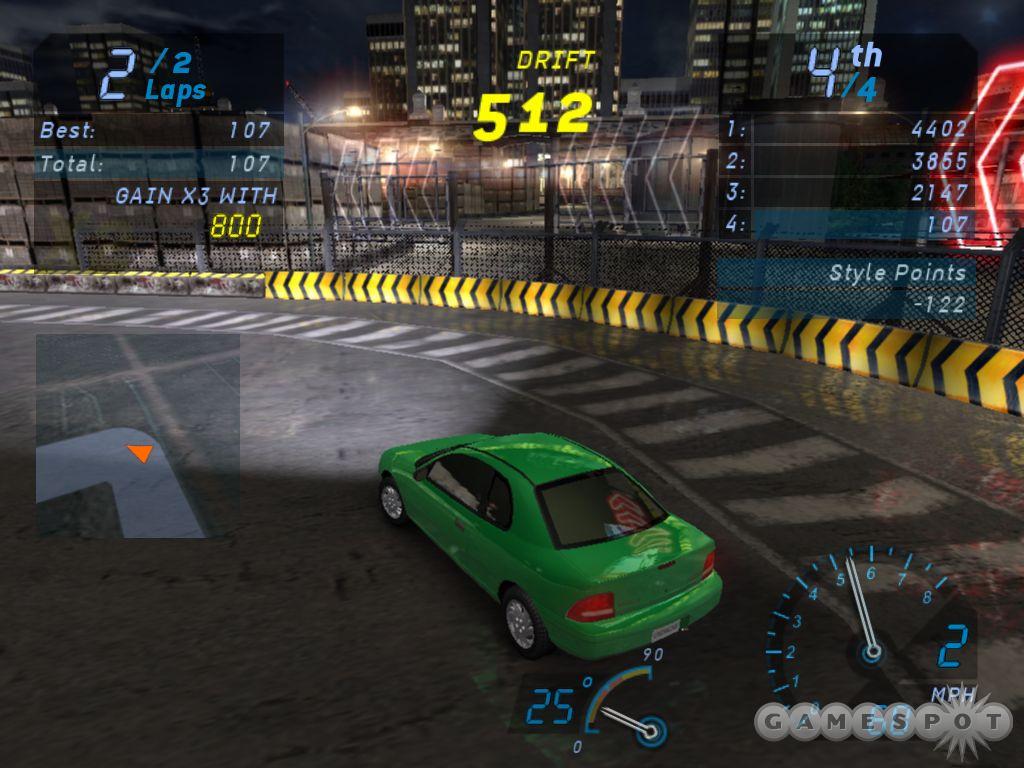
Drifts are the most non-conventional of any of Need For Speed: Underground's challenges. For one thing, there aren't any other cars on the track; for another, your lap times don't matter one whit. Instead, you'll be required to rack up points by Powersliding your way around a small course that's been specially slicked-up just to reduce traction. Drifts are frustrating before you learn the ground rules, but when you figure out what to do, they're a welcome respite from the breakneck speeds of the other types of challenges.
Powerslides are generally a bad thing in Need for Speed: Underground, since they often indicate that you've lost control of your vehicle due to taking a turn too fast or hitting a patch of dirt. In Drift mode, however, your main goal is to hit Powerslides, preferably in as flashy a manner as possible. As your loading screen will occasionally remind you, the two keys to scoring high in Drift challenges are speed and the angle of your slide. Achieving one of these keys is easy; combining them both without ramming into walls is quite difficult.
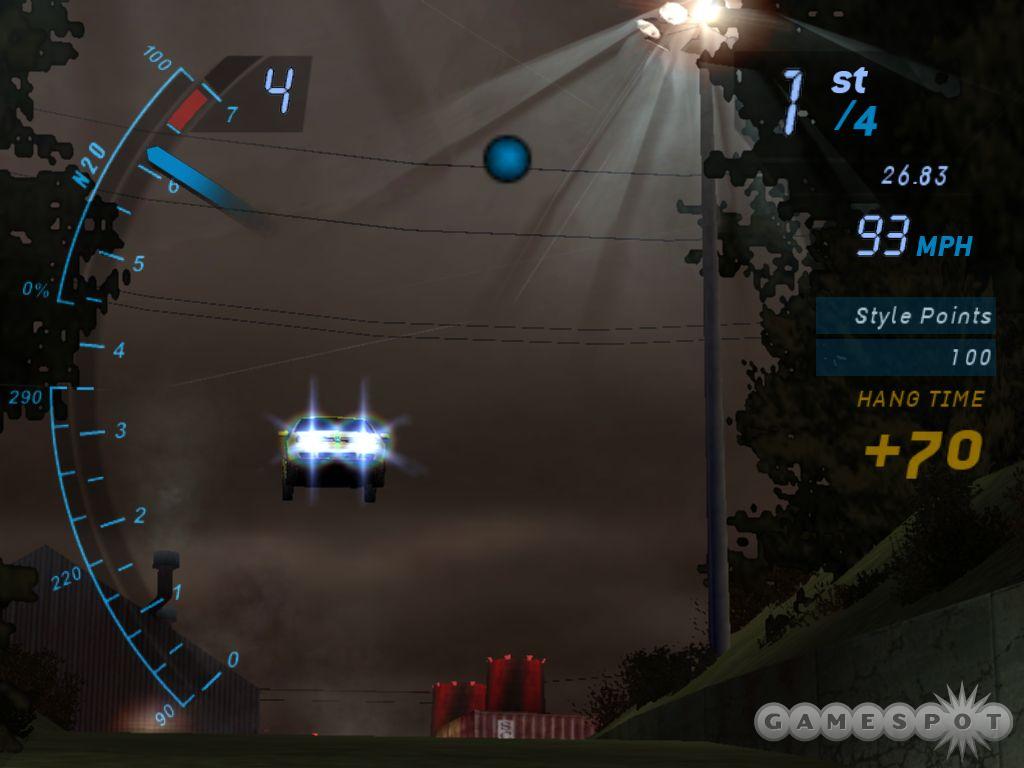
Points
First, though, a note on scoring. You should keep in mind that the point totals for Drift challenges are distinct from Style Points (although you will rack up huge Style Point bonuses when you master Drifting). Your score increases as you maintain a Powerslide, and will keep counting up until you either stop moving or stop Powersliding. Of course, a single Powerslide will be maintainable for only a finite period of time, due to the interference of the walls. Thus, you'll need to chain your drifts together to achieve truly outrageous point totals (details below!). If you do hit a wall while sliding, all the points that you've racked up during that Powerslide will be lost.
To make things more interesting, there's a Bonus Zone that rings the racecourse; it's the area with parallel lines that goes all the way around the track. If you get two or more wheels into this zone while Powersliding, you'll get bonus points. Your slides inside of this zone will see their points multiplied by the number on the left side of your screen, which itself is increased as you score more points. So, higher points lead to a larger multiplier, which in turn leads to more points, and so on. Of course, the multiplier is set back to its default setting if you hit a wall. You must also be above a set speed limit for the multiplier to kick in, so keep your car moving.
Technique
Now that you know a little about scoring, it's time to take your car out to the track and rack up monster points. The most critical aspect of getting big scores is to perform slides at a high speed; you can control slides better if you're puttering around at 20 mph, but your slide scores will increase very slowly, and you won't get the benefit of the score multiplier. So go fast, and prosper. (Note that the very first Drift track you encounter isn't very conducive to getting high speeds, so don't worry if you can't apply this right away; the later Drift tracks are a bit more open.)
Second, you'll need to coax your car into traveling almost perpendicular from the plane of the front end to get more points during a slide. In other words, if you're sliding for monster points, your car should wind up traveling almost sideways, especially in turns. While the slick roads will help you out here, you'll still want to get things going by hitting your emergency brake, then giving your wheel a tap into the corner you're going through. This will let your car's rear end fishtail out, resulting in more points than a slide with a less drastic angle. Of course, your car will be harder to control, and if you hold an extreme-angle slide for too long, you'll usually find yourself ramming into a wall.
Walls are the end point for any slide, actually, unless you learn how to get your car out of slides as well as you can get it into them. The trick is to not hold down the throttle, but rather to feather it or, if you're on a console controller, rapidly tap it, while moving your wheel back and forth to prevent your car from either going into a wall or ending the slide. This is easier to do than to describe in words; a little practice will be required before you can do this consistently. Don't be discouraged by wall impacts; Drift races are short and restarted easily enough if you fall behind the leaders.
Of course, for truly monstrous point totals, you'll need to chain your drifts together. In a perfect situation, such as a wide straightaway, you can begin a Powerslide off to one side of your car, then shift it to the other side to extend the length of your slide, and repeat the process to score one massive trick total. This requires a bit of touch, of course; you'll need to feel when your car is reaching the point of no return in a Powerslide, beyond which you can't prevent it from hitting a wall. Before it reaches the breaking point, you'll need to let go of the gas completely, jerk your wheel in the opposite direction, then re-apply the gas. When done properly, your car should reverse its course and start Powersliding in the opposite direction, thus giving you an uninterrupted influx of points. If you spend too much time readjusting, however, and wind up traveling forward for more than a second or so, the chain will be broken.
Beyond the basic mechanics, though, it's critical that you hit your Bonus Zones if you wish to win an event. The middle of the track is obviously the safest area to slide in, since the risk of hitting a wall is relatively low, but you'll rake in the points in the Bonus Zones.
Strategies
Since your Style Points aren't tied to your progress in Underground mode, and you can rack up massive amounts of Style Points in Drift competitions, you can unlock most of the vinyls in the game by running around Drift tracks in Quick Race mode. If you use a car with a Reputation multiplier of three or higher, you can easily get over 50,000 style points per Drift event; try setting the lap number to 10 to get even more Style Points in a single challenge.
Keep in mind that there are significant differences in the way that rear-wheel drive and front-wheel drive cars perform; FWD cars are going to be more difficult to put into Powerslides and will thus be a bit harder to get high scores with. Since trading in cars is essentially free, you may want to trade in an FWD car for a RWD vehicle, like the Miata, before heading off to the Drift tracks. All of your upgrades will carry over to the new car, and you'll find that the rebate and costs of trading from your normal car to the RWD car and back balance out, thus eliminating any kind of penalty to your bank.
There's no cheating allowed! If you attempt to turn your car around, you'll be automatically reset facing forward, and if you attempt to reverse your car to try a section again, you won't accumulate any points until you reach a part of the track that you haven't yet hit on that lap.
Tip: Although unequipping performance parts is a tactic that works best in the racing portions of Need For Speed: Underground, it can also help you with Drifting, especially towards the end of Undergound mode. A car that's fully tricked out with level 3 parts will be a monster on the Drag track, but the extra acceleration and top speed will only help you ram into walls quicker during Drifts. If you find yourself having a hard time controlling your car, try taking everything down to level 2. You should find it easier to avoid wall contact and switch your drifts from side to side.
Drag
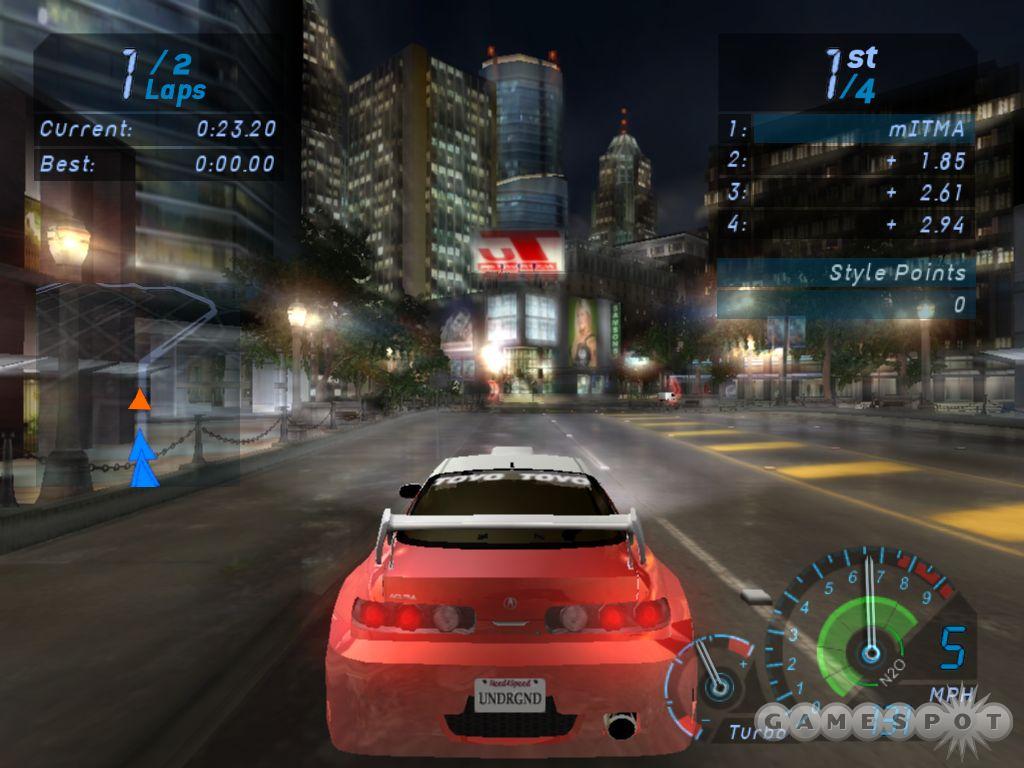
If you're looking for quick cash, you can't do any better than a Drag race. These take place on a long, straight stretch of road, where you'll have to scorch off the starting line and beat the other three cars to the finish.
Your car controls much differently in a Drag race than it will in a regular challenge. For one thing, you won't be able to use an automatic transmission; manuals are mandatory. Second, steering is automatic, except for lane changes, which are done automatically when you move to the left or right. This may sound like it would result in a difficult race, but in fact, Drag challenges are among the most fun races in Need For Speed: Underground.
The Basics
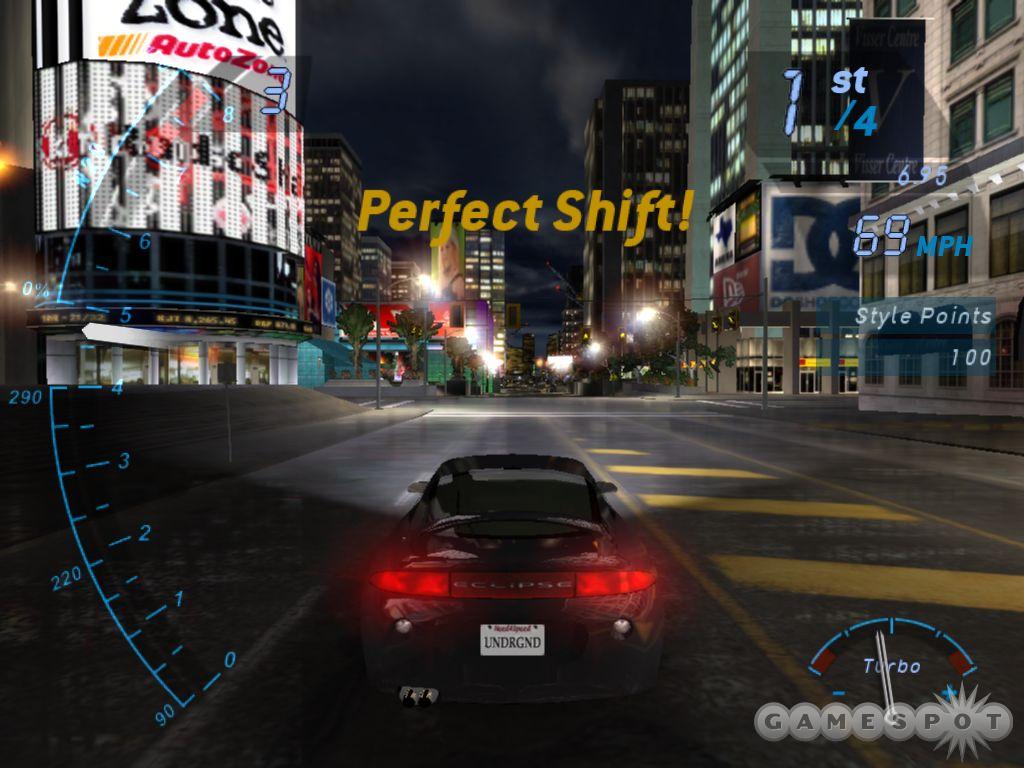
Although the first car across the finish line is the victor, Drag races are really won at the starting line. Before you take off, you'll notice a tachometer along the left side of your screen; the needle here changes from blue, to green, to red, corresponding to the comparative readiness of your engine to upshift. While you're waiting for the race to start, you'll want to attempt to lightly press on your accelerator so that the needle stays green; this will give you a Perfect Shift to start the race and should let you jump out ahead of your competitors. It's difficult to maintain a green needle, though, especially on the Gamecube or PS2 controllers; if you're having a tough time with it, keep in mind that it's far better to shift early than late.
The same holds true after you begin the race. Immediately after a race begins, your car will be ready to shift into second gear, so watch the needle as it falls and rises, and try to time your button press along with the green needle. To aid your shifting, a blue dot will appear in the top-center of your screen to warn you when the perfect shifting opportunity is approaching; it will turn green during your window of opportunity. Shifting in the blue can either result in an Early Shift, which is bad, or a Good Shift, which is, well, good. Shifting in the red, however, will result in an Over Rev, which will take a bit longer to recover from than an under-shift. It's incredibly difficult to overtake a car after they pull away from you; if they're a few car lengths ahead, you can attempt to draft them, then pass, but if they're beyond drafting range, you usually will be forced to restart the race.
Early Drag races are simple affairs, but as you progress through the game, you can expect to see a few complications arise here and there, such as lanes suddenly ending, oncoming traffic, cars that pass across the track at intersections, ramps, and so forth; you'll need to stay on your toes if you don't want to total your car. (Although it must be said that the slow-motion replays of spectacular crashes more than make up for having to restart the race.) In addition to the normal style bonus for winning the race, you'll also be able to rack up points for near-misses, hang time, head starts, and drafting. Drafting becomes especially important as you begin to race against better cars; if someone gets a jump on you, shift over behind them and attempt to get a speed boost. Then pay them back by coming alongside them and ramming them into an oncoming car.
Upgrades
Unlocking the turbo and nitrous upgrades for your car will also increase the difficulty of Drags, or, at least, increase the amount of technical skill required to get a good jump off of the starting line and obtain Perfect Shifts. You'll notice that the red zone on your tachometer will shrink after installing a turbo kit; this will reduce the Perfect Shift zone required to get a good jump, so watch the needle carefully before you zoom off. Turbo kits also make it nearly impossible to get a Perfect Shift into second gear, due to the way the needle jumps after shifting into first, but a Good Shift shouldn't hurt you overmuch.
Nitrous systems can also make your life more difficult. Keep in mind that after you install a part onto your car, all of the other cars that you're racing against will be equipped with the same thing, and they'll generally be more proficient in their use of nitrous than you will be. You'll likely not want to hit your NOS before you reach third gear; doing so before that shift will usually force your needle into the red, and lock you into an Over Rev shift into fourth. You can use nitrous in bursts between your early gears, to get into position for a Perfect Shift, but again, this puts you at risk of an Over Rev if you don't time your burst properly. Of course, after you hit fourth or fifth gear, you'll be able to drain your NOS for a huge speed gain; this can help you catch up to a car that's pulled away, or just extend your lead a bit. Most of the computer racers will drain their nitrous early, so don't panic too much if they jump out ahead; just get behind them, hit your own nitrous, and blast past them after drafting. Just make sure not to push your engine too far with nitrous; blowing an engine is as bad as totaling.
Strategies
If you're having a hard time getting a jump off the line, try going into your garage and reverting back to a stock turbo kit. Doing so will force your competitors to remove their turbo kits, as well, but will also make it much, much easier to hit early Perfect Shifts. Revving up before a race will still be difficult, but losing the turbocharger will eliminate your tachometer's proclivity to jump before shifting to second gear, and will give you a much bigger window in which to get Good Shifts and Perfect Shifts. If your competitors keep bursting out in front of you, you can attempt to take off your nitrous system as well. Some challenges, however, will detect your car's capabilities and force you to install these parts if you've taken them off.
Although blocking is important in races, it's especially vital in drag challenges, where you can push your opponents into obstacles or cars, or simply prevent them from passing you until you hit the finish line. Use your rear-view mirror to check on any cars that are drafting you, and try to get out of their way so that they can't gain a speed boost; if they try to race by, jam over into their lane. If you actually hit an opposing racer while changing lanes, you'll either be repelled back into your lane, or they'll be forced over; your chances of getting a good result depend on the position of your cars. If you're slightly ahead of their front end, you'll likely win; if you're hitting their rear, you won't accomplish anything useful.
Time Trial
In Underground mode, you'll occasionally come across Time Trial challenges, which are effectively solo Sprints. Instead of racing against other cars, you'll need to make your way from the starting line to the finish line before the pre-set time limit is reached; the prize for these kind of races is usually a unique upgrade to your car that cannot be bought in the garage.
Challenge Tips
In this section, you'll find the vitals on each challenge in the Underground mode, as well as tips to help you emerge victorious from each. For more specific strategies for each course, see the Tracks chapter of this guide.
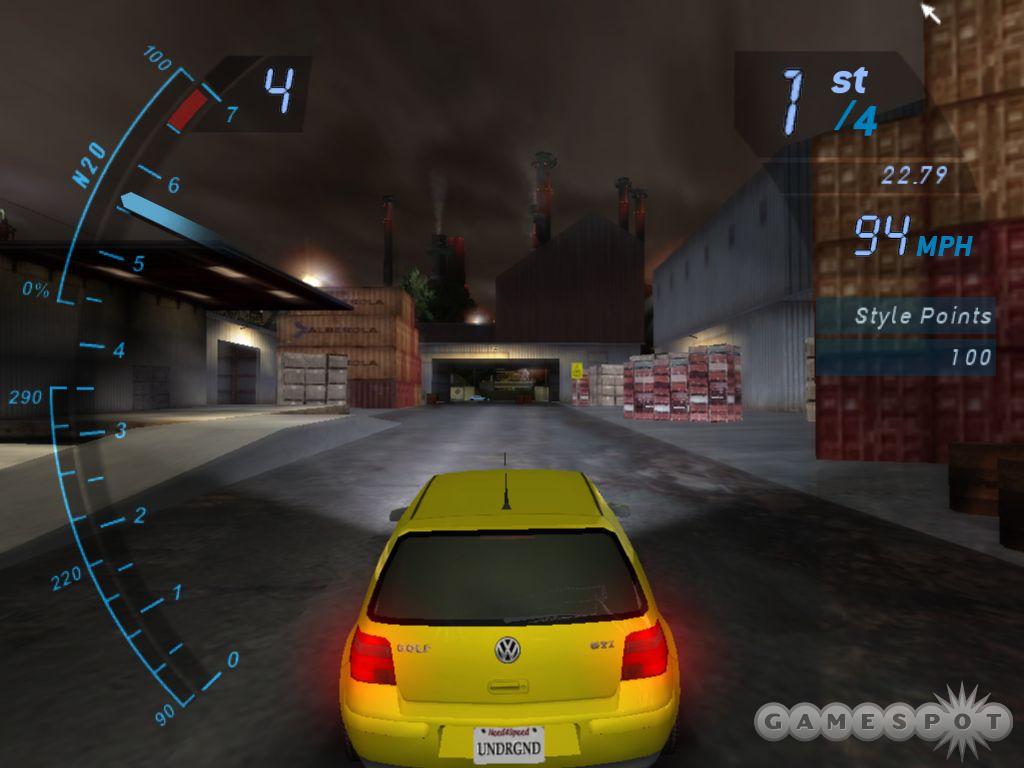
Prologue: Dream Streets
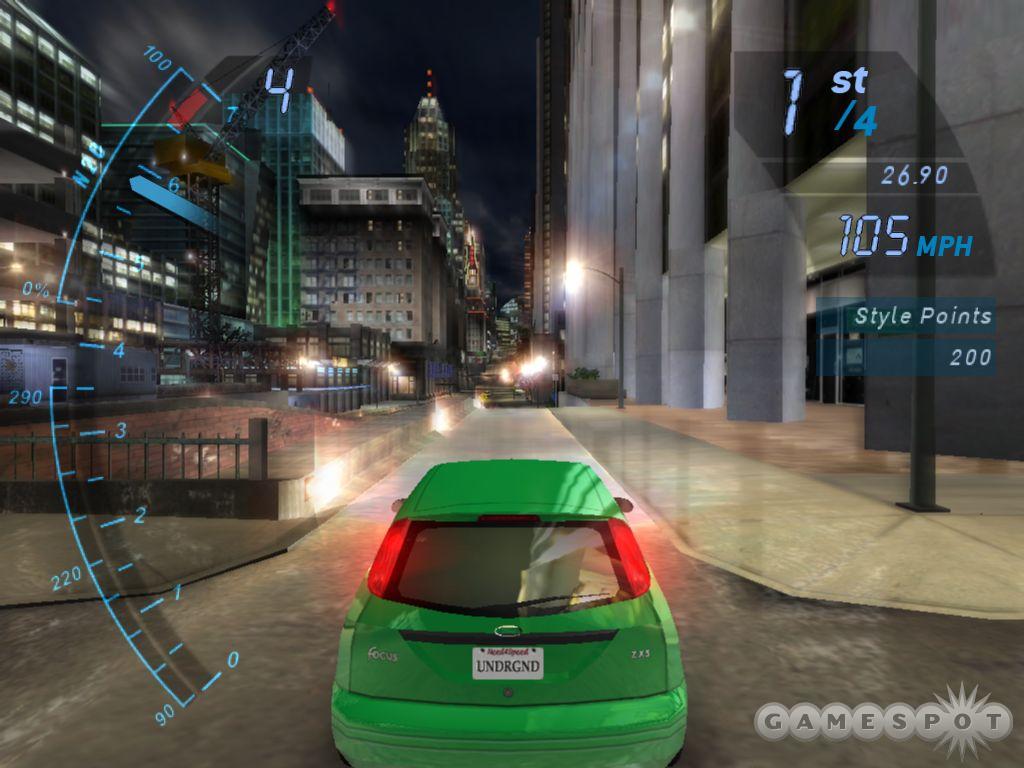
You begin the game with a little teaser sequence. You're going to get a nice, souped-up hotrod to take through around Olympic Square. Get used to this racecourse; you're going to be seeing parts of it for a long, long time.
The course itself is a relatively smooth ride with two shortcuts. The first arrives after you take the long left turn; keep to the left and cut across the brick sidewalk to eliminate a turn from your course. The second comes near the end, after the track makes a little half-figure eight; hang a left and take the leftmost road when it splits again. You'll be able to clearly see this shortcut on your map, but it can be difficult to make the first time you come around the preceding corner. Downshift when coming out of the split-track area to make the turn easier.
Tip: Downshifting is an easy way to lower your speed, allowing you more maneuverability, without applying the brakes. Downshift whenever you see a turn coming that you're unsure of your ability to make.
The only goal here is to win; none of the Style Points that you're racking up here will hold over to your racing career. Why? Because "it was all a dream," as they say at the end of bad short stories. You don't get to keep your little supercar after the race is over; you're forced to head off to the rather shady car salesman who lives under a bridge and pick up a stock model. Luckily, the new cars you get to choose from are available at a substantial discount from their retail price. Just don't get pulled over by the cops, if you know what we mean.
At the car lot after the race, you'll be able to choose from the Volkswagen Golf GTI, the Honda Civic, the Peugeot 206, the Mazda Miata MX-5 (sadly available only with a hardtop), and the Dodge Neon. Take a look at their stats and performance levels before choosing one. If you consider yourself a talented racer, you can probably make do with a cheaper, less-powerful car, and convert your savings into visual mods to get your Reputation up; other players will want to spend more for the Miata or the Civic and get ready to burn rubber. Keep in mind that the game reveals only basic stats on the cars; it won't tell you what kind of drive they have, which is, oh, mildly important to know. The Miata is a rear-wheel drive, for instance, while the rest of the cars are front-wheel drives. When you start trading in vehicles later on, be sure to check our Car section for the skinny.
Race 1: Jose's Got Your Back
Circuit Race: 2 Laps
Location: Olympic Square
Approx. Distance: 4.2 miles
Reward: Easy 375, Medium 500, Hard 625
Unlocks: Nothing
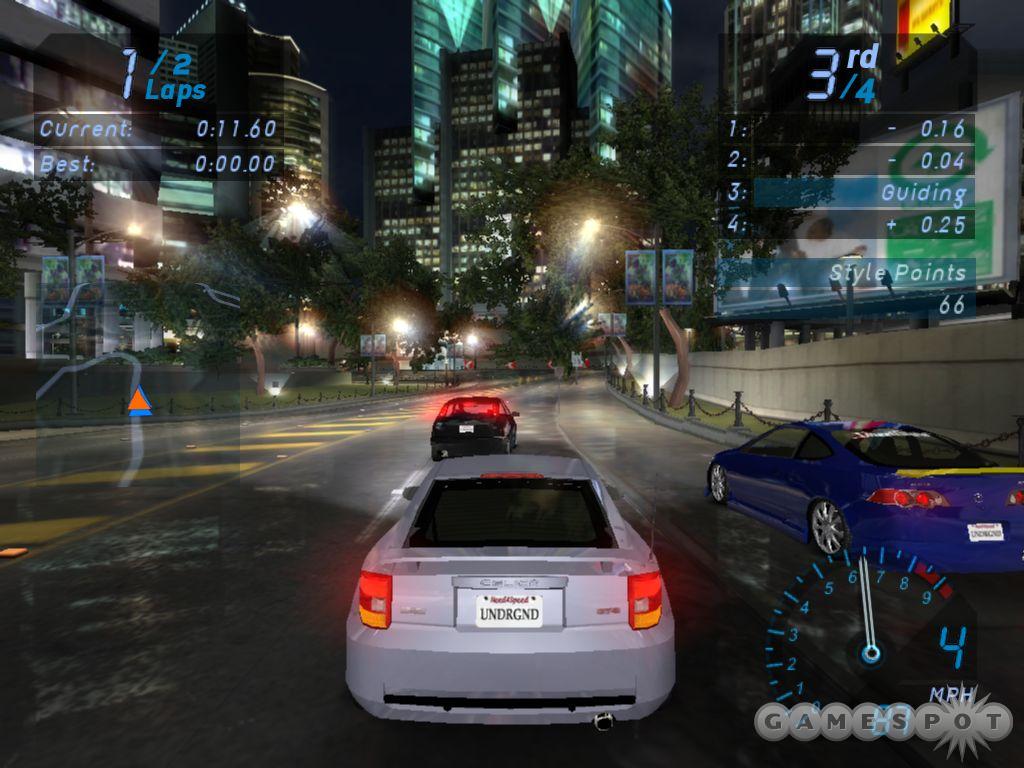
Your goal here should be to run a clean race, to hit the two shortcuts cleanly, and, of course, to win.
Since there won't be any oncoming traffic, you'll have free rein on the roads; use it to pick a decent line and to stay away from the race walls. You won't have a lot of opportunity to rack up Style Points due to near misses or from drafting (due to the fact that you should be in the lead the entire race), but you can get monster points for running a clean race. If you can run the race from beginning to end without hitting a wall, you'll get 750 points for the clean sections, 600 points from the two clean laps, and a 500-point bonus for the clean race, on top of the 500-point victory bonus and any shortcut, drafting, or drifting bonuses you get.
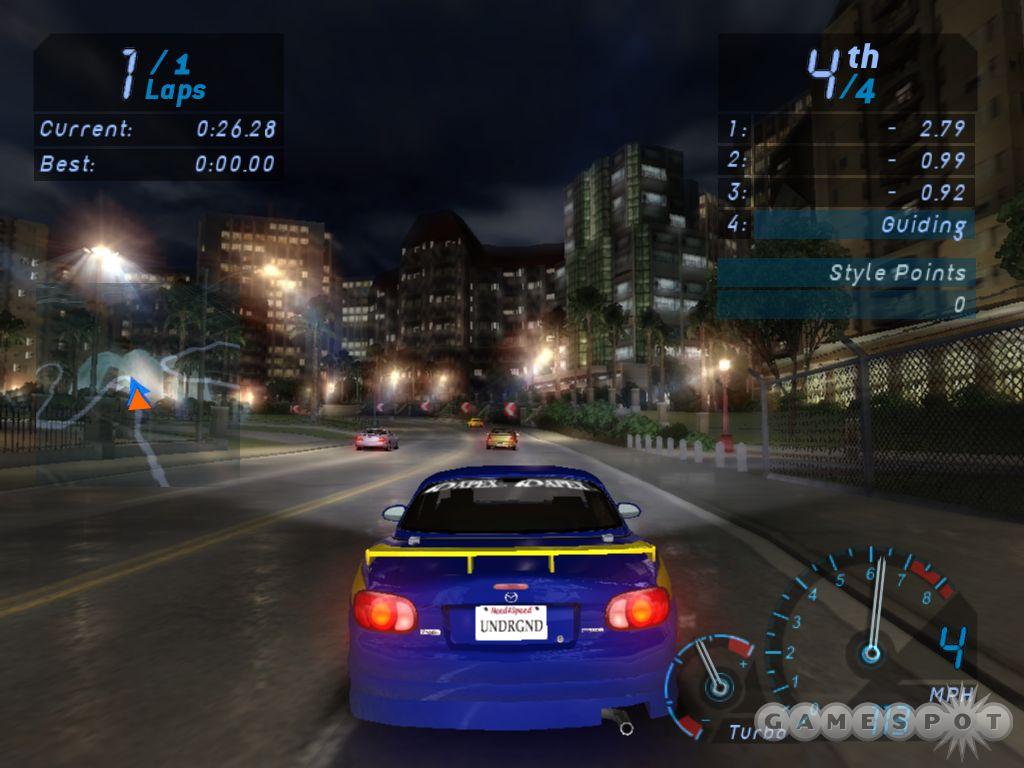
Race 2: Last One There Is A Rotten Egg
Sprint Race
Location: Liberty Gardens
Approx. Distance: 2.7 miles
Reward: Easy 375, Medium 500, Hard 625
Unlocks: Nothing
The bulk of this course should be familiar; it's similar to the course that you traversed in your dream sequence, save in reverse. The first shortcut is easy to hit, while the second requires some decent perception. The first comes right after the initial main turn (with the flashing red arrows telling you where to go). After this turn, veer off the main road to the right, for a nice narrow straightaway. In addition to the normal shortcut benefit of traveling less distance than your competitors, you'll also have a chance to gain speed.
The second shortcut comes shortly after the two small bumps that you'll use to try to gain hang time. You'll come toward a tree, and the main road runs around to the left; nudge yourself around the right side for a straighter path onward, and a shortcut bonus.
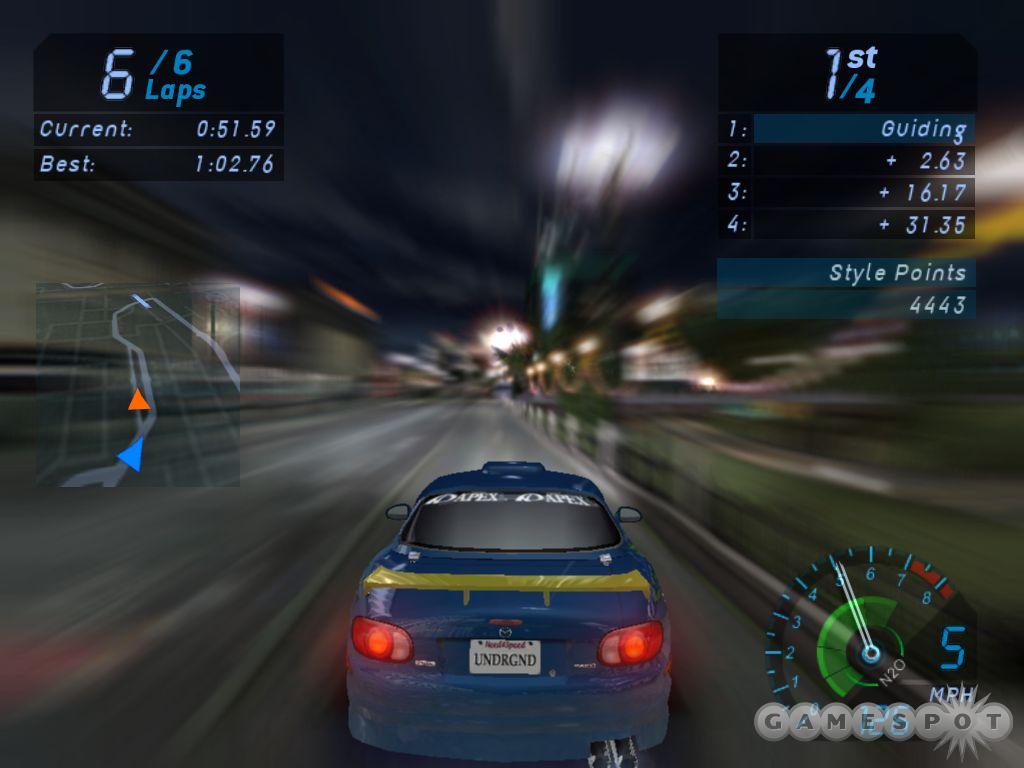
Race 3: It's All About Style And Finesse
Drift Race
Location: Drift Track 1
Approx Distance: n/a
Reward: Easy 375, Medium 500, Hard 625
Unlocks: Nothing
You can rack up some insane Style Points in your first Drift race. Drifting is easily the most difficult kind of racing to get started in, but it shouldn't be difficult to pull out a victory once you know what you're doing. (See our Race Types section for Drift-specific information.) The important thing to consider is that the point total required to get first place almost doubles between Normal and Hard mode, so don't kill yourself trying to get that extra 125 dollars; it'll be chump change in the long run.
Race 4: The Perfect Shift
Drag Race
Location: 14th & Vine Drag Track - Reverse
Approx Distance: n/a
Reward: Easy 375, Medium 500, Hard 625
Unlocks: 14th & Vine Drag Track - Reverse
At this stage of the game, a Drag Race will be an easy win for you, since the computer opponents, even on Hard mode, won't hit many of their Perfect Shifts and will thus fall behind. Make sure you get the head start bonus by keeping your tachometer near the green zone before the start. The first shift will be the only difficult one, but even if you miss it, you should be able to hit the rest of them perfectly. Take home the gold for an easy 625 dollars. There is no non-race traffic on this challenge.
Race 5: Last Place Is A Bad Place To Be
Knockout Race
Location: Olympic Square - Reverse
Approx Distance: 6.25 miles
Reward: Easy 375, Medium 500, Hard 625
This race is a repeat of ‘Jose's Got Your Back,' only in reverse and with an extra lap. There is oncoming traffic now, so take advantage of this fact and rack up some easy Style Points through near misses. Hit the shortcuts, avoid the walls, and you should have no trouble making it through this challenge quickly.
Race 6: Rookie Tournament
Circuit Race Tournament: 3 laps
Reward: Easy 3750, Medium 5000, Hard 6250
Location: Various
Approx Distance: Various
Tournaments are a string of races, with point totals based on where you finish.
1st: 8
2nd: 6
3rd: 4
4th: 2
This first tournament was called by a bunch of ‘cocky newbies' who think they're all that. Time to show them otherwise. It consists of three two-lap races down at old Olympic Square. For the first time thus far, you do not need to come in first in order to win. The first race, as we would expect, is the easiest of the three, however, and as such, you should win it before moving on.
Given the scoring scheme for the tournament, winning two of the three races guarantees you the tournament win so long as you come in second on the third race. Win the first, and you're in good shape for the rest of the tournament.
The 2nd race is the same course, but backwards. If you didn't win the first race, make sure you win this one, or you'll have likely eliminated yourself from contention before even beginning the third race.
The final course is a new one, with the first appearance of ninety-degree turns. You can use this opportunity for monster Powerslides, if you wish, but don't give up the lead for the sake of Style Points. There's a new shortcut, as well, which appears on your minimap; cut through the construction site for extra hang time. There's a fairly long stretch of high-grade hills on this course - if your tachometer isn't near the red, be sure to downshift for extra power climbing them.
In the long straightaway before the end of each lap, fly close by oncoming traffic to garner some near misses, and be prepared to slow down and use your handbrake to make it through the extremely tight corner just before the finish line unscathed.
Race 7: TJ's Time Trial
Time Trial Race
Location: Airport to Downtown
Approx. Distance: 2.7 miles
Reward: Unique Upgrade
Unlocks: Nothing
This time trial acts as something of a one-car Sprint, and, in fact, it traces the first Sprint race that you did backwards. You'll start out in the construction zone near the airport and have to work your way through the course to downtown. Get there fast enough, and TJ will give you a unique upgrade.
If you've already spent the dough on the performance upgrades that were unlocked after the Rookie Tournament, then you probably won't see much of an enhancement from whichever part you pick out. Take a look at your stats after you go over the parts, and select one that seems to help your driving deficiencies the most.
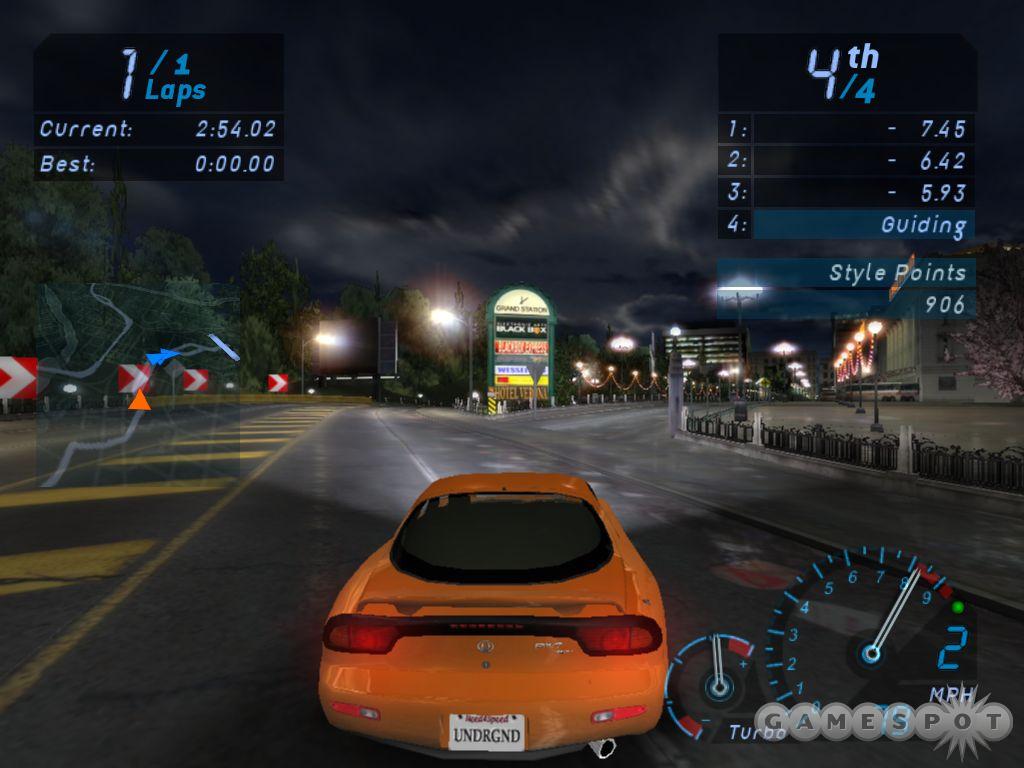
Race 8: Atlantica Challenge
Circuit Race: 3 Laps
Location: Atlantica Circuit Track
Approx. Distance: 6.1 miles
Reward: Easy 525, Medium 750, Hard 900
Unlocks: Atlantica Circuit Track
Welcome to the sewers! The Atlantica Challenge takes place in a less race-friendly portion of the city, so get ready to get wet. The pillars beyond the starting line present an obvious spot to ram a rival into, especially given the poor grip of the surrounding terrain. The shortcut is obvious - hit it for monster air if you've got enough momentum to climb it easily.
Race 9: All Go, No Show!
Drag Race Tournament
Location: Various
Approx. Distance: n/a
Reward: Easy 3750, Medium 5000, Hard 6250
Unlocks: 14th & Vine Construction Track Reverse
Back we go to 14th and Vine, site of the first Drag race in the Underground mode. This time, the race is a tournament of 3 drags, with much higher payouts. Be sure to choose Hard mode, as the AI still has trouble shifting. You should be able to consistently get Perfect Shifts, which will make this tournament a breeze even on the higher difficulty level.
Starting with the first drag in this tournament, oncoming traffic will try to trip you up. True oncoming traffic isn't a problem - you'll have plenty of time to change lanes - but traffic emerging from intersections on the last drag may trip you up. Luckily, this traffic always appears in the same place, at the same time, so subsequent runs will be easier.
On the second race, there's a ramp on the right-hand side of the road at the end of the drag. Maneuver yourself into that lane to score some bonus Style Points.
The third track runs through a construction zone partway through - make sure you get off to a good start so that you can freely move to the center lanes to avoid totaling your ride. As mentioned earlier, this race also features perpendicular traffic, so be prepared for quick lane changes on the back half.
Four new races appear after you complete All Go, No Show!
Race 10: Olympic Knockout
Knockout Race
Location: Olympic Square Reverse
Approx. Distance: 6.3 miles
Reward: Easy 525, Medium 750, Hard 900
Unlocks: Nothing
By this point, you've likely unlocked and purchased several performance upgrades, emphasizing speed and acceleration over handling. Back to Olympic Square you go, to see if you can handle the resultant slight decrease in responsiveness. You know the track well; hit your shortcuts, avoid the walls, and success will come.
Race 11: Drop The Klutch!
Drag Race
Location: Highway 1
Approx. Distance: n/a
Reward: Easy 525, Medium 750, Hard 900
Unlocks: Highway 1 Drag Track
Again, be sure to choose Hard difficulty for drag races. If you've purchased a turbo kit, you'll need to get used to the decreased window for Perfect Shifts here. As well, there's significantly more traffic on this challenge compared to previous drags - be prepared to change lanes.
Race 12: Cross-town Hustle
Sprint Race
Location: Broadway
Approx. Distance: 3.9 miles
Reward: Easy 525, Medium 750, Hard 900
Unlocks: Broadway Sprint Track
It's time to sprint from Chinatown to some condos down in Atlantica. This course is filled with shortcuts, tight turns, and oncoming traffic - the end result being a course with ample opportunity to rack up mondo style points through precise driving, albeit one on which it is incredibly easy to lose control, crash, and burn.
Right off the starting line, you'll cover a long straightaway; take advantage, but be prepared to downshift or Powerslide around the turn at the end. Take the abrupt left for a shortcut if you're courageous - it's quite a tight fit. Shortly after this shortcut, you'll find yourself outside of the city, with grass and trees on either side rather than skyrises. Take the shortcut over the bridge on the left-hand side of the road, but do so in second or third gear unless you want your vehicle to play the role of a pinball. Be ready for the quick left turn as you exit the shortcut.
Next you'll re-enter the city proper - note the shortcut off the right-hand side of the course. You'll lose a small amount of speed as you break through the weak barriers, but it's a straight shot and avoids a rather tight turn, so you'll come out ahead both in time and Style Points. After this point, you'll drive your way back onto portions of older courses that you're already familiar with.
Race 13: Time To Get Dirt-Y
Drift Race
Location: Drift Track 2
Approx. Distance: n/a
Reward: Easy 525, Medium 750, Hard 900
Unlocks: Nothing
As with the first Drift race, Hard mode is much more difficult than Medium, so don't bother with it unless you're racking up Powerslide points with ease.
This track isn't just a straight rectangle like the first drift track - you'll be able to gain some easy Powerslide points, and acceleration, at the curves in the middle of the straightaways.
Race 14: Downtown Series
Circuit Race Tournament: 4 laps
Location: Various
Approx. Distance: Various
Reward: Easy 3750, Medium 5000, Hard 6205
Unlocks: Level 1 Weight Reduction Kits, Level 1 Suspension Packages, Level 1 Nitrous, Stadium Circuit Track, Atlantica Circuit Track - Reverse
You'll recognize the first course in this tournament from a previous challenge, with added cross-traffic this time through; be ready for it. The second course is a rehash, as well, though this time you'll race it in reverse.
The third track, however, is quite new. You'll run through Chinatown again, only this time you'll do it backwards. This will let you grab some air on those steep hills, rather than trying to climb them. You'll also pass a stretch of highway, as well as an incredibly long back alley straightaway. In short, this course is all about speed over precise handling. If you had removed any speed upgrades for the previous challenge, stick them back in.
Toward the end of the open highway section, downshift to gain control for the much-tighter underpass area ahead. Ramp yourself up to top gear during the massive straightaway, and hug the center line during the jumps to keep yourself from hitting obstacles. That's about all the strategy there is to this course - let it all hang out.
Race 15: Jail Break
Time Trial Race
Location: Lock Up
Approx. Distance: 4.7 miles
Reward: Easy 100, Medium 125, Hard 150
Unlocks: Unique Hood Upgrade
Given the miniscule difference in reward/difficulty ratio, take the Easy level if you have any trouble at all with this course.
Once again, you've seen most of this course before in one form or another; run through the sprint at a slower pace and gather your bearings, then on the second run go for the win. Make sure you purchase the nitrous upgrade before beginning this challenge - it will come in handy on this track's long straightaways. The upper limit on your time is fairly generous on this challenge; so long as you don't have any complete wipeouts, you should have no trouble finishing in time.
Race 16: Style Guide
Circuit Race: 4 laps
Location: Inner City Reverse
Approx. Distance: 3.9 miles
Reward: Easy 200, Medium 250, Hard 300
Unlocks: Inner City Circuit Track - Reverse
Jose is back. Dust him and his pals on this familiar course - save your nitrous for the start of the second lap, on the long straightaway.
Race 17: New Kids in Town
Drag Race
Location: 14th & Vine Construction Reverse
Approx. Distance: n/a
Reward: Easy 200, Medium 250, Hard 300
Unlocks: 2003 Hyundai Tiburon GT V6
Another drag race; take Hard difficulty, nail your shifts, and use your nitrous in 5th gear to punch ahead and unlock the Tiburon. Just watch your engine's temperature if you burn the nitrous in 5th - get too aggressive and you'll blow your engine.
Race 18: A Glowing Reception
Drift Race
Location: Drift Track 2
Approx. Distance: n/a
Reward: Easy 200, Medium 250, Hard 300
Unlocks: Level 2 Neon
This challenge takes place at the same drift track as the second Drift race, but against much tougher competition.
Race 19: The Only Way to Go Is Up
Circuit Race: 3 laps
Location: Market Street
Approx. Distance: n/a
Reward: Easy 200, Medium 250, Hard 300
Unlocks: Market Street Circuit Track
Win this race, and you'll break into the Circuit rankings, unlock a new track, and get yourself another magazine cover.
Race 20: Saturday Night Drive
Drag Race Tournament: 4 races
Location: Various
Approx. Distance: n/a
Reward: Easy 3750, Medium 5000, Hard 6250
Unlocks:14th & Vine Construction Drag Track, Main Street Drag Track
Back to your favorite Drag course, 14th & Vine, for a 4-Drag tournament. The first race is straightforward; it's very similar to the last few. The second takes place on an open highway, so your victory will depend as much on your advantageous use of traffic as much as on power shifting. Obviously you'll want to keep from hitting traffic, but maneuvering yourself around your opponents so that they have trouble avoiding an impact with traffic will help thin your competition.
For the third race in the series, you'll head back to a traditional drag strip, only with even more traffic and work zones. Worry about the traffic until you've run for about 20-25 seconds, then maneuver into the rightmost lane and hit the ramp to fly over the oncoming train for the victory.
The fourth and final race in this tournament is extremely difficult to finish at full speed without totaling - if you did your job and won the first three races, you'll be able to take this one slowly and still come out of the tourney with a win.
Race 21: Gut Check Time
Drag Race
Location: 14th & Vine Construction
Approx. Distance: n/a
Reward: Easy 200, Medium 250, Hard 300
Unlocks: Nothing
In this repeat of the fourth race in the previous Drag tournament, you'll break into the Drag rankings.
Race 22: Sprint Challenge
Sprint Race
Location: To Broadway
Approx. Distance: 4 miles
Reward: Easy 200, Medium 250, Hard 300
Unlocks: 2003 Subaru Impreza 2.5 RS, Broadway Sprint Track Reverse
This race will pave your way into the Sprint mode rankings list, and unlock the track and a major upgrade of a car, as well. Save your nitrous for the end run of the sprint.
Race 23: Steeltown Sprint
Sprint Race
Location: Lock Up
Approx. Distance: 4.7 miles
Reward: Easy 225, Medium 300, Hard 375
Unlocks: Level 2 Paint, Lock Up Sprint Track
You saw this course back on the Jail Break Time Trial challenge awhile back. Here you'll be able to win the race with a slightly slower time, but you'll still need to run a fairly solid race. Follow the plan that should be becoming rote by this point: shift well, take advantage of shortcuts, and avoid the walls. Don't worry about your opponents; worry about driving well.
Race 24: One Down, Two to Go
Knock Out Race
Location: Inner City Reverse
Approx. Distance: 5.8 miles
Reward: Easy 225, Medium 300, Hard 375
Unlocks: 2004 Nissan Sentra SE-R Spec V
Another course you've already seen. If you have trouble controlling your car to run a tight race, remember that you can remove speed upgrades to increase your car's relative handling ability, allowing you finer maneuvering control.
Race 25: A Little Dirt Won't Hurt
Drift Race
Location: Drift Track 3
Approx. Distance: n/a
Reward: Easy 200, Medium 250, Hard 300
Unlocks: Drift Track 3
Drift courses begin to get interesting with Drift Track 3; you'll face several 180-degree turns and curves, along with a couple of 90-degree jobs. Use the 90-degree turns sparingly, and take advantage of the 180s to gather up some monster drifts. Win this challenge, and grab another magazine cover shot, break into the Drift rankings, and take home the track.
Race 26: Keep Them Coming
Time Trial Race
Location: 9th & Frey
Approx. Distance: 4.75 miles
Reward: Easy 100, Medium 125, Hard 150
Unlocks: Unique performance upgrade, 9th & Frey Sprint Track
TJ's got another job for you - we advise you to take it and earn yourself another upgrade. Although the course has a new name, you've seen all of it before - just not strung together. TJ's required time for the course is fairly tight; if you removed any performance upgrades on previous tracks to gain a handling advantage, you'll want to stick them back in before this time trial, or you'll be hard-pressed to burn enough rubber to please TJ.
Race 27: Wrong Place, Right Time
Sprint Race
Location: Bedard Bridge
Approx. Distance: 4.45 miles
Reward: Easy 225, Medium 300, Hard 375
Unlocks: Bedard Bridge Sprint Track
Underground continues its blitz of new tracks with Bedard Bridge, but as usual, you've seen the majority of the track before. This track packs a lot of tight corners, immobile obstacles, and traffic, so you'd do well to remove your turbo upgrade to gain some extra maneuvering room. Emerge victorious, and you'll find yourself on the front of Sport Compact Car magazine, and up a spot in the Sprint rankings.
Race 28: Loud And Proud
Drift Race
Location: Drift Track 4
Approx. Distance: n/a
Reward: Easy 225, Medium 300, Hard 375
Unlocks: Level 2 Muffler Tips, Drift Track 4
Drift Track 4 is essentially a copy of Drift Track 3, with a bit more ‘easy' curves for building up speed. Concentrate on upshifting and gaining some speed before the 180-degree turns, then Powerslide around and you'll advance quickly.
Race 29: Scouting Report
Drag Race
Location: 14th & Vine Construction Reverse
Approx. Distance: n/a
Reward: Easy 225, Medium 300, Hard 375
Unlocks: Level 2 Window Tint
A typical Drag - use the same skills you've used in the past, and your success will continue.
Race 30: Dead Calm
Circuit Race Tournament: 2 laps
Location: Various
Approx. Distance: Various
Reward: Easy 3750, Medium 5000, Hard 6250
Unlocks: Level 2 Engine / Exhaust Packages, Level 2 Drivetrain Packages, Level 2 Tire Packages, National Rail Circuit Track
The first race in this tournament takes place on old Olympic Square, which you should know like the back of your hand at this point. Second, you'll encounter a new track - the National Rail Circuit Track - there's a shortcut right after the starting line, but you'll generally want to avoid it. It's filled with heavy (read: momentum-stealing) obstacles, and even when run perfectly doesn't aid you much.
Race 31: Outtasite!
Knock Out Race
Location: Atlantica
Approx. Distance: 6 miles
Reward: Easy 225, Medium 300, Hard 375
Unlocks: Level 2 Roof Scoops
At this point you know Atlantica better than your own neighborhood - this challenge is a piece of cake; just avoid totaling in traffic.
Race 32: World of Hurt
Circuit Race: 3 laps
Location: National Rail
Approx. Distance: ???
Reward: Easy 225, Medium 300, Hard 375
Unlocks: Nothing
It's back to the railway, for a meeting with Kurt and his Acura RSX.
Race 33: Drift to the 9's
Drift Race
Location: Drift Track 3
Approx. Distance: n/a
Reward: Easy 150, Medium 200, Hard 250
Unlocks: 1992 Nissan 240SX SE
Heading back to Drift Track 3, you'll need to take advantage of the 180s for powerful slides, and make fewer mistakes than before - the competition has kicked it up a notch. Win, and you'll move up a spot in the drift rankings.
Race 34: Sleeper Shootout
Sprint Race
Location: To 9th & Frey
Approx. Distance: 4.7 miles
Reward: Easy 225, Medium 300, Hard 375
Unlocks: Level 2 Rims, 9th & Frey Sprint Track Reverse
You've seen this course before, but this time you'll be racing it backwards. Your nitrous will serve you well over the final stretch of the course to fend off any late rushes by your opponents.
Race 35: Earn Your Stripes
Circuit Race: 6 laps
Location: Inner City Reverse
Approx. Distance: 11.5 miles
Reward: Easy 150, Medium 200, Hard 250
Unlocks: Nothing
This is a familiar course, but you're not used to such a long haul. Bide your time, and save your nitrous for the last lap - you'll have plenty of time to correct any early errors the old-fashioned way. Notably absent is any non-race traffic. You can let it all hang out and not worry about extraneous obstacles appearing. After you've won, you'll advance to 9th in the Circuit rankings.
Race 36: For the Ladies
Drag Race
Location: Main Street
Approx. Distance: n/a
Reward: Easy 150, Medium 200, Hard 250
Unlocks: Nothing
Win this straightforward Drag race, and move up to 9th on the Drag rankings. Take the right-most lane early to catch a side ramp and avoid most of the non-race traffic.
Race 37: No Love From Kurt
Circuit Race: 6 laps
Location: Atlantica Reverse
Approx. Distance: 12.2 miles
Reward: Easy 225, Medium 300, Hard 375
Unlocks: Nothing
Race against Kurt and company to grab the #8 spot in the rankings. This is another long circuit, so remember to save your nitrous; expending it early is a waste, since the computer will give a boost to everyone not in the lead. Win, and Import Racer sticks your car on the front of their rag.
Race 38: Import Tuner Drift Event
Drift Race Tournament
Location: Various
Approx. Distance: n/a
Reward: Easy 3750, Medium 5000, Hard 6250
Unlocks: Level 2 E.C.U & Fuel System, Level 2 Turbo Packages, Level 2 Brake Kits, Drift Track 5
In your first Drift race tournament, you'll knock ‘em flat, and unlock a slew of new upgrades.
Race 39: Inner City Knockout
Knockout Race
Location: Inner City Reverse
Approx. Distance: 5.8 miles
Reward: Easy 225, Medium 300, Hard 375
Unlocks: Level 2 Side Skirts
These guys want to race you in a knockout in their new imports! Apparently that makes them crazy. An easy win.
Race 40: Play the Spoiler
Drift Race
Location: Drift Track 4
Approx. Distance: n/a
Reward: Easy 225, Medium 300, Hard 375
Unlocks: Nothing
Win this drift race, and you'll jump to #8 in the rankings, as well as grab the cover of Import Tuner Magazine.
Race 41: Crosstown Dash
Sprint Race
Location: Broadway
Approx. Distance: 4.5 miles
Reward: Easy 225, Medium 300, Hard 375
Unlocks: 2002 Toyota Celica GT-S
Races starting to get repetitive for you, too, eh? You've seen the course, you've raced the conditions. Go out and win. You'll move up to 8th in Sprint race rankings after you do.
Race 42: The New Muscle In Town
Sprint Race
Location: Highway 1
Approx. Distance: n/a
Reward: Easy 225, Medium 300, Hard 375
Unlocks: Nothing
The preponderance of traffic on this Drag makes things interesting; you'll need to pay as much attention to traffic as to shifting if you're to win. Following the pattern, you'll jump up a spot in the Drag rankings with a victory.
Race 43: Where There's Smoke, There's...
Sprint Race
Location: To Lock Up
Approx. Distance: 4.6 miles
Reward: Easy 300, Medium 400, Hard 500
Unlocks: Level 2 Hoods, Lock Up Sprint Track - Reverse
This challenge marks an increase in difficulty, as well as in the payouts you'll receive for victory. The course begins with very light (nearly non-existent) traffic, but don't let that fool you - it picks up a great deal during the latter portion of the race, notably the straightaway shortcut that appears near the end; in past races it's been a highly effective shortcut. At this point, you risk totaling through no fault of your own each time you choose to take it.
Race 44: Get Sideways
Drift Race
Location: Drift Track 5
Approx. Distance: n/a
Reward: Easy 300, Medium 400, Hard 500
Unlocks: Level 2 Front Bumpers
Returning for a second race on Drift Track 5, just play the Powerslide game as you always have, and you'll come out on top.
Race 45: No Way, Jose
Circuit Race: 3 laps
Location: National Rail Reverse
Approx. Distance: 6 miles
Reward: Easy 300, Medium 400, Hard 500
Unlocks: Level 2 Spoilers, National Rail Circuit Track - Reverse
Jose still wants a piece of you, huh? Show him who's boss on this 1-vs-1 Circuit. Concentrate on keeping your car moving forward - so long as you don't total or make any velocity-crushing mistakes, Jose is fairly easy to beat since he swerves around so much.
Race 46: Double Klutch
Drag Race
Location: 14th & Vine Construction
Approx. Distance: n/a
Reward: Easy 300, Medium 400, Hard 500
Unlocks: 2003 Acura RSX Type-S
This Drag is just like you've seen it before, with slightly faster opponents. Remember that if you're having trouble beating them with a tricked-out car, removing your turbo upgrades will make attaining a Perfect Shift much easier. Don't forget to hit the right-lane ramp at the end of the course.
Race 47: Blue Light Special
Time Trial Race
Location: To Broadway
Approx. Distance: 4 miles
Reward: Easy 125, Medium 150, Hard 175
Unlocks: Unique Rim Upgrade
This one has a tight time requirement - if you get frustrated, lowering the difficulty level of the race adds time to your max, as does removing performance upgrades.
Race 48: Get The Point!
Circuit Race Tournament: 2 laps
Location: Various
Approx. Distance: Various
Reward: Easy 3750, Medium 5000, Hard 6250
Unlocks: Level 2 Weight Reduction Kits, Level 2 Suspension Packages, Level 2 Nitrous Oxide
Win this cutthroat tourney, and get your hands on some higher-level performance upgrades. These races are only two laps apiece, so you'll have fewer opportunities to make up for careless mistakes - so don't make any.
Race 49: National Rail Knockout
Knockout Race
Location: National Rail
Approx. Distance: 6.1 miles
Reward: Easy 300, Medium 400, Hard 500
Unlocks: Level 2 Rear Bumpers
Take the left-hand path over the highway before the underpass for smoother sailing. Save your nitrous boost for this section of the final lap.
Race 50: Sliding Made Easy
Drift Race
Location: Drift Track 3
Approx. Distance: n/a
Reward: Easy 300, Medium 400, Hard 500
Unlocks: Nothing
Take the challenge to move up to 7th in the Drift race rankings.
Race 51: Deal Yourself a Straight Hand
Drag Race
Location: 14th & Vine
Approx. Distance: n/a
Reward: Easy 375, Medium 500, Hard 625
Unlocks: Level 3 Decals
Shades of the first Drag race, Batman! This is an exceedingly easy Drag. Hit your shifts, avoid the minimal traffic, and you'll be golden.
Race 52: Lucky 7
Circuit Race: 2 laps
Location: Atlantica Reverse
Approx. Distance: 4.1 miles
Reward: Easy 300, Medium 400, Hard 500
Unlocks: Nothing
Win this Atlantican Circuit and move up to 7th in the Circuit rankings.
Race 53: Go Jose
Circuit Race: 2 laps
Location: Inner City Reverse
Approx. Distance: 3.8 miles
Reward: Easy 375, Medium 500, Hard 625
Unlocks: 2000 Acura Integra Type-R
Jose really needs to just accept the fact that he embarrasses himself every time he races against you. Put him in his place on this short run through the inner city. There's no non-race traffic on this challenge.
Race 54: Mad Dash
Sprint Race
Location: 9th & Frey
Approx. Distance: 4.7 miles
Reward: Easy 375, Medium 500, Hard 625
Unlocks: Level 3 Muffler Tips
The crosstraffic doesn't pick up until the latter portion of this Sprint. Concentrate on drafting your opponents, then pulling ahead near the end to defeat their catch-up speed & acceleration bonuses.
Race 55: All the Eyes are On You
Drag Race
Location: Main Street Reverse
Approx. Distance: n/a
Reward: Easy 300, Medium 400, Hard 500
Unlocks: Turbo & High-Tech Performance Magazine cover, Main Street Drag Track Reverse
These Drags are getting tougher and tougher to complete without totaling, but you can still safely choose Hard difficulty and win fairly easily. On this race, move over to the rightmost lane as quickly as possible. You'll be able to avoid all traffic this way. If you don't get Perfect Shifts off the line, use your nitrous to catch up and draft the leader, then use that boost to pull ahead and cross the finish first. Win, and you'll move up to 7th in the Drag mode rankings.
Race 56: Kick Out That Tail
Drift Race
Location: Drift Track 5
Approx. Distance: n/a
Reward: Easy 375, Medium 500, Hard 625
Unlocks: Level 3 Window Tint
If you have trouble passing your opponents' scores, knock down the difficulty to ease your task.
Race 57: Chad's Back
Sprint Race
Location: To Bedard Bridge
Approx. Distance: 4.4 miles
Reward: Easy 300, Medium 400, Hard 500
Unlocks: Bedard Bridge Sprint Track Reverse
You've gotten Chad's attention. Knock him around and move up to the #7 Sprinter in the rankings. Take the shortcut at the beginning of the course to pull out an early lead, then save your nitrous for the final run over the construction zone.
Race 58: And Then There Was One
Knockout Race
Location: National Rail Reverse
Approx. Distance: 6.1 miles
Reward: Easy 450, Medium 600, Hard 750
Unlocks: 1999 Mitsubishi Eclipse GSX
There's nothing at all unique about this race - familiar course, familiar conditions. Just go out and win.
Race 59: Friendly Competition
Circuit Race: 4 laps
Location: Stadium Reverse
Approx. Distance: 10 miles
Reward: Easy 375, Medium 500, Hard 625
Unlocks: Super Street Magazine cover, Stadium Circuit Track - Reverse
You haven't yet run this course in a circuit, but you have seen it all before. The AI tends to do relatively poorly on the uphill jump section and the monster straightaway through the alley, so as long as you run a fundamentally sound race, you should have no problem turning those eight sections into a victory. Move up to the 6th spot with a win.
Race 60: Bright Lights Big Spoiler
Knockout Race
Location: Inner City
Approx. Distance: 5.7 miles
Reward: Easy 750, Medium 1000, Hard 1250
Unlocks: Level 3 Head Lights
With this race, you move into the next tier of difficulty; wins now net you a fat 750 minimum reward. You've seen this course several times before; hit the construction and straightaway shortcuts and you'll win easily.
Race 61: Stadium Sprint
Sprint Race
Location: To 9th & Frey
Approx. Distance: 4.7 miles
Reward: Easy 750, Medium 1000, Hard 1250
Unlocks: Level 3 Tail Lights
Straightforward Sprint to 9th & Frey. Again, nothing fancy is required on this course - use the uphill and straightaway portions to overtake the AI, and avoid the walls for victory.
Race 62: Glow, Baby, Glow!
Drag Race
Location: Main Street
Approx. Distance: n/a
Reward: Easy 750, Medium 1000, Hard 1250
Unlocks: Level 3 Neon
To follow the straightforward Stadium Sprint, you'll race the straightforward Glow, Baby, Glow! Drag race. Hit your shifts and stay to the right for an uneventful victory.
Race 63: Straight Up
Drag Race
Location: 14th & Vine Construction Reverse
Approx. Distance: n/a
Reward: Easy 1125, Medium 1500, Hard 1875
Unlocks: Nothing
Show up your opponents, and grab 6th place in the rankings. There's nothing unexpected going on for this race.
Race 64: Free Style
Drift Race
Location: Drift Track 4
Approx. Distance: n/a
Reward: Easy 1125, Medium 1500, Hard 1875
Unlocks: 1998 Toyota Supra
Another chance to grab a 6th-place ranking.
Race 65: Drift Mania
Drift Race
Location: Drift Track 6
Approx. Distance: n/a
Reward: Easy 1500, Medium 2000, Hard 2500
Unlocks: Level 3 Paint, Drift Track 6
Don't try for any outrageous Powerslides when moving downhill - you'll quickly lose control.
Race 66: Art Center Sprint Tourney
Sprint Race Tournament
Location: Various
Approx. Distance: Various
Reward: Easy 3750, Medium 5000, Hard 6250
Unlocks: Level 3 Engine / Exhaust Packages, Level 3 Drivetrain Packages, Level 3 Tire Packages
There's not much to be said for this tournament - you've seen it all before.
Race 67: Legit
Sprint Race
Location: Lock Up
Approx. Distance: 4.7 miles
Reward: Easy 1875, Medium 2500, Hard 3125
Unlocks: Sport Compact Car Magazine cover
Use those Level 3 Performance Upgrades to boost your ride's performance, then show it all off on this sprint. Win, and you'll jump to the 6th spot on the Sprint rankings.
Race 68: Dead of Night
Time Trial Race
Location: Bedard Bridge
Approx. Distance: 4.5 miles
Reward: Easy 1875, Medium 2500, Hard 3125
Unlocks: Unique Upgrade
Finish this familiar course in the allotted time, and Samantha will fix your car up with a unique vinyl. Definitely accept this challenge, as some of the vinyls are pretty amazing.
Race 69: Rush Hour
Circuit Race Tournament: 3 laps
Location: Various
Approx. Distance: Various
Reward: Easy 3750, Medium 5000, Hard 6250
Unlocks: Nothing
This races that comprise this tournament are a bit longer than most in Need For Speed: Underground; chill out behind the leader, then pump out some nitrous to overtake him near the end of the course.
Race 70: Mano e Mano
Drag Race
Location: Main Street Construction
Approx. Distance: n/a
Reward: Easy 450, Medium 600, Hard 750
Unlocks: Level 3 Roof Scoops
This is a one-on-one drag versus a Supra. Block off your competitor, then head over to the far right lane and stick there as much as possible, avoiding the cross-traffic.
Race 71: Who's Got Endurance?
Circuit Race: 6 laps
Location: Terminal
Approx. Distance: 12.6 miles
Reward: Easy 450, Medium 600, Hard 750
Unlocks: Terminal Circuit Track
Six laps is more than enough to get sick of this little circuit track, especially with the increasingly brutal AI. The sticking point here is the tunnel before the airport; keep in mind that it's always better to hit the brakes than it is to hit an oncoming car. The last sprint through the construction zone can save you a second or two if you cut through the barriers blocking off the dirt patches. You can clear yourself a path on the first lap, and then have a clean road for each consecutive trip through around the track.
Race 72: Draw Bridge Blitz
Knockout: 3 laps
Location: Market Street
Approx. Distance: 8.7 miles
Reward: Easy 450, Medium 600, Hard 750
Unlocks: Nothing
If possible, ride up on your competitors and tap them as you go over the bridge; its close enough to the end to ensure that they'll never recover quickly enough to overtake you following the massive accident that will ensue.
Race 73: Drift for Fifth
Drift Race: 4 laps
Location: Drift Track 4
Approx. Distance: n/a
Reward: Easy 450, Medium 600, Hard 750
Unlocks: 1995 Mazda RX-7
If you're not good at Drifting by now, you probably won't ever be, but with even just a basic knowledge of the techniques required, you should be able to beat this race on Medium and claim the right to purchase the new Mazda.
Race 74: Late Night Rush
Sprint Race
Location: Spillway
Approx. Distance: 5.2 miles
Reward: Easy 450, Medium 600, Hard 750
Unlocks: Spillway Sprint Track
You'll see a new track section, which involves a number of paths that diverge and converge, towards the end of this course. Your best bet appears to be to hit each right as it appears; this will get you a fairly straight path, minus one somewhat nasty left turn towards the end. Otherwise, you should be familiar with the individual parts of this track.
Race 75: Bring It
Circuit Race: 5 laps
Location: National Rail Reverse
Approx. Distance: 10.1 miles
Reward: Easy 450, Medium 600, Hard 750
Unlocks: 2003 Nissan 350z
The faster you're going as you come off the highway, the harder you'll have to brake before you cut through the dirt section. This is where most accidents will occur (save for unavoidable traffic-related collisions), so master it, or, at least, try not to knock your car all over the place when you pass through.
Race 76: It's Klutch Time
Drag Race
Location: Main Street Reverse
Approx. Distance: n/a
Reward: Easy 450, Medium 600, Hard 750
Unlocks: Nothing
This track takes you back down Main Street, but in reverse, so you'll hit the monster jump shortly after you reach third gear. From there, stick to the right and try to stay out of the oncoming traffic, but dodge back and forth to avoid the cars up ahead. After you win, you'll finally knock Klutch out of Drag racing forever.
Race 77: Samantha's Big Tease
Time Trial Race
Location: To Spillway
Approx. Distance: 5.2 miles
Reward: Easy 100, Medium 125, Hard 150
Unlocks: Spillway Sprint Track - Reverse; Unique Spoilers
You went through this track a few races ago, except for the fact that it's now in reverse. The new track section will be the sticking point, but again, try to keep to the left (which was the right last time). This will give you the shortest path with the fewest bad turns. Beyond that, everything should be familiar. Samantha will grant you a new spoiler after you win; the Katana is probably the only one that will blend with your paint job.
Race 78: Friends Are Easy To Make, And Easier To Lose
Sprint Race
Location: 1st Ave. Truck Stop
Approx. Distance: 3.8 miles
Reward: Easy 2000, Medium 4000, Hard 6000
Unlocks: 1st Ave. Truck Stop Sprint Track
If all of these rendered cinemas prove anything, it's that you really need to get your eyes checked. Everything's in focus, then it's not, etc. Odd that it doesn't affect your racing.
Anyway, your only opponent here is your good pal Samantha, and she's none too happy at having to race you. Make her less happy by kicking her butt. This track is another pastiche of familiar parts in an odd arrangement; one thing to note is that you start close enough to the jumping shortcut to make it actually viable, since you're at such low speeds.
Race 79: Enjoy the City Skyline
Drag Race
Location: Main Street
Approx. Distance:
Reward: Easy 1000, Medium 2000, Hard 3000
Unlocks: 1999 Nissan Skyline R34 GTR
This race can be tricky to win even without nitro and turbo, but if you drag properly, you should be able to pass for the lead shortly before the last big jump. After you grab the top spot, you'll unlock the game's most expensive car, so hop into the Skyline and take her out for a spin on a Quick Race track to see if she's appropriate for you.
Race 80: First Dibs
Drag Race Tournament
Location: Various
Approx. Distance: n/a
Reward: Easy 6000, Medium 8000, Hard 10000
Unlocks: Level 3 E.C.U., Level 3 Turbo, Level 3 Brakes, Main Street Construction Drag Track Reverse
You'll be required to install all of the performance mods for this tournament, so get your car modded up and hit the streets. Keep in mind that the differences between difficulty levels is mostly a matter of pride at this point; if you were able to afford the Skyline (if you wanted it), the rest of the performance and visual mods shouldn't put much of a dent in your bank. The only problem is that they come in bursts; the group after this race will put you back 12,000 bucks, so you may want to let that influence the difficulty you take this tournament on.
The first track is easy enough to win, but the second will vex you with a criss-crossing traffic pattern that will often wind up in your car getting totaled if you're not quick on the lane changes. Staying to the left will be natural, and indeed required, for the first rise, but try to get to the right afterwards, to avoid the scripted truck heading across your lane.
The third track also features crossing traffic patterns, but it's a bit easier to stick to the right and stay there for the whole race. The fourth race is another fairly easy one; block off your competitors as you hit the first rise, then keep the lead for the rest of the race.
Race 81: Round And Round And Round We Go
Circuit Race: 4 Laps
Location: Terminal
Approx. Distance: 8.4 miles
Reward: Easy 900, Medium 1200, Hard 1500
Unlocks: Level 3 Rims
Now that you've unlocked the Skyline and the second group of top-shelf performance upgrades, you'll notice the difficulty level of these races, even on Easy, start to increase dramatically. Don't be afraid to quit out of a race and switch cars or eliminate performance mods to get a lucky configuration.
Race 82: Moving On Up
Sprint Race
Location: 1st Ave. Truck Stop
Approx. Distance: 3.8 miles
Reward: Easy 1125, Medium 1500, Hard 1875
Unlocks: Nothing
You should be sufficiently familiar with the Truck Stop track to have little trouble with this race.
Race 83: Dragging On
Drag Race
Location: Commercial
Approx. Distance: n/a
Reward: Easy 1125, Medium 1500, Hard 1875
Unlocks: Commercial Drag Track
Ah, a new Drag track! This one will see you pop through a ditch before returning to the streets for a big finish. There are a few ramps on the far lanes on either side of the street, so try to stick to the middle if you don't want to take the ensuing speed hit. If you're not driving the Skyline, and are having trouble hitting Perfect Shifts, you may want to switch to that car for the express purpose of killing Drag races; it's much smoother at shifting than many of the other cars.
Race 84: Skirt the Issue
Knockout Race: 3 Laps
Location: Market Street Reverse
Approx. Distance: 8.8 miles
Reward: Easy 900, Medium 1200, Hard 1500
Unlocks: Level 3 Side Skirts, Market Street Circuit Track - Reverse
Do your best to knock Bryce in the 206 out of the race early, and, by the same token, you may find it useful to allow your last-lap competitor to come up alongside you and then ram him into a wall really hard. Don't neglect to hit the gas station shortcut immediately following the starting line; it's a lot easier to see here than it is on the same track, when played through forward.
Race 85: High Profile
Drift Race
Location: Drift Track 6
Approx. Distance: n/a
Reward: Easy 1125, Medium 1500, Hard 1875
Unlocks: Magazine Cover - Import Tuner #3
Drift Track 6 is great for knocking out massive scores; you should be able to put up two hundred thousand points with relative ease, with the ever-present caveat that you avoid the walls. Again, if you're having trouble drifting with a new car, feel free to switch back to an earlier model.
Race 86: Four Play
Circuit Race: 4 Laps
Location: Terminal Reverse
Approx. Distance: 8.4 miles
Reward: Easy 1125, Medium 1500, Hard 1875
Unlocks: Terminal Circuit Track - Reverse
Frankenstein says: "Tunnel bad!" That's right, Frankenstein; the terminal tunnel is a nasty spot, especially with the heavy traffic that's peppered throughout this race. Beyond that little problem, there are a number of nasty right-angle turns to throw you off your lines; the bold can Powerslide, but otherwise, slam on the brakes as you approach and let the outside wall knock you back on course.
Race 87: Top 3
Drag Race
Location: 14th and Vine
Approx. Distance: n/a
Reward: Easy 1500, Medium 2000, Hard 2500
Unlocks:
There's lots of traffic here, but, for a change, little in the way of stationary obstacles. Grab a lane, control it, and make sure no one is drifting off of your rear before you charge to the finish line.
Race 88: Three-Three-Three
Circuit Race: 3 Laps
Location: Terminal
Approx. Distance: 6.3 miles
Reward: Easy 900, Medium 1200, Hard 1500
Unlocks:
Another trip through the Terminal run, except this time you're gunning for third place in the Circuit rankings.
Race 89: Hoods Are Slippery When Wet
Drift Race
Location: Drift Track 7
Approx. Distance: n/a
Reward: Easy 900, Medium 1200, Hard 1500
Unlocks: Level 3 Hoods, Drift Track 7
This newest Drift course doesn't have lines quite as smooth as Drift Track 6, but you should be able to string together some impressive drifts nonetheless.
Race 90: Special Preference
Knockout Race: 3 Laps
Location: Port Royal
Approx. Distance: 6.1 Miles
Reward: Easy 1125, Medium 1500, Hard 1875
Unlocks: Level 3 Front Bumpers, Port Royal Circuit Track
The track may be a new one, but the pieces are not. For a track that pops up so late in the game, the path is surprisingly smooth; when you hit the section past the gas station, hold to the right and brake when you hit the dirt shortcut to avoid ramming the wall. From there, it's an easy path to the finish line.
Race 91: Eddie's Posse Part 1
Circuit Tournament
Location: Various
Approx. Distance: Various
Reward: Easy 3750, Medium 5000, Hard 6250
Unlocks: Level 3 Weight Reduction Kits, Suspension, and Nitro; Port Royal Circuit Track - Reverse
Sorry, but we find it difficult to be intimidated by anyone named Todd, Kurt, or Chad, let alone three such individuals all at once. Let's send them back to the country club.
The first race here is the familiar drawbridge-back alley-highway repetition; try to slam your opponents into the walls of the alley when you're passing them to give them a temporary setback. The second track, however, is the dreaded Terminal Reverse, with heavy traffic. You'll probably need a few restarts before you take first place; if you get frustrated, settle for second and redouble your efforts on the final track. Port Royal comes in last, and should be smooth sailing.
Race 92: Drift Duel
Drift Race
Location: Drift Track 7
Approx. Distance: n/a
Reward: Easy 1500, Medium 2000, Hard 2500
Unlocks: Nothing
This is a Drifting challenge between yourself and the mighty Tanaka, destroyer of worlds. Try to hit the corner at the end of the stretch that leads to the upper level and extend your drift from there into the Bonus Zone on the other side of the track for a colossal drift; you can make 20,000 points or more in this one little stretch if you hit it right.
Race 93: Chad's New Toy
Sprint Race
Location: 7th & Sparling
Approx. Distance: 4.1 miles
Reward: Easy 1125, Medium 1500, Hard 1875
Unlocks: Level 3 Spoilers, 7th & Sparling Sprint Track
Chad's little Sprint track is one of the shortest ones in the game. The only difficult part will be the depressingly familiar tunnel past the airport; luckily, there's very little traffic this time around, so rip through and beat Chad at his own game.
Race 94: Into the Fire
Sprint Race
Location: To 1st Ave. Truck Stop
Approx. Distance: n/a
Reward: Easy 1500, Medium 2000, Hard 2500
Unlocks: 1st Ave. Truck Stop Sprint Track Reverse
The finish line here is just past the annoying half-pipe shortcut, the one that's usually just after or before the airport construction zone. If you're running neck and neck with an opponent near the end of the race, they'll sometimes pull off one of their annoyingly perfect jumps through the shortcut and beat you to the line, so your best bet is to just be well ahead of your competitor before you get within sight of the finish.
Race 95: Kurt's Race
Circuit Race: 6 Laps
Location: Market Street Reverse
Approx. Distance: 17.4 miles
Reward: Easy 750, Medium 1000, Hard 1250
Unlocks: Nothing
If the words "Market Street Reverse" and "6 Lap Circuit Race" don't make your spine tingle at this point, then perhaps you have the backbone required to face the prospect of running five stunning laps and still managing to lose thanks to a truck getting in your way just before you hit the finish line. Whether you have the stuff or not, you'll need to find it to take down Kurt.
Race 96: Mods to the Max
Time Trial Race
Location: 7th & Sparling
Approx. Distance: 4.1 miles
Reward: Easy 100, Medium 125, Hard 150
Unlocks: Unique Performance Upgrade (one of seven)
You have to cover this track quickly to claim the prize. Don't feel too discouraged by the prospect of a run through the airport in heavy traffic; a perfect run can complete the sprint with over ten seconds to spare, so you have enough leeway for at least one bad spill.
Race 97: Draggin' Slayer
Drag Race
Location: Commercial Reverse
Approx. Distance: n/a
Reward: Easy 2250, Medium 3000, Hard 3750
Unlocks: Commercial Drag Track Reverse
As with the regular Commercial track, you'll want to avoid the ramps on either side of the track. If someone jumps out, draft them until you reach the finish line, but be sure to jump out to one side before the successive jumps at the end.
Race 98: Circuit Dustoff
Circuit Race: 6 Laps
Location: Port Royal
Approx. Distance: 12.1 miles
Reward: Easy 2250, Medium 3000, Hard 3750
Unlocks: Nothing
Well, golly, another six-lap circuit race that you'll enjoy resetting if you make a single error during the last lap. You have a spot of luck in that the computer will hemorrhage seconds if they take a left instead of a right in the final set of twists; if this happens on the final lap, you're basically home free if you can manage the turn after the dust shortcut correctly.
Race 99: Mistakes Are Costly
Sprint Race
Location: To Bedard Bridge
Approx. Distance: 4.4 miles
Reward: Easy 2250, Medium 3000, Hard 3750
Unlocks: Nothing
Bedard Bridge is another pastiche track, this time with the sewers connected to the airport terminal. The cross-traffic just before the half-pipe jump shortcut is remarkably dense, so slow down as you exit the airport construction site.
Race 100: Extra Innings
Sprint Race
Location: To 9th & Frey
Approx. Distance: 4.6 miles
Reward: Easy 1125, Medium 1500, Hard 1875
Unlocks: Level 3 Rear Bumpers
Supposedly the ballgame just got out of extra innings, resulting in heavy traffic, but you wouldn't know it from looking at the highway, which is dead empty. Must've been a Brewers game.
Race 101: Eddie's Posse, Part 2
Sprint Tournament
Location: Various
Approx. Distance: Various
Reward: Easy 6000, Medium 8000, Hard 10000
Unlocks: Magazine - Hot4s
Grab all of the performance upgrades before heading off to this little soiree with Chad and the boys, then pound the fight out of them. Your first race will again place you in danger of losing your lead to a leaping car right before the finish line; unfortunately the computer takes the jumping shortcut much more accurately than you can. Not much you can do about it except save your nitro for the home stretch and kick it in if someone does cut you off. You should recognize the second track; it's the reverse course of the track you just played through. Luckily, the fact that they're Sprints reduces the time wasted when you're forced to restart.
After you win, you'll get the pleasant surprise of learning that this was the last tournament in the game. The end is near...
Race 102: Toughest ‘n Roughest
Knockout Race: 3 Laps
Location: Market Street
Approx. Distance: 8.6 miles
Reward: Easy 750, Medium 1000, Hard 1250
Unlocks: Nothing
Another race through Market Street. Don't forget to uninstall your performance upgrades that you were forced to reinstall for the last tournament.
Race 103: Enduro Street Circuit
Circuit Race: 7 Laps
Location: Terminal Reverse
Approx. Distance: 14.6 miles
Reward: Easy 750, Medium 1000, Hard 1250
Unlocks: Nothing
In the "thank goodness for small favors" category, we have the fact that there's no traffic in this race. On the other hand, it's seven laps through Terminal Reverse, against a madman in an RX-7. You'll need to hit the tunnel without a mistake and make your turns with pinpoint precision if you hope to come out on top.
Race 104: Drift Devil
Drift Race
Location: Drift Track 8
Approx. Distance: n/a
Reward: Easy 2250, Medium 3000, Hard 3750
Unlocks: Drift Track 8
Drift Track 8 is a bit easier to bust out on than Track 7, so show your stuff to take 2nd place in the drift rankings.
Race 105: Rotary Engine Drag
Drag Race
Location: Main Street Reverse
Approx. Distance: n/a
Reward: Easy 750, Medium 1000, Hard 1250
Unlocks: Nothing
Try to draft one of your competitors down the stretch; they'll monitor traffic for you and let you know when to change lanes. Get out from behind them before you hit the big jumps at the end and you'll move ahead for the win.
Race 106: #1 Racer
Circuit Race: 3 Laps
Location: Port Royal Reverse
Approx. Distance: 6.1 miles
Reward: Easy 3750, Medium 5000, Hard 6250
Unlocks: Nothing
Kurt's RX-7 will be your only competition for this little circuit race. Paste him up against a wall on the final lap and dust him to become the #1 Circuit racer in all the land.
Race 107: Drag King
Drag Race
Location: Highway 1 Reverse
Approx. Distance: 14.6 miles
Reward: Easy 3750, Medium 5000, Hard 6250
Unlocks: Highway 1 Drag Track Reverse
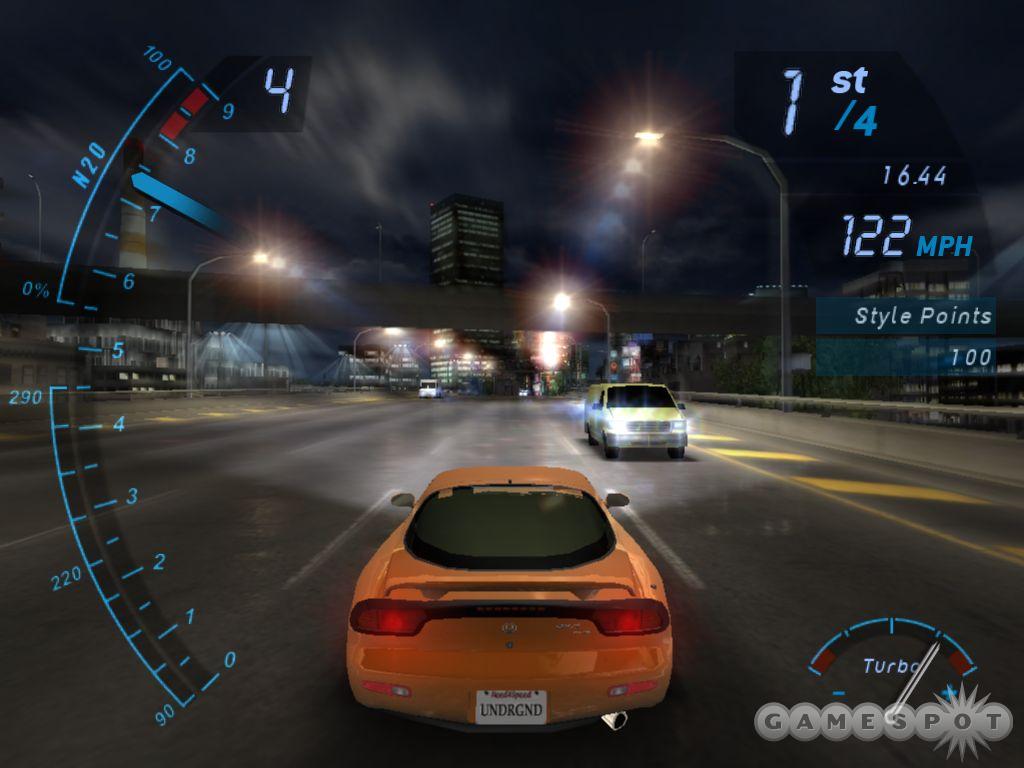
This is a bit of a tricky one. First off, you're on the highway, but in reverse mode, meaning that you're face up with four lanes of traffic coming straight at you. You'll need to keep your eyes on the headlights to know when to change lanes.
Secondly, although you can enter the race without upgrades, the other cars will be decked out no matter what your car is equipped with. Your only real chance is to give your car Level 3 everything, get a couple of Perfect Shifts at the beginning of the race, and hope they don't take a late lead with their nitro. If you're having trouble, the Skyline is, as usual, a monster car to take out for drag races. If you get a Perfect Shift from neutral, you can safely Short Shift into second gear, then get Good or Perfect Shifts until you hit fifth, at which point you can blast your nitro until you hit the finish line.
Race 108: Drift Champ
Drift Race
Location: Drift Track 8
Approx. Distance: n/a
Reward: Easy 3750, Medium 5000, Hard 6250
Unlocks: Nothing
Point totals aren't noticeably higher than in previous Drift races, so hit some monster slides until you bring home the gold medal...or whatever it is you get for being #1 in the Drift rankings.
Race 109: Sprint Supremacy
Sprint Race
Location: To 7th & Sparling
Approx. Distance: 4.1 miles
Reward: Easy 3750, Medium 5000, Hard 6250
Unlocks: 7th & Sparling Sprint Track Reverse
As with the Drag King race above, all of the cars in this race will come loaded, with power windows and AM/FM Stereo. You'll need your own top-of-the-line parts to compete, so grab everything from your garage before you hit the track. After you load up, it's a simple matter of beating the other guys to the finish line before you become #1 in the Sprint rankings.
Race 110: Good Samaritan
Circuit Race: 5 Laps
Location: Port Royal Reverse
Approx. Distance: 10.2 miles
Reward: Easy 7500, Medium 10000, Hard 12500
Unlocks: Unique Wide Body Kit (one of two)
TJ has, for some reason, suddenly become a big meanie and stolen Samantha's car, but apparently will obey the law of the streets and give it back if you manage to beat him in a five-lap race. Luckily, he's in a Civic, which should be outclassed by your fully stocked up-scale ride, and you're racing through Port Royal, which the computer has a hard time figuring out. If you stick to the left path when the road forks, then cut through the dirt shortcut onto the bridge area, you should be able to gain enough of a lead to stay in first position throughout the rest of the lap. Worst comes to worst, slam TJ into a wall or two before you approach the finish line. No one ever said racing was fair, after all.
After you win, Samantha will offer you one of two wide body kits, which are essentially matched sets of bumpers and sideskirts. Pick one and move on.
Race 111: Wrath of Eddie
Sprint Race
Location: To 1st Ave. Truck Stop
Approx. Distance: 3.8 miles
Reward: Easy 7500, Medium 10000, Hard 12500
Unlocks: Magazine Cover - Stuff
After witnessing you blow through his pitiful posse, Eddie will finally deign to take you on, one on one. The course he's chosen is luckily a fairly smooth one, save for a few right-turns towards the end. You shouldn't be unfamiliar with any of the individual sections, but it's up to you to put together a smooth race from beginning to end, because Eddie can and will take advantage of even your slightest mistake to leave you in his dust. As with any duel, your best bet is to play dirty and use your car to push Eddie's Skyline into a wall, then try to get to the finish line before he can catch up. If you win, you'll find yourself on the cover of Stuff - truly high literature.
Race 112: Legend of the Street
Circuit Race: 4 Laps
Location: Market Street
Approx. Distance: 11.7 miles
Reward: Easy 7500, Medium 10000, Hard 12500
Unlocks: Nothing
One note: this is the final race of the Underground mode. After you complete this race, your career will be over, and you won't be able to access the Customize Ride portion of the Underground menu, which means you won't be able to trade in cars or change the visual appearance of the car with which you win the race. Make sure your car is as you like it before you start this challenge!
After defeating Eddie, an anonymous stranger challenges you to a four-lap race through the ever-popular Market Street course. Racer X has a well-tuned 350z, so hit your shortcuts and run a clean race. As ever, don't neglect to play rough. The two-lane highway through the countryside is a perfect place to take some liberties with your lateral movement; if you can knock Melissa into a curve here, she'll usually drop quite a few seconds before she can get back on track. You won't be safe until you cross the finish line, though; her 350z can hit almost 200 mph.
Cars
The cars in Need For Speed: Underground are fairly faithful analogues of their real-world counterparts. While the needs of an arcade racer like NFSU don't always allow for exceeding realism, you'll note that the game's cars possess turbochargers, six-speed transmissions, and the other accoutrements of the cars that they're modeled on.
A note about pricing: since the game doesn't allow you to purchase more than one vehicle at a time, you're forced to trade in your current car if you want to move to another model. All of your currently equipped visual and performance upgrades are switched to the new car, and they also affect the trade-in price of your car. As such, stock prices aren't available for the cars beyond the five you begin the game with; this shouldn't matter much, though, since the trade-in costs for the advanced cars should usually be well below the amount of money you have, even if you play through all of the races on the easiest difficulty. The one exception is the Nissan Skyline; it's a pricey car, so you'll want to have around 5,000 dollars on hand when you unlock it.
Acura Integra Type R
The Integra Type R is a popular car amongst modders. The 195-horsepower engine helps it knock out high top speeds, but it does suffer from somewhat lower acceleration than other cars.
Year: 2001
Drive: Front-wheel
Unlocked: Race #53
Acura RSX Type S
The RSX is an entry-level premium car for Acura, but doesn't skimp on performance for the low price. The Type-S improves on the normal 5-speed transmission by offering a six-speed manual, along with a 200-horsepower 2.0-liter engine.
Year: 2003
Drive: Front-wheel
Unlocked: Race #46
Dodge Neon
The Dodge Neon began the design process in 1993, and hit the streets two years later to almost universal praise. Utilizing a 2.0-liter engine, it delivers more power than most cars in a comparable price range.
Year: 1999
Drive: Front-wheel
Stock Cost: 8500
Unlocked: Race #1
Ford Focus ZX3
The Focus has a large following among racing fans interested in domestic cars, and has sold through over a million vehicles in the first few years of its existence. The Performance kit for the ZX3 has an optional 2.3-liter, dual-overhead camshaft engine for extra oomph.
Year: 2003
Drive: Front-wheel
Unlocked: Race #08
Honda Civic Coupe Si
The Civic Coupe has an astonishing array of aftermarket parts available for it, owing to its massive popularity among modders and car tuners. In NFS: Underground, this is probably the best FWD car you can buy at the beginning of the game, and with performance upgrades, it should be competitive for much of the Underground mode.
Year: 2000
Drive: Front-wheel
Stock Cost: 10,000
Unlocked: Race #1
Honda S2000
This is one of Honda's flagship sports cars, and comes standard with a six-speed transmission and powerful four-cylinder engine. Unfortunately for you, Underground doesn't let you remove the hard top, but this is still one of the best RWD vehicles in the late game. While it does lack the acceleration of some of the other RWD cars, its top speed is absolutely unbeatable.
Year: 2003
Drive: Rear-wheel
Unlocked: Race #69
Hyundai Tiburon GT
The Tiburon GT has a massive V6 2.7-liter dual-overhead camshaft that pumps out 170 horsepower; coupled with a six-speed manual transmission, you can expect this car to be quite competitive once you start pouring in performance upgrades.
Year: 2003
Drive: Front-wheel
Unlocked: Race #17
Mazda RX7
This is one of NFS: Underground's blasts from the past, as the 1995 model was the last to be sold in America. While newer versions of this car are available on the import market (and the RX8 has recently been introduced in the States), the 1995 breed still holds its own amongst its younger competitors. Drivers comfortable with rear-wheel vehicles will find this to be an excellent vehicle to use in the game's later races.
Year: 1995
Drive: Rear-wheel
Stock Cost: 30,000
Unlocked: Race #73
Mazda Miata MX5
At the beginning of the game, the Miata will be the best (well, only) rear-wheel drive car available; if you enjoy the incredible handling that such a feature gives you, then you'll be comfortable using this vehicle for the bulk of the game's Underground mode.
Year: 1999
Drive: Rear-wheel
Stock Cost: 9,500
Unlocked: Race #1
Mitsubishi Eclipse GSX
The Eclipse GSX stands out among small sports cars, thanks mainly to a 2.0-liter, DOHC, turbocharged engine that puts out 210 horsepower. Among AWD cars, the Eclipse is second in performance only to the (much more expensive) Nissan Skyline.
Year: 1999
Drive: All-wheel
Unlocked: Race #58
Mitsubishi Lancer
It's important to note that this car is a Mitsubishi Lancer, not the Lancer Evolution, a vastly more powerful beast, itself almost a straight replica of Mitsubishi's race-dominating rally car. The Lancer is no slouch, however, with excellent all-round performance; note that it does come with a front-wheel drive system instead of the Evo's AWD.
Year: 2003
Drive: Front-wheel
Unlocked: Race #04
Nissan Skyline R34-GTR
The last car you unlock in NFS: Underground, the Nissan Skyline, can be likened to a caged animal waiting to be unleashed upon the world. The all-wheel drive can take a bit of getting used to, but after you've mastered the Skyline's mechanics, you'll find yourself in a car that's at the top of its class in handling, acceleration, and top speed. Even if you don't use the Skyline for racing, you may want to switch to it for drag challenges, where its tachometer is much more forgiving than other cars that are unlocked shortly before it.
Year: 1999
Drive: All-wheel
Unlocked: Race #79
Nissan 350z
The 350z is the last rear-wheel drive vehicle you'll unlock in Underground mode, and if you can handle the massive power output of its 3.5-liter engine, you should find it to be one of the game's best cars.
Year: 2003
Drive: Rear-wheel
Unlocked: Race #75
Nissan Sentra SE-R Spec V
This 2004 Sentra trim is technically a compact family sedan capable of holding up to five passengers, but after a few modifications, you should be able to turn it into a lean racing machine.
Year: 2004
Drive: Front-wheel
Unlocked: Race #24
Nissan 240sx
Although the stock engine configuration only puts out 155 horsepower, the 240sx can still be a competitor during the middle third of the game after you upgrade it. The handling and response of the rear-wheel drive still inspires some racers to track down aftermarket parts for this, the oldest vehicle in NFS: Underground
Year: 1992
Drive: Rear-wheel
Unlocked: Race #33
Peugeot 206 2.0 Gti 16v 3d Hatchback
The Peugeot 206 is one of Underground's oddest vehicle choices, as it's available only in Europe. The hatchback model won't be able to ride with the big boys later on in the game, and certainly won't be a feasible option for online play, but does have excellent handling if you intend to use it for the game's first few challenges.
Year: 2003
Drive: Front-wheel
Stock Cost: 8,500
Unlocked: Race #01
Subaru Impreza 2.5 RS
There are quite a few models in Subaru's Impreza line, running the gamut from wagons and SUV's to cars based on Subaru's World Rally competition cars. The 2.5 RS, however, is a sedan with a 165-horsepower, 2.5-liter engine.
Year: 2003
Drive: All-wheel
Unlocked: Race #22
Toyota Supra
Although there was a Supra Turbo vehicle in the same model year, NFS: Underground uses the normally-aspirated engine model. The 225-horsepower engine produces a high top speed, but can't accelerate quite as fast as the RWD cars that become available a mere ten races after it.
Year: 1998
Drive: Rear-wheel
Unlocked: Race #64
Toyata Celica GT-S
The Celica has long been one of America's best-selling cars, and the GT-S helps explain its popularity among modders. Although it costs around $5,000 more than the normal GT model, the GT-S pumps out 40 more horsepower and comes standard with performance tires.
Year: 2003
Drive: Front-wheel
Unlocked: Race #41
Volkswagen Golf GTI
Although the Golf GTI may be a rather attractive car for the price in real life, Need For Speed: Underground apparently uses a crippled, 115-horsepower model that's only available in Europe. It is the game's cheapest car, but, as always, you get what you pay for.
Year: 2003
Drive: Front-wheel
Cost: 8,000
Unlocked: Race #01
Upgrades
You didn't think that you were going to be able to run a stock car down here and win, did you? No, my friend, you're going to have to reinvest your winnings into upgrades.
Upgrades come in two forms: Visual upgrades, which boost your Reputation, which, in turn, leads to more style points for all those slick maneuvers you're going to be pulling off, and Performance mods, which give your car better acceleration, speed, handling, or what have you. Performance mods are, obviously, the more important of the two, but don't neglect to buy a few Visual upgrades as you proceed; some races will have a Reputation requirement for entering, which can only be boosted by outfitting your car with stylish new parts.
Performance
The cars in Need For Speed: Underground are apparently Plug N Play compatible; you don't have to tweak any gear ratios or adjust your brake camber for maximum performance or anything like that. All you need to do to upgrade your car is buy and install an upgrade; your car's performance will automatically be adjusted to account for the new parts.
All of these parts are linear, in that a Level 3 part will always be better than a Level 2 part, and so on. Of course, you'll have to unlock the different levels in the Underground mode before you can install them. Most of these parts will have "brand packages" that you can choose from; these have no gameplay effect at all, so if you don't particularly care who's making the parts that go into your car, you can default to the first selection after every upgrade.
Engine / Exhaust Package
Engine / Exhaust packages can refit or replace almost every part of your engine, eliminating power bottlenecks and freeing up your car's hidden potential. This increases your potential acceleration and top speed.
Tier 1: Street Performance
Cost: 500
Unlocked: Race #06
Tier 2: Pro Performance
Cost: 1000
Unlocked: Race #30
Tier 3: Extreme Performance
Cost: 2000
Unlocked: Race #66
Drivetrain Packages
Drivetrain mods will replace your flywheels and clutch, giving you more power from each gear; level three kits even add a sixth gear to cars that don't already have one. Going from stock parts to a level 3 kit will more than double most cars' top speeds, and lower-level kits provide big bonuses, as well.
Tier 1: Street Performance
Cost: 500
Unlocked: Race #06
Tier 2: Pro Performance
Cost: 1000
Unlocked: Race #30
Tier 3: Extreme Performance
Cost: 2000
Unlocked: Race #66
Tires
Stock tires aren't going to last long once you hit the mean streets. They may be fine for everyday driving conditions, but to deal with the dirt, water, and other surfaces that you're going to be coming across, you'll want to upgrade to tires with better traction. Doing so will improve your car's handling and let you take turns more tightly at the same speed as with your stock tires.
Tier 1: Street Performance
Cost: 500
Unlocked: Race #06
Tier 2: Pro Performance
Cost: 1000
Unlocked: Race #30
Tier 3: Extreme Performance
Cost: 2000
Unlocked: Race #66
E.C.U. & Fuel System
Most modern cars have an Engine Control Unit; a chip that controls such things as valve timings, fuel delivery, turbocharge boosting, and so forth. Factory E.C.U.'s can be overwritten or replaced, which will result in more horsepower and faster acceleration.
Tier 1: Street Performance
Cost: 1000
Unlocked: Race #09
Tier 2: Pro Performance
Cost: 2000
Unlocked: Race #38
Tier 3: Extreme Performance
Cost: 4000
Unlocked: Race #80
Turbo Package
Turbochargers are used to drastically increase an engine's performance without affecting its weight. They do this by compressing the air that's sent into an engine's cylinders, which in turn allows each cylinder to burn more fuel with each explosion. Turbocharging your ride will result in much faster acceleration and higher top speeds.
Tier 1: Street Performance
Cost: 1000
Unlocked: Race #09
Tier 2: Pro Performance
Cost: 2000
Unlocked: Race #38
Tier 3: Extreme Performance
Cost: 4000
Unlocked: Race #80
Brake Kits
Although you may not think it when you first start playing Need For Speed: Underground, high-performance brakes will become an integral part of your car's arsenal in the later, more difficult races. Hairpin turns and right-angle corners will prevent you from exercising your lead foot and force you to use technical braking to prevent your car from slamming into the wall. Better brakes will reduce your braking distance, allowing you to start accelerating sooner and letting you be more accurate in your position as you come out of turns.
Tier 1: Street Performance
Cost: 1000
Unlocked: Race #09
Tier 2: Pro Performance
Cost: 2000
Unlocked: Race #38
Tier 3: Extreme Performance
Cost: 4000
Unlocked: Race #80
Weight Reduction Kits
An engine's power only tells half the story of a car's performance: the weight of the car will also have a huge impact on its overall racing ability. Heavier cars will have reduced acceleration and poorer handling in turns, but these kits will help you strip down your car to the bare essentials, by ripping out the back seats, replacing the windows with "lightweight polycarbonate", and so on.
Tier 1: Street Performance
Cost: 750
Unlocked: Race #14
Tier 2: Pro Performance
Cost: 1500
Unlocked: Race #48
Tier 3: Extreme Performance
Cost: 3000
Unlocked: Race #91
Suspension Package
A new suspension package will replace your shocks and perform upgrades on the other parts of your car's suspension, resulting in a smoother ride and tighter handling.
Tier 1: Street Performance
Cost: 750
Unlocked: Race #14
Tier 2: Pro Performance
Cost: 1500
Unlocked: Race #48
Tier 3: Extreme Performance
Cost: 3000
Unlocked: Race #91
Nitrous Oxide
Installing a nitrous-oxide system on your car can greatly improve performance, if only for a short period of time. When you pump nitrous oxide into your engine, it breaks into its component parts; roughly one-third of the liquid's weight will be converted into pure oxygen, which allows much more fuel to be burned. The nitrogen in the mixture also acts as a buffer against increased cylinder pressures.
In NFS: Underground, successive levels of Nitrous Oxide will allow for longer periods of injection.
Tier 1: Street Performance
Cost: 750
Unlocked: Race #14
Tier 2: Pro Performance
Cost: 1500
Unlocked: Race #48
Tier 3: Extreme Performance
Cost: 3000
Unlocked: Race #91
Visual
There's an absolutely stunning array of visual modifications that you can add to your car. Although some of these, such as spoilers, would seem to aid your car's performance, in truth, all they do for you is increase your Reputation, which in turn helps you gain more style points, which in turn unlocks more visual modifications that you can apply to your vehicle. Some challenges, especially tournaments, have Reputation requirements, but for the most part, you won't need to worry about upgrading the look of your car unless you would like to.
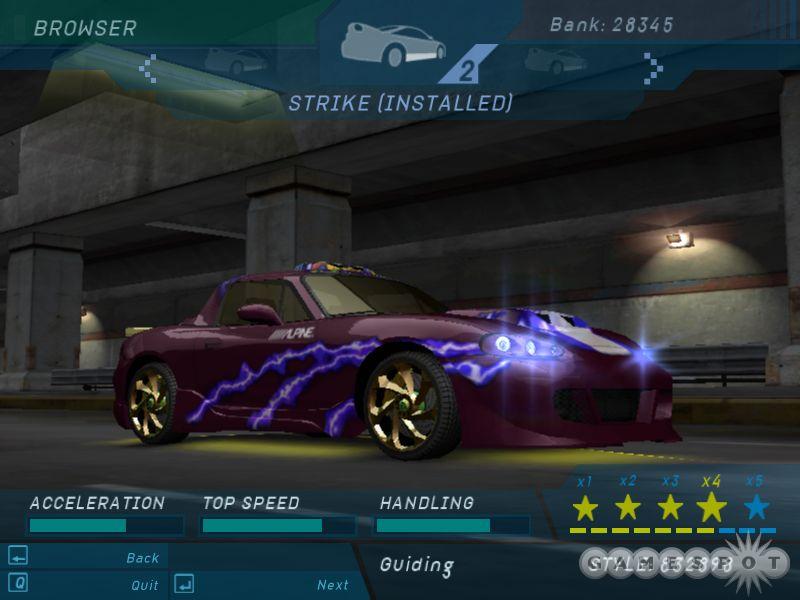
Visual modifications work in concert to increase your Reputation, meaning that you will usually get a bit of a bonus to your Reputation for having a full suite of upgrades installed. Keep in mind, though, that many of the visual mods don't affect your Reputation score at all, such as paint, decals, and vinyl, which are exclusively for your own eye candy needs. In general, if you have to pay for something, it'll boost your Rep; if not, it won't.
Most visual modifications are split into up to three categories, with each level of modification being unlocked individually. Different races will unlock different modifications, so before long, you should be able to trick out your ride and make it look as sleek or as garish as you like.
Last, note that some of these modifications begin at Level 2; this just means that you won't be able to buy any of these upgrades at the beginning of Underground mode. You'll need to unlock them before you can move up from the stock model.
Body
Body mods are going to be your primary source of Reputation points. They can be expensive, however, so you may want to hold off on buying them until you unlock enough of them to get to the next Reputation multiplier, and buy any engine upgrades that come along in the meantime.
Front Bumper
Level 1
Cost: 500
Unlocked: Race #1
Tier 2
Cost: 1000
Unlocked: Race #44
Tier 3
Cost: 1500
Unlocked: Race #90
Rear Bumper
Tier 1
Cost: 500
Unlocked: Race #1
Tier 2
Cost: 1000
Unlocked: Race #49
Tier 3
Cost: 1500
Unlocked: Race #100
Side Skirts
Tier 1
Cost: 400
Unlocked: Race #1
Tier 2
Cost: 800
Unlocked: Race #39
Tier 3
Cost: 1200
Unlocked: Race #84
Spoiler
Tier 1
Cost: 300
Unlocked: Race #1
Tier 2
Cost: 600
Unlocked: Race #45
Tier 3
Cost: 900
Unlocked: Race #93
Hood
Note that decals and hood vinyls can't be applied to non-stock hoods. If you want to gussie up your hood, you'll need to revert back to the stock model. This may drop you back to a lower Reputation, so check your multiplier before changing equipment out.
Tier 1
Cost: 300
Unlocked: Race #1
Tier 2
Cost: 600
Unlocked: Race #43
Tier 3
Cost: 900
Unlocked: Race #89
Roof Scoops
Tier 2
Cost: 400
Unlocked: Race #31
Tier 3
Cost: 1500
Unlocked: Race #70
Rims
Tier 1
Cost: 400
Unlocked: Race #1
Tier 2
Cost: 800
Unlocked: Race #34
Tier 3
Cost: 1200
Unlocked: Race #81
Accessories
Neon
Tier 1
Cost: 200
Unlocked: Race #1
Tier 2
Cost: 400
Unlocked: Race #18
Tier 3
Cost: 600
Unlocked: Race #62
Headlights
Tier 3
Cost: 600
Unlocked: Race #60
Taillights
Tier 3
Cost: 600
Unlocked: Race #61
Muffler Tip
Tier 2
Cost: 200
Unlocked: Race #28
Tier 3
Cost: 300
Unlocked: Race #54
Window Tinting
Tier 1
Cost: 100
Unlocked: Race #1
Tier 2
Cost: 200
Unlocked: Race #29
Tier 3
Cost: 300
Unlocked: Race #54
Paint
The basic paintjobs are free, but you will eventually be able to unlock extra colors. After you hit level 3, don't forget to check out the options for pearlescent and metallic paint. After you unlock and buy extra paint, it will be available for all of the parts that you can apply it to, so if you buy level 2 under the body menu, it will be available for painting your spoilers, brakes, and so on, at no extra cost.
Tier 1
Cost: 0
Unlocked: Race #1
Tier 2
Cost: 600
Unlocked: Race #23
Tier 3
Cost: 900
Unlocked: Race #65
Decals
Decals are available for all of the game's parts manufacturers, and can be applied to almost any available space on the exterior of the car, including the hood, the rear and door sections of either side of the car, and the windshield and window. These are all free, though you will need to unlock them.
Tier 1
Unlocked: Race #1
Tier 2
Unlocked: Race #12
Tier 3
Unlocked: Race #51
Vinyl
When you want to make your car look really hideous, then look no further; vinyls will help you force passersby to retch as they see your loathsome, repellent vehicle drive by. Or, you could use them to turn your car into something really stylish, although this is much more difficult than achieving a critical-mass level of ugliness. Luckily, vinyls are free, so you can mix and match all you like. Most vinyls are unlocked via style points, so if you want to expand your selection, take your car out for a Quick Race on one of the later Drift tracks for huge scores. You can easily unlock five or six different vinyls in a single race, especially after your car hits the fourth or fifth Reputation multiplier.
Tracks
Circuit
Olympic Square
Olympic Square is the first, and easiest track in Need For Speed: Underground. There aren't any super-hard turns, so keep your foot on the floor and try to keep your vehicle at or near its top speed.
The first turn that you reach after the starting line is the most difficult to get a clean line through; it's almost a 180, but without the simplicity of a pure hairpin. For the earlier portions of the game, you should be able to make it through cleanly by letting go of the gas as you enter, then flooring it as you exit. After you've modified your car with performance upgrades, however, you'll likely need to hit the brakes shortly before entering the turn to avoid ramming into the outside wall. A shortcut immediately follows the turn; cut across the oncoming traffic lanes to jet through.
After you take your next turn, you'll be faced with three paths, including both lanes of traffic and a tunnel. The tunnel offers no significant time benefit, and isn't a shortcut for the purposes of Style Points, but is generally preferable to travelling along the oncoming traffic lane, which has a blind jump that will occasionally see you flying head-first into a car you can't see. It's often difficult to cut back from your turn and make it into the correct lane of traffic for the direction you're heading, especially with a tricked-out car, but if you can reach it, then that's usually the best choice, since you'll be able to avoid traffic and will be in a good position for the next turn.
Said turn is a lengthy 90-degree angle that opens into a road with a tree-lined median. Try to slide into the outside lane here, erring on the side of caution, if necessary, by sticking close to the exterior barrier. You do not want to hit one of the trees here, as doing so will bring you down to zero miles per hour instantaneously.
The road splits in two beyond this little avenue. Try to take a right at the fork; this will prevent you from having to make a difficult turn where the road rejoins, and will give you a much better angle to enter the second shortcut of the track, which runs parallel to the dip in the road ahead. Hit the shortcut if possible, but beware of the cross-cutting traffic. Subsequent to that shortcut, you have an easy path to the finish line. As you head for home, be sure not to undercut any of your turns, as you will sometimes find yourself ramming into the corners of the track when you do this.
Reverse:
The reverse angle on Olympic Square results in a slightly tougher race. The important hotspots include the second shortcut (now the first), which is now a bit more difficult to hit properly as you round the corner towards it; you'll need to brake, or at least ease off the gas, to hit the entrance without sliding into the wall.
The fork in the road should, again, be taken with a right turn. It's tempting to go straight on these forks, but doing so results in a tougher turn a few second later, and as such isn't worth it.
The tunneled road offers the same set of choices as it did before, but here, it's more important to get to the outside before making the turn. The small drops in the road that you encountered on the straight course have turned into a couple of jumps that will prevent you from adjusting your position; before you go over them, you'll want to make sure that you're heading straight up the road and are not going to ram into any oncoming cars. Past those hurdles, take the second shortcut, round the corner (which is a bit tighter in the entrance than on the normal route) and you're home free.
Atlantica
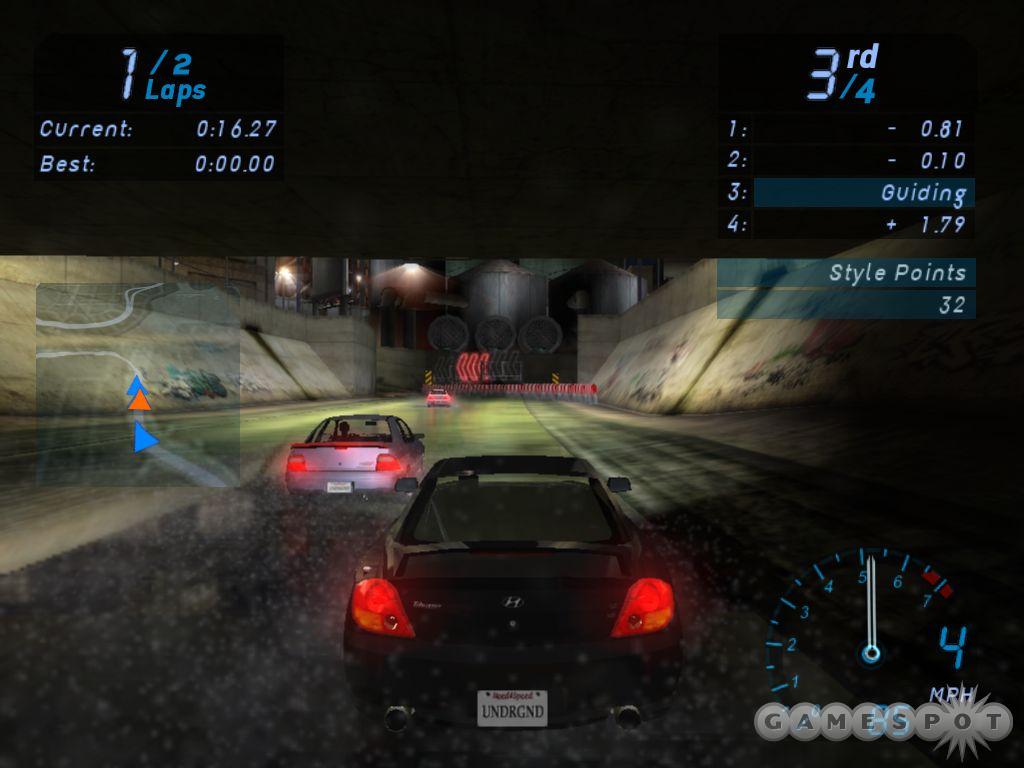
The sewer section that leads off Atlantica will be a very familiar sight to you by the time you reach the end of the Underground mode; it pops up in quite a few of the Sprint and Circuit races. It's a simple section, excepting the pillar twins that split the path into three shortly after the beginning of the race. If you're runnnig alongside a car here, it goes without saying that you should attempt to ram them into one of blockades, but try not to be the rammee.
After you reach dry ground, you're going to face a hard left into a dirt section of the track. Taking this with a tricked-out car can be a pain; try not to go over 110 MPH or so as you head through, and tap the brake if you feel yourself sliding towards a wall. Subsequent to that little diversion is the well-used construction shortcut. Stick to the right wall here and take the jumps to cut a couple of seconds off your lap time. The left-hand section of this shortcut is to be avoided; it, too, offers a couple of jumps, but forces you to steer from right to left while you take them. Wall grindage usually follows, which is never a pretty sight.
The shortcut leads onto a familiar road with the obstacle-laden median. The subsequent track segment consists of four lanes of traffic, divided in the middle by numerous concrete barriers. The right lane of traffic is your friend here; the oncoming lanes are to be avoided at all costs.
The final turn into the sewers is preceded by a slow right. If you're in the right-hand lane, watch your speed here; the left-hand barrier has an abutment that will usually send you careening if you slide along the inside wall.
Reverse:
The backwards run towards the concrete barriers poses a quandary for drivers: the left-hand lane is a much easier turn after you begin the race, but leads into oncoming traffic, while the right-hand lane is a wider and sharper turn, but leads into the much safer traffic lane. It is possible to take the left-hand lane to make the first turn, then shift over to the right-hand lane after the turn is complete, but you'll have to dart through one of the gaps in the barrier shield, which is easier said than done, especially at 150 MPH. In the end, the decision will have to rely on the density of traffic: minimum or no traffic will make it easy to take the left-hand lane; any heavier, and you're greatly increasing your chances of running into a car.
The second difficult spot comes as you try to enter the construction shortcut; you'll need to brake, sometimes quite hard, as you round the corner towards it to reduce your speed enough so that you can manage the hard left into the left-hand shortcut. From there, the dirt shortcut poses another problem, but so long as you don't edge your car past about 120 or so, and brake appropriately, you should make it through without too many scratches.
Inner City
The tunnel that leads off this track is easily navigable, and leads down towards the familiar long shortcut that precedes the road split from the Olympic Square track. Take it as you normally would, by hanging right, then get ready for a 90-degree left turn that immediately precedes the construction shortcut. It's best to hang along the outside of the turn, before cutting back inside to hit the shortcut, but you shouldn't have to skimp on speed overmuch here due to the extraordinary width of the turn itself.
The subsequent road is itself very wide. Hang to the right side, riding up on the sidewalk, to prepare you for another sharp left. You can Powerslide through this turn if you wish (the computer usually does), but all that's normally required is to lay off the gas and hug the inside of the turn. From there, there's a straight shot up the jumps until you reach the last sharp left. This final turn is much more severe than those that came before it, so hit your brakes well in advance and get your speed under control before you attempt it. There isn't much room for a Powerslide, but you're welcome to try if you feel that it helps you retain speed.
Reverse:
You begin this race by facing down the sharp turn that immediately preceded the finish line to the normal Inner City track. Luckily, the computer seems to have a hard time handling it off the starting line, so take advantage of their ineptitude by jumping off to an early lead. The three jumps that end the first straightaway must be taken head-on. If you hit them with your car turned even a slight amount, your vehicle will twist in mid-air and land at an angle, thus making it more difficult to line up the next jump, and so on. A slight error on the first leap will be compounded on subsequent takeoffs, so make sure you're traveling as straight as possible when you hit the jumps. The turn at the bottom of the jumps can be taken at near top speed, depending on the traffic. If there are cars muddling about on the inside of the curve, you'll probably need to brake and stick to the outside; if not, though, letting go of the throttle for a second to gauge your control will be all that's necessary for most vehicles. The subsequent shortcut is much more easily hit than on the Inner City track, so take it along the right-hand side.
The next turn is much easier to handle than it was on the straight-ahead version of this map; you'll probably be able to keep your pedal on the floor all the way through. From there, the familiar shortcut section looms, which leads back to the tunnel before the finish line. The tunnel itself isn't difficult to navigate, but you'll want to tap on the break before entering it, since the ramp leading up to it will sometimes send you airborne if you approach at 120 mph or more. You'll want to make sure that you stick to the road here, because if you do leave the surface, hitting the wall becomes much more likely.
Stadium
The highway section here will be repeated throughout the game, so get familiar with its twists and turns. For the purposes of a forward Stadium race, it's best to keep to the right and stay in the correct lane of traffic; you're faced with a semi-sharp turn right away, which may force you to rub against the yellow retaining wall if you take it too fast, but from there, it's an easy run towards the point where the roads converge. Take the inside shortcuts between the pillars and the walls when you reach them, and use the tightness of the passageway to slam any competitors into the barriers. After you round the long corner and rejoin the other lane of traffic, you'll need to keep to the left as you take the next turn, and glide between the barriers here until you reach the alleyway.
This alley is a nasty place to be: on top of the speed-sucking obstacles that litter the road, you'll have to deal with the numerous bumps in the surface. These won't slow you down, but will make it so that your car spends a significant portion of its time in the air, rendering it difficult to make steering adjustments. What adjustments you do make will likely be exaggerated by the up-and-down motion of your car, so steer softly and try not to jerk your wheel too far to either side.
At the end of the alleyway, you'll hit the jump leading over the bridge. There aren't any secrets here; just make sure that you're traveling straight when you go over it. If possible, try to tap any nearby opponents before they make the jump; doing so will usually send them spinning through the air, and make it much more difficult for them to regain their line when they come back down.
If you're the first over the bridge, you'll have to bust through the gate ahead and make your way through the left turns that follow. The three-jump track section follows, and leads you on to the finish line.
Reverse:
The turn into the bridge jump here is somewhat difficult to take properly, due to the way it narrows as your turn proceeds. Hitting it properly may require you to come down from your top speed, but it's important to not slide into the walls, so that you have maximum control as you head over the bridge.
The alleyway's jumping problems are magnified a bit by the slight downhill angle you're traveling upon. Do your best to retain control until you hit the end of the highway, where you'll need to dodge the barriers again before choosing the lane of traffic. It's extremely easy to overshoot the turn into the right-hand lane if you're at top speed here, so just before the last barrier, you may want to hit the brake and sacrifice speed for control before you find yourself facing oncoming traffic. The finish line is at the very end of the highway section, so don't hesitate to maneuver your competition into cars or the walls to gain an edge.
National Rail
The section that begins this track is a relatively easy one, if you can avoid the traffic. Take the curves down the middle at high speed, then ease off the gas a bit for the sharp right turn. The long straightaway here is a great place to use your nitrous oxide on the last lap if you're off the lead.
The dirt section here isn't quite as terrible as it is on some of the other tracks, since the walls will do a good job of keeping you oriented if you lose control. Of course, it's always best to overestimate your braking needs when heading into the dirt, so take it slow and ease your way through until you hit the pavement again. Entering the dirt at around 110 MPH, depending on your handling, should give you optimal control over the dirt and let you exit at around 125 MPH.
The highway ahead is a different highway section than the one in the Stadium course. You can either play this safe and take the right-hand lane, or go for broke and veer into the oncoming traffic. The left lane will put you in a better position for the upcoming tunnel, which has a nasty s-curve in it that will result in more than a few breathtakingly close encounters with doom, especially if you try to head through it at full speed. The best line is to head into the tunnel in the oncoming traffic lane, tap the brakes just before the turn, pass into the right-hand lane before the pillar in the middle of the curve, and take the proper traffic lane to the end of the tunnel and out onto the finish line. If you have to enter the tunnel in the right-hand lane, you'll need to hit the brakes a bit harder before you reach the curve. The shortcut just beyond the starting line that the computer players will usually take is to be avoided. The AI can sometimes maneuver through the barrels and water to gain a second, but the time advantage doesn't outweigh the relative difficulty of the path when you compare it to the simple and speedy road above.
Reverse:
You begin this race by heading through the tunnel here; the first lap will be easy enough, with the low speeds, but subsequent laps will be a bit more difficult. An optimal path, disregarding traffic, would be to enter it in the oncoming traffic lane, swing over to the right lane during the curve, then swing back out to the oncoming lanes to avoid a spin-out that's possible when you attempt to stick to the right-hand lane here. Luckily, having the tunnel at the beginning of the race lets you take the highway segment in the right-hand lane.
The dirt section here is incredibly dangerous and easy to misread. Although the turn into the dirt looks simple, the outside wall juts into your path after you reach the new surface, and if you're heading into the turn above 100 MPH, you'll usually be powerless to avoid ramming into it. Take the turn slow and steady, and save your speed for the long straightaway ahead.
The left turn at the end of the straightaway can be taken without braking if you ease off the gas and cut across the oncoming lanes to make it. As with the normal National Rail track, avoid the shortcut and jet down the road towards the finish line. Be careful not to approach the final turn too quickly, as there isn't a wall to veer you back on course if you don't turn in time; you'll pass through an invisible barrier and be reset on the track at zero speed, which will usually let someone blast past you for the win.
Market Street
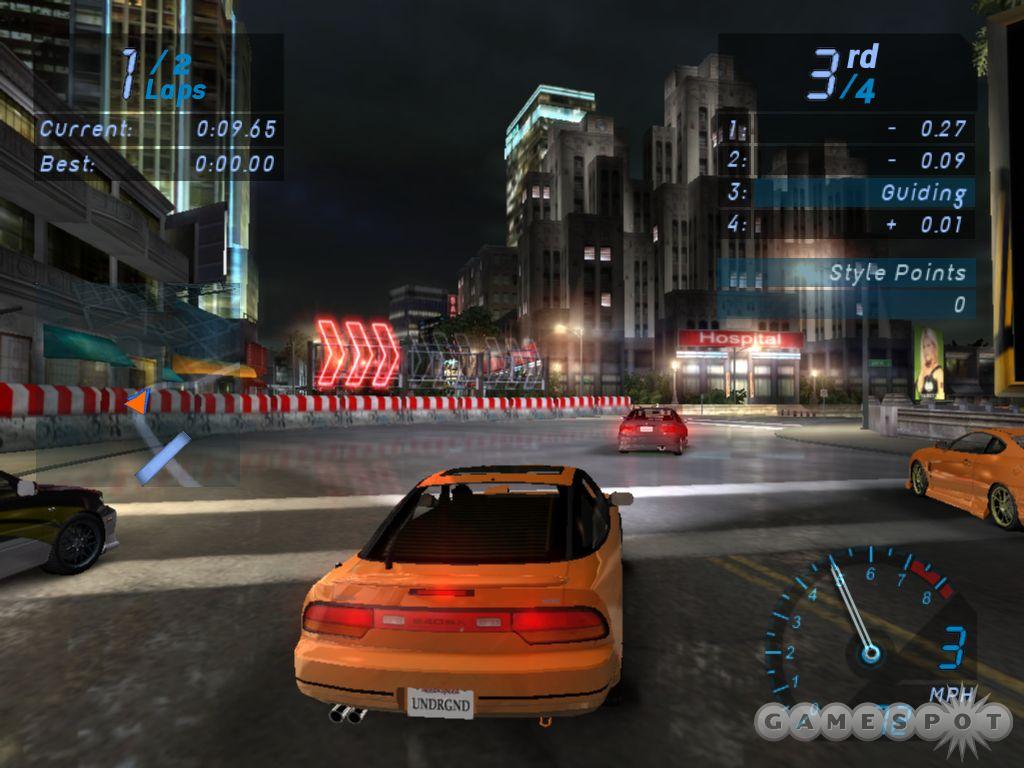
The first turn here is easily taken at high speed, if you approach it from the outside and lay off the gas as you head through. Avoid the trolley that will be heading down the subsequent road, and try to make it through the shortcut on the left side of the road. If you're the first one through the cut, you may get rattled by the gates, but you should be able to regain your footing before you hit the country road that's at the heart of Market Street.
This little backroad is the narrowest section in NFS: Underground, and is the most difficult to get through without ramming into a wall or two. The shortcut here is usually not worth taking; it's far too easy to ram into the divider that leads into it, and even if you hit it cleanly, you'll usually wind up grinding the wall as you pass through. The normal road features a lengthy right turn which can be taken, depending on your car and your mods, either at full speed or with taps on the accelerator; braking shouldn't be necessary unless you had a real head of steam coming in. There's a small chicane before the exit from this section, so lay off the gas and swerve to and fro to avoid contacting the walls. If you've done all this correctly, you'll need to brake as you exit the section, so let off your excess speed and make the hard left.
There's another shortcut that cuts across the next turn, but it saves you little time due to the way you have to brake almost to a complete stop before you can turn in. It's better just to approach the turn, braking as necessary, and not worry about the Style Points. The last complex turn of the level consists of a shortcut on the left-hand side of the road that lets you take the next turn without needing to brake. This is arguably the best path to take, since although it would seem to extend the length of track you need to traverse, you'll be able to keep your top speed through the turn and up into the center of Chinatown. Alternatively, you can turn right before the shortcut and cut through the barrels before the corner for an alternate shortcut, but this will often result in a wall-slam, especially if you misjudge your exit speed.
After Chinatown, you'll hit the familiar bridge. There's one final turn here, which you can either take on the outside or attempt to cut by heading through the gas station. The gas station isn't a true shortcut in the Style Points sense of the word, and is something of a blind turn from this angle, so it's usually best just to lay off the gas and take the safer turn before slamming your pedal down and making your way to the finish line.
Reverse:
The first gas station shortcut is easily accessible here, so use it to shave a half-second off your time before hitting the bridge. The descent through Chinatown is rife with side-streets, so watch your contact with other cars; if you veer off into one of the side alleys, you'll have to reset at zero speed. If this happens, take the left-hand shortcut through the barrels; otherwise, stick to the right path and round the corner at top speed.
After the next corner, you'll be faced with the turn into the back road. The turn here is at an angle that's a bit more than ninety degrees, so don't be afraid to brake hard to avoid grinding against the wall. The shortcut through this section is as avoidable as it was on the forward version of the track; even if you avoid the walls, you'll still be forced to proceed at a slower pace than you would on the main track. Either way, you may want to brake on the turn just before the shortcut that exits the road. You'll need to have complete control of your car through the shortcut if you want to avoid slamming into the walls. After you hit the main drag here, you'll need to navigate through one final turn before the finish line.
Terminal
The first turn here is sharp, but can be taken at nearly full speed if you approach from well on the outside, especially if you lay off the gas to gain control. The subsequent tunnel is a good opportunity to ram your competitors into a wall; it's followed by another fairly easy right turn.
After you bypass the construction area, you're faced with a couple of independent turns that lead to the terminal tunnel. The best way to approach these turns is to just stay off the gas entirely as you pass through them; this eliminates the need for braking, and lets you turn into the second curve without having to sacrifice much speed. Traffic, of course, will dictate your tactics, but it's always good to avoid braking whenever possible.
The tunnel here is a killer, and will result in more last-place race restarts than almost any other track section in the game, especially when traffic is heavy. The optimal path relies on you entering it in the right-hand lane and crossing over to the oncoming lane in the middle of the curve. If you have to swerve back outside to avoid traffic, do so, but if you do, you'll need to brake as you exit the tunnel to make the left-hand turn that immediately follows.
Past the airport, you'll hit another construction area. The dirt segments of this section present a tempting target for shortcutters, but some parts conceal nasty bumps that can send you flying if you hit them at an odd angle. Past that area, though, there's another long curve leading to the finish line. You can take the shortcut through the curve, if you're suicidal; the jump requires you to slow your car down quite a bit before you hit it, and the walls on either side will crush your hopes for victory if you happen to impact them. On the whole, it saves you virtually no time; take the outside curve and live to drive another day.
Reverse:
The jumping shortcut here is actually accessible if you hit it just after the race begins; you won't have built up enough speed to make it dangerous, so long as you can hit it correctly. For subsequent laps, though, play it safe and proceed through the outside curve back into the construction area.
The terminal tunnel is no less dangerous here than it was on the forward version of this track. Again, approach it in the right-hand lane, then shift over in the middle to reduce the severity of the curve. You'll need to head back outside to make the following hard left, but you will have to time to adjust your position after you exit the tunnel for this; just concentrate on making it out of there without getting in a collision.
After that turn, you'll be faced with a fairly clear path to the finish line, save for two more hard lefts that will need to be taken after laying on the brakes.
Port Royal
From the beginning of the race, hold the pedal down until you reach the end of the sewers; everything from the start line through there should be familiar to you, and little of it requires braking or even letting up off the throttle.
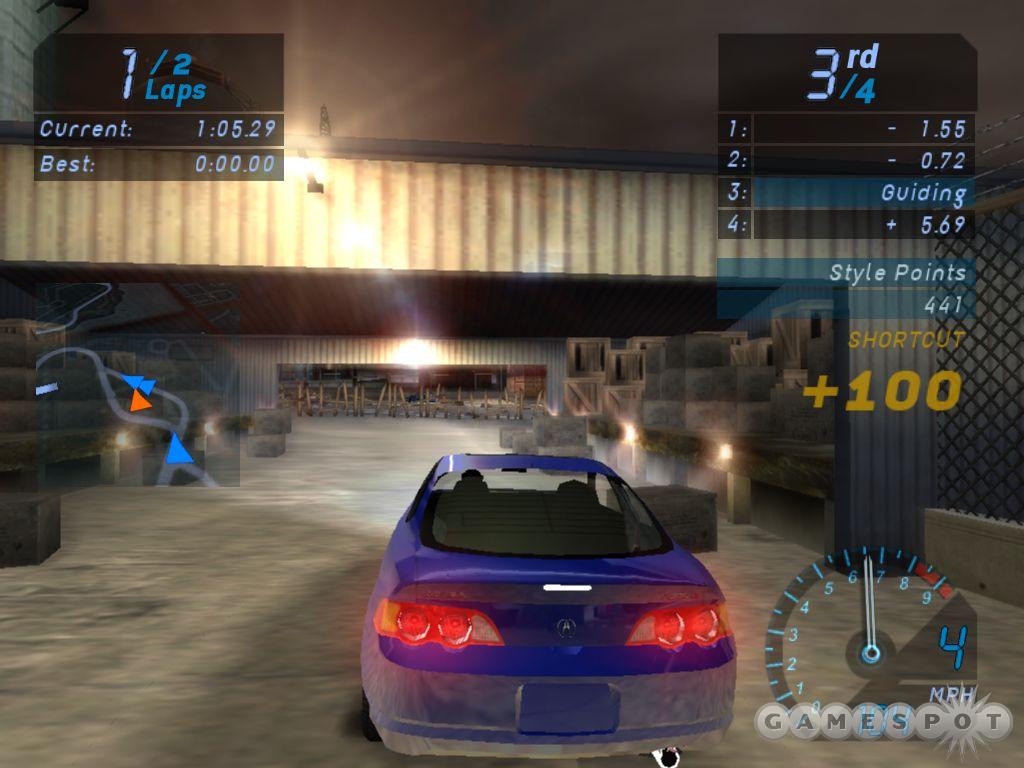
After you exit the ditch, though, you'll be faced with a long left turn that segues into a semi-sharp right. The elevation changes can make this transition difficult, so lay off the gas as you approach the right to avoid slamming into the wall, then floor it. There's a seemingly complex series of roads ahead, but in reality, you have an easy choice: take the right-hand road at the first fork, head straight across the dirt shortcut, tap on the brakes to gain a little control as you exit and round the sharp left turn, then floor it until you hit the finish line. The computer will occasionally turn left at the fork; if they do so, you will sometimes be able to get a five-second lead on them by following the path outlined above.
Reverse: As with the forward version of this course, you can build a monster lead on the AI cars by taking the same path through the maze of streets that now lead off the track. Take the first left that's available to you, slam on the brakes when you reach the red markers pointing you to the right, then cut back through the dirt shortcut and floor it. From there, it's easy curves until you reach the sewers.
When you hit the exit from the sewers, take care not to extend too far to the outside. There's a street that runs across your track, and if you go too fast, you can hit the wall here and lose all of your speed, which is a bad thing to have happen just before the finish line.
Sprints
Liberty Gardens
Liberty Gardens consists of a stretch of the Olympic Square Circuit track with a bit of the Terminal course hacked on to the end. The parts aren't difficult in themselves, if you're familiar with the Circuit tracks from whence they were spawned, but the transition point may be a sore spot. Shortly after the long 180, you'll be faced with a sharp 90-degree left turn. You can Powerslide over the grass and cut the inside of the corner, but on anything about minimum traffic, you'll probably wind up being rewarded with a collision.
After you make the turn, however, it's clear sailing to the finish line, which is set almost flush with the end of the construction zone beyond the airport. If you have any nitro left when you pass the terminal, use it up in a mad dash for first place.
Reverse: To Liberty Gardens
The traffic cones and other bric-a-brac that litter the construction zone are acceleration killers, so stick to the pavement as you pass through on your way to the airport terminal. The tunnel here is a nuisance, as always, so take it slow and wide to the outside, and line up your entrance so that you can hit the oncoming traffic lane with a minimum of fuss. After exiting the tunnel, make the hard right and get back into the Olympic Square track to head home. Depending on the traffic levels, you may have to dodge suspiciously well-timed cars on the long shortcut before the finish line, so be wary.
Broadway
Broadway begins with a long section of Market Street, beginning with the narrow back-country track, and ending shortly after you pass the trolley, which you should watch for if you're in the lead at this point. The transition from Market Street to Olympic square is surprisingly difficult, consisting of a few sharp turns, so watch your speed and be prepared to brake as you pass from one Circuit track to the next.
Reverse: To Broadway
There's little that should challenge you on this course, if you're familiar with the two Circuit courses. The hard turns at the junction point between Market Street and Olympic Square should be easily navigable when you learn where they are. If possible, save your nitro for the final stretch before the finish line; you will have a few seconds to retake a lost lead here if you conserve your boost for when you really need it.
Lock Up
Why this track is called "Lock Up", we can only speculate. We do know that it starts you out with a track that's practically identical to Broadway's Olympic Square - Market Street transition, save that Broadway's finishing sprint has been replaced with a turn back up through Chinatown until you hit the Stadium track's bridge jump, which itself leads into National Rail's formidable highway-tunnel section. The tunnel here will be especially exhausting, coming as it does right before the finish line; if you have a lead, this is the time to slow down and avoid losing it because of a silly mishap, like accidentally ramming into one of the central pillars.
Reverse: To Lock Up
You should be able to navigate the opening tunnels without any problems here, due to the low speeds you'll be traveling at immediately following your launch from the starting line. From there, everything should have been burned in through multiple exposures, with the possible exception of the hard left-hard right duo before the transition back to Olympic Square. Save your nitro for the last shortcut before the end, and use it to overtake anyone ahead of you there.
Bedard Bridge
You'll start off on the reverse Terminal course here, so avoid the Jumping Shortcut Of Death on your way towards the tunnel. The hard right that follows can trip you up, especially if there's any amount of traffic, so veer into oncoming traffic and slow down so that you can take it without a hitch. From there, run the Olympic Square section (back of hand, etc.) until you reach the concrete dividers that lead down to the sewers.
Before you reach the end of the course, though, you'll have to deal with the myriad trails that lead through the factory that immediately precedes the finish line. There is one shortcut that involves busting through a wood fence and a chain link fence beyond that, but it's very difficult to line your car up for this, since you won't be able to see through the fence before you trample it. The best "normal" route is found by taking a left when the road forks, and then hitting the brakes and taking the right turn to the finish.
Reverse: To Bedard Bridge
The sticking point here comes just after the starting line in the form of an obscured shortcut, which requires you to take a left onto the dirt, follow that path through the black fence on the opposite side of the street, hang a slight left through the building, and then bust out through the wooden fence, keeping to the right to avoid slamming into the wall. When done properly, you can get a lead of a second or so on your opponents, but you will sacrifice a bit of speed, so you can expect them to jump right back on your tail. From there, it's a simple matter to proceed back to the Terminal and the finish line.
1st Ave. Truck Stop
You can actually hit the jump through the shortcut at the beginning of this race, since you begin so close to it that you should have total control over the speed and angle of your car, so hit it and get moving. The first big right turn is also close enough to the starting line to normally occur before the pack separates, so if you get the opportunity, hit one of your opponents while you're going through to steal some of their momentum and prevent yourself from having to brake.
The last track section will be your savior if you've fallen behind; as usual, the computer can be expected to lose a few seconds in the mess of roads, so take the left road, cut across the dirt, and head down across the unfinished road, which will deposit you directly in front of the finish line.
Reverse: To 1st Ave. Truck Stop
Unfortunately, the computer seems eager to take the route that normally saves you a few seconds, so you shouldn't expect any huge leads to begin the course. The concrete barrier section will let you gain a second or two on your opponents, however, especially if you dare to travel in the oncoming lanes after you exit the canal. The final jumping shortcut is so temptingly close to the finish line that you may want to try taking it, especially if there's someone ahead of you who's going over it as well. The loss of speed inherent in taking a big jump like this isn't that important, given the short little sprint to the finish line, and if your competition lands badly, you should be able to pass them for the win.
7th & Sparling
The dirt section after the canals here should be taken slowly enough to prevent any spin-out mishaps; you'll have a good opportunity to make up time or retake the lead on the construction shortcut that immediately follows.
If you take the right-hand slot of the shortcut, you'll need to make a hard right and hold it longer than you normally would; you'll barely have time to straighten it out before you're faced with the right turn at the fork in the road. If you can't coax your car through the somewhat extreme turn radius, it's better to sacrifice the right turn and keep your speed while heading into the left side of the fork. This may make it more difficult to hit the shortcut ahead, but you should still be able to make it if you weave far enough to the outside.
Reverse: To 7th & Sparling
The main sticking point here will be the nasty turn subsequent to the fork. You'll either need to take the turn on the far outside edge, or cut your speed drastically; blasting through it as fast as possible is an option, as wide as it is, but this will leave you in a bad position to make the ensuing shortcut. If you do manage to negotiate your car into the shortcut, the dirt section that follows is just straight enough for you to go full-throttle through it, if you can keep an eye on where the walls are.
9th & Frey
If traffic's bad, then the right-hand lane is your only real choice. It's probably the best choice, no matter what, but if you prefer to dare the oncoming traffic, at least you know that the catch-up feature will let you get back in the race should you have a horrific accident. If you're not in the lead when you reach the alleyway, try to get behind the first car and let him or her deal with the signs and traffic paraphernalia that lead to the bridge; they'll take the speed hit from the successive impacts, letting you blast past them and take the lead after you land.
Reverse: To 9th & Frey
Making it into the construction shortcut will be difficult on your first run-through of this map, since it doesn't show up on your HUD map, and follows a somewhat unfamiliar turn. After you pass the concrete barrier section, start looking for a very gentle right turn and keep your eyes open for the construction barriers; when you spot them, get in line for the shortcut and head through full-blast. The rest of the course is a fairly speedy one, but be sure to hit the brakes, if necessary, to get in the correct lane of traffic when you reach the bottom of the highway.
Spillway
You'll need to draw upon the hard-earned skills you've built up while racing on the many different Circuit tracks to do well on this, the longest Sprint track. Truth be told, most of the curves are rather moderate, letting you floor it for most of the track without concern, but if you hit a rough spot, even towards the end of the route, don't give up hope; ahead lies the wonderfully confusing Port Royal track section that the AI cars never seem to handle properly. If you can bust through the dirt shortcut and get back on line before the long left turn, you should have an unbreakable hold on the lead.
Reverse: To Spillway
The action here can get quite intense, simply because there are so many opportunities to screw up, especially when there's heavy traffic. By the time you unlock this track in Underground mode, you should have a pretty good NOS kit installed; if you're fighting for the lead through the Terminal construction area, you can attempt to take the jump shortcut, slam on the nitro, and make a mad dash for the finish line. It's a desperation move, obviously, but that's what makes it so fun when you actually pull it off.
Drag Tracks
14th & Vine Construction
This first Drag track is among the simplest. After getting a good start, there's a long, open stretch of road for you to maneuver and bump your opponents, but watch the two outlying lanes, as both will be cut off eventually as the road heads underneath the overpass. After exiting the overpass, you'll need to stick to the right to hit the ramp that jumps the train; any contact with the train itself will probably render your run useless, so be sure you're going as fast as possible. Use your nitro before the ramp to ensure a high speed.
Reverse:
Hit the left lane as soon as you get in a position to do so, as the right lanes here will be mostly inaccessible due to construction and traffic. Once you get an opportunity to get back in the proper traffic lanes, do so and, depending on the traffic, stay in the middle lane with the yellow stripes to avoid collisions. You will need to watch out for cross-traffic as you approach the finish line; try to avoid swerving into the oncoming traffic lanes.
14th & Vine
If the 14th & Vine Construction track is "among the simplest," then the normal 14th & Vine track is the simplest. None of the lanes are blocked off here, giving all of the cars a full four lanes to play with. Winning against equal or better competition here will require positioning and bumping off the starting line and drafting down the stretch. As per usual, hit the ramp at the end for a spectacular finish.
Reverse:
Without the train at the end, all you need to worry about here is traffic avoidance. If you're running neck-and-neck with a foe, try to ram their car into an oncoming traffic lane.
Highway 1
This is another traffic-laden course, but then, what would you expect from a highway? You'll need to stick to the middle lanes as you enter the flow of cars, if only to give you two avenues of escape when you come up on a slower-moving vehicle. The right lane is blocked off in one spot by a truck, so avoid it.
Reverse:
Well, at least you have a bit of a buffer zone to accelerate through before you head off against four lanes of oncoming traffic; after you reach the highway, though, you'll need to keep your wits about you. Again, stay in the center lanes, and try to avoid shifting over into a lane where you can see a car coming; your margin of error here is drastically reduced.
Main Street
The first jumps here will make it difficult to shift properly, but whatever you do, avoid shifting in midair; your tachometer jumps to the far red zone and you'll wind up killing your acceleration. If you can manage it, shift in-between jumps; if not, wait until you hit the street again and shift there, laying off the gas a bit if need be. From there, stick to the right and stay out of oncoming traffic. If you get stuck behind a fellow racer, you won't have much room to maneuver before you hit the bridge, but you should get enough of a speed bonus from drafting to allow you to easily take the lead on the final stretch. Hit your nitro before the bridge jump for a last-second boost of speed.
Reverse: Get to the right after the bridge jump and ride up and over the overpasses to avoid traffic. You'll need to be at or near your top speed when you hit the final jumps if you want to win; go too slow and you'll likely bang right into one of the cross-cutting trucks that would normally drive serenely underneath you.
Main Street Construction
This course is unique in that it eventually narrows down to one lane, with a second narrowing of a mere two lanes. There isn't much room to maneuver here, obviously enough, so you'll want to be in the first or second spot as you hit the two-lane choke point: if you're in the lead, block off your drafter on the home stretch; if you're in second, cut around them before the bridge and use your nitro to pull away.
Reverse: If you get anything less than a perfect start here, you'll almost certainly be relegated to second place before the choke points, which, again, isn't such a bad place to be. If this is the case, stay on the leader's rear until just before the two jumps before the finish line and use your speed boost and nitro to come in first.
Commercial
The notable obstacle in the first half of this race is the choke point in the canal, where the lanes constrict down to a total of two. You obviously want to be in the center when this occurs. From there, you pass through an industrial area, where, again, you'll want to be in the middle two lanes to avoid the ramps on either side of the track. There's one last huge ramp before the finish line, on the right side; if you want a spectacular end to your race, try changing lanes onto it or off of it a split-second before you reach it; you should wind up careening through the air as you pass over the finish line.
Reverse:
Get to the rightmost lane off the starting line and stay there until you reach the canal. Traffic comes from left to right at the first cross-street, and it's almost impossible to avoid a car that you can't see coming, which you can't, due to the building's walls. After you reach the canal, though, you should have a clean shot to the finish line, minus the two huge jumps that immediately precede it. Hit your nitro before you go over them; at low speeds your car can sometimes hit the ground before the finish line in an odd position and wind up spinning out.
Drift Tracks
Drift Track 1
Don't worry if you hit this track early in the game and can't rack in the points; it's difficult to get much of anything going with an unmodified car due to the short straights and wide turns. The general idea is to use your hand brake to drift the front half of your car through the turns so that they pass through the bonus zone. Repeat for a few laps and you'll have done as well as you possibly can. If you're feeling extra lucky, you can try to shift your drift to the outside of the straights before coming back in close for the turns, but this is quite difficult to do without straightening out long enough to lose your drift completely.
Drift Track 2
The little curves that are thrown in your way here will let you double or triple the scores that you obtained on the previous track. You'll want to try to shift your engine towards the inside of the first curve, cut it across to the inside of the second curve, and then shift it back over to the inside of the 180-degree turns on either side of the track. If done right, you can obtain a 20,000 point drift, if not a significantly higher one.
Drift Track 3
Track 3 has sharper turns than the previous tracks did; 180-degree hairpins are usually drift killers unless you have a preternatural talent for the sport. Luckily, there are enough soft curves here to let you bust out some monster scores anyway. The straight sections will also let you start drifts with your entire car in the bonus zone, which will send your multiplier through the roof in a matter of seconds. The extra speed that you'll pick up, though, will send the unwary into the walls on occasion; get used to holding down both the brake and the emergency brake as you coast out of control.
Drift Track 4
The sharp hairpins here will make building speed difficult, so concentrate on hitting the inside of the curves and keeping your drifts alive as long as possible. Whenever it's possible to accelerate, do so and start a drift while your car resides in a bonus zone, then hold it through the next curve.
Drift Track 5
There are a number of fake turns here, where past experience would seem to indicate that a given corner leads into a 180-degree turn, but then you're surprised to find the road actually bending out in the opposite direction. Take advantage of these by cutting the inside corner, then shifting over to the opposite bonus zone. The finish line itself lies astride a nice spot to rack up points, since the interior corner just past it is extremely wide, allowing you to get almost your entire car within the striped zone.
Drift Track 6
Drift Track 6 has perhaps the highest potential for sick scores when compared against all of the other drift tracks. The turns are softer, the curves easy to hit, and there are plenty of opportunities to string together two or three drifts in rapid succession for insane Style Point bonuses.
Things start off in the curves that immediately follow the starting line. A bit of touch is required here, but if you can swing your car through each of the bonus zones and hold your drift through the chicane at the end, you should be able to rack up 30,000 points or so; just don't blow it by overshooting the hairpin that follows. A succession of smooth turns follows, with one particularly great opportunity on the road that leads up to the second level. The 180 on the upper level is difficult to string a drift through; you may be best just getting your points on the approach, then accelerating through the curve after the turn for a nice little two-part drift that leads back down to the finish.
Drift Track 7
Another great run awaits you on Track 7. It starts with the very wide semi-straightaway that follows the starting line; drift back and forth to the bonus zones on either side of the street for huge points, then head around the hairpin and do the road that leads to the downspiral. The spiral here is nearly impossible to keep a drift through, so get what points you can on the top end before you straighten out and hit the finish.
Drift Track 8
Your biggest opportunities for points here will be on the first half of the track, where the softest turns and curves await. When you hit the upper level, you can try to get a drift going through the inside of the 180-turn; you'll need to get something going to finish strong, since the chicane that was here on Track 6 is now just a straight line.
Cheats
Note that cheats must be entered at the main menu for the consoles.
PS2
Unlock all Circuit Tracks: Down, R1, R1, R1, R2, R2, R2, Square
Unlock all Drag Tracks: Right, Square, Left, R1, Square, L1, L2, R2
Unlock all Drift Tracks: Left, Left, Left, Left, Right, R2, R1, L2
Unlock all Sprint Tracks: Up, R2, R2, R2, R1, Down, Down, Down
Unlimited Nitro: X, Circle, Triangle, Triangle, X, X, Circle
PC
To enable the cheat codes, start the game, go to the Statistics menu, exit back to the main menu, and enter the following codes:
Unlock all Circuit Tracks: gimmesomecircuits
Unlock all Drag Tracks: gimmesomedrag
Unlock all Drift Tracks: driftdriftbaby
Unlock all Sprint Tracks: gimmesomesprints
XBOX:
Unlock all Circuit Tracks: Down, R(trigger), R, R, Black, Black, Black, X
Unlock all Drag Tracks: Right, X, Left, R, X, L, White, Black
Unlock all Drift Tracks: Left, Left, Left, Left, Right, Black, R, White
Unlock all Sprint Tracks: Up, Black, Black, Black, R, Down, Down, Down
Gamecube:
Unlock all Circuit Tracks: Down, R, R, R, X, X, X, Z
Unlock all Drag Tracks: Left, Z, Right, R, Z, L, Y, X
Unlock all Drift Tracks: Right, Right, Right, Right, Left, Black, R, White
Unlock all Sprint Tracks: Up, X, X, X, R, Down, Down, Down
Unlockables
Style Prizes
Starting at 5,000 style points, you will unlock a new vinyl for every 16,500 style points you accumulate, whether in Underground or Quick Races. New vinyls come either as a single splashy vinyl that you can apply to your side or hood, a manufacturer's logo vinyl, a full-body vinyl, or a vinyl that replicates the look of a real-world race car, or the car of one of your in-game competitors.
As we've mentioned in a few places, the easiest way to get style points is to take a car with a 4x or 5x Reputation multiplier out for a Quick Race on a Drift track. If you're at all proficient at Powersliding on these courses, you can easily wind up with over 200,000 style points per 10 laps. Since the vinyl prizes stop after you hit 3,000,000 style points, you'll obtain all of the possible styles within 15 races or so, and that's not counting all of the points you'll have racked up in Underground mode.
After you get to 2,000,000 points, the number of points required for the next prize goes up greatly. The last four vinyl styles are as follows:
2,000,000 points: Samantha's car preset
2,250,000 points: TJ's car preset
2,500,000 points: Melissa's car preset
3,000,000 points: Eddie's car preset
Magazines
1. Modified Mag - Win Challenge #19
2. Sport Compact Car - Win Challenge #27
3. Chromen Flamen - Win Challenge #25
4. Turbo & High-Tech Performance - Win Challenge #55
5. Import Tuner - Win Challenge #40
6. Import Racer - Win Challenge #37
7. Super Street - Win Challenge #59
8. Sport Compact Car - Win Challenge #67
9. Import Tuner - Win Challenge #85
10. Hot4s - Win Challenge #101
11. Stuff - Win Challenge #111
12. Autopress - Buy all Level 1 Performance upgrades
13. Super Street - Buy all Level 2 Performance upgrades
14. Maxi Tuning - Buy all Level 3 Performance upgrades
15. Option - Reach a Reputation level of 1.5
16. Elaborare - Reach a Reputation level of 2
17. Maxi Tuning - Reach a Reputation level of 3
18. Hot4s - Reach a Reputation level of 4
19. DUB - Reach a Reputation level of 5
20. Turbo & High-Tech Performance - Beat the best time in any Drag event on Hard in Underground mode
21. Import Racer - Beat the best time in any Circuit event on Hard in Underground mode
22. Import Tuner - Beat the best score in any Drift event on Hard in Underground mode
23. Sport Compact Car - Beat the best time in any Sprint event on Hard in Underground mode
24. Import Tuner - Get 500 Online Reputation Points (PC and PS2 only)
25. Hot4s - Get 500 Online Reputation Points (PC and PS2 only)
26. Elaborare - Get 500 Online Reputation Points (PC and PS2 only)
27. Import Tuner - Get 500 Online Reputation Points (PC and PS2 only)
Race Prizes
28. No Prize
29. No Prize
30. No Prize
31. Mitsubishi Lancer ES
32. No Prize
33. Level 1 Engine/Exhaust, Drivetrain, Tires
34. Unique Engine/Exhaust, Drivetrain, or Tires upgrade - pick one
35. Ford Focus ZX3
36. Level 1 E.C.U., Turbo, and Brakes
37. No Prize
38. No Prize
39. Level 2 Decals
40. No Prize
41. Level 1 Weight Reduction, Suspension, and NOS
42. Unique Hood
43. No Prize
44. Hyundai Tiburon GT
45. Level 2 Neon
46. Magazine - Modified Mag #1
47. No Prize
48. No Prize
49. Suburu Impreza 2.5 RS Sedan
50. Level 2 Paint
51. Nissan Sentra SE-R Spec V
52. Magazine Cover - Chromen Flamen
53. Unique Performance Upgrade: Brakes, Drivetrain, Tires, E.C.U., Turbo
54. Magazine - Sport Compact Car #1
55. Level 2 Muffler Tips
56. Level 2 Window Tinting
57. Level 2 Engine/Exhaust, Drivetrain, and Tires
58. Level 2 Roof Scoops
59. No Prize
60. Nissan 240 SX
61. Level 2 Rims
62. No Prize
63. No Prize
64. Magazine - Import Racer #1
65. Level 2 E.C.U., Turbo, and Brakes
66. Level 2 Sideskirts
67. Magazine - Import Tuner #2
68. Toyota Celica GT-S
69. No Prize
70. Level 2 Hoods
71. Level 2 Front Bumpers
72. Level 2 Spoilers
73. Acura RSX
74. Unique Rims
75. Level 2 Weight Reduction, Suspension, NOS
76. Level 2 Rear Bumpers
77. No Prize
78. Level 3 Decals
79. No Prize
80. Acura Integra Type R
81. Level 3 Muffler Tips
82. Magazine - Turbo and High-Tech Performance #1
83. Level 3 Window Tinting
84. No Prize
85. Mitsubishi Eclipse GSX
86. Magazine - Super Street #1
87. Level 3 Headlights
88. Level 3 Tail Lights
89. Level 3 Neon
90. No Prize
91. Toyata Supra
92. Level 3 Paint
93. Level 3 Engine/Exhaust, Drivetrain, and Tires
94. Magazine - Sport Compact Car #2
95. Unique Vinyl - Samantha - Garish! - one of ten
96. Honda S2000
97. Level 3 Roof Scoops
98. No Prize
99. No Prize
100. Mazda RX7
101. Magazine - Import Tuner 3
102. Nissan 350Z
103. No Prize
104. Unique Spoiler
105. No Prize
106. Nissan Skyline R34 GTR
107. Level 3 E.C.U., Turbo, and Brakes
108. Level 3 Rims
109. No Prize
110. No Prize
111. Level 3 Side Skirts
112. No Prize
113. Magazine - Import Tuner 3
114. No Prize
115. No Prize
116. Level 3 Hoods
117. Level 3 Front Bumpers
118. Level 3 Weight Reduction, Suspension, NOS
119. No Prize
120. Level 3 Spoilers
121. No Prize
122. No Prize
123. Unique Performance Upgrade
124. No Prize
125. No Prize
126. No Prize
127. Level 3 Rear Bumpers
128. Magazine - Hot4s
129. No Prize
130. No Prize
131. No Prize
132. No Prize
133. No Prize
134. No Prize
135. No Prize
136. No Prize
137. Unique Wide Body Kit
138. Magazine - Stuff
139. Final Race - No Prize
Got a news tip or want to contact us directly? Email news@gamespot.com
Join the conversation