Metal Gear Solid 4: Guns of the Patriots Walkthrough
Conquer Solid Snake's last mission with the Metal Gear Solid 4 walkthrough.
Hideo Kojima’s Metal Gear series continues in Metal Gear Solid 4: Guns of the Patriots, a perfect blend of action, stealth, and story. This game of the year contender will satisfy both long-time Metal Gear veterans as well as brand new Solid Snake-hopefuls looking for the ultimate stealth action experience.
This Metal Gear Solid 4 game guide includes a complete walk-through of the single-player game with strategies for defeating bosses, locating hidden weaponry and items, and conquering the game’s toughest sections. We’ve included lists of unlockables, including emblems, weapons, FaceCamo, and iPod tracks and how to obtain them as well as a collection of Easter Eggs and secrets. You’ll also get tips on obtaining the coveted Big Boss emblem and strategies for battling your friends and enemies on Metal Gear Online.
This Gamespot Metal Gear Solid 4 game guide features:
- Walk-through: Here’s a complete walk-through of the single-player game. You’ll find tips on all the boss battles, maintaining stealth, and finding vital weapons and ammo.
- Metal Gear Online: Check this section for tips on Metal Gear Solid 4’s multiplayer mode, Metal Gear Online.
- Unlockables: This section reveals Metal Gear Solid 4 unlockables, including emblems, weapons, items, costumes, FaceCamo, and iPod tracks.
- Big Boss Emblem Tips: The Big Boss emblem is the pinnacle of Metal Gear Solid 4 rewards. Look here for tips on acquiring it!
- Easter Eggs and Secrets: We’ve compiled a list of Metal Gear Solid 4 Easter Eggs and secrets.
Chapter 1 - Walk-through
This section provides a complete walk-through of Metal Gear Solid 4. There are many ways to play Metal Gear Solid 4. You can complete the game as a one-man killing machine with little concern for alerts and ammunition expenditure, or you can choose a stealthier route and attempt to finish the game without kills or alerts. Furthermore, many situations feature multiple solutions encouraging experimentation. We’ll provide tips for a variety of gameplay styles and include plentiful tips on finding optional items, completing secondary tasks, and defeating specific enemies and bosses.
Prologue
Crawl under the truck in front of you and grab the ration. Keep moving to the right and duck and crawl under the other truck to trigger the cut scene. Pick up the AK-102 off of the ground. Move to the left or right around the building to trigger the next sequence and the arrival of the Gekkos. Avoid the Gekkos—there's no need to fight.
As you follow the instructions to proceed north, you can search some buildings to find additional rations and ammo. For example, on the southern side there's a two-story building; search the upstairs for a ration and ammo. On the southern side of this building there's debris but you can crawl under for a ration.
Move around this building on its northern side. Search another destroyed building on the right side of the street for ammo and a ration inside. Continue following the objective north until you trigger another cut scene.
Act 1 - Liquid Sun
Middle East: Red Zone
Turn around and search the alley behind you for a ration and some ammo. Continue the other way and start to cross the street, noting the soldiers on the right, to trigger a cut scene.
Search the shadow across the street for a petro bomb. Check the rooms across the street for another ration. You can also maneuver into a crawlspace that contains a compress. Another building across the street has another petrol bomb, a locker with noodles, and a cardboard box on the shelves by the locker.
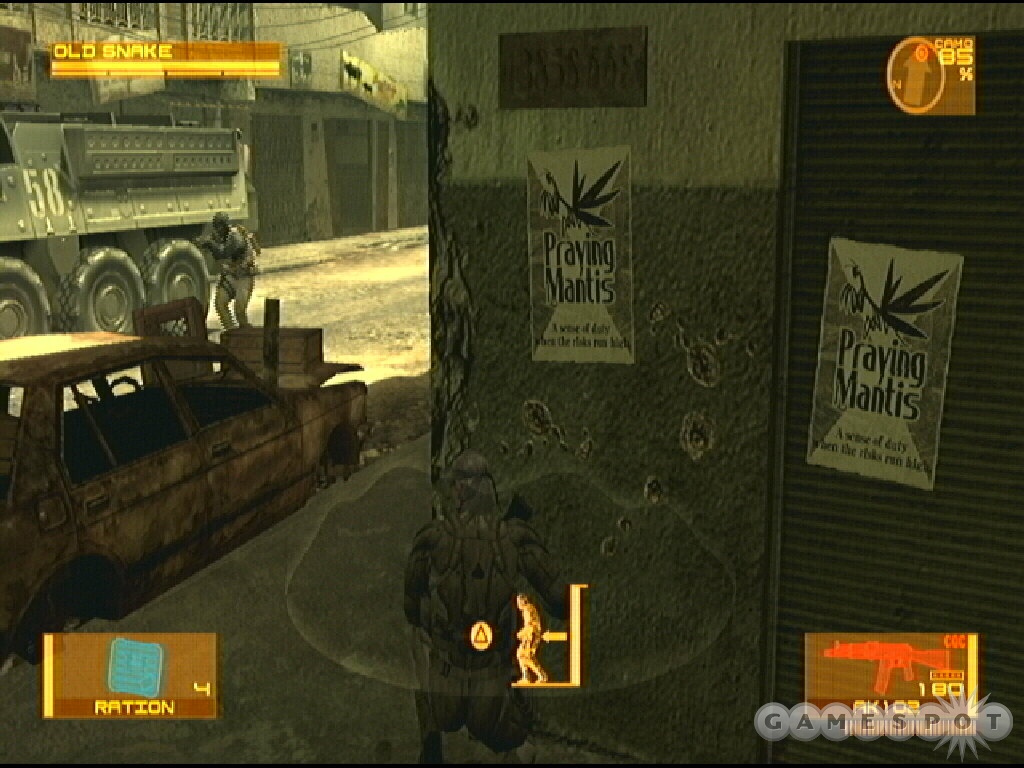
The bulk of the guards are near the intersection. Stick on the right side of the road. Use the destroyed car for cover and enter the building on the right to find more items—ammo, ration, compress—and use the crawlspace here to move through.
Stay in the crawlspace until any soldiers ahead move away. Stick in the shadows on the right side. Reach a locker room with ammunition; search the locker for a regain. Avoid any guards patrolling this area. The opposite side of this area contains a ration, ammo, and compress if you want to search it. Cross the street toward the right side and into the checkpoint.
Explore the area around the staircase for items, such as a compress underneath the stairs. You can cross through the area's middle section. The building's provide decent cover and anytime you are spotted you can crawl back inside and activate OctoCamo. Locate a staircase inside one of the first buildings and traverse the top floors. Upstairs you’ll find ammo and continue further to grab a Playboy as well as a couple noodles.
Ascend the staircase near the start. This will take you around many of the ground patrols if you’re hoping to remain out of sight. Roll as instructed over the small gap. Knock out the guard ahead. There are stairs back down here; search lockers down there for a ration and regain. Drop down over the ledge ahead.
Drop down when the coast is clear and snag a compress in the right corner. When exiting the area, check carefully for patrols to the left. Exit and hid in an alley on the right; there's another ration there. Watch for the patrols to move past. Crawl into the next structure on the right side to trigger a cut scene. You've found the Metal Gear Mk. II. You gain a couple new items, the solid eye, an operator, and a valuable weapon for stealth players, the Mk 2 tranquilizer pistol.
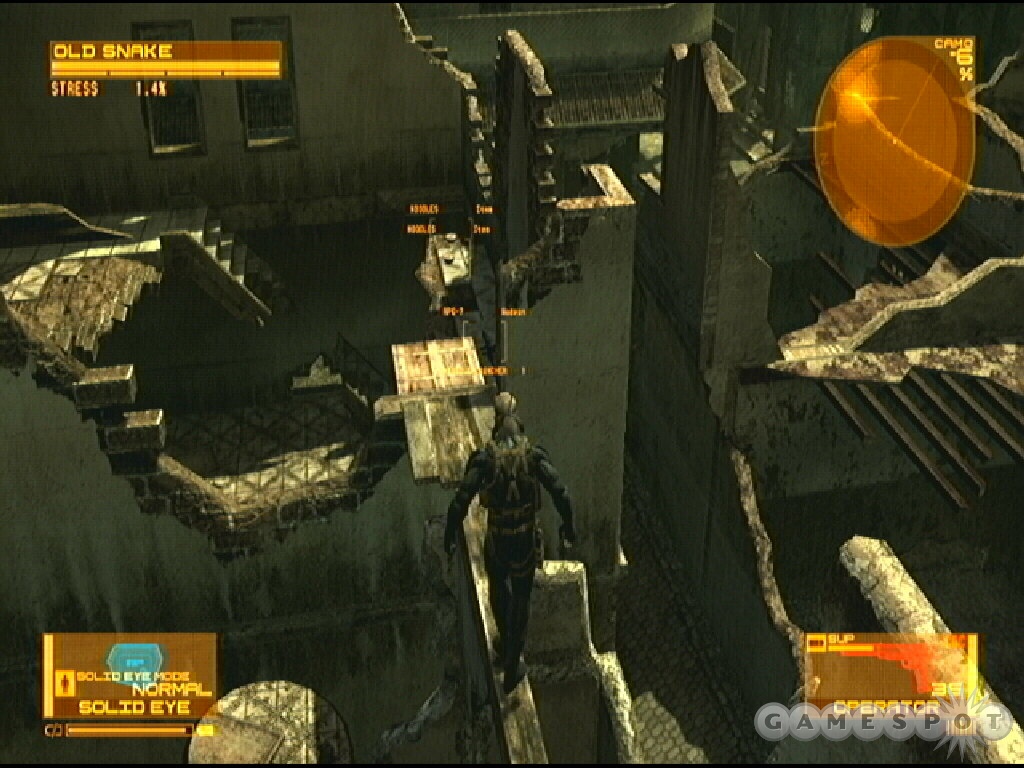
Search around the corner to the left for a ration. Move out to the east side and snag some ammo by the barricades. Wait until the soldiers move away before going for the ammo. Your goal is due north—right in the middle of the firefight.
Cross behind the APC and crawl along the buildings until you reach the area behind the sandbags. Gather up any discarded ammunition, snag an RPG in the back corner (if you didn’t use it to destroy the APC as described in the tip), and go down the stairs into the Militia Safe House.
Middle East: Militia Safe House
As instructed, switch the solid eye to night vision mode. This section plays differently depending what you did before you got inside. If you helped the militia eliminate the soldiers outside (and the two APC) then you can go through without worry. If you didn't then you'll have to be a bit sneakier. The first room contains some boxes and a guard to maneuver carefully past.
Grab the ratio in the corner and some ammo on the opposite side. Reach the chicken room and snag a regain and noodles inside. Continue onward and search a room on the left for a GSR as well as ammunition. If you aren't friendly with the militia, you may need to remain hidden in the chicken room until the guards here leave.
Continue into a room with wounded militia. Stay hidden if required by crawling along the left. Grab pentazemin off of the crate and a compress on the other side.
Go through the tunnel snagging ammo in the corner. There's a militia guard at the next room. Avoid the guard (or say hello if you're friendly) and move into the next room along the right side. Past this room, look to your immediate left and find a room containing a smoke grenade, stun grenade, white phosphorous grenade, and a fragmentation grenade.
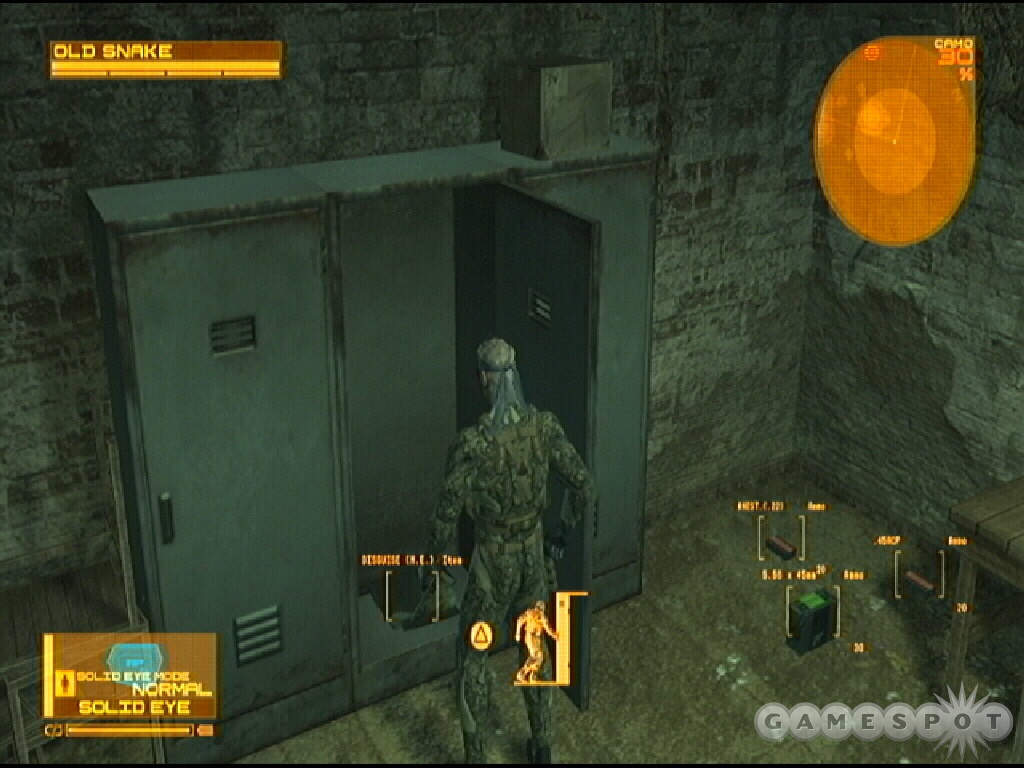
Continue and search a room on the right for ammo (including RPG) and the lockers for a Middle Eastern Militia Disguise. This will help you if you aren't friendly with the militia; you can return to previous rooms and grab any items you overlooked while avoiding contact. There's also a Playboy in the adjacent locker.
Go through the next series of rooms. When you reach the intersection, search the left dead-end for RPG ammo. Head the other direction and collect a ration and ammo from the storage room. Proceed up the staircase. Meet Drebin—and a monkey—at the top.
Middle East: Urban Ruins
After speaking with Otacon, turn around and find an RPG in the back corner. Search an alley on the right side for an assault rifle, Playboy, and noodles. Climb the staircase to the top grabbing ammo along the way. At the top, grab the weapon and ammo and turn right to spot another object. Drop down and grab the dot sight. Walk around on the ledge to grab an RPG and a sleep gas mine in the dark left corner.
At the top of the stairs, drop down into the room on the right. Snag an RPG as you drop in. Crawl through the passage into the next room. Grab more weapons and ammo. Hop over the ledge. There are a couple militia to the left—they die shortly. You can search these rooms for a ration and compress.
Climb over the ledge with the ration and go right. When the wall collapses ahead of you, go to the right and hop onto the ledge. Hug the left wall and traverse the narrow ledge. Exit to the left. Cross this room to the left and get up at the end. Exit right. Spot a body to the left. Duck here and find a hidden alcove with iPod music—it’s "Zanzibarland Breeze" from the Metal Gear Music Collection 20th Anniversary Album—and noodles.
Drop into the next area and find a ration, Playboy, and regain. Walk out into the hall and trigger the cut scene. After the scene you acquire a drum to hide inside.
Middle East: Downtown
Turn around and look in the right corner to find a handgun light. Start sneaking down the street toward the objective. Take the first right and search back here for a regain, behind boxes, and pentazemin in the back corner. You’ll encounter a militia squad here. They’ll move ahead while you check some side corners for ammunition.
If you continue through this alley toward the objective you’ll hear the militia indicate there’s a sniper up ahead—Otacon also provides this information. Instead of moving forward and taking fire, take a left turn; before you do, go prone and crawl to grab the petrol bomb if you want it.
Find a narrow alley on the right side down this street. Squeeze through and continue toward the objective using these side alleys to move through. It won’t be long before you spot the road ahead of you (the road with the snipers is to the east). Sneak through and head into the building on the right. Ascend the staircase and you’ll find a grenade on the first floor and a regain on the second.
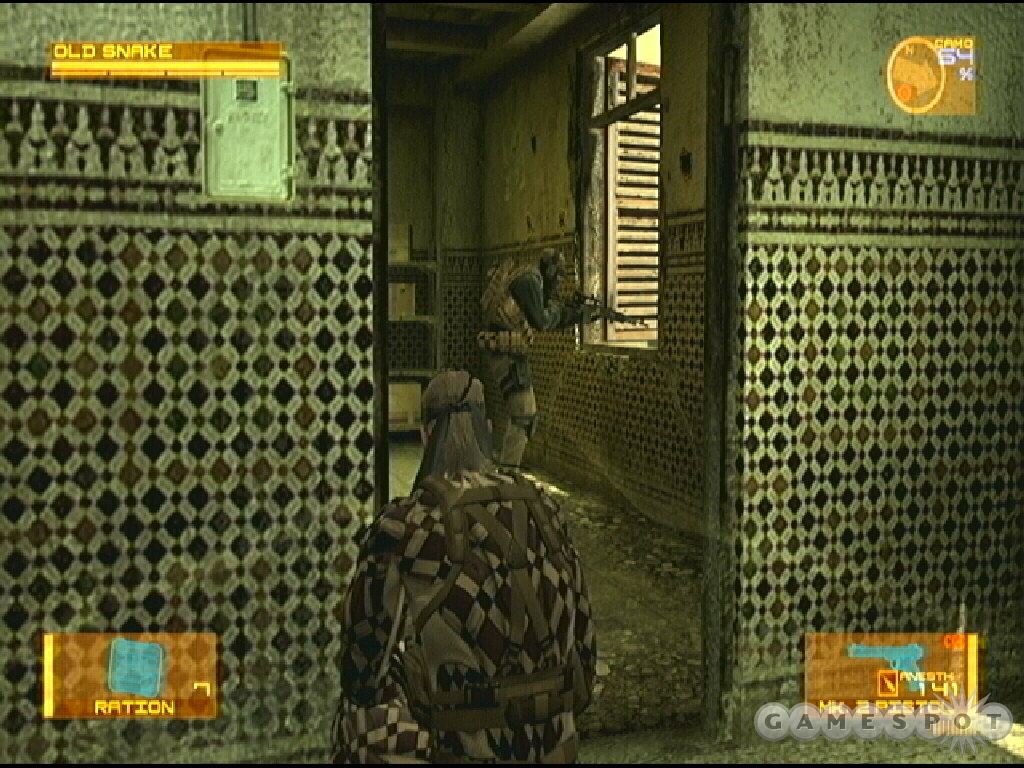
A group of PMC soldiers also occupies the second floor. If you get rid of them you can recover a M14RBR, an automatic sniper rifle, and get it to Drebin to unlock. Crawl up the stairs and maneuver into room on the right. Wait for a bit and one soldier will leave the room. Crawl inside and use a CQC maneuver to take down the sniper and recover his weapon.
Return downstairs carefully and avoid detection by the guard that decided to leave the sniper room. Exit on the western road and cross to the next alley on the right. Take cover here and move through toward the next street. Crawl into the shadows remain behind the vehicle as you pass through. Follow it toward the next street and crawl along the right wall to avoid any soldiers on the left side.
It’s loud here but you can crawl through carefully. Maneuver between the sandbags. Check an alley on the left side (behind the vehicle) and find a RPG—which can be used to take down the helicopter if you’re feeling like causing a little commotion. Cross the street to the opposite side toward the objective. Enter the door to finish the area.
Middle East: Advent Palace
Switch on night vision to better spot traps inside this building. There are no enemy soldiers here to avoid but there are traps positioned near items as well as near the stairs leading up to the objective. Carefully move over to the back right corner and snag a Playboy off of the sofa. Crawl over the adjacent claymore to acquire the mine. Grab a weapon off the table and locate a sleep gas mine close to the wall.
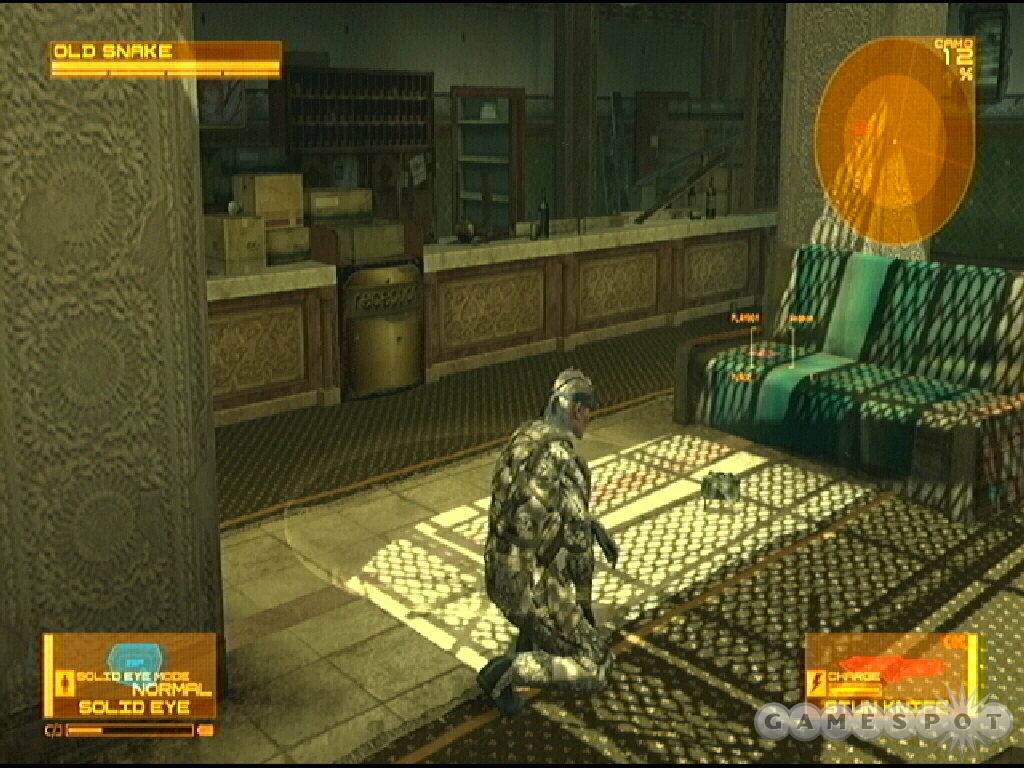
Ascend to the second floor. Move forward and crawl over the claymore to get it and the stun grenade just behind. Maneuver down the opposite path and grab another claymore. Search the back rooms on this side for a smoke grenade and another claymore protecting some noodles.
Crawl up the stairs toward the third floor because there’s a sleep gas mine along the way. Locate a couple more sleep gas mines in the corner. Explore the bar area behind one for ammo, and ration. The original staircase has a claymore on the next flight; grab it and explore the top for noodles.
Cross to the opposite corner (on the other side of the debris) to find the stairs up to the fourth floor. Crawl over the sleep gas mine ahead. Check to the right for regain. Leap over the bar at the regain and find some ammo and noodles. Exit the rear door to trigger the cut scene—the rendezvous with Rat Patrol 01.
When you regain control after the cut scene, the battle begins. Remain behind Meryl and the Rat Patrol to provide support. Target the soldiers up ahead; others arrive up high afterward. Help Rat Patrol clears the path ahead. Gather all of the dropped P90 weapons as you follow the Rat Patrol down to the third floor.
Enemy soldiers approach from the opposite side of the floor. Watch for them to jump onto the walls in the floor’s center. Retreat into the bar and follow the Rat Patrol as soon as they leave. The enemy soldiers do an effective job of flanking your position so keep moving with the Rat Patrol so you have the most protection possible.
Take cover in the bar area and prepare to battle enemy soldiers from the passage ahead as well as from the adjacent room on the right. After the firefight, follow Rat Patrol through the bar and toward the next staircase. Maneuver down to the second floor behind Rat Patrol.
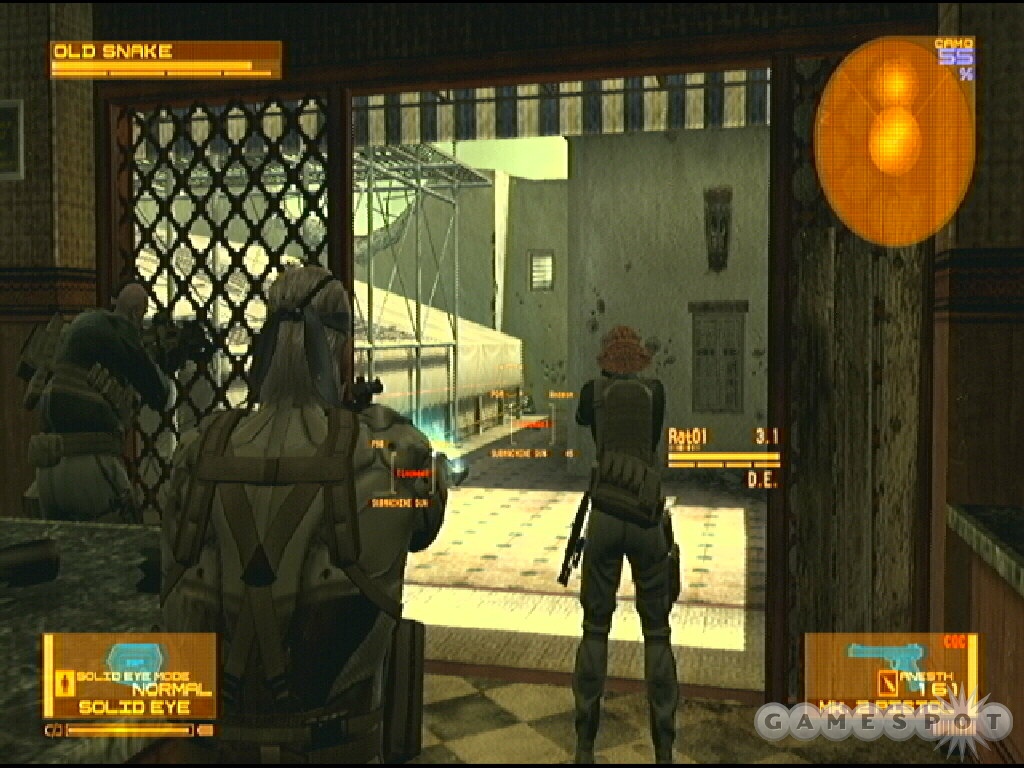
The enemy soldiers attack once you reach the next floor; expect to face them from the opposite side as well as on the upper balcony. Target both groups and continue to eliminate the soldiers. You will hear Akiba having some "issues" during the firefight. Clear the floor and follow Rat Patrol into the restroom area.
Once inside, Akiba gets knocked out. Crouch and move over to his body and press the triangle button to wake him up. Watch for soldiers to break into the bathroom; eliminate them and trigger the cut scene in the next hallway. Akiba disables the laser field and Rat Patrol jumps into the hole toward the next floor.
Drop into the hole and follow Rat Patrol behind the bar counter. Enemy soldiers drop onto the floor and others attack from the second floor railing. Eliminate all of the incoming troops and then follow the group to the elevator shaft. Snag the items and ammo from the room before jumping down. Walk over to Rat Patrol.
Middle East: Advent Palace Garage
Grab the P90 weapons left behind by the slain soldiers. Exit through the opening on the left side of the garage. Once inside, climb over the boxes on the right and drop into the next section.
Middle East: Crescent Meridian
Move through the hall out to the city street. Walk onto the street and trigger a cut scene and spot the incoming militia tank. Take cover behind the barricade in front of you. There’s a petrol bomb in the alley to the right and pentazemin on the opposite side. From the pentazamin, hop through the window and go prone. Stick on the left side and move behind the soldiers and tank and into the corner locating a smoke grenade.
If you cross to the opposite side of the road, you’ll find an opening behind the destroyed car. A crawlspace here contains a ration. Across the street behind crates you’ll find ammunition. When moving through this map, consider that the left side of the road feature PMC soldiers and the right side includes militia.
Stick on the right side of the road and remain prone. Use the shadows and your camo for cover. After the burned car, move left and cross the road remaining out of the line of sight of nearby enemy soldiers on the left. There’s a ladder in this corner. Traverse the backside of this building and drop off the ledge to trigger the next section.
Middle East: Millennium Park
Snag all of the discarded weapons on the ground for extra DP. Go prone and activate OctoCamo. Maneuver to the left side of the road. Crawl until you spot a couple guards on the right side. Take cover behind the car and wait for these guards to patrol away toward where you just left.
Spot another patrol at the barricade ahead. Remain on the left side of the street and wait for him to move away from you. Crawl along the left side and maneuver into an alley on the left. There’s an opening into the building on the right side.
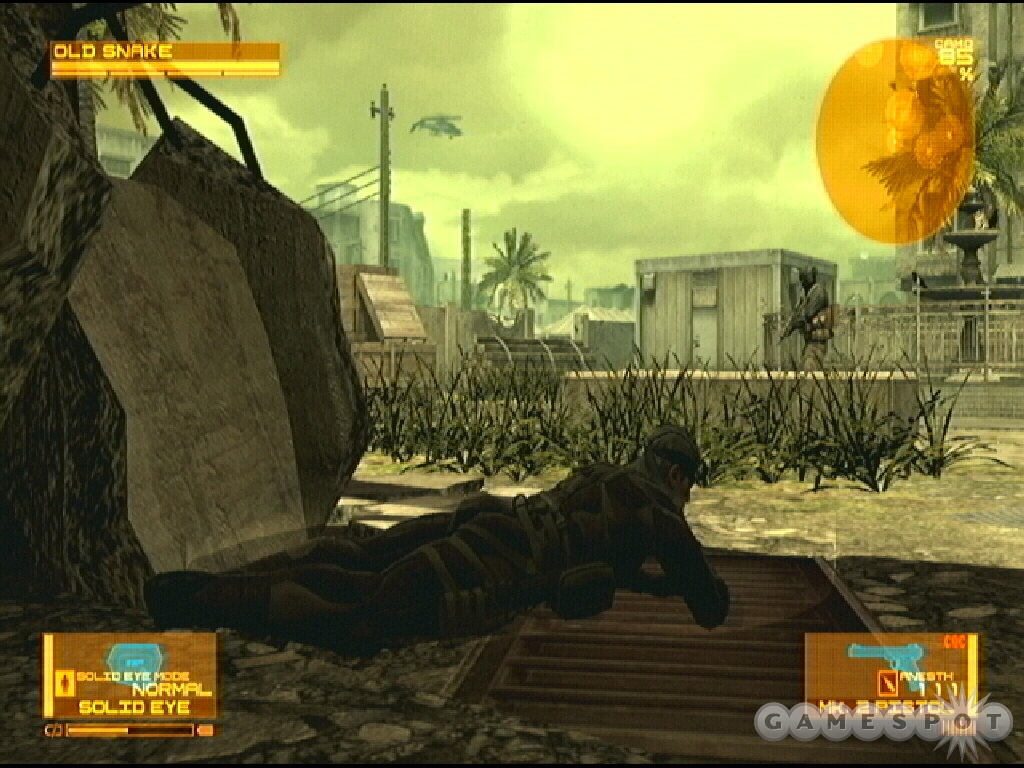
Crawl to the top of the stairs and beware of a guard on the left side. Wait for the guard to patrol the second floor and avoid him by ducking into the left hallway. If you choose to deal with the guard then grab the tranquilizer ammo right of the window. Also, open the door left of the hole and search the room for a Playboy. It’s also not a bad room to use for sniping if you plan to eliminate the enemy instead of avoiding them.
Drop into the hole. Find a smoke grenade near the crates. Open the left door down here and search the locker for a Suppressor for M4 Custom. Be quiet because there are patrols just outside that can hear the opening doors. It’s a custom part for the M4 and reduces the risk of gunshot noise alerting the enemy. Search lockers on the opposite side for ammo and find a ration under the desk.
Spot the patrols outside near the fountain. Wait until the closest guard moves over to the right and crawl out proceed to the left side. Stay prone and in the shadows as the same guard finishes his patrol and goes over to the left. Hide behind the crates and wood to remain out of his patrol. Grab the ammo here. Spot another guard across the courtyard. When he moves away, start crawling toward the opening on the left side.
Check the left side for a patrolling guard; when he’s away, maneuver behind the crate and check the right side very carefully. Wait for that guard to move away. Crawl to the right corner and into the shadows. Check behind the crates for noodles. A guard at the end of this next section patrols from west to east. Wait for him to move west then crawl behind the crates nearby. Check the alley on the left to ensure no guards are watching. Get to the red door on the right side when the nearest guard moves away and enjoy the concluding cut scene.
Act 2 - Solid Sun
South America: Cove Valley Village
You begin overlooking a PMC camp; as you gathered from the opening cut scene, there are several rebels held prisoner in the area just below your position. This compound offers several options. You can ignore alerts and gun your way through, which will aid and rescue the local rebels; you can ignore the rebels, avoid alerts, and sneak around all of the guards toward the next objective; or you can use stealth to aid and rescue the rebels by incapacitating the enemy guards with the Mk 2 or Mosin Nagant (if purchased from Drebin) all while avoiding alerts.
Aiding the rebels does have its benefits. If any of the rebels survive, they open access to a storage room; it’s the first house on the right side. You can search the storage room for a twin barrel shotgun, muña (an item that slightly increases psyche restoration speed when equipped), and a South American rebel disguise.
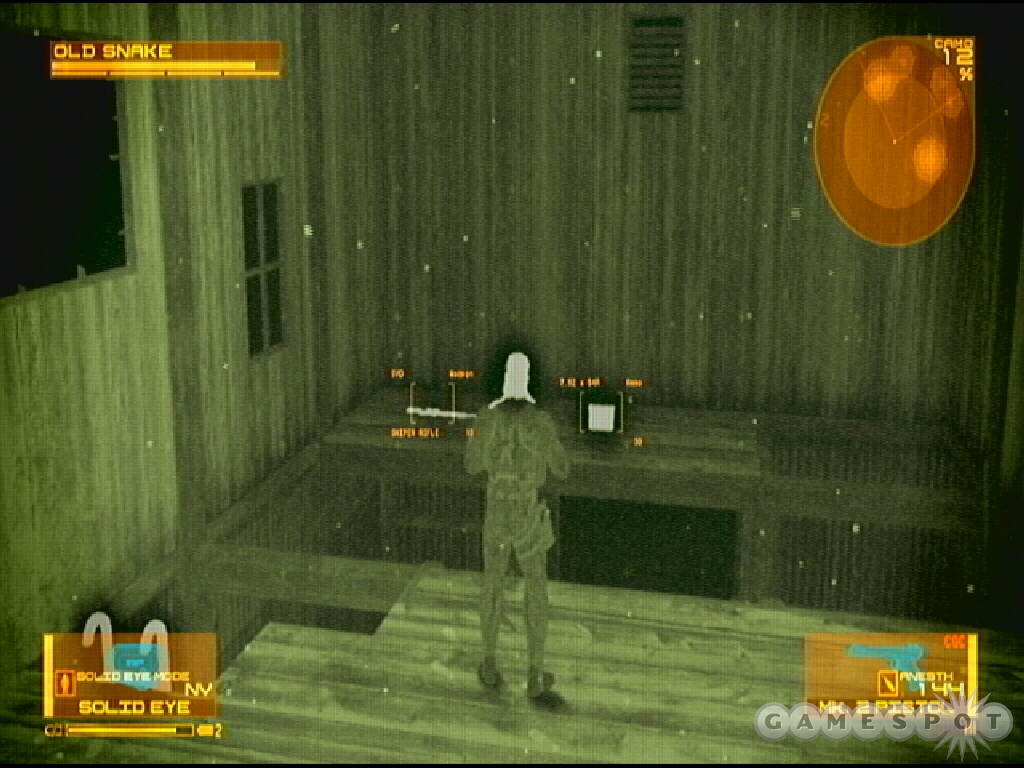
If you’re interested in searching the structures in this compound, you’ll recover a few useful items. Explore the first house on the left to find ammo and a Playboy. There’s a guard inside, who will leave if you attempt to aid the rebels but remains inside if you’re sneaking around and ignoring the rebels. The third house on the left contains C4 and ammo downstairs. Climb the ladder inside to find ration, pentazemin, ammo, and an SVD sniper rifle upstairs.
The house in the compound’s center, behind the truck, includes another iPod music track. It’s "The Fury" from Metal Gear Solid 3. Drop down a hole inside the structure and explore the crawlspace to find a suppressor and a smoke grenade under the front steps. Your objective lies down the eastern path out of the compound—locate it due east from this house in the compound’s center.
Move carefully along the raised ledge on your left side. You will spot a patrolling guard on the upper ledge. Stick close to the ledge and crawl forward and remain out of sight. If you search all the way down this road you’ll find ammo on the right side and a Playboy adjacent to the barricade.
Your goal is to ascend this hill—ideally while avoiding the patrols. Find the way up on the left side of the hill. There’s a second guard patrolling a few ledges above and a second a bit higher close to a structure and stun grenade. Stay prone with OctoCamo as you scan enemy movements. Make your move up the hill when guards are looking away. If you stir a guard’s attention, crawl carefully away from that spot into higher grass and boost camouflage with the aid of the OctoCamo.
Continue up on left side of structure with stun grenade. Crawl to the right after moving up past the structure. Find another ledge up. As you carefully move through the grass on the right side into the pass ahead, you receive a call and it concludes with a checkpoint.
Continue up the passage and discover a squad of rebels about to make a move on the PMC forces north of your position. Check under the rocks on the right side to find some tranquilizer ammo.
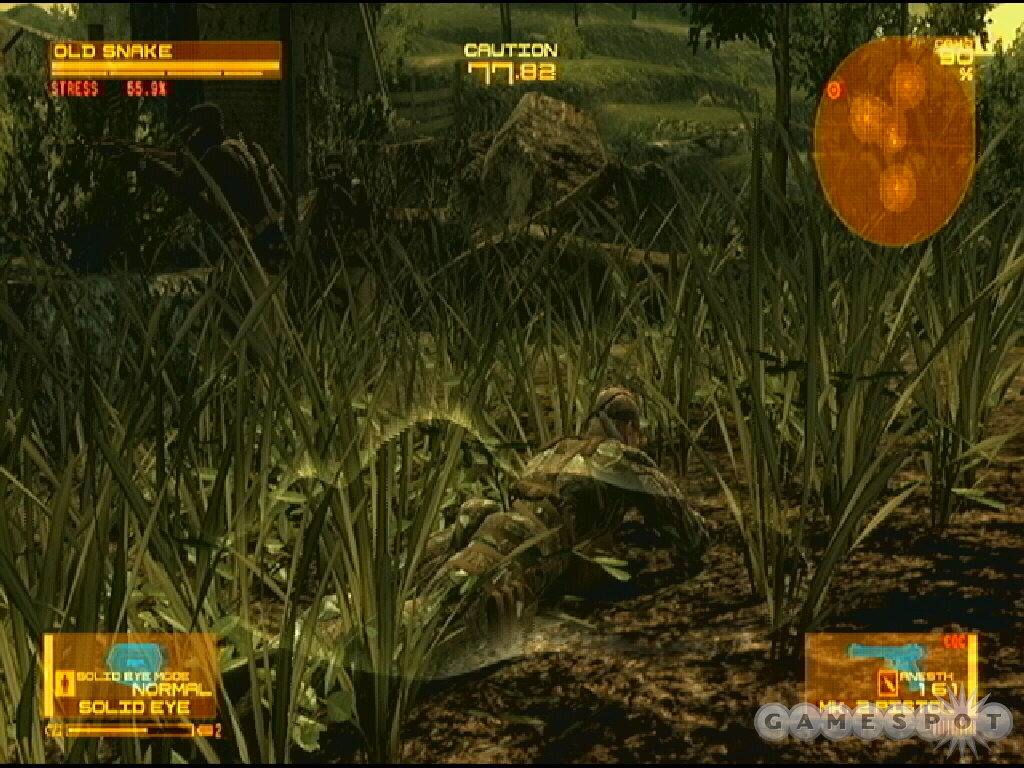
If you rescued any rebels from the compound and recovered the South American Rebel costume from the storage room, you can switch into it now and "join" the rebels as they move north. Stick with the two lead rebels; the leader will indicate when to move forward as he’s watching the PMC patrols.
It’s fairly difficult to remain undetected. If you aren’t seen, the rebels you’ve joined are. Ideally you are away from the group when they are detected so even though the rebels are spotted, and attacked, you are not. You can remain back and pick off the enemy soldiers with a weapon or use a tranquilizer weapon to immobilize the enemy soldiers. Your goal is to avoid an alert so remain out of sight and immobilize enemies while the rebels do most of the work (or fail miserably). Switch back to OctoCamo once the soldiers detect the rebels so you can take cover as needed.
Remain on the right side of the area and search a structure for ammo. Stick in the grass and shadows and check on any remaining soldiers to the west. From the structure, locate the path on the right side. Be cautious around the opening and check for guards before beginning your crawl through, especially up on a ledge to the right. Once past the guards, move forward toward the objective and into the next area.
South America: Power Station
Octacon warns of snipers; they’re to the south. You can stick along the left-most path to remain behind rock cover. When you follow this route you’ll emerge right in front of the power station where a couple enemy soldiers are using turrets to repel the rebel attack.
Here’s another option: you can infiltrate the sniper area. Go right and climb the ledges and then the crates to the upper path. Perform a roll to cross the small gaps, though if you fall you can still get back up. There are several enemy patrols here. Move through cautiously and either sneak past them, disable them, or kill them. The patrols are basically guarding the snipers, which are positioned on the side of the hill inside the cover of grass.
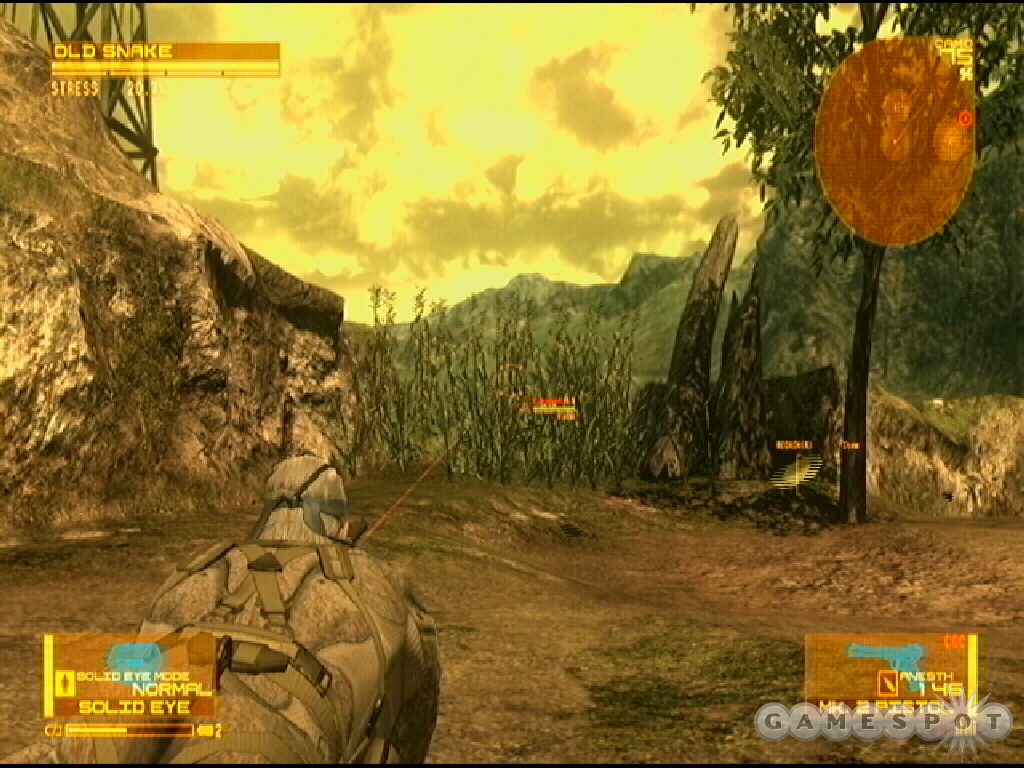
Find the first guard just after you reach a short fence on your left. Take cover and wait for him to get close. Disable him or move around to the left side. Move past this guard if you disabled and find another patrolling around the left side of a big rock; a third on the opposite right side further down. As stated, the snipers are in the cover of long grass at the cliff’s edge. Use the Mk 2 to disable them. If you disable the snipers, snag the regain next to them.
Descend the hill at the end and spot the power station as well as PMC guards and turrets on the left side. If you take this route, use the wood as cover against the turrets to the western side. You can wait for the rebels to gain the upper hand before moving around the right side of the truck toward the power station.
With the area cleared of PMC guards (hide near the truck or the sides of the entrance to ensure you aren’t spotted), enter through the doorway on the left; it’s the closest area to the power station controls. Find a sleep gas satchel in the back corner. Search the adjacent room for C4. If you’ve waited until the rebels gained the upper hand on this side of the structure, they’ve likely gotten into the room with you and destroyed the power station controls. If not, you can do it.
Search the crawlspace under the power station for a regain, compress, and Playboy. With the power station disabled, the rebels eventually clear the enemy soldiers and declare victory. Follow the map to the marked objective by approaching the truck on the left side on the opposite side of the station.
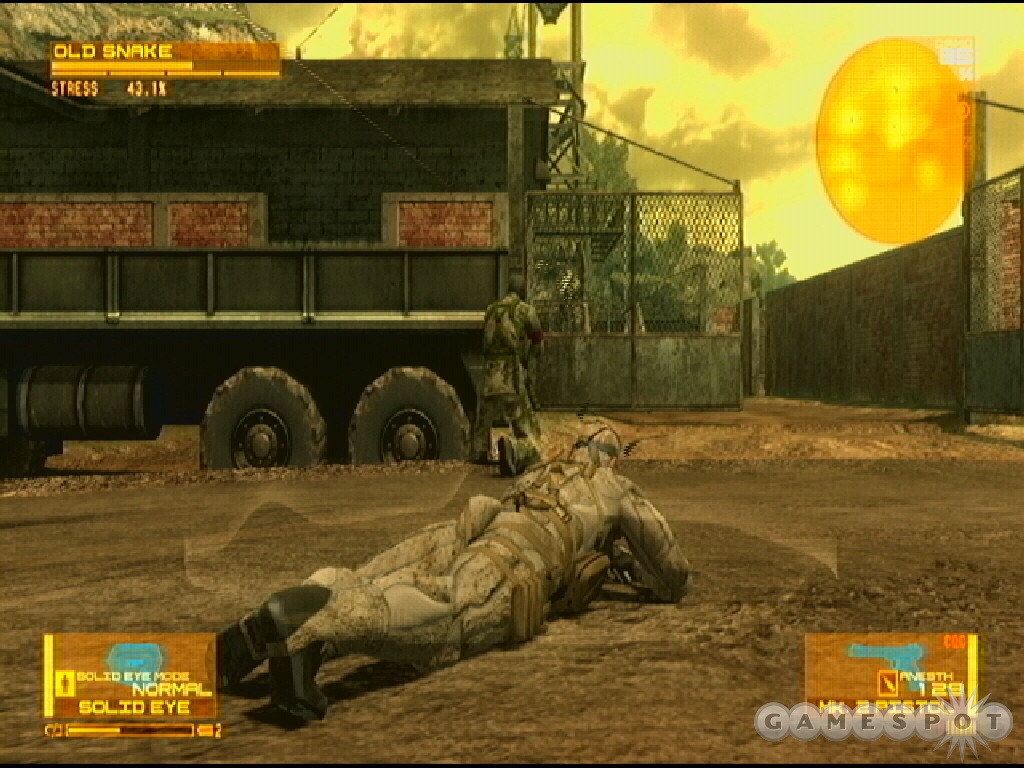
There are two routes in front of you; take the left path. Note that this section will play drastically different depending on what happened at the power station. Ideally you allowed the rebels to disable the power station and gain control of the area. In that case, this area lacks enemy soldiers as the rebels are in control.
When you reach the piles off wood, look around for a Playboy, sleep gas mine, noodles, and ammo. Just up ahead in an alcove on the left side, find an XM8 carbine and a Javelin missile launcher. Further up the path find a regain, PSS, and compress underneath some rocks. Resume course along the path into the next section. There are actually two routes into the confinement facility. Locate them on the northern and northeastern sides after collecting the last items from the pathway.
South America: Confinement Facility
There are several routes you can take through this next section. First of all, the two entrances from the power station lead to two different areas. Furthermore there are two exits from the confinement facility into the next area. Although we’ll cover a complete route through the confinement facility, note that you can choose to bypass a lot of the section and reach the next map quickly.
Taking the northeastern route from the power station leads to a small pond with an island of rocks scattered in its center. Although there’s not much in the area, you can search the right corner for a Playboy where the rebels enter the area as well as an iPod tune off of the middle island.
Avoid a patrol to the left as you move inside the area. Cross through the water taking care to remain undetected—watch for the patrol on the eastern side of the pond. You can swim to better conceal your advance. Move around the rock ahead to the north and find an underground passage connecting the pond to the next area. This underground tunnel is a safe route and even contains a ration should you need one.
When you reach the end of the tunnel, emerge into the cover of grass. Remain prone and camouflaged inside the grass while moving left. Watch the guards currently battling in front of this base. As long as you stay under cover, prone, and well camouflaged the enemies should remain distracted by the rebel attack. Crawl around the entrance of the base and to the right spotting a hole in the wall.
Search this storage room for chaff grenades (grenade that temporarily scrambles the functions of all electronic devices) as well as noodles and compress. Exit through door left of the grenades and explore the building. You’ll find a few items, such as noodles, a Playboy, and an iPod track, the "Metal Gear 20 Years History (Part 3)" from the Metal Gear Music Collection 20th Anniversary.
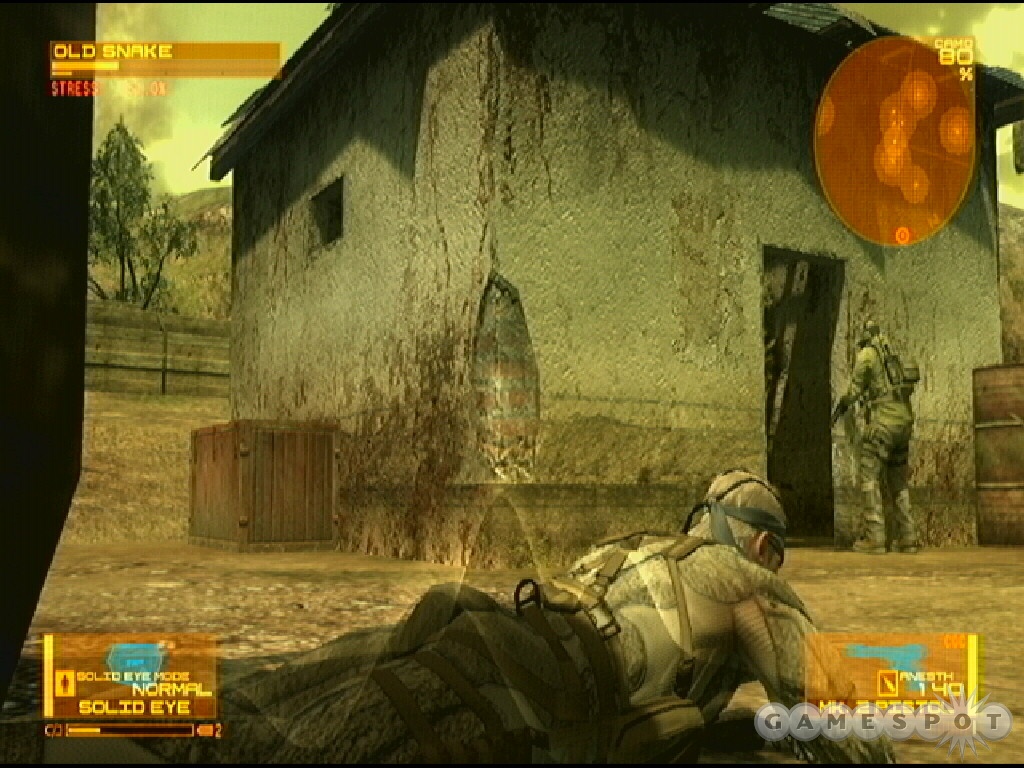
Exit and maneuver around the building on the eastern side to the northeast corner. There’s a guard standing post at a small structure. Disable this guard with CQC or the Mk 2. Rescue two rebels inside. Search the interior for a couple Playboys.
There’s another storage room on the northwestern side of the base; it’s on the opposite side from where the captives were held. Inside you’ll find a M870 custom, 12-gauge pump-action shotgun as well as ammunition.
Look on the side of the northwestern storage room and find a Playboy. There’s a hole in the wall here. Crawl through and out to the right, which avoids the sniper tower and the PMC soldiers waging battle at the front. Tread carefully because there could be soldiers patrolling this exit. Remain hidden to avoid them or incapacitate with CQC or the Mk 2. You can exit into the next section through the northern passage or explore the other confinement facility by moving to the west.
A couple soldiers patrol the rocky path on the left side of the route between the two facilities. Stick close to the left side rocks and remain prone to stay hidden. You can incapacitate these guards to make the trip easier. You can approach the facility from the recessed route or use the elevated rocky path on the left side. The elevated path is a bit easier.
Use the trucks and piles of wood as cover when approaching the base. You’ll spot a soldier patrolling the front as well as a sniper in a back tower. Crawl between the vehicles and the first building. This building holds a couple rebels captive. If you go behind the building, the captives spot you, which causes the guard to see what the captives saw—you can use this to your advantage and ambush the guard there with CQC or the Mk 2. Otherwise you can just take out the guard in front of the building to free the captives.
The exit from this section of confinement facility into the next map is found on the northeastern side of the base. You can maneuver around the northwestern side of all the buildings and go behind the tower toward the exit passage. As mentioned previously, there are two routes into the next map. The route from this facility is better because you arrive on an elevated path and not in the middle of the frantic firefight.
South America: Vista Mansion
If you arrive from the northwestern confinement facility, you emerge onto a relatively safe elevated path. Note the fighting in the recessed area to the east; that’s where you would enter if you arrived from the northeastern confinement facility. As you push forward, a cut scene interrupts the action—an armored bulldozer pushes through toward the mansion.
Approach the mansion entrance and go to the northeastern corner of the compound. Take cover on the right side to avoid the firefight. Search the back corner. There’s a big crate that you can narrowly squeeze behind. Find an iPod music track here. It’s "Sailor" from Metal Gear Solid 3. In that game it was healing music that could be heard by calling a secret radio frequency. It serves a similar function here.
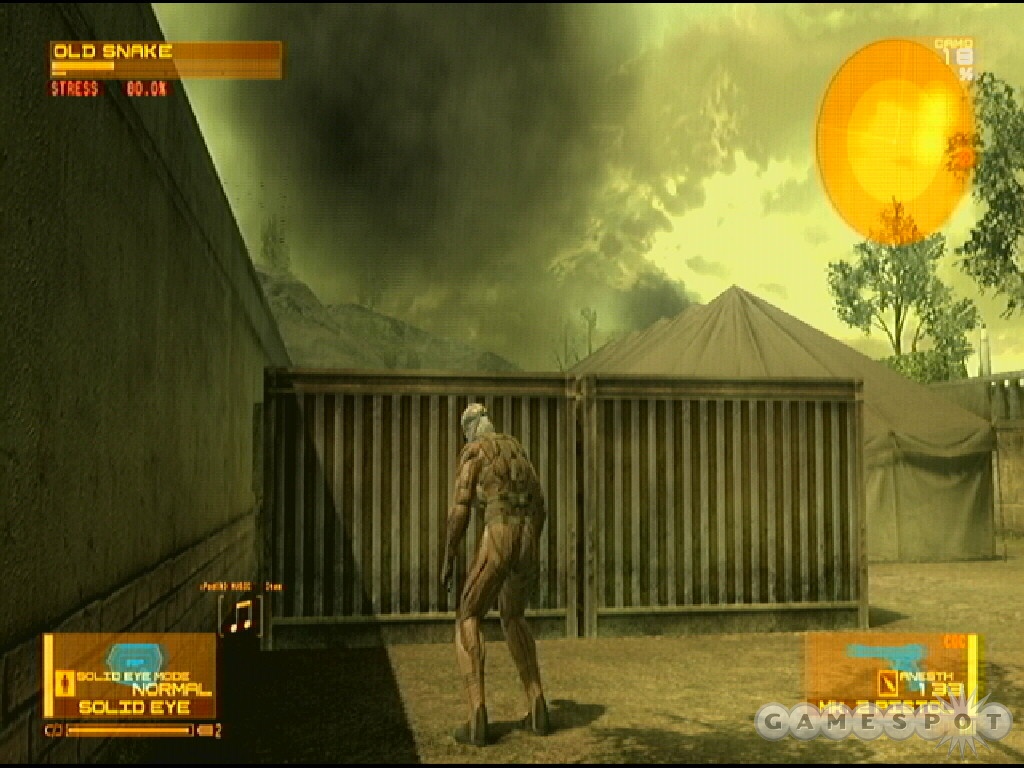
Continue to the back corner and spot a staircase. Crawl carefully up the stairs and rotate the camera to check for any guards. Keep moving and avoid confrontation. Move around the corner of the mansion and spot a window. Pick up the grenade in the corner then smash the window. Leap into the hallway.
There’s a dining room to the left; it contains regain and a PSS in the fireplace. Explore a lobby area to the right. Grab pentazemin off the lounge. From the lobby, search the room on the left for a grenade; this room connects back to the dining room.
From the lobby, advance right toward the stairs but remain prone and camouflaged because a couple soldiers descend the stairs and exit the mansion. Maneuver over to the right and avoid the front of the steps. Carefully move up the stairs when the soldiers leave. Search the bedroom at the top for a ration, ammunition, and other items.
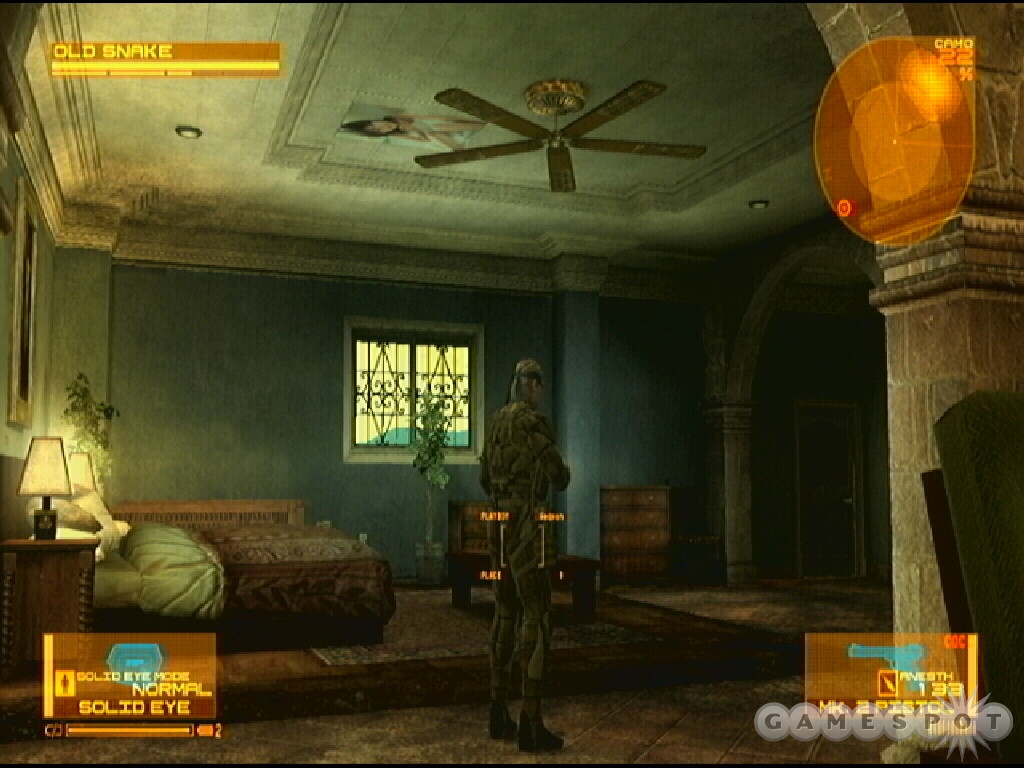
Exit the door onto the roof. Move out carefully and ensure there are no soldiers. There’s a turret if you want to join the carnage. Gather some ammo then move around to the left side and drop into the open skylight. Descend the stairs. Grab a claymore off of the table. As you move through the tunnel, explore a room on the right for ammo, supplies, and grenades. Follow the tunnel to a ladder. Ascend to the next checkpoint.
South America: Research Lab
After the opening scenes, you receive a syringe, restores psyche and suppresses nanomachine activity. When you regain control, get ready because those enemy soldiers from the cut scene are about in the room. If you don’t mind slaughtering them then equip your favorite weapon and start firing. If you prefer a stealthier approach then crawl underneath a bed and use the Mk. 2. There are four pairs of soldiers.
Upon eliminating all eight, explore the lab rooms for a handful of items, including ammunition, stun grenade, regain, compress, ration, and a Playboy. When you are finished exploring the lab, move to one of the outer hallways to trigger the boss battle against Laughing Octopus.
Boss Battle: Laughing Octopus
Let’s cover Laughing Octopus’ moves and attacks first and how to avoid them. When Laughing Octopus rolls into a ball, she’ll have two attacks. First, she could release black smoke (creating no visibility around her position) with small homing explosive drones. Run out of the black smoke and away from her position. Move around corners and the homing drones will stick into the wall and explode. Rotate the camera to see if they’re behind you and keep moving around corners to evade.
After Laughing Octopus rolls into a ball she may attempt a rolling attack. She can move around corners so to evade you must get off the ground. Hop onto a crate or a bed to avoid the attack. When you reach the higher position, look in the room and she’ll probably have rolled in. She’ll unroll which offers a good time to attack.
Laughing Octopus carries a weapon too. If she pulls out a submachine gun, take cover around a corner. Don’t stand in the line of fire. As soon as she drops the weapon, counter attack. In between these attacks, Laughing Octopus may disappear—she’s actually cloaked and hiding. Activate the solid eye’s night vision to discover her location. She could hide on the wall, roof, a painting, or even inside a machine (note the bright tentacle-cables when using night vision). Shoot Laughing Octopus in her hiding spot. If she’s in a machine, shoot the machine.
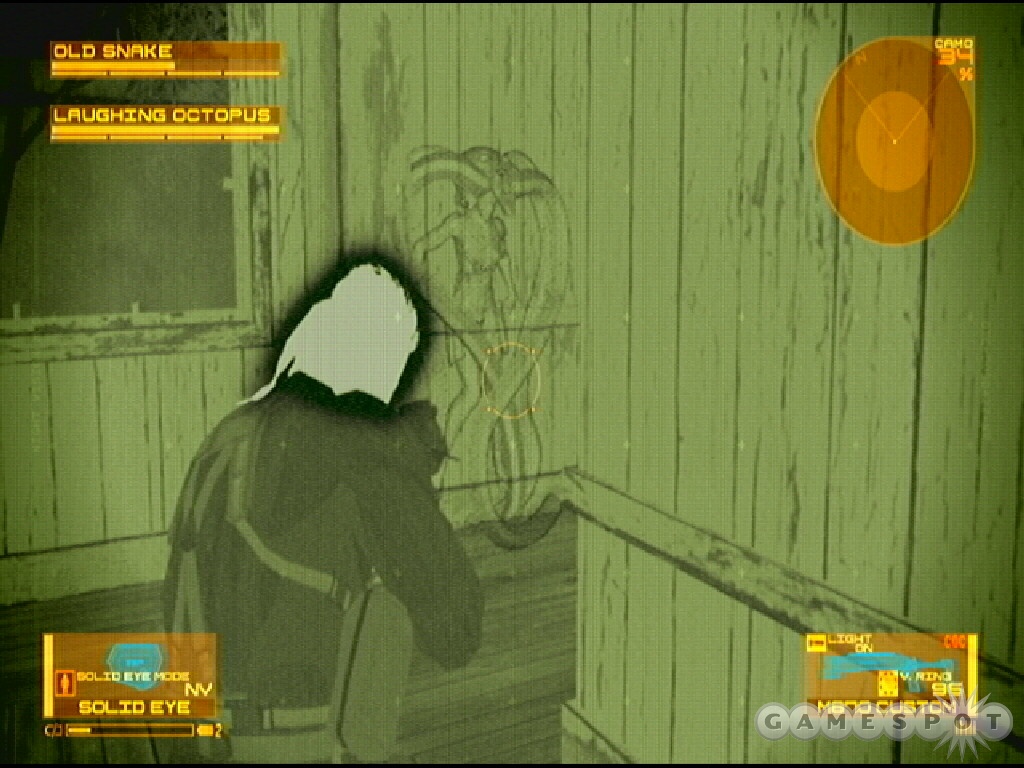
You can use any weapon in this battle against Laughing Octopus, but like Metal Gear Solid 3, it’s possible to take down a boss using "non-lethal" weapons. Doing so reduces the boss’s psyche instead of the health bar. Battle Laughing Octopus with a shotgun using v-ring ammunition if you plan to attempt a non-lethal victory.
Once you have exhausted Laughing Octopus’ health or psyche, Laughing Beauty emerges from her octopus shell. She’ll approach Snake. Repel her with a weapon attack. But you’ll notice she’s quite effective at dodging the projectiles. It won’t take many successful hits to take her down (about three shotgun v-ring shotgun blasts if you’re gunning for a non-lethal victory).
It’s possible to just evade Laughing Beauty. Eventually you emerge into another zone to continue the battle. Evade Laughing Beauty again for several minutes and she’ll perish concluding the battle. After victory, Snake recovers the FaceCamo.
South America: Mountain Trail
Turn around at the start; you can return to the research lab and grab Mk 2 ammunition and noodles if you need them. Follow the mountain trail and grab the ration in an alcove on the right side.
At the first fork in the trail, search the right path to find a soldier relieving himself. Take him down with CQC or a tranquilizer in the back of the head. Grab the part next to him; it’s the fore grip B, which improves control during automatic fire. Continue across the bridge carefully and avoid or incapacitate a patrolling guard on the other side. Three paths lead out of this area.
Search the left path to find noodles; go prone and crawl up to the noodles because there’s a claymore right behind it. Explore the middle path to discover a rat-infested house. There’s a soldier hiding inside. Activate night-vision and crawl over to the left side to spot the soldier’s head. Incapacitate the soldier and search the area for a grenade, Playboy, and PSS. Continue along the right path to reach another intersection.
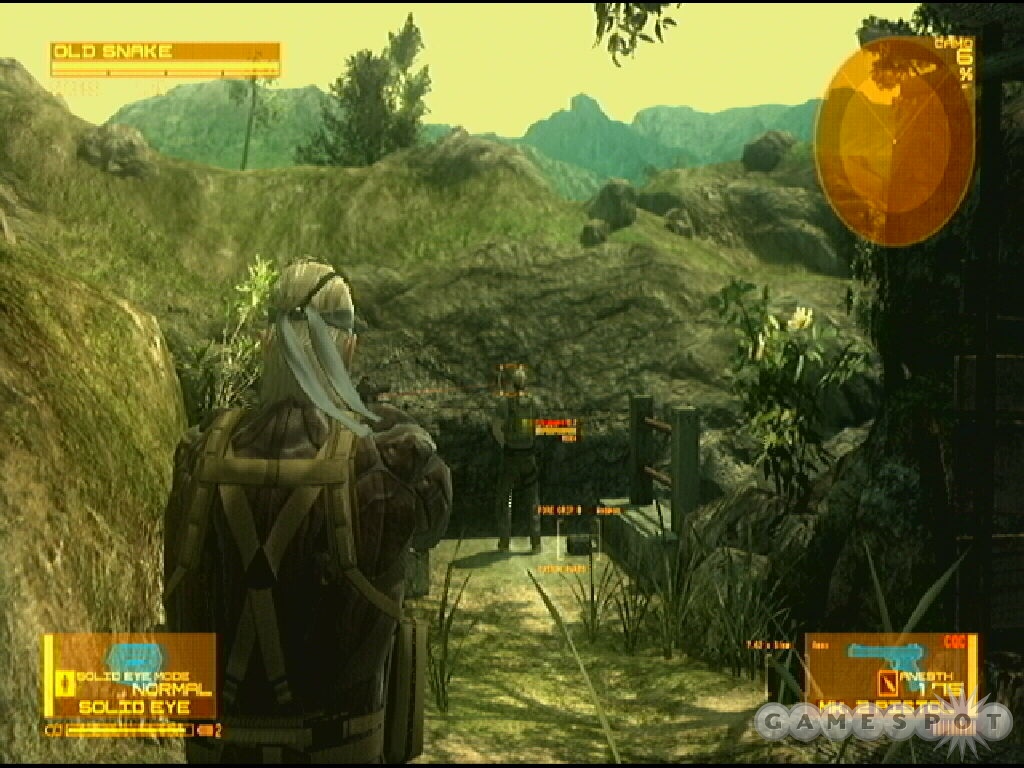
There’s a sniper perched on a hill at the center of this intersection. The left path leads back to the house from the previous intersection; grab the ration here. The right path features a pink bra on the right side—this should clue you in that this mountain trail is filled with traps. Explore the end to find a couple guards and items. Proceed down the middle path but stick close to the rock edge so you remain out of the sniper’s sight (you could always incapacitate him first).
Move carefully through the grass and beware of patrols. On the right side you can spot a soldier waiting to ambush. Take him down with the Mk 2. You can also reach that soldier’s position from the path featuring the pink bra. Resume course on the trail and reach the river.
Find the path on the southeastern side of the river. Crawl through the left path to avoid an ambush. When you reach the clearing, look to the right and you’ll spot a soldier lying in wait. You can avoid this soldier or disable the trooper with the Mk 2. You’ll reach another split in the trail.
If you maneuver close to the right path you’ll hear a woman. Crawl into the area carefully. There’s a sniper perched on a ledge on the right side just waiting for you to investigate the shack on the left side. Incapacitate the sniper with a tranquilizer to the head. Look in the shack and discover Naomi is just a recording.
The left path features a soldier hiding behind a tree. Crawl into the area and reach the alcove on the right side; disable the soldier with a shot from the Mk 2. There’s another soldier waiting to ambush in tall grass just ahead on the right. The middle route converges with the ambushing soldier in the grass.
Continue to the next clearing. Stay prone. As it clears on the right look carefully, there’s a soldier behind a tree trunk messing with a claymore. Shooting the soldier while he’s over the claymore could detonate the mine. Make some noise and lure the soldier away and incapacitate him there. Another three paths lead out of this area.
Crawl carefully into the middle path. You’ll spot a pair of shoes in the middle. It’s another trap; there’s a sniper waiting on the rear ledge. Also, don’t maneuver onto the shoes or suffer explosive damage. Continue through the right path at the clearing to move into the next section.
The middle and right paths eventually connect; you’ll encounter several patrolling guards at the bottom clearing. Disable or avoid the guards. Go to the southern side and find a path that leads toward an entrance into the next section.
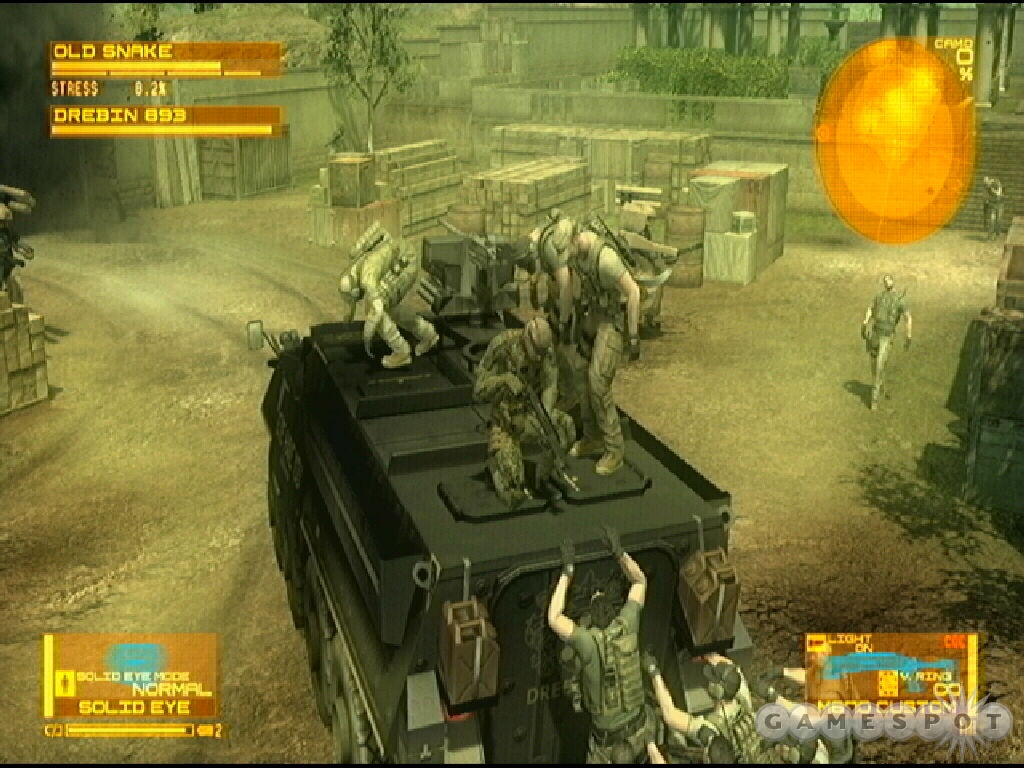
You’re on top of Drebin’s vehicle with an available turret. Drebin drives from the mountain trail through previously visited maps to reach the eventual destination at the marketplace. If you don’t mind killing adversaries then this trip is pretty simple: grab hold of the vehicle’s turret and annihilate everything in your path. Some of the zombie-like soldiers will climb onto the vehicle and attack you from behind. Equip a shotgun and repel these soldiers; a single blast will knock the soldier back and off of the vehicle.
Vista Mansion is the first area. Grab the turret and shoot the powered armor ahead of you. Watch the area around Snake and repel the soldiers with a shotgun blast. If you are hoping to complete the game with zero kills then use a shotgun with v-ring ammunition when repelling the soldiers and don’t bother with the turret. After awhile Drebin leaves the area regardless of the number of kills you achieve.
Next you enter the Confinement Facility with a gang of Gekkos in front of the vehicle. Use the turret to eliminate all of the Gekkos. Continue to monitor the area around Snake and repel the soldiers using a shotgun. Once again, if you are gunning for zero kills, use the turret only on the Gekkos and use v-ring shotgun ammo to blast the soldiers.
The Power Station is the third area. Ignore the area’s enemies and focus the turret solely on the area’s gate. The barrels alongside the gate will explode when fired upon. Destroy the gate to leave the area.
The fourth and final area is the High Woodlands Highway. Drebin drives through while you focus the attack on pursuing Gekko. Eliminate the Gekko as necessary as you drive toward the destination marketplace.
South America: Marketplace
Gekkos have invaded the marketplace. Your goal is to reach the rendezvous in one piece so it’s better to just try and avoid the Gekko. You can find missile launchers in the side alleys but your first priority should be to reach the exit, not attack the Gekko.
As the Gekko enter the marketplace and smash the stalls, various items will be left behind. Check the middle of the marketplace debris for an iPod music track: "Bon Dance" from Metal Gear Solid 3.
Use the alleys as a means of avoiding the Gekko but don’t expect to remain hidden for long—the Gekko have a way of intervening during your escape. Work your way to the barricade blocked by a Gekko. Otacon will exclaim, "Just a little farther, I can see you." Get through the barricade to automatically conclude the section.
Act 3 - Third Sun
You must carefully follow a resistance member to locate Big Mama. Not only must you avoid the PMC patrols as well as avoid detection from the resistance member you must also help the resistance member avoid the PMC patrols!
You receive the signal interceptor, which monitors PMC voice and data transmissions to help you determine the resistance member’s location. You won’t necessarily need the signal interceptor’s help if keep track of the resistance member from his start location. You also begin the task with the civilian disguise and the Young Snake FaceCamo (you also receive the Young Snake w/ Bandana FaceCamo).
Eastern Europe: Midtown S Sector
Move forward from your start location to trigger a cut scene—the arrival of a resistance member. Remain behind the van until he moves away. Hide behind cars on the southern street and wait for the resistance member to move up. If you happen to lose track of the resistance member, you can catch up to him (listen for the whistling) or even find a new one to track. If you prefer to make the attempt again, you can reload a saved game at this map’s checkpoint and restart.
After reaching a couple corners, the resistance member notices a PMC soldier standing guard up ahead. Otacon reveals the problem: the resistance member can’t advance because of the presence of a PMC soldier. If you could get rid of the soldier, the resistance member could continue. An easy way to get rid of the PMC soldier is to use the Mk 2 and incapacitate the trooper with a tranquilizer to the head.
With the PMC soldier out of the way, the resistance member continues around the next corner going north. You’ll spot the park fountain in the distance; the problem is there’s another PMC soldier standing guard near the park entrance. Disable this soldier with another shot from the Mk 2.
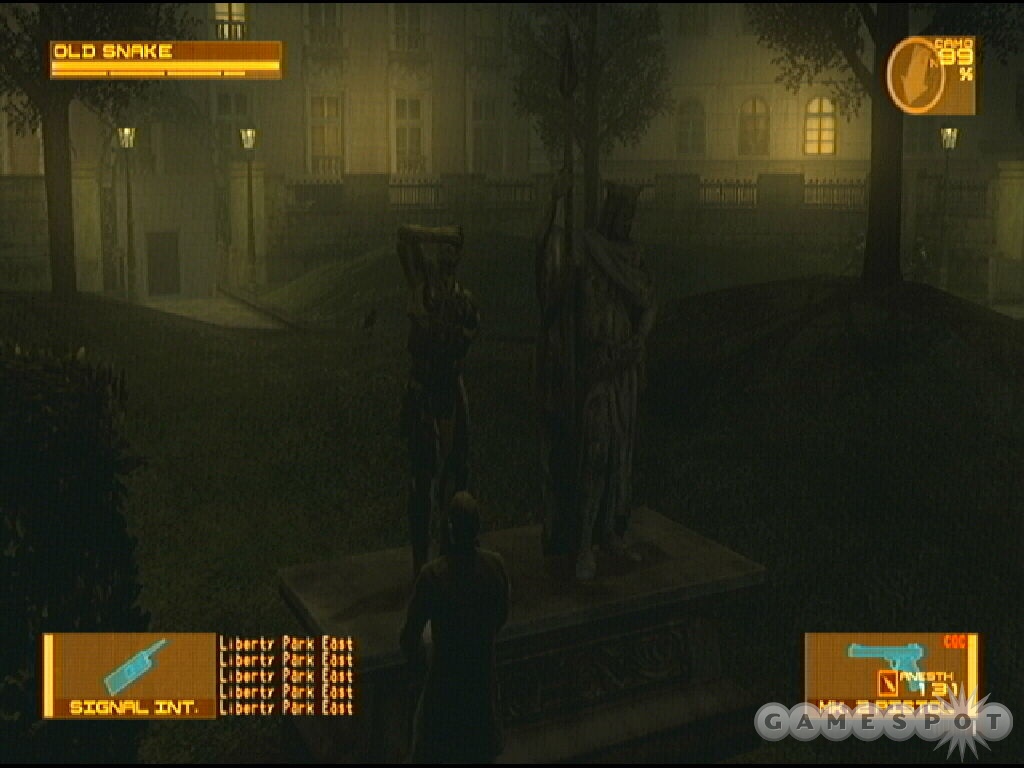
The resistance member moves left at the park entrance then returns to the right advancing into the park. Remain behind cover as you follow him inside. The resistance member crosses through the center; but watch for him to turn around suddenly at the end. He needs to take a "quick break" at the statue.
There are a few other PMC patrols to worry about on the way out of the park. Watch for a couple of PMC guards to try and apprehend the resistance member on his path out of the park. You can aid him by disabling the guards with a couple tranquilizer shots from the Mk 2. Stick close behind the resistance member as he moves away from the park and toward the next map.
Eastern Europe: Midtown NE Sector
Remain stationary at the start of this map; look to Snake’s left and you’ll spot the resistance member taking cover behind vehicles and finally crossing the street. Resume tailing the resistance member toward Big Mama.
The resistance member approaches an intersection guarded by PMC soldiers and a helicopter. Listen to Otacon’s warning about the searchlight—steer clear of the searchlight. The best course of action is to stick to the resistance member’s route. Stick behind the vehicles and follow the resistance member’s footsteps behind cover as you move to the right of the soldiers and helicopter.
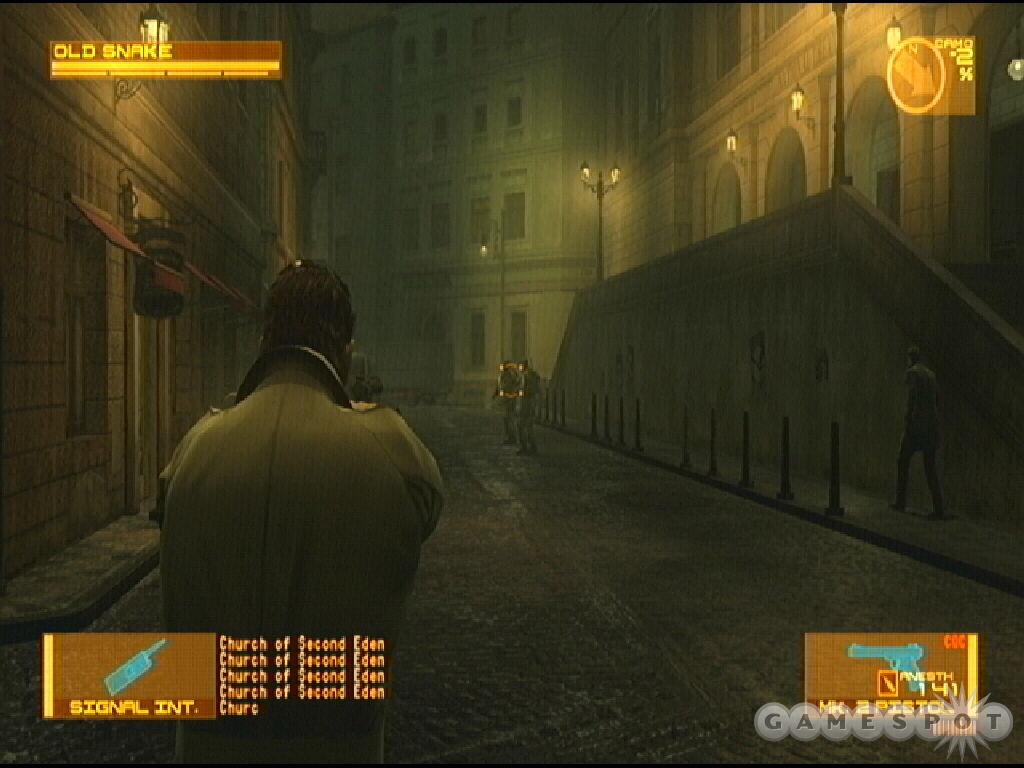
The resistance member will carefully advance toward a left turn. Look ahead and spot a couple PMC soldiers standing guard. The resistance member attempts to tip-toe quietly behind them but knocks a can; the noise alerts the soldiers and the resistance member is immediately apprehended. You can disable the PMC soldiers before this happens or even after the PMC soldiers apprehend the resistance member. Disable the soldiers using the Mk 2. Find more tranquilizer ammo behind the truck on the right side and follow the resistance member into the next sector.
Eastern Europe: Midtown N Sector
Spot the resistance member moving into an alley just ahead of your start position—he’s putting on a PMC solider disguise. Wait for the whistling resistance member to emerge. There’s a compress and a ration on boxes inside the alley.
While the resistance member moves toward the two PMC troops in the distance, move down the alley on the right side and grab Mk 2 ammo. Remain on the right side and use the cars as cover from the enemy troops. Cross behind them and stick on the right side.
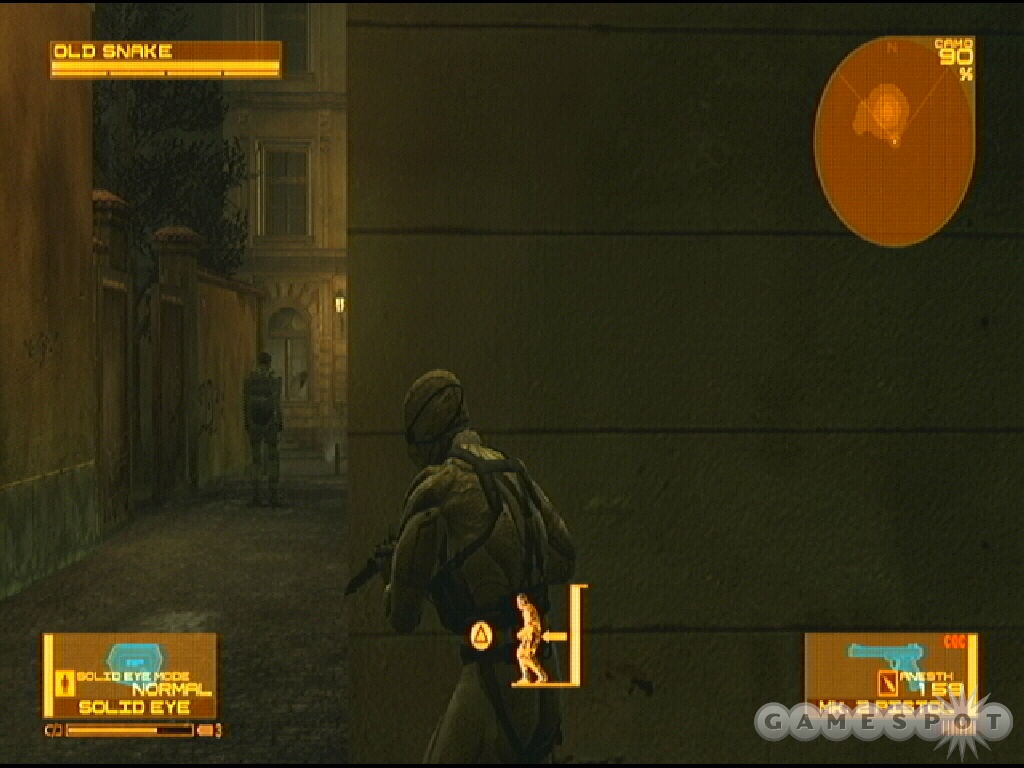
The resistance member moves toward several PMC guards. Go along the road behind them and turn at the first left, then another left, and then the take the first right to find a small alley. Grab the iPod music, "On Alert" from Metal Gear Acid, in this alley. Take cover around here and wait for the resistance member to appear on the street to the south of your position. There may a PMC patrol on the street so take him down if necessary or remain behind cover.
When you spot the resistance member approaching, there may be a PMC patrol close by. Use the Mk 2 to disable the soldier or stick behind cover. Resume tailing the resistance member across the street. Find a ration and grenade in the back alley.
Otacon sends a warning: PMC vehicle patrols. Cross the street quickly but expect a vehicle to arrive shortly. If you’re in OctoCamo and FaceCamo, take cover against the wall. Resume course behind the resistance member and listen for another vehicle pass; assume camouflage and remain hidden. A side street on the left side contains an RPG if you want to cause some carnage.
At the end of the alley, the resistance member removes the PMC disguise. Follow him to the opposite side to trigger the cut scene.
Eastern Europe: Church Courtyard
This is a three-part chase sequence. You can fire a weapon while on Big Mama’s bike but it must be a one-handed weapon. You can choose to target the PMC soldiers with lethal weapons or use the Mk 2 if you are attempting to finish the game without kills. This first sequence is short; Gekkos and PMC soldiers block the route on a few occasions. Keep firing at the PMC soldiers as you move onto the next area.
Eastern Europe: Riverside West
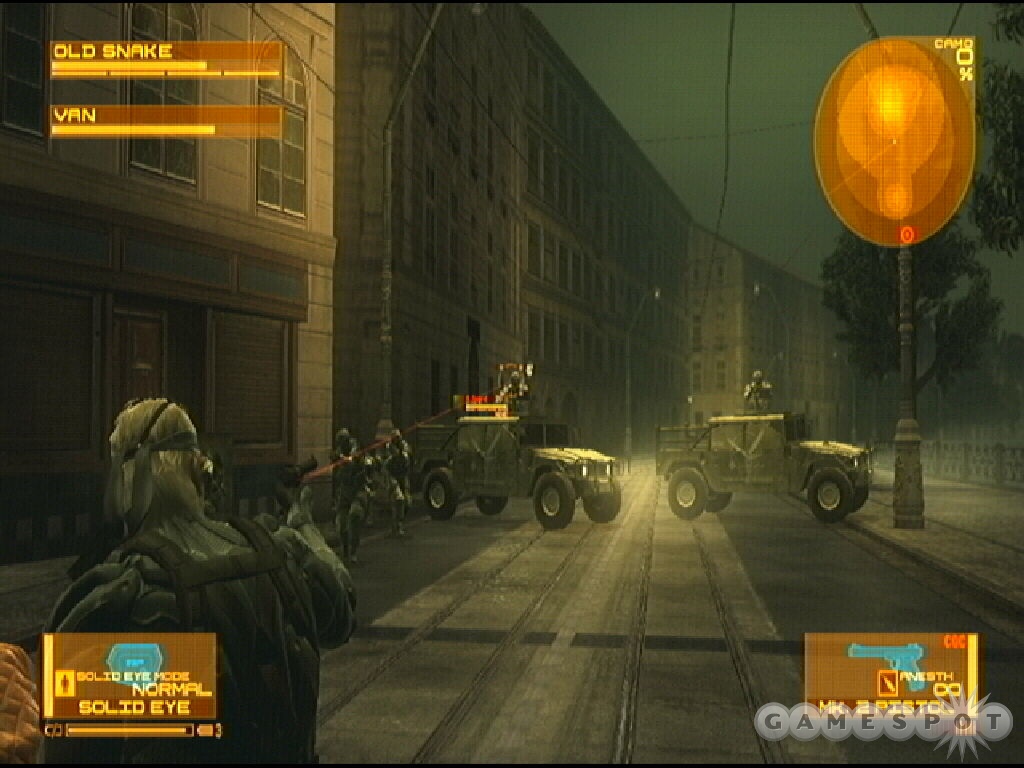
This is a longer chase sequence with greater dangers, primarily PMC soldiers manning the turrets in vehicles as well as other soldiers dropping onto the van and inflicting damage to the escort vehicle. At the beginning, watch for PMC soldiers on the right side with the arriving vehicle and eliminate them.
Take out the PMC soldier manning the turret and watch for the soldier that drops onto the van. At the blockade, Big Mama drives the opposite direction only to be blocked again. Target the turrets at the blockade and when she drives away, look the opposite way and target the soldiers before you suffer significant damage.
When Big Mama hits the jump to move over the blockade, aim for the turrets. Upon landing, eliminate the remaining guards. Watch for another trooper to drop onto the van.
Eastern Europe: Riverside East
Repel the winged attackers. Eventually there’s a vehicle on the right; try and take out the gunner when you first pass cause he’s gives chase and will be behind you moments later.
Expect to encounter a two vehicle blockade with turret gunners; aim for the turrets. During the slow motion through the rolling vehicles, dispatch the nearby soldiers. Encounter another vehicle intersection followed by soldiers. Finally, shoot the soldiers in front when Big Mama turns down the alley.
Eastern Europe: Echo’s Beacon
The chase comes to a painful conclusion at the beginning of this section. You gain control at the bottom of a structure.
Boss Battle: Raging Raven
Ascend to the top of the building. Check a corner on the top floor for an iPod track: "The Essence of Vince" from Metal Gear Acid. Find the opening on the top floor so you can get a good shot on the attackers. You’ll face Raging Raven and a group of other flying attackers. Equip the solid eye so you can target Raging Raven among her group; look for the icon on the target to distinguish the boss from the standard flyers.
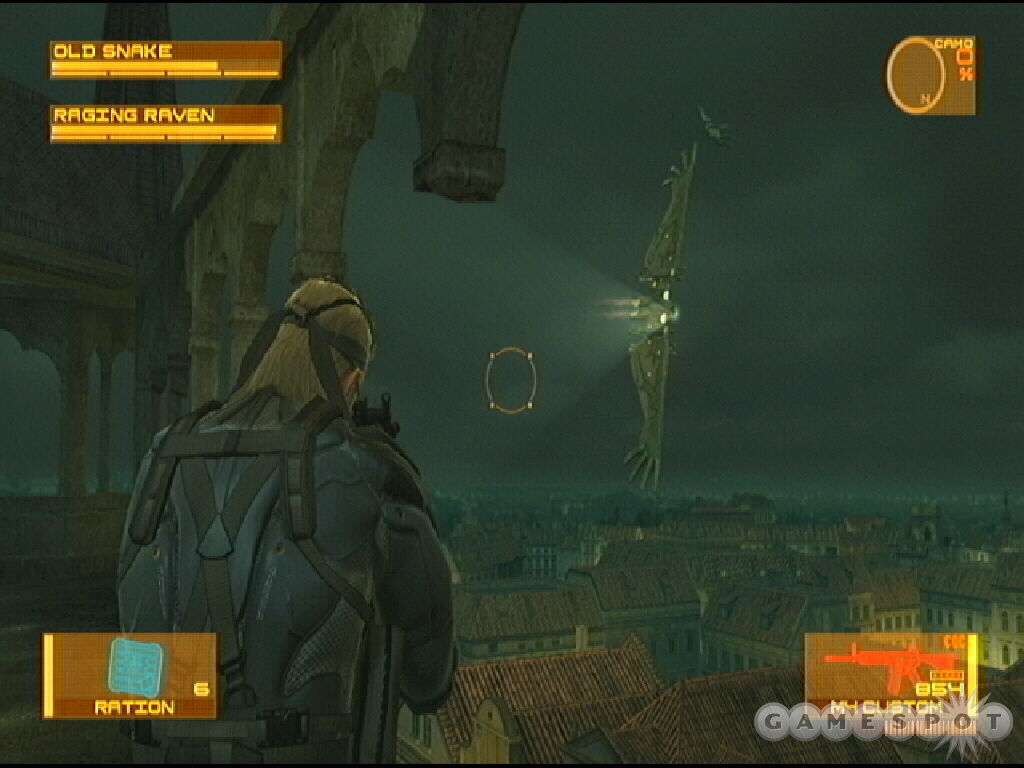
Avoid Raven’s projectiles with side rolls. Don’t hold your weapon sight for too long or the projectile may strike you. If you are striving for a non-lethal kill then use the Mosin-Nagant sniper rifle to target Raven. Eliminating Raven with a non-lethal weapon provides the doll reward; you need to collect all of the dolls in order to receive the unique end game award.
Continue to battle Raven with the sniper rifle and back away between shots and avoid any explosive projectiles. Once you have defeated Raging Raven with non-lethal ammunition, search the top floor to find the Raging Raven Doll.
The encounter with Raging Beauty is similar to the encounter with Laughing Octopus. Equip a shotgun (with v-ring ammunition for a non-lethal kill) and blow her away at close-range. Continue to back away to avoid her "hug" and shoot the shotgun. Defeating Raging Beauty with non-lethal ammunition provides the Raging Beauty FaceCamo as a reward. After the battle gain the MGL-140—a six-shot grenade launcher that uses 40mm grenades.
Act 4 -Twin Suns
Something strange happens at the beginning of this act. It’s a Metal Gear Solid flashback—literally! You can play through this short section anyway you wish. As soon as you are caught, Snake wakes up. You’ll gain the MGS1 Snake FaceCamo after this section.
Shadow Moses: Snowfield
The snow is blinding. Toggle the solid eye and night vision for better visibility through the snow. Various bits of ammunition encircle your start position. Gather the ammo and then find the exit path approximately to the southwest.
Move carefully through the path and spot the Gekko patrolling around the corner. With night vision active, watch the Gekko’s scanner. While it looks away, move past the Gekko using the rocks as cover as you continue west toward the next section. There’s a crawlspace on the northern side of the Gekko patrol; the space contains ammo, regain, and noodles.
Shadow Moses: Heliport
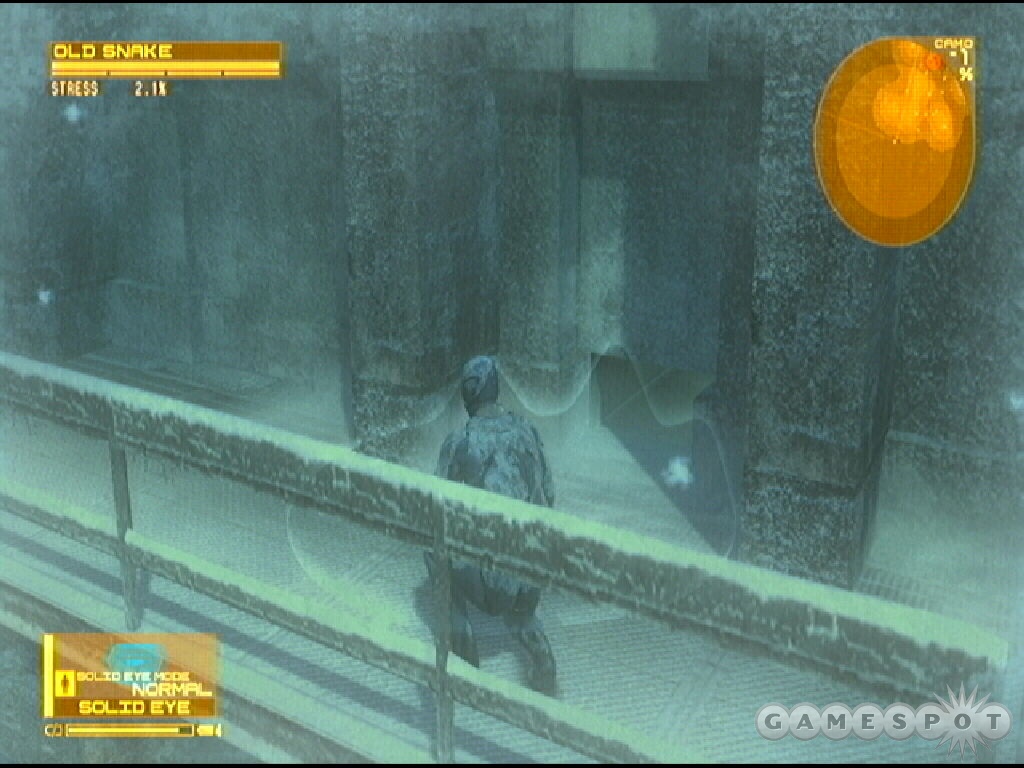
When you reach the clearing at the heliport, look right to spot a ration. Search the western storage room for ammunition and a compress. Use the crawlspace to reach the adjacent storage room and find a ration. Crawl to the next storage room and find a 40mm grenade and RPG ammo. Search under the vehicle for the Mk. 23, a familiar weapon for veterans.
Ascend the stairs near the front entrance. Find tranquilizer ammo to the far left and additional ammunition to the far right. Toggle on night vision. Find the crawlspace at the top of the stairs and squeeze through. Doing so leads you into the next area as well as triggers an audio flashback.
Shadow Moses: Tank Hanger
Crawl all the way through the shaft into the tank hanger. At the end, you’ll recover an iPod track: "Warhead Storage" from Metal Gear Solid. Exit the shaft and hang on. Keep night vision active. Wait for the scanner to move away then drop. Snag a stun grenade in the corner behind you.
With night vision active you can spot the scanners. Wait for the scanners to move away as well as the sentries below your position. Hang over the edge and drop down when it’s clear. Crawl through the passage to the north. Wait for the scanners to move away and continue through when the path is clear.
Shadow Moses: Canyon
A narrow path to the right leads to ammo; another path to the left leads to a ration behind a rock. Look on the left side in a small cave to find an iPod track: "flowing destiny" from Zone of the Enders.
Although the area seems serene, the sleeping "giant" will awaken as you move past. Sneak by and gather ammo and other items if you wish. Proceed quickly toward the next section while avoiding an engagement with the alert Gekko.
Shadow Moses: Nuclear Warhead Storage Bldg 1F
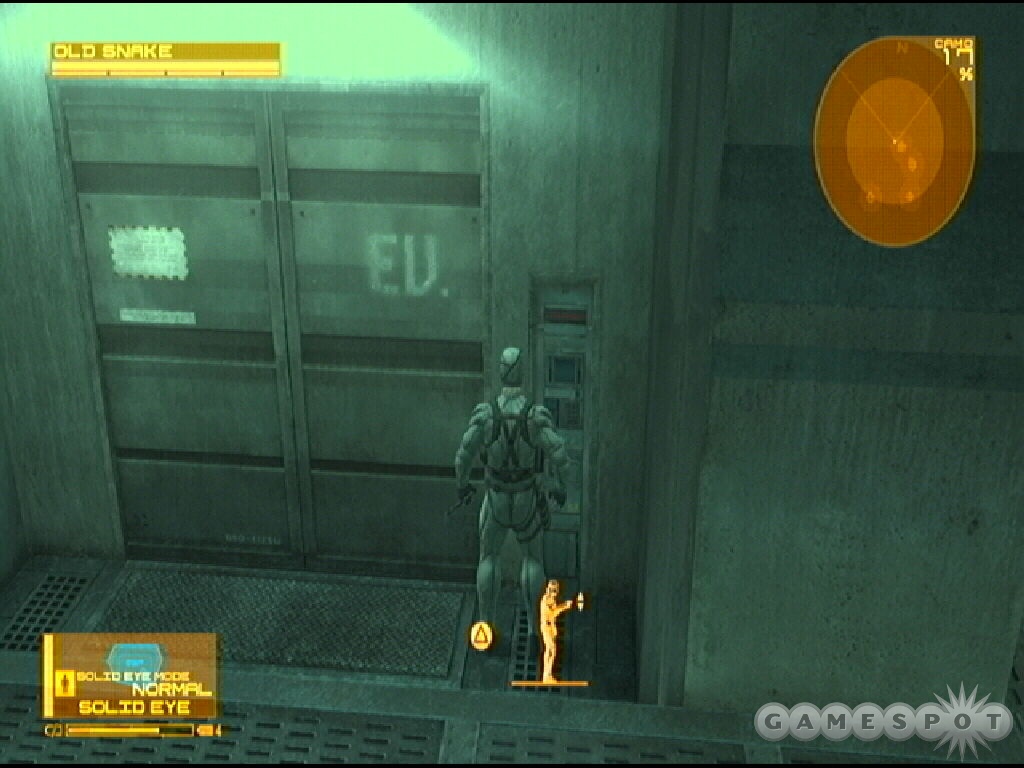
Before heading down, look on the catwalk to the left for a ration. Go down the ramp and crawl inside to receive a call from Otacon. Spot the truck ahead and search inside the back of the truck and find a FIM-92A. You can explore the room’s corners and stockpile some additional ammunition.
Approach the back door on the right side (ground floor) and receive another call from Otacon. You receive a code: 48273. Ascend the staircase and find the elevator at the top. Press the call button and enter the elevator. Operate the controls and proceed to level B2.
Shadow Moses: Nuclear Warhead Storage Bldg B2
Locate the M72A3 in the adjacent room. Walk through this area and receive another call from Otacon. Pass through this hallway and locate an iPod track in the back corner: "Metal Gear 20 Years History (Part 2)" from the Metal Gear Music Collection 20th Anniversary Album.
Return to the lift and go south. Turn left at the intersection; as you approach the doorway, expect to receive another audio flashback. Follow the hallway to its end and trigger a cut scene. Time to input the code at the control panel: in case you forgot, it’s 48273.
Explore the office and find a variety of items, including a ration, compress, regain, noodles, Playboy, and assorted ammunition. Approach the locker inside the office for another audio flashback. Exit the office and retrace your steps back toward the elevator—this triggers the arrival of a Gekko.
Destroying the Gekko isn’t difficult if you have heavy armaments and don’t mind an alert. A few rockets from the RPG are enough to destroy the Gekko; but if the Gekko spots you, of course you will trigger an alert. If you’re trying to avoid an alert, there’s a sneaky way to eliminate the Gekko.
Hide in the left corner and wait for the Gekko to move down the left hallway. Activate the Metal Gear Mk. III and move it straight across. Maneuver underneath the desk. Follow the hall back toward the elevator but stop in the room just left of the lift. This room features controls for the electrified floor. Position Metal Gear Mk III in front of the controls and receive the prompt: press triangle to activate the floor, which will instantly destroy the Gekko and include a 5,000 DP reward.
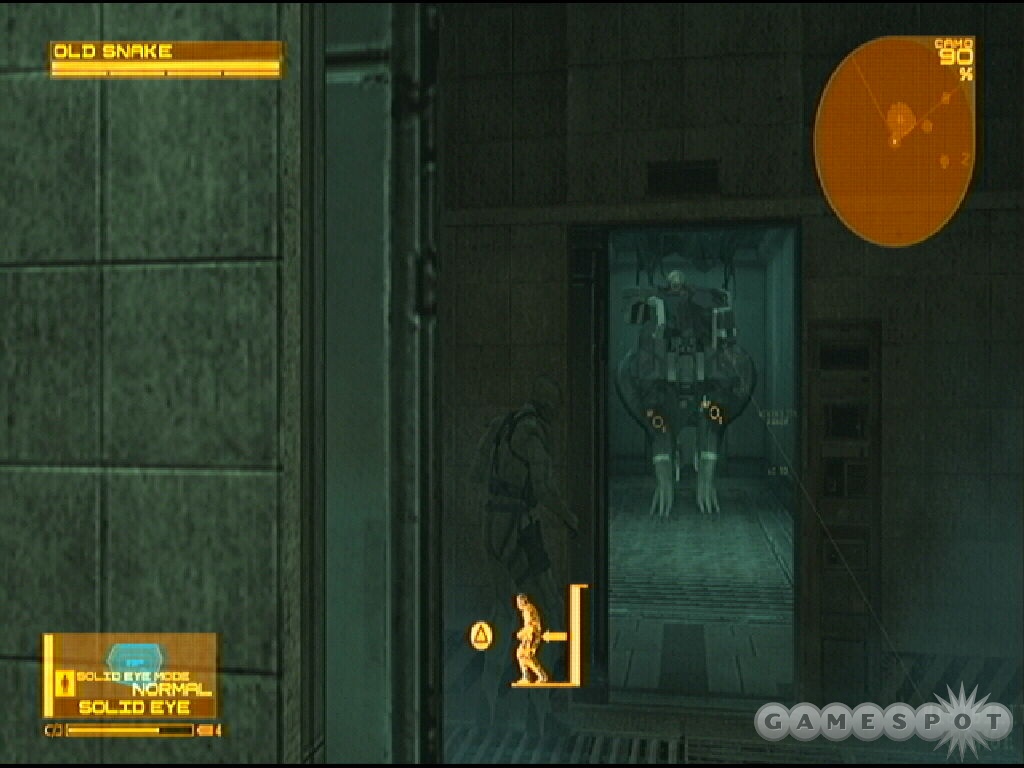
Return down the elevator to the Nuclear Warhead Storage Bldg 1F and drop to ground level and approach the exit door on the northern side—this triggers another Gekko arriving from the upper floor. Once again, he’s not that difficult to take down if you have a rocket launcher and ammo and don’t mind an alert. Wait for the Gekko to drop down then blow it to pieces.
Avoiding an alert requires a bit more patience. The Gekko will drop down off of the second floor and slowly make its way around the left side of the truck (if you’re facing away from the exit door). Take advantage of this knowledge!
While the Gekko remains on the upper level, use the opportunity to plant explosives on the ground on the left side of the truck (for instance, C4). Put about four on the ground. Return behind the truck and hide. Wait for the Gekko to move behind the truck and scamper to the opposite side of the room and up the stairs. Equip a missile launcher and stand at the edge overlooking the Gekko and truck below. Detonate the C4 when the Gekko steps on the explosives then launch a missile.
Shadow Moses: Snowfield & Communications Tower
Grab some ammunition in front of you then jump over the fence to the left. Snag a couple stun grenades in the right corner. Search the storage room on the left side for an SVG sniper rifle, ration, claymore, and ammunition. Drop off of the ledges into the next area.
Boss Battle: Crying Wolf
The snowfield and communications tower area is large and visibility is limited. You begin in the south; there’s a recessed path here leading toward a southern tower. You’ll find another tower just to its north and additional obstacles on the eastern side. Enemy soldiers crowd the area and Crying Wolf primarily remains hidden choosing to battle from long-range with a powerful rail gun.
Activate the solid eye and toggle night vision. You’ll need the visual boost to locate Crying Wolf’s position. This battle isn’t necessarily difficult as long as you remain extremely patient, especially if you’re trying to avoid triggering an alert. The presence of patrolling soldiers is the biggest problem. Use OctoCamo and FaceCamo with the snow to remain as hidden as possible. If necessary, use a tranquilizer to incapacitate a soldier that’s snooping too close.
You must hit Crying Wolf when she’s out of the shell; she emerges from the shell to pinpoint her rail gun on your position. If you spot Crying Wolf running around, don’t bother firing. Remain prone and crawl around as you hunt for Crying Wolf’s position. When you find her, target her exposed body (the bright part of Crying Wolf with your night vision activated) with a sniper rifle. Get off as many shots as possible before Crying Wolf moves; watch which direction she moves so you can resume another search.
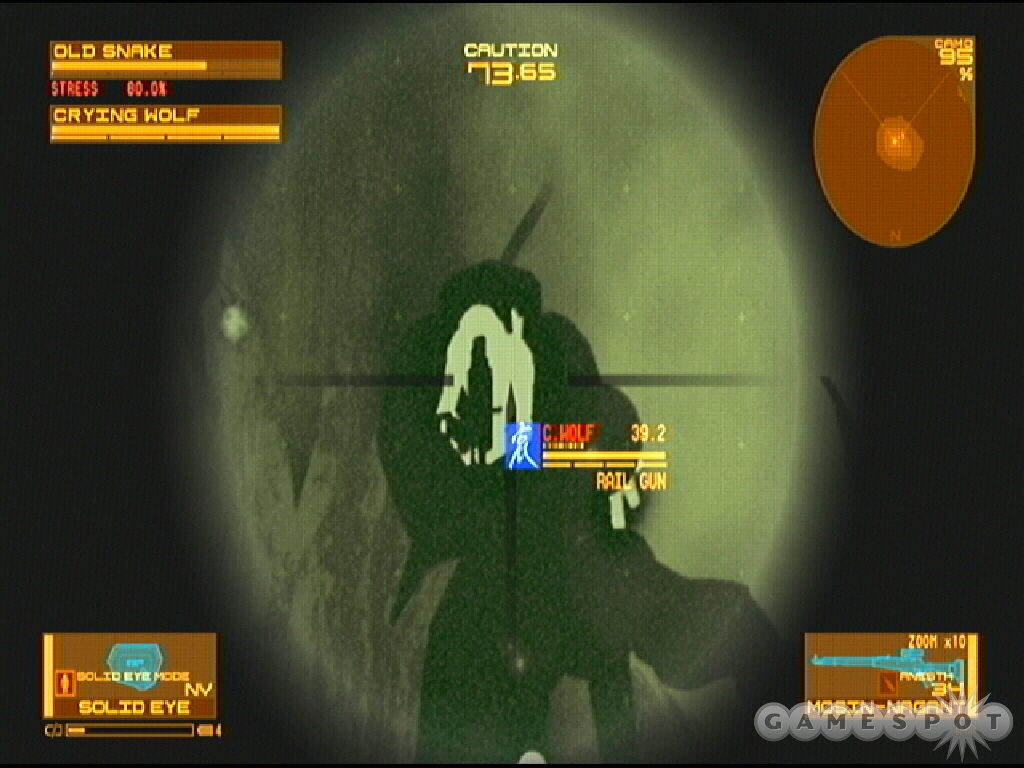
Constant use of night vision has a way of draining the solid eye battery. Find a good hiding spot with full camouflage so you can take the time to recharge before resuming the hunt against Crying Wolf.
Once again, it’s all about patience. You need the patience to remain prone and camouflaged for most of the battle so you can avoid the patrols. Use the Mk 2 to incapacitate enemy soldiers. Don’t just target enemy soldiers because Crying Wolf will replace them (and any you have incapacitated with a tranquilizer could be woken up by another patrolling soldier). Defeating Crying Wolf triggers the arrival of Crying Beauty.
This is similar to the previous fights: Crying Beauty attempts to reach Snake and you need to keep her off. Target her with a shotgun (or one with v-ring non-lethal ammunition if you’re going for the bonus reward) and blast Crying Beauty as she gets close. After the battle you get Crying Wolf’s rail gun, which Drebin immediately unlocks. Defeat Crying Beauty with non-lethal ammo and receive the Crying Beauty FaceCamo.
Open the door on the northern side of this area. As soon as you enter the area, immediately look to the right and on the ground to locate an iPod track: "The Best Is Yet To Come" from Metal Gear Solid. Grab some regain behind the crates on the left side before advancing toward the next area.
Shadow Moses: Blast Furnace
Grab the stun grenade and ration off of the catwalks. Move along the western ledge, Snake will need to be against the wall. Maneuver over to the other catwalk. Descend the stairs. A sentry on the catwalk ahead of you; it’s guarding the rail gun ammo. Using night vision you can see their scanner beams. This sentry actually rolls across the catwalk to your current position. If you want the rail gun ammo, hang off the side and shimmy across to the opposite area. Pull up once the sentry leaves, grab the ammo, and then hang off the ledge again.
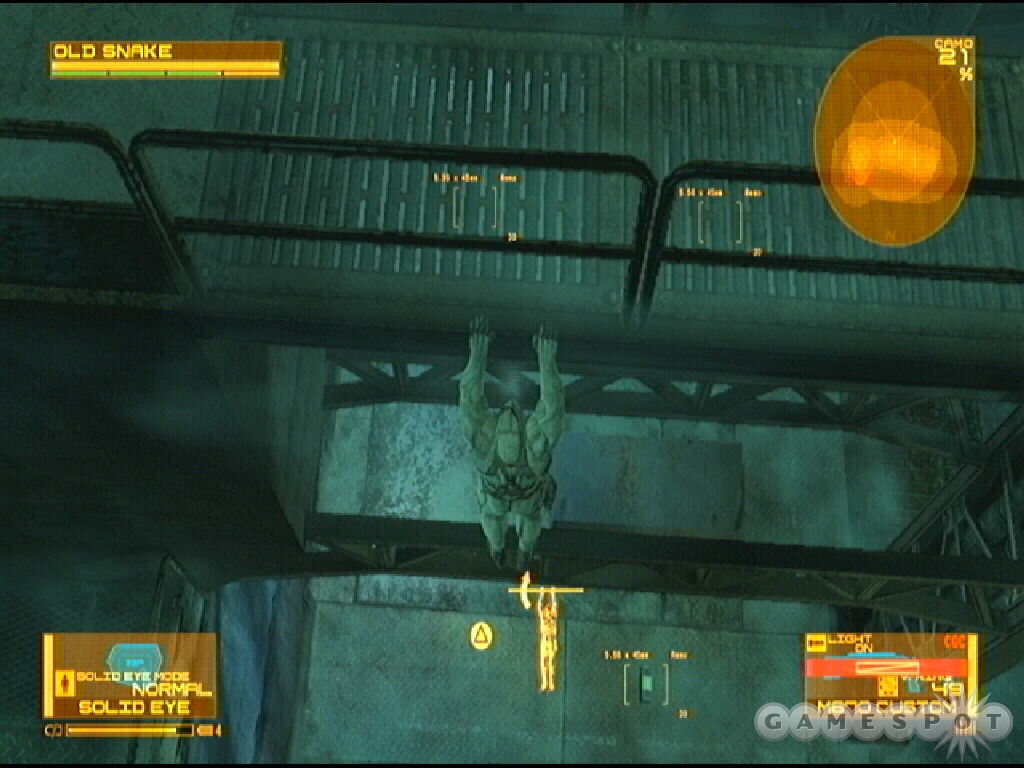
The best way to reach the exit is to return to the area’s start location. Hang off of the ledge and spot the ammo below you. Drop onto this section. Grab the ammunition from this area and then crawl through a crawlspace and reach a room—with a ration and ammo—looking directly at the exit door.
Remain camouflaged on the left side of this doorway while you wait for the ground sentries to move out of the way. Wait for them to move over to the left then approach the front of the door (avoiding the scanner above). Once you trigger a call with Otacon, get camouflaged on the right side.
Proceed west and ascend the steps taking care to avoid any sentries. Get to the top. Drop down twice, noting the scanners below. Press the call button on the elevator. Get inside and go to B5. Inside the elevator you will receive an audio flashback.
Shadow Moses: Casting Facility South
You will spot a Gekko directly ahead as soon as the elevator doors open. Thankfully it’s looking the other way. Take cover on the left side. Wait for the Gekko to move away toward the right. Advance forward. Grab the ammunition as you move into the next section.
Shadow Moses: Casting Facility North
Gekko patrol this area’s center so remain to the left side. Rotate the camera to keep an eye on the patrolling Gekko. Maneuver along the left side and avoid the sentry scanning ahead of you. When you move past, you’ll encounter several sentries patrolling the next section.
Watch the patrol pattern of these three sentries. When this group rolls east, scurry past them and toward the wall ahead. Turn right and take cover where the ration is located.
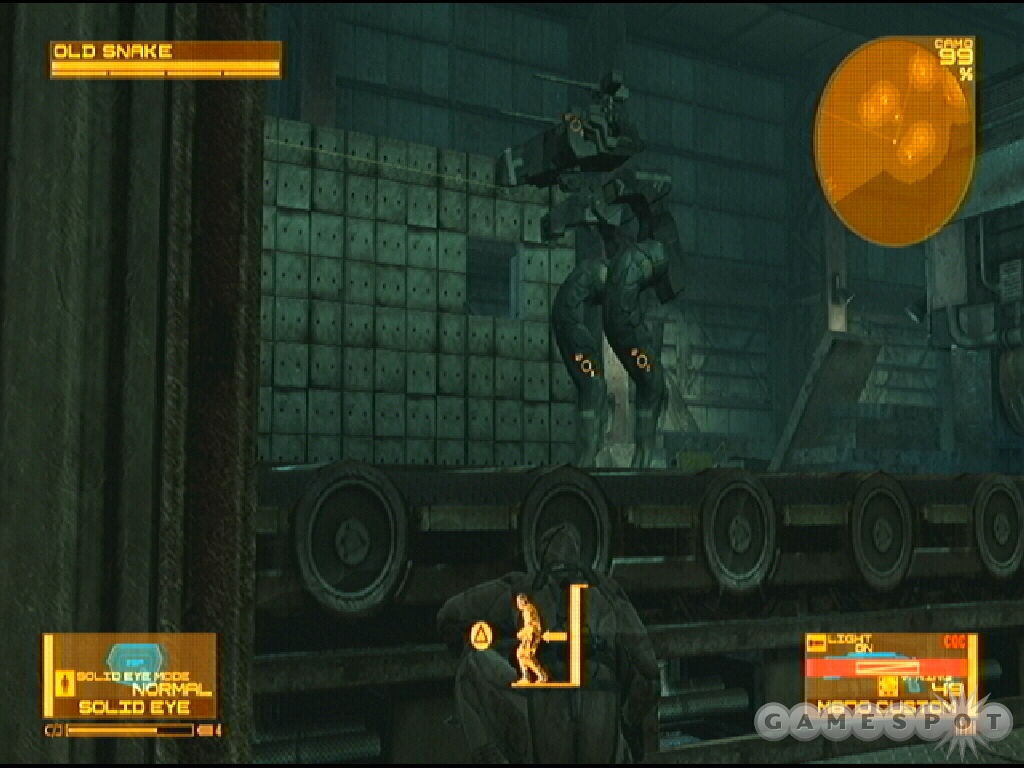
Continue east and hide at the conveyor. Wait for the patrolling Gekko to turn south and start the patrol in that direction. Cross over the conveyor.
Wait for the sentries are over on the right side and scamper to the left toward the alcove (there’s another overhead scanner to avoid as you move through). Descend the ladder or just drop down and proceed into the next section.
Shadow Moses: Underground Base
Grab some ammo ahead then crawl through to the next hall. Wait for the sentry to move away. It will continue to move away allowing you to move toward the far wall, where you can hide to the right. The sentry eventually moves over here too but if you are fully camouflaged on the stairs, you can avoid detection.
With the ground sentry away, wait for the overhead sentry scanner to look away from you and follow it to the door. Enter the hall.
Shadow Moses: Underground Supply Tunnel
With assistance from Metal Gear Mk III, you begin the ascent toward Rex. According to Otacon, the rail gun has been removed. To make matters worse, Vamp interrupts your mission.
Boss Battle: Vamp
In your item slot, equip the syringe. Keep an eye on your health, though, because you may need to use a ration if the battle against Vamp isn’t going as planned. Use your favorite assault rifle in the weapon slot (such as the M4). This battle is fairly straightforward—shoot Vamp at every opportunity. He has a few attacks, primarily a variety of knife throws. Dodge the projectiles with side rolls. Vamp also charges and leaps with a melee strike; dodge or run to the side. It’s better to stop shooting and concentrate on avoiding the damage.
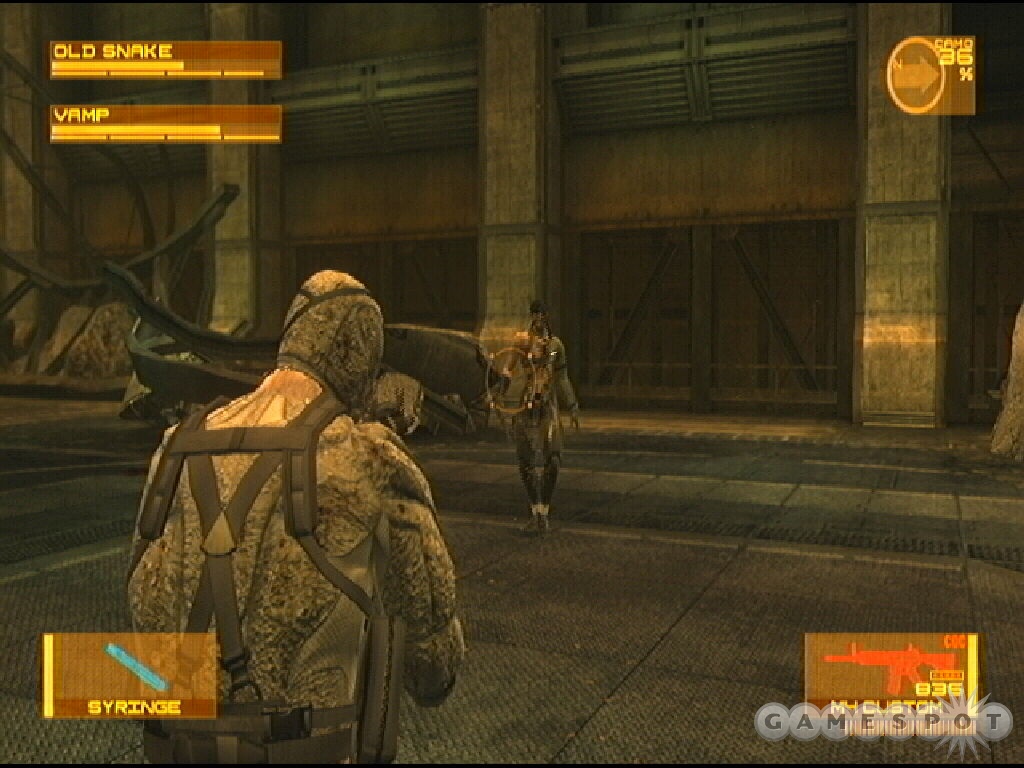
Vamp leaps and hops around the area. Continue to shoot him whenever you can. You’ll be able to get a lot of damage on Vamp as he runs toward your position. Watch Vamp’s health. The key moment is when Vamp has just a sliver of health remaining: practically one line of health bar. When he’s shot with a sliver of health, he’ll drop to the ground.
Quickly move to Vamp and make sure you have the syringe equipped in the item slot. Holster your firearm. Stand over Vamp and as he starts to stand up, press R1 to begin a CQC maneuver. When prompted, press the triangle to utilize the syringe to terminate Vamp.
Self-destructing "suicide" Gekko arrive after you finish the battle with Vamp. The screen splits: on the left it’s Snake against the self-destructing Gekko and on the right it’s Raiden versus Vamp. You automatically begin the battle wielding the rail gun—it’s the weapon of choice against the approaching Gekko.
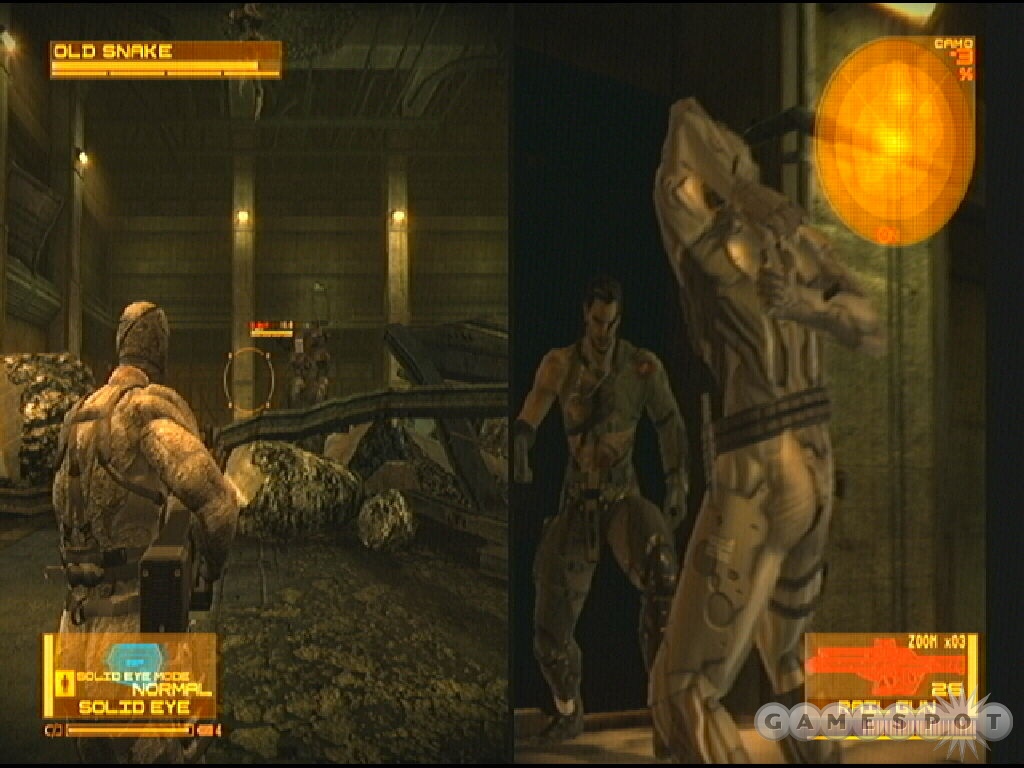
Move around constantly to avoid gunfire from the approaching Gekko. Wait until the rail gun charges before firing at a Gekko, otherwise it will take several shots to eliminate a Gekko. Watch the rail gun and when you see it electrified, it’s ready to fire. With a fully charged rail gun, you can eliminate a self-destructing Gekko in a single blast. Ideally, you should strike the Gekko from long-range.
Avoid allowing the Gekko to get close. If they reach Snake’s position, the Gekko activate their self-destruct sequence. You will be able to spot the countdown; if it reaches zero it’s all over for Snake. Allowing a couple Gekko to get close will cause big problems because the rail gun likely won’t charge fast enough to eliminate the self-destructing Gekko in single shots.
Shadow Moses: Surface Tunnel
The timer at the top indicates how much time you have to get out of the building—it’s basically a straight north shot out of the structure. There’s plenty of time so have fun inside Metal Gear Rex. Utilize the gatling gun to obliterate the Gekko that emerge from the left and right sides of the screen. Take your time moving through the tunnel because you can rack up DP (+500 for each Gekko destroyed) as you make your way out of the tunnel.
Shadow Moses: Port Area
Metal Gear Rex features a trio of weaponry. You can use the standard gatling gun (tap the fire button to avoid overheating). You can switch to the homing missiles. The red boxes indicate a missile lock; fire the missiles at Ray. There are 15 missiles and you must wait for them to reload. Finally, there’s the laser. Activate the laser and wait for it to fully charge then fire it at Ray. Like the missiles you must wait for the laser to recharge before using it again.
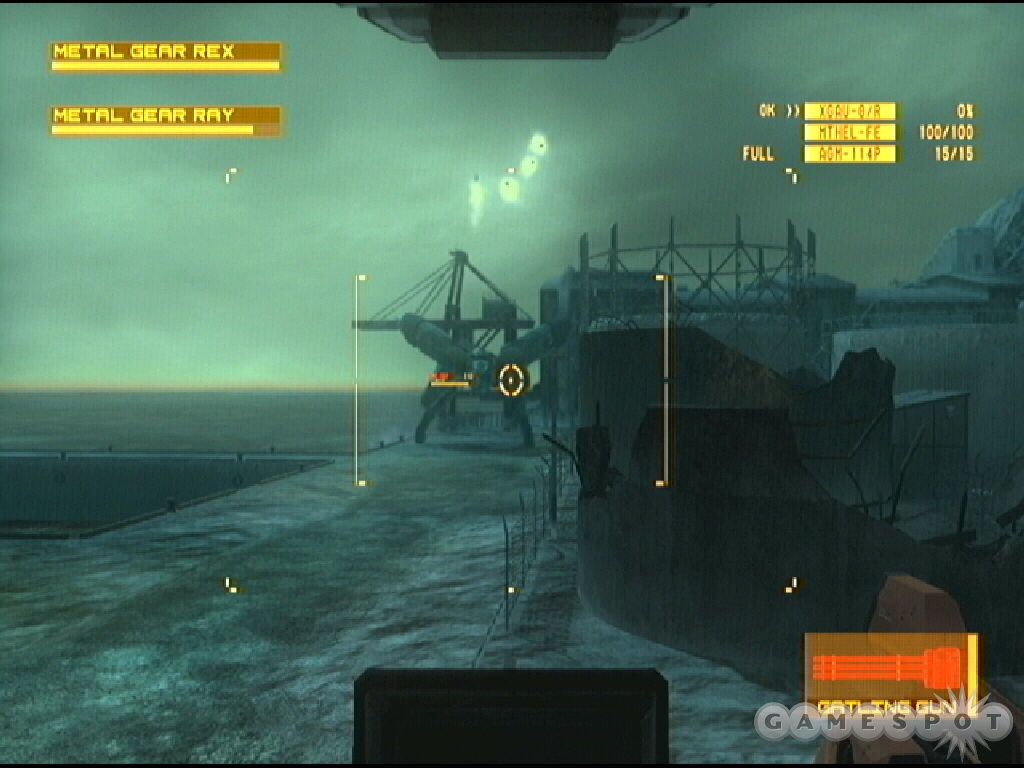
All of the weapons are highly effective so don’t hesitate to switch between them as the weapons become ready to fire. Expect various structures to topple around the area as you blow everything away with weapons fire (or ram into them). The key to the battle is remaining behind cover as much as possible. Ready a weapon and get a line of fire on Ray and unload your weaponry. Return to cover and repeat the strike. If you lose the cover around your position, maneuver to another location and continue the fight.
Act 5 - Old Sun
Outer Haven: Ship Bow
Guards approach your position almost immediate as you gain control. Make an effort to keep things quiet and out of an alert. Equip the Mk 2 and go prone. Maneuver to the left and wait for the approaching guards to get close and incapacitate them with a couple tranquilizer shots to the head.
There’s a hall in the center of your start location that contains a ration but moving over here triggers a quartet of guards dropping in just beyond the ration. You can avoid them by keeping on the left side of your start location and advancing toward the objective from there.
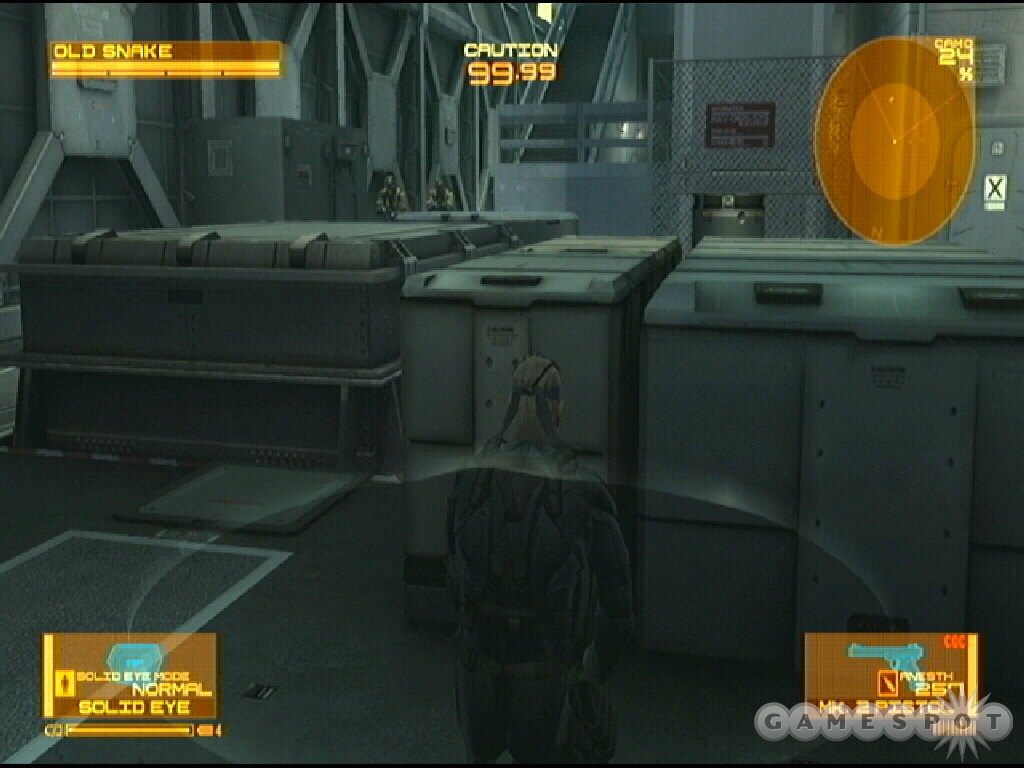
Advance on the left side and watch a couple more soldiers drop down ahead. Hide on the right side and wait for these guards to move away to the right side. Continue toward the next corner and spot more guard movement ahead of you. Wait until these guards maneuver into view and begin to approach your location. Incapacitate these guards with your Mk 2.
After taking down these two guards, cross forward but check around the right corner first to make sure there are no guards watching. Remain on the left side and use the crates and objects as cover. You can squeeze through the narrow gap next to the crates to continue forward. Rotate the camera and take note of the Gekko patrol to your right.
Move slowly forward and trigger a couple soldiers dropping down in front of you. Take cover and use the Mk 2 to incapacitate these guards. Take cover ahead where the guards dropped but keep an eye on the Gekko to the right.
Your goal is to reach a door just to the right and forward. The problem is the door doesn’t open automatically. You must stand in front of the door and tap "triangle" as prompted to open the door. This takes several sections during which you could get spotted or attacked—and getting assaulted by the Gekko while attempting to open the door is basically game over.
In the hallway behind, grab a ration, ammunition, an RPG, and a PSS. Move forward to the elevator. Note that the elevator won’t activate if there’s an alert active. You’ll hear an audio flashback in the elevator as you move into the next area.
Outer Haven: Command Center
Move forward and trigger the cut scene. Save again at the checkpoint. When you regain control you must defeat several groups of troops. These soldiers drop into the area a handful at a time. Take cover behind one of the pillars and use it as cover against the advancing forces.
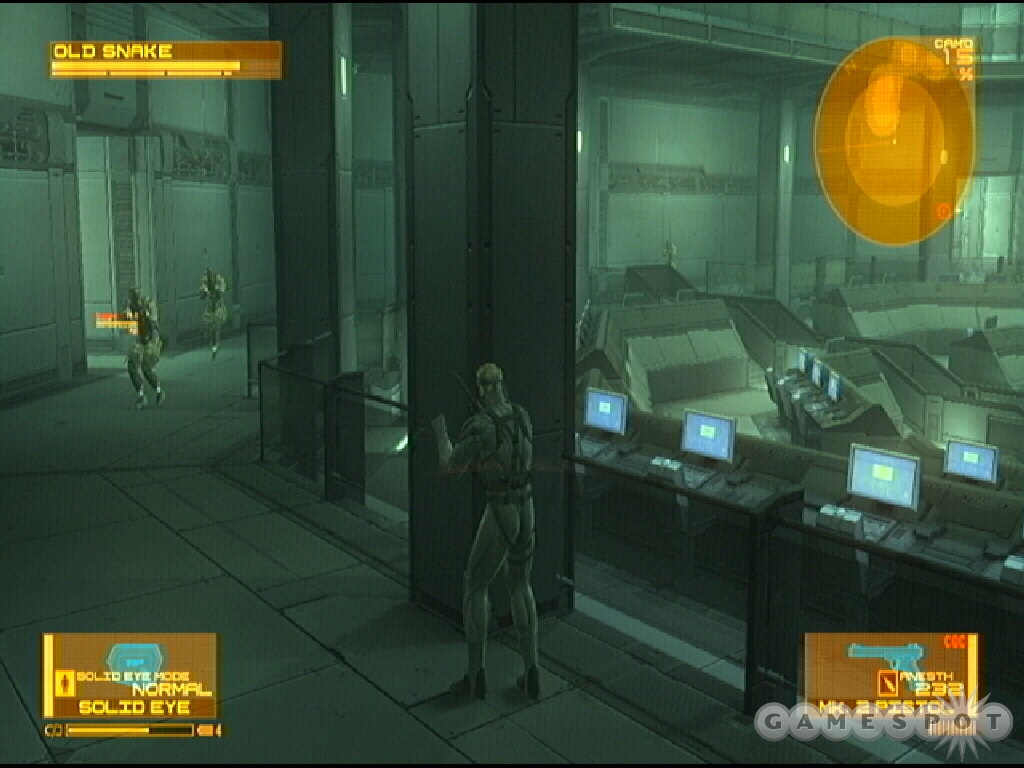
You don’t want to remain at the bottom of the area where you are exposed from all sides; advance up steps and find a pillar to hide behind. Don’t attempt to bottle yourself into the hallway leading to the door; although you can’t be surrounded here, the soldiers will repeatedly toss in grenades. You can keep moving along the sides of the command center and find a ration and ammunition. Defeat a group on the lower floor, then a group that appears on the upper floor, and finally a final wave that drops into the lower area.
Boss Battle: Screaming Mantis
When the battle against Screaming Mantis begins you’ll soon discover that you can’t do much. Every time you attempt to aim up at Screaming Mantis, you’re forced down—you can’t get a shot! Not only that but other strange things are happening. It may suddenly appear as if your television switched stations to Hideo 2. Thankfully it switches back!
If you do nothing (just go prone and wait this out) eventually you will receive a call from Rosemary and Roy Campbell. They suggest trying a proven strategy against Mantis—switch controller ports! (Metal Gear Solid veterans remember that one, right?). Waiting further and you receive another call from Roy about attacking Mantis’ bust…but there’s no bust here. Finally a call from Otacon provides a tip.
Listen to Otacon’s tip: nanomachines, resisting her charms, etc. Equip the syringe in your item slot and use it. You break free from Mantis’ charms and can now begin the boss battle!
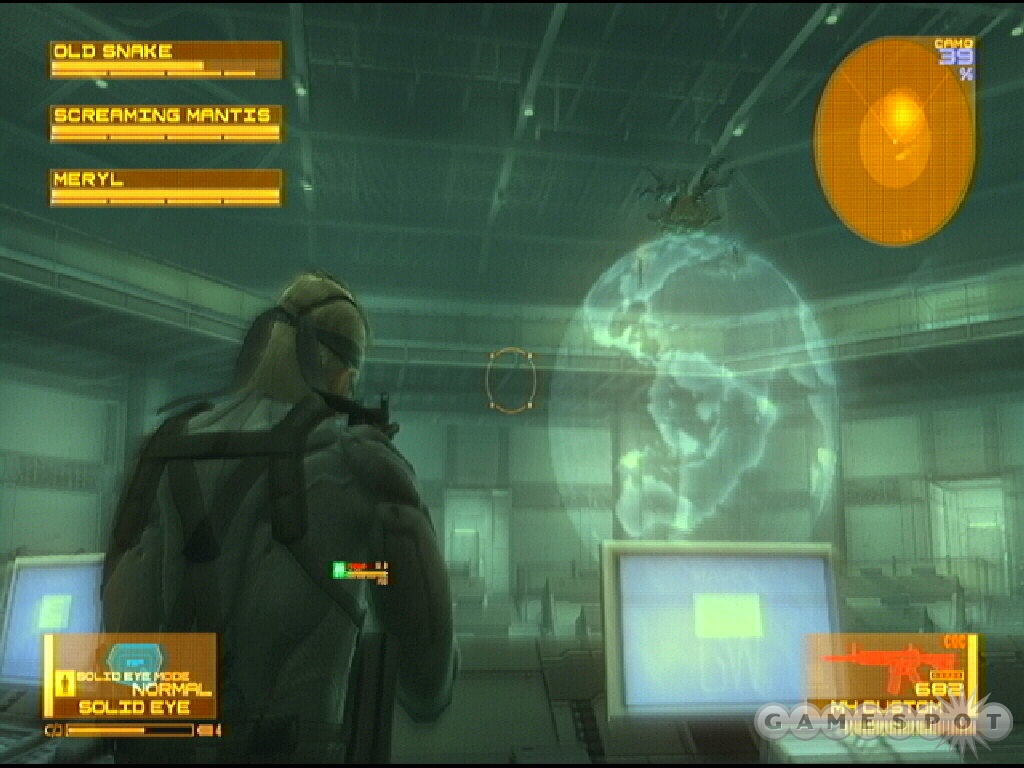
You won’t target Screaming Mantis. Instead you will target one of the dolls. Target the doll on the left side (Mantis holds this doll in her right hand). Shoot the doll a couple of times and trigger a cut scene, which begins the next stage of the battle.
Screaming Mantis employs a few attacks. When Mantis begins teleporting toward your location, get ready to roll away. Mantis uses a melee strike when she reaches your position so move away before she strikes. If she teleports again after the melee strike be ready to roll away again. Mantis also throws a set of boomerangs. Take cover to avoid the projectiles.
Target the left doll and shoot it a couple more times. You will trigger another cut scene. Once again, target and shoot the left doll and Mantis will drop it. Run over and pick up the Mantis Doll.
Equip the Mantis Doll. Press L1 to aim with the doll and press R1 to fire it at Screaming Mantis. Once the projectile strikes Mantis, follow the onscreen instructions with your controller. For instance, if you have a Sixaxis controller, follow the waggle instructions. Keep performing the action until Mantis falls.
After the battle, search the northern side of the bottom entry for the Screaming Mantis Doll. If you have been successfully collecting the other dolls then you will receive a reward upon completing the game.
Screaming Beauty emerges and the battle is the same as previous fights. Equip a shotgun (with v-ring ammunition if you are going for a non-lethal kill) and blast her at close-range. Keep backing up to avoid her "hug" and blast a few times to complete the battle. You will receive the Screaming Beauty FaceCamo for defeating her with a non-lethal weapon.
Outer Haven: Missile Hanger
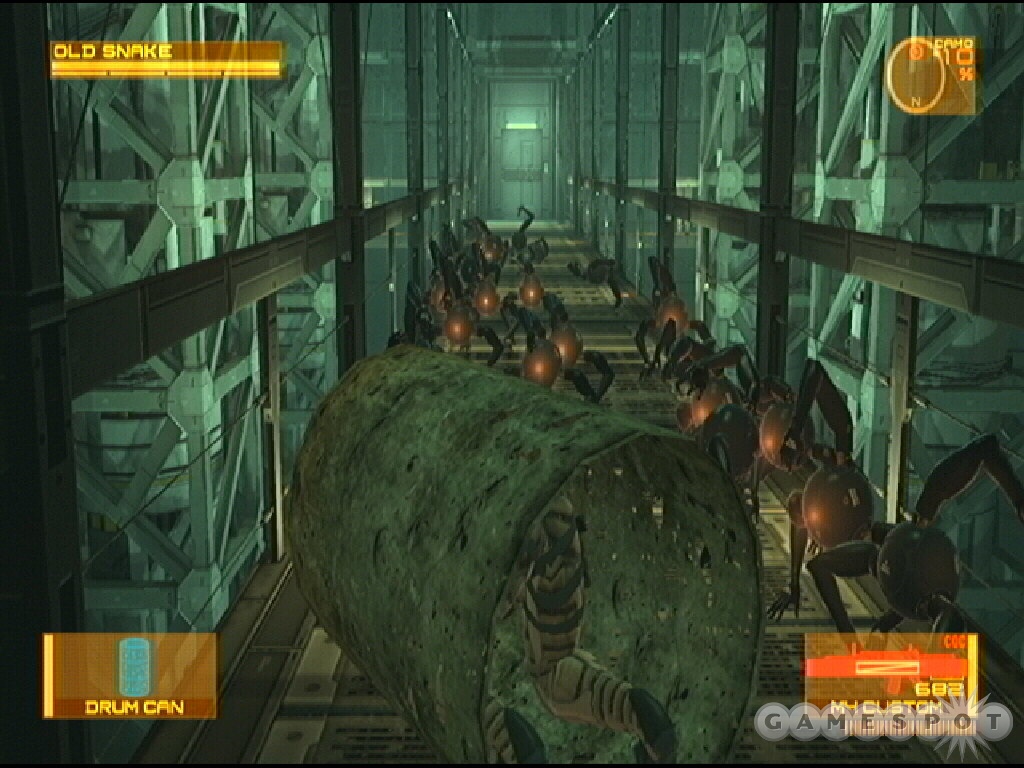
Walk forward to trigger a few audio flashbacks. Just keep moving forward until you trigger a cut scene. When you regain control, expect to face a ton of sentries. You can gain +50 DP for each plus additional +1500 for dropped weapons. You can basically remain here for as long as your ammunition allows. There are a few hallways of sentries. Keep moving through until you reach the next cut scene.
If you just want to get through the sentries quickly, just equip the drum and roll through them! Remember that Snake gets sick if he rolls too long so stop before he gets sick.
Advance through the microwave tunnel and follow the button prompts. Be prepared for frantic "triangle" pressing! Don’t give up!
Boss Battle: Liquid Ocelot
You’ve reached the final battle of Metal Gear Solid 4 and it probably is a bit different than you expect. In fact, the battle is more like a fighting game!
Take note of the controls. Press L1 to guard. Tap R1 for a multi-hit punch and kick combination. Hold L1 (guard) while pressing R1 for a strong punch. Press X to duck or, while moving, dash. Press dash and then R1 for a dashing body blow. Hold R1 down for a CQC maneuver. Finally, you’ll use Triangle for several onscreen prompted maneuvers.
Like a boxing match, this battle is separated into rounds; distinguish each round by the music played (as well as the appearance of Solid and Liquid’s health bar). Strategy basics include using "X" to dash away from Liquid. Stay away then move in for a strong punch or a multi-hit combination. During round one, expect to perform a grappling ground-and-pound move several times. Follow the onscreen prompts (triangle then R1 to punch and finally triangle again for the finisher).
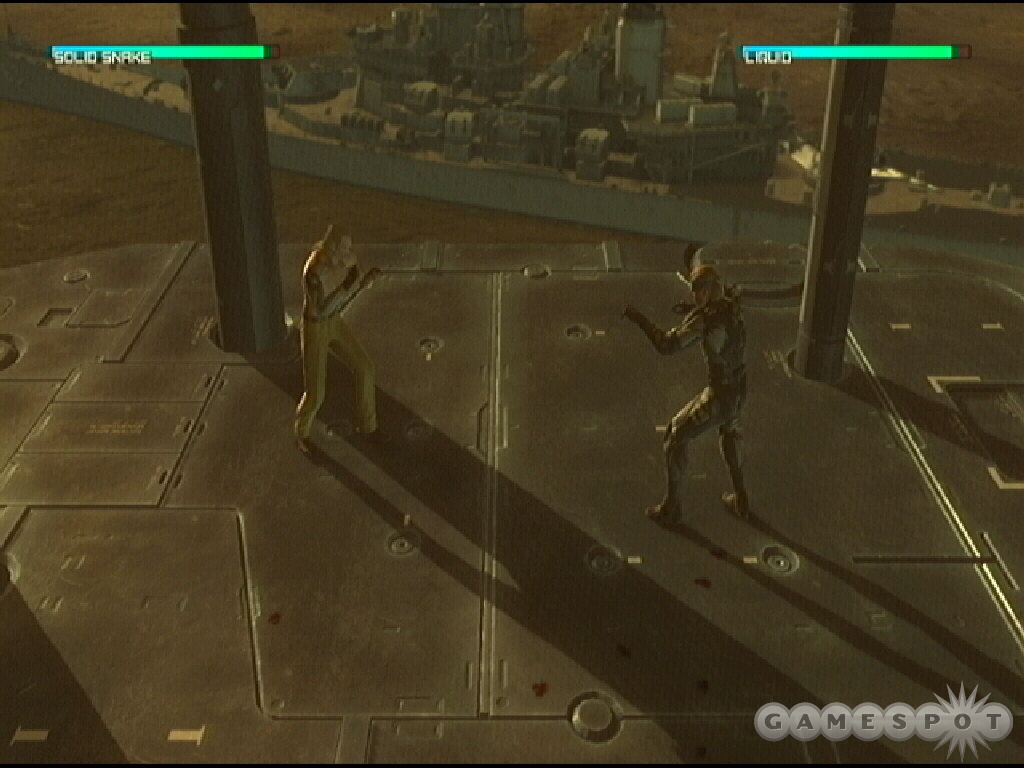
In the second round, Liquid employs a new maneuver. Watch for Liquid to backpedal slightly and then he’ll lunge forward with a strong punch. This move inflicts big damage. Use "X" to constantly move away from Liquid so you’re out of range. You can dodge this blow by moving side to side as well. Wait for an opening and attack Liquid. Back off using dash after the strikes so you can regroup and avoid a quick Liquid lunge counter.
Continue the fight through the third round, which is similar to the first two. Look for openings and use dash to keep away. The fourth and final round is simple: just keep punching using the R1 button. Enjoy the conclusion!
Chapter 2 - Metal Gear Online
The Metal Gear experience doesn’t end even after your first, second, or thirteenth playthrough of the single-player game. Metal Gear Solid 4 features a solid multiplayer component that should feel familiar for Metal Gear veterans while still offering something brand new. This section provides tips on Metal Gear Online, including coverage of skills and game types as well as strategies for conquering the online competition.
Skills
After registering and selecting your name and appearance, you’ll notice the first difference between Metal Gear single-player and online: the player skills. You can choose up to four skill points for your character and you can change these before a game if you’d rather mix it up; so when making your initial selection, don’t worry you can always change it later.
The table below reveals the available player skills and the corresponding description.
| SKILL | DESCRIPTION |
|---|---|
| Handgun+ | Skill wielding handguns. Reduces recoil when firing and decreases reload time. |
| SMG+ | Skill wielding submachine guns. Reduces recoil when firing and decreases reload time. |
| Assault Rifle+ | Skill wielding assault rifles. Reduces recoil when firing and decreases reload time. |
| Shotgun+ | Skill wielding shotguns. Reduces recoil when firing and makes reloading and pump action faster. |
| Sniper Rifle+ | Skill wielding sniper rifles. Reduces recoil when firing and makes reloading and bolt action faster. |
| Hawkeye | Increases the zoom rate when aiming weapons in First Person View (Does not affect zoom rate when using a scope). |
| Surveyor | Extends the maximum lock-on distance. |
| Quarterback | Skill wielding throwing weapons. Enables you to throw farther. |
| Trickster | Skill wielding traps. Enables you to set up traps more quickly. |
| CQC+ | Close quarters combat skill. Press and hold the R1 button to use CQC against nearby enemies. Can capture and use advanced CQC. |
| Blades+ | Skill wielding knives. Raising this skill enables faster knife attacks. Can move during knife attack. |
| Runner | Level of agility. Increases movement speed. |
| Monomania | Displays enemies you’ve attacked. Can share data through SOP. Increasing skill increases display time. |
| Sixth Sense | Displays nearby traps. Can share data through SOP. Increasing skill increases display range. |
| Narc | Displays attacking enemy when locked-on and damage is taken. Can share data through SOP. Increasing skill increases display time. |
| Scanner | Skill needed: CQC+. Press the triangle button to inject Scanning Plus S into a captured enemy and display link info. Can share data through SOP. Item needed: Scanning Plug S. Increasing skill adjusts scanning time. |
Skills will increase over time as they are used (as long as they’re currently selected). For instance, to increase your assault rifle skill, just use assault rifles. Running around a map (remember upright, not crouching or crawling, which poses a problem since running around upright is not advisable) will increase your running skill. Bolster your trickster skill by placing traps. Your skills will increase gradually from normal play but if you join "shotgun-only" or "CQC-only" games then you will obviously find those skills increasing quickly because of the limited game options—when you can only fire shotguns then expect the skill to rise!
Obviously you should utilize a weapon skill based on your preferred weapon selection. Assault rifles and snipers seem to be the most popular online, although shotguns can be highly effective for a sneakier player. The benefits of increasing a weapon skill are apparent in a one-on-one firefight. For example, if two players are unloading an assault rifle at one another, the one with the higher assault rifle skill will reload faster. While one player is stuck reloading, the higher skilled player is already done and firing.
Monomania is arguably the best SOP-related skill (which means sharing data with your teammates). Hitting an enemy with a single bullet can reveal that enemy’s position making it easier for you or your teammates to find and eliminate him. It’s also a good combination with CQC. Strike that enemy with a weapon from long-range to reveal the enemy’s position then hide and sneak up for a CQC kill. Even a sniper will find it useful—you can spot the enemy if you don’t score a one-kill headshot and may be able to follow up (or alert your teammates to a wounded enemy). It’s not a bad idea for most of your team to have monomania as a selected skill.
Skill selection is certainly personal preference but you should concentrate on increasing your most used skills and get them to the higher levels. You won’t gain any enhancements if you are switching around frequently, which means skills are gradually increasing at a slow rate.
You will also achieve certain ranks online depending on your statistics. The chart below reveals the ranks and the requirements.
| RANK | REQUIREMENT |
|---|---|
| Bear | Utilize many CQC attacks. |
| Bee | Frequent scanner uses. |
| Chimera | Many sniper kills. |
| Crocodile | Excellent kill death ratio. |
| Eagle | High percentage of headshots. |
| Flying Squirrel | High percentage of rolling. |
| Jaws | Many knife kills. |
| Kerotan | Prefers Capture rules. |
| Night Owl | Use the ENVG frequently. |
| Pigeon | Prefers non-lethal attacks. |
| Rat | Falls for many traps. |
| Sloth | Receives a lot of headshots. |
| Snake | Prefers Sneaking rules. |
| Turtle | Uses the cardboard box frequently. |
Combat Training
Increasing weapon skills isn’t as important as knowing how to effectively kill another player. A player with assault rifle skill level 3 won’t stand a chance against a player with assault rifle skill level 1 if he’s not using proper tactics when attacking the opponent. Metal Gear Online isn’t a first-person shooter. Tactics, planning, and observation are much more important and much more effective than running and gunning.
Headshots, headshots, headshots—keep repeating it! Proper aim, which means aiming for the head, is the first step to elevating your kill count. If two people are engaged with one aiming for the head and the other aiming for the body, the one aiming for the head should win nearly every single battle. Aiming for the body is only advisable if that enemy is already near death (the body does provide a larger target).
Any veteran of realistic shooters will already know this tip: fire your submachine gun or assault rifle in short-controlled bursts. Aim around the enemy’s head and instead of spraying weapons fire everywhere, burst fire for increased accuracy. It’s also not wasting ammunition. You’re going to unload a clip a lot faster if you’re just jamming on the fire button.
Running around standing upright may increase your running skill if you have it active but it’s also going to make you an easy target. Sure, at the beginning of a round you can run around to get to a particular position but when it comes to the firefight, it’s better to find cover, crouch, or even go prone. You’re looking to get a jump on your opponent not the other way around.
There’s a "Trickster" skill for a reason: because traps can be useful! For instance, a sniper should lay traps to protect the sniping spot. Place a trap near a staircase leading to the sniper spot or around the corner just inside your sniping room. You’d be surprised how often you’re saved from the approaching enemy! Here’s another amusing trap use: toss someone down with a CQC then place a Playboy on top of the player. If that player attempts to stand up, he’s trapped! But that player can still shoot you from the ground so be ready! On the bases game type, place traps near captured areas to help protect them from the enemy.
The most important thing to remember in a team game is that it’s a team game! Yes, your individual exploits on the bases game type is impressive but if your team just lost the game it doesn’t amount for much. Don’t run around alone. Stick close to your teammates. Two firearms are better than one (as well as gaining benefits from SOP skills). Help your teammates cover multiple directions so you aren’t ambushed. Target the same enemies to eliminate them quickly. Look for opportunities to assist your teammates in firefights. Go after the team goals instead of worrying about your own kill death ratio!
Deathmatch and team deathmatch game types should be self-explanatory to any shooter veteran but what about the Sneaking game type? Although it seems similar to team deathmatch (a red and blue team battling with no primary objective), there’s actually a third team: Snake! One player controls Snake, who’s fully equipped with OctoCamo. For Snake to win, he must collect dog tags (defaults to three) from red or blue players. To obtain dog tags, knock out or hold up a red or blue player and perform a body search (triangle button). If Snake doesn’t win, the team that performed better against each other wins the match.
If you’re playing as Snake find an area that’s both under cover and also trafficked by enemy players. For instance, inside a building where players typically choose snipe from. You want to avoid putting yourself at risk in the middle of a firefight and lay in the shadows and under OctoCamo waiting for your chance to strike. Use a non-lethal firearm and shoot an enemy player in the head with a tranquilizer. Keep in contact with the Metal Gear Mk. II player and work together to ambush enemy players.
In the base mission game type, teams must capture specific points on the map. If one team gains control of all points, that team wins. The team with the most controlled points when time expires wins. Once again it’s important to realize this is a team game so move with your teammates to specific control points. Once there, spread out and watch all entry points as you gain control of the location. Check the mini-map frequently to spot uncontrolled points you can go after or to spot points that are currently being captured by enemy forces. Take notice on how your teammates are approaching a particular control point and consider a flanking approach to get a jump on defending enemy forces.
Chapter 3 - Unlockables
This section provides lists of Metal Gear Solid 4 unlockables, including emblems, FaceCamo, costumes, weapons, items, and iPod tracks.
Emblems
Upon completing Metal Gear Solid 4, you are rewarded with an emblem or a number of different emblems depending on your actions during the game. Game actions like number of kills, alerts, continues, weapons collected, and even quantity of side rolls and time spent crawling all have associated emblems. Collecting every emblem would take several play-throughs.
| EMBLEM | REQUIREMENTS |
|---|---|
| Ant | Shake at least 50 enemies for items. |
| Assassin | Beat the game with more than 50 knife kills, more than 50 CQC holds, and 25 or less alerts. |
| Bear | Choke at least 100 enemies to death. |
| Bee | Use the Scanning Plug S or syringe on at least 50 enemies. |
| Big Boss | Complete the game on The Boss Extreme difficulty level with no kills, no alerts, no continues, no health or special items, and under five hours. |
| Blue Bird | Give friendly soldiers at least 50 items. |
| Centipede | Get less than 75 alerts, less than 250 kills, and more than 25 continues. |
| Chicken | Get over 150 alerts, over 500 kills, over 50 continues, and use over 50 health items, and finish the game in over 35 hours. |
| Cow | Get over 100 alerts. |
| Crocodile | Achieve over 400 kills. |
| Eagle | Score over 150 headshots. |
| Fox | Complete the game on normal difficulty or higher with less than 5 alerts, no kills, no continues, no health or special items, and under 6 hours. |
| Fox Hound | Complete the game on hard difficulty or higher with less than 3 alerts, no kills, no continues, no health or special items, and under 5 hours, 30 minutes. |
| Frog | Perform at least 200 rolls. |
| Gecko | Be pressed against a wall for over 1 hour. |
| Giant Panda | Complete the game in longer than 30 hours. |
| Gibbon | Hold up at least 50 enemies. |
| Hawk | Receive admiration from at least 25 soldiers. |
| Hog | Achieve at least 10 combat highs. |
| Hound | Beat the game on hard or higher with less than 3 alerts, no kills, no continues, no health or special items, and in under 6 hours, 30 minutes. |
| Hyena | Pick up over 400 dropped weapons. |
| Inchworm | Crawl on the ground for at least 1 hour. |
| Jaguar | Obtain over 75 alerts, less than 250 kills, and less than 25 continues. |
| Leopard | Obtain over 75 alerts, less than 250 kills, and more than 25 continues. |
| Little Grey | Collect all 69 weapons. |
| Lobster | Crouch for at least 2 hours, 30 minutes. |
| Mantis | Complete the game on any difficulty with no alerts, no continues, no health items, and in under 5 hours. |
| Octopus | Complete the game with no alerts. |
| Panther | Obtain over 75 alerts, over 250 kills, and less than 25 continues. |
| Pig | Use more than 50 health items. |
| Pigeon | Complete the game with no kills. |
| Puma | Obtain over 75 alerts, over 250 kills, and over 250 continues. |
| Rabbit | Look at 100 Playboy pages. |
| Raven | Complete the game in fewer than 5 hours. |
| Scarab | Perform over 100 rolls. |
| Scorpion | Obtain less than 75 alerts, less than 250 kills, and less than 25 continues. |
| Spider | Get less than 75 alerts, over 250 kills, and over 25 continues. |
| Tarantula | Get less than 75 alerts, over 250 kills, and less than 25 continues. |
| Tortoise | Spend more than 1 hour inside a cardboard box or drum during the course of a game. |
| Wolf | Complete the game with no continues and no health items. |
FaceCamo
Upon defeating Laughing Octopus, you receive the FaceCamo. Throughout the game you will acquire additional FaceCamo items; some of these are hidden and require certain tricks or game actions to gather. The chart below reveals FaceCamo collections and how to obtain them.
| FACECAMO | REQUIREMENT |
|---|---|
| Big Boss | Obtain the Big Boss Emblem (complete the game on The Boss Extreme difficulty with no kills, no alerts, no continues, no health or special items used, and in less than 5 hours). |
| MGS1 Snake | Automatically acquired at the beginning of Act 4. |
| Corpse | Continue the game 41 or more times. |
| Crying Beauty | Defeat Crying Beauty with non-lethal ammunition. |
| Drebin | Purchase or acquire more than 60 different weapon types. |
| FaceCamo | Defeat Laughing Octopus. |
| Laughing Beauty | Defeat Laughing Beauty with non-lethal ammunition. |
| Otacon | During the Act 3 Mission Briefing, hit Otacon with the Metal Gear Mk II. |
| Raging Beauty | Defeat Raging Beauty with non-lethal ammunition. |
| Cyborg Raiden (Visor Closed) | During the Act 3 Mission Briefing, wait until Naomi stands up and walks over to the screen. Bump her with the Metal Gear Mk II. |
| Cyborg Raiden (Visor Open) | During the Act 3 Mission Briefing, wait until Sunny stands and allows Naomi to use the computer. Bump Sunny with the Metal Gear Mk II. |
| Campbell | Rewatch the Act 1 Mission Briefing after you acquire the FaceCamo. Hit Roy Campbell with the Metal Gear Mk II. |
| Screaming Beauty | Defeat Screaming Beauty with non-lethal ammunition. |
| Young Snake | Automatically acquired at the beginning of Act 3. |
| Young Snake w/ Bandana | Automatically acquired at the beginning of Act 3. |
iPod Tracks
There are many iPod music tracks scattered throughout the game. We revealed these locations within the walk-through section (including more detailed locations) and compiled them here.
| IPOD TRACK | LOCATION |
|---|---|
| "Inori no Uta" from HIDECHAN! Radio. | Act 1; Mission Briefing |
| "Theme of Tara" from the original Metal Gear. | Act 1; Middle East: Militia Safe House |
| "Zanzibarland Breeze" from the Metal Gear Music Collection 20th Anniversary Album | Act 1; Middle East: Urban Ruins |
| "Level 3 Warning" from Metal Gear 2: Solid Snake | Act 1; Middle East: Advent Palace |
| "Theme of Solid Snake" from Metal Gear Solid 2: Solid Snake | Act 1; Middle East: Millennium Park |
| "Boktai 2 Theme" from Boktai 2: Solar Boy | Act 2; Mission Briefing |
| "The Fury" from Metal Gear Solid 3 | Act 2; South America: Cove Valley Village |
| "Rock Me Baby" from Metal Gear Solid 3 | Act 2; South America: Confinement Facility |
| "Metal Gear 20 Years History (Part 3)" from the Metal Gear Music Collection 20th Anniversary | Act 2; South America: Confinement Facility |
| "Sailor" from Metal Gear Solid 3 | Act 2; South America: Vista Mansion |
| "Bon Dance" from Metal Gear Solid 3 | Act 2; South America: Marketplace |
| "Show Time" from Metal Gear Solid Portable Ops | Act 1 or Act 2 and friendly with militia or rebels; give a militia or rebel an item. |
| "MGS4 Love Theme (Action Version)" from Metal Gear Solid 4 | Act 1 or Act 2 and friendly with militia or rebels; give a militia or rebel an item. |
| "MPO+ Theme" from Metal Gear Solid: Portable Ops Plus | Act 1 or Act 2 and friendly with militia or rebels; give a militia or rebel an item. |
| "Destiny Call - Break for the Fortress" | Act 1 or Act 2 and friendly with militia or rebels; give a militia or rebel an item. |
| "Shin Bokura no Taiyou Theme" | Act 3; Mission Briefing |
| "Bio Hazard" from Snatcher | Act 3; Hold up the resistance member and perform a body search. |
| "One Night in Neo Kobe City" from Snatcher | Act 3; Hold up a PMC soldier (in Midtown S Sector, the one to the right of the park entrance) and perform a body search. |
| "Test Subjects Duality" from Metal Gear Acid | Act 3; Eastern Europe: Midtown S Sector |
| "On Alert" from Metal Gear Acid | Act 3; Eastern Europe: Midtown N Sector |
| "The Essence of Vince" from Metal Gear Acid | Act 3; Eastern Europe: Echo’s Beacon |
| "Lunar Knights Main Theme" from Lunar Knights | Act 4; Mission Briefing |
| "Warhead Storage" from Metal Gear Solid | Act 4; Shadow Moses: Tank Hanger |
| "flowing destiny" from Zone of the Enders | Act 4; Shadow Moses: Canyon |
| "Metal Gear 20 Years History (Part 2)" from the Metal Gear Music Collection 20th Anniversary Album | Act 4; Shadow Moses: Nuclear Warhead Storage Bldg B2 |
| "Policenauts End Title" from Policenauts | Act 4; Shadow Moses: Nuclear Warhead Storage Bldg B2 (input 13462 into the control panel). |
| "Old L.A. 2040" from Policenauts | Act 4; Shadow Moses: Nuclear Warhead Storage Bldg B2 (input 78925 into the control panel). |
| "Beyond the Bounds" from Zone of the Enders: The 2nd Runner | Act 4; Shadow Moses: Tank Hanger (after completing the control panel sequence). |
| "The Best Is Yet To Come" from Metal Gear Solid | Act 4; Shadow Moses: Snowfield & Communications Tower |
| "Yell Dead Cell" from Metal Gear Solid 2 | Act 4; Shadow Moses: Casting Facility North |
| "Metal Gear Solid Main Theme (The Document Remix)" from The Document of Metal Gear Solid 2 | Act 5; Outer Haven: Ship Bow |
| "Desperate Chase" | Use the password "thomas" in the Extras menu. |
| "Gekko" | Use the password "george" in the Extras menu. |
| "Midnight Shadow" | Use the password "theodore" in the Extras menu. |
| "Mobs Alive" | Use the password "abraham" in the Extras menu. |
Costumes
You can obtain new costumes through regular gameplay (unlocked at the start of an act or by completing the game), through careful search of each level, and by obtaining a particular emblem.
| COSTUME | REQUIREMENT |
|---|---|
| Altair | Obtain the Assassin emblem. Beat the game with more than 50 knife kills, more than 50 CQC holds, and 25 or less alerts. |
| Civilian Disguise | Obtained at the beginning of Act 3. |
| Middle East Militia Disguise | Find in a locker inside the level Middle East: Militia Safe House. |
| South American Rebel Disguise | Save the rebels from death at the beginning of the level South America: Cove Valley Village. |
| Suit | Complete the entire game. |
Weapons and Items
There are several unique weapons and items obtained from completing the game with certain conditions or performing specific actions during the game. We’ve compiled these weapons and items below.
| WEAPON/ITEM | REQUIREMENT |
|---|---|
| Bandana | Complete the game with no kills. |
| Desert Eagle, Long Barrel | Obtain the Fox emblem. Complete the game on normal difficulty or higher with less than 5 alerts, no kills, no continues, no health or special items, and under 6 hours. |
| Patriot | Obtain the Big Boss emblem. Complete the game on The Boss Extreme difficulty level with no kills, no alerts, no continues, no health or special items, and under five hours. |
| Scanning Plug | Play on Metal Gear Online for at least 10 hours and then purchase from Drebin. |
| Solar Gun | Collect five figurines in a single game: Frog Soldier, Laughing Octopus, Raging Raven, Crying Wolf, and Screaming Mantis. Get these figurines after defeating each with a non-lethal weapon. |
| Stealth Camouflage | Complete the game with no alerts. |
| Thor .45-70 | Obtain the Fox Hound emblem. Complete the game on hard difficulty or higher with less than 3 alerts, no kills, no continues, no health or special items, and under 5 hours, 30 minutes. |
| Type 17 Pistol | Obtain the Hound emblem. Beat the game on hard or higher with less than 3 alerts, no kills, no continues, no health or special items, and in under 6 hours, 30 minutes. |
Chapter 4 - Big Boss Emblem Tips
Of all the emblems, one is coveted above all others: the Big Boss Emblem. To acquire this emblem you must beat the game on The Boss Extreme difficulty level (which unlocks after you have beat the game one time) with no kills, no alerts, no continues, no health or special items used, and under five hours. Certainly an impressive feat! Here are some general tips for obtaining the covet emblem.
Note that if there are any items mention below that you aren’t sure how to collect, check the unlockable or walk-through section of this game guide. Also, given the nature of this section there are game spoilers below as we expect you to have completed the game one time.
- Weapons and items carry over from your previous game so prepare yourself accordingly. On The Boss Extreme level you won’t be able to purchase non-lethal ammunition from Drebin. Sure you can find those scattered throughout the levels but more is always better! In Act 5 of your previous game, stock up on all non-lethal weapons and ammunition to their maximum capacity (it helps that everything is half-off!). You should also stock up on gas mines, chaff grenades, and other non-lethal equipment. After completing the game you can purchase emotion ammo from Drebin. It’s non-lethal so get it! Be careful, though. Shooting a soldier with emotion ammo can cause them to go crazy, which could lead to death from other soldiers. Use with caution!
- An item that can more than help the lack of non-lethal ammunition is the Solar Gun. This unique weapon is unlocked if you eliminate the four bosses with non-lethal ammunition as well as the Frog soldiers in Act 1. You’ll find the Solar Gun invaluable, especially during the Act 3 bike chase and the Act 4 battle against Vamp. He’s vulnerable to sunlight, you know! The Solar Gun can stun enemies for a short period of time. You can also use it to shoot unconscious enemies and an item might pop out!
- Obviously knowledge of enemy soldier locations and patrol routes is extremely important. It’s not a bad idea to play through on the easier difficulty levels for a bit for memorization sake. Preparation is key! It’s generally better to avoid an enemy than incapacitate them so look for the fastest route you can maneuver through a map while avoiding confrontation..
- Cut scenes count toward your total game time. That should be obvious considering the requirement for the Big Boss emblem is completing the game in less than 5 hours—there’s more than 5 hours of cut scenes! As soon as a cut scene begins, hit pause and manually skip it!
- One of the requirements for the Big Boss emblem is no kills—which is why the stress on non-lethal ammunition. However, it’s important to know that some enemies don’t count as kills. You can blow away Gekkos and dwarf Gekkos and you can also use lethal weapons against the first boss forms (but not against the beauty forms). Against the Gekkos, though, remember that you can’t trigger an alert! Chaff grenades disable these machines so use them to get through an area quickly without shooting or flirting with an alert.
- Since you can attack the first boss forms with any weapon, it pays to bring a good one! The rail gun acquired from the Crying Wolf boss battle works well. Be sure to stock up on ammunition during Act 5 so you are fully loaded for Big Boss emblem playthrough. Basically you’ll want to carry over every powerful weapon so you have everything you need. For the beauty forms, use a shotgun with v-ring ammunition or, ideally, the Solar Gun.
- There are a few iPod tracks that are worth taking into the Big Boss emblem attempt. Make sure you grab "Sailor" and "Rock Me Baby" during your first playthrough. "Sailor" is found in the South America: Vista Mansion level. It’s behind a crate on the right side of the mansion from your start position. "Rock me Baby" is found in South America: Confinement Facility on the island within the small lakes. Listening to these tracks will help heal Snake. Remember, you can’t use a healing item so you need that extra help!
- You are prohibited from using "special items" during the Big Boss emblem attempt and these include the bandana (which provides infinite ammunition) and the stealth camouflage. The Middle Eastern Militia Disguise, South American Rebel Disguise, and Solar Gun are not included as special items. The militia disguise in particular will help during the first section of the game.
- Hiding will regenerate your health but that takes valuable time. There’s a sneaky way you can get back some of Snake’s health—adjust your PlayStation 3’s date! Snake will regenerate health over time—over real time—which means you can fool your PlayStation into thinking several days have passed.
- A successful Big Boss emblem run through The Boss Extreme should conclude well under the five hours. To make sure you’re on track, you should be able to complete the first three acts in less than 50 minutes each. Both of the final acts can be completed in another 50 minutes total. That’s a good benchmark but a reasonable completion time can be well under four hours.
- It pays to be ahead of the game. You’ll need some time cushion as you get to the end because there’s around 20 minutes of credits that your gameplay time will have to absorb! Keep that in mind because you don’t want to see the final screen reveal 5:01:32! You certainly won’t want to backtrack. On a similar note, make sure you check each post-act screen carefully. It’s entirely possible that you could have accidentally killed someone or inadvertently used a health item. No use in carrying on if that happens!
- During Act 3 when you are tailing the resistance member, wear the civilian disguise and the Otacon FaceCamo (or the Drebin FaceCamo). The PMC soldiers will essentially leave you alone (make sure you’re walking around with your hands in your pocket, which means no weapon equipped) and you can concentrate on following the resistance member. Speaking of FaceCamo, the standard FaceCamo adds some percentage to your standard camouflage so it’s a good idea to keep OctoCamo and FaceCamo as your usual combination.
- The Act 3 bike chase is one of the hardest parts of the Big Boss run. This is because you are constantly being shot at from PMC soldiers and turrets and you have little to help repel their attacks—you can’t kill anything! The Mk 2 doesn’t do much. Use "auto aim" to target the turret gunners. The Solar Gun is a big help for this sequence but if you didn’t get it from your original play then you’ll have to stick with the Mk 2, twin barrel shotgun (v-ring ammunition), and stun and smoke grenades to provide further assistance. Memorize the location of squads and turrets. Use smoke grenades when faced with a group of enemy soldiers and concentrate on the turret gunners because keeping them alive is devastating to your health bar.
- Remember the installation that occurs between each act? That time likely counts toward your total gameplay time. To be safe, make sure you save the game at the end of an act. Install the next act and then quit out. Reload that last save at the end of the previous act and you will begin the next act without the need for further installation.
- Watching a mission briefing provides game stats, such as kills, alerts, continues—the vital stats for a Big Boss emblem run! So if you’re halfway through an act and want to make sure you haven’t accidentally killed something or used a health item then watch a mission briefing from that saved game and check the stats.
- Knowing the location of all or most of the non-lethal ammunition scattered throughout the game will help your Big Boss run considerably. Utilize our walk-through, which lists the location of many of the non-lethal ammo items.
- In the chase sequence at the end of Act 2, the zombie-like PMC soldiers do count as kills so use non-lethal ammunition to get them away (or CQC to conserve ammunition). Also, in the first part, the powered suits also count as kills. You can use a chaff grenade to temporarily disable the suits but it’s probably better to just save the grenade and try and survive the area—the powered suits don’t have to be stunned or killed because Drebin will just leave the area when he wants!
Chapter 5 - Easter Eggs and Secrets
Below are some miscellaneous secrets, tips, and Easter eggs to enjoy while playing through Metal Gear Solid 4. Note that these will include some gameplay and story spoilers so you may want to read this section only after you have completed the game.
- If you’re watching a cut scene and Snake’s psyche drops suddenly, press "X" repeatedly while it’s still onscreen and you can replenish the psyche.
- After meeting Drebin you’re able to purchase weapons, ammo, and items. On Wednesday and Sunday you receive a 20% discount. You don’t have to wait until Wednesday or Sunday: just change the date on your PlayStation 3!
- Shaking a Sixaxis controller will return Snake to the standard OctoCamo. It also works during cut scenes!
- During the mission briefings once the screen splits you can control Metal Gear Mk II. Explore! You’ll find various items and can even gather hidden FaceCamo. We describe all of these during the walk-through. Search upstairs to find batteries (and down near the helicopter) and iPod tracks. Grab a camera near Sunny’s desk. And bump into Otacon, Naomi, Sunny, and Roy Campbell to obtain unique FaceCamo (after defeating Laughing Octopus).
- Grab the camera using Metal Gear Mk II during the mission briefings (look near Sunny’s desk). When you battle a beauty, just avoid her for about three minutes and you will enter a white world. Use the camera and point it at the beauty for some unique photography opportunities. Try playing the iPod track Oishii Chuhan Seikatsu.
- Completing the game unlocks several new combat vest colors as well as the Boss Extreme difficulty level. You can also purchase new emotion ammunition and colored smoke grenades from Drebin on a new playthrough.
- During gameplay load "Oishii Chuhan Seikatsu" into your iPod and give it play. Pause the game and check the camera in the Nomad. You’ll probably spot Sunny enjoying the music!
- There are some secret codes you can enter into the control panel in Otacon’s office in Act 4. Use 14893 (Drebin’s codec frequency) for 100,000 DP; type in 78925 and 13462 for iPod tracks.
- Sunny’s eggs come from caged chickens on the Nomad. You may have noticed the three chickens’ names during the cut scenes: Solid, Liquid, and Solidus.
- When you reach South America: Research Lab, there are a couple secret scenes during the opening cut scene. Hold L1 as Naomi sits on the bed and watch Snake attempt a sly maneuver. Also, later after you save the game she’ll crouch in front of you after delivering bad news. Hold L1 for another secret scene and Snake trying to catch another glimpse.
- Obtain the Sorrow Doll from Screaming Mantis in Act 5. Do so by shooting it out of her hand after you have shot the Mantis Doll out of her hand. Keep it for another playthrough and equip it during your exploration of Shadow Moses. Use the camera and you will spot strange apparitions throughout the act.
- In the level South America: Mountain Trail during Act 2, reached a river area, walk over to the northern side and spot a circular clearing in the grass. Stand in the center of this clearing and you will receive a familiar audio flashback from veterans of the Metal Gear Solid series. After the transmission concludes, you receive a DP bonus.
- Although the Act 5 Mission Briefing doesn’t take place on the Nomad, there’s still some fun to be had with the Metal Gear Mk. III. You can’t move him around and hunt for items but you can move around the projection screen. Give it a shot!
- When you’re inside the Vista Mansion bedroom, stand on the bed and look up. There’s a poster above the bed! Apparently the guy who slept in the room was a fan of Akina Minami. Aim your weapon at the poster and look in first-person mode and Snake will say "It’s Akina!" while his psyche rises at a hyper-increased rate. Apparently Snake is a fan as well!
- When you start a new game and are watching the unusual television programs, you can change channels using the "X" button. One of the programs features the man behind Snake’s voice, David Hayter.
- If you aren’t able to collect the bandana (no kills) or stealth camouflage (no alerts) during a playthrough then you can purchase these items from Drebin on a subsequent playthrough. Unfortunately he charges 5,000,000 DP for each item. Well, that’s only 4,000,000 on Wednesdays and Sundays! Or only 2,500,000 during Act 5!
- If you die during the game, choose to "continue" instead of reloading a saved game. Do this a few times and then give Rosemary a call for a unique codec conversation about Snake’s dreams of death.
- During the boss battle with Screaming Mantis, switch your controller assignment from "1" to "2" for an amusing codec from Otacon. If you don’t do anything at the beginning of the fight you will receive another couple amusing calls from Campbell and Rosemary.
- Get to the Heliport in Shadow Moses and find the Mk. 23 underneath the vehicle in front of the tank hanger. Aim and point the Mk. 23 in first-person mode and listen to Snake. You receive a bonus 1,000 DP. Also, maneuver the camera for an overhead view, similar to the overhead view in Metal Gear Solid, for another Snake-ism: "Overhead view, now that’s more like it!" You also get another 1,000 DP.
- The Metal Gear Mk II and III should be familiar to fans of another one of Hideo Kojima’s lesser known but equally classic games, Snatcher.
- When Raiden and Vamp are fighting on top of Metal Gear Rex while Snake fights off the self-destructing Gekko with the rail gun, aim and fire the rail gun at Raiden and Vamp. Snake will refuse invoking a similar situation in a previous game.
- If you have a Sixaxis controller, call Rosemary at any point during the game and start shaking your controller. You may notice something else on screen "shaking" around.
- Find the first statue in the Middle East: Red Zone during Act 1 and get on top of it. When you press "triangle" Snake will strike a pose and go undercover as part of the statue. Try pressing "triangle" repeatedly and watch what happens.
- During Act 1 you will find dumpsters (you’ll also find more later, such as in Act 3), which Snake can hide inside. While inside a dumpster, give Otacon a call for an amusing conversation.
- After the Screaming Mantis battle and the encounter with Psycho Mantis, wait until Psycho Mantis explodes and press "X" for a secret "Hideo" flashback.
- When a character is introduced and the voice actor’s name is revealed, hold down R2 and it will reveal the motion capture actor instead.
- During the Act 1 Mission Briefing pilot Metal Gear Mk II upstairs. Look on the table next to the radio and discover that Sunny has her very own PlayStation 3. During the Act 2 Mission Briefing, pilot Metal Gear Mk II upstairs and wait for Sunny to return after Otacon begins Naomi’s message. Sunny begins to unpack a box that contains her very own PSP! Check out the game she’s playing. It’s Penguin Adventure, one of Hideo Kojima’s first titles.
- After completing the battle against Crying Wolf and Crying Beauty in Act 4, kill all of the wolves left behind. With all the wolves dead, give Otacon and Rosemary a call and listen to their reactions.
- Pause the game and go to the camouflage screen. Select the viewer and spin Snake in a circle using the analog stick. Just keep spinning! After a minute, exit and return to the game. Apparently all that spinning got Snake a little sick!
- When you begin Act 3 and the resistance member first appears, put on the Civilian Disguise with the Laughing Beauty FaceCamo (if you acquired it). Approach the resistance member slowly. Hearts appear above his head—apparently he’s in love!
Got a news tip or want to contact us directly? Email news@gamespot.com
Join the conversation