Little Big Planet Walkthrough
There's a lot to find in the world of LittleBigPlanet and we'll help you track it all down with our complete walkthrough!
Little Big Planet is a small game with big ideas. While much attention has been heaped upon it for its focus on user-generated content, we're here to help you get through the game's story mode and find those hidden collectibles. Yup, that's a heck of a lot of stuff to find, but someone had to do it. In addition, we'll provide you with some general item-finding tips, sure to help those who find their level-complete percentage to be a tad lacking.
Here's what you'll find in GameSpot's Little Big Planet Game Guide:
- General Tips: Learn the basics of Little Big Planet.
- Walkthrough: Find all of those pesky Stickers, Materials, and more with our guide to 100% completion!
- Trophies: Want trophies? We've got the info you need here!
General Tips
Because Little Big Planet's tutorials do such a great job at bringing you up to speed on the game's various level creation tools, we're going to focus on helping you hunt down the collectibles in Story mode.
Stickers and Objects and Materials, oh my!
As you explore the core levels in Story mode, you'll find numerous item bubbles scattered about. By collecting these, you'll unlock various objects and accessories that can be used to do different things, such as outfitting your Sackboy in the latest fashion, or creating brand new levels. In short, collecting these items are the key to maximizing your potential creative output. After completing a level, it will show how many of the level's hidden objects you have found. If it's anything less than 100%, you still have some work to do!
While many bubbles are located in plain sight, others can be deviously hidden. Sometimes you will even have to look for secret paths or interact with some sort of trigger. In fact, you'll often encounter "Sticker Spots"--blank canvases in the shape of some kind of object on which a sticker can be placed. By planting the appropriate 'Trigger Sticker' on this "Sticker Spot" (the sticker will be the same shape as the canvas), you'll earn a reward of some kind. Unfortunately, you may not always have the correct sticker at that point in time, meaning you'll have to find it first in another level and return later.
Playing with Friends
Throughout your adventure, you'll generally come across an area or two per level marked by a sign indicating you need 2-Sackboys or more in order to complete the challenge. These sections are entirely optional and can be safely skipped if you're playing by yourself. But if you're playing with enough people, then great rewards await those who complete the challenges within.
Interacting with Stuff
Little Big Planet is a physics based platformer. What that means is every object behaves in a quasi-realistic way, and you'll often have to use these attributes to your advantage. Most objects can be grabbed by holding "R2;" if it's light enough, you can push it around (or knock it over) by pushing/pulling it back and forth, allowing you to use it as a platform to reach a ledge above.
First Steps
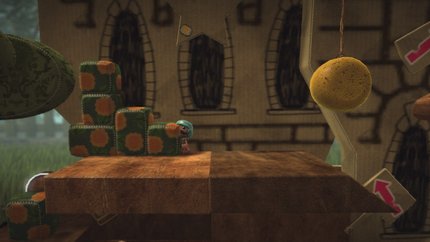
As the first true level to Little Big Planet, don't expect much in the way of challenges. Heck, you'll mostly just be running and jumping! Though to pass by the raised bridge, you'll have to place the proper stickers on the blank character near the end of the level. And you shouldn't have any trouble locating 100% of the level's collectibles, as they're all out in plain sight.
The house by the second large egg is home to seven costume bubbles. You can't miss these: You'll find three stickers by the first Queen. Eight objects can be found next to the second Queen.
Get a Grip

At the "R1" block, push both toward the house on the left and use them to reach the roof. Follow the rooftops left to find 2 Stickers, as well as a Star Sticker Spot. Place the Star Sticker there (found in "Skate to Victory") to reveal 3 Objects. After the ramp, you'll find a Sticker, which you can then apply to a Sticker Spot just above that will reward you with 2 Stickers. You'll also find the second Star Sticker Spot here--place a Star Sticker there (located in "Skate to Victory") to reveal 3 Objects. Just after the first horse, look for the a Sticker in front of a tree. Push the second horse aside to find another Sticker, then check behind the tree just past the next obstacle for a third Sticker. After using the third horse to climb to a ledge above, leap off the far left of the half-pipe to grab a Sticker floating in air. After pushing the fourth hose down the long ramp, head left to find 3 Stickers by the base.
After crossing the murky waters marked by the Skull & Crossbones, grab the Sticker to the left of the first seesaw. Tilt the second seesaw so the right side is raised, and quickly leap off of it to grab the Sticker just above. Just after the second seesaw, you'll come across a stack of green boxes, with a Star Stick Spot above. Plant the star sticker there (located in "Skate to Victory") to unlock 5 Objects. Subsequently, leap from the green boxes to the trees on the left and follow them to find a 2 Stickers, then look for a second Sticker Spot on the cloud beyond. Plant a Star Sticker there (located in "Skate to Victory") to reveal 5 objects. Use the seesaw just before the flag to jump to the orange ball above, then swing to the key on the left, unlocking a Challenge. Just past the flag, you'll find a Tool as well as a Decoration.
Place the Donkey Tail decoration anywhere on the Donkey, near the end of the level, to reveal 4 decorations. Halfway down the racetrack, look for a Sticker Spot. Place a Star Sticker there (located in "Skate to Victory") to reveal 5 Objects. When the Donkey comes to a rest against the large mushroom, leap from it to find a Sticker on the small mushroom to the left.
Skate to Victory
Grab hold of the bird and ride it up the cliff side. Now latch onto the spinning windmill and let go when swung to the far right to launch across the gaps. When you reach the hanging bucket by the drawn bridge, use the jetpack to pick up the yellow canisters on the ground and place them in the bucket to weigh it down and lower the bridge. Inside the ghost house, avoid being stomped by the shoes and being touched by the ghosts. Though to climb through the mansion, you'll have to make use of those very shoes in various ways, such as riding them up shafts, or grabbing hold of objects they're kicking and flinging yourself from them for momentum.
From the get-go, head left to find a Star Sticker Spot above a trio of tea cups. Plant a Star Sticker there (located later in this level) to unlock 3 Objects. After grabbing hold of the third windmill, let go when it spins you to the upper-right to fling toward a ledge holding three bubbles--as long as you touch it, it will collapse allowing you to collect 3 Stickers. Now drop down past the third windmill and land on the right ledge for a Sticker, then drop to the bottom to find another Sticker, in addition to a Sticker Spot. Place a Star Stamp there (located later in this level) to unlock 4 Objects.
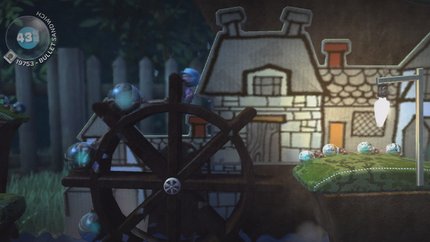
Check each spoke of the waterwheel to find 8 Stickers. Grab hold of the bird just past the waterwheel to nab a Sticker on the right. Now use the bird to reach the ledge above and follow it left and grab hold of a second bird to float down and find a 2 Stickers you can drop to. Look for a Tool by the queen and TV. Use the jetpack to reach a 2 Stickers and a Decoration atop the left tree. You'll also find a Sticker Spot in the center. Place a Star Stamp there.
Inside the Ghost House, catch a ride on the first shoe to a Sticker above. Inside the room with the three ghosts, leap off the top-most platform to grab a Sticker from the corner. In the next room. leap from the box to grab a Sticker from the left. When you reach the shoe shaft, leap off the second shoe as it climbs to reach a Sticker as well as a Key. In addition, you'll find a Sticker Spot in the background--plant a Red Lion Emblem sticker there to reveal 2 Audio Objects. After the shoe shaft, you'll reach the "2-Player Cooperative" room. Grab the Sticker from the ground, then have a single Sackboy stand on each switch just beyond (Requires 2 Players) to gain access to a 2 Stickers and a Costume. In the shaft adjacent to the two-switches are two platforms rising and sinking--leap off the top gun just before its apex to super-jump to a ledge on the left, where you'll find a 2 Stickers and a Sticker Spot. Place a Star Sticker there to reveal 3 Objects and 3 Materials. Check behind the boot kicking the board for a 2 Stickers.
After the skateboard race, push the skateboard to the left to find a Key hanging a few meters before the finish line. Continue heading left to find 2 Decorations by a tree, then a Sticker in the very back of the wooden structure. Look for 5 objects by the Queen. Grab the Sticker from the clutches of the bird just beyond (this is the sticker you need to trigger those 'Star Sticker Spots' you've been seeing).
Swinging Safari
After launching from the submarine, drop to the path below and head left for a Decoration and Object. You'll find 10 Costumes in the house just after the first monkey, then look for an Object just beyond (next to the sign). Check the background behind the second giraffe for a Decoration, then enter the tunnel just beyond it for another Decoration, as well as a Sticker Spot. Plant the Rose Sticker there to cause the giraffe to lift its neck, allowing access to the two items it's concealing: an Object and Costume. Now jump onto the back of the first giraffe to find an Object. After using the first giraffe to reach the checkpoint on the ledge above, you'll find a 2 Decorations to the right. Jump onto the giraffe just past the noted checkpoint, then grab hold of the nearby monkey tail and swing across the gap to find 2 Materials.

Shortly after the trio of Monkeys, jump onto the next giraffe and leap from its tail to a low-hanging branch to grab a Sticker. Afterward, hop into the background behind the giraffe to reach a Sticker in a seemingly inaccessible area to the right. Now, use that same giraffe to reach another branch to the left, then follow it across the platform the monkey is hanging from to find a Sticker and Decoration, then drop down the shaft left of the monkey to grab an Object.
When you reach the large basket, you'll find a tunnel just beyond (on the right) that leads to an area that requires Two-Players. Have one stand on the platform while the other depresses the switch, causing the platform to rise, allowing you to grab a Sticker, Costume, and Decoration. Then have that same player stand on a second switch, revealing 2 Objects and a Sticker. Now return to the basket and check the ledge left of it (below the giraffe) for a 2 Decorations. Grab hold of that same giraffe's head to gain a lift to the level above, where you'll find an Object to the left. At the next checkpoint, jump to the ledge above and follow it left to find a Material on a branch. Use the nearby monkey to reach a Material on the right. From here, jump to the branch in the foreground and follow it find 3 Decorations and an Object on another branch.
Look for an Object in a low alcove, just past the three monkeys jumping on fire. Now look for an Audio Object on the ledge above, in front of Zola. Use the monkey just past Zula to swing into an Object, then drop off the basket to the branch below to find a Decoration. Drop down once more, head left, and plant the Wooden Steed sticker on the Sticker Spot to reveal 4 Decorations
As you cross over the first Bull Stampede, look for a Decoration floating above, about halfway. Use the monkey at the end of the bull stampede to swing onto a left branch, which yields a Sticker, then continue left for a Sticker and Object..
Burning Forest

At the start, jump onto a hill behind the monkey and head left to find a Key and Material. When you reach the bull-stampede, cross over to the far right side to find a Sticker, Object, and Material in a tunnel. As you follow the bulls left, continue past the bridge (ignore the bubble there for now) to find an Object and a Sticker Spot on the far left. Plant the Cat Head sticker there to reveal an Object.
After swinging over several crocodiles, use the swings by the monkey to climb onto the branches above, and follow them left to find two Decorations and an Object. Afterward, swing onto the skull, right of the monkey, to find two more Decorations as well as a Sticker Spot. Plant a Stylized Antelope sticker there to gain access to a Sticker. Now drop into the skull and look for a Sticker in an alcove on the left, below the monkey. Bop off one of the enemies in the pit afterward to reach an Object above.
When you reach the crocodiles inside the skull, work your way along the ceiling of the second chamber to find a Decoration on a high ledge to the right. At the bottom of the first shaft, head into a tunnel on the left by climbing a hill in the background to find a Sticker Spot. Plant an Amazing Diamond sticker there to get an Audio Object and Costume. In the next shaft with crocodiles lining the walls, grab the top-most swing and fling Sackboy onto the right crocodile to grab an Object. At the bottom of the second shaft, use the last swing above the crocodile pit to reach a Sticker.
The Meerkat Kingdom
From the outset, head right to find a secret path that leads to a Sticker Spot. Plant a Fluffy Tree sticker there to 3 Materials, 1 Decoration and a Costume. Now proceed down the ramp to the left to find an Object at the base (you might have to sift through the debris). During the race, look for a small light-colored rock you can pull from the right wall to reveal an alcove with a Material. Shortly after the race, you'll reach a gap--use the swing to fling yourself across then jump over the spikes for 3 Stickers.
Inside the first cavern with the bouncy-moles and several point bubbles, bounce off the moles to the top-right and left corners to find an Audio Object, Key, Material, and 2 Stickers. Grab hold of the swing just after and swing to another on the left, which will lift you to an alcove with a Sticker. Now use the same swing to reach another alcove on the other side for a Sticker, then look for a third Sticker just below.
Afterward, return to the previous room and head right to find two creatures on the ground with an "X" Marked on their stomach. Have one Sackboy stand on the far-right side of the second creature's head, then have the second jump on the creatures Belly, causing player one to be launched into a secret area along the ceiling containing an Object. Now have them drop to the left to grab the Material hovering in air. After the room with the two creatures marked with "X"s, drop into a shaft to the right and quickly climb the debris to a Material in the corner, then another below. After passing by a few gophers in the tunnel, a large one will push you toward the ceiling, allowing you to leap into a Secret Area containing an Object. When you reach the nightclub, use the two "X" creatures on the ground to reach a Sticker above each. You can also reach a ledge via the left creature, then leap to a Sticker in an alcove above (a mole will pop out of the left wall, allowing you to use it like a platform.

After you grab Stripy Tail, use him to get past the mole at the base of the ramp to find an Object inside the tunnel. As you exit the nightclub, look for a ramp in the background you can climb into a secret room containing a Sticker and a Sticker Spot. Plant a Growl Face sticker there to gain access to an Object. After dragging Stripy Tail off the next ledge, use him to gain access into the tunnel blocked by a second mole to find 2 Objects. After returning Stripy Tail to his mom, you'll find a Object and two Materials in the revealed path.
Once past Stripy Tail's mom, bounce off the second gopher to find a Sticker on a high ledge, to the left. Bounce off a 3rd Gopher to find a Key. Shortly thereafter, you'll reach a shaft full of gophers--use them to reach a secret area above containing Two Stickers and an Object. From here (the top section), head left into the wall to find a secret room with a Sticker Spot--Plant a Voodoo Face sticker there to reveal an Object. Just after, another gopher will blast you above ground where you'll find three stickers, just before a monkey.
The Wedding Reception
You can't miss the 8 Costumes near the very beginning. After passing through the skeleton, knock over a series of vertical platforms to find 3 Materials and an Object. When you reach the board held in place by two-springs, bounce off of it several times to get enough height to reach an Object high above, a Material to either side, and finally onto a platform on the right where you'll find a Sticker Spot. Plant a Skeleton Hat sticker there to reveal two decorations. Afterward, you'll spot an Object on a platform in the next gap.
At the first balloon section, grab hold of them to catch a ride to the platforms above, where you'll find 6 Stickers and an Object. Just after, you'll find several egg-shaped objects attached to Bungee cords: grab the left-most one and lower your into a secret room, halfway up the left wall where you'll find four Objects.

The next room contains several bubbles surrounding a skull-like mural in the background. You're going to have to grab the stretchy-string in the center, then use it to bounce into the spring below, allowing you to grab them. All in all, you'll collect an Object, Sticker, and 3 Materials. If you're playing co-op, Skip the skull just ahead for now and continue into the next room (Requires 2 Sack Boys)
Bounce off the subsequent Skull to reach a ledge above. Now look at the center skull-notice something missing? Plant the Huge Eye sticker on his missing eye to reveal a Costume. Now head to the far right and drop to the level below, grabbing hold of the roller along the wall to dislodge an Object. The room just after (to the right) contains several goodies you can grab, if you have two players:
Return to the area above (by the skull that was missing an eye), then bounce off another skull to the far-right to reach an Object on a platform to the left, then continue upward by landing on the right ledge. You'll find a series of skull lifts that'll bring you up to a checkpoint--jump off of the far-left lift once it gets close to the top to jump onto its head and grab an Object. Now jump to the platform to the right, and cross over the tops of the skulls for four decorations.
When you reach a series of hanging springboards, drop to some skull-platforms below and look for a secret tunnel on the left, where you'll find 5 Stickers. Now return to the spring boards and use high-bounces to reach a Decoration above each one (5 total!). Shortly after crossing a bridge with a large skeleton in the background, you'll come across a shaft with several skulls--bounce off of them to grab an Object halfway up the shaft, two more above it, then 3 Stickers on the left ledge. From here, leap onto the skeleton's hat to the left for an Object, Audio Object, and a Key.
The Darkness
At the first long spike-pit, look for Two Objects in a background alcove. You'll find a Material floating above shortly after--leap to it from the dog's back as it climbs the nearby ramp. After passing underneath the poisonous tunnel, look for a Decoration right by its exit. Now ride the dog down the hall, jumping to grab a sticker above each of the three pillars. After flipping the switch to give the dog a lift to your level, ride him to the left and leap to a ledge for a Sticker and Object.
After the dog gets kidnapped, you'll spot an item embedded in the wall as you ride the skull-lifts--simply hold right toward the wall as you pass the Decoration to find a secret passage right to it. When at the top one, jump from its jaw as it nears the top, then wrap around onto its skull (being careful not to touch the teeth in his upper-jaw) to find an Object on top. From the top of the skull, make a leap of faith to the left and grab hold of a hanging skull to swing across the gap to find an Audio Object and Key.
Just past the next checkpoint, look for three Decoration total on either side of the first two candles, hidden behind the column. Just beyond, grab the object in the bat hallway. You'll find a Object as you use the hanging skull to glide over a spike-pit, then another Object just in front of a candle, above another spike pit. Check in the foreground of the staircase (just before the yellow skull block) for 3 Stickers. Now pull that yellow skull-block aside to find an Object hidden behind it.
Beyond the next checkpoint, snatch the Material floating above the rising/sinking spike trap. After encountering the groom, you'll find a pair of rising/lowering skulls in the spike pit beyond. Grab hold of one and ride it to the ledge above, where you'll find another challenge requiring 2-Sack People.
After dragging the groom past the room with the switch and spring, use him to reach a couple of alcoves in the background containing two Stickers each (4 Total). At the next skull-lift shaft (after ditching the groom), hop into the background at the top of the first lift and head right to reach the Object hidden inside the wall. Afterward, enter a tunnel to the top-left of the shaft and ride the hanging skull within to an area above where you'll find five sticker Spots in the background! Plant a Pixel Skull on each to reveal 2 Costumes!
Skulldozer
Finding everything in this level is a piece of cake, as everything is located out in the open. The only trick is you'll have to grab the items fast, before the dozer runs you over. In general, hop on any object you come across and swing across the gaps when you can to grab all the items. When all is said and one, you should have collected 11 Stickers, 4 Materials, 2 Objects, and 1 Audio Object.
Boom Town
After your ride touches down, leap from the right side of the hatch that opens toward the rocky structure on the right to find an Object, Material, and a Sticker hidden behind the cactus. Now head left to find a Material, just below the starting point. Head right again and grab the 7 Costumes from the hut. Now check behind the cactus just past the hut to find a Sticker and Object, then continue up the hill (to the right) for another Sticker.
After the checkpoint, you'll have to jump over several cacti--you'll find two Objects along the way. After jumping over the last cactus and touching ground, check behind that very cactus for two Materials. You'll find another Material atop a stack of boxes--push it over to retrieve it, then check behind the cactus on the left for an Object. Now use those boxes to jump over the pair of cacti beyond, snatching the Object hovering above.

Shortly after activating the second dynamite switch, you'll spot a cow on the left. Push it off the cliff, then drop down to grab a Material, as well as the Key it was holding. As you continue your trek up the mountain, you'll find an Object in plain sight just before the 3rd Dynamite switch. Speaking of which, prepare for a Material to roll down the mountain after blowing up the third set of TNT.
After the next checkpoint, grab the sticker from atop the dynamite, then from the adjacent house. After blowing up the aforementioned explosives, grab a Sticker that appears, then check inside the destroyed building for a Sticker, then climb on top of it for a material (just below the hanging creature). Now jump to the buildings on the left for another sticker, as well as a dynamite switch, which will destroy this building, revealing 4 Stickers. Now jump onto the hanging creature to the right to find a Key and Sticker. Now head back to the building you just leapt from, then drop off the building below and to the left to find another Sticker.
Look for an Object and Sticker on top of the bank, then an Audio Object on its left side. After crossing the chasm on the rocket, if you missed the Object floating in air, drag the rocket back to the left (you may have to grab it from inside the center area) and use it to reach an Object near the cliff edge. You'll grab 3 Stickers as you pass by the scorpions. Once you reach the explosives (beyond the scorpions) drag a nearby box to the far-right, then leap from the explosives to it, and into a tunnel on the right. Plant the Orange Bird sticker on the 5 Sticker Spots within to reveal 4 Stickers, 1 Material, and a Audio Object. As you roll the explosives back down the track, stop it just past the last scorpion and use it as a platform to reach an alcove containing a Sticker and 2 Objects.
After blowing up the Jail, check either side of the hole for 2 Objects and a Sticker. When you reach the first jetpack, explore the cavern above for a Sticker, Material, and Object. After blowing up the second barrier, you'll find an Object amongst a whole bunch of point bubbles. Look for another Object just before the cart you need to grab onto.
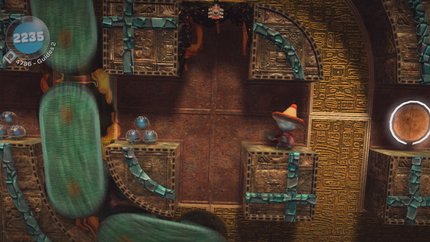
The Mines
After jumping over the first fire pit, bounce off the enemy to grab an Object and Material. Subsequently, at the two spinning wheels, grab the Material from between the two, then a Sticker on the ledge beyond. You'll also find a Sticker Spot. Plant an Angry Skull sticker there to reveal an Object and 2 Stickers. After dropping between the two wheels, look for a Sticker and Object to the right. Once you've blown open the second mine cart hole, check inside the hole for an Object.
Past the draw bridge, you'll find another switch--hold off on pulling it until the basket higher of the two baskets is right above you, as it'll drop a Sticker (which would have otherwise fallen into the pit). After crossing via the first basket, grab the sticker in the corner (next to the lift). After riding the lift, catch a ride in the higher basket to find an Object on the left. You'll also find a Sticker Spot. Plant the Red Explosives sticker there to earn a Sticker, Costume, and Object.

After riding the lift, hop onto the red background and use the spring-board on the left to launch into a sticker above. Once past the exploding wall section, jump over the wheel to a Material on the right ledge. Once at the part where you ride the trolley, jump near the start for an Object. As you descend the fiery shaft, you'll spot a Material about halfway.
Just after the Race begins, grab some TNT that drops from the ceiling and drag it back to the wall with the "explosive" sticker on it. It will blow it up, revealing a Decoration, Object, Sticker. During the race, grab the Sticker that's accessible after destroying the first barrier. After pressing the switch, creating a ramp, leap into an alcove just above (from the ramp) for a Sticker. After creating the second ramp, push the mine cart with the explosives to the right to blow open a weak portion, revealing two Stickers.
During the second mine cart ride, get ready to jump for a Key (near the middle) and an Object (near the end). When you reach the section with several wheels, grab hold of the first red one and ride it around for an Object. Do the same for the 2nd Green one for another Object.
During the third mine cart ride section, use the swing you grab a hold of to reach an Object hovering above the flame jets to the left. Once the ride's over, climb the ramp behind the checkpoint to find a Sticker Spot. Plant the appropriate sticker there to reveal some goodies.
When you reach the shaft you'll descend with the spinning wheels, grab hold of the first green one and ride it around into a Material. Do the same for the second Red Wheel for a Key and Audio Object.
The Serpent Shrine
After raising the staircase, look for an Object you can leap to on the left. Following that, grab the Decoration in the gap, just past the checkpoint, then bounce off the springboard beyond for a material. Use the second springboard to grab a Sticker from the enemy on a ledge above. Now bounce off the enemies just after (past the 3rd springboard) to reach a ledge containing a Decoration, Sticker, and Material. Look for another Material on the same level as the fourth springboard. After being forced down the tunnel, kill the snake-like enemy for an Object. Continue to the very end of this corridor (to the far-right) to find a Sticker Spot. Plant an Aztec Face sticker there to reveal 2 Stickers and a Decoration.
After climbing the shaft with several springboards, head left to find an Object and a Sticker Spot. Plant the appropriate sticker there to earn some items. Now bounce off an enemy to the right for an Object. Kill the snake just after the bridge for a Material. After grabbing the red ball on a chain that lifts you up a level, head left into the tunnel and ride a second ball-chain up to an Object and Decoration. Now head right (from where the first red ball-chain dropped you off) to find a Sticker at the end of the hall, just past another ball on a chain.
Ride the ball-on-a-chain (by the 2-Player section) down a level, then push the block on the right up against the wall, revealing an opening in the background. Hop to it, then head right to find a Sticker Spot. Plant the appropriate sticker there to reveal some items.
From the spot where the lowering ball-chain dropped you, head left across the hall, then drop through the tunnel to find an Object to the left of a checkpoint, and another Object to the right, after killing the snake. Now head right until you emerge back outside, then bounce off the enemies to the ledge above for a Sticker. After meeting up with the bandit for the first time, leap from the broken pillar in the background to a hidden tunnel on the left for an Object.
Lowrider
You'll find an Object inside the car. After driving past a couple of cacti, you'll find a Sticker Spot on a sign in the foreground. Plant a Route 77 there to reveal 2 Stickers. After driving the car up several ramps to the top level, stop it just before going off the next ledge and jump off the car to grab an Object above. After exiting the first car, grab the 9 Costumes from the hut, below the Statue of Liberty.

At the first hydraulic equipped Hot Rod, have it bounce you to the hanging lights above and swing from one to the next for 3 Decorations. Use the 2nd Hot Rod to bounce into a small control room on the right, where activating a switch will open a door below. Go through that door to find a Sticker Spot--plant a Pink Blaster sticker there to reveal five items, including an Object, 2 Decorations, Audio Object, and a Sticker. Bounce off the third hot rod to another series of lights and swing from them for a Sticker and 2 Objects. Then swing from the far left light into the building on the left for a Material, then drop to the floor below for a Sticker. From the bottom floor of that building, leap to a traffic signal on the left, and work your way over to a crane. You'll gather 3 Stickers and 3 Objects along the way.
When you reach the second car you can drive, bounce off the hood to a ledge on the left and push the yellow box to cause two Stickers to drop, which you can now grab. Subsequently, bounce off the car again to grab a Key and 3 Objects (you'll have to move the car around a bit to reach them all). After driving that car to the end of the hall, perform a high bounce off the hood to grab a light high above, then use it to swing into a Material on the left. Now knock over the yellow wall, creating a ramp, and grab the Sticker from it. Now drive the car up the ramp and bounce off the hood to reach an Object at the top. Once past the next door, bounce off the car to a light above (to the right of the three electrical generators) and swing to a Material on the right. Then cross over the hanging car to a large wheel and grab the items spinning by above 3 Stickers, 2 Objects and 2 decorations.
Grab the Sticker from the trunk of the car, just past the two large wheels, then drop to a car below for an Object. When you reach the "2-Person" area, ride the moving car and jump around to gather 2 Objects, 3 Stickers, Material, and a Decoration in the area. Once you get your "new car," make sure to grab the object in the driver's seat, then plant a Pink Blaster sticker on the side of the car to reveal 4 Decorations. After the race, grab the Audio Object from behind your crashed car.
Subway

As you ride the lift down, you'll find 6 Objects and 5 Materials, and a Sticker (you may have to replay this section several times to grab them all. Once you reach the first Subway train, ride it to the very next platform, then look for a Sticker Spot below--plant a Yellow Fries sticker there to reveal an Object and Costume.
You'll find an Object after passing through the three wooden wheels. When you reach the lift that you control, look for a secret passage on the left about halfway down--inside you'll find 4 Objects and a sticker. Continue to ride the lift down to the train, then look for an Object early into your ride. After jumping to the train in the background, look for an Object to the left.
Just before the second race, you'll find a Sticker Spot to the left. Plant a Intense Blue Graffiti sticker there to reveal Material and 2 Stickers. During the race, work your way to the top-right corner of the section with a ton of wheels to find an Object, then check out the far right for a Key and Sticker just below.
After raising the car from the sewage, grab the Object in the trunk, then climb the boxes on the right for a Material. As you ride the next lift back up, get ready to collect 6 Stickers along the way. Knock over the box piles at the top to grab 13 Stickers.
The Construction Site

During the race, look for an Object a short ways up the first ramp. When you reach the sponge-swing, use it to reach a hanging girder to the left for a Sticker and Object. As you cross the series of hanging beams, tilt the last one (before a checkpoint) so the right side is slanted upwards, then quickly jump from it to grab 3 Stickers on a high platform. Shortly thereafter, you'll find an Object near a switch when you double-back on your path. When you jump onto the hanging girder after the switch, tilt it so the right side is raised, then jump from it onto a walkway to the right. Follow the path to find a hanging girder that'll move you back and forth along 6 sticker spots in the background. Plant the Skyline 2, 3, and 4 Stickers there to reveal 2 Costumes and 5 Stickers Sticker. Head back and bounce off the spiked enemy afterward to grab an Object in a high alcove.
During the second race, keep an eye out for 2 Objects. After the race, grab an Object from the center of the weird spinning enemy rolling down the ramp. Then check behind the second Checkpoint for a Sticker. At the top of that area, you'll reach a split path: The left leads to an area requiring 2-people, whereas the right takes you further in the level.
Head right at the split path, then bounce off the enemy to a sponge above. Ride it up to collect a 5 Materials and a Key from three hanging platforms (you'll have to use the sides of the platforms like a spring in order to reach the ones above). When you reach the downhill section with the rolling burning objects, collect the 4 Materials along the way, then an Object and 4 Materials on the conveyer belt. You'll find 2 more Stickers just past the checkpoint. After crossing the girders, you'll find an Object. Check below the plant at the end of the level for an Object.
Endurance Dojo
Look for 4 Costumes inside the hut as soon as you disembark from the plane. Swing from the light just beyond the first checkpoint to grab a Sticker above. After the sensei, swing from the second light to reach two decorations in the hut ahead, then check behind the next checkpoint for 2 Objects. You'll find 2 Objects as you jump across the fans.
You'll find another Object in another hut, next to a swinging Green Roller. Pull the Roller toward the platform, then quickly jump on top and leap to the Object. Now check behind either side of the next checkpoint for 2 more Objects. After running across the two rows of wooden-dominoes things, grab the roller ahead for an Object, then leap from it to another Object above the checkpoint.
When you reach the section with several tilting platforms, bounce off the enemies on each one to grab 2 Objects and a Sticker along the way. Then leap from the third tilting platform to an Object just above the checkpoint you recently passed. After jumping to the third tilting platform, look for 2 Stickers to the right. As you swing across the three green rollers, you'll find a Material and Object. Soon after, you'll reach a section with several panels that flip 180 degrees every few seconds--look for 2 Materials, one on the closest panel, the other on the furthest.
After riding the Sensei to a level above, head across the bridge, then jump onto the platforms in the background (just before the trio of enemies) and follow them to the right for 2 Stickers and 2 Objects. Then grab hold of the base of the hanging light just after and swing back over to where you came from for 2 more Stickers. Now head left until you find a large wheel-grab hold and swing to the floor below. Look for a Sticker Spot to the left of the wheel--Plant a Geisha sticker there to reveal an Object and 2 Stickers. Continue right for a Material, then grab hold of a second wheel and ride it down to the checkpoint.
During the race, you'll collect 4 Objects as you hop across the pillars. When you reach the controllable platform (with the checkpoint), stop it along the way for an Audio Object on the left. After crossing the next bridge, leap across some platforms in the background to the right to collect 2 Decorations, a Key, Sticker, and Audio Object. You'll also find a Sticker Spot--plant the appropriate sticker there for some items. After riding the four large wheels, you'll find a Decoration at the bottom.
As you descend down the final ramp (just before the end), look for a Sticker Spot below. Plant the appropriate sticker there to gain access to some items.
Sensei's Lost Castle

After Catapulting yourself onto the wall, leap to the nearby tree for an Object. Now return to the catapult and push it as far right as you can, then launch from it to hopefully reach a ledge high up on the right for an Object and Sticker. Once inside the castle, work your way to the second floor (accessible by the first staircase) and look for a hidden path in the wall (where the enemy comes from) for a Material. When you reach the large spinning wheel, grab hold and ride it around for a Sticker. After jumping to the ledge above the first wheel, look for a room to the left that contains four Sticker Spots--Plant the Blue Mountain and Japanese Wave stickers there to reveal 2 Objects and 2 Stickers.
As you climb your way up several more wheels, jump from the second wheel closest to the top toward a Sticker on the far right. At the next checkpoint, head left to find a Material behind the wall. At the balloon section, jump to the far right (before dropping down) to find a Decoration. Now grab hold of a balloon and float down to a ledge on the left for a Material, then another just below for a Sticker...and another Sticker on the ground level. There's also an Object on a far right left, so you may have to kill yourself in order to return to the previous checkpoint and grab another balloon.
When you reach the large wheel (past the balloons), grab hold and follow it around for an Object below, then leap from the top of it for a Key, and 3 Objects. Inside the shaft with the numerous spinners, you'll find 2 Objects and a Sticker as you work your way up--you can reach them by leaping from the spinners either below them, or to the sides. As you swing across the electrified chasm on the ball, you'll automatically collect an Object.
When you reach the ball on the track, grab hold, then drop down a level and head left for an Object. Look for Sticker on the right on the level below. Once you reach the very end of the track, it should swing you right into a Material.
As you traverse the corridor (just after the ball track), you'll find an item inside a pillar. Afterward, Bounce off one of the enemies to reach an Object. Soon after, you'll reach another shaft with some green wheels. Ride the bottom one around for an Object, then leap from the very top one to reach an Audio Object and Key. In the hall with the two large enemies, bounce off one to reach an Object in the center alcove.
After defeating the sumo wrestler, you'll have to grab hold of some friendly creatures who'll bounce you up a shaft. Look for an Object on the second platform from the top. When you grab hold of another roller soon after, ride it along the tree branches slowly to ensure you grab the 4 Decorations, and 1 Sticker along the way.
The Terrible Oni's Volcano

Grab hold of the second light to swing into a Sticker. Once you start flying the Flying Machine, keep an eye out for a Sticker and Object as you ascend the first shaft. After landing the flying machine at the house where you open the gate, look for 2 Objects--one to the left of the house, the other above. After dropping into the tunnels beneath said house, look for a Decoration to the right of the first ninja.
After passing by the first gate, drop into the valley below to spot two bubbles covered by the smoke of death. Just above them is a Sticker Spot--Plant a Bouncy Cloud sticker there to gain access to the decoration and costume. Now look for a Material above the second house. Inside the tunnels beneath the second house, look for an Object to the right, a Material to the left, as well as a Sticker Spot. Plant a Sakura Flower sicker there to reveal a Sticker and Object. Now drop down and grab the Sticker behind the moving spikes below.
After passing by the second gate, use the flying machine to reach a Material, 2 Stickers, and an Object amongst the clouds. As you descend into the volcano, look for 2 Stickers early on, then 2 more Stickers and a Decoration a bit closer to the floor.
As you work your way through the volcano, you'll soon come across a large, burning stone wheel. After crossing it, head to the far left and jump to find a hidden Sticker spot. Plant a Pink Warrior Mask sticker there to earn an Object and Decoration. Now cross in front of the second large burning wheel to nab a Material and Object.
After killing the boss, you'll be awarded 4 Objects.
The Dancers' Court
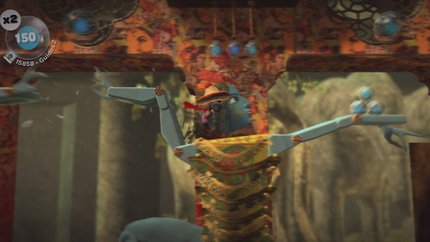
Grab the 6 Costumes from the hut near the start, then check behind the shopkeeper's head for an Object. Inside the shop, grab the hanging ball to pull the shelf down, revealing an Object. Now use the cats to reach another Object hanging in the upper-left corner. You'll also find a Sticker Spot in the upper-right. Plant a Prince Face sticker to gain access to the 2 Objects locked below. Inside the tunnel, bounce off the guy's head to reach a ledge on the left containing an Object and Sticker.
When you reach the dancer that alternates between standing and crouching, run up her legs to grab a Sticker to the right, then cross over her back to an Object. You'll soon come across a series of dancers, who raise and lower their arms--leap from them when raised to grab a Sticker, Object, and Decoration. Upon reaching the Ferris wheel-thing, ride it around to find an Object in an alcove.
When you reach the large slithering snake, leap from its back to grab 2 Stickers above. Just after, you'll reach several more Ferris-wheel type things. Look for an Object riding around each one (3 Total!), then look for another Object above the last one.
At the next dancer (with the waving arms), leap from either arm to grab 2 Materials and an Object above. During the race segment, use the snake as a spring to reach a Sticker above. Just after the race, you'll spot five sticker spots above a shaft you must descend--plant the Temple and Tower stickers there to reveal 3 Stickers. When you reach the large, waving floor (you'll know it when you see it), leap from it to grab an Audio Object, about 1/3 from the base. As you run underneath the burning snake, look for an Object in an alcove about halfway. Grab the Object from the base of the room with the twirling background just beyond, then look for another Object to the left.
Elephant Temple

Early into the level, you'll encounter a series of rising/sinking platforms. Leap from the last one to reach an Object on a ledge above, then look for a sticker spot to the left--plant the appropriate sticker there to earn some items. After climbing up the shaft with the crushing walls, grab a Sticker just past the next checkpoint, above the large rising/sinking section. At the next pull-out stairwell, leap from the middle step to grab an Object in the background. Once on the other side of that staircase, reposition a large block below a Material above, then leap to it from the staircase (after pulling it toward you), allowing you to grab the Material. Afterward, enter the hole in the background (near the block) and head right for an Object. Finally, you may have noticed a Sticker Spot on that large block--plant a Monkey sticker there to reveal 2 Costumes and a Sticker.
When you reach the lever, make sure to grab the Material from the nearby moving platform. Now stand on the revealed switch to cause the floor to rise. Grab the ball overhead and use it to swing into an Object on the left. Soon, you'll come across two blocks moving around in a circular fashion--leap from one as it rises to grab an Object and Material in an alcove above. After crossing over the next section, jump from the rising block portion to reach an Object above, as well as a Sticker Spot--plant a Tiger sticker there to reveal a Decoration, Sticker and Object.
At the second room with the two squares moving in a circular fashion, check the bottom right corner for a Material. After dropping to the odd-moving floor below, look for an Object embedded in one of the columns to the far left. Look for another embedded Object just past the crushing ceiling part. Finally, check along the right wall of this section to find a hidden area with a Key and Object.
Soon after, you'll find another area with two squares moving a circle--look for a Material inside one of them. Finally, as you ride the elephant to the level's end, make sure to grab the 4 Materials, Key, Object, and 2 Decorations along the way.
Great Magician's Palace
As you cross over the first two 'falling' brick floor, you'll grab a Decoration and Object, then look for 3 Stickers and an Object as you cross the next section. After the checkpoint, use the walkway that appears to reach a ledge above, allowing you access a Decoration and Object to the left, and 2 more Objects to the right.
Just below the next checkpoint, you'll spot a seemingly unreachable object in a hole below. Wait for one of the nearby blocks to disappear, allowing you to drop right on in. You'll soon reach a corridor with a series of pillars that drop a block at a time--leap from the blocks to grab 2 Objects. As you pass over the fiery floor thereafter, you'll spot an Object just past a block-dropping column.
Eventually, you'll come across a lever that controls some kind of blue contraption above. A switch on the ceiling above causes that machine to drop a block--use it to create a path across the fiery pit, and collect the Object in the window along the way. Shortly after, you'll find an area with three levels: you'll find 2 Decorations on the middle floor. Afterward, look for a Decoration and Object in the corridor with the burning columns that drop a block at a time. After climbing the shaft that fills with falling blocks, climb them to a sticker above.
A little ways after the block-filling shaft, you'll find a series of windows with bubbles inside. You can leap to the first one easily enough, which contains a Sticker. Now pull the two blue blocks on the right to just below the center window, then leap from them to a Sticker and Object. You'll also find a Sticker Spot here. Plant the appropriate stickers there to reveal some goodies. You'll collect 2 Decorations and an Object as you jump over the next three pits.
Upon reaching the guy who informs you that LittleBigPlanet is in danger, you'll notice the box he's holding reveals a different object every time he raises it. Wait for it to reveal a box, then push it right and leap onto the blue platform for a Key. Now jump onto his hand, then to his head for an Object.
The Frozen Tundra
Grab the 5 Costumes from the hut at the start, then look for an Object just beyond, next to the sign and another Object being held by the bear. When you reach the sleds, catch a ride on the top one, but move slowly so you can leap to an Object in front of the first tree. When you reach the checkpoint inside the cavern, look for a Sticker Spot to the left. Plant a Gear Graphic sticker there to reveal 2 Costumes.

Just after, you'll reach a room with several platforms; look in the alcove below for an Object, then hop around the platforms for 6 Stickers and a Material (be careful, because the upper platforms will collapse when falling ice hit them). If you can manage to hop along the top row, you'll find an Object and 2 Stickers on a couple of high ledges to the right. If you took the upper route, you'll one of the platforms you knocked over should cause a chain reaction that opens up a secret area below, near the next checkpoint (by a trapdoor). Head down to find 2 Stickers and an Object (bounce off the trampoline for it).
A bit deeper in the cavern, you'll come across a snowy ridge in the background. Thankfully, some rocks will drop to the floor, allowing you to jump to said ridge and collect a Material, Sticker, and Object. A rock on the right also forms a ramp, leading to a Material (just before the checkpoint). After the checkpoint, more pillars will drop, forming a stairway of sorts. Climb it to an alcove just above the checkpoint for an Object.
After the next checkpoint, quickly run across the bridge before it collapses to collect an Object at the end, then drop on down to find a Sticker, Key, Material, and Object in the area below. When you reach the section with the missiles, leap to the upper level (after destroying the first launcher) and head left to find an object by a toy soldier.
During the race, you'll collect 2 Objects as you clear a jump. Keep an eye out for a Sticker on a secondary track in the background just a bit further on, then an Audio Object at the end of this section, just before dropping. After the race, knock over the tower with the Object to grab it.
Bounce off the enemy just beyond the 4-Player section to reach an Object above, then use the truck to reach another Object (you can also try jumping off the army-guy you're dragging around).
The Bunker
Knock over the army dude, at the start, and use him to leap to 2 Decorations above the starting point. The next room contains an electrified pillar that pops out of the ground--leap from it as it rises to grab 2 Objects--one right above, another to the right. Once at the large spinning wheel, jump on top of it (by riding the thin opening, then jumping) for an Object and Material. You'll grab another Object as you run through across the spinning platforms in the electrified corridor. Bounce off the first enemy thereafter for an Object above. When you reach the room with the two large wheels, leap from the left one as it rotates clockwise to reach a hill in the background, to the left. Follow it to grab a Material and Object. Return to the wheels and grab the key between the two (by jumping from one as it tilts toward it). Just after the two wheels, but before the next checkpoint, climb a couple of hills in the background to find a Sticker Spot directly above the wheels. Plant the appropriate sticker there for some items.
As you cross through the hallway with the electrical barriers that pop out, leap from a short ledge to grab an Object after the second barrier. Bounce off the second enemy you come across for an Object above, then bounce off a second enemy to reach the hill in the background where you'll find an Object, Decoration, and Sticker. After riding the mine cart down the tilting ramp, grab the easy-to-reach Object just before the checkpoint. At the next large wheel, leap from the entryway again as it spins upward to grab an Object and Decoration in the background ridges. Then continue to ride the top of the wheel around to find 3 Decorations and a Sticker on a ledge to the right, as well as an Object in the corner below. After dropping to the conveyer belt, head left for an Object. You'll find another Object and 2 Decorations between the electrified barriers as you cross the conveyer belt. When you reach a large TV overhead, grab the nearby lever to split it apart, revealing an Object. As you traverse the huuuge spinning wheel, you'll find a Material as you cross the platforms just before dropping from it, to a conveyer belt below. Once on this second conveyer belt, head left to find a Material, then right for another Material.
The Collector's Lair
Use the group of hanging objects to swing across the gap to find a Sticker Spot. Plant a Wirey Tree sticker there to reveal 2 Costumes (just make sure you stand to the side before placing the sticker, otherwise you'll go boom!). Now grab hold of one of the hanging objects to ride it down the shaft: as you drop, keep an eye out for 7 item bubbles you can collect on the way (most of them in the center). After dropping down the shaft, enter the cage to the left (by flicking the switch) for an Object. After unlocking the gate, you'll find an Object to the right. Just past the checkpoint, you'll find a large box that expands and contracts--look for an Object in a corner of the second half (on the top). As you explore this giant contraption, you'll spot an Object inside another roller--wait for the dog you released to press a switch, allowing you to reach it. Roll it to reveal an opening, allowing you collect the object within. After freeing a dragon, use one of the nearby platforms to reach a Material to the right. After feeing the lion, grab the 2 Stickers, Decoration, and other items from the spinning platforms that form squarish-objects. Once past the sliding room-sections, you'll have to cross over them, where you'll find 2 Objects before the next checkpoint. After freeing the sensei and riding the hanging object down the shaft, head left first to grab the 2 Objects and a Sticker, then head right for 2 more Objects. Just past the next checkpoint, ride the rising platforms up to 2 Objects.
When you reach the second shaft that you'll slowly descend, get ready to grab 8 item bubbles on the way down. After freeing the horse at the base, grab the 2 Objects from its back, then ride it to the right for 14 more Objects.
The Collector
This one's easy--you'll find it on your path to defeating the boss. Now go explore some of those user-created levels!
PlayStation 3 Trophies
Note that there are Spoilers on this list.| Trophy Name | How To Earn | Reward |
|---|---|---|
| The Gardens | Complete all levels in The Gardens | Bronze |
| The Savannah | Complete all levels in The Savannah | Bronze |
| The Wedding | Complete all levels in The Wedding | Bronze |
| The Canyons | Complete all levels in The Canyons | Bronze |
| The Metropolis | Complete all levels in The Metropolis | Bronze |
| The Islands | Complete all levels in The Islands | Bronze |
| The Temples | Complete all levels in The Temples | Bronze |
| Expert Creator | Complete all levels in the Tutorials | Bronze |
| Artist | Place a sticker | Bronze |
| Homemaker | Place 10 stickers or decorations in your pod | Bronze |
| Fashion Sense | Choose a costume for your sackperson with at least one item on your head, at least one item on your body, and a material | Bronze |
| Forager | Collect 25% of the prize bubbles on the story levels | Bronze |
| Sticky Fingers | Collect 50% of the prize bubbles on the story levels | Bronze |
| Treasure Hunter | Collect 75% of the prize bubbles on the story levels | Bronze |
| 2X Multiplier! | Get a 2X Multiplier | Bronze |
| 8X Multiplier! | Get a 8X Multiplier | Bronze |
| Incredible Speed! | Travel at incredible speed | Bronze |
| Incredible Height! | Travel to an incredible height | Bronze |
| Friendly | Complete a level with more than one player | Bronze |
| Party Person | Complete a level online with 3 other players who are on your friends list | Bronze |
| Socialite | Complete a level online with 3 other players who are not on your friends list | Bronze |
| Top of the class | Win a 4-player game | Bronze |
| Traveler | Complete a community level | Bronze |
| FIRST | Be among the first 10 people to complete a community level | Bronze |
| Opinionated | Tag a community level | Bronze |
| Neighbourhood | Watch Heart 5 community levels | Bronze |
| Networking | Heart 3 authors | Bronze |
| Talkative | Post a comment on a community level | Bronze |
| Creator | Build and save a level with the thermometer more than 30% full | Bronze |
| Team Creator | Build and save a level with more than one player with the thermometer more than 30% full | Bronze |
| Publisher | Publish a level | Bronze |
| Look what I made! | A level you published was played by 5 or more people | Bronze |
| Just Beginning | Complete all the main path story levels | Silver |
| 20X Multiplier! | Get a 20X Multiplier | Silver |
| Hi Score | Collect 1,000,000 points over all levels you have played | Silver |
| Booty Master | Collect all the prize bubbles on the story levels | Silver |
| Dr Frankenstein | Create a living creature with at least 2 eyes, 2 legs or wheels, and a brain | Silver |
| Crowd Pleaser | A level you published was played by 50 or more people | Silver |
| Feel the love | A level you published was hearted by 10 or more people | Silver |
| Celebrity | You were hearted by 5 or more people as a player | Silver |
| Play | Complete all story levels without dying, with the exception of those levels that only end when you die | Gold |
| Create | A level you published was hearted by 50 or more people and you were hearted by 30 or more people | Gold |
| Share | Play 150 community levels, tag 50 community levels and heart 10 community levels | Gold |
| 100% Complete | Earn all LittleBigPlanet trophies to unlock this platinum trophy | Gold |
| Trendsetter | Place a sticker or a decoration on another player's sackperson | Bronze |
| Cranium Collector | Kill 100 Creatures across all levels | Bronze |
| Secret Stickerist | Unlock the race in First Steps | Bronze |
| Sackbird | Spend 8 seconds or more in the air | Bronze |
Got a news tip or want to contact us directly? Email news@gamespot.com
Join the conversation