Killer7 Walkthrough
Killer 7 is one of the weirdest games in years. We might not be able to help you make sense of the plot, but this walkthrough should at least help you beat the game.
Design by James Cheung
Well, games don't get much weirder than Killer7 - we'll let you know that straight up. It features multiple personalities, ghosts, killer terrorists that are organic bombs, international political conspiracies, a comic book artist that can see the future, and at least one very, very mentally disturbed individual. It also involves some classic Capcom puzzle elements, a host of unique boss enemies, and a group of six assassins whom you can select and switch between at any time during gameplay.
If you're stuck in the game, then look no further than GameSpot's Game Guide to Killer7 to help you. In addition to a complete (and spoiler-free) walkthrough, we're going to give you the rundown on the characters in the game, as well as their abilities, and detail some of the unlockable features that you get for beating the game. Enjoy!
Characters
Harman Smith
Apparently the leader of the Killer 7, Harman is wheelchair-bound sniper, who's apparently escorted everywhere by Samantha Sitbon, an ancillary member of the brain trust. He doesn't speak much, but when he does, his words are delivered with a peculiar kind of force. Although he doesn't get into the field much anymore, relying on the six core members of the team to do the dirty work, he can still be deadly with a rifle when pressed into action.
Harman can't be upgraded or manually selected; he only appears at certain points where it's dictated by the story.
Garcian Smith
Don't make him say it again - Garcian's a cleaner. This character exists outside the hierarchy of the Killer 7, and is seemingly the only character capable of interfacing with people in the "real world." His role in the game is somewhat analogous to that of a combat medic; when one of your combat personas gets taken out, you'll respawn as Garcian back in the last Harman's Room that you visited. If you can escort Garcian back to the body of the persona that was killed, he'll grab the remains and escort them back to the safety zone, as good as new.
If, however, Garcian dies during the trip to the body, it's game over for you, and you'll need to reload a saved game. That's often the real trick, as Garcian possesses only a silenced pistol that will barely scratch most enemies, and he doesn't have any real evasive maneuvers with which to avoid opponents. He can use blood vials to heal himself, but even so, if you happen to die past a bunch of hard enemies, then you'll probably be better off just resetting and reloading a saved game than attempting to use Garcian.
Dan Smith
Dan, a.k.a. the Hellion, is probably the most well-rounded of the Killer 7 characters in terms of general combat acumen. His revolver does a good amount of damage and reloads quickly, and he has a decent amount of health should enemies get too close. He can also charge up his shots with thin blood; three vials of blood will let him shoot a Collateral Shot which does extra damage to anything it hits. His main drawback is that his gun can initially only hold six shells, forcing him to reload often, and that he takes a second or so in between shots.
Dan doesn't have any particular puzzle-solving abilities, but his Collateral Shot will occasionally be needed to bypass certain hard-to-damage enemies or puzzles that involve blasting a weak spot on an environmental feature.
Exclusive Abilities
Head Lockon (Waver 3, Critical 3): With Dan's Head Lockon ability, he'll automatically lock on to the head of an enemy, at least for those enemies that actually have heads. This is far more useful than Coyote's Foot Lockon ability, as a few enemies will always have their critical spots on their heads (such as Laser and Bomberhead Smiles), and even if they don't, you're not going to reduce your chances of hitting the real critical spot by blasting off their heads; you'll usually wind up getting extra blood for this anyway. On enemies without heads, you won't perform any lockon.
When Dan obtains Critical Lockon, it replaces Head Lockon.
Triple Tap (Speed 4): A few characters can obtain Double Tap, which replaces a single shot with a rapid two-shot attack (at no extra ammo cost), but Dan is the only character that can pick up Triple Tap, which, predictably, lets him shoot three bullets with a single shot. This doesn't occur every time he pulls the trigger, but happens fairly often nonetheless. The drawback to Triple Tap (and keep in mind that you can't turn it off when you obtain it) is that the recoil is pretty severe, which can make it difficult to re-aim if you're looking at shooting a critical spot at a monster and happen to miss the first time.
Kaede Smith
Kaede is the only female member of the Killer 7, and is a potent offensive force. Although her semi-automatic doesn't do quite as much damage as Dan's revolver, it can hold more rounds in a clip, preventing her from having to reload as often. Her reloading time, however, is substantially longer than Dan's, and is probably the longest of any of the assassins, so be sure to reload when you're not in any danger. In addition to the size of the clip, though, Kaede's weapon also packs in a scope which can zoom in for extra precision at long range, making her as close an approximation of a sniper as you're going to get in the game.
Kaede's scope will make many sections of the game far easier to beat than if you used one of the other characters, so she's definitely worth upgrading early and often. She's also noteworthy for obtaining the Critical Lockon ability earlier than any other character except Con, and when you get that, things start to get a lot easier. Until you get Critical Lockon, though, you'd do well to increase her Waver skill before the others, as the scope isn't going to be all that useful to you if Kaede can't hold her hands steady. Kaede does have a fairly small reservoir of health, so she can't take much damage before dying.
In addition to her combat acumen, Kaede can interact with puzzles and barriers that involve blood. If you see a curious bloodstain on a wall, or run up against a seemingly sheer wall that's colored red, use her special move button to see if you can interact with it; you'll usually either destroy the barrier or absorb the blood, giving you access to clues or items. This requires one vial of thin blood for each use.
As a trivia tidbit, the voice actress responsible for Kaede also worked as Rikku in Final Fantasy X and FFX-2. Now if only we could replace Rikku's battle comments with Kaede's "The **** you lookin' at?" That'd be high comedy.
Exclusive Abilities
Kaede doesn't have any combat abilities that are exclusive to her.
Coyote Smith
Coyote is a former thief that now uses his skills to help the Killer 7. He's likely not going to be your primary choice in combat - if you need someone to fire away with a revolver, Dan's a better bet - but he does have a couple of abilities that will be required on most levels if you wish to make your way around.
The first ability is lockpicking. Lockpicking will let you bypassed doors or containers that are locked with a padlock. In most cases this is going to be used for backtracking; you'll come across a locked door early in a level, but be told that the lock is on the other side. Later on, if you need to backtrack to an area you passed through earlier, you can find the other side of the door and pick the lock to quickly move back. There are some mission-critical locks that need to be picked, though. These are pretty easy to spot, since there are always large padlocks visible from any of these locations.
The second ability is jumping. At the cost of one blood vial, Coyote can jump from the floor to the roofs and platforms above him, assuming such as jump is valid and allowable; you can't just jump up while standing in the middle of an open area to see if there's anything above you. You have to be in a specific spot in order to jump, which will usually be called out by the peculiar, puzzle-noting guitar twang. Jumping will sometimes be necessary to proceed in a mission, and sometimes will simply let you talk to Travis or Iwazura.
As mentioned, Coyote brings a revolver to combat. Although he can charge his shot up, he's not exactly intimidating in combat, so if you need to mow down fiends, you'll want to flip over to Kaede or Dan.
Exclusive Abilities
Foot Lockon (Speed 2, Waver 2): This is somewhat similar to Dan's Head Lockon, but instead of aiming at the head, Coyote will zoom in on his opponent's upper leg and shoot it off. This is honestly more of a hindrance than a help in most cases, as enemies that get their legs shot off will start to crawl towards your character, often more rapidly than they moved when they were walking. This also makes it more difficult to hit their critical spots, since they'll often be obscured by other parts of the Smile's body. So, in short, this is kind of an annoying power to have, and you can't switch it off when it's obtained. Yay!
Deadly Blow (Power 4, Critical 4): With Deadly Blow, Coyote will be able to shoot limbs off - for great justice! This replaces the disintegration effect of limb destruction with another animation, and may allow you to absorb more blood from limb destruction. Other than that, it doesn't do too much.
Kevin Smith
Kevin is perhaps the most enigmatic of the Killer 7, choosing not to speak at all. He's unique for another reason, though; of all the assassins in the group, he's the only one to forego firearms, choosing instead to use throwing knives in combat. This gives him one huge advantage over everyone else: he has no reloading to do, and can thus whip out knives as quickly as he likes without having to stop and reload. When dealing with a hoary host of foes, especially slow-moving ones, this can be a huge asset, as most garden-variety Smiles can be stunned simply by shooting them in the chest when they're about to leap at you. Since you can throw out knives with a quickness when using Kevin, you can keep doing this until they happen to keel over dead. Although knives aren't as powerful as bullets, you can throw them fairly quickly.
Kevin's special ability allows him to turn himself invisible for a short period of time. While this is handy for getting past laser tripwires in a few parts of the game, it's also noteworthy due to the fact that it makes you effectively invulnerable to damage while the invisibility lasts. While you're invisible, Smiles will stop moving, and you'll be able to pass right through them without having them blow up. You will instantly revert to your visible state if you happen to aim or fire a weapon, however. Later in the game, where you find yourself having to backtrack across areas that you already cleared, you may find it easier to just use Kevin's power to avoid fighting, rather than clearing out the entire area again. Using this power requires one thin blood vial.
Exclusive Abilities
Shine Sparkling (Power 3): When you obtain Shine Sparkling, Kevin will be able to charge up his shots with up to three vials of thin blood. When firing a fully-charged shot, he'll throw starts in a wide arc in front of him, damaging multiple enemies.
Con Smith
Con is one of the more intriguing members of Killer 7. He seems to have two large drawbacks: the fact that he's a kid, and the fact that he's blind. He manages to overcome these limitations, however, by using his sonar-like ability to detect enemies and by using his speed and stature to his advantage. He's definitely the fastest character in the group, which makes him a handy character to use when running through zones clear of enemies.
In combat, Con starts out as one of the more shoddy characters in the game. He dual-wields semi-automatic pistols, and can thus fire more rapidly than any other character in the group, and can also reload more quickly than anyone. Unfortunately he's quite inaccurate at the outset, and individual rounds don't do much damage. When upgraded, though, Con can become the most deadly character in the ground, especially after you enable him to use Critical Lockon. Since he can go for a good length of time without reloading and can reload so quickly, you can keep up a stream of fire with him long enough to take down groups of enemies, and with Critical Lockon, you should be able to curse up a storm by getting critical after critical. Along with Kaede, Con can get Critical Lockon earlier than the other four characters, so he's a good choice to concentrate on upgrading in the early game.
Con's special abilities include his sonar ability, which allows him to detect weak spots in walls and to deduce the correct path in labyrinths. In truth, the labyrinth ability is only rarely used, and weak spots are easy to detect just by looking at walls and such. Secondly, Con is possessed of the miraculous ability to lean over! He can pass under passages as low as three feet high! This is important because none of the other personas can be bothered to get down on their hands and knees and crawl for a couple feet to clear these passages, so you'll need to use him to get past them. Lastly, when you activate his special ability, you'll convert one thin blood vial into pure speed, allowing Con to move much, much more rapidly than he normally would. Unfortunately, you'll still take damage if you happen to get hit by an enemy, making this ability somewhat inutile; it can still be handy when attempting to lure enemies in and then run away before they self-destruct.
Exclusive Abilities
Like Kaede, Con has no special upgradeable abilities save for those listed above.
Mask De Smith
Mask is the biggest and bulkiest of the Killer 7, and also packs some of the most deadly weapons, since he wields a pair of handheld grenade launchers that are guaranteed to eliminate most simple Smiles in a single blow. Although he's powerful, a number of deficiencies cause him to be less than an ideal character in combat, at least not until later in the game.
The first problem with Mask is that he has to reload after every shot he takes with his launchers, meaning that he'll spend as much time reloading as he will actually firing. If he happens to miss a shot, then it's likely than Smiles will get up close and personal with him before he's ready to take another. Although this problem is eliminated when he gets his first costume upgrade about halfway through the game, you're likely to have gotten well used to other characters by this time. An unfortunate side effect of his grenade fire is also that it seems to prevent you from absorbing blood from most normal Smiles, and it's exceedingly difficult to get critical hits on them, either, although the armor-plated foes that only Mask can kill, which start appearing later in the game, will let you get criticals and collect blood from them. (You may be able to get critical hits on normal Smiles by upgrading Mask to Critical Lockon status, but it's far better to spend your blood on other characters.)

Although Mask has the most health of any of the Killer 7, and is thus well-suited to taking unavoidable damage, his generally poor combat skills will probably mean that you're better off upgrading other characters, and only using him when absolutely necessary. There are plenty of obstacles that only Mask can get past, in fact, including large crates and barrels that block your path. There are also cracked walls that can only be opened with Mask's grenade launchers, so you'll need to flip to him every once in a while whether you like to do so or not.
It's worth noting that Mask will eventually get a series of upgrades which will increase his attack power, for instance by letting him reload more rapidly, and even eventually removing his need to reload at all, allowing him to pump out grenades at a greatly improved clip. He also gets an upgraded charged shot, which will eventually let him pop up a full five thin blood vials into a massively damaging attack. This, however, is going to be overkill on most enemies, at least on Normal difficulty, and will thus be rarely used.
Exclusive Abilities
Like Con and Kaede, Mask has no unique abilities save for those described above.
General Abilities
In addition to the exclusive abilities listed above, there are numerous abilities that are available to one or more of your characters.
Down Attack: When a character is faced with an enemy that's crawling along the floor, they can use a Down Attack to instantly kill them when they're within melee range. When it's about to leap at you (there will usually be a white flash on the screen when this occurs), hit the X button to counter the attack and finish them off. Some characters seem to be able to do this with the A button, as well; Con will perform this move fairly frequently without touching the X button at all, for instance. All characters can obtain this move, and they'll all get it with just a few upgrades. Note that down-attacking won't get you any blood for the kill and will end your string of critical kills, if any exists.
Counterattack: Another early-game maneuver that all characters will obtain, Counter Attack works just like Down Attack, save that it works for upright enemies that are about to attack you. It has the same drawbacks as Down Attack, so your best bet is to kill enemies before they get close to you. Note that some enemies can't be countered, so don't rely on it all the time.
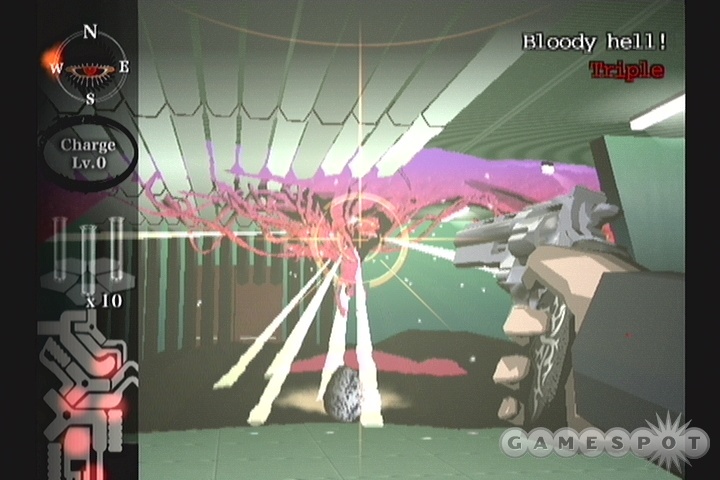
Charge Shot: Dan, Kevin, Coyote, and Mask all start the game with some form of Charge Shot. When you bring up your weapon in aiming mode, you can press the Y button (on the Gamecube, at least) to charge the shot with extra power, but this will consume thin blood vials. Dan's attack will consume three blood vials, but is the most powerful shot, while Kevin's and Coyote's will consume one. Mask can charge his shot with anywhere from one to five vials of blood (after he upgrades himself).
Doubletap: Dan, Kaede, and Coyote, as members of the semi-automatic weapon club, can all earn the ability to doubletap early on in their upgrading careers, usually as a result of increasing their Speed. Doubletap replaces a single-bullet shot with a two-bullet shot, while only using one round of ammo. You can't decide when to use this, though; it occurs randomly when you press the trigger. It's most helpful when aiming at an enemy's chest, as the double recoil will make it difficult to re-aim when you're attempting to hit a critical spot on a foe.
Enemy Slow: Only Dan and Kevin get the Enemy Slow ability, typically after a good amount of upgrading. Dan can obtain it by increasing his Power and Critical to rank four, while Kevin gets it earlier, at Power and Critical three. When they do obtain it, though, each shot that hits an enemy will have a chance to greatly slow their movement for a few seconds, allowing you time to reload (in Dan's case) or try to track down their critical spot. This is more useful on the Deadly or Killer 8 difficulties than on Normal, as most enemies will be easily killed before they get near you in Normal mode.
Critical Lockon: Arguably the most important ability in the game, Critical Lockon allows the character that upgrades to it to automatically lock onto the critical spots of a foe, which means that they'll usually instantly kill an enemy with one shot after they lock on. All characters can upgrade to Critical Lockon, but it requires a large investment in most cases. Dan, Coyote, Mask, and Kevin will have to max out their stats in order to achieve Critical Lockon, while Kaede and Con can obtain it by getting rank four in all of their stats. Since the move from rank four to rank five costs 26 ampules of serum, this means that you'll be able to get Con and Kaede upgraded to Critical Lockon for over 100 fewer ampules than the other characters, which basically means that you should concentrate your early-game upgrading on one of them, probably Kaede, and get them up to rank four in everything as soon as possible, as Critical Lockon will make the game much easier when you obtain it.
General Tips
Collecting Blood
There are two kinds of blood that you can collect: thick blood and thin blood. Both types of blood are collected by killing enemies.
Thin blood pours in on its own accord after you kill foes in your path; you collect it in vials, and can carry up to 20 vials before you fill up. It has three primary uses. First off, if you're injured, you can enter the start menu and use one vial to heal yourself a certain amount. Secondly, you need to expend vials of thin blood to charge up Charge Shots for Dan, Mask, Coyote, and Kevin. Third, vials are needed to activate certain special abilities of characters when they encounter obstacles in the game world, e.g. Coyote needs to use up a vial of blood to perform his jumping maneuver.
Thick blood is just as important as thin blood, as it's what allows you to upgrade your characters. You can only collect 1,000 deciliters of thick blood at a time. Like thin blood, it flows from the blood of the enemies that you kill, but you can increase the amount of blood that they drop with a few techniques, like placing tiny classified ads...oh wait, wrong guide.
Anyway, increasing the amount of thick blood that you collect is a fun and profitable endeavor. The primary way to boost your blood gains is to aim for the critical spots of enemies and kill as many enemies in a row as possible with critical kills. This is easiest on Normal difficulty, where you'll be able to spot the critical points of every enemy that has one and aim for it, but it's still not a sure thing. A lot of enemies have critical points on their arms and legs, and it's a common thing to aim for the critical spot but instead blow the limb off entirely, making the critical spot either disappear (in the case of arms) or be obscured by the rest of the creatures body mass (when you blow off a leg and they start crawling towards you).
If you do manage to kill an enemy by shooting it in a critical spot, then it'll instantly disintegrate, and your character will usually respond with a verbal cue, usually of the vulgar variety. Getting kills in this manner will let you gain more blood than you normally would, and stringing together multiple kills by getting consecutive critical shots will further increase the amount of blood you obtain from each enemy. (Although the game reads double, triple, and so on, the actual gains are a bit more modest.) If you happen to kill an enemy without getting a critical hit, for instance by shooting it in the chest until it keels over, then your critical streak will be ended and you'll have to start anew. Getting hit by enemies does not end critical streaks, though.
Upgrading Characters
With the thick blood that you collect from fallen foes, you can upgrade your characters (save for Harman and Garcian) with new abilities and statistical increases. You can carry up to 1,000 deciliters of blood at a time; any obtained beyond that amount will be discarded. You can convert the blood that you're carrying in any of the numerous Harman's Rooms by flipping on the television and switching to channel B. The mad doctor there will automatically take your blood and convert it to ampules of serum, which are what you use to upgrade your characters.
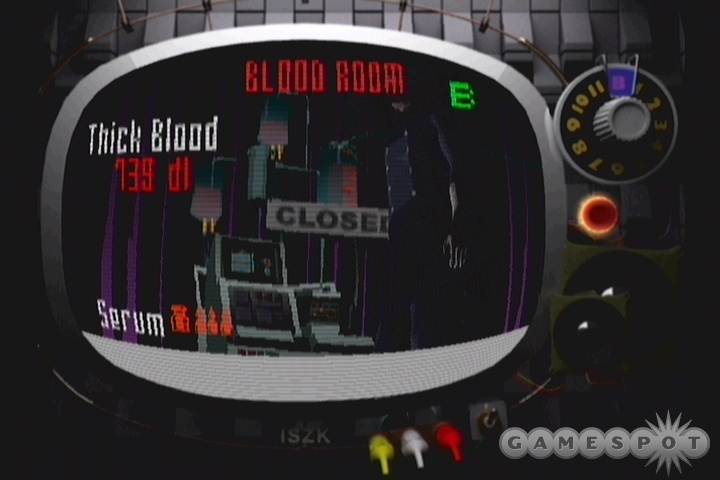
Keep in mind that each mission has a maximum amount of blood that you can convert into serum; this number starts out at around 1,400 deciliters but increases throughout the game until you get up to around 2,600 deciliters near the end. If you attempt to convert more blood into serum than is allowed on that level, the doctor on the B channel will shut down his machine. It's generally a good idea to make sure that you hit this limit before you leave a level, though, as that'll ensure that you've obtained all the serum that you can get from it. You'll still have the excess thick blood on your person after you convert all of it that you can into serum, but this doesn't hold over from level to level. You can, however, carry over vials of serum from level to level, so you don't have to expend them all as soon as you make them. (Although it's a good idea to do so, as there's really no point to carry them around unless you need to build up a stockpile for an expensive upgrade.) You can only carry 100 vials of serum at a time, or 10 large vials, although very few people will ever have this many without spending them on upgrades.
When you get serum stockpiled away, you can use the same television in the Harman's Rooms to upgrade your characters. Characters have four stats to upgrade: Power (which increases the damage that they inflict with weapons); Speed, which increases their movement and firing speed; Waver, which reduces the amount of crosshair movement when a character aims, and thus makes it easier for them to land precise shots; and Critical, which makes it easier for a character to land a critical shot. Two characters have unique attributes that replace one of these: Kevin has Invisibility, which increases the duration of his invisibility power, and Mask has Range, which lets him fire his grenade launchers a further distance.
In addition to upgrading statistical performance, upgrading your attributes will also unlock more abilities for your characters. These are detailed in the Characters chapter above.
Walkthrough
Note that there are two difficulties available to you by default when you first start up Killer Seven. Normal difficulty should probably be considered more of an Easy mode for most experienced gamers, as you'll have a bevy of hints available to you, both on the in-game map and via conversations with Iwazaru and other characters. In Deadly mode, however, there'll be fewer hints to help you out, the enemies will be tougher to kill, and their critical spots won't automatically appear, making it necessary to quickly upgrade one of your characters to obtain Critical Lockon. You also won't be able to absorb as much blood on Deadly difficulty.
This walkthrough assumes that you're playing through on Normal, but most of the puzzle solutions should be similar. Some of the bosses may take more damage than we indicate here, though.
Chapter One: Angel
In Angel, your team will be tasked with infiltrating a building infested with Heaven Smile, climbing the stairs until you reach the top, and killing the brood queen that dwells there. This is going to be a relatively easy level, so take your time and learn the controls and how to take on the Heaven Smiles that you encounter. It might be wise to just run around a bit, run through a few puzzles, kill a few guys, then restart the game when you feel comfortable with the game's style.
First Floor
Immediately after entering the building, Garcian will yield the floor to Dan, who'll be a decent choice as a primary battle character throughout the game. Although his revolver can only hold six shells and doesn't fire very rapidly, it's a powerful weapon and can reload quickly. If you wish, you can switch to another character in the start menu, but some of them will be locked to you until you kill a certain number of Heaven Smiles. Feel free to experiment with the characters until you find one you like.
The first room past the entrance features the first appearance of Iwazaru, a bizarre character that offers you plenty of vague tips and ominous warnings. You don't ever really need to speak to him - we'll give you all the information you need to get past the various puzzles in the game - but if you wish to do so, feel free. Beyond him is the first Harman's Room, where you can save your game, power up your characters, or plum Iwazaru's mind for more information. Save your game if you wish, then return to the main hallway and head to the Elevator Hall. There are a couple of Heaven Smiles here, of the slow-moving and easy-to-kill variety.
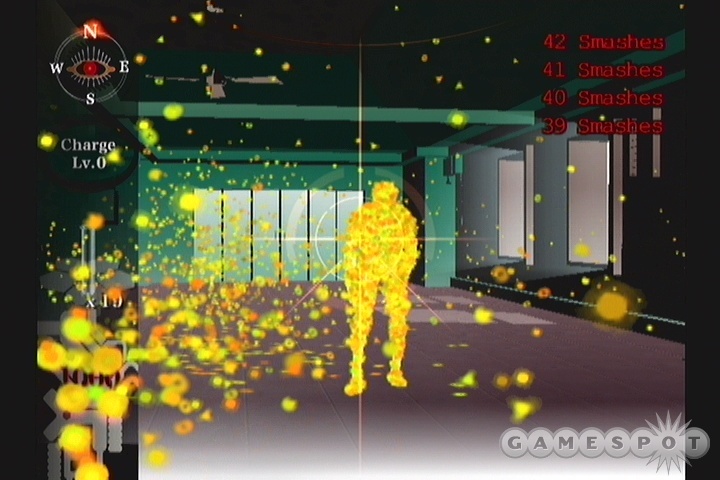
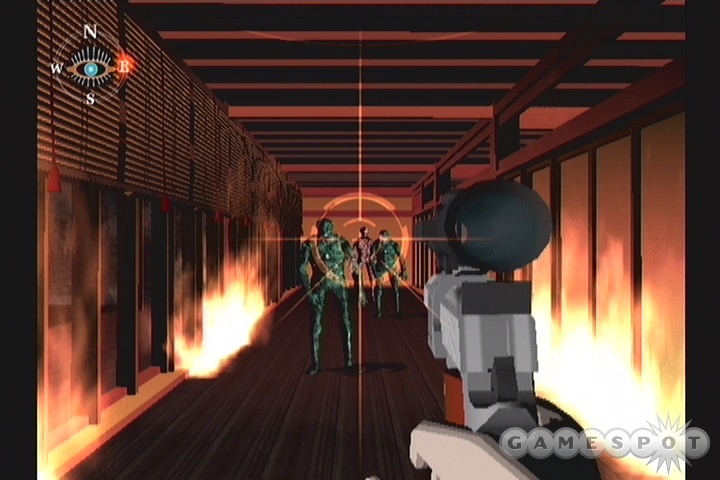
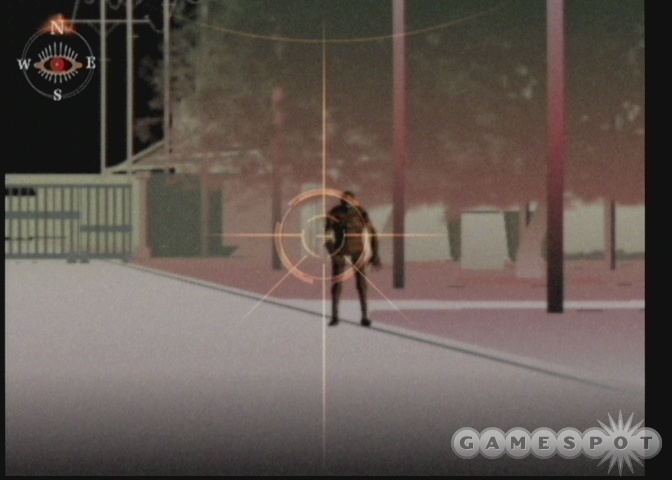
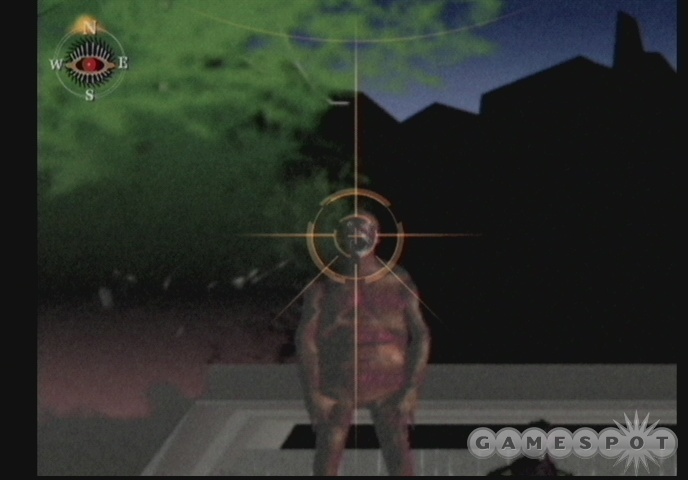
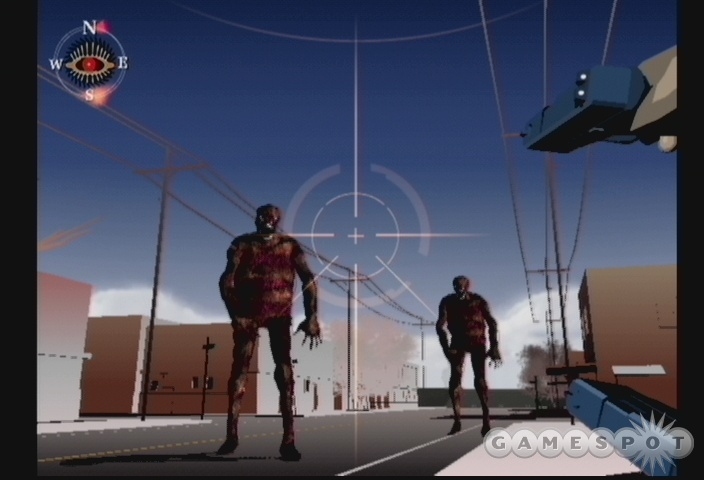
The important thing to note about Heaven Smiles is that the blood that they exude when killed is what allows you to power yourself. You can kill them by simply firing at their bodies for a decent amount of blood, but if you want to acquire large amounts of blood, you'll need to shoot off their limbs and aim for critical spots on their bodies, which appear as small, gray, pustulating masses, usually on one of the limbs. Dealing enough damage to a critical spot will instantly kill a Heaven Smile and greatly increase the amount of blood you can absorb from it, but be careful, as you can shoot off a limb with a critical spot on it, forcing you to kill the HS normally. Each consecutive kill you achieve with a critical shot will increase the blood multiplier, so that you can eventually start earning ten times the normal amount of blood if you string together criticals.
After taking out the Smiles, round the corner of the hallway to meet up with Travis, another oft-occurring character in the game. He rarely says anything terrifically useful. Keep heading past him towards the Parking garage.
Inside the garage, you'll run into your first Camellia Smile. These traitorous HS enemies are intent on betraying their cult and joining you, but all they seem to really be good for is running away and exploding. If you do manage to kill them before they detonate, however, you can earn hearty amounts of blood, so try to zoom in with Kaede and see if you can get a critical shot on it. Failing that, try to just shoot it in the back before it blows. Scan the background behind it to reveal the presence of a large HS Duplicator. This thing will pump out HS pods which, when shot, will explode into full Heaven Smile enemies. These guys only offer a minimal amount of blood, on the order of five units per enemy, so don't bother using this as a get-rich-quick scheme. Instead, focus on the yellow dot on the Duplicator itself; after shooting it a dozen times or so, the machine will explode. (You can also use Dan's Collateral Shot to instantly take it out.) With it out of the way, head to the end of the lot and speak to Travis; he'll give you a Soul Shell, one of two magical bullets you'll need to have in your possession to reach the boss of this complex. (You'll need to select it as you would a path or an NPC to pick it up after the trunk of the car opens.) With it in hand, return to the Elevator Hall, where a new path will have opened up, which leads to the stairs.
Second Floor
After killing off the HS in the first room here, you can enter Harman's Room, which acts as kind of a quicksave. If you happen to die after visiting a Harman's Room with a TV, Garcian will appear in that room and walk towards your character's body. Thus, it's a good idea to dip into each Harman's Room you see, even if you don't plan on saving, as it'll save you some time if you happen to die.
Return to the hallway and head north, where you'll run into your first Micro Smile. These fliers will rapidly close in on your character when you get close to them, so be sure to go into aiming mode as soon as you hear the laugh. Heading down the hallway towards the laundry room will result in a dead end, although Travis is here for talking to if you wish. With that done, head east and around the corner to where you come across a dying female - she'll be dead before you can help her out. There's a locked door to the north, and another Smile to the south, as well as Yoon-Hyun, who'll be your hintmaster throughout the game. If you ever need a hint for a puzzle, you can trade blood for a hint by shooting the mask that he carries. Of course, if you're reading this guide, you won't need to.
Room 212 is near this position, but for now you can't do anything inside of it, so head to the stairs and go up to the third floor.
Third Floor
Note that the third floor stairs will reveal your first Carrier Pigeon note, so check your map if you need help finding it. You'll also probably want to enter the Harman's Room here and turn your Thick Blood into Serum, which you can use to upgrade the stats of some of your characters. For now, it's best to concentrate on upgrading whomever you're using the most.

After entering the third floor, kill the Heaven Smiles in the area and proceed into the Library. There isn't much you can do here yet, so head to the stairs towards the west, which lead back down to the laundry room on the second floor. Turn off the Dryer here to obtain the Fire Ring from a disembodied head. You're going to need this to obtain some of the items in the building that you had to pass by before. To begin with, continue east and use Coyote to unlock the door at the end of the hall there; all you need to do is select the hallway beyond the door and he'll pick the lock automatically. With that out of the way, head to Room 212, which you passed by earlier, and enter it.
Before you can light the candles here, you'll need to equip your Fire Ring, which you can do by entering the start menu and pointing towards "Items". With the Fire Ring equipped, you'll be able to solve the candle puzzle, which is about as easy as they come. Just light the candles according to the number on the candlesticks, counting up from one to five, and you'll earn the Odd Engraving.
With that in hand, return to the third floor and enter the Restroom near the Library. Inside you'll find a Sprinkler and an empty Toilet. In order to flush the toilet, you'll need to use your Fire Ring on the Sprinkler, which will fill the toilet and let you flush it, which will then eject another Odd Engraving onto the floor of the laundry room of the second floor below you.
Now that you have both Odd Engravings in your possession, return to the Library and use the Control Panel there; that will move the shelves and allow you to head north through the room. There is a branching path leading to the Warehouse, but you'll have to bust down the wall blocking it off with Mask DE Smith's grenade launchers if you want to pass through. Don't forget to reload his grenade launchers before moving on, though, as they can only hold one round at a time, and there's a Smile beyond the broken wall. The only real item of concern is another Carrier Pigeon message. Grab it before heading up to the fourth floor.
Fourth Floor
After upgrading your characters again, head into the fourth floor and check your map. This floor has a lot of corridors, so it can be easy to get lost. With your map, though, it shouldn't be too difficult to figure out where you're going.
First off, head north up the initial corridor, at the end of which you'll run into Iwazaru and a freaky-looking marionette hanging from the ceiling. In order to get past the wall here (which is actually just a barrier), flip over to Kaede, run up against the wall, and activate her special power button. This will bust down the wall, allowing you to pick up the second Soul Shell.
In the first hallway off to the side that you enter, there'll be a cracked wall, so use Mask to bust it down and head through. Room 406 is locked by a padlock, so use Coyote to open it and kill the yellow Smile inside for a large amount of blood. With that in hand, return to the hallway and start heading north. Eventually you'll come to another hallway, where Travis stands guard by a wall smeared with blood. If you use Kaede's power on the wall, all of the letters will disappear save for "NO," which is the code you need to use on the door to the northwest to unlock the path leading up to the fifth floor and the Boiler Room.
Fifth Floor
Most of the fifth floor is initially taken up by a long, green hallway. Be mindful of Smiles coming from around the corners as you proceed, as you're likely to run into them if you just sprint along the hallway. Eventually you'll reach the Gatekeeper, who'll take your Soul Shells in exchange for getting you through to the final levels of the building. With that done, head through the hallway to the Colosseum, a large and apparently empty room. After crossing it, you'll be warned of a quick monster in the room beyond, so head through the Vinculum Gate and meet up with this terrible foe. The Speed Smile here is indeed rather fast, but you have a long hallway between you and it, giving you plenty of time to aim and take it down. If you're looking for a critical kill, try using Kaede's zoom and popping it in the weak spot while it's stunned from an earlier hit.
After killing the Speed Smile, you'll be returned to the Gatekeeper's room, and although it'll appear that you're going backwards, you are indeed proceeding on. You'll have one last Harman's Room available to you before the boss, so save your game before entering the Express Elevator.
Sixth Floor
You'll automatically switch to Garcian when you enter the sixth floor for the first time. If you head right at the branch past Travis, you'll get a ghost visitation detailing a strategy for defeating the end boss here, although, as per usual, we're going to be explaining it anyway.
When you head north into the Large Hall, you'll revert to Harman Smith for the first time, the wheelchair-bound sniper that's the head of the Killer 7. It'll be up to him to start the process of elimination that'll let you finish off the boss of the level, a diminutive angel. When you meet up with her, let Harman bring out his sniper rifle, then shoot off each of her wings at the base. This will result in her falling down and actually beginning to attack you. Although you default to Dan at this point, Con is the Smith you actually want to be controlling here, as you're going to need his speed to get behind the girl. Her attack here consists of a line of flame that shoots out from her hand and deals some decent damage to you. It's easily avoidable if you use Con, though; just jam on the movement button as soon as you hear the sound that signifies it's begun.
While she's shooting her flame at you, you need to move 180 degrees around the room so that Con can get a clear shot at her back. There are four red targets there, and you'll need to hit each of them before you can finish the angel off for good. The last couple of targets will be hard for Con to hit due to the inaccuracy of his weapons, so you may have to try a few times before reaching them.
After the angel has been destroyed, head north through to the Top Floor to meet up with Kun Lan, a master terrorist and apparently the progenitor of the Heaven's Smile cult. He's got a pretty neat God Hand that can turn people crazy, and which is apparently his only weak spot, so when you have the opportunity to take shots at him, shoot his hand to end the level.
Target One: Sunset - Part One
Your mission here is to kill Toru Fukushima, apparently some kind of middleman between the US Government and the Japanese UN ambassadors.
Garcian's Home
When you first take control of Garcian, enter Harman's Room and use the TV to switch over to Harman. This will let Garcian and Harman rap at each other for a few minutes, which will then let Garcian leave the house, which will kick off a long series of cutscenes. Eventually you'll wind up at your target location, a sushi house outside of Washington, D.C.
Fukushima - Entrance
When you've flipped over from Garcian into Mask, take out the two Smiles in front of you, then examine the rock in front of the entrance to the building to destroy it. You might want to save your game in the Harman's Room around the corner before heading in, as there are some tough encounters right at the beginning of this level.
You'll probably want to switch off to Kaede before moving up the hallway, as Mask's slow reloading time will put you at a disadvantage in the upcoming battles.
Waiting Room
Take a right into the Waiting Room as you move up the hall here, but be sure to switch over to Kaede before doing so. As soon as you enter, you'll find that two Smiles are moving at you, with a Camellia in the background that isn't doing anything. As you move up the hallway, a Micro Smile will come at you, so be wary of it. What's more, enemies will start to spawn behind you as you move around the corner, so keep an ear out for their laughs and return to the first hallway to tag them.
This room contains a Carrier Pigeon, a conversation with Travis, and a seemingly dead-end room. If you head into the room, though, you'll get the guitar riff that clues you into the presence of a puzzle. Indeed, if you switch over to Coyote here, you can press the Y button (or whatever the special move button is on the PS2) to jump up into the rafters. After killing the Smile there, head outside and around to an elevated room, where you'll obtain the Water Ring. Go ahead and put it on before returning back to the hallway before the Waiting Room. There'll be another Smile in the rafters level when you enter it, immediately to your right, so be mindful of it. The two Smiles in the Waiting Room itself will also have respawned, and indeed will respawn quite constantly, so keep killing them if you wish. As with most regenerating enemies, they won't give you much thick blood, but they do seem to count towards the number of kills you need to awaken your other personalities, so feel free to get a bunch of kills and unlock characters in Harman's Room.
Hallway
After heading through the Courtyard, you'll wind up in the Lobby, where you'll meet up with your first Bombhead Smile. These guys are relatively easy to kill, at least with Kaede; just wait for their headguards to pop open, then shoot them in the face for a critical. They move fairly slowly, so feel free to zoom in on their heads and pop them for extra blood. There are more in the lounge up ahead, so move forward until you hear them chuckling, then reverse course and wait at the end of the hall for them to come to you; it'll be easier to grab criticals that way. There's a Harman's Room in the lounge, as well, so feel free to save your game or wake up more characters. Just be careful when coming out, as there'll be a normal and a Bombhead Smile near the exit.
Move around to the north and enter the next Hallway, then take a left into the Garden. There's a Camellia and two Smiles here, so kill everything that moves before using Kaede's blood power on the translucent tree down the path. You'll find another Duplicator here, but your only reward for killing it is the priveledge of talking to Travis. Yay. When you're done with that, head north and take the stairs to the Large Hall.
Inside, you'll meet your first Spiral Smiles. These large ball-shaped creatures will detonate with extreme force if they get close to you, but they're extremely slow and easy to kill if you shoot for the green face when it rotates past. In fact, since these guys keep respawning here and can easily be hit for criticals, this is a good spot to earn a ton of blood by stringing together ten or fifteen criticals. It's probably a good idea to take advantage of the easy blood by shooting these guys until you have 1,000 thick bloods in your inventory.
When you've satiated your blood cravings, head into the Guestroom here and use the Water Ring on the Vase. Doing so will grow the plant, which will in turn unlock an Odd Engraving on the far wall, which you'll need later on, so grab it and continue on to the north.
Guestroom
Head up the eastern hallway here first; it'll give you more room to maneuver when dealing with the enemies that come out of the central rooms by allowing you to turn around and run before doubling back when you hear them laughing. Watch out for the Micro Smile in the eastern room if you head in that way. Neither of the rooms here really contain anything critical, save for a Travis conversation. When you're ready to move on, use the Odd Engraving on the northern door to reach the Special Room.
After grabbing the carrier pigeon to your right and making a quicksave by entering Harman's Room, head north, where you'll need to use Mask to bust through a barrier leading to the Kitchen. After the odd cutscene there, you'll automagically be returned to the hallway, where the barrier before the northern door has been removed.
Annex
The annex features a large installation puzzle that's started off by the appearance of a Feng Shui Map. You can see which direction corresponds to which creature here, so mark them down on a piece of paper if you wish, or, if you're reading this guide to obtain the answers, simply read on....
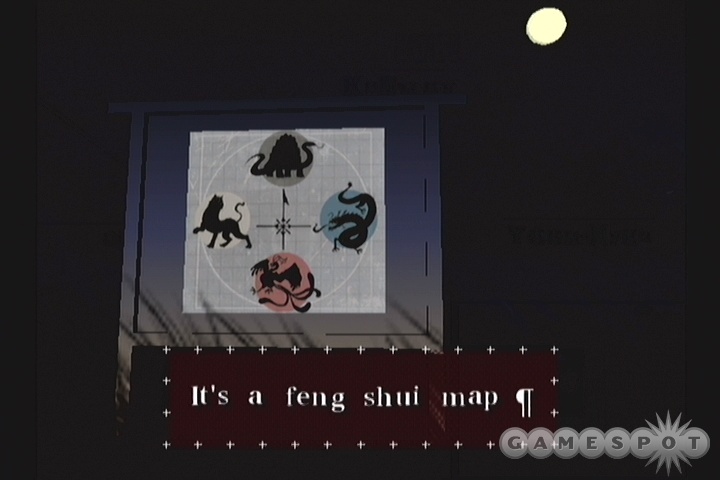
There are four small houses around the annex in each direction of the compass. In the West House, close the White Tiger door; in the North House, close the Black Warrior; in the East House, the Azure Dragon; and in the South House, the Red Phoenix. Closing all of these (which apparently can be done in any order) will lower the drawbridge in the middle of the Annex, which will also allow you to obtain the Soul Shell there. With that in hand, head to the Gatekeeper in the middle of the Annex, who'll shuttle you off to the Vinculum Gate once again.
Owner's Room
You'll soon meet up with the Phantom Smile here. It can be tough to kill if you don't know what to do; shooting it anywhere but square on the face will make it teleport right to your location and blow up, which is good enough to kill Kaede instantly. So, be sure to make like a baddie in Far Cry and yell "I'm gonna shoot you in the face!" before doing the dirty deed. Just aim for the center of the stalks on its head and you should be ok. Note that Phantom Smiles occurs elsewhere in the game, as well, but sometimes they have large hands instead of growths on their face; in these cases, you need to aim at the hands in order to take them down.
After encountering Toru Fukushima and being witness to his untimely demise, it'll be time to take out his secretary Kisugi. She's not at all what you could really call difficult, as her encounter is a simple shoot-out, pitting you against her for a solid minute and seeing which of you can land the most shots. You can't take damage during this minute, so all you have to do is land a bunch of shots. Either Kevin or Con should be able to land fifty or sixty more shots than Kisugi can during the minute of firing, so go ahead and use either of them to easily win the match.
Sunset - Part Two
Your assignment now is to kill off Agent Jean DePaul. After the bizarre opening cutscene, you'll find Garcian outside of the Koku Building. Check out the car for a bizarre abbreviation: BTJ CSC WTS. When you've checked that out, head towards the building to start the fiesta. You can check with Iwazuma if you happen to need a hint on the puzzle, but it's not that difficult; just pick the categories that much up with the abbreviations to get into the building. For the record, that means you should pick Bloody Tomato Juice (mmm!), Creamy Southern Coffee, and Wild Vegetable Tempura Soup, in that order.
First Floor
Inside the building, kill off the Smiles that come at you (the Poison Smile apparently does extra damage if it gets close, and can also apparently come back to life after being knocked down with body shots, but it moves quite slowly), then head left towards the Manager's Room. There's a locked Control Panel here; open it with Coyote, then switch it off to...do something. This apparently lets you run the dice game in Room 105 around the corner without the dice being manipulated. You should be able to roll snakeeyes on them the first time you examine them, giving you access to the Soul Shell in the room. With that in hand, you've pretty much cleared the first floor, so head to the stairs and start going up.
Second Floor
The first thing you need to do here is take a right and head northwest. The card game puzzle on the table is fairly simple; just flip over the nine card to complete the Royal Flush, and another table will open up, revealing another Soul Shell. You don't really need to enter the other room here - it just gives you a hint for the puzzle you just solved - so hit the stairs and move on up.
Third Floor
You're going to be facing off against a Mother Smile as soon as you enter this floor. These guys are like mobile Duplicators, able to spit out numerous normal Smiles from their body cavities. Like normal Duplicators, they can be killed by aiming at the yellow spot on their bodies. If you have Dan unlocked (you can wake him up at a TV in a Harman's Room), you can use his charged shot to shoot out powerful blows to quickly take down the beasts. There also happens to be a real Duplicator in one of the side rooms here, so you can get overwhelmed by enemies if you don't kill them quickly. Using Kevin to take them down might be a wise idea, thanks to his invisibility and no-reloading talents.
The puzzle here involves horse racing. On one of the walls in Room 307, you'll see a poster with a number of horses on it, labeled 1, 4, 3, 7, 6, 2, 5 from left to right. Note them down and head to the southwestern room (you'll probably want to kill the Duplicator in Room 301 on your way), and set up the race so that the numbers read the same as they did on the poster before hitting Start. This will unlock the third Soul Shell.
Fourth Floor
There are two ways to reach the fourth floor. The first is by the stairs, and the second is by heading into Room 301 and using Coyote to jump up through the hole in the ceiling there. You should use Coyote's method first, as it'll let you access a small room that's otherwise blocked off from you, where you can obtain an Odd Engraving. With that in hand, return to the third floor and take the stairs on up.
On the fourth floor proper, you're going to have to deal with more of the annoying Phantom Smiles. One of them is killable in the face, the other in the large hand. Be sure you're fully healed up before reaching this floor, as one bad shot could quickly end your life.
The Harman's Room here finally has a save spot, so save your game. The puzzle on this floor consists of a few decks of cards in one of the northern hallways. If you speak to Yoon-Hyun, he'll let you know that the combination is "Wild Boar - Deer - Butterfly." This ties into the three pinup posters near the Harman's Room on this floor; each of them has an icon of one of these animals on it somewhere. If you examine them closely, you'll see that the Deer is the first from the left, the Butterfly is the second, and the Wild Boar is the rightmost of the three. The three decks of cards are sorted with animal backs, so you'll need to find the Deer deck first, assign it the number one, then go to the Wild Boar (it looks more like a fish) deck next to it and assign it #3, then find the Butterfly deck and assign it #2. This only works if you go from the bottom-left of the decks and work your way around the screen clockwise. Assigning all three decks their correct number will net you the last Soul Shell.
Vinculum Gate
With that out of the way, use Kevin's invisibility power to get past the laser barriers in the hallway and unlock the door leading to the Gatekeeper. With four Soul Shells in hand, he'll let you past to the Colosseum. After getting the usual hint for beating the pre-boss Smile (aim for the sickle; shoot its back when it turns around), head into the Vinculum Gate and face off against the Smile inside. The process outlined to you by the ghost definitely works; just shoot at one of the wings on either side of the Smile until it turns around, then pop a shot off at the yellow spot on its back. It seems easier to flip the Smile if you concentrate on one side of it, rather than shooting at both equally. Either Kaede or Kevin will be best for this, as they can fire plenty of shots without having to reload.
Before taking the elevator down to the first boss, listen to what Iwazaru has to say; he'll let you know that DePaul can't be hit by bullets, but that you can aim at the ceiling to take him down. Save your game and go on down to the basement to meet this magical bullet-dodger! You'll need to use Mask's grenade launchers to bust through the wall in front of the elevator. After that, you'll be in a pitched battle with the sushi chef from hell.
Basement
Jean DePaul is going to be annoying. He'll hit you every few seconds, causing you to recoil and usually preventing you from firing back. As mentioned, he can't be hit directly, either, so you'll need to find some other way to take him down. Luckily, he doesn't do much damage with each hit, so you'll have a little time to do so. The key here is that the ceiling above him is cracked, so when he stops to reload, you can hit one of the ceiling segments above his head, which will kill him. It's best to use someone quick, like Con or Kevin for this, as you won't have more than a few seconds to make the shot. You can also run up a little closer to him if you find the ceiling tiles too small to hit from where you start the fight at.
When you finally do manage to drop a block on him, you'll be able to move on down the hallway and into the Mah-Jongg Room. The events within are mildly inexplicable, so watch the cutscene, then grab the Wind Ring from the head in the Storage Box. Use the Control Panel near Travis to switch the elevator from B1 - 4F to B1 - Top; this will let you reach the highest floor of the building. Work your way back through the hallway, where DePaul is now freshly ghostified for your talking pleasure, and head into the elevator to meet up with the final boss of the mission. As per usual, you'll get some tips on the fight from the kid near the door; apparently one of the bosses needs to be shot in the brain, while the other one has to be shot in the tie, or something like that. Armed with pure knowledge, head on up to the roof.
Rooftops
Before you head in to the room where you fight the bosses, move out onto the roof a bit until you reach a Harman's Room where you can save your game. In order to enter the Meeting Room, you'll have to equip the Wind Ring to blow away the curtains over it.
The two bosses here have to be taken on simultaneously, but they're not difficult to beat. As mentioned, one of them needs to be shot in the brain, and the other in the tie, but in order to finish them off, you'll first have to expose their weakspots. This is easiest to do with Kaede, since you can't get any closer to them, and she's the one with a scope for her weapon, which'll make it easier to land precise shots. Keep an eye on the brain matter that they chuck up into the air, which'll eventually start making a beeline for you and impacting you for slight damage.
To start killing off the enemies, you'll need to hit the rightmost guy's tie. This will cause it to flip backwards over his shoulder, forcing the gentleman on the left to reach over and straighten it out. This will give you a second or two of unfettered line-of-sight to his brain matter. It's much easier to hit his brain, however, if you line yourself up on the left side of the large table and aim from there; his head will block most of the brain if you aim from the right. After hitting him in the brain twice (on normal difficulty), he'll keel over, leaving only the taller gentleman standing.
Target Two: Cloudman
(Note that you have to move the aiming reticule at the beginning of this level to actually hit the black figure before you can load the level.) Your goal here is to find Andrei Ulmeyda and kill him in the Ulmeyda InterCity that he's created for himself. Why? Because he's a bad man.
Main Street 1
Much of the InterCity is going to feature wide-open streets with enemies coming at you from a distance away; Kaede, with her scope, is going to be useful here, as she can relatively easily hit enemies that are a ways away from you.
Start heading up the road, but be aware that the enemies here will respawn a few seconds after they're killed. You can save your game at the Harman's Room if you wish, but you need to head towards the gas station afterwards. If you wind your way around to the front of the truck there, Mask can pull it out of the way, giving you access to one of the pumps, where you'll find yourself taking possession of a Stamina Ring. When equipped, this will reduce the damage your characters take from Smiles, making it an excellent all-purpose ring to wear while you're running around. You should also speak to Travis here, who'll give you some background on Andrei, as well as clue you in to a password you'll need later on: the word "hustle" is emblazoned on his shirt. When you have the stamina ring, head north to the next section of Main Street 1.
The first thing you'll notice when you pass the blockade is the presence of Giant Smiles, the appropriately-named monster variants of the smaller brethern. There are also numerous Ulmeyda Smiles roaming the streets here, who jog along, oblivious to your presence unless you shoot them first. Shooting them in the yellow jersey that they were is an instant hit, though, so they're not too tough to deal with; just avoid standing in their path, or they'll explode when they hit you.
The Giant Smiles are a bit more problematic. They won't initially come at you unless you happen to shoot them, but when they do start moving, they can only be taken out by a direct shot to the eye. This is difficult even with Kaede, as their eyes are pretty small and they open and shut rapidly. Luckily, they don't just explode when they reach your location; instead, they'll tip over and attempt to fall on you. If you don't manage to get a shot in on their eye, then just let them get close to you, then turn around and run away while they're falling over to avoid damage.
Anyway, there isn't much you can do here just yet, so instead of going up the road, take a left, grab the Carrier Pigeon, and head into the Suburbs. When you're inside, you're going to be faced with another long road and a multitude of homes on either side of the road. Now, there's nothing in most of these homes save for enemies, so if you don't want to explore, feel free not to. If you're looking for blood, though, it might be worth your while to use Coyote to jump up on top of them and peek through the windows. It is, however, important that you kill a bunch of Ulmeyda Smiles. Doing so won't earn you much blood, but you'll earn tokens that will be important later on. Be sure to kill at least 15 or 20 of them.
The only building you need to enter on the first street here is 210 Terry Street. Jump atop it with Coyote, then head inside and use your Water Ring on the Vase there to obtain an Odd Engraving. With that in hand, return to the street and wrap around to your north. You'll come across a couple of Duplicators in front of 206 Terry Street, which you likewise need to enter. If you head inside and use Kaede's blood power near the bloodstain on the wall, you'll obtain the 12th part of the Ulmeyda bottlecap collection; you'll need to find all of these before you can complete this mission. With it, return to the road and head east until you run into a locked door. Pick it with Coyote to get back out to Main Street.
After killing or dodging the Giant Smile here, head around to the north and examine the machine that's keeping the gate locked. You'll automatically insert the Odd Engraving, allowing you to input the code, which, again, is the word "hustle." After doing so, you'll be shuttled off to the next section of town.
Main Street 2
Your first challenge here will be getting past the four Giant Smiles that appear on the road. If you've unlocked Kevin, then you may want to try using his invisibility to get past them; if not, then Con may be able to run forward and back off when they start to drop without getting hurt. If you haven't unlocked either of those guys, then switch to someone with a lot of health like Mask and quickly heal yourself after you take the damage given by the giants. Unfortunately they'll quickly respawn, so if you haven't unlocked Con, you should do so in the Harman's Room off the main road and use him to avoid the explosions from these guys.
After examing the Bulletin Board and Poster for clues about the Ulmeyda collection, head into the Diner up the road. Inside here, you can find a Toy Dispenser. Remember our advice about killing the Ulmeyda Smiles? Well, for each one you killed you'll be able to use this machine once. It dispenses ten of the Ulmeyda Collection bottlecaps, all except number 12 (which you already have) and number 7 (which you'll obtain shortly). You'll need to keep using the machine until you get all ten of the possible bottlecaps from the machine, since you need them all. You can get duplicate caps, though, so if you run out of tokens, return to the Suburb via the locked door behind the Diner and kill a few more Smiles.
Anyway, with most of the collection in tow, return to the street and head north past the Railroad. Enter the Drugstore on the right side of the road; in order to do so, you have to walk past the entrance until you hear the guitar twang indicating that there's a puzzle, then enter your pause menu and select the photograph of Ulmeyda from the inventory. If you do this while you're standing in the correct spot, the doors will open and let you in. After your conversation with the shopkeeper, the door to the warehouse nearby will open, allowing you to enter and grab the 7th Figurine in the collection, which should also be your last.
Mountain Pass / First Life
Another pair of interesting Smiles guard the building at the end of the street. You'll remember these guys from the end of the last level; just shoot their wings until they rotate, then pop them in the vulnerable spot on their back to finish them off. If you have all 12 of the Figurines, then you can unlock the Post Office and head on inside. Through there you'll find the Mountain Pass, which will lead you to the First Life corporate offices. Along the path, there'll be a Harman's Room for you to transfuse your blood in, as well as a bunch of posters outlining Ulmeyda's corporate philosophies. These are the key to the puzzle at the First Life Gate, if you care to note down the various characteristics of them, but if not, here are the answers to the puzzle, in order:
- Three people.
- Four continents.
- Purple.
- Texas Bronco.
- A Perfect City.
- Six.
- Suit.
Answering all of these questions in order will get you into the building. Enter the Guard's Room and pass through to the large courtyard in front of the office tower. There are three Smiles to kill here, each of which will respawn once after dying, so be careful when moving forward. Save your game before moving into the tower, which turns out to be a...
Desert
Enter the Control Room to meet up with Ulmeyda. And after a long and bizarre cutscene, you'll be involved in another boss fight. Ulmeyda himself isn't terrifically difficult to beat; he only takes one shot, actually. In order to meet up with him, start chugging your way through the ambulances; they're all linked up on the inside, so you'll have a dense little network of pathways to follow. Be sure to switch over to Con, though, as you'll need his quick feet here.
Eventually, you'll run into Ulmeyda, who's now definitely the worse for wear after the treatment the government gave him. He moves exceedingly slowly, which is good for you, but can only be hurt by hitting him from behind; you'll need to aim for the little brain that he drags along behind him like a dog on a leash. (This game has something of a brain-destruction fetish.)
Anyway, the only way to hit this brain is to lure Ulmeyda into one of the ambulance hallways, then run around the corridors until you're behind him and pop him in the brain. He apparently has a ranged attack, so if you run into him head-on, quickly back around a corner and try again.
Target Three: Encounter
After switching over to Harman again on the TV in Garcian's place, you'll learn that you now have to take on another assassin, Curtis Blackburn, who's apparently kidnapping children at the Ishizaka Fairgrounds. Can't have that, now can we?
Main Entrance / Light Canopy St.
There's not much to see at the Main Entrance, save for some conversations and a Harman's Room. Head through to Light Canopy St. to meet up with your first Protector Smile. These heavily-armored foes are going to be invulnerable to much of your fire...save that of Mask. Use his grenade launchers to bust them up in a single shot; these will always register as criticals, so you don't have to worry about breaking a lengthy critical streak by using him.
In the Passage beyond this little gauntlet, you'll come across a door that locks shut as you approach it. Although it has cracks indicating that it can be blown open by Mask, he won't be able to do so yet; you'll need to upgrade him a bit before you can do so. Instead, head up the long hallway nearby to reach the ISZK String Quartet.
Small Theater
As soon as you enter the theater space, you'll be facing off with a Broken Smile, a jetpack-wielding foe that will zigzag its way towards you and detonate when it reaches you. It's difficult to avoid taking damage here, unless you can pound it with a shot from Mask. Con may be able to shoot it the old-fashioned way before it reaches you, if you've upgraded his power a bit. Regardless, you'll need to take it and the other Smiles in the area out before you can move around freely here, so start flipping characters and eliminating the opposition.
Now, when the road's relatively clear, you'll be able to access the four cinema areas along the street here. You'll probably want to enter each of them eventually, but for now, you should probably start with Cinema 4, which is the closest to the door you entered through, and houses a treasure chest behind a theater screen. Opening it will reveal a new costum for Mask which will increase his attack power and greatly reduce his reload time. (This will also let you blow past the door that blocked you earlier, but for now, stay in this area.) After that, you might want to head to Cinema 2, which has a Harman's Room that'll let you unlock another character, such as Dan or Kaede, if you need someone for general combat. You just have to be very careful, as there's a triple-Duplicator in there that'll spit out three eggs at a time. It's probably best to use Coyote's charged shot to quickly take out the weak spots on the Duplicator, then worry about the eggs. You may take some damage, but it's better than sitting around shooting at eggs until you get a chance at the Duplicator itself.
With that out of the way, head back to the road and enter Cinema 1, the one farthest to the east on your map. The padlocked chest here can only be opened by Coyote, obviously, so pop it open and grab the Time Ring from the head inside. Two Protect Smiles will appear behind you when you get it, so take them out with Mask, but switch to someone else before heading down to the theater floor, as a couple of normal Smiles will appear, and you won't be able to get criticals on them with the grenade launchers.
Now that you have the Time Ring, return to the main road and follow it east until you come to a clock and a ruined vanity. With the Time Ring equipped, you can reverse the damage to the vanity and obtain the Odd Engraving from it. With that, return to the west, near the door where you first entered the area, but instead of going through there, head south to the Main Breaker and turn it on. When it's on, run to the balloons that fell down and use the Wind Ring to obtain the first Soul Shell from them. That's all you need to do here, so return to the passage you entered from and use Mask to blow open the shutters blocking your path to the Adventure Plaza.
Adventure Plaza
Your first foe here will be a Protector Z Smile, a more heavily-armored variant of the Protector. Mask is still your best bet here, but even he will need to charge up his shot with at least one vial of blood to kill these guys off. There are also a couple of mobile Duplicators here, so you'll probably want to deal with them with Kaede or another quick-shooting character.
When you've cleared the screen, head up to the Freaky Fun House on your left. You'll probably need to use Mask to get inside.
Mystery House
At the end of the long hallway here, switch to Con, who can duck underneath the Children's Entrance in a needlessly flashy manner. When that's done, head into the Loop da Loop. This hallway loops back in on itself, as the name implies, meaning that you can run forward forever if you choose, but there is a crack in a wall that Mask can bust through, which leads to Squeaker's Attack. This annoying room doesn't appear all that challenging, but when you attempt to leave, the large wheel of cheese in the middle will start rotating. You won't be able to proceed until you shoot out all of the mice in each of the small holes here, so flip over to Kaede and use her zoom scope to go to work. It's easier to lock onto a hole and wait for the mouse to appear there, rather than attempting to zoom in on a hole when you see a mouse pop up; the scope moves a bit too slowly for the latter method.
Switch over to Kevin before entering the Burning Hot Hell, as there are more of the annoying jetpack Smiles in there. You'll need to use the Water Ring on the Burning Bridge to douse the flames there before you can cross. After you do so, the jetpack Smiles will spawn in; you may want to stay off the bridge while Kevin's invisible and wait for them to blow up, as there's a conversation in the middle of the bridge that will usually switch off the invisibility long enough for Kevin to get hit.
Around the corner from the bridge, you'll need to use Kaede to shoot the ceramic plates that adorn each of the demonic gorilla targets. After all six of them are destroyed, head into the Spinny-Spinny. The Ceramic Smile here is going to be annoying to kill, as he can only be destroyed by landing a shot on the small heart symbol on his chest; he won't take damage anywhere else. Luckily, you only need to land one shot to finish him off. If he happens to spot you aiming at him, though, he'll turn back and start running the opposite direction in an attempt to hit you from behind. This cycle is going to repeat a dozen times or so before you get lucky and hit him in the heart, but if you just keep your weapon up in front of you, then you should be able to keep him away from your position, at least. If he does happen to overrun you, it'll be an instant death. Kaede is probably the best character to do this with, but anyone with decent accuracy will work.
When you've killed the Ceramic Smile, grab the Demon Gun and the Soul Shell from the Fallen Angel that appears. The Demon Gun is an upgraded weapon for Dan with more firepower and with the ability to lock on to opponent's heads. With that in hand, save your game, then head over to the Killer Mansion to retrieve the last Soul Shell.
Killer Ted Mansion
The Killer Ted Mansion is a set of circular hallways set inside of each other, with multiple doors leading inward. If you pick the wrong door, you'll wind up right back where you entered the building. In order to pass through the first ring, you need to head around and look at the pictures above the doorways. When you find one showing a Smile looking forward at you, both with the face and the body, head through and you'll reach the second ring. You'll need to find the door with the Smile facing you in each of the two subsequent rings (it'll usually be the second door you reach when heading in any direction) before you reach the center of the mansion.
Now, if you don't want to have to do all that over again, use Coyote to jump up to the small room above the hallway in the center of the mansion before you move forward towards the throne there. Talking to Travis up there will net you another Soul Shell, so grab it, then return to the road, where you'll automatically turn into Garcian for some reason when you hit the throne at the end. You'll need to enter the Harman's Room when you leave the area to flip back into a character that's actually capable of killing things. When that's done, return to Adventure Plaza, quickly cross to the Harman's Room here before the eggs start rolling out, save your game, and then hit up the Gatekeeper nearby.
Vinculum Gate
You should know the drill by now: trip through the Colosseum, ominous warnings from a ghost, a new Smile to deal with, and a boss fight. The new Smile here is a Mithril Smile, and is heavily plated with armor. You need to hit this guy in the critical spot in order to get past him, which is usually on one of his elbows. If you have a character with Critical Lockon, then your job is pretty easy; if not, use Kaede, zoom in one the guy's arms, and start firing away.
Parking
In the parking lot, you'll meet Ayame Blackburn, a freakish-looking little girl that wields a submachine gun and moves exceedingly fast. This is a pretty wide-open fight, as you're going to be taking her on in the middle of a parking lot while she runs about and attempts to strafe you from long range. The only way you're really ever going to hit her is by using Mask's grenade launcher; you can't lock onto her, so normal gun-users will require a large amount of luck in order to make contact, unless you perhaps use Con and just fire away at a point along her path. But Mask is far easier to use, since you can make contact with her just by exploding the shells at her feet; be sure to aim a bit in front of her. Also, be sure to keep the Stamina Ring equipped and use Recovery when you happen to run low on life, as her bullets do a good bit of damage.
After Ayane fades into the darkness, it'll be back to Garcian's home to start the second part of this mission.
Encounter - Part 2
Well, after the game takes a decided turn for the disturbing, it's time to find and kill Curtis Blackburn, who's apparently holed up back at his home.
Entrance
There's not a whole lot to see at the entrance, save for a pair of the exploding-head Smiles on the road. Dan's Demon Gun can lock onto their heads, allowing him to easily take them out with critical hits from a good distance away. After saving your game, head around the corner and into the Garden.
Courtyard
The first thing you want to do here is take a right at the junction, move around to the Water Tank, and use the Fire Ring on it to obtain the Odd Engraving. Then, you can use Kevin to get through the laser grid nearby and enter the Garage.
Inside the garage, you can shoot the wires across from the door to disable the security lasers, allowing you to pass back to the Garden without having to use another invisibility charge. Elsewhere, you'll find a control panel and a picture, indicating that the cars here have to be moved so that the gap is directly in front of the garage door. This means that you have to move the cars so that the middle right spot on the nine-square map on the control panel is clear. Doing so will bring in a new car with Susie's head in it; talk to her to obtain the Power Ring, which will increase the power of your attacks while you wear it.
With that done, you can wheel around to the northwestern corner of the garden, where a Statue lies in wait. It holds a Soul Shell, but doesn't seem eager to give it up; if you charge up Dan's weapon with a few vials of blood, however, and shoot it in the chest, it can be persuaded to part with its prize.
Before you move on to the house, you may just want to hang around this area and kill a bunch of Bombheads before returning to Harman's Room and turning in your blood. The Bombheads are worth a good amount of thick blood per kill, and with Dan's Demon Gun, you can lock on to their heads with ease. It only takes a couple of minutes to fill up on blood, so you may want to just go ahead and do so before turning it all in and saving your game. With that done, head back to the garden and enter the house.
Main Residence
There are going to be more Mithril Smiles wandering the halls, so if you have anyone with Critical Lockon, now would be a good time to switch to them. To begin with, head right and wrap around to the east until you reach a Fireplace. Obviously enough, the Water Ring will be what you need to douse the flames here, so use it and take the Soul Shell in the Chimney. If you happen to have unlocked Coyote by this point, then feel free to jump up to the top of the chimney to speak to Travis. He doesn't give you anything, so feel free to skip this if you're not interested in the game's backstory, such as it is.
With that done, return to the ground floor and use Mask to bust through the cracked wall nearby, then head outside via the passage there.
Courtyard Passage
The new enemy here is a Protector ZZ Smile. It's guarded by a pair of its lesser brethren, so after you get past the laser fence with Kevin, you'll need to switch over to Mask and let him start knocking heads. The first Protector can be killed with normal grenades, while the Z protector will take a one-vial charged shot. The ZZ Protector, predictably enough, will need a full two-vial charged shot to do away with. With those guys dealt with, head up to the Backhouse to find the next Soul Shell.
Backhouse
If you need to turn in blood or save your game, head straight from where you start to find a Harman's Room. Beyond that, there are a few things to do here.
First off, head down the western corridor and duck into the first bedroom on the right; there's a Security System switch here. That will open up the Large Hall in the northern end of the house, but don't go there just yet. Shut it off, then move into the far western bedroom and use Con to duck under the Children's Entrance there and pick up the Odd Engraving.
To the east, you'll find a "clock whose life has run out." Use the Time Ring on it to make it eject a Soul Shell. Elsewhere in the same room, you'll find a Garbage Chute. Don't go in it just yet, though, as it'll take you all the way back to the first house.
With both of those rooms explored, head up to the Large Hall for another encounter with Ayame Blackburn. She's somewhat similar to the version you encountered in Part One of this mission, but she can take a lot more damage. She'll move back and forth in front of the shutters here, and you'll be able to tell where she's moving by tracking which shutters open and which close, as she only fires at you when a shutter is open.
Be sure to have the Stamina Ring on during all of this, as it'll let you take a bit more damage than you normally would. You can use Mask if you wish, but you'll find that you need to be more precise than you were in the parking lot encounter, so you may want to use Dan. Shooting Ayame twice before she fires will cancel her firing action and force her to move.
As the fight progresses, Ayane will start using some new actions. If all the shutters open at once, for instance, then she'll do a little side-to-side strafing run which will make her almost impossible to hit. After a few rounds of this, eventually all the shutters will close and she'll just start to unload on you; one good shot at this point should finish her off and allow you to use the Security switch here to turn on the lights at the Pool.
Now, after Ayame's done for, it's time to head to the pool. The quickest way to get there is to just return to the eastern bedroom and use Con in the Garbage Chute there, which will take you right back to the door near the pool. When you reach the pool area, you'll be able to use the lights to reach the pool valve, which will open thanks to your pair of Odd Engravings. After draining the pool, head down into the bottom of it and blast the wall with Mask to reach a Harman's Room, save your game, then head into the Basement elsewhere in the pool to reach the Gatekeeper.
Vinculum Gate
Switch over to Kaede before heading into the Vinculum Gate area, as the Laser Smile there will be best handled by her. As per the ghost's warning, it doesn't move, but if you dilly dally too long, it'll shoot you with a laser, so you'll want to take it out fast. You need to shoot it directly in the face, so go ahead and zoom in and pop it on; if you have Critical Lockon, you should be able to lock on with that. Dan's Demon Gun may offer the same ability, especially if you move forward a bit.
In order to enter Curtis' room, you need to use Dan, and Dan is indeed the only character you can use during the final duel. And a duel is what it is - you and Dan will just stand there, facing each other, until one of you manages to get four rounds into the other.
The trick here is that Curtis will always beat you to the trigger if you don't wait until precisely the right time to shoot him. Said time occurs when the bird on his shoulder flies away. The bird has a habit of trying to trick you into firing first by hopping up and down, though, but it's not too difficult to tell when it's hopping and when it's preparing to fly. The hopping occurs quite suddenly, without much warning, while the flight animation will be preceded by a bit of warbling and some bobbing of the bird's neck. If you attempt to fire when the bird hops, then you'll be shot; if you wait until it flies away, though, you should be able to easily land a round on Curtis before he manages to get his guns up. Repeat that process four times and you'll win the match. Good on you.
Target Four: Alter Ego
There's no conversation with Harman at the beginning of this mission; instead, your clues come via the TV itself. Now that the tables have been turned, and it's Killer7 that's the target of the assassination attempts, you have no choice but to head to the Dominican Republic and kill a comic book writer, Trevor PearlHarbor.
Town
Oh dear; it's a musical interlude. Immediately after you regain control of Dan, speak to Iwazaru to pick up the Color Samples, which you'll need later on. After you get the first samples, head to the left towards the Harman's Room; a set of kegs blocks your way to another Iwazaru conversation. If you can break them with Mask, you'll obtain more Samples from Iwazaru. Only one of the two exits from this area will be passable at this point, so head on into the Wandering Streets.
Wandering Streets
After encountering Iwazaru again, grab another set of samples from him and move on. Now, this is another of those corridors that'll flip back in on itself if you don't happen to follow the right path. Unfortunately, only Con is capable of actually finding the path, so you'll need to switch to him. When you come to the correct alley to hit, he'll spot a little yellow ripple in space-time, or whatever, so turn into those alleys. Just be sure to always continue towards the north when turning out of an alley, or you'll wind up back where you started.
Church Front
Your new enemy here are the Rolling Smiles. These guys do have critical spots, so if you have Critical Lockon on any of your characters, you may want to try and use them to kill them before they roll up on you, but they're tough to hit since they move so rapidly. Con can sometimes off them just by firing as rapidly as possible at them as they approach, although these won't be critical kills. If they get close, you'll probably want to try and counter them. If you have the Stamina ring, then they won't do a huge amount of damage when they do impact you, so they're more of an annoyance than anything.
After moving around to the east, find the first alleyway leading north and use Kaede's blood power to destroy the barrier there. (If you haven't unlocked her yet, there's a Harman's Room nearby where you can do so.) Inside you can have a little chat with Travis, which is perfectly optional if you want to skip this little alleyway.
The little lamp puzzle can't be solved yet, so grab the next Color Samples from Iwazaru and head into the alley to the east. Take the first left in your path to meet up with Iwazaru again and obtain another set of Samples. In addition to the samples, there are two spots where you can use Coyote. One is in one of the small alleyways near where they form a square; if you jump up here, you'll learn from Travis that you need to light the lamp that you passed by earlier to reach PearlHarbor's house. The second spot is near the locked door that leads back to the Town map.
When you've explored the area thoroughly, find the entrance to the Church and head inside.
Church
After entering the church, flip over to someone with Critical Lockon, if you happen to have anyone, and start taking out the Smiles that drop down in front of you when you move forward. Watch out for a Micro Smile that appears after the first wave of enemies, as it'll be a bit above your normal view and can't be locked onto. When everyone's dead, speak to Iwazaru for the fifth Color Samples. You can save your game at the Harman's Room nearby, but your ultimate destination lies in the corridor to the east.
When you reach the corridor, take a left and head north; you'll pass through a door to reach the upper level of the church, where another Iwazaru awaits with more Color Samples. With that in hand, return to the corridor that surrounds the corridor until you reach an unlit lamp. Light it with the Fire Ring to reveal a hidden corridor. Head down it to reach the...
Sanctuary
When you enter the sanctuary, you're going to be greeted by one hell of a big Duplicator. On normal difficulty, this thing is going to have three yellow weak points and one red one; the red one will be most easily killable with Dan's Collateral Shot, so be sure to fully charge him up with vials before attempting to take it out. The yellow spots can be eliminated with normal gunfire; if you have Con upgraded to the point where he has Critical Lockon, then feel free to use him to take these out, as he'll also be able to easily dispose of the many smaller smiles that the Duplicator dispenses, thanks to his quick-firing and quick-reloading capabilities.
Head south into the southern corridor. You can speak to Travis if you wish, or turn in blood at the Harman's Room, but your goal is to reach the Grand Staircase, mount it, and head through into the Alley there, which will spit you out into the Entrance area.
Entrance
Not much to see here save for a Harman's Room. There is a path leading north, but avoid it for the moment. When you've saved your game, head to the west and enter the Artist's Studio through the westmost door.
Artist's Studio
After using Mask to bust through the cracked wall here, speak to Iwazaru to obtain another set of Color Samples, your seventh and penultimate set. With that in hand, return to the Entrance and head through the path leading to the north.
When you reach the branch in the path, head right and examine the Object when you reach it. The Time Ring can reverse the destruction here and net you an Odd Engraving, which you will of course be needing in the future. Head north to the windmill area and grab the final Color Samples from Iwazaru, then wrap around to the west to find the Entrance to Trevor's Home.
Foyer

Ah, we're finally closing in on our prey. After saving your game at the Harman's Room, head around to examine the gate to PearlHarbor's house; it's protected by a special lock which you can't bypass just yet. Move on to the alley to the southeast, kill the rolling Smiles on the balcony, then use the Wind Ring on the Windmills. Thanks to alternative energy sources, you're now cleared to enter the gate that was previously closed to you. On your way back to the gate, be sure to flip back over to the Stamina Ring, and you might want to use Mask as well, because two Rolling Smiles will be coming at you, and it's difficult to shoot them when you're standing on top of a flight of stairs. If you get hit by both of them, you might still get finished off if you're a weak character like Con or Kaede, so it's worth flipping to a beefier character for now.
With the gate opened, you'll have to head towards it and open the security panel next to the front door of the villa. If you've collected all eight of the Color Samples, then the puzzle will complete itself automatically; if not, you'll have to backtrack and seek out Iwazaru for the rest of the samples. You can light the lamps down the alley near the door if you want to warp around to various parts of the stage.
When you have all the samples ready to go, unlock the door and head inside. The cutscene there will quickly reveal the fate of Mr. PearlHarbor, and warp you back to Garcian's home to prepare for the final battle.
Broadway
We like Handsome Light Brown the best.

Anyway, this is one of the easiest boss fights in the game, mostly because you literally can't lose. You're going to be paired off with the Handsome Men in a series of duels, in which all you have to do is fire away at the opposing force until one of you keels over dead. The Handsome Men will directly mirror your actions, and you can't move, so there's no way to prevent getting hit or prevent them from firing. Some of your troopers (Kaede, Kevin, and Con) will always lose, so don't get frustrated; the rest of your team will always win. The one exception to this is Mask, who will initially lose, then resuscitate himself and use a five-vial charged shot to defeat Handsome Purple.
When you reach the final bout, which features Garcian against Handsome Pink, the level will end.
Target Five: Smile
After discovering Samatha at the beginning of the level, walk down the hallway into the Forbidden Room of Garcian's Trailerhouse. Finally time to see what's inside...with that done, head outside to the Overpass to get your next mission. You'll find that that plan is soon to be disrupted, however, leaving you without a master and without a government contact to fall back on. There's nothing to do but head to Philadelphia and attempt to take out Matsuoka Kenjiro.
Hotel Union - First Floor
Not much to do here initially, save run to the Lounge and enter the Harman's Room there to flip from Garcian to a combat-oriented character. There are enemies in this room, so don't explore with Garcian or you'll be in trouble. When you flip over to your main characters, use Kaede in the Reception area to find a Soul Shell, then move on up to the second floor via the elevator.
Second Floor
Right out of the gate, you'll need to take a left and deal with a massive Duplicator in the hallway. This one has four or five weakspots on it, and drops a couple of eggs at a time, so you may want to use Con to deal with the yellow spots and the eggs, then switch to Dan for the killing blow to the red spot.
With that done, head into Room 203, beyond the Duplicator, to retrieve the Soul Shell. There's no trick to finding it; it's lying about on the windowsill here.
Third Floor
Room 306 hosts the Soul Shell on this floor. In the bathroom, shoot the power cord leading to the hair dryer in the bathtub, then grab the Shell from the water.
Fourth Floor
Beware of the jetpack Smile here, or it'll pop you but good. Room 404 is where the Soul Shell is on this level. You'll need to bust through a cabinet with Mask to retrieve it. Elsewhere on the level, you can commune with Iwazaru and Handsome Black to learn a bit about a crime that Killer 7 supposedly committed here at some point in the past, which left six people dead.
Fifth Floor
Room 502 is where you want to be here. There are a few armor-plated enemies roaming the halls, so you may want to switch over to Mask to deal with them, or just use an invisibility charge with Kevin to reach 502. When you do, however, you'll be treated to an interesting conversation with Mills, your government handler who was sniped out of the car on the freeway at the beginning of this mission.
Anyway, use the Fire Ring to light the Candles in this room, and the Soul Shell will appear next to them.
Sixth Floor
You can finally save your game here, so you may want to go ahead and do so before moving on to the location of the Soul Shell, which is in room 601. You'll need to use Coyote to pick the padlock on the door, obviously. Talk to Travis inside to trigger the appearance of the Shell, grab it, then head up one more floor.
Seventh Floor
Note the appearance of the Micro Smile just beyond Iwazaru as you exit the elevator; be sure to shoot it before moving out. The Soul Shell here is hidden underneath the flowers; use your Wind Ring to blow them away before grabbing it. With that in hand, head into the Suite to meet up with the Gatekeeper. (The Roof button on the elevator is currently unselectable.)
Vinculum Gate
The Timer Smile here is pretty dang annoying. He's covered in boils, and you'll need to shoot each of them to kill it. You can use Kaede to snipe out most of the spots from long distance, but when all but one of the boils are popped, the Smile will start running towards you and moving its limbs in a manner that makes it hard to hit the last remaining boil. You'll want to flip over to Con or Kevin here to get the last boil, or you'll wind up taking some good damage from the Smile impact.
After you get past the Timer, you'll automatically flip over to Garcian and hit an abrupt end to Part 1 of this mission.
Smile: Part Two
Well, Harman's back in his little room here, so something must be going right. Your new and interestingly-clothed contact won't really give you a mission, but you'll jet off anyway, apparently headed to the Coburn Elementary School to "Contact the National Hub." Sounds like a plan.
School Entrance
Beside the conversation with Iwazaru here, there's not much to see save for Harman's Room and a Cassette that rests atop the water fountain on top of the steps. With that in hand, head into the Data Room for a difficult puzzle. It involves examining the posters in the hallway near the water fountain and the drawings inside the Data Room itself, and using them to formulate numbers that you input into the Control Panel here. If you want to give it a shot, feel free, as it's a bit more complex than most puzzles and will likely be pretty satisfying to figure it out on your own.
If you need a hint, then here's one: each of the characters on the posters is composed of multiple, smaller creatures, like Voltron. Each of the drawings in the Data Room will list the number of bits for each character. When you match up the visual elements of a poster with a drawing in the room, you'll know how many pieces the poster character is made up of, and you can input the total transformations for each character into the Control Panel. This can be difficult to do because you'll have to run back and forth between the hallways a few times to match up everything.
If you just want to skip everything, though, enter 3576 into the control panel and speak with Travis, who'll give you the Cassette Player and tell you that he's moving to one of the student's rooms. Now that you have that, return to the first floor and make your way through the other door there to reach the classrooms. If you listen to the tape, you'll get a clue: the number 55549 is the number of delinquent students in the school (big school!), as well as the number to a safe somewhere. Hmm...
First Floor
To begin with here, use Kaede to enter the Lady's Room on your left and retrieve the final Carrier Pigeon by flushing the toilet within; you'll finally learn the identity of the mysterious letter writer with this, the final memo. You'll also get the first code to the Principal's Office, 55549 (again), as well as another Tape, number Five. Listening to this one, you'll get another code: 11221942, the birthdate of one Emir, who appears to have been the target of the tape-maker's investigation, and also the person who paid the memo-writer to investigate the Killer 7. Curious.
After leaving the bathroom, wrap around the corridor and enter the first classroom you encounter to find Cassette Six. Playing it will reveal more info: Emir's from Alabama, and his parent's blood types are A for the father, and O for the mother.
After heading west through the doorways, you'll be in another set of corridors with more classrooms scattered around. You'll notice that there are a couple of jetpack Smiles in these corridors, so you may want to use Kevin to avoid them. If you've upgraded Con, he can shoot them down if you just spray-and-pray.
The first classroom here is L3A, immediately next to the doors through which you entered this area. It holds Cassette Two, which has another code for you: 72712, "the number of criminals in this school." Okaaaayyyy. If you head to the northwesternmost classroom, L3C, you can find Cassette Three, which gives you the full name of Emir: Emir Parkreiner, who was apparently sent to this school by the government. You can also examine the graffiti on the chalkboard to receive another code: Locker 666 [L3G]. The classroom across the hall from this (L3D) contains Cassette Four, which gives you a student ID number: 00480158.
Move around to the southeast to find classroom L3F, which holds Cassette Eight. 04281952 was the date of death for the "real" Emir Parkreiner, apparently. Around the corner is L3A, which holds Cassette Seven, which reveals the names of Emir's parents: Michael and Katharine.
Now that you have all the tapes from the classrooms, it's time to find the hidden ones. If you remember the graffiti pointing out locker 666, then track it down (it's in the southernmost corridor, near the locked door), and shoot it open to retrieve a Soul Shell and Cassette Nine. When you have that, find locker 656 and shoot it to speak to Travis. He tells you to repeatedly shoot Emir's locker. If you do so, you'll notice that more doors pop open along the hall. Keep shooting these until you unlock a locker that has the Iron Mask inside of it. If you pick this up while playing as Mask, you'll receive his ultimate upgrade.
With the Iron Mask in hand, keep shooting the open lockers until you close all of the doors. Doing so will unlock the nearby door and let you access the Second Floor.
Second Floor
You can speak to Travis down here if you wish, but the only real path leads up to the Cafeteria, where a humongous Duplicator awaits. You'll need Dan to blast out both of the red spots on its stalks as well as the numerous yellow spots before it finally implodes, so we hope you brought a few vials of blood for his Collateral Shots. When you're through, save your game in the Harman's Room nearby and head into the Library to meet up with the Gatekeeper. He'll take your Soul Shells and let you pass on to the Vinculum Gate.
Vinculum Gate
Your unique Smile here is the Galactic Tomahawk Smile. According to the ghost that precedes it, it can be killed by shooting it in the face, but if you don't shoot it immediately after you enter the room, it'll start firing off numerous rockets at you until your vision is overwhelmed by explosions and you die. It's easiest to just enter the room with Mask and use a five-vial charged shot to take the Smile out instantly. Just be sure you actually hit the damn thing, or you'll have to waste more blood to try again.
After beating the Tomahawk Smile, you'll retrieve Cassette Ten, which gives you another code: Eagle. After picking it up, you'll return to the Second Floor, but the new path here will lead you up to the Principal's Office. Said Principal, Benjamin Keane, is keenly interested in playing a game of Russian Roulette, and Garcian's only too happy to oblige. It ends...oddly. (Would you expect anything else from this game by now?)
After the duel is over, enter the Chairman's Room nearby and head up to the Operation Panel. Enter the codes 55549 and 72712, in that order, to open the door. Garcian's fingerprints will open the door leading to the Safe. All you apparently need to do to open the safe here is to twist the handle by first pressing your stick to the left until you hear the guitar strum indicating that you've solved a puzzle, and then pressing it to the right until you get the "Ok?" prompt. Clicking OK at that point will net you an Odd Engraving. (This puzzle may be more difficult on the hardest difficulty setting.)
Return to the Principal's Office and shoot the shining trophy on the trophycase to open an emergency staircase leading back down to the street outside the school. You won't be able to enter the Gymnasium just yet, so return to the school's Entrance and head back to the Data Room. You'll finally be able to access the Terminal there, thanks to the Odd Engraving, and Garcian's Vision Ring will enable you to turn the Terminal on. It'll ask you to identify yourself as Emir by answering some biographical questions, the answers to which were given in the many Cassette Tapes that you've been tracking down. You're going to have to type them all out, unfortunately.
- Parkreiner.
- 00480158.
- Alabama.
- 11221942
- B. (You have to infer this from the fact that it's not the blood type of either of his parents, who have O and A type blood.)
- Michael.
- Katharine.
- Eagle.
Entering all of these codes will unlock the doors to the Gymnasium. Head inside, and the truth will set you free! I...guess.
After you meet up with the Chairman, press the switch by the side of the platform to open the curtains, then sit through another short cutscene. Your epic battle with the Chairman will commence. To begin, start shooting him on either side of his body to cause him to swing. Someone like Con is probably best for this, since you need to shoot him rather rapidly. When you swing him hard enough, his pants will fly off, revealing a red weak spot on his crotch; shoot this, either with Dan's Collateral Shot or normal weapon fire, until it blows off. At this point, seven Black Smiles will appear, which are completely indestructible. You won't have any recourse but to let them kill off your six core combat characters; when Mask dies, however, you'll flip over to Garcian, who's the only one of the bunch that can wield the Golden Gun that was dropped. Pick it up, shoot the last Black Smile before it kills you, then pop the Chairman in the gut to finish him off. With that done, exit the Gymnasium. Aren't you glad you got all your questions answered?
The mission's not quite over yet, though. After you return to Garcian's Trailerhouse, exit the building, and you'll return to the Hotel Union.
All of your alter-egos are a thing of the past at this point, so it's up to Garcian to see this thing through to the end. After checking in at the Harman's Room, return to the lobby and examine the Bloodstain in the Reception area to get a little flashback of some of your past handiwork. After doing so, the elevator will pop up.
Most of this mission is essentially a run-and-watch operation. You'll enter each floor, find a bloodstain, watch the cutscene, and then return to the elevator to repeat the steps. Mills will be around for you to speak to on the fifth and seventh floors. You'll want to save your game before you enter the Suite on the seventh floor. When your time there is done, head back to the elevator and enter the Forbidden Room on the next floor, then head up the stairs to the Roof. All that remains is to take your Golden Gun and kill off the game's final target, after which the credits start to roll.
Target Six: Lion
Note, however, that there is a semi-hidden extra level at the very very end of the game. After the credits roll, you'll notice that there's a sixth target listed to the right of the other six levels on the level select screen, codenamed Lion. You'll be forced to use Garcian in this brief mission, and you may have a hard time seeing your foes, but if you look carefully you should be able to make them out. Note also that you have a choice as to whether or not you kill your target at the end of this mission; the ending will differ based on your choice.
Unlockables
Now, if you wish, you can play through the game again to pick up on the clues and story implications that you might've missed or misunderstood the first time through. In addition, you will have unlocked a couple of new modes for play. The first is the ultra-hard Killer 8 mode, which eliminates hints on the map almost entirely and makes most enemies even harder to kill than in Deadly mode. You're also limited in the number of vials of blood you're able to carry, making it harder to use Collateral Shots and heal yourself. When you play in Killer 8 mode, you'll also be able to use a young Harman Smith character by switching to channel 9 on your TV.
If you happen to play through and beat the game on Killer 8 mode, then you'll unlock a Hopper 7 mode, which is apparently something of an Easter egg, as all of the enemies in the Target 0 level are replaced with grasshoppers. (Because the game was co-developed by Grasshopper Manufacture, get it?) This is a pretty short level, since there's only one level in the mode, but it's entertaining nonetheless.
Got a news tip or want to contact us directly? Email news@gamespot.com
Join the conversation