Jade Empire Walkthrough
Jade Empire puts you in the shoes of a humble student of martial arts in a small academy on the fringes of the massive area ruled over by Emperor Sun Hai. When disaster and strife falls upon your tiny village one day, you'll have to embark on a quest to discover the source of the corruption that's rotting the Empire from the inside out. In this Walkthrough, we'll give you a complete walkthrough for Jade Empire, as well as tips on combat, using your followers, and the many styles of martial arts available to
Design by Marty Smith
Not much needs to be said about BioWare's RPG pedigree: over the years, they've managed to create a trio of incredibly fun franchises. With Baldur's Gate, Neverwinter Nights, and Knights of the Old Republic under their belts, though, they've spent the last few years working on a new project: Jade Empire. This kung-fu themed action RPG marks the first time that BioWare has created both an entirely new setting and a new ruleset for one of their games.
In it, players take on the role of a student at a martial arts academy who's quickly swept away from their humble beginnings as turmoil overtakes the eponymous Jade Empire, ruled over by the rarely-seen Emperor Sun Hai. As his elite Lotus Assassins, led by the fearsome Death's Hand, scourge the countryside in an attempt to find you, you'll have to piece together precisely why you're so important. Along the way, you'll collect numerous followers who'll help you out in combat (and perhaps become amorously involved with you), and, in classic BioWare fashion, you'll need to decide whether or not you wish to help the many innocent bystanders that you come across, or crush them beneath your iron boot.
GameSpot's Game Guide to Jade Empire is going to give you everything you need to get through your lengthy adventure in one piece. From tips on using your Followers, combat tactics, descriptions and locations of the many martial arts styles in the game, and, of course, a walkthrough complete with detailed tips on all main and side quests, hopefully you'll find everything you need in the following pages. Enjoy!
Followers
You'll have the ability to pick up as many as 12 followers in Jade Empire, ranging the gamut from drunken axemen to diminutive bunmakers. You can bring most of them into battle with you, where you can take advantage of their combat acumen or their unique support abilities to help you win the day. You can select a new follower at any time (outside of combat) by opening your start menu, then hitting A while hovering over the follower you want in the Follower screen. You can change their tactics from Attack to Support, or vice-versa, by hitting X and selecting your choice; this can be done in combat.
Unfortunately for you, followers are pretty much a non-factor in most combats. If you're playing on Master or Grand Master difficulty, a typical fight will go something like this: 8 or 12 enemies will attack you, with the bulk coming at your character, while your follower will distract a pair of them off in a corner. After you kill off all of the enemies that attacked your own character, you'll head over to your follower to find that he or she is almost dead, and has managed to take off around a quarter or a third of the life bar of a single attacker, forcing you to run over and bail him or her out of their troubles before they bite the dust. What's worse is that you can't command them at all in battle, and in fact they'll actively try to avoid targeting the same enemy as you. If they're fighting against enemy A, then, and you're fighting against enemy B, then switching your target from B to A will force your follower to switch from A to B. Only when you have a single valid target will your follower allow you to truly join forces with them and pound your foes into the dust; even then you can expect to have to deal the bulk of the damage yourself, as none of your followers will ever do more than about 10-20% of the damage your own character can dish out, especially after you upgrade your skills.
This distressingly frequent experience can be eliminated, however, by keeping your followers in support mode all of the time. In support mode, they'll passively channel their strength into your body, allowing you to restore your energy or deal more damage with your attacks, and what's more, while they remain in passive mode, they can't be hurt or attacked by enemies. We personally just kept everyone in support mode constantly, but if you're having trouble in fights, then feel free to keep them in attack mode when you're running around and, during longer fights, enter the menu to switch them into support when you need their support abilities or when they're about to die. A dead follower will come back to life with all their health after a fight, but if they're going to be useless to you during the fight anyway, you may as well switch them over to support mode and at least take advantage of their abilities that way.
If you really enjoy having your followers in battle with you, then you're going to want to keep them alive as often as possible by using the Chi Heal ability. Chi Heal will heal your follower as well as yourself, at no extra cost to you, so long as you buy now in this very special TV offer, etc. Anyway, it heals your follower, but the caveat is that you yourself have to have taken damage in order to use your healing powers. If your follower is getting reamed by a single dude while you've been dodging the attacks of a dozen fighters and destroying them all, you won't be able to heal them unless you let yourself get hit. This isn't exactly a user-friendly system for healing, but if you want to keep your follower alive, flip them into support mode. You can heal a character that's in support mode (again, though, this only true after your main character has taken damage), so that after getting their health back up, you can flip them back into attack mode and get them back in the game.
One of the few real uses for teammates in combat is in fights where you take on a single opponent. There are relatively few such fights in the game, though; most boss fights will force you to go in mano-a-mano and will come up with some storyline twist to keep your followers at arm's length. Or, alternately, your teammates will run up to the boss with you and take part in the pre-battle bantering, and then just disappear when the fighting begins. Fun! Even in two-on-one fights, though, your followers are little more than distractions, but useful if only for that.
Dawn Star
Her Story: Dawn Star is the first companion that you pick up, and will be with you from very near the beginning of the game. Your schoolmate in Master Li's academy, Dawn Star arrived at the academy at around the same time as your character, having apparently been abandoned by her parents due to her abilities to see into the spirit world. Her psychic gifts have earned her a bit of an outsider status in the school, but will come in quite handy as you attempt to discover what's causing the influx of spiritual energy into the world.
Combat Tactics: Dawn Star attacks with a long sword, but she's much more valuable in support mode, where she constantly channels her energy to restore your Chi. This is a fairly slow restoration, so you won't be able to stay in a Transformation form for an infinite length of time or anything, but will let you heal yourself for a bit more health each battle, or let loose with a few more Chi Strikes, or build up more Chi for a magical attack. We actually found Dawn Star to be the most valuable follower solely for her support abilities.
Sagacious Zu
His Story: You'll meet Sagacious Zu in the first chapter of the game, as you attempt to rescue a kidnapped classmate in the fields surrounding two rivers. This mysterious warrior bears a number of scars, presumably from his former life as a soldier, but he's reluctant to speak of his past with you. It isn't until you begin to go up against the Lotus Assassins directly do the moldy facts under the rock of his facade come to light, or something like that.
In Combat: Zu's staff is an asset to him in battle, as it lets him keep enemies at a distance while still dishing out damage, theoretically speaking. His support ability isn't quite as useful, as it will allow you to deal more damage with your weapons styles. Early in the game, you'll be shying away from using your weapons styles, due to the fact that they require a lot of focus to use initially, and late in the game, when you've both upgraded your weapons to use less focus and have a larger focus bar, well...you'll see why you don't want to use him then.
Silk Fox
Her Story: This mysterious masked warrior first comes to your aid in the forests around Tien's Landing. She seems to loathe Death's Hand and the Lotus Assassins for some reason, but doesn't reveal much of her motivations to you - at least, not right away. It isn't until you encounter her in the Imperial City that you begin to realize why she attempts to fight those who would corrupt the Emperor.
Combat Tactics: As with Dawn Star, Silk Fox brings her long sword talents to bear in combat, quickly slicing through opponents, except, you know...not. She's much more valuable in support mode, where she'll add damage to all of your attacks with your martial styles. You'll probably be using martial styles more than any other kind of attack, due to the fact that they're free, so this will be handy in almost any fight, albeit not quite as useful as Dawn Star's support ability.
Black Whirlwind
His Story: The deadly Black Whirlwind is the most renowned mercenary in the Jade Empire - and beyond. Although he has a penchant for strong drink, "accidentally" killing people, and forgetting where he left his clothes when he wakes up, he's about as deadly with his twin axes as anyone is likely to get. Although you can't pay him to come along on your trip, he'll stick around with your character just for the heck of it; you're probably going to get into some big fights before you complete the quest, and he wants to be around for the action!
Combat Tactics: Black Whirlwind has no support abilities, so if you're bringing him into combat, you're going to have to rely on his combat prowess. Unfortunately, like most of your followers, he's portrayed as a savage killer in the cutscenes but winds up being something of a milquetoast in combat, being barely capable of dispatching even grunt-level enemies. As a result, we didn't wind up using him much.
Henpecked Hou
His Story: Having been kidnapped by a group of nasty cannibals in the forests surrounding Tien's Landing, Henpecked Hou is grateful enough for your rescue to follow you along on your journey. He's not looking forward to returning home and meeting with his wife, though; she lives in the Imperial City, and is apparently quite the dominatrix according to Hou's telling, and not in the kinky fun way, either.
In Combat: If you bring Henpecked Hou into combat with you, you'll be able to take advantage of his unique support ability (he has no attack of his own): he'll periodically throw out bottles of wine onto the battlefield, which, when picked up by your character, will launch you into the Drunken Master style until the alcohol wears off! Sounds pretty cool, right? Hey, if the greatest martial arts film of all time, Legend of Drunken Master, features Jackie Chan taking on a hundred axe-wielding enemies at once and defeating them all thanks to chugging alcohol, then surely it must be a pretty powerful style in Jade Empire, right? Right?
Well, brace yourselves for a disappointment, but the Drunken Master style here is pretty much useless. We wish that weren't the case, but c'est la vie. The main problem with it is that it's not upgradable; since it's only avaialble when Hou is in your party, it doesn't appear on your styles tab. Thus, although it may be marginally more powerful than your primary martial style when you first come across Hou in chapter two, it doesn't seem to ever gain power, thus becoming quickly outstripped by your primary martial style, which you'll be upgrading at each level up. The second problem is that it's fairly slow to attack, allowing enemies, especially when they attack in groups, to disrupt your primary attack combo by hitting you in mid-animation, thus knocking you out of your attack and forcing you to start again. Sounds like a recipe for fun.
So, yeah, you can expect to use Hou once or twice to try out the style, then pretty much never use him again.
Sky
His Story: Sky's a dashing rogue that seeks vengeance on Gao the Greater for crimes committed against his family years previously. Your paths thus intersect, due to the fact that your character has their own bones to pick with Gao. Although Sky's mission of revenge doesn't come off quite as planned, he'll still join your merry band in the desire to see that what befell his family doesn't occur again.
In Combat: Sky wields two swords at once in battle, but hey - two times zero isn't very impressive. His support ability, which restores your focus, is also fairly underwhelming. Although focus is a difficult stat to restore in the middle of combat, it's not usually necessary to do so - after you upgrade your weapon styles and focus bar, you should have more than enough focus to last for a couple of fights in a row, which will generally be good enough to get you to a focus shrine.
Wild Flower
Her Story: The mysterious Wild Flower is bound to the demon Chai Ka, a guardian of the gates between the Jade Empire and the afterworld. He uses her body as an anchor in reality, and can summon himself to the real world for short periods of time, or use her body as a channel through which to speak and guide the main character. In exchange for her service, he keeps Wild Flower safe from harm - it's hard to hurt an eight-year-old when she can morph into a demon at the first sign of trouble.
In Combat: Whenever you enter a combat situation, Wild Flower will immediately morph into Chai Ka, who will use powerful attacks to swipe at enemies. While he has a lot of health, Chai Ka is immensely slow when he's forced to traverse the battlefield, meaning that he can be out of the action for long periods of time while trying to catch up with quick-moving enemies. In support mode, he'll passively restore your health, which is a decent ability, but not more worthwhile than Dawn Star's. Dawn Star's chi restoration can be used to restore your health through Chi Heal, as well as power other abilities, making it a more versatile choice for most players.
Note: All things require a balance, and for Chai Ka to possess the soul of Wild Flower, there must also be a counterbalance, and indeed there is another entity within the girl: Ya Zhen, a demon of darkness, struggling for primacy in the battleground of Wild Flower's spirit. You can advance this plot by speaking to Wild Flower every time you reach your base camp in Chapter 3, and especially just before the end of that chapter. If you've advanced the plot far enough when you fly away from the Imperial City to begin Chapter Four, then Chai Ka and Ya Zhen will enter into open battle inside Wild Flower, and you'll need to choose which demon you wish to aid. If you choose Chai Ka, then defeating Ya Zhen will prevent him from exerting any more influence over Wild Flower; if you side with Ya Zhen, however, then the mind of Wild Flower will be forever subsumed beneath his hate.
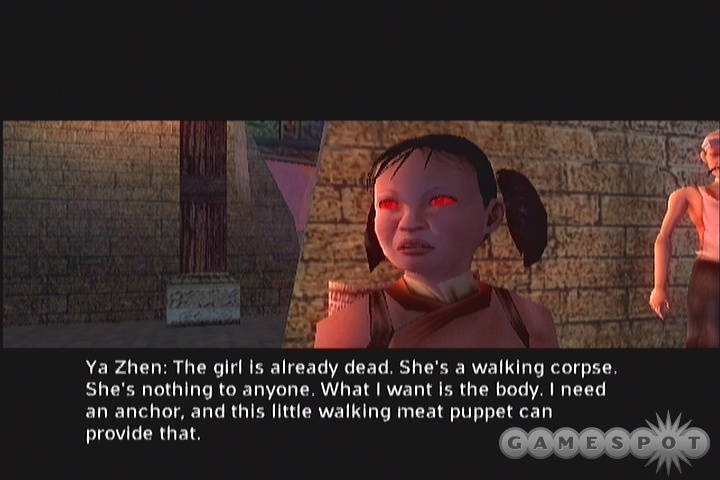
Ya Zhen is much the same as Chai Ka in his support abilities; when set to support mode in battle, your health will slowly be restored. His attack form is, however, somewhat more powerful, as he takes on the form of a Toad Demon, complete with the quick power attack and poisonous swipes of the claws. This isn't worth converting Wild Flower over to the dark side on its own, since you'll still rarely use any of your followers in attack mode, but is a nice bonus for Closed Fist players who're looking to make some friends with the evil powers-that-be.
Ya Zhen takes up the lower-middle space on the Follower screen, so if you don't convert Wild Flower to evil, then that spot will remain blank until the end of the game.
Zin Bu
After a brief introduction in Chapter Two, Zin Bu will shift himself to your followers screen, never to be seen again. This celestial bureaucrat was formerly in charge of accounting for your actions, but after your character starts killing their way through half of the Jade Empire to find your erstwhile master, he falls behind in his duties and quickly gets demoted. Although dejected, he quickly offers himself up to you as a mobile merchant, and indeed, you can check in with him on your followers screen at any time to buy goods (more items are unlocked as you complete each chapter), or sell excess goods.
A tip, though: Never sell Zin Bu anything if you can help it. Unfortunately, all the stuff you sell him will be added to his own sell screen, meaning that if you unload a bunch of Inferior Monk Gems on him, you'll have to scroll through them each time you check his inventory to see if he has anything new to sell. Since he doesn't give you any more cash than other NPC merchants do, just wait until you come to an in-game merchant and unload all your crap on them. This way, you'll be able to easily tell when Zin Bu has something new to offer.
Kang
Kang is a purely non-combat follower, despite his self-proclaimed primacy over the explosive arts. He's mostly good for ferrying you from place to place in his Magnificent Dragonfly, although he is also the source of the Lord Lao's Furnace side-quest in chapters two and three, so speak to him often to pick those up. Check the Side Quests section of Chapter Three in our walkthrough for more info on these.
Abbot Song
His Story: Abbot Song is a Spirit Monk, killed in the same attack that resulted in the destruction of Dirge twenty years before the game begins. Like so many of the inhabitants of Dirge, his spirit remains trapped between the human world and the Wheel of Life, unable to move on to his next incarnation.
In Combat: Although Abbot Song is fairly handy in combat, using his mighty Monk Spade to defeat the spirit enemies that haunt Dirge, he'll be even more useful in support mode, where he'll simultaneously restore your health, chi, and focus. Enjoy it while it lasts!
Big-Time Spoilers!
Near the end of Chapter Six, you'll be able to recruit a certain follower. We hesitate to say more about the character here, lest some impressionable reader scrolls through this section and gets a major plot point revealed. If you're curious to read more about this character, feel free to skip to our walkthrough and check out the end of
Styles
There are numerous combat styles available to you in Jade Empire, in a number of different classifications. You can obtain as many styles as you like, but can only have four of them available in battle at any given time, since they're bound to the four directions of your d-pad. If you ever decide you want to use something new in the middle of a fight, though, all you need to do is hold down one direction of the d-pad, and you'll be able to select a new style to replace the one bound to that direction.
The caveat to styles is that, although you can obtain as many styles as you wish, you'll only obtain a few style points at each level-up, but this number does increase as you proceed through the game. Each time you gain a level, you'll gain a number of style points equal to the level that you're proceeding from, so if you're going from level 16 to level 17, then you should get 16 style points to spend. Each style has three areas that you can improve on, but to completely maximize a style's potential, you're going to need a total of 69 style points, so it'll pay to pick a few that work well and stick with them throughout the game, as you'll need well-upgraded styles to really compete towards the end of the game. You can't take points out of a style once inserted, so go with something that you really like!
Martial
Martial styles are the most basic type of offensive style. They have to be used while you're in melee range of an enemy, but do decent damage and, best of all, don't require any chi or focus to use, meaning that you're going to be using them quite a bit throughout the game.
White Demon
White Demon is the strongest of the martial styles, but it's also by far the slowest of the bunch, and for that reason alone is probably not worth picking up for most gamers. Although it does a lot of damage, it takes a long time to land your blows, leaving you open to counterattack from the sides and behind when fighting groups.
If you want to pick up White Demon after the beginning of the game, you'll need to wait for Sin Bu to begin selling it sometime after Chapter Two or Three.
Leaping Tiger
Leaping Tiger is one of the two medium-speed martial styles in the game, along with Legendary Strike. Its claim to fame is that it sprouts two claw-like...claws from your fists when it's activated, although it's still considered to be a martial style, not a weapon style. With it, you'll be able to, you know, hit people, and stuff. Sin Bu also sells Leaping Tiger, but not until after at least Chapter Four.
Legendary Strike
We found Legendary Strike to be the best martial style in Jade Empire, although that may just be our own biased opinion after playing through the entire campaign with it. It has a good balance of power, speed, and range, and the power attack is pretty quick to come off when you hit the button, and it lets you move straight ahead, rather than up and down like Leaping Tiger.
Thousand Cuts
If you intend to get really up close and personal with your foe, then the Thousand Cuts style may be for you. It's by far the quickest of the martial styles, letting you punch multiple times in a single combo, but you pay for that by being forced to get exceedingly close to your foe; the range on Thousand Cuts is much shorter than that of the other martial styles.
If you decide not to start the game with Thousand Cuts, then you can buy it later by visiting Sweet Poison Lyn in the Imperial Arena in Chapter Three.
Weapon
Weapon styles are pretty self-explanatory; instead of a hand-to-hand combat technique, they'll place a weapon (or two) into your greedy little mitts. Weapon styles typically deal more damage than do martial styles, and may allow you to swipe at multiple members of a group of foes as well, but do have one drawback: they constantly drain focus each time you hit an enemy. With a little upgrading, though, you can mitigate this focus loss somewhat, making weapons styles quite powerful and easy to use in the last few chapters of the game.
Long Sword
Heck, it's a long sword; what more do you need to know? We found this to be slightly better than the staff for dealing with large crowds of enemies, as you get a bit of side-to-side motion in its attack animations, whereas the staff is pretty much exclusively up-and-down, making it unlikely that you'll hit enemies on either side of your target.
Staff
Unfortunately you're not going to be pulling any Kilik-style moves with your staff in Jade Empire. While a powerful weapon, it's primarily good for striking single targets, whereas most of the other weapons will let you hit more than one target when they're clustered together, as occurs pretty often in most group fights. You may get some non-target hits with the staff, but the animations make this unlikely to occur, so you're probably going to be better off with another weapon in your hand.
Both the Staff and Long Sword styles can be obtained from Gujin in Two Rivers, although you can only choose one of them. If you want to change styles later on, you can pick up both styles from the blacksmith shop near the Black Leopard School in Chapter Three.
Dual Swords
Now we're talking. If you manage to defeat the noble Crimson Khana in the Imperial Arena, she'll teach you her custom dual-swords style, and if you happen to do the Right Thing by tipping her off about the poison plot against her, you'll obtain the Crimson Tears style, which adds 25% damage off the top, without any upgrades. We found dual swords to be the best and easiest-to-use weapon style in the game, as you can strike quickly with it and hit multiple opponents when they're clumped around you. The main drawback is that the power attack is somewhat slow to perform, and doesn't deal a terrifically larger amount of damage than the normal attacks, but the normal attacks are good enough to take down most bosses.
Dual Axes
You can obtain the dual-axe style by completing all of the Imperial Arena quests. Although more powerful than the dual swords style and possessing a bit more side-to-side sweep, it's also slower than dual swords, giving you fewer opportunities to attack in a given amount of time. Try them both and see which you like.
Spade Staff
The spade staff is only available if you purchase the limited edition of Jade Empire. We didn't have a chance to test it out with our copy, but if there's anything unique or special about it, we'll be sure to update the guide with that info.
Mirabelle
The most unique weapon style is Mirabelle, the rifle that belongs to the Outlander in the subquest of the same name in Chapter Three. If you defeat the Outlander in a debate and combat, you can choose one of five prizes from him, including Mirabelle. While this is the only weapon style that lets you attack from range, it has a number of notable drawbacks. The first is the extremely long reloading time after each shot; you can sometimes skip this by tapping to another style after a shot, then returning to Mirabelle to fire again. (Literally tap; just keep hitting one of the buttons for another style to be sure that the switch registers.) Second is the absurd amount of focus that each shot takes off; on Master or Grand Master difficulty, you can expect to expend a full bar of focus to take down a single normal enemy. Third is the fact that there's no area attack for the weapon; pressing the buttons for an area attack will launch you into a power attack instead. Fourth is that you can't jump or dodge while wielding Mirabelle; blocking is your only defensive action while it's in your hands.
So, yeah, Mirabelle is pretty much useless in any large melee. When going up against single powerful opponents, a Mirabelle with a full Damage Increase suite of upgrades will undoutably be a handy ally, but its general inutility don't exactly make it worthwhile of upgrading at all.
Improvised Styles
The infamous "twin hams" style on BioWare's Jade Empire website is one of many theoretical improvised weapon styles. These become available when you smash some kind of background object during a fight; a small icon will appear where the object was, allowing you to pick up a piece of wood, or some meat, and use them as weapons for a short period of time before they break. We found some wooden leg chairs in the Teahouse in Chapter Two, but if there are more improvised styles hidden around, they're hidden well, as those were the only ones we saw all game long.
Magic
We didn't use magic styles as often as we did our martial and weapon styles, although it's possible that someone willing to pump a lot of upgrade points into their magic styles and Spirit stat will be able to use them quite effectively. Their main claim to fame is their ability to fire projectiles at enemies from a good distance away, whereas both martial and weapon styles force you to get relatively close to a foe. The drawback, though, is that they use up your Chi energy, which we generally found best to reserve for Chi Strikes with our melee styles and for healing. If you use up all your Chi flinging fireballs at an enemy, and don't manage to kill him off, then you're going to have to hope you don't need to heal later on, because you won't be able to. Still, if you want to try something different, feel free to stick a magic style on your d-pad and try using it.
Magic styles can be used to start harmonic combos, which when combined with a martial style will result in an instant kill and a power-up of some sort. See our Combat Tips section for more details on these combos.
Ice Shard
With the power of ice in your hands, you can deal damage at a distance with icebolts, or freeze enemies in place for a short time with your power attack. It can be difficult to hit enemies with the power attack, especially if they jump or move while you're aiming, but if you do, they'll be locked up tight in a block of ice for a few seconds, allowing you to switch to another target or continue to wail on them as you please.
The area attack with Ice Shard is one of the game's more unique moves, as it will cause chunks of ice to fall from the sky, slowing all nearby enemies. After a few seconds of channeling, a larger chunk of ice will fall towards whomever you're specifically targeting for a bit more damage.
Tempest

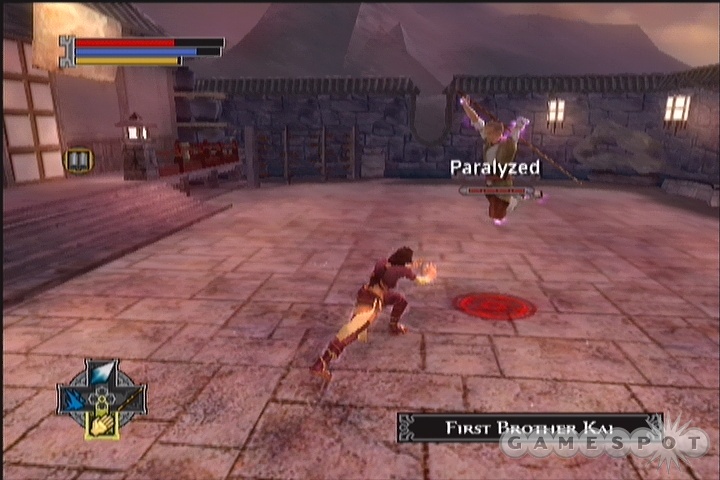
Tempest is one of the alignment-based magics that you can learn from Mistress Yo and Jian the Iron Fist, who give you the Ancient Game subquest in Chapter Two. By the end of that chapter, you should be far enough along one of the alignment paths to pick up your style. Tempest matches up with the Closed Fist path, and is taught by Jian the Iron Fist. With it, you'll be able to paralyze your foes with blasts of chilled air with the power attack and area attack forms, or just settle for ranged damage with your primary attack. Although the paralysis doesn't last as long as it would with something like Storm Dragon or Hidden Fist, you do have the added benefit of inflicting damage while your foe is held in the aerial grip of your magic.
Note that, if you don't get your style from Jian by the end of Chapter Two, you can return to Tien's Landing by using the gate in the Imperial City near Imperial Captain Sen, although you'll need to complete some of the questline there before you're able to do so.
Dire Flame
Dire Flame is, obviously enough, the fire-based magic style. Like other magic styles, you're going to have rapid-fire primary attacks (firebolts), a more powerful projectile attack (power attack), and an area attack. For the area attack, you'll summon in a dragon that will spit flames over a large area of the battlefield. It's all pretty straightforward, really. The power attack and area attack can both immolate enemies, resulting in them flailing around, vainly attempting to put out the flames that engulf them. Good times.
Stone Immortal
The Stone Immortal style is attuned to the needs of the Open Palm users that are most likely to acquire it. It's not supremely damaging, and focuses on repelling enemies rather than causing a lot of pain. The most unique aspect of it is the area attack, which causes earth to pop up from the ground around the caster, knocking back and knocking down any enemy caught nearby.
Transformation
Transformation styles are one of Jade Empire's most unique features. After you find one of these styles by defeating a creature, you'll be able to morph into that creature at will and take on their strengths and weaknesses for a short time.
The primary draw of transformation styles is that they deal incredible damage and are usually immune to one or more kinds of styles. The main drawbacks, though, are that they steadily drain your chi while they're active. You also aren't able to dodge anything while in a transformation mode; all you can do is block.
Toad Demon
Although the Toad Demon is the first transformation style you're going to pick up, it's still pretty decent for the situations that you'll find yourself in in the early game. Although it moves slowly and doesn't attack very quickly, its attacks can hit multiple enemies at the same time, with its power attack being especially useful for charging through groups of foes. Each successful hit will add a poison effect to the target, as well, although this does only a marginal amount of damage. Still, with the power attack, you can spam your way through groups of enemies without too many problems; just target someone in the middle of a pack, hit the button, and everyone near the target will be hit alongside him. Your area attack can act similarly; it will swipe the Toad's tongue across everyone in front of you, knocking them back.
Toad Demons are immune to Support styles, which is obviously the ultimate in awesome hotness. Well, no, it's pretty much useless. Few enemies make heavy use of Support styles, save for one important one.
Horse Demon
Horse Demons are fearsome, fire-infused foes that you're probably going to loathe facing with your main character. When you pick up the style yourself, though, you can turn the punishment back on your enemies by stomping around on your hooves and hitting them with your firey fists of doom. What's more, you take on the Horse Demon's fire aura as well, allowing you to reflect damage back to each enemy that strikes you. The Horse Demon's a bit faster on its feet than the Toad, as well, giving you a bit more maneuverability in combat.
The Horse's power attack is a bit less useful than the Toad's, as it only affects one opponent; when you use it, you'll shoot out a firebolt towards your foe that will immolate them. Its area attack is decent, as it will summon in a number of sharp spikes to shoot up from the ground at its feet.
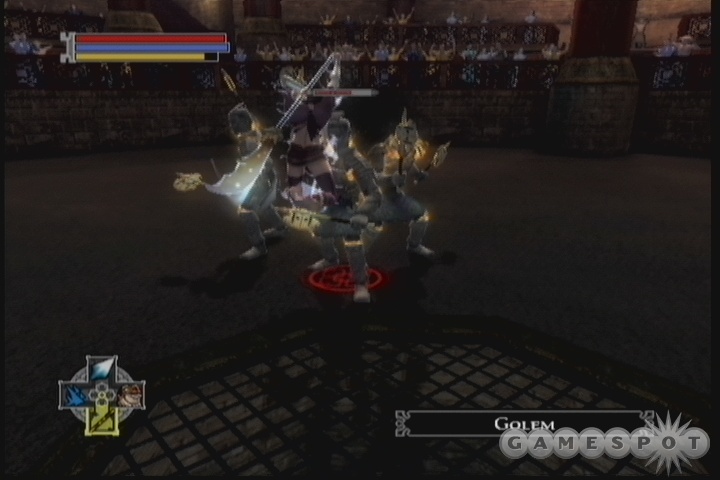
Jade Golem
Ah, now we get down to brass tacks. Although you won't pick up the Jade Golem style until you're halfway through the game, this is probably going to be the first transformation style you're going to sink any serious upgrade points into, as it is monstrously powerful and monstrously big, and just plain cool-looking to boot. Although it's by far the slowest of the transformation styles, that doesn't matter much when you're a Jade Golem, as most enemies will come right up to your feet and let you pound on them. Both your normal and power attacks are useful for smacking fools down, but the area attack's first swing comes out too high to hit anything, making that usually a waste of time and precious Chi.
In addition to its pure offensive prowess, the Jade Golem is immune to all magic and martial styles, making it perfect for taking on groups of humans. Even if half of them wield weapons, that means that half of your foes won't be able to touch you. Holla!
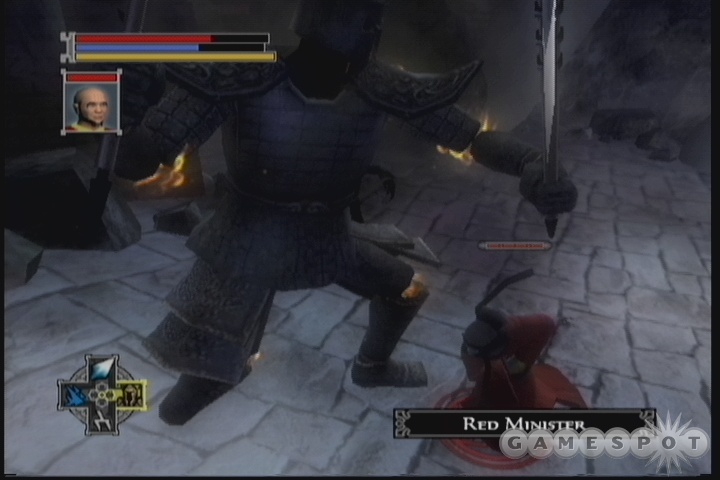
Red Minister
It's a shame that you won't be able to use Red Minister for very long, since you don't get it until late in the game, it's one of the most powerful transformation styles available to you, since it allows you to counteract the steady chi-draining effects of transformation. Each hit from a Red Minister will drain health and chi from a foe and transfer it to yourself, allowing you to constantly keep your health and chi maxed out, given enough targets. Although the attacks aren't quite as powerful as the Jade Golem's, the staying power afforded to you by the constant health stealing goes a long way to balancing that out.
Red Ministers are immune to weapon and support styles, making it another good choice for large groups of enemies, as well as the end boss.
Support
Support styles deal no damage on their own, but instead have other effects that hamper an enemy's ability to fight, such as slowing or paralyzing them temporarily. Using these in tandem with your martial and weapon styles will let you cripple an opponent before switching over to a damaging style to dish out the hurt. Support styles can also be used to start harmonic combos, which when combined with a martial style can let you instantly kill an enemy. See the Combat Tips section for more info on these combos.
Storm Dragon
Oh, Storm Dragon, how do we love thee - let us count the ways. This is, in our minds, the best support style in the game. You can get it early on, and should make every effort to obtain it as soon as it becomes available for purchase (from Storm Catches Leaf, immediately after Black Whirlwind joins your party). Its description says that it's supposed to do a small amount of damage over time, but in combat, it actually shocks your opponent for almost no damage, but will completely lock them up with a stunning animation for a good five seconds, allowing you to pull off a couple of martial style combos, steal their chi with Spirit Thief, go take a nap, etc. Only Hidden Fist can stun enemies for as long as Storm Dragon can, and that style will cause them to stagger about - with Storm Dragon, it's much easier to continue attacking, since they're frozen in one spot.
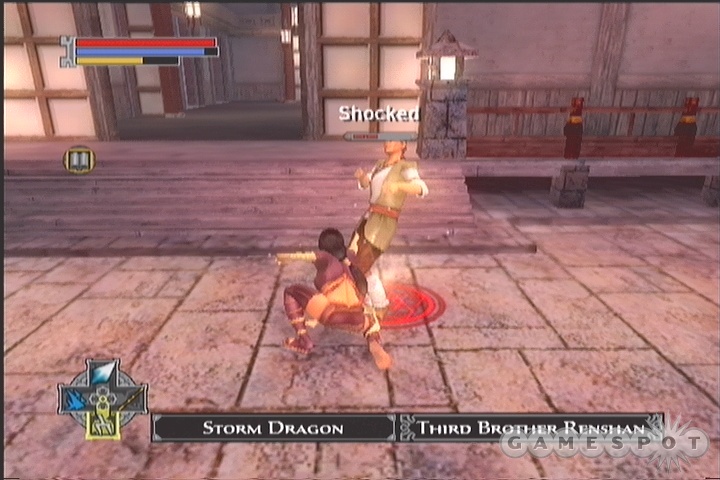
One of the main drawbacks to using Storm Dragon (assuming it's not bugged as is) is that it's tremendously cheap - pretty much every boss fight in the game can be reduced to the level of triviality by simply hitting your opponent with Storm Dragon (if they're not immune, and no humans are), switching to a martial style and using a combo, then switching back to Storm Dragon and hitting your foe again before the stunning effects of the first hit wear off. It's cheesier than Gouda! Most people will probably want to pick up Storm Dragon as a bit of insurance, but you probably shouldn't use it unless you absolutely need to - it makes the game pretty easy.
Heavenly Wave
Heavenly Wave is similar to the other support styles, save for the fact that it doesn't completely paralyze your enemies, or even prevent them from attacking; all it does is slow them down. However, the slowing effect here is pretty significant, and lasts for a good amount of time, especially if you can pull off an area attack. Initiating Harmonic Combos with Heavenly Wave will also produce Health power-ups, which are always useful to have scattered around.
All students at the Two Rivers school learn Heavenly Wave; it's impossible to start the game without it.
Paralyzing Palm
Paralyzing Palm is similar to Storm Dragon, in that it can paralyze an enemy, rendering them vulnerable to your martial or weapon styles. The duration of the paralysis is much lower than with Storm Dragon, though, so unless you pump points into it, you're barely going to get a half-second's worth of paralysis from a successful hit. The area attack will paralyze all enemies in a wide area around you, but again, the paralysis will wear off quickly, usually even before you finish up the attack animation.
To pick up Paralyzing Palm, side with Master Radiant in the Black Leopard School subquest in Chapter Three.
Hidden Fist
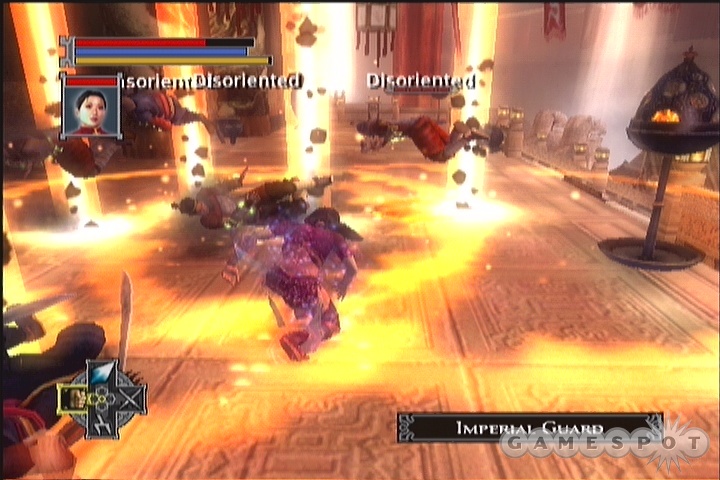
Hidden Fist is one of the two support styles that you can learn at the Black Leopard School in the Imperial City, and it's good - quite good. Although you'll have to follow the path of the Closed Fist to obtain it, it's well worth the cost. It's primary and power attacks are decent, in that they will temporarily Disorient your enemies. This is similar to paralysis, save that your foes will stumble around on the playing field rather than stand still. It's the area attack that's really great here, though, as it can be used extremely quickly, hits all enemies in a good radius around you, and will disorient them for an appreciable amount of time. Harmonic combos set off by Hidden Fist will also result in valuable Chi power-ups, although it can be hard to connect a power attack on a disoriented foe due to their unpredictable movement.
To obtain Hidden Fist, side with Smiling Hawk in the Black Leopard School subquest in Chapter Three.
Combat Tips
The combat system in Jade Empire is one of its biggest draws, as it'll let you pick up many of the fighting styles you've seen in various Hong Kong martial arts flicks over the years. It's pretty easy to pick up after you fight for a while, so this chapter is intended to just give you some general tips that will hopefully get you on your way to kicking all kinds of ass.
Know Your Attacks
Each style will have three basic attacks to use: a normal attack (used by pressing the A button); a power attack (X button); and an area attack (use both A+X buttons simultaneously). Knowing when to use each of these will help you keep your health up and beat down your foes.
Normal Attacks: Your bread and butter, normal A-button attacks are what you're going to use throughout your career to do most of your damage, as they're the quickest kind of attack. Most styles will let you tap the A button once, twice, or three times for a corresponding number of strikes in a row. Sometimes, it's better to just tap twice, as the three-strike combos will often leave you recovering from the move for a second before you can start again, whereas two-strike combos can often be strung together much more quickly.
Normal attacks, even of the magical variety, can be blocked by shields. If a magical attack or weapon style attack hits a shield, it will still drain Chi or Focus.
Power Attacks: Power attacks are slower than normal attacks, but have the added benefit of breaking through blocks. In most situations, however, you aren't going to want to use power attacks unless you're certain you're not going to get hit while performing the animation; after you start a power attack, you can't break out of the (often lengthy) charging animation for it, meaning that any enemy in the area will get a free hit on you, and if you get hit, then the animation will break and you won't have accomplished anything in the second or two it took for all this to occur.
The only time you're really going to want to risk a power attack is when you're fairly certain no one is going to hit you while you perform the animation. In most cases, this will involve hitting someone with normal attacks until they put up a guard, then jumping over them and using the power attack from behind. Even if they drop their shield while you're charging up your power attack, they'll still have to turn and face you, giving you another second or so to let your attack loose.
Area Attacks: Area attacks almost never deal damage, but instead are a means of crowd control. For most styles, pressing A+X will cause some kind of explosion to issue forth from the player, causing all nearby enemies to be knocked down for a second, allowing you to reposition yourself or just use your Chi Heal ability without having to worry about being hit. Support styles will often combine their area attacks with some form of status effect, allowing them to disorient or paralyze all nearby foes momentarily.
We personally didn't find area attacks very useful in Jade Empire; it's so easy to dodge or flip away from a foe or from the middle of a group of enemies that the time spent to knock them all down didn't seem worth investing in. Jumping away is often going to be safer, anyway, especially when you're surrounded, as the short time it takes to put forth an area attack will still usually be enough to allow someone to hit you, perhaps even disrupting the attack.
Harmonic Combos
Harmonic combos are both a way to eliminate low-level enemies instantaneously and to restore some of your energy during a drawn-out fight.
You'll need to use either a support style or a magic style to begin a harmonic combo. Each style will either use its area attack or its power attack to start a combo; read the style descriptions in the style menu to learn which attack matches up with a specific style.
When you successfully initiate a harmonic combo, a green timer will appear around the ring at your target's feet. You'll only have a few seconds to complete the combo; to do so, switch to a martial style, get close to your foe, and unleash a power attack. When it successfully hits, your enemy will be instantly killed, usually in some fantastically gory manner. What's more, you'll automatically receive either a health, chi, or focus powerup, depending on what style you used to initiate the combo. (Again, you can check their descriptions in the style menu to know these ahead of time.)
The main drawback to harmonic combos is that it's often quite difficult to land a power attack, especially when your target is in the middle of a group of enemies. To overcome this, try starting them with a support style that uses its area attack to begin a combo, such as Storm Dragon or Hidden Fist. When you use an area attack to begin a combo, you'll be able to stun most of the enemies in the general area, giving you a much better chance to actually pull off a power attack to finish the combo.
Note also that some enemies, especially bosses and their minions, are immune to harmonic combos, so you can't always count on them to get you out of the tougher jams you might find yourself in.
Everybody Jump Jump
You can block whenever you like in combat by simply pressing the B button, but after you get past the first few fights of the game, it's unlikely that you're actually going to want to do so. Although blocking protects you from attacks from any side of your character, there's too much danger of getting hit by a power attack when you're surrounded by foes to justify sitting there and blocking, waiting for your chance to strike back. Plus, it's kind of boring.
Instead of blocking, then, you'll want to get used to using Jade Empire's powerful dodging maneuvers. By holding B and pressing a direction on your analog stick, your character can quickly shuttle around the battlefield, quickly enough to avoid most attacks, in fact. What's more is that you can actually jump forward into enemies, disrupting their attacks, or jump over them if you're close enough, allowing you to hit them repeatedly. Many of the videos in this guide will demonstrate this basic technique, so take a look at a few of them and get used to jumping and dodging, as it'll make your battle experiences much more satisfactory.
Grand Master Mode
We hate to sound dismissive, but Jade Empire isn't tremendously difficult on its default "Master" difficulty setting. Since you can dodge so easily, you'll mostly just be jumping in and out of battle while you choose when to land your strikes. If you find yourself breezing through the early chapters, then you may wish to bump the difficulty up to Grand Master, which will let the enemies deal and receive more damage.
Walkthrough
Choosing a Character
We're not going to go too in-depth here, as the character creation system in Jade Empire isn't nearly as complex or meaningful as in the Knights of the Old Republic Games. The main thing you're going to be choosing here is the style and look of your character, so be sure to select a character that you're going to want to look at for 20-30 hours. The other choices on the character screen (Fast, Strong, etc.) don't really mean anything; you can take Tiger Shen and give him the fastest attack style, and he'll be just as fast in combat as Radiant Shen will be, so far as we can tell.
The main thing here is to realize that you're going to be using your starting martial style for a long time, so you'll want to pick one that suits your play style. We recommend the Heavenly Strike style as a good mixture of range, speed, and power, but you may want to start the game a few times and spar with some of the students in the school with the various styles to get a feel for the differences and make your choice after you find one that suits you.
If you choose to customize a character, you'll also be asked to allocate some basic stat points. Two points to body and one each to spirit and mind is usually a good allotment, but if you're going straight to Grand Master mode, you may want to throw all of them into body to give yourself a good amount of health to work with.
Love Is In The Air
One of the trademark features of the BioWare games has been your ability to foster romances between the different characters that you control, and Jade Empire is no different. We haven't had much time to test out all the different permutations of the system in this particular game, but if you want to wind up swapping spit with one of your followers, then all you really need to do is talk to them - a lot. Talk to them before and after finishing each main story quest, and before and after each chapter ends. The good thing about Jade Empire is that your choices in conversations with your teammates will rarely have an impact on your alignment, so if you're trying to go through the game as an ultra-evil badass, you can still be nice to and woo some of the fly honeys in your posse. Word.

Anyway, all you really need to do to advance a romance plot is talk to the character you're interested in multiple times throughout the game and try to be as flirtatious as possible; if you're consistently condescending and insulting towards a character, they're unlikely to get all hot and bothered by you. Having the character in your party probably also helps, although you have to be careful, as they'll be watching what you do and react accordingly. Dawn Star, for instance, won't like it very much if you go around slaughtering innocents. You can seemingly mitigate these negatives by keeping a character out of your party if you partake in activities contrary to their nature, but both Silk Fox and Sky are a little more flexible in their ethics than is Dawn Star.
So far as we can tell, both Silk Fox and Dawn Star are possible targets for a male character to woo, with Sky being the primary topic of interest for female characters. It's possible that some of the other characters can be opened up to romance, as well, and really, who wouldn't want to hop into bed with Hou, given the opportunity. It's also possible that same-sex relationships might be possible, although this would likely require you to be quite cruel to the possible lovers of the opposite sex. When we get definite word on this, we'll update this guide.
Chapter One
And So It Begins...
After you're done selecting or customizing a new character, you'll find yourself inside the Jade Empire, and in fact in the middle of a fight. Your character will be sparring with Jing Woo, a fellow student of yours in the martial arts academy run by Master Li. It'll end before you gain control of your character, launching you into a conversation.
For those of you unfamiliar with the BioWare method of RPG character development, most of the choices you make between good and evil will come in the dialogue that your character is involved in. When another character talks to you, you'll have your choice of multiple responses to select. You can choose to be as kind or as cruel in your conversation with Jing Woo as you wish, but be advised that consistently acting in a certain way will shift your character's alignment towards the Open Palm ("good") or the Closed Fist ("evil"), which will affect the way other characters react to you.
However you choose to treat Jing Woo, be sure to take him up on the opportunity to spar once again; this will walk you through a brief tutorial on Jade Empire's combat system, which is definitely different than that included in the Knights of the Old Republic games. It's based on more real-time action, for one thing, so you won't be able to pause and analyze your actions; you'll need to be quick on your toes if you wish to defeat multiple enemies. Jing Woo isn't very difficult to take down, so feel free to pound on him until he falls.
Wandering

Before you meet with Master Li, it'd be a good idea to wander the school grounds to explore the world a bit. There are a number of students in the school's main courtyard. If you leave the sparring grounds, in fact, Student Lin will rush in with another student and begin sparring; if you talk to her, you'll discover that she's either sluttish or jealous, depending on the sex of your character. If you treat her nicely, though, she'll agree to spar with you, netting you 40 XP.
Student Wen may also be sparred with; he's in a gazebo near the sparring ring. You may also talk to Smiling Mountain and set up a simple sparring match with an unnamed student, although this won't net you any experience. There are also a pair of students atop a hill to the northeast which you can take on simultaneously, netting you more experience.
In addition to the fighting, there's a wealth of story information available from the various students around you, so be sure to talk to all of them. There are also four bookstands or scrollstands in the area (although one of them is far to the southeast, near the gate leading to town). If you find all of the books in a given set (and these four are a part of one), then you'll get an experience bonus; you'll also gain experience just for reading the books themselves, so be sure to click onto them when you reach them.
Main Quest: A Master's Teachings
When you've explored to your liking, save your game and walk into Master Li's dwelling to speak to him. The conversation is briefer than he intended it to be, for it will be interrupted by the news of a bandit attack from the direction of the river nearby - Master Li will instruct you to meet up with another pupil, Dawn Star, and to head with her to the shop of Gujin, who holds a weapon for you.
When you're ready to head out and bash some bandits, move out to the gates to town to find Dawn Star conversing with Gao. After she sends him packing, she'll join your group. Head into Two Rivers to start defending the town from the bandits.
Two Rivers
As soon as you enter the town, you'll be accosted by a pair of bandits intent on getting to the looting while there's looting to be gotten to. With Dawn Star by your side, you should be able to dispatch them relatively quickly, so take them down and start making your way to Gujin, to the north. There's a Bamboo Cask in the northern part of town that will hold a few silver coins for you; you can also use the Scroll Stand in Gujin's shop to complete your first Hidden Book Set, which will net you the Legacy of Master Li book, which apparently adds a bonus to your Focus score.
When you talk to Gujin, he'll give you the opportunity to choose between two weapon styles. The sword style is a bit quicker, with shorter reach, while the staff focuses on slower strikes that are a bit stronger. Take either weapon as you choose and get ready to use them.
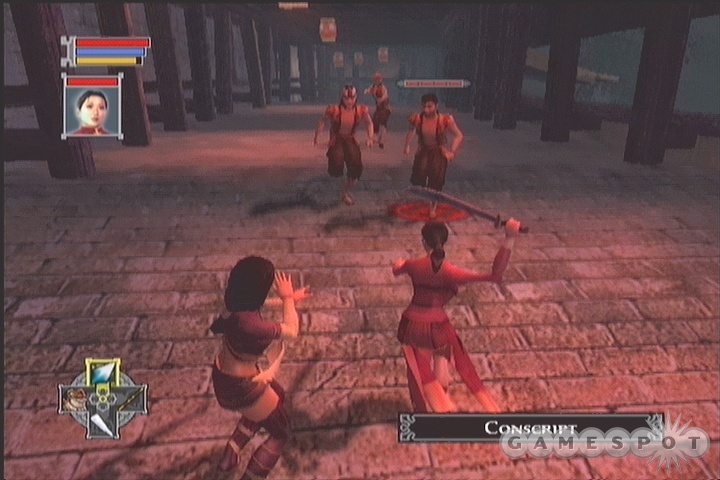
On your way back to the lower part of town, you'll face off against two more enemies, then fight four more in the main square. These guys can do a significantly larger amount of damage to you than previous enemies have been capable of, thanks to their weapons, so be sure to keep an eye on your health and use your Chi Healing when necessary.
Although you'll be prompted to head to the beach after fighting off the bandits in the square, first head south to a small residential area where another villager is being attacked by four bandits. If you can drive them off, you'll gain plenty of experience and will be able to loot the Villager's Chest for 200 silver.
The Beachhead

When you're ready to get down to some real combat, head to the east to find the beach. (You may want to use the Focus and Chi shrines near Gujin's shop to restore your health before doing so, though.) The bandits' ship is there, and they're coming ashore in full force. You'll have to defeat no fewer than three waves of enemies, with the first two consisting of groups of four foes. Do your best to stay mobile so that enemies can't box you in between them, and don't hesitate to use your area-of-effect abilities (A+X) to sweep multiple enemies off their feet. The second wave of enemies will also include a powerful Bandit Leader, so be wary of his claw attacks.
Keep in mind that there will be some cannon shots coming in at you during this fight; when Dawn tells you to watch out, be sure to use your B button and dodging moves to cover some ground, as they'll be aimed right at your feet. If they hit your enemies and Immolate them, rush in and pound on them while they're burning to finish them off.
The third wave of foes are more interesting; these are the first spirit enemies that you'll encounter. Spirit enemies are immune to your weapon style, so switch back to your martial style to take them on. They also possess ranged attacks, so be quick with the dodge button.
If you find yourself having trouble with these fights, then you may want to flip Dawn Star over to Support mode in the Followers menu. This will cause her to sit and silently channel her energies, which will cause your own Chi meter to continually recharge, allowing you to heal yourself as often as you like. All the enemies will ignore her, though, and attack you, which can be a bit overwhelming.
Aftermath
When Master Li does his trick with the boat, he'll come back ashore and finish off the last of the bandits, then ask you to meet him back at the academy to discuss current events.
The first thing to do when you regain control of your character will be to level up. You'll be able to increase your Body, Spirit, and Mind attributes (a good idea at this point is to put a point into each ability), as well as some of your styles. You only have two style points; it'd be wise to increase the damage and speed of your primary Martial ability, which is what you're likely to be using more often than anything else.
When you regain control of your character, you'll be able to speak to Old Ming, if you wish to learn a little more backstory. He doesn't seem to have anything critical to tell you, but there's some interesting information in his conversation tree if you wish to hear it. Ni Joh is the son of one of the men in the town square you encountered earlier; whether his father lived or died, you can earn some points towards the Closed Fist path by treating his concerns bruskly.
After returning to the town square, you can meet up with Fen Do, one of the merchants who has suddenly appeared. He doesn't have anything to sell just yet. Before you return to school, head back to the residential area in the south of town to fight off a few of Gao's goons - you can't avoid a fight here, so just take them down for the experience and cash that they drop. If you're seriously loathing the weapon you chose from Gujin earlier, you can also return to him and exchange it.
Return to School
When you're ready to move on, return to the school and head towards Master Li. If you wish to engage in a little side quest, then talk to Smiling Mountain and inquire about Kia Min's healing to pick up Side Quest: Kia Min. If you walk down to the beach again in the course of that quest, you can also pick up Side Quest: An Unfortunate Debt.
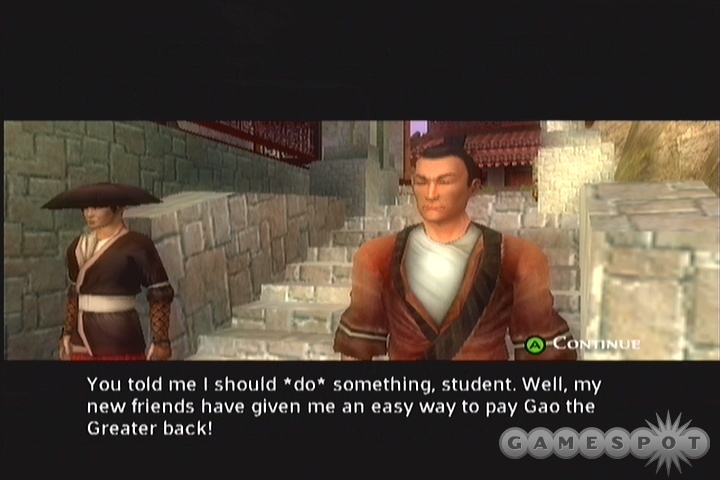
When you reach Master Li, he'll tell you to explore the Spirit Cave - but before you can go, Gao interrupts and challenges you to a duel. When you're ready to accept his duel, talk to Li and fight! Be sure to save your game ahead of time.
Gao is a pretty tough opponent, mostly due to the large amount of health that he possesses, but his attacks will mostly be avoidable if you're quick with dodges. If you enter with full health and Chi, then you should be able to heal yourself up if you happen to take damage. The key to beating Gao is to stay out of his way, and not letting him box you into a corner. With your forward flip, though, that should be easy. Beyond that, the basics are going to win this for you; block or dodge when he uses normal attacks, use a power attack when he's blocking, and otherwise just avoid him. He'll go down after a couple of minutes of solid punching.
The Spirit Cave
When you've finished up the Lion of Two Rivers, Kia Min, and An Unfortunate Debt side quests, save your game and speak to Master Li in his home. The resultant cutscene will reveal a bit of your past, but will probably only bring up more questions for you. Afterward, he'll ask you to enter the Spirit Cave, the site of your first true challenge.
After you bypass the first gate in the spirit cave, walk forward and use the Pillar to receive the Dragon Amulet. With it, you'll be able to equip certain gems that you find in your travels. If you have any already, use the A button to place them into the amulet and receive the bonuses that they accord you.
After fighting off the three spirits that attack you, use the amulet to read the seal on the next gate to the north, then head through. Your next fight is against the Old Master, a previous master at the school. He's powerful, and possesses a damaging ice attack that can hit you from above, so stay mobile and try to take down his minions before focusing on him. He doesn't have much health, so close in with your Martial style and bring him down.
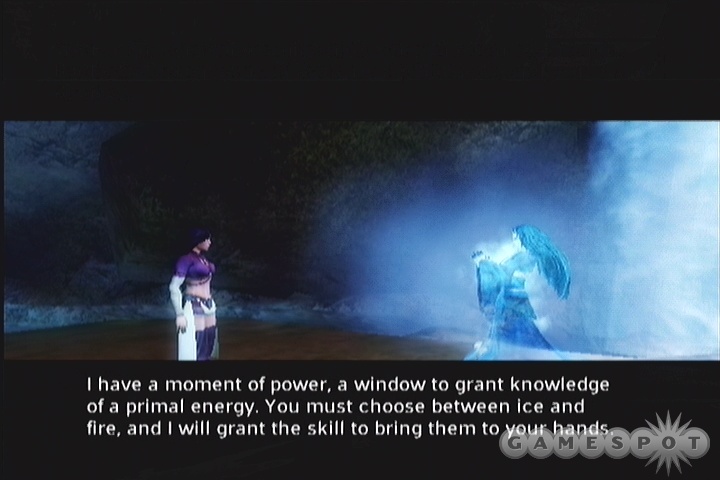
A Mysterious Visitor
When the Old Master has been killed, a strange apparition will appear and offer you a gift: you may learn either an Ice or Fire Magic style. Make your choice as you please. When you regain control of your character, be sure to examine the various containers in this area to find more items and cash, then read the Scrollstands before entering the portal to return to Master Li.
Main Quest: The Search For Dawn Star
After emerging from the Spirit Cave, you'll learn from Master Li that Gao is involved in the disappearance of Dawn Star. Before you rush out after him, though, stop by Smiling Mountain; he'll sell a few gems if you have the cash to buy them. For 200 silver, you can purchase a gem that will add one point to either your Body, Mind, or Spirit attributes.
When you're ready to head after Gao, return to town, where you'll find the charred body of Si Pat, apparently cut down by Gao during his escape. If you want more gems, speak to Fan Do for a new selection. He'll also tell you to talk to Gujin about Gao's escape.
On your way up the stairs to Gujin's shop, a villager will likely be waiting for you. If you opened the Villager's Chest during the earlier fights with the bandits in town, he'll ask you if you've seen the 200 silver that was in it. If you wish to return the cash to him, you can, or you can simply laugh and keep it for yourself, with the appropriate alignment shifts.
After talking with Gujin, head north towards the gate out of town. You'll have to deal with multiple goons of Gao the Greater at this point, including the villager from the Unfortunate Debt sidequest, if you happened to tell him to deal with his problems himself. Defeat them, then talk to the guard to learn that Gao has headed to the swamps.
The Swamps
After defeating the first group of bandits that you encounter here, speak to Merchant Hing to learn that the bandits have taken off with his wife, allowing you to pick up the Side Quest: The Flower Of The Fields. When you're done talking to him, walk along the path behind him to meet up with Sagacious Zu. However you treat him, he'll join you as a follower.
After examining the area for bones and a Scrollstand, start moving north to the bandit camp (take the left path first, as it'll let you fight a couple more enemies for extra XP), which has been overtaken by Gao's soldiers. Defeat them to learn a bit more about the drama surrounding Dawn Star - apparently she's managed to escape Gao and flee into a cave nearby. When you're done interrogating the soldier, you can either let him go, or kill him as your whim strikes.
One of the bamboo casks in this area has been trapped. Since you can't currently tell when chests are trapped, all you can really hope to do is avoid the trap by evading its effects when it goes off. A high Focus score will help you do so, so before you open these chests, equip any Monk Gems you happen to have.
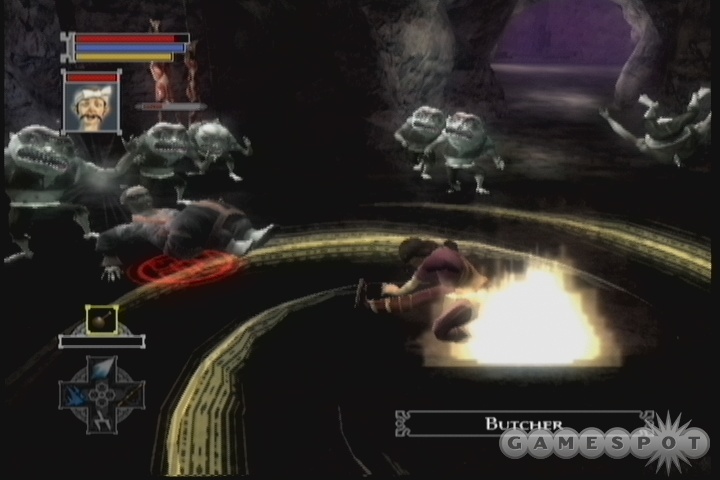
Swamp Cave
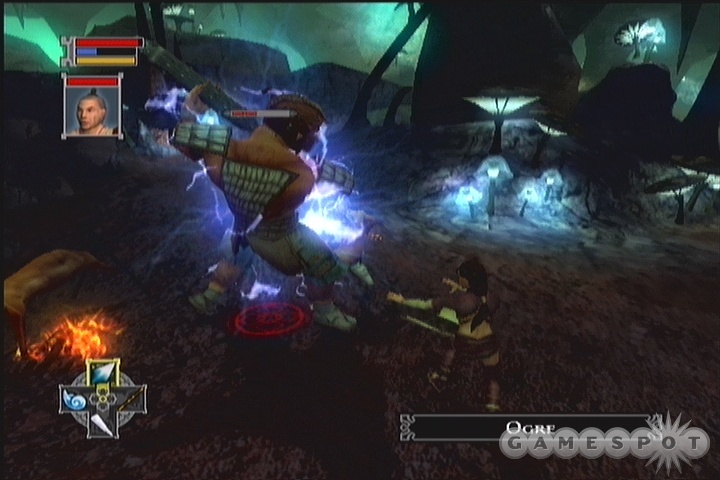
When you're ready to find and rescue Dawn Star, head north into the Swamp Cave, dwelling place of Ogres and Toad Demons. Your path will be blocked by one of Gao's well-timed fireballs, but it's of no matter; you'll at least have confirmation that Dawn Star is still alive. Take your time exploring the cave and fighting off the Ogres here. These guys have some powerful attacks, so be sure to use your backflip to avoid their power attacks when they start to glow blue, as a single hit will knock a third of your life off in one shot, if not more. If possible, let the Ogres face you while Zu attacks them from behind - he doesn't deal a lot of damage but can kill them if given enough time.
When you've dealt with the Ogres, head up the ramp in the middle of the cave to deal with your first Toad Demon. You'll need to be mindful of their power attacks, which come out quickly and will poison your character when they hit. Again, though, it's a two-on-one situation, so let Zu strike when he can while you avoid or block the Toad's attacks. When the Toad goes down, you'll gain your first Transformation Style: Toad Demon. With it in hand, search the cave for any remaining bones or chests, then head down to where Gao and Dawn Star are conversing.
Boss Fight: Gao The Lesser
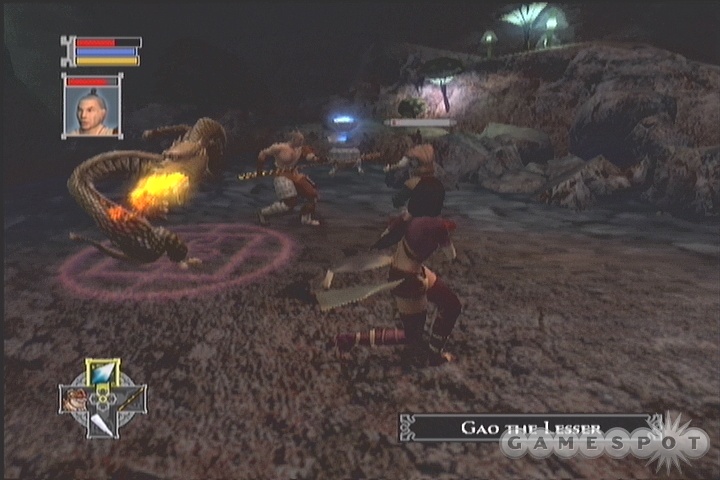
Gao brings a number of new abilities to the table here. You can attempt to take him down either by yourself, or with either Dawn Star or Zu by your side; you don't seem to gain any extra experience by taking him down on your own, so feel free to pack a sidekick if you wish.
The most notable change between this bout and your earlier duel with Gao will be his use of ranged fire attacks. In addition to his normal firebolts, he can also summon a dragon to spit out flames in a wide swath of the fighting zone. Keep in mind that your Toad Demon transformation style is immune to fire damage, so feel free to switch over to it if you want to be temporarily immune to the firebolts. It will constantly drain your Chi, though, which you'll probably need more for healing than magical tricks.
If you run low on Chi or Health, keep in mind that you can bust the two rocks in the arena while you're in free-target mode. One of them will drop a small Focus replenishment, but the other should net you a full Chi restore, so use whatever Chi you enter the fight with to heal yourself, then bust it and grab the pickup when you're running low.
You'll want to close in on Gao while he's firing firebolts at you by side-dodging his bolts and jumping in as possible, then using your weapon style or your Focus mode to beat him down at close range. You can also try matching magic styles with him at range, which can be especially neat if you have Dawn Star along in Support mode to continually replinish your Chi.
However you deal with him, take down Gao and select one of the party to help you clean out the cave. There are three chests near Gao's corpse, including a new technique for you, 250 silver, and a good chance at a new gem. When you have them, head back to the entrance of the cave.
Quest: The Burning Town
Uh-oh...it seems that some of Gao's friends have launched a premeditated attack on Two Rivers from the air. You'll need to take your little flying machine up to the skies to take them down, old-school-shooter style. The controls here are about as easy to use as you could imagine; just use your left analog stick to move your ship up and down or left and right, and use the A button to fire your weapon. Your X button can be used to activate a temporary energy shield around the ship, but you shouldn't need to use it. If you're quick on the fire button, you should be able to take down everything save for the first two bombers that you spot.
When you hit the ground, start making your way back through town - or what's left of it, anyway. Most of the villagers will have been killed, but you can wreak havoc on the invaders with Dawn Star by your side. This map is actually a combination of the town map and the school map, since many of the areas have been blocked off, so head west until you reach the school. Before going into the main area, head to the southern sparring field to fight more bandits, and be sure to search the Student's Body here. When you're ready to move on, head into the school's main square.
Another wave of enemies will come at you here, with another wave coming after that. The second wave will feature Gao's Lieutenant, who wields claws and lightning attacks that can shock you. Dawn Star will likely get beat up by him if you attempt to take on the minions first, but that's not such a bad thing; if you monitor her health and flip her over to Support mode before she dies, she'll be able to continually restore your Chi, allowing you to heal yourself or blast away with your magic style.
When the Lieutenant and his minions die, Jing Woo will appear, and tell you with his last dying breath that Death's Hand, a close lieutenant of the Emperor, was responsible for this offense, and that Master Li was taken away shortly before he arrived. After the conversation, you'll blast off in your ship for another trading town. On your way out, you can choose to engage in another mini-game of ship battling, if you wish, or just head straight to your destination.
Side Quests
The Flower Of The Fields
After obtaining this quest from the merchant in the swamps, head to the northeast of his position to find three bandits harrying a woman. If you rescue them, you'll be able to free the woman, as well as the merchant's cow, which is the real flower that he was referring to - lololpwned. Accept your reward and get moving.
Lion Of Two Rivers
After your conversation with Master Li, you can inspect the statue of the Lions of Two Rivers, which interacts with the three lion figurines you can find in a nearby chest. You can't do much with it yet, save mimic the colored lights that flash when you approach the altar, but keep the figurines anyway.
When you have some silver in your pocket, take the path leading north of the school to the grounds where two students were formerly sparring. There's a small tomb here which, if you place a single silver coin into its mouth, will yield another lion figurine. If you approach the alter in Master Li's house again, you can use this figurine on the statue, which will change the sphere to a greenish color. Here's the steps to earn your reward:
- Place blue and yellow. (Sphere turns orange.)
- Remove blue, place red. (Sphere turns purple.)
- Remove yellow, place blue.
If you perform these steps, you will obtain the Gaze of the Lion technique, which nets you +2 Health and Focus.
Kia Min
After you obtain this quest from Smiling Mountain, talk to Kia Min near the steps leading to Master Li's house. She'll tell you that she's been injured, and cannot spar you until she's been healed. In order to help speed her recovery, you'll need to travel back to Old Ming at the beach and learn about the two grasses that you can give her: red silk grass will bind the wound and allow her to actually heal, while bearded tongue grass will just deaden the pain, allowing her to believe that she's been healed, but not doing much besides acting as anasthesia.
Your choice is fairly clear; if you want to actually heal Kia Min, get the red silk grass and give it to her; if you're traveling the path of the Closed Fist, though, and don't particularly care about her physical well-being, get the bearded tongue grass. You should be able to knock Fan Do down to 20 silver on the sell price, and if you're particularly bad, you can get Kia Min to pay you 50 silver for the herb when you return to her.
When you've either healed or sabotaged Kia Min's body, return to Smiling Mountain and ask him to spar. If you can defeat Kia Min and four other students simultaneously (using your area effect abilities to knock them off their feet), then you'll gain the Alloyed Body technique, which will net you five extra Health and Focus. If you gave Kia Min the bearded grass, then you'll earn more points in the Closed Fist path. After you return from your trip through the Spirit Cave, you can rub in the fact that you won for extra-evilly goodness.
An Unfortunate Debt
There's a man standing on the beach near Old Ming after the encounter with the bandits there. If you speak to him, he'll tell you that he's in hoc to Gao the Greater for the princely sum of 20 silver. You can either help him out by giving him the money he owes (Open Palm) or tell him to solve his own problems (Closed Fist). If you choose the latter path, he'll reappear in a fight between you and some of Gao's goons later on, allowing you to kill him. Either way you go, you should be able to get and resolve this side-quest within the course of one conversation.
Chapter Two
Main Quest: Picking Up The Pieces
After your crash landing, it'll be up to you and a teammate of your choice to find the town of Tien's Landing and somehow obtain a wind map and a new flyer to resume your journey.
Begin by heading out to the west, where a band of Spirit enemies will attack you. Recall that weapon styles don't damage these fellows, so use your martial or magic styles to take them down. When they've been defeated, the spirit that schooled you in the Spirit Cave will appear again, and let you know that there are no fewer than four pieces to the Dragon Amulet that you wield, of which you only possess one.
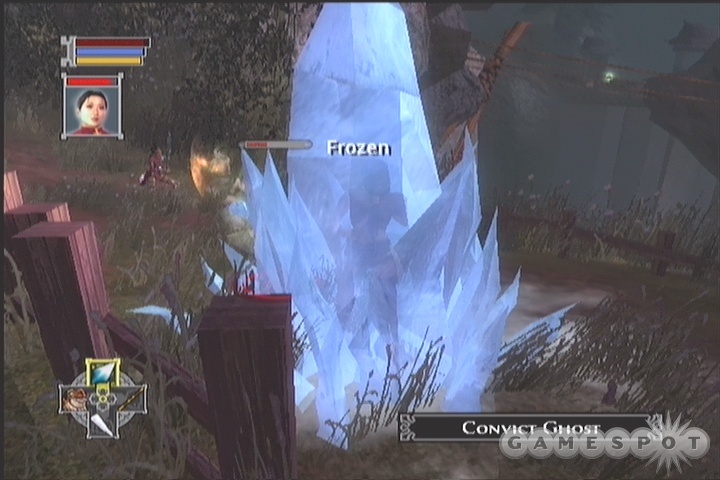
Around the southern road, you'll come to a headstone, which you can break if you wish to take on more enemies. The Convict Ghosts here are powerful, and have the ability to freeze you with ice magic. You can heal yourself while frozen, but it's best to avoid this fate altogether, as they'll often just repeatedly freeze you to lock you up.
Unfortunately, the bridge to Tien's Landing is raised, forcing you to take a southeastern passage to wrap around to the village, which will lead you to Side Quest: A Woman In Black. Defeat the mysterious warrior and move on.
You'll soon come to the marker stone that Zu mentioned earlier. One of the arrows points to the right, towards Tien's Landing, but before you head into town, take a left and explore a bit to find another set of Imperial soldiers, doing the bidding of Death's Hand. A fight here seems impossible to avoid, so destroy the three soldiers, then talk to the fourth that approaches you afterwards. You can get information from him, if you wish, then choose to let him live or kill him for a large alignment swing. Check the chests in the room behind the soldiers for the Silk Strings plot item, then head into town.
Main Quest: The Great Dam | Main Quest: Find A New Flyer
After you meet up with Zu again, start walking towards town. The two women you encounter here will give you two new story quests, both involving Minister Sheng, whom you are supposed to track down in town and talk to.
Main Quest: Hui The Brave
Head into town to meet up with Hui, who will quickly come under attack from a few simple sailors. Help her defeat them to learn more about what precisely happened at Dirge lo those many years ago - apparently the Emperor, in his desperation to end the Long Drought, managed to not appease the god he had offended, but instead kill it. The dude's got style. After the lengthy conversation, Hui will teach you the Spirit Thief style.
The Teahouse
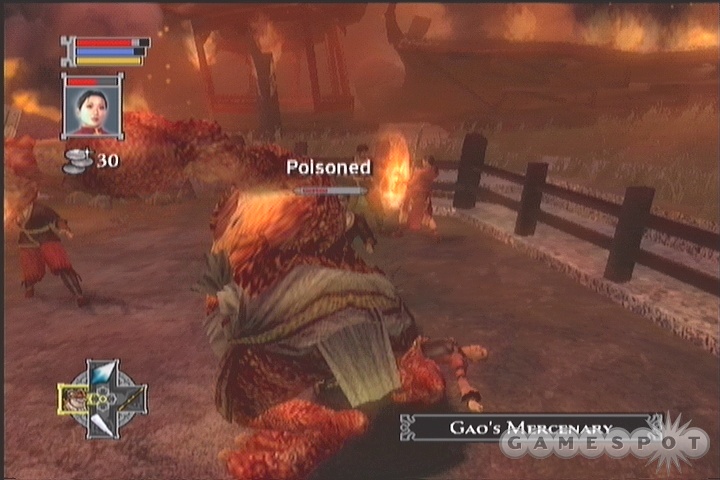
When you're ready to talk to Hui some more, feel free to head into the Teahouse. You'll immediately be ambushed by multiple sailors, apparently too dumb to know when they're outmatched. All great kung fu movies have a fight scene in a tavern or inn - it's the law - and, true to form, Jade Empire will allow you to use broken tables and chairs as makeshift weapons during the fight here. If you smash a wooden object by jumping onto it or smashing it in free target mode, you'll be able to walk over the icon that appears and use the wood as a weapon temporarily. These objects do decent damage, but will disappear after five or six strikes, so make the most of them.
After the fight, Hui will tell you to search the ruins of Old Tien to find the next piece of your Dragon Amulet. You'll need to speak with Minister Sheng to receive permission to head there, though; it seems like many of these quests will be sending you in his direction.
Chai Jin's Challenge
Before you leave the Teahouse, though, you may wish to walk around and see the sights inside. There are a few containers to loot; you can pull off the Zhong The Ox Carrier side quest; and you can speak to Chai Jin, the master chef, to complete an optional task. This isn't a quest, per se, but if you speak to him, he'll challenge you to taste three of his dishes. It sounds like a fool's bargain, at first; he'll take 300 silver if you get knocked out by the power of his dishes, but if you withstand the culinary assault, you get nothing. However, if you can survive the first round of tastetesting, Jin will offer up a super-secret dish for your perusal, at the cost of another 300 silver. If you manage to survive that round, you'll get all of your cash back, as well as a gem.
Each of his dishes will take off a certain amount of health, focus, or chi energy. If any of these attributes drops to zero, you'll lose the game, and your cash. (Be sure to save beforehand, obviously.) We had a lot of Body score, so we chose for our first two dishes the meals that affected our constitution. The third dish worked against our Mind, while the fourth, optional dish affected them all. After you survive the fourth dish, you can either tell Chai Jin that it severely weakened you, at which point you'll get your reward, or you can tell him that it didn't seem particularly effective, at which point he'll sample it himself and promptly keel over dead, netting you Closed Fist points and the gem from his body, you sadist.
Merchant Area
Before heading down to the main part of town to deal with the Minister, feel free to wander the town and examine the chests and casks in the area for more goodies, or pick up the numerous side quests that you can find in the area. You can find the Bar of Nickeled Iron plot item in a cask to the west of the teahouse.
If you head east from the Teahouse to the Merchant Area, you can speak to the villagers and merchants there to pick up some new quests. Merchant Cheung will give you Side Quest: The Stolen Memento (this only has an Open Palm resolution, so you may want to skip it if you're a Closed Fist character), the Messenger by the gate will offer up Main Quest: The Sickened Forest, and you can also find Minister Sheng, the locus of many of the quests that you've picked up thus far.
You're going to need to speak to Sheng to further the Great Dam and Find A New Flyer Main Quests. He'll reveal who opened the Great Dam, and further reveal that you should speak to Ru the Boatswain in the Teahouse if you're looking to find a new flyer. Before you can take the river up to the pirate camp, though, you'll want to head out to the Great Dam and find your missing Dragon Amulet piece.
Shortly after you speak with Sheng, Merchant Jiang will approach you with a counter-proposal. He's making a killing off of selling wine to the sailors trapped in town by the low river, and asks you to permanently destroy the dam's mechanics so that it'll be stuck open forever. In exchange, he offers you a substantial amount of silver. You can already tell what choice will affect your alignment, most likely.
Moving On
After exploring the rest of the town, you'll be able to follow one of three paths. You can either head to the Dam to find the second piece of the Dragon Amulet, or head into the Forest to see about helping Yun heal the sickened woods there, or talk to Ru the Boatswain and attempt to talk him into taking you to the pirate's camp. We'll go ahead and deal with the dam first, so head back east of town and walk through the Ruin Gate near the Imperial Army troops you slaughtered earlier. You'll almost definitely want to bring along Dawn Star, if only because her support ability is going to be much more useful against the enemies that you're going to fight.
The Ruins
After entering the ruins of old Tien, you'll have to fight more Army slugs; luckily, their Lotus Assassin commander will leave the area before you charge in, but not before he has the chance to summon a number of Rat Demons to search the ruins and harry your movement.

After killing the initial soldiers, you'll receive the Gem of Thief's Sense, which will let you detect trapped chests and casks while you have it equipped. Whether you use it or not, open the Assassin's Supplies box nearby to find the Dragon Powder, a key item.
With that in hand, head south to meet up with a Cowardly Rat Demon. If you beat him in a fight, he'll offer to tell you where the special gem they're searching for is; it's apparently hidden behind a wall somewhere, which the Assassins are preparing to blow up with rockets and Dragon Powder. This is part of the Gems In The Quarry sidequest. Since you already have one ingredient, it's time to find the other. Before you start looking around, though, search the bones of Cameo behind the nearby house to find Cameo Portrait. (This is something of a hidden side quest. If you return this to Old Wei, in the Merchant Area of Tien's Landing, then you can either give it to him for Open Palm points, or taunt him by keeping it for a Closed Fist swing.)
Further down the path, you'll find more Army fools guarding the rockets. Kill them, then use the Dragon Powder on the rockets and fire them off to destroy the wall. This sidequest will take you to another area; see the Gems in the Quarry segment of the Side Quests subchapter to learn more. You can also speak to the orphans in the house to the west here to nab the Drowned Orphans sidequest.
The Crane
After moving down the path a bit, you'll encounter a soldier and an assassin fighting off some ghosts. One will let slip the command word for the sentry golems on the dam, just before you utterly destroy him. Unfortunately, the assassin will escape across a nearby bridge and raise it, but all you need to do to lower it again is use the crane switch nearby. Funny how things work out like that some times... After one more encounter with your mysterious spiritual advisor, you'll move on to the...
Dam Site
Soon after you enter this map, you'll come across a little girl. Before you can get a straight answer as to who she is, she'll transform into Chai Ka, a demon servant intended to test you. He's a bit upset, though, so instead of testing you, he's going to attempt to kill you.
Chai Ka has a number of powerful attacks, the most annoying of which are his power attack, which comes out quite quickly and will knock you down, and an area-of-effect attack which channels his power into the ground and will likewise knock you down. As a demon, he's also immune to support and magic styles, so stick with your weapon and martial styles to deal damage. His big weakness is a lack of maneuverability, so if you want to take him down, you'd be well advised to sit Dawn Star down in support mode to have her restore your magic while you continually flip over him and quickly strike from the rear, healing as needed or as possible. He's plenty slow, so you can outrun him and wait for your magic to build back up if you want to use Demon Toad mode to wade into combat.
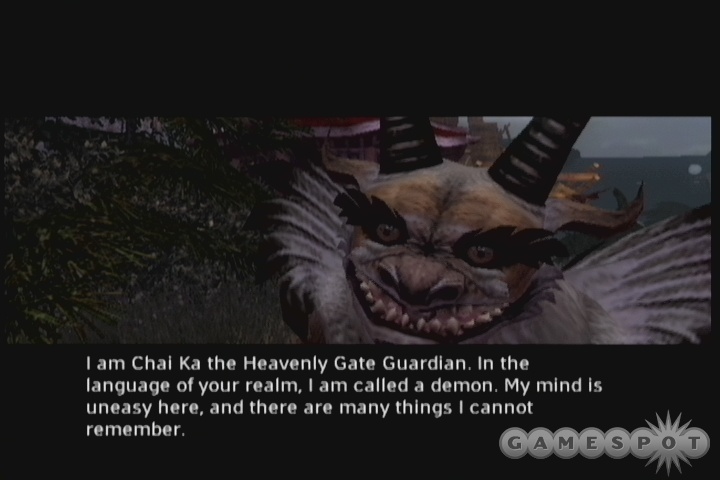
After Chai Ka has been defeated, he'll grant you a gem, and tell you that the Lotus Assassins stole the Dragon Amulet part that he was supposed to give you. He and Wild Flower will join your quest as your third follower. Hooray!
Moving On
With Chai Ka as a member of your party (or one of the other characters, as you please), first head north into the small valley near the exit to the Ruins to find the River of Time technique, then head east to the pagoda to find another chest and a scrollstand.
Before you move on, you'll need to get past the sentry golems that guard passage to the dam controls. You can fight them, although they're monstrously tough; a better plan is to use the code word you overheard earlier (Shao Hua) and pass by unscathed. At the bottom of the steps, you'll encounter the dam controls, and you'll be forced to make a choice: you can either close the dam, and please Minister Sheng, as well as earn a reward from Captain Ing and some Open Palm points, or destroy the controls, which will earn you a number of Closed Fist points and the cash reward from Merchant Jiang.
Whichever path you choose, you'll probably have to defeat a Lotus Apprentice and a bevy of guards when you return to the top of the dam. If you have Chai Ka along in your party, then you'll need to watch his health; although he's powerful, he's quite slow and can be surrounded by foes. If he's near death, switch him to support and he'll start to replenish your health. This will be a slow replenishment, obviously, but it should be enough to let you use Heavenly Wave and Spirit Thief to leech back some Chi power from one of your foes until you can heal Chai Ka back up and get him back to Attack mode.
Whichever action you took with the dam, it's time to return to Tien's Landing and report your findings. Head across the drawbridge and south towards town to meet up with Silk Fox again. She'll tell you that only Lord Yun, the Imperial soldier tasked with cleaning up the Sickened Forest, has a wind map. This opens up the Silk Fox side quest.
Back to Tien's Landing
When you return to town, now would be a good time to talk to Dawn Star and Zu while they stand around in the camp. Just speak with them and explore their new conversation trees; you may find yourself sowing the seeds of future romance by listening to them talk. You can also talk to Wild Flower, if you wish.
If you opened the dam, then be sure to speak to both Minister Sheng and Captain Ing to receive your rewards; if you forced the dam open, then Merchant Jiang will have your just desserts waiting for you. In addition to that overarching quest, you can also return the Cameo Portrait to Old Wei in the Merchant Area, track down Kindly Yushan in the Teahouse for the Drowned Orphans quest, and finish off any of the side quests you previously left undone.
When you're ready to move on, meet with Ru the Boatswain in the upper floor of the teahouse and persuade him to meet you down by the docks. With that accomplished, talk to him at Beggar's Pier and get him to take you to the pirate's lair downstream.
Lower Pirate Island
The Pirates apparently hold the key to flying technology, so you'll need to infiltrate their base to get back to the air. Gao the Greater also apparently resides here, so you can also use this trip as retribution for what happened at Two Rivers.
The washed-up pirate you run across after the opening cutscene here will offer you a choice: you can either pull the rope suspending the cannon above the bridge to kill all of the pirates on it, as well as the innocent sweeping boy (Closed Fist); or you can just run around and kill them all the old-fashioned way, which doesn't seem to have an alignment shift. Be careful, though, as they pack long swords, and the woman wields a style that can Disorient you and prevent you from attacking with each hit. Nasty. You will get 1,000 XP for using the cannon, though, which seems to be a bit more than you get for fighting the guys.
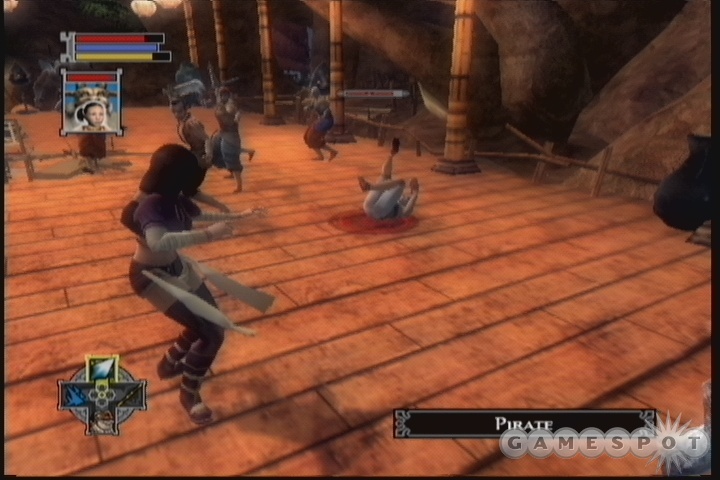
With the bridge-soldiers out of the way, you can follow the path to the northeast, where you'll encounter a large group of six or seven pirates that will have to be fought en masse. This is going to be a tough fight, no doubt about it, so you'll probably want to have either Chai Ka or Dawn Star along for their support abilities. If you've got the Chi for it, then Demon Toad might be a good way to start the fight, as it'll let you slash at multiple foes and poison them all, but you don't want to stay in it too long, as you'll usually wind up being flanked or attacked from the rear by sword-wielders. With Chai Ka or Dawn Star along, though, you can set them to restore your health or Chi powers, which should let you just run away from your foes until you're strong enough to re-enter the fray. Just keep using your area-of-attack abilities; don't forget that Heavenly Wave can slow multiple foes at once with its A+X attack.
With that fight out of the way, you may want to return to the Spirit Font near Pirate Cheung and restore your health and Chi before returning to the path and heading around to meet Sky, who's working on freeing the slaves of the pirates. He'll drag you into battle with him, so fight off another group of pirates to learn his story - it appears that he's here to fight Gao the Greater for some personal reason, and offers to help you open the door leading to the upper levels of the camp. You can also get the Yifong and Fuyao side quest by speaking to the female slave that he freed.
Kang The Mad
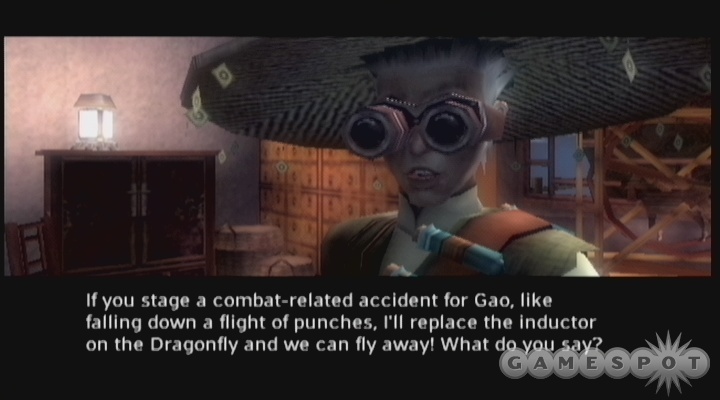
As you pass further up the pirate camp, you'll eventually come to a large building, within which you'll eavesdrop on Inspector Lim and Gao the Greater speaking with Mistress Jia, the woman who instigated the assault on Two Rivers. It would appear the Lim does indeed have the Dragon Amulet fragment you've been looking for, but is soon to depart the area. Of more short-term interest is the notice of a new long-range Flyer that Kang the Mad is soon to finish construction on. If you could get your hands on that, you could get to the Imperial City in no time!
When you enter the building and destroy the pirates within, you'll be able to converse with Kang - apparently he yearns to be free of the yoke of Gao, and offers to give you the flyer he's constructed, as well as help you in your cause, if you take Gao out. Sounds like a plan.
Further up the steps, you'll come to another group of pirates and a fork in the road. Head to the northwest to resolve the Yifong and Fuyao quest, or just head northeast to meet up with Gao.
Workshop
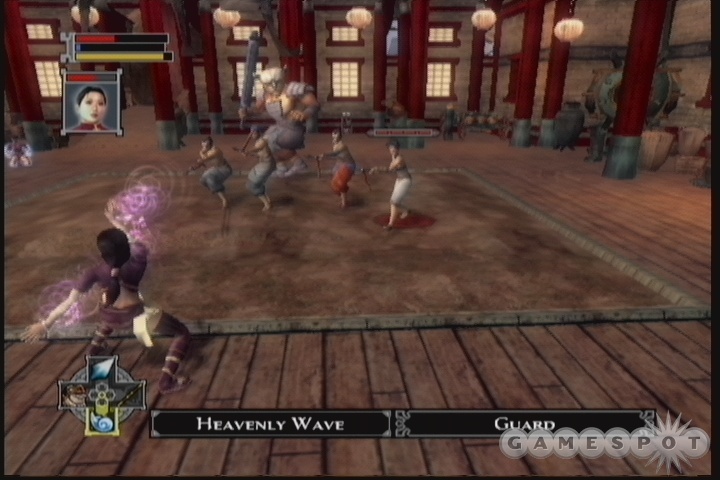
After entering the workshop and attempting to cross it, you're going to need to fight a couple of waves of enemies. The first will consist of lesser and greater Rat Demons; watch out for the greater demons' fireball attacks. The second wave features numerous pirates and an ogre, so do your best to stay away from the Ogre's power attacks while dispatching the lesser foes in his midst. As per usual, Dawn Star's support mode will be helpful in building up Chi for healing or for chi attacks. When you can isolate the ogre, flip over its head and attack it from behind to finish it off.
When the area is clear, check the vases and boxes here for items; one of the scrollstands has the Configuration of the Horse plot item. When you've cleared the room, head up to the uppermost section of the pirate cove to meet up with a new friend.
Boss Fight: Gao The Greater
Gao is going to come at you with a few flunkies in tow, but he's the most dangerous enemy in the room, obviously. If you have Dawn Star in tow, you may want to just set her into support mode and use Frog Demon's power attack to poison the flunkies and weaken them before you flip over to your weapon or martial style and pick them off.
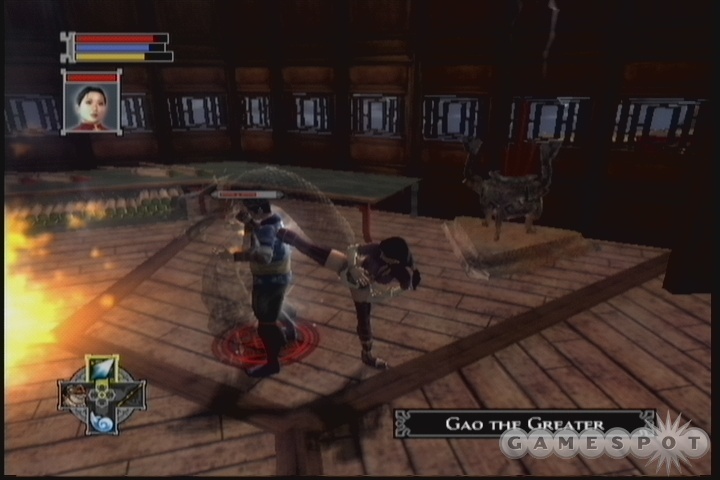
When you can get Gao off by himself, you'll have to deal with his attacks, which will mostly consist of icebolts, fireballs, and the power attack of fire magic, which summons a large snake to Immolate you (you should be familiar with this from when his son did it). One of his favorite tricks is to block, then wait for you to start a power attack before pelting you with ice bolts. Beyond the obvious tip of staying maneuverable, you'll probably want to keep in close to Gao and use your weapon style with chi strikes to drain his health and prevent him from getting into an offensive rhthym. If you can get him into a one-on-one or two-on-one matchup, he shouldn't be too difficult to take down.
When Gao's been killed, Sky will join your party as a follower, Kang will get the Magnificent Dragonfly up and running, and you'll be able to check one of the chests in Gao's little villa for the Zither Case, part of the Zither of Discord sidequest. You can also walk around the house to find a smashable Bonsai Tree that you may find another gem in.
When you're ready to head back to Tien's Landing, return to the workshop and speak to Kang. Give him the Inscrutable Power Source you obtained when you first met Chai Ka, and your very own personal airship will be ready to take off.
The Sickened Forest
Back in Tien's Landing, speak to Dawn Star and Sky to learn more about them and to continue your romance plots, as applicable. When you're ready to finally track down that Dragon Amulet piece, speak to Minister Sheng for your reward for wiping out the pirates, then head north into the Forest. You can also deliver the Zither Case to Scholar Six Heavens, if you wish.
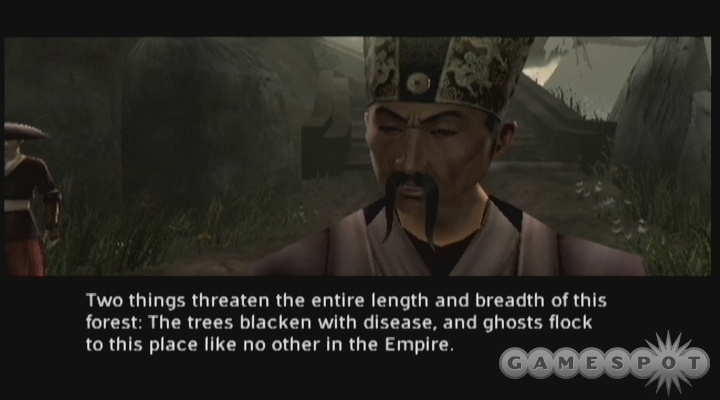
Soon after your arrival and a fight with some forest spirits, you'll run into Lord Yun, who offers you a deal: he'll make you a copy of his wind map if you somehow manage to placate or eliminate the Fox Spirit, who's seemingly responsible for the disease affecting the trees of the wood and the many ghosts that have been appearing in the area.
Make your way north until you come to a another group of Spirits that you have to fight. You may notice the appearance of a small shrine here; if you head towards it in free attack mode, it will create a small zone of influence in the middle of the area that seems to weaken the ghosts when they enter it. Use it to polish them off more quickly. When they're done, you can either head to the east to finish off the Zither of Discord side quest, or head north to the bridge, where a civilian is being attacked by a pair of Lost Spirits. Fend them off, then speak to the man to learn that he comes from someplace called Pilgrim's Rest Inn, which has been cut off from civilization by the appearance of the forest ghosts, including the mysterious Forest Shadow that Yun spoke to you about. Said spirit will actually appear after you finish your conversation with the man, turn him into stone, and attempt to do the same to you. You're not about to be finished off by some second-rate Gorgon, though.
Approaching The Temple

When you reach the fork in the roads, take the left path to reach the temple of the fox spirit, ignoring the many switches you see on the way there. Soon after you arrive, you'll be attacked by a bear of a man named the Black Whirlwind. He wields a pair of axes and can swing for some pretty impressive damage, but your degree of maneuverability should let you stay away from his blades until you're ready to strike. You can also use Heavenly Wave to slow him down while you wield your weapon style on his big old butt. Take him down however you wish to learn more about he and Spear Catches Leaf, Yun's chief hunter who is examining the temple to see if he can't summon Forest Shadow to enquire about her behavior. It appears that there's some kind of crystal that he'll need to complete his ritual, which was taken off to the Pilgrim's Rest Inn.
Important: Before you head out that way, shop at Spear Catches Leaf's little shop. In addition to the powerful Hunter's Spirit technique that he sells, you can also buy the Storm Dragon style, your first new style in quite a while. It's a better technique to have than Heavenly Wave, in our opinion, as its ability allows you to shock opponents, which will freeze them temporarily instead of merely slowing them down. We strongly recommend that you pick this up now. If you don't have enough cash, sell your excess gems, or come back when you do, as Storm Dragon is going to make the rest of the game much, much easier for you.
When you're ready to move on, head up to the northeast to find the exit to the Pilgrim's Rest Inn. You'll need to deal with multiple waves of spirits before you can move out. If you wish, you can also return to the first fork between the paths leading to the Inn and the Temple to respawn multiple enemies here and there. Each enemy should net you around 85-100 XP, and you can spawn in as many as you like, so if you want to build up your skills a bit, feel free to do so.
Pilgrim's Rest Inn
When you reach the Inn, kill off the spirits wandering outside, then head in for a curious cutscene. It appears that something resembling a Rat Demon is escaping the inn just as you reach it.... There's nothing you can do with it for now, so head inside the Inn to speak with the Keeper, who acknowledges that they did indeed steal the crystal from the temple, and offer to give it to you if you agree to kill the Forest Shadow.
Note that, during your conversation with the Keeper, you have a few choices as to how it resolves. You can either accept their offer of silver for killing Forest Shadow, or you can lie to them to accept it. This will let you explore the inn, and speak to Hou in the rear, a merchant who will offer to sell you items, including perhaps the handy Gem of Struggle, which will net you +2 to Body, Mind, and Spirit if you're a Closed Fist user. If you say that you're going to kill them, or refuse to accept their blood money, then they'll reveal their true selves: it appears that they're actually cannibals, in the service of some great subterranean demon named Mother. Depending on your choice, you will either open up the Fox Hunt or the Cannibals In The Inn side quest.
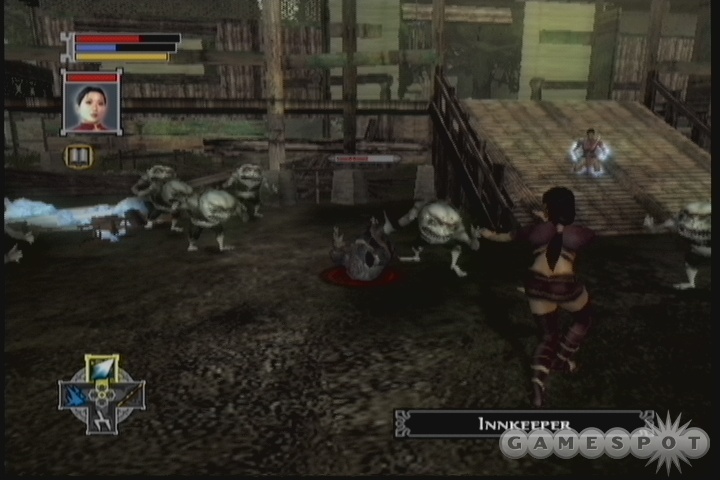
The cannibals attack in large groups, but are individually weak. The best way to deal with them is to use Demon Toad's power attack to charge through them, poisoning large numbers of them at a go, interspersing that with attacks on individuals with your martial style. Don't forget to use your area attacks to sweep them off their feet.
Whether you kill the cannibals, or merely accept the crystal from them in exchange for dealing with Forest Shadow, you'll have to bring the crystal back to Spear Catches Leaf, who will return to Lord Yun, leaving Black Whirlwind behind as a new follower for you.
The Light Puzzle
In order to reach Forest Shadow, you'll have to maneuver through a bit of a puzzle at the temple. Don't worry; it's not terribly complicated. To start out, place the crystal in the central pedestal; you'll be pointed towards a switch down the steps. Flip both it and the switch further to the south to point two beams of light towards the temple. In order to open the portal to the next area, you need to pull the blue and red switches at the two other furnaces, then hit the central pedestal again to combine the beams. With that done, you'll be able to open a portal to...heaven?
Forest Shadow's Heaven
Immediately after you enter Forest Shadow's Heaven, you'll be accosted by Zin Bu, a celestial bureaucrat who offers to join your little party. When you click on him in the Followers menu, you'll be able to enter a store at any time you wish; he immediately sells the Leaping Tiger martial style, if you wish to purchase it.
Shortly around the bend, you'll encounter more Fox Spirits, who will soon come under siege by Toad Demons. The Fox Spirits are quite capable of dispatching the demons on their own, so let them; you'll still gain experience, and the Spirits will assume that you helped out and let you pass. Further up the trail you'll come to your first Horse Demon. When you use martial styles on these fellows, you'll take damage with each blow you land, due to their flaming manes; use a weapon style to avoid this.
After two fights involving Horse Demons, you'll come to the pagoda of Forest Shadow herself. If you have any intent to kill the Forest Shadow (a Closed Fist path, as you'll understand when you talk to her), be absolutely sure to return to the Spirit Font and Focus Shrine you passed by earlier and top off your health and energy. This is going to be a difficult fight.
Conversing with Forest Shadow

However you choose to treat Forest Shadow in your conversations, the choice to deal with her is pretty clear-cut: either you can force her into a confrontation and fight, which, knowing what you know, will result in a Closed Fist alignment shift; or you can accept her offer to track down and kill the Mother demon in the caves below the Pilgrim's Rest. If you choose to help her out, you'll only be able to go kill Mother; if you choose to kill her, though, you'll be able to do both that and kill Mother.
Closed Fist Path: Destroy Forest Shadow
If you choose to attack Forest Shadow, she'll attempt to lure you to the lowest of the islands in her Heaven. Before you can start after her, though, you'll need to defeat her bodyguard Shining Tusk, as well as three of her elite Fox Spirit warriors. This is going to be tough, obviously, so bring along Dawn Star and let her either help in combat or, preferably, sit around and recharge your Chi.
The first task should be to eliminate the three Fox Spirits. This will be annoying to do, due to Shining Tusk's area-of-effect powers, so be sure to use your weapon style with whatever focus you have, along with Chi Strike to up the damage. When you run out of Chi, you can use Spirit Thief's power attack to drain the Foxes from long distance to enable you to heal yourself back up and use your Chi Strikes again.
When the Foxes are out of the way (and this will take a while), go to work on Shining Tusk. Like most big opponents, the key to beating him is to jump over him and strike at his back while he pivots, but be mindful of his powerful attacks and feel free to stay away while your Chi recharges.
You'll need to work your way down the hill, fighting through multiple Fox Spirits, until the game auto-saves and you're thrown into battle with three of the Spirits simultaneously. Forest Shadow will appear immediately after these guys go down, so be sure to pause on the third and final Spirit and use Spirit Thief style to completely restore your Chi and health before finishing it off.
Boss Fight: Forest Shadow
If you've thought that Jade Empire was easy thus far, then get ready for a surprise, because Forest Shadow is tough. Every attack of hers will drain health, chi, and focus, and in substantial amounts, too; she also has an area-of-effect skill that will knock you down as well as draining all of your energy attributes equally. You can expect to go through most of this fight without any focus or Chi, so it'd be extremely wise to bring Dawn Star along in support mode, and convert whatever Chi she sends your way into health as soon as it arrives.
If you begin the fight with full health and energy, though, you can actually use Dawn Star in attack mode and attempt to lock down Forest Shadow. If you can get her into a wall with both of your characters beside her, switch to your weapon or martial style (whichever's quicker) and start pounding away on her, and she may not have enough time to use any counterattacks.
If she does break free, though, or if Dawn Star runs low on health, then you'll have to take her on solo. Switch Dawn Star over to support and get down to brass tacks. The most devastating attack of Forest Shadow's is her area-of-effect, which can knock you down and damage you even if you're well beyond the graphical representation of its boundary. What you'll want to do, then, is not give her a chance to hit you with it. We found it best to use B+forward to dash in, whip off a single combo from our martial style, then dash back out again. If she starts her AOE attack, dash back a second time; if not, repeat the process until she goes down. Engaging her at close range is unwise, if only because a single barrage of attacks from Shadow can absolutely cripple you.
When Forest Shadow finally goes down, she'll entreat you to kill off the Mother creature. You'll also be rewarded with the Gem of Earth Power, which adds +5 Body when you equip it. Nice.
Back to the Inn
After Forest Shadow's death, you'll automatically be warped straight to the Inn. The creatures there will reveal themselves to be cannibals, and offer to pay you the silver they promised. You can accept it, if you wish, and return to Lord Yun with the report that the Forest Shadow is dead, which should net you the wind map you've been looking for, or you can choose to attack them. The latter is probably the better path, because it'll net you more experience, and it's just more fun to kill stuff! Killing the cannibals here is also apparently the only way to get Henpecked Hou on your side as an ally. Note that, if you wish to do so, you can either take your silver, or kill the cannibals that hold Henpecked Hou hostage, then return to Yun to get your wind map. In other words, you don't have to go all the way into the caves and defeat the Mother, although there is a good reward for finishing her off.
Open Palm Path: Destroy the Mother
With your alliance with Forest Shadow still freshly minted, head back to the Pilgrim's Rest and polish off the cannibals there. After they're dead, you'll meet up with Henpecked Hou, who'll join your group as a new follower. He has no attack of his own; instead, he'll throw numerous wine bottles towards you in battle, allowing you to utilize the powerful Drunken Master style of combat. In theory, this should be the ass-kickingest style on the face of the planet, but in practice, it's not really that much more powerful than the martial style you started the game with, especially since you can't upgrade it when you level up. Another negative to it is that you'll have to keep Hou in your party to use it, who offers up no attack or support abilities besides throwing you Feel free to try it out as you like, though, and keep him in your party, as you wish.
When you're ready to deal with the Mother, head into the caves by finding the path through a broken wall near Hou's kitchen.
The Caves
You'll come out near a large group of cannibals, who've strung up the corpses of their skinned victims. Defeat them all, then either kill the lone survivor, as he asks you to, or wait for him to turn into a cannibal as well and finish him then. Shortly thereafter, you'll come to a rat handler, who'll free a horde of Rat Demons to attack you.
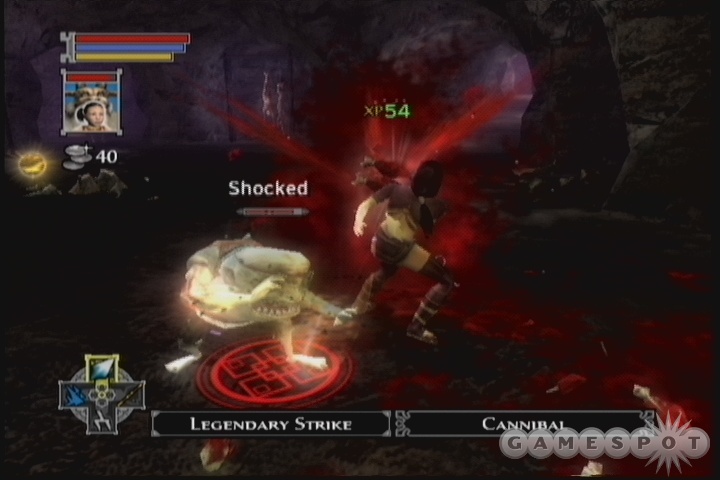
When you cross the bridge underneath the tree roots and finish off the enemies there, you'll be forced to go on with only Black Whirlwind and Hou as your teammates. Search the eastern and southern portions of this area before heading to the northwest, towards the Mother.
Boss Fight: Mother
Well, this isn't as complicated as it could be.... As implied in the cutscene before you reach Mother, the pillars in this area are going to be weakened, and all you have to do to finish her off is destroy three of them. Just cycle your targets over to their position, attack it as normal, and after a few pillars are gone, the cave will collapse, polishing off Mother and the rest of her brood. You can't kill Mother with any of your normal attacks, so this is the only solution.
If you killed off Forest Shadow, then unfortunately your only reward will be 691 Silver and 1,225 experience. Still, worthwhile for a short dungeon romp. If you didn't kill her, though, Forest Shadow will appear, bearing a better reward: 1,500 Silver, 2,000 experience, and the Brilliant Gem of Balance, which will net you an impressive +4 to all of your primary stats. You can now return to Lord Yun for your wind map.
Inspector Lim
Before you can make it back to Lord Yun, you'll have to face off against Inspector Lim, who's foolishly come to finish you off before heading back to the Imperial City. He bears the fragment of the Dragon Amulet that you've been searching for for the last 5-10 hours of gameplay, so you'll want to kill him to grab it.
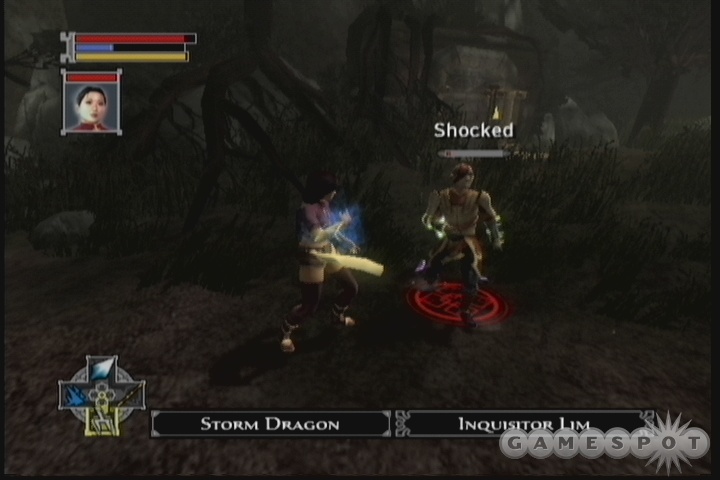
As per usual, deal with Lim's minions before taking on the man himself. With Dawn Star replenishing your Chi, this should be a simple matter of jumping around and darting into combat with your martial style; none of them have a lot of health. Lim himself is utterly simple to dispatch. Just map Storm Dragon to one of your directions, get him up against a wall, then quickly switch between that style and your martial style to completely lock him down. You should be able to hit him with Storm Dragon, switch to your martial style, unload a full combo or a power attack, then switch back to Storm Dragon to repeat the cycle all over again to kill him without him ever getting an attack in on you.
This upgrade to your Dragon Amulet is a bit underwhelming; all it does is add two new slots for gems. Useful, sure, but not quite as earthshaking a power as you might've been anticipating.
Retrieving Your Wind Map
Return to Lord Yun to retrieve your wind map. If you happen to have a high rank in a certain conversation skill (above 40, at least), you can attempt to talk him into giving you more than just the wind map; if you succeed, you'll net 600 silver on top of the bargain. Sweet. If you have any conversation-boosting gems, then equip them before you talk to him.
Wrapping Things Up In Tien's Landing
If you finished up most of the side quests in Tien's Landing earlier, then you shouldn't have too many waiting for you now that you're about to leave. If you haven't polished off An Ancient Game, then return to Mistress Vo and Jian the Iron Fist outside of the boathouse and attempt to train; you should be far enough into your chosen Path to learn either the Tempest or Stone Immortal style. Other than that, you can check your All Active Quests journal page to see what you have remaining. Open Palm characters should have everything but Silk Fox done, while puritanical Closed Fist devotees may also have Stranded Orphan Girl and The Stolen Memento remaining if they didn't skip the quest-givers for those.
With that out of the way, return to your base camp and start interrogating all of your followers. Be sure to follow up on all of the conversation options that they offer, and react according to how you feel your character would respond. You don't have to choose the cruelest responses if you're going for the Closed Fist path, mind you; none of these will affect your alignment either way, or so it would seem. So if you intend to get hot and heavy with one of your followers, be sure to be as nice as possible.
Kang himself is seemingly impossible to start a romance with (shame, that), but he does offer you a unique opportunity. If you coax him into talking about the wind map that he owns, he'll offer to let you fly it. If you do so, and defeat the final boss of the Dragonfly stage that occurs, then you'll obtain the Cloudburst upgrade for your Dragonfly. Yay. In addition to that, though, he'll also be inspired to create a unique item which...doesn't do anything for the moment. Still, you'll be able to build on this side quest in the next chapter, so be sure to go flying with his personal wind map before heading out to the capitol.
When you're ready to polish off the chapter, fly to the Imperial City by speaking to Kang. When you arrive, Silk Fox will be there to greet you; she says that she has information for you, but wishes to speak in private. Chapter Two fin.
Side Quests
A Woman In Black
As you make your way to Tien's Landing for the first time, you'll be accosted by Silk Fox, a ninja-like foe who apparently thinks that you're in league with Death's Hand and Gao the Greater. Convince her otherwise by beating her in battle. She'll run off for now, but you'll encounter her again later on. When you do, this quest will be completed, although you'll immediately pick up the Silk Fox main quest.
The Beaten Baker
Speak to Seamstress Lan, outside the Teahouse, to learn about her fiance Bei, who's beaten each day by a group of thugs. She seems to think the attacks are unprovoked, but there's sure to be more to the story than she lets on, or perhaps even knows about....
If you go down to the southern entrance to Beggar's Pier, you'll see Bei about to be wailed on by a group of thugs. You won't have any choice but to fight them, so wipe them out, then tell Bei that you'll speak to Ai Ling, the woman who's been sending the thugs, on his behalf. She's in the Boathouse. It was previously locked, but if you tell the guard that you're there to speak to Ai Ling, he'll let you pass.
When you speak to Ai Ling inside the boathouse, she'll accuse Bei of proposing to her first, and accuse him of not having the guts to come and speak to him. When you're ready to start the conference, speak to Ai Ling again and Bei will automatically come to the Boathouse. (If you want, you can just tell her to repeatedly stay away from Bei, and she'll fight you, and that'll be that. But it's more fun to cause a little trouble first, if that's the route you're going.)
After Bei arrives, Lan will appear as well, and you have the opportunity to either reason things out, or cause some havoc. If you're of an evil bent, suggest that Ai Ling and Lan should fight over Bei; this will set in motion a sequence of events that will leave pretty much everyone but you and your follower dead, or so you hope. If you want to square things off, suggest that Ai Ling promised to never make Bei unhappy, and that she's being unreasonable, and she'll let Lan and Bei go free. Whichever path you choose, be sure to search the Boathouse; you can find a Boathouse Key in a vase here which will open the gate leading to the office, where you can find 750 silver and a Flawed Charm Gem. If you keep Ai Ling alive, she'll also give you the Matchmaker quest.
Matchmaker
After Ai Ling lets Bei go free, she'll ask you to help her find a husband. There are numerous candidates for the position, including: Yaoru, on the upper floor of the teahouse; Ru the Boatswain, also in the teahouse (unless he moved to the Pier as part of the Find A New Flyer quest), although she may not be interested in him; Big Tian, standing to the east of the boathouse; and Chumin the Craftsman, who lives in the residential area in the southwestern corner of the map.
It appears that any of these guys can be talked into speaking with Ai Ling, and the pursuant conversation can encourage her to marry any of them, even the dummyhead Big Tian. You'll need to be good at one of the three conversational arts, so be sure to equip gems that either add directly to those arts, or that give big bonuses to your primary stats. Don't forget that Charm is based on Mind and Body, while Intuition is based on Mind and Spirit, and Intimidation is based on Body and Spirit. With a little smooth talking, you'll get Ai Ling married off in no time, and receive a substantial cash and experience reward. In point of fact, even if you're going evil, you may want to skip the evil ending to the Beaten Baker quest and pursue this one, as it'll net you 500 silver and 1,000 experience!
Zhong the Ox Carrier
If you walk around on the upper level of the Teahouse, you'll come across Dong Ping talking to Zhong; you can't miss it, since Zhong is an ogre, apparently trained to work Ping's farm. After accidentally killing an ox, though, Zhong has refused to return to the farm, and it's up to you to persuade him to do so.
Before you talk to Zhong, try to use any gems you have that increase one of your conversation skills. If you then talk to Zhong, speaking kindly to him, you'll be able to persuade him to leave with your skill. If you want some Closed Fist points, though, go ahead and goad Zhong into a fight and kill him; the farmer, without any way to work his farm, will be ruined. Heh.
Old Mother Kwan
If you speak to Old Mother Kwan in the Teahouse, she'll reveal that she used to own the building and the business, but gave it over to Dutong when he showed up with an Imperial writ, apparently without ever even asking to examine it. If you speak to Dutong, he'll refuse to show the writ to you. Hmm....
If you speak to Steeper Yanru (across the way from Kwan), you'll be able to cook up a plan to deal with Dutong. Yanru can send him drinks repeatedly. You're going to need to get him drunk enough to be depressed, but not so drunk that he gets paranoid; we managed to do it with one Imperial drink and four peasant's wines. When he's depressed, speak to him and use one of your conversational skills to wring the truth out of him; he'll admit that the writ is a forgery, but will instantly be sobered up by his guard before he can do anything too incriminatory. At this point, you can either tell Mother Kwan the truth about the writ (Open Palm), or accept Dutong's offer of 1,000 silver for your silence (Closed Fist).
An Ancient Game
Mistress Yo and Jian the Iron Fist play their game of Yi near the Boathouse. If you inquire about what they're doing, then attempt to walk away, they'll tell you of secrets that they can share with you - if, that is, you choose to walk either the Open Palm or the Iron Fist. When your alignment is suitably skewed towards one end of the stick or the other, you will be able to learn either Stone Immortal or Tempest styles. It's unlikely that you've been able to get yourself far enough to one side of the alignment meter to be successfully trained the first time you meet the pair.
When you complete most of the quests in Chapter Two and are about to hop into your flyer out to Chapter Three, try returning to Yo and Jian and attempting to obtain your training then. If you can, then you'll need to fight one of them to obtain your new magic style. If not, then you'll have to travel to the Imperial City and attempt to return to Tien's Landing via the gate there when it opens to travellers.
Trapped
Captain Ing, down at Beggar's Pier, offers you a reward to close the dam, which will raise the river and let his ship leave port. After you either open or close the dam, you can speak to him again to finish this quest.
The Stolen Memento
Merchant Cheung, near Minister Sheng, will tell you that a man named Tong stole one of the figurines that he had for sale, and ask you to retrieve it for him. Tong is to the southeast, near Beggar's Pier. When you reach him, you can either use your persuasion skills to convince him that his mother wouldn't want him to be stealing figurines (which he took because it reminded him of her), which will net you Open Palm points, or just beat him up to retrieve it. If you get into a fight, be sure to attack the sailors around him first, as they'll net you some XP; beating Tong ends the fight early.
If you bring the memento back to Cheung, he'll give you a discount on the items that he'll sell, but he'll only sell items if you happen to open the dam. This also automatically brings Open Palm points, so you may want to just skip this quest if you're a Closed Fist devotee.
Gems in the Quarry
It appears that the Lotus Assassin in charge of the hunt for the Dragon Amulet is also looking for some special gems, and has summoned Rat Demons to do his bidding for him. If you speak to a Cowardly Rat Demon near the Assassins' camp, he'll tell you how to obtain these gems; you'll need to use Dragon Powder on the rockets that the soldiers have set up to blow the wall overlooking the quarry.
If you head into the quarry, you will indeed be able to find some Gems, but you'll have to kill off numerous spirit creatures to do so. The first wave isn't so bad, but the second wave will feature Stabber Yuxi, some kind of quarry boss in his former life. The Convict Spirits that appear beside him will continually respawn until your teammate is dead, so you may just want to wait for him or her to get down to a sliver of life, then set them to Support mode and take down Stabber. When you're ready to move on, head into the Quarry area.
The Quarry is the scene of some more fights against spirit enemies, including a doozy of a battle against a ghost named Strangler Jizu after the second auto-save. This guy's a bit of a bruiser, mostly because he'll spawn in six or eight guard minions in waves of two. Unfortunately, you'll have to kill them all before you can kill Jizu, because he'll absorb their health if you manage to knock him down to zero. Your teammate will be unlikely to survive the melee unless you heal fairly often, so if you have Dawn Star, you may just want to periodically switch her over to support mode to let her restore your Chi while you heal yourself and her.
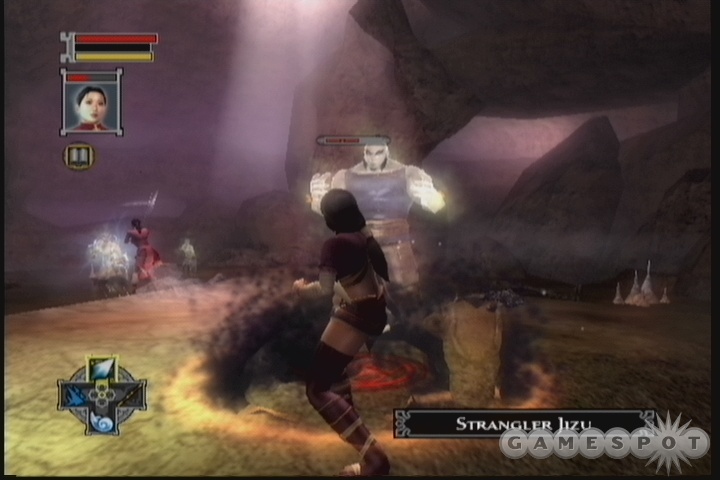
After you wipe out all of the guards, focus your attacks on Jizu and take him down. When he's dead, Turnkey Shiji will appear; this is the ghost of the man who attempted to free the prisoners before the water rose, and was killed by Jizu for his troubles. The "death" of Jizu's ghost will have freed Shiji's ghost from his torment, but you can still earn Open Palm or Closed Fist points based on your attitude towards him in the ensuing conversation. Defeating Jizu will net you the Wanderer's Jewel and wrap up this side quest.
Drowned Orphans
There are two orphan ghosts in one of the buildings in the Lower Ruins. If you speak to them, they'll tell you that Kindly Yushan, the orphan master, abandoned them in the locked building when the floodwaters rose. One will ask you to kill Yushan and return with his head, while the other wants you to persuade Yushan to return to the orphanage and bury their bones.
You can find Kindly Yushan on the second floor of the teahouse in Tien's Landing. You can either talk him into returning to the orphanage to bury the children's bones, or just end his worthless life, then bring his head back to the children to finish the quest.
Stranded Orphan Girl
After completing Gems in the Quarry, attempt to walk out of the quarry. You'll come across the ghost of a drowned girl, who'll ask you to help her cross a puddle by breaking some of the roof supports in the cave. If you're looking for Open Palm points, go ahead and break the supports to get her out. If you want some Closed Fist points, repeatedly tell her that you won't help. Unfortunately, there doesn't seem to be a way for a Closed Fist student to actually finish the quest, and it'll sit in your logbook...forever. If you don't want to deal with that annoyance, just free her and eat the goodness.
Yifong and Fuyao
Yifong and Fuyao left Tien's Landing to try their luck in the wilderness; unfortunately their master plan didn't quite come off as they intended, as they got kidnapped by pirated. When you meet up with Yifong in the pirate cave, she'll tell you that she's been separated from her daughter, and ask you to find her.
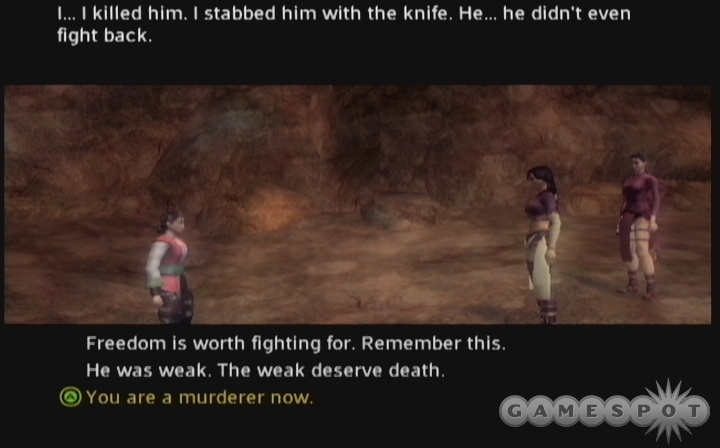 | 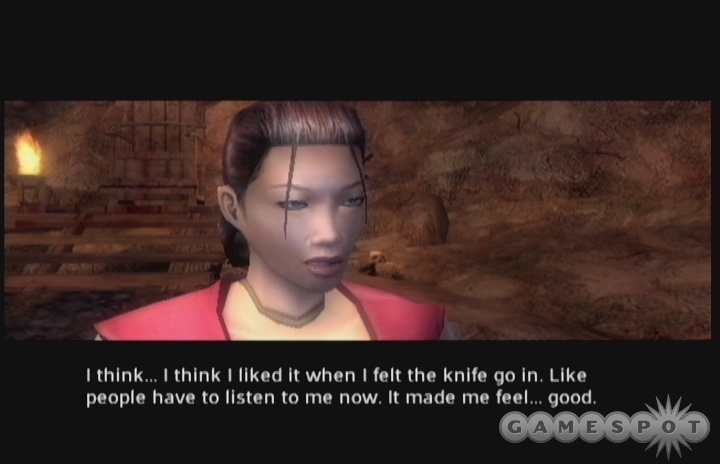 |
Fuyao is higher up in the pirate lair, past the point where you meet Kang. When you come across her, you'll have to fight against a few pirates to leave just a potential slave-buyer and Fuyao herself. As you may expect, you'll have a few options here. You can immediately free Fuyao for Open Palm points, or you can force her to fight for her freedom by instructing her to take a knife to the slaver. He'll go down without a fight, and with the proper conversation choices, you can let both Fuyao and her mother know about the wonderful social Darwinism of the Closed Fist philosophy. You can also just sell Fuyao to the slaver, if you want to be cruel.
The Zither of Discord / Test of the Closed Fist
If you speak to Scholar Six Heavens, who dwells in the southeast, near Tong, he'll ask you to bring him two pieces of the Zither of Discord, which belonged to Bladed Thesis, the originator of the Closed Fist philosophy. The first piece are the Silk Strings, which you likely already found in the Imperial Army camp to the east of town. The second piece is the Case, which can be found at the pirate's camp.
When you retrieve the Zither Case from Gao's personal belongings, bring it back to Scholar Six Heavens, who will ask you to fetch one more piece for him: the instrument's bridge. He says it should be somewhere in the forest, but that there will be a test required before you can obtain it, to ensure that you actually walk the Path of the Closed Fist.
When you're ready to retrieve the bridge, head into the Forest area near Minister Sheng, then take the right path at the first fork in the road you come to. This will lead to Bladed Thesis, who possesses the bridge. There are multiple paths you can take to get the bridge from him, the most simple of which is to goad him into a fight and then kill him. In a two-on-one, you can probably lock him up with quick attacks and prevent him from unleashing any of his potent offensive moves. He can suck away both your Chi and your Health, so he'll be a handful if you can't get him cornered.
If you want to play the game, though, take him up on his challenge to describe the view from the pagoda. There is a conversation option, something like "I see trees tearing and water churning at the rocks, which are both being destroyed by Time because they are weak," which will allow you to skip the test that Bladed Thesis has set out for you, but this option is likely only going to be available to you if you've already walked down the Path of the Closed Fist a decent way. As we said, if it's available, it'll let you skip Bladed Thesis' test. If you insist on testing yourself, though, accept his challenge, then speak to the two ghosts that appear. This will lead you into the Test of the Closed Fist side quest.
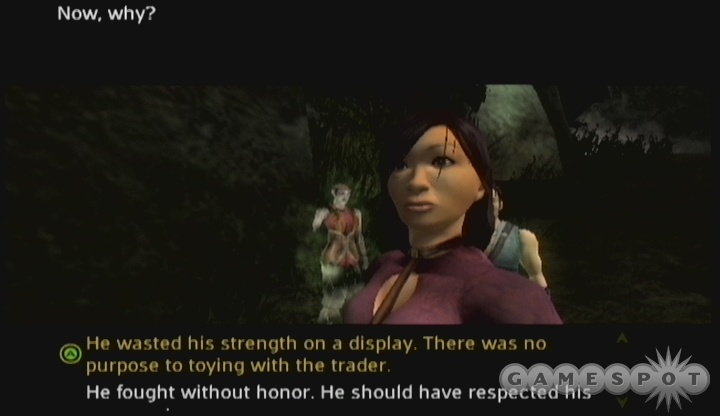
In order to pass Bladed Thesis' test, you'll need to speak with two other ghosts and learn of their fates, then decide which one most deserved their death when analyzed from the perspective of the Closed Fist. The correct answer is the man, since he made a display of the trader's death, which served only as a show of power, not a lesson of strength. Answering incorrectly will cause Bladed Thesis and both of the ghosts to attack.
Whether you have the automatic success dialogue option, or have to take the test, Bladed Thesis will offer you a deal: he wants to use the essence of Scholar Six Heavens to strengthen himself. To do so, he wants you to give Scholar the bridge of the zither, which, when reconstructed and played, will quickly overpower Scholar and allow Bladed Thesis to steal his life force, or something like that. If you help him in his little plot, then he'll reward you with all of the cash that Scholar was carrying, as well as the Chaotic Strains technique, which will net you +5 Health and Chi. Nice. If you attempt to kill Bladed Thesis, whether this is before or after he attempts to take down Scholar, you'll earn slightly more experience and the same amount of cash, but won't get the technique. All of these results will give you Closed Fist points, with the acceptance of the Chaotic Strains technique likely being the most "evil" of the bunch.
Chapter Three
As soon as you begin this chapter, head to your nearby base camp and start interrogating your followers to advance any plots that they may be concealing. Among the most interesting is the conversation with Wild Flower, wherein you'll get a hint of what may come regarding the mysterious "Other" that she's been talking about.
Kang can actually whirl you off to a winter wonderland if you speak to him and inquire about his wind map, then ask him to activate the device that he's built. This isn't a specific sidequest, but we've put it in that part of this chapter, under Lord Lao's Furnace.
Exploring the City
When you're ready to move on, feel free to head away from your Base Camp and start looking around. If you're interested in picking up side quests, there are plenty of them to be found. Imperial Captain Sen, in the northeastern corner of the map near your camp, has a pair of bounties up for offer, so speak to him to pick up Creative Yukong's Bounty and Fading Moon's Bounty. If you head to the northwestern corner of the map and enter the building to the west of the Gate to the Imperial Arena, you can find the Configuration of the Dragon in a bamboo cask. There's a Blacksmith Shop near the exit to the Black Panther school, at which location you can buy a new long sword or staff to replace the supposedly legendary one you received from Gujin way back when. There are many other sidequests to be attempted in the city, all of which are detailed in the appropriate section of this chapter. When you're ready to progress the plot, though, head to the Scholar's Garden through the Golden Way to meet up with Silk Fox, who in actuality is the daughter of the Emperor himself!
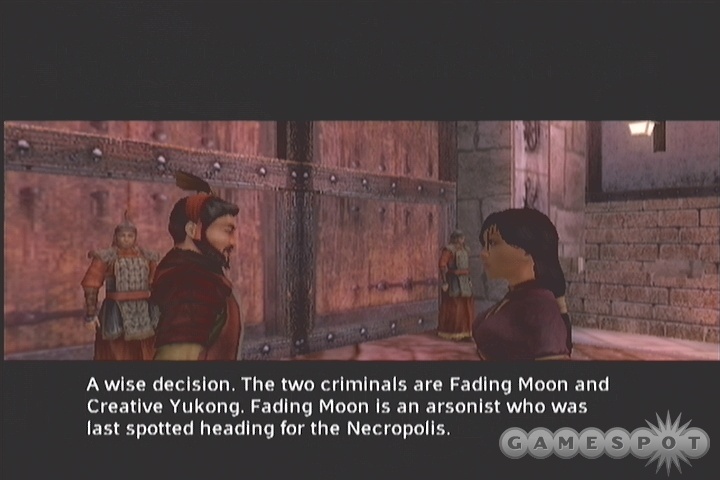
Silk Fox's Plot
Your conversation with Silk Fox reveals some interesting information. It seems that Master Li has been taken to the palace in chains, and that Death's Hand has been putting the massive criminal labor force to work at building golems and automatons to help him wrest control of the kingdom from the Emperor. She suggests that you infiltrate the Lotus Assassins to learn more about Death's Hand and to obtain some kind of incriminating evidence. She suggests that you attempt to join either the Inquistorial or Executor branch of the Assassins, and will suggest methods for attracting the attention of either. You don't have to make a decision now; just tell her which one you think you'd prefer to join. You'll be able to change your mind later.
With that conversation done, Silk Fox will join your party as a follower and give you two quests, The Inquisitors and The Executors, that will give you opportunities to infiltrate the Lotus Assassins. Before you take her up on her advice, though, head back to your base camp to talk with your followers. You'll have to decide whether to side with Zu or Fox when they start arguing, or disagree with them both, but you'll probably want to side with whichever one you most want to start or continue a romance with. In addition to that, there are numerous little sub-scenes involving Fox and the rest of your little troupe, but you can't see them all in a row. If you want to deal with all of them now, do Hin Goo's missions, or just warp back and forth to Lord Lao's Furnace until they stop popping up. Your reactions to the conversations of your followers will influence some of their romance plots in the future; if you're unconcerned with dealing with all of the various cutscenes, just keep on moving with the main quest. Even if you do want to pursue the romances, you don't have to see all of the scenes at once, so feel free to do some side quests, come back, and repeat until they stop popping up.
The Executioners
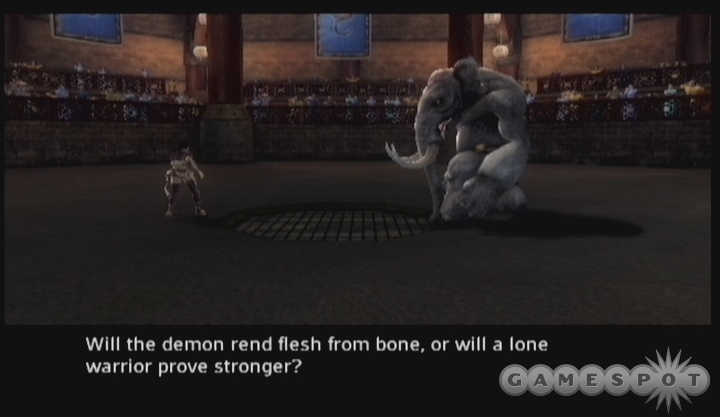
If you want to infiltrate the Lotus Assassins by way of the Executioners, then you'll need to head to the Imperial Arena, off of the Market District, and suitably impress the Executioner Recruiter who waits there by working your way up the standings of the gladiatorial arena they've set up. This is technically a side quest, and there are parts of it that are optional, so see the
After you win the Silver Division of the Arena, then the Executioner Recruiter will approach you and give you a pass to enter the Assassin's base, located in the Necropolis head there to begin that part of the chapter. You can also attempt to finish off the Inquisitors sidequest, as well, if you wish.
The Inquisitors
If you choose to follow the Inquisitorial path to the Lotus Assassins, then you'll need to speak to Scholar Dongow in the Scholar's Garden; he'll point you back to your ship, where he says that someone will be waiting to speak to you. The Inquisitorial path is much less time-consuming than the Executioner's path, although it does offer less money and experience.
When you return to the Dragonfly, you'll be met by an Assassin who tells you that two Ministers are soon to meet to discuss a report that could cause...problems for the Assassins should its contents come to light. Your goal as a prospective Inquisitor will be to prevent the report from being delivered without being too obvious about showing off your influence.
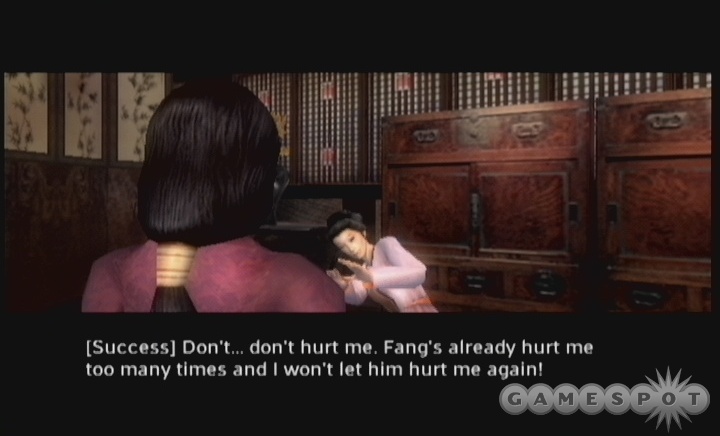
There are a few ways to go about doing this. If you choose to deal with Judge Fang, then you can speak to Gentle Breezes, his concubine, in the Imperial Arena. With a little smooth talking, she can be convinced to help you blackmail him into resigning his post. After she nabs his Imperial Ring from him and gives it to you, go speak to him and demand his resignation. Rather than admit that he had the ring stolen by a prostitute, he'll accede to your demands and you can return to your ship to receive the Lotus Inquisitor Seal.
If you want to deal with your old friend Minister Sheng instead, head to the Ministry Hostel in the Golden Way. If you happened to close the Great Dam for him, then you'll be able to guard the honor gift he was planning to give to Judge Fang; if you didn't close the Dam, then you'll have to talk him into allowing you the honor. With him asleep, you'll be able to exchange the turtle eggs that Hou gave you for the honor gift. When Judge Fang comes in, he'll be enraged and will leave the hostel before hearing the report. Note that there's a chest with a Configuration of the Horse inside of it here. If you have another Cow Bezoar, perhaps from the First Gravedigger line of side quests, then you can use the configuration in Lord Lao's Furnace. You can only use each Configuration once, though, so if you retrieved this Configuration in Chapter Two, then don't bother.
Main Quest: Infiltrate the Lotus Assassin Fortress
With your acceptance into the ranks of the Lotus Assassins, it's time to head into their fortress and attempt to dig up the evidence Silk Fox needs to eliminate the influence of Death's Hand from her father's court. To reach it, head to the Pagoda in the Necropolis, and use one of the Seals that you received after your initiation rite on the Blessing Board within. This will open the path into the Assassin Fortress.
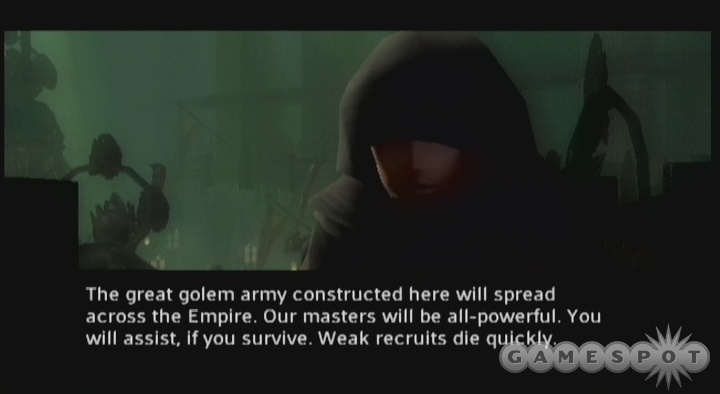
Inside, you'll find the Watcher, who will bring you further into the fortress, and tell you to find Master Gang to begin your instruction. If you inquire with him, he'll tell you more about the fates of the slaves brought to construct the many golems required for the Assassins' army. As you make your way to your teacher, you'll be challenged by a group of acolytes; defeat one of them to meet up with Zu. As promised, his willingness to help you will depend on how you react to what you see in the Assassin fortress, so be sure to play through this experience as your character would.
If you explore the Hall of Induction, you'll be able to meet the Mold Masters, who keep the golem press functioning, as well as Merchant Kia Jong, who will sell you the Dire Flame Style which you've seen so many enemy spellcasters use. Master Gang is at the end of the hall; he'll be getting a dressing-down from Master Shin, who demands a speedier method of creating the golems.
Defeat the Rampaging Ghosts
After following Gang down the steps, he'll order you to defeat a group of ghosts that have been rampaging in the golem works and slowing down production. Before you head out to do so, though, examine the area and speak to some of the NPCs here. The Keeper of the Archive has much interesting knowledge for you, if you ask her to reveal it; you can find a Configuration of the Rabbit on one of the scroll stands behind her.
When you're ready to take up the challenge, head to the door to the northwest of Gang and pass through. There are only four ghosts, so blast them and get back to Gang. With the first challenge of proving your worth out of the way, he'll give you two new tasks: he wants you to create a superior spirit shard for a Jade Golem, and he wants you to find a way to creatively kill Master Shin so that neither you or he are suspected in his death.
After this conversation, head to Acolyte Trainer Guang and spar her; you'll wind up as Gang's trainer yourself, having convincingly proven him of the need for such a switch. It appears that part of your duties include the training of Master Shin's attendants, and that, sometimes, perhaps, "accidents" can occur during training, resulting in the death of those who are being trained. Sounds like an opportunity to really ingratiate yourself to Gang. Don't forget to examine Guang's wares; she has some powerful techniques for you to purchase.
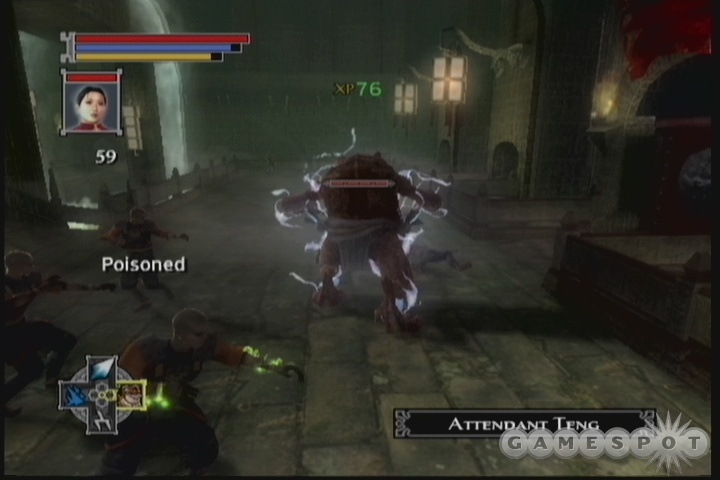
Before you begin with your main quests, though, go ahead and wipe out some of Shin's attendents. They're across the bridge to the north of Gang. After you kill two of them, the others will scurry off, allowing you to pass through the door they guarded. When you attempt to return to Gang's position, though, five of the attendants will attack you en masse. If you go into the fight with full health and chi (as you should be able to, thanks to the Spirit Font in the hall where you fought the previous two), it should be a simple matter to use Toad Demon's power attack to quickly blast through all of them.
Main Quest: Kill Master Shin
In order to kill Master Shin with an appropriate degree of subtlety, you need to find a way for it to look like an accident. Head into the Golem Press Room, to the northeast of Gang, to find a clue as to how to proceed. Speak to the acolyte at the top of the wooden steps to learn that anyone who fell prey to an accident in the press would suffer an immediate loss of stature within the Assassins, due to it being so easy to avoid them. Feel free to examine the machinery; there are only two levers involved with making a golem and dropping it on the walkway nearby, so it's pretty difficult to mess up.
If you return to Gang, he'll give you a more detailed list of tasks that will have to be performed if you wish to take out Master Shin with the press. He doesn't leave his chambers often; only to inspect the new shipments of slaves, which arrive from the Necropolis. And he wouldn't enter the press of his own will anyway, so you'll need to kill him elsewhere, then move his body to the press and drop a golem on it to make it appear as it that was how he died. And you won't be able to have any witnesses to your little endeavour, as that would defeat the whole purpose of keeping Gang's name out of it, now wouldn't it?
The Prerequisites
So, to proceed, you'll need to stop the slave shipment before it reaches the fortress, and convince both the press operator to leave the press and the individuals in the Hall of Induction to leave that room. The plan is to kill Shin in the Hall, then transport his body to the press and squash it with a golem. Sounds like fun!
Begin by speaking to the press operator; he'll be convinced to leave his post without much trouble, and will encourage you to kill Gang to boot, the insolent little whelp. Next up is the Hall of Induction. Begin with the Acolytes in the southeastern corner; after their master attempts to summon a demonic servitor and sets them both alight, you'll have to defeat them to convince the bunch to "leave" the hall.
That will leave only the Mold Masters and Kia Jong. First speak to the Mold Masters, who predictably refuse to leave the room. They will helpfully tell you that they'd be in deep trouble were the press to ever break, and then tell you precisely how to effect such a breaking...not the brightest stars in the sky, these guys. If you want to go through with breaking the press, ask Kia Jong for a bottle of Phoenix Oil, then attempt to use a conversation skill to convince him to move down to the central chambers. You'll need to have a skill up to around 55 to be successful, or so it seems, so be sure to equip a gem that boosts one of your skills that high. If you fail a persuasion, then you won't be able to attempt again, and you'll have to give him 1,000 silver to get him to move.
With the jar of Phoenix Oil in hand, return to the press and load it into the golem selector. That will automatically force the machine to malfunction, but will also animate the three clay golems standing guard along the wall, so be sure to enter the room with plenty of Focus for your weapon style. When the press has been broken, return to the Mold Masters to let them know the merry news, and they'll hurry off to the market district to find a smith to make repairs. Two down, and one to go. (Note that you can also just kill the Mold Masters if you're looking to speed this quest up a bit.)

Lastly, you can head back up to the Necropolis to confront the Lotus Assassin that's bringing in more slaves for Master Shin to inspect. If you want to be really, really evil, you can convince her that the lot is substandard, and talk her into killing all of the slaves. Alternately, you can kill her, then kill the slaves yourself. (Bring Black Whirlwind along beforehand, as most other followers will be rather shocked by this act.) If you're one of those Open Palm goody-two-shoes, though, you can just fight her and free the slaves. (Booooring!)
Killing Shin
When you have all three of the prerequisites complete, return to the Hall of Induction to meet up with Shin. He's not so tough to beat, although he will animate a pair of Clay Golems to help him out. Beat them all, and you'll automatically be warped back to the press, where Shin's body will be crushed. One quest down, one to go.
Main Quest: Create a Spirit Shard
When you're ready to create a Spirit Shard, head into the Soul Extractor Room, where Zu will give you a hint of what to do to both appease Gang and corrupt the Jade Golem he's attempting to create. Beyond him, you'll encounter Go Rin, who will instruct you on the basic mechanics of the Soul Extractor, and tell you to fetch a soul. Go Rin and Gang want a soul from one of the slaves on the prison level, but Zu told you to retrieve one from the lowest mines instead, to corrupt the Jade Golem. Which will you choose?
If you want to be a nice guy about it and free the slaves that have been used to make the spirit shards thus far, use the elevator controls to bring you down to the prison level, and walk east into the holding cells. The guard there will inquire as to your purpose. If you say that you wish to free the prisoners, you'll have to kill both him and Go Rin, then return to the lead slave and let him know that the time for their escape has come. With that done, you can head down to the near-surface mine, collect the shards there, then head all the way to the deepest mine and kill the ghost of Zeng Sai. His corpse is what you need to create the corrupt spirit shard that will ruin the Jade Golem.
The Closed Fist method of completing this quest is more or less identical, save for the fact that you won't be visiting the prison level. You can't actually use a slave to make a spirit shard for the Jade Golem; the choice doesn't pop up in the dialogue tree with a guard there. So just head to the mines, beat Zeng Sai, and use his body to fuel the Soul Extractor. You'll have to kill Go Rin, who realizes that something is wrong, but hey - if you want to make an omelette.
Whichever path you choose, you'll be confronted by yet more acolytes as you attempt to make your way back to Gang. Defeat them, then deliver the spirit shard to complete your duties to him. Before you take him up on his offer to enter the inner chambers, be sure to fully charge yourself at the Spirit Font and Focus Shrine in the Hall of Induction - things are going to get sloppy within.
The Inner Chambers
In the fight that follows the standoff with Grand Inquisitor Jia, you'll be pitted against Executioner Zogu, Master Gang, and two of the powerful Jade Golems. This fight isn't as overweeningly powerful as it may seem, mostly thanks to the fact that you should've been increasing your weapon style's power since you first obtained it, and can thus use it on the Jade Golems to bring them down from behind fairly quickly. If you wish, you can take on Zogu and Gang first, but it may be easier to try and take on the Golems first with Chi Strikes from a weapon style, then use your Storm Dragon to polish off the human enemies.
The real test lies up ahead, when you have to face off against Grand Inquisitor Jia herself. The Queen of Scream attempts to hold you back from obtaining the third piece of the Dragon Amulet, but you're not going to let some crone stand in your way, are you? Of course not.
Boss Fight: Grand Inquisitor Jia
If you wish to, this is yet another fight you can cheese your way out of by using Storm Dragon to paralyze Jia while rapidly switching to your martial or weapon styles to finish her off. Assuming you're trying to play things legit, though, all you really need to do is press your attack and keep Jia off guard long enough to kill her. She'll start out with a ranged air magic style that can trap you in a whirlwind, but if you keep hitting her long enough, she'll eventually flip over to a long sword and user her own kind of Chi Strike mode (she'll glow purple) to hurt you. Hurt you bad. The damage she can cause is immense in this mode, so flip away and avoid her until the purple glow fades. Having Dawn Star along in support mode is a big help, as it'll let you fuel your own Chi Strikes that much more easily.
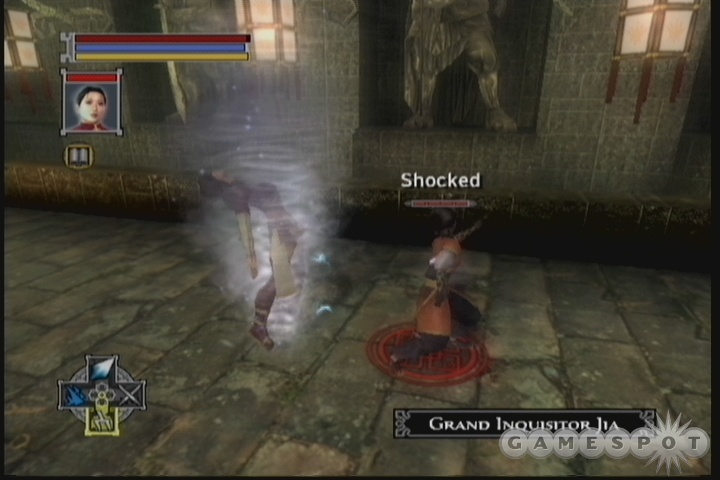
When Jia goes down, you'll obtain the Dragon Amulet piece, which will let you pop in two more gems. And hey, you also get two gems! What a coincidence! Take a moment to power up before you start making your way out of the soon-to-collapse fortress. You'll have to fight your way through multiple Lotus Acolytes and Assassins into the Hall of Induction, where the rampaging clay golems will attempt to stop your progress. Beat back the tide of enemies and make your way back to the cave through which you first came to leave the fortress. The Watcher and a few of his cronies will likewise attempt to prevent your egress through the Necropolis, so slaughter them before hacking your way through the spirits in the graveyard to return to your friends.
When you reach Silk Fox and the rest of the gang, take one last opportunity to speak to everyone, advance any romance plots you may be working on, and check any Configurations you've found at Lord Lao's Furnace before heading out to the Imperial Palace.
Market District Sidequests
For the sake of conciseness (ha), we'll throw in the Black Leopard School and the Lord Lao's Furnace quests in this section. Besides those, all of the quests in this section are given to you by NPC's in the Market District. Note that some of these apparently don't become available until you've met up with Silk Fox in the Scholar's Garden, or perhaps not even until after that, so don't fret if you can't find the questgiver immediately upon arriving in the Imperial City.
The Black Leopard School
If you head into the Black Leopard School area, you'll immediately be accosted by a group of students who are about to fight amongst themselves. With your appearance, though, they'll decide to gang up on you instead, so defeat them all to impress some of their brethren. Shortly thereafter, you'll be invited to join the school, which will give you the opportunity to learn new styles from the Masters there. There are two, oddly enough, Master Smiling Hawk and Master Radiant, who walk different Paths, thus creating an at-odds atmosphere at the school.
In order to join the school, though, you'll have to defeat all of the Brothers, who are second in power only to the Masters. You'll have to work your way up through the ranks, from the Sixth Brother to the First. Feel free to question them about the goings-on at the school before you challenge each of them to a fight. It appears that there's some tension between the two Masters, and that the Second Brother, a vocal opponent of Master Smiling Hawk, was sent by Hawk on an errand into the city and never returned. Hmm....
After defeating Fourth Brother, you will be escorted in to speak with Master Smiling Hawk himself, who has a bit of a proposal for you. He admits to killing Second Brother, and ask you to kill both First Brother and Master Radiant in exchange for wondrous power, new training; the usual deal. Your choice of Path will obviously dictate your response.
Open Palm: If you refuse to help Smiling Hawk assassinate Radiant, then you should tell First Brother of your conversation, then challenge Third Brother, who waits in the cafeteria. Like the rest of the Brothers, he's not too difficult to beat, although he does use a style that will allow him to Disorient you, which will prevent you from attacking. The key to beating him, as in most other one-on-one fights against human opponents, is to combine Storm Dragon with whatever martial style you prefer. A single hit from Storm Dragon will paralyze Third Brother for a short while, allowing you to pound him with your martial style, then flip back to Storm Dragon and start the cycle over again. He'll go down after a minute of this.
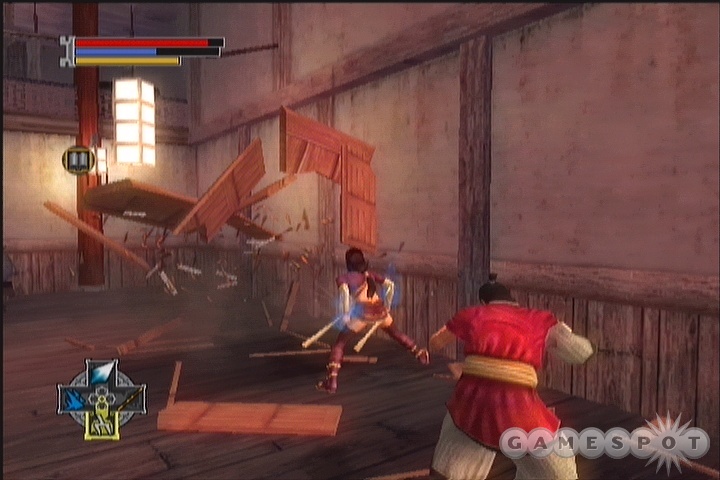
With Third Brother out of the way, First will take you to meet Radiant, who's actually a ghost! He was killed by Smiling Hawk some time before, who stole his style and killed him in his sleep. He'll ask you to attack and defeat Smiling Hawk once and for all!
To start this fight, head to Smiling Hawk's room and confront him. Soon enough, he'll be kicking you through walls, threatening you with imminent death, etc. The fight that ensues can be difficult, but if you want a cheap way out, just spam out Storm Dragon to paralyze Smiling Hawk and beat him while he's defenseless.
For your role in cleansing the Black Leopard school of Smiling Hawk's evil taint, you'll be well-compensated. You'll receive the Rote of the Endless Mind technique (+5 Focus, +5 Chi), the Paralyzing Palm style, the Gem of Inner Genius (+10 Mind, -5 Body and Spirit) and the Heaven's Blessing Gem, which surrounds you with a shield that will damage anyone who strikes you in combat.
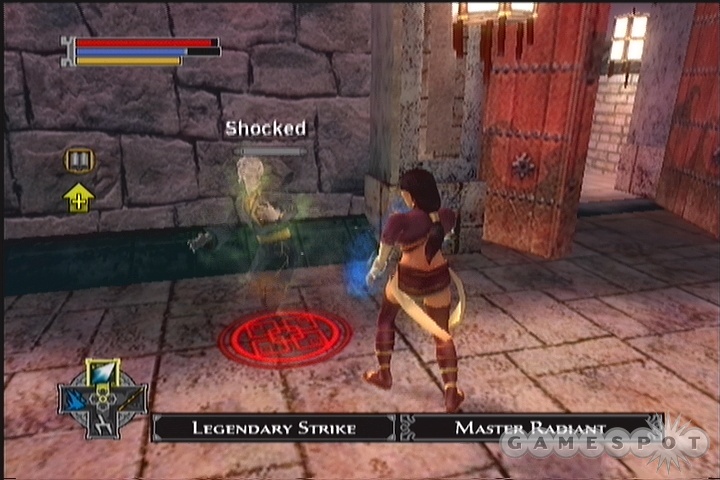
Closed Fist: If you agree to Smiling Hawk's demands, you'll have to kill both First Brother Kai and Master Radiant. First Brother isn't difficult to take down; just Storm Dragon him to insensitiveness and beat him down. Before you can take on Master Radiant, though, you'll have to defeat Fourth Brother and a Novice. Dispatch one of them quickly, then use Storm Dragon and Spirit Thief to completely restore your health and Chi before finishin the other one off.
Master Radiant himself isn't so difficult to take on, either. Even though he's a ghost, the Storm Dragon style will still affect him, but be careful, as he uses it himself, although his style won't paralyze you when it hits. With Storm Dragon, you can lock him up and beat him down with your martial style. For defeating him, you'll learn the the Hidden Fist support style, as well as receive the Gem of Black Flame (Mind and Spirit +3). If you search Radiant's rooms, you'll also obtain the Warrior of the Inner Eye technique (Focus +7, Intuition +1).
Whichever path you take, you'll polish off the Black Leopard School sidequest by siding with one of the masters against the other.
Lord Lao's Furnace
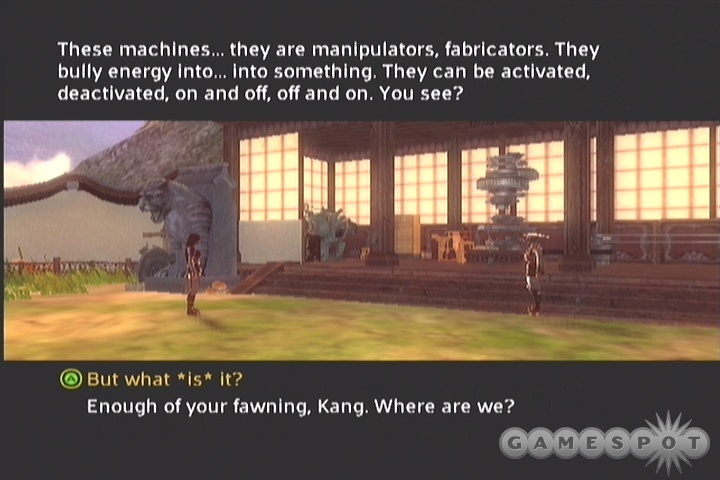
If you were diligent in following up on Kang's personal wind map in Chapter Two, at the beginning of Chapter Three he'll be able to take you up to Lord Lao's Furnace, a private heaven of a legendary artificer in the Celestial Bureaucracy. This place is initially quite confusing, with a large array of switches, devices, buttons, and so on. You'd be well advised to save your game before you start examining everything.
The Furnace works based on configurations, i.e. recipes, and uses ingredients in tandem with specific sequence of devices and button presses to create...things. You already should have one configuration (Configuration of the Horse, from the workshop in Gao the Greater's pirate hideout) and one ingredient (A Bar of Nickeled Iron, from a chest to the west of the Teahouse in Tien's Landing). You can find another configuration and ingredient in the Ceramic Urns near where you pop into the heaven; they hold the Configuration of the Ox and the Cow Bezoar.
With the Configuration of the Horse and the Cow Bezoar, you can use the Furnace. If you examine the Config: Horse in your Plot Items screen (press X on your Journal screen), you'll read the strange rantings of a madman, who nonetheless gives you what you need to proceed: the ingredient ("The stone of the cow"), the device you need to activate ("all but the cogs"), and the button you need to press (the Tiger). So, if you want to make whatever the Configuration was designed for, you'll need to load the Cow Bezoar into the Fuel Hopper, then activate all of the machines in the area except the Whirling Cogs by pulling the levers beside them. With all of the machines save for the cogs activated, head to the Tiger Button near the pagoda and hit it (you'll have to wait for all of the machines to finish their animations before you can do so). With the proper ingredient and the proper machines active, this will net you the impressive Song of the Spirit technique, which will grant you a permanent +5 to Spirit. Not +5 to Chi, mind you, but the Spirit stat itself. Very nice!
There are other configurations you can find in this chapter; Kang himself will give you hints as to their locations if you ask him. We'll list the recipes here and tell you what you need to do to complete them. Note that you can buy ingredients from many merchants (including Zin Bu), in addition to finding them in casks and urns and the like, so be on the lookout for them. Unfortunately, you can't use a configuration unless you have the recipe itself, not even if you know the precise steps for completing it.
| Configuration | Ingredient | Necessary Machines | Result |
| Of the Ox | Vial of Sulfurous Water | Water Wheel, Chimney, Dragon Button | Increased Magical Damage |
| Of the Dragon | Vial of Sulfurous Water | Cogs, Cauldron, Tiger Button | +5 Body |
| Of the Snake | Bar of Nickeled Iron | Conductor, Chimney, Cauldron, Tiger Button | +5 Mind |
| Of the Tiger | Bar of Nickeled Iron | Conductor, Cogs, Dragon Button | +30 Focus |
| Of the Horse | Cow Bezoar | Water Wheel, Chimney, Conductor, Cauldron, Tiger Button | +5 Spirit |
| Of the Rabbit | Cow Bezoar | Conductor, Chimney, Cogs | Heaven's Blessing Gem (Damage Shield, Open Palm only) |
| Of the Rat | Eyes of the Void | Cauldron, Chimney, Cogs, Water Wheel, Dragon Button | Increased Martial Style Damage |
| Of the Goat | Eyes of the Void | Cogs, Water Wheel, Conductor, Tiger Button | +3 to Mind, Body and Spirit |
Here are the known locations of the recipes for these:
- Of the Horse: Found in the workshop of Gao the Greater's pirate hideout. Also found in Ministry Hostel in the Golden Way during the Inquisitors quest.
- Of the Ox: Found in Lord Lao's Furnace area, in a ceramic urn.
- Of the Dragon: Found in a bamboo cask in the northwestern corner of the Imperial City, near the gate to the Imperial Arena.
- Of the Tiger: Reward for completing the Jinlin side quest.
- Of the Rabbit: Found in the archives in the Lotus Assassin Fortress.
- Of the Snake: Found in the Scholar's Garden, in a scrollstand near where you meet Scholar Dongow.
And here's the location of known ingredients:
- Cow Bezoar: Bought from Zin Bu; obtained for helping the merchant ghost in the Necropolis; in an urn in the Great Furnace.
- Sulfurous Water: Bought from Zin Bu; obtained from Kang after completing one of his shooting missions.
- Nickeled Iron: Found in a cask near the Teahouse; bought from the mechanic in the Imperial City; bought from the mechanic Hin Goo near the camp in the Imperial City.
After you complete three successful configurations, Kang will receive another Wind Map, seemingly intended to reward proper use of the device. If you follow it and complete the Dragonfly challenge, you'll obtain the Mirage style for the ship.
If you manage to complete all six configurations, then Kang will remember one more Wind Map, resulting in a fiercesome fight against a lightning-embued boss. If you manage to complete this stage, then you'll reveal that Kang actually is Lord Lao, who apparently had his memory altered for insulting the heavens. He'll give you two new pieces of fuel called the "Eyes of the Void", and two new configurations, Of the Rat and Of the Goat. Using either of them will require both of the Eyes of the Void as ingredients, and you'll only be able to use one of them before the furnace breaks, so choose wisely!
Creative Yukong Bounty
This is one of the bounties given to you by Imperial Captain Sen, who stands a bit to the southeast of the base camp in the Market District. You can find Creative Yukong standing in the Scholar's Garden; he masquerades as Scholar Kongyu, wears an orange robe, and will attempt to impress upon you how completely nonsuspicious and busy he is. (Note that, if you wish, you can head to the Imperial Arena and speak to Lady Rento to learn all of this, but the only reward is 100 XP, so it's best just to head straight for him.)
After you pester Kongyu enough and press him on his supposed knowledge, you'll be able to reveal him as Creative Yukong. If you want to help him out, agree to do so, and you'll be warped back to Imperial Captain Sen, whom you'll need to distract in order for Yukong to sneak past him and through the gate that he guards. If you're going for Open Palm points, keep up the masquerade, even as Yukong does his best to screw it up. If you want some Closed Fist points, you can either just kill Yukong, or agree to help him, then tell Sen what the deal is while Yukong does his little pratfall routine at the gate.
Fading Moon Bounty
Fading Moon can be found in the southeastern corner of the Necropolis, near the Unfinished Tomb. She's apparently insane, and like any good arsonist, wields fire magic. Put her out of her misery to retrieve the Gem of Pure Flame, which will add +3 to Mind and Spirit for Open Palm users. You can then return to Sen to collect the sizable reward offered for her death.
Aishi The Mournful Blade
After you complete the first two quests, you should be able to return to Sen and get your rewards for them, and you may be able to pick up the Aishi The Mournful Blade quest from an old man in the area. If you do so, he'll tell you of a dangerous criminal that has come into the city and now resides at the Black Leopard School.
When you find Aishi at the Black Leopard School, you can choose to just kill her, if you wish, but if you choose to listen to your story, she'll tell you of her distant relations with Sen, back when they were both children. She wants vengeance on Sen, and asks you to escort her to his location. If you do so, you again have the option of killing her, or letting her kill him. If you let her kill him, then agree to defeat her in battle, you'll earn Open Palm points.
The Slave Traders
Prefect Jitong holds two men, one Chandler Ling and one Scholar Songtao, in custody. The Ministry is putting pressure on him to convict Songtao of slave trading, but the Prefect knows that Ling is the one running the show, and is curious why the fix is in. He asks you to speak with Xi Bao, one of Ling's associates, and discover what's really going on.
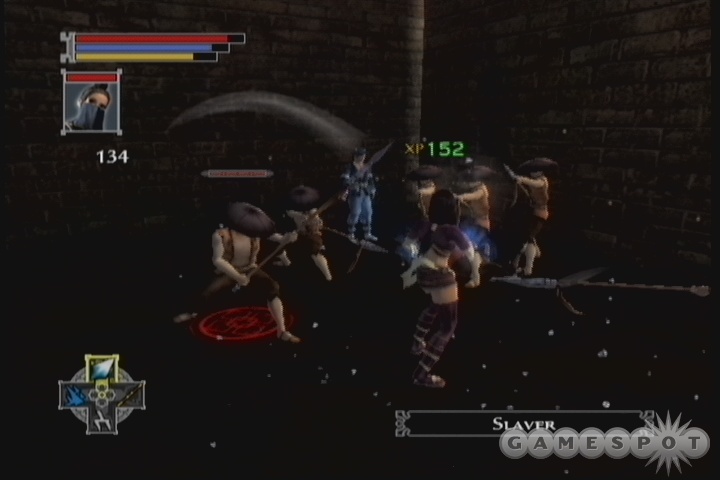
You can find Xi Bao in the Heart of the Empire Tavern, in the Arena district. You'll need to either bribe or talk him into taking you to the slave traders, but be careful, as some of the conversation options here can net you Closed Fist points; you may want to save your game before speaking to him if you want to avoid that. If you want to just reach the slave traders, then offer him 500 silver, at which point he'll walk away. You'll have to follow him down to his meeting with Cao Zeng, the master slave trader, at which point you'll have to defeat all of the guards to get Zeng's ear.
When you meet with Zeng personally, you have a predictable choice to make. Either you can kill Zeng and bring the Slaver Documents back to the Prefect to clear Songtao's name, or you can accept Zeng's offer to help solidify the frame-up. If you choose to free Songtao, then he'll move to the Scholar's Garden and offer to sell you gems; if you free Ling, then he'll move to the Golden Way. They both sell the same gems, of which the only interesting one is the Lucky Hand, which will let you loot more silver from human enemies.
Jinlin

After you've run around the city for a bit, you'll encounter Jinlin, a young girl who's being exploited by an old miser that wants her to enter a tomb in the Necropolis and retrieve an artificat for him. The only problem is that the tomb is obviously full of ghosts, and she'd never survive the trip. You can treat her as roughly or as kindly as you like, but you can still earn Closed Fist points by asking her for money, then agreeing to go even after she tells you she can't pay you.
If you accept her task, you can head to the Necropolis and meet her by the entrance to the Tomb of the Dignified Collector. She'll open the door for you, and ask you to head inside and clear out the tomb.
Most of the enemies in the tomb aren't so difficult, but when you reach the Inner Sanctum, you'll have to take on the Insane Emperor Ghost and three Lost Spirits simultaneously. You'll obviously want to take on the Spirits first; hopefully you have enough Chi to quickly take them down with Chi Strikes before turning your attention on the Ghost itself. It can use Spirit Thief, which also happens to restore its health, so you may want to flip your follower onto attack mode and gang up on it to bring it down.
After you fight your way out of the tomb, you'll earn the Configuration of the Tiger and Jinlin will scamper back off to Shouji to give him the urn. Unfortunately, there's no way to mock her weakness and steal the urn from her, mocking the fate of her poor kidnapped mother, so you'll be forced to accept Open Palm points if you want the Configuration.

Mechanic Hin Goo
After you explore the city a bit and get Silk Fox along as a follower, return to your base camp to meet up with Hin Goo, a flyer mechanic who wants you to retrieve supplies for him. To do so, you'll need to undergo a few flyer missions, with varying goals in addition to the standard "make it to the end of the map" overarching objective. The last mission he gives you will involve running supplies to his crashed colleague; ignore the "destroy all enemies" text that pops up, as all you have to do is survive.
After each mission, you'll earn a sizable amount of experience and silver, and Hin Goo will also act as a merchant for Dragonfly styles.
Golden Way Quests
The Play's The Thing
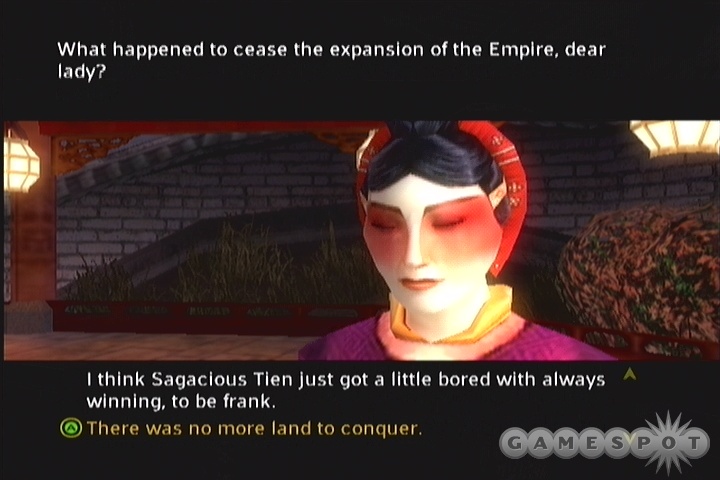
If you speak to Incisive Chorus, a playwright who dwells in the Golden Way, he'll explain a bit of a problem he's been having. A roaming troupe has been performing one of his plays in the countryside, but now that the company has returned to the Imperial City, he's discovered that they've altered the play to come off as a satire of the Empire, and asks you to take part in the play as an actor, reading the lines that he originally wrote, to prevent any...interested parties from taking offense at the altered version of the script.
If you agree to help the writer out (or if you just want to screw him over by going with the edited script and attempt to get him in trouble), head to the east until you find the pagoda where the play is being performed. The actor there will give you the Edited Script. With it and the original script, you can head to the bookstand near the stage and study your lines.
You have a choice here: you can either read from the original script that Incisive Chorus wrote, which reveres the Emperor and claims him to be guided by heaven itself, or you can accept the changes in the edited script, which imply that the Emperor is under the thumb of the Lotus Assassins. There are only two places in the script where you have a choice to make between the edited script or the original script; the other lines are only either correct or incorrect. If you get more than three lines totally incorrect, then you won't be rewarded for your part in the play.
- First Line: White banners are flying. "White Banners Fly."
- Second Line: Original: Heavens sending a message at dusk. / Edited: "Flower Guardians".
- Third Line: Decision was made on the edge of a vast plain.
- Fourth Line: Original: "Heaven's reach is wide." / Edited: "The flower guardians may blossom..."
- Fifth Line: The emperor turned to the heavens themselves.
- Sixth Line: A shooting star raced across the sky.
Now, if you go with the edited script, you'll net 1,000 Silver and experience from the actor afterwards, but Incisive Chorus will refuse to reward you further, thanks to the beating he receives from the Lotus Assassins. You do earn some Closed Fist points for this choice, though. Going with the original script throughout the play won't shift your alignment one way or the other, but you'll net both the reward from the actor, as well as an extra 1,000 experience and 1,500 silver from Chorus. Even the most Randian of Closed Fist scholars will probably be swayed by those numbers.
Scholar's Garden Quests
The Outlander
During your meanderings in the Golden Way part of town, you'll come across a man heckling the passersby, insulting their parentage, calling them names, and the like. When you confront him, he'll reveal himself to be a servant of the Minister of Culture, who wants you to perform a task for him. It appears that there's an Outlander, meaning someone from beyond the boundary of the Jade Empire, who's taken up lodgings in the Scholars' Garden and has been acting a bit too gregariously for his own good and that of the people around him. The Minister asks you to find some way to deal with the man and convince him to leave town before the Lotus Assassins catch wind of his heresies.
When you reach the Scholar's Garden, head towards the western end to meet up with Sir Ponce Von Fontlebottom the Magnificent Bastard, fresh off a glorious harmonic kill on some poor kid. If you wish to shove Ponce's words back down his throat, you're going to have to defeat him in...a debate? Oh, joy; it'll be like defending yourself at Manaan all over again.

After speaking to Percival, you'll be able to talk to each of the five judges in the arena to learn a bit about how the debate works. Each individual judge will be impressionable to a certain kind of argument, but only to a point: if you pick a certain type of argument that a judge respects once, they'll be in your favor that round, but if you attempt to repeat that type of argument in the next round of the debate, they'll flip back again and side with Percival. So the trick is to get as many judges on your side as possible without alienating any of them. If you have a majority of judges on your side in a majority of the rounds of the debate, you'll win; you'll also win if you manage to get all five of the judges on your side at any time.
The order of the judges is like so: Minister comes first, then Heng, Zou, Cai, and Gu. Here's a list of which judges are influenced by which style of argument.
- Sympathy: Minister, Zou, and Gu.
- Confrontation: Minister
- Facts: Heng, Zou
- Dismissive: Zou, Cai
- Mocking: Cai, Gu
With this information, you can probably sketch out what solution will most quickly get you a clear-cut victory over Percival on a piece of paper, if you enjoy puzzling these things out for yourself. If you're here to get the answers, though, have no fear: answer with Facts, Dismissive, and Sympathetic arguments, in that order, to get all of the judges on your side and win the debate automatically.
Of course, no duel of words would be complete without a duel of weapons to follow it up, and you will indeed have to deal with Percival after the debate is complete. He's a powerful foe, thanks to his blunderbuss, which can strike at a distance and damage all of your attributes at a go. He is vulnerable to Storm Dragon, of course, so if you can jump into him, you can lock him up and take him out without a problem. Otherwise, just get close to him, unload a simple combo, then flip over to his back side to avoid his shot and repeat the process.
After you polish off Percival, he regretfully won't join your party as a companion. He will offer up your choice of one of five rewards. If you choose one of the stat responses, you'll gain a technique that adds +3 to that stat; if you ask him for a gem, he'll give you the Silver Tongue, which nets you +6 to all of your conversation skills; while the Weapon will net you the Mirabelle weapon style, which is almost useless due to the long reloading time and large Focus requirements. When you're done with Percival, speak to the Minister of Culture to earn an extra reward of silver and experience.
Necropolis Quests
The First Gravedigger: A Mournful Ghost
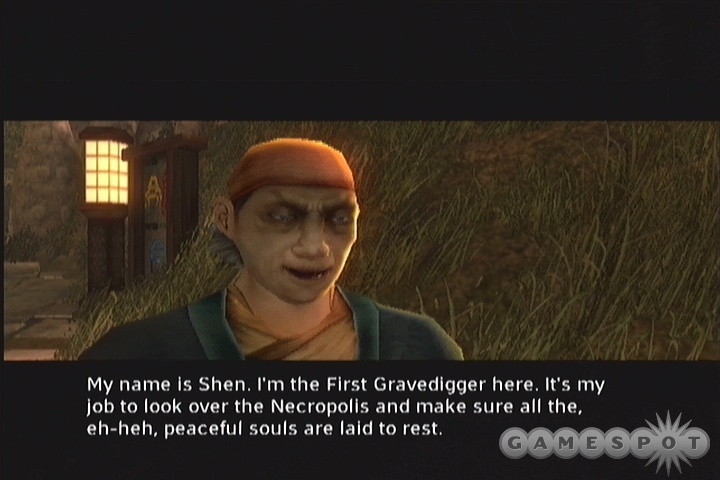
The First Gravedigger can be found in the Necropolis, and wishes you to somehow "put down" three of the more troublesome ghosts that have been popping up in the graveyard so that he can safely travel the area and bury the new corpses that are coming in. (Note that after he gives you these quests, you can speak to him in his house and destroy the ghost in his backyard as a little mini-side-subquest thing for a cash reward and a gem.)
The Mournful Ghost is Miss Chan, who needs some closure in the matter of her baby son, who apparently died during the same childbirthing that killed herself. There are four gravestones near Miss Chan, and you have to choose which one you believe belongs to her son. The correct answer is Chan Tuo, but pointing her to the correct grave will result in Open Palm points.
The First Gravedigger: A Fearful Ghost
Merchant Bai was killed by two thugs, who were eventually caught and beheaded themselves. Unfortunately, their ghosts have also arisen, and the ghost of Bai cannot be at peace until they're found and brought down. They dwell within the Masses' Grave near Bai's position.
If you travel to the grave and defeat the brothers, then Merchant Bai will offer up a Cow Bezoar. Given the scarcity of Lord Lao's Furnace ingredients, you may want to accept the Open Palm points and take the reward for helping him out, even if you're going Closed Fist. The alignment shift is minor.
The First Gravedigger: A Vengeful Ghost
Master Ren believes that his wife murdered him, and wishes only vengeance against her. He asks you to bring her back to his grave so that he can kill her.
You can find his wife standing by a hut in the Market District, near the blacksmith's shop. There are a number of ways to deal with this encounter after you find her. The Open Palm way involves bringing her back to her husband's grave and convincing him that what killed him truly was an accident. The Closed Fist path, however, will either involve you killing his wife in the Market District, then returning to tell him the news, or, if you're truly a sadist, bringing her back to him, goading him into disbelieving her story ("If you can't believe the truth..."), and then either letting him kill her, or flipping out ninja style and killing them both yourself.
The Tanners Fong
After you complete all of the First Gravedigger quests in the Necropolis, he'll give you one last chore to complete. It appears that one of the corpses he recently buried, that of Tanner Fong the elder, actually managed to zombify itself and return to the home of his son. Since the son contends that the burial didn't keep, he's asking for a refund, or to have someone eliminate the corpse from his house.

The Tanner Fongs are located on the southern half of the Merchant District, in between the entrances to Black Leopard School and the Golden Way. When you reach the house, you'll discover that the Elder Tanner Fong was never really dead; his son just carted him off to the graveyard while he was asleep! The younger Fong will ask you to kill his old man so that he can take over the business. If you're of an Open Palm bent, you can attempt to broker a reconciliation between the two. If you're more of a Closed Fist person, then you can either agree to kill the Elder Fong, or bring him outside to speak to his son, then kill them both!
The Scientist
If you enter the Tomb of the Forgotten Scholar in the Necropolis, you'll come across Mad Wen Zhi, a doctor who needs a fresh liver to save his daughter, who's dying of some sort of degenerative liver disease. He tells you to find the corpse of Ji Xin, freshly deceased, who was interred in one of the towers to the north of Wen Zhi's position, and bring the liver from his corpse back to him so that he can perform the operation.
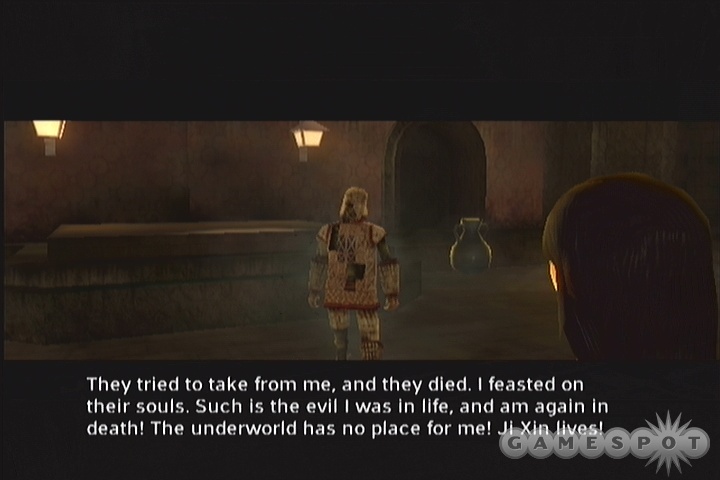
When you find the Tomb of Ji Xin, you'll come across the zombified spirit of the evil nobleman in the act of taking down a couple of graverobbers. You have two avenues to pursue to get the liver from him: you can either make an Intuition check and attempt to convince him that giving up his liver would lead to a chance at redemption for his evil ways, which will obviously net you Open Palm points; or you can just fight him and take it.
When you return to Wen Zhi with the liver, you unfortunately can't mock his daughter's weakness and eat the liver just to spite him, as a true Closed Fist devotee would do; you have to give it to him. If you talked Ji Xin into giving it up, then all will go swimmingly; if you fought him for it, though, something will go wrong with the procedure, and Wen will ask you to sacrifice whatever's necessary to save his daughter. If you refuse to do so, she'll live anyway; if you in fact agree to his sacrificial request, you'll take a permanent -10 Chi penalty, and will have to fight Ji Xin again to save her life. This latter course of action will earn you Open Palm points.
Note that, whichever path you take, you can visit Wen Zhi and his daughter at the blacksmith shop near the Black Leopard School to follow up on them. If you happened to make a sacrifice to save her life, he'll give you the Theories of Medicine, which will net you +7 Focus and +1 Intuition.
(There's apparently another option for finishing off this quest. If you speak to Dr. An, in the arena, and thoroughly examine her conversation tree before coming out to speak to Wen Zhi, you'll have the option of referring him to the doctor's services when you hear his plight. If you do so, you'll have to bring Dr. An back to the Necropolis, where she'll perform the transfusion, allowing Wen Zhi to sacrifice his life for his daughter's. Dr. An will then take care of the girl. You may be able to pursue this course even if you didn't speak to Dr. An ahead of time, if you visit her before the girl is revived. You may have to get the liver from the zombie before you can mention the doctor, though.)
Imperial Arena Quests
The Imperial Arena
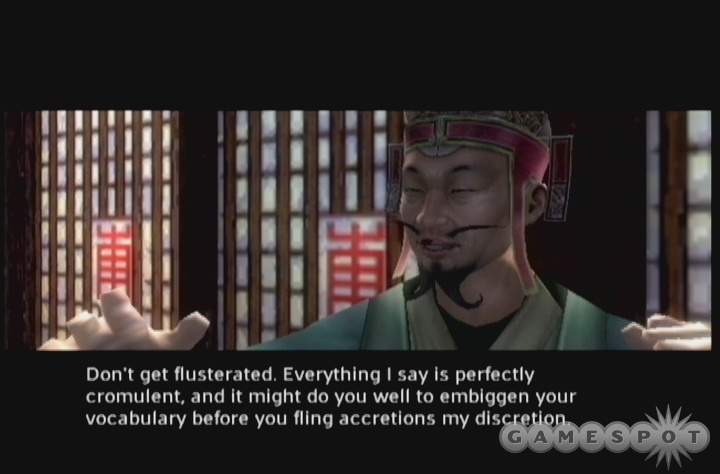
In order to join the Arena, you'll need to speak to Qui the Promoter, who's speaking to a fiercesome-looking dude upstairs in the tavern. Feel free to speak to all of the NPCs in the area leading up to Qui, as there are plenty of them, each with a little story to tell. Some of them you'll be revisiting in the future, but for now, your goal is to get to Qui and join the arena.
When you've done so, you can start working your way up the ladder from the bottom all the way to the top. If you wish to do so, you can speak to the other fighters in between rounds to learn of them, but it's not really necessary to do so.
Novice Division
Fight One: Ogre
Fight Two: Four Black Leopard novices
Fight Three: Dragon Statue (use Chi Strike with your most powerful weapon to destroy the statue before time runs out).
Fight Four: Han the Hapless. (Storm Dragon, martial style, he's dead.)
After you polish off the novices, you'll be accosted by someone named Lucky Cho, who tells you that his employer is watching you. He hints at some kind of reward if you manage to win the Bronze Round. You'll also learn the Black Whirlwind was once a fighter at the Arena.
Bronze Division
Fight One: Five Cannibals
Fight Two: Dodge the projectiles that come your way while avoiding the traps on the ground. This is pretty tough, so be sure to equip any +Body gems you have before heading out.
Fight Three: Toad Demon. Before this fight, you'll learn that the Guild is betting heavily on you. You can throw the fight, if you wish, just to see their reaction, but you'll be forced into a rematch if you want to proceed.
Fight Four: Crimson Khana. Storm Dragon, martial style, and you win.
Before you fight Crimson Khana, you'll be asked to speak with Lucky Cho in the room near Qui. If you do so, take advantage of the opportunity to buy and sell from Sweet Poison Lyn. When you speak to Cho, he'll propose that you poison Khana before facing her, launching the Bronzed Opportunity side quest. If you go through with the poison plot, then Khana will die after the bout, and thus obviously be unable to pass on her style to you as promised. If you refuse to poison her and win, she'll teach you her twin-bladed weapon style. If you refuse to poison her, and then tell her about Lucky Cho's plan, then win anyway, she'll teach you the Crimson Tears style, which does an extra 25% damage over the standard twin-blades style. Unless you're really roleplaying the Closed Fist path, you'll probably want to follow the last option: Crimson Tears is arguably the best weapon style in the game. Although you're forced to get up close and personal, you can strike extremely quickly for huge amounts of damage.
Note that after you're allowed access to Lucky Cho's room, you'll be able to accept the Gambler's Favor subquest from Gambler Daoshen, elsewhere in the tavern.
Silver Division
Fight One: Elephant Demon. He may look intimidating, but he's sloooow. Jump behind him and use Chi Strikes to quickly sap his health while he turns, then repeat the process to finish him off.
After the first fight here, you'll be asked to speak with Kai Lan the Serpent alone, in his quarters near Lucky Cho. Before you get a chance to hear his entire proposal, though, Black Whirlwind will barge in, initiating a string of events that will end with you and he fighting and killing Lucky Cho. Afterward, he'll tell you about Raging Ox, his brother and the former champion of the arena, and how he, Whirlwind, wound up killing his own sibling. He'll warn you against siding with Kai Lan. It's probably wise to humor him; he does have two axes and the strength of ten men, after all.
Fight Two: Four Guild Assassins. The green-armed foes can poison you with their strikes, although it isn't a very deadly poison. Be sure to hit a Spirit Font or walk back down to the Creature Pens before starting the fight, because you won't have your health restored after the fight with Lucky Cho.
Fight Three: Three Imperial Golems. Golems are massively tough enemies to beat, since they're immune to support, martial, and magic styles. All you can really use are weapon and transformation styles. Luckily, they're extremely slow, allowing you to use your weapon style with Chi Strike (they can be afflicted by Spirit Thief, at least) to do damage fairly efficiently. Just dart in, wait for them to start their attack animation, then dodge to one side and unload a combo on them. Just don't let them box you in, or you'll find that your health gets drained quite quickly.
Before you fight Iron Soldier, he'll ask you to meet with him in the Creature Pens in the bottom of the arena. (This may only occur if you poison Khana, but it seems like it should occur no matter what.) He offers to throw the fight to you, in exchange for you tracking down General Stone Kao and killing him, giving you the Soldier's Offer subquest. Kao was the man responsible for throwing Soldier out of the Imperial Army lo those many years ago.

If you track down Kao (he's standing by Sen in the Market District), you can either kill him, or refuse to fight him after hearing his story. If you do kill him, then Soldier won't attack during your fight with him, and you'll net an extra 1,000 Silver after the fight.
Fight Four: Iron Soldier. Even if you don't punk him by using Storm Dragon, Iron Soldier isn't too difficult to defeat. Just stay a tad out of range of the kick that ends his four-move combo, then unload on him with Chi Strikes when he lands. He moves quickly, but doesn't have as much health as some of the other enemies you've been facing.
With the Silver Division out of the way, you'll be able to proceed with the Executioners main quest. You can also keep climbing the ladder and attempt to become Arena Champion.
Gold Division
Fight One: Phoenix Assassin. After you defeat the first Assassin, the power of the Phoenix Unity style will become apparent, as she'll split into six identical duplicates that all attack you simultaneously. Nice. Each individual fighter is susceptible to the Storm Dragon/martial style "combo," but it'll be difficult to separate them. Use your area attack to drop them, and try to target one fighter at a time while darting in, landing a combo, then darting back out. They don't move overly quick, so if your Chi gets drained, you should be able to use Spirit Thief's power attack to get back in the game.
Fight Two: The Sung Brothers, of which there are three in all. Go for the magic-user first, or he'll harry you with firebolts throughout the match. Your best bet when dealing with these guys is to dash in with your roll, which will disrupt their attacks, then use Chi Strike with either a weapon or martial skill to land some blows, before darting back out and starting again. After one of them goes down, the remaining two will be a bit more susceptible to stunning with Storm Dragon, making the fight a bit easier to pull off.
Fight Three: Hot holy god this is going to take a while. In this fight, you're going to be going up against the Ogre, Han the Hapless, a Toad Demon, an Elephant Demon, Iron Soldier, and the Sung Brothers. Yeah, sounds fun, doesn't it?
All we can really say here is to kill the earlier fighters off as quickly as you can, because you only have around 15 seconds before the next opponent comes into the ring. No matter how fast you go, though, you'll be forced to slow down when the Elephant Demon comes in, as his area attack will consistently knock you off your feet when you get close to him. Thus, you're probably going to wind up with Iron Soldier and all three of the Sung Brothers coming at you alongside the Elephant Demon, which is no fun at all. The only thing that makes sense is to approach this like you would any other group of demanding foes; single one out for destruction, dart in and out to attack him, then retreat. Keep yourself as far away from the Elephant Demon as possible. When you're down to a single human foe and the Elephant Demon, use the human with Storm Dragon and Spirit Thief to regain some Chi and health before finishing him off and jumping behind the Elephant to hit it from behind.
If, on the other hand, you want to take down the Elephant in short order, you may want to switch over to Horse Demon form and use its power attack on it. You'll lose a bit of maneuverability, but should be able to take out the Elephant relatively quickly.
Championship Bout: The Ravager. Hmm...those twin axes...could it be? This guy is uber-difficult to take on legitimately; he's immune to area attacks, can't be Spirit Thiefed, and, what's worst, his attacks aren't interrupted by your own attacks, so you can't rely on getting in close and spamming him with martial attacks in an attempt to lock him up. If you want to take Ravager on without using Storm Dragon, you'll need to be a master of the "float like a butterfly, sting like a bee" philosophy. Single blows are about all you'll get, so you may want to use a weapon style, wait until he starts his normal weapon combo, then side-dodge and try to land one blow before darting back out again. We don't mean to trivialize it, though: the Ravager may be the single toughest foe in the entire game. He can be Storm Dragoned, though, which is the real triviliazation here; just shock him, do a combo, shock him again, etc. He'll go down fairly quickly.
After you defeat Ravager, you'll be confronted by Kai Lan, who challenges you to a fight himself. You have two options here: either let Black Whirlwind fight against the Serpent, or do the dirty work yourself. Believe it or not, but this fight is actually probably going to be easier with the Whirlwind in the ring, thanks to his ability to use weapon styles without consuming focus and his ridiculous amount of health.
Kai Lan The Serpent: Kai Lan, you see, is something of a sorcerer, using poisoned fists, ice magic, and a deadly rapier to take you down. He's not too difficult to handle, though; just jump into him when he's using fists or magic and use Whirlwind's axes to swing at him from behind. When he brings out his rapier, though, you'll want to stay away, as he's incredibly quick with the sword and it does a massive amount of damage. If you did use your main character in this fight, then you can of course use Storm Dragon to paralyze him completely and deal with him that way.
Unfortunately, Kai Lan's sorcerer's ways come into play a bit more materially when he's almost dead, as he'll become completely unhittable while he channels two Horse Demons into the fray. As you recall from your fights in the Fox Spirit's Heaven, these guys deal damage to you with each blow that you make, but Whirlwind should have plenty of life to work with here, and his twin axes will often manage to hit both Demons simultaneously. You just have to be very quick to get out of the way of both their projectile attacks, which do insane damage, and their melee attacks, which do slightly less damage but which will be coming at you much more quickly. (If you're playing on Grand Master difficulty, then you may need to use your main character, if only for the extra Chi and healing abilities.)
If you can survive the horse demons, then Kai Lan will come back at you with a full health bar. Hopefully one of the Demons will have dropped a health pickup for you; regardless, the same strategy you used to beat Kai Lan before will work again, so polish him off to become the true king of the Imperial Arena.
After all that's done, you'll earn Tang's Revenge, a dual-axe weapon style, as well as a substantial amount of cash and experience. Poison Lyn will approach you and tell you that the Guild bears no grudge against you for your acts, so feel free to get the heck out of dodge, content in the knowledge that you just destroyed everything the Arena put against you. You can also enter Kai Lan's quarters in the arena to find his secret stash of gems and techniques, although most of the chests there are trapped, so be careful.
The Gambler's Favor
After you gain access to Lucky Cho's rooms, Gambler Daoshen will offer you this quest. It's a simple enough affair; he wants you to pay Sweet Poison Lyn, near Cho, so that Daoshen is allowed to run higher-stakes games. If you run down to Lyn and give her 500 silver, then return to Daoshen, he'll repay your money, give you a nice gem, and let you up the stakes on your dice games up to 25 silver. Pretty simple, all told.
Chapter Four
Chapter Four is a fairly short chapter, although it's somewhat dense with plot revelations. Pay attention!

You'll begin by finding yourself on the landing platform of the Imperial Palace. It appears that the Lotus Assassins have sealed many of the hallways leading to the throne room and are attacking anyone who enters, even the Princess. The good news is that everyone you fight against here is vulnerable to Harmonic Combos, so don't hesitate to use Storm Dragon's area attack to set one up before switching to a martial style to finish your victims off.
The path here is exceedingly linear, so you won't really have much opportunity to explore. Head through the Imperial Army thugs until you reach the lift heading to the Throne Room.
Wacky Antics In The Throne Room
Make your way through the Tombs (which will remain sealed for now) up to the Throne Room. You'll know you're almost there when Silk Fox tells you so. Any romance plots that you've been working on may pay off here, as one of your followers may or may not profess their love for you, or you may have the opportunity to declare your undying devotion yourself. Awwww....
When you're ready to get some of those imperiacidal urges out of your system, head into the throne room to meet up with the Glorious God-Emperor Sun Hai himself. He'll make short work of your teammates, leaving you to follow him up the steps to his throne, but you'll first have to deal with the many, many bodyguards that stand in your way.
Your first test will come against a couple of dozen Imperial Army and Lotus Assassin thugs. They have the strength of numbers, sure, but are fairly weak individually, so use your weapon style or Toad Demon's power attack to quickly overwhelm them.
Next up is a group of four Lotus Assassin Masters. Although individually more powerful than the bodyguards you just ripped through, they're still not tough enough to take you down. They're susceptible to Harmonic Combos, which makes them fairly easy to kill with Storm Dragon. After they fall, recharge yourself at the Spirit Font and Focus Shrine before heading up to take on the Emperor himself.
Boss Fight: Emperor Sun Hai
You know, for an all-powerful Emperor that managed to kill a god and absorb its essence, the Emperor's a pretty tough old bastard. He's got excellent damage in all three of his primary styles. The one to watch out for, though, is his magic style, Tempest, with which he can paralyze you in place and pelt you with airballs from a good distance away while you're helpless. It's pretty damn annoying when this happens, if we do say so ourself.
The Emperor's big thing is a Borg-like adaptability; he's immune to all damage from styles the same as the one he currently wields. E.g. if he's currently using his staff weapon style, then you won't be able to hurt him with your own weapon style. If you wish, you can continue changing styles, but each time you hit him with something that he's not immune to, he'll almost immediately switch over to whatever does make him immune, meaning that to kill him with multiple styles will take a long time.
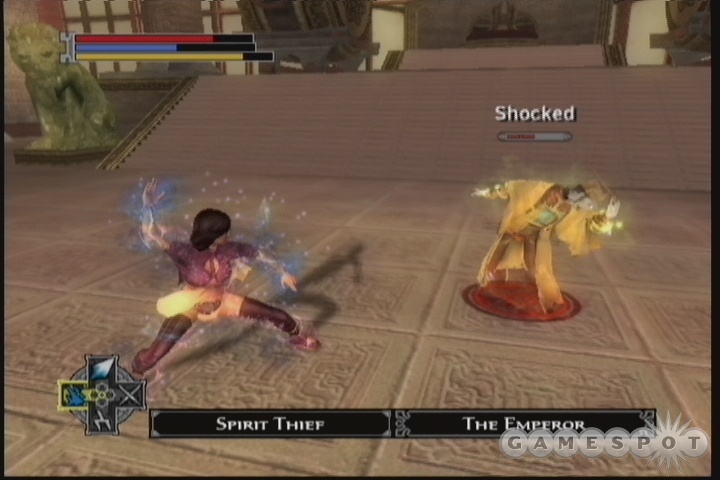
Fortunately, though, the ever-handy Storm Dragon style does indeed work on the Emperor, allowing you to shock him, then hit him with Spirit Thief, then repeat the cycle until all of your health and chi have been restored, if you wish (although this will obviously take a while). In addition, Storm Dragon will allow you to take advantage of one of the few styles that the Emperor can't adapt to: Transformation styles. If you shock him, then quickly load up Jade Golem, you can then use Chi Strike and quickly do a power attack for massive damage while the Emperor is still writhing helplessly. You'll probably need to immediately shift back to Storm Dragon, hit him again, then repeat the process multiple times to kill him off, but the sight of a 30-foot tall Golem smashing a pair of titanic axes into a 5-foot tall ghost doesn't come along in too many videogames nowadays.
After the Emperor goes down, though, your troubles are just beginning...
Chapter Five
Main Quest: The Land of Spirits
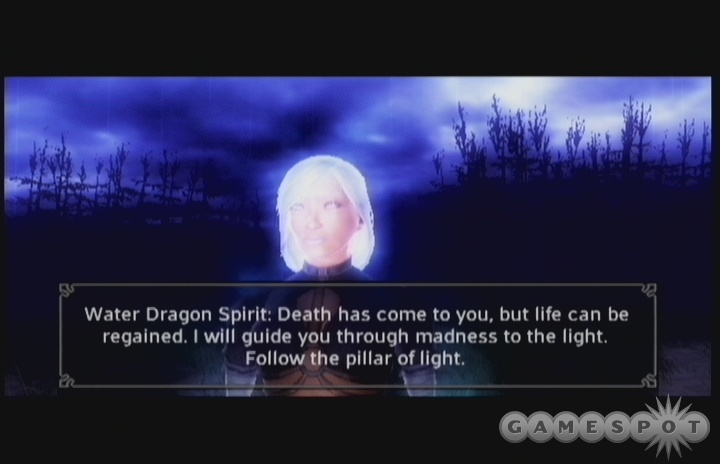
Well...you're dead. Or a spirit, at least, but, hey: same difference. Your goal now is to find some way to get yourself back into your body to take vengeance on your former Master and hopefully help your friends out of their little predicament.
To begin with, you'll have to fight your way across a number of Lost Spirits to reach the Water Dragon. She's on a pedestal near where you start out at, which is well lit up, so...go into the light, Carol Ann. She'll give you all the pertinent details on Master Li's betrayal, before sending you back to Dirge to restore the fountains there, which will enable her to restore you to life before Master Li fully absorbs her power and becomes unstoppable.
Dirge
After reaching Dirge, defeat the Horse and Rat Demon on the steps to reach Abbot Song, who has an interesting little retelling of the story Master Li told you way back in Two Rivers, and whom will then join you in your party for your attempt to restore the fountains here. He says that they were originally corrupted by human blood, which has long since washed away; all that needs to be done to restore their purity is to replace their seals which were smashed by the Emperor.
Your first task is to take down Xian Wu, one of the Spirit Monks who betrayed her brethren after being bribed by Master Li before the siege of Dirge. She got her just desserts, though, by being executed and having her spirit bound to one of the fountains and told to guard it so that the seal could never be replaced. Until you came along, that is.
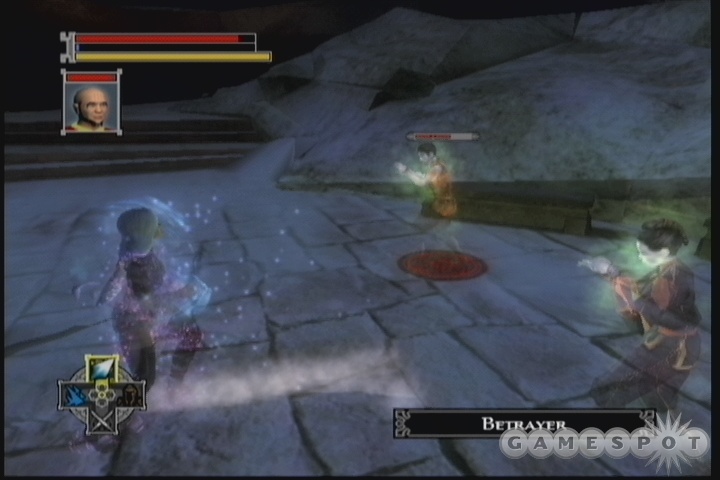
Xian Wu and the two betrayers wield the usual flock of fists and magical styles, with one of them using air, one using cold, and one using fire magic. Xian Wu is the Tempest user, and is going to be the most problematic of the three individuals due to her ability to paralyze you with her ranged attacks. Each of the fighters also has a tremendous amount of health, making killing them a long and drawn-out process. Luckily for you, Abbot Song's support ability will restore your health, Chi, and Focus all at once, allowing you to pop him into support mode, then use free-attack mode to run around the fountain so that none of the spirits can shoot their spells at you while you recharge a bit. All of the ghosts are vulnerable to Storm Dragon and Spirit Thief, as well, allowing you to use those trusty standbys to paralyze your foes and sap their Chi.
When Xian Wu is dead, take the seal that Song gives you and place it into the fountain to restore it, then head to the inner courtyard.
Inner Courtyard

Shortly after reaching the Inner Courtyard, you'll come across a Minion of Suffering, who claims to have stolen the seal for the second fountain. You'll have to track him down and punish him for his petty theft, but it's not going to be easy, since you have to "traverse the Path of Demons" to get to him. Sounds like fun.
Before you head out to reach the demon, though, Abbot Song will clue you in to something that may help you on the path: there's a powerful gem that's been hidden away in the monastery for the last twenty years, under the protection of multiple spells. This is Side Quest: Gem of Power If you can claim it, it may give you the upper hand against the demons, but the spells have undoubtedly attracted many powerful spirits. So you'll need to fight to get to the gem that will help you fight to get to the demons. Makes sense. If you don't want to get the gem, you don't have to; it is, after all, a side quest.
Gem of Power
Man, we're going to be upset if this winds up to be a spirit +4 gem or something like that. To reach the gem that Song was talking about, you'll need to follow the path leading to the southwest from the second fountain. After fighting your way to the Treasury, you'll be accosted by a Red Minister and two Lost Spirits. All of these guys are annoying, with the Red Minister probably being the most so. Since you just recharged at a Spirit Font, though, you should have plenty of Chi around for either Chi Strikes or a Transformation style; we found the Jade Golem to be quite capable of ripping through all of your foes with a minimum of trouble, although you will take a good amount of damage from them due to being unable to dodge.
With the Minister out of the way, you'll be able to retrieve the gem from the treasury. What you get seems to be based on what Path you've chosen; our Closed Fist novice got The Eye of the Demon, which adds +6 Body, Mind, and Spirit, as well giving you a small chance to drain health from every opponent that strikes you. So, yeah...not just +4 Spirit. If you're Open Palm, apparently you get The Eye of the Dragon, which has the same stat increases, but will also net you a small chance to knock enemies back with a shockwave when you're struck in combat.
Before you leave this area, check around near the Spirit Font for a set of steps leading up to a Focus Shrine, along with a Ceramic Urn that will likely have another decent gem in it.
The Path of Demons
To get started on the Path of Demons, head to the southeast of the second fountain, where another Rat / Horse Demon combo will strike at you. Since none of the enemies you've been facing have been vulnerable to weapons, you should have plenty of focus to use on these guys, so dispatch them and move on. Another group of demons waits before the next area, so kill them, then return to a Spirit Font and restore your health and Chi before moving into the cave.
Cave
Inside the cave, you'll have a couple more demons to face off against before you reach the Minion of Suffering. For a two-headed bull and the minion of pure evil, he can sure talk the talk, but he's not overly difficult to defeat. His primary attack consists of chucking purple balls of electricity at you from a distance, but if you head into the fight with a good amount of health, Chi, and Focus, then you should be able to get in close, jump behind him, and use Chi Strikes with your weapon style repeatedly to take him down, just like killing an Elephant Demon.
When the Minion is dead, you'll have your seal, as well as the promise of ultimate destruction from an ultimate evil that waits in the temple, etc., etc. After returning to the Inner Courtyard and placing the seal in the second fountain there, recharge at a Spirit Font and head through the gate that's opened up to the Temple Courtyard
Temple Courtyard
If you wish, you can immediately head west upon arriving in this zone; the Dragonfly Landing Pad has a Focus Shrine on it, but is guarded by a pair of Red Ministers. There aren't any chests or items hidden on it, but you may get the Red Minister style by defeating them.
When you're ready to move on, walk into the temple courtyard, then climb the stairs to the temple itself. Be sure you're in tip-top shape before you do so, of course.
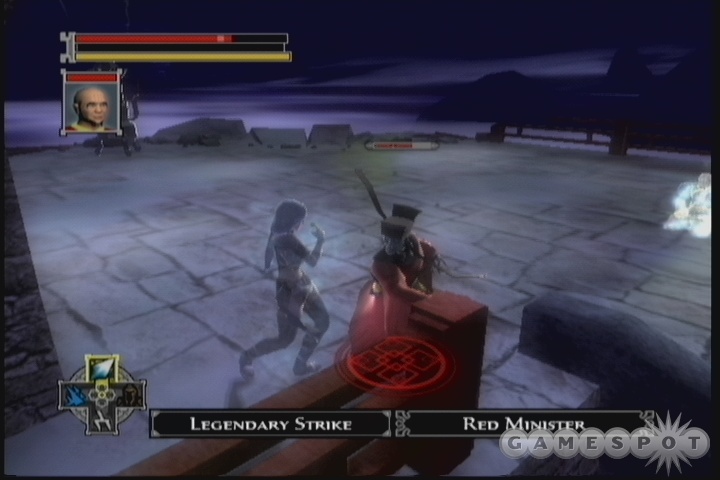
Boss Fight: Abomination
The Abomination in the Temple is going to take on the form of...you. Three replicas of yourself will attack you, in the Aspects of Sorrow, Rage, and Despair. In order to finally cleanse the temple and free the Water Dragon to restore you to life, you'll need to defeat all of them.
Luckily, they're considered to be human opponents, so that your Storm Dragon and weapon styles will work on them, as well as any transformation styles that you may want to pop into. We found it easiest to just use your weapon style with Chi Strikes, pick a single foe, then start the jumping madness while darting in and out of the middle of the group to land your combos. You're obviously going to need to take them on one at a time, since they can overpower you if you try to spread yourself out amongst all of them.
Go for the one using ice magic first, or she'll constantly slow you with her spells. You can attempt to use Jade Golem style if you wish, since it's immune to magic, but you won't be able to target any single enemy very well with it, as they'll usually be pushed well out of the reach of your attacks, if they don't jump out purposefully. So weapon styles are your best bet. Keep in mind that each foe will attempt to heal itself when it's near death; press the attack on any crippled foe to finish it off before moving on to the next.
Main Quest: The Return To Dirge
After the Water Dragon restores you to the realm of the living, you'll have to explore Dirge - the real Dirge. Shortly after you arrive, though, you'll find yourself under assault from a number of Horse Demons. To seal them on the far side of the portal, strike at it with your weapon styles in Chi Strike mode - it'll quickly go down, leaving you on your lonesome. Now it's time to find your friends.
Before you set out, though, examine the many statues and bookstands in the temple itself. The two large statues here will act as Focus Shrines and Spirit Fonts, while the bookstands will net you experience. One of them will also give you the Mantra of Inspiration quest item. You can also find Pages from the Tome of Release (1/5) on one of the bodies near the statue between the two bookstands, and the Replenishment of the Mind technique (+7 Chi and Focus) from the decaying bodies near the central fountain.
Before you head outside, find the steps leading down to the escape passage the Spirit Monk took in the two cinematics that you've seen that took place in this room. You can't open the lid to the well here, but you can grab the Machined Cogs in the chest. These are intended to be used on the Meditation Wheels that line the hallway leading to the inner courtyard, but be sure not to spin them just yet. Instead, head down to the courtyard, where you'll have to defeat four ghosts before ending the chapter.
Chapter Six
The bones to the northeast of the bottom of the steps here will hold another page from the Tome of Release. A third page can be found on another set of bones in the midst of the statues here, to the south of the green star on your minimap. With those in hand, head south and meet up with your stalwart followers at the Dragonfly landing pad. Note that you can now buy some powerful upgrades from Zin Bu, including three that will add +50 to either Focus, Health, or Chi. Each of these will cost 50,000 silver, though.
After your conversation is done, head out to the pad itself and pick up the fourth page from the bones near the Focus Shrine. If you had a romance plot that you've been working on so far, then it may be about to come to a head. If someone asked you to meet them at the tent, though, ignore them for now, and instead head back out to the main path and find a set of bones near the steps leading to the inner courtyard. It will have both the Beveled Cogs and the final page of the Tome of Release. With these in your possession, head back to the temple.
With both pairs of Cogs in tow, you can examine the Meditation Wheels again. If you place both of the cogs into the wheels and spin them, you'll obtain the Communion of the Dragon technique, good for +5 Health and +15 Chi. (If you had attempted to repair the wheels with only one cog, you would've gotten a technique for only +10 Chi, at which point the wheels would've broken anyway.)
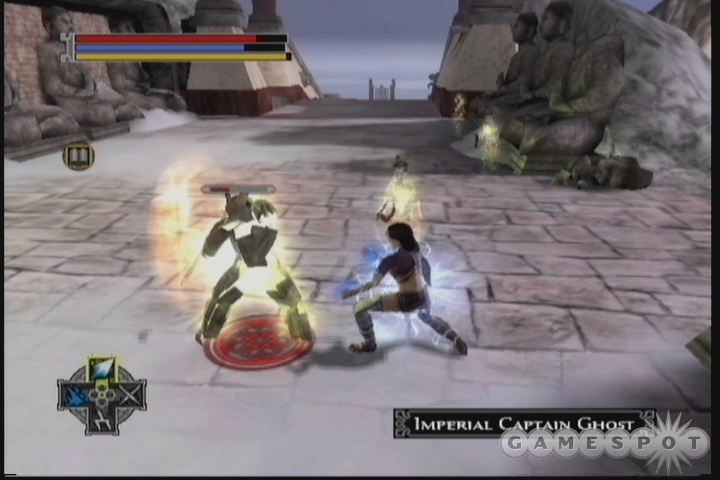
Now, with the Tome of Release in your hands, you can examine it in your plot items menu. Apparently, if you perform the ritual of release at the Statue of Mah Tsung, in the temple, the souls of the Imperial Army soldiers that still haunt the temple will be released to the afterlife. Performing the ritual here will earn you the Turning Wheel technique, which grants +7 Focus and Chi. If, however, you perform the ritual at the Heavenly Gate Guardian statue, you'll shred the souls of the Imperial soldiers, removing them from the wheel of life for all eternity. Serves them right! For this act, you'll get the Broken Wheel technique (+7 Chi and Health) and a Closed Fist alignment shift.
When you're ready to get your mack on, return to the tent and speak to whomever is waiting there for you. Again, what happens next depends on your previous willingness to engage in the romance plots by speaking with your teammates at your base camp, but if everything's been going alright, then you should have the opportunity to smooch out with one of your favorite subordinates.
Dream Sequence
Soon after you hit the sack, your dreams will be invaded by Master Li, who'll burn the spirits of three of your fellow Two Rivers students to a crisp and force them to attack you. Although this is a dream, each of these guys is corporeal and are apparently considered human, so use your weapon style and Chi Strikes to deal uber damage. Li appears to be the weakest, so go after her first, then Wen, then polish off Jing Woo. Unfortunately, that's only a prologue to the real spectacle, as when you wake, you'll discover the full might of the Imperial Army, including the golems of the Lotus Assassins, pressing up the pass to the temple, intent on stamping out your pitiful little band.
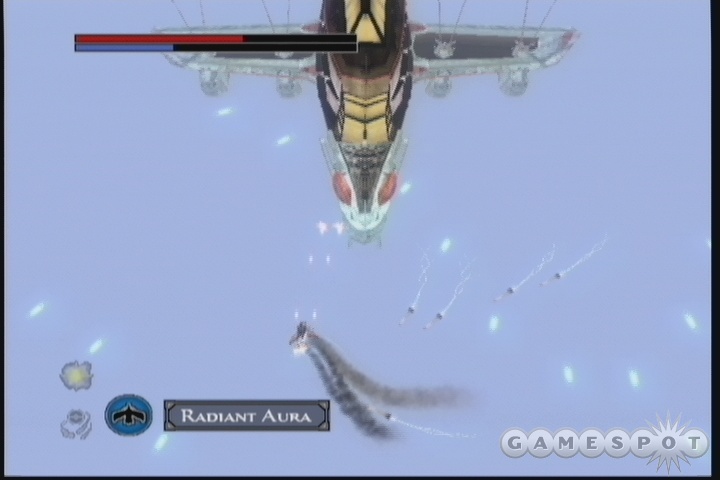
In the conversation that follows, you're going to have two choices to make. You can either send Silk Fox to lead Dawn Star and Kang to the bridge to blow it up, or you can send out Silk Fox to take the lead instead of Dawn Star. This has a material impact on how the next portion of the chapter plays out, so pick whichever one you'd prefer to use in combat! This probably also affects the outcomes of any romance plots you've been working on with the pair, so if you're intent on doing some dirty dancing with one of the foxy femmes, pick the one you'd prefer to wind up with to lead the charge.
Next up is an idea of Sky. If you wish, you can take up the Dragonfly into the skies in an attempt to reduce some of the numbers of Lotus Assassins that will soon be landing on the mountain. This is a fairly tough challenge, as the ships come in fast and furious. You'll want to bring Radiant Aura, for sure, along with any offensive styles that you've grown accustomed to using. Upon destroying the large Imperial assault ship, you'll earn a new style for your Dragonfly, the Spirit's Calling. Completing this mission may thin the numbers of Assassins that appear in the temple grounds later on.
Main Quest: Flight To Dirge. | Subquest: Dawn Star / Silk Fox
When or if you get done with the aerial mission, you'll come under control of whomever you decided to send there, either Dawn Star or Silk Fox. Regardless of your choice, you'll be able to upgrade their weapon by running behind the fountain that your main character previously restored; this will uncover a Hidden Urn there. Open it to grab your new weapon, then head down to the bridge, where Kang awaits. Before you do so, though, you may want to check your journal; each of these characters will have journal entries re-written from their point of view if you check their Completed Quests log.
In order to complete this mission, you're going to have to protect both Kang and your teammate while Kang prepares his explosives on the bridge. This can be difficult, as the screen changes on the bridge are jarring and ill-designed, but if you stay near the far end of the bridge, you should be able to kill the enemies as they come through. Don't stand right at the edge of the screen, though; instead stand a few steps to the left so that enemies can't jump past you. When large groups of foes congregate, use your area attack to knock them down, and be sure to prioritize any enemies that start attacking Kang. You're going to need to survive two minutes before the explosives are set and you can blow the bridge. After it's done, speak to the other member of your party to wrap up the competitive subquest.
Finish Him!
With the bridge destroyed, the only way for the Lotus Assassins to get into the temple is via the air, and indeed they now start dropping in from the sky, along with a Jade Golem. It's up to Black Whirlwind and Hou to hold them off - an unlikely duo if there ever was one.

The waves of Lotus Assassins are endless here, and will only cease if you destroy the Jade Golem. Although it's one against many, Black Whirlwind is more than up to the task, especially if you find his hidden urn with upgraded axes, near the western wall. With it, any Assassin will die in three hits. The Jade Golem is trickier to kill, as you'll have to deal with it in the midst of all the assassins, but luckily, Hou will be throwing out bottles of alcohol wherever he sits. If you go into free target mode, you can run over one of these for a full health and Chi replenishment.
Note also that special Unreal Tournament-esque rampage messages pop up after every 20 kills you achieve on the Assassins. The one for 100 straight kills is especially amusing.
20: Untold Slaughter!
40: Bringer of Pain!
60: Destroyer of Lives!
80: Ravager of the Ages!
100: ???
After the fight's over (or during it, if you wish), you can again check Black Whirlwind's journal for some amusingly slanted quest descriptions. When you're ready to move on, head up to the temple for the final fights of the chapter.
Death's Hand
When you reach the temple, Sky will be there, ringing away at the bells. He says that he's signalling for Death's Hand to enter the temple - he was approached with the notion of becoming a turncoat, but has instead decided to help you in your cause by signalling for Death's Hand to enter a trap. When he arrives, his entourage will be killed, allowing you to face the dread Prince Sun Kin mano-a-mano.
Boss Fight: Death's Hand
Death's Hand is a fiercesome foe, no doubt, mostly due to his unrelentingly powerful attacks - on Grand Master Difficulty, his power attack can hit for over 250 damage in a single blow, and his normal attacks, while less damaging, come more quickly and thus have an even greater capacity for destruction. The key here is avoidance; stay away from him until you're ready to strike, then jump over him and strike from behind with your weapon style in Chi Strike mode. Unlike the Ravager (still the hardest enemy you've probably faced thus far), Death's Hand can be stunned by blows, so all you really need to do is strike quickly enough to stunlock him (Crimson Tears will usually do the job) then just keep wailing on him until he goes down. He can and will heal himself when he's near death, although he'll eventually stop, so just keep pounding and avoiding his strikes until he goes down.
A conversation with your former master will then ensue, followed by another fight with Death's Hand. This time, however, your Spirit Monk powers allow you to bind Sun Kin's soul to yourself and use his spirit to fight against...himself!
Main Quest: One Chance
As you possess the spirit of Sun Kin, you'll have to pit him against the Death's Head armor in a duel to the kinda-sorta death. Or is it????!?!?!?!
Anyway, Sun Kin is probably a bit faster than your own character, and possesses a mighty long sword with which he can swing extremely quickly. He can't take a whole lot of punishment, at least not on Grand Master difficulty, but with a bit of sprightly movement, you should be able to stay out of Death's Hand's armreach by jumping behind him, unleashing a combo, then leaping away and repeating. Be sure not to get DH backed up against a wall, though, as this will sometimes let him unleash an opening swing without any warning, and you can only take four hits or so before Sun Kin will go down for the count.
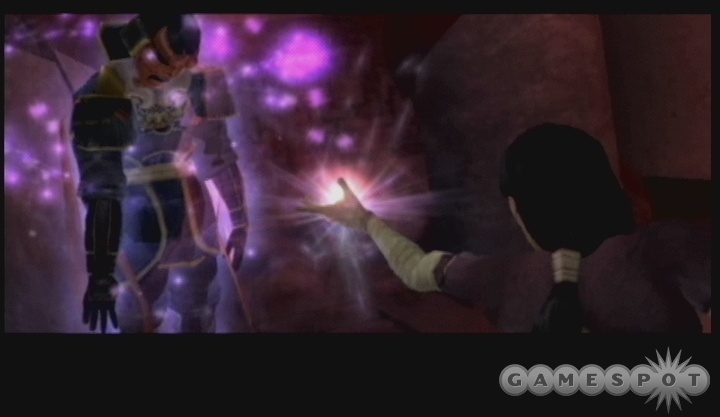
Now, if you just let Death's Hand kill off Sun Kin, then the story will continue regardless, but actually defeating him will yield much richer rewards, especially for Closed Fist players willing to be very, very evil. If you do manage to win the fight, then Sun Li will fade away, back to the Imperial Palace, to wait for your arrival and the inevitable duel. Death's Hand, however, will not just fade away: you'll have to choose whether to release his spirit, or bind this most powerful ally to your will! If you release him, you'll obtain a big Open Palm alignment shift, along with the Way of the Open Fist gem, which nets you a conversation skill bonus and stat modifiers. If, however, you choose to bind his spirit to you, you'll obtain the Way of the Closed Fist gem, which likewise nets you a conversation skill bonus (to Intimidation), a Body bonus, and a Spirit penalty. And, of course, you'll gain Death's Hand as a follower.
Dissension In The Ranks
What occurs in the next conversation with your other followers will depend on how you treated the matter of Death's Hand. If you freed his spirit, then they won't really even notice what happened, and you can proceed on to the Palace after speaking with all of them. If, however, you walk out with Death's Hand in tow, they'll be perturbed, to say the least, or at least some of them will. Dawn Star, Silk Fox, and Hou will all be rather irate at your Closed Fist antics (this line-up may change based on your romantic affiliations, though), and demand that you release your new servitor from his torment.
Now you have another choice. When your followers confront you over the matter of Death's Hand, you can agree to their demands and proceed to release his soul; you'll earn Open Palm points, Death's Hand will fade away, and that'll be that. (You'll still retain the Way of the Closed Fist gem.) If, however, you insist that they fall in line, well, there's only one way to command their complete subservience. Evil as it may be, you can't afford any independent thinkers in your band, so you'll have to take the ultimate step to ensure that all of your followers are of one mind. With that out of the way, speak to each of them in turn, then check back at your camp to retrieve the gem from the chest there (this doesn't seem to appear before this moment), and be sure to refill your health, chi, and focus before returning to Kang to take off for the Palace.
Chapter Seven
Main Quest: A Master's Fate
With the petty squabbles regarding Death's Hand behind you, head out to the Palace to find Master Li and put his little sacrilege to rest once and for all. Before you can hope to defeat him, though, you'll have to find the Water Dragon's body and destroy it.
Begin by following the same path that you took the last time you were in the palace. After charging up your health and focus at the shrines in the second room, head out to meet up with a dozen or so Lotus Elites. As befitting their name, these guys have a deep reservoir of health to work with, but they are susceptible to harmonic combos, so use them to polish them off individually if you think you have the time for them. We had a lot of fun in this fight by bringing Death's Hand along as a follower; he tied up two of the Elites while our main character took on the other ten, and somehow managed to die just as we were polishing off our group without having killed even a single foe. So much for the fearsome power of an assassin that managed to make an entire Empire fear him. We switched him out for Dawn Star in support mode right afterwards.
After you finish off the Elites, grab all of the new vases and chests, then return to the spirit font and focus shrine for another recharge before heading off to the elevator. The Water Dragon will meet you there, let loose with some more cryptic utterances, then fade away again. Time to find her body.
The Tombs
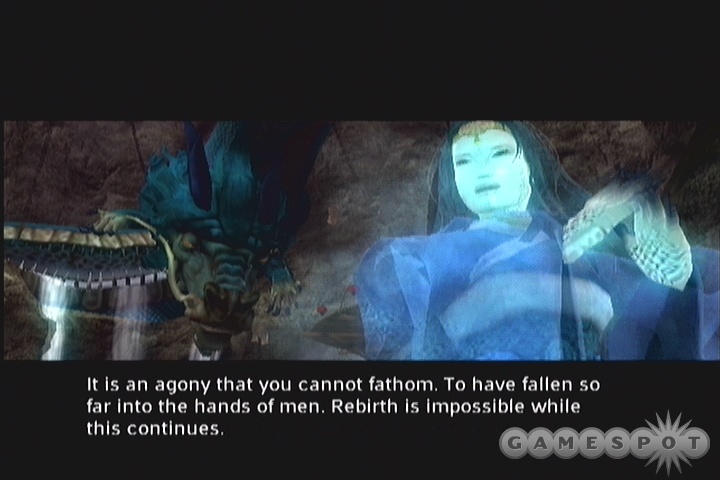
When you reach the tombs, you'll be confronted with the magnitude of the brothers' crimes, as the Water Dragon's body is seen, having been mounted up in a cave and allowed to bleed water for twenty years to restore the land after the great drought. Before you can make the big decisions regarding the disposal of the bodies, though, you'll have to fight off four Lotus Elites, including a pair of wizards. This fight is going to be greatly annoying, since apparently all of your enemies have the Tempest magic, which can paralyze you if a power attack hits, and said attacks will be coming out fast and furious. The best way we found to deal with these guys was to use Jade Golem style, which is immune to magic, and use Chi Strikes to overpower your foes. Otherwise, they are all vulnerable to harmonic combos, so you can use Storm Dragon to paralyze them with an area attack and then instantly finish them off.
The Choice
With the soldiers out of the way, you'll be confronted by the spirit of the Water Dragon, who asks that you destroy her desecrated body so that she can return to the Wheel of Life and eventually be reborn. This seems likely to plunge the Empire back into the Great Drought, but the water that flows from her body was not intended in the larger scheme of things, and as such you will only be setting the Empire back on the path it was meant to follow 20 years ago. This is one of the biggest alignment-shifting decisions in the game, and will play a large role in deciding what ending you get, so choose carefully. You do have an auto-save shortly before this point, though, so if you're unsatisfied with your choice, you can always just reload and go through again.
If you go ahead and destroy the body, you'll receive the Open Palm gem, which nets you an impressive +10 to Spirit and +5 to Mind, and your alignment will undergo a nearly total shift into Open Palm territory, even if you were nearly at the bottom of the scale.

If, however, you choose to instead poison the body of the Water Dragon to weaken Master Li, with the intent to kill him, then use the body to steal the power of the Dragon for yourself, you'll have some tough choices to make. In order to poison the body, you're going to need the blood of a mortal, so you'll have to choose someone from among your cadre to die. Your candidates will probably vary based on your actions in the game thus far, including your romances; we had to choose between Silk Fox, Dawn Star, Hou, and Death's Hand. Whomever you choose will probably not go willingly, causing an intense factional dispute - i.e. open combat - between the followers who agree with this course of action and those who would rather not desecrate the body of a god. After you kill the treasonous fools, you'll need to take the blood they spilled and bring it up to the fountain near the Water Dragon's body and poison it.
Regardless of your choice here, you'll weaken the power of Sun Li, and will have to head out to the throne room to face him. Be sure to check the headstone near the base of the ramp in the dragon's room before heading out, though, as you''ll receive a Scintillating Gem of Power from the headstone there.
Li Awaits...
When you reach the throne room, Li will be waiting for you. After a bit of initial bantering, he'll summon in some enemies to harry you while he prepares for the main duel. This opening fight, though, is ridiculously difficult in its own right, as you'll have to face off against two Elephant Demon constructs and two Minions of Suffering.
Taking these guys on in Grand Master mode will either require an incredibly lengthy amount of time jumping, dodging, and generally avoiding their powerful attacks...or you can just shift your follower into attack mode and use his or her distraction to shift over to Jade Golem mode and start blasting on the constructs with Chi Strike power attacks. Even this isn't guaranteed to save you from a pounding, but it'll let you do a lot of damage quite quickly. Just be sure to shift your position over to one side of the room, behind your teammate, so that the enemies can't box you in and overwhelm you. Go after the Bull Constructs first, as they'll do less melee damage to your Golem when they attack you. This is one of the toughest fights in the game, so don't feel too ashamed if you have to reload your last save and bump the difficulty down a notch to advance.
Defeat Your Doubt
After you finally reach Li, he'll reveal yet another nasty surprise, as he completely encases you in stone and attempts to enter you mind to kill your consciousness. This is where things get tough for the followers of the Closed Fist (as if the last half hour of the game was a cakewalk...). He'll summon in two waves of enemies for you to go up against, consisting of construct versions of himself, Sun Kin, Sun Hai, and Death's Hand. If you chose to slay the body of the Water Dragon, you'll have three teammates for each wave, leaving you with only a single foe to defeat, but if you chose to poison the body instead, you'll only have two teammates, forcing you to kill two tough enemies simultaneously. And that's just in the first wave; the second will force you to take on three of the previous single bosses simultaneously, including Sun Hai, who retains his invulnerability adaptation technique, or at least a shadow of it. He seems to be invulnerable to whatever style he wields, but doesn't seem to switch styles, so he should be a bit easier to defeat than he was when you fought him in Chapter Four.
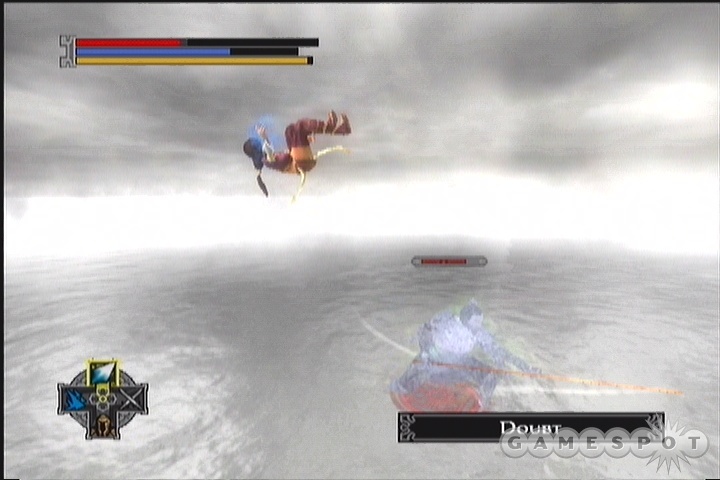
In order to get past these fights as a Closed Fist master, you're going to have to attempt to take down the initial pair of enemies while conserving as much health, chi, and focus as possible. If you need to, use your weapon style to quickly take one down while attempting to avoid the next. For the second round, Sun Hai is definitely going to be the sticking point, since he may be invulnerable to some of your attacks. We found it easiest to just expend as much focus as needed to quickly bring the other two fighters down, then switch back to Jade Golem form to power attack the erstwhile Emperor into the ground.
With the two waves of opponents swept into the virtual ground, it's time to get down to brass tacks and deal with the one obstacle remaining to complete power - or complete peace.
Oh, It's On, Baby - It's On
Now, before you even decide to fight Master Li - now Emperor Li - you're going to have a choice to make. He offers you the chance to avoid fighting altogether if you agree to die at his hand, sacrificing yourself in exchange for solidifying his rule and having your name revered throughout the ages. You'll have to agree to this multiple times to be sure that you're not choosing accidentally, but doing so will let you skip right to one of the game's three endings without having to face Li in combat, not unlike the end of Dragon Warrior for the NES.
The other two endings are dependent on your choosing whether or not to slay the body of the Water Dragon or to poison it; to experience either of them, you're going to have to fight and kill your former master.
The Circle Is Now Complete
It's time to get busy. Master Li is beatable, even on Grand Master mode, but he comes straight from the cheese factory, and is one of the most annoying, yet perversly fun enemies to fight against.
Most of his annoyance factor comes from the fact that he has multiple ways to completely shut you down and totally paralyze you. In point of fact, he has his own version of Focus Mode, where he can use his own focus to slow down time, allowing him to move at normal speed while you're trapped in the chrono-flow and forced to move as if you were struggling through molasses. You can eliminate this effect by tapping your own focus button, but you'll have to burn some of your own focus to do so. If the fight lasts long enough, then you should see the Out of Focus sign appear above Li's head, which theoretically prevents him from using this ability afterwards.
In addition to focus mode, though, Li can also use Tempest style to trap you in a whirlwind, ice magic to freeze you in a block of ice, and a seemingly unique style of his own that can paralyze you in place. Any of these can become sentences to death row, as they'll allow Li to freely strike away at you while being unable to take damage himself. The Tempest one is especially troublesome, as it can be used as an area attack; if he stops moving and starts performing the summon animation (similar to that which fire magicians use before summoning the dragon), you should immediately start backflipping away from him, perhaps even using focus mode to increase your chances of getting away in time. The one drawback to his use of these styles is that you'll be able to tell that he's using one due to the fact that he won't be holding a weapon in his hands. If he intends to get down and dirty, he'll use either his dual swords style or Leaping Tiger, which can be easily spotted by the telltale claws that appear on his hands.
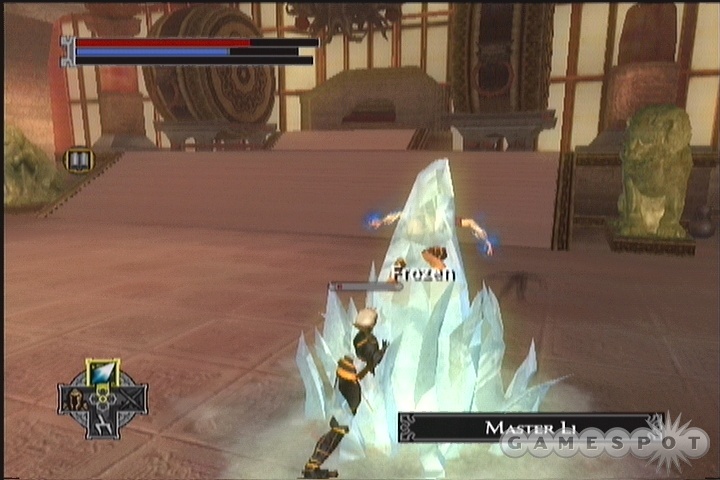 | 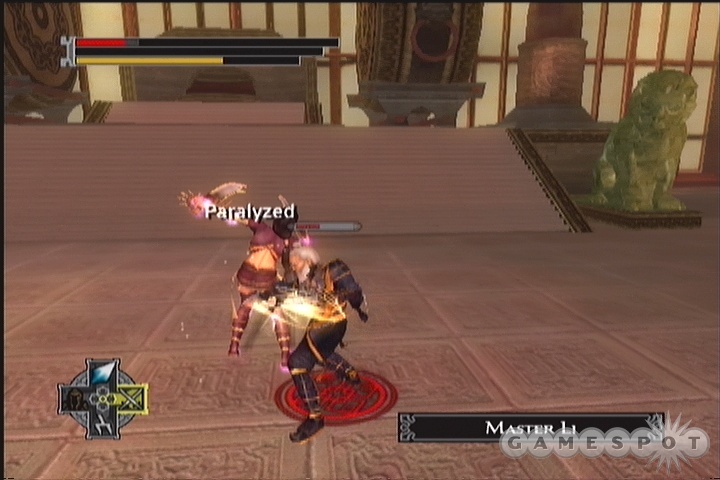 | 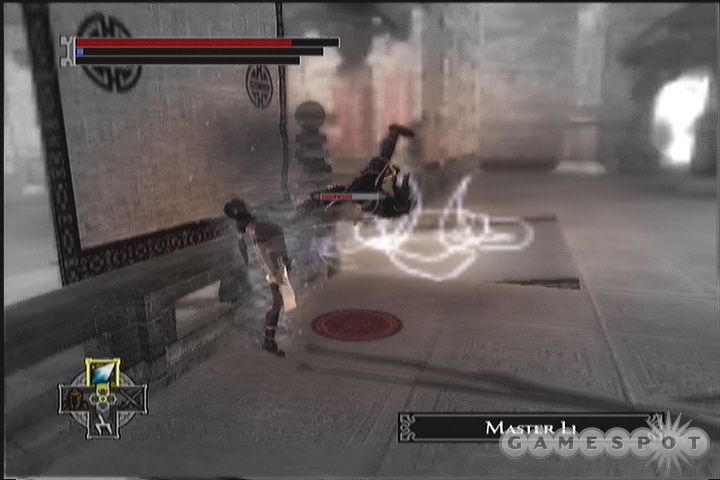 |
(Note that switching to a Transformation Style should let you escape from some of these effects, as they're all immune to either support or magic styles. The pure paralysis seems to be unbreakable, but having Jade Golem bound to a direction is quite helpful in getting out of a Tempest trap.)
Beyond slowing down time, his primary methods of dealing damage to you will be the aforementioned close-range styles and his unique style, which launches homing bolts at you which damage all of your stats at once. Even if you've been eschewing your block button throughout the game, it's worth practicing using it here, as it's really the only way to stop these bolts from knocking you a good one. Just block, wait for the third bolt to hit, move towards him a bit, then block again. He'll eventually either switch styles, or you'll get close enough to jump into him and disrupt his casting animation.
Since you're going to need your focus to break Li's focus mode, the best bet for damaging him will be your good old martial style. (Note that there are two jars on eitherWe found it best to just jump around like House of Pain, trying to jump into him to disrupt his attacks, then hitting him with a few combos from behind before jumping away again to regroup. Try to stay in the middle of the room, if possible; if you get too close to a wall, then the camera will undergo some dizzying changes when you quickly change positions. The main danger here is Li's damage shield. He'll periodically activate this, and when his hands glow orange, every time you hit him you'll take a large amount of damage. Unfortunately his glowy-hands effect is pretty subtle, and you often won't know his shield is up until you start a three-hit combo, resulting in a massive amount of damage (sometimes half of your total bar on Grand Master difficulty). Like we said, cheesy.
There are a couple of ways in which to make this fight a bit more easy. First up is the aforementioned Jade Golem form. With it active, none of Li's support or martial styles will hurt you at all, and neither will his seemingly unique homing-missile style, leaving him with little save for his dual swords to hit you with. If you plan on using Jade Golem, try maneuvering Li into a corner before flipping it on, then continually pound him with power attacks so that he doesn't have time to escape. If he does flip over to his sword style, though, it will be difficult to see it due to your immense size, so he may wind up taking off a bunch of your health before you can switch away. Alternately, he is human, so Storm Dragon can keep him paralyzed indefinitely if you want to cheese your way through him.
After enough damage is dealt to him, though, Li will go down and you'll be able to establish your rightful dominion over the Empire, if that is your wish. The resulting cutscenes will change based on your decision over how to deal with the Water Dragon's body, and the text descriptions of your followers' fates will likewise depend on your choices throughout the game. Enjoy the endings...and here's looking forward to Jade Empire 2.
Got a news tip or want to contact us directly? Email news@gamespot.com
Join the conversation