Homeworld 2 Walkthrough
The GameSpot Walkthrough to Homeworld 2 will tell you everything you need to know about the Hiigaran and Vaygr fleets. The guide comes complete with combat tips, unit counters, and a full campaign walkthrough.
Design by Katie Bush
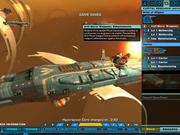
Relic Entertainment's Homeworld was one of the most original real-time strategy games of its time and Relic continues and expands the Homeworld universe with their newest release, Homeworld 2. This sequel continues the struggle of the Hiigarans, who face a new enemy: the Vaygr, a warrior race bent on cosmic domination.
This comprehensive GameSpot Game Guide to Homeworld 2 includes:
- General Strategies: This section provides general strategies, including tips for fleet management, resource collection, and ship organization.
- Combat Strategies: Check here for Homeworld 2 combat strategies, including the importance of focus fire and a full chart of appropriate unit counters.
- Hiigaran Units: This section covers the Hiigaran units, including statistics and tactics for each.
- Vaygr Units: This section covers the Vaygr units, including statistics and tactics for each.
- Mission Walk-throughs: Look here for complete walk-throughs for all fifteen campaign missions. You'll find specific battle strategies, fleet suggestions, and tips on completing all objectives.
Table of Contents
General StrategiesCombat Strategies
Hiigaran Units
Vaygr Units
Walk-through
Mission 2 - Angel Moon
Mission 3 - Sarum
Mission 4 - Gehenna Outskirts
Mission 5 - Gehenna
Mission 6 - The Karos Graveyard
Mission 7 - Derelicts
Mission 8 - Dreadnaught Berth
Mission 9 - Counter Attack
Mission 10 - Keepers of Sajuuk
Mission 11 - Sacrifice
Mission 12 - Thaddis Sabbah
Mission 13 - Balcora Gate
Mission 14 - Balcora
Mission 15 - Return to Hiigara
Chapter 1 - General Strategies
This section offers several general strategies and tips for Homeworld 2 single and multiplayer games.
- If you're just starting out in the Homeworld 2 single-player game and finding the campaign difficult, then start thinking about fleet preparation. Like the original Homeworld, your resources and fleet carry over to the next mission. So if you complete a mission with just a squad of interceptors then you begin the next mission with only that squad of interceptors. In some missions that would be okay as you may have time to construct additional ships to survive against the enemy. However, in some missions you're attacked very early on and you won't have time to build those additional ships. It's valuable to use the current mission to help prepare for future missions.
- Before completing the last objective in a mission, prepare your fleet for the next mission. Build a full complement of fighters, frigates, and capital ships so you're prepared for battle as soon as the next mission begins. It can backfire, though; for instance, perhaps interceptors would be better than those bombers you built. Save your game just before beating each mission so you can easily return and adjust your fleet as necessary to handle the next mission's threat.
- If you're using mobile refineries to help support your collectors, set the mobile refinery to guard one of your collectors. That way the refinery will follow and maintain a close proximity to the collector. Generating income as quickly as possible can help you acquire that valuable research a bit sooner or build that valuable bomber squadron before your opponent.
- Don't neglect scouts and probes, important units in both the single and multiplayer game. Probes are best used when trying to keep tabs on a particular location, such as a resource point when you're attempting to determine if your opponent as moved on to gather from a new location. Scouts are best used to keep tabs on your opponent. The scout can be kept close-by to see what your opponent is building. If you're discovered, the scout can retreat (unlike the probe) and outrun any pursuing enemy.
- Destroying ships leaves behind debris, which can be collected for resource units. Some of the debris chunks are particularly valuable and offer a high amount of resources. If you're trying to gather resources quickly, use a collector to grab the pieces of debris instead of gathering from an asteroid.
- Organize your fleet in "control groups," which is a concept that most real-time strategy gamers will be familiar with. Moving around your fleet and attacking the enemy in one big clump isn't as effective as organizing your fleet into specific subgroups and focusing your attacks against specific enemies. How you organize your fleet is up to you. You may want all fighters in control group 1 or decide that bombers need their specific control group since they counter ships that interceptors or assault craft don't. You could split your frigates into anti-fighter and anti-frigate.
Chapter 2 - Combat Strategies
This section offers a collection of strategies and tips for Homeworld 2 combat situations.
- Focus fire is an important real-time strategy concept and it's definitely important in Homeworld 2. Focus fire means focusing all of your ships' firepower on a specific enemy vessel instead of allowing your vessels to select their own targets, which spreads the firepower across many other ships. Now, you don't necessary need to focus all your firepower on the same ship. While you may want to get rid of the most powerful threat as soon as possible, you should also see what other enemy units are in the area and send specific counters against them. For example, you encounter an enemy battlecruiser and some bombers. While you may want to use all of your ships to blow apart that battlecruiser, your flak frigates would be better used against those bombers.
- Focus fire is also important with the new subsystem feature. You can specifically target a carrier's engines, for instance, or perhaps its fighter facility. Destroy that fighter facility to prevent that carrier from building any more fighters until the fighter facility is replaced.
- It's also occasionally worthwhile to micromanage individual strike craft engaged in battle with other strike craft; though, certainly, if there are more pressing matters (like the rest of your fleet), the time spent gaining the upper hand on a squad of assault craft would be better used elsewhere. But if you're trying to harass resource collectors and need to defeat a specific strike craft squad, focus your fire on specific fighters. For instance, if one enemy fighter is near death, don't let your strike craft engage the others when it could simply kill that fighter in a few hits. You gain a numerical advantage and you win the battle.
- Use tactics to adjust your strike craft's formation and stance. The two most important are aggressive and defensive tactics. Use aggressive tactics to switch your strike craft group into the claw formation; use this stance when entering a battle. Use defensive tactics to switch your strike craft group to delta formation; use this stance when you have selected your strike craft to guard a specific craft.
- While the "platforms" for each race (gun and ion beam for Hiigara and gun and missile for Vaygr) seem best suited for defense, they're also very powerful offensive weapons. Note, however, that all platforms can only be moved one time. Once the platform reaches its destination, it remains there until destroyed or scuttled. Using the platforms offensively is a powerful single and multiplayer game tactic. They're invaluable for fighting the Vaygr in the single-player game; the platforms are essentially additional firepower, an important ally against formidable battlecruisers.
- Counter units are one of the most important concepts in Homeworld 2. If you aren't fighting intelligently, you lower your chance of success considerably. For instance, using flak frigates to fight other frigates or ion cannon frigates to defend against bombers isn't smart. Many craft are specifically designed to battle other types of craft. If you aren't following these rules, then you're putting yourself at a disadvantage in single and multiplayer games. Use the following chart as a guideline for what ships to use to counter specific enemy craft.
Combat Strategies - cont.
| Ship Encountered | Hiigaran Ship Counters | Vaygr Ship Counters |
| Interceptor | Interceptors, Gunships, Flak Frigates | Assault Craft, Assault Frigates |
| Assault Craft | Interceptors, Gunships, Flak Frigates | Assault Craft, Assault Frigates |
| Bomber | Interceptors, Gunships, Flak Frigates | Assault Craft, Assault Frigates |
| Lance Fighter | Interceptors, Gunships, Flak Frigates | Assault Craft, Assault Frigates |
| Gunship | Pulsar Gunships, Torpedo Frigates | Lance Fighters, Missile Corvettes |
| Missile Corvettes | Pulsar Gunships, Torpedo Frigates | Lance Fighters, Missile Corvettes |
| Pulsar Gunship | Interceptors, Pulsar Gunships, Torpedo Frigates | Assault Craft, Lance Fighters |
| Laser Corvette | Interceptors Pulsar Gunships, Torpedo Frigates | Assault Craft, Lance Fighters, Missile Corvettes |
| Torpedo Frigate | Bombers, Ion Cannon Frigates, Destroyers, Battlecruisers | Bombers, Heavy Missile Frigates, Destroyers, Battlecruisers |
| Heavy Missile Frigate | Bombers, Pulsar Gunships, Destroyers, Battlecruisers | Bombers, Missile Corvettes, Laser Corvettes |
| Flak Frigate | Anything but Interceptors, Bombers | Anything but Assault Craft, Bombers, Lance Fighters |
| Assault Frigate | Pulsar Gunships, Ion Cannon Frigates, Destroyers, Battlecruisers | Laser Corvettes, Heavy Missile Frigates, Destroyers, Battlecruisers |
| Ion Cannon Frigate | Bombers, Pulsar Gunships, Torpedo Frigates, Destroyers, Battlecruisers | Bombers, Missile Corvettes, Pulsar Gunships, Heavy Missile Frigates, Destroyers, Battlecruisers |
| Destroyer | Bombers, Pulsar Gunships, Ion Cannon Frigates, Destroyers, Battlecruisers | Bombers, Laser Corvettes, Heavy Missile Frigates, Destroyers, Battlecruisers |
| Battlecruiser | Bombers, Ion Cannon Frigates, Destroyers, Battlecruisers | Bombers, Heavy Missile Frigates, Destroyers, Battlecruisers |
Chapter 3 - Hiigaran Units
This section provides unit stats and tactics for Hiigaran units. These stats and tactics are accurate for the release version of Homeworld 2 and are applicable to multiplayer and the single-player campaign.
Scout
Speed: 480
Attack Damage per Second: 9
Health: 90
Cost: 350
Class: Fighter
Primary Role: Reconnaissance Fighter Squadron
Strong versus: None
Weak versus: Fighters, Corvettes, Frigates, and Capital Ships
Prerequisites: None
The scouts aren't battle worthy ships. Instead, use scouts as mobile probes. They have a superior sensor range to other fighters and can even be upgraded with the ability to "ping" locations to investigate an area of the map (useful for seeing your enemy's fleet or checking out resource areas for defenses) and with EMP technology to disable enemy ships for a short period of time. If your scouts are attacked, retreat; they won't last long against any other strike craft.
Interceptor
Speed: 350
Attack Damage per Second: 36
Health: 150
Cost: 500
Class: Fighter
Primary Role: Basic Fighter Squadron
Strong versus: Fighters
Weak versus: Corvettes, Frigates, and Capital Ships
Prerequisites: Fighter Facility
The Hiigaran interceptors are best used against other fighters (such as the Vaygr assault craft or bombers). The interceptors can also be effective in large groups against certain frigates, such as the ion beam or heavy missile frigate. Don't send interceptors to attack a group of flak frigates! The interceptors' speed makes them ideal for resource collector hit-and-run harassment. Use interceptors to protect your capital ships and frigates from bomber attacks.
Bomber
Speed: 260
Attack Damage per Second: 439
Health: 150
Cost: 550
Class: Fighter
Primary Role: Anti-Capital Ship Fighter Squadron
Strong versus: Frigates, Capital Ships, Subsystems
Weak versus: Fighters, Corvettes, and Anti-Fighter Frigates
Prerequisites: Fighter Facility
Bombers are fighters that are best used in large numbers against frigates and capital ships and their subsystems. For instance, when attacking a battlecruiser you may choose to attack the cannon platforms to help protect your own capital ships from the battlecruiser's bruising weaponry. Or you could destroy the engines to disable the craft in preparation for a marine frigate. Protect your bombers with interceptors and corvettes. If you plan to use bombers in large quantities, research improved bombs to increase their potency against those frigates and capital ships.
Gunship
Speed: 215
Attack Damage per Second: 56
Health: 1200
Cost: 625
Class: Corvette
Primary Role: Anti-Fighter Corvette Squadron
Strong versus: Fighters
Weak versus: Corvettes, Frigates, and Capital Ships
Prerequisites: Corvette Facility
The Hiigaran gunships are fighter killers. Specifically task them against enemy fighter-class vessels, including interceptors, bombers and assault craft. Avoid the Hiigaran pulsar gunships and Vaygr missile corvettes. You could use them to guard your bombers against enemy fighter counter-attacks or protect your capital ships and frigates against enemy bombing runs.
Pulsar Gunship
Speed: 215
Attack Damage per Second: 54
Health: 1200
Cost: 625
Class: Corvette
Primary Role: Heavy Corvette Squadron
Strong versus: Corvettes and Frigates
Weak versus: Capital Ships
Prerequisites: Corvette Facility
The Hiigaran pulsar gunship's ion beam cannon is most effective against other corvettes and (with a large group of pulsar gunships) enemy frigates. The pulsar gunship isn't as effective against fighter-class vessels; for instance, you shouldn't use pulsar gunships to defend against a bombing run. Though you make kill some bombers, your capital ships will suffer damage in the process. Use pulsar gunships to guard your strike craft against corvette counters. This is especially effective in the single-player game when you must protect against laser corvettes, used effectively by the Vaygr to attack your frigates.
Minelayer
Speed:
Attack Damage per Second:
Health:
Cost: 800
Class: Corvette
Primary Role: Utility Corvette. Can deploy mines as a special action.
Strong versus: Capital Ships
Weak versus: Corvettes and Capital Ships
Prerequisites: Corvette Facility, Advanced Research Module, Minelaying Technology
The Hiigaran minelayer corvette is similar to the Vaygr minelayer. Use the minelayer corvette to help protect resource areas. Mine the area around the resources to prevent your enemy from destroying your collectors. You could also use it to protect the area around your mothership or carriers placed at the front line to help support your fleet.
Hiigaran Frigates
Torpedo Frigate
Speed: 161
Attack Damage per Second: 305
Health: 12000
Cost: 700
Class: Frigate
Primary Role: Basic Frigate. Torpedoes can be upgraded to improve effectiveness against Capital Class Ships (research "Improved Torpedoes")
Strong versus: Corvettes, Frigates (when upgraded)
Weak versus: Bombers, Destroyers
Prerequisites: Frigate Facility
The Hiigaran torpedo frigate is a "multi-purpose" frigate as it can be effective against corvettes and other frigates (research improved torpedoes first). While the Hiigaran flak frigate should be employed only against strike craft and the ion beam frigates only against frigates and capital ships, the torpedo frigate can be used against both, though not as effectively as the other Hiigaran frigate class vessels.
Flak Frigate
Speed: 161
Attack Damage per Second: 50
Health: 16000
Cost: 700
Class: Frigate
Primary Role: Advanced Anti-Fighter Frigate equipped with powerful Flak Turrets.
Strong versus: Fighters
Weak versus: Capital Ships
Prerequisites: Frigate Facility and Advanced Research Module
Flak frigates are best used in large groups (around eight or more) and can be completely devastating against enemy strike craft groups. Protect your other frigates and capital ships from bombers or even protect your bombers from enemy fighters. Flak frigates are awesome support during the single-player game where the Vaygr seems to use countless squads of strike craft but should also be a staple of a multiplayer game. Beware of corvettes, which are stronger against flak frigates, and vessels that specifically counter frigates: flak frigates will fall very quickly to these attacks.
Ion Cannon Frigate
Speed: 150
Attack Damage per Second: 315
Health: 16000
Cost: 700
Class: Frigate
Primary Role: Anti-Capital Ship Frigate equipped with ion beams. Capital Ship Killer.
Strong versus: Frigates, Capital Ships
Weak versus: Bombers, Destroyers
Prerequisites: Frigate Facility and Advanced Research Module
Use the Hiigaran ion cannon frigates to counter enemy frigates and capital ships (employ in large groups if you plan to counter destroyers). Ion cannon frigates are very weak against strike craft so they must be supported with anti-strike craft units, such as gunships, interceptors, or flak frigates. Ion cannon frigates are also the slowest Hiigaran frigate. Be careful when engaging in battle and ensure your ion cannon frigates are close to the front line so they'll engage the enemy's frigates or capital ships.
Defense Field Frigate
Speed: 161
Attack Damage per Second: 17
Health: 18000
Cost: 1250
Class: Frigate
Primary Role: Utility Frigate. Can protect nearby ships from most attacks. Must be activated.
Strong versus: N/A (defensive)
Weak versus: Bombers and Corvettes
Prerequisites: Frigate Facility, Advanced Research Module, and Defense Field Technology
Protect your frigate or capital ship groups with defense field frigates. Set your defense field frigate to guard a specific frigate or capital ship and, as long as your vessels remain close and within the defense field frigate's sphere of influence, its protective field can reject enemy weapons' fire. You must activate the defense field frigate to utilize its ability; the defensive field doesn't last long, however, and slowly recharges after depletion.
Marine Frigate
Speed: 230
Attack Damage per Second: 80
Health: 18000
Cost: 700
Class: Frigate
Primary Role: Frigate Facility and Advanced Research Module
Strong versus: Capital Ships
Weak versus: Bombers, Frigates
Prerequisites: Frigate Facility and Advanced Research Module
Marine frigates are like the Vaygr infiltrator frigates: they're used to take over enemy capital ships. Use bombers to disable a capital ship's engines then move in a marine frigate to take over the vessel. It takes several seconds to take command of the vessel. If you're on the receiving end of a marine or infiltrator frigate, listen to the mission events carefully and when you hear a capital ship is in jeopardy, find the offending frigate and destroy it as soon as possible before you lose the capital ship to your enemy. When moving the marine frigate toward an enemy capital ship, protect it against strike craft with gunships or flak frigates.
Hiigaran Capital Ships
Carrier
Speed: 75
Attack Damage per Second: 40
Health: 80000
Cost: 2800
Class: Capital Ship
Primary Role: Capital class production ship equipped with three production and two module slots.
Strong versus: None
Weak versus: Bombers, Capital Ships
Prerequisites: Capital Ship Facility
Carriers are other multi-purpose vessels, though not effective in direct combat situations. Carriers are used as front line support for your fighters, frigates, and resource collectors. Keep carriers near the front line so damaged fighters can return to the carrier, dock, and emerge repaired and ready to return to battle. Carriers can also produce additional units (depending on which production platforms you choose) and can also hold other modules, such as research or cloak modules. Use carriers to pump out defensive platforms, which can be quickly ushered to the front line to support your fleet in battle or set it at a resource area to serve as a drop off point for your collectors as well as a place for your fleet to move and repair.
Destroyer
Speed: 115
Attack Damage per Second: 1034
Health: 85000
Cost: 2000
Class: Capital Ship
Primary Role: Capital Class Anti-Frigate Ship
Strong versus: Frigates, Capital Ships
Weak versus: Bombers, Battlecruisers
Prerequisites: Capital Ship Facility, Research Module, and Destroyer Chassis research
Destroyers crush enemy frigates and, in numbers, can hold up against battlecruisers (though, as with all Homeworld units, are best used with supporting vessels). Destroyers are the foundation of your capital ship force and should be used to primarily counter enemy frigates (particularly flak, torpedo, and assault frigates, which aren't as effective against capital ships). Support your destroyers with anti-bomber vessels and beware of ion beam frigates, ion beam and missile platforms, and heavy missile frigates in large numbers.
Battlecruiser
Speed: 69
Attack Damage per Second: 5200
Health: 240000
Cost: 4000
Class: Capital Ship
Primary Role: Heavy Capital Class Ship
Strong versus: Frigates, Capital Ships
Weak versus: Bombers
Prerequisites: Capital Ship Facility (on Shipyard), Advanced Research Module, and Battlecruiser Chassis research. Can only be built at Shipyard, which requires Hyperspace Module.
This is the largest combat ship in the Hiigaran fleet and it's a formidable, though expensive (especially when you add in all its requirements), capital ship threat. The battlecruiser is best used against frigates and destroyers (or other battlecruisers) and should be protected heavily against bombers, especially those targeting the battlecruiser's weapon and engine subsystems. Your strike craft can dock with the battlecruiser, so it's easy to repair your support craft when necessary.
Chapter 4 - Vaygr Units
This section provides unit stats and tactics for Vaygr units. These stats and tactics are accurate for the release version of Homeworld 2 and are applicable to multiplayer and the single-player campaign.
Survey Scout
Speed: 420
Attack Damage per Second: 9
Health: 90
Cost: 350
Class: Fighter
Primary Role: Reconnaissance Fighter Squadron
Strong versus: None
Weak versus: Fighters, Corvettes, Frigates, and Capital Ships
Prerequisites: None
The Vaygr survey scout excels at reconnaissance. This isn't a combat ship; instead, use the scout to keep tabs on enemy movements and location. The survey scout possesses enhanced sensor range and can be further upgraded via the research panel. If spotted, avoid combat; the scout will fall quickly to any other vessel in the game. But it's faster than all other ships so make a hasty retreat and use the scout again later in the game. Though a probe serves the same purpose, unlike the probe the scout can move again after placed.
Assault Craft
Speed: 325
Attack Damage per Second: 30
Health: 210
Cost: 500
Class: Fighter
Primary Role: Basic Fighter Squadron
Strong versus: Fighters
Weak versus: Corvettes, Frigates, and Capital Ships
Prerequisites: Fighter Facility
The assault craft are the Vaygr's basic fighter, similar to the Hiigaran interceptors. Assault craft are best used to counter other fighters, including bombers. Assault craft can be effective in large groups against certain frigates (those that don't counter fighters). Use them to guard your own bombers from enemy interceptors. Assault craft are also ideal for hit and run harassment against resource collectors.
Bomber
Speed: 260
Attack Damage per Second: 332
Health: 180
Cost: 550
Class: Fighter
Primary Role: Anti-Capital Ship Fighter Squadron
Strong versus: Frigates, Capital Ships, Subsystems
Weak versus: Fighters, Corvettes, and Anti-Fighter Frigates
Prerequisites: Fighter Facility, Research Module, and Fusion Bomb Research
Bombers are strike craft that are best used in large numbers against frigates and capital ships and their subsystems. For instance, when attacking a battlecruiser you may choose to attack the cannon platforms to help protect your own capital ships from the battlecruiser's bruising weaponry. Or you could destroy the engines to disable the craft in preparation for an infiltrator frigate. Protect your bombers with interceptors and corvettes. Vaygr bombers require fusion bomb research before they can be built.
Lance Fighter
Speed: 260
Attack Damage per Second: 43
Health: 150
Cost: 500
Class: Fighter
Primary Role: Heavy Fighter Squadron
Strong versus: Corvettes
Weak versus: Fighters, Anti-Fighter Frigates
Prerequisites: Fighter Facility, Research Module, and Lance Beam Research
The Vaygr lance fighter is a strike craft designed to counter corvettes (similar to the Hiigaran's pulsar gunships, though more maneuverable and far less durable). The lance fighter is also effective against capital ship subsystems; especially undefended capital ships that have few defenses against highly maneuverable strike craft. Disable a capital ship's engines in preparation for an infiltrator frigate. In battle, don't task lance fighters against other strike craft; they're best used against corvettes (better against pulsar gunships) or subsystems.
Vaygr Corvettes
Missile Corvette
Speed: 215
Attack Damage per Second: 26
Health: 1600
Cost: 625
Class: Corvette
Primary Role: Heavy Corvette Squadron
Strong versus: Corvettes, Frigates
Weak versus: Capital Ships
Prerequisites: Corvette Facility
The Vaygr missile corvette is designed to counter other corvettes and frigates, particularly ion beam frigates that have little defense against this maneuverable corvette. Keep missile corvettes nearby to support your strike craft against gunships or your frigates against laser corvettes. On the offensive side, task your missile corvettes against enemy corvettes and frigates; beware of torpedo and flak frigates (though flak frigates aren't as powerful against corvettes).
Laser Corvette
Speed: 215
Attack Damage per Second: 350
Health: 1600
Cost: 650
Class: Corvette
Primary Role: Anti-Capital Ship Corvette Squadron
Strong versus: Capital Ships, Frigates
Weak versus: Corvettes, Capital Ships
Prerequisites: Corvette Facility, Research Module, and Corvette Laser Research
Laser corvettes are called the "bigger brother of the lance fighter". These corvettes are specifically designed to counter frigates and capital ships. Laser corvettes make quick work of flak frigates, which are better suited to counter weaker strike craft like bombers or assault craft. Laser corvettes are also useful against capital ship subsystems and even the capital ship itself, particularly those that are left unsupported. A capital ship has few defenses against a couple laser corvette squadrons.
Command Corvette
Speed: 215
Attack Damage per Second: 0
Health: 600
Cost: 400
Class: Corvette
Primary Role: Utility Corvette with improved sensors and fire control systems. Improves all nearby Vaygr ship accuracy
Strong versus: N/A
Weak versus: Corvettes, Capital Ships
Prerequisites: Corvette Facility, Research Module, and Command Corvette Systems Research
The Vaygr command corvette possesses no attack but can be one of your best allies in battle. The command corvette increases sensor range and also improves Vaygr ship accuracy for anything under its sphere of influence (select the command corvette to gauge its influence). The command corvette does require extra research to build but it's a worthwhile addition to any fleet. Expect enemy strike craft to attempt to destroy the command corvette; therefore, use anti-strike craft vessels to protect the command corvette.
Minelayer Corvette
Speed: 215
Attack Damage per Second: 48
Health: 400
Cost: 800
Class: Corvette
Primary Role: Utility Corvette. Can deploy mines as a special action.
Strong versus: Capital Ships
Weak versus: Capital Ships, Corvettes
Prerequisites: Corvette Facility, Research Module, Minelaying Technology
The Vaygr minelayer corvette is similar to the Hiigaran minelayer. Use the minelayer corvette to help protect resource areas. Mine the area around the resources to prevent your enemy from destroying your collectors. You could also use it to protect the area around your mothership or carriers placed at the front line to help support your fleet.
Vaygr Frigates
Heavy Missile Frigate
Speed: 150
Attack Damage per Second: 351
Health: 16000
Cost: 700
Class: Frigate
Primary Role: Basic Frigate equipped with powerful anti-ship missiles
Strong versus: Frigates, Capital Ships
Weak versus: Bombers, Destroyers
Prerequisites: Frigate Facility
The Vaygr heavy missile frigate specifically counters other frigates (best used against flak, torpedo, or assault frigates) and even capital ships if used in larger numbers. The heavy missile frigate has little defense against strike craft groups so it should be supported with anti-fighter measures to guard from bomber attack (or even lance fighter and certain corvette attacks).
Assault Frigate
Speed: 161
Attack Damage per Second: 127
Health: 16000
Cost: 700
Class: Frigate
Primary Role: Advanced anti-Fighter Frigate equipped with turrets and swarmer missiles.
Strong versus: Fighters
Weak versus: Bombers, Capital Ships
Prerequisites: Frigate Facility, Research Module, and Assault Frigate Chassis Research
The Vaygr assault frigate specifically counters strike craft. It's not as much of an offensive weapon as the Hiigaran flak frigate; instead, the assault frigate is best used to support other vessels in defense against enemy strike craft, specifically bombers, which in large groups could take out capital ships and their subsystems. Keep assault frigates close to help guard against strike craft assaults.
Infiltrator Frigate
Speed: 230
Attack Damage per Second: 53
Health: 18000
Cost: 800
Class: Frigate
Primary Role: Frigate capable of infiltrating and commandeering enemy ships using drop pods.
Strong versus: Capital Ships
Weak versus: Bombers, Frigates
Prerequisites: Frigate Facility, Research Module, and Infiltration Pod Research
Infiltrator frigates are like the Hiigaran marine frigates: they're used to take over enemy capital ships. Use bombers to disable a capital ship's engines then move an infiltrator frigate in to take over the vessel. It takes several seconds to take command of the vessel. If you're on the receiving end of a marine or infiltrator frigate, listen to the mission events carefully and when you hear a capital ship is in jeopardy, find the offending frigate and destroy it as soon as possible before you lose the capital ship to your enemy. When moving the infiltrator frigate toward an enemy capital ship, protect it against strike craft with gunships or flak frigates.
Vaygr Capital Ships
Carrier
Speed: 75
Attack Damage per Second: 200
Health: 55000
Cost: 1700
Class: Capital Ship
Primary Role: Capital class Production ship equipped with one production and two module slots.
Strong versus: N/A
Weak versus: Bombers, Capital Ships
Prerequisites: Capital Ship Facility
Carriers are multi-purpose vessels and are used as front line support for your fighters, frigates, and resource collectors. Keep carriers near the front line so damaged fighters can return to the carrier, dock, and emerge repaired and ready to return to battle. Carriers can also produce additional units (depending on which production platform you choose) and can also hold other modules, such as research or cloak modules. Use carriers to pump out defensive platforms, which can be quickly ushered to the front line to support your fleet in battle or set it at a resource area to serve as a drop off point for your collectors as well as a place for your fleet to move and repair. Note that the Vaygr carrier features only one production slot (the Hiigaran equivalent boasts three) though the Vaygr carrier is slightly better at defending itself and is less expensive.
Destroyer
Speed: 115
Attack Damage per Second: 1100
Health: 85000
Cost: 2000
Class: Capital Ship
Primary Role: Capital Class Anti-Frigate Ship
Strong versus: Frigates, Capital Ships
Weak versus: Bombers, Battlecruisers
Prerequisites: Capital Ship Facility, Research Module, and Destroyer Chassis
Destroyers crush enemy frigates and, in numbers, can hold up against battlecruisers (though, as with all Homeworld units, are best used with supporting vessels). Destroyers are the foundation of your capital ship force and should be used to primarily counter enemy frigates (particularly flak, torpedo, and assault frigates, which aren't as effective against capital ships). Support your destroyers with anti-bomber vessels and beware of ion beam frigates, ion beam or missile platforms, and heavy missile frigates in large numbers.
Battlecruiser
Speed: 69
Attack Damage per Second: 5404
Health: 240000
Cost: 4000
Class: Capital Ship
Primary Role: Heavy Capital Class Ship
Strong versus: Capital Ships, Frigates
Weak versus: Bombers
Prerequisites: Capital Ship Facility (on Shipyard), Research Module, and Battlecruiser Chassis research. Can only be built at Shipyard, which requires Hyperspace Module.
This is the largest combat ship in the Vaygr fleet and it's a formidable, though expensive (especially when you add in all its requirements), capital ship threat. The battlecruiser is best used against frigates and destroyers (or other battlecruisers) and should be protected heavily against bombers, especially those targeting the battlecruiser's weapon and engine subsystems. Your strike craft can dock with the battlecruiser, so it's easy to repair your support craft when necessary.
Chapter 5 - Mission Walk-throughs
This section features complete walk-throughs for Homeworld 2's single-player campaign mission. Each mission walk-through includes a complete list of objectives and secondary objectives with a proven solution for each. The mission walk-throughs will also help you prepare your fleet for future mission encounters and help guide you smoothly into tricky mission triggers.
Mission 1 - Tanis
The Mothership prepares to undertake a series of trials at Tanis, a secret Hiigaran outpost in the Great Wastelands.
Objective: Begin harvesting. Collect 700 RUs.
Select your resource collector and send him to collect resources from the storage containers. Some storage containers only offer 200 RUs each so be sure to select the container that offers 700 to complete the objective quickly. The objective will be fulfilled once the resource collector grabs the storage container and deposits the container inside the mothership.
Objective: Build a fighter facility.
Select the "Build" menu on the mothership then select the fighter facility. Your resource collector will continue to snag resources from the storage container group. Allow it to continue to fund the series of trials you're required to complete. The next objective appears once the fighter facility has been built.
Objective: Build a squadron of interceptors.
Open the "Build" menu again and select the fighter tab. Create a single squad of interceptors. Once the interceptors have been built, the next objective appears.
Objective: Use the interceptors to destroy the target drones.
Select the interceptors and add them to a control group (press CTRL + 1, for example). The location of the drones is revealed on the sensor map.
Before attacking the drones, build a few more squads of interceptors to prepare for the next objective, which occurs suddenly after the drones have been killed. Move the interceptors to the drones and engage. Hold down the CTRL button and select the drones to attack them all.

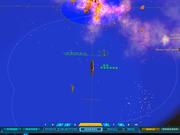
Objective: Defeat Vaygr forces at Chimera.
Enemy forces have entered the Great Wastelands and disrupted the trials. Select your interceptors (it's easiest to group them all into a single control group and just press the corresponding number to recall the group). Attack the Vaygr forces with your interceptors. Build more from the mothership if necessary.
Objective: Protect the mothership. Secondary Objective: Build a squadron of bombers.
The next battle illustrates the importance of using your fighter units to specifically counter certain enemy forces. Fulfill the secondary objective by building a couple squadrons of bombers. Continue to battle the Vaygr bombers with your interceptors while the bombers train. You have two minutes until your next target appears.
The Vaygr are using hyperspace gates. You must destroy them before the Vaygr can send in additional reinforcements. Continue to use your interceptor group against the Vaygr bombers and task your bomber group on the gates. When reinforcements arrive, target the Vaygr frigate with your bombers and continue to counter the Vaygr bombers with your interceptors. Build reinforcements if needed.
Mission 2 - Angel Moon
Arriving in the Homeworld system, the mothership must rendezvous with its crew and mount a desperate defense.
Objective: Protect the crew transports. Secondary objectives: Build resource collectors.
Orders are to save at least four of the six crew transports attempting to make their way to the mothership. Vaygr assault craft and bombers are attacking the crew transports.
First, build another resource collector or two and start it gathering resources at nearby asteroids. This will help you gather resources quicker, which can then be turned around to produce additional interceptors and bombers to assist the crew transports.
Build an additional bomber squadron (for a total of three if you have two from the previous mission) then start building interceptor squadrons. Add the new interceptor squadrons to your existing battle group and assist the nearest crew transport that's under attack from the Vaygr craft. Target the bombers first. Maneuver your bomber squadron toward the map's center. Don't use them to fight the Vaygr assault craft or bombers--you're going to use them against a much larger Vaygr vessel.
There's a Vaygr carrier in the area that's building fighters to reinforce the attacks on the crew transports. If you can destroy the carrier's fighter facility, you can cut off the reinforcements.
Secondary Objective: Destroy the carrier's fighter facility. Build a corvette facility.
Group your bomber squadrons (three will suffice) and send them toward the Vaygr carrier. Attack the fighter facility on top of the carrier. Once the fighter facility has been destroyed, the carrier can no longer reinforce the fighter groups attacking the crew transports.
Switch to your mothership's "Build" menu and construct a corvette facility once it's available; the corvette facility enables you to build gunships and pulsar gunships. Add a few gunships to your strike craft group; they're effective against the Vaygr's assault craft.
Continue to usher your interceptor squadrons to each of the crew transports and attack the bombers first. At some point during the battle, Captain Soban enters the map to assist your efforts. Assist him in clearing out the remaining Vaygr bombers and assault craft.
The Vaygr carrier in the map's center begins to retreat; it must be destroyed before it can escape. Send your bombers directly at the Vaygr carrier and destroy it to complete the objective.
The mission ends when the last crew transport reaches the mothership. So if you want additional attack units for the next mission, build them before the transport nears the mothership. Note that you also receive bonus units when particular crew transports reach the mothership (for instance, elite bomber groups).
Mission 3 - Sarum
Begin rebuilding the Hiigaran fleet at Sarum.
Objective: Protect the shipyard Nabaal. Secondary Objective: Begin resourcing operations.
The Nabaal shipyard is under attack and needs your assistance immediately. Assign your interceptors and gunships into separate groups. Send both directly to the shipyard. Use the interceptors to attack the Vaygr bombers and the gunships to attack the Vaygr assault craft.
Send your resource collectors to the large asteroids to the right of your mothership. Build a mobile refinery and send it to the same resource area. Assign the mobile refinery to guard your two collectors and the refinery will stay close and serve as a dropoff station for your resources. You will be able to gather resources much more quickly with the mobile refinery at this position.
Objective: Repair the shipyard. Secondary Objective: Defend the forward resourcing operation.
Once you have eliminated the enemy forces from around the shipyard, you're ordered to repair the shipyard using your resource collectors with a research upgrade. Select the mothership's "Research" panel and research the "Resource Collector Repair" upgrade. Build another resource collector and send it to the damaged shipyard. Don't repair the shipyard just yet, however; repairing the shipyard to capacity triggers the next attack.
Secondary orders are to defend the resourcing operation. You can now build defensive platforms. Build the platform control module for your mothership. When finished, build a gun platform and send it to the center of your resourcing operation. Now you can start repairing the shipyard.
Objective: Destroy the Vaygr probes.
Meanwhile, Vaygr probes enter the area. Use the sensor map to locate them. One is positioned near the map's center; one can be found near the mothership; and a third can be found near your resourcing operation. Use your interceptors to destroy them. Split your interceptor squad into three groups so you can engage all three probes as quickly as possible.
Objective: Destroy the Vaygr attackers.
A Vaygr carrier enters and unleashes an array of assault craft and bombers. Task your interceptor squads against the enemy bombers, your gunships against the Vaygr assault craft, and your bombers against the Vaygr carrier's fighter facility. Destroy the fighter facility quickly to prevent any additional fighter reinforcements. Once the fighter facility has been eliminated, use the bombers to attack the carrier.
You will also spot Vaygr resource collectors in the area (over the resource area). Use any of your strike craft to eliminate them.
Send all of your strike craft toward the shipyard and dock them with the shipyard for repair. The next Vaygr attack also occurs here so it's best to have all of your fighters and bombers here to assist. You should also reinforce your bomber group with two to three more squadrons from your mothership. Send them directly to the shipyard and add them to your bomber group.
Recovering the shipyard also provides use of a carrier. This carrier serves as a secondary unit construction center. It will be invaluable to defending the shipyard because you can reinforce your army much faster from the carrier since it's already at the battle's front line.
Select your carrier and build a frigate facility and a fighter facility. You'll want to build at least four flak frigates, which are excellent anti-fighter ships. With the fighter facility, you can reinforce your bomber group, which will be vital in completing the mission.
A new force of Vaygr attackers enter near the shipyard. The force consists of three carriers depositing infiltrator frigates and a variety of strike craft in the area. The infiltrator frigates move directly toward the shipyard and attempt an infiltration. You can also build marine frigates to counter a successful infiltration. But if you defend against the infiltrator frigates successfully then you won't need to build a marine frigate.

Defending the shipyard requires sending the flak frigates and your interceptors and gunships against any strike craft escorting the infiltrator frigates. Your bombers will be focused on the closest infiltrator frigate. A large bomber squad can defeat the infiltrator frigates quickly, often before they even reach the shipyard.
The problem is the enemy carriers will continue to build more infiltrator frigates. You must destroy the carriers (or its frigate facility) to stop the attack. Build a few extra bomber squads from your own carrier and send them to destroy each carrier's frigate facility or the carrier itself as soon as possible. Use the nearby resource collector to repair your flak frigates if necessary. Keep them engaged with enemy fighters; park them near the enemy carriers when you're bombing the carrier's facility to help counter any assault craft released. The mission ends once all three carriers are destroyed.
Mission 4 - Gehenna Outskirts
The fleet must slip past Vaygr patrols guarding the outskirts of the Gehenna Asteroid field.
Objective: Destroy the hyperspace inhibitors.
The key to this mission is preparation. Before heading to the hyperspace inhibitors, it's important to prepare your fleet well with specific reinforcements to face the large onslaught of attackers that await you. You should have accumulated a lot of resources upon completing the last mission. You'll certainly use them!
The Vaygr hyperspace inhibitors are located on three asteroids (their location is marked on the sensor map). A Vaygr command station is located on the far side of the map. Orders are to destroy the hyperspace inhibitors first, which will allow passage toward the command station. Once there, orders are to destroy the command station.
While your fleet exits the mothership, begin your preparation by building four to six more flak frigates (in addition to those from the previous mission, so you have a total of around eight to ten) to counter Vaygr fighters, and five or six pulsar gunship squadrons to counter Vaygr laser corvettes (which can crush your frigates quickly). The remainder of your corvette slots should be filled with gunships to also counter fighters, while you complete your fighter slots with a 3:1 ratio of bombers and interceptors. Bombers will be used to counter enemy frigates, carriers, and to destroy the inhibitors; interceptors should join the gunships and flak frigates to counter Vaygr assault craft. You should also purchase armor upgrades for these ships and the improved bombs upgrade as well.
Maneuver your resource collectors to the resource area to the right of your mothership. Place the mobile refinery on guard to assist. Vaygr forces will attack this position so your collectors must be protected! Send four flak frigates and two to four squads of gunships (mix in a couple pulsar gunship squads). Check the frigates occasionally for damage; use a resource collector to repair if necessary. You could also keep a carrier nearby for dock and repair (if you only have one carrier, consider building another).
Once you've prepared your fleet with all of these reinforcements, send remaining flak frigates, your bomber squad, and your gunship and interceptor squad to the inhibitor on the far left. You should also send a carrier, which will allow you to reinforce your fleet quickly as well as provide a repair station for your fighters and gunships.
When you reach the inhibitor, you'll encounter a minelayer corvette (there are mines!) and a collection of fighters, laser corvettes, and an assault frigate or two all supported by a carrier. Assign specific targets for your unit types: flak frigates against fighters and bombers, interceptors and gunships against fighters and bombers, pulsar gunships against laser corvettes, and finally your bombers against frigates and the carrier. Build a resource collector from your carrier to repair any damaged frigates if necessary. You could also reinforce your groups with torpedo frigates to help counter the Vaygr corvettes and frigates.
Maintain your position at the first inhibitor. Destroy all enemy forces in the area. The Vaygr may send a few groups of bombers and assault craft at your mothership. Return some gunships to the mothership and assign them on guard to counter any of these attacking forces (a single flak frigate will also prove effective, especially if repaired frequently). Destroy the first group of inhibitors when there are no enemy forces in the area.
Begin moving your fleet to the second inhibitor, the center asteroid. The Vaygr have a lot of frigates in the area and may move them in a full group. Keep your carriers away from these assault and heavy missile frigates. Your carrier can fall quickly to their attack and will have trouble escaping if you don't get a head start! Just task your bombers on the frigates and eliminate them all. Torpedo frigates also provide useful assistance. Don't use the flak frigates but your interceptors and gunships can certainly provide some assistance. Reinforce any units that are destroyed and don't forget to periodically dock with a carrier for repair.
Destroy the second and third inhibitors. Check the sensor map often to spot the enemy's location and intercept any enemy units with the appropriate counter. You could also use probes to better keep an eye on the enemy's movements.
Once all three inhibitors are destroyed, you automatically initiate a tactical hyperspace jump; the mothership moves within striking distance of the command station.
Objective: Destroy the command station. Destroy the remaining Vaygr forces.

Check the sensor map for a few more marked spots where Vaygr forces (including a shipyard) remain. Move your fleet to each position and destroy any remaining forces to complete the mission.
Mission 5 - Gehenna
In the dust fields of Gehenna, the fleet must infiltrate a heavily guarded dig site to retrieve the Oracle.
Objective: Retrieve the Oracle. Secondary Objective: Destroy the Vaygr garrisons.
In order to retrieve the Oracle, you must use a marine frigate to dock with the dig site. Once the marine frigate "captures" the dig site, the Oracle will be retrieved and the mission will conclude.
Not long into the mission, a secondary objective appears. There are three Vaygr garrisons in the area. Eliminate the three garrisons to prevent them from detecting your presence and position.
The dust fields of Gehenna actually mask your signature from Vaygr sensors. Remain in the dust clouds to stay undetected from the Vaygr. It's easiest to use the sensor map to move. That way if you do accidentally exit the dust fields, you can nearly instantly see what ship has moved out of formation and can quickly select the ship and move it back into the dust cloud. When you do exit the dust cloud, a timer appears on screen ("Time to Detection"). You must move all ships back into the dust cloud before time expires or the Vaygr will unleash their attack against you.
The garrisons aren't very big; there are some frigates (assault and heavy missile), a couple platforms, and an assortment of strike craft. Wipe them out easily by moving your entire fleet there: it should consist of a full squad of bombers for use against the frigates and platforms, a full squad of corvettes (mix of gunships and pulsar gunships) for use against the fighters, and an assortment of flak frigates and torpedo frigates to support your smaller ships.
Move through the dust clouds to the garrison on the far right. Fight smartly: task your corvettes against assault craft, bombers against frigates, and frigates against fighters (flak) and frigates (torpedo). Once you eliminate the garrison, return to the mothership and your carriers. Dock the fighters to repair them; use a resource collector to repair any damaged frigates. Move to the middle garrison and clear it out as well. Move back to the mothership and administer any necessary repairs.
While you eliminate the garrisons, build approximately five to seven marine frigates. The easiest way to capture the Oracle is to simply make a charge at it. After you clear out two garrisons, the Vaygr forces detect you with probes and launch their attack. This is your cue to make a run for the Oracle.
From your mothership, head straight to the Oracle's position. Counter all enemy forces you encounter all the way; nearly every enemy force is targeting your marine frigates! Keep them behind your other forces. That way you can attack the enemy fighters and frigates as they approach and inflict plenty of damage as they attempt to reach your marine frigates. Every time you lose a marine frigate, replace it from one of your carriers.
Secondary Objective: Destroy the Vaygr shipyard.
Push your way to the dig site. As you near, you're notified of a Vaygr shipyard adjacent to the dig site (there's also a Vaygr carrier there). It's creating reinforcements. The shipyard can withstand a lot of damage and you'll lose a lot of ships trying to blow it apart. It's much easier to work your way to the dig site and send a marine frigate as quickly as possible to attach on the dig site to retrieve the Oracle and complete the mission.
As you near the dig site, use your fighters and frigate to clear out the weapon platforms protecting the site. Attack any ships launched from the shipyard. Send your marine frigates directly to the dig site. Replace any marine frigates you lose as soon as possible and send them right to the dig site.
The mission concludes as soon as you've retrieved the Oracle--even if there are enemy ships (and the shipyard and carrier) in the area. It'll save you a lot of resources if you just get to the dig site quickly. Realize that you will need several marine frigates; because the enemy is targeting them, you may lose the first two or three marine frigates. But when your fighters and frigates reach the dig site, they can occupy enemy forces long enough for you to sneak a marine frigate to the Oracle and complete the mission.
Mission 6 - The Karos Graveyard
Under the influence of the Oracle, the mothership hyperspaces to the Karos Graveyard.
Objective: Begin resourcing operations.
Select your resource collectors and hit "H" to send them to the nearest asteroid to begin resource operations. Use your mobile refinery to guard the resource collectors to keep it close. While you gather resources, reinforce your corvette group with additional gunships and pulsar gunships and your frigate group with more torpedo and flak frigates.
Objective: Defend the fleet.
Sensors detect anomalous signals from the surrounding debris hulks. Unidentified units emerge from the hulks and move toward your fleet. These unidentified units are called movers; they're very durable with a strong against, particularly against your frigates. The approaching movers are targeting your corvette group over your frigate group; if you have your corvette group docked, the movers target your corvettes.
Keep your corvettes positioned behind your frigates so the movers move through your frigate group. Focus your attack on the nearest movers to inflict as much damage as possible (and hopefully kill some). Engage the movers with your corvettes once they're within range. Make sure your frigates are engaged as well since the movers are not targeting them. Reinforce your corvette and frigate groups by creating more from your mothership or carrier.
After destroying the initial group of movers, the Oracle initiates a hyperspace jump on your mothership; it's sent on a short jump to another location on the map. The Oracle remains in control of the hyperspace core.
There are more movers in the hulks surrounding the mothership's new location. Move your fleet to the mothership quickly. Select your carrier (or mothership) and build two to three resource collectors in preparation for the next objective.
Objective: Salvage the derelict ship.
There's an immobile derelict ship located near your mothership. Retrieve the immobile mover with a resource collector; it will be returned to the mothership and you can reverse engineer the vessel and learn its strengths and weaknesses.
It's best to get the derelict ship as soon as possible because the reverse engineering allows you to research anti-mover weaponry, which significantly increases your weapon potency against these armed utility vessels. To get the derelict ship quickly, send three to four squads of corvettes to the derelict ship to destroy the two guarding movers. Send in two to three resource collectors immediately behind these corvette squads and attempt to salvage the derelict ship. The reason you send more is to ensure at least one resource collector reaches the derelict ship.
Keep your corvette group reinforced always; avoid having only frigates or the enemy movers will obliterate them quickly. Continue to produce corvettes from your mothership and carrier and keep them engaged with the enemy movers. Your corvettes are primarily distractions until you get the derelict mover back so you can begin the anti-mover weaponry research.
Objective: Begin anti-mover weapon enhancements research.
Within moments after the derelict mover is returned to your mothership, you can research anti-mover weapon enhancements. Select the research panel and find the anti-mover weapon enhancements on the mothership area.
The mothership moves once again; this time the Oracle positions the mothership near a specific debris hulk. Move your fleet once again to the mothership's new position.
Objective: Defend the mothership.
The easiest way to defend the mothership during this extended onslaught of movers is to use the sensor map. While on the sensor map, attack specific mover targets with your corvettes and frigates. This battle takes awhile; the enemy movers continue to pour from the nearby hulks. If any of your corvette squads are weakened, dock them with the mothership for repairs. You could also keep a resource collector handy to repair any damaged frigates.
Once the mothership reaches the hulk, the Oracle activates the derelict, powers down all movers on the map, and the mission concludes successfully.
Mission 7 - Derelicts
Pulled out of hyperspace, the mothership and Hiigaran fleet find themselves surrounded by Progenitor derelicts.
Objective: Investigate the derelict hulks.
This is a tough mission that requires good defense, a lot of micromanagement, and careful fleet planning. Plus, it's wise to start purchasing your unit upgrades if you haven't already; you'll need the added armor and firepower to survive against the plentiful Vaygr attacks during the course of the mission.
The first step is to send a probe to one of the derelicts to investigate. Build a probe from your mothership or carrier and move it to one of the derelicts marked on the sensor map. Investigating the derelict triggers the next objective.
Objective: Build movers to clear the radioactive debris.
The marked derelicts lie in radioactive clouds. Your normal units suffer damage if they move within these clouds; this is an important aspect to remember during the mission. You can lose a group of strike craft very quickly if they happen to maneuver inside one of the radioactive clouds. The movers, however, are unaffected. You can now replicate mover technology, so build the mover construction facility on the corvette panel and build the maximum number of movers available.
While building movers, send your strike craft (interceptors, corvettes) to the map's middle. A Vaygr long-range probe appears on the right side of the map and will move through the map's center to the far left. Intercept the probe to prevent detection. Don't head straight for the probe; instead, cut it off because it's too quick for most of your strike craft. Once destroyed, you're notified that the Vaygr will likely send patrols to investigate their downed probe.
And "likely" is correct: within moments, you detect hyperspace signatures. The Vaygr forces are using shielded carriers to penetrate the radiation and unleash fighters, corvettes, and frigates into the area. Those carriers are in the radiation so you will need to use movers to destroy them. You could also use frigates or destroyers from longer range.
Objective: Use movers to destroy the radioactive debris.
Once you begin building movers, you're told to use the movers to destroy the radioactive debris marked around the map. The radiation is preventing the mothership from initiating a hyperspace sequence. Once you have built a full complement of movers, start on the far left derelict and begin destroying each debris piece in turn. If there are any defenders protecting the debris, send a corvette group (or whatever is necessary) there to clear the defenses.
Send out probes to discover when enemy units are on their way to your mothership. Realize, though, that the probes will be attacked and destroyed. The enemy's attacks move toward your resource gatherers or your mothership, whichever is more lightly defended. Intercept attackers and counter the attackers by using fighters and gunships against strike craft, pulsar gunships and torpedo frigates against corvettes, and bombers and ion cannon frigates against frigates. Don't forget flak frigates against fighters and, once built, destroyers against frigates.
Enemy ships fill the map's outskirts. A carrier lies on the left, and a second carrier and a shipyard lie to the right. Continue to work around the map with the movers. Nearby enemy units may attempt to engage your movers. It's best to avoid combat and just move them away and into a corner until the enemy group moves away. You can also help the movers by using your own strike craft and corvettes to intercept any aggressive enemy squads.
The last radioactive debris--on the far right--is located adjacent to a Vaygr shipyard. There will likely be other Vaygr forces in this area so you may need to escort the movers with strike craft and frigates to keep the enemy squads occupied long enough for you to destroy the final piece of debris.
During your trip around the map with movers, purchase the "Destroyer" research so you can build the new capital ship. You should also research the destroyer armor upgrade (and any other armor upgrades you have neglected). Build three to four destroyers from your mothership if resources permit. You can use them to take out the carrier on the left (movers are also good for this if you want to divert them between debris assaults).
Objective: Destroy all remaining Vaygr forces.
Although the mothership can initiate hyperspace, you still can't afford to be followed so you must eliminate all remaining Vaygr forces. Destroyers are key here and can eliminate the carriers and the shipyard very quickly. Again, avoid the radioactive areas with non-movers or you will lose the ships quickly. Be careful maneuvering through resource areas as they have likely been mined by the Vaygr.
Escort the destroyers with your strike craft, corvettes, and frigates. When you're attacked, counter the enemy's units appropriately. Keep a few resource collectors near the destroyers to initiate repairs. You should also purchase the weapon upgrade for the torpedo frigate, which also upgrades the destroyer. This increases both vessels' effectiveness against the Vaygr capital ships. The mission concludes once all Vaygr non-resource vessels have been destroyed.
Mission 8 - Dreadnaught Berth
Among the derelicts lies a powerful Progenitor ship that holds the key to Balcora and Sajuuk.
Objective: Confirm location of Dreadnaught.
Before confirming the dreadnaught's location, reinforce your fleet as necessary. Primarily you need pulsar gunships and torpedo frigates to counter a new enemy and more ion cannon frigates to counter an even deadlier new enemy. You should also consider building a full fleet of five destroyers. Also, make a squad of 10 movers.
Build a probe and send it to the area marked on the sensor map; it's the possible location of the dreadnaught vessel. When the probe reaches the site, the dreadnaught is revealed. Something emerges from the derelict repeating the message, "The keeper is aware...the keeper understands...the keeper has seen the enemy." Not comforting words.
Objective: Use movers to transport the dreadnaught.
You must use at least six movers to transport the dreadnaught. However, the dreadnaught is protected by drones launched from the keeper. These drones aren't simple enemies; they're extremely durable and can wipe out your strike craft very quickly. The drones are essentially corvettes so counter them with anti-corvette units, specifically pulsar gunships and torpedo frigates. Research upgrades for these units for further assistance.

Move up your destroyers and ion cannon frigates near the dreadnaught. Send your movers to dock with the dreadnaught and begin hauling the huge vessel toward the mothership. The keeper will appear periodically and unleash its powerful cannon weaponry against anything in its path. It has the ability to crush a destroyer fast. When the keeper appears, concentrate all firepower on it. The keeper disappears after sustaining a certain amount of damage; so the faster you can inflict damage to the keeper, the better.
Escort the dreadnaught back to the mothership. Replace any destroyed pulsar gunships or torpedo frigates and move them quickly back into battle. You should also replace any lost destroyers (also, try to keep them repaired with resource collectors after the keeper leaves).
Objective: Protect the fleet.
As stated, concentrate all firepower on the keeper when it appears. Use ion beam platforms for additional firepower; just move them up near your fleet to help keep the keeper occupied. Repair any damaged ships after it exits. Reinforce your units when you lose any craft. You'll be told that you can't defeat the keeper with conventional weaponry. Thankfully, someone found a weakness. There are Progenitor power modules in the area. The modules can be activated and can cause the keeper to overload. New locations appear on the sensor map; send probes to all locations.
Objective: Send probes to scan for trigger devices.
Create six probes and send one to each of the marked locations on the sensor map. Also, build a full squad of movers if you don't have one; you'll need it shortly. You'll be notified if the location contains the power modules or nothing. Meanwhile, continue to pound on the keeper if he arrives. Repair and dock vessels as necessary and keep your units as healthy as possible.
Objective: Use movers to collect Progenitor devices.
Send your pulsar gunships ahead of your movers toward the location of the power modules. There are drones awaiting your arrival and your movers won't be able to withstand their firepower. Use the gunships in the lead to distract the drones long enough for your movers to nab the modules. As you approach, micromanage each mover to one of the three power modules. This will ensure you grab a module as quickly as possible. And should a mover die on the way, another mover will follow it and take its place. Keep your pulsar gunships engaged with drones as the movers haul the devices to their destination.
And as always during this mission, watch out for the keeper, who will appear near your mothership in the heart of your units. Concentrate all fire on him and keep your destroyers repaired!
When the movers haul all three modules to their destination, the devices are installed and the keeper arrives in its center. As promised, the keeper is overloaded and self destructs as you escape and complete the mission successfully.
Mission 9 - Counter Attack
Captain Soban has provided the coordinates of a Vaygr assembly point. A counter attack is planned.
Objective: Defend the dreadnaught. Bring the dreadnaught engines online.
The opening cut scene reveals the dreadnaught laying waste to a few Vaygr forces but the attack overloads the Vagyr's weaponry. The dreadnaught is dead in space and vulnerable to Vaygr assault. Use your initial units to repel the remaining Vaygr forces, which consist of a couple frigates and a destroyer. If you have destroyers, attack them frigates first then the enemy destroyer.
This mission can be very difficult if you don't prepare ahead of time. By the time you're moving and repairing the dreadnaught, the Vaygr attacks are quite vicious. You can easily become overwhelmed without adequate preparation.
After repelling the initial Vaygr forces, make the following preparations: build a total of five destroyers, build a full complement of frigates at a ratio of 75% flak frigates and 25% torpedo frigates; build a full squad of bombers; build a squad of gunships and pulsar gunships; and, as resources allow, conduct other research such as armor upgrades, fire control upgrade for the mothership, and others that might prove effective in an extended battle.
Send one resource collector to the dreadnaught and begin repairs. The resource collector will automatically work on its engines. Send the other collectors to gather resources, though expect them to be attacked at some point in the mission so be prepared to move them if necessary.
Move your destroyers and bombers to the map's center. Keep your frigates and corvettes around the mothership and dreadnaught.
Secondary Objective: Eradicate the hyperspace gates.
Vaygr hyperspace gates are revealed on the map. They're using them to send in their strike craft vessels. Send your bombers to the three gates to the left, right, and behind your mothership. Use your destroyers to eliminate the two gates in front of your mothership. Keep moving the destroyers north after destroying the gates. As strike craft enter and attack your destroyers, counter with the corvettes. Keep your frigates at the mothership for defense. Once you bombers destroy a gate, move to the next marked gate quickly. The bombers may be countered by strike craft. Ignore them and just fly to the next gate and destroy it.
The reason you should keep moving your destroyers toward the far side of the map is because there's a Vaygr shipyard there building a lot of the enemies in the mission. Support the destroyers with your corvettes and destroy the shipyard as quickly as possible. Five destroyers shouldn't have much trouble blowing apart the Vaygr capital ship.
You should also use the bombers to sweep the map because there are more hyperspace gates than the ones that were marked. Use probes to gain line of sight around the map then hunt down remaining gates with the bomber squad. Killing the gates and the shipyard will make the remainder of the mission much easier.
Objective: Dock the dreadnaught with the shipyard for repairs.
The resource collector will eventually repair the engines. Move the dreadnaught toward your mothership. The shipyard Nabaal will enter and offer to complete repairs. Move the dreadnaught to the shipyard; it will dock and repairs will commence. It takes 15 minutes to complete repairs. During that time, the Vaygr will continue their assault. If you prepared well (with suggested units and destroying the gates and shipyard), it shouldn't be very difficult to survive. You should also keep an eye out for Vaygr resource collectors. Destroy them on sight.
Vaygr carriers will enter the map. Use your destroyers and bombers to eliminate them. Keep your corvette group mobile and intercept any strike craft. Use your frigate group in a bunch to counter approaching bombers and strike craft. A high amount of flak frigates can obliterate a strike craft squadron quickly. Use resource collectors to repair frigates and your destroyers. Monitor your bombers and corvettes and replace any that are lost; you should also dock damaged squads to repair them.
The 15 minutes will seem to go by quickly if you've prepared well. If not, you will have an enormous amount of strike craft to deal with. The flak frigates really are key here. Target the lead Vaygr strike craft groups and watch them crumble against the flak. Keep destroyers and bombers targeted on carriers or frigates and the corvettes mobile to assist either the destroyers, bombers, or the frigates if they're overwhelmed. A second group of carriers will enter later in the mission; move your destroyers and bombers in to annihilate the carriers.
Objective: Destroy the remaining Vaygr.
Once repairs have been completed, you have access to the dreadnaught's weaponry (though not that impressive cannon seen in the mission's opening cut scene). The dreadnaught can quickly destroy Vaygr frigates and destroyers. Move it to the front line and assist your other ships in clearing out the Vaygr capital ships, which includes a battleship. The mission is almost over so try not to lose any of your frigates or destroyers. Keep them repaired! The mission concludes when the Vaygr forces fall.
Mission 10 - Keepers of Sajuuk
The Keepers return.
Objective: Defeat the Keepers.
Now there are two keepers to deal with and each launches tough drones. Any frigates you possess will likely crumble quickly under the drone attack. Pulsar gunships are the best counter for the drones; against the keeper, you must concentrate all firepower on the nearest one with your dreadnaught, destroyers, remaining frigates, and bombers.
Replenish any destroyed gunships or destroyers. Frigates are likely a waste of resources because they fall very fast to the drones and the keepers. Use resource collectors to keep the destroyers and dreadnaught repaired.
Take the time to micromanage your battles against the drones. Select your corvette group and run your mouse over the drone targets. Seek out drones that are near death and focus all of your corvettes' firepower on that single drone. If you're patient and focus attacks on specific targets, you can kill the drones quicker.
Keep pounding away on each keeper. One will overload and disappear. Now focus your attacks on the last remaining keeper. It too will eventually overload and disappear.
This cues the arrival of the Bentusi vessel; it offers to repair the dreadnaught's primary cannon. Move the dreadnaught toward the Bentusi vessel and enter docking formation. Unfortunately, your actions will eventually alert the keepers once again. This time there are additional keepers; each with their ability to create more drones. This is not an easy battle; expect to lose a lot of ships. Thankfully the next mission affords plenty of time to replenish your fleet.
Objective: Defend Bentus
The keepers will target everything: your carriers, your shipyard, the mothership, and the Bentusi ship. They continue to exit and enter the map, which makes countering their arrival very tough. The Bentusi ship can withstand significant damage so don't counter keepers attacking Bentus unless you see the Bentusi ship is heavily damaged. Instead, counter the keepers attacking your mothership or other important vessels. As stated, it's difficult to save everything. Try to save expensive ships, such as the shipyard and your destroyers. Should a destroyer fall in battle, build another. Use resource collectors to gather resources but also use them to help repair your capital ships during the extended battle.
It takes the Bentusi ship seven minutes to repair the dreadnaught's cannon. As soon as it's complete, select the dreadnaught and usher it into battle. The dreadnaught's cannon can pummel the keepers. It recharges quickly; the difficulty lies in the fact the dreadnaught has to line up with the keeper to get a good shot; not easy if the keeper is moving. Continue to counter the drones with your corvettes (dock any damaged squads and replenish slain groups).
Eventually the Bentusi ship realizes that there's nothing you can do against these keepers and offers to lend a helping hand--a sacrifice. The Bentusi ship initiates its self-destruct sequence. The explosion kills the keepers and completes the level.
Mission 11 - Sacrifice
The Hiigaran fleet must locate the fragments of the Bentusi core.
Objective: Retrieve the Bentusi hyperspace core.
This is one of the game's easier missions, which is good considering the difficulty of the next mission! You'll have plenty of opportunity to build up your fleet for the next mission. Try to conserve resources and keep your ships healthy against this mission's rather simplistic enemy encounters.
Scans of the Bentusi debris field have isolated the three core fragments. All three of the core fragments must be retrieved but each lies in a hazardous environment. You're told to launch probes to discover the extent of this hazardous environment. Build three probes and send one to each of the three marked locations on the sensor map.
Objective: Research radiation shielding and retrieve the Bentusi core fragments.
You must use defense field frigates to protect resource collectors while they salvage the three core fragments. Further, the defense field frigates must be enhanced through research; select the research tab and research improved defense field to add radiation shielding to the defense field frigates.
To get a fragment, set your resource collector to guard the defense field frigate. That way the resource collector will remain next to the defense field frigate as it approaches the core fragment within the radiation. If you just move the collector to the position, it will move ahead of the frigate and be unable to withstand the radiation from the hazardous environment.
As you approach the environment, focus on the defense field frigate. When its sphere of influence (the area around the frigate that will be protected under the defense field) reaches the core, activate the defense field then send the resource collector to retrieve the core quickly. The collector will automatically grab the core and start back to the mothership.
When you're on the way to the first core fragment, start to move your fleet toward the map's center. You should have a full squad of bombers, a corvette squad, your dreadnaught, groups of flak and torpedo frigates, and some destroyers. If you've maxed out all ship types, that's even better.
Vaygr forces will enter around the time you snag the first core fragment. A Vaygr carrier will dispatch a collector to grab one of the fragments; you're notified when this occurs and can even see it move on the sensor map. Quickly move your fleet to its position. When the core fragment reaches the Vaygr carrier, you have six minutes to destroy the carrier and prevent it from using hyperspace to exit the map.
The defenses around the carrier aren't strong. Counter the strike craft with flak frigates and corvettes and use your bombers and capital ship group against the carrier. When the carrier explodes, the core fragment remains. Grab it with a resource collector and it will return to the mothership.
Before grabbing the third and final core fragment, prepare your fleet for the next mission. You will need a full squad of bombers, a full squad of corvettes (75% pulsar gunships), a full squad of frigates (50% flak, 25% torpedo, 25% ion cannon), five destroyers, and two battlecruisers. If you lost the shipyard Nabaal previously, build a shipyard and use the shipyard to build your battlecruisers. Don't advance to the next level until you have these capital ships.
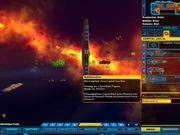
Objective: Destroy the Vaygr forces.
A few Vaygr forces remain on the map: some strike craft, frigates, capital ships, and a shipyard. Keep your capital ships healthy so you don't have to replace them. Remember that even if it's near death when you go to the next level, it will appear back fully repaired.
Meanwhile, you should also acquire further research, specifically armor upgrades for all your ships, including your destroyer and battlecruiser. If you haven't already, you should also research improved manufacturing for your mothership and carrier. The mission ends once you have all three fragments and have destroyed all Vaygr forces.
Mission 12 - Thaddis Sabbah
Captain Soban's emergency beacon leads the fleet to Thaddis Sabbah, and Makaan.
Objective: Assault the command station Thaddis Sabbah.
As stated at the end of the previous mission walk-through, you should begin this mission with as much of a full fleet as possible: max out your destroyers, battlecruisers, frigates, and have full squads of corvettes and bombers. You should also have at least one carrier (two is better) to help produce ion beam platforms to serve as support for your fleet: you'll need them against this mission's alarming number of Vaygr battlecruisers.
Don't worry about the command station Thaddis Sabbah. It's not going anywhere and you have much more important things to deal with before rescuing Captain Soban. In fact, it's best if you just wait to accomplish this objective after all enemy units have been destroyed.
Set your resource collectors to gather. You may also consider other resource collectors to serve as repair craft; though realize that they will be heavily targeted by Vaygr vessels (though they will certainly help in between battles). Check the sensor map and note the two resource sources in front of your mothership. The bulk of the Vaygr force lies at the second resource patch. You want to fight the Vaygr before that patch. This will help prevent you from being overwhelmed by the enormous amount of destroyers and battlecruisers the Vaygr possess.
Move most of your fleet between the first and second resource points. Put your capital ships (including the dreadnaught) in formation to keep them together. Should a destroyer get ahead of the rest of your fleet, it could be easily killed by the Vaygr's plentiful units. Keep your frigate group close by. Ideally you should have flak frigates and ion cannon frigates in near equal measure. The flak frigates lay waste to the Vaygr's fighter groups and the ion frigates help against the numerous Vaygr capital ships. Keep your carriers close as well and begin pumping out hordes of ion beam platforms.
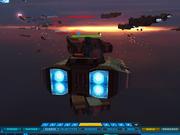
Ion beam platforms, like other defensive platforms, can only be moved once. Ideally you should be able to build a full batch of them before the Vaygr capital ships move into position. As they approach, move the ion beam platforms just in front of your capital ships. The Vaygr will have to deal with your defensive platforms while you focus your attacks on specific capital ships. Continue producing ion beam platforms even if you're maxed out. You need the extra firepower to survive this mission.
There are a lot of variables when the Vaygr fleet finally arrives so there's no perfect solution. It's extremely important that your fleet is together so you can concentrate all firepower on specific ships. The ion beam platforms are vital and should be within range of the approaching enemy fleet. And you should watch your dreadnaught carefully. It shouldn't be the lead ship or it will be targeted first and likely quickly destroyed by the enemy's focused attack; if the dreadnaught explodes, the mission ends in failure.
Objective: Destroy Makaan.
At some point during the battle, Makaan jumps in with his flagship and additional enemies. A new objective appears to destroy Makaan. Like the station, don't worry about destroying Makaan yet. There are plenty of enemies in the map's center to deal with. Also, realize that there won't be any additional Vaygr battlecruisers. You may have to deal with more fighters during the course of the mission but no more battlecruisers. Survive against the battlecrusiers and you can win the mission.
Vaygr battlecruisers are your priority. When one moves within firing range, use all your capital ships, bombers, corvettes, ion frigates, and ion platforms to target a single battlecruiser. When it's destroyed, move to the next. If a Vaygr destroyer moves within range first, destroy it instead. Don't hesitate to retreat toward your mothership. You can place ion beam platforms at a secondary position and move to that point. Don't forget to start building destroyers or battlecruisers to replace those that are lost. It's also wise to build frigates and bombers to keep your fleet strong. Research armor upgrades if you haven't already (ion beam, capital ship, etc).
Use probes to keep tabs on the Vaygr fleet. Some may attempt to move down the right side of the map to attack your mothership. Intercept with your capital ships. Focus fire is important in every battle. Destroy the battlecruisers as quickly as possible. Keep your flak frigates mobile to intercept the Vaygr fighter and bomber squadrons.
As you begin to whittle down the Vaygr capital ships, locate the shipyard and carriers and destroy them. Then continue toward the station and destroy Makaan's flagship--though he escapes before he's completely annihilated.
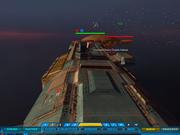
Before you use a marine frigate to rescue Captain Soban from the station, rebuild your fleet in preparation for the next mission: it's another tough battle against numerous Vaygr capital ships. You want to max out battlecruisers, destroyers, flak and ion frigates, bombers, and corvettes. You should also use carriers for your defensive platforms (don't build them until the next mission because they don't carry over). If you need resources quicker, use your collectors to grab from the ship wreckage and specifically target the most plentiful resource chunks.
Don't advance to the next mission until your fleet is in place. Save your game after clearing the map's enemies and patiently prepare your fleet for the next mission. When ready, move a marine frigate to the station. Dock the frigate with the station; Captain Soban will automatically exit and proceed toward your mothership. Once he arrives, the mission concludes.
Mission 13 - Balcora Gate
The Vaygr make a desperate attempt to cripple Balcora Gate and prevent access to Sajuuk.
Objective: Destroy the Vaygr forces attacking the gate's power generators.
The Balcora gate has three power generators; fleets of Vaygr frigates and strike craft are attacking each generator. To make matters even more complicated, a large Vaygr force also patrols nearby; this force consists of battlecruisers, destroyers, and plenty of frigates and strike craft. The power generators will not last long against the Vaygr attack. You must intercept those attackers before dealing with the Vaygr battlecruisers.
Move your fleet toward the Vaygr ships attacking the gate's bottom power generator. Keep all your ships together. Don't let your frigates get too far out in front or even your strike craft. It's best to be patient and attack as a large group. Use your flak frigates against the strike craft and your capital ships and ion frigates against the Vaygr frigates.

Meanwhile, use your carriers and mothership to build ion beam platforms to prepare your defenses. As the Vaygr capital ships approach, you'll move the ion beam platforms as a group to intercept their path. Attempt to coordinate the defense in conjunction with the rest of your fleet so you attack as a complete group.
It's best to retreat to your mothership and let the capital ships approach toward you. That way you can position your ion beam platforms carefully and focus all of your attacks on the lead battlecruiser. Keep replacing destroyed ion beam platforms. And don't forget to keep reinforcing your group with additional units when any perish during the tough battle.
Objective: Investigate power signature.
You may be notified of a power signature; it will be marked on the sensor map. Use a probe to investigate. It's a Vaygr shipyard. It's possible to discover the shipyard without being notified about the signature. Either way, discovering the shipyard activates another objective.
Objective: Destroy Vaygr shipyard.
Don't be in a rush to destroy the shipyard. Worry about the approaching capital ships first. The shipyard may create more strike craft but it won't build more battlecruisers, your main adversary during the mission. As the Vaygr forces approach, concentrate all fire on the battlecruisers (except flak frigates, which should be used against strike craft). Be sure to fight close to your ion beam platforms so they're involved in the battle.
If you leave the shipyard for last, don't destroy it. Destroying the shipyard completes the remaining objectives and will conclude the mission. Instead, gather resources around the map and start reinforcing your fleet. You know the drill: max out your capital ships, frigates, bombers, corvettes, and acquire any research you haven't already. Be patient and only advance to the next level once you have created a full fleet.
Mission 14 - Balcora
In the heart of Balcora, a battle will decide the fate of Sajuuk, the Great Maker.
Objective: Protect the mothership.
The enemy is heading to you. Don't move out from your mothership. Instead, form up your fleet there and allow the enemy vessels to move within range of your ships. Use your mothership, shipyard, and carriers to build ion beam platforms. Position them just in front of your ships so the platforms assist in any battle around the mothership. Upon completion of the battle, if resources allow, scuttle the platforms so you can build more to send to the other battle areas.

As you have in the previous missions, it's important to focus fire on the largest approaching threat. Typically it's a battlecruiser but it could also be a destroyer. Counter strike craft with flak frigates and send everything else at the capital ships. Focus fire on one ship at a time to destroy it as quickly as possible then focus fire on the next closest enemy capital vessel.
After successfully protecting the mothership, you're told that the Vaygr are regrouping around Makaan's flagship.
Objective: Destroy Makaan. Destroy the Vaygr shipyard.
Take the time to reinforce your fleet. Maintain a defensive position and counter anything sent at you. Rebuild your fleet to maximum strength before proceeding. Move your fleet as a single group out from your mothership. Use the sensor map and attack any "red dot" within range. Continue to push toward Makaan's flagship. You're also told of a shipyard providing additional reinforcements. Seek it out and destroy it before moving to Makaan's flagship.
As in the previous missions, you should hold off on completing the final objective until you have taken the time to rebuild your fleet. The next mission is the final mission of the game and it's wise--and very important--to have the maximum fleet possible when engaging the forces in the next mission.
But the requirements for the last mission are a bit different. Instead of building bombers, build interceptors. You'll also want corvettes (a mixture of gunship types is fine). Split both into two control groups (half interceptors, half corvettes in each group).
Conduct any other research before advancing to the last level: you won't be able to acquire any research there! Get even the speed upgrades. Be patient and gather resources from the map to fund your reinforced fleet. Micromanage collectors and grab the debris from ship wreckage, making sure to snag the largest pieces first.
When ready, destroy Makaan's flagship (it may send out more strike craft, easily countered with flak frigates) to complete the mission successfully. The mothership powers down and ejects its core; all three cores are integrated into the Sajuuk progenitor ship. You'll use it in the last mission in the game.
Mission 15 - Return to Hiigara
Lift the siege of Hiigara.
Objective: Destroy the Vaygr blockade forces.
Move your capital ships, frigates, and carriers toward the map's center. Stick together so you can fight as one group. Keep your interceptors and corvettes behind for a future objective. Start building ion beam platforms from your carriers, which will be used to help defend your capital ships against Vaygr forces. You'll need the extra firepower!
Keep your fleet together and focus fire on Vaygr capital ships. Counter strike craft with your flak frigates and conduct the battle as close to your ion beam platforms as possible.
Note that you will be able to move the Sajuuk vessel but it's so slow that it's unlikely you will be able to get it close to these enemy forces. It has a much more important use!
Objective: Use Sajuuk to destroy the three planetary bombardment platforms.
You detect multiple mothership-class hyperspace signatures. Some sort of weaponry warps on the map; there are three of these planetary bombardment platforms and each is immune to conventional weaponry.
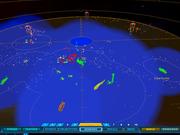
You don't necessarily need to rush toward the planetary bombardment platforms but they pose grave danger to mission success.
Objective: Protect Hiigara from destruction by destroying any missiles that are launched.
Each planetary bombardment platform continuously launches destructive missiles aimed at Hiigara. These missiles dive toward the planet at specific locations (marked on the sensor map when the missiles are revealed). You can only survive approximately five to six missile blasts. Each one decreases Hiigara's population by millions.
There are three platforms: the left, middle, and right platform. Position your two interceptor/corvette groups on the left and right and place them just in front of the point where the missiles dive to the planet's surface. The best way is to assign each of these strike craft groups to their own control group so you can recall them easily and target incoming missiles.
The missiles that approach from the middle platform can be countered by your middle force. You could position your flak frigates here or even branch off a few interceptors and corvettes to handle the missiles here.
Select your Sajuuk ship and task it onto one of the platforms. It will move slowly toward the platform and fire its huge cannon once it moves within range.
Be on the look out for the Vaygr shipyards on the far left and right of the map. Divide your capital ship forces and target these shipyards while the Sajuuk vessel moves between planetary bombardment platforms.
Remember to keep an eye on your interceptor/corvette groups and don't let any missiles get beyond their position. Switch to the sensor map frequently to check for incoming missiles. Select the appropriate strike group and quickly counter the missile. As you destroy platforms, the frequency of the missiles increases so make a mental note to check the sensor map often!
The mission and campaign concludes successfully once all planetary bombardment platforms are destroyed and the Vaygr forces have been vanquished.
Got a news tip or want to contact us directly? Email news@gamespot.com
Join the conversation