Hitman 3's penultimate mission, The Farewell, takes place at a beautiful winery in Mendoza, Argentina. You have two targets again, and if you follow the Mission Stories, you can get to them fairly easily. Here are a few tricks you can use to get away unscathed, and there's even a secret Mission Story that's not given to you in the planning phase.
Eyes On Target
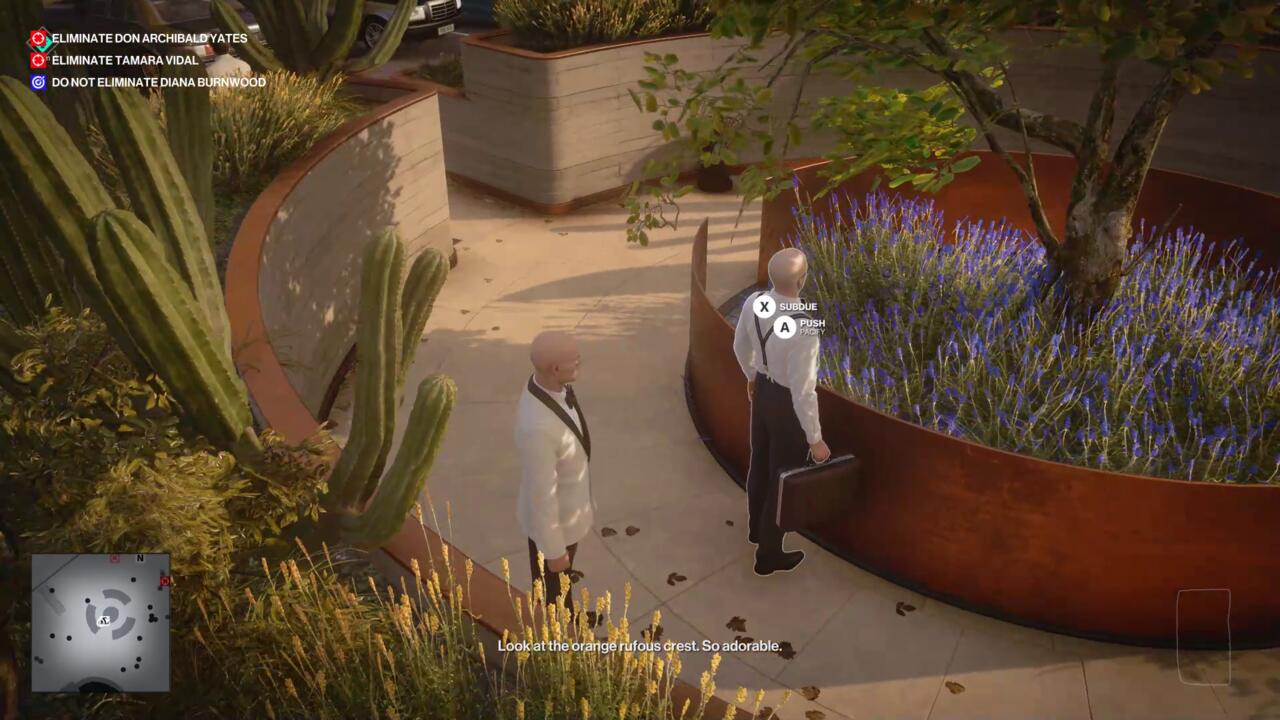
This Story Mission lets the very guards doing security for the event eliminate Tamara Vidal for you. First, head down to the roundabout and keep an eye on the lawyer who is standing in front of the security blockade opposite the winery. Wait for him to walk to the secluded centerpiece of the roundabout--he's now out of sight, ripe for a knockout. Take his outfit and hide the body in the tall grass here. Drop any illegal items now, and head over the security blockade. You'll get frisked and granted free passage.
Make your way toward the marked location on your UI. You'll end up at a watchtower where guards are patrolling and overlooking the party. Make your way to the top of and eavesdrop on the sniper and spotter. They'll mention that if they get a photo of a target and receive the command, they'll eliminate whoever.
Now steal a commando's uniform--easiest way is knocking out the guard who's already patrolling the watchtower below. Next is to snatch the spotter's earpiece. Hide in tall grass near the spot marked on your UI and snatch it when the suspicious guards aren't looking. Leave the area and head into the winery for the party.
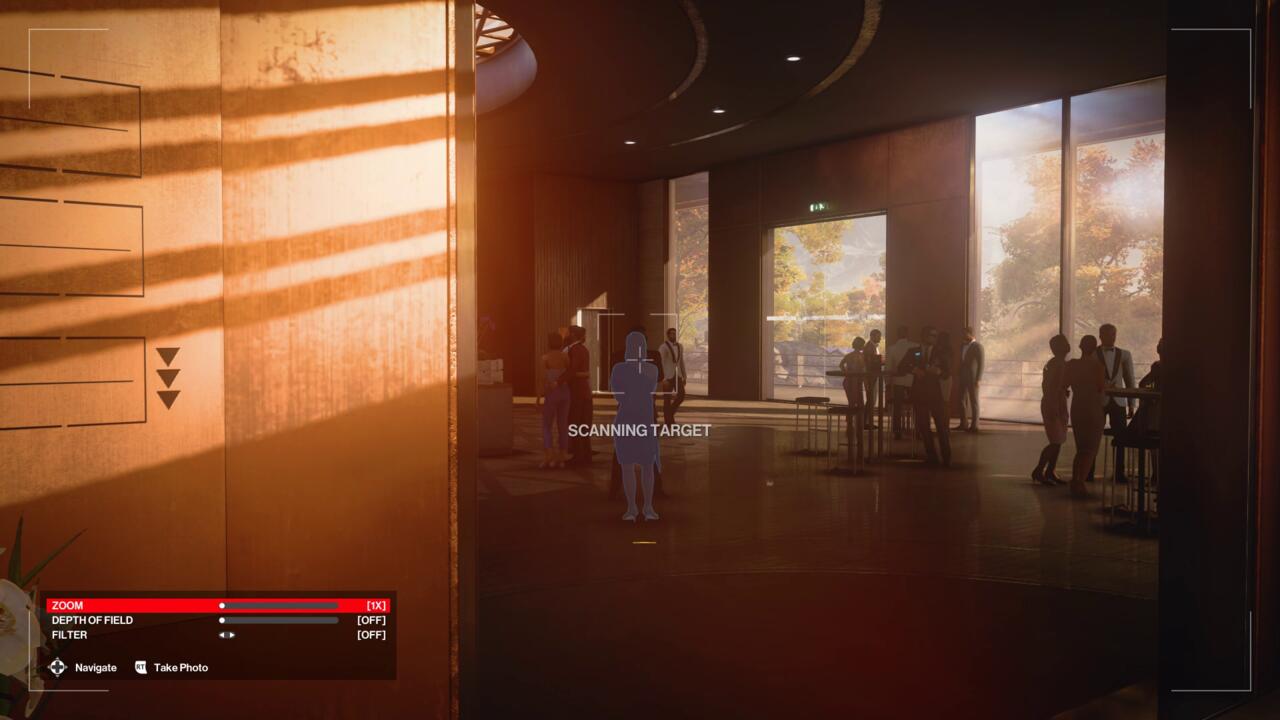
Head to the far end of the winery and try to scan Tamara Vidal's face without getting spotted by her high-alert bodyguards. Afterward, loop around the winery to talk to Diana at the bar without being noticed.
Diana, Tamara, and her guards will head outside and eventually the guards will spread around the lawn area. Luckily, this is away from the crowds and you can figure out some painless ways to knock them out and hide their bodies.
At this point, you just need to walk up to where Tamara and Diana are hanging out, and give the command. You can listen to their conversation before giving the command, too.
Over The Top
We're about to get into some real wine business. You can do this right after Eyes On Target since you'll have a guard access that lets you go down to the production facility. Follow the senior worker, wait for him to talk to his subordinate, then catch him when he's alone in a corner between the two wine tanks. Guards are near but you can district him to go behind the tanks for a safe knockout. Take his worker's uniform, but be careful; many of his subordinates will notice you're not him if you stay in their vision too long.

Now follow the marker on your UI and search the workshop room for a screwdriver. The guard here can get suspicious but just swipe the screwdriver in the toolbox and also swoop up the fuse to the right of it if you can. Head down to the facility again and get a wrench on top of a toolbox in the sight of a suspicious subordinate. If you're quick enough, it won't alert him.
Go back to the main floor of the facility to expose the electrical wire, but not before distracting the worker who's mopping the floor right next to it. Then you can sabotage the wine pump immediately after. Now watch the facility flood with tasty wine that no one gets to drink.
This is the end of the Mission Story, but this lures Don Yates out from seclusion. He'll go down to the facility floor and yell at workers for a good long while. Kill him how you want--or use that fuse you picked up earlier to power the exposed wire from earlier and zap him by powering a nearby fuse box.
The Tour
This Mission Story is the most comprehensive one in all of Hitman 3. It lets you access both targets, and it's equal parts hilarious and serious. It's also pretty important narratively because it also leads into a bonus Mission Story that doesn't get logged into your playthrough.
It's best to start this one by entering the party normally with an invitation. You then begin The Tour by eavesdropping on Corvo Black, an important man who's inside the winery marked by your UI. After his conversation, he'll take a long walk out to the lawn outside the winery. Now you can strike and take his outfit.
Go to the reception desk, then find a way to the ground floor of the winery to meet up with Diana and Tamara Vidal. Now the chief winemaker is held up because he wants ripe Malbec grapes for whatever reason. Use pure stealth skills and sneak into the vineyard to investigate the hold up. You'll have to disguise yourself as a winery worker, who should be marked on your UI. Knock him out, take the outfit, hide the body, but be sure to pick up the winery workers' key he drops.
Then follow the next marker to get the grapepicking knife. You can find the Malbec grapes only at the far end of the vineyard where most workers will be suspicious of you. Keep a low profile when getting these grapes. Bring the grapes back to the chief winemaker, then change back to your Corvo Black disguise and sneak out of the vineyard to finally start the tour. He'll walk you through the facility while talking up the wine-making process, but just hold on, wild stuff is about to go down.
You can "ask" the chief a question once you make it the main floor of the winery facility, which has you going to one of the massive pieces of machinery. For example, the closest one to the group is an industrial sized grape presser. The group will ask for a picture underneath the presser. Then Diana will ask to see the picture first, leaving Tamara under the machinery in the meantime. Head over the operating mechanism and activate it using the winery workers' key, and uhh, it's terrible and hilarious.
That eliminates Tamara Vidal (and completes the Pulp Friction challenge), but there's another option for elimination if you follow up on the hidden Mission Story that's coming next. Either way, the tour keeps moving on. Eventually, the chief winemaker takes you and Diana to the cask room.
Here, Don Yates will make an appearance, and will conclude this Mission Story. Technically this is an opportunity to assassinate him, but don't do that quite yet. Let him give his speech and let Diana leave for the secret meeting with members of a certain organization. Stick around in the cask room and wait for a new Mission Story marker to pop up on a specific guard here.
Bonus Mission Story: Closing Statement
In the cask room, eavesdrop on the guard as he speaks to the sommelier. You have an opportunity to pose as the sommelier who needs to deliver the super vintage wine requested by Don Yates himself. Before you do anything else, head over to the workshop area adjacent to the cask room and pick up the tier 1 access dongle on the table next to the winery worker.
Go back to the cask room and drop down into the vent shafts below. Use your camera to hack into the vents that lead into the sommelier's room. Find a way to knock out the sommelier and his assistant, then change into the sommelier's outfit. If you listened to the conversation they were having, they mentioned the keypad code to access the vintage wine is the same as the year World War II ended--1945, which is also the year of the wine itself. Pick up the wine and head back to the cask room.
The guard will then escort you to the secret meeting Don Yates and Diana are attending. There is a frisk ahead so make sure you drop illegal items at this point. Agent 47 gets to play sommelier and present the wine to the people of the meeting and goes into depth about tasting notes and wine history--who knew he was a somm himself.
Tensions are high at this point, but wait for the meeting to conclude. If you didn't kill Tamara yet, something will happen during this meeting that'll take care of her without you having to lift a finger (it also completes the Murder By Proxy challenge).
You now have 10 minutes to save Diana since she's being held hostage. A good option is to head out of the meeting at the far left end of the room, which also unlocks a shortcut. You'll be trespassing, but an unsuspecting guard is ahead--knock him out and take his outfit. Take a look around the house for a pipe that lets you climb to the roof. Once you're up there, look for a balcony that a guard is using to watch over the winery, this connects to the room Diana is being held in. Knock out all the guards in the vicinity, then talk to Diana.
With a guard uniform on, no one will suspect you when Yates arrives. Watch this series of events play out, then wait for Diana to make her move. Once she does, act fast in taking out Yates' guards. Finish off Yates and hide the body. Afterward, Diana will ask you to disguise yourself appropriately--take a look at the coat rack right next to the bed in this room and put on this classic outfit.
You'll have to sneak out of the estate's premises but it's fairly easy to duck, take cover, and sprint out of sight. Make sure you're heading to where Diana tells you to go--you can check by using your vision to see where Diana's blue outline is located. Approach her to conclude the mission.
Log in to comment