Dubai
Last Edited: May 25, 2021 07:03 PM PDT
Below is our guide detailing all the Mission Story opportunities in Hitman 3's opening Dubai mission. Your targets are Marcus Stuyvesant and Marcus Ingram.
(In)Security
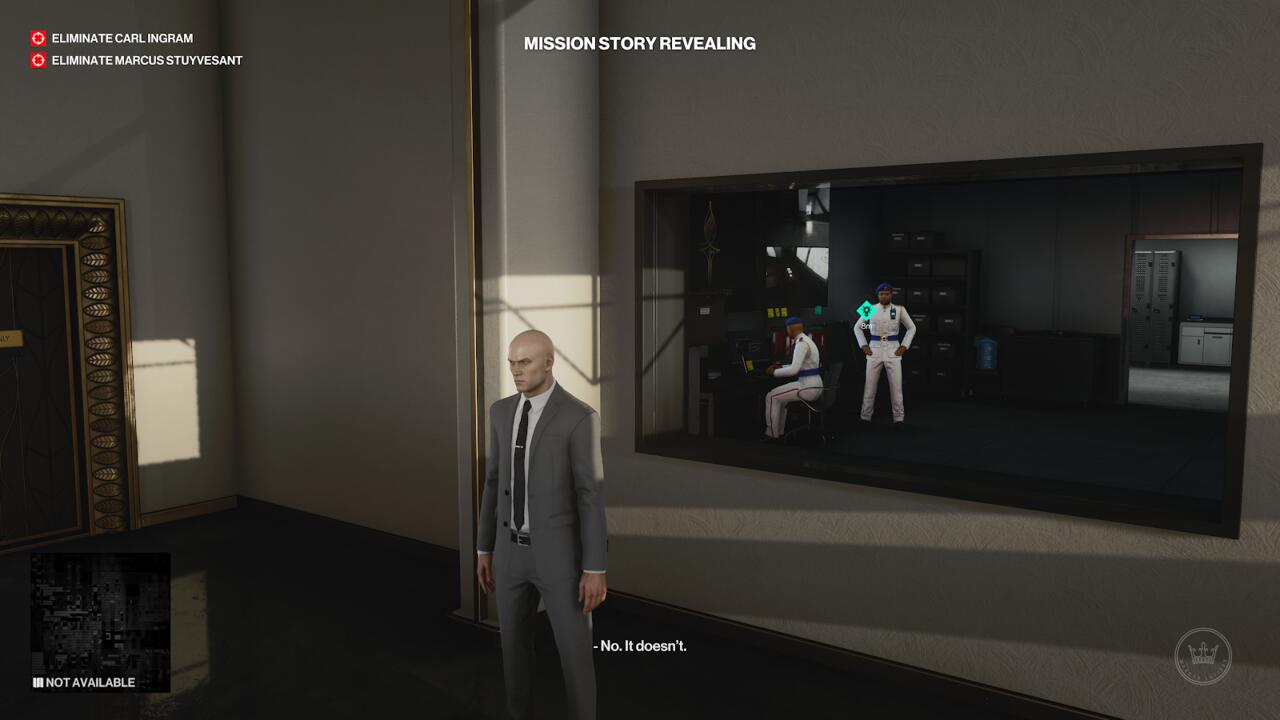
This one grants you access to eliminate Marcus Stuyvesant cleanly. The best way to go about this is to head to your first marker, which leads you through the main bar and upstairs near the security room; stand nearby and eavesdrop on the Mission Story reveal.
Your next best move is to go to the opposite end of this walkway and subdue the guard who is around the corner when out of sight during his patrol pattern. He walks between one guard overlooking the party, then to the secluded corner. Knock him out and steal his outfit; this will grant you access to all the necessary areas and it's the disguise you need to carry out the objective.
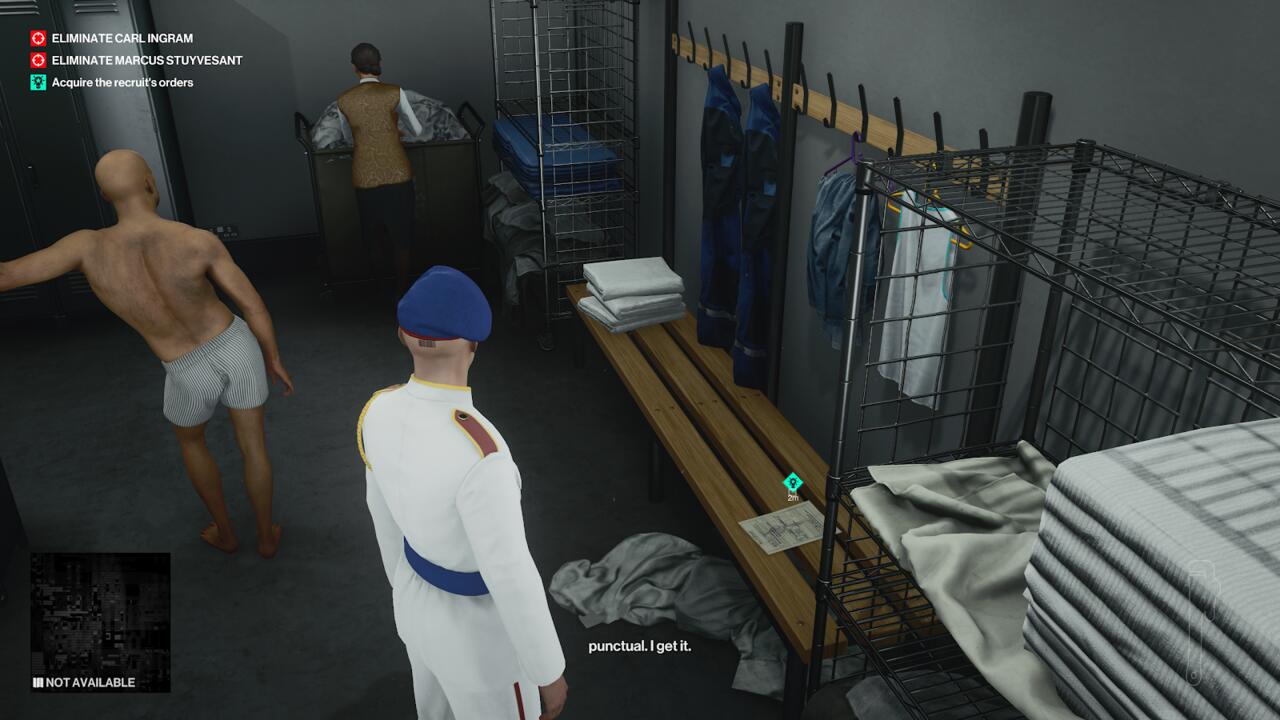
Make your way back to the bar and go through the staff area door and make your way to the locker room where the recruit's orders are. A guard will be talking to the laundry lady and you can easily sneak behind him to snatch the orders.
Head back to the security room from earlier and report for duty. Here, your target Marcus Stuyvesant will show up. Follow him through the entire path he leads you. An additional guard will accompany you but pay him no mind. You'll eventually be outside the building where they'll ask you to hit targets with throwing knives. Hit the targets and let things play out. The additional guard will eventually leave, which means it'll just be you and Marcus. At this point, your method of assassination is up to you, but pushing him off the ledge completes a challenge.
Bird Of Prey
To get to Carl Ingram, you'll want to follow this Mission Story. When you activate this one, follow the marker and eavesdrop on a conversation between Zana Kazem and a woman in a yellow Hanfu robe. Afterward, follow Kazem as he walks to the grassy smoking area across the way--he'll get into a spat with another woman and he'll then walk to a more secluded part of this area out of anyone's sight. This is the perfect opportunity to knock him out and take his disguise. You can also hide his body in tall grass here.

Be sure to drop any illegal items at this point. Head through security where you first found Kazem and get frisked. Talk with the lady Kazem was speaking to earlier (she won't even notice you're a different person); follow her and you'll be in a meeting room with guards. Take the open seat and wait for Ingram to show up. Let the dialogue between you and Ingram play out. Then seek out the target he asks you to incapacitate.
You'll find the target down by the main area where most people are partying. Your best option is to wait by the white-tabled bar in this area (not the main bar from earlier) and eavesdrop on him asking the bartender for information. Approach and talk to him; you'll say you have the info he needs, and he'll start following you. Take him to a secluded area and knock him out--the bathroom near the smoking area where you knocked Kazem is a good candidate. Take a photo of the body and report back to the lady that escorted you to your meeting with Ingram.
Follow her, and after a long walk to the upstairs penthouse, you'll meet again with Ingram. Guards will still accompany him in his private quarters, but wait for him to walk into his second room, and during this dialogue sequence, walk outside to the balcony and Ingram will follow. Here, you can kill him without guards noticing.
It's also an opportunity to kill Ingram using his oil rig model for a challenge, but you'll have to distract one of the guards if you want to get away clean.
How The Mighty Fall
This Mission Story will get you both Stuyvesant and Ingram in one shot. You'll have to go through staff areas, which you can access through a keypad-locked door toward the back of the main party area. You'll get the keypad code over comms. If you don't already have a disguise, you can knock out one of the staffers in this area and hide the body. If you have the staff area entry point unlocked, you can bypass all this, though. Follow the quest markers and you'll find yourself in a room with massive windows and two people smoking. Wait for them to leave, then scan the windows with your camera to open them.
Jump out the window to start scaling the side of the building. Shimmy over toward the right side and climb upward. This will take you to a hostile area on the upper floor. There's one guard down this hallway that you can easily approach in the middle of his patrol pattern. Take his disguise and hide the body in a nearby bathroom. Enter the server room and access the terminal, then pull one of the server racks. It doesn't matter which one--whichever option you choose will activate a lockdown.
Hide in a far corner behind a server rack away from the doors--two guards will show up but won't thoroughly search the area. To reactivate the server room, go outside and knock out the male janitor on this floor and hide his body while his coworker isn't looking--he carries the maintenance card you need. Back in the server room, swipe the card and pay attention to the screens on each server rack. Pull the rack from the server rack that has a screen showing yellow text.
You can now access the main terminal. Of your options, "Re-arrange Meetings" gets Stuyvesant and Ingram to meet, "Open Elevator Doors" gives you another exit point, "Disable Cameras" does just that, and "Deposit Emergency Funds" makes gold bars fall out of a vending machine somewhere (which is for another assassination challenge).
Since you have a guard outfit on, you can waltz your way upstairs without a problem--there's a staircase across the other end of the floor you're on, which is the same path as the Bird Of Prey Mission Story. You can follow Stuyvesant or run up to the penthouse room where Ingram will be waiting. Once they're in the penthouse suite together, you'll be able to initiate a room lockdown to seal off anyone else from entering--the switch will be marked on your UI. Kill both targets however you want.
You can let Lucas Grey finish his speech to them, or get the timing right to drop a chandelier on them to complete a challenge, too.
Previous
Hitman 3 Walkthrough, Guides, And Tips Overview
Log in to comment