After completing Hitman 3's third mission, you'll soon discover that Agent 47 is no longer waiting for his former employers at the ICA to come to him. Ready to expose the agency that used his lethal skills to help shape the world, 47's next stop is the port town of Chongqing, which is home to ICA’s China branch. Here are all of Chongqing’s assassination challenges and everything you need to do to complete them.
Door Codes Reference
For your reference, we’ve included all the door codes in this mission to make your life easier during subsequent playthroughs. But if it's your first time through, and you’d rather figure them out yourself, then skip this section.
- Container door code to ICA facility entrance – 0118
- ICA Apartment door code – 0118
- Laundromat door code – 0118
- Benchmark lab staircase door code – 2552
- Therapy room door code – 2552
- Arcade door code – 2552
Stick It To The Man
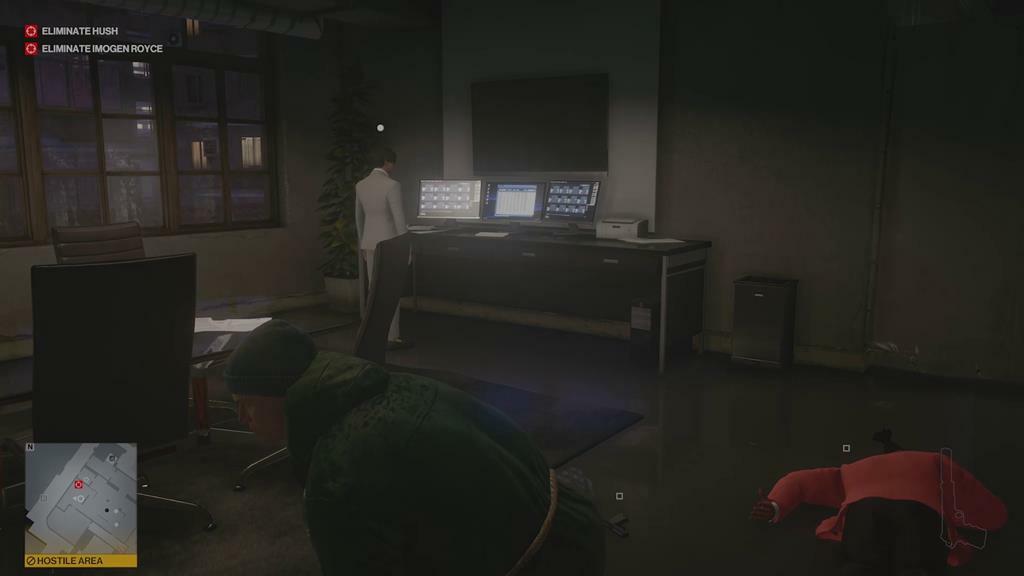
Hush has an ambitious mind control project in development, which he has been testing out on the local homeless populace, leaving left a trail of broken minds scattered across Chonqing. It's time for a little payback as Agent 47 dresses up for an audition. The easiest way to acquire a hobo disguise is to take one off of the vagrant sleeping outside of Hush's secret lab.
Once inside, you'll need to sneak your way up to one of the top two floors that Hush frequents. If you're looking to catch him when he's alone, your best option is to sneak up to the top where his sensory deprivation chair is and take out the scientist and block guard present. You can easily access it from the bathroom where Subject A is by climbing out the window and along the building, or you can sneak in from the opposite side of the building and use code 2552 to open the door.
Whichever path you wind up choosing, you'll get a chance to strangle the life out of Hush and complete the challenge Stick It To The Man in the process.
Mnemonic
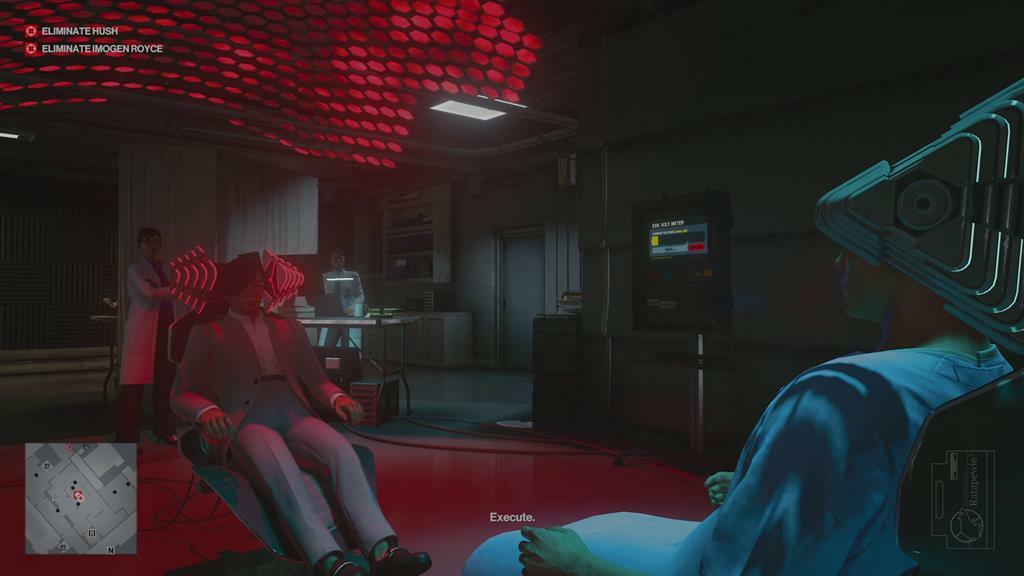
Disguise acquired, the mental confrontation with Hush begins, but 47's mind proves too resilient for him to control. With more power from his machines, Hush believes that he can overpower the assassin, but one of his assistants refuses to follow through with the experiment, fearing that it could result in lethal side-effects.
After the first unsuccessful test, Hush will temporarily retreat to his room for a short break. Once the coast is clear, tail the researcher who runs the equipment when she stops near the bathroom where you obtained the Subject A disguise. Quickly subdue her and hide her body, then wait for Hush to return. Without the scientist to hold his ambition in check, Hush will amp up his device’s power and attempt to mentally overpower 47. At this point, you're in a prime position to prove that even without a gun, 47 is still an exceptionally deadly individual, as his mental fortitude ends with Hush overloading his own brain. Commit to this kill, and you’ll complete the Mnemonic challenge.
Deprivation

If you'd prefer to take Hush out while he's sitting in a different seat, his nearby sensory deprivation chair is just asking to be tampered with. Hush has a rare condition that renders him sensitive to visual stimuli, which requires him to regularly recharge in a specially designed chair.
Once you've obtained a power cell, which can be found by a pile of boxes on the third floor, sneak into Hush's room and insert it into the nearby fuse box.
Hush's chair will then become extra luxurious, lulling him into a false sense of security the next time he sits in it. At this point, you can take care of him in any manner that you want, so long as you kill him while he's in the chair. We took the more indirect route and ran poison through the ventilation equipment outside to kill him, which can earn you the Tasteless, Traceless challenge (more on another way to achieve that one below). Regardless, with this assassination complete, you will finish the Deprivation challenge.
Big Bada Boom / Straight Shot / Bullet Points
Getting Hush and Imogen Royce together involves setting the duo up for a confrontation. As part of ICA's security, drones are patrolling the rooftops of the buildings in Chongqing, and Agent 47 needs to destroy several of them so that he can tap Royce's phone and eventually set up a meeting between her and Hush.
The Mission Story All-Seeing Eyes will lead you to a rooftop where you can grab a sniper rifle and settle in for some target practice, eventually taking out several drones and setting up the meeting between the two ICA employees. If you're having trouble with the sniping part of this assignment, you can also take drones out up close and personal with your silenced pistol, but this will run the risk of nearby security spotting you.
At this point, you have several options for getting rid of Hush and Royce.Watch how they move during their argument to get a chance for a well-placed round to the cranium that completes the Bullet Points challenge, or to test your accuracy with a single shot through both targets to complete the Straight Shot challenge.
You can also complete the Big Bada Boom challenge by firing a bullet into a gas cylinder near Hush and Royce, which is mostly hidden by some debris (spot it with Instinct vision). If you'd prefer to get up close and personal to them, you can navigate the rooftops and hide near the Lotus passageway where they'll meet, eliminating them and completing more of the challenges in the Versatile Assassin challenge list.
A Shock To The System
Royce keeps to a strict patrol of the ICA facility, and there's only one chance to set her up for an electrocution assassination. In the break on Tier 2, you'll spot a water cooler and a set of plugs conveniently next to it. You can grab a screwdriver from inside Royce's lab to tamper with the plugs, although you will have to be careful of the two NPCs in the room.
Those characters can be taken care of with a number of methods. If you hack the glass and activate security mode, you can eliminate them the old-fashioned way and stash their bodies in a nearby cupboard. You can also poison the coolant with emetic poison and send a worker scurrying to the bathroom, or you can turn on the air cooling system to make one of them leave the room.
With that room now empty, make sure that the plugs have been tampered with but don't add water to the deathtrap just yet, or you'll end up accidentally killing an NPC. Go to the analysis room on the same floor and hack all three computers, which will activate a lunch break procedure for the staff. Royce will go looking for her team, and while her back is turned you can puncture the coolant to set up the trap.
Activate the nearby cooling system again, and Royce will then decide to go investigate it. One step into an electrified puddle later and Royce's well-cooked remains will complete the Shock To The System challenge for you.
Medium Rare / Someone Could Hurt Themselves
After the lengthy Story Mission that sees you infiltrate the ICA facility, Imogen Royce will show off her new analysis software that can accurately predict the actions of any of the employees it has logged within its database. Royce won't be in the room for long, though, as she'll resume her patrol of the computer core and leave you to your own devices. From here, you can assassinate Royce with the power of computer-aided prediction software.
The trick here is to fire ICA employees in the correct order. Dismiss Jeremy Bolt first to leave the core safety mechanism unguarded. Next, fire Alicia Reynolds, and she'll disable core safety mechanisms on her way out. Wait for Royce to enter the chamber, and then proceed to fire Sharon Reed. As the computer predicts, Reed performs core maintenance as her final act, but with the safety protocols disabled, this results in Royce being burned alive in the process. Gruesome, but at least it scores you both the Medium Rare and Someone Could Hurt Themselves challenge completions.
Cooling Down / Piano Man
Getting some one-on-one time with Royce can also be tricky, but her revolutionary analysis software proves to be her undoing once again. When you're left alone in the lab. Distract the nearby guard inside the lab, make certain that the glass has been set to dark, and eliminate him. Not only will you have a new disguise that you can use to more easily explore the facility, but you also won’t have to worry about being constantly shadowed.
When Royce returns to the lab to hear your impressions of your software, you can easily assassinate her. Time the firing of Jeremy Bolt properly and Royce will be without her security detail, leaving you alone in the room with her.
The other method available to you is to once again fire an ICA employee while hacking your way around the facility. Fire Bolt again, and when Royce enters the chamber, she'll be without her security.
Make certain that you've grabbed the Tier 3 dongle in Tier 2, which is on the desk of the analyst on the side room that Royce occasionally stops in, and ensure that all the glass in Tier 3 has been darkened so that no one can witness 47 when he gets to work. You'll have a prime opportunity to take care of Royce. In the core, she'll have her back turned when she works on the terminal, or she'll be leaning over the railings to observe the cooling fluids below.
The choice here is yours, as pushing Royce over the railings will complete the Cooling Down challenge, while strangling her with the carbon wire completes the Piano Man challenge.
Venting Some Stress
Outside the break room on Tier 2 is a small room that houses the air conditioning unit. It's easy to tamper with, but the trick here is to ensure that Royce comes to the break room. Using the method outlined in the Shock To The System mission story, get Royce's employees to take an unauthorized break.
Add a lethal poison to the air conditioning unit, or the flask of chloroform found in Tier 3, wait for the employees to leave, and switch the panel on outside the break room before Royce exits. The deadly gas will flood the room, knocking her and anyone who enters the room out until you switch the air conditioning unit off and bank the challenge completion for Venting Some Stress.
Tasteless, Traceless / Hold My Hair
As detailed in the previous mission stories, getting Royce and Hush to be unguarded is easy enough. Once you've unlocked enough gadgets in your career mastery, you can easily cut them off from their security, inject them with one of several poisons available to you and earn the Tasteless, Traceless or Hold My Hair challenge completions.
Log in to comment