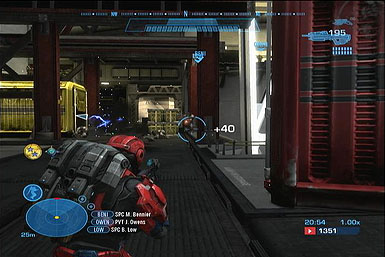
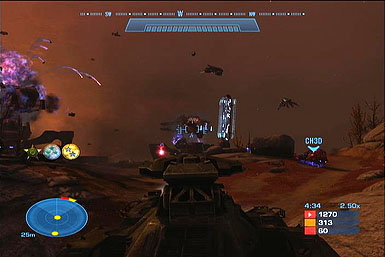
Halo Reach Walkthrough
As the newest member of Noble Team, you'll experience first hand the fall of Reach and learn the secrets that started the Halo trilogy. Our Halo Reach Walkthrough will provide you with an armory of every weapon and vehicle, tips for combating both the Covenant and enemy players, and a full walkthrough through the entire campaign.
As the newest member of Noble Team, you'll experience first hand the fall of Reach and learn the secrets that started the Halo trilogy. Our Halo Reach Game Guide will provide you with an armory of every weapon and vehicle, tips for combating both the Covenant and enemy players, and a full walkthrough through the entire campaign.
- Weapons, Gear, and Vehicles: Learn how to properly arm yourself for both the intense campaign and brutal multiplayer
- Walkthrough: A Full Walkthrough spanning all 10 missions of the Reach campaign
- Xbox 360 Achievements: Boost your Gamerscore with a huge list of Achievements
USNC Weapons
Assault Rifle
This high-capacity automatic rifle can fire up to 32 rounds per magazine before having to reload, but each round does a fairly small amount of damage, and if you attempt to fire for too long you'll also lose a lot of accuracy. In short, small bursts, you can hit enemies a good distance away with the assault rifle, but on higher difficulties, you'll want something that does more damage. On Heroic or above, you can use the assault rifle to take out enemy Grunts, particularly when they're fleeing, drones, who have pretty low health amounts. But mostly, we suggest only retaining this weapon until you can find one more useful.
DMR
The Designated Marksman Rifle--DMR for short--is designed to replace the battle rifle from the previous games. It is powerful at both long and medium range, able to disable a target's shielding with only four shots, and able to instantly eliminate unshielded enemies with a lone headshot. It's perfect for making long distance quick kills.
You can burn through ammo relatively quickly if you use it on tougher enemies or against large groups, but if you can set the terms of an engagement, firing on your foes from a distance and use cover to hide, this will be your best friend for a large portion of the game.
Grenade Launcher
The Grenade Launcher is one of the most powerful weapons in the game. While at first it might only seems like a frag grenade with a clip, its true power comes from its secondary fire ability. The grenades released from the launcher can be detonated manually, allowing you to either make quick explosions or set up traps. The manual detonation also releases an EMP blast that will disable shields and vehicles for a short time. This makes it an incredible weapon for taking out powerful turrets or tanks, and is great for supporting any allies.
Magnum
The pistol was once considered to be a very powerful weapon in the multiplayer version of the original Halo, thanks to its great accuracy and ability to get headshots from a distance with its scope. In Halo 3, however, the scope has been removed (you can zoom in while aiming, but your targeting reticule is removed and you leave the zoom after firing once), and the ammo capacity has been dropped to eight rounds. You can still nab headshots with the pistol, but you probably won't want to use this if you have any better weapons available.
Rocket Launcher
The rocket launcher is a dependable method of dishing out the hurt, especially to enemy vehicles, but the speed of the rockets is a concern; they're fairly slow, if not quite as slow as the fuel rod gun charges seem to be. That said, they pack quite a punch, and this is sure to be a highly desired weapon in multiplayer maps, so learn where they spawn and get used to checking the location every once in a while.
The launcher can only hold two rounds of ammo at a time, making each miss somewhat of a harsh penalty, since it takes a while to reload after firing the weapon. Get your shots on target and make sure they stay there by firing at close range, at least when going after vehicles. In multiplayer, you can fire on vehicles that are stationary without too many problems (perhaps from a distance when you see an enemy about to enter them), or simply use the rocket launcher as an antipersonnel weapon. Its splash damage will be good enough to kill almost anyone if you manage to hit close enough to them. Just remember the old Quake rule: aim at their feet, not at their bodies. That'll increase the likelihood that you'll get them with splash damage, even if you happen to miss them. Don't even bother trying to hit someone unless you can see their feet; i.e. no shooting at people on ridges above you. You'll miss 99% of the time if they move away from you, and you'll simply waste a rocket.
Shotgun
Halo Reach's Shotgun has gone through a big overhaul from its Halo 3 counterpart. The gun's rounds are much stronger and clustered tightly. It can instantly destroy enemies at close range, or damage multiple targets from mid way. It's an excellent choice if you want to fight your enemy head on and a stronger melee weapon--such as the gravity hammer--is not available. It makes for a great secondary firearm to supplement a powerful primary weapon.
Because you'll be more vulnerable the closer you are to an enemy, be sure to only resort to the shotgun when you have ample shielding and health.


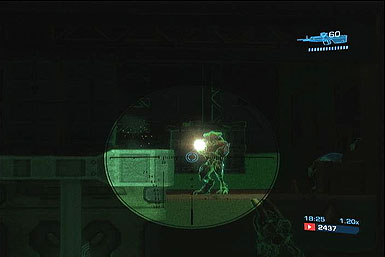
Sniper Rifle
The sniper rifle is a powerful single-shot weapon that's designed to quickly and permanently eliminate foes that are far away from you, although of course it can be used on enemies close to you with devastating results as well.. You can fit four bullets into a clip, and can hold 24 bullets in total. The rate of fire isn't great, but again, in general, this should be a one-shot kill on most enemies.
Headshots are important for most weapons, but with the sniper rifle, you really want to learn how to nab them, especially at long range. On heroic difficulty, anything up to and including a jackal should be a one-hit kill, even if you hit them in the body, but Brutes and hunters will of course require more hits. Low-level Brutes (the blue ones) will still die in one hit from a headshot, but the upper-level Brutes will probably require at least one headshot to knock off their helmets before you can kill them.
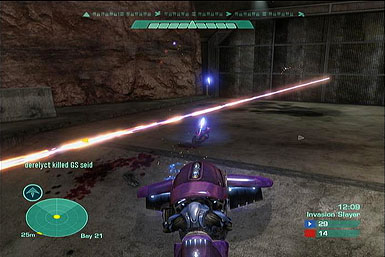
Spartan Laser
When you pull the trigger on the Spartan laser, nothing happens. It'll take five seconds or so for the weapon to charge itself completely; check the aiming reticule, and look for the small arrow to rotate from the bottom to the top. When it does reach the top, a wide and very powerful laser will shoot out, toasting anything in its path. This will be a one-shot kill on any moving target, and will also one-shot most vehicles excepting Wraiths or other high-armor targets; these move so slowly, however, that they'll be easy to shoot twice.
So basically, the Spartan laser is a super-powered beam rifle that requires five seconds to charge. The catch is that your target has to be in your view at the end of that countdown; if someone seems you aiming at them with a Spartan, they're pretty sure to duck under cover, which will waste your shot. You can always just let go of the button to stop the countdown, but that will cause the arrow to revert back to its starting position, meaning that you'll have to charge it all the way up before you can fire again.
The countdown makes the Spartan basically worthless for close-quarters combat, unless you can completely get the drop on an opponent; any decent enemy will close on you when they see the laser in your hands, and will be able to stick you with a grenade or otherwise kill you before you can fire. (In these situations, though, you can always try to use a melee swing; like most big weapons, the Spartan deals a heavy punch in melee combat.) In open maps, though, if you can find a laser (it's predictably rare), you can wreak havoc with it. Try firing it on high-priority targets like the slow-moving flag carrier or a Warthog that's loaded up with your enemies. Since your range is virtually limitless, it's also great for taking out opposing Wraiths or Scorpions that are sitting back and shelling you from afar.
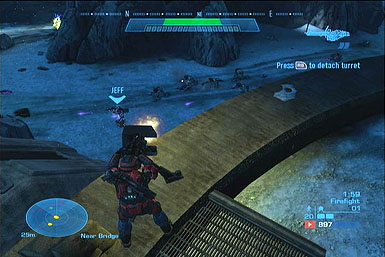
Mounted Machinegun
When you spot a turret in the game world, you're able to use it, sure, but that's for plebeians. Real men gird their loins and rip the damn things right off their moorings, then shove them down their enemy's throats, cleaving their bodies in two.
Well, some of that's correct; you can rip a turret off of its base by pressing RB to use it, then tapping B. Some turrets will also be found on the ground, or in the hands of Brute Chieftans. Using a turret in your hands will let you dish out a lot of power, but it will greatly curtail your ability to move, so you'll be more easy to hit while you wield one. You also won't be able to make a melee attack or throw a grenade until you drop the weapon.
Covenant Weapons
Concussion Rifle
Concussion Rifles serve as the Covenant's counter-part to the USNC's grenade launcher. The Concussion Rifle fires a powerful arc of plasma energy. When it hits the ground, the plasma spreads over an area burst, able to destroy and obliterate closely packed groups of enemies. It is a great weapon for delivering long range mortar shots, or quickly dealing with close range clusters.
Energy Sword
The Energy Sword, long a favorite in close-quarters. When you have this weapon equipped, you can kill pretty much anything in one blow, whether you use it with a melee attack (B button) or attempt to use the charge maneuver that's bound to the right trigger. The charge is most helpful, especially on the intimate, smaller maps, as it'll let you close in on a target before he sees what's coming. Having the energy sword out and in your hand will put an immediate target on your head, so don't be surprised if you suddenly become the center of attention while wielding it.
Fuel Rod Gun
The heaviest weapon in the Covenant arsenal is the fuel rod gun, which acts as a slightly weaker rocket launcher. When fired, the fuel rods quickly accelerate, but they're still somewhat slow and dodgeable while in the air. What's more, they're highly noticeable when they fly, since the projectiles become large and green when they're in the air. Most enemies will have little trouble dodging them if you fire at range.
That, and the fact that the FRG can hold five rounds of ammo in a clip, makes it best used as an up-close anti-personnel weapon. The splash damage is there, but not as big as the rocket launcher, making you less likely to hit yourself with it, and you can fire the rounds fairly rapidly, letting you finish off wounded foes without a problem. The slow speed of the projectiles makes it more difficult to take out enemy vehicles with the FRG, but if you're close enough or approaching from behind, it's quite doable.

Gravity Hammer
The gravity hammer is a rare weapon, and only dropped by powerful Brute chieftans. If you manage to pick one up, though, you can swing it into the ground by tapping the right trigger, which will cause area-of-effect damage to all nearby foes. If you manage to hit an opponent with a swing, you'll usually instantly kill them, although of course high-level Brutes and hunters will be the exception to this. You can also swing the hammer into the ground and jump immediately before you do so to increase your jump height slightly.
Focus Rifle
The Focus Rifle is the pre-cursor to the Covenant's beam rifle. It fires a powerful, consistent beam that rapidly damages the target. The Focus rifle is built for shear suppressant fire rather than instant damage.
It is ideal for taking out heavily armored enemies that have very little momentum, such as Hunters and Brute Chieftains.
Needle Rifle
A long range version of the popular needler. It combines the functionalities of the needler's explosive force along with the DMR's range. As few as six shots from the Needle Rifle are enough to take out an enemy's shielding, and for three direct needles to cause a super combine detonation.
The Needle Rifle is good for sniping, allowing it to instantly kill unshielded enemies with a lone headshot. Its additional improved rate of fire makes it an ideal rifle for those who require less precision.
Needler
The needler is back in Halo Reach, and as powerful as ever, at least in the campaign mode. The needler fires multiple small explosive strikes that will home in on a target if fired in their general direction. Spikes do a bit of damage on impact, but then explode a few seconds later, causing a great deal more damage to the target and anyone nearby. One of the prime benefits of this method of firing is that you can unload an entire clip of needles pretty rapidly, letting you fire on a Brute before ducking back under cover. Both the rate of fire and reload rate are very fast here, meaning that you can unload a lot of damage pretty quickly, but that you'll run out of ammo pretty quickly.
The needler is a bit more useful in singleplayer than in multiplayer, since your enemies will be more likely to stand still and let you shoot them, while in multiplayer you will probably only want to use this in close-range combat against enemies that have nowhere to hide, which is a situation that won't occur very often. Note also that the needles will burn themselves out after a hundred feet or so, making this weapon useless at long ranges.
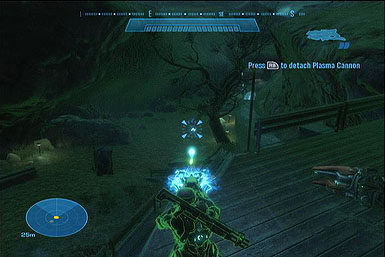
Plasma Launcher
The Plasma Launcher is able to charge and fire up to four powerful explosive bolts. These bolts have limited tracking and stick to the intended target. After a short period of time, they will detonate and damage the victim. The Plasma Launcher is good for situations that require a grenade type explosion, but also a more direct firing jujectrory.
Plasma Pistol
The plasma pistol is the most basic weapon in the Covenant armory, but it's still going to be more worthwhile to you than the default USNC pistol. The plasma pistol fires energy bolts at your enemies, and more rapidly than the pistol does. Each individual bolt does a light amount of damage, making this default firing method useful only against weak enemies like Grunts.
However, if you press and hold the trigger, you can charge the plasma pistol and fire a supercharged burst of energy. This can be used to instantly drop the shields on a target, allowing you to finish them off by switching to another, more powerful weapon, like the battle rifle. This attack has light homing capabilities, so it'll usually hit an enemy unless they actually try to dodge away from it. You can keep the trigger depressed as long as you like, but the longer you hold it down, the more energy you'll drain from the battery reserves. This doesn't result in a super-charged weapon; it just means that you lose ammo. Each charged shot automatically drains 10 ammo from the weapon anyway, so if you can't fire these charged shots quickly, you'll probably only manage to get a couple of them off before running out of ammo.
Plasma Repeater
The Plasma Repeater has an inverted heat scheme. It begins with poor acceracy, but becomes much more deadly accurate as the clip empties and heat builds. When the Repeater is vented, its precision will began to lower. This makes it an ideal weapon for takening on enemies that require constant attention, rather than those that are quickly deadlt with single powerful shots.
Plasma Rifle
Another iconic Halo weapon, the Plasma Rifle will be a trusty weapon in the hands of any soldier. It rapidly fires plasma bolts at your targets, causing their shields to fall just as rapidly. It won't do as much damage against flesh as a bullet-based weapon would, but it'll still finish them off quickly, especially if you can find a pair of them to dual-wield. Just keep in mind that firing them for too long will cause them to overheat, and you'll have to wait a few seconds for them to cool down before you can fire again, leaving you quite vulnerable.
Spiker
The Brute spiker is something of a baby version of the Brute shot, at least in appearance; it has the same curved blade on the underside. However, it fires in a much different manner. Instead of firing grenades, it fires spikes which pierce your foes and deal damage. It fires rapidly, and can be dual-wielded, making it the Covenant counterpart to the USNC submachinegun, and it has enough rounds in a clip (40) to allow it to be fired for five or six straight seconds without needing to be reloaded. It's a decent weapon, but requires you to be pretty close to your targets to hit them, due to the spread of gunfire.
Plasma Turret
When you spot a turret in the game world, you're able to use it, sure, but that's for plebians. Real men gird their loins and rip the damn things right off their moorings, then shove them down their enemy's throats, cleaving their bodies in two.
Well, some of that's correct; you can rip a turret off of its base by pressing RB to use it, then tapping B. Some turrets will also be found on the ground, or in the hands of Brute Chieftans. Using a turret in your hands will let you dish out a lot of power, but it will greatly curtail your ability to move, so you'll be more easy to hit while you wield one. You also won't be able to make a melee attack or throw a grenade until you drop the weapon.
Equipment
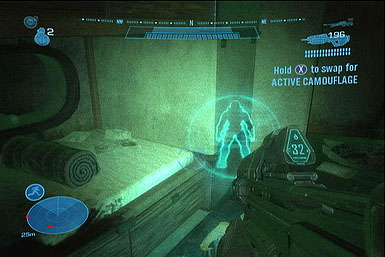
Active Camouflage
Active Camouflage provides you with a light-bending cloaking device. When you activate cloaking, you'll have 20 seconds or so of near-invisibility. In the campaign, enemies won't react to your presence, but a faint Predator effect will still be present in multiplayer. Firing a weapon will partially reduce the amount of invisibility that you possess.
It also has a built in radar jammer, concealing you from the enemy's radar. However, to balance out the camo ability, your own radar also becomes jammed and audio will be great hampered. You'll need to be extra perceptive when opting for this armor ability.
Armor Lock
Armor Lock will temporarily make you invincible, allowing you to withstand any enemy assualt. After the lock is released, an EMP wave will fire, removing any grenades stuck to you and pushing back nearby foes. To counter the lock's defensive advantage, you will become immobile while in this state.
Armor lock is best used when supported by a squad of allies. You can provide a quick distraction, drawing enemy fire away from your comrades, or rely on the EMP burst to push back enemies. It is far less practical when attacking solo.
Drop Shield
The Drop Shield serves as a large barrier that will block or deflect nearly every projectile. It however can be penetrated by enemies simply walking into the bubble itself. Allied forces in the drop shield's bubble will regenerate health while inside.
The Drop Shield is great for stopping long distance enemies, such as snipers, or quickly healing wounds. It is much less practical during a close range firefight, as enemies can simply walk passed the barrier.
Evade
Evade allows you to quickly avoid an enemy assault or quickly roll. This ability is great for breaking an enemy's tracking or lock on, and also getting the drop on your foe.
The Evade armor upgrade is not available during the campaign, as it is an Elite exclusive. However, during multiplayer, it is under free use for Spartans.
Hologram
The Hologram produces a copy of yourself that will run in a straight line. After the Hologram suffers enough damage, or your energy meter depletes, it will shut down and disappear.
Hologram is great fro the campaign, as it will distract any foes, leaving you free to follow up with a surprise attack. It has much more limited uses in multiplayer, where human players will either catch on to the distraction after a few shots, or ignore the decoy all together.
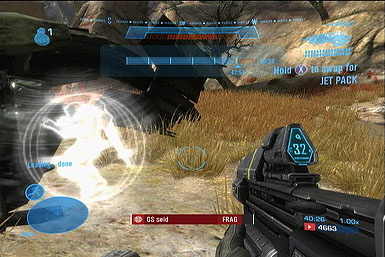
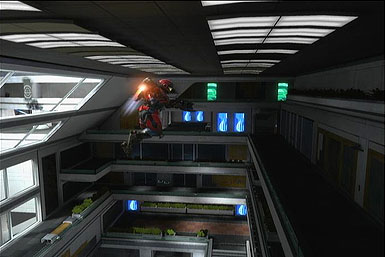
Jet Pack
The Jet Pack will enable you to fly over long distances or quickly make short bursts. It's a great ability for evading powerful attacks or getting a height advantage against your enemy.
There are many parts of the campaign that will require manning a jet pack, from crossing barriers to navigating structures.
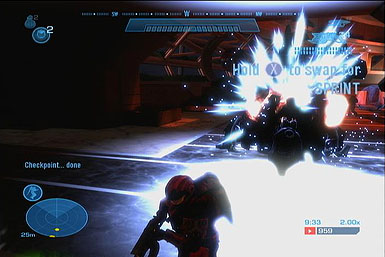
Sprint
Sprint allow you to move at increased speeds, however during so you will be unable to fire. It's best used to either quickly enter the battlefield, or quickly escape to cover. It has limited use as an actual combat strategy.
Vehicles
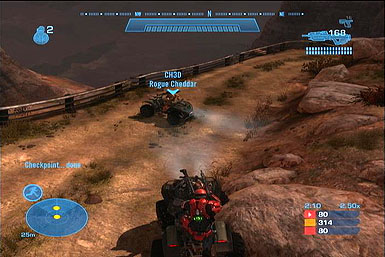
Mongoose
The Mongoose is a small two-seater ATV that features no weapons and little armor for the driver or passenger. With no weapons, this is basically useful only for getting to where you want, but it does this faster than any other ground vehicle. The passenger can still fire their weapons, but it's difficult to aim while bobbing up and down.
Warthog
The Warthog is the iconic vehicle of the Halo franchise, and as such will see near-constant use during your time in Halo Reach. It's hardy and comes in a few different configurations for your pleasure.
Driving the Warthog can be a tricky proposition, since it takes air easily and has a tendency to flip with little provocation. If it does start flipping, you can wait and see if it rights itself, but it will often land upside down, forcing you to get out and flip it over again before you can use it.
For most of the single-player campaign, you want to be driving the Warthog instead of taking the gunner's position. You can drive well, theoretically, but the AI Marines are terrible at driving, especially during combat. On the other hand, they're ace shots with the turret, so they'll be much better at shooting it than you'll ever be.
Scorpion
Ah, the Scorpion. This hulking tank is painfully slow, but equally painful to your enemies when they get hit by its shell. The shells here are highly explosive and accurate at long range, but they do take a second to hit their target, so will need to lead distant foes. That said, the ability to hit pretty much anything at any range is obviously a powerful one.
There's room for five passengers here, including four seats above the treads and one gunner, but you shouldn't expect people to climb aboard in multiplayer unless they get to man the turret, as you'll probably be moving at about walking speed and passengers are totally exposed to enemy fire. The turret can only be fired by a second passenger who rides in your vehicle.
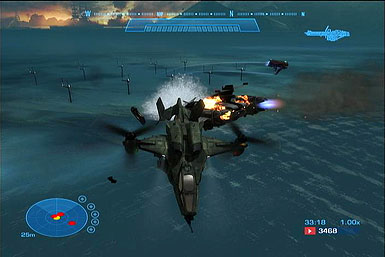
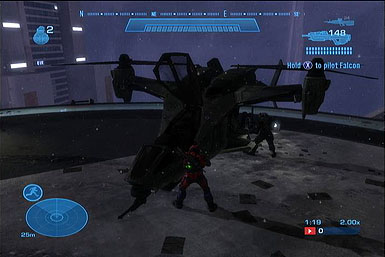
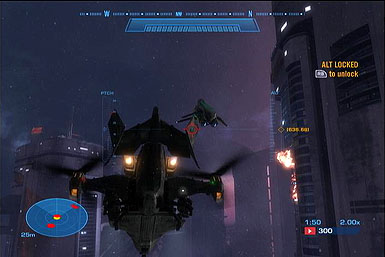
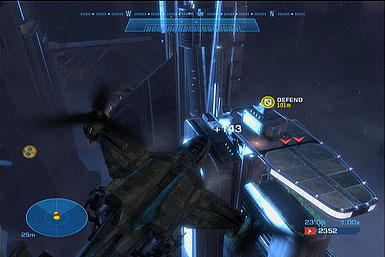
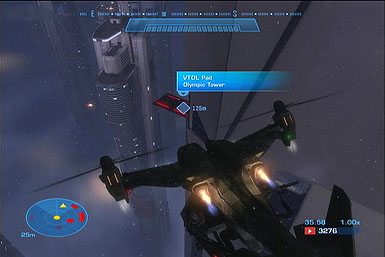
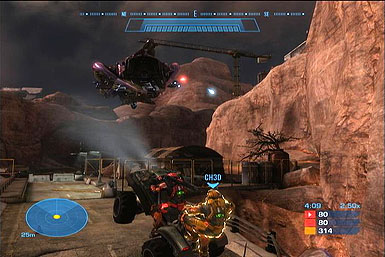
Falcon
The Falcon's serve as the USNC's main form of Ariel transportation. During the campaign you'll mostly ride as a passenger or gunman. The falcon's mounted machine guns are fast and power, making them great for taking out ground based enemies and turrets. They are less ideal for taking on other nimble flying craft, such as the Banshee, but can still provide adequate suppressant firepower.
During one mission of the campaign and often during multi-player, you'll be given full access to the cockpit. Its frontal munitions are excellent for destroying any enemy opposition. Though it isn't a very maneuverable aircraft, the Falcon's gunman support allows it survivability and transportation to the heart of an enemy stronghold.
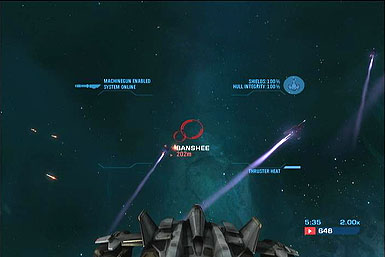
Sabre
The Sabre is the USNC's new spacecraft. Its powerful missiles and turrets are good for destroying an array of Covenant aircraft, from Banshee to heavy Cruiser. You will only have access to the Sabre during Halo Reach's campaign, and therefore will not require any strategies for a multi-player setting.
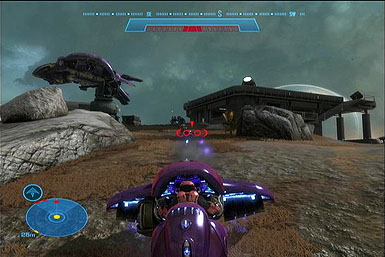
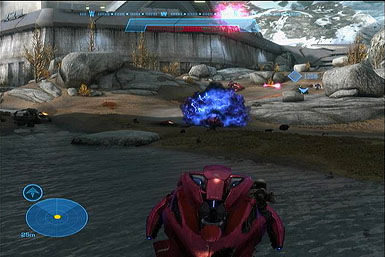
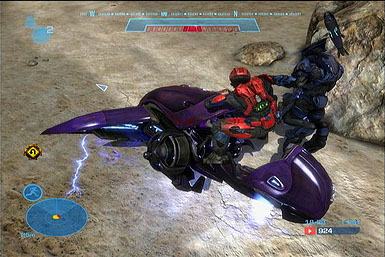
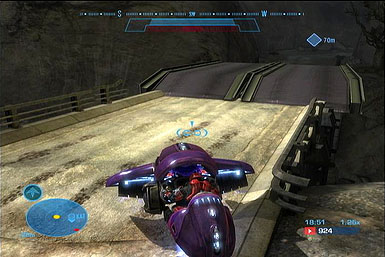
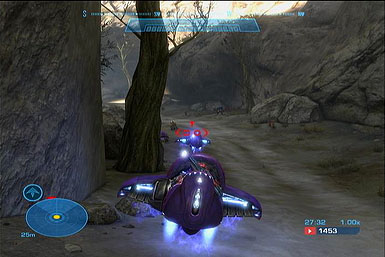
Ghost
This small, one-passenger craft is a handy tool, but you probably won't find unmanned Ghosts very often. When you do climb into one, you can use it to move a bit faster, take a bit more damage, and fire on your enemies, so you're basically just a bit more enhanced in your combat capabilities than you would be on foot.
That said, the Ghost is a fun vehicle when you can get in it, as it's quick to move and can deal good damage with its dual plasma cannons. You can tap the left trigger for a burst of speed, which is handy if an enemy is directly in front of you and you want to run them down. Just be careful, as the Ghost is prone to tipping on bumpy ground.
Revenant
The Revenant acts as a link between the sleek Ghost and massive Wraith. The Revenant is a two seated assault carriage mounted with a deadly light plasma mortar. This allows for maneuverability while still packing a punch. The Revenant is ideal for bringing heavy fire power where a Wraith or Scorpion would be too cumbersome.
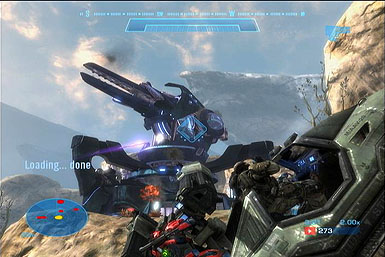
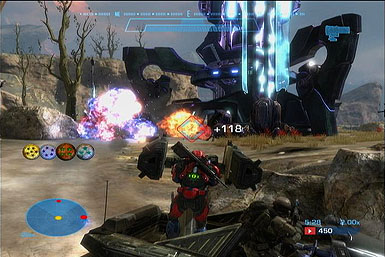
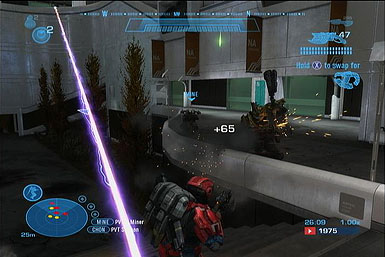
Wraith
The Covenant's heavy tank is the Wraith. Taking out a Wraith is a tall order, as the presence of a turret on their fronts makes that very difficult. In the campaign, you'll usually have access to a turreted Warthog or another long-range vehicle that you can use to take out a Wraith, but if you don't, you might want to try sniping out the turret gunner (he's vulnerable to headshots), then driving a quick vehicle up close and hopping aboard to grenade the Wraith.
Wraiths you see will pack mortars that fire huge bursts of energy at extremely long ranges. These move very slowly, in an arcing manner, so you should be able to see them and dodge them when you're at a distance. As you get closer, though, these mortars get progressively more deadly, since they can be fired at very close range and will impact pretty much instantly.
On Heroic difficulty or higher, a single mortar hit anywhere near you will instantly kill you, and they can hit even quick vehicles pretty accurately if you're driving straight towards them. Try to approach at an angle, then, and if possible get on their rear side, where you can grab onto their back sides and throw a grenade into the engine without having to deal with the turret.
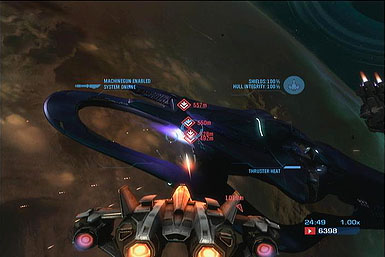
Banshee
The ever-popular Banshee returns in Halo Reach, and is equipped with a homing missile. It doesn't seem to do as much damage as the homing missiles on the Hornet, but still, it'll help you out in those wild dogfights.
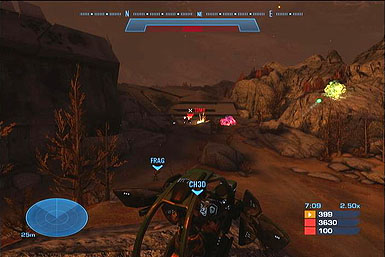
Enemies
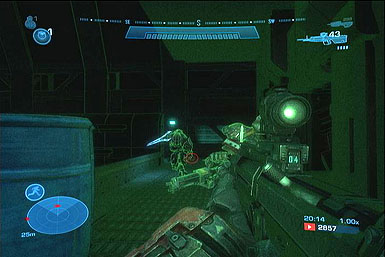
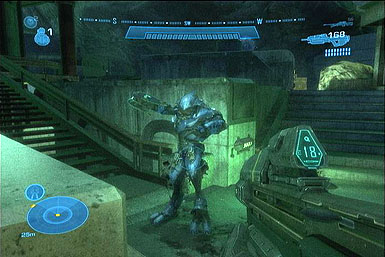
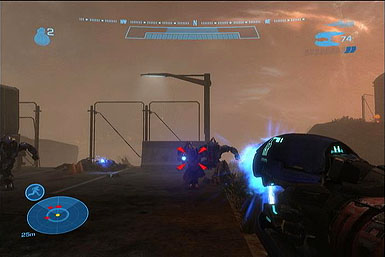
Elite
The Elites are the most common enemies within the camp again. They serve as the Covenant's squad leaders, preventing lower level Grunts from fleeing and keeping Brutes in check. Killing off the Elites will break down the cohesion of any enemy force, making the remaining enemies slim pickings.
Elites themselves use a large variety of weapons, including plasma pistols, rifles, and the deadly energy sword. Elites favor two armor upgrades in particular: Active Camouflage and Evade, both of which will help them avoid danger and move swiftly. You'll need to diversify your tactics in order to match all of their possible weapon combinations.
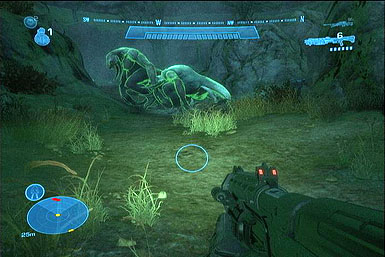
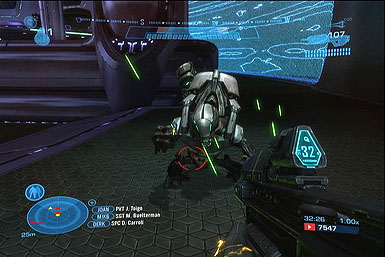
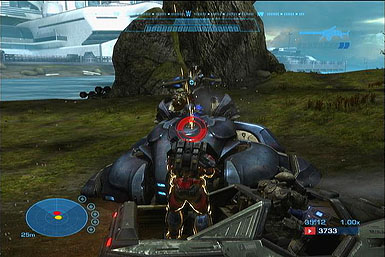
Hunter
Hunters always appear in pairs, and attempt to fire on you with their massive green lasers before they close in for the kill with their melee attacks. Hunters are tough and incredibly well-armored, making them difficult foes to bring down.
The best way to kill a hunter is to attack it from the back. If you get close to it, it will start to swing its fists at you. Strafe around it as best you can and unload a shot to its unprotected backside (or stick a grenade on there). Just be careful, though, as they often will attack backwards over their heads in retaliation.
If you find that you truly can't take down a Hunter, you can always run away. This probably won't work on the first encounter, but they don't seem to pursue you if you run from them after you encounter them the second time during the campaign.
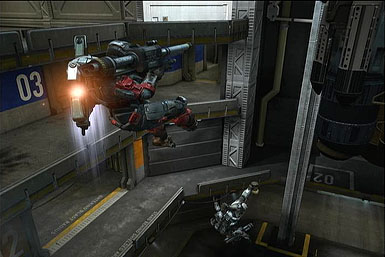
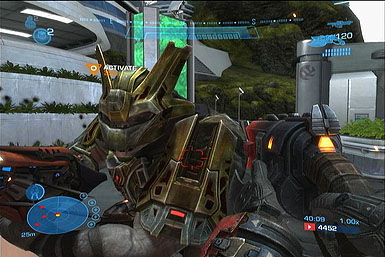
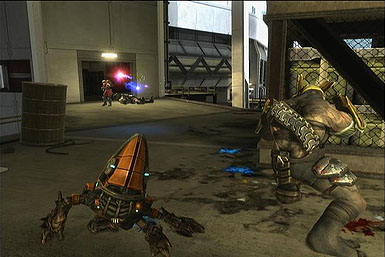
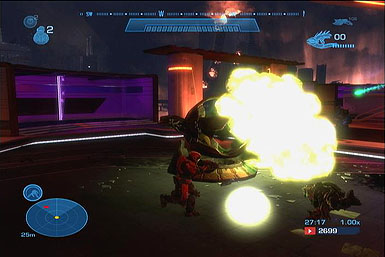
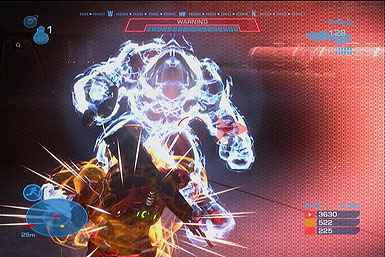
Brute
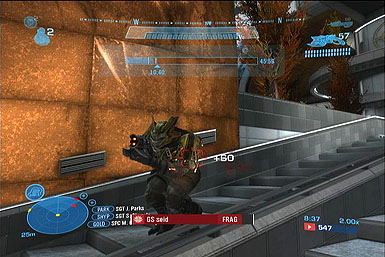
Although Brutes will possess a wide variety of weaponry, they all have one thing in common: body armor that will protect them from damage until it's removed. You need to knock this armor off (preferably with plasma-based weapons), then finish off the meat inside (preferably with bullets). One weapon in particular is great at taking down Brutes: the needler. If you can fire off a clip at most Brutes, they'll die right quick. Grenades also work well, especially the varieties that can stick onto your opponents, but then again, most Brutes will be good about diving away from your grenades.
There are a few different varieties of Brutes, from the lowliest (usually clad in blue armor) to the toughest chieftans (armored with yellow plating). The lower ranks will often be found commaning squads of Grunts; if you can kill them, then their Grunt soldiers will often flee in disarray. Mid-level Brutes will usually be found in groups, and will be a formidable challenge; these groups are when you want to bust out your grenades or explosive weapons.
The chieftans are a breed apart; their yellow armor will prevent you from sticking plasma or Brute grenades onto them (they'll bounce right off), and they'll often wield powerful weapons like the gravity hammer, the fuel rod gun, or dismounted turrets. They'll also usually use the Invincibility equipment just before wading into battle, making them impossible to kill for ten or fifteen seconds or so. Nothing to do then but run away!
Skrimisher
Skirmishers are related to the common Jackal, however they are much more feral and agressive. In contrast to their Jackal kin, the Skirmishers will use their improved speed and health to flank and charge you. They are typically armed with plasma pistols and needlers, making them likely to fight in close quarters. Due to their nature of approaching in close proxcimity, it is wise to counter with your own brutal melee attacks.
Jackal
Jackals are the regulars of the Covenant army, and usually arrive in one of two forms. The rarer form is the sniper. These guys sit back on cliffsides and balconies in support of a Brute/Grunt squad, usually with a beam rifle or a carbine in their hands, and will take potshots at you. It's important for you to identify them and take them out before proceeding into combat with the squad they're attached to. Usually they'll start firing at you as soon as they're alerted to your presence. If you find yourself under fire from above, immediately backtrack to cover and start zooming in on the cliffs above you to find your adversary and shoot them.
More commonly, however, Jackals will appear with power shields in front of them and will fire on you from a narrow slit on the side, usually using a plasma pistol for the task. The shield will protect them from most damage, so killing them can be tough. If you can get close, landing a grenade anywhere near them will cause them to turn away, letting you fire on them. If you're using a precise weapon, however, you can actually aim at the firing hole on the right side (as you're viewing them). It's small, but you can hit it; a sniper rifle shot will kill them if you hit them here, and any other weapon hit will cause them to recoil, momentarily dropping their shields and allowing you to blast them with a headshot.
Drone
Drones are rare, but annoying. These flying buzzards will descend from the skies and attack with plasma pistols more often than not. Individually they're not very difficult to defeat, but since they attack en masse they can dish out a lot of damage in a small amount of time. Their flying capabilities also usually make them immune to grenades unless you get a lucky stick.
In most cases, it's best to let your teammates deal with the Drones, or just attempt to run past them while they're firing at another target. If you do need to fire on them, use a weapon that fires rapidly, like the plasma rifle or the assault rifle.
Grunt
Grunts are the lowbiest of lowbie enemies. These foot soldiers for the Covenant are poorly armored and usually poorly armed, packing plasma pistols, needlers, and plasma grenades. They're also quite cowardly, and will usually run in fear if you happen to kill the Brute that stands guard over their squad.
Grunts come in different colors, which roughly denote their varied strengths. Even on Heroic difficulty, though, you're unlikely to notice any real difference in strength between the various Grunts, although there are rare gray Grunts that have significantly more health than the other types.
Some Grunts can be driven insane by the pressures of combat and will ignite plasma grenades in their hands and rush towards you. Shoot them before they get close, or they'll blow you to pieces.
Engineer
The Engineers are purely defensive enemies, able to provide powerful overshields to their allies. Because the Engineer has no combat abilities and its survival will greatly aid additional Covenant forces, destroying any Engineer should be your top priority.
Winter Contingency
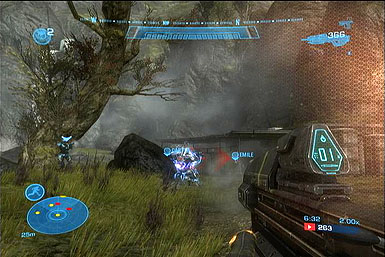
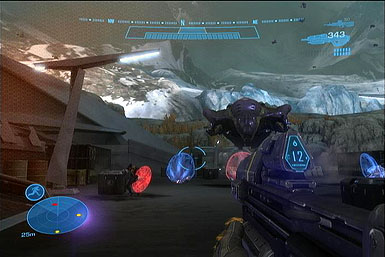
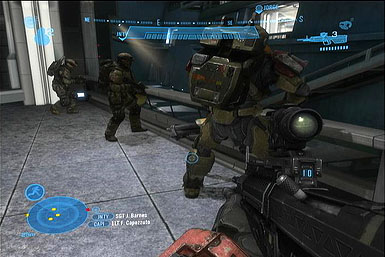
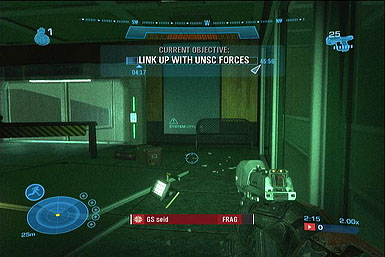
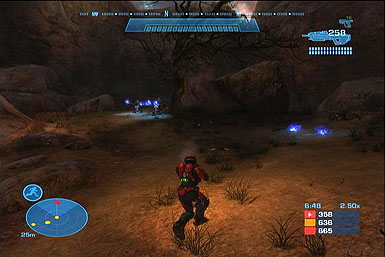
You'll arrive at the settlement in search of rebel insurgences. Follow Carter and the rest of Noble Team and you'll discover a shack where the residence is holding up; Jorge will translate and discover they are famers, not rebels. Continue following your Noble allies and you'll discover the Covenant. They won't notice your presence at first, so be quick and gun down as many as possible.
An array of grunts will storm in from the left. A frag grenade is a good option for destroying them all in one quick swoop. With the drones eliminated, exit the building to the right and proceed up the hill. You'll be ambushed by more grunts and a few elites. The elites can be fairly wily, dodging attacks or absorbing many more shots than the grunts. Coming in close with a melee attack or making headshots is a good way to deal with them.
You may want to consider exchanging your side arm magnum for one of the weapons dropped by the Covenant. Either way, continue passed the shallow river and up the hill to locate a second band of grunts and elites. The same tactics from the first fight will apply here.
Rebels Don't Leave Plasma Burns…
You'll break off with Carter and Jorge from the rest of the squad. There is a truck just up ahead that will help transport you to your next goal. You can either drive or take the passenger seat, while Jorge will always get in the back and mount his Gatling gun.
You'll come to an outpost where the Covenant is hiding. Even though you're currently riding in your truck, you'll need to exit and get a clear shot at the elites inside. The enemies aren't much of an issue, you clean them up and drive on to the next enclave.
You'll come to a river bed where more elites and grunts await. They are also easily taken out with just your assault rifle or a few grenades. At the top of the hill you'll discover a group army soldiers being pinned down by the Covenant.
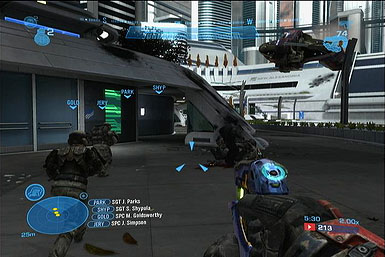
Help support the soldiers by taking out the initial grunts and elites. An enemy drop ship will appear and deliver a second wave of enemies. Use your rifle to destroy these reinforcements. Soon, the USNC will send a falcon to pick you up and reunite with the rest of Noble Team.

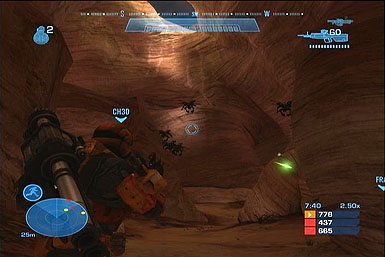
You'll arrive at relay outpost where Emile and Kat are already defending. The Covenant will send both drop ships and banshees to fire at you. It's best to keep in cover and kill what you can from a safe position. There will also be a high concentration of jackals--defensive soldiers with strong shields and long range weapons. If you can manage, be sure to grab a needler from the fallen enemies.
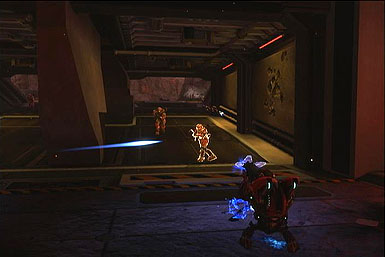
Skeleton Crew
When the heat becomes too much, you'll enter the inside of the outpost. It's pitch black inside, so switch over to night vision. After a brief scene, you and Jorge will split off from the rest of the team. It's a good idea to arm yourself with the DMR sitting on the rack on the right of the entrance. This will give you a distance advantage against the enemies ahead.
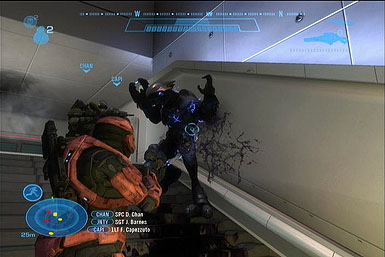
You'll soon come to a control room which powers the base. Jorge will cover you while you take point. The deadliest enemy here is the elite wielding an energy sword. You'll want to kill him from range with your DMR before he can get close. Even with full shielding, two hits from the sword are enough to finish you off. There is a second elite and a few grunts, but they are far less of a threat to worry about.
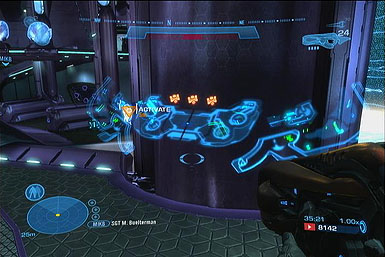
When the coast is clear, enter into the room the Covenant were held up in. Locate the button on the computer console to restore power and finish mission.
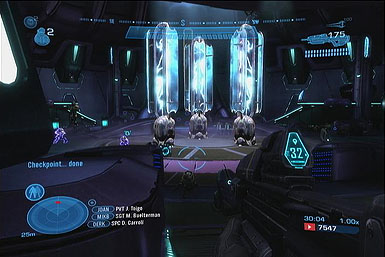
Oni: Sword Base
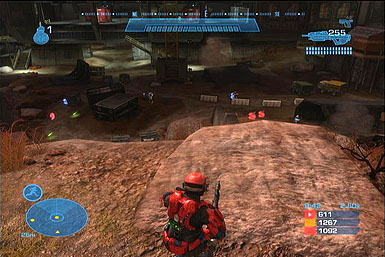
You'll arrive in Sword Base during a Covenant strike. There are a large amount of elites and grunts storming the far end of the base. You have a few options for dealing with them. The most direct is to simply charge them head on. This can be a task as many of the enemies are armed with shields to block most attacks.
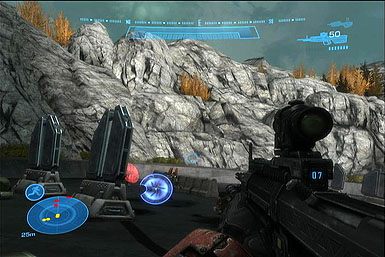
A better option is to sneak to the left ramp and grab the rifle sitting on the balcony. While Kat and the other soldiers distract the enemy, you'll be free to snipe a few key headshots. The enemy isn't totally oblivious and will eventually spot you. That will be the point to clean up with your assault rifle.
Move ahead and you'll come to a bunker. The key item to get here is the target locator, which summons a powerful airstrike. Exit back into the battlefield and you'll see that the Covenant has sent out two wraiths. Use your locator to paint a target on these tanks and lay down a brutal explosion. Alternatively, you can save the charge and destroy the wraiths directly, though that can take some time.
If any enemy vehicle still remains, such as a Ghost, steal it and use it travel much faster to your next objective. Here, you'll need to arm the cannon, which will destroy the enemy drop ships. The control panel is on the building's roof and can be reached by climbing the outter steps. There is a lone elite waiting on top, so be ready to take himout with your rifle or a frag grenade.
Mount up your vehicle again and follow Kat to your next target. You'll be restarting the comm relay and naturally the Covenant will have taken it under their control. The most ruthless enemy here are the jackals on the roofs, armed with needle rifles. They are far less troublesome without their range advantage, so you'll want to make your way to the steps and kill them close range. With the enemy destroyed, activate both the button on the ground level and the second one on the roof to restart the comm.
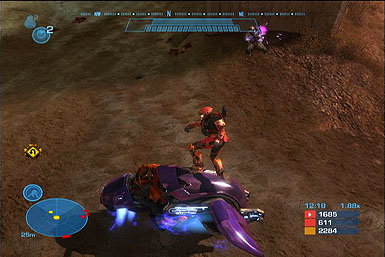
An enemy Revenant will approach to try and stop you. It's actually a better idea to steal this craft rather than destroy it outright. Pilot it back to Sword Base where the enemy has started their invasion. The base is surrounded by a lot of heavy vehicles, so it's a good idea to stop and destroy each individually before moving ahead. Additionally, a hail of missile fire will be raining down at the start of the fight, so avoid traveling on foot. When ready, activate the base's front gate and return inside.
Office of Naval Intelligence
The Covenant has sent out some of their big guns, the hunters, who have a massive defense against most weapons. They have a weak point on their back side, which you should exploit as much as possible.
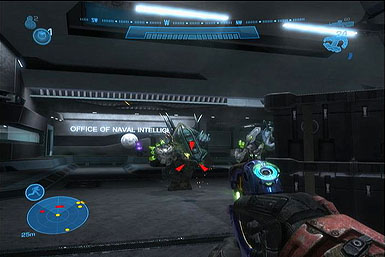
Deeper into the base you'll gain the assistance of the USNC troops who will follow you around. Unlike your allies in Noble Team, these soldiers can easily be picked off by enemies, which prevents them from being useful meat shields.
Move up the steps carefully, as the Covenant will always be to get the drop on you. It's best to arm yourself with both a long range firearm, and a close range weapon. If you still have a energy sword, now is a great time to make use of it.
At the very top, a few of the Covenant drop ships will be giving some initial support, however they will soon dissipate, leaving on the elites to fend from themselves. Take them out to finally end the mission.
Night Fall
…Too Quiet
You'll be aided by Jun during this mission. Both of you are armed with DMRs and sniper rifles, giving you a keen distance advantage against the enemy. Since it's night time, you may want to switch to night vision for most of this mission.
Since the Covenant isn't aware of your arrival, be sure to get in as many sneak attacks as you can. These are silent, instant death kills that won't alert the enemy. In some cases, your foes will be out of range for a melee attack, meaning you'll have to snipe them. This will however alarm the rest of the Covenant.
Follow Jun into the house where you'll begin your ambush. There is a active cammo power on the bottom floor, which will be essential for sneaking up on remaining enemies. Remember, this doesn't make you completely invisible, so enemies will attack once thy can spot you. Since you still have rifles, your best bet is to defeat the elites with headshots, rather than coming in close.
When ready, make your way to the next area. you have two options for clearing this area. The first is to perch up on the round ledge in the center, picking off enemies with your rifle there is even a mounted turret on the opposite end, though pivoting toward the enemy may be a problem. The more direct option is swooping around to the right side where a shot gun rests. This is a powerful weapon that can heavily damage enemies if fired from close range. It's a good way to quickly kill elites once the grunts are dealt with.
Travel along the path and you'll come across some humongous wildlife. The Covenant will keep them distracted, so there is no need to stop and fight. Move ahead and you'll find a group of mercenaries pinned down by elites. They only have basic magnums, making them sitting ducks against their well armed foes. It's best to snipe as many elites as you can before moving in close. There are plenty of health packs, so retreat and heal up before charging again.
It's most important to avoid staying in small rooms for too long, as the enemy will love tossing in frag grenades. One direct blast from these will kill even a full armored Spartan. Stay a good range away and headshot them before they can make an attack. The surviving mercs will join up. follow Jun and the rest of your allies and you'll arrive at the Covenant's main outpost.
The enemy is bunkered inside, so you'll want to do your best to draw them out. As mentioned above, fighting in close quarters can quickly end in your demise. they will even unleash hunters as a last resort. As always, attack them from behind to damage their weak point.
With the Covenant stronghold taken, advance forward You'll come across Covenant manned turrets. It's best to grab the hologram power up and send out a decoy. This will distract the enemy, giving you time to kill of the turret's operator. With the enemy's main offensive force wiped, it's a small matter of destroying the rest of the cannon fodder. Keep moving with Jun and the mission will conclude.
Tip of the Spear
Tempest Perimeter
You'll be teamed with Kat for this mission. You're armed with the DMR and the new grenade launcher. While the name implies standard grenades, there is a secondary fire that sends out an EMP blast. This will be valuable when taking out the turrets ahead.
Without proper cover or a decoy the EMP is your best option for disabling the gear, making it a much easier task destroying their on coming forces. Also be sure to avoid the blasts from the support ships. Your own allies will eventually draw the fire away, but the first few seconds can be hectic.
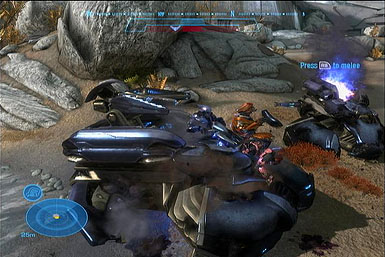
Meet up with the USNC soldiers and grab the warthog. You can choose to either drive or man the guns. Instead of a standard machinegun, the warthog has a mounted missile launcher, which will be a fantastic asset in stopping the enemy stronghold. Start by taking out the ghosts, and then drive to the base it self.
Enter inside and you'll be instructed to destroy the generator. Wait for it to blast out a burst of energy, which will lower the shields for a very short time. This is your opportunity to shoot it with your firarm, which will eventually overload the generator. Either get back in your warthog or steal an enemy ghost. Your goal is to make your way up the hill and across the bridge.
There is a wraith along the road, but it destroying isn't required. Instead, jet passed them and make your way to the next enemy stronghold. Although you'll have a few allies, they won't be much help. Instead, you'll need to use the small amount of cover along with your rifle to blast passed the turrets.
Find the stair case leading to the top of the building. You'll want to move carefully, as several explosive containers are littered around. If you're a good shot, you can catch the enemy in the blast, taking them out instantly. If you are able to grab a hologram power, be sure to make use of it for distracting the elites and jackals.
Move ahead and you'll find a case with ordnance, including a good rifle and a few grenades. Exit the area and you'll arrive at a new ghost. Take it to the next enemy generator. This base is much more fortified than the last, including wraiths and hunters. It's best to destroy as many as you can while still in a vehicle, as there aren't many strong weapons lying around. When the enemies are dealt with, enter inside and destroy the generator by shooting it. A USNC falcon will arrive and take you towards the Covenant Spire.
The Spire
You can destroy enemy vehicles while riding in the flacon's turret. When it drops you off, you'll be assisted by Jorge. There is also some military supplies, the most important being the jetpack. This will allow you to get a height advantage while Jorge distracts the enemy.
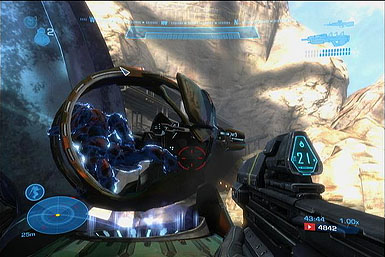
Your priority targets are the turrets, as they can rip through your shields quickly. Make sure they are firing on Jorge, which will allow you time to move towards the gunner and execute them. Once inside the spire, locate one of the two lifts that will take you to the top level.

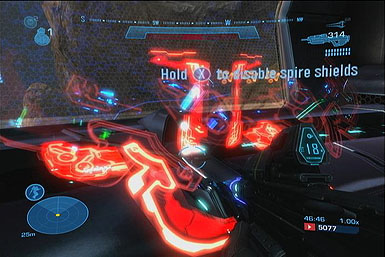
The biggest concern in the spire are the elites armed with energy swords. Use grenades to blast down their shields and then quickly snipe them with a headshot. As long as they can't enter melee range, you'll remain safe. At the highest point, there is a shield console. Use this device to lower the shielding, ending the mission.
Long Night of Solace
First Floor: aliens, Beaches, Secret Launch Stations
You'll be charging towards a USNC base. The Covenant has already set up turrets to block your assault. With the amount of rocks and well placed USNC barriers, you'll have enough cover to easily slip by the grunts and elites that stand in your way.

Be sure to stay with the rest of Noble Team, as your numbers will be the main strength of tearing down the enemy. The interior of the base doesn't have much Covenant resistance, so kill off the few that are inside. you'll come to a dead elite who has dropped his energy sword. It is in your best interest to take it along what you. Travel to your waypoint and you'll take flight in the USNC space fighter, the sabre.
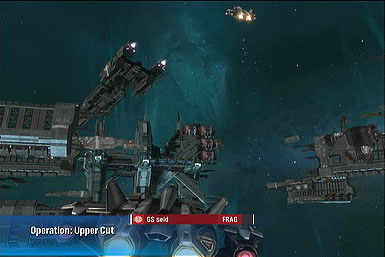
Operation: Upper Cut
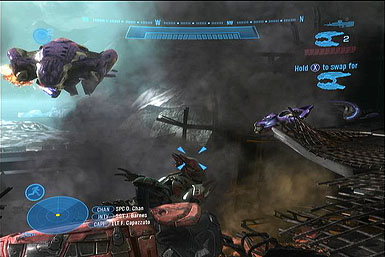
The sabre has both a rapid fire laser and guided missile system. You'll need to change between the two in order to take out various types of enemies. Banshees can be destroyed with just missiles. Seraphs on the other hand must be hit with lasers first, which will lower their shields. An undefended seraph is then open to a missile attack.
Phantoms are heavily armed, so you'll need to dodge them quickly if they lock on with a missile barrage. They can be quickly destroyed with your own lock, however. Eventually, the base will restore their weapon systems, giving you the added boost in destroying the enemy fighters.
You'll be instructed to fly into the base and set course towards an enemy corvette. Start by shooting it's impulse drives. There are four total, and each can be taken out with a locked on missile. A few enemies fighters will appear, so you'll need to clear those out before they are able to call for reinforcements. With your allies by your side, they won't be much of a problem. When ready, enter inside the Covenant cruiser to start the next phase.
And the Horse You Flew In On…
You'll start in a pressurized area, making auto muffled. Move through the generator field below and into the ship itself. Take out the elites guarding the area to help support the USNC. Make your way to the next room where a large cluster of grunts awaits. Your assault rifle is a strong enough weapon for clearing out the area of any threat.
If you grabbed the sword from much earlier in the mission, now is the time to make use of it. Several of the lites will attempt to get in your face, and the energy sword is a great way to deal with them instantly.
Use the console to lower the ship's shields and let more USNC forces in, including Jorge. Arm up with whatever USNC or Covenant weapons available and continue towards the control room.
The enemy won't spot you at first, giving you the first shot to kill key enemies. You should target the elites first, causing havoc among the remaining grunts. There are some energy shields laid around the room, so take advantage of them for cover. Activate the button nearby and return to the hanger.

The Covenant will resort to one final defense. Both your energy sword and the concussion rifle are great for clearing out the hanger of enemy forces. Be sure to quickly kill the grunts will grenades, as they will attempt to suicide bomb you, which mainly results in instant death. With the area secured, press the final button and return to Jorge, finishing the mission.
Exodus
The Devil His Due
You'll be badly hurt and on your own. You only have a simple magnum at the start of this mission, so you'll need to steal any firearm you can.
You'll start by fighting grunts, and many of them will resort to suicide bombing. Shoot them quickly to avoid being caught in their blast. With such low health, any heavy damage will instantly do you in. Meet up with the USNC to defend the remaining humans.
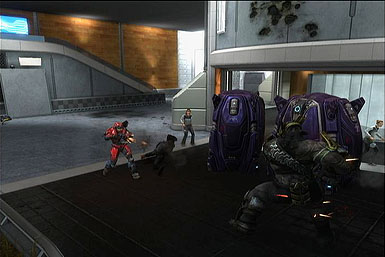
First heal up with a health pack. You'll team up with a unit of USNC soldiers. You'll be introduced to a new enemy, the brutes. These enemies are more durable, but not much strong than the elites you've encountered. The spiker they wield is a powerful weapon that will be useful in your Spartan hands.

You'll soon come to a jammed elevator. Brutes and grunts will storm from the left hand side. It's not required to actually save any of the residence, so concentrate on killing the Covenant. Either way you'll take the elevator, leaving any survivors behind.
Too Close to the Sun
You'll team up with a squad of ODST troopers. Grab a nearby jet pack power up and fly across the platforms ahead. You can split up on either side, though you'll have better protection taking the right path.
The enemy you'll want to take out right away is the brute carrying a gravity hammer. he can instantly kill your allies, which will put you at a grave disadvantage. Grenades are your best solution at destroying his shielding and taking him out.
Move ahead and you'll gain reinforcements for any fallen ODST members. enemy forces are a bit lighter in numbers, but the brutes will be armed with stronger weapons. Since you still have the jet pack, use your height advantage to get the drop on them quickly.
Once inside the next area, use your jet pack to fly to the top floor and leave through the exit. You'll gain a new unit of USNC soldiers. Lead the charge against the jackals and brutes. They are several floors above, so either toss a grenade or use your jet pack to fly onto their level.
The enemy is on the building's ground floor. To easily take them out, move to the upper levels and blast them with your rifle. If one does manage to get close, use your melee attack to quickly subdue them.
Outside are enemy turrets, your goal is to destroy them quickly. Use the pillars around the area to make your way behind them and neutralize the situation. Afterwards, a falcon will arrive and take you to your final objective.
There will be a warthog you can take towards the inactive cannons. This heavy firepower will be key in destroying the enemy wraiths. Move to the cannons themselves and start up the defenses.
There is a rocket launcher nearby, which will be great for taking out the remaining brutes. Finally, move up the building towards the last control panel. Pressing this button will finally conclude your mission goals.
New Alexandria
Fly by Night
For this mission you'll have full access to falcons in order to make your rounds. Your first goal is to find the enemy beacon. Kat will provide support over the intercom, leading you towards the enemy hideout.
The enemy won't spot you at first, so use sneak attacks while you have the chance. There are a few engineers which provide barriers to their allies. Killing off these defensive targets is of the upmost importance.
Make your way passed the grunts and brutes to arrive at the beacon. It can be detonated with a simple push of a button. This will alarm more Covenant, who will be hot on your heels. This is much to worry about, as you'll be backtracking to the exit and to your falcon anyway. You'll be given a brief order from Kat to destroy a few brutes guarding a tower.
If you need to, call in an evac to reset your position. Kat will send you on your next objective of destroying another Covenant base. The landing platform is guarded by turrets, making them your first priority. If you grabbed a strong gun from the previous encounter, even these Gatling guns won't be much of an issue. Enter the inside of the building and take the elevator to the top.

On this level activate the beacon. It however turns out to be a trap and you'll be swarmed by drones. Quickly flee back to the elevator and return to your falcon. Kat will once again give a brief side mission to defend a few USNC soldiers from brutes. Afterwards evac back to the starting area.
You'll be ordered to storm a club where the last Covenant node awaits. There are nearly six hunters inside here, but none of them are necessary to kill. If you move fast enough, they might not even attack. Destroy the last of the Covenant's creations and return once again to the falcon.
Last One Out…Turn Out the Lights
Your last objective is to destroy the turrets scattered about the city. Each will be displayed on your HUD, allowing you easy access to their location. A few shots from the falcon's guns is all that is needed to destroy these turrets. With the defenses breached, descend onto the tower's landing pad to end the mission.
The Package
Torch and Burn
You'll only have a few basic allies during this mission, meaning most of the work will be in your hands. The first Covenant outpost is well protected, so you'll want to use your DMR to snipe whatever you can before moving in close with your rapid fire guns.
You'll gain a powerful scorpion, which will quickly lay waste to the enemy soldiers. It's cannon can also quickly destroy the generators and heavy cannons, making it unneeded to exit your vehicle and disable them on foot.

Take out each enemy vehicle one at a time with your cannon. While your blasts are powerful, they are slow, so be sure that every shot counts. Drive towards Sword Base and lay waste to the final defense. Exit the scorpion and enter the base.
Latchkey
Use your heavy weapons to destroy the elites and move into the bunker below. This is the same room where you fought the hunters during Oni: Sword Base. The grunts here will have access to turrets, but there is otherwise little threat.
Make your way through the remainder of sword base, which is much like the previous mission mentioned above. However, you'll take one final different route, leading to the canyon below.
This Cave is Not a Natural Formation

First arm yourself with powerful weapons. There are grenade launchers, rocket launchers and many automatic weapons. The main base defenses are the auto turrets that will seek out enemies. After they fire too many round, they will cool down and retract. You'll need to manually restart them to regain their support fire.

The Covenant will send wave after wave of enemy. As long as the turrets are kept in shape, the enemy forces won't be too powerful. Carter, Emile and Jun will secure the stronghold's front door, leaving you free to roam and protect the guns. When the enemy launches ghosts, you may want to steal one to quickly clear out any stragglers. Finally, use the control panel to open the base door, ending the mission.
The Pillar of Autumn
Once More unto the Breach

You'll be teamed with Emile for this mission. While he will suggest sneaking, he himself will start charging head on with his shotgun. Allow him distract the enemy while you go arm yourself with some better weapons. There is a rocket launcher on the far right shack, which will be helpful in destroy heavy weapons. When ready, join Emile on a mongoose and stroll to the next objective.

While there are many enemy vehicles along the way, stopping and dealing with them is not needed. In fact, many will be too powerful to take head on.
This Town Isn't Big Enough
You'll have to take on a wraith with little in the way of your own vehicle. If you grabbed that rocket launcher, you'll have a great head start. You can also stall this enemy vehicle by ramming forklifts or trucks straight into it. While these don't have direct weapons, they will allow you to move fater than on foot.
Move up the hill, based th few grunts, and deep into he caves. There will be many drones here that will constantly swarm and fire. You can try charging through and just escaping, but the number of their attacks might be too great. Stop to thin the numbers as much as possible, and then move through the cave. There are skirmishers here, which you'll need to fight n close quarters with melee attacks and a shotgun.
You'll storm ahead near a huge battle between USNC soldiers and Covenant forces. Use your height advantages to snipe off as many foes as possible, before making your way to the battle itself. To make transportation and firepower easier, steal an enemy ghost and wipe up the elites.
Inside the buildings are a number of rifles and grenades you can use to restock your ammo supply. Make your way deeper into the base to come across a squad of elites. Some of them will resort to deadly close range melee attacks, so have your rifle on the ready to snipe them fast.
There will be two hunters as well. As always, get behind them and hit their weakness. Any other place on the body is much more resistant, either taking less or avoiding damage altogether. Finally, move up the rafters, killing the brutes and elite on the way with headshots.
The Covenant will start their final assault on Reach. They will come in several waves, each time brining a drop ship filled with a variety of grunt, brutes, elites, and jackals. Constantly change out your weapon for more ammo and stronger firepower. Retreat if your shields become too low, and grab a health pack if your life is in danger. While the USNC will send support, you're essentially on your own.
Clear out the last of your enemies. As before, using head shots and explosives are the best way to harm them before they can get close with their sword swipes. Your last task is to man the cannon. The cannon has a slight delay between each shot, so make your attacks count. Destroy each banshee or cruiser as it comes in range. Your shields won't regenerate when they pound you with lasers. If you really need to, exit the cannon and heal up. Return once the mother ship gets in range. Charge your cannon for one final shot at the core, which will end the mission.
Lone Wolf
This is a post-credits last stand against the Covenant. You'll be vastly out numbered by the enemy, making it near impossible to survive forever.
You have a great height advantage and a mounted turret from your starting position, making it a great place to perch and take out enemies. You can use this as an opportunity to gain bonus points until you are overwhelmed. As your visor starts to shatter, you'll know the end is near and the conclusion of Halo Reach.
Xbox 360 Achievements
| Achievement Name | How To Earn | Reward |
|---|---|---|
| The Soldier We Need You to Be | Completed the Campaign on Normal difficulty. | 25 |
| Folks Need Heroes… | Completed the Campaign on Heroic difficulty. | 50 |
| Gods Must Be Strong | Completed the Campaign on Legendary difficulty. | 125 |
| A Monument To all Your Sins | Completed every mission in Halo: Reach alone, on Legendary. | 150 |
| We're Just Getting Started | Completed the 2nd mission on Normal or harder. | 10 |
| Protocol Dictates Action | Completed the 3rd mission on Normal or harder. | 10 |
| I Need A Weapon | Completed the 4th mission on Normal or harder. | 10 |
| To War | Completed the 5th mission on Normal or harder. | 10 |
| You Flew Pretty Good | Completed the 6th mission on Normal or harder. | 10 |
| Into The Howling Dark | Completed the 7th mission on Normal or harder. | 10 |
| Dust and Echoes | Completed the 8th mission on Normal or harder. | 10 |
| This Is Not Your Grave | Completed the 9th mission on Normal or harder. | 10 |
| Send Me Out… With A Bang | Completed the 10th mission on Normal or harder. | 10 |
| They've Always Been Faster | Cleared the 2nd mission without setting foot in a drivable vehicle. | 25 |
| Two Corpses In One Grave | Killed 2 vehicles at once with the Target Locator in the 3rd mission. | 25 |
| Banshees, Fast And Low | Hijacked a Banshee during the Reach Campaign. | 25 |
| Your Heresy Will Stay Your Feet | Killed the Elite Zealot before he escaped during the 5th mission. | 25 |
| If They Came To Hear Me Beg | Performed an Assassination against an Elite to survive a fall that would've been fatal. | 25 |
| Tank Beats Everything | Finished the 9th mission on Legendary with the Scorpion intact. | 25 |
| Lucky Me | Earned a Triple Kill while Jetpacking in Campaign, Firefight or Matchmaking. | 25 |
| KEEP IT CLEAN | Killed 7 Moa during the 2nd mission of the Campaign. | 5 |
| I Didn't Train To Be A Pilot | Killed 3 of the anti-aircraft batteries during the 8th mission. | 10 |
| Doctor, Doctor | Used a Health Pack to replenish life after taking body damage. | 5 |
| That's A Knife | Performed an Assassination on an enemy. | 10 |
| I See You Favour A .45 | Killed 10 enemies in a Firefight or Campaign session with the M6G pistol. | 10 |
| An Elegant Weapon | Killed 10 enemies in a Firefight or Campaign session with the DMR. | 10 |
| Swap Meet | Traded weapons with an AI ally in Campaign. | 10 |
| A Spoonful Of Blamite | Killed 10 enemies in Firefight or Campaign with a supercombine explosion. | 10 |
| Be My Wingman Anytime | Let a teammate spawn on you 5 times in an Invasion Matchmaking game. | 5 |
| Yes, Sensei | Earned a First Strike Medal in a Matchmaking game. | 10 |
| Skunked | Won a game of Invasion in the 1st phase. | 10 |
| What's A Killing Spree | Earned a Killing Spree in multiplayer Matchmaking. | 5 |
| Crowd Control | Earned a Killionaire medal in Firefight. | 10 |
| Knife To A Gun Fight | As an Elite, killed 5 Spartan players in Matchmaking. | 5 |
| Score Attack | Scored 15,000 points in Score Attack Firefight Matchmaking. | 10 |
| Firestarter | Scored 50,000 points in a Firefight game. | 10 |
| Blaze Of Glory | Scored 200,000 points in a Firefight game. | 25 |
| Heat In The Pipe | Scored 1,000,000 points in a Firefight game. | 75 |
| Game, Set, Match | Completed a Firefight set on Legendary without dying. | 25 |
| Make It Rain | Purchased an item from the Armory that required the rank of Lt. Colonel. | 10 |
| The Start Of Something | Reached the rank of Corporal in the UNSC. | 15 |
| An Honor Serving | Reached the rank of Captain in the UNSC. | 25 |
| A Storage Solution | Used the File Browser to upload a file to your File Share. | 5 |
| A New Challenger | Completed all of the Daily Challenges in a given day. | 10 |
| Make It Drizzle | Purchased an item from the Armory. | 10 |
| Cool File, Bro | Recommended a file to someone. | 5 |
| Lemme Upgrade Ya | Advanced a Commendation to a Silver state. | 10 |
| One Down, 51 To Go | Completed a Weekly Challenge. | 10 |
Got a news tip or want to contact us directly? Email news@gamespot.com
Join the conversation