Halo 3: ODST Walkthrough
Get the drop on the Covenant with our Heroic campaign walkthrough for Halo 3: ODST.
Listen up shock-trooper, Master Chief is out running some errands, forcing us to rely on the likes of you to save New Mombasa city from certain destruction. We realize it's a large burden to place on you lowly soldiers, but it's all we've got. Thankfully, we've worked with the experts at GameSpot Guides--who unbeknownst to many, are experts in modern warfare--to prepare a field guide that should walk you through any combat situation. Move it out soldier, you're all we have left.
Here's what you'll find in GameSpot's Halo 3: ODST game guide:
- Combat Training: Even elite soldiers can use a refresher.
- Enemies: Gain insight into the enemies you'll be facing with our dossier.
- Vehicles: Attend our driver's ed class to enhance your skills in each vehicle.
- Walkthrough: Check out our point-to-point walkthrough for the entire campaign, optimized for Heroic difficulty.
- Xbox 360 Achievements: Learn how to obtain this game's every achievement.
Combat Training
Alright soldier, this is war. While the walkthrough provides situational-specific information, here's some quick info to prepare you for most combat situations.
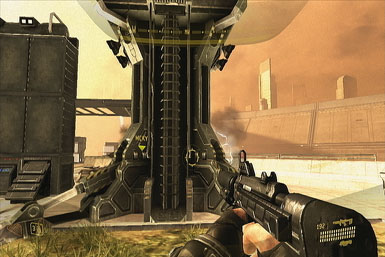
New Mombasa
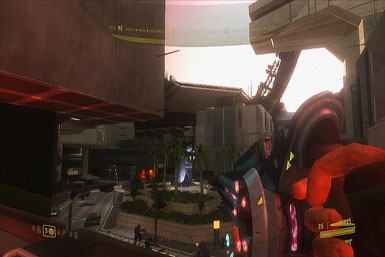
Perhaps the most drastic change to ODST is the addition of an overworld, the city of New Mombasa. Basically, as a Shock Trooper who crash-landed off course, you'll explore New Mombasa city six hours after some serious stuff went down. The city itself is relatively open, allowing you to traverse the streets in almost any direction. As you work your way around, you'll come across artifacts left behind by other ODSTs. Whenever you locate one, you'll 'replay' that soldier's memories, which serve as the game's actual missions. After each mission, you'll be returned to the city where you'll then search for the next artifact.
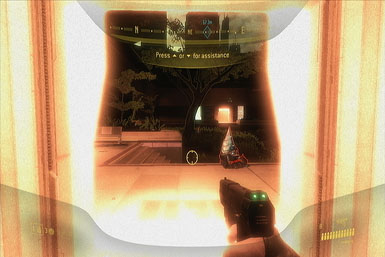
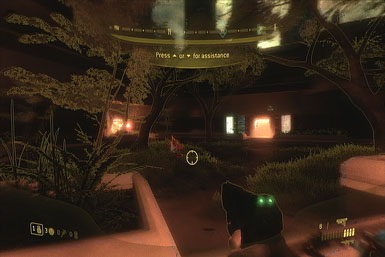
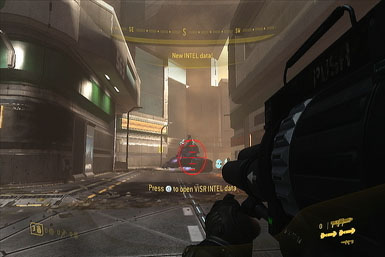
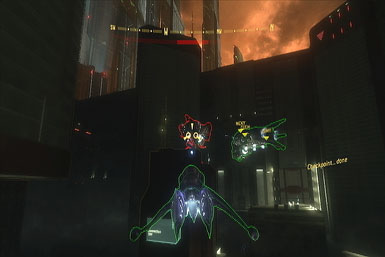
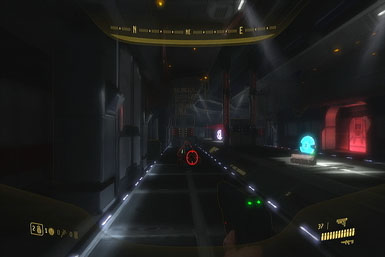
VISR
All ODSTs are equipped with a state-of-the-art, night-vision visor system. This not only enables soldiers to see in low-light conditions, but the visor also highlights any objects of importance, such as outlining enemies in red or friendlies in green. In low-light conditions, we recommend keeping it enabled at all times. However, you'll have to disable it in bright environments, as
Comm Data
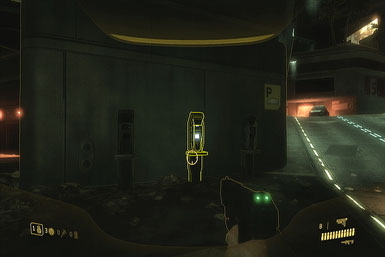
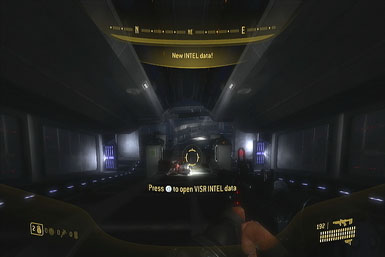
As you explore New Mombasa, you'll come across various Communication Stations that you'll notice are highlighted in bright yellow when using your visor. Interacting with these allows you to listen to an audio file, providing more back story on the ODST universe. There's 30 of them scattered about the city, so keep an eye out for them.
Health
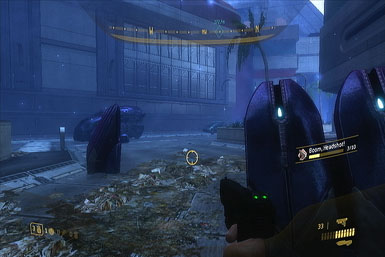
The health system in ODST works a bit differently than it did in Halo 3…in fact, it's almost identical to the original Halo's. In short, in addition to your recharging overshield, you now have a health bar as well, displayed at the top of the screen. As long as your shield remains intact, your health won't sustain any damage. However, if your overshield buckles under intense gun fire, then your health bar's going to take a hit…and that doesn't recover. Thankfully, you'll find health packs scattered all over the place (whether embedded in wall terminals, kiosks, or even just lying on the ground) which will restore your health to prime condition.
When you come under fire, your screen will turn increasingly red, indicating how close your shields are to failure. Once they're completely depleted (as indicated by your soldier wheezing for air), you need to find cover to let them replenish before your health bar takes the hit. As before, your overshield automatically regenerates if you can stay out of harm's way for four seconds.
Weapons
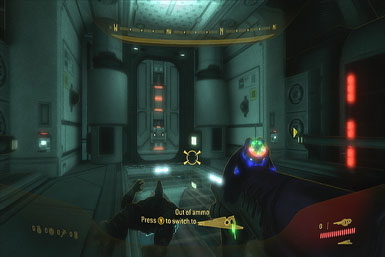
While we'll go more in-depth into each weapon on the next few pages, here's some general tips to get you started. So as you probably know, you can only hold two weapons at a time. As such, it's important that you have both ready to go at a moment's notice, so reload both whenever you get the chance.
Second, in general, Covenant weapons are superior at depleting shields, whereas the UNSC (aka human) weaponry excels at inflicting damage once their shields are down. For this reason, it's not a bad idea to keep one of each on hand. The Plasma Pistol, in particular, is fantastic for removing shields quickly (a single charged shot should do the trick).
UNSC Weapons
Pistol (Campaign Only)
The pistol was once considered to be a very powerful weapon in the multiplayer version of the original Halo, thanks to its great accuracy and ability to get headshots from a distance with its scope. However, it was significantly neutered in its sequels…that is, until now. That's right, the pistol's finally back, with zooming capabilities and all. As such, it is now a powerful weapon for both close and long-range combat. Also, it's now equipped with a silencer, making it ideal for stealth takedowns.
Magnum (Multiplayer Only)
The magnum is similar to the pistol, except that it lacks a scope, making it near-useless for only long-range encounters. You can still nab headshots with the magnum, but you probably won't want to use this if you have any better weapons available.
Submachine Gun (Dual Wield in Multiplayer)
The SMG is a close-range weapon that can be dual-wielded in multiplayer. Its primary weaknesses including poor accuracy and a tendency to induce recoil when fired in automatic mode for a bit. Its weapon fire also isn't particularly powerful, but the weapon has a large clip, allowing you to fire for quite a while without needing to reload. The reload times are fairly quick, besides, and you can carry around a ton of ammo, so this is a decent backup weapon, especially against Grunts.
Assault Rifle
This high-capacity automatic rifle can fire up to 32 rounds per magazine before having to reload, but each round does a fairly small amount of damage, and if you attempt to fire for too long you'll also lose a lot of accuracy. In short, small bursts, you can hit enemies a good distance away with the assault rifle, but on higher difficulties, you'll want something that does more damage. On Heroic or above, you can use the assault rifle to take out enemy Grunts, particularly when they're fleeing, grones, who have pretty low health amounts. But mostly, we suggest only retaining this weapon until you can find one more useful.
Sniper Rifle
The sniper rifle is a powerful single-shot weapon that's designed to quickly and permanently eliminate foes that are far away from you, although of course it can be used on enemies close to you with devastating results as well.. You can fit four bullets into a clip, and can hold 24 bullets in total. The rate of fire isn't great, but again, in general, this should be a one-shot kill on most enemies.
Headshots are important for most weapons, but with the sniper rifle, you really want to learn how to nab them, especially at long range. On heroic difficulty, anything up to and including a jackal should be a one-hit kill, even if you hit them in the body, but Brutes and hunters will of course require more hits. Low-level Brutes (the blue ones) will still die in one hit from a headshot, but the upper-level Brutes will probably require at least one headshot to knock off their helmets before you can kill them.
Battle Rifle
Shot to the dome! The battle rifle returns and is as desirable a weapon to have as ever. The USNC counterpart to the Carbine, this little guy will let you bust out three shots in a tight grouping with great accuracy at long distances, making it perfect for nabbing headshots. You can burn through ammo relatively quickly if you use it on tougher enemies or against large groups, but if you can set the terms of an engagement, firing on your foes from a distance and use cover to hide, this will be your best friend for a large portion of the game. We almost always had one on our person during our playthrough, excepting when it ran out of ammo or when we fought against Flood forces.
Shotgun
The shotgun won't be found very often in the game, and even when you do find it, you probably won't want to use it very often on Heroic or higher difficulties. While it does plenty of damage at close range, it will still leave enemies standing an uncomfortably large portion of the time. It's great when used against unshielded enemies and can be useful for pounding the rear sides of Hunters when they turn around. Apart from that, you probably won't want to keep it in your inventory very often.
Rocket Launcher
The rocket launcher is a dependable method of dishing out the hurt, especially to enemy vehicles, but the speed of the rockets is a concern; they're fairly slow, if not quite as slow as the fuel rod gun charges seem to be. That said, they pack quite a punch, and this is sure to be a highly desired weapon in multiplayer maps, so learn where they spawn and get used to checking the location every once in a while.
The launcher can only hold two rounds of ammo at a time, making each miss somewhat of a harsh penalty, since it takes a while to reload after firing the weapon. Get your shots on target and make sure they stay there by firing at close range, at least when going after vehicles. In multiplayer, you can fire on vehicles that are stationary without too many problems (perhaps from a distance when you see an enemy about to enter them), or simply use the rocket launcher as an antipersonnel weapon. Its splash damage will be good enough to kill almost anyone if you manage to hit close enough to them. Just remember the old Quake rule: aim at their feet, not at their bodies. That'll increase the likelihood that you'll get them with splash damage, even if you happen to miss them. Don't even bother trying to hit someone unless you can see their feet; i.e. no shooting at people on ridges above you. You'll miss 99% of the time if they move away from you, and you'll simply waste a rocket.
Spartan Laser
One of the major weapons returning from Halo 3 is the Spartan laser, a powerful beam weapon that can toast just about anything in the game in one blow. It's arguably the most powerful hand-held weapon in the game, but requires a lot of skill to use properly, even more than the sniper rifles.
When you pull the trigger on the Spartan laser, nothing happens. It'll take five seconds or so for the weapon to charge itself completely; check the aiming reticule, and look for the small arrow to rotate from the bottom to the top. When it does reach the top, a wide and very powerful laser will shoot out, toasting anything in its path. This'll be a one-shot kill on any moving target, and will also one-shot most vehicles excepting Wraiths or other high-armor targets; these move so slowly, however, that they'll be easy to shoot twice.
So basically, the Spartan laser is a super-powered beam rifle that requires five seconds to charge. The catch is that your target has to be in your view at the end of that countdown; if someone seems you aiming at them with a Spartan, they're pretty sure to duck under cover, which will waste your shot. You can always just let go of the button to stop the countdown, but that will cause the arrow to revert back to its starting position, meaning that you'll have to charge it all the way up before you can fire again.
The countdown makes the Spartan basically worthless for close-quarters combat, unless you can completely get the drop on an opponent; any decent enemy will close on you when they see the laser in your hands, and will be able to stick you with a grenade or otherwise kill you before you can fire. (In these situations, though, you can always try to use a melee swing; like most big weapons, the Spartan deals a heavy punch in melee combat.) In open maps, though, if you can find a laser (it's predictably rare), you can wreak havoc with it. Try firing it on high-priority targets like the slow-moving flag carrier or a Warthog that's loaded up with your enemies. Since your range is virtually limitless, it's also great for taking out opposing Wraiths or Scorpions that are sitting back and shelling you from afar.
Covenant Weapons
Plasma Pistol (Dual Wield in Multiplayer)
The plasma pistol is the most basic weapon in the Covenent armory, but it's still going to be more worthwhile to you than the default USNC pistol. The plasma pistol fires energy bolts at your enemies, and more rapidly than the pistol does. Each individual bolt does a light amount of damage, making this default firing method useful only against weak enemies like Grunts.
However, if you press and hold the trigger, you can charge the plasma pistol and fire a supercharged burst of energy. This can be used to instantly drop the shields on a target, allowing you to finish them off by switching to another, more powerful weapon, like the battle rifle. This attack has light homing capabilities, so it'll usually hit an enemy unless they actually try to dodge away from it. You can keep the trigger depressed as long as you like, but the longer you hold it down, the more energy you'll drain from the battery reserves. This doesn't result in a super-charged weapon; it just means that you lose ammo. Each charged shot automatically drains 10 ammo from the weapon anyway, so if you can't fire these charged shots quickly, you'll probably only manage to get a couple of them off before running out of ammo.
Carbine
As far as light ranged weapons go, the carbine is a decent tool for taking down distant, lightly armored enemies. There isn't much to say about it: when you fire, a round will quickly travel to your target. The fire is almost perfectly accurate at any range, and you can fire the weapon while scoped. Unfortunately, the carbine does fairly light damage, so you'll need a lot of shots to take down anything hardier than a Grunt. The rate of fire is also somewhat limited, so if you have the choice, you'll probably want to use a battle rifle instead of the carbine. If you need distance fire, however, and nothing better is available, the accuracy of the carbine will be good to have.
Plasma Rifle (Dual Wield in Multiplayer)
Another iconic Halo weapon, the Plasma Rifle will be a trusty weapon in the hands of any soldier. It rapidly fires plasma bolts at your targets, causing their shields to fall just as rapidly. It won't do as much damage against flesh as a bullet-based weapon would, but it'll still finish them off quickly, especially if you can find a pair of them to dual-wield. Just keep in mind that firing them for too long will cause them to overheat, and you'll have to wait a few seconds for them to cool down before you can fire again, leaving you quite vulnerable.
Brute Spiker (Dual Wield in Multiplayer)
The Brute spiker is something of a baby version of the Brute shot, at least in appearance; it has the same curved blade on the underside. However, it fires in a much different manner. Instead of firing grenades, it fires spikes which pierce your foes and deal damage. It fires rapidly, and can be dual-wielded, making it the Covenant counterpart to the USNC submachinegun, and it has enough rounds in a clip (40) to allow it to be fired for five or six straight seconds without needing to be reloaded. It's a decent weapon, but requires you to be pretty close to your targets to hit them, due to the spread of gunfire.
Needler
The needler is back in Halo ODST, and as powerful as ever, at least in the campaign mode. The needler fires multiple small explosive strikes that will home in on a target if fired in their general direction. Spikes do a bit of damage on impact, but then explode a few seconds later, causing a great deal more damage to the target and anyone nearby. One of the prime benefits of this method of firing is that you can unload an entire clip of needles pretty rapidly, letting you fire on a Brute before ducking back under cover. Both the rate of fire and reload rate are very fast here, meaning that you can unload a lot of damage pretty quickly, but that you'll run out of ammo pretty quickly.
The needler is a bit more useful in singleplayer than in multiplayer, since your enemies will be more likely to stand still and let you shoot them, while in multiplayer you will probably only want to use this in close-range combat against enemies that have nowhere to hide, which is a situation that won't occur very often. Note also that the needles will burn themselves out after a hundred feet or so, making this weapon useless at long ranges.
Brute Shot
The favored weapons of the Brutes, the brute shot is a portable grenade launcher that can deal explosive damage over a small area of effect when fired. Unfortunately, the area of effect is very small, so you can't expect to take out multiple enemies with this weapon unless you're firing into a group of Grunts. Against larger enemies, brute shot grenades can be useful to blast the armor off of Brutes, but it can be difficult to hit enemies at any decent range due to the slowness of the grenades in the air. If you must use the Brute shot, try to aim downwards at enemies below you to ensure that they have a better chance of taking splash damage from it. Note that although the grenades appear to fly in a straight line, they will actually dip into a slight arc if fired at extremely distant targets.
The brute shot does possess a mighty blade attachment that will let you kill almost any enemy in one melee blow, excepting Brutes themselves. If you find yourself in a melee situation, this isn't a bad weapon to have handy, but keep in mind that firing grenades at short range will damage you as well, since you'll be in the area of effect.
Heavy Weapons
Gravity Hammer
The gravity hammer is a rare weapon, and only dropped by powerful Brute chieftans. If you manage to pick one up, though, you can swing it into the ground by tapping the right trigger, which will cause area-of-effect damage to all nearby foes. If you manage to hit an opponent with a swing, you'll usually instantly kill them, although of course high-level Brutes and hunters will be the exception to this. You can also swing the hammer into the ground and jump immediately before you do so to increase your jump height slightly.
Beam Rifle
The Covenant version of the sniper rifle is the beam rifle. Unlike the sniper rifle, it doesn't use ammo, so it requires no reloading, but it does have a finite number of shots in it (20 if you find a fully-charged weapon). It also can't be fired very quickly; if you attempt to rapid-fire it, it'll overheat and take a few seconds to cool down before it can be fired again. Apart from that, it's a fine weapon; find a distant enemy and send a little love his way if you find one.
Energy Sword (Multiplayer Only)
The Energy Sword, long a favorite in close-quarters multiplayer can only be found in ODST's multiplayer mode. When you have this weapon equipped, you can kill pretty much anything in one blow, whether you use it with a melee attack (B button) or attempt to use the charge maneuver that's bound to the right trigger. The charge is most helpful, especially on the intimate, smaller maps, as it'll let you close in on a target before he sees what's coming. Having the energy sword out and in your hand will put an immediate target on your head, so don't be surprised if you suddenly become the center of attention while wielding it.
Mauler (Dual Wield in Multiplayer)
The mauler is a simple single-handed shotgun that can be dual-wielded. The spread from the fire here is extreme, making it impossible to hit anything that's not right in front of you. The power level also seems to be lacking compared to other weapons. If you're fighting in extremely tight corridors, then this can be useful to finish off a foe after you drop his shields, but apart from that you probably won't want to bother with it.
Fuel Rod Gun
The heaviest weapon in the Covenant arsenal is the fuel rod gun, which acts as a slightly weaker rocket launcher. When fired, the fuel rods quickly accelerate, but they're still somewhat slow and dodgeable while in the air. What's more, they're highly noticeable when they fly, since the projectiles become large and green when they're in the air. Most enemies will have little trouble dodging them if you fire at range.
That, and the fact that the FRG can hold five rounds of ammo in a clip, makes it best used as an up-close anti-personnel weapon. The splash damage is there, but not as big as the rocket launcher, making you less likely to hit yourself with it, and you can fire the rounds fairly rapidly, letting you finish off wounded foes without a problem. The slow speed of the projectiles makes it more difficult to take out enemy vehicles with the FRG, but if you're close enough or approaching from behind, it's quite doable.
Machinegun Turret / Plasma Turret
When you spot a turret in the game world, you're able to use it, sure, but that's for plebians. Real men gird their loins and rip the damn things right off their moorings, then shove them down their enemy's throats, cleaving their bodies in two.
Well, some of that's correct; you can rip a turret off of its base by pressing RB to use it, then tapping B. Some turrets will also be found on the ground, or in the hands of Brute Chieftans. Using a turret in your hands will let you dish out a lot of power, but it will greatly curtail your ability to move, so you'll be more easy to hit while you wield one. You also won't be able to make a melee attack or throw a grenade until you drop the weapon.
Missile Pod
The missile pod is intended to be your anti-vehicle weapon. When you pick it up and aim at a vehicle, it'll instantly lock on, letting you rapidly fire homing missiles at your target. These are quick enough to take down Banshees, but also excel when used against ground vehicles.
Flamethrower (Multiplayer Only)
As you may be able to tell from the title, this is a flamethrower; it shoots flammable gel a few meters from your position, causing instant and extreme damage to most foes that you manage to hit with it. Unfortunately, since it slows you down so much, it's difficult to use well on mobile enemies. The flames stick around for a few seconds after hitting an enemy or the floor, so you also need to be wary of using it if you think you might be walking through the flames; they'll burn you just as well as your foes.
Enemies
Grunts
Grunts are the lowbiest of lowbie enemies. These foot soldiers for the Covenant are poorly armored and usually poorly armed, packing plasma pistols, needlers, and plasma grenades. (Late in the campaign you'll run across perhaps half a dozen Grunts that wield fuel rod guns, but they're very rare.) They're also quite cowardly, and will usually run in fear if you happen to kill the Brute that stands guard over their squad.
Grunts come in different colors, which roughly denote their varied strengths. Even on Heroic difficulty, though, you're unlikely to notice any real difference in strength between the various Grunts, although there are rare gray Grunts that have significantly more health than the other types.
Some Grunts can be driven insane by the pressures of combat and will ignite plasma grenades in their hands and rush towards you. Shoot them before they get close, or they'll blow you to pieces.
Jackals
Jackals are the regulars of the Covenent army, and usually arrive in one of two forms. The rarer form is the sniper. These guys sit back on cliffsides and balconies in support of a Brute/Grunt squad, usually with a beam rifle or a carbine in their hands, and will take potshots at you. It's important for you to identify them and take them out before proceeding into combat with the squad they're attached to. Usually they'll start firing at you as soon as they're alerted to your presence. If you find yourself under fire from above, immediately backtrack to cover and start zooming in on the cliffs above you to find your adversary and shoot them.
More commonly, however, Jackals will appear with power shields in front of them and will fire on you from a narrow slit on the side, usually using a plasma pistol for the task. The shield will protect them from most damage, so killing them can be tough. If you can get close, landing a grenade anywhere near them will cause them to turn away, letting you fire on them. If you're using a precise weapon, however, you can actually aim at the firing hole on the right side (as you're viewing them). It's small, but you can hit it; a sniper rifle shot will kill them if you hit them here, and any other weapon hit will cause them to recoil, momentarily dropping their shields and allowing you to blast them with a headshot.
Brutes
Brutes are your primary foes throughout much of Halo ODST. Although Grunts will be more numerous, Brutes will be more deadly. Although Brutes will possess a wide variety of weaponry, they all have one thing in common: body armor that will protect them from damage until it's removed. As with Elites in the previous Halo games, you need to knock this armor off (preferably with plasma-based weapons), then finish off the meat inside (preferably with bullets). One weapon in particular is great at taking down Brutes: the needler. If you can fire off a clip at most Brutes, they'll die right quick. Grenades also work well, especially the varieties that can stick onto your opponents, but then again, most Brutes will be good about diving away from your grenades.
There are a few different varieties of Brutes, from the lowliest (usually clad in blue armor) to the toughest chieftans (armored with yellow plating). The lower ranks will often be found commaning squads of Grunts; if you can kill them, then their Grunt soldiers will often flee in disarray. Mid-level Brutes will usually be found in groups, and will be a formidable challenge; these groups are when you want to bust out your grenades or explosive weapons.
The chieftans are a breed apart; their yellow armor will prevent you from sticking plasma or Brute grenades onto them (they'll bounce right off), and they'll often wield powerful weapons like the gravity hammer, the fuel rod gun, or dismounted turrets. They'll also usually use the Invincibility equipment just before wading into battle, making them impossible to kill for ten or fifteen seconds or so. Nothing to do then but run away!
Drones
Drones are rare, but annoying. These flying buzzards will descend from the skies and attack with plasma pistols more often than not. Individually they're not very difficult to defeat, but since they attack en masse they can dish out a lot of damage in a small amount of time. Their flying capabilities also usually makes them immune to grenades unless you get a lucky stick.
Hunters
Hunters are also fairly rare, only appearing perhaps a few times throughout the game. Hunters always appear in pairs, and attempt to fire on you with their massive green lasers before they close in for the kill with their melee attacks. Hunters are tough and incredibly well-armored, making them difficult foes to bring down.
The best way to kill a hunter is to attack it from the back. If you get close to it, it will start to swing its fists at you. Strafe around it as best you can and unload a shot to its unprotected backside (or stick a grenade on there). Just be careful, though, as they often will attack backwards over their heads in retaliation. If you find that you truly can't take down a Hunter, you can usually run away without issue.
UNSC Vehicles
There are a wide variety of vehicles in Halo ODST, from the small and quick to the slow and well-armed. To enter any of them, walk up to them and press R2; this will put you into a different position in the vehicle depending on where you stand and which vehicle it happens to be. You can also press the right-bumper when an enemy is riding a vehicle to attempt to carjack him. In light vehicles, this will automatically kick them out of the driver's seat, but on heavier vehicles you'll simply cling on for dear life. In the latter case, you can attempt to punch out the driver with the B button, which will leave you with a damaged but usable vehicle, or you can just chuck a grenade inside with the left trigger, which will blow the whole damn thing after a few seconds.
Most vehicles will have alternate abilities that you can perform when you're inside them by clicking the left trigger. Generally these act as some kind of speed boost, but some vehicles use this functionality for additional offensive powers.
Warthog
The Warthog is the iconic vehicle of the Halo franchise, but you'll only be using it a couple of times in ODST's campaign. It's hardy and comes in a few different configurations for your pleasure.
Driving the Warthog can be a tricky proposition, since it takes air easily and has a tendency to flip with little provocation. If it does start flipping, you can wait and see if it rights itself, but it will often land upside down, forcing you to get out and flip it over again before you can use it.
Warthogs have two to five slots for Marines to fit into. If one of your Marines is getting into the passenger slot, try to trade them a powerful weapon if you have one in your inventory, like a beam rifle, sniper rifle, or rocket launcher. They'll be able to use it while you drive to take out enemies.
Machinegun Warthog
For most of the single-player campaign, you want to be driving the Warthog instead of taking the gunner's position. You can drive well, theoretically, but the AI Marines are terrible at driving, especially during combat. On the other hand, they're ace shots with the turret, so they'll be much better at shooting it than you'll ever be.
Gauss Gun Warthog
Although rare, Gauss guns mounted on Warthogs are ideal for taking out opposing vehicles; they're capable of dropping most enemy vehicles in one to four hits. You'll need to stay mobile to avoid enemy fire if you're driving one, but your gunner will be wreaking havoc on your enemies. The Gauss gun can one-shot most enemies, as well, but it has no splash damage, so it might be difficult to take out whole crowds with it; you might be better off just running them over, if possible.
Mongoose (Multiplayer Only)
The Mongoose is a small two-seater ATV that features no weapons and little armor for the driver or passenger. With no weapons, this is basically useful only for getting to where you want, but it does this faster than any other ground vehicle. The passenger can still fire their weapons, but it's difficult to aim while bobbing up and down.
Scorpion
Ah, the Scorpion. This hulking tank is painfully slow, but equally painful to your enemies when they get hit by its shell. The shells here are highly explosive and accurate at long range, but they do take a second to hit their target, so will need to lead distant foes. That said, the ability to hit pretty much anything at any range is obviously a powerful one.
There's room for five passengers here, including four seats above the treads and one gunner, but you shouldn't expect people to climb aboard in multiplayer unless they get to man the turret, as you'll probably be moving at about walking speed and passengers are totally exposed to enemy fire. Unlike in Halo 2, you can only fire the main cannons here; the turret can only be fired by a second passenger who rides in your vehicle.
Covenant Vehicles
Ghost
This small, one-passenger craft is a handy tool in Halo ODST, but you probably won't find unmanned Ghosts very often. When you do climb into one, you can use it to move a bit faster, take a bit more damage, and fire on your enemies, so you're basically just a bit more enhanced in your combat capabilities than you would be on foot.
That said, the Ghost is a fun vehicle when you can get in it, as it's quick to move and can deal good damage with its dual plasma cannons. You can tap the left trigger for a burst of speed, which is handy if an enemy is directly in front of you and you want to run them down. Just be careful, as the Ghost is prone to tipping on bumpy ground.
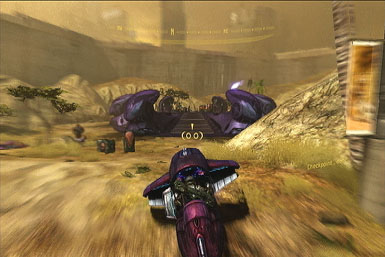
Wraith
The Covenant's heavy tank is the Wraith, and unlike in Halo 3, you cannot jack these during the single-player campaign. Taking out a Wraith is a tall order, as the presence of a turret on their fronts makes that very difficult. In the campaign, you'll usually have access to a turreted Warthog or another long-range vehicle that you can use to take out a Wraith, but if you don't, you might want to try sniping out the turret gunner (he's vulnerable to headshots), then driving a quick vehicle up close and hopping aboard to grenade the Wraith.
Mortar Variant
Most of the Wraiths you see will pack mortars that fire huge bursts of energy at extremely long ranges. These move very slowly, in an arcing manner, so you should be able to see them and dodge them when you're at a distance. As you get closer, though, these mortars get progressively more deadly, since they can be fired at very close range and will impact pretty much instantly. On Heroic difficulty or higher, a single mortar hit anywhere near you will instantly kill you, and they can hit even quick vehicles pretty accurately if you're driving straight towards them. Try to approach at an angle, then, and if possible get on their rear side, where you can grab onto their back sides and throw a grenade into the engine without having to deal with the turret.
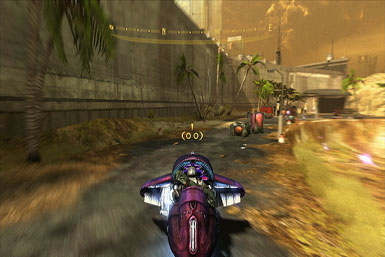
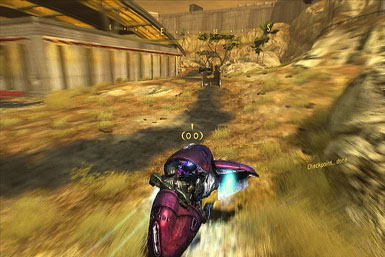
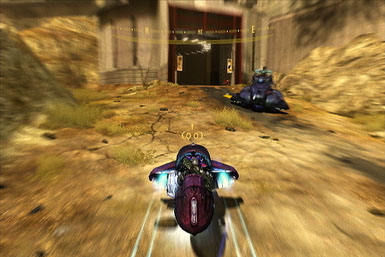
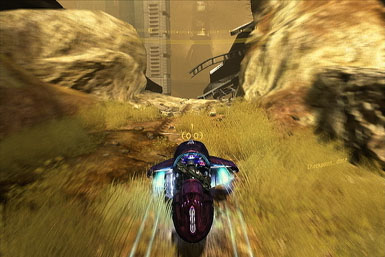
Chopper
The Chopper is a one-seater motorcycle…and it's awesome. There's nothing especially complicated about it; the primary fire button is a powerful laser cannon that can chew through most light vehicles relatively quickly, while the left trigger will get you a bit of a boost in speed for a few seconds.
The narrow width of the Chopper will make it difficult to hit players with it, unless you're good at fishtailing the vehicle. The width also makes it easier to get into lengthy flip sequences when you get off-axis, though, so you need to be careful while driving.
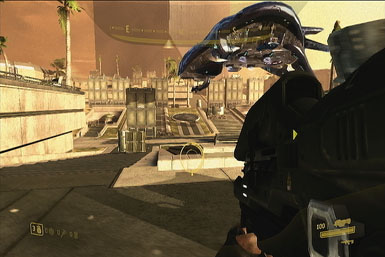
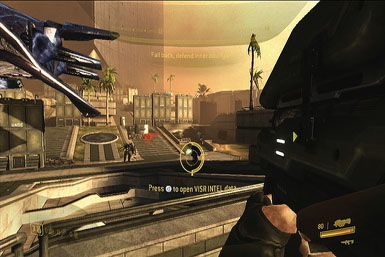
Banshee
The ever-popular Banshee returns in Halo ODST, and is equipped with a homing missile. It doesn't seem to do as much damage as the homing missiles on the Hornet, but still, it'll help you out in those wild dogfights.
Prepare to Drop
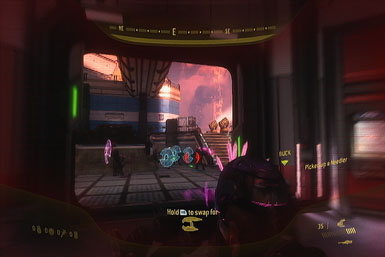
Find a Medical Kiosk to Restore Health
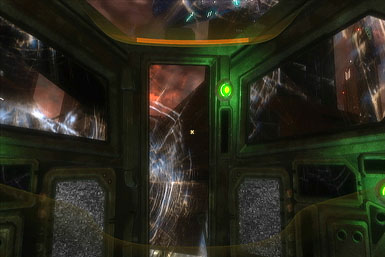
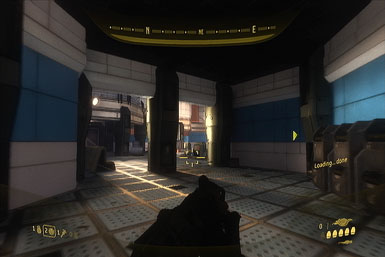
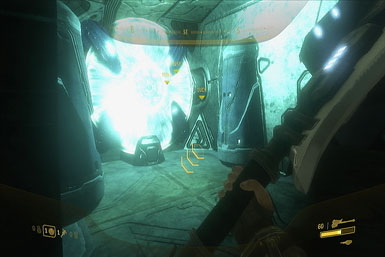
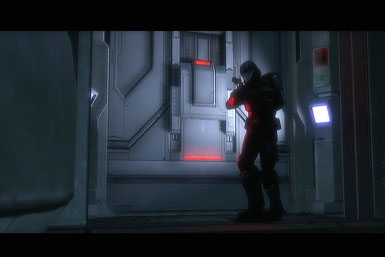
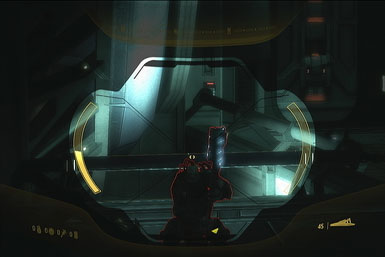
Great, so you've flown off course and crash-landed somewhere in New Mombasa. Upon awakening, your first task is to get the hell out of your capsule. To do so, you'll have to arm the four glowing green bolts by looking at them and holding the right-bumper. There's one on each wall and they're impossible to miss.
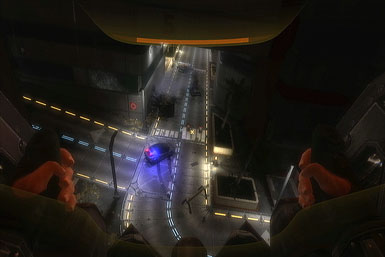
Freedom! Now that you're on ground-level, the game will provide a quick tutorial of how health works--if you never played Halo 1, you should pay attention. Now you essentially have two health bars: one's your actual health, and can only be restored via medical packs. The other is your shield, which automatically regenerates so long as you keep out of harm's way for a few seconds. Since you've taken damage from your fall, your first task is to find a Medical Kiosk, and there just so happens to be one across the street, on the right.
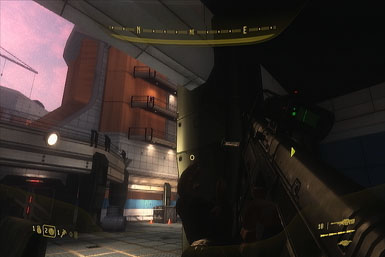
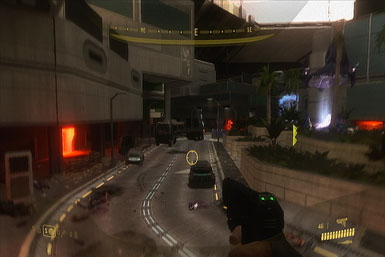
Explore the Streets, Find your ODST Team
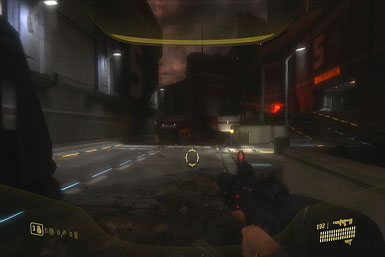
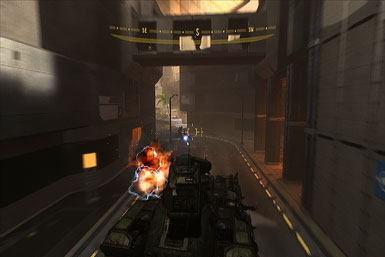
With your health restored, it's time to regroup with your squad. From the drop capsule (assuming you're facing away from it), head right and be prepared to take on a Brute and a few grunts. The potted trees can provide cover if you need it, simply by crouching behind them. Now's a good time to test out both of your weapons: the pistol and SMG.
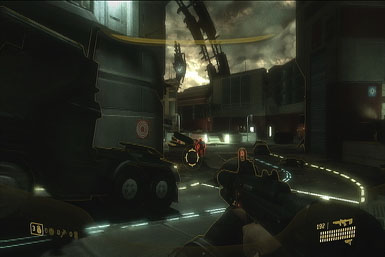
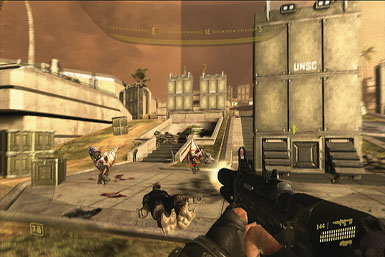
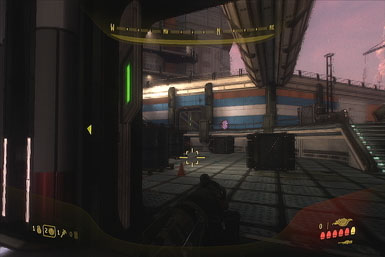
After your first engagement, the path seemingly splits. The ramp leads to a dead-end, so stick to ground-level. As you turn the corner, you'll spot several grunts on the central concrete island, with a Brute just beyond them. If you're stealthy, you can take down most of the grunts before drawing the Brute's attention. Once the Brute approaches, remain on the concrete island, circling the interior barrier for cover. You may want to grab one of the Grunts dropped weapons, such as the Plasma Pistol, to quickly deplete his shields, then follow-up with either some human-made weaponry or a few quick melee attacks.
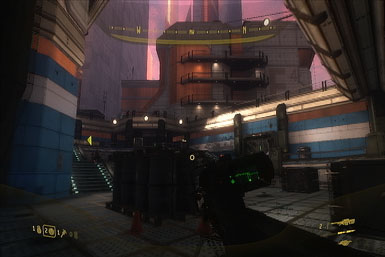
With the enemies down, a couple more squads (including a pair of Brutes!) will soon approach from a side-street, to the left (assuming you're facing away from the street you just came from). We suggest grabbing the Brutes grenade launcher (remember to use your visor to easily find it), then taking cover by the flipped car--use your pistol (or other single-fire weapon) to target the grunts before turning your attention to the Brutes--a shot or two from your launcher should clear them out.
Contact City Superintendent
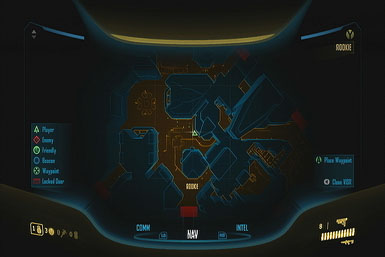
With the street cleared, you'll hear a ringing sound coming from your left. Approach the glowing terminal (remember, use your visor!) and interact with it to activate your map, which will plant a coordinate on your HUD, showing the location of a nearby ODST squadmate!
Search Tayari Plaza for ODST Squadmate
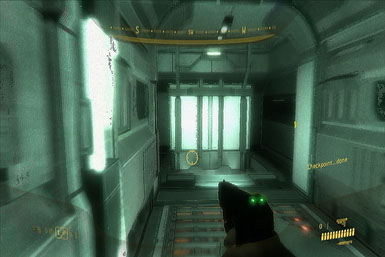
Now that you have your squadmate's coordinates, the blue marker on your compass will provide some loose guidance of where to go next. For now, that means proceeding up the right side of the street, where the enemies just attacked from. If you need a health refill, you'll find a couple of stations on either side along the way. At the end of the road, you'll find an unlocked door with a green light that you can continue through, on the right.
Continue through the dark hall, using your visor to find your way, and open the door at the end leading back outside. Well, would you look at that--it's a Grunt! But he's but the first of a field-full! At any rate, you should be able to melee both him and his compadre to the right before the others catch on. We suggest remaining on the walkway, using the plantations for cover (crouch and hug the wall behind them to make yourself near invisible) and use your human-weaponry to target the foes. If you run out of ammo, collect one of the grunt's dropped weapons, or toss a grenade near the middle to take several down at once. If you take heavy fire, you can always retreat back into the hall for protection.
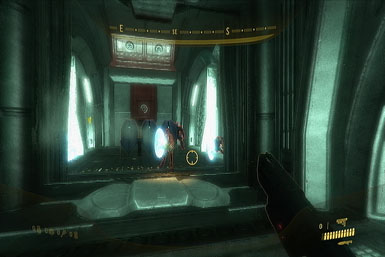
With the field cleared, grab whatever weapons you need, then proceed through an unlocked door, opposite of where you entered. Inside you'll reach the marked Beacon. Continue up the staircase, just left of the second door. Proceed along the hall, up another staircase, to the third floor.
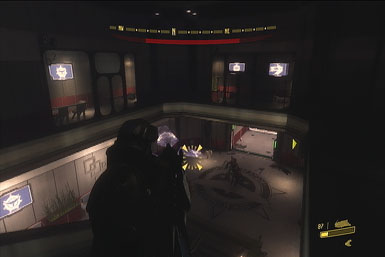
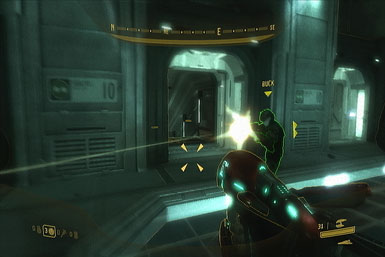
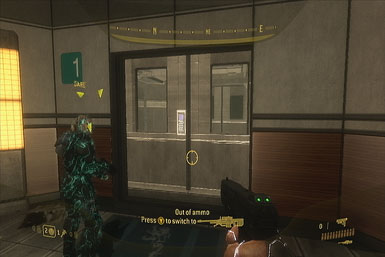
On the third floor, be ready for a door to open on your right, leading into a room with two Jackels--you should be able to either shotgun or melee them before they know what hit them. Proceed up another staircase, where you'll soon find a Combat Helmet embedded in a screen on the left, which will begin the first several flashback missions.
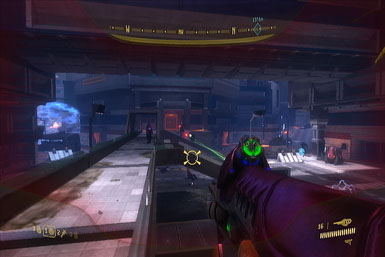
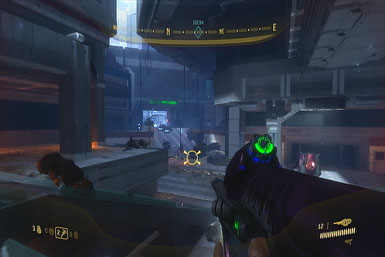
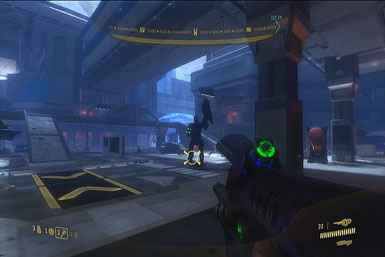
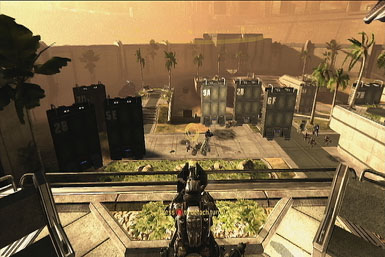
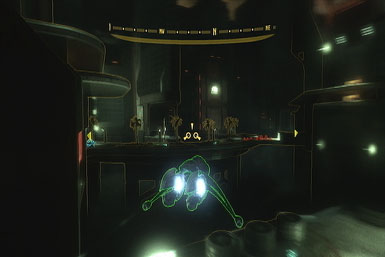
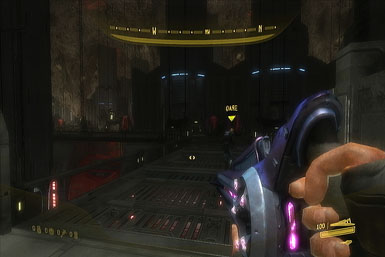
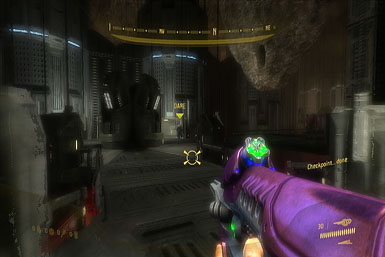
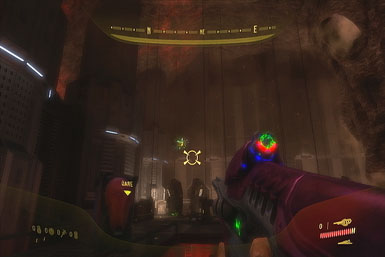
Tayari Plaza
Find Dare's Crash Site
This is no time to relax--there are Grunts inbound! Stand behind the sandbag wall for cover and use your pistol to easily pick off the Grunts (remember to zoom!). If you need health, look for a pack on the ground, just to your left. Once you've taken down most of the grunts, you'll find a pair of stubborn Brutes far in the back. Drop down and follow the right side of the street up to a three-piece barrier--we also suggest grabbing one of the dropped Plasma Pistols along the way (we recommend swapping it for your machine gun, but it's up to you).
Once at the three-piece barrier, peek around either side to take down any remaining grunts before focusing on the closer of the two Brunts. If you have a Plasma Pistol, fire a charged blast at the Brute, then immediately follow-up with a few pistol (or machine guns) shots for a quick takedown. Now there's still one remaining Brute on the left side of the street, and he's armed with a grenade-launcher! To take him on, proceed into the area below the building, where the first Brute was, then seek cover behind one of the pillars lining the street, facing the remaining Brute. Target any remaining grunts first, then take the Brute on like the one before, using the pillar for protection from his explosives. If you run out of ammo, try tossing a couple of grenades. Do not try and attack him head-on, as it's suicidal.
After the battle, continue up the street where you'll find a couple of squadmates! Before departing, look for some health in a kiosk just beyond them. As you step into the Brute filled side-street, dart into an open doorway on the left, which will allow you to get the upper-hand on the enemies. Inside, take a left up the stairs, leading to a second floor balcony. This provides an awesome vantage point for some Brute-destroying. Remember to use the ol' charged Plasma Pistol and human weapon combo if you've still got 'em. Otherwise, you'll find several weapons lying around nearby, or try tossing a few grenades. If you need cover, the hall on either side will provide it. Oh, and if any Brutes take residence in the lower hall, you should be able to target them by crouching.
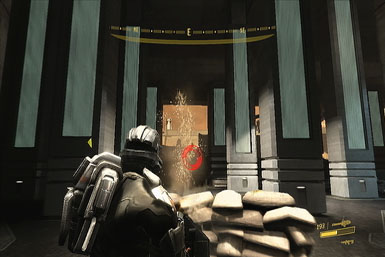
With the first Brute batch dealt with, drop to street level and push forward to the concrete barrier ahead (you may also want to swap weapons with either of the marines, whether they're still alive or dead). Peek around its side to pick off nearby grunts, but ignore the one on the raised turret for now, as well as the Brute. Push forward to the truck for additional cover, and peek around its backside to target the Brute, ideally with the same Plasma Pistol and human weapon combo as before--barring that, toss grenades. With the Brute finished, you should be able to pick off the enemy on the raised turret--if not, just climb up and greet him with a melee attack (you'll also find some health on the ground nearby). We also suggest ripping the turret from its perch and taking it with you, as it'll come in handy for the next segment.
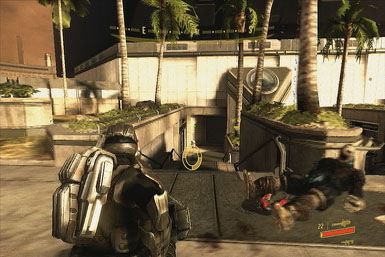
With the street cleared, proceed ahead--as you go around the bend, hug the wall and continue behind the parked semi-truck. Take down the two shielded jackals at its rear (if they're protected, either melee them, or aim for the gaps in the shield). Once they're down, use the truck for cover to target any remaining grunts, then hug the nearby wall as you turn the cover to target the enemies beyond--this allows you to easily backup for cover. Just be careful of any snipers either on top, or around the tower. Subsequently, push forward to any of the destroyed vehicles for cover, which should get you close enough to kill the remaining Covenant. As for the sniper atop the tower, simply ride the gravity-beam inside and take him down with an old-fashioned melee attack. It's also strongly advised you grab his Beam Rifle.
Now that you've cleared the area, continue through the large gate behind the sniper tower. If you grabbed the sniper's Beam Rifle, use it now from the top of the ramp to pick off the enemies ahead, including a pair of snipers on the bridge, as well as some jackals and grunts--it doesn't have enough ammo for everyone, but it'll help. Afterward (or if you didn't grab the Beam Rifle), follow the left pathway (not the street itself!) to find a lone soldier who advises that you continue through the building entrance ahead. Heed her advice, but consider grabbing either the pistol or one of the shotguns just by the entrance.
Inside the hall, head left first, down the ramp to the lower level. Remain in the hall for now for cover and pick off the enemies you can through the opening. Once you've thinned the herd, venture further out to tackle any remaining enemies, including some pesky Brutes and snipers (such as on the bridge, a left to the far left, and a high deck to the right)--we found the Carbine worked best for this section, thanks to its long-range capabilities. You'll also find a pair of health packs to the left.
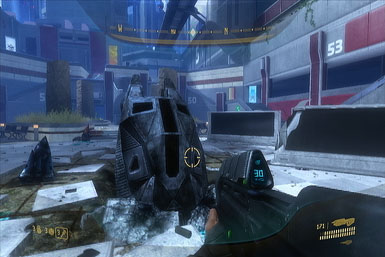
Once you've cleared all you can, head back into the hall and exit through the center door onto the upper walkway--there may be a sniper just outside the door you can melee for a quick victory. As you cross the bridge, a turret to the right will open fire, and two Hunters will emerge through the doors--quickly take down the turret first with a few quick shots before turning you attention to the Hunters.
Although it may seem counter-intuitive, its easiest to tackle the Hunters at close-range, though we strongly suggest arming the shotgun (you can find one in the hall you just came from). Their weak-spot is the exposed membrane halfway up on their backside--simply circle behind one at close-range and pump a couple of shots into that spot--he'll go down without much of a fight, then do the same for the second. Because they're slow, circling behind them is not only super-easy, but they'll have trouble targeting you with their rockets. Just be careful of the second Hunter when targeting the first; if you're having trouble, try to isolate one behind some kind of wall or object for protection while you focus on taking him down.

With the Hunters cleared out, proceed through the door they came through, toward the Beacon. Once through, look over the ledge and target the Grunts on the lower level (there's also a health kiosk in the wall behind you), then drop down and open the crashed pod from the front-side.
Uplift Reserve
Link Up with Friendly Forces
This mission's all about speed--as long as you keep moving, you can complete it--easily, we might add--without firing a single shot.
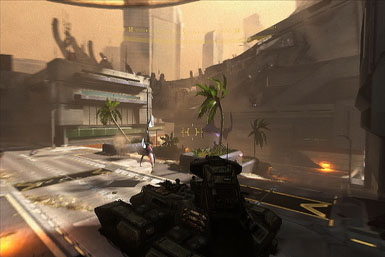
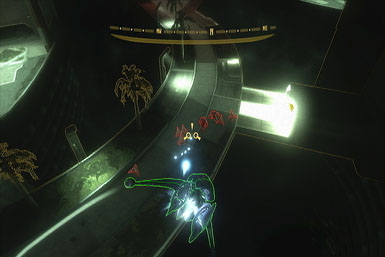
From the get-go, follow the beach through the corridor, which leads into a large, expansive field. A teammate ahead radios in for help in securing the Warthog--run up to it fast, flip it back onto its wheels, and hop into the driver's side and get the hell out of there! Gun it around the central island and into a corridor to the north--you'll encounter several Covenant enemy vehicles along the way, including a Brute Chopper and Wraiths--just veer around them, as they won't bother you once you're behind them.

You'll soon reach a tunnel entrance: at this point, we ditch the Warthog and hop into the nearby Ghost, before proceeding into the tunnel.
Find Marine Second Platoon
You grabbed the Ghost, right? Its boosting power makes the next section a breeze: instead of fighting all of the enemies, just boost past 'em! You're fast enough that you should evade any significant damage; the only tricky bit is making sure you stay on the path. From the get-go, we advice sticking to the right side, that is, at the first split path, hang a right, drive straight through the small pond, then make a soft right after cresting the hill, up the ramp. Now make a sharp right at the top of the ramp and boost along the road (ignoring the enemies and turrets along the way) into a natural corridor at the very end--you just reached a checkpoint soldier, all without firing a shot! Well done! Continue onward, making a right at the split path, until you emerge on a ledge overlooking an expansive field.

Find Colonial Across Bridge
Again, this expansive field is a breeze. Take your ghost down the ramp, and make a sharp right at the base, then follow the black roadway (boosting the entire way) into a building and across the bridge. And that's all there is to it!
Drive Up and Out of Park
After crossing the bridge, you'll have an opportunity to swap into a second Ghost--if yours has taken damage, we recommend it. Now boost along the path, up the spiraling hill (again, ignoring the enemies) until you come across a large purple base. Once there, hang a sharp right and make another just a few meters up, by the Wraith. Now boost up the past into another area with several Wraiths--hug the left wall and boost through the gap in the wall to complete the level.
Kizingo Boulevard
Save Marines and Scorpion Tank
Immediately from the start, turn around and face the street you just ran from during the cutscene. A Wraith is about to turn the corner ahead--wait for it to park, then launch both rockets at it for a quick victory. Now turn around and dart down the same street and follow it up to the Scorpion tank. Once you've caught up, hop inside (you may have to wait for the current driver to exit first), then turn the turret toward the center area and take down the enemies within. Watch out for a Ghost that'll soon attack from the right, as well as a Wraith in the far distance. Your current position works great for tar getting virtually every enemy, so don't bother driving around.
Drive Tank to Rally Point
Once you've cleared the area, drive the tank around the corner ahead, toward where the distant Wraith emerged from, to the west (try using the helper icon if you have trouble finding it). As you push up the street, watch out for some enemies lining the rooftops, as well as a wreckless ghost that'll tear around one of the corners.

Before long, you'll encounter a group of pinned-down Marines. Remain in the alley for protection and open fire on the enemies ahead, including the turret, as well as the drop ship. Once you've cleared the area ahead, pull up to target the remaining enemies in the area.
When finished, proceed along the same street and around the next corner. Immediately take down the three turrets ahead, followed by the Ghost, before focusing on the remainders. Once you've cleared the area, you've got a choice: Either hurry up to the other side of the street and proceed through the door (it'll take a few moments to open), or stay here and takedown the enemies that a gunship drops off. We suggest the former, but if you want to stick around and take them on, you're on your own.
Rescue Dutch
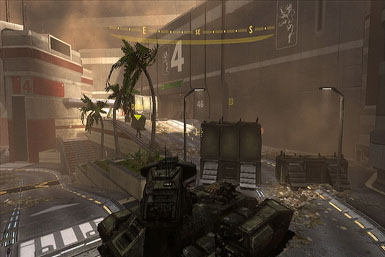
Once through the gate, stop at the top of the descending ramp, as two Banshees are inbound. They'll fly right at you, providing a perfect opportunity to target them. Once done, proceed up the street to the bend and target the distant Wraith from here--this position also provides decent cover from a nearby drop ship, which will soon depart. Continue toward Dutch, as marked on-screen, taking down any enemies along the way.
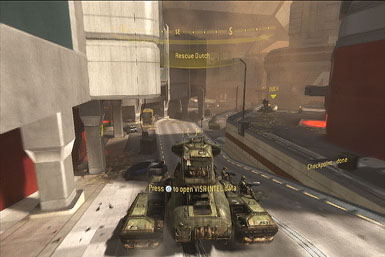
As you close in on Dutch's location, a final Wraith will make its appearance--take it on head-on with a face full of tank shells. Now although the tank will be blocked by some debris, we're not done with it yet. Go ahead and exit it briefly and step toward Dutch, which will trigger a wave of enemies who'll storm through the nearby door. Return to the tank and take 'em all down with a few shells. Okay, now we're done with the tank, so go ahead and exit and proceed through the now-cleared door.
It's tough being back on-foot, isn't it? At any rate, there are a few more Brutes and assorted enemies ahead. Try grabbing a Plasma Pistol before engaging them, and use the various objects in the street for cover.
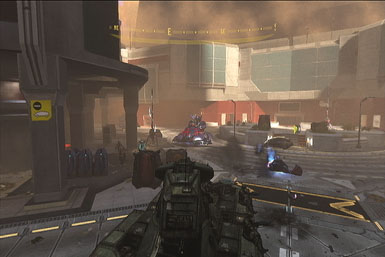
Help Dutch Defend the Rally Point
Alright, so a whole mess of enemies are inbound and you need to kill them all. Luckily, you have a bit of time before the first drop ship appears. As such, we strongly suggest grabbing one of the grenade launchers that the Brutes dropped, as well as the sniper rifle resting against one of the shields by Dutch. Now that you're equipped, let's kill some fools.
Although it may seem ballsy, the best course of action--initially at least--is to get the 'drop' (heh) on the enemies that the ship drops off. The ship stops at two places, dropping off some low-rank baddies at first, followed by some Brutes on the second. Approach the ship from below (but don't get too close) and either toss a few grenades or launch a few from your grenade launcher as soon as the first batch of enemies touch down (they'll depart from the ship's right side). If you don't kill them all, don't sweat it. Turn your attention to the second wave, containing Brutes--they'll drop from the ship's left side. Quickly toss or fire more grenades their way, then turn around and hightail it just behind the opening beneath the bridge--this is a good spot to target the remaining Brutes from.
With the first drop ship's enemies taken care of, a second will soon be inbound. For this one, it's best to tackle them from afar, so we hoped you grabbed the Sniper Rifle (near Dutch), as we suggested. Now we found the best location to tackle them from is from the top of staircase to the right of the Wraith (assuming you're facing it). You can get there easily via the right bridge. Once there, use the Sniper Rifle to focus on taking the Brutes down first--aim for their heads. Once you've thinned the crowd, focus your attention to the snipers, as well as a Rod Cannon-armed grunt on the opposite side (look for where the blasts are coming from to locate him). With the most dangerous enemies taken down, cross back over to where Dutch is to take down the remaining few enemies.
Okay, all the enemies are dead, right? That should just leave the pesky Wraith. We found the easiest way to deal with him was to cross over the central bridge, from where Dutch is, then drop behind him and hug the wall and attempt to sneak up on him and hop aboard to destroy him by either planting a grenade or meleeing the vehicle to death. Once you've finished it off (and any remaining enemies), regroup with Dutch to finish the level.

Oni Alpha Site
Arm All Charges on the Bridge
Okay, so what you're supposed to do is interact with each charge along the length of the bridge. But you can forget about that, as simply turning around and hightailing it to the safe end of the bridge (away from the enemies) seems to automatically set them all for some reason. Yeah, that means you can ignore the enemies too. Well, no complaints here. Once there, go ahead and climb up the ladder into the watch-tower in preparation of your next objective.

Use Detonator in Watch-Tower
With the charges set, you can detonate them by interacting with the console inside the watch-tower, which you can get inside via the ladder. With the bridge destroyed, the door at the base of the ramp will open, allowing you through.
Fall Back, Defend Inner Courtyard
Bah, what's this fall back business? If you followed our strategy above, you should have all your ammo left, including the Spartan Laser. As such, we recommend waiting by the top of the left staircase and using the Spartan Laser to pick off the Hunters and Brutes that are dropped off by the ship--also, toss a grenade or two early on, when the enemies are bunched together. If you can, try and save some Spartan Laser ammo for the pair of Hunters, as it's much easier than trying to take them on from behind.
With the first wave dispatched, push forward to the structure ahead and take control of the turret, in preparation of the next drop ship. As soon as it unleashes its load, aim for the two Hunters first, then pick off as many of the remaining enemies as you can before turning right to tackle some more baddies in-bound from that direction. Once you've reduced their numbers, rip the turret off its perch and use it to ream anyone who might be sneaking up behind you (most likely to your left). Work your way deeper into the field (away from the side you entered from) and take residence on yet another turret on a grassy ledge, to the right. Remain here to tackle some more drop-ship enemies, ready to rip it off its perch to tackle some more who'll attack from behind.
Retreat, Defend Oni Interior
After a short while, you'll be instructed to retreat into the Oni center. The entrance is nearby, along the backwall--drop inside. Alright, so this central area is soon going to fall under attack in two directions. The central turret may lure you into using it, but it almost always results in death. Instead, we suggest hightailing it out the South side of the room and let your teammates deal with most of the enemies. Since you'll be completely protected in this area, feel free to use whatever weapons you have (such as the Sniper) to pick off any enemies who cross your line-of-sight. Eventually, all but Mickey will perish, but they should have dwindled their numbers enough that you can just go in and perform clean-up duty.
After the first batch of enemies are dealt with, a dropship will unleash some more enemies by the other two entrances (such as the one you had used for cover before). Now your strategy's going to have to change a bit, as you'll have to take the lead on this one. At least you can rest assured that the enemies won't enter your central area, creating a safe haven of sorts. Go ahead and collect whatever weapons and ammo you can from the two previous entrances (the Brute shot is particularly effective) and get ready to crack some skulls.
Basically, you're going to want to focus on only one Brute at a time, backing away for cover as soon as you start taking heavy damage or fire. The sandbag wall that lines the top of each staircase is surprisingly effective for cover, so long as you crouch behind it. Because there are initially so many enemies, you shouldn't have any trouble finding at least one to target at a time, but as their numbers dwindle, you'll have to get a big more aggressive in your approach, venturing deeper beyond your safe haven for the kill. When you do, get ready to retreat at the first sign of trouble. Remember to use grenades and other explosives whenever you get a chance, and be sure to scour the enemy corpses for additional weaponry.
Take Elevator to Roof for Evac
With the Brutes taken care of, hop aboard the elevator and interact with the panel in the back to get it started. As you ride it up, you'll be attacked by some nasty bugs. Quickly crouch behind the low wall on the front of the elevator for almost complete protection and don't even bother trying to shoot them unless they dare venture around the barrier, giving you an easy target.

When the elevator comes to a stop, you'll find two exits leading onto the roof…and a ton of baddies. Thankfully, they'll rarely enter the central elevator area, providing a safe zone of sorts. As such, we suggest alternating between the two sides, attacking the closest enemies, returning to that safe zone for a shield recharge. When it comes time to venture farther out, the boxes on either platform provide decent cover. When clear, the Pelican will lower itself, allowing you to clamber aboard.
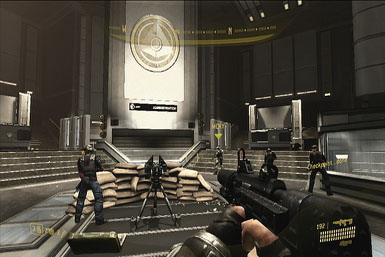
NMPD HQ
Find Mickey and Dutch's Pelican
Follow Buck up the stairs and through the building. At the top of the second staircase, turn right and exit outside, through the door.

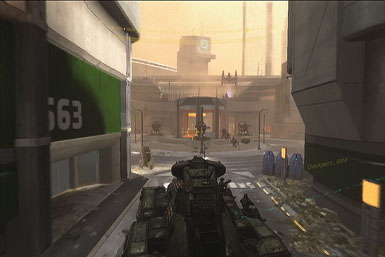
Outside, turn right to spot a trio of enemies including a Brute. They haven't yet spotted you, giving you an ideal chance to try out your sniper rifle. Try aiming it at the Brute's noggin--a single shot won't take him out, but you should have time to finish him off with a second before they attack. Now target the two nearby grunts with the pistol, then seek cover behind the concrete barrier to the left overlooking the platform below. This provides a great vantage point in which to target the remaining enemies, including the turret to the left, and another Brute. Once those two are taking care of, cleaning up the Grunts is simple.
With the area cleared, hop into the now-vacant turret and aim left to kill some baddies on an adjacent platform. Once you've taken down all you see, proceed through the nearby door, leading to that platform. Remain inside the doorway for cover as you target the enemies just outside. Before long, more will emerge on the upper walkways; you're best off sticking to the lower levels, hugging the walls just below them for cover, aiming for the enemies whenever you back away. There's a turret along the edge, near the spotlights, that you may also want to detach and carry around with you to quickly rip through the Covenant ranks.
After clearing the platform, continue through the door on the upper-most walkway. Inside, feel free to stock up on guns, ammo, and health--may we suggest the Silenced SMG (but keep your sniper)? When fully loaded, exit through the opposite door.
As you exit, Buck will point out a sniper above--he's but the first of several that'll appear on those balconies, as well as the far bridge. It's best to use the first pillar for cover, hugging it closely, only peeking around it far enough to reveal a single enemy at a time--if you take fire, quickly get behind it again to regain your shields. Remember, if you run low on health or ammo, more can be collected in the previous room. Once you've finished off the snipers, several Brutes will roll in, some armed with jet-packs. Continue to use the pillar for cover while you pick off the Brutes--if it looks as if one's about to take to the air, wait for him to launch then target him while airborne--they're surprisingly easy to pick off while hopping around. Oh, and watch out for a turret just below the bridge--if an enemy hops inside, carefully aim for his exposed head (remember to wait for your cursor to turn red, indicating the enemy is within your crosshair.)
After clearing the deck, drop down and proceed through the far left door. Grab the ammo and health on the right before exiting out the other side. Actually, about that exiting thing--don't. Instead, use the room's interior for cover as you blast the enemies outside. Once you've cleared the lower floor, step out and use the nearby cluster of containers for cover and get ready to take down the enemies on the levels above, including some Brutes. Pay particular attention to the turret on the left. If you run low on sniper ammo, we suggest backtracking to that health/ammo room a little ways back to restock, which should give you enough to take down the remaining enemies.
Continue through the door on the top floor and descend the staircase inside. Kill the two grunts at the base and go through a couple more doors, leading back outside. See the two enemies ahead? Watch out, as the Grunt is armed with a Fuel Rod Cannon--aim for him first, then the nearby sniper. You might also want to pick up the Fuel Rod Cannon he drops. At any rate, you'll spot your two friends across the abyss, but thankfully, a suspended platform provides a perfect walkway--carefully drop onto it and follow it to your teammates.
As you approach the far end, a couple of Banshees will swing by--don't worry about them. Instead, you should concern yourself more with some Brutes and co who appear on the far platform. Before dropping to it, it's best to remain on the suspended platform, using either the sniper rifle or Fuel Rod Cannon to easily pick 'em off from a distance. Once clear, drop on down and join your squad by the Pelican.
Defend Pelican Crash Site
Alright, so you need to protect the Pelican from a squadron of inbound Banshees. Grab one of the Missile Pods lying near the open hatch, or from behind the ship, and let 'er rip. Remember to wait for the lock-on icon before firing. There's also a missile turret on the left side of the ship (assuming you're facing away) which has unlimited ammo, but it can only cover the left half of the dock, so use it with caution. If you exhaust your missile supply in one of the pods, simply ditch it and grab another--they respawn continually.

Throughout the battle, both Banshees and Drop Ships will appear--in regards to the latter, you'll want to take down the individual turrets on each ship so they don't blast you to smithereens. As you near the end of the battle, some Brutes will appear. Missie Pods work just as well against them, and you don't have to worry about the lock-on. In addition, a machine gun turret located behind the ship can come in handy too, or you may also want to consider using your Fuel Rod Cannon.
Kikowani Station
Capture Phantom Drop-Ship
Head down the stairs, to the left, and kill the trio of grunts. Now approach the ledge and grab a Beam Rifle from the weapon stash, then use it to clear the opposite platform of as many enemies as you can. When you run out of ammo, grab the second Rifle. When that's depleted, you'll find two Brute Shots farther up the platform--use it to clear whatever's left.
With the enemies down for the count, Mickey will commandeer drop ship, but he'll request your assistance in a Banshee. Oblige him by taking control of one of the Banshees just behind where the drop ship is (or was).

Escort Phantom in a Banshee
Okay, quick Banshee rundown: It controls similar to the Ghost, that is Right-Trigger shoots and Left-Trigger boosts. However, it also has an unlimited supply of missiles that can be fired with "B." Beyond that, it can also perform different stunts by holding a direction on the control stick and pressing "A." To perform a quick barrel roll to the left or right, tap "A" while pressing it in either direction. The Banshee can also perform a somersault by holding down while pressing "A," allowing you to gain altitude quickly.
Now that you have the controls down, let's kill some fools. Don't bother waiting for the drop ship to tell you what to do--you can find some enemies to take down just opposite of where you entered. We suggest attacking them from high above, bringing down a barrage of plasma blasts and missiles. But stay close to the wall so you can roll behind it if you begin taking fire. Once you've cleared the area, follow the Phantom up to the large opening gate.
After the gate opens, two enemy Banshees will dart through. If you can't take them down from head-on (using missiles or lasers), just get behind them and try again. Now continue into the tunnel, taking down the tower full of enemies, and whatever lies beyond.
You'll emerge in a large room with more flying enemies and Banshees. After taking them down, land on the platform by the large gate and interact with the controls in its center to force it open. Now hop back into the Banshee

Open All Blocking Doors
Inside the next tunnel, destroy the tower (with a missile) and take down the Ghost. When back outside, destroy another tower, then focus on the Banshee on the far bridge. Simply strafe back and forth to evade its fire and return the favor in kind. When clear, you'll have to park the Banshee again to open another door…
…dammit, the door's jammed! No worries, go ahead and walk through the convenient man-sized opening. Inside, you may want to grab either a Carbine or Beam Rifle from the racks dead-ahead, as you have more enemies to take on. Once you're equipped, your current location is actually perfect to attack them from. Simply stand at the base of the stairs and use the sniper rifle to pick them off, using the walls on either side for cover.
Once they're down, climb up the staircase toward the far control room, where you'll face a few more Brutes. Grenades or the sniper rifle work best, but be ready as one of them is equipped with a hammer. Back away from him as far as you can--jumping if you have to--to evade his attacks. Once the room's clear, enter the far control room and interact with the panel inside to open the way. Now go and get your Banshee and continue forth young ODST!
Evade or Destroy Scarab
The next room is home to a Scarab. The easiest way to deal with it is to take it down from the inside. Simply fly right toward its head, rolling to evade its fire, and hop out of your Banshee to land on the main deck of the Scarab, just behind its noggin. Once there, fight down the ramp, through a few enemies including a Brute--a well place grenade should take most of them out. Melee attacks are also quite effective, due to the tight quarters. Once you've cleared the enemies, continue up to the control room, on the backside of the Scarab (the walkway at the top of the ramp leads to it). Once there, destroy the large, glowing control unit with either a couple of grenades or a ton of ammo. Once destroyed, you have about 10 seconds to get the hell off to avoid the resulting explosion--just drop to the ground and back away a few meters.
With the Scarab defeated, you should now be able to open the large door just behind it, to the left. Head through, grab a Banshee, and simply take down one of the marked targets ahead to start a chain reaction so powerful that you finish the level. Whoa.
Data Hive
Fire Dare on Sublevel 9
Drop from the elevator to the ground, then explore the room for some grenades, and a shotgun (if you want it). We suggest keeping at least one medium-range weapon in your arsenal. Proceed through the door ahead and down the ramp. You'll come across a group of grunts, but it's nothing you can't handle. Hang a left through a door near the end of the hall, leading into another corridor.

The second corridor's not much more difficult than the first, but now you'll face some Jackals as well. Use the pillars for cover and work your way into a small room at the end. Once there, turn left down another short hall into a similar room. There, a Brute and his accomplices will attack--a well place grenade should clear most of them out, otherwise use the Shotgun if you have it. If you're low on ammo, or have insufficient weapons, just back down the hall you came from and seek out more.
As you pass through another room, you'll come up behind some Grunts, making their way toward a room containing a Brute. Take down the Grunts quickly, then either use a grenade or shotgun on the Brute. If you're having trouble, try waiting by the entrance of the hall leading to him, forcing him to come to you--now either plant a grenade on his ugly face when he turns the corner, or melee him to death. It's hard to miss either way.
Just beyond, you'll meet up with a teammate in the next room. Interact with the central control panel to raise a pillar, exposing a hole to the floor below. However, you'll have to take down some flying bugs first--any weapon works, but the shotgun is most effective. After dropping down, we suggest augmenting your Shotgun with one of the Plasma Pistols lying around, before proceeding through the unlocked door.

This hall contains several Brutes, some of whom are cloaked, and some other low level grunts. Thankfully, there's a ton of cover, so it's best to charge up a Plasma Pistol shot from behind cover, then lean out, pop it off, and follow-up with some Shotgun blasts or melee attacks. The cloaked Brutes are no different. Also considering lobbing grenades if they bunch together. Beyond that, you'll trudge through several smaller rooms, many of which include groups of Brutes. It's often best to just chuck a grenade at the pack, if you have any. If not, you may want to back into the previous room and wait for them to come to you. Remember, if you run low on ammo, you can always backtrack for more--and hell, while you're doing so, sometimes your teammate will even finish the job for you. At the end, interact with the control panel again and drop through the exposed hole.
As soon as you drop to the third floor, more buggers will attack. Use a pillar for cover and take them down using whatever you've got, though the Shotgun's ideal. Alright, so the next hall is a major pain in the rear: it's host to a ton of Brutes, including a Chiefton. We suggest staying near the entrance of the hall so you can back into the previous room for cover. If you have a Carbine, that weapon seems to be most effective. Try using the objects near the entrance for cover as you target the Brutes. Make sure to lob grenades whenever they bunch together. If you need health, look for packs embedded in the left wall of the central raised platform, near the entrance, as well as a pair in the previous room.
Once you've thinned the crowed, you'll have the Chiefton left to deal with (identifiable by his large head piece, as well as the large gun he's carrying). Fighting him directly is practically a guaranteed suicide, so we actually suggest running past him entirely! Stick to the outer walls for protection (ideally staying on the opposite end of the room as him) and make haste for a tunnel on the right. Once you make it into the room at the end, you're as good as safe…

…well, at least you would be safe if it weren't for another pesky room full of enemies just beyond. Like before, stay near the entrance and lob grenades toward the center to thin the ranks. Now, odds are you're going to run out of ammo, and unfortunately, you actually have to kill everyone in this room in order to proceed. In such a situation, we found it's actually best to run laps around the room, and simply melee everyone (excepting the Brute--save him for later, if you haven't killed him already) as you run past. After each lap, take a breather in the prior room for a shield recharge if you need it, then repeat. When done, you may still have the Brute left--if so, grab one of the fallen enemies weapons and take the Brute down like you normally would, then proceed through the door that unlocks.
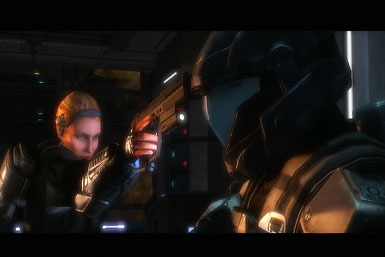
After knocking on the closed gate, you'll find Dare. Follow her toward your next objective.
Fight Through Hive to Data-Center
Follow Dare through another corridor, using largely the same tactics you have before: hang back, take cover, lob grenades at groups. Basic stuff. At the end, duck through a door on the right and then drop down the shaft that Dare points out.

After landing, you'll encounter a few corridors-worth of enemies. It's best to move up to the corner preceding each one to target those beyond. Oh, and if you find your weapons aren't quite getting the job done, consider swapping for Dare's pistol--she won't mind.

Before long, you'll wind up in a large, industrial-looking room. Upon entering, you may want to grab the Beam Rifle from the gun rack and the Carbine on the floor, both somewhat near the entrance. Now cross over one of the bridges and follow Dare through a door on the left to an elevator.


After riding the elevator, follow Dare down the hall and into the top floor of the industrial-looking room. Hang back while she pushes ahead, triggering a wave of flying bugs. With your Carbine, pick them off from a safe distance. When clear, follow Dare just close enough to trigger the next wave--specifically, you should hang back on the walkway just prior to the well-lit platform. Go ahead and jump onto one of the purple canisters for an better vantage point, and target the bugs as they dart in (they'll approach from both the left and right sides of the lit platform).

With the second wave down, follow Dare along the walkway to a platform containing a Carbine cache. Restock, then wait here while she triggers a couple more waves ahead, allowing you to easily target them from afar. Subsequently, when you catch up to her afterward, she'll double-back, triggering a surprise wave. Quickly retreat back down the walkway, to put some distance between you, her, and the bugs, then take 'em on from afar again. That should be the final wave, so follow Dare into the Data Center and down another shaft (though you may want to refill your Carbine ammo first, via the weapon stashes just before the data center).
Rescue Superintendent
You'll emerge in a large room, with some Brutes attacking a door ahead. Still have your Beam Rifle? If so, now's the time to use it, as you can easily pick off all the Brutes from this safe position. If you run out of ammo, your Carbine can finish the job. Lacking those weapons, you can also sneak up behind them (since they're pre-occupied with the door) and lob some grenades right onto them. Lacking those (seriously, maybe Halo's not the game for you), simply unload whatever you do have into the nearest Brute and revert to Melee attacks if you have to. In regards to the Chiefton, you'll want to time your jumps to avoid being pummeled by his gravity hammer.
With the Brutes down, Dare will open the door they so failed at. Continue through a few more doors, into the Data Center.
Escort Engineer to Safety
Well, isn't this a strange turn of events. Alright, so you need to escort the engineer safely out of here. Unfortunately, the engineer isn't very patient, forging ahead with or without you. As such, it's important you keep up with him taking down the nearby enemies. Since he'll draw most of their attention, taking them down shouldn't be difficult. Once the engineer makes it to the end of the first section, follow it and your squad through a door, down into another room.
See the bugs on the ceiling? Start taking them down quickly, before they have a chance to do any real damage. Once you've cleared the area, follow the engineer into an adjacent room, where he'll unlock a door, allowing you to continue onward. Proceed through another corridor with a few more bugs, then hop aboard the elevator at the end to complete the mission!

Coastal Highway
Find Elevator to the Highway
Alright, so you're still on "engineer protecting" duty, but thankfully, he's a bit more restrained this time. A short ways up the street, you'll encounter the first batch of enemies, including some gunners in a tower, and several Brutes on either side. If you still have the Beam Rifle, hang back and use it to pick off the tower's gunners first, then any Brutes you can see. If you don't have the Beam Rifle--or you ran out of ammo--look for a passageway on the left you can enter. Not only does it have a large weapon cache and several health packs, but there's actually a doorway in the corner leading to a balcony above, where you'll find a Sniper Rifle! This balcony also provides a fantastic viewpoint for clearing both the tower, and the remaining Brutes from the field (you can also step onto the glass awning to get closer to the battle). Try lobbing grenades from here toward groups of enemies as well.
Should you run out of sniper ammo, there's still a cache of weapons in the aforementioned passageway on ground-level more than capable of clearing out enemies. Simply push forward along the left wall, again using the pillars for cover. Once the area is clear, push forward a ways to cause more Brutes to appear. If you still have sniper ammo remaining, back up a bit and target them from here. Although they'll often use the flatbed truck for cover, you can still target their exposed noggins over the top of it (Brutes aren't very smart, evidently).
With the area completely cleared, proceed up the street where the last batch of Brutes came from, and continue through a building where you'll find a door you can interact with, after the alien unlocks it.
Escort and Protect Dare's Vehicle
You heard the man, hop into the Warthog! So you have to escort Dare's vehicle through several miles of highway. Thankfully, there's not much "protecting" involved as Dare's vehicle is built like a tank, and even when we completely neglected it, we never once saw it destroyed. As such, your primary goal should be just staying alive…and that's easy too. Here are some quick tips to get you through most of the sections:
- Don't worry about protecting Dare's vehicle--it's extremely resilient.
- Inside every gate, you'll find several health packs, as well as a replacement vehicle (usually a Warthog).
- At each gate, we suggest swapping into a replacement vehicle. This usually isn't necessary, but it'll ensure your vehicle's in good condition, plus at least one of the Warthogs is equipped with the far superior missile launcher--awesome for enemy vehicles.
For the first several sections, simply race to the end of each area and wait for the door to open. Your gunner will take down any threats without any help. Just be careful at the third gate, as a small army of bugs await on the other side. Backup and let your gunner tackle them from afar.
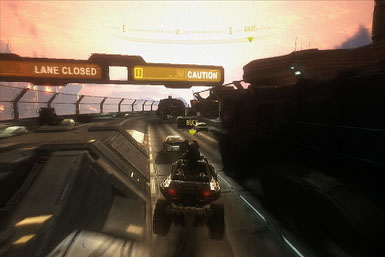
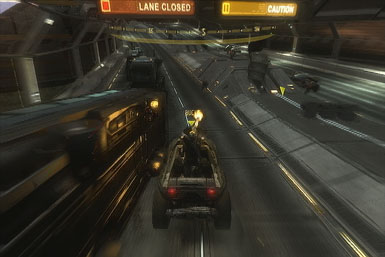
Before long, you'll begin facing a bit more resistance. This simply means that you should hold back and push forward slowly (even slower than Dare's vehicle), allowing your gunner to take the enemies down from a safe distance. This goes double when taking on vehicles, such as Wraiths and packs of Ghosts. You should also swap Warthogs at each gate, that way it's always in good condition--though when you find the one with the missile-pod, keep it, as that weapon is far more effective.
Soon after, you'll encounter the Scorpion tank in one of the tunnels--climb inside, as this baby excels at cleaning the Covenant's clock. Like before, take it slow and blast the enemies from afar, including the guard towers stationed throughout. You might encounter an enemy or two equipped with a Fuel Rod Cannon--in these cases, stick to the center of the road so you can easily take cover behind some debris, and try to take him down when he pauses between shots.
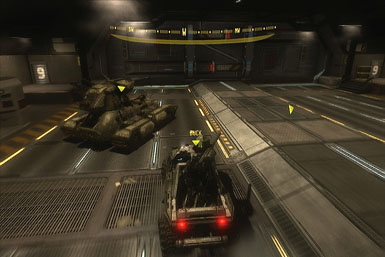
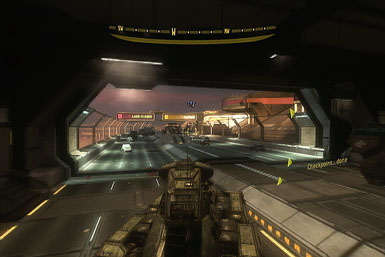
When you reach the Scarab that opens fire on Dare, just ignore it and continue onward, down the next ramp, where your tank journey comes to an end. Now head inside the building ahead, taking down the grunts just outside.
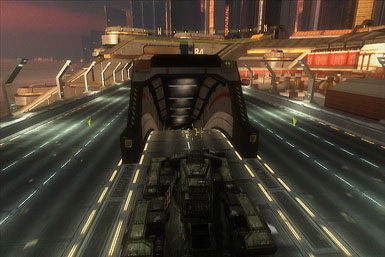
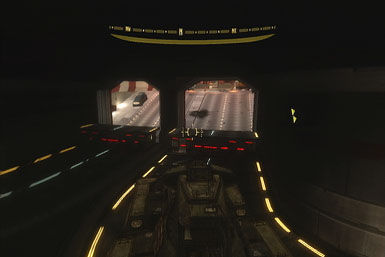
Defend Engineer Until Friendly Phantom Arrives
Okay, your final task is to hold down the fort from three waves of enemies. Thankfully, you have a ton of arsenal on your side, including a rocket launcher and four health packs. Oh, and don't worry about the engineer--he's well protected inside the building. In fact, you can take shelter there too without worry of being attacked.

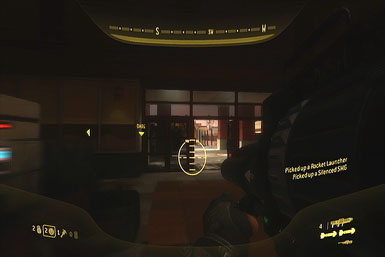
With the rocket launcher in tow, it's best to use it for either the Brutes, or Hunters that show up in the second wave (the second wave is otherwise devoid of Brutes). For the most part, simply stay near the base, venturing outside just far enough to target an enemy or two at a time, then veer back inside for a shield (or health refill). You may also want to try and grab some of the dropped weapons, such as the sniper rifle, which is helpful for targeting the enemies.
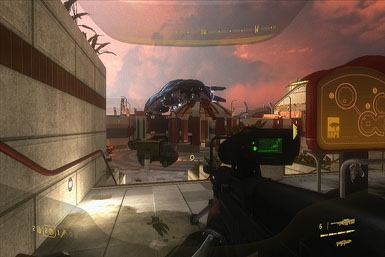
Between waves, you may also want to consider venturing out on either of the walkways so you can more easily target the grouped enemies as they disembark from the drop ship (grenades work wonders). We suggest retreating back to the base soon though, before they manage to flank you. Once you clear the area, you'll have beaten Halo ODST. Good job!
Mombasa Streets
Mombasa Streets is the overworld that connects you to the individual missions. As you explore the streets, you'll come across "clues" left behind by fellow ODSTs, such as discarded weapons or gear. Whenever you locate one, a 'flashback' mission will start, where you'll actually take control of that soldier, experiencing what he did. Because New Mombasa is relatively non-linear, it's difficult to provide a step-by-step walkthrough. Plus the game even points you toward at least one clue at any time, via the marked beacon on your map and compass. Now as you explore the streets, you'll also encounter roaming groups of enemies, which are also visible on your map. Quite often, you can slip by these guys without incident, either by taking a route that bypasses them completely, or simply running through the area before they see you.
When you get close to a clue, you'll hear a beeping noise, indicating it's nearby. Below you'll find more specific information on where exactly each clue is, once you've reached its general location:
Uplift Reserve
As you enter the area, a sniper watches over the street, but don't worry about him, as you're just about done here. Follow the curving street to the right to find the Drone Fighter Optics, which you can inspect to begin the mission.
Kizingo Boulveard
When you hear the beeping, look for a door you can enter nearby. Climb to the top floor to find the Gauss Turret, which can be found to begin the next mission.
Oni Alpha Site
Scan the Remote Detonator on the left side of the waterfront.
Kikiwani Station
Look for the Bio-Foam Canister on the ground, beneath the Kikiwani Station awning, that can be scanned.
Underground Entrance
You should already be close to the underground entrance. The only snag is a horde of snipers and Brutes guarding the entrance, including one armed with a Fuel Rod Cannon. Ideally, high-powered long-range weapons, such as the sniper rifle and Carbine are the most effective. We recommend approaching from the left alley, but hang back for cover--try and take down the snipers and Fuel Rod Cannon launcher first, unless some other Brutes pose an immediate threat. Once they're dealt with, grenades can be an effective way to clean out the rest, who should be bunched up around the corner. If you run completely out of ammo, try grabbing either the Fuel Rod Cannon, or one of the dropped sniper rifles.
When clear, approach the lit door to the underground to start the next mission.
Xbox 360 Achievements
Note that there are Spoilers on this list.
| Achievement Name | How To Earn | Reward |
|---|---|---|
| Heal Up | Find the first Medical Kiosk and heal yourself. | 5 |
| Tourist | Access and download the city map to your VISR. | 5 |
| Dark Times | Kill 5 enemies while using VISR mode. | 5 |
| Boom, Headshot | Get 10 automag headshot kills in any level. | 5 |
| Stunning! | Stun a vehicle with an overcharged plasma pistol and quickly kill the driver | 5 |
| Ewww, Sticky! | Get 5 sticky grenade kills in any level. | 5 |
| My Clothes! | Plasma Pistol Overcharge and qucikly kill 10 Brutes. | 5 |
| Pink and Deadly | Get 10 Needler supercombine kills on any covenant | 5 |
| Trading Down | Trade weapons with a fellow character | 5 |
| Headcase | Finish any level with at least one Skull activated. | 5 |
| Tayari Plaza | Complete Tayari Plaze on Normal, Heroic, or Legendary to unlock a new Firefight character. | 30 |
| Uplift Reserve | Complete Uplift Reserve on Normal, Heroic, or Legendary to unlock a new Firefight character. | 30 |
| Kizingo Boulevard | Complete Kizingo Blvd. on Normal, Heroic, or Legendary to unlock a new Firefighter character. | 30 |
| ONI Alpha Site | Complete ONI Slpha Site on Normal, Heroic, or Legendary to unlock a new Firefighter mission. | 30 |
| NMPD HQ | Complete NMPD HQ on Normal, Heroic, or Legendary to unlock a new Firefight mission. | 30 |
| Kikiwani Station | Complete Kikowani Station on Normal, Heroic, or Legendary. | 30 |
| Data Hive | Complete Data Hive on Normal, Heroic, or Legendary to unlock a new Firefighter mission. | 50 |
| Coastal Highway | Complete Coastal Highway on Normal, Heroic, or Legendary to unlock a new Firefighter mission. | 50 |
| Campaign Complete: Normal | Complete the Campaign on Normal difficulty. | 100 |
| Campaign Complete: Heroic | Complete the Campaign on Heroic difficulty. | 100 |
| Campaign Complete: Legendary | Complete the Campaign on Legendary to unlock a new Firefight character. | 100 |
| Junior Detective | Find the first clue unraveling the mystery. | 10 |
| Gumshoe | Find the 3rd clue unraveling the mystery, alone or with another ODST. | 10 |
| Super Sleuth | Find the final clue unraveling the mystery, alone or with another ODST. | 10 |
| Wraith Killer | Kill are Wraiths in Uplift Reserve | 5 |
| Both Tubes | Get 10 Rocket kills on Kizingo Boulevard. | 5 |
| Laser Blaster | Get 10 Spartan Laser kills on ONI Alpha Site. | 5 |
| Dome Inspector | Get 15 headshot kills on NMPD H | 5 |
| I Like Fire | Kill 10 enemies with the Flamethrower on Data Hive. | 5 |
| Good Samaritan | Killing things that are new and different is bad, alone or with another ODST. | 20 |
| Naughty Naughty | Killing things that are new and different is good, alone or with another ODST. | 5 |
| Listener | Find the first Audio Log. | 5 |
| Tuned In | Find 3 Audio Logs, alone or with another ODST. | 15 |
| All Ears | Find 15 Audio Logs, alone or with another ODST. | 30 |
| Audiophile | Find all Audio Logs, alone or with another ODST. | 75 |
| Be Like Marty | In Firefight, finish a full round without lilling a single enemy. | 10 |
| Firefight: Crater | Score over 200,000 points in Firefight on Crater. | 10 |
| Firefight: Lost Platoon | Score over 200,000 points in Firefight on Lost Platoon. | 10 |
| Firefight: Rally Point | Score over 200,000 points in Firefight on Rally Point. | 10 |
| Firefight: Security Zone | Score over 200,000 points in Firefight on Security Zone. | 10 |
| Firefight: Alpha Site | Score over 200,000 points in Firefight on Alpha Site. | 10 |
| Firefight: Windward | Score over 200,000 points in Firefight on Windward. | 10 |
| Firefight: Chasm Ten | Score over 200,000 points in Firefight on Chasm Ten. | 10 |
| Firefight: Last Exit | Score over 200,000 points in Firefight on Last Exit. | 10 |
| Vidmaster Challenge: Classic | Finish any level solo on Legendary, on LIVE, with no shots fired or grenades thrown. | 25 |
| Vidmaster Challenge: Endure | In Firefight, on any mission, pass the 4th Set on 4-player Heroic LIVE co-op. | 25 |
| Vidmaster Challenge: Déjà Vu | Complete Highway on 4-player Legendary LIVE co-op, with Iron, and no ‘Hog or Scorpion | 25 |
Got a news tip or want to contact us directly? Email news@gamespot.com
Join the conversation