Grand Theft Auto IV Walkthrough
Conquer the sprawling streets of Liberty City all over again with GameSpot's walkthrough for Grand Theft Auto 4.
It’s rare for a game to live up to the enormous pre-release hype and Grand Theft Auto IV is that rare game. With a huge Liberty City to explore, impressive detail, sharp writing, compelling characters, and a ton of side missions and activities to complete, Grand Theft Auto IV is not only the best GTA game ever, it’s one of the best games ever period.
We’ve put together a comprehensive guide to get you through every facet of Grand Theft Auto IV and every corner of Liberty City. You’ll find a complete walk-through of the story mode, details on all friends, girlfriends, and random characters, solutions to side missions, multiplayer tips, and cheat codes.
This Gamespot game guide to Grand Theft Auto IV features:
- Story Walk-through: A complete walk-through of the single-player game with tips on completing all mission objectives.
- Friends, Girlfriends, and Random Characters: Make friends, date girlfriends, and meet random characters. This section covers them all, including how to show your friends a good time, impress dates, and how to unlock special benefits.
- Side Missions: Need cash or just want to take on some additional work? Check here for tips on completing the available side missions, such as Brucie’s export business, Little Jacob’s package runs, Stevie’s vehicles, or the assassin tasks.
- Multiplayer Tips: This section compiles tips on competing in Grand Theft Auto IV’s multiplayer modes.
- Cheat Codes and Extras: Check here for Grand Theft Auto IV cheat codes and other extras.
- Xbox 360 Achievements: This section lists achievements to unlock in the Xbox 360 version.
Chapter 1 - Story Walk-through
This section provides walk-throughs for all of the single-player story missions. Note that many of these missions can be completed in a different order than the one presented below. You may have two or three story missions available at a time and can complete any one before moving to the next (although you will eventually complete them all). This walk-through attempts to stick with a particular contact until the mission set is exhausted.
The Cousins Bellic (Roman)
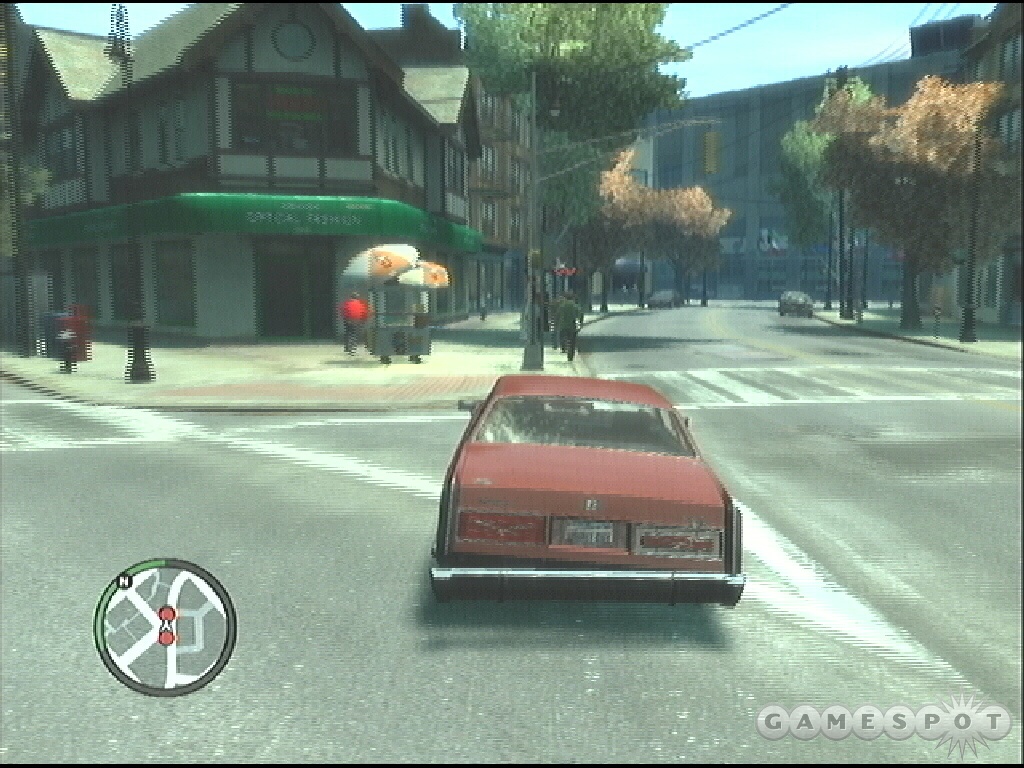
Niko Bellic arrives at Liberty City onboard the Playtpus; he’s come to live the American dream, like his cousin Roman. Sports cars, mansions, women…Roman claims to have it all. But it doesn’t take long for Niko to realize that Roman wasn’t quite honest about his situation. It turns out Roman’s sports car is just a taxi and the mansion is a rundown apartment.
Objective: Drive to Roman’s Place.
Follow the marked route out of the docks toward Roman’s "mansion". Drive Roman’s taxi onto the resident parking space in front of the apartment building—parking cars in this space will save them (like the garage in previous GTA games).
You earn $25 for completing this mission (as well as an achievement if you’re playing on the Xbox 360). Take the opportunity to save your game with a power nap on the bed before heading out to meet with Roman; he’s marked on the mini-map at his cab depot, the Express Car Service.
It’s Your Call (Roman)
Objective: Take Roman to the hardware store.
The hardware store is actually a front for an underground gambling ring. Apparently Roman pays off his debt by getting into more debt—your cousin is playing with money he was supposed to give to Albanian loan sharks. Roman claims he’s known as "The Janitor" because he cleans up…but that might be as accurate as his sports car and mansion.
Park at the marked location in front of the Discount Hardware and Roman will exit. Your cousin hands you an old phone with his new number: you need to call if those Albanian loan sharks show up. Roman says they’ll be in a beige Willard.
Objective: Remain stationary in the car and look out for the loan sharks.

Roman heads inside and leaves you as the lookout. You can rotate the camera around your car to look for the loan sharks. Look for them to pull up on the opposite side of the street. Roman will call once to tell you he’s cleaning up and moments later the loan sharks arrive.
Objective: Phone Roman and warn him.
Once the loan sharks arrive, it’s time to warn your cousin. Toggle the cell phone and dial Roman. Your cousin makes a quick exit out of the card game and gets into the taxi.
Objective: Lose the loan sharks and take Roman back to the cab depot.
You must evade the loan sharks, not eliminate them. The marked route leads you back to Roman’s cab depot. Drive fast and put distance between you and the loan sharks. It won’t be too hard to evade them. Accelerate along a straightaway and avoid crashing into vehicles or objects that would slow you down. Return Roman to the cab depot and pocket $30 for your troubles.
Three’s a Crowd (Roman)
Not long after you drop Roman off at the cab depot, he sends a text message. Your cousin is in trouble already. Drive to the cab depot and find Roman getting roughed up by Albanian loan sharks. After the fight, Roman wants your help in picking up Mallorie, his girlfriend. Plus there may be a girl for you.
Objective: Go to the subway station.
Get inside Roman’s car and drive along the marked route to the Hove Beach subway station. Pull up to the marker in front of the station. Honk the car horn to get the girls’ attention.
Objective: Take them back to Michelle’s apartment.
Proceed along the marked route toward Michelle’s apartment. It sounds like Michelle might be interested in ole Niko…but your "fresh off the boat" clothes need a makeover. After dropping the girls off, Roman phones and suggests hitting a clothing store to update your threads. This Russian style clothing department is back near the safehouse.
Objective: Get to the clothes shop on Mohawk and buy some new clothes.
To complete the mission, you must purchase an item of clothing. Fortunately, the first item is free but you can still completely overhaul Niko’s wardrobe if you wish. After the task is complete, Michelle will ring on the cell phone. She asks you out on a date! (The new clothes are already working their magic). Look for the heart and "M" on the map.
Bleed Out (Roman)
After you set up a date with Michelle, Roman will call needing your help. You can choose to go on the date or help Roman out. Family first, right?
Objective: Go and rescue Roman.
Apparently the irate Albanians have Roman cornered and he needs you to bail him out once again. Don’t worry—the date will wait. Drive to Roman’s location and find him getting pummeled on the basketball court.
Objective: Beat up Belder. Beat up Kalem.
This is your first task of melee combat. Follow the tutorial instructions to punch, kick, counter, block, etc. These guys aren’t too tough. Take ‘em down one at a time to complete the objective.
Objective: Go help Roman. Chase Darden.
Walk over to Roman and pick him up. Your cousin spots Darden outside the court—Darden makes a break for it. Sprint to Roman’s car; wait for Roman to hobble over and get into the passenger seat. Pursue the marked red car on your mini-map.
Keep Darden within your sights. Eventually, Darden will hop out and attempt to escape on foot. Exit your car and follow Darden up the stairs.
Objective: Take out Darden.
Darden’s got a knife so you’ll need to disarm him if you want to survive. Follow the onscreen tutorial to disarm Darden. Now you have the knife! He won’t last long against the blade.
Objective: Drive Roman back to the garage.
Return to your cousin’s car and drive back to the cab depot to complete the mission.
First Date (Michelle)
After setting up the date with Michelle, a heart and "M will be marked at her apartment. Drive there and walk up to the marked location. After brief introductions in her extraordinarily clean apartment, you decide to take her to the fun fair, err…the carnival.
Objective: Take Michelle to the carnival.
Once inside her vehicle, proceed along the marked route south to find the carnival. You arrive only to discover the carnival is closed—apparently some big developer swooped in and bought it. Michelle quickly discovers a new activity; there’s a bowling alley nearby.
Objective: Go bowling with Michelle.
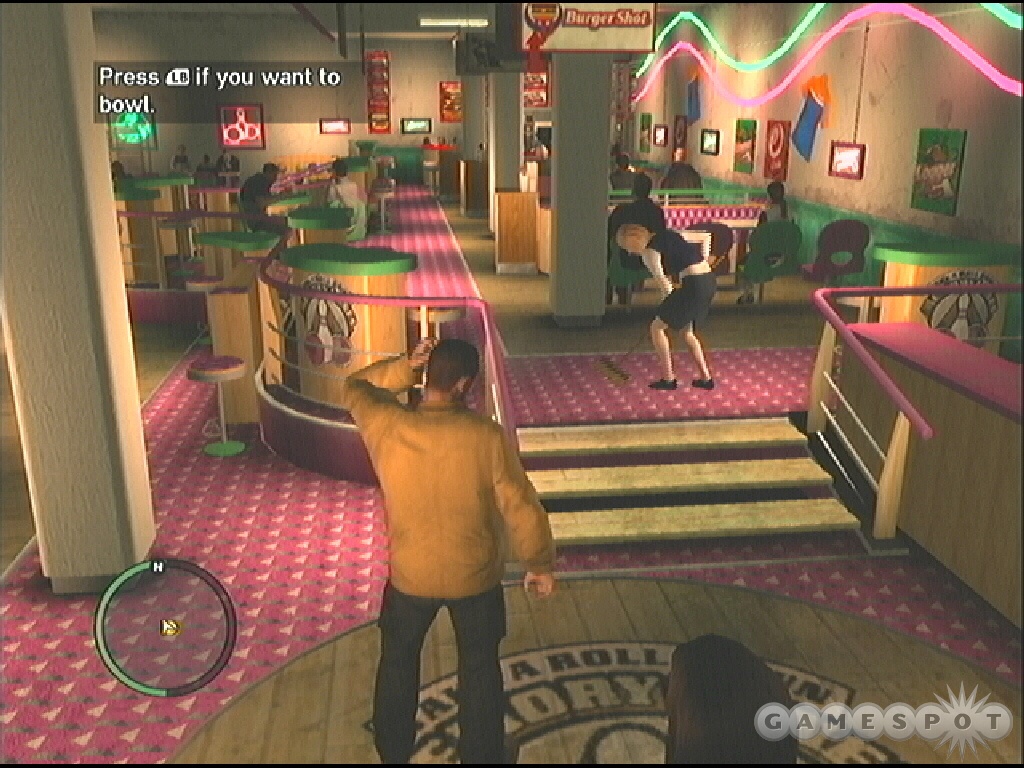
Go south onto the boardwalk then east toward the bowling alley marked on the mini-map. Fortunately for you, this is a rather cheap date: there’s a five frame bowling game for free! Walk to the desk and start the game. Time to bowl! Follow the onscreen instructions and try to get three strikes in a row—a turkey—to unlock an Xbox 360 achievement.
Objective: Go back to Michelle’s car.
After the strenuous five frame bowling game, Michelle is tuckered out and ready to go home. Return to her car and drive Michelle back to her apartment. The date should have gone well. You can call Michelle again on your cell phone to set up another date (or she may call you). She loves games, such as pool or darts, and it may only take one more date to try your luck.
Easy Fare (Roman)
Head over to the cab depot, but Roman’s not there. Vlad decides to boss you around a bit but you stand your ground. Roman finally arrives and saves you from more of Vlad’s blabbering. Apparently Roman owes Vlad money as well—not a huge surprise. To help pay down some of Roman’s debt, Vlad asks for a favor.
Objective: Get in Roman’s car. Drive to Rotterdam Hill and meet Roman’s customer.
Find Roman’s taxi nearby and get inside. Follow the marked route to Rotterdam Hill. Park the car at the marker and wait for Jermaine to approach and get inside.
Objective: Take Jermaine to Masterson St.
Jermaine needs to deliver stolen goods and he decides to trust your driving even though he expected Roman for this run. Drive along the marked route to Jermaine’s drop. Find it in a back alley just off the road. Pull up to the marker.
Objective: Lose your wanted level.
Jermaine thinks something looks fishy…is that door open? Oh wait, it’s the cops! The law immediately surrounds your position. Jermaine leaps back into Roman’s taxi and tells you to start driving! Turn around and exit out the alley. You need to lose your wanted level.
Drive quickly and get out of the flashing wanted zone indicated on the mini-map. Roman’s taxi isn’t exactly a Ferrari so you should turn down side streets and even proceed through the park northeast of the cab depot to try and avoid the pursuing police. Avoid police positioned ahead of you when you’re almost out of the flashing zone. You don’t want to get spotted and create another zone. Once you’re free of the zone, lay low and lose the wanted level. Stay out of trouble to remain undetected.
Objective: Take Jermaine to Gibson Street.
Drop Jermaine at the auto parts store on Gibson Street. The location is also a Pay-n-Spray used to paint your car to avoid police and the wanted level. Just don’t let the cops see you go inside! Vlad calls—Roman owes him a lot of money. Vlad says he has more work…looks like you’ll have to comply in order to keep Roman intact.
Jamaican Heat (Roman)
Objective: Go and pick up Little Jacob.
Roman wants you to go pick up a friend of his, Little Jacob. Get inside Roman’s taxi and follow the marked route to Little Jacob. You’ll find Little Jacob outside The People’s Park. Honk your horn to get his attention. Once inside the taxi, Little Jacob provides a new destination.
Objective: Go to Schottler.
Follow the marked route to Little Jacob’s destination. Along the way, he gives you a pistol—apparently he may need some backup.
Objective: Go to the lookout spot.
Proceed to the lookout spot and watch for any "badness". It’s up a staircase on the right side. Arm your pistol as you approach. When you reach the overlook, spot Little Jacob on the far side. Crouch and aim your pistol in his direction and prepare for the "badness".
A group of three thugs approach Little Jacob—you’re at the perfect spot to ambush their ambush. Target each thug in turn and eliminate all with the pistol. Don’t forget to reload. After eliminating all three, a fourth appears on an adjacent rooftop. Target and eliminate the enemy.
Objective: Get Little Jacob back to the café.
Drive along the marked route and take Little Jacob to his destination. For your efforts, you get to keep the piece. Also, as you drive away, expect a phone call from Little Jacob—he’s eager to work with you again.
You get a call from Roman about the family business. He needs more cab drivers. Just call him on the phone and select job. You can drive as many cab fares as you wish!
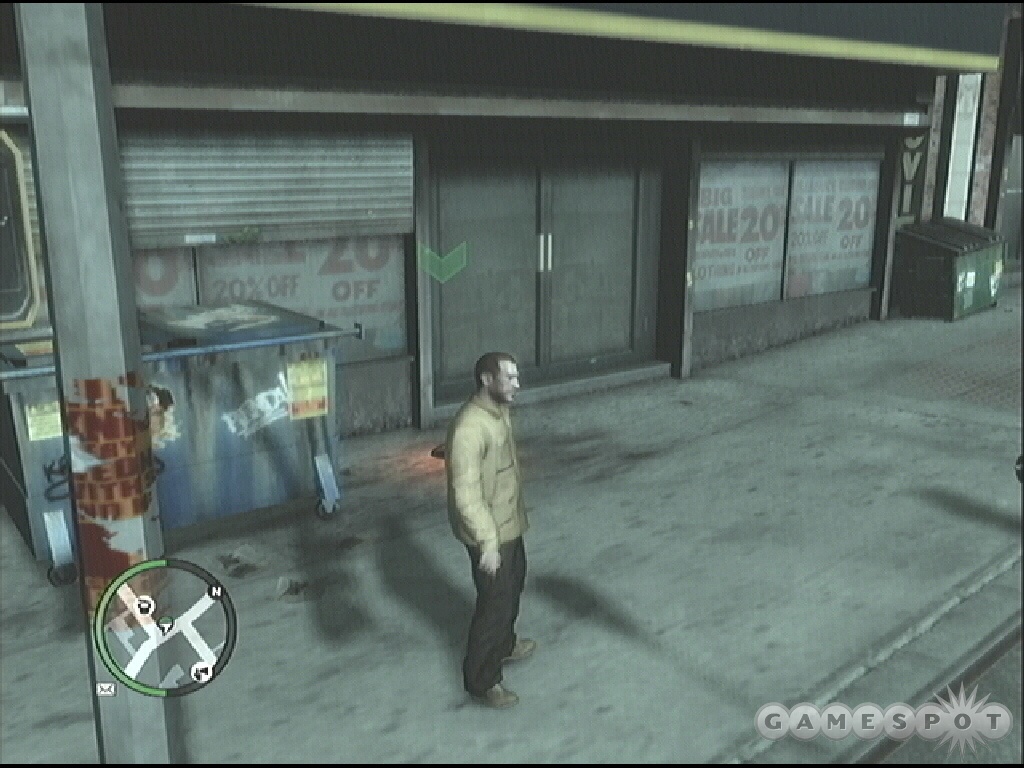
Bull in a China Shop (Vlad)
Vlad wants you to shake down some guy who owns a china shop—the guy owes Vlad some money. Time to take out Vlad’s displeasure on the guy’s shop.
Objective: Go to the shop.
You’re told you can get a cab to take you around the city (and to this destination) or, if you prefer, you can just drive your own vehicle (or someone else’s) to the shop. Just make your way along the marked route to find the location.
Objective: Find something to throw through the shop window.
You knock on the door and try to reason with the fellow but he’s having none of it. If he’s not going to pay then, well, he’s going to have to pay. Locate the green marker on the mini-map. Walk over and pick up a brick from the debris pile and then return to the shop window.
Objective: Throw the object through the window to show the owner you’re serious.
Don’t toss the brick into the double doorway—it just bounces off (and you’ll probably have to go get another brick). Toss the brick through the windows on the left side. That gets the owner’s attention! He decides to pay up.
Objective: Take the money back to Vlad.
Return along the marked path and park in front of Vlad’s watering hole. You hand over the money and complete the mission, earning $50 for your efforts.
Hung Out to Dry (Vlad)
Vlad has another non-paying customer—a guy who owns a laundromat on Masterson Street. Vlad wants you to teach the guy a lesson.
Objective: Go to the laundromat.
Get back into your car and drive the route to the laundromat. Get out of the car and approach the marked entrance. Niko enters the establishment—and gets underwear tossed in his face. The target is making a run for it!
Objective: Chase the shop keeper.
Follow the shop keeper out the rear entrance. He gets into a van and drives off. There are a couple cars here. Steal one found on the right side and pursue the fleeing van, which is marked as red on your mini-map.
Objective: Ram the shop keeper’s van until he stops.
Quickly exit the back alley and pursue the van. Your objective isn’t to kill the driver but to make the van stop. But first you must catch up. As you pull up behind the van, move to its left or right side and accelerate. Push into the side of the van and attempt to ram it off of the road. It may not happen the first, second, or even third time. Maintain pursuit and push the van around. If the van makes a left or right turn, take the opportunity to ram straight into the side, which could topple the van and end the mission quickly.
The shop keeper decides your way is the best way and hands over Vlad’s money. As you return to your car, expect a call from Vlad that concludes the task.
Clean Getaway (Vlad)
Apparently yet another person, a lowlife named Jimmy, owes Vlad some money. This time your orders are to take the scumbag’s car as payment. You won’t take a vehicle there and Vlad certainly isn’t in any condition to drive you. Instead, you’ll use the Liberty City subway transportation system.
Objective: Go to the subway station. Go up on the subway platform. Wait for the train to arrive.
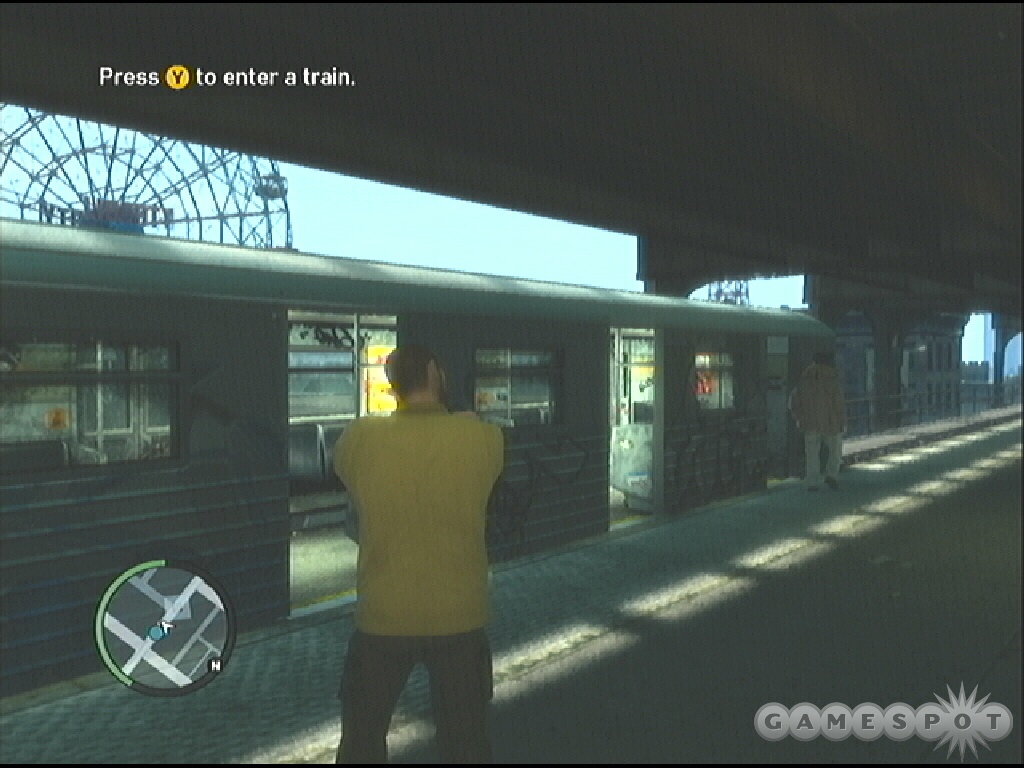
The subway station isn’t far. Locate the marked position on your mini-map and just sprint there. Once inside the station, ascend the ramp and then the staircase onto the platform. At this point just wait for the train to arrive. Get on the train and enjoy the sights.
Objective: Find and take the silver Blista Compact.
Descend the subway platform and exit the station. Locate the marked Blista Compact on the map. Jimmy’s cleaning his prized possession as you approach. Read the tutorial on the stun punch and greet Jimmy with one. Get inside the Blista Compact and drive off.
Objective: Take Jimmy’s car to the lockup.
You call Vlad on the way back and tell him about the car’s condition: Vlad can’t sell it dirty! He needs you to take it by the carwash before heading to the lockup.
Objective: Take Jimmy’s car to the car wash. Drive the car into the garage.
Follow the marked route to the car wash. Drive up to the front to trigger the car wash cut scene. At its completion, continue along the route and drive the vehicle into the lockup garage to finish the task.
Ivan the Not So Terrible (Vlad)
Vlad says that a guy named Ivan plans to rob your cousin. Supposedly Ivan plans to steal paperwork from the cab depot—but with the head’s up from Vlad, you’ll be waiting in ambush.
Objective: Go to Roman’s garage.
As you near Roman’s garage, Ivan is already out of the depot and making an escape in a vehicle.
Objective: Ivan is already making an escape. Chase him.
Pursue Ivan in your vehicle. There’s no need to get too fancy here. Just stick close to him and don’t let him get too far away or you will fail the mission. Eventually Ivan reaches a construction site and gets out of the car. It’s time to resume the chase on foot!
Objective: Ivan is escaping into the construction site. Chase him.
Get out of your car and head into the construction site. There’s a ladder near the entrance. Climb up; at the top, turn right and locate another ladder. Continue up the stairs in pursuit of Ivan. You’ll have to jump between several buildings. Just follow Ivan on radar. As you pursue across a catwalk, he’ll slip and hang precariously off the edge. He’s right where you want him.
Objective: Choose Ivan’s fate.
You’re given a choice here: complete Vlad’s task and knock Ivan off of the building and let him fall to his death or save Ivan’s life and tell him to get out of Liberty City. Either way the mission concludes. If you do choose to save Ivan’s life, you can meet him later in the game for some side tasks.
Concrete Jungle (Little Jacob)
Drive up to Little Jacob’s location. He wants to take drive but you’ll need to get behind the wheel because Little Jacob is just a tad under the influence. Grab the nearby vehicle.
Objective: Take Jacob to the apartment block in Willis.
You’re driving Jacob to a deal…but Jacob is a little paranoid. He thinks it might be a set up but that might just be the influence talking. Follow the marked route toward the apartment block in Willis.
Objective: Drive to the rear alleyway.
Once you drop Jacob off, he tells you to drive around the back in case one of the dealers tries to make a run for it with the product. Drive and park around back in the alley and wait for Jacob to phone. Answer his call. Apparently the deal went bad and you need to take care of any fleeing dealers.
Objective: Waste the drug dealers.
Three dealers run out the back door and into the opposite side of the alley. You can waste the fleeing dealers while on foot or inside your car. Driving over them a couple times certainly does the trick. If you’d rather have a gun battle then get out of your vehicle and chase after the dealers. The dealers run in the opposite direction of your parking spot and eventually onto a busy road. Note that if you choose to fight with guns on the city streets, you may attract the law’s attention.
Objective: Go and pick up Jacob. Take Jacob to the town house in Meadows Park.
Drive back around to the front and stop in front of Jacob. Honk and he’ll come inside. Once he’s in the car, follow route guidance to another location; this time a town house in Meadows Park.
Objective: Go with Jacob to the front door.
When you arrive at the location, Jacob exits the vehicle and you must accompany him to the front door. Walk to the marker and, as instructed, take cover next to Jacob.
Objective: Take down all the drug dealers.
There’s a gang of dealers inside the house. Jacob breaks the door down; be ready to start firing. Eliminate the dealer on the staircase then listen for Jacob’s instructions to move over to the window, which provides a better firing angle against the dealers hiding in the room on the left side of the town house. Shoot into the window and at the dealers inside.
Objective: Follow Jacob into the house.
Assist Jacob when he moves into the house and eliminate any remaining dealers. It’s possible for Little Jacob to be taken down in this mission, which ends the task in failure. Keep ahead of Little Jacob so you take the brunt of the damage should you get fired upon from the remaining enemies.
Objective: Take Jacob back to the Homebrew café.
After clearing out the town house, return to the parked car and drive Jacob back to the marked location to complete the mission.
Uncle Vlad (Roman)
Roman thinks Mallorie and Vlad are having an affair…something you already know is happening. Roman is devastated that you didn’t do or say anything. Roman questions your loyalty and you plan to do something about it.
Objective: Go with Roman and look for Vlad at Comrades.
Follow the marked route to the Comrades Bar, Vlad’s usual hangout. You find Vlad inside, drunk as a skunk. Roman follows and attempts to talk through the situation.
Objective: Don’t let Vlad escape.
Vlad runs out of the bar. His minions will attempt to block your escape. Don’t bother stopping to fight them, just chase Vlad out of the bar.
Objective: Vlad is fleeing in his car. Get back to your vehicle and chase after him.
Grab your parked vehicle and pursue Vlad. You don’t need to worry about ramming him off the road. Just maintain pursuit as close as possible and avoid running into oncoming traffic or smashing into various objects. Don’t let Vlad get too far away or the mission will end in failure.
Objective: Vlad crashed his car. He’s trying to escape on foot.
Eventually Vlad crashes his vehicle and attempts to make an escape on foot. Get out of your car and chase Vlad into the construction yard. With pistol armed, follow the instructions to complete the execution. Watch the excellent concluding cut scene where Niko reveals some of his motivation for being in Liberty City.
Crime and Punishment (Roman)
Roman calls soon after you’ve disposed of Vlad’s body. Sounds like he’s in trouble yet again. Drive to his location to start the mission and find Roman hiding in a dumpster. He’s paranoid after the execution of Vlad—or is he just imagining things? Roman was right for once because one of Faustin’s men jumps you from behind.
Even though Faustin wasn’t that happy with Vlad, he still thinks you owe him for eliminating one of his men. You now have debt to repay…if you can just get Roman to shut up and stop screaming.
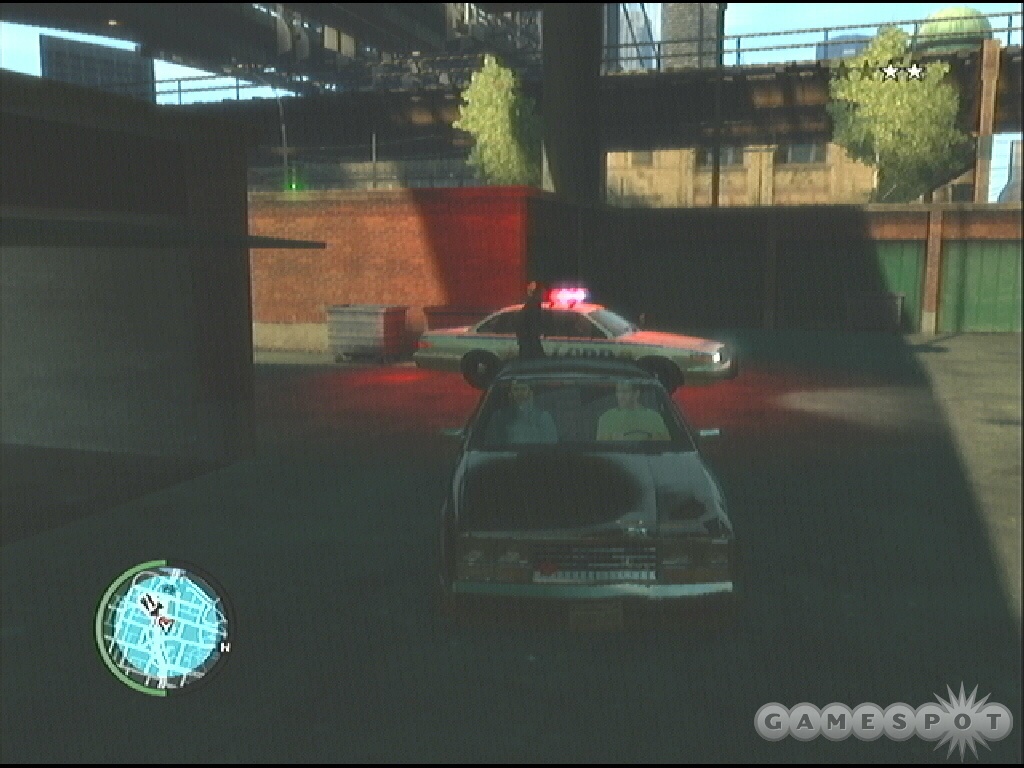
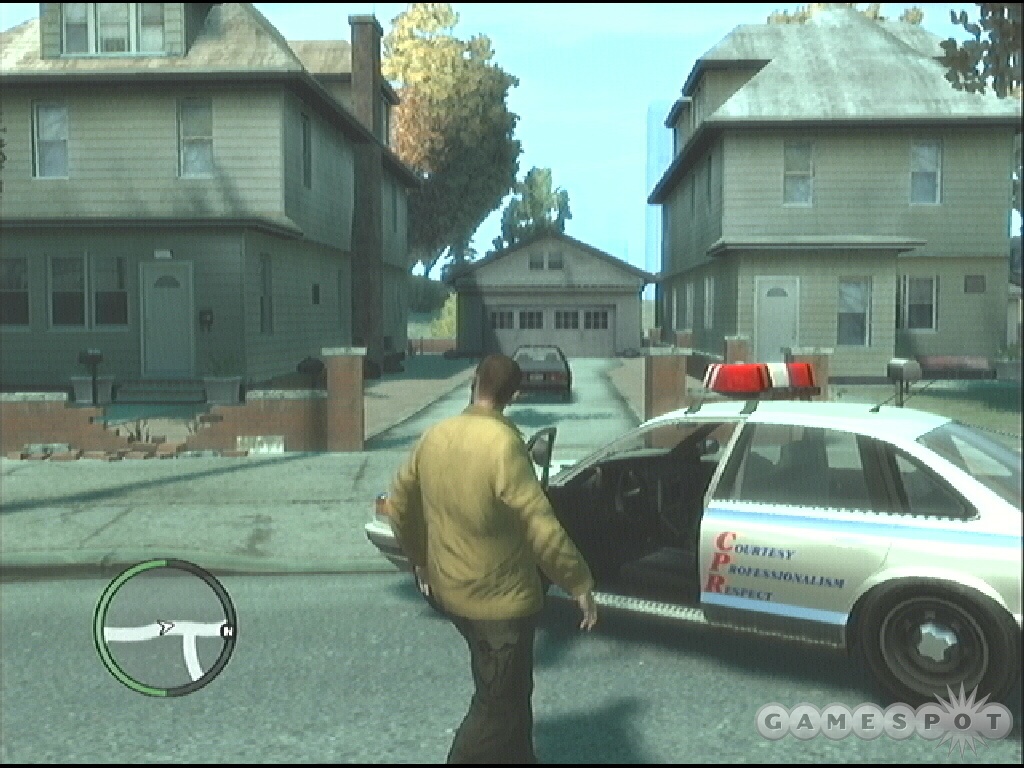
Objective: Find a cop car.
First you must steal a police car. As soon as you gain control listen for the siren approaching. Exit Faustin’s residence and run down the street to the left. Spot a police car approaching. Wait for the police car to pull over; the cop gets out and runs toward a private residence. Meanwhile, you steal the car. You automatically call Dimitri with the good news.
Objective: Find and pull over the vans before they reach their destinations.
Three vans appear on your map. You must find the van that contains the televisions. Drive to the nearest van.
Objective: Pull over the van. Park up and approach the driver’s window.
Activate the cop car’s siren and pull up behind the van. The van will stop. Exit the police car and walk up to the driver’s window to activate the cut scene. The van may not contain the televisions, which means you must continue the search. Locate the next van on the map, the one closest to your current location and head that way. Use your siren so the residents of Liberty City will get out of your way.
Objective: Steal the van. Drive to the lockup.
When you locate and pull over the correct van, the objective changes. Abandon your car and steal the van. Drive along the marked route to Vlad’s lockup. Once there, park the van inside the garage to complete delivery.
After the mission, Roman phones to tell you he’s fine, even though he was shot in the stomach and stitched up in a filthy doctor’s office. Your next mission then appears on the mini-map.
Do You Have Protection? (Faustin)
The fiery partnership between Faustin and Dimitri has another task for you. Apparently the owner of a sex shop is making money on the side without permission.
Objective: Take Dimitri to the sex shop on Delaware Avenue.
The plan isn’t to kill the sex shop owner but to reason with him—his little enterprise is plenty profitable he just needs to send a cut to Faustin and Dimitri. Drive along the marked route to the destination.
Objective: Enter the shop.
Exit the vehicle and follow Dimitri into the shop. Once downstairs, Dimitri pulls a gun on Joseph and demands payment. Then Dimitri hands you the gun.
Objective: Target Joseph to intimidate him.
With pistol drawn, target Joseph to get him talking. Switch targets to the guy on Joseph’s right side.
Objective: Shoot the porn actor in the leg.
Dimitri orders you to shut this guy up…without killing him. Use the analog stick (move the target town) to target the actor’s leg. Fire and deliver a non-lethal wound to put the actor out of commission.
Objective: Follow Dimitri out of the shop. Go with Dimitri to the gun store.
Exit the sex shop behind Dimitri then get back into your vehicle. Follow the marked route to the underground weapons store. For your help and loyalty, Dimitri is going to buy you a present. When you reach the alley, get out. Dimitri tells you to go into the store and pick something out.
Objective: Head into the gun store. Purchase a Micro-SMG.
Walk over to the display on the right side and find the marked Micro-SMG. Purchase the weapon, which you tell the owner to charge to Faustin.
Objective: Get back to Dimitri. Take Dimitri to Faustin’s house.
Exit the store and return to the car. Drive Dimitri back to Faustin’s house. The next Faustin mission appears at the club Dimitri mentioned, Perestroika.
Shadow (Little Jacob)
Expect this mission to open up sometime after Do You Have Protection? Badman "greets" you at the door in his own special way. Then he explains the situation (which Jacob translates for you). Some rival dealers are violating Badman’s corner and you need to fix the situation.
Objective: Go find the dealer in South Bohan.
Despite the name south, the location is actually far north. Heading north means crossing the toll bridge. Pay the $5 unless you want a wanted level. If you run through the toll, just keep driving out of the flashing wanted zone toward your destination.
Objective: Follow the dealer to his supplier on foot. Stay behind him and try not to be seen.
Shadow the dealer: stay close but not too close. You don’t want to spook the dealer but you can’t be too slow either. When the dealer moves around corners, run to get closer. Watch the position on the mini-map to gauge the distance. You’ll reach a fence at some point; climb over and continue into the building.
Objective: The dealer is in the apartment block. Follow, but don’t attack him.
Once you’re inside the apartment block, it’s essentially straight up. It’s a long staircase. Don’t get too far behind and just keep going up until you reach the dealer’s floor.
Objective: Damage the lock to break open the door.
The dealer’s apartment door is locked. Whip out your pistol, target the door lock, and shoot it to break open the door.
Objective: Take down the dealer and his suppliers.
Eliminate the dealer and supplies with your preferred weapon. Use cover at the doorway and aim for headshots. After the mission, Jacob calls and becomes a friend. You can now perform side jobs for Jacob—running drug packages for him and Badman. Give Jacob a call if you want to give them a try.
Final Destination (Faustin)
Objective: Go to Guantanamo Ave in South Bohan.
Faustin has a new job: take out a suspected rat named Lenny. Grab a vehicle and drive north into South Bohan. After crossing the bridge, Faustin calls. He tells you to find Lenny on the Guantanamo subway platform.
Objective: Take down Lenny on the station platform.
There are actually a couple staircases that lead to the subway platform. One will lead you to the same platform that Lenny and his associate stand on; the other leads to the opposite platform (so you are across from Lenny and his associate). As soon as you reach the top of the stairs, a cut scene interrupts the action. Lenny makes a run for it while his associate starts shooting.
Objective: Take down Lenny. Do not let him escape.
If you’re on the same platform, Lenny runs across the tracks and flees via the opposite platform; if you’re on the opposite platform, Lenny flees down the staircase on his platform. Either way a subway car blocks your path across the tracks, making it difficult to take a shot at Lenny before he gets away. Complicating matters is Lenny’s associate taking shots at you.
No matter which route you approach from, the result is generally the same: Lenny bolts for a car. It’s difficult to shoot him before he escapes. Follow him quickly and take shots at his car (aim for the tires) as he’s driving off. Doing so can slow him down or stop him, giving you extra time to take him out before he drives out of view. Otherwise you’ll need to grab a vehicle and chase Lenny down. If Lenny gets home, you will fail the mission.
Logging On (Roman)
Roman introduces you to his hyper online friend, Brucie. Roman wants you to get into this century and get online.
Objective: Go to the Internet café.
The Internet café "Tw@" is nearby. Grab a vehicle and drive over there. Park out front and enter the Internet café.
Objective: Go and speak to the assistant in the café. Go and use one of the computer terminals.

Approach the front desk to automatically speak with the assistant. After the conversation, walk over to the computers and activate the terminal. The computer desktop appears. Click on the "Web" icon. Your goal is to simply check email so you can activate your email account. Read the email then click on "Send a positive reply". You’re essentially finished with the objective but you can spend time checking out the web. Otherwise logout.
As you leave the café, Roman calls and tells you that Brucie may have some work for you dealing exotic cars. You can check your emails at the café to find jobs from Brucie.
No Love Lost (Faustin)
When you arrive at Faustin’s residence he’s engaged in a heated argument with his wife. Apparently the dispute was about their daughter, who isn’t very high on Faustin’s list right now (who is?). Faustin hires you to check on her; if his daughter is hanging with that biker boyfriend of hers, then your orders are to kill him.
Objective: Go to Firefly Island.
Grab a vehicle and follow the marked route to Firefly Island. Just as Faustin suspected, you find his daughter with her biker boyfriend, who’s a member of a gang called The Lost. You interrupt the lovebirds, which doesn’t sit well with the biker: he drives off claiming he’s going to get his brothers and kick your tail end.
Objective: Get on the bike and chase him down. Take out the biker.
There’s a motorcycle nearby. Get on it and start after the boyfriend. You can shoot from the bike and attempt to stop and eliminate the target. Motorcycles are quick and it can be difficult to shoot and pay attention to the road at the same time. A minor collision could send you flying off of the bike (if you get knocked off, you can grab a car and resume the chase, but the boyfriend will have a big lead on you). If you kill the boyfriend during this chase the mission will end successfully.
Objective: Chase down all the bikers and wipe them out.
At some point during the chase, additional gang members join the boyfriend. They drive into a field, get off their bikes, and start firing. Pull in somewhere away from the group so you aren’t taking a lot of fire immediately. There are plenty of trees in the field so use them as cover as you target and eliminate each gang member in turn. Grab their discarded weapons for ammunition
Rigged to Blow (Faustin)
Niko knocks on the door—Faustin’s not home but his wife lets you in. Through conversation, you bond with Faustin’s wife for a bit…at least until Faustin comes home and continues his usual rant. There’s a guy who owes Faustin money. You need to deliver a "truck" to that guy—Faustin style.
Objective: Go to the old factory and find the truck. Get in the truck.
Get into a vehicle and follow the marked route to the old factory. There you’ll find the truck. Get inside and you automatically contact Faustin to tell him you’ve arrived. He tells you the truck’s contents: a bomb. Once you deliver the truck, trigger the explosive onboard. Oh, and drive carefully.
Objective: Drive to the garage.
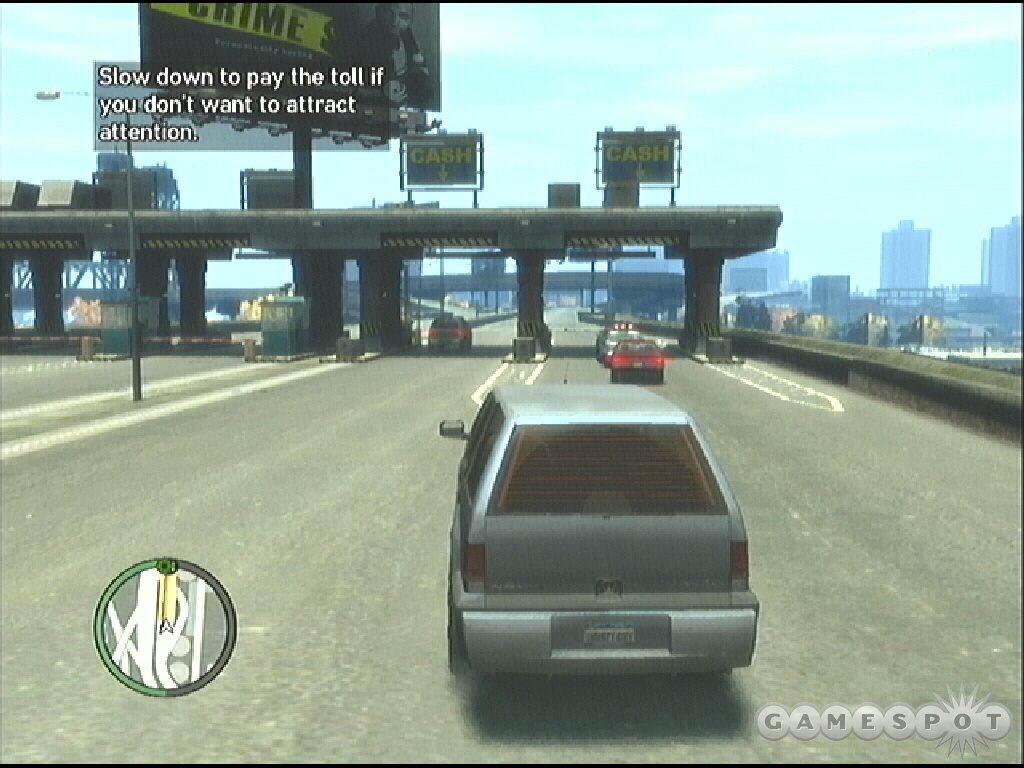
Once again, drive carefully! There’s a light on the back of the truck; it indicates the explosive’s stability. If the light starts flashing (faster flashing is even worse) that means it’s starting to get unstable. Avoid running into things! The route takes you across the toll bridge. No need to anger the law here—pay the $5!
Objective: Park the truck inside the garage. Trigger the bomb. Get out of the area.
When you reach the destination, drive the truck inside the garage. It’s a used auto parts store. Once inside, trigger the bomb. Niko automatically leaves the truck and avoids the gigantic explosion. Time to get out of the area before the law arrives. Grab a car and flee the scene. On the way out, expect a call from Roman who tells you that Brucie may have some work for you.
The Master and the Molotov (Dimitri)
Drive south from your safehouse to the boardwalk. You find Dimitri waiting on a bench; he’s troubled about Faustin and his lunatic ways. The situation with killing Lenny, Kenny Petrovic’s son, has come to a head. The only way to appease Lenny’s father is to eliminate Faustin. And to cool the situation over, you have to do it.
Objective: Get to Faustin’s club.
Drive a vehicle to Perestroika. Faustin arrives with a couple bodyguards. Check your text messages. Dimitri tells you that he’s left protection around the side of the club. Walk over to the green marker and grab the body armor.
Objective: Faustin is inside Perestroika.
You enter and confront Faustin. There’s no peace to be found here. Faustin orders the guards to attack. Eliminate the guards in front of you with your preferred weapon. Additional guards enter while Faustin exits out the back door (once he’s been hit). Sprint after Faustin. Eliminate guards that attempt to block your path.
Outside, start up the stairs and onto the rooftop. Faustin (or guards you may have missed) will take shots at you but it’s better to just keep moving quickly.
At the top, Faustin drops his weapon. You can listen to his rant or slowly approach, target, and execute. Be careful about shooting him from too far away, though. It’s actually possible to shoot Faustin a couple times sending him backwards off the roof. It’s possible Faustin could land on the ground—still alive—and run off and you will fail the mission because he got away. It’s much wiser to just perform the execution.
Search and Delete (Brucie)
Find Roman’s hyperactive online pal Brucie at Brucie’s Executive Lifestyle Autos—he’s as hyper as ever. Brucie needs help and the Bellic cousins need money. Brucie wants to whack some witnesses. You’ll need to steal a police car and get on the computer. Once there, give Brucie a call for further information.
Objective: Get a cop car.
Simply jacking a cop car isn’t the easiest thing to do. You may get lucky and find one parked somewhere (or you could go to a police station). After a few minutes, Brucie sends a text message: one way to get the cops’ attention is to dial 911 on your cell phone! Activate your cell phone and dial 911. Select "police" and a cop car will arrive at your location shortly. Once the cops exit the car, run and get inside and quickly drive off.
You will probably need to lose a wanted level given your chosen method of jacking a cop car. Just escape the flashing zone and lay low until your wanted level disappears. You get in touch with Brucie who tells you to access the police car’s computer and locate Lyle Rivas.
Objective: Access the police computer.
Stop the car and activate the police computer. Select "Search Police Records" then "Search by Name". Type in "LYLE RIVAS" and hit enter. The records reveal Lyle Rivas’ mug shot as well as his hangout: Broker. Mark Rivas’ house on radar.
Objective: Go to Rivas’s house.
Drive along the marked route—provided by the police computer—to Rivas’s house. Get out of your car and enter the house. You catch Lyle in the bathroom and he makes a quick escape through the window.
Objective: Chase down and get rid of Rivas.
This is a long car chase. If you’re still in the police car, which is a good idea, activate the siren so other drives will stay out of your way. Keep Rivas in view but concentrate on avoiding crashes—if you get stopped, it doesn’t take long for Rivas to get far enough away that you fail the mission. You may even have to avoid logs rolling across the freeway!
Eventually Rivas gets out (or you can kill him beforehand by ramming his car or shooting at it—though just keeping up with him is difficult enough). Chase him down on foot and eliminate him to complete the task.
Russian Revolution (Dimitri)
Dimitri calls about money owed to you. He tells you to meet him at a downtown warehouse. But before you can meet Dimitri, Little Jacob agrees to meet you there and provide backup. Something doesn’t smell right.
Objective: Meet Little Jacob in East Hook.
Grab a vehicle and follow the marked route to the warehouse in East Hook. You’ll find Little Jacob waiting for you at the marker. Jacob plans to take cover while you meet with Dimitri. During the conversation, additional thugs enter and the door closes behind you. This is not going well. Little Jacob gets inside and provides backup.
Objective: Wipe out Bulgarin’s men.
This is the biggest firefight of the game so far. There are enemies on the ground floor, on the catwalks above, on the left and right sides of the room. Take cover and eliminate the nearest enemy guards and try to reach the next piece of cover ahead of you—there’s body armor there that provides invaluable protection against the warehouse crossfire.
Work your way to the right side of the warehouse. You’ll find a Molotov cocktail here; plus there’s another room on the right side that contains a health kit (which reappears even after it has been taken). Note that Little Jacob can take damage and if he’s killed, the mission ends in failure.
Check the mini-map often to note the position of enemy guards. Find cover and take out the guards up on the catwalk and continue to work your way across the warehouse to the exit. Eventually Bulgarin and Dimitri escape the battle; this event triggers the arrival of the cops.
Objective: The cops are here. Get Jacob back to the Homebrew Café.
Getting out isn’t easy. First, eliminate any remaining enemy guards near the exit (be sure to check the high catwalks). One of the toughest parts of this conclusion is making sure Jacob gets out with you (and survives for that matter). Run out of the exit and proceed to the right to find a vehicle. If Jacob is still inside, you’re notified by some text on the bottom. With Jacob following, get inside the car quickly and drive off away from the police.
Objective: Lose your wanted level. Take Little Jacob back to his café.
All the commotion inside the warehouse has created a two-star wanted level. The flashing zone is much larger and tougher too escape. Drive away from any police cars and get out of the flashing zone. Once you’ve escaped, lay low until your wanted level disappears. Return Jacob to the café and complete the task. Little Jacob suggests calling Roman; doing so triggers the Roman’s Sorrow mission.
Easy As Can Be (Brucie)
You find Brucie doing his ‘roid workouts. Gotta love the spin kick! Brucie tells you there’s a car worth stealing—one of Lyle Rivas’ old rides. The pay will be good and the job is "easy as can be"…famous last words, right?
Objective: Go to Yorktown Ave. Walk round and get the car.

Grab a vehicle and follow the marked route to Yorktown Ave. When you arrive, get out of your car and walk through the nearby alley and get into the marked car. Three cars immediately surround you. So much for easy as can be!
Driving off and attempting to out run these enemies is almost instant death. Instead, use the car as cover and target the closest enemy vehicle while on foot. Aim for the driver and passenger and eliminate the first group. Move carefully over to the car waiting down the alley and eliminate the occupants. Finish off remaining enemies while on foot (or you could even fire your weapon from inside the car, but it’s still easier than trying to attack and defend while driving off).
All the gunfire may trigger the law. You may need to lose a wanted level after these fights. Drive the target car out of the area and escape the flashing zone to lose the wanted level.
Objective: Drive to Brucie’s lockup.
Return the car to Brucie’s lockup. Follow the marked route and deliver the vehicle back to Brucie to complete the mission.
Roman’s Sorrow (Roman)
Call Roman on your cell phone after completing the Russian Revolution mission.
Objective: Go to Roman.
Take a car to Roman’s location. You’ll find your cousin in an alleyway—Roman is hiding in the trunk of a car. You tell him what went down with Dimitri and that Bulgarin is here.
Objective: Go to Roman’s apartment.
Grab a vehicle and follow the route back to the safehouse. You find your former living arrangements—Roman’s "mansion"—going up in flames.
Objective: Go to the depot.
Roman suggests heading to the cab depot. It’s in flames as well. They’ve burned down Roman’s home and business.
Objective: Go to Bohan.
Proceed north and across the bridge to Bohan. You’re directed to a new safehouse. This is your new save point. Check out your new digs, save your game, and complete the mission.
Escuela of the Streets (Manny)
Head over to the St. Mary Community Project. Roman’s girl Mallorie introduces Niko to Manny Escuela, some sort of local celebrity who’s determined to clean up the streets of Bohan. You interrupt Manny’s video shoot in your own special way.
Objective: Get in a vehicle with Manny. Go to the dealer’s place with Manny.
Get into a nearby vehicle and Manny joins you. Drive along the marked route. Manny tells you to pull up behind the drug wagon ahead. Drive up behind the car to trigger the next objective.
Objective: Follow the dealer to the meet. Don’t let him know you’re following him.
Tail the dealer’s car. Close, but not too close. Manny will let you know if you’re getting too close (doing so too often will spook the dealer and fail the task). Keep the dealer’s car in your sights. If he stops at a traffic light, stay a couple car lengths behind. Don’t hesitate to reverse a bit if you’re getting too close.
Objective: Park behind the dealer. The dealer went into the warehouse; get him.
The dealer goes inside the warehouse—and he’s not the only one inside. There’s a gang of enemies inside. There are few ways to attack the warehouse. You can actually get onto the roof of the building to the right side of the warehouse, cross over, and attack from an open skylight (this should allow you to kill off a couple enemies before going into the warehouse).
Break open the window to the left side of the warehouse door and pull yourself inside. There’s a health kit in this office, which can be saved for later. Push open the office door and eliminate any enemies nearby. Getting an angle on the rest of the warehouse occupants can be tough; sprint across from the office door to the stairs to the upper catwalk.
Cross the catwalk while crouching and eliminate the guards attempting to take cover behind the boxes below. If you have grenades or Molotov cocktails, use them to eliminate the enemies hiding behind cover. Continue to the opposite side of the warehouse. There’s a soda machine on the far side; purchase a soda to replenish health. After clearing the warehouse, leave and complete the mission.
Street Sweeper (Manny)
Manny’s doing his public relations routine once again, this time with an actual police officer assistant. Manny needs another favor: more street cleaning to be done over on Windmill Street.
Objective: Go to Windmill Street. Clean out the gang members.
Grab a vehicle and drive over to Windmill Street to the marked location—it’s not far. As you get close, some red blips appear on your radar. They aren’t firing yet, though. You can actually pull up close and prepare your attack. The situation is, as soon as you fire, a couple gang members escape in a car. That’s the real problem because if the car gets too far away, you fail the mission.
Objective: They are trying to escape in a car, don’t let them get away.
You can actually pull your car in front of the car inside the garage. However, as soon as you shoot, the enemy car still tries to drive off and while your block technique may slow them down, they will probably still get away. Try to aim your weapon at the car’s tires or the driver to slow down or stop the car.
Another method is to drive after the car, but go straight instead of following the enemy car when it takes the first right. The enemy car will double back along the road that’s the second right from your position; you can hit the car head on and crash it or, at worst, stop it. Get out of your vehicle and eliminate the two occupants at close range. Now, return to the garage and eliminate the remaining gang members with a drive-by shooting or while on foot. After this task, Mallorie calls with a new contact, Elizabeta
Luck of the Irish (Elizabeta)
Mallorie introduces you to her old friend Elizabeta, who needs you to protect Packie McReary. He’s got a meeting on Joliet Street. There’s a sniper rifle on a nearby rooftop—you’re the guardian angel.
Objective: Go to the building in South Bohan.
Take a vehicle and drive over to the marked building in South Bohan. Packie tells you to get up to the roof, where you’ll find the rifle.
Objective: Go to the roof and pick up the sniper rifle. Make your way to the vantage point.
Ascend the staircase inside the building. When you exit onto the roof, you’ll find the sniper rifle ahead of you. Walk to it and you’ll automatically pick it up. Turn around and find the marked vantage point on the opposite side of the roof.
Objective: Packie and his associates have arrived. Watch over the meeting with the sniper rifle. Take out all of the attackers.
The meeting is taking place right below your position. Keep your sniper rifle zoomed in on the area away from your position on the opposite side of Packie. The enemies will approach and attack from this direction. Eliminate each enemy that approaches; even if the enemy takes cover, it’s easy to get a shot at him with the sniper rifle. You have plenty of ammunition but take good shots and aim for the head for quick kills.
Objective: Packie is in trouble, find him and help him
Move the scope down occasionally to check on Packie. At some point during the fight, an enemy will approach Packie and attack from close-range. While Packie and the enemy are engaged, shoot the enemy with the sniper rifle.
Also, keep an eye on the vehicle at the opposite end of the alley. Watch for a bad guy to move toward the van at the far end. Nail the enemy with the rifle before he gets inside. Keeping Packie safe completes the mission successfully.
Blow Your Cover (Elizabeta)
Elizabeta needs your help; she asks you to oversee a heroin deal for her friend Johnny. And this time you won’t be alone. Another friend, a guy with a great name, Playboy X, will provide assistance.
Objective: Take Playboy to the contact’s apartment.
Grab a vehicle and drive Playboy along the marked route to Johnny’s place. If you acquire a wanted level along the way, be careful—Playboy X will start shooting at the cops, which could escalate the situation! Remember that when you’re crossing the toll bridge. It might be worthwhile to pay the $5 this time.
Objective: Follow Playboy to meet the contact on the third floor.
Exit the car and proceed inside the apartment building. Playboy X starts up the stairs to the third floor. Before joining him, grab the shotgun resting against the wall at the end of the hallway. Head up the staircase and go up to the third floor. Enter the open apartment or go to the right side to trigger the next cut scene.
It’s obvious within seconds that the buyers are acting weird…cause they’re cops! You regain control under cover. Eliminate a couple cops across the room. Playboy X provides assistance and states your next objective: clear out the floors on your way to the apartment rooftop.
Exit the apartment into the hallway. There are another couple cops in the hall; one on either side of the hallway. Take them out and proceed to the staircase. Advance slowly up the stairs; a cop rolls into view at the top. Be ready for him! There’s another cop on the opposite side of the floor. Turn around and back up the remainder of the stairs so you’re facing him when you reach the top.
Take out the cops on the next floor and spot the rooftop ahead. There’s a much-needed health kit just outside on the roof—grab it! Keep close to Playboy and eliminate the cops that appear on the opposite side of this rooftop. Playboy continues to the adjacent roof. Grab body armor on the right side as two more cops attack. When Playboy keeps moving you need to stay close—and certainly watch your step and not fall off the roof—otherwise you abandon Playboy and fail the mission.
Eventually Playboy will move down a catwalk and staircase to another rooftop. Continue toward the rooftop door on this level; here a cop bursts through so be ready to eliminate him. Open the door at the top of the stairs and take out the cop below. Start down the staircase and terminate all the cops along the way.
Objective: Lose your wanted level.
All this commotion has created a two-star wanted level. When you reach the ground floor, join Playboy X in the car across the street. Start driving! Get away from the cops as quickly as possible. You don’t need to escalate the situation with a three-star wanted level by killing cops (Playboy X will be shooting!). Watch the mini-map and drive away from the police. If you spot cops ahead, take a side street to get out of the flashing wanted zone.
Objective: Take Playboy back to his apartment.
Once you’ve cleared the wanted level, you’re safe to drive Playboy back to his place. It’s way out in Northwood on the middle island. Follow the marked path and drop him off to complete the mission. Expect a call from Playboy X soon—he’ll soon offer you work.
Out of the Closet… (Brucie)
Roman and Brucie are up to something. Lyle Rivas’ cousin owes Brucie money and Roman and Brucie have devised an unusual way of trying to get it back—online dating. Roman is currently working on your online profile.
Objective: Go to the Internet café.
Get into a vehicle and follow the marked route to the Internet café. When you reach the marker outside, you automatically call Brucie to update. He gives you the info: get onto the website Love-Meet and seek out the user named French Tom.
Objective: Use the computer to get on love-meet.net and find French Tom.

Walk into the Internet café and approach the computer terminals. Get online and move the cursor to the "Web" icon and use it. On the homepage, find the advertisement for Love-Meet on the right side of the screen. You could also check your emails too, especially if you haven’t dropped by an Internet café in awhile. You’ve likely received a bunch of interesting mail…as well as a bunch of server-clogging spam.
Once you’re on the Love-Meet page, click on "Male". Scroll down the list of available males (noting your own profile in the process) and find French Tom. Click on the "More" button under French Tom’s photo. Read French Tom’s profile (is he the one for you?) and click the "Date" button at the bottom.
Now you must allow some time until French Tom replies to your email request. You can spend time at the Internet café, go drive around and complete other activities, or even head off to other missions.
When you return later (Roman will usually text message to remind you that French Tom has probably emailed back by now), check your email and spot an email titled "RE: Date Request with French Tom" from frenchtom68@love-meet.net. He tells you to meet at the 69th Street Diner in Hove and gives a meeting time. He also says he’ll be wearing a red rose. Send a positive reply to set up the date.
You now can wait until the designated appointment time. Check your phone organizer for the exact time. You can keep your phone’s organizer open to keep track of the current game time. The diner is near your old safehouse. As the date nears, expect an appointment reminder. Also, the heart-shaped "date" icon is marked on your map for further reminder. Get to the diner to meet French Tom.
…Out of the Closet (Brucie)
You sit down and meet with French Tom. During the conversation, you’re told how to stand up. Listen to French Tom ramble on for awhile but soon the conversation turns to owing back money, which eventually prompts French Tom to get up and leave. Take the opportunity to stand up before and shoot him or wait until he tries to leave and shoot him as he exits the diner. If he gets out, chase him down.
The commotion may create a wanted level, which will need to be lost before taking on the next mission.
The Puerto Rican Connection (Manny)
Manny isn’t thrilled about the metrosexual nature of his video presentation—it’s got him edgy and there’s already some punks talking smack about him. He’s got another job. Go shut up those punks!
Objective: Go to the Algonquin Bridge.
Locate a vehicle and drive it to the marked location overlooking the Algonquin Bridge.
Objective: The target is on that train. Follow the train and take him out when he gets off.
The red dot on your mini-map represents the train. You can’t let the train get too far away or you fail the mission. Most of the time you can follow a road directly beneath the train but occasionally you’ll have to turn down a couple side streets to follow the train’s path.
Drive your car in a controlled fashion. It’s easy to follow the train as long as you aren’t trying to race down the road. Driving too fast or carelessly could mean running into other cars or other obstacles that slow you down or completely stop your progress. It doesn’t take long for the train to get out of range. It’s better to drive slower and make sure you avoid obstacles as you follow the train’s position.
Objective: The target got off the train.
There are three targets that get off the train. They exit the train station and make their way to a parked car. The mission will be much easier if you eliminate these targets before they get away in the car. Drive forward past the station stairs and look left across the street. That’s the targets’ parked car. Wait nearby for the targets to leave the station and approach the car. Pull out a weapon and gun them down!
After completing the task, expect a few calls or text messages. You may receive a cryptic text message from "unknown" to meet at the end of the pier at Castle Gardens. Also, expect a call from Elizabeta too—she’s having trouble understanding your friend Jacob.
The Snow Storm (Elizabeta)
Jacob and Elizabeta aren’t getting along. Some of Jacob’s friends ripped off Elizabeta…allegedly. Now it’s your job to rectify the situation.
Objective: Go to the old hospital and get Elizabeta’s coke back.
Grab a vehicle and drive to Colony Island to find the old hospital. You’ll soon discover the rundown building is crawling with bad guys. This mission could turn into a fierce firefight so bring plenty of weaponry! If you’re friends with Jacob by this point, give him a ring and get him to drive a car packed with heat over and purchase what you need.
Objective: Elizabeta’s coke is somewhere in the old hospital. Find the drugs in the hospital and take out anyone in your way.

As you approach the hospital, some guards lurking outside might spot you. Return fire and eliminate them. Walk around the back of the hospital. Stick close to the building to avoid being spotted by guards on the upper floor. Locate the ladder on the rear side of the building. Climb the ladder onto the upper floor. Eliminate any guards that spot you; check the hallway across the room. As you scan the floor below, take note of the propane tanks. Shooting a propane tank causes a huge explosion—handy in eliminating nearby enemies.
Maneuver to the left side of this upper floor. There’s a hole in the floor on this side. Look through and spot a health kit on the floor below. Drop onto the health kit and be prepared to return fire if there are guards nearby. Go left from the health kit area and find an AK-47 inside the room.
The adjacent room (you’ll spot some red targets on the radar) contains Elizabeta’s coke. Terminate the guards inside the room and grab the nearby body armor. Pick up the coke and you automatically call Elizabeta. Things just got worse. The cops have arrived and they’ve brought a helicopter.
Objective: N.O.O.S.E. are raiding the hospital; get out of there, and lose your wanted level.
It’s actually a good thing if there are still bad guys inside the hospital because the cops and the bad guys will occupy each other—at least to a point. You now have a three-star wanted level. You must not only get out of the hospital, but also find the best way to lose the high wanted level.
One of the best routes is actually out of the entrance to the hospital. Run east out of the entrance and ignore bad guys and cops that might be taking shots at you. When outside, go through the opening in the fence (it’s a little bit to the right). Don’t delay. Look at the water below. You’ll spot a dock and a speedboat. Drop down onto the dock or the boat and start driving! Pilot the boat either north or south and avoid other police boats to escape the large flashing wanted zone.
Objective: Go and meet Little Jacob.
You receive a new objective once you have escaped the wanted level. Little Jacob is to the north; pilot the boat toward his position and find a dock to get out on. Return to the streets and jack a car and drive to meet up with Little Jacob to deliver the goods. Unfortunately, Michelle interrupts the exchange and she has a secret to share.
Have a Heart (Elizabeta)
The police are closing down on Elizabeta and she’s seriously freaking out. The street vigilante Manny barges in with his video camera and escalates the situation to a boiling point. Within moments, Elizabeta takes matters into her own hands. Now it’s up to you to clean up the situation.
Objective: Get in the car. Take the bodies to the doctor.
Get into the nearby vehicle. The trunk contains the body of Manny and his cameraman. You must drive along the marked route to reach the doctor. It’s important that you drive carefully. Don’t jostle the car around much or the trunk could open and attract all sorts of unwanted attention. You will also be crossing the toll bridge. Pay the $5 so you avoid having to flee from the police.
Reach the marked location and give the bodies and the car over to the doctor. After the mission you speak with Elizabeta and receive your cash reward.
No. 1 (Brucie)
Pay a visit to Brucie after completing your "internet date" and find him doing his usual shirtless workout routine. Brucie wants a vehicle to satisfy his flashy needs and the one in the garage doesn’t start. Lenny the mechanic suggests paying Steve a visit.
Objective: Go and collect the race car.
Take Brucie along the marked route over to Willis. Along the way, Brucie gets on the phone and sets up the "borrowing" of Steve’s car. At the end of the marked route you’ll find Steve’s beautiful, yellow, flashy Comet. Get inside the Comet.
Objective: Go to the race start.
Brucie wants to show off the new digs. Time for a street race! Follow the marked route to the race start. The competitors are already waiting at the starting line. When you reach the marker, the countdown begins.
To complete the mission you must finish the race in first place. So incapacitating the Comet is bad news. Avoid getting jostled at the beginning of the race. The competitors are all around and it’s easy to get knocked around and flipped over if you’re fighting for position around the first couple of turns.
Your primary goal should be to just remain among the leaders and keep them in sight. Concentrate on following the checkpoints and the course. There’s time to overtake the leaders near the end of the race but it’s nearly impossible to get first if you miss a turn or checkpoint and have to turn around.
Make your move on the straight sections at the race’s end. The Comet is fast and can over take the other competitors if they’re still within view. Drive through the finish line in first place to complete the mission.
Objective: Take Brucie home.
On the way home, you and Brucie bond. But you can’t deal with his steroid rage any longer. You still want to be friends but doubt there’s going to be a working relationship. Complete this mission and now you can call Brucie and set up other street races. Also, Brucie may call you to hang out. Gain Brucie’s friendship and you gain a reward: he’ll pick you up in a helicopter and fly to your desired location.
Deconstruction for Beginners (Playboy X)
Playboy X introduces you to "his town" and all the tiny ants that live in it. You also meet the recently paroled Dwayne Forge, Playboy X’s mentor. You could cut the tension with a knife.
Objective: Playboy has left the weapons in a car in an alley downtown.
Get a vehicle and drive the marked route to The Exchange. Find Playboy’s car in an alleyway.
Objective: Get in the car to retrieve weapons.
Get into the car and you automatically retrieve a host of weapons, ammunition, and grenades. Playboy mentions that there are three lookouts at the construction site. You should take out these lookouts with your sniper rifle.
Objective: Take out the lookouts.
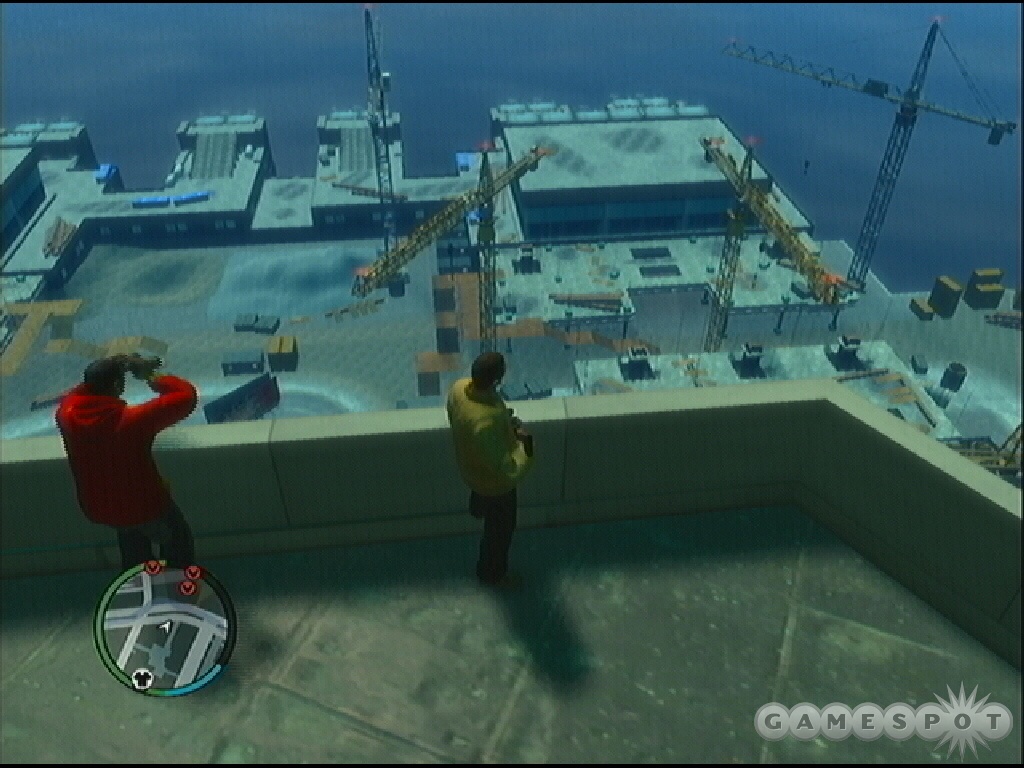
Playboy gets on a window washer platform. Join him and use the controls to raise the platform to the rooftop. Stand next to Playboy on the rooftop and scan the construction site with your sniper rifle’s scope. The lookouts are positioned high on cranes. You can note their approximate position by looking at the red targets on the mini-map. One of the lookouts is very close to the edge of the roof, so look down when trying to find him. Eliminate each lookout with a headshot.
If you want to take the time, you will be able to find other enemies inside the construction site. Use the sniper rifle to eliminate as many of these targets as you can find.
Objective: Go to the construction site and find the first union leader.
Descend the rooftop on the platform. Cross the road into the construction site. There’s plenty of cover here, although most of the enemies won’t appear on your mini-map—just the union leader. Work your way to the target and eliminate all enemies in your path. Grab their discarded ammunition. Eliminate the union leader and Playboy X reveals the next target’s location: south and up a few stories.
Objective: Take down the next union leader.
Cross the construction yard and find a ramp to the upper floor. Prepare to come under fire as you near the top. There’s a health kit at the top of the ramp; save it for when you need it the most. Eliminate the guards protecting the union leader here. Work your way to the target and take him out. Playboy X helps find the next union leader: at the southwest corner of the yard by the water.
Objective: Take down the next union leader.
The next union leader is just around the next left corner. You can actually take him out using the sniper rifle. Remain at the corner and use the sniper rifle’s scope to find the union leader on the back edge closest to the water. Take him down and any other guards blocking the path.
Objective: Backup has arrived to protect the last leader. Take him down.
Move toward where you eliminated the third union leader and go left. This area is totally cluttered with enemies. Take cover and use grenades to level the playing field. Work carefully toward the target and avoid taking shots from multiple enemies. Continue toward the last leader marked on the mini-map. You may find him running away from your position. Catch up and take him out to complete the mission.
Photo Shoot (Playboy X)
Some guys have been calling Playboy a snitch. But in fact, that same guy is the one with the loose lips. This rat hangs out near the courts. Playboy attempts to give you a description but Niko can’t understand the street lingo. Instead, you get a camera: take a picture of the guys at the courts and Playboy will point out the rat.
Objective: Go to the baseketball courts on Exeter Avenue.
The location is close. Grab a vehicle and drive over to the basketball courts. Move to the marker to trigger the cut scene.
Objective: Take a picture of the gang members and send it to Playboy. Don’t get too close.
Walk over to the fence surrounding the basketball court. Onscreen instructions tell you how to use the camera phone. Open your cell phone and select the camera. Zoom onto the three gang members in the middle of the court and take a photo. Send it to Playboy X and wait for him to call back. He tells you he’s that guy in canary yellow.
Objective: Take down Marlon.
Quickly arm your sniper rifle—hopefully you have ammunition left over from the construction site mission—and shoot Marlon. He’ll run out the back of the courts. Get him on the ground or eliminate him as quickly as possible. If he gets away, he’s headed for a vehicle. If he reaches the vehicle you’ll have to chase in your own car—and if he gets too far away the mission ends in failure.
Taking down Marlon at the court is the optimum way to end the mission. As soon as Marlon dies, the mission completes in success and any remaining gang members cease fire.
Ruff Rider (Dwayne)
On Playboy’s request you go visit Dwayne. Dwayne feels tainted—no one wants to hang out anymore, not his girlfriend, Playboy, no one. He actually thinks his girlfriend is hanging with Jayvon now—and Dwayne thinks Jayvon is the one who snitched. Like an old friend, you volunteer to pay Jayvon and Dwayne’s ex a visit.
Objective: Go to the arcade in Chinatown.
Grab a car and drive from Dwayne’s place along the marked route to the arcade in Chinatown. You’ll find Jayvon and Dwayne’s ex, Cherise, outside.

Objective: Execute Cherise or let her live.
As soon as you arrive, the problems begin. Jayvon takes off and you’re presented with a choice. You can kill Dwayne’s ex Cherise or let her live. Deciding to allow her to live just means leaving the scene and going after Jayvon. If you do decide to let her live, your compassion will be rewarded when Cherise appears as a friend later in the game.
Objective: Chase Jayvon down.
Jayvon grabs a motorcycle and takes off. You can join him on a bike by looking along the street to the right of the arcade. Follow the red target on the mini-map. As you get close, start firing at Jayvon’s tires. Slow him down so you can take him out. The motorcycle chases can be challenging because one false move and you might get thrown off. Look for an opportunity to get close (perhaps Jayvon gets stuck in traffic or has a rough time around a turn) and start firing at close-range.
Objective: Get Dwayne’s money.
Eliminate Jayvon and he drops Dwayne’s money. Pick up the money and you automatically call Dwayne.
Objective: Go meet Dwayne at the Cluckin’ Bell.
Drive over to Star Junction and find the marked Cluckin’ Bell. Park and get out of your vehicle. Head inside the Cluckin’ Bell and find Dwayne seated in the back. Approach Dwayne and finish the mission.
Hostile Negotiation (Roman)
At some point during your missions with Dwayne and Playboy X, Mallorie calls and tells you that Roman has been kidnapped. Dimitri sends you a text message and photo of your cousin—Roman isn’t looking good. The mission automatically begins at this point; your mini-map marks the location of the warehouse.
Objective: Go to the warehouse where Roman is being held.
Grab a vehicle and drive along the marked route and find the warehouse where Roman is being held. As you approach the marked entrance, search the area for an AK-47. There are many guards inside. You’ll need good weaponry and plenty of ammunition.
Objective: Roman is on the top floor. Rescue him.
You begin the battle behind cover near the warehouse entrance. This isn’t a bad staging ground because you have a good line of fire on the enemies on the bottom floor. If you move over to the left then you’re pinned near a corner and most of the enemies have plenty of pillar cover to avoid your fire. Note that there is a health kit over on this left side. Save it until you’re heavily wounded.
Aim at the enemy in the far back left corner; he’s currently smoking and standing next to an explosive barrel. Shoot the barrel to cause a big explosion that could take out a few guards and thin the ground floor. Stick behind cover and eliminate each guard in turn. If you have a line of sight on any guards on the second floor, take aim. Work your way to the left toward the health kit.
When you enter the ground floor, take cover behind the pillars and clear any remaining guards from the floor. Scan all areas of the second floor and shoot any guards exposed into view. Go to the far right area of the ground floor and ascend the stairs to the second floor.
Work your way across the second floor; hang to the left side. Eliminate any guards you may have missed before. When you reach the flight of stairs that leads to the third floor, grab the body armor on the ground nearby. Ascend the stairs to the third floor.
There are more guards here. Work slowly toward the end of the hall. Take cover, eliminate any guards within view, and then push forward to the next piece of cover. There’s a health kit at the end of the hall. Start up the staircase to the fourth floor.
As you cross the fourth floor, be prepared to target enemies on the left side; they’re on the rooftop to the left. Shoot these enemies and any blocking your path toward Roman, who’s marked on your mini-map. Reaching Roman’s room triggers the next objective.
Objective: Use Free-Aim to take out the kidnapper and free Roman.
Save Roman by being quick and accurate. Freely aim and target the kidnapper’s head. A single headshot with an assault rifle will terminate the kidnapper and free Roman.
Objective: Follow Roman. Take Roman back to the Bohan safehouse.
Follow Roman out of the warehouse. When you reach the ground, get into the nearby vehicle and drive Roman to safety. Follow the marked route back to the Bohan safehouse. Roman tells you that he’ll get a new place. Not long after the mission, expect a call from Roman with information about your new safehouse in Algonquin.
Undress to Kill (Dwayne)
Dwayne is still being a mope. He tells you about the Triangle Club—when Dwayne went to prison, some gangsters took it. You decide to help.
Objective: Go to the strip club.
Grab a vehicle and follow the marked route to the marked location: the Triangle Club. Pull into the parking lot and note the onscreen notification: weapons aren’t welcome in the club. Keep your weapons in your pocket as you pass by the doorman.
Objective: Take out the three strip club managers. Locate the managers by listening in on conversations.

The weapon problem continues inside the club because as soon as there’s weapons fire, the three strip club managers run to exit the club and escape in a vehicle. Plus, the various bouncers inside the club pull out their own weapons.
Enter the club. Go through the lobby and into the establishment. Spot two guys in front of you. Walk up to the two men and listen to their conversation—apparently Jose is counting money. Sounds like a manager! Jose’s location appears on your mini-map. Turn around and spot the door to the right of the exit door; this door is marked staff only.
When you walk in, you’ll find Jose with his backed turned. Equip your baseball bat or knife and attack. Jose pulls out a gun so keep attacking until he’s dead. Don’t let him fire!
Return to the club. Cross the main room toward the jukebox in the corner. Along the way you’ll hear a guy talking to a stripper—it’s Javier and he’s telling a stripper how to appropriately pronounce his name. Javier is marked as another manager. Go through the exit door ahead and into the opposite side of the club. You’ll find the last manager in a private room here—Jesus is giving an employee a trial run.
If you attempt to go into the private room, the guard is alerted and guns come out. You need to figure out a way to kill both Javier and Jesus in the quickest method possible. You could toss a grenade into the private room then go gun down Javier. Or you could take a sniper rifle to Javier while standing near the private room then turn around and gun down Jesus and his guard. Take note that Jesus carries a shotgun so avoid getting too close when it’s time to take him down.
Call and Collect (Francis McReary)
Drive to the question mark located in Castle Gardens in the southern section of the map. You discover the unknown contact is Officer Francis McReary, Manny’s cop friend. It turns out McReary is being blackmailed by someone and wants your help.
Objective: Go to the viewpoint off Union Drive East.
Get into a vehicle and proceed toward north to Lancaster and find the viewpoint. Approach the overlook. McReary calls and texts you the blackmailer’s phone number, which is added to your cell phone’s phonebook.
Objective: Call the blackmailer’s cell and look to see who answers their phone. Keep him talking until you identify him.
Walk down to the bottom area of the overlook. Most of the area residents are hanging down here so it will be easier to spot the blackmailer. Open your cell phone’s phonebook and dial the blackmailer’s number. While you’re talking to the blackmailer, scan the people until you find the one using a cell phone.
Objective: That’s the blackmailer. Take him down.
Once he’s discovered, the blackmailer makes a run for it. He’s not particularly quick, especially if he’s headed up the stairs. Gun him down from behind.
Objective: Pick up the storage device.
Locate the dropped storage device near the blackmailer’s body. Grab it.
Objective: Lose your wanted level. Take the photographs on the storage device to Francis.
All the commotion has likely alerted the local authorities. Sprint to a vehicle and get inside. Drive away from the scene and get out of the flashing wanted zone. Once you’ve lost the wanted level, drive to the marked location and find Francis. Deliver the storage device to complete the mission.
Final Interview… (Francis McReary)
Not long after you’ve completed his first task, Officer McReary texts and tells you to go over to the LCPD in Westminster for another mission. There’s a lawyer named Tom Goldberg; he has something on McReary. You need to get close to Tom Goldberg. Francis wants you to get a job interview at the law firm—it’s the best way to get close to Goldberg.
Objective: Go to an Internet café.

Grab a vehicle and drive over to the nearest Internet café. Once inside, approach the computer terminals and log on. Click on the "Web" to get to your homepage. Check your email; there’s a new one from Francis McReary. He provides the law firm’s website address: www.goldberglignerandshyster.com. Alternatively you can click on the law firm’s Internet advertisement to get to the firm’s page.
When you’re at the firm’s website, click on "Careers". Next, click on "Submit Resume" and you can read through Niko’s resume if you wish. When you’re done, click on "Submit Resume" at the bottom of the page. You will be called ASAP with further details.
As you leave the Internet café and drive off, you speak with McReary about the interview. Also, the law office calls and sets up an appointment time—expect it to be on the next day. You have plenty of time to prepare!
…Final Interview (Francis McReary)
The interview appointment is added to your organizer; as you near the appointment time, reminders will be sent. To get into the law firm you must look the part of an aspiring lawyer going to a job interview. Head over to a clothing shop and purchase your favorite looking suit. The interview location appears as an "i" on your map; head over there when the time nears and head inside.
Objective: Go to the reception.
Walk over to the receptionist’s desk to check in for your job interview.
Objective: Follow the receptionist to Goldberg’s office.

The receptionist leads you toward Tom Goldberg’s office. Follow the receptionist and enter the lawyer’s office. You have a pleasant interview with Tom Goldberg—but it’s time to get down to business. You’re instructed that when you’re ready, stand up and aim your gun at Goldberg. Stand up, equip your pistol, and target Goldberg.
Objective: Retrieve the files.
Grab the marked files off of the desk to complete one of your objectives.
Objective: Kill Goldberg.
Tom Goldberg must die to complete the mission. You can shoot him down with your pistol or take a quieter route by just pummeling him with a baseball bat. The latter creates less commotion in the law office. If you choose to shoot Goldberg, expect chaos to ensue. The cops are alerted and the security officers inside the firm pull out their weapons and proceed to the office.
Objective: Escape from the building. Take the files to Francis.
Taking aim on every security guard isn’t necessarily the best method out of the building. It might be easier to just run! Proceed back toward reception and find the staircase down. Eliminate any significant threats. As you work your way toward the front doors here, grab a health kit off of the desk to offset any damage sustained from making a run for it. Grab a vehicle nearby—a cop car isn’t a bad idea—and drive out of the flashing wanted zone to lose the wanted level.
Follow the marked route to the alley next to the LCPD station. Approach the marker to deliver the files to McReary.
Holland Nights (Francis McReary)
McReary continues to clean up loose ends. There’s a drug dealer holed up in a tower in East Holland. McReary needs help dealt with and employs your help.
Objective: Go to the projects in East Holland.
Drive a vehicle to the marked location, the projects in East Holland. Upon arrival, you automatically call McReary. You’re given the location of the target—the second floor—and Officer McReary suggests getting off the ground floor before getting violent.
Objective: Take down Clarence.
Walk forward into the projects and ignore the insults. Keep your weapons concealed for now. Spot the overhead sign marking the direction to the stairwell. It’s on the right. Start up the stairs and pull out your favorite weapon (assault rifle or sub machinegun works best). Because when you reach the second floor the guards won’t just lob insults anymore—the weapons come out.
There are several enemy guards along each walkway and stairwell to deal with. Move slowly and target each guard before advancing to the next area. Follow the walkways to each stairwell and continue to ascend to the upper floors. Make sure you grab the health kits that are positioned close to the stairwells.
Clarence continues to run away leaving scores of his guards blocking your path. Proceed up the stairs and reach the roof. Discover additional enemies on the roof and eliminate them. The red target marks Clarence’s location; ascend one more staircase to find his position. Approach to trigger the cut scene.
Objective: Choose Clarence’s fate.
Listen to Clarence’s speech and decide his fate. You can just walk away to spare Clarence’s life or you can equip a pistol and perform an execution if you don’t feel merciful. Note that if you do choose to spare Clarence’s life then he’ll appear later as a friend and have a side mission to complete.
Objective: Lose your wanted level.
Shooting up the projects has created a two-star wanted level. Get down off of the building and grab a vehicle. Drive away from the scene and escape the flashing zone to lower your wanted level.
Lure (Francis McReary)
Find Francis McReary to the south in Castle Gardens near where you met him for the first mission. The marker is at the fountain. Surprise, surprise—McReary has another guy for you to kill. For this mission, McReary has left you a sniper rifle in a car.
Objective: Get ammo for your sniper rifle from the car.
Get into a vehicle and drive to the marked car; it’s in a side parking lot. Get into the car to recover the sniper rifle.
Objective: Make your way to the dealer’s apartment off Denver Avenue.
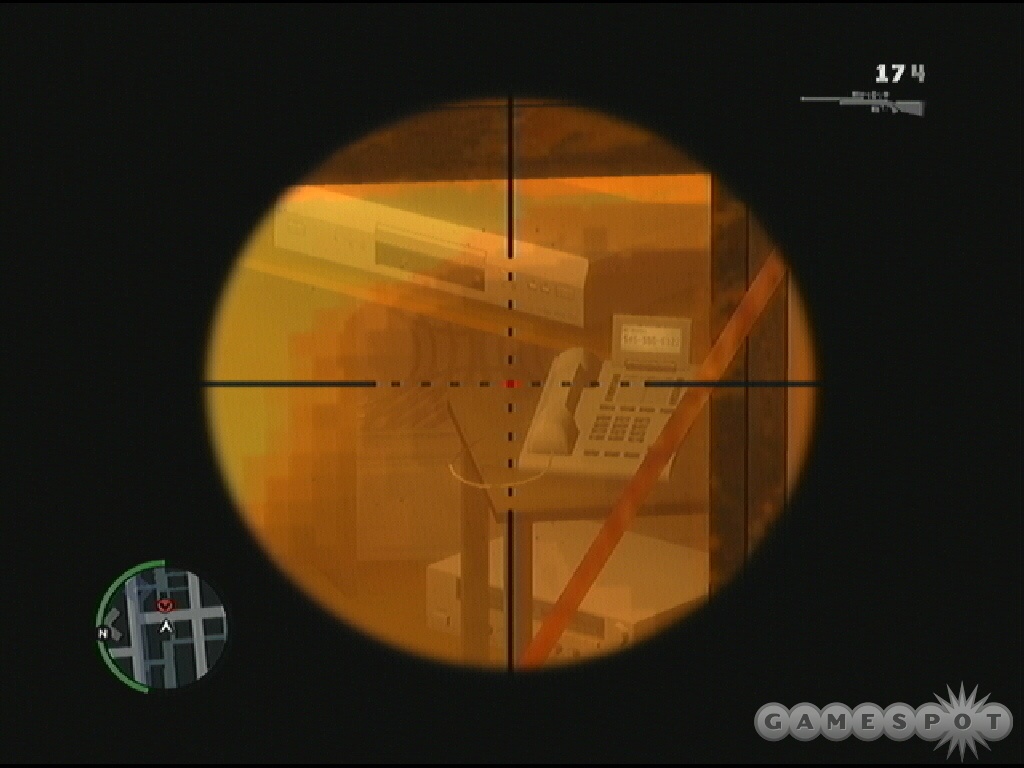
Drive this vehicle to your next destination, the dealer’s apartment. When you arrive, you call Francis. He tells you the dealer’s location: the fourth floor on the east side of the street. You need to go into the opposite building and onto the roof to get a shot at the target.
Objective: Go to the rooftop.
Enter the building opposite the target’s apartment and ascend the staircase. Exit onto the roof and approach the marked location. The cut scene offers a not-so-subtle hint on the best method to lure the dealer to the window and into your line of fire.
Objective: Lure the dealer into the open and take him out.
Pull out your cell phone and dial the dealer’s home number: 545-555-0122. The dealer will walk over and answer the phone—it’s right in front of the window. Zoom the sniper scope onto the dealer’s head and take the shot.
Objective: Leave the rooftop.
Get off the roof and descend the stairs inside the apartment building. Reach the bottom to contact McReary and complete the mission.
Wrong is Right (U.L. Paper)
Michelle contacted you by cell phone and set up an unknown contact in the Triangle Area—it’s marked with a question mark on your map. Head there and meet with Michelle—actually Karen—outside the building. You’re led to office 396 and meet with someone who looks like the Daily Planet’s editor-in-chief.
He has an offer for you: complete a task and he won’t turn over your information to the F.I.B. The mission is to find everything you can about a man named Oleg.
Objective: Go to Oleg’s apartment in Hove Beach.
Take a vehicle and drive along the marked path to Oleg’s apartment. You break inside and find a laptop computer. You automatically call the contact; he tells you to check the emails on the laptop for clues about Oleg’s whereabouts.
Objective: Check the computer for information.
Activate the laptop. The interface is similar to the terminals at the Internet café. Click on the "Web" then the "Check Email" button. There are three emails; the most important is the one from Vasily in regards to "Meet me". Read the email and find that it talks about a meeting outside a jewelry shop off Tulsa Street.
Objective: Get a vehicle and go to the jewelry store.
Grab a fast vehicle—it’ll pay off in the end—and proceed along the marked route to the jewelry store. Wait in the car and spot the rendezvous. It doesn’t take long before your cover is blown and Oleg speeds away.
Objective: Oleg is getting away. Take him down.
This is a really fast chase! Concentrate on keeping up with Oleg. Don’t worry about shooting at first. Continue to follow Oleg and keep his marked vehicle in your sight. Wait for opportunities when you’re closer to his car to take shots. Aim for the front or side window and attempt to eliminate Oleg while he’s still in the vehicle (if Oleg gets out, you’ll have to chase and gun him down).
Portrait of a Killer (U.L Paper)
Visit your friendly neighborhood blackmailer again. They have another mission for you: complete the task and you won’t get murders pinned on you. Plus, maybe they’ll actually help you out. You need to find someone for them. And to do so, you’ll need access to a police computer.
Objective: Your contact will send you a picture of the target. Read the message when it arrives.
Wait for the text message from U.L. Paper. Open your cell phone and read the message to receive a photograph of your target.
Objective: Get a cop car.
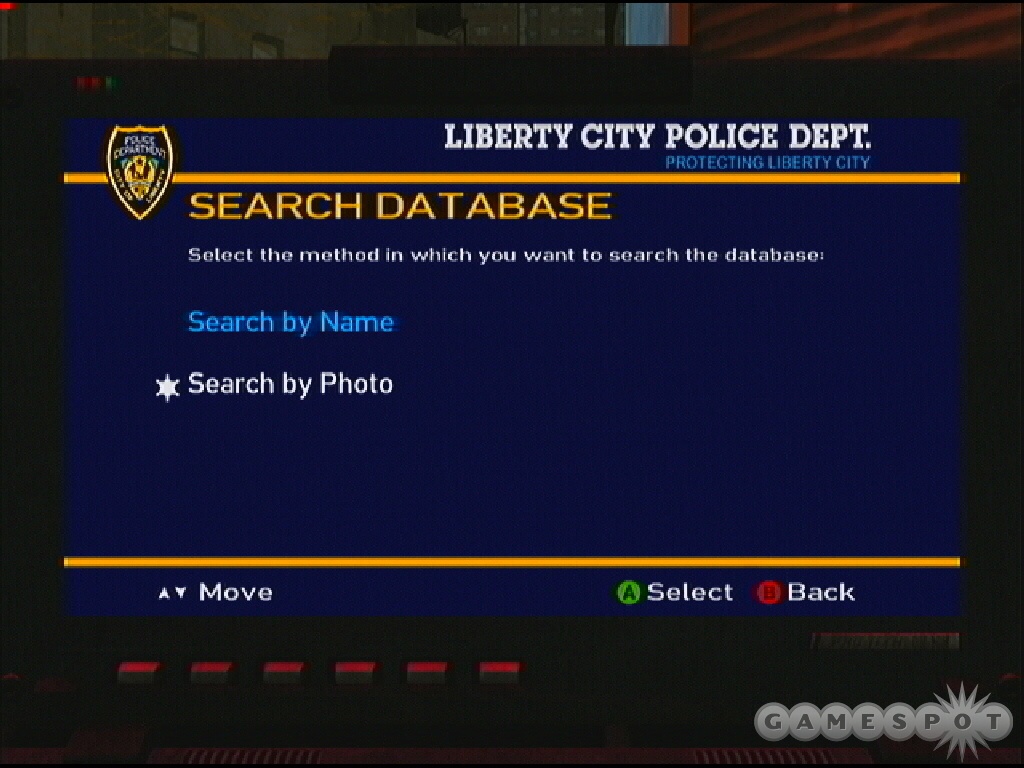
You need a cop car. You can steal one from a police station or you can dial 911, have a cop come investigate the situation, and then steal that cop car. You may need to lose a wanted level before continuing with the mission.
Once you’re safe from the law, access the police computer. Select "Search Police Records" and "Search by Photo". You automatically connect to your wireless device. Upload the photo. You discover the target’s name, Adam Dimayev, and location. Mark the target’s hangout on your radar.
Objective: Go to Dimayev’s hangout.
Drive the cop car to the hangout marked on the map. As you get close, you automatically call U.L. Paper for an update. Check the mini-map and discover that the hangout is cluttered with bad guys.
Objective: Dimayev is there with his guards. Eliminate them all
Don’t charge into the hangout. Instead, move into the area across the street and notice that you can see a lot of the bad guys from this position. If you have a sniper rifle and plenty of ammunition, here’s a good time to use it. You can eliminate many of the guards from long-range. You can still be hit so move around accordingly to avoid enemy fire. Eliminate every guard you can see before changing plans.
Cross the street and find the ramp on the right side. Go up to the next floor, eliminating any remaining enemies you may have missed. Grab the discarded weapons for ammunition. Locate the ladder on the right side. Ascend and, once again, terminate any guards you may have missed and gather the dropped weapons for ammunition.
Eventually there will be only one red target on your map: that’s Dimayev. He’s on an adjacent rooftop. Walk around to the back of that building and look up. Move backward from the building until you can spot his head. Eliminate Dimayev with a headshot and complete the mission.
Dust Off (U.L. Paper)
Drive over to U.L. Paper to begin this mission. According to your contact, there’s a guy moving a lot of money for terrorists. It’s your job to eliminate him. But first, your contact wants you to analyze the target’s movements.
Objective: Get a vehicle and go to the Civilization Plaza.
Snag a vehicle and start driving along the marked route to Civilization Plaza. Your contact at U.L. Paper calls soon after your departure with a mission update. When you near the plaza, a helicopter will take off. You must follow the helicopter until it lands. When the chopper is one the ground, steal it and take it to the airport in Dukes. As you near the marked location in Civilization Plaza, you see the helicopter take off.
Objective: The helicopter is leaving. Track it to its destination. Follow the helicopter.
Following a helicopter in a car sounds challenging but it’s not too difficult. The helicopter basically moves south and then to the west before it finally lands at a pier on the western side of the island. Follow the chopper on main roads. As the helicopter begins to turn westward, turn down appropriate streets and continue to keep the helicopter in view.
Objective: Let the helicopter land, then move in to take it. Take the helicopter.
Wait for the helicopter to land. Keep your distance and take note of the guards at the entrance to the pier. Once the marked chopper turns from red to blue on your mini-map, get out of your vehicle. Equip a weapon and eliminate the enemies guarding the entrance to the pier. There are additional guards behind cover on the left side of the helicopter. Clear the area and board the helicopter.
Objective: Fly to the drop off point on the south side of the airport.
There’s no danger here, other than your flying ability. Even a wanted level is lost easily. Pilot the chopper across the islands to the Dukes airport.
Objective: Land the helicopter next to the cargo yard.
As you near the airport, begin your descend. Land the helicopter next to the cargo yard on the southern side of the airport. After you land, you call U.L. Paper again. You’re told the helicopter will be ready when you need it—apparently the guy you’re hoping to find and eliminate is only accessible by air.
Paper Trail (U.L. Paper)
Not long after you complete the helicopter theft in Dust Off, you get another call from your contact at U.L. Paper. The chopper is prepped and ready to go! In this task you need to shoot down another helicopter. Your pal Jacob will be riding shotgun and manning the onboard rocket launcher.
Objective: Meet Jacob at the salvage yard off Grummer Road.
Take a vehicle and drive it over to the salvage yard. Follow the marked route and find Jacob there waiting for you inside the helicopter.
Objective: Get into the helicopter. Fly south and locate the target chopper.
Climb onboard the helicopter. Take off and fly south toward the marked target chopper. Along the way, Jacob tells you that the enemy chopper must be destroyed where there are no people. You must wait for the enemy chopper to fly over water before you take a shot.
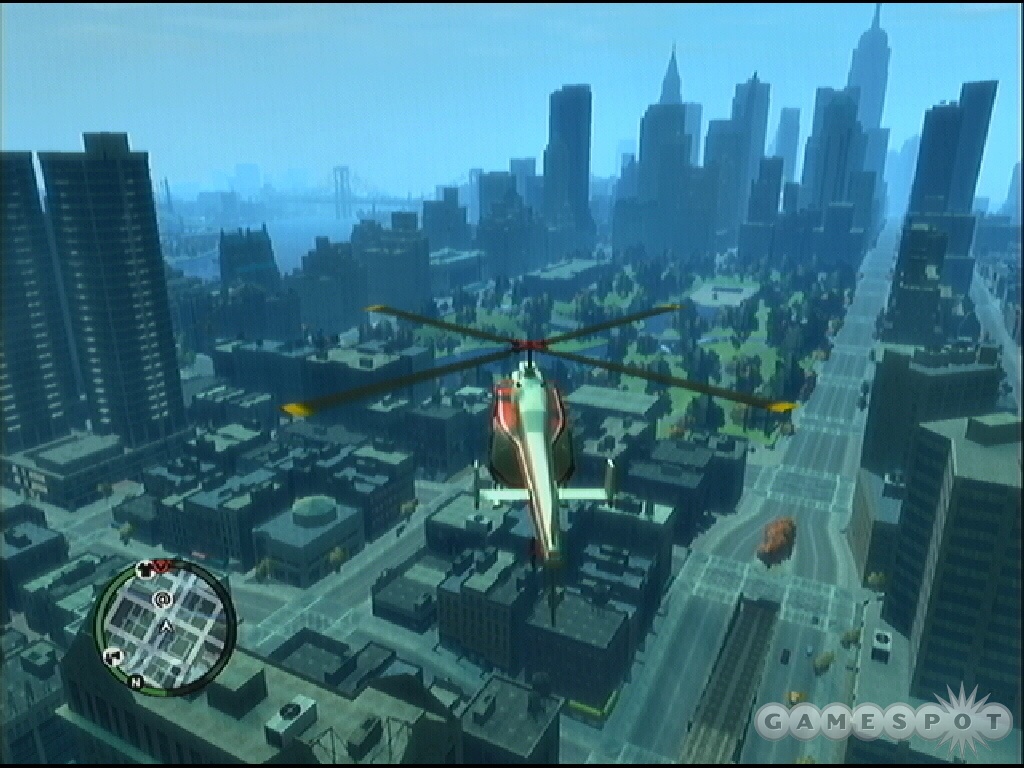
It’s a thrilling chase through the city. Keep the marked red target chopper in view and follow it through the city. Eventually the enemy chopper moves close to a bridge and then proceeds on the opposite side toward the open water. Cut it off by flying straight for the water.
Objective: Get close and move to the right of the target chopper to give Jacob a shot. Line up your helicopter at the same height as the target. Keep your helicopter to the right so that Jacob can get a shot.
Move to the right side of the enemy chopper. Drop altitude until you’re nearly level with the opposing helicopter. When you get in position, Jacob takes shots with the rocket launcher. Don’t worry if the first couple projectiles miss the target. Stay to the target helicopter’s right side and remain at the same height. It shouldn’t take long for Jacob to score a successful hit. Get into position as soon as possible because the target helicopter doesn’t stay over open water forever.
Objective: Drop Jacob at the helipad off Union Drive East.
Fly the helicopter to the landing zone. Land the helicopter near the Fishmarket at the marked landing pad.
The Holland Play… (Playboy X)
You pay a visit to your acquaintance Playboy X, who gives you a big bloated speech. Despite all the ramblings, the speech is actually about Dwayne. You attempt to reason with Playboy but it’s not working—looks like Playboy’s mind is made up. Dwayne has to go. And in typical fashion, Playboy wants you to do it. You leave the apartment, which completes the first part of the task.
Eventually Dwayne calls and tells you he’s going crazy and suspects Playboy wants him dead. He proposes that you go after Playboy for him. Dwayne promises to stick by you to the end if you’ll take out Playboy.
Now you’re in a pickle. Playboy X will call you back soon and ask you if you’ve made a decision yet. Time to decide who lives and who dies.
…The Holland Play (Playboy X)
Once both parties have proposed killing the other, a red "X" and a red "D" appear on your map. You can decide who lives and who dies.
Objective: Kill Playboy X or Dwayne.
Let’s start with Playboy X. There are more advantages to getting rid of Playboy X. First, Dwayne becomes a friend if you eliminate Playboy. Get friendly with Dwayne and you earn a special benefit: Dwayne will have backup assist you on missions. Also, if you get rid of Playboy X, Dwayne gives you Playboy’s old apartment to serve as a safehouse.
Drive over the Playboy’s apartment. You find him inside with four of his bodyguards. Playboy soon realizes why you’ve come and makes a run for it. Eliminate the four bodyguards then pursue Playboy onto the roof.
Descend the fire escape and chase Playboy. When you reach the streets, Playboy calls more guards, this time driving a vehicle. Stick to the right, ignore the vehicle, and follow Playboy into an alley. Find him trying to get inside a building. Gun down Playboy, which completes the mission.
Targeting and eliminating Dwayne is easier and not as wise in the long run (because of the lost friendship). Drive over to the marked location and find Dwayne and a bodyguard inside his place. Eliminate both parties to complete the task.
Harboring a Grudge (Packie McReary)
Packie McReary makes contact and offers a job. When you pay Packie a visit, you meet more members of the McReary clan, including Ma McReary and Packie’s sister Kate (you seem to catch her eye as she’s leaving, much to Packie’s irritation). Packie’s got business out at the harbor.
Objective: Go to the harbor warehouse.
Grab a vehicle and pick up Packie. Drive along the marked route to the harbor at Fishmarket South.
Objective: Follow Packie. Follow Packie up onto the roof.
Once you reach the marked location, exit the car and follow Packie into the harbor. Packie does his best Lara Croft imitation—he climbs over lumber, grabs the billboard railing, and shimmies to the other side. Follow the onscreen instructions and his movements. Pull up onto the roof and rendezvous with Packie. A cut scene reveals the arrival of the boat. The deal is going down.
Objective: Steal the truck. Climb down the mini cabin to get to the ground.
There are plenty of enemies below but the rooftop offers an excellent height advantage and line of fire. If you’ve got some grenades, toss them into the cluster of guards. A sniper rifle can also be a nice ambush weapon against several of the enemies. Arm a pistol or assault rifle for long-range accuracy. Clear out as many guards as you can see; there are others inside the garage. Drop down.
Approach the garage carefully and take cover by the entrance. Eliminate the guards waiting inside. Make your way to the office on the left side and find a much welcome health kit. Clearing the area triggers the next objective.
Objective: Escape in the van back to Packie’s lockup.
Thankfully the lockup isn’t far because you’re pursued and attacked from enemies inside a car. Listen to the dialogue: you find grenades in the car. Follow the onscreen instructions to toss the grenades out of the van. Concentrate on your driving. If you’re careful and don’t get stuck, the close proximity of the lockup will allow you to reach safety quickly. The mission ends as soon as you reach the marked lockup—even if you have a wanted level and a bunch of enemies still on your tail.
Waste Not Want Knots (Packie McReary)
Pay Packie a visit and discover him handing out weapons to his crew. The plans are to hit a mafia-controlled waste management plant. It’s a Robin Hood mission!
Objective: Find a four door car. Pick up Packie and the others.
You need a four door car to hold all of Packie’s crew. Find one either down the street or just jack a car that happens to drive by at the time. Drive back and pick up Packie and the crew.
Objective: Drive to the waste depot.
It’s a long drive to the waste depot over on Colony Island. Enjoy the conversation and learn more about the McReary family. The money at the waste management plant is kept in the office inside the main building. Packie has a boat near the depot to serve as the getaway vehicle.
Objective: Get inside the depot and get the cash.
Pulling up to the marked spot triggers the next objective. When you park there, Packie and the crew run and climb over the fence into the depot and start the attack. You don’t have to park there to trigger the attack. You can also pull up near the fence and get out there. The second option seems a bit better for getting ahead of Packie and his crew and taking control of the fight.
There’s plenty of cover. The problem is that if Packie or any of his crew dies, the mission fails. Take command of the battle and eliminate enemies as quickly as possible. Keep attacking until you hear Packie say, "Alright boys, let’s go inside and find this money." That’s your cue that the area outside the depot is cleared. Pick up the health kit by the main entrance to the depot; save it for after you’ve completed the exterior fight.
Objective: Get the cash from the office.
The depot is also cluttered with defenders. You receive help from the crew but keep in mind that they can still die, which will end the mission in failure. Make your way toward the stairs; these lead to the upper office and the money. There are a couple guards around the office; watch the upper catwalk as you make your way toward the cash. Grab the marked loot to trigger the next objective.
Objective: Meet up with Packie outside of the depot.
Descend the staircase and discover that more enemies surround your position. The crew can still die and the enemies keep pouring in so it’s vital to work fast. Your best choice is to push quickly toward Packie’s location—it’s the door on the left side.
Objective: Escape the depot with Packie. Swim out and get in the boat.
Follow Packie away from the depot. Jump into the water and swim to the marked boat. Get inside.
Objective: Get Packie back to safety.
Drive the boat to the marked location on the map. Get Packie safely to the dock to complete the mission.
Three Leaf Clover (Packie McReary)
Packie calls at some point after the Waste Not Want Knots mission. First he’ll ask you to take out his sister, Kate. Next, expect this mission to become active. Packie introduces you to two more McReary brothers, Derrick and Gerald. The pleasantries are anything but pleasant. The brothers don’t seem to like the fact that you’re working your way into the family business.
The plan is to rob the southern Algonquin branch of the Bank of Liberty. Enjoy this obvious homage to one of the best action movie scenes ever, the bank robbery and street gun fight from Heat.
Objective: Find a four door car. Go to the bank.
Jack a four door car and pick up the McReary boys. The plan is for each man to handle a security guard then you take care of the employees while the "PE4" is used to blow the vault. Drive the car up to the marked location in front of the bank and watch the great cut scene.
Objective: Go down to the vault and get the money.
Proceed through the doorway ahead. Descend the stairs to the blown vault and grab the cash. You now have a five-star wanted level. Cops, vans, choppers…all surrounding the bank.
Objective: Cover Packie and Derrick. Follow Packie and Derrick.
Here begins a long, exciting street battle and chase. There are tons of cops outside at the start. Packie and Derrick are pretty crazy. Start shooting cops and when they run into the alley on the right, follow them. As you move through each alley, more cops arrive. You must clear out the cops in order to press forward. An assault rifle is the weapon of choice. You need accuracy and quick kills to keep the group moving. One of the alleys contains a cellar door. Check the bottom of the stairs inside for a health kit.
Continue the fight through Chinatown—shoot the police cars and cops that get in your way. You’ll eventually reach an alley where the police chopper finds you. Packie ducks into the subway.
Eliminate the cops cluttering the lobby area. Grab the health kit off of the pillar. Additional well-armored cops arrive from the staircase. Have your assault rifle ready to mow these enemies down as they advance toward your position. Follow Packie and Derrick onto the subway tracks. It’s likely better to keep running but you can shoot or lob grenades at the pursuing cops.
Objective: Go to the service hatch. Get to street level.
Locate the service hatch on the side of the subway tunnel. Before going up to the street level, grab the health kit in front of you once you’ve moved into the heath.
Objective: Find a four door car and go to Packie’s Ma’s house.
When you’re at the street, look to the right. There’s a four door car right there. You only (only!) have a three-star wanted level now. Once everyone is inside, drive off and escape the flashing zone to lose the wanted level. Complete this mission to earn the exploration achievement on the Xbox 360—the last island is unlocked. Packie also becomes a friend; you can go and hang out and hopefully get on his good side to earn his car bomb benefit. Finally, after this mission expect a call from Gerry McReary as well as Packie requesting you check on his brother Derrick.
A Long Way to Fall (Ray Boccino)
Drive over to Drusilla’s Ristorante in Little Italy and meet with Ray Boccino. He tells you about Teddy Benavidez, a former friend who’s not a friend any more.
Objective: Go to the projects on Galveston.
Grab a car and start driving toward the projects. While on route, Ray sends a text message with a photo of a guy named Alonzo—take note of his football #72 jersey. Ray says Alonzo might provide some help locating Teddy if you’re persuasive enough.
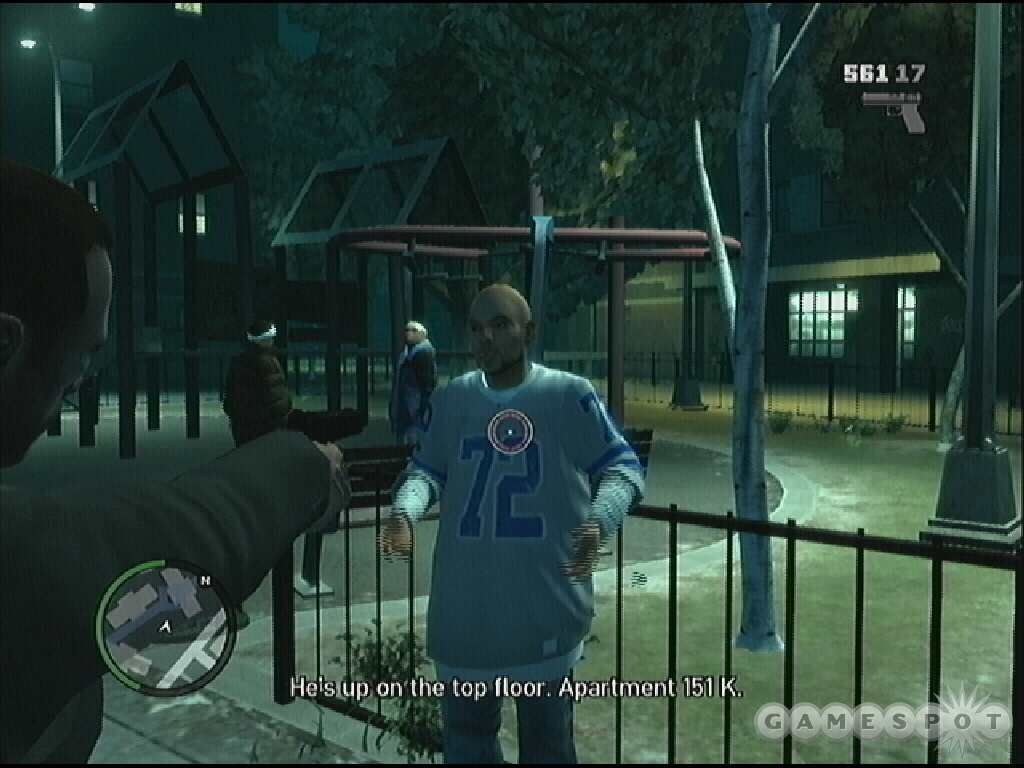
Objective: Use Ray’s text message to find Alonzo.
Exit the car at the projects and walk into the park. Search for Alonzo. Once found, walk over to him.
Objective: Intimidate Alonzo.
Equip your pistol and target Alonzo to elevate the intimidation factor. Alonzo gives up Teddy’s location: top floor, apartment 151K. Alonzo runs off. If you let him leave, he’ll alert Teddy that you’re coming, which makes his guards stand on ready and makes the attack difficult. Instead, gun Alonzo down when he runs away.
Objective: Go inside and look for Teddy Benavidez’s apartment. The elevator can be used to reach the 20th floor.
Head inside. Use the elevator, which unfortunately doesn’t go up all the way to Teddy’s floor. You’ll have to fight your way up there.
Objective: Go to Teddy Benavidez’s apartment.
If you let Alonzo live and warn Teddy, guards are already in the hall and posted on both sides. If you gunned Alonzo down, there’s a couple guards at the top of the elevator and they wonder what you’re doing up there. You have time to ambush them!
Battle your way slowly through the hallways. There’s usually a guard around every corner. When you reach the stairwell, check the area above before advancing. Ascend the stairs. On this floor, search the first left door on the right side. There’s a health kit in this hall. Expect to find plenty of enemies here.
Objective: Search the apartment. He must be in there somewhere.
Eliminate everyone in Teddy’s apartment. Search the kitchen and find another health kit. After clearing the apartment, Teddy ambushes you.
Objective: Take out Teddy Benavidez.
Chase Teddy out of the apartment and up the stairs toward the roof. There are more guards; be careful in these close quarters. Clear the guards and chase Teddy to the red target on the map. He’s attempting to open a door to continue the chase. Don’t give him a chance—shoot him to end the mission.
Taking in the Trash (Ray Boccino)
Go and talk with Ray. He needs you to help pick up some garbage. Sounds like a dirty job but in actuality, the garbage bags contain a ton of stolen diamonds.
Objective: Go and pick up the Trashmaster. Get in the truck.
Walk to the marked vehicle on your map. It’s the Trashmaster. You have a little meet and greet with Ray’s crew. Get inside the truck.
Objective: Drive to the first diamond pickup.
Drive the Trashmaster to the marked location. Pull up and wait for Tuna and Johnny to make the garbage pickup. When prompted, open up the back of the Trashmaster so the crew can throw the loot inside.
Objective: Drive to the second diamond pickup.
When finished, start driving the Trashmaster to the second marked location. Wait for Tuna and Johnny to get the goods, open the Trashmaster, and then start to drive off. After you grab the second diamond pickup, a cut scene reveals that you’ve got company!
Objective: Go to the drop-off in Fishmarket South.
Tuna and Johnny take aim on your pursuers. The Trashmaster isn’t exactly agile. Drive as quickly as possible but be very careful around corners. You don’t want to over or under steer and get stuck on a pole or a parked car allowing the pursuer to open fire on the crew. Concentrate on safe driving. Pull into the area at Fishmarket South to finish the task.
Meltdown (Ray Boccino)
Someone ripped off Ray—it’s either you or Luca and his buddies. Ray gives you the location of Luca, in Castle Gardens. Go get Ray’s stuff back so everyone can get paid.
Objective: Go to Castle Garden City.
Take a car and drive along the marked route to the target location in Castle Gardens. Approach Luca and his buddy. You tell him that you need the ice back—Luca claims he gave it all back. He’s lying.
Objective: Chase after Luca’s gang. You need Luca alive to get the diamonds back.
There’s a nice sports car nearby. Steal it and start after Luca and his gang. Don’t shoot the target car. You need Luca alive to get back the diamonds. Just follow the car. Stick close and don’t lose them. Eventually Luca’s gang crashes the car in a park.
Objective: The gang have escaped into the park. Take them down.
Eliminate the three members of Luca’s crew before hunting down Luca and the diamonds. Just target and shoot.
Objective: Luca is hiding in the toilets. Flush him out.
Run over to the marked area where Luca is hiding. It’s in the park bathroom. Shoot open every stall door until you find the one containing Luca.
Objective: Take out Luca. Pick up the diamonds.
Blow Luca away and pick up the dropped diamonds.
Objective: Go and meet Ray on the bridge.
Jack a vehicle and drive to the nearby bridge. Here you’ll rendezvous with Ray and complete the mission.
Museum Piece (Ray Boccino)
Sitting on two millions dollars of stolen ice is freaking Ray out—he wants you to offload it. You want a guarantee that Ray will help you find the man you’ve been looking for. Ray gives you a name: Florian Cravic. Before you can resume your hunt, you must meet a guy named Johnny at the Libertonian.
Objective: Meet Johnny at the side entrance of the Libertonian.
Take a car over to the Libertonian and reach the marked location just outside to find Johnny. You automatically enter and begin the deal. It doesn’t take long for things to go south—someone ambushes the deal!
Objective: Escape the Libertonian.
There’s plenty of cover here and no pressing need to be fast. Be patient and eliminate each guard as you push forward. Remain behind cover at all times. When you move on the right side of the cover, you can go cover to cover to remain hidden from enemy fire. There are adversaries in front of you and on the opposite walkways. Target one immediately to the left as soon as you gain control.
When you reach the end of the original path, locate the health kit on the wall to the left side. The stairs are found forward. When you push into this area, any enemy you missed before will attempt to flank. Plus, other guards will advance up the stairs. Take cover in this room and eliminate all of these enemies that approach from the left and right.
Descend the staircase. At the bottom, take cover behind the desk on the left. There’s a piece of body armor on the desk. Eliminate the guards crowding this room. Find the exit door at the opposite side. Go down the stairs and face more enemies. As you near the exit, grab another health kit.
Objective: Lose Issac’s crew.
Issac’s crew blocks the escape route. Eliminate the crew near the cars. Turn left and you’ll spot more enemies lying in wait—they’re in cars and plan to ambush if you drive off. You can snipe the drivers or use grenades to blow apart the vehicles. Grab a vehicle and escape. It’s possible to lose the crew even if you’re pursued but it’s generally easier to whittle down the enemies before you leave.
No Way on the Subway (Ray Boccino)
Ray Boccino has a problem: a bunch of missing money and the biker gang, The Lost. The boss needs to get paid and you’re the man to help.
Objective: Go to where members of The Lost are hanging out.
Take a vehicle along the marked route to the designated location. The bikers don’t stick around for long. They take off and you must grab a bike and pursue.
Objective: Take the bike. Chase and take out the bikers.
Get onto the nearby motorcycle and follow the bikers. These are challenging chases because motorcycles are fast and if you happen to run into something, you’re likely to be tossed from the bike. That much delay usually means the target gets away. Concentrate on following the bikers and sticking close until the next stage of the chase.
Objective: The bikers have entered the subway system. Follow them.
Target and eliminate one of the bikers. Watch the biker’s movements on the subway track. It will help determine the location of an approaching subway train. For instance, if the biker moves to the left, follow to avoid the oncoming train on the right.
The chase eventually continues onto a bridge. Stick close and keep firing. Watch ahead because a heap of subway cars eventually blocks the bridge route. The biker moves onto a walkway on the left. Follow the biker off the bridge and back into the city. Eliminate the second biker to complete the mission successfully.
Weekend at Florian’s (Ray Boccino)
Ray Boccino calls with information about Florian Clavic, which automatically begins this mission. You give your cousin Roman a call to tell him you’re going to go pick him up.
Objective: Pick up Roman.
Drive along the marked route to find your cousin. Pull up near the marker and let Roman into the car.
Objective: Go and see Talbot.
A guy named Talbot is your contact in finding Florian Clavic’s location. Proceed to the marked location and find Talbot. He’s not exactly forthcoming with information—but a little intimidation works wonders.
Objective: Get a four door car. When in a car, Talbot will give directions as you approach a junction.
Grab a four door vehicle so Talbot can join the Bellic cousins. Talbot knows that Florian lives uptown somewhere but doesn’t know the address. Instead, he’ll provide real-time directions on how to get there. Drive slowly so Talbot has time to provide the directions. He’ll provide an update at each intersection: like go straight, take a left, or take a right. Eventually you will reach the marked location.
You break into Florian’s place and learn Florian, now known as Bernie, isn’t the man you’re looking for. You’re now seeking out Darko Brevic. After this mission expect calls from both Bernie and U.L. Paper. Bernie calls with a mission task; U.L. Paper calls because they realize you found Bernie, who they knew wasn’t the guy you are seeking.
Late Checkout (Ray Boccino)
Ray Boccino continues to have problems regarding the stolen diamonds. Now Ray wants you to eliminate the diamond dealer Issac. Find the ice dealer holed up in the Majestic hotel with his cronies.
Objective: Go to the Majestic hotel.
Take a car and follow the marked route to the Majestic hotel.
Objective: Find a way to the penthouse suite and eliminate Issac and the diamond dealers.
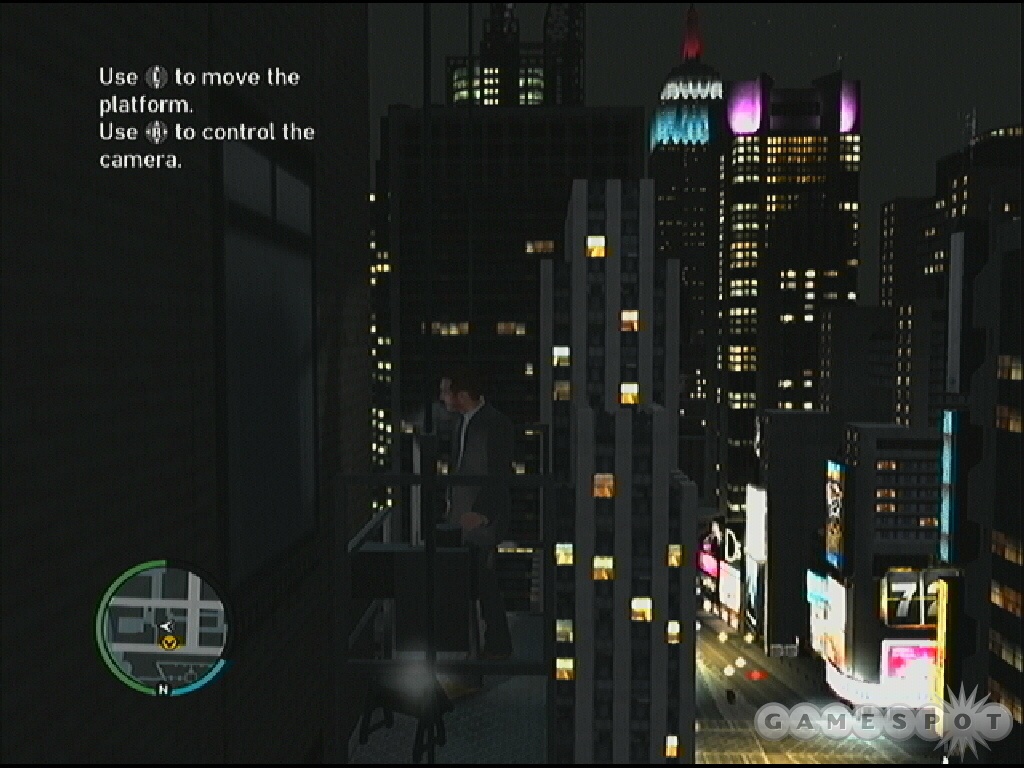
You can ride the elevator but it doesn’t go all the way to the penthouse, which means fighting your way up to the top. Instead, exit the hotel and search the rear of the building. Out back you will find a cleaning lift platform. Get on and rid it to the top.
Cross the rooftop and ascend the staircase here. Spot the guards out on the deck. Ambush the guards with a grenade or other weapon. Eliminate all of the enemies out here then search the deck for a body armor power-up. Head inside and descend the staircase.
Search the bedroom on the right side and eliminate the target inside. Continue down into the penthouse and eliminate remaining targets. Look for more marked targets in the kitchen area. Take out Issac and his marked diamond dealer targets to complete the objective.
Objective: Escape from the hotel.
Exit the penthouse and return to the roof. There will likely be some enemies blocking the route to the lift. Eliminate the guards and then get onto the lift platform and ride it back down to the ground. Drive off to complete the task. After this mission, expect a text message later from Ray—he wants to set up a meeting with him and Phil at a depot in Normandy.
Action Speaks Louder Than Words (Gerry McReary)
Gerry McReary is eager to cause some problems—some explosive problems. Gerry wants you to plant a bomb in Tony Black’s car. The detonator is rigged to a cell phone call.
Objective: Pick up the bomb on Inchon Ave.
Take a car and locate the bomb in an alley on Ichon Ave. Follow the marked route to the location. Get out of the car and grab the bomb. You call Gerry with an update. He tells you that Tony’s car is in an alleyway near Feldspar Street.
Objective: Go to the Ancelotti’s car and rig it with the bomb.
Grab a car and drive along the marked route to the alley on Feldspar Street. You’ll spot Tony Black’s car parked inside the alley.
Objective: Go to the back of the Ancelotti’s car and rig it with the bomb.
Get out of your vehicle and walk to the trunk of the marked vehicle. While standing on the truck, follow the onscreen instructions to attach and arm the bomb.
Objective: Get a vehicle and move away from the rigged car.
Return to your car and drive to the marked location across the street. Wait for Tony Black to emerge and get into the rigged vehicle.
Objective: Follow the Ancelottis. Don’t let them know you’re following them.
This is a long car ride to the next location. Just keep the target car in your sight but don’t follow too close. If you spook the target car, the mission ends in failure. Keep your distance and wait for the target car to reach its destination.
Objective: Go to a safe point and detonate the bomb.
Go to the marked location to get safely away from the impending detonation.
Objective: Call Gerry to detonate the bomb.
Open your cell phone and select the phonebook. Select Gerry and then choose detonate. Enjoy the explosion.
Objective: Take out the remaining Ancelottis.
Some Ancelottis survive the blast. Cross the street toward the fiery inferno and take out the handful or remaining enemies on the scene. All this commotion triggers the cops and a wanted level.
Objective: Get out of there and lose the wanted level.
Take a vehicle and leave the scene. Race out of the flashing wanted zone to lose the wanted level and complete the mission.
I Need Your Clothes, Your Boots, and Your Motorcycle (Gerry McReary)
Gerry owes the Pegorinos and wants you to do the work—Gerry wants to chill because he thinks he might get pinched soon. You need to disguise yourself as an Albanian and whack Frankie Garone. The guy you’ll be disguised as is currently in Gerry’s freezer.
Objective: Get on the motorbike.
Sprint in your new motorcycle garb to the marked motorbike. Get on it.
Objective: Go to the meeting point.
Follow the marked route to the meeting location. Your disguise doesn’t last long. You’re fingered pretty quickly.
Objective: Take out Frankie Garone
This is another motorcycle chase task. Concentrate on following Frankie as closely as possible while taking shots with your pistol or sub machinegun. Be careful around turns and avoid smacking into a pole or another car, which will significantly delay your pursuit and could very well end the mission in failure. You may knock Frankie off of the bike and he’ll make a run for it. Take him out on a drive-by or follow him on foot and eliminate Frankie Garone to finish the mission.
Smackdown (Derrick McReary)
Derrick’s not doing too well strung out on a park bench—Packie texted you and asked you to check up on him. Derrick wants you to take care of someone for him. The target’s name is Bucky Sligo; he’s been threatening the family.
Objective: Find a cop car.
Exit the park containing Derrick and go to the left. There’s a police car right across the street. Get inside.
Objective: Use the police computer to find Bucky’s hangout.
Remain stationary and activate the police computer. Select "Search Police Records" and then "Search by Name". Type in "Bucky Sligo" and press enter. Wait for the search to complete and discover Bucky’s hangout is the Burger Shot in Alderney.
Objective: Drive to Burger Shot where Bucky hangs out.
You automatically call Derrick with the update. He suggests keeping the police car; if Bucky is alone at the Burger Shot, he’ll think he’s getting busted and flee back to his crew. Then you can take them all out!
Follow the marked route to the Burger Shot. Park at the marker and watch as Bucky pulls out and makes a run for it.
Objective: Follow Bucky to his crew.
Bucky takes an unusual route back to his crew. If you follow exactly, expect to run over fences and drive through backyards to keep up with Bucky. You don’t have to follow his exact path. You can stick to the main roads but make sure Bucky remains within sight. You can’t let him get too far away.
Objective: You have found Bucky’s crew, take down the whole gang.
There are a couple guards outside on the porch and another trio of guards inside. Clear out the porch then stand at the front door. You can push open the door and toss a grenade inside to help clear out the room or just start shooting at the guards inside. Bucky has retreated up stairs. He’s at the very top and wields a shotgun. As you approach, keep your target pegged at the top of the stairs to eliminate Bucky before he can get off a significant shot.
Objective: Lose your wanted level.
The longer you take inside the house, the higher the chance that the cops arrive and become part of the problem. It’s better to eliminate Bucky and his crew fast so you can escape without dealing with cops inside the house. You still must lose the wanted level but you won’t have to shoot cops to escape. After this mission, expect Brucie to call. He has a new side job for you—Stevie wants cars found and grabbed.
Babysitting (Derrick McReary)
Locate Derrick McReary down near the edge of the water. Derrick pulls up in a boat—looks like you’re manning the yacht!
Objective: Go to Kim’s boat.
The job sounds simple: you’re escorting Derrick’s Korean contact and his boatload of counterfeit money. Pilot the boat over to the marked location, that’s Kim’s boat.
Objective: Follow Kim. Stay close to Kim’s boat. Protect him from the attackers.
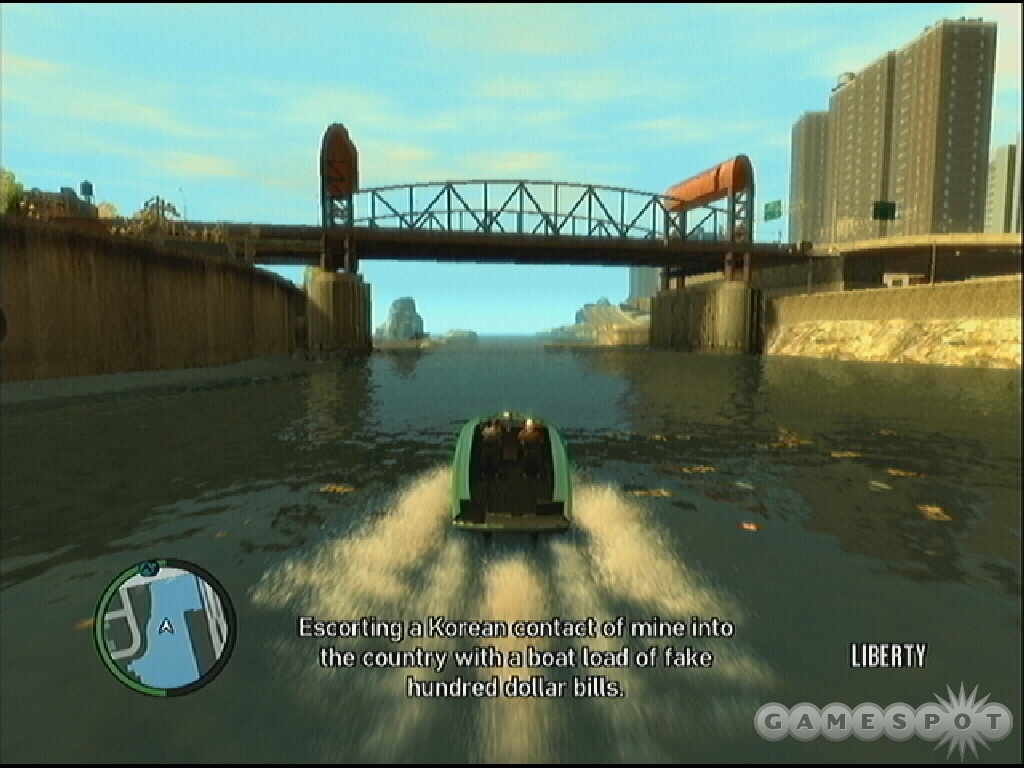
Drive closely behind Kim’s boat. It doesn’t take long before the simple escort task to become a heated battle task. Several enemy boats emerge behind Kim. Aim your pistol or sub machinegun at the rear of the enemy targets. Derrick also provides assistance. Note that the turn radius of your boat isn’t quick so be careful when maneuvering around bridge pillars. Don’t get stuck; you fail the mission if you get too far away from Kim.
An enemy chopper joins the chase. Derrick hands over a rocket launcher and takes the wheel.
Objective: Use the rocket launcher to shoot down the chopper.
Aim the rocket launcher at the chopper and fire a rocket. If it misses the target, adjust your aim and fire another. Destroy the chopper to complete the task. Eliminate any remaining enemy boats.
Objective: Follow Kim
Continue to follow Kim to the destination. Derrick believes Francis McReary may have been involved with the attack on his operation.
Tunnel of Death (Derrick McReary)
Find Derrick again in the park. He’s looking a little better this time—at least he’s sitting up. Of course it doesn’t take long to realize he’s not doing that much better. Once again, someone’s talking smack about Derrick—a guy named Aiden O’Malley. The task sounds simple: silence Aiden forever.
Packie calls and warns that since Aiden is in police custody and being transferred, he’ll be well protected. Packie has provided a truck for the mission. The convoy with Aiden is coming from the Booth tunnel; you must block the tunnel with your truck while Packie blocks the tunnel’s other end.
Objective: Get the truck.
Grab a vehicle and drive to the truck’s location. Get inside the truck and you automatically call Packie. The goal isn’t to kill Aiden at the scene. The operation needs to look like a prison break so it doesn’t get pinned on Derrick.
Objective: Block off the Booth Tunnel.
Drive the truck to the marked location inside the Booth Tunnel. There are two markers here. You must park the truck across both markers so you block passage through the tunnel.
The arrival of the cops triggers the next battle. Packie’s location is marked as blue on the mini-map. Take cover and advance toward Packie while eliminating all of the cops.
Objective: Steal the Stockade.
Get into the police van; wait for Packie to get into the back.
Objective: Lose your wanted level. Ditch the truck at a quiet location.
Drive out of the Booth Tunnel (slip by the truck blocking passage). Continue straight and out of the flashing wanted zone to lose your wanted level. Follow the marked route to the quiet location. Drive through the fence and park at the marker in the alley.
Objective: Take Aiden to the cliffs.
Escort Aiden to the cliffs—he’s very thankful about the prison break. Though he can’t imagine who was the one to organize this operation. Follow the marked route off road and reach the destination marker.
Objective: Kill Aiden.
Pull out a weapon and shoot Aiden. He’ll topple off the cliff and into the raging waters below.
Hating the Haters (Bernie Crane)
The haters are trying to kill Bernie. It’s not fair—he’s just being Bernie! Someone is threatening to kill him and you need to help out.
Objective: Take Bernie to Middle Park.
Drive Bernie over to the marked location in Middle Park. It’s Bernie’s cardio time. He stretches for his usual jog and it’s your job to escort him safely through the park.
Objective: Follow Bernie as he jogs, but keep your distance.
Stick close behind Bernie’s jogging routine. Close, but not too close. When Bernie reaches the tunnel, he gets jumped.
Objective: Take down the hater. Pick up Bernie.
Get on the nearby scooter and prepare for a long scooter chase through the park. Target the hater with your pistol or sub machinegun and knock him off the scooter. Stick close. If you don’t take down the hater, you end up driving past Bernie and you must pick him up and continue.
Objective: Take Bernie to Perseus in the Exchange.
Drive Bernie over to the Perseus store in the Exchange to complete the mission.
Union Drive (Bernie Crane)
You walk in on Bernie who’s on the phone with his boyfriend Bryce. Sounds like they’re both in trouble and you’re just the guy to help. Bryce is being blackmailed about his relationship with Bernie. You agree to meet with the blackmailers.
Objective: Take Bernie to the rendezvous to meet with the blackmailers.
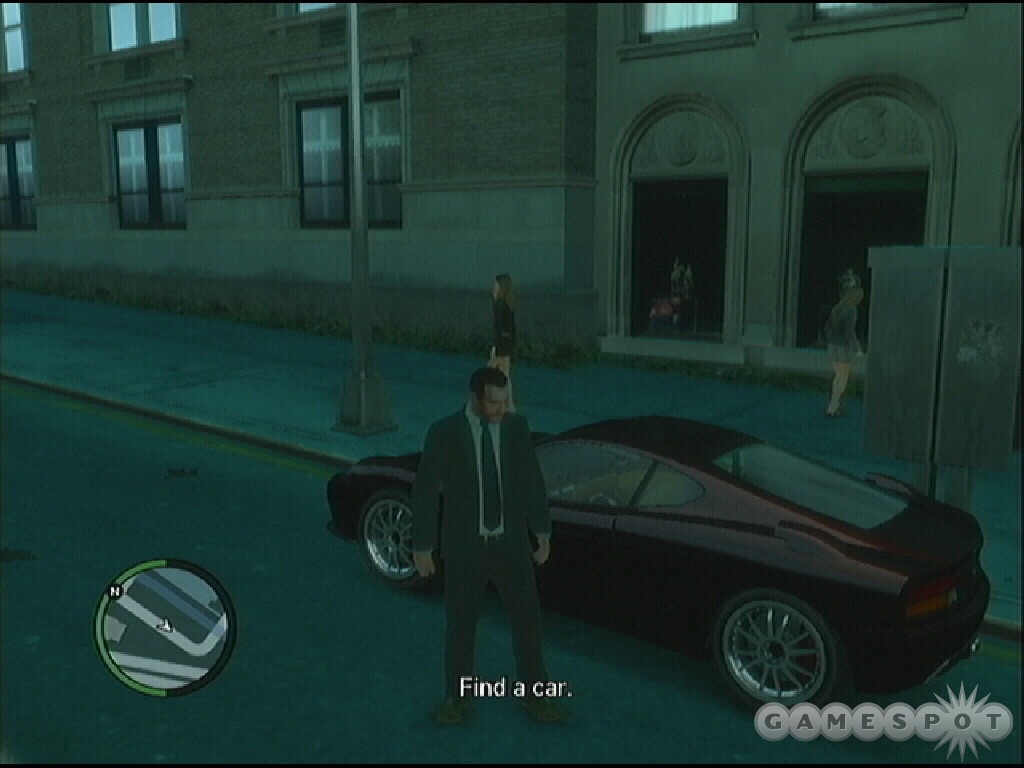
Grab the Turismo located on Bernie’s street. You’ll need the fast car. Drive to the marked location and reach the meeting. The blackmailers arrive at the rendezvous but they’re looking for Bryce. You tell the blackmailers to back off. You also learn the identity of the "boss" blackmailer: Dimitri!
Objective: Eliminate the blackmailers.
This is a long, fast car chase. The blackmailers will eventually crash so it’s better to just stick as close as you can. Concentrate on driving and not firing. Avoid running into cars or other objects so you aren’t slowed down. The blackmailers are fast and it won’t take them long to get out of range.
Once the blackmailers crash, get out of your car and chase each one down. Blast them at close-range with a shotgun or take them out from a longer distance with the assault rifle.
Objective: Take Bernie back to his apartment.
Pick up Bernie and drive him back along the marked route to his apartment. This concludes the mission.
Buoys Ahoy (Bernie Crane)
Bernie sends you a text message: he’s having a panic attack! Bernie wants you to meet him at Pier 45. You discover Bernie isn’t quite as hysterical as he sounded. Instead, Bernie has a fun day planned—a boat trip!
Objective: Take Bernie off the coast of Firefly Island.
Drive the boat to the marker. There’s no time to enjoy the sun. Dimitri’s men arrive and spoil the f-u-n.
Objective: Take out Dimitri’s men.
Follow the target boat and shoot with your pistol or sub machinegun. The boat isn’t particularly agile on corners so be careful around bridges and docks. You don’t want to smack into a pillar because it’s tough to get back into the chase.
Objective: Dimitri’s men have reached land. Follow Dimitri’s man and get rid of him.
The target boat eventually reaches land and Dimitri’s men make a run for it. Drive the boat to the dock or just onto the land and get out. Chase down the targets and eliminate them with your favorite weapon.
Objective: Go back to Bernie.
Return to the boat (which will be in the water if you drove it onto land! Thanks Bernie!) and speak with Bernie to complete the mission.
At some point after this task, Bernie will call and give you some good news. As a thank you, Bryce has decided to give you a gift. His car! It’s an awesome Infernus. Grab it at the marked "Bernie" location and drive it back to a safehouse.
Blood Brothers (Francis McReary)
Francis has found out that you’ve been hanging out with Derrick. He claims Derrick isn’t well and the problem isn’t just his—it’s yours too. Francis wants you to kill Derrick…kill his own brother.
Objective: Go to the courtyard park in Lancet.
Derrick calls soon after and tells you that Francis set up a meeting and he’s worried for his life. He wants you to get there and provide support. You call Francis for a mission update. He says to use the cleaning platform to get in position. And don’t accidentally hit him. No problem, right?
Objective: Go to the window cleaning platform. Use the window cleaning platform, on top of the scaffolding, to get to the roof top.
Drive along the marked route and reach the building. Park in front of the building and jump onto the scaffolding to find the window cleaning platform. Get on it and ride it to the ceiling. Walk over to the marked location.

Objective: Take out Derrick or Francis when ready.
You have a choice to make. Do you kill the junkie Derrick McReary or the corrupt cop Francis McReary? Aim your sniper scope at your intended target and score a headshot. Don’t miss or the brothers will flee and you will fail the mission.
Objective: Get off the roof and evacuate the area.
Descend the rooftop using the lift platform and get into a car. Drive off. You automatically call the McCreary survivor.
Undertaker (Packie McReary)
A short time after Blood Brothers, Packie McReary calls about the death of one of his brothers. Packie suggests dressing in a suit. Expect a call from Kate as well.
Objective: Change into a suit for the funeral or go to Perseus and buy a smart outfit.
If you aren’t fully decked out, the next objective won’t open. Follow the onscreen instructions to discover what you need. Drive over to Perseus and get the appropriate attire.
Objective: Go to the church and attend the funeral.
Grab a car and follow the marked route to reach the church. Go to the marker and attend the funeral of one of the McReary brothers. The family is attacked upon leaving the church!
Objective: Help Packie fight the Albanian hoods.
The Albanian hoods arrive in waves—four at a time inside cars. An additional group approaches from the alley across the street. You can use heavy artillery, such as the rocket launcher or grenades to attack the cars. Be careful, though. You can’t allow the hearse holding the McReary brother’s body to be destroyed. If it’s destroyed, the mission ends in failure.
Objective: Get in the hearse with Packie.
Get inside the hearse and start driving.
Objective: Drive Packie and the hearse to the cemetery.
It doesn’t take long for more enemies to arrive. You’re attacked and pursued by more vehicles. Drive carefully but quickly. You can’t allow the casket to fall out or the mission ends. Reach the cemetery safely to complete the mission.
I’ll Take Her… (Gerry McReary)
Gerry wants you to pay him a visit in the Alderney State Correctional Facility. He wants you to call Packie, who will explain what Gerry needs help with the most. You automatically call Packie—he tells you that Gerry wants you to kidnap an Ancelotti daughter named Gracie. She’s selling a car; you must pose as the buyer.
Objective: Go to a computer terminal.
Take a car or a taxi over to an Internet café. Go inside and activate a computer terminal. Click on "Web" and then on the "Autoeroticar.com" ad on the homepage. Or you could just go to the website itself. Click on "View Cars" and scroll down until you find the pink Feltzer. The phone number is added to your cell phone as "Mob Daughter" and you’re told to call between 8:00am and 9:00pm.
…I’ll Take Her (Gerry McReary)
Wait until the appropriate time then use your cell phone to dial Mob Daughter. Gracie tells you to come over; her place is on Babbage Drive.
Objective: Go to meet Gracie Ancelotti at her house.
Grab a vehicle and drive over to Gracie’s house. Find her and the pink Feltzer out front.
Objective: Test drive the car to the coast.
Follow the marked route on the test drive. At some point during the casual ride, you’re told it’s time to initiate the operation.
Objective: Time to initiate the kidnapping. Take Gracie to the safehouse.
Gracie doesn’t yield easily. She grabs the wheel, which causes the car to swing wildly. Keep the Feltzer on the road and continue to drive toward the safehouse. Eventually you’ll knock Gracie out and she won’t be a problem.
Objective: Take the girl to the safehouse.
Continue along the marked route to reach the designated safehouse location. You call Packie after the mission is complete. He says he’ll let you know when the plan is in motion.
After the task, Packie will call at some point requesting a photo of Gracie. You need to drive over to her location and take a picture with your camera phone.
Objective: Go upstairs to the safehouse.
Return to the safehouse and head upstairs. You’ll find Gracie inside.
Objective: Take a photo of Gracie.
Follow the onscreen instructions to make Gracie look at you. Activate your cell phone and its camera. Focus on Gracie and snap a photo of her face. Send the picture to Packie.
Objective: Get out of the building.
Exit the safehouse and drive away to complete the mission.
She’s a Keeper (Gerry McReary)
Packie sends a text message to go visit Gerry at the Alderney State Correctional Facility. The mission orders are coded because of the eavesdropping guards but it sounds like you need to move Gracie.
Objective: Go to the safehouse.
Grab a vehicle and drive along the marked route to the safehouse holding Gracie. Pull up to the marker and Gracie is put into the trunk.
Objective: The Ancelottis are on to you, get to the safehouse quickly.
This is a car chase with a twist—Gracie is in the trunk and if you drive too wild, she could die. If you reach the safehouse and she’s dead, the mission ends in failure. She keep talking and banging on the trunk; that’ll confirm that she’s still breathing. Just keep driving carefully along the marked route and keep away from the pursuing Ancelotti vehicle. Reach the safehouse with Gracie intact to complete the task.
Diamonds are a Girl’s Best Friend (Gerry McReary)
Make your way over to Alderney State Correctional Facility and visit Gerry. It sounds like the Ancelottis are prepared to pay the ransom. You automatically call Packie and set up a meeting.
Objective: Go to Packie’s car in Northwood.
Take a vehicle over to Packie’s location in Northwood. Get inside the car.
Objective: Drive to the Charge Island Sewage Works. Go around the back to the exchange point.
Drive Packie’s car along the marked route to the Charge Island Sewage Works. Once there, continue around the back to the marked exchange point. It looks like the deal is going down: Gracie for the diamonds. That is until your old nemesis Bulgarin shows up and he’s got an army of bad guys with him.
Objective: Take out Bulgarin’s men.
Packie shouts, "I think I know who’s got the ice, follow me". Remain behind cover and take out the enemies with your assault rifle. There are also guards on the catwalk. Don’t forget about them! As you follow Packie up the ramp, grab the body armor.
When you reach the upper catwalk, more enemies appear in front and to your left. Clear them out and advance. When you turn left, more bad guys approach from the stairs in front of you.
Objective: Make your way across to the walkway.
Packie suggests splitting up. Advance forward and spot the arriving cars below.
Objective: Take out the reinforcements.
Target all of the enemies and eliminate them with your assault rifle (or toss a few grenades down there for big explosions). Advance and take the first left. Go forward and find Packie. Grab the health kit on the right. Locate more guards ahead and others to the left. Eliminate them. Continue to follow Packie. He finally reaches the guy with the ice. But Bulgarin’s man drops the ice into a dump truck that pulls away.
Objective: Take out the last of Bulgarin’s men.
Terminate the last couple bad guys to complete the battle.
Objective: Follow Packie. Take Packie back to his Ma’s House in Dukes.
Follow Packie out of the Sewage Works and grab a vehicle. Take Packie back to his Ma’s place in Dukes.
Truck Hustle (Phil Bell)
Pay a visit to Ray Boccino’s contact Phil Bell over in Normandy. The triads are trying to offload some product. But instead of buying, you’ll be stealing.
Objective: Go to the alley.
Take a vehicle over to the location marked on the map.
Objective: Steal the truck.

They aren’t going to give up this truck easily. There are plentiful enemies guarding the truck. Use your assault rifle, grenades, or even rockets to thin the enemy numbers as you push your way toward the target truck. Clear everything out between you and the vehicle. As you get close to the truck, it starts to move.
Objective: The truck is escaping. Move to its rear to grab on.
Go to the rear of the escaping truck. Follow the onscreen instructions to pull yourself onto the truck. Once you’re on top of the truck, roll to stay in the middle and counter the truck’s turns. If you fall off, tap the button repeatedly again to get back on. During all this time, push the analog stick forward to move to the front of the roof. Once there, you automatically get into the truck. You automatically call Bell with the news.
Objective: Drive the truck to the old mansion.
Drive the truck along the marked route. Deliver the vehicle to Phil’s nephew Frankie—it’s a wedding present!
You call Phil with the good news. In return, he offers a contact for side missions: assassin tasks! Phil also calls again with another new contact: Jimmy Pegorino. Wear some respectable clothes for the meeting.
Pegorino’s Pride (Jimmy Pegorino)
Drive over to Jimmy Pegorino’s pad over in Westdyke. There’s going to be a meeting between Jimmy and the Pavano family. But these guys haven’t shown the appropriate respect in the past and something might go down. Jimmy wants you to provide security for the meet.
Objective: Get in Pegorino’s car. Drive to the old refinery.
Get inside Pegorino’s car and wait for Jimmy to get in. Follow the marked route over to the old refinery. Once there, you receive a sniper rifle from Marco. Jimmy tells you to go up the building to overlook the meet. Don’t shoot unless they shoot first!
Objective: Go to the vantage point and watch over the meet.
Find the staircase in the middle of the building and go up to the vantage point. The entrance is right at your start position. Once you’re at the vantage point, zoom the sniper scope onto the meeting. Wait for the attack. Eventually all the Pavanos appear as enemies.
Objective: Keep a guard over Pegorino.
Use the sniper rifle to eliminate all of the enemy guards surrounding Pegorino.
Objective: Rescue Pegorino.
This is your cue that you cleared out the initial enemy forces. Quickly run down the stairs. When you emerge from the building, proceed a little to the left and target and eliminate the enemies within firing range. Pull yourself up on the left side of the stairs. Pegorino will die if you take too long so don’t hesitate.
There are plenty of enemies inside this building. Make sure you target and eliminate the bad guys up high as well. Remain on the right side of the building and make your way from room to room. Watch out for guards hiding on the left side of each doorway. If you neglect to check these areas, a guard could easily get the jump on you and take you out with a shotgun blast. Check one of the rooms on the right side for body armor. Reach Pegorino’s marked position on the map.
Objective: Get Pegorino’s offering back from the Pavanos.
Pursue the Pavano vehicle. Shoot the wheels to slow down the enemy car. The vehicle eventually crashes in the refinery. As you approach, don’t park your own car too close—gunfire might mow you down!
Objective: Go get Pegorino’s offering.
There’s a health kit where the Pavano car crashes—it’s up the stairs and to the left. Eliminate the Pavano bad guys and grab the dropped cash offering.
Objective: Get back in Pegorino’s car with offering. Take Pegorino back to his place.
Return to Pegorino’s car with offering in hand. Follow the marked route back to Pegorino’s place and complete the mission.
Payback (Jimmy Pegorino)
After Jimmy’s sends a text message offering a new job, drive over to his place. Obviously after the disastrous meeting, Jimmy has a problem with the Pavanos. Some of their boys are in town—word on the street is that they’re at a diner in Acter. Jimmy wants you follow them to a meet and disrupt it.
Objective: Drive to the diner.
Take a vehicle and drive along the marked route to the diner in Acter.
Objective: Chase the Pavanos.
You’re spotted almost immediately. The Pavanos attempt to lose you on the way to the meet. Expect a wild chase through alleys and back roads. You don’t have to worry about shooting so just concentrate on driving. Stay on the road and don’t smash into a wall, car, or other obstacle that would slow you down.

Objective: Wipe them all out.
The Pavanos lead you to an Autoerotica. Pull up close to the building and annihilate everything with some rockets, grenades, or a mixture of your firearms. Terminate every marked target. Expect the cops to get into the mix—that’s what shooting up a car dealership will do. Work quickly and try and get out of there before cops arrive so you can avoid shooting the police on your way out
Objective: Lose your wanted level
Grab a car and get out of there. Drive out of the flashing wanted zone and clear your wanted level. Expect a call soon after this mission concludes. It’s from U.L. Paper and he has a new mission contact.
Catch the Wave (Phil Bell)
Meet Phil Bell over at Honkers. An emergency interrupts your conversation—something’s going down at the docks.
Objective: Go to the truck.
Take a vehicle or a taxi to the marked truck. Get inside; wait for Phil to get in.
Objective: Drive to the boatyard on Charge Island.
Drive the truck along the marked route to the boatyard on Charge Island. When you arrive, you discover that the boatyard is heavily guarded—the element of surprise will be crucial!
As you’re talking to the Russian, back up in the truck and start shooting out of the window to eliminate the first two guards. You can remain back in the truck and shoot as many other guards as you can from the relative safety of the truck. Once you’ve exhausted that tactic, get out and take cover on the side of the building.
Objective: Get through the boatyard with Bell.
Phil must survive this mission or it ends in failure. Don’t let him get into a firefight alone. He has a tendency to get inside the boatyard. If he’s inside, you need to work fast to eliminate all of the enemies targeting him. There are a bunch of enemies both high and low. Use your assault rifle to eliminate the bad guys. You can also use a grenade or two against any enemies attempting to remain behind cover.
Check just inside to the left and between a couple of containers: there’s body armor here. Clear out all of the guards before running through the boatyard. There are more enemies on the dock too. Phil tells you to take the left boat; he’ll take the right.
Objective: Go to the coke boat.
Make sure Phil’s path to the right boat is clear of enemies. Go over to the left boat and find another body armor power-up here. Get inside the boat.
Objective: Follow Bell to the drop-off point. Protect Bell from the attacking boats.
Drive the boat and follow Phil closely. Enemy boats join the chase. Fire at the attacking boats and put yourself between them and Phil. Continue to fire and drive behind Phil. Watch where you’re going so you maintain position behind Phil but in front of the enemy boats.
Objective: Disembark onto the jetty.
Go to the marked dock and park the boat. Get out of the boat and onto the dock to complete the mission.
Trespass (Phil Bell)
Phil is in a hurry. Did you a see helicopter? No? Oh, then you’ve got to get to Port Tudor fast. Phil wants you to take out a rat named Chubby Charlie before he leaves in a chopper.
Objective: Go to the old Sprunk factory near Port Tudor.
Phil tells you that there are two methods of attack at the old Sprunk factory. You can burst in the front door and hit them in the face or slip around the back and go in through the basement. Find the front door around the left; the rear basement entrance is down a trench behind you.

Both routes lead to the same location. Basically if you take the basement route you get a jump on two of the guards positioned at the front door.
Objective: Find Chubby Charlie.
Choose a route. Eliminate the enemies in the initial room. This building is in shambles and enemies on an upper floor can still shoot at you on a lower floor. Search the room on the first floor (above the basement) for body armor; it’s hidden among debris so walk over every inch of the room. Target and eliminate each bad guy before moving up the debris to the upper floor. Eventually Chubby Charlie spots you and starts running.
Objective: Chase Chubby Charlie.
Continue to work your way up the building. Toss grenades onto the higher floor to help clear out the bad guys taking cover behind debris. Go up the staircase and reach a window out onto the roof. Shoot any guards you can while still standing inside the building. Drop out onto the roof. There’s a health kit just outside after dropping out of the window.
Run forward through the makeshift tunnel. Turn left and spot Charlie climbing a ladder. Make sure you eliminate each guard as you continue the pursuit. Watch for guards up high on catwalks. Follow Charlie through another tunnel and up a couple ladders. Eventually a helicopter comes to get Chubby Charlie.
Objective: Take out the chopper.
Gunfire is striking you so work fast. If you have any rocket ammo, launch one at the helicopter to end the mission fast. Otherwise you can use an assault rifle and eventually down the chopper and complete the task.
To Live and Die in Alderney (Phil Bell)
Drive over to Phil Bell’s location. You ask him for help but there’s a mission to complete before any help is going to be given. That’s how things seem to go around here.
Objective: Take Bell to the old mansion in Westdyke.
This is the same old mansion where the drugs were stashed with Frankie. Drive along the marked route to the old mansion. Frankie has loaded up the heroin into two cars. Within moments, however, the Feds arrive.
Objective: Follow Bell. Don’t let him get busted by the feds.
Follow the car following Bell! Shoot the car’s tires. You have to be somewhat careful here. It’s actually possible to destroy the pursuing car and if it explodes to close to Phil’s car (or your car), the mission ends in failure because the drugs have been lost. Aim for the tires and try and get the pursuing car out of commission as quickly as possible. Expect police cars to join the chase as well. When Bell stops his car, park behind him.
Objective: There is too much heat. Follow Bell and Frankie. Take out anyone who gets in your way.
Eliminate the cops in the alley and turn the opposite way and encounter more arriving cops, including a N.O.O.S.E. van. Get rid of all the heat.
Objective: Get to the escape van and lose the cops.
Run over to the marked escape van.
Objective: Take out the helicopter. There is too much heat with it following you.
Touch the back of the van to acquire more rocket launcher ammunition. Aim and fire at the helicopter to take it out.
Objective: Get in the van with Bell and Frankie. Lose your wanted level. Take Bell and Frankie to the safehouse.
Get inside the escape van. Drive away and out of the flashing wanted zone to clear your wanted level. Follow the marked route to deliver Phil Bell and Frankie to the safehouse and conclude the mission.
Flatline (Jimmy Pegorino)
Go over to Jimmy’s place in Westdyke—he greets you with the business end of a shotgun. Jimmy’s personal bodyguard, Anthony, has been wearing a wire. That’s a problem. Jimmy called Anthony to confront him and Anthony had a heart attack on the phone! The rat is in the hospital, obviously under heavy guard.
Objective: Go to the hospital.
Drive along the marked route to the hospital. Keep your weapons in your pocket. The onscreen instructions tell you not to enter the building with weapons drawn because there are cops inside.

Objective: Silence Anthony. He’s in the ER.
Follow the sign to the ER department. It’s on the right side. Approach the ER reception desk. Turn right and spot the locker room. Approach the open locker and change clothes into the doctor’s scrubs.
Go past the reception desk and turn left. Follow the hall toward the marked red target; that’s Anthony. At the end of the hallway, turn left. The cops let you inside. You ask for privacy, and you get it.
Approach the life support machine while listening to Anthony’s rambles. When you’re ready, follow the onscreen instructions to unplug the life support machine. Run out of the room and the hospital. The cops will try and block your path. Shoot your way out if necessary.
Objective: Lose you wanted level.
Exit the hospital and grab a vehicle. Race out of the flashing wanted zone to clear your wanted level. After the mission concludes, Ray Boccino sends a text that Jimmy wants to set up a meet.
Pest Control… (Jimmy Pegorino)
Make your way over to Jimmy’s play in Westdyke and join the war council in progress. Jimmy’s discussing pest control! Ray and Phil don’t seem to be on the same page but one thing is certain: something is going down.
Jimmy wants to speak with you alone. He wants you to shut someone up so everyone knows he means business. Jimmy’s got to think about it…Ray or Phil. He’ll give you a call.
… Pest Control (Jimmy Pegorino)
Jimmy calls. He tells you to go pay Ray a visit.
Objective: Head over to East Holland and look for Ray. Exterminate Ray and his bodyguards.
Follow Ray and his bodyguards’ vehicles but not too close. Don’t fire yet. Just wait and eventually Ray and his bodyguards pull into a gas station. That’s the perfect moment for your attack. Just fire a rocket launcher at the gas station; the resulting explosion will likely eliminate most of your targets. You can add a grenade or two or just mop up the survivors with your assault rifle or sub machine gun. Eliminate all the marked red targets to complete the mission.
Entourage (Gambetti)
Head over the to hospital in Schottler and visit Mr. Gravelli in his hospital bed. Gravelli wants to work with you. He offers to get the man you’re looking for if you’ll provide a service. Gravelli’s got a friend giving a speech in Liberty City. You need to make sure Gravelli’s friend gets to City Hall—Gravelli suspects Dimitri may try and prevent the speech.
Objective: Go to Grand Easton Terminal.
Take a vehicle over to the Grand Easton Terminal. Approach the marked friend. You need to stay in the convoy all the way to City Hall.
Objective: Get in the car. Pick up Bobby Jefferson. Follow the convoy car.
Get inside the car and pick up the friend. Follow the convoy. You’ll eventually reach a road closed by construction—the perfect time for an ambush.

Objective: Go out there and deal with them.
There are a bunch of enemies. Take cover and target anything and everything in sight. Move your target left and right looking for the next exposed enemy. Check the rooftops as well as the alleys. There are plenty of targets to choose from. There’s no time crunch here. Just take cover and eliminate each enemy in turn.
Objective: Get Bobby Jefferson to safety. Lose the pursuers.
Get back into the vehicle with Bobby Jefferson. Drive off—and drive fast. Red target cars appear all around you on the map. You must lose the pursuers to complete the mission successfully. Take a quick left and drive fast. Get the surrounding cars behind you instead of around you. Drive fast and careful so you don’t hit an obstacle. It won’t take long to get away from the pursuers if you maintain high speed and avoid delays.
Dining Out (Gambetti)
Pay another visit to Mr. Gravelli at the Schottler hospital. The conversation quickly turns to Darko Brevic. Apparently he’ll be here soon. Gravelli wants you to do a favor for the mutual friend at U.L. Paper. There’s a Korean spreading counterfeit bills…sound familiar? His name is Kim Young-Guk and he eats at Mr. Fuk’s Rice Box in Alderney City.
Objective: Head over to the restaurant. Go inside the restaurant.
Drive along the marked route to Mr. Fuk’s Rice Box in Alderney City. Before going inside, check around the back. There’s a motorcycle and car here. Shoot the tires on the car; that’ll slow down any potential escape attempt.
Walk into the restaurant and speak with the host. He tells you where Kim is; he’s talking to a manager upstairs. The battle begins soon but it might as well begin now. Shoot the host.
Objective: Look for Kim in the Manager’s office.
The staff of Mr. Fuk’s Rice Box is well armed. As you enter the main area of the restaurant, expect to be attacked from guards both high and low. Toss grenades on the upper floor to eliminate bad guys taking cover. Work your way upstairs. Don’t rush it. Eliminate all of the bad guys before getting to the upper floor. Go toward the red door in the back corner.
Objective: Question the manager to find Kim.
Grab the body armor on the manager’s desk. Aim your gun at the manager to find Kim’s location. Shoot the manager.
Objective: Don’t let Kim escape.
There are more guards in the restaurant again. Target and eliminate all of the bad guys as you move toward the double door. Go inside and pick up the health kit. Follow Kim out side. Leap off of the fire escape and watch Kim pull away in the car—the car that has blown tires! Grab the motorcycle and pursue. It’s an easy chase if Kim’s on bad tires. Shoot Kim’s car until it’s destroyed or until he stops and exits the vehicle. Terminate Kim to complete the task.
Liquidize the Assets (Gambetti)
Head over to the Schottler hospital and find Gravelli and the contact from U.L. Paper in conversation. Apparently the Ancelottis are in league with the Russians. They’re distributing product inside a group of vans. You need to destroy them all. The grocery business location is just a cover; expect the area to be heavily guarded.
Objective: Go to the compound. Find a way into the compound and destroy the vans.
Take a vehicle and drive it over to the marked computer. Go to the front of the compound and watch the opening cut scene, which reveals some clues on the best route to take inside. At the start, turn right and climb the smaller fence. Go forward and spot the building shown in the cut scene. It’s time to become Niko Croft and climb up the ventilation system.
Cross the rooftop and spot the ladder. Climb the ladder. Find a guard here; he’s standing next to a sniper rifle. Eliminate the guard with a baseball bat to the back of the head and grab the sniper rifle. Check the right side for body armor; there’s another guard that lurks around here, probably behind the door to the body armor’s left side. Take him out.
From this vantage point you can use the sniper rifle to eliminate most of the mission’s adversaries. Just take everyone out you can see. Don’t stop until you simply can’t find any more targets to shoot. Make your way back down to the ground level.
Search the compound for any remaining enemies. Locate a health kit on the ground level near the northernmost van. Find the kit next to a dumpster. Once the area has been complete cleared of guards, it’s time to take out the vans. Do so with rockets, grenades, or weapons fire. Destroy all of the vans to complete the mission.
That Special Someone (U.L. Paper)
U.L. Paper calls on your cell phone. They have Drako Brevic. He’s at the cargo bay at Francis International Airport. The time has come.
Objective: Pick up Roman. Head to the rendezvous.
Drive over to Roman’s location and pick him up. Then follow the marked route to the rendezvous point over at Francis International. During the ride, Roman and Niko have an important conversation. Is there humanity left inside Niko or has Niko’s past removed it from him fully?
A van pulls up and delivers Darko Brevic.
Objective: Choose to kill Darko or let him live.
The decision is up to you and has no bearing on remaining story missions. Eliminate Darko with an execution or walk away and let him live.
Objective: Take Roman to Brucie’s place.
Return to a vehicle and let Roman get inside. Follow the marked route to Brucie’s place and complete the mission.
One Last Thing… (Jimmy Pegorino)
After dealing with Darko Brevic, you get a frantic call from Jimmy Pegorino. He needs to see you at the club in Tudor. Drive over to Honkers in Tudor. Jimmy wants to sell the drugs and he has a buyer: Dimitri Rascalov!
You give Roman a call. Do you do the deal or do you get revenge on Dimitri? You know where he is. It would be easy. You also call your other confidant, Kate. Roman wants you to take the deal—you came to Liberty City for profit, right—but Kate doesn’t want you to compromise your beliefs. Make your decision…
Two new symbols appear on the map: a dollar sign—Deal—and red individual—Revenge. Pick one, which affects the game’s final three missions.
Revenge - A Dish Served Cold
Drive over to the revenge icon in the shipyard in East Hook. Approach the ship to begin the mission. The Russians are loading heroin onto the cargo ship and Dimitri is supervising the operation in the ship’s hold. The doors to the cargo hold are controlled from the bridge. Time to get your revenge.
Objective: Go to the bridge.
Eliminate the Russians outside the ship. Look to the right and spot the ladder. Climb the ladder and to the upper perch. There’s a sniper rifle up here. Use this perch to eliminate many of the guards from long-range with your sniper rifle. There’s more sniper ammo but it’s on the ship. Ascend the ramp and grab the sniper rifle to the right if needed.
Take out as many enemies as you can from the safety of height then get onto the ship. Climb another ladder on the right and go to the top of this smaller perch on the ship. Grab the body armor up here. You can also resume your sniping from this location and eliminate any other guards you happen to locate.
Start across the lengthy ship. Stick to the left or right side. There are likely plenty of guards left so move slowly and use cover. Eliminate the enemies with your assault rifle or sub machinegun. Continue to the ship’s bridge area; find the doorway on the closest side.
Take cover at the doorway and target the enemies inside. A couple of explosives can help thin the enemy numbers inside. Grab the health kit off of the counter. Cross the roof and ascend the staircase. Take cover in this hallway and eliminate the guards at the end of the hall. Check the middle room on the right side for body armor.
Exit to the left side and work your way around this floor killing bad guys as you go. There’s no rush here; just work carefully to avoid significant damage. Take cover at each corner and eliminate any guards ahead. Continue up the staircase. Follow the level around to the next stairs and eliminate any opposition in your path. Enter the bridge.
Objective: Operate the controls to open the cargo hold.
Follow the onscreen instructions to operate the bridge controls to open the cargo hold. Turn around and grab the armor.
Objective: Go to the cargo hold and get revenge on Dimitri.
Time to retrace your steps. Exit the bridge and return to the base of the ship. The bad news is that there are more guards blocking the route. The good news is that the health kit you grabbed from the kitchen has returned. Grab it as needed. Exit back onto the ship’s deck.
Go to the open end of the cargo hold and drop inside. There’s another health kit in the back left corner (if you’re facing away from the closest wall toward the bulk of the hold). Take cover and eliminate the enemies down here in the hold. Walk forward and trigger the cut scene.
There are just a few more bad guys left! Terminate the guys around Dimitri. You can stay safely behind cover but it may be difficult to get a shot on them in the crowded hold. Move forward as needed and eliminate the bodyguards. Target and shoot Dimitri; eventually you approach.
Objective: Finish off Dimitri.
Perform an execution and eliminate Dimitri once and for all.
Objective: Go to the cargo hold’s exit.
Go forward through the passage and up the stairs. You’re back in the mess hall area again—and there’s another health kit in the kitchen if you need it. Follow the ship to the exit ramp and get off.
You call Roman automatically at the mission’s end. He tells you to wear a suit to the wedding. You also hear from Phil; sounds like the Pegorinos are in chaos.
Revenge - Mr. & Mrs. Bellic
After the conclusion of the last mission and you’ve heard from Roman about the wedding time, you call Kate and tell her about your recent activities. She respects that you didn’t compromise your beliefs. You agree to pick her up for the wedding.
Objective: Go and pick up Kate.
With suit on, drive over to Kate’s location and pick her up.
Objective: Meet Roman at the church.
Drive along the marked route to the church and listen to the foreboding conversation between you and Kate. After a beautiful ceremony, Jimmy Pegorino pulls up and gets his own revenge.
While you’re in mourning, Little Jacob sends a text message. Your friend tells you to get some weapons.
Revenge - Out of Commission
Little Jacob calls and tells you that he and Roman have found one of Pegorino’s men. Vengeance is yours.
Objective: Roman and Jacob are waiting for you in a car in Alderney.
Grab a vehicle and drive over to Roman and Jacob’s location in Alderney. Get out of your own vehicle and get in their car.
Objective: Follow Pegorino’s goons they’ll lead you to Pegorino.
The goons know you’re tailing them but they’re still leading you to Pegorino’s location. It’s a wild ride. You don’t need to shoot so just concentrate on good driving. Don’t crash or hit walls. Don’t let the target car get too far away.
During the chase on the highway, the goons’ car crosses to the other lane—against traffic! Get over when you can because the goons remain there and get off the wrong way exit ramp. Eventually the target car goes off road and leads directly to an old casino where Pegorino is holed up.
Objective: Pegorino is inside the old casino. Find him.
Remain behind the cover of the car and use your sniper rifle to eliminate everyone in firing range. There’s a trio of bad guys on the roof to the right and a bunch hiding behind cars in the casino parking lot. Take out as many as you can before moving forward.
You have a couple choices here. You can continue to battle in the parking lot then push through the casino’s front door or you can go to the right and move around the building to find a staircase. Go up the stairs and ascend a ladder to the rooftop. From the roof you can fire down onto the parking lot and clear out all the bad guys there; then move over to the casino rooftop and locate the holes. Target the guards inside the casino below and terminate all the guards inside.
During the attack, Little Jacob texts about the escape plan; he tells you to keep your eyes on the sky.
Go inside the casino’s front door; it’s a small door in the parking lot area. Once inside, find a health kit on the left side of the room. If you didn’t eliminate the guards in here from the roof, expect a handful of enemies, including one at the top of a staircase on the left. Clear the room and go to the back left corner to trigger a cut scene. You’ve found Pegorino.
Objective: Chase Pegorino.
Sprint up the stairs. At the door, have a weapon ready. Walk out onto the roof and eliminate a couple enemies. Cross the roof and descend the ladder.
Follow Pegorino. Eliminate more enemies along this route. The bad guys take cover on the left and right side of the path. As you near Pegorino’s location, a car pulls up. Shoot into the passenger window once it stops and terminate the guards inside. Go down the stairs and spot Pegorino fleeing in a boat.
Objective: Get on the bike
Get close to the bike and get on it. Don’t get on too far from the bike or you may trigger the nearby ladder instead—there’s no time to delay!.
Objective: Chase Pegorino. Stick to the coastline, do not lose him.
This can be a challenging chase if you aren’t comfortable with the motorcycle. Pegorino is moving quickly and any delay could mean mission failure. Stick close to the water and drive along the coastline. You take fire from Pegorino’s boat but don’t worry about it. Just keep driving forward. Maintain speed and you leap a small gap. Avoid hitting rocks and make tight turns to stay on the path.
During the chase you spot a helicopter coming into view. Watch the sky, right? It’s Jacob and Roman. Continue along the coast toward their location.
Objective: Accelerate off the jetty to jump.
A yellow glow marks a ramp on the left. Stick to the left; don’t drive to the right because there’s a blockade of enemies there. Remain to the left and concentrate on driving straight for the ramp. Hit the ramp at full speed (or near full speed). If you fail to get there quickly enough or you fail to hit the ramp with enough speed, the mission ends in failure (basically you miss the target and the bike is destroyed in the water).
You must reach the ramp at the right time and hit it with enough speed and you manage to leap onto Jacob’s helicopter. As you hang on, follow the onscreen instructions to get into the chopper.
Objective: Get low and stay close to Pegorino.
You’re driving the helicopter. Stick close to Pegorino’s boat. You don’t have long to chase. Just remain in the air. Don’t worry if you’re hit and spinning out of control—that’s part of the plan. You land the wounded chopper on Happiness Island.
Objective: Chase Pegorino.
Chase after Pegorino, the red target marked on the map. Eliminate the bodyguard that attempts to block your path. Catch up to Pegorino and start shooting. Kill him to complete the mission and the story.
Deal - If The Price is Right
If you decide to take the deal, drive over to the marked dollar sign location. You meet up with Phil; he says you’re going to Port Tudor.
Objective: Go to the docks. Head inside the docks.
Take a vehicle over to the docks in Port Tudor. Drive to the marker at the front entrance. After the brief conversation, continue inside and drive over to the designated location inside the docks. It turns out the deal isn’t going down as planned. You and Phil are going to have to fight your way out. But while you’re here, you might as well get the money too.
Objective: Follow Phil
Exit the car and run after Phil. Follow him up the ladder and onto the roof. Phil runs over to the far skylight. He shoots and breaks the glass. Drop in after him.
Objective: Steal the money from the office.
Scan the upper catwalk and eliminate all imminent threats. Check both left and right several times as the enemies approach. There are plenty of targets below, too. Start shooting at the enemies below. Toss grenades or fire rockets at groups of enemies to clear them out quickly. Go to the right and find the staircase down. Reach the next catwalk.
Resume your attack from this position. First scan this catwalk and eliminate the closest threats coming from the left and right. Check the staircase and make sure there are no bad guys coming up from the bottom floor. Next, resume your assault on the guards taking cover on the ground floor below. Eliminate everything you can before moving downstairs to the ground level.

There’s plenty of cover down here. Use it and start working your way toward the second boat in the distance. Check the area around some crates near the second boat to find a health kit. Eliminate the enemies around this location and go up the staircase on the left side of the second boat.
Objective: Follow Phil.
Phil doesn’t waste time. He runs up the stairs to the catwalk above. He’ll wait for you to clear out the enemies nearby and provide covering fire. Take aim on the opposite catwalk and other guards below you. Phil works his way toward the office door. Just keep taking out enemies as you move toward his location.
Objective: Go and help Phil.
When Phil reaches the office door, he’ll need your help. Run over to him and trigger the cut scene.
Objective: Chase after the buyer.
The buyer makes off with the cash. Run through the office, descend the stairs, and exit through the opening on the left. Spot the buyer escaping in a truck. Get into the pick-up truck and wait for Phil to join you.
Chase after the buyer’s vehicle. It’s not particularly fast but it’s also crashing into tanks and scaffolding, which will impede your progress if you run into these obstacles. There are also barrels dropping out of the back of the truck. Run over one of these barrels at high speed and you might flip your truck. Drive carefully but quickly! If you lose the truck, just proceed toward the red target marked on the map and look for the dropped barrels along the way.
The big moment comes when the buyer’s vehicle takes a left up a hill and through a fence to escape the shipyard. If you miss this turn, the truck will likely get away on the Liberty City highways. Don’t miss the turn. Go up the hill and through the fence and chase the buyer along the highway.
Shoot the truck’s tires (don’t destroy the truck though!) or run it off the road. Pull in front of the truck and trap it in traffic. The buyer will attempt to make an escape. Shoot the buyer.
Objective: Collect the money. Take Phil back to Tudor.
Grab the marked bag of money. Drive Phil back to the marked location in Tudor to complete the mission. The chase may have alerted the police. You don’t need to lose the wanted level. Reaching Phil’s destination automatically clears it. After the task you call Roman. We’re rich! You also touch base with Pegorino, who is of course thrilled. And finally, you give Kate a call. She’s not happy about your decision and it doesn’t sound like she will attend Roman’s wedding.
Deal - Mr. & Mrs. Bellic
Roman calls and tells you his wedding day has arrived. It’s at 10am, so go get on a suit and wait as the time arrives. Roman will call and let you know he’s at the church and he needs his best man.
Objective: Meet Roman at the church.
Drive or take a cab to the marked location on the map. After the beautiful ceremony, an assassin sent by Dimitri tries to kill you. But as you’re attempting to disarm the assassin, the gun goes off and the stray bullet kills someone else.
While you’re in mourning, Little Jacob texts a message and tells you to get some weapons.
Deal - A Revenger’s Tragedy
Little Jacob gives your cell phone a ring and says that he has discovered Pegorino and Dimitri are hanging out now. He also has a tail on a couple of Pegorino’s goons and can find out where they’re hiding out.
Objective: Jacob is waiting for you in a car in Alderney.
Grab a vehicle and drive over to Jacob’s location in Alderney. Get out of your own vehicle and get in their car.
Objective: Follow Pegorino’s goons they’ll lead you to Pegorino.
The goons know you’re tailing them but they’re still leading you to Pegorino’s location. It’s a wild ride. You don’t need to shoot so just concentrate on good driving. Don’t crash or hit walls. Don’t let the target car get too far away.
During the chase on the highway, the goons’ car crosses to the other lane—against traffic! Get over when you can because the goons remain there and get off the wrong way exit ramp. Eventually the target car goes off road and leads directly to an old casino where Pegorino is holed up.
Objective: Dimitri is inside the old casino. Find him.
Remain behind the cover of the car and use your sniper rifle to eliminate everyone in firing range. There’s a trio of bad guys on the roof to the right and a bunch hiding behind cars in the casino parking lot. Take out as many as you can before moving forward.
You have a couple choices here. You can continue to battle in the parking lot then push through the casino’s front door or you can go to the right and move around the building to find a staircase. Go up the stairs and ascend a ladder to the rooftop. From the roof you can fire down onto the parking lot and clear out all the bad guys there; then move over to the casino rooftop and locate the holes. Target the guards inside the casino below and terminate all the guards inside.
During the attack, Little Jacob texts about the escape plan; he tells you to keep your eyes on the sky.
Go inside the casino’s front door; it’s a small door in the parking lot area. Once inside, find a health kit on the left side of the room. If you didn’t eliminate the guards in here from the roof, expect a handful of enemies, including one at the top of a staircase on the left. Clear the room and go to the back left corner to trigger a cut scene. You’ve found Dimitri and Pegorino. Dimitri eliminates Pegorino.
Objective: Chase Dimitri.
Sprint up the staircase. When you reach the door, have a weapon ready. Exit onto the roof. Dimitri flees across the roof on the right. Eliminate the bad guys ahead and to the right. Go forward to the ladder. Descend the ladder and run toward the dock. Dimitri has taken off in a helicopter!
Objective: Get in the boat. Chase Dimitri.
Jump into the boat and start driving. Follow the red target marked on the map to chase Dimitri’s helicopter. Eventually you spot Jacob’s escape plan—he’s got a chopper. You need to be close to Dimitri because Jacob pulls in close behind. He drops low and tells you to get underneath and grab on.
Objective: Get underneath Little Jacob’s chopper.
You don’t have much time here. Quickly get underneath Jacob’s chopper at the marker. If you miss the chance, Jacob moves off and you lose Dimitri. When you grab on, follow the onscreen instructions to get inside the chopper.
Objective: Get low and stay close to Dimitri.
This is a helicopter chase through the city. Concentrate on the chase. Keep Dimitri’s helicopter in front of you. Don’t fall behind and don’t go the wrong direction. Just stay close and chase Dimitri. Eventually Jacob starts shooting at him—and Dimitri shoots back. Both choppers crash onto Happiness Island.
Objective: Chase Dimitri.
Run after the red target marked on the map. You will have to kill some enemies and maybe even some cops along the way. Nothing is going to stop you. Just keep running and ignore the wanted level. Reach Dimitri on the opposite end of the statue and shoot Dimitri to complete the task and the story.
Chapter 2 - Friends, Girlfriends, and Random Characters
This section covers all of the friends, girlfriends, and random characters you can interact with in Grand Theft Auto IV.
Friends
There are five characters you meet during the main storyline that can become more than just mission contacts: these characters can become friends! Friends with benefits, actually! If these guys like you enough, you’ll gain their special benefit, which can be used to assist during story or side missions.
Completing their mission tasks will certainly elevate the friend’s admiration but you can further increase it after the mission tasks are over by setting up activities. Open your cell phone’s phonebook and select one of the friends. If you can set up an activity, it will be listed here.
Your friends like what’s on the list but they also have more specific likes and dislikes that can affect the relationship. For instance, Brucie likes to maintain his genetically superior body and doesn’t want to eat at fast food restaurants. Little Jacob, on the other hand, loves Cluckin’ Bell. A thumbs up or thumbs down after the activity will cue you in on how much (or little) your friend enjoyed the time you spent together.
The possible friendships are listed below as well as their special abilities and more details on their likes and dislikes.
Roman
You’ll gain Roman’s friendship early in the single-player game—he is your cousin after all! Roman’s a pretty laid back guy and enjoys just about anything. Take him out to eat at a Burger Shot or participate in any of the listed activities when you give him a call (bowling, darts, drinking, etc).
When Roman likes you enough, you’ll gain his special ability: car service! Open your cell phone, dial Roman, and select car service. A taxi will arrive at your location and take you anywhere for no fee. It’s a much nicer ride than the standard street taxi…although that comes with the driver’s attitude. Acquiring this special ability also unlocks the Driving Mr. Bellic achievement on the Xbox 360.
Little Jacob
Completing the Shadow mission with Little Jacob and Badman allows you to participate in their package business (see the side missions section of this guide for details on running packages for Jacob and Badman) but it also turns Little Jacob into a friend. Take Little Jacob to eat at Cluckin’ Bell or any of the listed activities when you give him a call.
Hang out with Little Jacob long enough (and show him a good time!) and you’ll gain his friendship and special ability. Give Little Jacob a call and he’ll send over a vehicle filled with weapons. You can purchase these weapons before a mission task. Acquire this special ability to unlock the Retail Therapy achievement on the Xbox 360.
Brucie
You gotta love Brucie. Upon completing the single-player mission No. 1, you and Brucie agree to sever the working relationship but to continue the friendship. You can now do activities with Brucie. He’s more high maintenance than your other friends: Brucie doesn’t like fast food restaurants and doesn’t like being woken up, so don’t call him in the middle of the night. Brucie loves activities such as boating and helicopter rides.

Gain Brucie’s friendship and unlock his special ability: a helicopter lift! Give Brucie a ring and request a helicopter. Brucie will fly to a rooftop near your location. Get up there and board the chopper. Brucie will then fly you to any of the designated locations around Liberty City. Acquire this special ability to unlock the That’s How We Roll achievement on the Xbox 360.
Dwayne
In order to gain Dwayne’s friendship, you must first keep him alive—choose to kill Playboy X over Dwayne in the mission The Holland Play. After this mission, drive over to an Internet café and check your email. Find an email from Dwayne titled "Yo" and discover it’s about becoming better friends. Send a positive reply to initiate the friendship. If you fail to respond to the email in a timely fashion expect an amusingly desperate call from Dwayne: "I thought I heard the phone and maybe it was you." Sad, but funny!
Once Dwayne likes you enough, you’ll unlock his special ability. Give him a call and he’ll send backup to your location—certainly helpful assistance during most mission tasks! There isn’t an achievement linked to Dwayne’s special ability since you might have chosen to kill him during the single-player game.
Packie
Packie seems like the best of the McReary bunch and he’ll become a possible friend after the Heat-inspired bank robbery shootout mission. Give Packie a call and participate in any of the listed activities to improve your friendship. Once Packie likes you enough you’ll unlock his special ability: car bomb! Give Packie a call and he’ll make a car bomb, which you can use to plant on a vehicle. Acquiring the special ability unlocks the Dial B for Bomb achievement on the Xbox 360.
Girlfriends
Not all of your friends have to be male. There are several available girlfriends you can wine, dine, and…do other stuff with. A couple potential mates are found during the single-player missions—Michelle and Kate—and three more are available once you have logged onto the Internet, have access to your email account, and created a "love" profile during the mission Out of the Closet.
No big shocker here but girls have their own specific likes and dislikes (you won’t have the convenience of the cell phone menu to tell you what they like to do). Plus, girls are apparently pretty judgmental and have opinions on your clothing and the type of car you drive. They’ll even notice if you’re wearing the same outfit on back-to-back dates!
For the online dates, read the girls’ profile to find clues on their likes and dislikes. Respond to their profile and you will receive an email a few game days later with a meeting time. Complete a successful first date (did she say she had a good time?) and you can ask for her phone number. Continue to impress with additional dates and you can "try your luck" and if you are successful, you can gain a special benefit (LawChick, SoboHoe, and Alex only).
Michelle
You’re introduced to dating early in the single-player game with the mission First Date. It’s easy to determine her likes: just follow the mission objectives. You attempt to go to the carnival but it’s closed down so you take her bowling instead. Michelle likes games. Take her on other dates and go play pool or darts. Michelle is pretty low maintenance and doesn’t mind your initial dress or vehicles.
"LawChick"
Once you’ve gained access to the Internet, your email address, and put a profile on love-meet.net in the story mission Out of the Closet, get onto the "Web" and onto love-meet.net. You can access the site from the ads on the homepage. Choose to search through the available females and find "LawChick" also known as Kiki Jenkins.
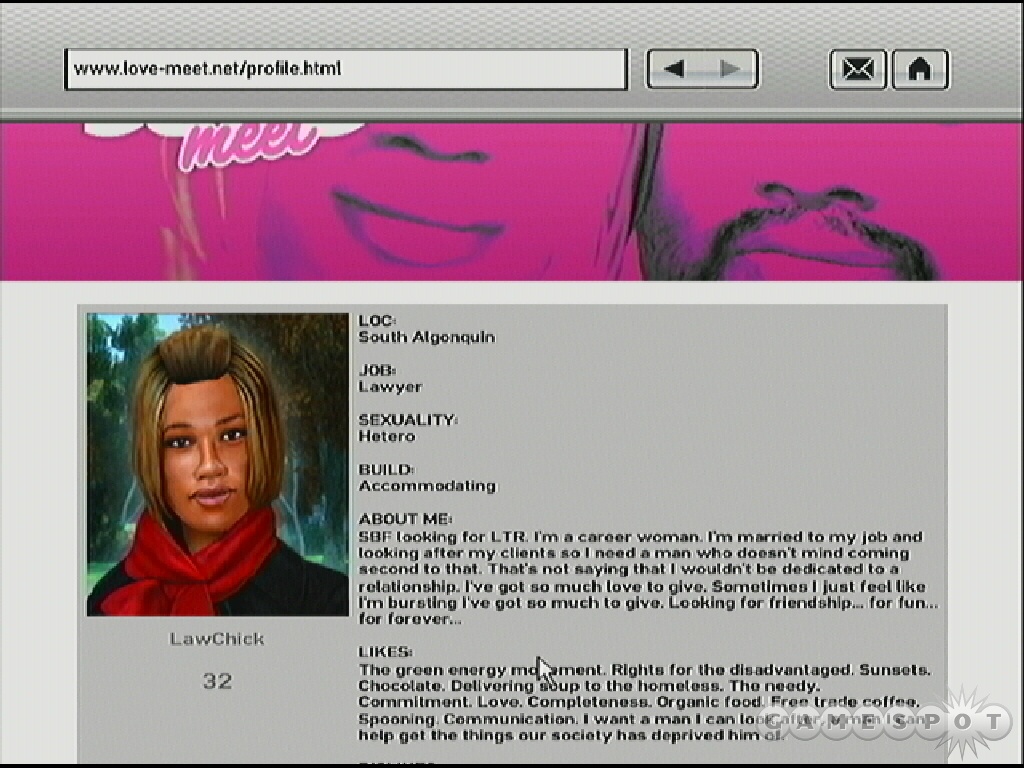
Reading LawChick’s profile you learn she’s one of those crazy tree-hugging types that has moved to Liberty City in hopes of making the world a better place. She’s not into the yuppie thing, which is a clue not to dress up for her (she’s similar to Michelle). Just meet her with your original clothes. She also prefers more reserved family type vehicles—not sports cars, expensive cars, or muscle cars.
Take LawChick to one of the shows, either the comedy club or the cabaret club. She also likes games so take her bowling or to play darts or pool. Once you have successfully tried your luck with LawChick, then you unlock her special ability. If you "ever feel that the cops are giving you a hard time for no reason" then give Kiki a call. She’s got pull with the DA. Basically this means you can use her to clear your wanted level. Just open the cell phone and select "Clear Wanted".
"SoboHoe"
Once you’ve gained access to the Internet, your email address, and put a profile on love-meet.net in the story mission Out of the Closet, get onto the "Web" and onto love-meet.net. You can access the site from the ads on the homepage. Choose to search through the available females and find "SoboHoe", also known as Carmen Ortiz.
Check out Carmen’s profile. Apparently she doesn’t mind getting her fingers greasy at the Cluckin’ Bell or even going to strip club. SoboHoe claims she works hard on her appearance, so you’ll need some nice clothes to impress—stick with Modo or Perseus. If you’ve already bought a suit for a single-player task then wear it on the date.
Although SoboHoe’s taste in activities seems low maintenance, don’t let that fool you—Carmen is high maintenance when it comes to cars and attire! Drive up in a muscle car (Carmen loves the Dukes) to impress. Once you have successfully tried your luck with SoboHoe, then you unlock her special ability. Carmen is a nurse after all (a fact she tells you over and over again) and can provide you with some "nursing" over the phone. Call Carmen and select "Health Boost".
Alex Chilton
Once you’ve access to the Internet, your email address, put a profile on love-meet.net in the story mission Out of the Closet, and unlocked all islands, get onto the "Web" and onto craplist.net. Choose to search through the "women seeking men" section and then click on "Party girl seeks man for NSA fun and blog material - 29". Read her profile and select "Contact Me" and check your email later for a reply from Liberated Woman.
Read her profile. She’s looking for someone rich. She claims to have a visionary sense of style. She writes a liberated woman blog on www.blogsnobs.org. Yikes. Alex prefers expensive attire (wear a suit from Perseus) and expensive sports cars. Be prepared to impress if you’re planning to take out Alex! The Grotti sports car place right near Alex’s place (corner of Pyrite and Bismarck) is a great source of expensive automotives.
Take Alex to the comedy club then the cabaret club next time. You’ll get lucky in no time. And once you have, you’ll unlock Alex’s special ability. She likes her dates to look good, if you want a discount at a clothes shop, give her a call! Open your phone, call Alex, and select "Clothing Discount".
Kate McReary
You first meet Kate McReary when you begin doing missions with her brother Packie McReary. Although Packie seems against a union between you and Kate, he soon warms up and encourages you to call his sister and show her a good time. Kate likes you for who you are so just wear your original clothes (or anything else from the Russian shop you bought from early in the game). Take her to play darts or pool and avoid the shows.
Random Characters
Not everyone you can meet in Liberty City is a mission contact—there are some crazy characters roaming the streets. The random characters appear as blue friend icons on the map; they’ll appear as you get close to their locations.
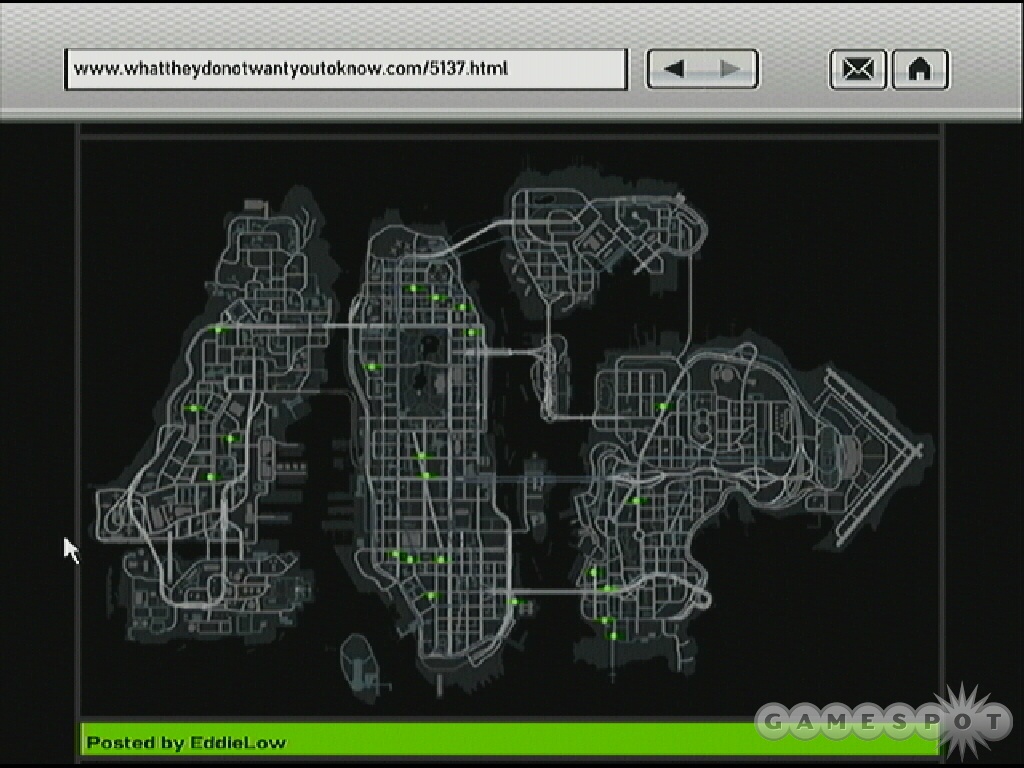
Many of the random characters appear after particular story milestones have been reached or completed, such as unlocking a new island or even sparing someone’s life. This section reveals all of the random characters and details on their side missions. Most of these contribute to 100% completion; the random characters that you could have killed during the single player game don’t count. Meet all the random characters to unlock the No More Strangers achievement on the Xbox 360.
Brian
Early in the game, find this friend near the cab depot. Walk up to Brian and after a brief conversation, he’ll hand you $100. Possibly the easiest money you’ll make in the game!
You’ll find Brian the tweaker again south of your original safehouse a few missions after discovering him the first time. He’ll still give you money but now you have to help him out to earn the cash. Grab a vehicle; Brian gets inside. Drive Brian to his destination on Masterson Street. Park at the marked location and Brian exits to make his deal. After it completes, take Brian to Wappinger. Drop him off and pocket $200.
Later, find Brian a third time downtown on the eastern island; he’s near the underground weapons store where Dimitri said you could purchase a Micro-SMG on Faustin. When you meet Brian this time, he claims to be clean. He had sunk pretty far but now he’s engaged and plans to pay off his old dealers. Get into a car and take Brian to the dealer; just follow the marked route. Unfortunate the dealers don’t see it Brian’s way—they attack Brian because he forgot interest. Eliminate Brian’s attackers then take Brian home and collect $500 for helping out.
Badman
You meet Badman during the Little Jacob mission Shadow. After the task, find Badman sitting in front of the Pill Pharm in East Island City; it’s on the northern edge of your start island. Walk up to Badman and speak with him.
Get into a vehicle. Badman tells you the Russian gang members are in the alleyway just off Carrollton Street doing a deal—take Badman there. When you reach the destination, eliminate the thugs. The firefight is tight but not difficult. Target and eliminate each enemy in turn; protect Badman by standing in front of him and becoming a human shield. Complete the task and earn $500 for helping Badman.
Mel
After acquiring your second safehouse (when you move to Bohan), check the area around your first safehouse—just north you’ll find Mel, a guy who’s seen you at Comrades Bar before. Mel owes a guy money and wants you to come along and help keep him cool.
Get into a vehicle then drive Mel to the meeting; just follow the marked route. The meeting doesn’t go well—eliminate Mel’s old friends. There isn’t a lot of enemies here; just target each foe and terminate them with your favorite weapon. Pick Mel back up and take him home. Your generosity pays off with $500 in cash (that’s the money Mel was going to pay…but you killed the guys he owed!)
Ilyena
Sometime after performing missions with Manny and Elizabeta and you’ve received the mission marked by the question mark, drive down to the boardwalk south of your old safehouse (where you took Michelle bowling). Search the western side and find Ilyena Faustin—yes, that Faustin. She seems to have gotten over the death of her husband but is still angry about her daughter’s boyfriend.
Objective: Go and speak to Anna’s boyfriend.
Grab the nearby motorcycle or just jack a different vehicle and drive to the marked location to find Ilyena’s boyfriend—he’s just standing around on the sidewalk. Approach the boyfriend and he starts to get tough. Ilyena requested that you don’t kill him. Complete her request—or don’t. You can simply beat him up with fists until the mission completes. That should teach him!
Hossan
Around the same time Ilyena becomes available, check the streets of Suffolk (southern area of the middle island). You’ll find Hossan on the side of the road. He’s an old friend from the boat over to Liberty City—and of course, he has a favor to ask. A former boss owes Hossan money and he needs help getting it back.
This task becomes a high speed car chase—the target’s car is very fast—so it’s important to drive a fast vehicle over to the first objective. It’s also not a bad idea to do this mission during the day when high speed driving might be a bit easier. Plus there’s generally more traffic during the day, which will help slow the target down.
Objective: Take Hossan to collect his back pay.
Get a vehicle and wait for Hossan to get inside. Drive along the marked route and reach the marker to complete the objective. The cutscene doesn’t last long—Hossan’s former boss is on the move!
Objective: Get Hossan’s money back.
As mentioned before, this is a high speed car chase to recover Hossan’s wages. You need to get the boss’s car stopped. Use your sub machinegun while driving to aim for the target’s tires to slow him down. When he’s slowed, he typically drives to bail the car and run away on foot. Eliminate the boss and he’ll drop Hossan’s money.
Objective: Retrieve Hossan’s wages.
Once killed, the boss drops the wages. Get out of your vehicle and grab the dropped money. The only danger here is if all the commotion has alerted the police, which could create problems when trying to recover the money. The police will start shooting when you’re going to grab the money! Grab it quickly and get back inside the car.
Objective: Take Hossan to the alleyway off Feldspar Street.
Follow the marked route to drop Hossan off in a marked alleyway. Completing the mission provides a nice $500 reward.
Pathos
Check the area in front of Thespian Theaters in Star Junction to find rising music sensation Pathos. Walk up to Pathos and listen to his successes and failures. Apparently he has some detractors.
Objective: Take out the men that are harassing Pathos.
When you regain control, Pathos is under assault by a couple men. Eliminate the attackers—a baseball bat works nicely. Save Pathos from the assault and you complete the task.
Complete some single-player missions then return later to the northern side of Star Junction and you’ll find Pathos again. He’s cut a new CD! But still has hecklers!
Objective: Take out the attackers.
The attackers shoot Pathos! Pull out a weapon and eliminate the attackers. Pathos is injured and needs a ride to a hospital. Get inside a nearby vehicle. Just jack one if necessary.
Objective: Get Pathos to the hospital, quickly.
Drive Pathos to the hospital. When you reach the marker, he automatically gets out and you complete the mission. For your help, Pathos agrees to give you a note on his album sleeve—a thank you right after God and his momma.
Sara
Search the streets of Suffolk close to where you find Hossan. There you’ll find Sara, a recently divorcee who wants to know if she’s still got it. You know, if she’s still H.O.T. After much back and forth, Sara requests a ride home.
Objective: Take Sara Home.
Follow the marked route to Sara’s house. Park at the marker; you automatically get out of the car only to find her husband outside! He’ll attack. Just beat him up with your fists and you complete the task.
Later, search the front of the Pier 45 Shops and Restaurants in the Fishmarket. Sara doesn’t remember you—guess it’s the combination of drinking and sleeping pills. Regardless, she wants another favor. Sara needs you to collect a box from the Perseus clothing store and bring it back to her.
Objective: Collect the box from the shop assistant.
Follow the marked route to the Perseus clothing store. Walk inside and speak with the assistant. He tells you that he has the item for Sara but it will be $500. You can now choose to buy the item for that price or just take a baseball bat (or firearm) to everyone in the store and get the item that way.
Objective: Take the box back to Pier 45.
Recover the box and drive back to Pier 45 to the marked location. You hand Sara the box. Paying for the item still paid off a bit; Sara gives you $1,000 as compensation for completing the task.
Jeff
After you obtain the camera phone, find Jeff on a street corner on the eastern side of East Holland. Jeff is very, very upset with his wife. He claims she’s cheating on him right this very minute. Jeff makes a request: take some photos of his wife and text them to him. Follow Jeff’s wife and her date, take some photos, and get paid.
Objective: Follow Jeff’s wife.
Jeff’s wife and her date get into a car. Get into a vehicle and follow the targets closely—but not too closely. The drive doesn’t last long. Eventually the couple comes to a stop and enters the Superstar café, presumably to grab a bite to eat. You’re told when the couple is coming to a stop; park behind their car and walk to the restaurant.
Objective: Enter the Superstar café and find the couple. Take a photo of the couple.
Walk into the Superstar café and ascend the stairs on the right side. You’ll spot the couple at a table on this upper floor. Activate your cell phone and its camera. Frame the photo so both Jeff’s wife and her date are in the photo. Take a snapshot then send it to Jeff.
Objective: Leave the Superstar café.
Descend the stairs and exit the Superstar café. Once outside, you automatically call Jeff for an update.
If you completed his first task then expect a call from Jeff awhile later. He’s got another favor to ask!
Objective: Wait for Jeff in the car park off the corner of Silicon Street.
Follow the marked route into the parking garage. Drive down a floor and find Jeff standing next to his car. Go up to Jeff to hear his request.
Objective: Take the car up to Walnut Way where it is quiet and dump it in the water.
So, Jeff has done something bad. He wants you to take his car, which contains a body, and dump it into the water. When you exit the parking garage, expect to be spotted—the police spot the body in your backseat and you must lose the wanted level before completing the mission.
Follow the marked route. The marker rests at a hill that leads into the water. Drive toward the ramp fixed at the edge. As you get close, exit your car. As long as the car reaches the water, you complete the task. If you land in the water as well just swim over to a dock and get out.
Awhile later, check the Suffolk area and find Jeff sitting on a bench. He’s got a pair of binoculars. Walk up to him. Turns out he got married again. And guess what? His new wife is currently in a room with her ex—Jeff wants you to kill her. Thankfully you decline. Jeff storms off into the street disgust…only to be run over by a guy’s car. Go collect Jeff’s discarded cash (he does owe you anyhow). While the guy is talking to the police, steal his car!
Cherise
After completing the Playboy X and Dwayne dispute, go to the Cluckin’ Bell in Northwood and find Cherise hanging outside. Note that if you killed her during the single-player missions, obviously she won’t be here.
Cherise claims that she’s trying to turn over a new leaf. But she still has problems: Cherise’s new boyfriend is hitting her. You decide to teach her new boyfriend not to hit women.
Objective: Take Cherise to Frankfort Ave.
Drive to the apartment complex where Cherise’s boyfriend is currently hanging out. It’s not a far trip.
Objective: Go and talk to Cherise’s boyfriend.
Cherise’s boyfriend is the red target on the mini-map. Walk up to him and start a conversation. Take out your baseball bat and beat Cherise’s boyfriend to the ground.
Objective: Go and talk to Cherise.
Return to Cherise by the car and speak with her to complete the task.
Eddie Low
You’ll find Eddie Low at an alley in Alderney City once you have unlocked the last island (which, if you’re on the Xbox 360, becomes obvious as you receive the Exploration achievement). Eddie is a really creepy dude with an interesting theory on the differences between man and animal.
Objective: Get Eddie to the docks.
Grab a vehicle and drive Eddie over to the marked location at the docks. Eddie’s carrying a heavy bag with him and claims he’s dropping the "kids" off. Yes, a creepy scumbag. Wait for Eddie to return.
Objective: Take Eddie to Westminster.
Once he’s back in the car, drive along the marked route back to Westminster. Park at the marker and let Eddie out to complete the task.
You’ll encounter Eddie Low a second time. Locate him in Berchem on Cockerell Avenue in the middle of the night. He’s standing near the side of the road. Walk up and speak with him for a bit. It doesn’t take long for the conversation to take a nosedive. Eddie lunges at you with a knife. Equip a weapon quickly—try the shotgun—and destroy Eddie once and for all. Pick up the discarded cash.
Marnie
Search the area around City Hall to find Marnie, a strung out junkie sitting on a bench at the fountain. Marnie attempts to make several deals but you turn them down. Instead, you decide to take Marnie to her dealer.
Objective: Get Marnie to the dealer’s.
Drive along the marked route to deliver Marnie to her dealer. She needs cash too. You hand over $500 but you gain a friend, right?
You can find Marnie a second time. Check out Varsity Heights at the end of Quartz Street during the day and you’ll find Marnie hanging around. Walk up to Marnie and learn she recently ripped off a customer and is as bad a shape as ever. Marnie decides it’s time to go home to mom and dad.
Objective: Get Marnie to the station.
Grab a car and let Marnie inside. Follow the marked route to the station. Bid Marnie farewell with another gift of $500—hopefully she’ll put it to good use this time.
Ivan
Visit a street corner in Acter during the day to find Ivan. You must have spared his life earlier in the single-player game in order for Ivan to be around. Ivan’s a loan shark these days and needs your help collecting some money.
Objective: Take Ivan to collect his money.
Grab a vehicle and pick up Ivan. Drive along the marked route to locate the gang members that owe Ivan cash. The meeting doesn’t go as planned.
Objective: Protect Ivan and take out the gang members.
As soon as you gain control, equip a weapon and eliminate the gang member walking away from you. Real danger comes from the two gang members positioned near the rooftop (as shown in the cut scene). Quickly turn right and target and kill that gang member; then turn left and target and kill the second. Eliminate the remaining gang members in the alley. Work quickly to keep Ivan intact.
Objective: Go and speak with Ivan.
Walk over to Ivan and speak with him to complete the mission.
Clarence
Drive over to Vauxite Street in East Holland during the day and locate Clarence. You remember him: "Please don’t kill me, boss!" You’ll only find him there if you spared his life earlier in the game. Clarence claims to have made some changes, he says as he pulls out a pistol. Apparently those changes don’t include your continued survival.
Objective: Take out Clarence.
You begin the sequence behind cover. Equip your favorite weapon and then target and eliminate Clarence to complete the brief mission.
Gracie
At some point after the conclusion of the kidnap story (after the "Diamonds are a Girl’s Best Friend" mission), drive by Gracie’s house in Acter and find her out front. Walk up to Gracie. She instantly recognizes you as her kidnapper! Oops!
Objective: Take out the Ancelottis.
Gracie calls on the Ancelottis to retaliate. Take cover behind a car and shoot all of the nearby enemies. This isn’t a complicated task—just eliminate all of the red targets on the mini-map. Grab all of the discarded cash and ammunition.
Chapter 3 - Side Missions
Grand Theft Auto IV’s story mode is just the beginning. There are plenty of side jobs and missions you can complete for additional cash, unlock achievements on the Xbox 360, or make progress on 100% game completion. This section covers the various side missions you can participate in during or after the story mode.
Taxi Driver
Early in the game (at least before the single player mission Roman’s Sorrow) you can join Roman in his profession as a cab driver. Roman will give you a cell phone call after the mission Jamaican Heat and suggest joining the family business. Afterward you can phone Roman and select "Job" to become a taxi driver! Get Roman’s taxi from the cab depot and pick up and drop off fares. It’s an easy way to earn extra money.
Little Jacob and Badman Packages
After you meet Little Jacob’s friend Badman in the single-player mission Shadow, you receive a call from Little Jacob about some side work. Little Jacob and Badman have packages that need delivered. Open your cell phone and call Little Jacob. Select the "Job" option from the list. He’ll tell you that there’s a car with the package parked by the café and also provide the package’s destination.
Proceed to the marked location to find the car (it begins in the same place for each delivery). Then follow the mission orders to deliver the package. If you fail to deliver the package for any reason, you can call up Little Jacob again and retry the task. There are 10 packages to deliver; complete all 10 to unlock the Courier Service achievement on the Xbox 360 as well as make progress toward 100% game completion.
The list below reveals all package objectives with details on how to complete each one. The tasks remain the same though the order is random.
- Take the car to Meadows Park. Exit the vehicle to stash the package for the buyer. Walk into the marker. A rival gang knows about the stash ponint. Wipe them all out. Surrounded in this alley. Kill all enemies. You call Jacob after the enemies are dead.
- Take the package to Willis, the buyer will meet you there. In a back alley, the buyers are there. Exit the vehicle and do the deal. The cops arrive! Two-star wanted level. Lose your wanted level.
- Get to the package to the tower block in Steinway by approximately 50 minutes. The buyer won’t wait around. Pull out and go left onto the main road. Just jump the median. Follow the remainder of the marked route but you must drive fast. Try and cut corners across the grass and around poles. As you approach the projects, pull off and toward the building. Drive toward the marker, get out, and approach the buyer.
- Get the package to the East Island City tunnel by approximately 45 minutes. The buyer is getting jumpy. It’s inside the tunnel. If you follow the marked route you’ll be right above it. You can keep going and drive off, land, then reverse into the tunnel to the marked location. Exit the vehicle and do the deal.
- Take the package to the Festival Towers Meadows Park, the buyer will meet you there. Pull up to the buyers. Exit the vehicle to do this deal. Approach the marker. The cops are onto the deal! Lose your wanted level.
- Take the package to Schottler by approximately 30 minutes. Follow the marked route. As you get close, the marker is underneath the overpass. Go behind it and find a tunnel in the back. Drive up to the marker. Exit the vehicle and do the deal.
- Get the package to Beachwood City by approximately 25 minutes. Drive forward and left out onto the freeway (otherwise the marked route sends you to do a u-turn). As soon as the marker approaches, turn left and into the auto parts garage. Exit the vehicle and do the deal.
- Take the package to the bridge in Outlook Park.Drive over to the park and walk over to the bridge. Jump down and go to the marker underneath. A rival gang knows about the stash point. Enemies surround you underneath the bridge. Equip and weapon and eliminate them.
- Take the package to the Cerveza Heights car stack. Pull into the alley and walk to the marker. A rival gang knows about the stash point. Two guards up high in front of you; another up high behind you. A car blocks you in with two more enemies. Eliminate them all.
- Drop the package in Meadow Hills. Exit the vehicle to stash the package for the buyer. Exit and walk onto the marker. Wipe them all out. Surrounded by enemies; two in cars to the sides and a single gunman in front of you.
Vigilante and Most Wanted

Obtain a cop car by any means necessary—dial 911 and just steal it when the officer arrives or grab one a parked one at a police station or other location—then you can participate in the old school Grand Theft Auto vigilante missions as well as the most wanted tasks. Complete 20 vigilante missions to unlock the Cleaned the Mean Streets achievement on the Xbox 360 as well as make progress toward 100% game completion. Finish all 30 most wanted tasks to earn the Manhunt achievement on the Xbox 360 as well as progress toward 100% game completion.
To begin the vigilante missions, get inside a police car and access the police computer. Select "View Current Crimes" then just select an option from the list. These tasks are essentially randomized. Gang activity involves just driving to a location and finding a group of thugs looking for a fight; just gun them down to clear the crime scene and finish the task. Vehicle stolen involves chasing down a stolen vehicle. Shoot it off the road—don’t worry about recovering the stolen vehicle, just blow it up and eliminate the criminal to finish the task. Choose criminal on foot and you will find a single adversary wandering the streets. Drive to his location and gun him down to finish the task.
To begin the most wanted tasks, grab a police car and access the police computer inside. Select "View Most Wanted" and you receive a list of the most wanted criminals on the current island. There are 10 most wanted for each of the three islands for a total of 30 tasks. It’s a good idea to remain well stocked with health, armor, and ammunition between most wanted missions.
Here are the targets and their crimes separated by island (you get the corresponding list when you’re on that island). Just pick your desired target and follow the mission instructions to hunt him down. It’s a good idea to be armored and stocked with weapons before seeking out these dangerous criminals.
Broker, Dukes, and Bohan
| CRIMINAL | CRIME |
|---|---|
| Maxwell Caughlin | Gang Related Violence |
| Scott Guzowski | Gang Related Violence |
| Antonio Rivette | Racketeering |
| Rodrigo Stavnes | Racketeering |
| Fernando Tisdel | Human Trafficking |
| Tyler Pickrel | Human Trafficking |
| Preston Pecinovsky | Credit Card Fraud |
| Alonso Goralski | Burglary |
| Bert Reker | Drug Trafficking |
| Freddy Paparo | Grand Theft Auto |
Algonquin
| CRIMINAL | CRIME |
|---|---|
| Shon Kikcuhi | Gang Related Violence |
| Jimmy Kand | Gang Related Violence |
| Simon Nashly | Racketeering |
| Tommy Francovic | Racketeering |
| Barry Lamora | Human Trafficking |
| Lino Friddell | Hit and Run |
| Juan Haimo | Burglary |
| Darren Covey | Arms Dealing |
| Leo Brodell | Drug Trafficking |
| Christov Mahonvic | Grand Theft Auto |
Alderney
| CRIMINAL | CRIME |
|---|---|
| Marty Boldenow | Gang Related Violence |
| Noel Katsuda | Gang Related Violence |
| Rodney McEniry | Racketeering |
| Glenn Lushbaugh | Human Trafficking |
| Phil Bacerra | Hit and Run |
| Sergi Szerbin | Burglary |
| Danny Hatmaker | Arms Dealing |
| Mervin Eskuchen | Drug Trafficking |
| Frederick Harrison | Grand Theft Auto |
| Keenan Burdett | Armed Robbery |
Exotic Export
Once you’ve gained access to the Internet and your email address in the mission Logging On you will start to receive emails from Brucie about specific vehicles he’s interested in obtaining.
Check your email at an Internet café and look for an email with attachment from Brucie; the title will read Exotic Export as well as the type of car. Once you recover a specific vehicle, drive them along the marked route to Brucie’s lockup. Try to keep a vehicle intact for maximum reward; if it’s damaged during apprehension, take the vehicle by the Pay N’ Spray near Brucie’s lockup. There are 10 missions total; complete all 10 to unlock the Order Fulfilled achievement on the Xbox 360 as well as progress toward 100% game completion.
The requested vehicles and the possible locations are all fixed; however, the order and the combination of vehicle and location are randomized. For instance, you might be asked to recover the PCJ600 first, last, or somewhere in between; and you may be asked to grab the PCJ600 from Cerveza Heights, Chase Point, or any of the other possible locations. The requested vehicles are: PCJ600, Banshee, Sabre GT, PMP600, Sanchez, Feltzer, Patriot, Intruder, Cavalcade, NRG900.
The table below reveals the possible vehicle locations as well as some tips on grabbing the vehicle.
| LOCATION | DESCRIPTION |
|---|---|
| Beechwood City | It’s at the car wash and currently being cleaned by the owner and a friend. How convenient! Just run up and steal it. |
| Cerveza Heights | The driver flees when you get close so you’ll have to chase him down and recover the vehicle. Alternatively you can park nearby and shoot the driver before he drives off. |
| Chase Point | A guy is inside the vehicle speaking with a hooker. Park down the street and shoot the driver from long-range before he drives off. |
| Docks in BOABO | It’s parked behind a truck with several guys around it. Eliminate the guys then steal the car. |
| Firefly Projects | Find it near a playground with a trio of guards. Blast them and steal the vehicle. |
| Meadow Hills | Parked in front of the train station. Wait until there’s no law around then steal it. |
| Meadows Park | This one is one the move. Follow the car and wait until it stops at a light then jack it. You could also just pull in front of the car to force it to stop. |
| Outlook | This one is near a park. There are no bad guys here; instead there’s a cop car parked right behind it. They’re in the process of making an arrest. Jack the car then escape the two-star wanted level. |
| Schottler | There’s a deal going down. Eliminate the two bad guys at long or short range and steal the vehicle. |
| South Slopes | This one is on the move. Just drive toward it, pull in front of the vehicle and force it to stop (or wait for it to stop at a light) and jack it. |
Cars for Stevie
When you play the single-player mission No. 1, you learn about Brucie’s friend Stevie. He hooks you up with the sweet looking Comet that you use in the street race. Later in the story mode after the mission Smackdown, Brucie informs you that Stevie has work. Stevie will text the location of a car; grab the car and drive it back to Stevie’s lockup, marked as "garage" on the map. It’s S&M Auto Sales in Bohan.

The location of all of these vehicles remains the same; however the order you receive the request from Stevie can change. Once you’ve recovered a vehicle, Stevie sends another text a few hours later (if you’re just doing these tasks, then just save your game in a safehouse after each delivered vehicle and you wake up to a text from Stevie). Complete all 30 delivers to unlock the You Got The Message achievement on the Xbox 360 and make progress toward 100% game completion.
The table below reveals the type and location of all 30 vehicles requested by Stevie.
| VEHICLE | LOCATION |
|---|---|
| Banshee | On Galveston Avenue near Middle Park. It’s in Middle Park West: just west of the park on the side of the street. Find it in Algonquin. |
| Bobcat | Top floor of the airport car park. Head over to the Francis International Airport and drive to the top of the parking garage. |
| Buccaneer | Over in the Industrial District. It’s in Bohan on the southeastern corner of the island right off of Lompac Avenue in Bohan. |
| Cavalcade | Somewhere near Westdyke Memorial Hospital in Leftwood. The hospital is at the corner of Long John Avenue and Manzano Road in Leftwood, Alderney. Look in a drive-way right across Manzano to find it. |
| Cognoscenti | It’s in Alderney City. Find it in an alley between Lyndon Ave and Rael Ave in Alderney. |
| Comet | Near the Swingers golf club. Go to Westminster and Hematite Street in Algonquin. It’s on the western side of the island near the pier. There’s a Burger Shot there. Find the Comet in the parking lot next to the basketball court. |
| Contender | Parked by Twitchin’s in BOABO. Climb the fence into Twitchin’s Sugar and find the truck out front near a staircase. |
| Coquette | A priest over in Suffolk drives this car. Right in front of the church on Liberty Lane. This is in Algonquin. |
| DF8-90 | In the car park under the station by the amusement park. Look in the parking garage cattycorner to the amusement park. It’s in there. This is the area south of your first safehouse. |
| Dilettante | In front of the Canyon Megaplex in Willis. Find it parked on Carrollton Street. |
| Dukes | It’s on Vauxite Street in East Holland. Look near the corner of Vauxite and Exeter, cattycorner from the Modo. It’s parked on the side of the street. It’s in Algonquin. |
| Faggio | By the Dragon Heart Plaza in China Town. It’s on Diamond Street. Run down Diamond Street and find it near a bus stop in Algonquin. |
| Freeway | Near the Willis Wash & Lube. It’s parked out front to the right. This is the car wash marked on your map in Willis. |
| Huntley Sport | LCPD station in Northern Gardens. Right next to the entrance of the station. It’s off Leavenworth Avenue in Bohan. |
| Infernus | Outlook Park. It’s just north of Outlook Park on Earp Street. Find it in front of Pizza Salad. |
| Intruder | Near the Liberty Transport Authority building in Rotterdam Hill. It’s parked by the street on Asparagus Avenue in the southwestern section of Rotterdam Hill. |
| Manana | Old Burger Shot near Huntington Street station. Parked behind it. Intersection of Thornton and Camden in Cerveza Heights. |
| Moonbeam | Somewhere on Charge Island. Northeast corner of the island at the water treatment plant. It’s in the parking lot on the northern side. |
| NRG900 | Corner of Bismarck Avenue and Topaz Street in Lancaster. It’s in Algonquin. |
| Patriot | Near those two joined towers down in Castle Gardens. Right in the middle of the road, side of the street, at the southern end of Castle Gardens in Algonquin. |
| PMP 600 | In The Exchange district. In an alley between Amsterdam Lane and Bismarck Avenue. Right at the curve in Amsterdam; appears as a road on the map. This is in Algonquin. |
| Rancher | Liberty State Delivery by the docks in Port Tudor. It’s in the parking lot just off Hollowback Street. Look at the eastern edge of Port Tudor in Alderney. |
| Rebla | At Fanny Crab’s eatery by Grand Easton Station. Parked on the street next to Fanny Crab’s in the eastern section The Triangle on Columbus Ave. This is in Algonquin. |
| Sabre GT | Near the Meadow Park Towers. Go to the intersection of Stillwater Avenue and Tudor Street. Check the first house on the left when facing down Tudor. It’s in the drive-way. |
| Sentinel | Parked by the docks in Normandy. In the parking lot of the Pharte Gas company. Find it in Alderney. |
| Sultan | Usually in the drive-way of a big green house in Berchem. Check by the garage at this house on Aspdin Drive in Alderney. |
| Super GT | This one is on Calcium Street in front of 69 Exchange. On the southern edge of China Town and northern edge of The Exchange in Algonquin. |
| Turismo | Over in Westdyke on Owl Creek Avenue. Never parks it in the garage! Find the big mansion on Owl Creek at Cariboo Avenue in Westdyke, Alderney. |
| Voodoo | Near the LC24 tower in East Island City. Right in front of the tower on Bunker Hill Avenue. |
| Washington | Always by the outdoor pool in Steinway. It’s on Franklin Street. The western edge of Steinway just north of the East Borough Bridge. |
Assassin
After the conclusion of the single-player mission Truck Hustle, Phil Bell sends word of a new contact where you can earn some extra cash. This unknown contact calls your cell and provides a pay phone location to call from. The pay phone is over in Port Tudor on Odhner Avenue. When you’re ready to try an assassin mission, walk up to the pay phone. After getting a job, check the area behind the pay phone for weapons and body armor. This section provides details on all nine assassin missions. You may receive the missions in a different order than that presented below.
Derelict Target
Three men have been lured to a building in Alderney City. Finish them there. Go to the target’s location. Take down the targets. It’s a tall building and there are more enemies than just the three targets. Work your way up the building. Before going in you may be able to snipe one from the outside. Toss grenades up staircases to help clear out upper rooms before you ascend.
Migration Control
The target is on top of the Booth Tunnel in Alderney City. Go to the target’s location. The helipad is above the Booth Tunnel entrance. Take out the target before they escape. Use a cab to get to the target. Walk out toward the water (south of the tunnel) and go east along the river. The helipad is just ahead. Shoot the helicopter with a rocket launcher before it takes off. Alternatively, use the sniper rifle to kill the target before he gets on the chopper.
Industrial Action
There are three targets at the refinery in the Acter Industrial Park. Go to the target’s location. When you arrive, the mission updates with take out the targets and all their bodyguards. Approach toward the Globe Oil sign and use the stairs here to get onto a sniper perch. You can hit some of the targets from this location. Many that are missed will run down and approach from the ground floor; eliminate them too. Clear out the remaining targets. There’s a health kit at the bottom of their original location.
Hook, Line and Sinker
The target is on a boat at the northern mouth of the West River. Go to the target’s location. Get dropped off by a cab. Go down the dirt road toward the shore. Find a way to reach the target. There’s a boat waiting to be driven. Pull out toward the target but not too close. You can snipe the target from here. If you get close or miss you’ll have to chase the boat. Fire at the target inside the boat during the chase; try to pull along side the boat for a better firing angle.
Taken Out
The target is in a car, they’re moving around in Alderney. Go to the target’s location. Take a car and follow the marked route. Stop the convoy. If you have a rocket launcher, this is simple: shoot a rocket at the limo at the front of the convoy. Otherwise you can drive ahead of the convoy and stop. As the limo approaches, blast it full of carbine bullet holes. When it stops, toss a grenade at it.
Water Hazard
The target is on a boat trip in the canal between Tudor and Acter. Go to the target’s location. Take a cab. Walk toward the water to the south and spot the sailboat. Zoom the scope in on the boat and eliminate the target. Hold your aim steady; the sailboat is bouncing a bit from the waves, which can make aiming a bit more different.
R.U.B. Down
The target’s over in the Acter Industrial Park. Go to the target’s location. Reach the location. Wipe out the targets making the deal. The main problem is that the targets are on motorcycles. They’re stationary for now but it doesn’t take much to get them on the move. You can use a rocket or sniper from long-range. You could also take a car and drive straight into the alley and crash into the targets and motorcycles. Try to avoid having to chase down more than one bike; if you have to chase two, they will split up and you will lose one and fail the task.
Bailing Out For Good
The target is at the police station in Leftwood. Go to the target’s location. When you arrive you are told the target is leaving the police station. A cab drops you close so you don’t have much time. Aim at the target and eliminate him before he gets away in the car. You can also use a rocket to destroy the car once he’s inside.
Dead End
The target is in Alderney City. Go to the target’s location. Chase down and eliminate the target. As you get close, the vehicle moves away to an alley. Follow it into the alley and eliminate the targets. A few more try to trap you into the alley. Shoot all of the targets and complete the task. Check the alley across from the target’s start location for a health kit.
Racing
After you complete the story mission No. 1 and win the street race, Brucie sends word that there are other races available to earn extra cash and bragging rights. Give Brucie a call on the cell phone and select the "Race" option to trigger a race. Grab your favorite vehicle—the faster the better—and drive to the marked location to begin the race.
Enhance your chance for success by activating the race during the day. At night it can be tougher to spot upcoming corners and objects. Plus you will probably lose your headlights during the race, which will make matters even worse. Also, avoid racing during the rain!
Chapter 4 - Multiplayer Tips
Along with a massive single-player game (that can last well beyond the story has been completed), Grand Theft Auto IV also features a diverse selection of multiplayer game options. You can play a standard deathmatch game, participate in car races, or challenge another team in a round of Cops ‘n’ Crooks. This section provides some multiplayer strategies to help you survive the online competition.
- Running and gunning isn’t effective for long-term success. If you just run around shooting wildly hoping to score kills you won’t end up near the top of the leaderboards. Here are a few tips for good gun skills. First, when you spot a target, crouch. This will increase your firearm’s accuracy. Second, don’t just hold down the fire button. Increase accuracy by firing in shorter, controlled burst fire. Finally, aim for headshots. You’re going to score much faster kills if you learn to aim for the head. Combine all of these techniques and you will survive many more gun battles.
- Knowledge of the map is important for virtually every online game (unless you’re playing Tetris, I suppose). Grand Theft Auto IV is no different. Test out the maps in free mode and learn the location of the most vital items, such as health kits, body armor, assault rifles, sniper rifles, and the rocket launcher. These are the most important items in the game and knowing exactly where to go will save your life time and time again.
- One of the greatest elements to Grand Theft Auto IV’s multiplayer mode is the freedom to be creative. You can be creative in every game mode but free mode is where it really shines. Go skydiving! Well, without a parachute I guess. Reenact your favorite car chase or gun battle movie scenes. Play chicken in your favorite vehicle. See who can survive against the police the longest. Do some stunt jumping or impromptu races. The open-ended nature of the single-player game certainly carries over to multiplayer free mode!
- The rocket launcher is primarily an anti-vehicle weapon. It has a long reload time, which becomes troublesome in close-quarters combat (while you’re reloading, your enemy is blasting you with an assault rifle). But the explosives are powerful. Use the rocket launcher at longer range, ideally at a group of enemy targets for maximum damage. It’s also not the only way to take down a vehicle. Don’t forget you can just shoot the driver with any firearm!
- Winning a deathmatch game isn’t measured by kills but instead by money. You receive money for each kill but you can score more cash by collecting the money dropped by the slain player. Don’t forget to scoop up this cash! You also lose money if you die by "other means," which basically means avoid suicide. Don’t fire a rocket point blank into a wall. That’s just more cash you have to collect to get back to the top. Remember the most money wins.
- Team deathmatch games are about working together with your teammates. Once again, it’s all about the cash. Score kills to earn cash, grab dropped money from slain foes for more bucks, and avoid suicides and other non-player deaths to prevent losing dough. More firepower equals better odds. Communicate with your partner or partners and focus attack on single foes when possible. Set up flanks and ambushes against your opponents. Exploit the environment: use alleys, take cover, or gain height advantage.
- Mafiya Work has players performing jobs for a mob boss. The goal is to complete the jobs before other players or teams. Objectives include killing specific non-player targets, stealing specific vehicles, kill a target and steal their vehicle, escort non-player characters, or deliver particular goods. In a free-for-all game, it’s every player for himself or herself but that doesn’t mean alliances can’t exist. Make impromptu deals and team up against another player and prevent them from completing a particular job. Oh and then of course as soon as you take down that player, betray the alliance! This is Mafiya Work after all.
- Cops ‘n’ Crooks is a great game type in which one team is designated the cops and the other the crooks. In the all for one version, one crook is the boss and the other crooks must escort him to safety. And the cops must take out the boss! Organization is key for both sides. The cops must work together and intercept the crooks and the crooks must work together to protect the boss and repel the cops. Good drivers are also vital; passengers should set waypoints allowing the driver to concentrate on what’s important and that’s driving. Maintain good communication with your teammates: call out the enemy positions and let teammates know where to go for survival and escape.
- The rules of Car Jack City could be summed up in its title. The goal is to steal the target vehicles and get them back to the drop-off point. The vehicles marked by the blue target are standard vehicles; the vehicles marked by the green target are filled with drugs and therefore worth more cash. The catch is that the cars lose value when damaged so you must balance between getting the vehicle back to the drop-off point quickly and maintaining the car’s condition to maximize profit. Even in free-for-all modes, alliances could occur to prevent an opponent from grabbing a vehicle. Watch your back, though. Everyone’s gunning for the top of the leaderboard so don’t expect a partnership to last.
Chapter 5 - Cheat Codes and Extras
This section reveals Grand Theft Auto IV cheat codes as well as various extras, including websites, easter eggs, and the What They Do Not Want You To Know maps for hidden stunt ramps and pigeons.
Cheats
During the game, activate the cell phone and dial the corresponding number to activate the cheat code. Some of these cheats disable achievements on the Xbox 360. Cheaters never prosper right?
| CHEAT | EFFECT |
|---|---|
| 468-555-0100 | Alter the weather. Make it rain, get cloudy, or get foggy. |
| 486-555-0150 | Get the "poor" set of weapons. |
| 486-555-0100 | Get the "advanced" set of weapons. |
| 267-555-0150 | Elevate your wanted level. |
| 267-555-0100 | Lower your wanted level. |
| 362-555-0100 | Restore your body armor. |
| 482-555-0100 | Restore health. |
| 948-555-0100 | Get information on the current song. |
| 227-555-0142 | Spawn a Cognoscenti. |
| 227-555-0175 | Spawn a Comet. |
| 938-555-0100 | Spawn a Jetmax. |
| 625-555-0150 | Spawn a Sanchez. |
| 227-555-0168 | Spawn a Super GT. |
| 227-555-0147 | Spawn a Turismo. |
| 359-555-0100 | Spawn an Annihilator. |
| 227-555-0100 | Spawn an FIB Buffalo |
| 625-555-0100 | Spawn an NRG 900 |
Internet Websites
You could spend hours and hours surfing the Internet—surfing the Internet inside Grand Theft Auto IV too! Drive over to an Internet café and log onto the web. You can follow links from the homepage or just type in websites into the address bar. There are dozens of working websites; we’ve listed many of these below. Have fun!
- www.a-thousand-words.net
- www.americantravelguide.net
- www.antfarmcam.net
- www.area53site.com
- www.artthrob.org
- www.autoeroticar.com
- www.babiesovernight.com
- www.beanmachinecoffee.com
- www.bigdog.blogsnobs.org
- www.blogsnobs.org
- www.bruciesexecutivelifestyleautos.com
- www.burgershot.net
- www.chiropracticovernight.com
- www.craplist.net
- www.darksoullock.blogsnobs.org
- www.designerslave.com
- www.domestobotlovers.com
- www.dragonbrainthemovie.com
- www.easterislandcoverup.com
- www.eatbiglogs.com
- www.eddielowfilthslayer.blogsnobs.org
- www.elchamucoroboto.com
- www.electrictit.com
- www.electronicwritingtablet.com
- www.erisfootware.com
- www.eugenicsincorporated.com
- www.eunux.net
- www.eyefind.info
- www.fantasyleaguebatswingers.com
- www.fefighter2008.blogsnobs.org
- www.fistfans.com
- www.flyhighpizzapie.com
- www.freejames.org
- www.friendswithoutfaces.net
- www.gloryholethemepark.com
- www.goldberglignerandshyster.com
- www.golfloversonline.net
- www.grype.org
- www.hand-jobs-online.com
- www.happyfarmersupplies.com
- www.heritagenothate.org
- www.homecremation.com
- www.homeworkfriend.org
- www.hornyhighschoolreunions.com
- www.huganimals.com
- www.inyapuper.blogsnobs.org
- www.ilovetoblow.org
- www.krapea.com
- www.leftover-vacations.com
- www.liberatedwoman.blogsnobs.org
- www.libertycitypolice.com
- www.libertycityrealestate.net
- www.libertytreeonline.com
- www.liesdamnlies.net
- www.limevenus.blogsnobs.org
- www.lipurgex.com
- www.littlelacysurprisepageant.com
- www.lootandwank.com
- www.love-meet.net
- www.loveyourmeat.com
- www.mail.eyefind.info
- www.money2makemoney.com
- www.modderstotallyrule.com
- www.myonlineme.com
- www.myroomonline.net
- www.onlineradiorevolution.com
- www.our-own-reality.com
- www.outdatedtastes.com
- www.outsourceforamerica.com
- www.peepthatshit.com
- www.pinktorpedo.org
- www.piswasser.com
- www.pointclickshipabitch.com
- www.poker-in-the-rear.com
- www.publiclibertyonline.com
- www.pychakilla.blogsnobs.org
- www.redwoodcigarettes.com
- www.roidsforlittleboys.com
- www.rustybrownsringdonuts.com
- www.shitster.de
- www.sprunksoda.com
- www.stopshavingnow.net
- www.thebankofliberty.com
- www.tobaccofacts.net
- www.vipluxuryringtones.com
- www.weazelnews.com
- www.whattheydonotwantyoutoknow.com
- www.whymommygotfat.com
- www.yourmexicandoctor.com
- www.yournewbabysname.com
What They Do Not Want You To Know
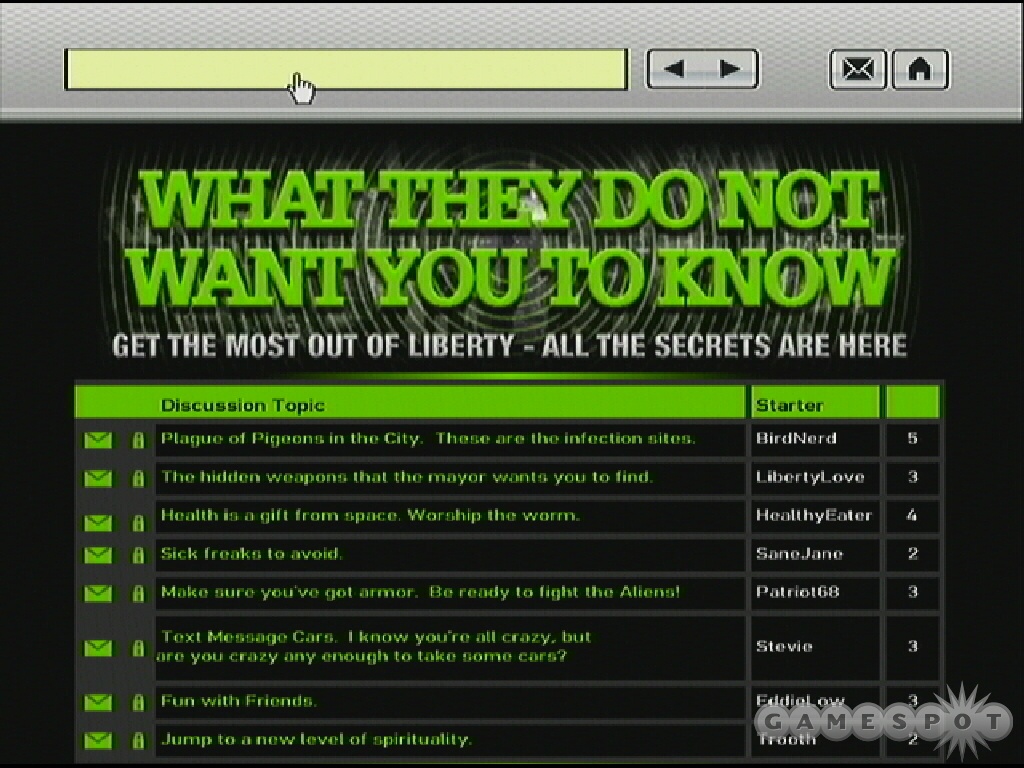
Go to an Internet café and log onto the web. In the browser’s address bar, input the website www.whattheydonotwantyoutoknow.com. A "secret" message board appears. The posters on this forum have discovered many hidden objects around Liberty City, including the locations of random characters and Stevie’s vehicle wants (both shown earlier in this game guide).
We’ve included some of these maps in this game guide so you can reference them as you search for hidden items throughout the game. Use the location descriptions for both the hidden characters and Stevie’s vehicles along with the maps to find them all—earn your achievements and make progress toward 100% game completion!
Stunt Jumps and Pigeons
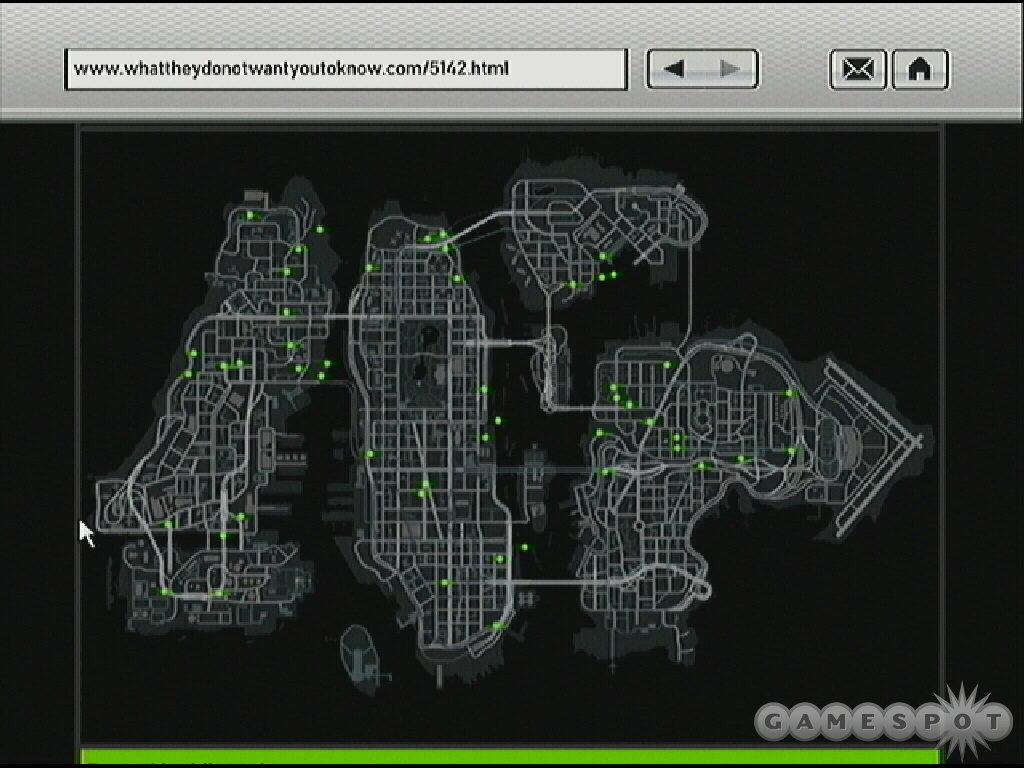
If you’re going for 100% game completion then you’re going to need to locate all stunt jumps and pigeons hidden throughout Liberty City. This is a daunting task but thankfully the good users at the in-game website What They Do Not Want You To Know have provided maps for finding these plentiful and scattered hidden items.
There are a staggering 200 pigeons in the game and around 50 stunt jumps to find. The pigeons look just like pigeons with a slight red glow to help you find them; also listen for the familiar pigeon sound as you get close. If you manage to find all 200, you not only gain progress toward 100% completion but you also unlock an Annihilator helicopter on the helipad. Recognize stunt jumps by, well, the presence of the ramp. In order to complete a stunt jump you must successfully make the leap and the landing. If you see "not good enough" then you’ll have to try again.
Hidden Health and Armor


You can replenish health by eating—just grab a hot dog from a stand or head into a diner for a burger—or drinking a soda from a drink machine. Taking a nap in the safehouse also restores your health. However, there are also health kits scattered around Liberty City if you want another quick fix. If you need extra protection, drive over to a weapon shop and purchase body armor. Or, once again, you can find hidden body armor scattered around the streets of Liberty City.
Checking the in-game website www.whattheydonotwantyoutoknow.com and you can find the maps for all the hidden health kits and body armor power-ups found in Liberty City. We’ve included these maps in this guide to help you locate these items. Knowing the closest boost of health or armor could mean the difference between life and death!
All This…and a T-Shirt Too?
Get over to Happiness Island—it’s in the southern corner of the map. It’s basically the Statue of Liberty in Liberty City. An easy way to get there is to go to the heli-tours on Algonquin and steal a maverick helicopter. Fly over to Happiness Island and land at the backside base of the statue. Go up the stairs and enter the door at the base. After a brief load, you emerge with a brand new t-shirt. The front says "Happiness is…" and the back says "…land".
Take the same heli-tour maverick and fly toward the statue itself. Hover near the statue’s feet, particularly the foot that’s behind the other. Position the chopper so the driver’s side is adjacent to that area next to the back foot. Exit the chopper! You’ll drop out and tumble down onto an upper ledge of the statue. There are four doors here. Check the back door. There’s a plaque that says "No Hidden Content This Way" on either side of the door. Go through the door—literally—and climb the ladder inside. At the top you discover the beating heart of Liberty City.
It’s the Little Details
Here are some additional tips and tricks and other hidden details that you shouldn’t miss during your time in Liberty City! The details in Grand Theft Auto IV are infinite. Don’t be surprised if you’re still noticing little things dozens and dozens of hours into the game.
- Check out the television in your safehouse for a variety of amusing programming. The show "Republican Space Rangers" seemed especially familiar. Those space suits look very similar to another big blockbuster game I know. Was that a halo the space rangers flew through at one point? Also check out the commercials for some familiar Rockstar landmarks.
- Do you want an instant five-star wanted level? Head to an Internet café and access the terminal. Go to the website www.littlelacysurprisepageant.com. You’re redirected to a page by the LCPD and the police are automatically notified. Instant five-star wanted level! Might want to start running.
- Date all of the online girls at once. Wine and dine them and make sure you "try your luck" and succeed. Then just sit back and ignore them and watch the text messages pour in. At first they’re "sweet" and a tad bit suggestive. But just keep ignoring them for a long time and some will start to lose their patience. It is kind of fun to wait until the girlfriends are mad and then take them out and get them drunk. Although Carmen is a crazy drunk even when she likes you!
- Go over to the sold carnival—the one that Michelle wanted to try out and instead decided to go bowling. There’s a miniature golf course here. Some of the items on the course should look familiar to long-time fans of the Grand Theft Auto series.
- While riding in a taxi or driving your own car, take the opportunity to listen to the news reports on the radio. You’ll often hear details on your recent exploits or other elements of the game, such as your dealings with the random character Eddie Low.
- Next time you’re in an Internet café, check out the LCPD website at www.libertycitypolice.com. Access the database by clicking on the link at the bottom of the homepage. You can now browse the criminal database. It features many of the characters from the single-player storyline. Read on for additional background information. Hey look, you’re in there too! Looks like you’re wanted for Grand Theft Auto. No big surprise there!
- Whistle for a taxi and get in. Change the radio station and Niko actually asks the driver if he can change the radio station. You may even hear the driver’s opinion of your chosen music.
- Before you complete your date with French Tom in the Out of the Closet story mission, check out your love-meet.net profile. After the mission, check it again and see that you’ve updated the profile to better describe what you’re looking for in love. Good thing too cause I think there are some lucky ladies out there looking for a match.
- Have you been causing a ruckus on the city streets? You might overhear a pedestrian dialing 911…because of you!
- Visit a Cluckin’ Bell and look at the little karate-pose action figure display on the walls. Apparently this toy’s name is Cluck Norris. Nice!
- Are you bored with your cell phone’s ring tone? After get an upgrade from Playboy X, go to an Internet café and check out www.vipluxuryringtones.com.
- Grand Theft Auto IV has incredible weather effects. There are great details in the wet road, the raindrops, and the thunder and lightning. But it’s how the non-player characters—and even Niko himself—react in the rain that might be the greatest details of them all. Watch as people cover their head, use and lose umbrellas, and how Niko wipes the water off his head and jacket.
Chapter 6 - Xbox 360 Achievements
The table below reveals the Grand Theft Auto IV achievements for the Xbox 360 version of the game. The table lists the achievement name, description on how to unlock the achievement, and the gamerscore awarded.
| ACHIEVEMENT | DESCRIPTION | GAMERSCORE |
|---|---|---|
| On the Boat | Complete the first mission. | 5 |
| Fed the Fish | Complete mission "Uncle Vlad." | 5 |
| Lowest Point | Complete mission "Roman’s Sorrow." | 5 |
| Gracefully Taken | Complete mission "I’ll Take Her." | 10 |
| Impossible Trinity | Complete mission "Museum Piece." | 10 |
| Full Exploration | Unlock all the Islands. | 20 |
| That Special Someone | Complete mission "That Special Someone." | 10 |
| You Won! | Complete the final mission. | 60 |
| Liberty City Minute | Complete the story missions in less than 30 hours. | 30 |
| Key to the City | Achieve 100% in "Game progress" statistic. | 100 |
| Driving Mr. Bellic | Unlock the special ability of taxi. | 10 |
| Retail Therapy | Unlock the special ability of buying guns from a friend. | 10 |
| That’s How We Roll! | Unlock the special ability of helicopter. | 10 |
| Dial B for Bomb | Unlock the special ability of phoning for a bomb to be placed. | 10 |
| Liberty City (5) | After meeting all possible friends, the ones left alive all like you above 90%. | 20 |
| One Hundred and Eighty | In a darts game, score 180 with 3 darts. | 10 |
| Pool Shark | Beat a friend at Pool. | 10 |
| King of QUB3D | Beat the high score in QUB3D. | 15 |
| Gobble Gobble | Score 3 strikes in a row, a turkey, in 10-pin bowling. | 10 |
| Courier Service | Complete all 10 package delivery jobs. | 10 |
| Order Fulfilled | Complete all 10 Exotic Exports orders. | 10 |
| You Got the Message | Deliver all 30 cars ordered through text message. | 20 |
| Dare Devil | Completed 100% of the unique stunt jumps. | 30 |
| No More Strangers | Meet all the random characters. | 5 |
| Cleaned the Mean Streets | Captured 20 criminals through the police computer. | 20 |
| Manhunt | Complete the Most Wanted side missions from the police computer. | 15 |
| Endangered Species | Collect every hidden package in the game. | 50 |
| Assassin’s Greed | Complete all 9 assassin missions. | 20 |
| Finish Him | Complete 10 melee counters in 4 minutes. | 15 |
| Wheelie Rider | Do a wheelie lasting at least 500 feet on a motorbike. | 30 |
| Rolled Over | Do 5 car rolls in a row from one crash. | 30 |
| One Man Army | Survive 5 minutes on 6-star Wanted Level. | 40 |
| Walk Free | Lose a 4-star Wanted Level by outrunning the cops. | 50 |
| Chain Reaction | You must blow up 10 vehicles in 10 seconds. | 20 |
| Genetically Superior | Come in first in 20 single-player street races. | 25 |
| It’ll Cost Ya | Complete a taxi ride without skipping from one Island to another. | 5 |
| Sightseer | Fly on all helicopter tours of Liberty City. | 5 |
| Warm Coffee | Successfully date a girl to be invited into her house. | 5 |
| Half Million | Reach a balance of $500,000. | 55 |
| Under the Radar | Fly underneath the main bridges in the game that cross water with a helicopter. | 40 |
| Teamplayer | Kill 5 players who are not in your team, in any ranked multiplayer team game. | 10 |
| Cut Your Teeth | Earn a personal rank promotion in multiplayer. | 5 |
| Join the Midnight Club | Win a ranked multiplayer race without damaging your vehicle too much and with damaged enabled. | 10 |
| Fly the Co-op | Beat Rockstar’s times in ranked versions of "Deal Breaker", "Hangman’s NOOSE", and "Bomb da Base II". | 15 |
| Taking It For The Team | Be on the winning team in all ranked multiplayer team games. | 10 |
| Top the Midnight Club | Come first in 20 different ranked standard multiplayer races. | 20 |
| Auf Wiedersehen Petrovic | Win all ranked multiplayer variations, all races and "Cops n’ Crooks", as both sides. | 30 |
| Top of the Food Chain | Kill 20 players with a pistol in a ranked multiplayer deathmatch. | 10 |
| Let Sleeping Rockstars Lie | Kill a Rockstar Developer in a ranked multiplayer match. | 10 |
| Wanted | Achieve the highest personal rank in multiplayer. | 20 |
The airport runway is a great place to try the Wheelie Rider achievement (there’s even a motorcycle near the tower). It’s also a great place for the Rolled Over achievement because you can get your car (the faster the better, grab a Turismo) screaming down the open road. Hit a curb and start flipping!
For the Chain Reaction achievement, steal a bus and part it on a bridge. Block traffic by parking the bus across all lanes. Wait for more than 10 cars to arrive. You now have a bunch of irate drivers. Time for crowd control! Toss a grenade into the mix. Or fire a rocket. Watch chaos ensue.
You can try the One Man Army achievement early in the game. Just take a boat or chopper to one of the locked islands and you have an instant six-star level. Now you just have to survive! Going inside a building helps—and a lot of ammo. If you want an easier route, just use a cheat code to raise your wanted level to six stars and hole up in your safehouse.
Got a news tip or want to contact us directly? Email news@gamespot.com
Join the conversation