God of War Collection Walkthrough
Become a gaming god with our full walkthrough for God of War Collection.
It seems compilation packs are all the rage these days, and now Sony has tossed their hat into the ring with God of War Collection. Collection includes God of War and God of War II, both of which play identical to their PS2 brethren, but now with high-definition support and trophies. In celebration of Sony releasing these classics, we've compiled both of our guides into one super-guide, ideal for aspiring gods.
Here's what you'll find in GameSpot's God of War Collections Game Guide:
- God of War: Battle the Gods with our full walkthrough to the first God of War.
- God of War II: Continue the fight with our God of War II walkthrough.
- Trophies: Check out how to obtain the brand new trophies in both God of War games!
Combat Strategies
This section provides some general combat strategies for God of War. Find weapon and magic specific combat strategies in the Weapons and Magic section of this guide.
Combo Starters
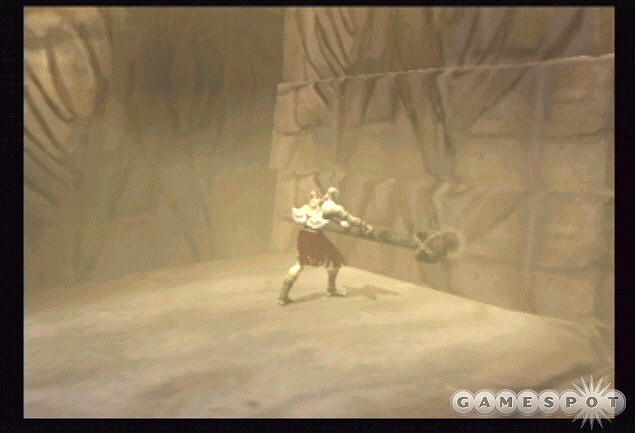
Some of Kratos' strongest attacks are those that knock down enemies. This is because Kratos can then follow up with additional damaging combos. Use the Blade of Chaos and try out the Plume of Prometheus (Square, Square, Triangle), Ascension (Hold Triangle) and Apollo's Ascension (L1 + X) and Square, Triangle, Triangle, Triangle. Check the weapons section for when these combinations become available.
Knock down undead or minotaur and continue to strike the fallen foe with more powerful strikes to juggle enemies, inflict damage with multiple hit combinations, or even unleash Poseidon's Rage. Score bigger combinations by trapping enemies against walls or cliffs or other obstructions. Juggle the enemies in the air and invoke Poseidon's Rage. After killing an enemy, keep the combo going by immediately seeking out a new target and scoring a blow. The higher the combos the greater the red orb experience reward.
Evasive Maneuvers
You could rather easily argue that Kratos' roll maneuver is as important as any of his combo attacks. When an enemy is about to attack or if you're suddenly surrounded by foes, just flip the right-analog stick in a direction to roll and evade the enemy's attack.
Although it'll be primarily used to evade attack, it's important to use the roll to put some distance between you and any enemies nearby. The advantage of Kratos' Blade of Chaos is its long-range usefulness. As you near closer range, roll away using the right-analog stick and restart your combination attacks. If you're close, an enemy can strike and interrupt combo strings. A solid pattern would be to perform a combo that knocks down enemies, perform a multi-hit strike to damage the prone foe, and then roll away and repeat the sequence.
Stat Management
As you'll learn during the game, killing a minotaur using a mini-game sequence provides health orbs and killing a gorgon using a mini-game sequence produces magic orbs. If you aren't in dire need of either then simply eliminate the minotaur or gorgon using combination attacks. You'll receive red experience orbs instead. The more experience orbs received, the faster you can upgrade your Blades of Chaos or magic abilities.
If you're approaching a circular "arena" like area you can probably count on being trapped inside and forced to battle a collection of beasts before you can escape. Obviously it's wise to use any health and magic chests before entering so you enter the battle at full strength.
Weapons and Magic
This section covers God of War's weapons and magic abilities. You'll find a breakdown of each, including their power-ups, new moves, and orb requirements.
Blades of Chaos
The Blades of Chaos are Kratos' initial weapon and the one you'll use most throughout the game. The weapon has five levels; powering up the Blade of Chaos increases damage and provides new maneuvers and even some new abilities, such as Rage of the Gods (invulnerability for a short period of time).
It's good strategy to upgrade the Blade of Chaos before all other magic abilities. If you're thorough in red orb collection (seeking out hidden chests, etc) then you can have the Blades of Chaos fully upgraded certainly by mid-game. This provides full damage potential, access to powerful new combos, and access to Athena's Blessing, which bestows infinite magic during the Rage of the Gods invulnerability move.
Take advantage of the Blade of Chaos' long-range attack. Make every effort to avoid getting too close to your opponent. If you begin to move close, use the right-analog stick to roll away. If you're close, an enemy's strike may interrupt your combo and leave you vulnerable for further attack. Roll away then start the combo string from long-range so you can complete the attack.
Some of the Blade of Chaos' strongest moves are those that knock enemies off their feet. The Plume of Prometheus is such a move that's granted from the very beginning of the game. Use the Square, Square, Triangle combo to knock lesser enemies off their feet and vulnerable to additional combo attack to inflict further damage and to also increase the amount of experience orbs you receive.
| LEVEL | ORBS | NEW MOVE | CONTROLLER | DESCRIPTION |
| 1 | N/A | Icarus Lift | X, X | Double Jump |
| Ascension | Hold Triangle | Launch enemies and Kratos into the air | ||
| Orion's Harpoon | Tap Circle | Launch enemy and tap Circle to slam them back to the ground. | ||
| Hades Reverse | Tap L1 | Use just before enemy's attack connects. | ||
| Plume of Prometheus | Square, Square, Triangle | Quick and powerful combo. One of the best ways to knock foes off their feet. Also breaks the shields on certain undead. | ||
| 2 | 1,500 | Rage of the Gods | L3 + R3 | God mode when meter is full. |
| Apollo's Ascension | L1 + X | Simultaneously launches enemies and Kratos into the air. Can follow with Hermes Stomp. | ||
| Apollo's Offensive (Air) | L1 + X | Slam enemies back to the ground with this powerful attack. | ||
| Hermes Rush | R1 | Ground dash attack. | ||
| Hermes Stomp (Air) | R1 | Air attack that drives Kratos quickly to the ground. | ||
| Tempest of the Fates | Square, Square, Square Hold | Space clearing attack used only during Rage of the Gods | ||
| 3 | 2,250 | Cyclone of Chaos | L1 + Square | 360 spin attack. Good for multi-strikes against downed foes. Follow with another combo starter. |
| Cyclone of Chaos (Air) | L1 + Square | 360 spin attack in the air. | ||
| Spirit of Hercules | Triangle, Triangle, Triangle | Powerful but slow combo. Like the Plume of Prometheus but slower. | ||
| Valor of Hercules | Triangle, Triangle, Square | Powerful but slow combo. Can chain into Plume of Prometheus, though slowly. | ||
| Hades Revenge | Square or Triangle or R1 while in Hades Reverse parry pose | Use this attack after parrying your foe. | ||
| 4 | 3,750 | Rising Helios | L1 + Triangle | Multi-hit attack that targets a single enemy. Ends with a powerful ground slam. |
| Falling Helios (Air) | L1 + Triangle | Multi-hit air attack that targets a single enemy. | ||
| Hermes Fury | R1 + R1 + R1 | Multi-hit dash attack. | ||
| Achilles Flip | Right-Analog Stick + X | While evading press X to attack. | ||
| 5 | 9,000 | Lance of the Furies | L1 + Circle | Continue to hold Circle for an even greater attack. Holding Circle basically charges the attack. Use when surrounded. |
| Lance of the Furies (Air) | L1 + Circle | In air, continue to hold Circle for an even greater attack. | ||
| Might of Hercules | Square, Hold Square | Hold Square during combo to unleash powerful attack. | ||
| Athena's Blessing | N/A | Infinite magic while Rage of the Gods is active. |
Blade of Artemis
The Blade of Artemis provides short-range power over a long-range advantage. It's stronger than the Blade of Chaos in terms of damage per strike but it's also slower and, since you must be at close-range, could potentially leave you more vulnerable to enemy attack. You're also a bit more vulnerable after completing combos and certainly more vulnerable after missing your attacks.
Use the Blade of Artemis against lesser undead; it slices through them like butter. It's also a solid weapon against the Cerberus pups. Since the small dogs can quickly reach close-range, the Blade of Artemis is ideal in chopping them into pieces before the pups can grow into their larger counterpart.
It is possible to start combos from long-range with the Blades of Chaos then summon the Blade of Artemis (Hold L1 + R1) for some finishing attacks. Note that there's a slight delay during sword summon. Each new power-up level increases the blade's damage but offers no new maneuvers.
| LEVEL | ORBS | NEW MOVE | CONTROLLER | DESCRIPTION |
| 1 | N/A | Sword Summon | Hold L1 + R1 | Summons the Blade of Artemis to Kratos' hands. |
| Sword Summon (Air) | Hold L1 + R1 | Summons the Blade of Artemis to Kratos' hands while in the air. | ||
| Sword Sheath | Hold L1 + R1 | Sheaths the Blade of Artemis if it's active. | ||
| Wrath of Artemis | Hold L1 + X | Multi-hit sword spin. | ||
| Revenge of Artemis | Hold L1 + Square | Slow but powerful multi-hitting attack. | ||
| Ascension of Artemis | Hold L1 + Hold Triangle | Launch enemies and Kratos into the air. | ||
| Retribution of Artemis | Hold L1 + Circle | Most powerful of all sword attacks. Single strike. | ||
| 2 | 3,750 | N/A | N/A | N/A |
| 3 | 10,000 | N/A | N/A | N/A |
Poseidon's Rage
Use Poseidon's Rage to create a blast of energy around Kratos. The energy damages anything within its blast radius. Therefore, it's best to use Poseidon's Rage when enemies surround you to get the maximum possible damage as well as the maximum possible combo. Every hit against a creature within the blast radius registers on the combo meter. You can chain Poseidon's Rage with normal attacks or even use Poseidon's Rage several times in a row to score big combo numbers resulting in additional red orb experience.
Power up Poseidon's Rage to increase damage, the blast radius, and to receive the Wrath of Poseidon spin attack. It's wise to keep Poseidon's Rage selected unless you are going to use another specific magic power for a specific purpose. That way you can simply hit "L2" at any instant. You may become surrounded quickly and need a counter. Instead of having to select Poseidon's Rage then hit L2, keep the power selected. You can use Poseidon's Rage to break a gorgon's gaze or even when you're about to be hit by a high damage foe--Kratos is invulnerable during Poseidon's Rage.
| LEVEL | ORBS | NEW MOVE | CONTROLLER | DESCRIPTION |
| 1 | N/A | Poseidon's Rage | L2 | Blast of energy surrounds Kratos. Use against multiple enemies for maximum effect. |
| Poseidon's Rage (Air) | L2 | You can activate the move while in the air. | ||
| 2 | 1,650 | Wrath of Poseidon | L2 + rapidly press Circle | Press Circle rapidly after enabling Poseidon's Rage to spin and create a larger blast radius. |
| 3 | 4,500 | N/A | N/A | N/A |
Medusa's Gaze
It's like Perseus stoning the Kraken! Use the severed head of Medusa to stone enemies with her petrifying gaze. Point the freeze beam at a specific enemy to stone that foe. Stronger foes require more time so it's best to use the gaze at long-range. The magic is also easily interrupted; if you're struck, the monster has time to recover.
Once stoned, the monster can eventually break out. Attack the stoned creature quickly to shatter the foe. Note that other enemies can actually strike the stoned creature (presumably inadvertently) and shatter his comrade. Medusa's Gaze is a good way of whittling down enemy numbers and should be used on adversaries such as minotaur or Cyclops.
Powering up Medusa's Gaze increases the power of the freeze beam and provides a few new moves, Gorgon Flash (essentially freezes faster) and Gorgon Rage for freezing surrounding enemies. Your experience orbs are best spent on the Blade of Chaos, Army of Hades, or Poseidon's Gift. When you have the extra orbs, then upgrade Medusa's Gaze.
| LEVEL | ORBS | NEW MOVE | CONTROLLER | DESCRIPTION |
| 1 | N/A | Gorgon Torment | Hold L2 + Hold Square | Use the gaze of Medusa to stone an enemy. The tougher the enemy, the longer the required gaze. |
| 2 | 3,000 | Gorgon Flash | L2 + Triangle | Instant freeze a single enemy. |
| Gorgon Flash (Air) | L2 | Using Gorgon Flash in the air. | ||
| 3 | 7,500 | Gorgon Rage | L2 + Hold Circle | Freezes all surrounding enemies. |
Zeus' Fury
Zeus grants Kratos the power to launch long-range attacks. A lightning bolt appears in Kratos' hand. Use the projectile primarily to assault undead archers from long-range. It's possible to use the attack against standard foes but it consumes a good deal of magic that would be better used for Poseidon's Rage or Army of Hades. Use against the sirens, which tend to try and remain at longer range.
Increase Zeus' Fury to bolster damage and lightning bolt rate of fire. Reaching level two also adds a charge attack for increased damage. It's a cheap upgrade even to its highest level, though you may still prefer your experience orbs spent on the better abilities.
| LEVEL | ORBS | NEW MOVE | CONTROLLER | DESCRIPTION |
| 1 | N/A | Zeus' Fury | Hold L2 + Square | Long-range lightning bolt attack. |
| Zeus' Fury (Air) | L2 | Long-range lightning bolt attack while Kratos is airborne. | ||
| 2 | 750 | Might of Zeus | Hold L2 + Hold Triangle | Charge attack. Hold the Triangle button to charge the lightning bolt's power. |
| 3 | 3,500 | N/A | N/A | N/A |
Army of Hades
Summon a swarm of tormented souls to fight at your side. The souls automatically seek out their targets and pummel anything in their path. Invoke the Army of Hades against groups of tough enemies. The magic ability consumes a huge chunk of magic so don't waste the ability on easy targets.
Powering up the Army of Hades increases the potency of the summoned souls. If you're having trouble with a particular sequence and possess Rage of the Gods, Athena's Blessing, and Army of Hades you can use all three in combination to lay waste to those previously frustrating foes.
| LEVEL | ORBS | NEW MOVE | CONTROLLER | DESCRIPTION |
| 1 | N/A | Army of Hades | L2 | N/A |
| 2 | 4,500 | N/A | N/A | N/A |
| 3 | 10,000 | N/A | N/A | N/A |
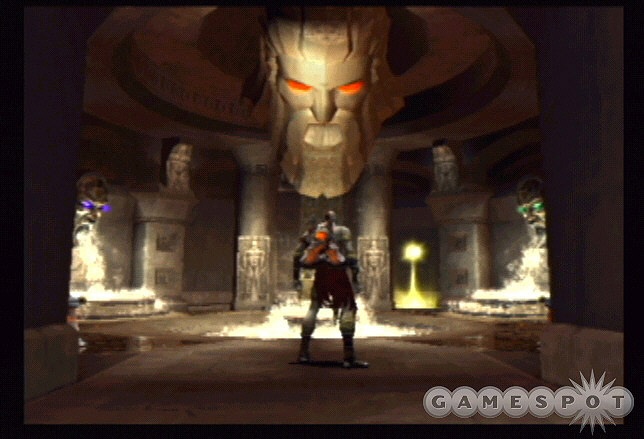
Bosses
This chapter compiles strategies for God of War's most menacing adversaries. Look here for specific tips on defeating the Aegean Sea's Hydra, the Challenge of Hades' Minotaur, and the God of War himself, Ares.
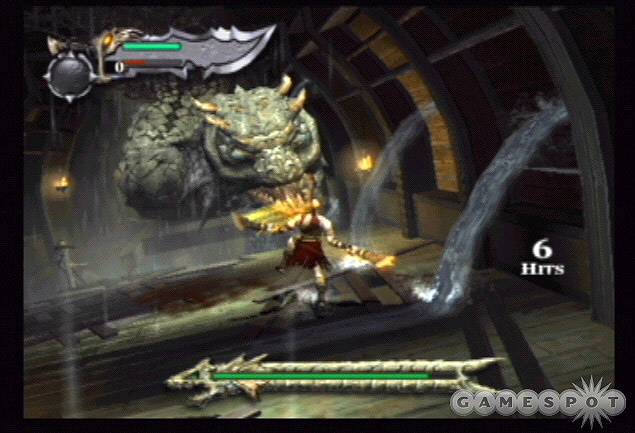
Hydra
You face the hydra during the game's opening level on the Aegean Sea. There are a couple encounters with the hydra early on. In the first, just block the hydra's attack then strike a five or six hit combo before blocking again. Then follow the mini-game to get past the hydra. The second encounter occurs on the ship's deck. Roll to evade the hydra's attacks (or use block) and attack wildly to bypass that encounter.
The final battle is against three hydra heads. There are two "smaller hydras" on the left and right sides of the deck. A larger hydra waits to battle in the center. Battle the hydra on the left and right side; block their attacks as you did previously. The hydras will suck you to their location so you can't concentrate on one hydra; you must split your time between each. Continue to hack and slash away when next to a hydra and block an incoming attack. Get close, use Triangle combos, block the counter, and then repeat.
When a hydra's head hits the deck, jump up onto the nearby crates (left of the left hydra and right of the right hydra). At the top, hop onto the platform and drive it into the hydra's neck. Finish off the other hydra in a similar fashion.
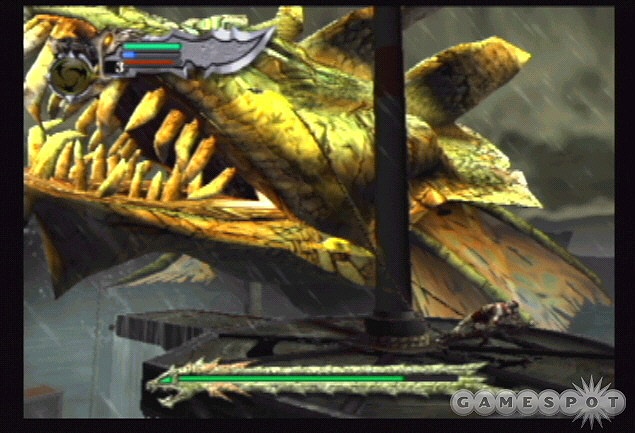
Climb the netting in the middle to battle the center, and much more menacing, hydra. This hydra can blow you off the platform; just climb back up if you're knocked off. Evade the hydra's bite. You can also use Poseidon's Rage as soon as the hydra bites; you won't take damage. When the hydra bites down on the platform, move left or right quickly to avoid then unleash repeated attacks on the head.
When prompted by the button icon, use it to inflict additional damage in the mini-game. Press the Circle button repeatedly when prompted to slam the hydra's head onto the mast. As long as the pole in the middle of the mast platform is breaking down, you're making progress--don't worry about the hydra's health bar. Just keep inflicting damage and successfully performing the button presses. Kratos smashes the hydra's head onto the broken pole.
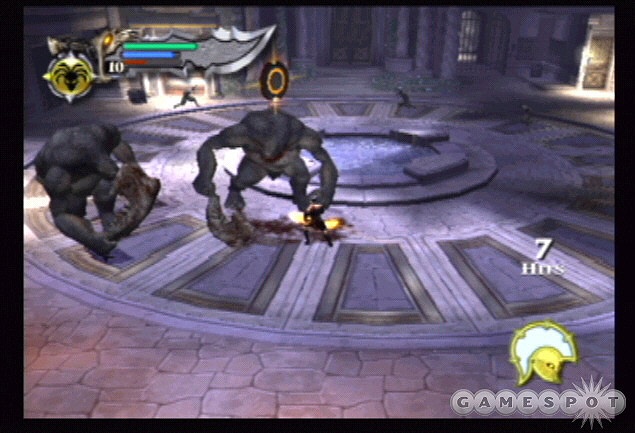
Challenge of Hades' Minotaur
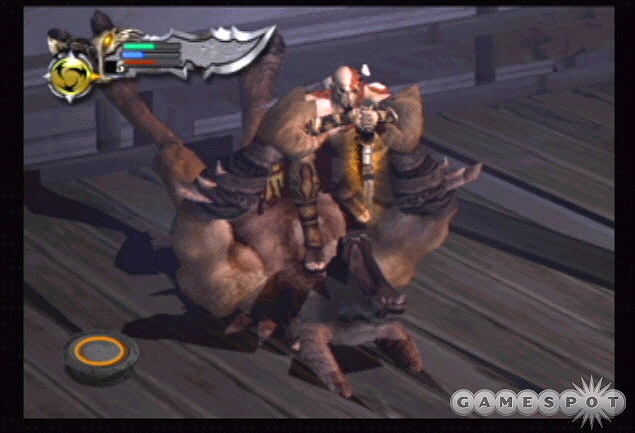
You face many minotaur throughout the course of the game but it's not until the Challenge of Hades within Pandora's Temple do you face the minotaur. Approach the large door and the huge minotaur boss emerges. Back up and go up the steps to the upper platform in the back of the room. It's better to battle the minotaur from that position rather than down on the lower floor. Strike the minotaur with your Blades of Chaos combinations. When the minotaur raises a hand, roll in the opposite direction. If the minotaur raises both hands, roll backward. Strike the minotaur repeatedly until it retreats. Perform the process over and over again until the button prompt appears over its head.
Drop down off of the ledge and quickly run to the minotaur. Use the Circle button to grab the beast. Follow the onscreen analog rotations. Complete the sequence to daze the minotaur. Run back to the upper platform and use the lever on the left side to launch an explosive projectile at the minotaur.
The beast shakes off the blow and charges the platform again. Repeat the process from the start. If you choose to use Rage of the Gods, use it early in the fight; that way it will have likely recharged near the end of the fight where you can use it again. This is a very long battle; the minotaur survives several projectile blasts. You're close to victory when the minotaur loses its armor and battles in its skin. Daze the menace a last time then use the lever to fire the projectile to complete the battle.
The God of War, Ares
In the first battle against Ares you possess all of your weapons and current magic powers. Use Rage of the Gods early and launch Army of Hades (hopefully upgraded) to start damaging Ares as soon as the battle begins. Get close and, if you have Athena's Blessing, use Poseidon's Rage to inflict further damage against Ares. Athena's Blessing keeps your magic bar full during Rage of the Gods.
A combination of the moves above should take a hefty chunk out of the God of War. You can block nearly every one of Ares maneuvers. Also, use the right-analog stick to roll out of the way to dodge Ares strikes and attacks. Ares will launch in the air and hurl flaming rocks at your position. Use the right-analog stick to evade the attack. Continue to evade until the bombardment stops. Ares will use his hammer like a flamethrower. Roll as far away as possible to avoid. Use the block button to resist other attacks, such as his overhead hammer blast and various strikes.
With Athena's Blessing, you should still have maximum magic after the Rage of the Gods move so continue to use Army of Hades to keep Ares occupied while you attack with various combinations (Square, Square, Triangle or use Blade of Artemis and its L1 + button combos). After inflicting chunks of damage on Ares, orbs of health and magic emerge from his body. The orbs should keep you relatively healthy and boost your magic so you can cast another Army of Hades or, if Ares' life bar is nearly drained, Poseidon's Rage when you're close enough.
As Ares nears death, the Circle icon appears above his head. Get close and use the Circle button to grab Ares. Once Kratos' has Ares grabbed, mash the Circle button repeatedly. Be careful, however, as soon as you complete the sequence another button icon appears. If you're mashing Circle without paying attention to the screen, you'll have to complete the entire sequence again. Complete the onscreen button sequences to finish off Ares.
In the second battle against Ares, you have been stripped of your weapons and magic. Instead of your familiar inventory, you possess a gigantic sword (the one used as a bridge earlier in the game). It's called the Blade of the Gods. You have a few new moves at your disposal: Zeus' Gift (hold L1 + X), Poseidon's Gift (hold L1 + Square), Athena's Gift (hold L1 + Triangle), and Hades' Gift (hold L1 + Circle).
One of the most important elements in the fight is momentum. The more damage you inflict against Ares, the higher your health bar rises. The more damage Ares inflicts on you, the higher Ares' health bar rises. The battle could end quickly in victory, in defeat, or could go on for several minutes as Kratos and Ares wage war back and forth.
Keep your finger ready on the L1 button, which serves as both the block button and your means of attack with the Blade of the Gods. If you spot Ares disappearing into the ground, roll away. When you spot the four spires appear from the ground, roll away to avoid being crushed. Block Ares attacks and counter quickly with the Blade of the Gods combinations.
After completing a combo Ares, a mini-game starts. Press the Circle button very rapidly to win the face-off. These are extremely vital to a successful victory against Ares. You'll inflict some big damage against him by completing the mini-game (which means your health bar rises as well). Exhaust Ares' health to defeat the God of War.
Walkthrough
This section provides a complete Walkthrough for God of War. You'll find specific solutions to puzzles, tactics for combat situations, and the location of hidden health, magic, and red orb experience chests as well as Gorgon Eyes, Phoenix Feathers, and Muse Keys.
Note that once you maximize your health and magic bar, you will no longer find Gorgon Eyes and Phoenix Feathers. So late in the game these chests become red orb experience chests. Therefore, this Walkthrough may differ slightly in its latter portions. The Walkthrough reveals the location of these chests but the contents may be different depending on what you've already found during the game.
The Aegean Sea
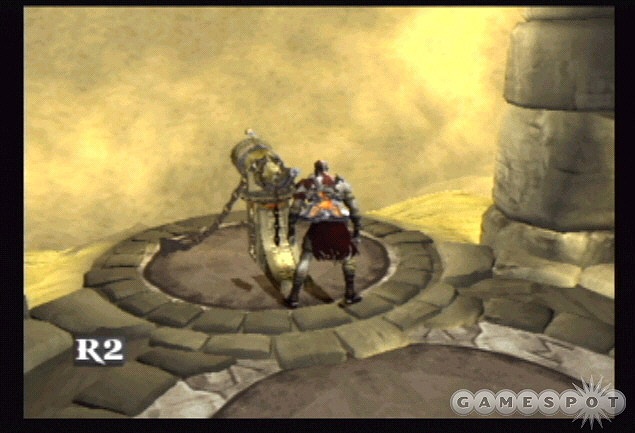
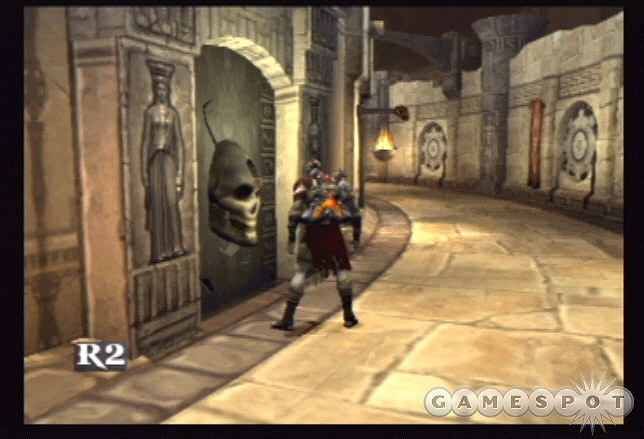
Crack the skulls of the four undead troops at the ship's bow. Practice using the Plume of Prometheus combo (Square, Square, Triangle) as it's one of your best allies through the game, especially against weaker undead foes. After defeating the first batch, a second set breaks through the chain-locked trapdoor and even more crawl from the ship's sides. Clear the bow then approach the trap door. Use R2 to open the trapdoor.
Drop inside the ship. Recover health from the chest if necessary or leave it for later. Use your Blades of Chaos to pound the nearby undead. Break open the barrels for more red orbs. Use your weapons to break apart the wooden planks blocking the path to the right of the health chest. In the barracks, break apart the beds for more red orbs.
Follow the hallway into the larger chamber and face off in your first battle against the hydra. The monster serpent appears in front of you and attacks with its fierce jaws. Use L1 to block the attack then counter with successive attacks. After scoring five or six hits, block again to avoid the hydra's bite. Resume the attack then block again and repeat. When the hydra gets knocked out, follow the button sequence to inflict more damage and drive the hydra away. Break all barrels for orbs then cross the beams ahead of you.
Smash more barrels on the left then exit through the opening also to the left. Once outside, go left and speak with the prisoner. Find the opening on the right and ascend the staircase. Open the chest full of red orbs. At the top of the stairs, break through the wooden blockade with your attacks. Use R2 to open the door.
Emerge onto the ship's deck and attack the harpies. Kratos isn't much concerned with the ship's innocent inhabitants; if you need health to mend your wounds, attack one of the frightened humans scampering around the ship's deck. Use light attacks to strike the harpies. Eventually the hydra bursts through the deck's center.

The hydra uses a spin attack (spins its head around the deck), a bite attack, and also slams its head onto the deck. Block these attacks with the L1 button and repeatedly cut the hydra's flesh with your blades. Use the right-analog stick to dodge if necessary. When you're inside its mouth, follow the button presses to escape and resume the attack.
Cross the deck to the right side and use the R2 button to open the two doors. Open the chests inside for red orbs. Drop into the hole in the deck and swim to the upper left. Grab the netting and climb up. Return to the ship's deck and battle more undead forces. Spot the beam on the right. Carefully cross the beam and reach an intersection of beams. At the intersection, go right to find a chest full of red orbs. Return to the intersection and follow the beam on the right and jump onto the deck of an adjacent ship.
Save your game in the glowing light on the left and use the health chest if you're in dire need. Otherwise save it. A gang of undead archers overlook the stretch of ship before you. While their arrows don't inflict serious damage, the problem is you can't reach their platform without the aid of a crate. And unfortunately the arrows do inflict serious damage on the crate. The crate begins on the lower right portion of the area.
You need to push and kick the crate to the other side while using the larger obstructions to take cover from the arrows. Grab the crate and move it left or right. Charge up Kratos' kick fully and launch it down the stretch. Run to catch up to the crate and take cover quickly. Try to time your movements away from the obstructions to avoid getting pummeled immediately by arrows. The box can't sustain much damage so you must work quickly and carefully. Kick the box all the way to the area just below the archers so you can use it as a platform to reach the higher ledge. When you reach them, beat the archers down. Use the nearby health chest.
The Aegean Sea (continued)
Find the path on the right side. Walk forward to the door with the wheel. Press R2; the door leads to the captain's quarters and it's locked. Turn around and climb the ladder and then the netting. Prepare to face undead forces on the net. Use the analog stick plus attack buttons (Square and Triangle) and the grab (Circle) to eliminate the opposition. Work your way to the top. Continue up the next set of netting. Reach the top of the mast and pummel the present undead.
There are two beams from this mast platform. Take the one on the left to find a chest full of red orbs. Return to the platform and spot the rope overhead. Jump up to the rope and ride it to the next ship. Break the wooden planks on the left and right side to reveal hidden chests. The one on the right contains your first Gorgon Eye; collect a total of six to increase your maximum health.
Break open the middle planks to reveal a passage. Follow it to the blue aura and enter. Receive Poseidon's Rage. Combat the undead that appear inside the room using your weapons and your new magic ability. Walk through the passage and to the ship exterior. Save your game on the left side. Search the right side for health and magic chests. Climb the netting on the right to reach the ship's deck and spot the hydra menace. Watch the cut scene to see the fate of the captain--and his key.
There are two "smaller hydras" (if such a thing exists) on the left and right sides of the deck. A larger hydra waits to battle in the center. Battle the hydra on the left and right side; block their attacks as you did previously. The hydras will suck you to their location so you can't concentrate on one hydra; you must split your time between each. Continue to hack and slash away when next to a hydra and block an incoming attack.
When a hydra's head hits the deck, jump up onto the nearby crates (left of the left hydra and right of the right hydra). At the top, hop onto the platform and drive it into the hydra's neck. Finish off the other hydra in a similar fashion.
Climb the netting in the middle to battle the center, and much more menacing, hydra. This hydra can blow you off the platform; just climb back up if you're knocked off. Evade the hydra's bite. You can also use Poseidon's Rage as soon as the hydra bites; you won't take damage. When the hydra bites down on the platform, move left or right quickly to avoid then unleash repeated attacks on the head.
When prompted by the button icon, use it to inflict additional damage in the mini-game. Press the Circle button repeatedly when prompted to slam the hydra's head onto the mast. As long as the pole in the middle of the mast platform is breaking down, you're making progress--don't worry about the hydra's health bar. Just keep inflicting damage and successfully performing the button presses. Kratos smashes the hydra's head onto the broken pole.
Enter the hydra's throat and find the captain--still alive. Press R2 to recover the key…and send the captain down the rest of the way. Climb the crates on the right side of the deck. Hop to the platform at the top and open the chests; the one on the left contains a Gorgon Eye. Jump to the rope and ride it to a previous ship. Save your game if desired and get health if you didn't before.
Drop down into the area where you pushed the crate before. Undead archers appear on the obstructions in the center. Defeat them and jump up onto the crate at the back end and onto the upper platform. Go right and to the captain's quarters. Press R2 to open the door. Descend inside and watch the cut scene.
When you regain control of Kratos, partake in some fun by pressing R2 next to the bed and following the button presses and analog stick rotations to…alleviate some stress and gain some red orbs. Approach the exit and read the journal on the right side. Exit and save your game in the light. Go around the left side and open the health and magic chests before climbing the ladder.
The Gates of Athens
Walk forward and speak with Athena for a recap of your primary objective. Exit the ship to the right and defeat the undead greeting party. Bust some containers then continue forward and take the left turn over the bridge. More undead appear here to greet your arrival. Defeat them and continue forward. Near the walkway's end, turn right and spot the decrepit wooden walkway. Cross it into the hole in the wall on the right.
Jump down into the water and swim left. Hop up onto the next ledge and move through the passage. Eliminate the undead guarding the hall. Open the chest to recover a Phoenix Feather, which will be used to increase your maximum magic. Around the corner, find the health chest. Jump up onto the crates and drop over the other side. You're back to the bridge. Cross the bridge and return to your previous location.
This time cross the decrepit wooden walkway and jump to the lift station in the alcove. Use the lever to activate the lift. Walk out onto the next catwalk. Bypass the health chest unless you're near zero. Defeat the minotaur on the catwalk. Keep your distance with long-range strikes from the Blades of Chaos. Finish off the minotaur using the mini-game to recover health from the minotaur's death. Don't hesitate to utilize Poseidon's Rage because there's a magic chest after the battle.
Continue down the catwalk and use the aforementioned magic chest if needed. Move toward the camera and around right to another lift station. Use the lever to ascend. Approach the Athens gate to see a snippet of the current situation. A Cyclops appears in the courtyard moments later. Use the right-analog stick and the evade maneuvers to avoid its spiked ball attack. Keep your distance with long-range weapon strikes. When the button prompt appears, follow the mini-game to deliver the death blow. A couple more Cyclops appear after the first perishes. After the battle, go to the far right side of the courtyard to find a ladder down to a health chest.
Return to the courtyard and cross it toward the open passage. There's a chest there that switches between health and magic; replenish whichever is needed then proceed into the passage. Enter the room with large crates. It's a top-down view. Look carefully and spot the crates with the wooden crates underneath. Break the wooden crates with your weapon to lower those upper crates; this provides a step system to ascend the room.
Jump onto the crate in the lower left corner. Jump to the crate to its upper right. Go right to find a crate containing red orbs. Jump back to the previous crate then jump again to Kratos' right to a higher crate. From the top of this crate, leap in the same direction to an alcove. The area contains a magic chest and another chest containing a Gorgon Eye.
Return to the crate top that contained the red orbs and use the ladder. Traverse the narrow ledge to the left then hop onto the next crate top. Jump to the netting. At the top of the crate with netting, you can spot the exit tunnel. Before jumping there though, jump to the crate to its lower left. The camera switches and a new chest is revealed. Leap to this chest and collect the red orbs inside. Jump right into the exit passage.
Drop down into the next room. Break open the containers around the room's edge for red orbs. Save the health or magic chest in the left corner. Walk into the yellow aura to speak with Aphrodite. Medusa appears and it's time to battle.
She's extremely quick. Use your weapons from long-range; use the Square, Square, Triangle combo, which also jolts Medusa out of her gaze. You can also avoid her gaze by using the right-analog stick to evade away from her position. If you are stoned, shake the left-analog stick quickly to break out. Don't jump away to avoid Medusa's gaze; if you're stoned in the air, you drop down and crack apart leading to death. When the button prompt appears, grab Medusa and follow the analog stick rotations to finish her off. Eliminating gorgons with button grabs nets magic orbs.
Three minotaur emerge after Medusa's death. Utilize your new magic ability, Medusa's Gaze to defeat them. As soon as one is stoned, attack it with your weaponry to break it apart before the creature recovers. Continue down the hall and defeat some undead down near a ladder. After clearing the hall, ascend the ladder. From the top of the ladder, double jump toward the camera to reach a ledge containing a chest full of red orbs. There's a second chest in an alcove to the left. Return to the ladder and climb.
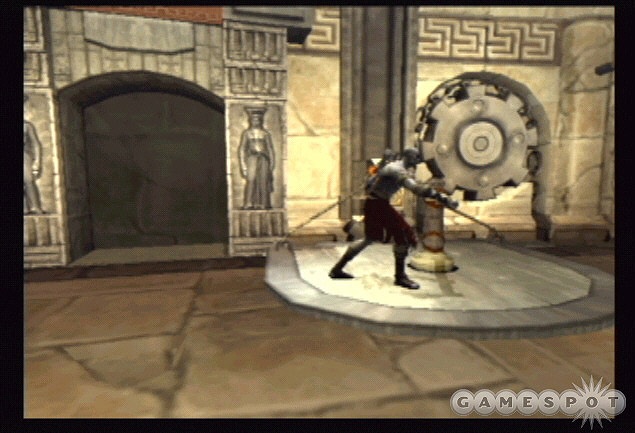
Walk toward the ballista and save your game on the left. Use the chest nearby to replenish health. Approach the back of the ballista and use the R2 button to grab then pull back to launch a projectile. It opens a secret room on the other side of the area.
The Gates of Athens (continued)
Return down the previous hall to the lever. Pull the lever once to rotate the ballista toward the wooden door. Return to the ballista and pull it back to launch a projectile at the door. There's another secret room. Rotate the ballista again so it points toward the save game point. Pull the ballista back and launch a projectile at the wall. Open the chest inside to collect the Phoenix Feather. Return the ballista to its position pointed down the hall toward the former wooden door.
Proceed down that hallway. Climb the ladder on the left down the short hallway. Defeat the undead at the bottom. Walk toward the camera to find a chest near a gate. Open the chest to find a Gorgon Eye. Open the gate using the R2 button but don't go outside; return down the hallway and go back up the ladder.
Climb the ladder on the right side. Walk out onto the balcony. Crush the undead that arrive. Face the entrance to the balcony and climb the wall on the left side. Eliminate the undead that appear on the wall using attacks or grabs.
Before continuing to the right, find a narrow ledge on the left. Leap from the ledge to a rooftop. Double jump from the rooftop to the two red orb crates in the area you opened with the ballista previously. Return to the balcony.
Climb the wall and jump over the gap to the right. Continue across several gaps until you're forced to climb down. Reach the ledge. Defeat the undead along the ledge and move behind the statue. Use the R2 button to push the statue over.
The ladder down is just around the corner. Use the nearby health chest to mend wounds if necessary. Descend the ladder and drop to the courtyard below. Cross to the left side and find the statue you toppled over. Jump from the top of its head to the ladder.
Defeat the gorgons. There's a health chest around the corner to the left if needed. Climb the next ladder and face off against minotaur and gorgon. If you left the health chest on the previous ledge, you can return and recover it at any time during the fight. After the battle, approach the pillars on the left side. Attack the pillars with your weaponry to lower their position; this enables you to jump up to the top and reach the next area.
Crush the undead on this rooftop and find another ballista. Pull back and fire to launch a rope to the other side. Go under the rope and start crossing to the right and the other side. Undead troops pursue; use attacks and grabs to get them off the rope. A good tactic is to use a light attack followed by the grab.
Traverse the rope to the far ledge then climb down the ladder. Use the health chest at the bottom if needed. Go to the left side to the large door. Open it using the R2 button. The location should look familiar; it's the hall where you first used a ballista weapon.
Now that the door is open you can shoot another ballista projectile to break apart the next wooden door. Make sure the ballista is pointed down the hall then fire the projectile to break the next door. A gang of minotaur enter. Use the ballista repeatedly to eliminate the approaching foes. If you don't get them all, eliminate remaining minotaur with your weapons and magic. Go down this hall to the ladder (use the health chest on the left if it's still there and needed). Jump onto the ladder at the end of the hall and ascend to find a couple chests. While standing inside this alcove, leap toward the camera to reach a ledge containing a red orb chest.
Descend the ladder completely and exit to the exterior. Approach the center of the bridge to speak with the oracle. Continue across the bridge.
The Road to Athens
As you cross the bridge, break all of the pots to unleash some red orbs. Cross the bridge and exit to the balcony and get your first good look at the God of War. Walk out to the balcony's edge. When you regain control, go left and down to the streets. The path ahead is blocked so veer to the left. A projectile closes the gate behind you.
Although it doesn't look like it, this area is actually a puzzle. You must use Medusa's Gaze to stone a minotaur on top of the floor switch; this opens the opposite gate and enables you to escape. There are two minotaur initially. It's easier to eliminate them and wait until the next, single minotaur appears. Lure it toward the switch by standing behind the switch. As it nears the switch, enable Medusa's Gaze. There's a chest full of magic orbs on the right side if needed. As soon as the minotaur is stoned, run toward the open gate. Roll under as you approach. Use the health chest if necessary.
Exit to the streets on the right. Start the trek down the street and break open all containers and crates for more red orbs. You can also break wooden doors leading into the various structures; many are empty but a few contain red orb chests and even two Gorgon Eyes (on the rooftop to the right and near the end on the left) and Phoenix Feathers (on the left side of the street near the beginning and near the end on the left).
Ignore the fleeing humans, though they can be slaughtered for health. The road contains undead archers, gorgon, and minotaur. When you round the corner and spot Ares in the background, leap up onto the rooftop on the right to find a crate with the Gorgon Eye. Jump to the adjacent roof, kill the archer, and enter to find a red orb crate. Continue down the street and search other structures for another red orb crate.
As you near the end, search a storage area on the left for two chests: one contains a Gorgon Eye and the other a Phoenix Feather. If you've followed the Walkthrough, this Gorgon Eye will increase your maximum health bar. Defeat another gorgon and find a red orb crate on the right near the barricade at the end of the street. Break the barricade and enter the recess to bust open some containers for red orbs.
Return up to where the barricade stood and spot the overhead rope. Use the rope to swing to the next rope. Before swinging to the other street, turn left and swing to an alcove containing a chest of red orbs. Return to the rope and finally down to the next street.
Go around the corner toward the staircase. Break open some containers on the left for red orbs. Ascend the staircase.
Athens Town Square
After the first flight, go left and break open the door to find a chest of red orbs. Search another alcove on the left to find a second chest of red orbs. Continue up the stairs and into the town square.
Once the force field appears behind you, turn left and break down the door ahead to find a red orb chest. A mammoth Cyclops appears in the town square. Frightened humans run everywhere; they can be killed for health!
If you are wounded during the fight just kill some of the humans to regain some health. Additional Cyclops appear. Defeat these foes. Break all crates and containers scattered around the area for some red orbs.
After exploring the area, cross the courtyard and enter the open passage. Enter the ornate room. Note that some of the wall murals are cracked. Break them open to find red orb chests, a health or magic chest, and a Gorgon Eye. Smash open the vases and other objects for more red orbs. Follow the woman up the stairs.
Exit onto the balcony. Use the health if you're in dire need then proceed to the right. Spot the woman on the other side of the broken balcony to the left. You can drop down into the courtyard if you want; there are some containers with red orbs as well as a health or magic chest. Use the ladder to return to the previous location.
There's also a tough secret here. Jump across the gap and aim to the left side. But just barely miss so Kratos grabs hold of the ledge. Shimmy left and around the corner until you can't go any further. Next, double jump backward to the ledge behind you. Break open the door to find a crate with a Gorgon Eye. Return to the previous location using the ladder.
Cross the jump and go right. Ascend the stairs and follow the woman to the balcony. Unfortunately she topples off the high ledge and plummets to her death below. Save your game to the left. Leap to the adjacent balcony to the left and open the chest to recover a Phoenix Feather. Drop off the balcony and approach the woman's body. Use the R2 button to recover a key.
You're back in the square. Return to the passage and into the ornate room you were in previously. There are new undead foes inside now. Break their shields using the Square, Square, Triangle combo. Ascend the stairs and battle two gorgon. Crush the archers on the upper balcony. Break open the door on the right side and enter another ornate chamber.
Defeat the undead inside. Break the cracked mural for a red orb chest. Exit onto the balcony on the right to find a health or magic chest. Break anything in the room for red orbs before returning to the broken balcony.
Jump over and ascend the stairs you climbed earlier. Defeat the archers and exit onto the balcony. Save your game to the left again if desired. Go right and jump over to the ledge. There's a hatch in the back corner. Open it with using the key and the R2 button.
Drop down and open the gate. It leads back to the town square. Head in the opposite direction and save your game. Traverse the tunnel and stick to the left. Open the gate at the end using the R2 button. Continue until you're outdoors.
Rooftops of Athens
There are plenty of things to break open here for red orbs. Climb up the ivy on the right side. Follow it to the top. When you can't move any further up, jump backward to the other ivy-covered wall. Ascend again until you stop then jump backward to more ivy. Finally, do it one more time until you're near a ledge with a couple chests. Jump to the ledge and use the health and magic chests if needed.
Enter the next room and crack open all containers for red orbs. Walk forward to trigger an encounter with the wraiths. These undead beasts burrow in the ground and attack from under your position. When you see a wraith burrow, press the block button to avoid the strike. Counter quickly with a combo or magical attack. Search the far right corner of this room for a breakable door. Bust it down and open the chest inside for a Gorgon Eye.
After killing the wraiths, ascend the wooden staircase (use the health chest near if needed). Kill the archers on the steps and break nearby containers for orbs. At the top of the stairs, battle more wraiths and Cyclops. Use the chest to replenish health. Walk to the far end of the roof and go right to find a couple secret chests. It's a red orb chest and a Phoenix Feather--which should raise your maximum magic bar.
Return downstairs and into the previous chamber. Go through the passage. Move toward the camera to find a chest full of red orbs. The other side contains a health chest. Walk to the end of the broken bridge. Perform a double jump move to reach the platform below then again to the pillar with the ivy. Rotate around the right side and avoid the archers' projectiles. Go down and back to the left. You will be close to a platform. Jump to it to find a red orb chest and a breakable door. Knock it down.
Defeat the wraiths in the hallway and crush the archers on the balcony. Walk to the left side of the balcony and use the R2 button to lower the wooden ramp. Return to the ivy-covered pillar. Rotate right and then jump to the next pillar and finally to the far ledge.
Open the chest of red orbs. Find a health or magic chest near the entrance. Turn left and leap over the broken bridge. Go left and spot a ballista. Continue into the next chamber and open all of the doors. Clean out any undead inside. Break all pots and containers nearby for red orbs.
Push the ballista into the room. Once in the room, push it onto the circle on the left side. The nearby switch (inside the alcove; you must open the door if you hadn't already) rotates the ballista. Use the lever once. Climb the ladder behind the lever and open the red orb chest at the top. Push the ballista off of the circle. Use the lever again. Return the ballista to the circle and use the lever a third time. The ballista should now be pointed toward the wooden door. Fire a projectile at the door.
Follow the hall into the room with the blue aura. Step into the aura and speak with Zeus and recover Zeus' Fury. Use the magic chest nearby if needed. Exit forward.
You'll start to cross the broken bridge. Use your new magic ability, Zeus' Fury, to kill the archers on top of the temple. This opens a passage to the right across the bridge. Proceed into this passage. Break all of the containers inside to recover red orbs. Smash through the breakable wall to the right to find a magic chest, a Phoenix Feather, and a Gorgon Eye.
Return across the bridge and go left. Break the statues and vases for red orbs. Save your game. Climb the ladder to the next rooftop. Defeat the minotaur and harpies. Go to the right side of this rooftop to find a ladder. Ascend the ladder to find a chest containing a Gorgon Eye and a health or magic chest. Return down the ladder.
Leap to the adjacent roof to the left. Go to the left side to find the ledge and rope. You can use Zeus' Fury to kill the archers in the distance. Swing across the ropes to find a set of chests, including red orbs, and a health or magic chest. Return across the ropes.
Leap onto the next rooftop and defeat the minotaur. Go to the upper left side of this rooftop. Stand about half a body length from the top edge then drop off the left side. You'll land on a small balcony that contains a Gorgon Eye chest. Return to the rooftop.
Break the barrier on the right side. Jump to the next rooftop. Use the chest if needed. Run up the ramp to the right and shoot the man at the lever across the path with Zeus' Fury. This opens a new passage and raises the bridge. Cross the bridge and break tons of pots and barrels for red orbs. Open the chests for a Phoenix Feather and Gorgon Eye.
Defeat the wraiths in the next hall. The room at the end contains some red orb chests and plenty of statues and containers to break open. Stand on the circular switch to lower on the lift. Follow the tunnel to the next bridge. Spot the oracle in trouble in the distance.
Athens Town Square (continued)
Carefully traverse the narrow beam that used to be part of the bridge. If you fall, there's a ladder on the right side. There's a challenging secret here. While on the narrow beam, jump to the right side where the bridge segment returns. If done correctly, Kratos will grab hold of the crumbling edge. Shimmy around to the right until you can't go any further. Jump backward to a small alcove with a red orb chest, a Gorgon Eye, and a Phoenix Feather. Return to the bridge using the ladder on the right.
Save your game in the light then proceed up the stairs. Defeat the undead troops. There's a breakable wall in the cliff; it's on the right side of the path. Find a red orb chest inside. Continue up the stairs toward the temple.
Temple of the Oracle
Use the magic and health chest if needed. Advance over the bridge and spot the oracle kidnapped by harpies. Force fields appear around the exits. You must defeat a small army of harpies as well as some gorgon. Block the harpies' bomb attack; press block when the fiery icon appears under Kratos.
Ascend the steps toward the temple entrance. Save your game in the light on the left. Go to the far left and spot a red orb chest on the ledge. Double jump to grab hold of the ledge then pull up to reach the chest. There's a second red orb chest on the far right side. Recover the Phoenix Feather and Gorgon Eye from the chests nearest the entrance then move inside.
In the top room, harpies are entering from the large holes in the walls. You can continue to combat the harpies but there's no end in sight. You must use something to block the large holes. Cross the room to the far back end. There are two large statues there. Pull and move the right statue and place it in front of the right hole (so the shield covers the hole) and pull and move the left statue and place it in front of the left hole.
There are a couple chests behind the statues and another on the left side of the room. These chests can replenish your health or magic. Also run toward the back side of the room near the entrance. You can't see them but there are two more chests on upper ledges. Leap to the ledges and find a Gorgon Eye and a red orb chest.

Open the gate on the left side using the R2 button. Climb the stairs. You're above the previous room and must cross the girders to reach the other side. Move slowly and wait for any girders around you to crumble to the ground so you know which way to move. Go along the far left edge and you can leap to a ledge just under a window. Break the window and find a Gorgon Eye inside. Reach the far side of the room and save your game.
Proceed through the long hallway and crush the undead troops inside. Exit outdoors and spot the oracle hanging precariously from a rope above the area.
There's no time limit to the first part of this challenge so don't feel pressured to rush…at least yet. From your start position, move to Kratos' left and pull out the large statue. Drag the statue to the lift just to the statue's right (it has the circular symbol on it). This lowers the lift. Jump back up to the upper platform.
Now drag the other statue and push it onto the lowered lift so it lands on the top of the other statue. Stand on the lift so it lowers then drag the double-decker statue into the lower courtyard. Search the courtyard for chests. You can break open a wall on the right side after you lower on the lift to find some red orbs and another to its left for a Gorgon Eye. Go to the back end of the area and leap to an upper ledge for more red orbs.
There are more red orbs chests to recover but it's very difficult to get them. You must drag the double-decker statue to the right of the structure at the back end of the area (near where the red orb chest was on the ledge). You can jump from the ledge to the top of the structure then to the top of the double-decker statue. From there you can see the alcove with the red orb chests on the right side. Jump into the alcove to recover them.
Your primary goal is to move the double-decker statue to the left side of the structure so you can use it to reach the ivy growing on the left wall of the area. Traverse the ivy to the left until a cut scene interrupts the action…this starts a timer and the pressure.
You have 67 seconds to reach the oracle before she falls, which leads to game over. Your first obstacle is to jump past the moving gears. Wait for the gear to stop then jump across to the next patch of ivy. When you reach the far side, don't just crawl along the ivy; use the jump button and press left to traverse the ivy faster.
Reach the ledge and next set of ivy. Jump up onto the ivy path and keep ascending. Use the jump button to climb instead of just crawling. At the top, spot the rope. Leap to the rope and hold circle to swing and immediately press X to jump to the far ledge. Turn left and spot the beams.
Carefully, but quickly, cross the narrow beams. Note that you can jump to save yourself some time. At the end, turn left to the rope and swing down to the statue and large dish. Turn left and run out to the oracle to save her.
After the oracle has been saved, you can return to the path which led to her swinging rope, if you wish, to obtain another feather. When you reach the curved wooden paths that you have to tiptoe along, you can turn right (facing the wall) and double-jump to reach another chest.
Exit through the open passage and descend the stairs. Save your game in the light. Ascend the long set of stairs on the left side of the area (near the save game point) to find a small temple. Go around to its far side and location a chest with a Phoenix Feather. Return to the save game point area.
Cross the long sword bridge. Descend the spiral staircase inside. At the bottom, find the chest under the stairs to recover a Phoenix Feather. Jump over the ledge and into the sewers.
The Sewers of Athens
There are two chests here if you need to replenish health or magic. Proceed down the tunnel. You'll encounter some undead troops with archers in the distance. Lure the troops away from their archer cover. After clearing out the ground troops, charge the archers. As you approach, jump onto their ledge on the left side (double jump to grab hold). Crush the archers on the ledge and open the chest on the left for red orbs. Continue into the sewers.
Battle the minotaur in the next tunnel. Use the chest on the right if needed. Round the corner and battle the archers. Drop off the next ledge and instead of going forward, turn around and walk under the ledge to find a secret red orb chest. Continue through the sewers and use the health or magic chests as needed. There are a couple red orb chests at the base of the next ledge. Open the chests then jump up to proceed through the sewer.
Face off against the Cyclops. The small obstruction in the middle of the tunnel provides a nice chokepoint. Utilize Medusa's Gaze to stone the Cyclops. As soon as one is stoned, attack with your Blades of Chaos to shatter the creature. Remember back as you battle more minotaur so you don't move into the range of the undead archers. If you need health or magic you can return to chests in the previous tunnel.
Climb the ladder and slaughter the archers on either side of the path. Open chests for red orbs, health, or magic. Continue to the back end of the sewers and climb the ladder to escape. Use the chest at the top of the ladder if needed. Ascend the spiral staircase and use the lever. Return to the bridge.
The Road to Athens, Part 2
Proceed forward up the stairs. Save your game in the light. Turn right and run along the mountain path. When you reach the ominous statues, find a red orb chest on the right side. Go through the open doorway into the next area.
Desert of Lost Souls
Move forward into the desert. To successfully traverse the desert, you must find the three sirens and kill each of them. This is the only way to unlock the next passage. The best way to find the sirens is by listening for their song. The louder you hear the song, the closer you are to the sirens.
The area isn't that large and basically resembles a rectangle. Each siren moves around in a small area of the desert. Look for a siren northeast (if north is away from the entrance), northwest, and far north from the entrance. The far north siren is close to the exit door. There are also red orb chests scattered through the desert.
Once you locate a siren, attack the creature quickly and aggressively. It will attempt to move away from you and use its longer ranged attack. Continue to strike with the Square button until you see the button prompt above the siren. Grab the siren to administer the finishing blow. Find and kill all three to open the exit. Expect to also face some minotaur in the desert.
With the exit passage open, proceed inside and save your game. Open the magic and health chests to replenish your supply. Proceed down the stairs and to the ledge above the conveyer system.
Drop onto the conveyer. It's possible to stop the conveyer by attacking the gear on the right side. It takes many hits; plus, touching the gear causes major injury. Strike twice from long range then jump back away from the gear to avoid being struck.
Underneath the ledge find the door. Lift it with the R2 button and pull the stone out. Defeat the undead that appear. Use the chest behind the stone if needed. Push the box to the left side, which will be more challenging if the conveyer remains intact. Leap on top of the stone and to the upper ledge. Break the containers for red orbs. Open the door and follow the hall toward the horn. You can look at the murals on either side of the room before approaching the horn.
Walk up to the horn and press the R2 button to blow the horn and create a path through the sand. Traverse the path and approach a second horn. This one disappears and three siren appear in its place. It's much tougher facing all three siren at once.
The three siren remain at a perimeter around you and pummel you with their projectile attack. Use your Blade of Chaos and combinations (Square, Square, Triangle). If the siren move close to each other, use Poseidon's Rage to inflict damage to all three. The siren can also survive several grabs; however, when the button prompt appears, grab the siren to inflict more damage and recover some health and magic from the orbs that appear. Unfortunately the siren reappear several times.
Once you've defeated the siren, blow the horn using the R2 button. When you regain control, save your game in the light. Start across the rope bridge.
Pandora's Temple
As you approach the steps, look on the left and right sides to find health and magic chests. Save the health for later because there's another soon. Find the path to the far left and follow it around to the right side. You'll reach a handle. Pull the handle to expose the large stone block. Leap up the blocks and speak with the man near the pyre. Use the health chest here if needed before dropping down and returning to the temple entrance.
Battle the Cyclops. The force field lowers upon defeating the beasts. Ascend the stairs. Open the chests at top for red orbs and a Phoenix Feather. Rotate the lever to open the door. Enter the temple. Fight the wraiths and archers inside. Use the chests to replenish health.
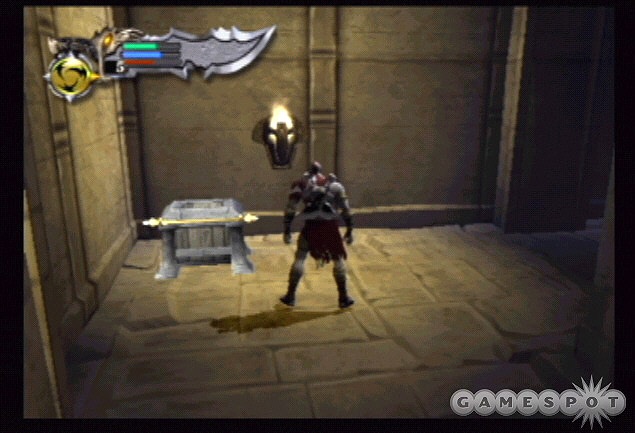
Approach the book on the pedestal and press R2 to read the text. There's an alcove on the right you can examine as well. Press R2 against the half-circle doorway ahead of you to open the passage.
The Rings of Pandora
Move forward and find the passage on the right side. The hall contains some spike traps. Navigate carefully past them then save your game inside the next chamber. Defeat the archers in the back corner and collect the orbs from the chest. Enter the alcove and pull the lever; this lowers another crank back in the previous hall.
Use the crank to rotate the rings and open up new passages in the previous hallway. Explore the first passage to find the door locked with muse keys (you'll find these later). Rotate the crank again to find another hallway. Follow the next hall and approach the aura to receive a new weapon, the Blade of Artemis. Walk through the opening into the next section.
The Challenge of Atlas
Save your game at the light. Enter the next chamber (the gate closes behind you) and battle the undead. Test out the new Blade of Artemis to make short work of these foes. A pack of gorgon also attacks you. When they're close together, use Poseidon's Rage to cancel their gaze and to inflict damage. Recover magic by killing a gorgon with a grab when prompted. Break all containers in the room for red orbs and find the health chest in the corner.
Jump to the broken staircase in the upper right corner of the room. There's a magic chest up here. Defeat the undead along the catwalk. When you spot the archers, switch to Zeus' Fury to eliminate them. Follow the catwalk to a narrow beam and cross it to the back ledge. Open the red orb chest on the right side and pull the lever on the left to lower the weight.
Leap to the rope and climb down. There's a second rope at the bottom. Jump and grab hold and traverse across. Undead troops attempt to impede your progress. Use quick attacks and grabs to pull them off the rope. Use the chests to regain full health and magic and continue right to the blue shield--the Shield of Hades.
As soon as you pick up the shield, a force field blocks the path. A spiked wall starts moving from the other direction. You must defeat an army of undead to deactivate the force field before the wall crushes you. Enable Poseidon's Rage when surrounded by undead. The best place is to stand close to the barrier and allow the undead to collect at that spot. Don't waste the magic unless you can strike many undead at once. Pummel them with your attacks and combos in between blasts of magic. Once out of magic and surrounded, retreat a bit then use the Square, Square, Triangle combo in the group's direction to launch a whole undead squad off their feet.
When the barrier falls, the wall retracts and you can return to the health and magic chest if you didn't use them previously. Continue through the downed barrier and find another health and magic chest. Jump to the far rope and return upward.
Exit into the tunnel on the right and battle the gorgon. Pull the cart from down the hall and send it down the hall on the left. Defeat any gorgon in your way. Once inside the room, eliminate the archers. Push the cart onto the floor switch and watch the doorway in the distance spin around. You must put the cart on the switch and get to the doorway before it spins.
Place the cart on the far side of the switch, so Kratos' back is to the spinning doorway. Instead of pushing the cart onto the switch, kick the cart onto the switch so you can activate the switch from long range. As soon as the cart is on the switch, roll backward to reach the doorway in time.
Challenge of Atlas (continued)
Battle the undead inside the next hall. Search the left side for breakable containers and a red orb chest. Replenish your health and magic if needed then find the ladder on the right side. Climb the ladder and exit onto the ledge overlooking the room.
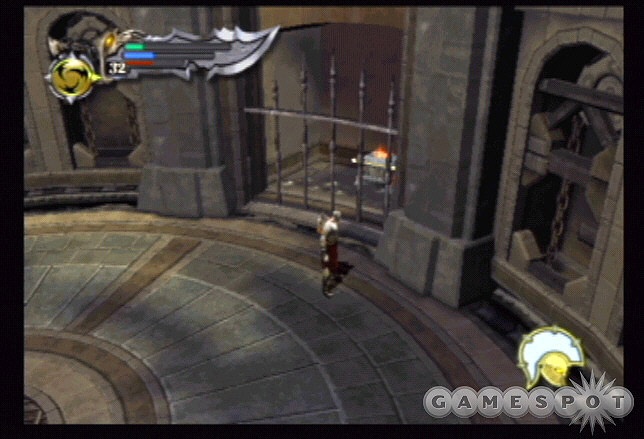
From the first ledge, jump to the left to find an alcove containing red orbs. Cross the girder to the yellow shield--the Shield of Zeus. Cross the girders to the far right side to find a red orb chest. Drop back down into the room with the cart. Find the door on the left side; the Shield of Hades and Shield of Zeus fit into the door. Use R2 to place the shields and open the door.
Descend the stairs on the right and reach the save point. Continue down the hall and locate the room with spinning blades. Cross the room and find the exit hall on the right side. Bust some pots for red orbs then go left to find a breakable wall. Defeat the undead foes inside the hallway.
Walk to another conveyer belt. You must traverse the conveyor belt while avoiding the spiked traps. Wait for the traps to pull away then roll or scamper through. Go left and up the steps to the bridge. Defeat the harpies. Part of the bridge railing is broken. Jump from there to the ledge in the distance. You'll find a red orb chest and a Phoenix Feather.
Cross the bridge and finish off any remaining harpies. Replenish your health or magic as needed. Find the climbable wall in the back left side. Ascend the wall and jump the gaps. Explore some of the ledges to find a couple red orb chests before ascending the cliff and proceeding to the far left side. Jump to the chain and go up to find more red orbs. Use the health and magic chests to replenish Kratos--there's a tough battle around the corner.
Go forward down the hall and you discover yourself trapped in the chamber with undead and sirens. Break the shields of the undead using the Square, Square, Triangle combo. This is a tough battle because there's also a time limit involved. The floor opens up beneath you after a short period of time; if you haven't defeated the minions inside the room, you plummet to your death. You must reach the blocked portion of the room before the floor opens.
Crushing the shields on the undead is your first priority. Once down, activate the Poseidon Rage when surrounded to big damage. Maintain an aggressive attack and use the Square, Square, Triangle move to disable enemies for further combinations and magic assaults. As soon as the barrier falls, leap to the area on the far side of the room to avoid any impending floor opening. Grab the Handle of Atlas from the pedestal.
Return outside and descend the chain to the bottom. Save your game in the light. Retrace your steps across the bridge and back to the conveyer belt. The spiked traps are still operational so time your advance over the belt while the spike traps are open. The patterns are different; the traps close quicker and more frequently. Roll through the opening to bypass the traps as fast as possible.
Follow the hall until you return to the room with the spinning blades. These move faster as well. Avoid the blades and reach the upper left corner of the room. Pull the lever to open the exit passage to the right. Enter and hop onto the ledge on the right side and traverse it to the far end. Open the door and defeat the archers to the left.
Use the crank handle to raise the large stone ball. Go behind the statue to find a chest containing the first Muse Key. Go to the right side of the room and find the staircase up. Defeat the undead and reach the upper ledges of the room. Search to Kratos' immediate left for a chest containing a Phoenix Feather. Cross the girder to find a red orb chest. There are two more red orb chests; just right from the entrance on both sides of the room to find them. You may want to wait until you pull the lever so they're easier to reach.
Stand on the middle of the upper girder and use the lever. The stone ball crashes down and breaks open the exit. Emerge outside and look left for some red orbs. Approach the coffin and pull it open. Hop onto the body inside and use the R2 button to pull off the Architect Son's Head. Descend the ladder and use the chest at the bottom.
Follow the long hallway past the corpses on the ground. Use another chest if needed then open the door. You return to a previously visited location just outside Pandora's rings.
The Rings of Pandora, Part 2
Save your game if desired then return through the hall to the rings. Defeat some undead along the way. When you reach the rings, the door closes behind you. Use the door with the skull on it in front of you to place the Architect Son's Head. Enter the inner ring.
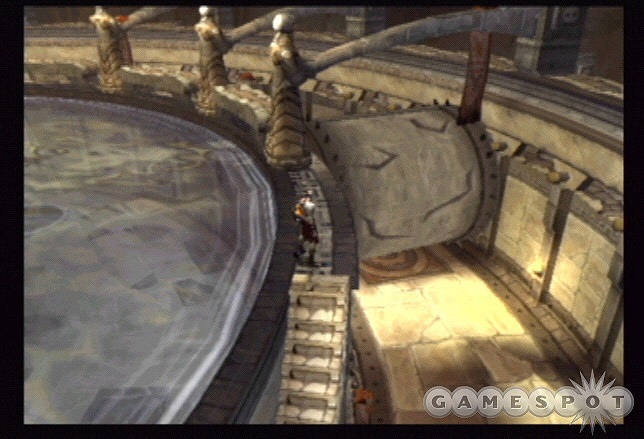
There's a huge steamroller behind you when you enter the inner ring. Run toward the camera until you reach the steps on the left. Your goal here is to jump on top of the steamroller and ride it until you're next to the ladder on the right. You need the height of the steamroller to reach the ladder. To ride the roller, just keep moving in the opposite direction of its roll. Adjust your pressure on the analog stick carefully so you don't move too fast or too slow. Reaching the ladder lowers it and also removes the steamroller.
Climb the ladder to the top to find an alcove with a health and magic chest and some red orbs. Save your game here as well. Follow the hall until you're back outdoors.
The Challenge of Poseidon
Cross the bridge and approach the circular area to face off against the Cerberus dogs. There's one full size Cerberus and several smaller dogs. If left alone, the smaller dogs eventually grow into their larger counterpart--this is not advisable. Ignore the full size Cerberus at the start and concentrate your battle on the smaller dogs to prevent them from growing. Use the Blade of Artemis to hack up the smaller dogs quicker.
It's also possible to use Medusa's Gaze to stone the large Cerberus dog as soon as the battle opens then shatter the stone with your weaponry. If you fail, though, making other attempts becomes a big risk with the smaller dogs having time to grown to full strength. With the large dog out of the way you can concentrate fully on the smaller variety. The small dogs keep respawning for awhile; just keep hacking away with the Blade of Artemis to complete the task. After the battle, use the chest to replenish health or magic.
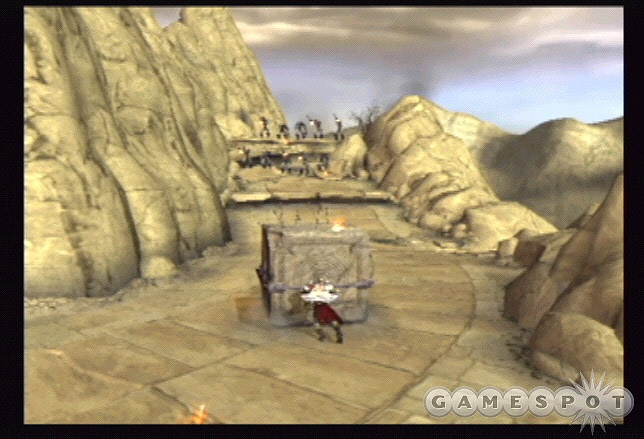
Exit along the new path. There's a second health or magic chest if needed. Before worrying about the stone block, defeat the Cyclops that arrive. Push the block to the corner. You need the block as cover against the gang of undead archers at the end of the path. Crush the archers when you get close. More small Cerberus dogs appear on the path ahead; switch to the Blade of Artemis and eliminate the pups.
There are more archers around the corner. Retreat and defeat the dogs away from the archers' line of fire. Clear out all creatures to lower the barrier. Enter the chamber.
The lever in the middle rotates the room. As it moves around, you can collect red orbs from the chests in the side rooms. However, you must work quickly. Enter, open the chest, and then roll back into the room. If you're too slow, the gate closes and spikes appear from the ground, which kill you instantly. Collect all of the red orb chests in a similar fashion before waiting for the exit.

Combat the undead outside. Jump up to grab hold of the upper ledges. At the top, go to the right to find a hidden chest. It's the second Muse Key. Go around to the left and battle the minotaur. Break the statues in the next hall for red orbs and continue toward the save game spot. Use the chests to replenish health or magic as needed.
Approach the large chandelier made of cages. Break the pots and statues in the area for red orbs. Proceed up the ramp to the small room at the far end. Break more containers for orbs. Read the note on the left side then grab the handle on the left. Return to the cages and spot the crank. Use the handle on the crank to lower the cage.
The object is to push the cage up the ramp and get it inside the small room at the end. The problem is since it's a ramp, if you let go of the cage it will slide back down to the front of the area. While that sounds like a simple task, you must also find undead creatures during the trip up the ramp. That's why the ramp has some elevated rocks. You can position the cage on the rock to prevent it from sliding down to the bottom.
The Challenge of Poseidon (continued)
Stick the cage on the rock and combat the undead then continue moving the cage up after the battle. There are health and magic chests at the top if you need them. Simply get the cage inside the room. Even if there are undead still alive, you don't need to worry about them once the cage is in the room.
Push the cage onto the floor switch beyond the lever. Use the lever. Return to the ramp and replenish health or magic if needed before continuing down the new tunnel.
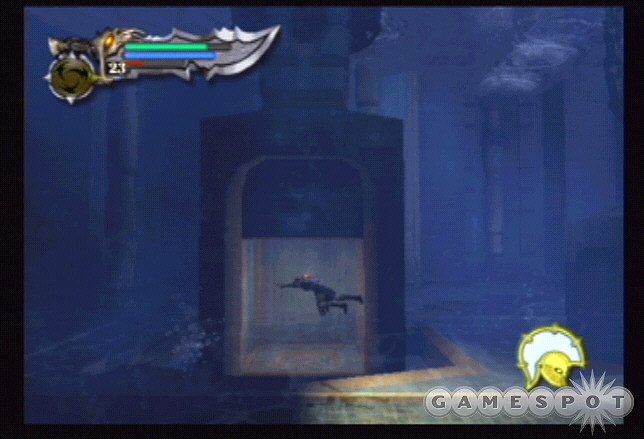
When you enter the next room, go left immediately and jump into the water. Climb the ladder to find a chest with a Phoenix Feather (the right side contains a health or magic chest). Cross the bridge and acquire Poseidon's Trident, which allows you to swim underwater indefinitely. Save your game in the back corner then jump into the water to the right side of the bridge.
Swim down and find the underwater tunnel. Use the R1 button to dash underwater and break the barriers. Swim up and out into the chamber filled with small Cerberus dogs. Hack them to pieces with the Blade of Artemis and use Poseidon's Rage to assist. Open the red orb chest on the left before opening the door. Use the lever inside to move stones in the previous chamber. Swim back and find a Cerberus and some harpies waiting to greet you.
Climb the recently-created stone steps to the upper tunnel. Follow the hall to another pool; stop and use the chest on the way if needed. Swim down and go forward. Swim toward the Nyad; after examining the Nyad, press the Circle button to embrace her.
Swim down. Go forward to examine the mural of Poseidon. Swim through the tunnel on the right. At the intersection, use the dash move to break through the mural ahead of you. Embrace the Nyad inside the alcove. You receive a Phoenix Feather. Return to the intersection and swim left. You emerge out of the water.
Defeat the undead and enter the circular chamber. Replenish your magic or health if necessary. Break the wall on the far side of the room. Crack apart all of the pots in the alcove for tons of red orbs. There's also a chest at the back end with even more. Swim back in the water and at the intersection go right.
When you read the passage with the large face-like entrance, use the dash move to swim quickly through the next tunnel to avoid being trapped inside. Swim until you emerge out of the water. Battle the undead and harpies to lower the barrier. There are a lot of enemies here; use the health and magic chests to replenish your supply during the fight. Lure enemies to one side of the area then roll to the chest so you provide some time for you to open the chest before the creatures can pursue and strike.
Once the barrier lowers, use the lever. It opens the Poseidon mural wall. Before leaving, jump onto the ledges on the opposite side of the water. The ledges are on the left and right side of the area. Break down the walls and find red orb chests in the alcoves.
Retrace your steps and swim through the open mural wall. Save your game in the light. Use the dash move to break the wall on the left side of the room. Embrace the Nyad inside the chamber. Swim up from the Nyad to find a room full of red orb chests. Return to the save game point.
Swim to the right side of the room toward the Poseidon statue. Swim down and spot the moving mechanism at the bottom. Wait for the mechanism to pass then swim down and to the left. Swim quickly and duck when you spot the space along the floor. The mechanism continues to pass through this hall. You must avoid it or you become crushed. Use the dash move to swim faster. Remain in the hole until the mechanism passes and start swimming again. Use the dash move to go quickly to the next hole in the floor. Duck down and wait for the mechanism to pass. Once it does, swim to the circular hole in the floor and swim down.
Swim forward and up into the next room. Emerge out to the left and save your game. Defeat the minotaur nearby. Use the chests to replenish health or magic. Use the lever on the middle of the platform. This raises a series of step-like platforms. It's timed so you must move quickly otherwise you must return to the lever and try again. Run and jump across the platforms to the statue. Read the book on the pedestal. Defeat some undead and open the chests.

Return to the lever and pull it again. Instead of leaping onto the platforms, jump into the left side of the water. Swim toward the back platform and find the secret alcove inside the pillar. Hide inside until the platform lowers. Swim through the passage and out of the water. You're back in a familiar room.
The Rings of Pandora, Part 3
Return through the spike trapped chamber (they aren't working) and defeat the undead inside. Return to the ring. Remember you picked up both Muse Keys now (if you followed this Walkthrough). Go to the right and follow the ring until you find the crank. Turn the crank until you reach the room with the Muse Lock. Use your keys to open the hidden chamber.
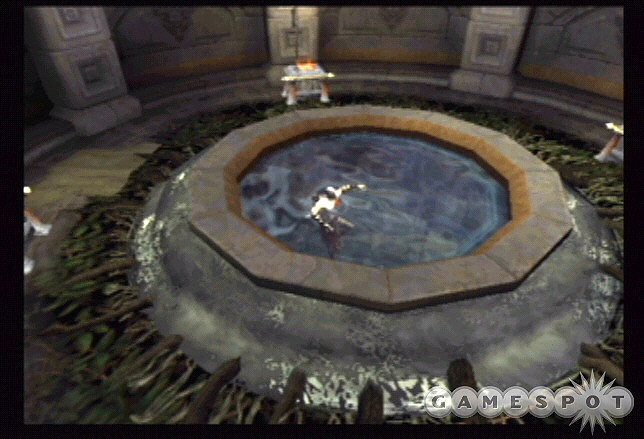
Inside you'll find a ton of red orbs and two fountains that raise your maximum health and life bar. If you followed this Walkthrough, you're now at the highest possible health; but your maximum magic requires one more feather. Use the center fountain for tons of red orb experience. Save your game then return to the ring. Use the crank and return the visible hall to the spiked traps.
Proceed to the inner ring and go left until you reach the stairs used earlier to avoid the steamroller. Ascend the stairs. Now you can jump and swim in the middle pool. Swim down and find the tunnel. Follow it to a new hallway. Ignore the door and lever in the room for now. Break the wall on the right side and continue through the tunnel. Save your game. Replenish health and magic at the chest then climb the ladder and enter the next chamber.
The Challenge of Hades
Break containers for red orbs. Search the left side for a ledge. You can jump to the higher ledge, break the wall, and find a chest inside. There are health chests on either side of the large staircase. Ascend the stairs and leap off the left side to grab hold of the lava bowl. Shimmy to the left and find a chest inside a narrow alcove. Do the same on the right side of the staircase to find chest with a Phoenix Feather (if you followed the Walkthrough, you're now at maximum) on the right side.
You can't move inside the path at the top of the stairs--it's too dark to see. Instead, go up the ledges on the left side and approach the door. Apparently Hades requires blood sacrifices before you can proceed. Accept the challenge.
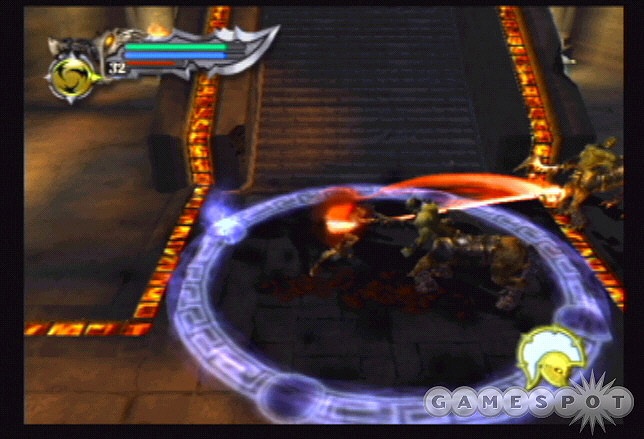
Centaur emerge from the darkness. You must kill the centaur on the glowing blue circles; there are two circles. One near the stairs and one near the chamber's entrance. Start with the circle close to the stairs. You know you have slaughtered enough centaur when the exit door opens slightly. The centaur must be defeated inside the circle. Scamper to the other circle and continue the attack after completing the first circle. If you need health, use the chests on either side of the stairs.
Enter the new hallway and replenish health and magic if needed. Break apart containers for orbs. Leap up to the platform along the back way to find a couple chests. Open the door on the far left.
The hall contains floor traps. Time your jump across the traps to avoid falling into the lava, which instantly kills you. Around the next corner, use the roll maneuver to bypass the arrow trap. Leave the health chest for later. Crush the gorgon around the corner.
You've entered a maze and you must defeat all creatures within. At the next intersection, go right and defeat the archers. Go left now. You reach another intersection. There are archers ahead and more beasts left. Defeat the centaur and gorgon to the left. Break apart all the pots for red orbs. Exit the chamber and open the chest. Go right and defeat some undead foes and finally some archers at a dead-end. You will eventually circle around into the same chamber. Exit and proceed toward the archers to the left.
At the archer intersection, go right to find some undead and gorgon in a dead-end. There's a health chest here if needed. Go left to the lift. Turn the crank to ascend.
Defeat the undead at the intersection. Before advancing further, push the block on the left wall. This opens a passage with some chests at the back end. At the intersection, follow the far right tunnel. Push the block until a new room opens. Eliminate the undead inside the room. Explore the left side to find some archers. Kill them with Zeus' Fury or just jump up to their ledge and hack away. Open the door on the left side to return to the intersection.
Proceed left and find some archers at the entrance to a tunnel. Kill the archers. The tunnel features a large crushing block. When the block moves to the far right, exit into the tunnel and leap onto the block. Kill the archers on top. Read the mural at the back end. After clearing the area, look on the right side of the tunnel while standing on the block. You can see another entrance. Wait until the block moves far enough back for you to drop into the new entrance. Kill the enemies here to lower the mural and the exit.
Stand on the floor switch to raise the center statue. Jump into the water below the statue. Swim down and use the lever to activate the light. Climb to the top of the statue and reach the upper level of the statue near the head. Turn the lever so the statue's head and light points toward the dark corridor you couldn't enter.
The Challenge of Hades (continued)
The new hallway contains huge, molten balls rolling toward you. Scamper to the left and right to narrowly avoid the balls and reach the very end of the tunnel. Enter the small room to find several chests, some undead enemies, and book that reveals that puzzle: you must find the appropriate exit in the tunnel and only one of the eight doors leads to the hall. Open the doors until you find the exit hallway. Wait until there's a large gap in balls before attempting to open the door.
Follow the hall into the chamber with two huge minotaur. There's a health chest on the left side if needed. Ascend the stairs on the right side of the chamber and defeat the undead archers at the top; this detour will help shortly. Open the chests here and return to the previous chamber. Take the left route now.
Reach the overhead rope. Traverse across and knock off the undead along the way. Combat the creatures on the circular platform. Use the magic chest in the right corner when needed.
Once the barrier lowers, climb the ladder. Jump onto the ledge and follow the hall. Check the alcoves on the right side for breakable containers and a chest. After the chest, reach the intersection and go right to the save point.
Proceed down the hall to the top of the challenge's primary room. There are narrow girders here as well as spinning blades. The trick is to traverse the girders while avoiding the blades. Look carefully at the girders and notice the markings; this reveals where the blade spins over.
Step onto the girder and instead of going left, jump to the platform to the right. You'll find a couple chests on along the right wall; the first is close to your current position and the other is farther to the left. When the blade moves toward your feet, perform a double jump just before you're hit. You'll remain in the same position, so you land on the girder, but avoid the blade.
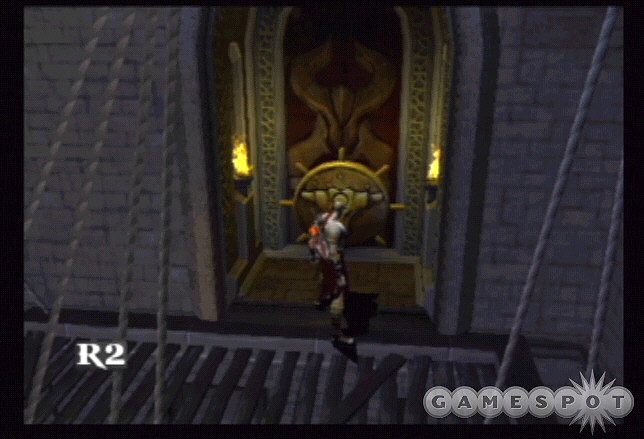
After the second chest, continue to the right all the way to the wider ledge for another chest. Return to the girder and walk onto the broken girder to Kratos' right. When the spinning girder ahead of you lines up in front, leap to it. Climb the ladders.
Cross another girder system--this time without spinning blades. Go around to the right to find a ledge with a chest. Return to the rope and use it to descend toward the new path. Follow the hall to the door with the minotaur logo. Use the wheel crank on the door. Descend the staircases. Use the health and magic chests here if available and needed. Climb the ladder and save your game. Return to the initial chamber with the large door and the lever. Time for battle!
This is a colossal fight. Approach the large door and the huge minotaur boss emerges. Retrace your steps to the upper platform in the back of the room. It's better to battle the minotaur from that position rather than down on the lower floor. Strike the minotaur with your Blades of Chaos combinations. When the minotaur raises a hand, roll in the opposite direction. If the minotaur raises both hands, roll backward. Strike the minotaur until it retreats. Repeat the process over and over again until the button prompt appears over its head.
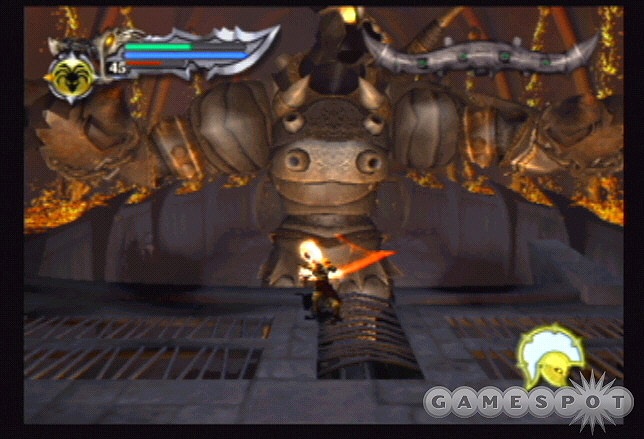
Drop down and quickly run to the minotaur and grab it. Follow the onscreen analog rotations. Complete the sequence to daze the minotaur. Run back to the upper platform and use the lever to launch an explosive projectile at the minotaur.
It shakes off the blow and charges the platform again. Repeat the process from the start. If you choose to use Rage of the Gods, use it early in the fight; that way it will have likely recharged near the end of the fight where you can use it again. This is a very long battle; the minotaur survives several projectile blasts. You're close to victory when the minotaur is down to its skin. You will have cracked off all of its armor and exposed its hide. Daze it a last time then fire the projectile to complete the battle.
Walk through the opening in the door and ascend the staircase to the left. Cross over the chain and to the save game point. Open the chests at the top of the stairs. Read the book at the pedestal. Open the casket then remove the Architect Son's Head. Return down the steps and proceed back into the minotaur room. Spot the red aura. Walk into it to receive the Army of Hades power.
You get a chance to use the power quickly--undead flood the room. Activate the power as you batter and bruise the undead foes. Proceed through the open passage. Stop and use the health chest if needed. Swim through the tunnels to return to the rings.
The Rings of Pandora, Part 4
You emerge in the middle pool. Locate the door with the skull and use it to place the Architect Son's Head inside. Enter the room with the crystal and the crank. Your goal is to rotate the rings of Pandora so there's a straight shot from this room through the rings, through the hall with the spiked trap, and into the room with the crystal eye. A beam of light will run from the crystal eye into the new room. If anything blocks the beam, you must rotate the rings again to create a clear shot.

Enter each area of the rings to find the crank and adjust the hall so there's a clear shot. Don't forget you'll need to adjust the room just opened (via the skull lock). It begins unaligned. Rotate that room and get a clear shot down the hall then go to the crystal eye (through the spike trap room, again with some undead) and pull the handle to close the eye and create the light beam.
Return to the inner room and use the lever to ride the lift. Exit onto the statue's hands then into the circular arena to battle the satyr. Replenish health and magic upon leaving.
Cross the bridge. Read the book on the pedestal. Break a wall on the right side to find a couple chests inside. Save your game. Continue forward into the next area.
The Cliffs of Madness
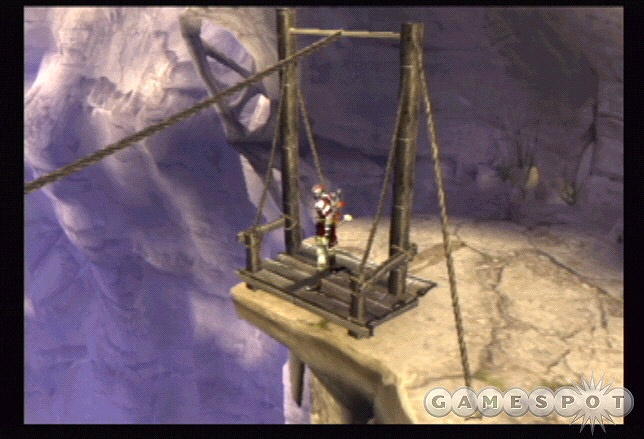
Walk forward and crush the undead. Check the left side for breakable containers and a magic chest. Use Zeus' Fury to eliminate the archers on the right side. Leap over the gaps and face more archers. Defeat them with your weapons or with Zeus' Fury from longer range. Defeat the harpies and archers near the rope. Traverse the rope to the far ledge.
Go around to the left side and crush additional undead troops. Use the crank to raise the lift. Use the save game point. Instead of using the ladder, go right and leap onto the new path. Defeat the archers in the way. Use the health chest here if you need any; there's a tough battle ahead. Enter the cavern. A barrier erects at the entrance. Defeat the satyr and undead inside the cavern. There's a health chest on the top catwalk but more undead guard it.
Proceed through the cave exit and find another lift. Turn the crank to ascend. Save your game. Enter the next cavern. The holes in the floor are actually spikes. This room is trapped. You need to pull the lever to raise the nearby gate. With the gate raised you can pull out the stone block. You must move the stone block from this cave to an adjacent cave on the upper portion of the screen (the path is back and to the left of Kratos' current position).

You must work quickly because the floor spikes eventually reappear. The best way to complete the task is to pull out the stone far enough so you can jump behind it. Charge a kick and kick it toward the other cave entrance. Charge completely and the block should line up almost perfectly with the next cave entrance. If not push it slightly into place before getting behind the block again. Charge a full kick again and kick it into the next cave.
Approach the block and push it slightly into place so you can kick it to the left. Get behind it and kick it left toward the ledge. Jump onto the block and finally onto the ledge before the spikes rise.
Open the red orb chest on the ledge then continue up the ivy to retrieve the Necklace of Aphrodite. Exit the cavern and stand on the stone block to the right to lower. Open the chest and defeat the archers that appear. Proceed around to the right side to the next entrance. Go down the first ladder to find a health chest.
Enter the cavern and battle a satyr, a minotaur, and finally undead archers (use Zeus' Fury). Stand on the unconnected bridge so the segment moves beyond the other segment. When you let go of the crank, the bridge rotates in the opposite direction. Your goal is to jump to the other side while it rotates. You want to rotate it a bit farther so you have time to make the jump.
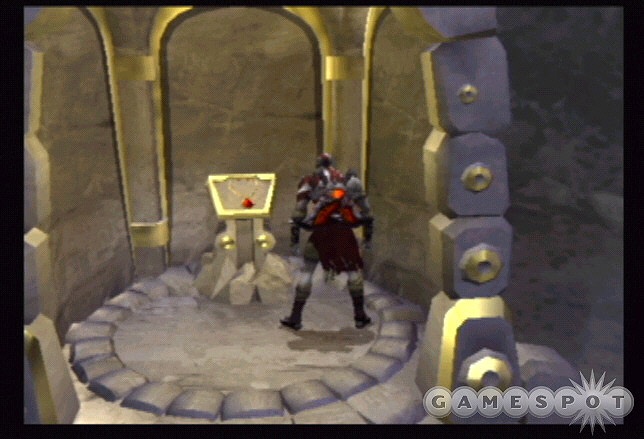
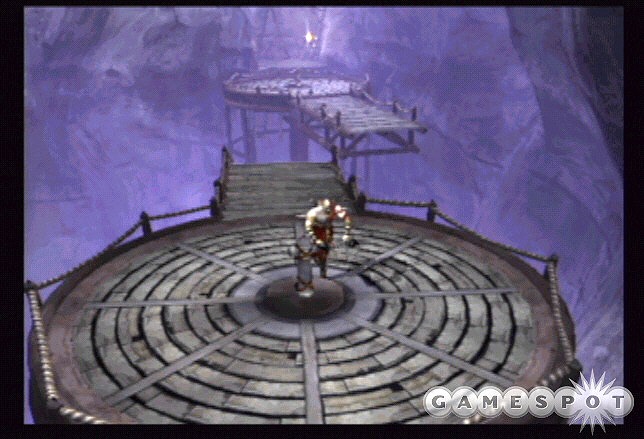
Defeat the creatures inside the tunnel and exit. Find the health or magic chest to the left. Proceed right and combat the minotaur. Descend the ladder to the ledge below. Defeat the undead and approach the rope (opening the nearby chest in the process). Traverse the rope to a new cave.
Battle the undead and minotaur inside the cavern. Use the health or magic chest when needed. Approach the next necklace. As you approach the necklace, a gate rises that blocks the prize. To solve the puzzle, you must move the Tetris-like puzzle pieces against the gate so you complete the wall. You must use the crank to rotate the pieces so they'll fit in properly. Read the book on the left side of the cave if you wish.
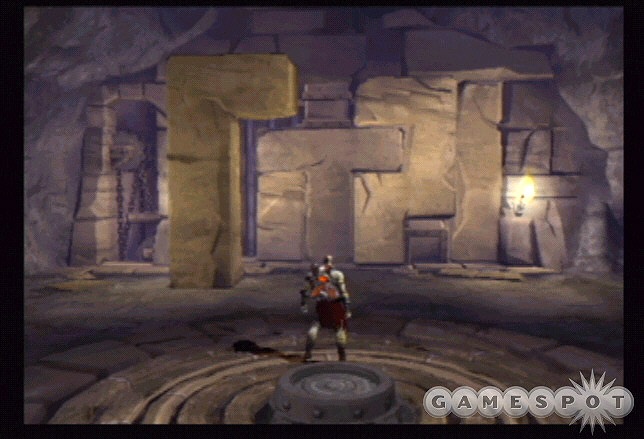
First, move away the small block from the gate area. You don't need the small block. Instead, position it on the left side of the cave and use it as a stepping stone to reach the upper ledge with several chests.
Next, place the upside-down "L" shaped piece onto the circular platform and use the crank to rotate it 180 degrees and place it on the far left side of the gate.
Next, move the long, straight block on the left side of the cave to the far right part of the gate.
Next, move the double block on the right side of the cave next to the "L" shaped piece.
Next, move the question mark piece onto the circular platform and use the crank to rotate it so it looks like a standard question mark. Position it on the far right side of the gate next to the straight piece.
Next, move the piece shaped like a "T" to the platform and use the crank to rotate it so it looks like a "T" and move it next to the question mark and in the puzzle's center.
Make sure all pieces are firmly against the gate to complete the puzzle. Pick up the Necklace of Hera.
Exit the cavern and use the ladder on the left. Climb onto the wall and use grabs to pull off the undead foes. Search everywhere you can climb. Find a couple crates near the top as well as the upper right side of the climbable wall. There are several ledges that include chests. Traverse down the wall and return to a previously visited area.
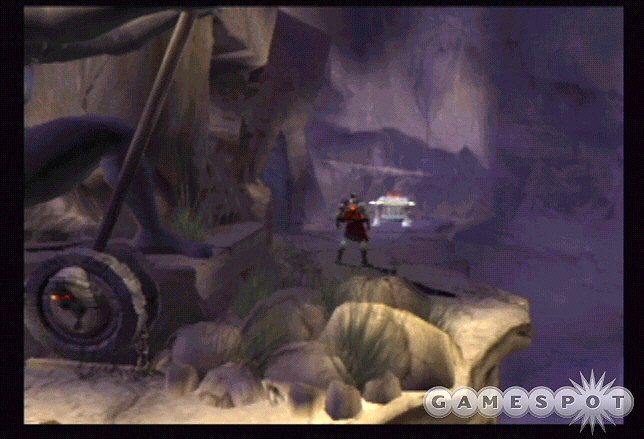
Follow the path left to the ladder. Climb and start to explore to the right side. Go all the way around to the right to find a chest. There's another tunnel to the chest's left. Follow it underwater to a secret area with a bunch of orbs. Break the walls in the area to find the chests.
Approach the large gate and notice the two holes--one for each necklace. Place the necklaces. This causes the bridge-like platforms to move. You must jump across each moving platform and reach the upper right side. Search the upper left for chests.
At the top, proceed to the right and battle the undead and minotaur after the cut scene. Follow the path to the rope. Swing from the first rope to the second. Make sure you are swinging strong and don't jump until you reach the apex. Climb the wall on the other side. Use the lever to activate the lift. Enter the passage and bust apart all of the containers for red orbs.
The Architect's Tomb
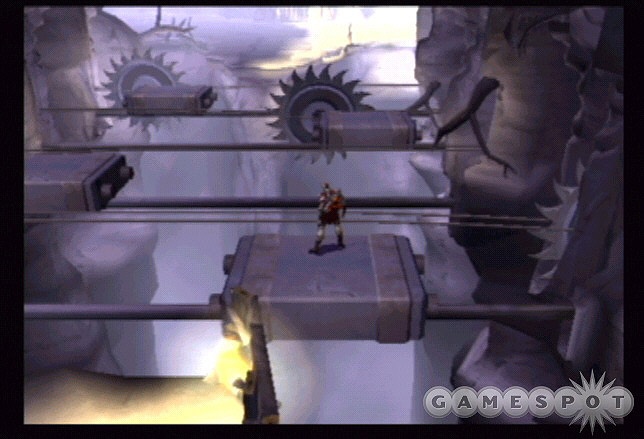
Save your game in the light on the left. There's a floor switch that opens part of a gate in the distance. You can't do anything with it yet. Instead, traverse the moving platforms while avoiding the spinning blades.
Break all of the containers in the area for red orbs. Open the gate on the right side and clear out the hall of enemies. Approach the upper arena and battle the Cyclops and small Cerberus dogs. Although you could stone the Cyclops with Medusa's Gaze to get it out of the way, another Cyclops appears right after. Instead, lure the small dogs into the hallway. More appear and should follow you to the hallway. Defeat them with the Blade of Artemis. You must work quickly to avoid their larger counterparts. If you're low on health, return down the hall to open a replenishing chest.
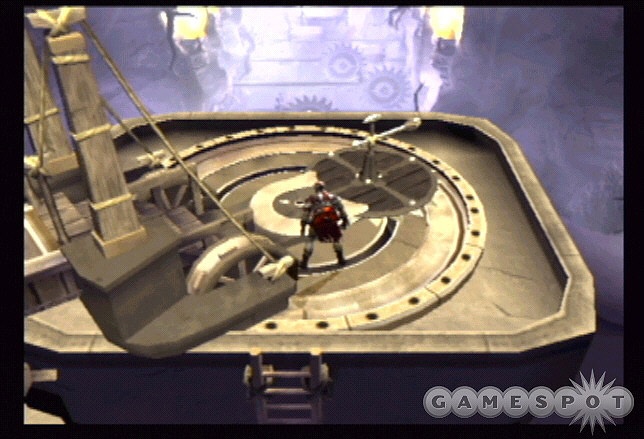
There's also a ladder on the upper side of the area. Climb it and break the wall at the top to find a room with chests, including a health or magic chest.
Climb the ladder on the far left side to reach the crane mechanism. Before rotating the crane, walk out to its end and jump to the ledge. Break the wall to reveal a couple chests. Return to the crank.
Rotate the crane so the stone block is over the breakable flooring below your position. Release the crane using the lever at its far end. This breaks the flooring. Rotate the crane again so the stone block is over the switch on the far right side of the area below. Release the block so it lands on the switch.

Drop down to the area where the floor switch is and defeat the Cyclops. Pull the statue in the back corner to the open floor on the far right side. Drop the statue inside then go down so you can pull it onto another switch.
There's one more switch to press: that switch at the beginning of the area. Return over the moving platforms and step on the switch. Now you must traverse the platforms quickly to reach the gate before it closes.
Roll into the room to avoid the closing gate. Read the note on the table and use R2 to examine all of the blueprints around the room's edges. Stand behind the corpse sitting at the table and use the R2 button to pull off the Architect's Head. Place it in the lock behind you.
Exit toward the bridge. Break anything you find for red orbs. Search the right side for a couple chests. Save your game then enter the structure ahead.
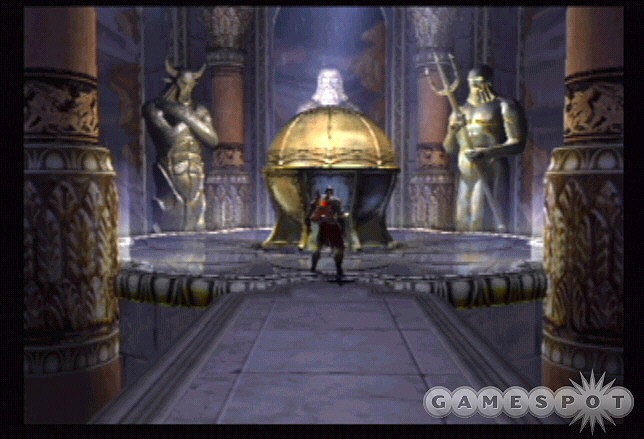
Descend the spiral staircase into the room with the conveyer flooring. Tons of harpies and archers protect the room. Use the Army of Hades (hopefully upgraded) to assist in the battle. Clear out the archers quickly then concentrate on the harpies. Avoid standing too close to the room's edge so you don't suffer damage near the gears.
When the barrier lowers, enter the next room. Examine the mural on the floor. Enter the next room and pull the lever to reveal Pandora's Box. Examine it. When you regain control, pull the box out of the temple's entrance. Unfortunately, Ares has other plans.
The Path of Hades
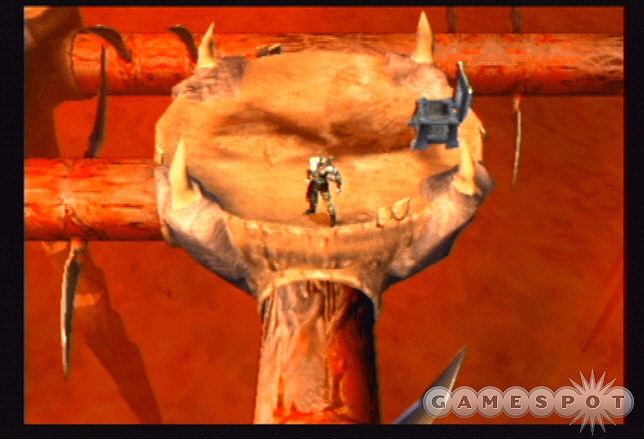
Walk up the spine flooring and use the health chest on the right. Save your game. Leap across the platforms. Go forward to find a red orb chest. Follow the platforms right to find another. Proceed left from the second chest to find the next ledge.
Combat the Hades undead troops. Advance up to the next ledge and defeat more of the Hades undead. Approach the spinning pole with the blades. The goal is to traverse the spinning pole while avoiding the blades. If you just nick a blade, you plummet to your death. The poles adjust speed and even change direction.
Start across the pole and search a ledge on the right for a chest. Return onto the pole and go forward to a second chest and a Hades archer. If you want another chest, proceed along the pole to the right. Stop on the ledge to defeat an archer then continue along the next pole to reach a chest at the end.
Return to the previous chest and jump to the pole to its left. Before reaching the end, leap to a ledge on the right for another chest and an archer. If you want another chest, you can continue onto the pole connected to this ledge and follow another pole to the left to find a chest at the end.
Return to the main pole and reach the next ledge. Defeat the archer. Proceed onto the pole to the left. Go to its end, jump to the pole on the right, and go to the end of that pole to find two chests. Defeat the harpies that attack. Return to the pole and jump to the ledge on the right. Continue across the next pole.
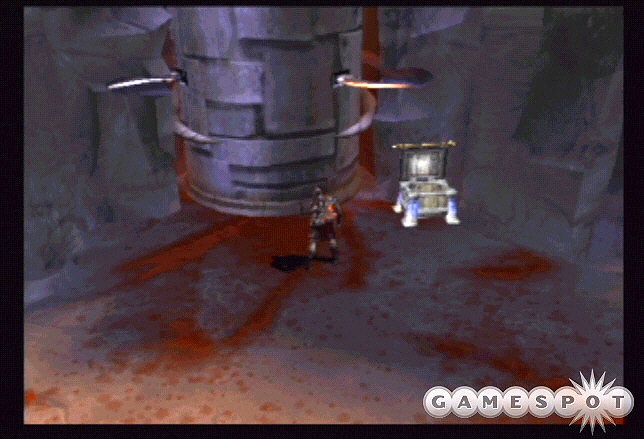
Follow this pole to its end. Battle the harpies on the ledge before advancing to the next area. Use the chest on the right side and the save game point on the left.
Next you must jump across the moving platforms while avoiding the archer fire at the far end. Use Zeus' Fury for assistance or just try and avoid the projectiles until you can get close enough to the archers to attack. Defeat the remaining archers and Hades minotaur on the ledges. Clear out all of the enemy presence on these ledges as you continue to ascend. A barrier blocks a spiked pole. You must defeat all enemies before the barrier falls.
Traversing the vertical spiked pole is extremely challenging--which is a nice way of saying it's extremely frustrating. If one of the blades simply touches Kratos, you fall down to the very bottom. It might not sound that bad but get nicked near the top and you must start over completely.
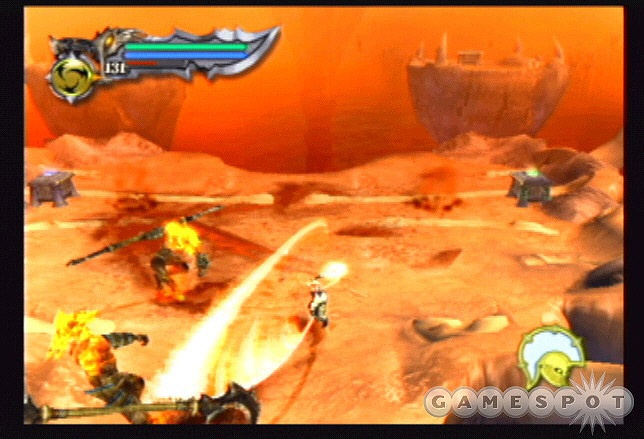
The key is patience. Don't try to go too quickly. If you're patient, you'll notice larger gaps in the spikes that you can work your way through. Since the pole is rotating, you'll be shoved against one side unless you work against the rotation. Keep this in mind if you're trying to climb diagonally between a couple spikes. When you near the top and the area is clear, press the jump button to ascend quickly. You can use the jump button at any time to try and bypass a segment quickly but it's much more dangerous because you could accidentally nudge a spike and go crashing down. There are two poles to traverse. Defeat the enemies between the first and second pole.
Save your game at the top and use the health and magic chests. Cross the platforms. Stick to the right to find a chest. The next ledge contains Hades satyr. You must defeat enough satyr to create the next platform walkway. There are a couple chests to replenish your health and magic as needed. As you cross the platforms, leap to the left and right to find chests. Leap across the final set of platforms to reach the rope. Climb the rope out of Hades.
Temple of the Oracle, Part 2
Save your game in this familiar location. Use chest as needed to replenish health and magic. The temple has seen better days. Ascend the staircase into the ruins. In the top courtyard, defeat the Cyclops and minotaur to lower the barrier. Exit to the left side.
Eliminate the gorgon and archers on the way up the staircase. At the large chamber, use Zeus' Fury against the archers. Cross the debris bridge to the chest on the other side. Go left and up more stairs. Combat the minotaur and archers in the hallway.
Reach the area where you saved the oracle--it's now in ruins. Drop down to the area below. Save your game. Go through the far passage and find the oracle on the ground. Speak with her. Open all of the chests on your way down the staircase.
Boss: Ares
You possess all of your weapons and current magic powers in this first battle against Ares. Use that to your advantage. You won't have magic powers during the game's final battle so use them to their maximum potential in this fight. Use Rage of the Gods early and launch Army of Hades (hopefully upgraded) to start damaging Ares as soon as the battle begins. Get close and, if you have Athena's Blessing, use Poseidon's Rage to inflict further damage against Ares.
A combination of the moves above should take a hefty chunk out of the God of War. You can block nearly every one of Ares maneuvers. Also, use the right-analog stick to roll out of the way to dodge Ares strikes and attacks. Ares will launch in the air and hurl flaming rocks at your position. Use the right-analog stick to evade the attack. Continue to evade until the bombardment stops. Ares will use his hammer like a flamethrower. Roll as far away as possible to avoid. Use the block button to resist other attacks, such as his overhead hammer blast and various strikes.
With Athena's Blessing, you should still have maximum magic after the Rage of the Gods move so continue to use Army of Hades to keep Ares occupied while you attack with various combinations (Square, Square, Triangle or use Blade of Artemis and its L1 + button combos). After inflicting chunks of damage on Ares, orbs of health and magic emerge from his body. The orbs should keep you relatively healthy and boost your magic so you can cast another Army of Hades or, if Ares' life bar is nearly drained, Poseidon's Rage when you're close enough.
As Ares nears death, the Circle icon appears above his head. Get close and use the Circle button to grab Ares. Once Kratos' has Ares grabbed, mash the Circle button repeatedly. Be careful, however, as soon as you complete the sequence another button icon appears. If you're mashing Circle without paying attention to the screen, you'll have to complete the entire sequence again. Complete the onscreen button sequences to finish off Ares.
Boss: Kratos' Family Sequence
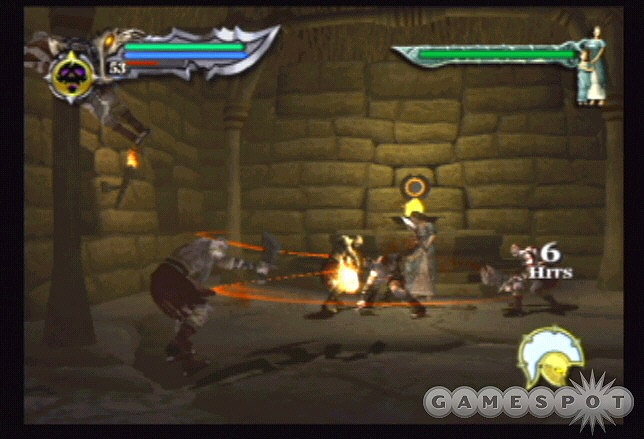
In the second battle sequence, Kratos must protect his wife and child…from himself. Dozens and dozens of Kratos clones emerge and attack. You still possess your weapons and magic attacks. If you used Rage of the Gods in the first battle, you may have to wait for it to regenerate. If you used it early enough, it might be ready. Rage of the Gods combined with Athena's Blessing can inflict a lot of pain on the Kratos clones. During Rage of the Gods, Athena's Blessing bestows infinite magic, which means you can cast Army of the Gods and repeated blasts of Poseidon's Rage against a packed group of clones for big damage and combos.
The most important aspect of the battle to keep in mind is that you can transfer Kratos' health to his family. Approach Kratos' family and press the Circle button to embrace them. During the embrace, Kratos' health decreases and Kratos' family's health increases. Monitor the family's health carefully and use the embrace when needed.
The structure begins to crumble around you. Watch your step carefully during the battle. It's possible to fall out of the structure, thus ending the battle rather anti-climatically. Remain close to Kratos' family so you can engage any clone attacking your loved ones. If you exhaust magic, use the Square, Square, Triangle combo and other attacks to bounce the clones away from your family.
Boss: Ares, Part 2
You must fight the God of War one final time to complete the game. This time you have been stripped of your weapons and magic. Instead, you possess a gigantic sword (the one used as a bridge earlier in the game). It's called the Blade of the Gods. You have a few new moves at your disposal: Zeus' Gift (hold L1 + X), Poseidon's Gift (hold L1 + Square), Athena's Gift (hold L1 + Triangle), and Hades' Gift (hold L1 + Circle).
This battle is different than your prior fights. One of the most important elements in the fight is momentum. The more damage you inflict against Ares, the higher your health bar rises. The more damage Ares inflicts on you, the higher Ares' health bar rises. The battle could end quickly in victory, in defeat, or could go on for several minutes as Kratos and Ares wage war back and forth.
Keep your finger ready on the L1 button, which serves as both the block button and your means of attack with the Blade of the Gods. If you spot Ares disappearing into the ground, roll away. When you spot the four spires appear from the ground, roll away to avoid being crushed. Block Ares attacks and counter quickly with the Blade of the Gods combinations.
After completing a combo Ares, a mini-game starts. Press the Circle button very rapidly to win the face-off. These are extremely vital to a successful victory against Ares. You'll inflict some big damage against him by completing the mini-game (which means your health bar rises as well). Exhaust Ares' health to defeat the God of War and complete the game.
You receive Athena's Blades (replacement for the Blades of Chaos) for defeating the God of War. Use the R2 button on the left side to spot the bloodied sword. Enter the circular portal.
Mount Olympus
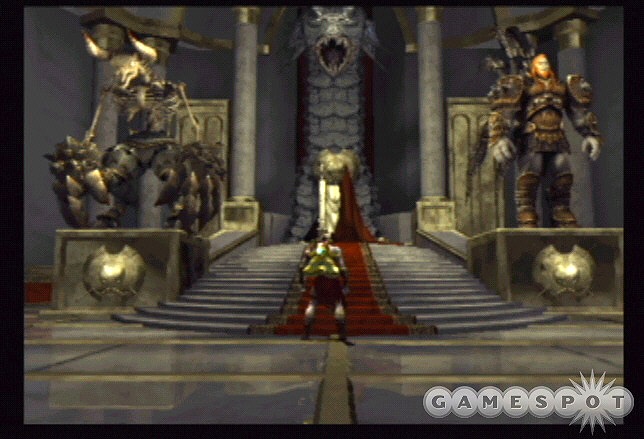
Ascend the staircase into the structure. Examine the statues of the minotaur and of Ares. You can unlock a secret (one of the Secret Messages in the treasures section) by destroying both statues. Each statue requires a bunch of hits. Just use your Athena's Blades or the Blade of Artemis to damage the statue. Jump and pummel the statue's midsection. Maintain the onslaught until each statue crumbles to receive the message. See the "Treasures" section of this game guide for more details.
Approach and sit on the throne to conquer God of War.
Treasures
This section reveals some of God of War's hidden treasures. You'll find instructions on finding the two Muse Keys during the game and where to use them to receive your reward. Plus, there are Kratos' new costumes and those mysterious secret messages.
The Muse Keys
Although it's not involved with any of the unlockable treasures, the two Muse Keys found in the game offer the opportunity to locate a valuable reward during the game. There are just two Muse Keys and they're used to unlock a door found within the Rings of Pandora.
The first Muse Key is located behind the statue of Atlas. During the Challenge of Atlas level, you'll discover a giant statue of Atlas. Use the nearby crank handle to raise the large stone ball over Atlas' head. Walk behind the statue to find a chest containing the first Muse Key.
The second Muse Key is near the beginning of the Challenge of Poseidon level. When Kratos traverses the exterior of Pandora's Temple and must shimmy along a narrow ledge, go to the right side to find an alcove with a hidden chest. The chest contains the second Muse Key.
After completing the Challenge of Poseidon, return both Muse Keys to the Rings of Pandora. Use the outer ring crank to rotate the ring until you can explore the hall that contains the locked muse door. Use both Muse Keys to open the door; this reveals a secret treasure room. Inside you'll find upgrades to your maximum health and magic as well as a ton of red experience orbs.
Costumes
Complete the ten Challenge of the Gods rooms to unlock alternate costumes for Kratos. The costumes aren't just a fashion statement. Each outfit offers a slightly different gameplay experience…or even a drastically different gameplay experience in regards to the cow costume!
Select a new game at the main menu. After choosing the difficulty level, you have the option to switch costumes. Note that you can't use the costumes on "God" difficulty.
Chef of War
The bloodied Chef of War's preferred skill is magic. The Chef of War costume replenishes more magic per magic orb.
Bubbles
Bubbles, the swimmer's costume, prefers the skill of health. Bubbles recovers additional health per health orb.
Tycoonius
Kratos dresses like a Wall Street mogul in the Tycoonius costume. His preferred skill is experience, which means he receives more experience per red orb absorbed.
Dairy Bastard
Kratos' most ridiculous costume is the new cow attire, complete with udder. It's the Dairy Bastard! The preferred skill is listed as magic, and for good reason, because the Dairy Bastard possesses an infinite magic bar! See how high you can raise the combo meter during Poseidon's Rage!
Ares Armor
Wear the God of War's outfit with the Ares Armor costume.
Secret Messages
There are two items in the God of War treasures labeled "secret messages". Unlock secret message #1 by completing the game on the "God" difficulty level. After completing the game, the message appears on screen. It's a phone number: 1-800-613-8840.
Call the number and Kratos' congratulates you for completing the God difficulty mode and offers you a "private" tour of one of Mount Olympus' darker corners.
Secret message #2 can be unlocked on any difficulty level but it must happen during the game. After defeating Ares for the second time, Kratos can go to Mount Olympus. There are two statues inside: one of the minotaur and another of Ares. Break apart both statues! Both statues are quite durable. It may seem like you're hitting those statues for an eternity but they will eventually break! A scrambled message appears on screen. It turns out it's also a phone number: 1-888-447-5594.
Call the number in secret message #2 to hear a congratulatory message from Kratos and David Jaffe, God of War's lead designer. They seem quite impressed that you discovered the hidden Easter egg…but aren't as impressed if you discovered the Easter egg from this game guide.
God of War II: Tips
O, Mashing?
There are numerous times in the game where you’re going to have to mash away (tap rapidly) on the O button. A simple example of this is when you open a large door; you have to press O fairly quickly to simulate Kratos flexing his muscles and lifting the door.
Well, O-mashing can be complicated if you actually use your thumb to do it; it’s difficult to move the thumb up and down rapidly enough to complete some of the more strenuous mashing challenges. So, if you’re having a hard time with any of the O-mashing sequences, it usually helps to remove your thumb from the button and use your index finger instead. The movement required to move the index finger up and down is much smaller than it is for the thumb, so doing this can help you get more button presses in more quickly.
Also note that for actions that require you to grab something with the R1 button, then mash O (like the aforementioned doors), you can usually let go of the R1 button after you’ve grabbed your target and solely concentrate on tapping O.
Button Selection Minigames
There are plenty (plenty!) of button-pressing minigames in God of War II. You know what we’re talking about - those minigames where you have to hit a certain face button after it pops up on the screen. If you hit the button correctly, you’ll move on to the next part of the animation; if you miss, you’ll usually wind up having to start the whole thing over, if not take a lot of damage from the opponent that you’re dealing with.
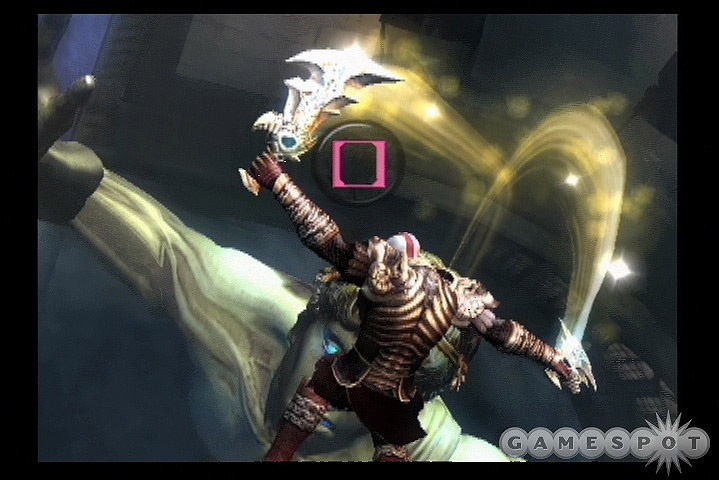
If you’re not good at these minigames, then you’re going to have a hell of a time getting through God of War II. One thing we found that helped us during the more difficult minigames was to plant our thumb in the small flat area in the middle of the buttons in between individual button presses, so that it’s actually touching the controller instead of floating over the buttons. There can be a tendency to attempt to cut down on the time it takes to hit the next button by letting your finger hover over one, generally the one you guess will come up next. If you plant the thumb in the center of the buttons, though, you’ll be close enough to reach all of the buttons when the prompt comes up, and you’ll also hopefully avoid hitting the wrong button by accident. Your mileage may vary, but this technique helped us a fair amount, especially late in the game.
Evasive Maneuvers
Reprinted from Doug Radcliffe’s guide to God of War:
"You could rather easily argue that Kratos' roll maneuver is as important as any of his combo attacks. When an enemy is about to attack or if you're suddenly surrounded by foes, just flip the right-analog stick in a direction to roll and evade the enemy's attack.
Although it'll be primarily used to evade attack, it's important to use the roll to put some distance between you and any enemies nearby. The advantage of Kratos' Blade of Chaos is its long-range usefulness. As you near closer range, roll away using the right-analog stick and restart your combination attacks. If you're close, an enemy can strike and interrupt combo strings. A solid pattern would be to perform a combo that knocks down enemies, perform a multi-hit strike to damage the prone foe, and then roll away and repeat the sequence."
Abuse Your Throws
One of the best ways to increase your survivability in God of War is to attempt to use your throw mechanics as often as possible. Pressing O while near an enemy will cause you to grab them and perform a variety of throw effects on them, depending on the next button you press. The square button will typically throw them around bodily, while pressing O again will start mauling them at close range, and so on. (Note that a good number of enemies, especially later in the game, can't be thrown until you deal a certain amount of damage to them.)
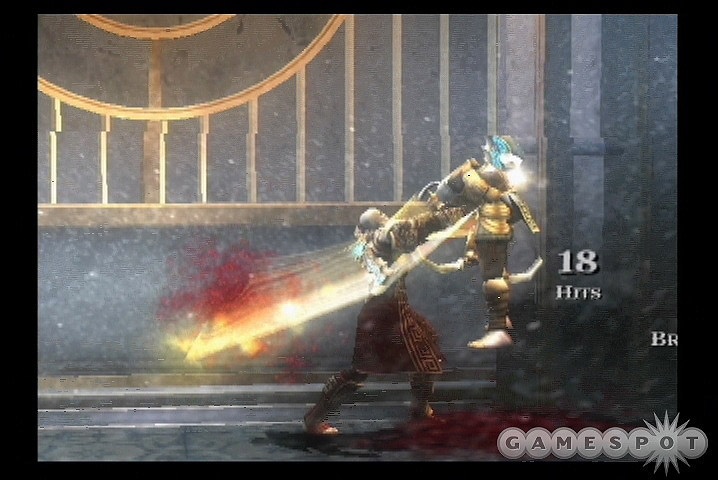
This is important for one major reason: while you're throwing or grappling an opponent, you can't be hit by weapons or enemy attacks. (This is true of most throws, but throws that require you to button-mash the O button to grab hold of your foe, like summoners and some demonoids, will still be interruptable by damage.) In large groups of foes, you can often concentrate on throwing a single small opponent around until he dies, then repeat the process on the next small enemy until everyone's dead. This works especially well when large, unthrowable enemies, like cyclopes, are surrounded by low-level annoyances, like soldiers or imps. Concentrate on throwing the lower-level enemies around, since you'll be invulnerable while you do so, then deal with the bigger foes when you've cleared out the area. (Note that some fights will simply respawn in smaller enemies forever, though.)
God of War II: Weapons and Magic
Weapons
You will spend most of the game with just one weapon: Athena's Blades. Eventually, though, you'll be carrying more than two weapons around. Since you only have one weapon switch button, you can only switch between the Athena's Blades and one other weapon at a time. To change weapons, hit Start and press O to cycle between the weapons that you want to select when you switch weapons. Athena's Blades are always equipped and can't be changed out.
Athena's Blades
You start the game with only Athena’s Blades as your sole weapon. You won’t get a true second weapon until well into the game, so make the most of the Blades by upgrading them fully before dealing with any of the other weapons that you possess. (We upgraded the Blades to level three, then upgraded Cronos' Rage to level two, then maxed out the Blades before bothering with anything else.) You’re almost definitely going to be using them more than the other weapons you pick up along the way, as they have longer range and a wider variety of attacks. Most of you will likely be familiar with the Blades from the first game; if you’re not, we’ll reprint the description that Doug Radcliffe wrote for our earlier game guide, when the Blades were called the Blades of Chaos:
"It's a good strategy to upgrade the Blade of Chaos before all other magic abilities. If you're thorough in red orb collection (seeking out hidden chests, etc) then you can have the Blades of Chaos fully upgraded certainly by mid-game. This provides full damage potential and access to powerful new combos.
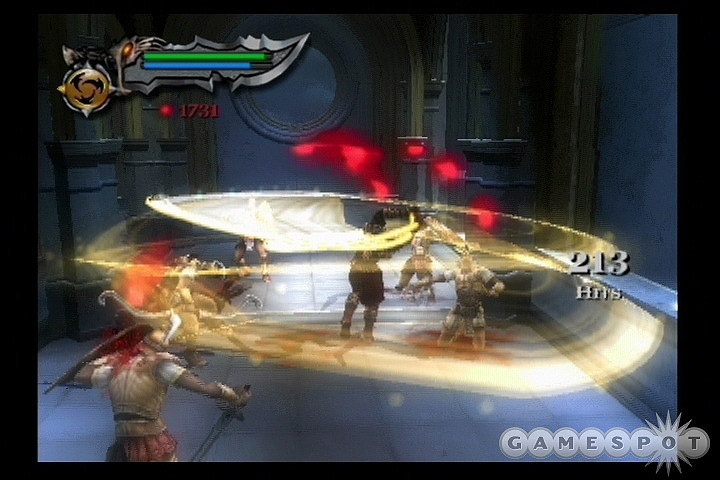
Take advantage of the Blade of Chaos' long-range attack. Make every effort to avoid getting too close to your opponent. If you begin to move close, use the right-analog stick to roll away. If you're close, an enemy's strike may interrupt your combo and leave you vulnerable for further attack. Roll away then start the combo string from long-range so you can complete the attack.
Some of the Blade of Chaos' strongest moves are those that knock enemies off their feet. The Plume of Prometheus is such a move that's granted from the very beginning of the game. Use the Square, Square, Triangle combo to knock lesser enemies off their feet and vulnerable to additional combo attack to inflict further damage and to also increase the amount of experience orbs you receive."
| Moves | Input | Description |
|---|---|---|
| Icarus Lift | X, X | Double-jumping is available as soon as you begin the game. |
| Olympic Ascension | Hold Triangle | Launches enemies into the air, and Kratos jumps along with them to allow for aerial combos or throws. |
| Orion’s Harpoon | O | When an enemy is airborne, you can grab them with the O button and slam them into the ground. |
| Athena’s Reverse | L1 | Tap L1 to parry a blow just before it lands. |
| Plume of Prometheus | Square, Square, Triangle | Two wide, sweeping strikes, followed by a ground slam that brings up an eruption of lava near where it hits. |
| Level Two: | ||
| Moves | Input | Description |
| Rampage of the Furies | L1 + O | Delivers a lengthy combo that's mostly intended to strike one large opponent. You'll be locked into the combo when it starts, so you'll likely be hit by any enemies that manage to get behind you, or by your target if they're immune to stunning. |
| Rampage of the Furies (Air) | L1 + O while jumping | Automatic attack that spins your blades in a mostly vertical motion, letting you hit targets above your normal maximum jumping height. |
| Level Three: | ||
| Moves | Input | Description |
| Cyclone of Chaos | L1 + Square | Another lengthy automated attack, albeit not quite as lengthy as Rampage of the Furies. This will swirl your blades around your body, hitting everything nearby multiple times. Works best against smaller enemies that can be stunned by damage; if your opponents don't get stunned (as in the case of cyclopes) then this will simply let them get a free attack on you. Still, for mass crowd control, this really can't be beat, and it'll also let you get some big hit counts when you have a lot of targets to hit. |
| Cyclone of Chaos (Air) | L1 + Square while jumping. | Lets loose with a circular spin-attack in midair that will hit nearby opponents around ten times. Can be used for taking out small flying opponents like imps. Also useful for darting attacks against enemies that can't be stunned, like stone golems or cyclopes; wait for them to complete an attack, then bust out one of these while they're recovering, then dash away before their next attack comes out. Since it’s one of the quickest moves you have, and attacks all around you, it can also be useful for attacking walls while attempting to find weak spots. |
| Spirit of Hercules | Triangle, Triangle, Triangle | A mostly single-target attack that deals heavy damage and finishes with another jet of flame that will pop enemies into the air, assuming they're capable of going airborne. |
| Valor of Hercules | Triangle, Triangle, Square | Two over-the-head attacks, followed by a whipping attack from both sides that will repel enemies and knock them backwards. Can be useful for crowd control, but attempting to pull it off while surrounded by enemies can be difficult, as the first two attacks will leave you vulnerable to attacks from the side and the rear. |
| Level Four: 9,500 Orbs | ||
| Moves | Input | Description |
| Hyperion Charge | Hold Square to run | Doesn’t do anything by itself, but sets up the following moves. |
| Hyperion Rush | Tap Square while running | Slams Kratos into any enemy in front of him. |
| Hyperion Rise | Tap Triangle while running | Will uppercut an enemy in front of Kratos, knocking them into the air. |
| Athena’s Wrath | While evading, hit Triangle | Slams Kratos’ blade into the ground at the end of a dodge, causing a jet of flame to travel along the ground. |
| Prometheus’ Torment | Hold Square while in Rage of the Titans mode | Causes Kratos to continously whirl his blades around him while in Rage mode. |
| Level Five: 13,500 Orbs | ||
| Tartarus Rage | L1 + Triangle | Smashes the blades into the ground in front of you, causing a large explosion and jetting foes up into the air. |
| Tartarus Rage (Air) | L1 + Triangle while airborne | This move can also be performed while airborne, but will cause additional whirling/slashing attacks in front of you before you land. |
| Prometheus’ Inferno | Hold L1 while in Rage of the Titans mode | |
God of War II: Weapons (continued)
Barbarian Hammer
You’ll receive the Barbarian Hammer around five hours into the game from the Barbarian King boss. As you might be able to tell by looking at it, it’s going to be slow and ponderous to use, although it does do a lot of damage.
Personally, we didn’t bother to upgrade the Hammer, and rarely used it after obtaining it. We’re sure that some players will find it enjoyable to use, but its slow attacks will often leave you vulnerable to damage, and the fact that you can’t dodge while holding it will screw up most player’s combat routines. If you upgrade it fully, then the Legion of Souls attack will serve you well in crowded combat situations, but apart from that, don’t worry too much if you don’t care to bother with it.
Some enemies, however, such as skeletons, seem to be especially weak to the hammer’s attacks.
| Level One | ||
|---|---|---|
| Moves | Input | Description |
| Crushing Defeat | L1 + Square | You whirl the hammer around you while moving forward. Starts off slow, but gains speed as you move along. If you use this in a crowd, expect to get knocked around, since you won’t be moving fast enough to avoid all incoming blows. |
| Might Of The King | L1 + Triangle | Slams the hammer into the ground, causing a sheet of flame to ripple along the floor there. Affected enemies will be damaged and launched into the air. You’ll be vulnerable to attacks from the side and rear while performing this move. |
| Might Of The King (Air) | L1 + Triangle while airborne | The same as above, save performed in midair. In most cases, double jumping before doing this move is a wise idea, since you’re less likely to get hit while in midair. |
| Level Two: 4,500 Orbs | ||
| Soul Summon | Tap upwards on the right analog stick | Sends out a tiny blue soul that will home in on nearby enemies. Does barely any damage, but can keep a weapon combo alive if you need to retreat. |
| Level Three: 17,500 Orbs | ||
| Legion Of Souls | L1 + O | Summons a large number of spirits that will attack nearby enemies up to 12 times. Enemies that can be knocked up into the air will have that affect applied to them, rendering them vulnerable to further attacks, but the spirits themselves do little damage. |
Spear of Destiny
The Spear of Destiny won’t appear until late in the game, but will be a worthy addition to your arsenal. It’s basically a two-handed staff that will whip itself around you and cause damage to most nearby foes when swung. At level one, it’s most notable for two things. The Piercing Shards attack will break through enemies’ guards, knocking them down, which can be helpful when dealing with demonoids or other fast enemies that keep up a constant block. Secondly, the triangle-button mash combo is notable for its ability to similarly deal with medium-sized opponents; it’ll knock them into the air, stab them before they come down, then hit them with a storm of ice shards. Powerful stuff, and useful for easily taking out medium-sized enemies when you face them one-on-one.
When upgraded fully, the Spear makes it relatively easy to deal with large crowds of smaller enemies with the Unfortunate Remains and Altering Slash moves. Most of your enemies will spend more time getting knocked around than they will on their feet.
| Level One | ||
|---|---|---|
| Moves | Input | Description |
| Deadly Slash | L1 + Square | Performs a sweeping attack that hits most enemies in a wide arc in front of and beside Kratos. |
| Piercing Shards | L1 + Triangle | Shoots a beam of weak icy projectiles in front of Kratos. This will penetrate the blocking actions of most small to medium-sized enemies, letting you follow through with more damage. |
| Piercing Shards (Air) | L1 + Triangle while jumping | Same as above, but fired in mid-air. These projectiles travel forward, not at the ground, so they’ll only hit airborne or elevated enemies. |
| Level Two: 3,750 Orbs | ||
| Unfortunate Remains | L1 + O | Places an explosive shell on the ground in front of Kratos that explodes after a few seconds, damaging nearby enemies. |
| Level Three: 12,500 Orbs | ||
| Altering Slash | L1 + Square | Altering Slash supersedes Deadly Slash, and is performed in the same manner. When it strikes, though, enemies will turn purple and eventually explode, dealing damage to themselves and all nearby enemies, in addition to knocking them around. This can only affect one enemy per swing, though, generally the first one that gets hit. Any size enemy can be affected, as well. |
Blade of Olympus
The Blade of Olympus only appears twice in the game, once near the beginning, and once near the end. As such, thinking up a huge strategy for wielding it is overkill; you swing it, you hit your enemies, they die.
| Level One | ||
|---|---|---|
| Moves | Input | Description |
| Divine Absolution | L1 + Square | Cheesy little slice and stab combo. There’s no real need to lock yourself into this attack animation, since it really doesn’t offer much to improve on the standard slashing attacks. |
| Divine Retribution | L1 + Triangle | Sends a beam of concentrated energy out towards an enemy. The animation is very quick compared to a lot of the other ranged attacks that the weapons offer. |
| Level Two: 9,000 Orbs | ||
| Divine Sacrifice | L1 + O | Drains red orbs from all enemies who comes nearby. Doesn't appear to cause any damage, or protect you from damage, and won't be of much use since you'll probably have already upgraded everything you actually want to by the time you can pay for this. |
| Level Three: 25,000 Orbs | ||
| Anger of the Gods | Square or Triangle | All of your attacks will cause a beam of energy to shoot from the tip of your weapon, causing damage to distant enemies. |
God of War II: Magic
You can cycle through your various magical abilities by tapping the D-pad in different directions on your controller.
Typhon's Bane
The first magical attack you receive in the game is Typhon’s Bane, a magical bow that can shoot gusts of wind at your foes. It’s a pretty simple skill, all told, and very similar to Zeus’ Fury from the first God of War, at least before you upgrade it. At its highest rank, it gains a couple of multiple-target effects, but for the most part, you’re going to be using this on distant enemy archers, and won’t need to bother with it on enemies that are close to you. It comes in handy during some boss fights, so upgrading it to level two is a good idea at some point during the game, preferably after you start picking up a lot more orbs in the mid-game. Level three is likely going to be excessive.
| Level One | ||
|---|---|---|
| Moves | Input | Description |
| Wind Blast | L2 + Square | Hold L2 to lock on to an enemy, then tap square to fire gusts of wind at them to deal them damage. |
| Wind Blast (Air) | L2 + Square while jumping | You can also fire wind gusts while jumping. |
| Level Two: 2,500 Orbs | ||
| Moves | Input | Description |
| Rapid Fire Wind Blast | L2 + Square | Greatly increases the speed at which you can fire the bow. |
| Lethal Vortex | L2 + Triangle | Causes a whirlwind of…well, of wind, to speed along the ground, knocking enemies up into the air. |
| Level Three: 12,500 Orbs | ||
| Moves | Input | Description |
| Wind Blast (Charged) | L2 + Hold Square | Holding the square button before firing will charge your bow, allowing you to shoot multiple homing wind blasts which will hit targets more than once. |
| Titan Storm | L2 + O | Hitting O will cause a huge vortex of air to appear and damage enemies. Possibly the largest area-of-effect of any spell in the game, but there’s a large mana requirement and it doesn’t do a crazy amount of damage. |
| Lethal Vortex Upgrade | L2 + Triangle | Presumably deals more damage, and seems to move a bit quicker. |
Cronos' Rage
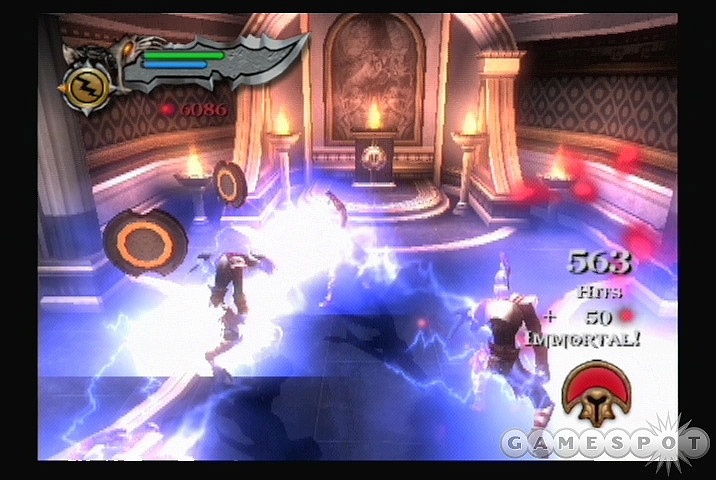
Cronos’ Rage is something of an analog to Poseidon’s Rage from the first game and the beginning of this one. When you hit the summon button, you let loose a ball of lightning that will zap nearby enemies, dealing them damage and knocking them around. Unlike Poseidon’s Rage, though, you simply let the ball go and can continue to move around and attack while it does its thing, making this a perfect ability to use when you need to stay mobile, such as when you have to fight enemies and deal with puzzle sequences at the same time. It’s range is negligible at level one, so upgrade this as soon as you have the extra orbs to do so. You’ll eventually want it up to level three, but you won’t absolutely need it that high until later in the game.
| Level One | ||
|---|---|---|
| Moves | Input | Description |
| Cronos’ Rage | L2 | Places an electrical orb that will damage nearby enemies. |
| Cronos’ Rage (Air) | L2 | Same as above, but in midair! |
| Level Two: 3,350 Orbs | ||
| Moves | Input | Description |
| Cronos’ Rage | L2 | Same as above, but will hit more enemies at a time and will damage enemies across a larger area. |
| Level Three: 15,000 Orbs | ||
| Moves | Input | Description |
| Cronos’ Rage | L2 | Hits more enemies, does more damage. At this level, the area where you stand when you hit L2 will also explode after a few seconds for extra damage and knockback effects. |
Head of Euryale
This is basically a clone of the Medusa’s Gaze spell from God of War, but this time you’re going to kill Euryale, the second of the three Gorgon sisters. (Who wants to bet that Stheno pops up as a boss in God of War III?) The basic effects are the same; you can use it to cause petrification of almost any enemy that you come across. Petrified enemies will break free from their stone prison after a few seconds, but if you hit them enough while they’re petrified, they’ll crumble and give you extra orbs for the kill.
At maximum level, the Head of Euryale can freeze multiple opponents, making it useful in fights against large numbers of small enemies, but this will come at a significant mana price. If you specifically enjoy freezing enemies, then upgrade away, but you can easily get through the entire game without using this spell, save in very specific circumstances.
| Level One | ||
|---|---|---|
| Moves | Input | Description |
| Gorgon Stare | L2 + Square | Slowly turns an enemy to stone when aimed at them. Some enemies are immune. |
| Gorgon Stare (Air) | L2 + Square | Same as above, but performed in midair. |
| Level Two: 4,000 Orbs | ||
| Moves | Input | Description |
| Gorgon Stare Upgrade | L2 + Square | Gorgon Stare petrifies enemies more quickly, and they seem to stay petrified for a longer period. |
| Gorgon Flash | L2 + Triangle | Uses more mana, but instantly stonifies most small enemies. Larger enemies will need more than one Flash, or a combination of Flash and Stare, to become petrified. |
| Gorgon Flash (Air) | L2 + Triangle while jumping | Same as above, but performed while jumping. |
| Level Three: 8,000 Orbs | ||
| Moves | Input | Description |
| Gorgon Stare Upgrade | L2 + Square | The Stare freezes enemies more quickly. |
| Gorgon Blast | L2 + O | Tapping O here will shoot out a bolt of petrification energy that can affect multiple opponents. Like Flash, though, larger enemies won’t be frozen all the way. Basically a petrification grenade. |
| Gorgon Blast (Air) | L2 + O while jumping | Same as above, but performed while jumping. |
| Gorgon Rage | L2 + Hold O and release. | While holding L2, hold down the O button, and you’ll see the snakes on Euryale’s head begin to quiver. When you let go of O, any nearby enemies will be petrified (assuming they can be at all). This is more powerful than Flash and Blast, in that larger enemies will also be petrified instantly, but requires much more mana. |
Atlas Quake
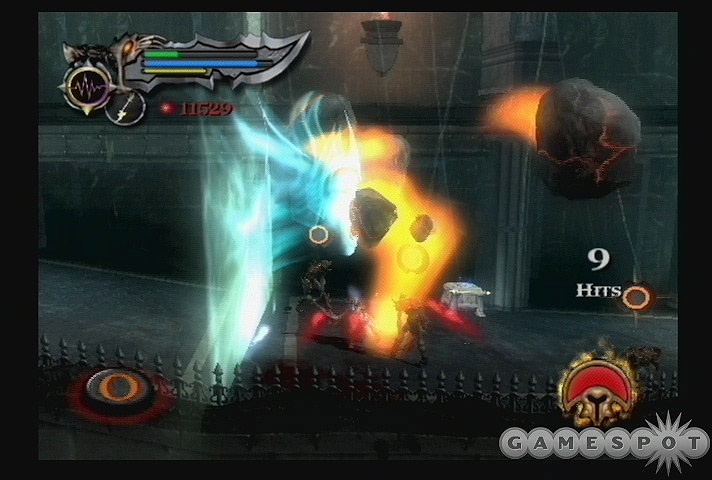
The final spell you get in the game is also likely your most powerful. It’s kind of a riff off of Poseidon’s Rage from the first game, in that it allows you to damage enemies all around you, will let you mash the O button to deal more damage, and will render you immune to damage while you perform it. It’s this last aspect of the spell that will probably make it most worthwhile to you. If you upgrade Atlas Quake to level two, each time you cast it you’ll gain around five seconds of complete immunity to any attack coming your way. Since this is one of the few spells that can actually stagger larger enemies, like gladiators and cyclopes, you’re going to be getting two birds with one stone when using it to avoid their powerful attacks.
| Level One | ||
|---|---|---|
| Moves | Input | Description |
| Trembling Earth | L2 | Smashes the ground, causing two hits to all nearby enemies and knocking them into the air. |
| Trembling Earth (Air) | L2 while jumping | Same as above, but performed in the air. Will cause you to drop to the ground and start the quake. |
| Level Two: 4,500 Orbs | ||
| Moves | Input | Description |
| Trembling Earth Upgrade | L2 | You hit the ground a few more times, causing more damage and knocking enemies around even more. |
| Level Three: 10,000 Orbs | ||
| Moves | Input | Description |
| Destructive Earth | L2, Tap O | When you start an earthquake with the L2 button, you can begin tapping the O button to cause more debris to fly up, dealing more damage to your opponents. Basically the same deal as Poseidon’s Rage in the first game. |
| Destructive Earth (Air) | L2 while airborne, Tap O when you hit the ground | Same as above, but performed after you hit the ground when pressing L2 while airborne. |
Chapter One: Rhodes
(Note that this walkthrough is written based on the assumption that you are playing through on the Normal difficulty setting. Also note that our chapter breaks are our own invention, made purely for organizational purposes.)
You begin the game in Rhodes, shortly after Kratos' power has been stripped and the Colossus of Rhodes has been animated in the city in an attempt to squash him like a bug. It'll be up to you to defeat the Colossus and fight your way out of the city. Luckily, you currently have max-powered Athena's Blades and a likewise ubercharged Poseidon's Rage magic, which will help you out quite a bit in the early going.
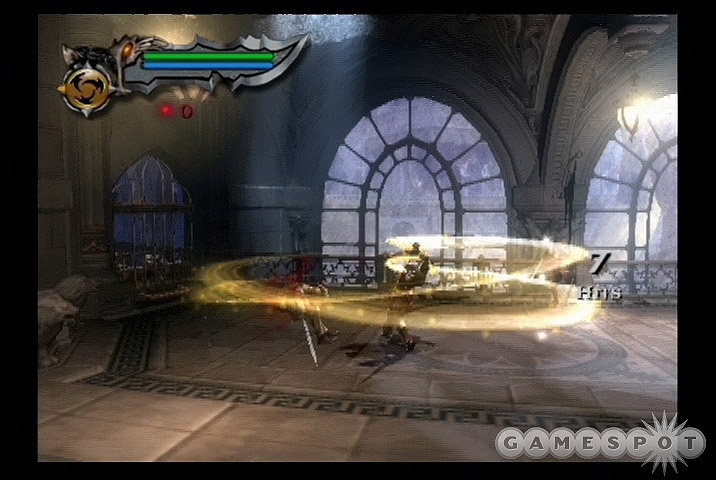
You begin in a small, sealed room that will feature a couple dozen soldiers attempting to take you down. This is your opportunity to get back into practice with Kratos' weapons, which feature most of the same attacks from the first God of War. Take your time disposing of the guards in as gruesome a fashion as you like.
When all of the guards are done, open the door leading onward with the R1 button. Fight your way through the guards until the Colossus' hand busts through the wall, opening a passage to your left. The boxes and crates here conceal red orbs, so smash them thoroughly to receive your boon.
Ballista Fight
When you reach the balcony, jump off of it before the Colossus manages to strike you. You'll wind up on a small spit of ground populated by enemy soldiers, with the Colossus standing off to one side, ready to hit you as you fight. You have to strike at the Colossus to get away from it, but doing so won't be easy.
Begin by defending yourself from the predations of the soldiers here while the Colossus does its thing in the background. It has a few attacks, including throwing soldiers at you and a fist slam. Both of these can be avoided by sticking towards the bottom of the screen. It can also slap the ground near where you are, as you'll discover; it raises its arm above its head and attempts to flatten you out. If you time it right, you can use the right analog stick to roll away from this attack as it comes down and avoid taking damage. It's tough to time it, but if you wind up standing near the palm, you can start to attack it, and eventually the Colossus will recoil in pain, earning you some red orbs.
You need to repeat this process until the Colossus keels over and his eyes go out momentarily. When that occurs, you can finish it off - for the moment, at least. Begin by jumping up onto the platform to your left and examining the ballista/catapult thing there. It's currently loaded with a large rock, so hit R1 while standing behind it to launch the rock at the Colossus' head; it'll impact it and earn you a large orb reward. With that done, you can either keep attacking its hand and the soldiers here for more orbs, or simply jump into the ballista and launch yourself at the head to cut out one of the eyes. This entails another button-pressing game, as you have to press the square button four times, when the prompts come up, to complete the eye-gouging. If you fail, you'll be smashed into the ground by the Colossus and forced to try again.
Rhodes Bathhouse
With the Colossus' eye put out, it will throw you to another part of the city, where you'll wind up underwater. Before swimming on, though, surface with the X button and attack the dressing partitions in the room above you to earn around 100 red orbs. You can also find a pair of lovely ladies in one of the pools. Pressing O while standing near them will allow you to play one of the infamous sex minigames. To play, tap the buttons that appear, then follow the directional movements indicated with the left analog stick. When directions start to appear in the bottom left corner of the screen, those are also performed with the left analog stick, but are intended to be performed continuously as long as the icon is on the screen.
After swimming through the tunnel below you (you can smash the barricade by holding down the R1 button), you'll surface in some kind of factory. Climb the stairs and pull the switch to reveal a grappling point. Grappling isn't so difficult; just stand near the edge of the ledge, tap R1 to grab onto the grappling point, then hit X to jump off when you reach the other side of the room.
Clean out the soldiers beyond the doorway here and head up the ladder, but be prepared to tap O like a madman, as the foot of the Colossus will bust through the wall and attempt to smash you. After throwing it off, poke around the room (there's a chest of red orbs in a corner off to your left), then start climbing the wall to the left of the hole the Colossus made in it. There's another chest of red orbs that's available after you shuffle off to the left around the small indentation that the Colossus makes in the climbable wall; just drop down.
Colossus: Round Two
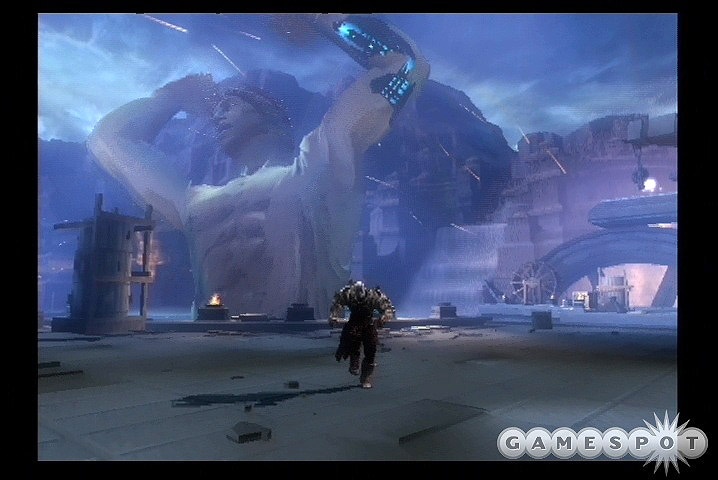
After climbing to the top of the wall here and jumping over, you'll be set to take on the Colossus in the next major phase of your fight with it. It holds court over a pair of docks which you can jump between via the grappling point in the center of the area.
You'll have to position yourself on one of the two docks to fight the creature, and you'll eventually have to defeat it from both platforms. Position yourself in the middle of the platform to more easily recognize its attacks and adapt to them as they land.
The Colossus here has a few major attacks that it'll use on you, which vary a bit in form depending on which side of the docks you're on, but which will be recognizably similar regardless of where you are. For our purposes, the Colossus is in "rest state" when it's resting with one palm on the docks and the other arm off in the air.
Attacks
- Fist Slam: The giant will rear back its hand and punch forward with it towards Kratos, then sweep its arm across the playing field towards the other platform. This will be the most common attack to come your way if you're in the middle of your half of the dock, but can be easily avoided by running or rolling towards the water. I.e. if you're on the left dock, then run to the left until you're out of range of the attack. When it lands, attack the fist before it withdraws, then attack the palm that rests on the dock.
- Arm Slap: When you move too far towards the water when the Colossus is in rest state, it'll smack you with the arm that's resting on the ground. This attack is quick and almost unavoidable, so stay away from the water's edge of the docks. If you're not attacking and notice this attack incoming, you can burn a Poseidon's Rage magic to temporarily become invulnerable and do a bit of damage to the arms.
- Palm Sweep: If you move too far towards the grappling hook in between the two docks, the giant will sweep his palm across the stage, knocking you down. Avoid the grappling hook around unless the beast is stunned!
- Palm Smash: Every so often, the Colossus will put both of its hands down on a dock and roar. Soon after, he'll slam the palm closest to the water down on the ground, hurting you if you're too close to the giant. Avoid this by backing away from the edge of the dock a bit, then counterattack the hand.
- Two-Fist Slam: After you damage the Colossus enough to cause it to recoil, it'll bring both of its hands up into the air and slam them into the ground in the middle of the dock. Back away into a corner of the area and jump before the slam hits the ground, or you'll be knocked down.
- Two-Arm Sweep: If you jump from one dock to the other too quickly, the Colossus will use both hands to sweep across the surface of the arena and attempt to slam you into the wall. Difficult to dodge, but you won't need to cross the docks very often.
Attack and Defense
You have to stun the Colossus a few times before you can more severely damage it. What this entails is avoiding its attacks while attacking its hands in return. The attack that is the easiest to avoid is the Fist Slam, which is generally what will come your way when you stand in the middle of one of the docks. (In other words, don't stand near the grappling hook; stand in the middle of one of the individual platforms, near the edge where the Colossus' hand rests.) When you see the hand rear back for a Fist Slam, dodge towards the water to avoid the blow, then turn around and start striking at the arm before it pulls back, and then attack the other palm as it comes to rest on the dock itself.
You'll see other attacks if you move around a bit, some of which are harder or easier to avoid, and which will give you more or less time to counter with your own attacks against the arms or palms of the giant. If you stick to the middle of the docks, though, you should consistently encounter the fist slam, which, again, is easy to avoid and easy to counterattack. After you hit the arms enough, the Colossus will stagger, feeding you red and blue orbs. (You may want to use Poseidon's Rage every now and then on the arms, whether to make yourself temporarily invulnerable if you don't want to bother dodging the Two-Fist Slam, or to free up some mana for when you nab these blue orbs, which are otherwise wasted if you have full mana when you get them.)

After a couple of cycles of this, the Colossus will crash onto the opposite dock and a large O-button icon will appear over its hand. Quickly leap across the grapple point and press O near the hand to start a button-press minigame. Doing so will let you slice open the creature's cheeks.
You'll need to go through this process twice. When you beat down the Colossus from the left dock, it'll crash into the dock on the right; when you beat it on the right dock, it'll crash into the dock on the left. Attack it on both sides of the dock, slice its cheeks in both directions, and you'll eventually be crushed in its grip. Quickly alternate between pressing L1 and R1 to break free and stab the hand, resulting in your being shuttled off to another part of the level.
Rhodes Palace
Now that you've escaped from the Colossus again, it's time to find out where the heck it is and hopefully finish it off. Begin by jumping up and opening the door here. Avoid the archers and find the savespot nearby, then start killing your way through the soldiers around the corner until you find a large statue that you can grab and move with the R1 button. Move it around to the pressure plate nearby to open the gate, then kick it under the gate with the X button. The gate will close behind it, so stand on the pressure plate yourself and roll under it to move on. If the statue didn't land on the second pressure plate, place it on it now.
You should be facing two paths, with one leading forward towards an orb chest. Avoid that path for now, and instead explore the path to your right. There's a long hallway here, at the end of which is a high platform with three chests on it. To reach it, you need to smash the eagle statue on top of the stone pedestal you've been moving around, then kick it underneath the platform and doublejump up. You'll earn the Urn of Gaia for your efforts, as well as a large number of bonus orbs.
With that done, return the pedestal to its resting spot and head towards the green chest there. Take a left, and when you reach the platform with a trigger on it, head towards the bottom of the screen before taking the lift to reveal another red orb chest.
Eastern Ramparts
After attacking the eye of the Colossus in the small hallway at the top of the lift, you'll be offered a boon by Zeus: the Blade of Olympus. Zeus' vague pronouncements about why he's helping you should probably forewarn you that a change is in the air, but there's nothing to do but forge ahead. Jump up to the wall on your right and jump up to the small ledge above it. Jump from there to the walkway above and start mowing through soldiers and archers, kicking open the door at the end of the walkway. Pop out the window at the end of the small chamber beyond to reveal a set of small walkways leading across the ruined roof of a room below you. The room is full of archers which will attack you, so you may as well drop down and finish them off. When you kill all of the soldiers, head back towards the window you smashed and find the ladder off to its side to climb back up.
When you start walking out onto the narrow wooden beams, be aware that there's a set of red orb chests off to your right. When you walk from the window onto the walkways, then take a right, you can double-jump from the second small corner of the beams off to the right to reach a platform with two of the chests. It can be tricky to know precisely when to jump, but you should be able to see the corner of one of the chests from the walkway.
With the orbs in your possession, return to the beams and cross them to find another save spot. Climb the ladder nearby and drop down via the chain there to reach a small room with magic and health recharge chests. Grab both of them, then open the gate and proceed across the bridge, rolling at the end to avoid its falling out from underneath your feet, if necessary.
The Final Battle
The Colossus is lined up to fight you for the last time…in a manner of speaking. In order to take him out, however, you'll have to charge and use the Blade of Olympus, which lies in the middle of the platform on which you will reside while fighting the Colossus. Doing so will require you to grab the Blade and charge it with the R1 button, but when you attempt to do so, the Colossus will knock you away.
The Colossus has three major attacks here, the first being a rift attack where he'll ram his shorn arm against the ground and cause numerous grooves to appear, which will quickly turn blue with energy. These are fairly easy to avoid. In addition, there's a hand slam that will come down whenever you're near the Blade of Olympus. You can double jump over the shockwave, but that's easiest to do if you're standing on the bottom side of the Blade. Lastly, if you get close to the upper edge of the screen, the Colossus will knock you around with a two-sided sweep of the arm and an arm slam into the ground.
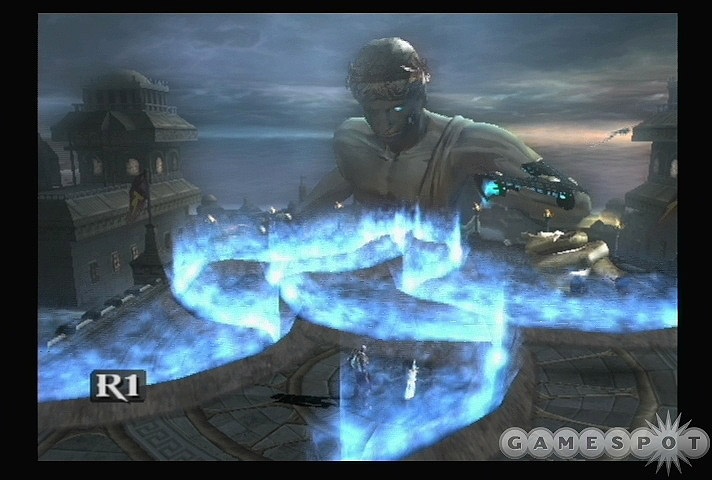
Begin here by getting close to the discarded hand on the ground and using R1 to slam it into the Colossus' head. This will stun it momentarily, allowing you to run up to the Blade and press R1 again to load it up with all the red orbs that you've obtained. The Colossus will reanimate shortly afterward and begin slamming you again.
The next item you'll have to charge the Blade with will be your magic meter, so stand just below the Blade, double-jump over the fist slams, and use Poseidon's Rage to damage the fist. (You can also just stand right under where the fist comes down and use Poseidon's Rage just before it hits to damage the arm and avoid damage yourself.) After the beast is stunned again, charge up the Blade with your magic.
Lastly, you have to charge the Blade with your health. Stunning the Colossus can be a simple matter of double-jumping over the fist slam shockwave and hitting the fist once or twice, or you can get closer to the Colossus's waist and hit it up close. Either way, it will eventually be stunned again, allowing you to charge up the Blade completely and wrest it out of the guide.
The Blade of Olympus
With the Blade in your hands, charge up to the Colossus and start whacking away at it, staying close to the fist of its right arm as it rests on the ground. The left arm will periodically sweep the area with low-damage energy blasts, so try to roll out to the right of the screen to avoid the brunt of them. When you deal enough damage to the Colossus' arm, it will withdraw, allowing you to hit it with an animated attack to bust through its weak spot and enter its interior portion.
Colossus Interior
Start making your way up through the interior of the Colossus, keeping in mind that the blue-shrouded pieces of wood will greatly wound you if you touch them. After jumping over a blue beam that lies in your way, walk towards the central pillar of the structure and press R1 to drain the energy of the Colossus into the Blade. Doing so will reveal some netting on the nearby wall, which will allow you to proceed upward. Find the rope bridge that leads across the area and drop down on the far side by tapping R1.
After climbing up a bit more, cross a beam to find another area where you have to drain the central pillar. (A health chest is near the wall to your left here, somewhat out of sight.) Drain it and walk back across the beams to move on. At the top of the netting, you'll have to grab onto the ledge in front of you and shimmy around to the left, using R1 to drop down and go hand over hand to avoid the jutting, burning wood. Before attacking the chains around the central pillar and draining it, note the netting off to your left; your first Eye of Gorgon lies atop it.
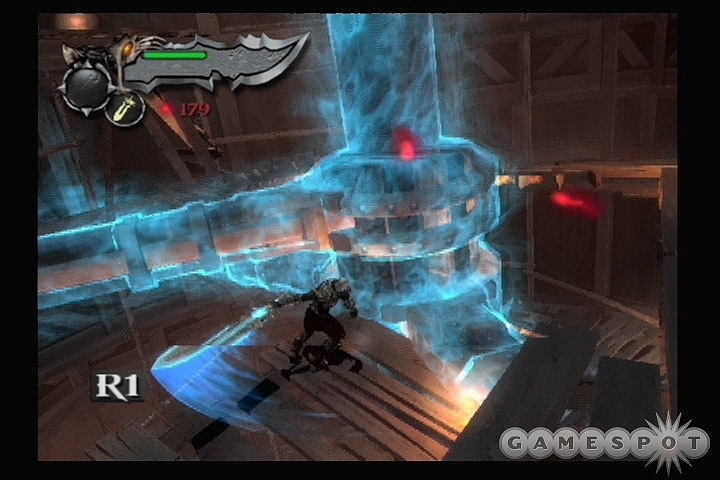
When you drain the third set of wood, a chain will drop down. Climb it to reach the giant's head. Climb the ladder when you reach it and flip the switch nearby to drop the large metal object here down to the ground. Climb back down the ladder and strike the metal with your sword to start it swinging, then climb the ladder again and flip the switch one more time to retract the object; it will now swing back and forth and block the energy beams that go to the Colossus' eyes. When it blocks the energy beam closest to you, use the X button while hanging from the rope to quickly get to the middle of the rope. Repeat the process to get to the far side of the rope, then drop down and find the final set of energy-imbued wood and destroy it.
With that done, the Colossus is dead and will begin falling. Quickly hop from platform to platform to reach the mouth and exit the giant once and for all.
The Wrath of Olympus
After a lengthy cutscene, you'll have to begin walking towards the Blade of Olympus. You won't reach it, though, as an ominous figure will accost you. You cannot win the fight that you get into, so do your best and enjoy the resulting cutscene.
Chapter Two: Typhon's Domain
You pick up with Kratos on the path down into Hades. You have your trusty Athena's Blades in your hands, so begin slashing at the hands in your path with your weapons to destroy them and gain some health. They'll regrow quickly, so try to stay on the move whenever possible. First jump to the right, then jump up, then navigate past the hands to return to Rhodes.
Save your game (note that it's now Gaia that's offering you the opportunity to save), then speak to the writhing Spartan on the ground nearby to finish this segment and take to the skies.
The Burning Horse
Gaia has a plan for you, and sends you off on a journey to reach the Sisters of Fate. She lends you a burning, flying pegasus that you'll have to ride off into the ether towards your next destination.
You'll have Olympian eagles to contend with on your journey, though. Get used to the controls here, as you'll be flying in a much different manner than you would normally be moving around. Left and right will move you towards the sides of the screen, and depending on your settings, up and down will move you around vertically as well, but you won't be able to speed up or slow down or anything like that. Eagles will periodically come up alongside of you and attempt to attack you, so you'll have to counter them with your blades; tap Square or Triangle to whip them to death, while attempting to stay away from their sides as best as you can, as they'll periodically ram you from the right or left. Dealing enough damage to them will cause an O-prompt to appear above their heads, letting you finish them off with a single button press. This will regain most of the life you lost during the fight.
Other eagles will periodically appear in front of you and fire missiles at you. These will track in and hit your pegasus for light damage. If you move around swiftly, you can usually avoid them; try hitting L1 and R1 to dash to either the left or right to avoid the damage. Most of these eagles will fire one volley of missiles, then come back and attack you up close; eventually you will have to deal with both kinds of attacks at the same time.
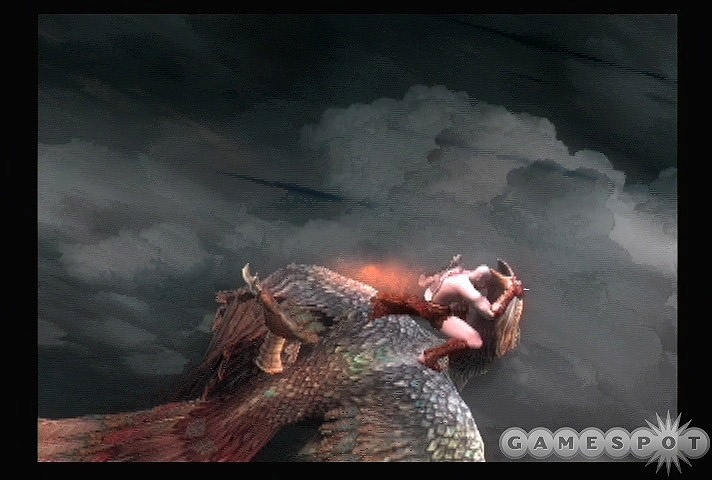
When that's done, a confusing (at first) divebombing eagle will attempt to spear you from the fore here. Its attacks can be dodged with the L1 button (albeit with some difficulty), but what you want to do is use your X button to charge at it as it comes towards you. Doing so will ram your pegasus into its beak, causing another button-pressing minigame in which you can mash the O button to break the eagle's neck.
Lastly, another soldier riding a winged beast will attack you in a pipe of air. Your magic will drain here, preventing you from catching up to the enemy, so attempt to dodge its purple energy balls (if they appear towards the bottom of the airshaft, ride to the top, and so on), until it unleashes too many for you to dodge. When that happens, you'll be shunted into…
The Lair of the Titan
After a bit of riding around on rails, you'll wind up back on the ground. Your goal now is to free the Pegasus from the fingers of the Titan, but doing so will require more power than you currently possess. Drop down from the finger and look around for a chest containing green orbs. If you move towards the bottom of the screen here, you'll find an obscured handhold leading to another red orb chest and another Eye of Gorgon.
Climb back up the handholds and strike at the fingers in your path to reveal a path leading onward to another set of handholds. Enemies will materialize while you make your way across it, so stay vigilant; they drop a lot of red orbs, though, so do your best to kill them all. When you reach the end of the handholds, you'll find a save point.
The Hand Cavern
Kill the minotaur nearby (don't forget to use L1 to block against its powerful attacks), grab the red orb chest at the end of the passage, then smash the box on the rope nearby and grab the rope to slide down to another area.
After a lengthy walk you'll be out in the open air again, where you'll be accosted by more minotaurs and some archers on wooden platforms. You can smash the platforms with your weapons to bring the archers down to your level, and the minotaurs can be dispatched normally. Note, though, that if you wish to, you can apparently cause a goodly number (half a dozen or so in total) of minotaurs to continually spawn if you keep the rightmost platform intact for the moment. Killing the minotaurs with the O-prompt attack will net you a good amount of red orbs, as well as plenty of health, so you may as well take advantage of this.
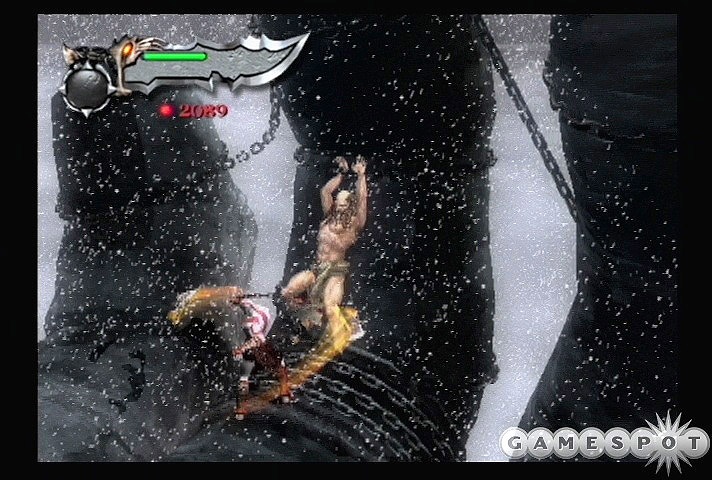
When you're ready to move on, smash the remaining platform and jump up to the ledge above you, walk to the left, then jump up from there. After grabbing the chests, ride the chain down to where Prometheus is chained to a statue of a fist. When he's done yapping, attack his body to cut the chains around him to suspend him over the fires below, then climb the chain suspended between two of the fingers to drop to the ground below. There's nothing you can do for Prometheus for now, so continue along the path in front of you until you reach another set of handholds. Follow them, killing the enemies as they appear, until you reach the path at the bottom. (You may notice a few red orb chests hidden behind a few stalagmites during your journey; you won't be able to get them until later on.)
Fire of Olympus
After saving your game, make your way around to the end of the path and more handhelds; another Eye of the Gorgon is in a chest nearby. Climb up the handhelds nearby to reach another icy cave with some chests in it. When you swing across the gap on your grappling hook thing, you'll note another chest behind some bars. To open the bars, find the rope that leads down back to where you grappled across. Gliding down on the chain here will open the bars, allowing you to grapple back across the gap and retrieve a Phoenix Feather.

Move on down the path until you encounter a Medusa. If you recall from the first God of War, medusas are slithering enemies that can dodge your attacks and turn you to stone with their gorgon eyes. Attacking them is usually a matter of hitting them a couple times with the square attack, then holding down triangle to launch them into the air and grabbing them with the O button to throw them to the ground. Roll away from their green magic beams to avoid getting turned to stone; if you do get petrified, quickly move your left analog stick left and right to avoid being smashed to bits and instantly dying. Try not to jump around when you have a green beam on you; if you're petrified in midair, you'll fall and die when you hit the ground.
Apart from that, learn their attacks and try to roll or block when they dodge one of your attacks, because they'll counterattack soon afterwards. When you defeat the second pair of medusas and the imps that fly around, you'll be able to smash a wall that flickers in the background to move on.
Typhon's Cavern
Typhon, a son of Gaia, resides in the cavern nearby. He'll breathe onto the walkways over which you have to pass, so you'll need to time your movements so that you're hiding on one of the shelters provided to you when he does so. Try to grab the imps with the O button when they're near; it's an instant kill and nets you bonus red orbs.
When you reach the large platform near the bottom of the room, find the shiny wall to the right and destroy it. Use R1 to shift the large block here so that it falls, leaving you with a walkway towards Typhon's face (as the game so painstakingly points out to you). With that done, walk towards Typhon and use R1 to grab Typhon's Rage from him. This magical bow can be used with the L2 button to target and the square button to fire. For the moment, at least, it won't cost you any magic to use.
Shoot out Typhon's other eye with the bow, then retreat towards the bottom of the cavern again. A scary face will bar your passage to the right, a la Devil May Cry, and more enemies will pop up to deal with you. Stay near the face barrier to protect yourself from the arrows, take out the swordsmen, then shoot the archers from a distance with Typhon's Rage.
Hidden Treasures!
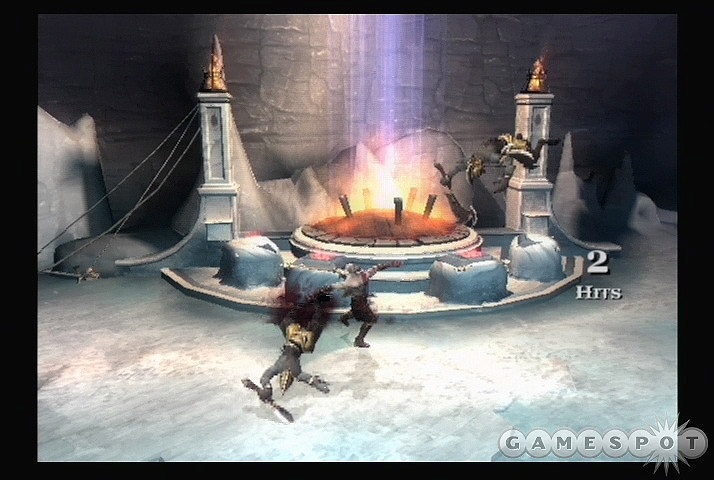
Before you swing back to the save point and head back outside, it's time to grab a hidden bonus to you. If you move over to the left side of this platform and walk towards the bottom of the screen, you should find a walkway heading out over the chasm below. It will lead you to a room with a large fireplace and infinitely spawning soldier enemies. The enemies don't provide you with any orbs, so don't bother killing them for that; instead, your goal is to throw them into the fire here. To do so, grab them with the O button, then make sure that the blue targeting icon is highlighting over the fireplace, then hit the square button to throw the soldiers into the fire. You'll need to throw five or so of them to melt the ice around the chests near the fire, resulting in a lot of red orbs for you and a new Phoenix Feather.
With that done, return to the platform you were on before and use the bow to fire away at the wooden barrier around the first grapple point. That will let you swing across the barrier (press X to jump, then immediately hit R1 to hit the next point) and fall down onto the ground on the far side, where a number of rocks have fallen. Smash them to retrieve a large number of red orbs, then start making your way back to Prometheus.
Freeing Prometheus
When you return to the exterior portion of the level, look to the left of the screen and find another of the boxes that cover the grappling hooks. Destroy it to come down near the concealed red orb chests, then smash another suspended crate to drop a rope. Climb the rope to return to the hand that Prometheus was originally chained to. Drop down via the chain again and hit Prometheus with Typhon's Rage until he drops into the fire, granting him a final rest, and granting Kratos the Rage of the Titans ability. When your power meter is full, you can click on both of your analog sticks to supercharge your attacks for a short time. Use it to dispatch the soldiers and minotaurs that appear nearby, then climb back up to the chain that Prometheus' death tightened up.
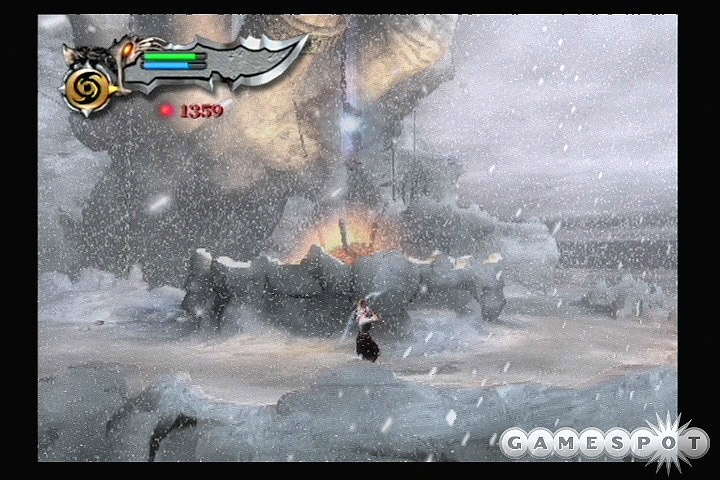
You can now finally obtain the hidden red orb chests here. Before grabbing onto the tightened chain, note the chain next to it that now drops into the abyss. If you jump to it, you'll be able to slide down to the cavern the chests are located in, nabbing you more red orbs and another Eye of the Gorgon. When you return to the top of the chain, examine the wall nearby for a handhold. Jump to it and follow the path to another small cave which contains another Phoenix Feather. Lastly, return to the bottom of the area, and follow the path you did before to reach the save point on the snowy path where all the soldiers were attacking you. Just before the handpath that leads up to the cave above, there's another broken bridge with a wood-encased grappling point. Destroy the wood with your bow and swing across to find another Eye of the Gorgon.
With all that done, return to the chain that Prometheus' death tightened and crawl across. Drop back down to the steel door that blocks your path back to the beginning of the level. There's a chest nearby that has magically appeared; it will refill your Rage meter. Note how the icon on the door looks just like your Rage meter? Activate Rage of the Titans, then smash the door to move on.
The Return
Start fighting your way back to the beginning of the level now, dispatching any soldiers foolish enough to get in your way. When you return to the fingers of Typhon, striking them will restore your Rage juice. Hit them until you're full, then activate your Rage and start whacking away at the fingers. When all of them are raised, your Pegasus will be freed, allowing you to return to the skies.
Chapter Three: The Temple of Lahkesis
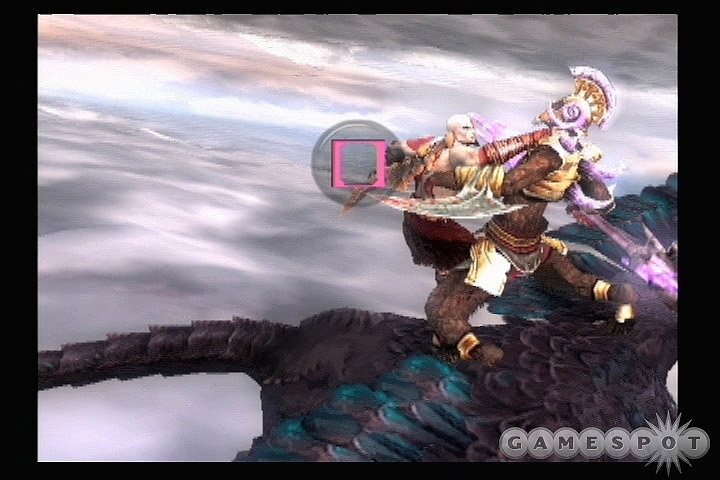
Another lengthy encounter with eagles here. Many of the eagles will be ridden by soldiers, allowing you to either kill them when you leap to the eagle (which extends the button-pressing game to two buttons), or attempt to knock them off their mounts by using your triangle whirling attack. Apart from that, the encounter is only slightly more complicated than before. You'll be able to kill the special mounted warrior at the end of the encounter, after navigating through another air tube; strike at him as you would an eagle, and when you fall off the pegasus, engage in the button minigame to finish him off for good and fall to the Island of Fate.
The Climb
Climb up the handpath that you're on until you reach a balcony. To your left are a pair of chests, one of which contains a Phoenix Feather, and to your right is a save point and a ladder. Climb the ladder up to reach another balcony with red soldiers, fierce warriors who act much like the warriors you've been fighting thus far, but who can't be grappled until you knock them around enough for an O-prompt to appear above their heads. We found it helpful to knock them up in the air with a strong triangle attack, then grab them in midair to knock them around a bit.
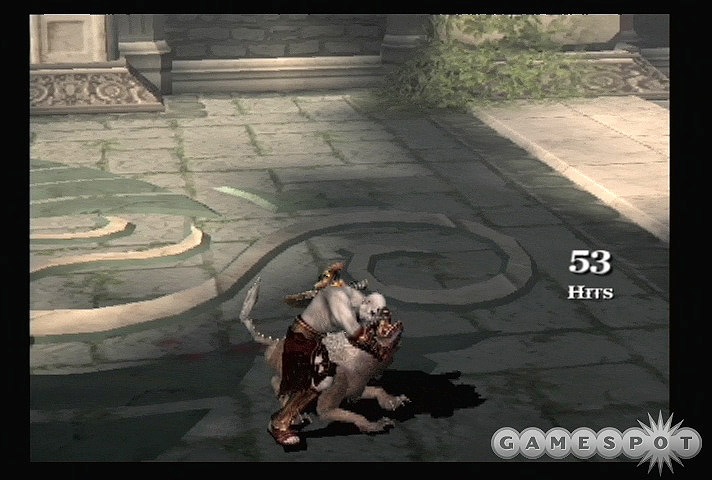
When the soldiers are dead, climb up to the ladder nearby to encounter some dog-like creatures. The dogs will attempt to swarm you, but if you keep grabbing them with the O button and kicking them around, you should be able to keep them away from you and deal heavy damage to them, to boot. When they're all finished off, head to the right and open the red orb chests there, then jump around to smash the hanging skeletons and the vases along the walls to wrest their precious lifeblood, as well. If you smash around enough, you should notice a dead body on the floor. Pick it up with the R1 button, then place it on the platform at the left end of the area and flip the switch to head downwards.
There's a pressure plate in the room below you that controls a gate nearby. Place the body on the plate to open the gate, then pull the switch in the groove here backwards until the second gate is opened. With that done, you should be able to run towards the second gate (which will close as you do so), then roll through it. Kicking the bridge nearby will show you a lengthy cinematic which explains a bit of the Greek mythology to you if you didn't learn it in school. What are they teaching you kids in school these days, anyway?
Cerberus
Your goal now is to reach the island across the sea. You can spy a chain off in the distance. If you head backwards you'll see a small walkway that's available to you, heading towards the chain; first head into the walkway opposite it and walk to the right to find another Gorgon Eye.
Following the correct path (be ready to jump to the end when it collapses) will lead you to the Cerberus fight. This three-headed dog will be surrounded by smaller dogs, which, luckily, you can use as weapons against it. Each of the heads of the cerberus will have to be removed individually before the animal keels over, but you'll gain Rage points for doing so, so feel free to use whatever Rage you have built up for the first head and third heads.
The easiest method to take down the Cerberus is to grapple the smaller dogs in the area. If the cerberus is close by, it will usually be auto-targeted as the target for the dog-kicking that follows, and it'll take light damage. There are so many dogs coming your way, though, that eventually you'll get the O-prompt above the animal's head and you'll be able to rip a head off (by simple O-button mashing). You can always just attack the cerberus for the same effect, as well. Note that you have a mana chest nearby, so feel free to unload your bow into the cerberus to damage it.
When the cerberus is dead, destroy the statues at the far end of the wall. One of them is holding up a large pedestal, which you can drag to the jumping spot here and jump up and move on.
The Siren's Song
After saving your game, move through the small alley to the left of the savepoint to find handholds leading down. You'll come to a ladder that leads to more handholds. Destroy the enemies and smash the stone block that blocks your path, then move around to a broken bridge with archers and more dogs. Defeat the archers first with your arrows, if possible, before taking out the dogs, then jumping across the gap to where the archers stood. Another decent-sized fight will occur before you can take a lift leading downward.
You'll encounter your first siren at the bottom of the lift. These guys are essentially a pallette-shifted version of the medusa; they act very similar to those enemies in the way they dodge and attack. Instead of turning you to stone, though, they'll hit you with a wide-area stunning sound attack that will temporarily incapacitate you. You can cancel out of it by shifting the left analog stick side to side. As with the medusas, these guys can be overkilled by waiting for the O-prompt above their heads, then squeezing them to death. Since they drop magic orbs when they die in this way, you can wheedle down their health with Typhon's Rage, then grab them and destroy them to gain your mana back. Killing three of the sirens will open the door leading onward.
Move through the opened door to reach a savepoint, and the Steeds of Time.
Boss Fight: Theseus
When you get to the end of the chain, climb up the handholds to your left to find an upper platform. Not much you can do here, but there is a switch you can flip, which will lower the rope nearby and let you drop down to another platform, where Theseus is locking a door with his key. He seems reluctant to part with it. Time to officially issue the beats.
First Phase
Theseus will attack with his energized staff during the first phase of this fight. He can block many of your attacks, so try to avoid overstepping your bounds; stay away from large combo moves unless you're relatively sure that you can penetrate his guard.
For the most part, getting a couple hits here and there should be sufficient to antagonize Theseus. Periodically, he'll probably manage to stab you with his staff, resulting in a very quick left analog stick prompt popping up. If you manage to hit the prompt correctly, you'll counter his move and throw him to the ground, allowing you to quickly pop out a combo or special move for big damage. Apart from that, just keep your block up, wait for him to bust out his three-move combo, then slash at him when it's over.
Eventually Theseus will charge up his staff with blue energy. This will allow him to stab the ground and cause large explosions to occur in his immediate area. If you want to avoid damage, just stay away from him when he runs away from you.
Second Phase
After you deal enough damage to Theseus, he'll climb up to the balcony above the arena and start flinging missiles at you. You can't hide from these (if you attempt to get underneath the overhang, he'll cause multiple explosions to appear at your feet), but you can dodge them. If you stand still until the missiles are in midair, they'll hit the floor. Just try not to constantly move, though, as Theseus will lead you and hit you if you move in a straight line. It's best just to stand still, wait for a missile to get in the air, move slightly to the left or right, then fire away with arrows until the next missile comes your way. Eventually he'll start flinging out homing missiles, which you'll probably need to dodge with the right analog stick.
During this time, you should be flinging Typhon's Rage arrows at Theseus to deal damage to him. This will use up mana, obviously, and you'll eventually run out. Luckily for you, though, Theseus will eventually summon in a pair of minotaurs, both of which will drop mana and health when killed. Quickly blast them with Rage of the Titans, get your mana back, and continue to unload on Theseus with Typhon's Rage. If you don't have Rage, then you'll have to take them down the hard way; try to use the triangle move that blasts them up into the air, then grab them and slam them into the ground. This will mostly keep you invulnerable while you're airborne, which is helpful, since Theseus will continue flinging missiles and explosions at you during this time. The missiles that he sends your way deal fairly light damage, at least on normal difficulty, so if you have a comfortable buffer of health, feel free to simply stand there and wail on him with arrows, assuming no minotaurs are around to harrass you.
It may take you a couple rounds of killing minotaurs to finally finish off Theseus, but he will eventually drop down and hang from the platform he's on. Pull him down with the left analog stick, then mash his head in the door by tapping the O button. That will finish him off and nab you the Horse Keeper's Key.
Holding the Reins
After you pass through the door here, take the right exit and climb the ladder nearby. There's a red orb chest at the end of the path, so grab it, then walk back to the platform that Theseus was shooting arrows at you from. There's a set of steps here; climb them, then jump to the other red orb chest. Grab the rope here to slide back to the first steed you were on; you can now unlock the door with your key. Doing so, then placing the key in the pedestal beyond, will net you Cronos' Rage. Hitting L2 while this magic is active will send electrical energy through all nearby enemies; you can use it on the soldiers that start popping out of the ground for an example. If you simply mash the button, you should be able to kill all of the soldiers and net yourself a huge combo to boot.
Head out via the left exit and climb the stairs. Exploring the platform above you will yield a save point, a red orb chest, and a Phoenix Feather in another chest nearby. Get them all, then take the path near the ladder. You'll come to a kind of control mechanism that holds locks for each of the four steeds' blinders. Your goal now is to unlock all of the blinders, apparently.
Unlocking The Blinders
You stand in the middle of the four steeds at this point. The red and blue steeds are to your right (as viewed if you look the same direction the steeds are heading), while the green and yellow steeds are to your left. Before you begin fiddling with the controls here, head to your left and mount the green steed; you can find a Gorgon's Eye if you follow the path down to its nose.
Your goal here is to unlock the blinders on all of the steeds. Begin with the red steed. Grab the red post on the small platform and move your left analog stick around until you see Kratos pulling it. Eventually it will lock into place, and you'll notice a small guard mechanism on the blinders on the red steed unlock. If you quickly jump across to the red steed, then use X to jump up the handholds, you should be able to reach the lock mechanism before it closes, allowing you to hit R1 to put the Horse Keeper's Key into it. That will unlock the blinders and free the small imp that was hovering above the lock to move off between the green and yellow steeds, where it will act as a grappling point. Repeat this process with the green steed to unlock another grappling hook between the red and blue steeds.
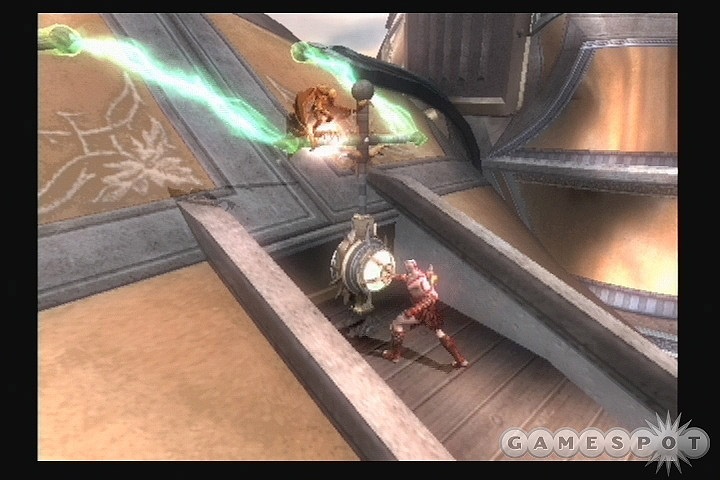
Now, you're going to have to do the same thing for the yellow and green steeds, but they're farther away from the central platform, meaning that, for the yellow steed, you have to pull its lever, head to the green steed, grapple onto the imp, then jump to the yellow steed and unlock its blinders. The same process is done for the red and blue steeds. You should have enough time to get to your goal, presuming you remember to jump up the handholds instead of simply climbing them. Also, keep in mind that the imps that act as your grapple points move around; if you jump when they're far away from the steed that's your destination, you'll likely wind up falling to your death. Wait for them to get into position before jumping, and don't forget that you can double-jump off of a grapple hook for extra distance. Getting back from the yellow steed might actually require you to jump from the upper platform and grapple to the imp in mid-air.
When all of the blinders are opened, the brace in the middle of the four small pull-levers will be open. Tab R1 to flip it and ride the platform up between the steeds, then hit R1 again to start whipping the steeds into a frenzy. Completing the left-analog-stick movement game will prod the steeds forward, pulling the Island of Fate so that it fits snugly with the Temple of Lahkesis, presumably allowing you to move from one to the other. Time to find out!
Return To The Temple
Another large fight with soldiers and minotaurs will break out as you proceed back to the Temple. Don't forget that minotaurs drop blue orbs when killed via the O-prompt; feel free to abuse your Cronos' Rage magic against these enemies.
Cross the chain, smash the rock that blocks your path on the handhold, and save your game. In the small water-filled room nearby, you can smash the ornate wall underneath the largest waterfall to reveal a red orb chest. There's another red orb chest at the top of the room, hidden on a ledge to the right. If you jump to the right when you reach the fiery pedestal, you should find it.
Follow the handholds nearby. When you reach a choice between heading left or heading down, head left; another Gorgon Eye is in a chest on the ledge there. Follow the handholds back and down to the ledge below. Before heading off to the left, though, find the additional handhold path to the right. If you follow it down and under the ledge, you'll see a broken rock; smash it to reveal a Phoenix Feather.
Head-Scratcher
With all of those items gathered, return to the middle ledge and kick open the door. You're inside a large chapel here, with a pressure plate that lowers the hands of a statue across the way. Not much you can do with it now, so drop down to the ground below and move all the way to the bottom of the screen to nab a Phoenix Feather and a Gorgon Eye, in chests that are just barely out of sight unless you move towards them (i.e. move Kratos backwards towards you).
With that done, use R1 to grab the large island in the middle of the water here, and drag it towards the bottom of the screen. Doing so will reveal a hole in the water. Swim through it and examine the statue on the other side of the grate to obtain the Amulet of the Fates, which will allow you to slow down time when needed by pressing the R1 and L1 buttons simultaneously.
Swim back through the passage here and stand on the pressure plate at the bottom of the room, near the treasure chests. That will cause the pedestals nearby to raise up, but they'll quickly drop when you step off the plate. Thus, you need to stand on the plate, activate the amulet, then quickly jump up to the upper walkway before your time-stopping power winds down. When you're up above on the upper walkway, repeat the process with the pressure plate at the bottom of the screen, which lets the hands of the statue fall down and raise up. When you're done talking to the statue, smash it with your weapons to cause it to break the window behind you, then grab the Phoenix Feather from the chest below before moving on.
A lengthy fight will ensue in the courtyard here, which is your last challenge before reaching the Island of Fate. Two of the annoying burrowing enemies from the last game, wraiths, will attack you here, but if you continually activate your time powers, you shouldn't have a problem with them; just remember to block when they're underground and burrowing towards you. The easiest way to defeat them is to grab them and throw them around before ripping their arms off. They drop mana orbs when they die, so feel free to use your Cronos' Rage magic, as well. When everything's dead, smash the head that lies on the ground and move out to the last challenge before reaching the Island of Fate.
The Green Shield
The Sisters of Fate are apparently intent to not let you onto their island. They erect a large shield of fate energy here which bars your passage. There are two ladders leading down, but before taking them, explore the upper platforms for a red orb chest and another Gorgon Eye.
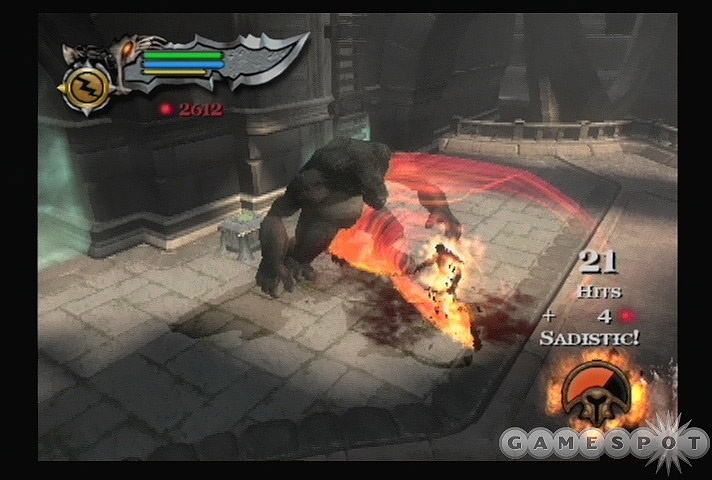
When you drop down, you'll be in another large arena, where cyclopes will attack you, alongside boars. Save your Rage of the Titans while dealing with the first cyclops. These guys are big and powerful, so try to keep your distance and tag them from long range when possible. When they roar and sparks fly out of their eyes, you can unload on them, since they won't be attacking you for a few seconds. They won't seem to take much damage, but they will eventually have a circle icon above their head, allowing you to bust their heads on your knee for a burst of red and green orbs. It'll take a couple of these to finish the beast off.
When the first cyclops is down, two more will pop up to replace them. Pop your Rage now and use the triangle-mashing attack to swiftly deal damage to the cyclopes here, being sure to de-activate the rage when you're stunned or caught up in a fist to preserve it. The boars around here will drop rage when you gut them, so grab them whenever possible with the O button to disembowel them.
Dropping the Shield
After both of the cyclopes are defeated, all of the barricades in the area will fall, giving you access to two new ladders. These ladders will lead to a walkway underneath the eye-beams that are raising the shield blocking you from the Island of Fate. You have to find some way to block the beams if you want to move on.
Luckily, there are two statues in the area. One can be simply dragged out and kicked towards the slot in the ground in front of the eyebeams, but the other one will be a bit more complicated. Flip the switch near it to drop the platform, drag the statue onto the platform, then flip the switch again to raise the platform. After you flip it, quickly double-jump onto the platform before it raises, then turn around and deliver a full-strength kick to the statue. If you kick hard enough while it's on the edge of the platform, it'll be kicked almost all the way to the slot on the bridge. Push it in to reflect the eyebeams back onto the eyes, destroying them and dropping the shield.
Chapter Four: Euryale’s Temple
Boss Fight: Barbarian King
After saving your game, move up the path into the bog, slicing up the hanging bodies to find some orbs. After you move forward a bit, a barbarian warrior will capture you and drag you along behind his horse. You need to deal with him!
Begin by saving yourself from a lot of damage by playing a button-pressing minigame. After four or five successful button hits, you'll regain your health and mana and be shuttled into a little arena to fight the barbarian king.
Phase One: Horseback
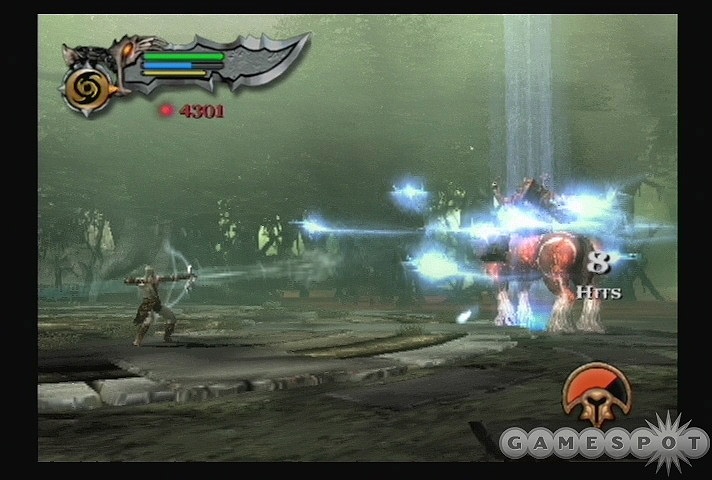
The barbarian rides into battle on his horse at the outset of the fight. He'll roam around the arena firing arrows at you, hitting you with his hammer when he gets close, and occasionally attempting to run you down with his horse. Dodge out of the path of the horse charge when that occasion arrives, and stay on the move to hopefully dodge the arrows. While doing so, unload your Typhon's Rage arrows into him; that will start knocking off the blue protective spirits that have gathered around him.
When you're out of mana (you'll gain some back each time you knock off a spirit), you'll have to finish off the remaining spirits with melee attacks. Get within range of attacks and start hitting your enemy, but try to avoid taking damage from the barbarian's hammer attacks. After knocking off the last couple of spirits, an O-prompt will appear above the horse. Getting close and nailing the O button will finish off the horse, making this a mano-a-mano fight. For the moment, anyway.
Phase Two: The Souls Of The Damned
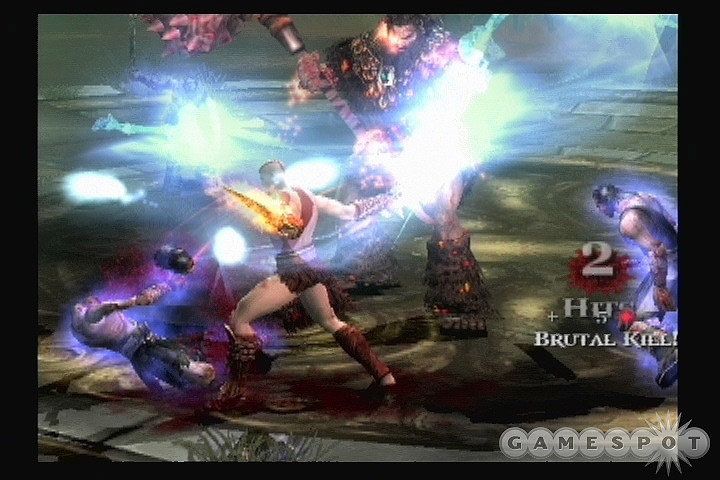
The barbarian will now attack you one-on-one, using his hammer to deal plenty of damage to you. He is, again, protected by the blue spirits that swirl around him. He can also stomp his hammer into the ground with his foot to cause a large jet of flames to ripple along the ground towards Kratos; you can jump over this attack if you anticipate it.
The key to his undoing here will be that he can materialize the spirits into bodies. He'll first summon up four helper spirits to deal with you. They'll attack you if they get close, but they can be eliminated by a simple O-button grapple. Focus on the spirits while avoiding the barbarian's attacks; after killing the first four, another four will appear. After they die, two final spirits will appear, including one that will drop some health for you. After all the spirits are destroyed, you'll move on to phase three.
Phase Three: Hammertime
After you knock off all of the spirits for the second time, the barbarian will absorb them and grow to three times his normal size. He has two basic attacks which he'll send your way here; a two-swing combo that results in a big windup before the hammer smashes into the ground, and a slightly quicker three-swing combo that has the same basic finisher. These attacks are all kind of slow, so do your best to roll to the side when they come out to avoid the ground slam. If you manage to avoid getting rammed by the slam, then you should be able to unload a combo into the barbarian's side before he recovers and attacks again. Feel free to pop some Rage at this point, if you like, to power through the fight more quickly, but if you have any to spare, you may want to save it for the last part of the fight.
Phase Four: Finish Him!
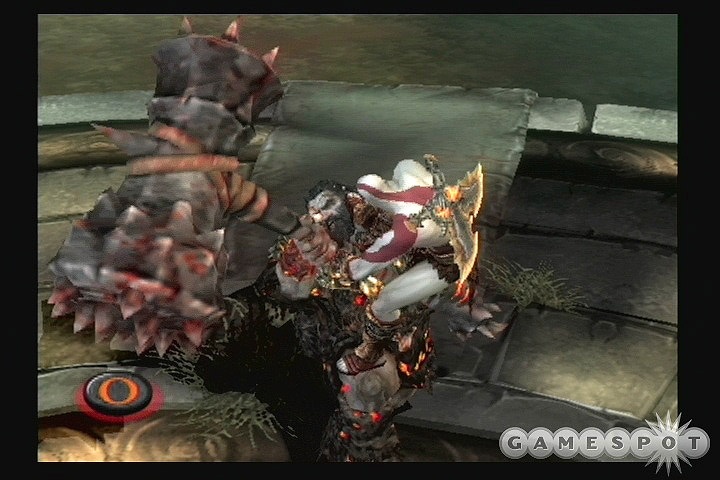
After knocking the stuffing out of the barbarian, he'll shrink to normal size and start wailing on you. He'll use the same basic combos that he put out while he was supersized, but will now also summon his spirits together and throw them at you. Try to keep an eye out for this move and dodge away from it when it comes in.
At this point, it's difficult to dodge the barbarian's attacks, unless you stay back and use Typhon's rage or something. If you're running low on health, feel free to bust out your Cronos' Rage or Rage of the Titans or some such. You have to deal enough damage to him to cause an O-prompt to appear above his head. When you see it, get close to him and hit O, but be ready to mash on the O button with your index finger, because you'll have to do so immediately to grab the hammer out of his hands. When you have it, you have to hit four button presses in a row; missing any of them will force you to go back and damage the barbarian again and repeat the whole sequence.
You Got The Whole Hammer In Your Hands
Obviously enough, this whole boss fight will earn you a new weapon: the barbarian hammer. It's a slow and somewhat unwieldy thing, so we didn't use it very often, but you can feel free to do so if you want to vary things up a bit.
The Temple of Euryale
When you reach the temple, head right and save your game. There's a small jumping path near the save point; follow it to find Euryale's Key on the body of a soldier, as well as a new enemy, the boarmen. These boarmen group together well, but can be grappled, so feel free to simply grab them and slam them around to finish them off. Another new enemy is waiting back by the doorway to the temple (which you can't enter yet); these skeletons can be knocked around by hitting them a couple of times with your hammer's triangle attack. That will cause their O-prompt to appear, allowing you to finish them off.
To the left of the doorway, a pair of skeletons will appear. Finish them, then jump into the darkened alcove in the corner of the building, before the locked door, to find another red orb chest. After opening the locked door with Euryale's Key, check the small alcove to the right of the path nearby to find another Gorgon Eye.
Ruins of the Forgotten
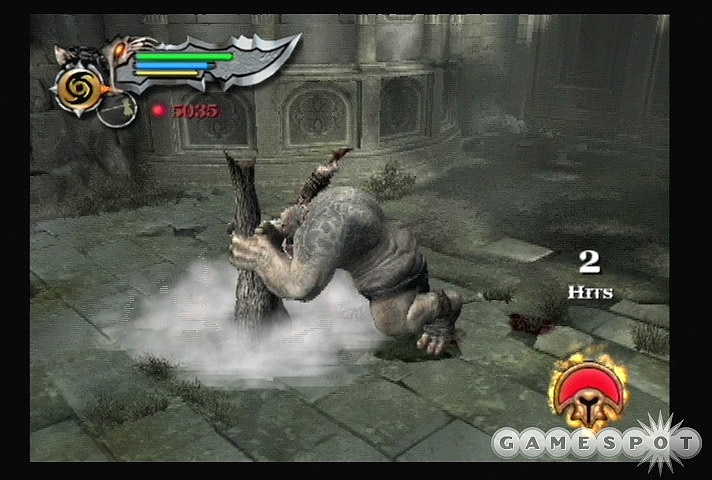
Gird yourself for a major fight here. As soon as you approach the ruins, a boarman will appear, blow a horn, summon a cyclops, and mount it, using its axes to command it in battle, and opening up numerous new attacks to it. The three major attacks it will wield are a straightforward tree slam, which is easily anticipated and dodged, a two-swing attack which can be avoided by keeping your distance, and a very damaging three-slam attack which will deal major damage to you if you get caught up in the blasts. (If you find yourself stunned by the first slam here, quickly activate Rage of the Titans if you have any left and use your unstunnability to escape the next two.) In addition, if you get knocked up into the ground at all, the cyclops will grab you and hold you while the boarman comes down to the arm to hit you himself.
Attacking the cyclops is best accomplishes through dancing like a butterfly; you can't stay within melee range of it at all times, or it'll give you an absolutely whooping. If you've upgraded your Athena's Blades to level three, the aerial L1 + Square move will be helpful in dashing in after it attacks and hitting it, especially after the single-slam move where it rams its tree trunk into the ground; this move has the longest recovery time. If you try to pull this move off and still get hit, you may want to settle for just a normal square-button mash, then dart away.
Higher Goals
The thing to keep in mind here is that there's a collection mini-game at stake. The game will reward you with a special urn if you manage to collect 20 cyclops eyes as you play. It doesn't appear that you were able to collect the eyes of the weak cyclopes that you fought earlier, but you can nab the eyes of the cyclopes here, if you like. If you don’t want to bother with the minigame now, that’s fine; you’ll be able to complete it rather easily after you beat the game and unlock the extra content.
Unfortunately, doing so requires you to kill the boarman on its back before killing the cyclops itself, which is a tricky task, since most of your normal attacks here will be hitting the cyclops, which will likely die first, all things considered. Doing so is easiest if you've managed to upgrade Cronos' Rage to level two; it'll deal more damage and affect a larger area if you've done so. Since the boarman will die to Cronos' Rage damage before the cyclops will, planting an upgraded Rage down next to them, then quickly dashing away, will eventually kill the boarman and let you deal with the cyclops by itself. Otherwise, again, you can simply attempt to throw the cyclops, pull the boarman off the shoulders, and deal with him on the ground.
When the boarman dies, the cyclops will revert to its normal attacks, which almost always is a two-attack combo including a kick and a overhand slam with the tree trunk. Dodging both of these will give you plenty of time to counterattack, since they will usually be followed by a roar in which you can simply unload on the cyclops. When you get the O-prompt over the cyclops' head, jam a few buttons in sequence to rip its eye from the socket and pocket it.
Uh-Oh…
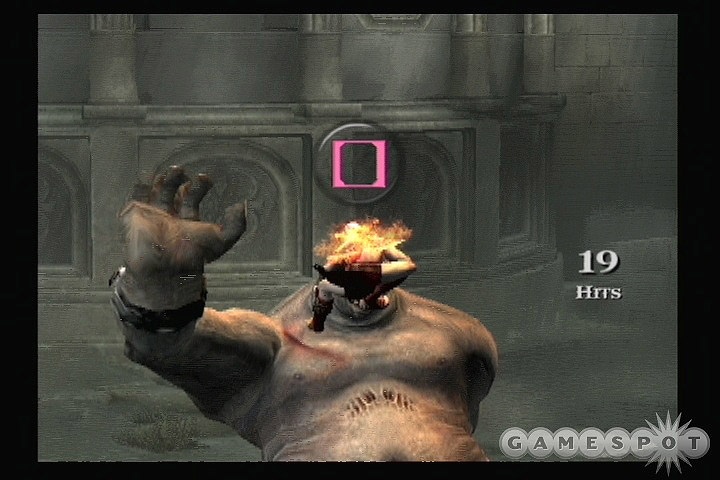
As soon as you defeat the first cyclops and boarman combo, a couple of boarmen will pop up from the ground, one of whom will call for another cyclops, which will come barreling up the cliff. If you leave the boarmen to their devices, one of them will mount the cyclops and start whacking you again.
It's obviously in your best interest to not let this happen, so try to defeat the boarmen before they get a chance to get near the cyclops, unloading Rage of the Titans or your magical attacks on them. Avoid grappling attacks if both of the boarmen are still alive; if you get locked into a multi-second animation while killing one of the boarmen, the second will almost definitely get on top of the cyclops and force you to fight another very difficult opponent.
Assuming you manage to kill both of the boarmen before they mount the cyclops, the cyclops itself will be a relatively simple kill. Again, avoid its combo attack, unload on it while it roars, then use the O-prompt to pluck its eye from the socket.
Into The Ruins
Now that you have all that out of the way, it's time to finally head into the ruins here. Pull the block away from the door and open the gate leading inside. (As far as we can tell, there's no particular puzzle involved with the tilting ruins here…although we're probably wrong!)
Inside the ruins, smash any suspicious-looking stacks of blocks in your way; one contains a red orb chest. You'll eventually come to a large doorway and a path leading off to your left; the path ends in another red orb chest. Head back through the doorway and begin killing off the firebugs and wraiths that appear; focus on the firebugs first, jumping and grabbing them, or they'll pelt you with fireballs. When everything's dead, smash the rock in the middle of the cave to reveal a grapple point. This one will spin you around as long as you hold down the R1 button, so time your jump so that you move to the far ledge here.
After a couple more grappling point jumps, you'll come to another section of bog. Climb the ladder on your right and slide across the rope to reach a Gorgon Eye, then quickly dash across the tree stumps in the bog until you get underneath the soldiers that are firing explosive grenades at you. Smash the pillars here to drop the soldiers down, then grapple them to death. After the left and right pillars are destroyed, you can R1 to grab the central pillar and shake it with the L1 and R1 buttons; that will spawn a few more soldiers, but also give you the path up to the ledge above you. There's a red orb and green orb chests near the edge here, in the small alcoves.
Bodies In The Water
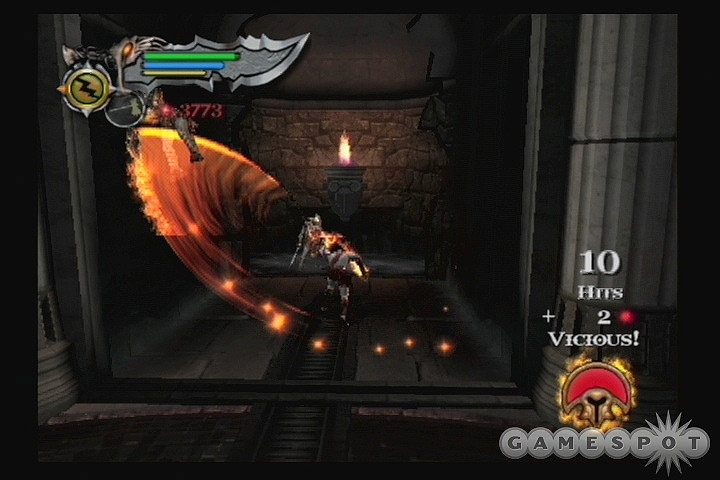
After you drop down into the large circular room, you'll be confounded with a puzzle. You have to depress two switches to open the gate that leads on, but you only have one dead body. It would be possible to open the gate if you could put the body on the plate behind the half-opened grate, but you can't jump over it while carrying the body. Hmm…
The answer here lies in the water. If you flip the lever in the circular room, then smash out the rear walls to each of the small alcoves, you'll find a river that flows behind all of the rooms, which apparently goes in a circle. If you drop the body in the river that you have access to, then jump over the grate to the left room and wait in the water there, the body will eventually appear. Grab it from the water and place it on the left pressure plate, then jump over the grate and stand on the central plate. This will drop the northern grate long enough for you to roll across it.
River of Blood
You'll spot the Spartan warrior who was pleading for your help earlier at this point. You won't be able to reach him directly, so jump onto the gear in the water and latch onto the lever nearby to start moving it. You have to move it far enough along the chains so that you can jump to the next gear, but your progress will be impeded by undead soldiers that hop onto the platform as you move. You can quickly dispatch them either by grappling and throwing them overboard with the square button, or by hitting them with a couple of triangle-button attacks with your barbarian hammer.
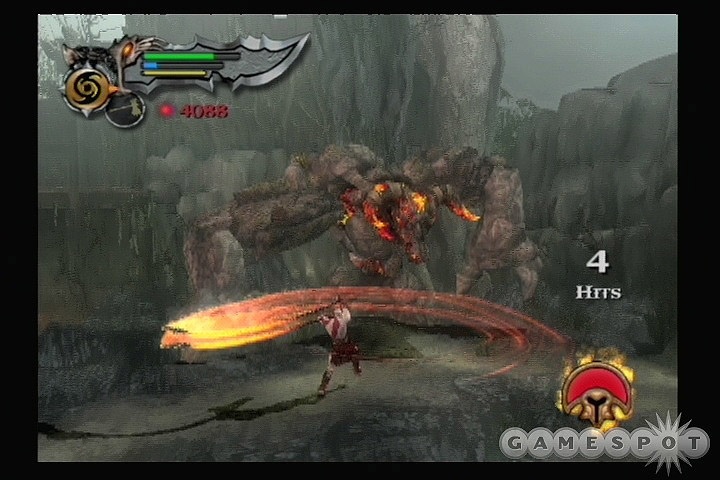
Navigate the gears until you reach the far exit from the river, where you'll encounter a stone golem which will bar your path. If you stand far away from it, it'll throw rocks at you; getting up close and personal will force it to whirl around with its fists. It's easiest to take it out with melee attacks. Get close enough to force it to whirl around and note the range of its fists during this attack. After it finishes the whirl and begins settling up, dart in with a combo, then dodge backwards as it begins a new one. As long as you're quick to dodge, you can repeat this action a dozen times or so to weaken the beast. When the O-prompt appears above its head, finish it off with button presses and break the tree behind it to move on.
When you reach the rope suspended across the area, start crawling along it and use the O button to grapple your enemies to their deaths. When you reach the end of the rope, drop down and open the shutter near the rotating wheel to reveal a fate statue; this will let you use your L1 and R1 buttons to freeze time and allow you to cross the wheel.
You have to navigate through a rolling platform here, replete with undead soldiers. There are petrifying beams that cover the hallway you need to move along, so don't jump. Use grapples and throwing attacks to clean out the soldiers as they pop up, but be aware that you get 15 extra orbs for killing a soldier while it's petrified. They won't cross the beams themselves, but if you knock the soldiers around a bit, some will turn to stone and let you pick up the bonus orbs for finishing them off in that manner. If you don't want to deal with them, just roll your way to the end of the path and use a special attack to destroy the wooden wall there, then use the grappling point to swing across to the platform nearby. Destroy the statues to reveal a wooden block and push it to head…
Right back to the teetering ruins you were at previously. Now that you have two sets of blocks, maybe you can do something about them? In order to use the block, jump onto the teetering building and push the old block back towards the left side of the screen, so that there's a small ramp leading onto the building. Then, push the new block onto the building from the ramp, ensuring that both of the blocks are on the portion of the building that leans. With that done, kick both of them over to the far side of the building, near the door you used earlier. This will cause the building to tilt more heavily than it previously did, allowing you to move to the edge of it and use the R1 button to throw the whole thing into the river below.
The Cave of Torment
Climb down onto the roof of the building you shoved into the river and jump from there to the handholds on the far side. Break the tree that blocks your path and jump over to the far side from there. Ignore the big grinding wheel in your path, and head up and over the path nearby. Speak to the argonaut on the ground to learn about the Golden Fleece, which Jason possesses.
There's a new Medusa in the area, with a powerful petrifying beam that will turn you to stone before you can roll away from it. You can attack her as you normally would, but again, don't jump around. You'll deal with more of them in a few minutes.
After looking around and finding the Phoenix Feather here, pick up the argonaut and place him in the middle of the hallway, on the rolling path that leads under a grinder. His body will clog up the works and allow you to move into the room nearby, where another Cerberus awaits you.
Boss Fight: Cerberus II
This cerberus is a bit different than the one you fought earlier: it's tougher, for one thing, and can breathe fire and shoot fireballs. Luckily for you, though, you can block pretty much all of its attacks, except for the fireballs, which will eventually break through your block and damage you. Still, though, if you're patient, you should be able to beat the creature without taking too much damage.
This is technically more of a miniboss fight, so there's not much indication of progress here; there's one animation that plays when you knock off around a quarter of the beast's health, but apart from that, you'll just have to use normal weapon attacks on the animal until you get the O-prompt above its head.
Ignore the switch on one side of the room here; it won't help you. Instead, let the beast get close to you and keep your guard up. When you block a couple of its attacks, hit it two or three times with your Blades of Medusa. That's basically the pattern that you're going to be following here, making the fight a relatively long one. No need to bust out any supercombos, which will likely just open you up to damage anyway. Feel free to use your Rage of the Titans, however, and use that to knock most of the beast's health away; you'll be getting a full health recharge when it dies, anyway, so you don't need to worry too much about taking damage so long as you leave yourself a comfort zone for finishing the fight.
When the O-prompt pops up, hit it to finish off the devil dog and grab the Golden Fleece.
Escape!
With the Fleece in your possession, flip the switch in the room, head to the scorch mark in the center of the room, and tap L1 just before it hits you to reflect the fireball back at the wall; this is the special power of the Golden Fleece, which will let you do this on most incoming enemy attacks from now on.
For instance, the medusas that attacked you earlier are back in full force now, with two attacking you at a time. They're tough to take on normally, but with two, you'll need something special to deal with them. The Golden Fleece will let you tap L1 just as their eyes start to glow green; if you then hit the button prompt that appears (it's randomized), you'll petrify any nearby enemies, allowing you to attack them and hopefully crush them to death before they unfreeze. Again, no jumping attacks; if you get frozen in midair, you'll die upon landing.
Into The Temple of Euryale
Head back to the entrance to the temple, near where the skeletons originally attacked you. If you walk onto the platform nearby, you can use the golden fleece to block the stone beams and reflect them back on the doorway, which in turn will let you attack it and head inside.
Inside, start making your way through the frozen enemies, smashing them before they can come to life. Climb down the ladder to reach a large abattoir with new minotaur-like enemies. You can throw the lesser soldiers at them, if you like, or just use some upgraded Cronos' Rage spells to knock a bunch of them out at once.
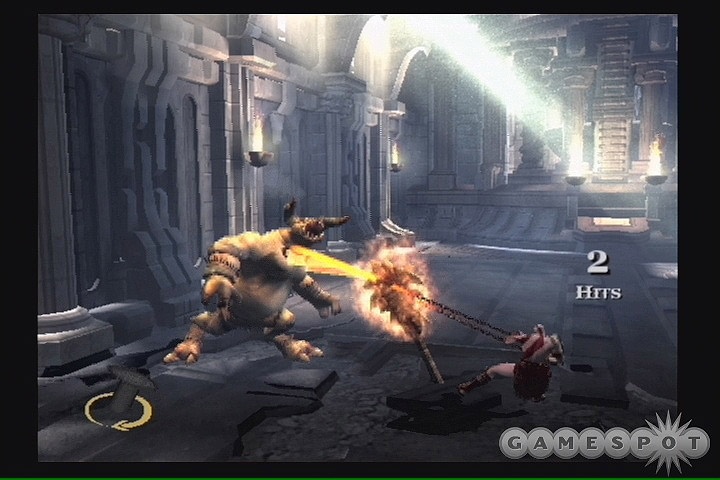
Nearby, you'll come across a still-human soldier that wrecks a lift, seemingly preventing you from moving on. Don't worry about it, though; take the working lift down into the transfer room, then kill the bugs that are flying around. When they're dead, you can smash the giant emblem on the wall here to reveal some treasure chests, including either a Gorgon Eye or a Phoenix Feather. (You may have to throw one of the bugs at the emblem in order to smash it.) Get back on the working lift and raise it up slightly off the ground; note that the height of the non-working lift is affected as well. What you want to do is raise the nonworking lift just high enough for you to jump up onto it, without it being too high to reach. When you do so, you'll be able to jump up onto some footholds in the shaft and climb your way up to the top from those.
A fairly tough supersoldier will fight you here. It's immune to throws and will block many of your attacks. If you can pull it off, the parry attack (hit L1 just before an attack comes your way, then tap O) will be a good way for you to bust through its defenses. You have a health chest near the save point here, though, so feel free to toy around with it and find a strategy you prefer.
Challenges
When you climb to the top of the ladder here, you'll need to climb up the wall and avoid the ceiling blades that rotate around up there. They move slow, and there's another health chest at the end of this section, so don't worry too much if you get hit once or twice.
When you drop down to the health chest, you'll find a switch. Flip it, then quickly run down the hallway nearby until you find another switch. Flip that one as well, then move to the end of the hallway and lift up the door there with the R1 button. You need to do all of this before the spiketrap comes back and kills you, but you should have just enough time to do so if you act quickly.
Boss Fight: Euryale
Euryale, Medusa's sister, is a rotund, large snake that attacks with petrification effects and her massive body; she'll appear when you read the book in the room in front of you. There are three main phases here.
First Phase
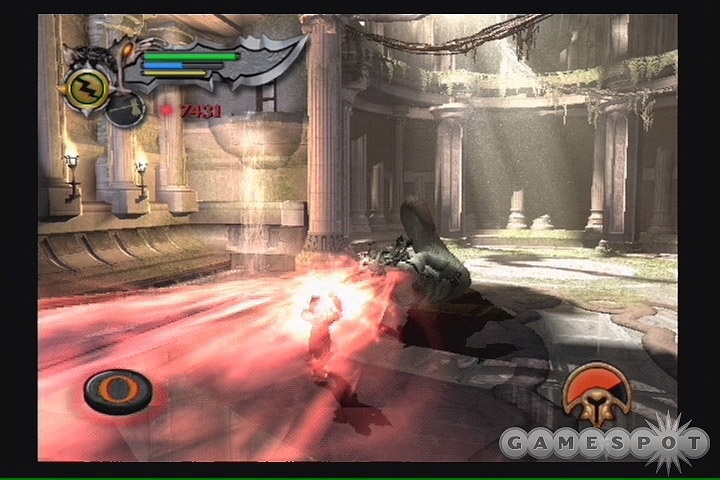
This is going to be the quickest phase of the fight, since Euryale won't have many attacks to send your way. Her favorite move will be a quick tail-sweep, followed by a tailslam into the ground. You can block the first sweep, but the slam is unblockable, so roll out of the way. Jumping around is a good way to avoid this attack. Secondly, she'll periodically send out a red petrification field at you. If you're standing still, you can tap L1 just before it hits to activate the Golden Fleece; mashing on the O button if you're successful will explode the energy coming your way, causing Euryale to drop a few blue orbs for you.
Apart from dodging these attacks, you can attack Euryale as you like here. We used the aerial L1 + Square attack quite a bit to get in a quick ten hits, but you can also use Cronos' Rage on her, since you'll be getting back magical orbs when you reflect her petrification beam and when this phase ends. Save your Rage of the Titans, though.
After a bit of time, you'll get some health and mana from Euryale and the next segment will begin.
Second Phase
At this point, Euryale will head to the pillars on the north side of the room. She'll slither around them and attach herself to the wall in this manner. You can nail her with the aerial Cyclone of Chaos, if you like, or jump up and hit her with magic. She'll occasionally swing her lower body around, so be on the lookout for that, although it can be blocked if you're on the ground. She'll also periodically send down a huge wave of petrification at you; it apparently can't be dodged or jumped over, so just let it hit you and quickly tap your way out of it. Lastly, she'll sometimes jump off of the platform and create a shockwave, which can be jumped over.
Attack her while she's attached to the pillar, if you like, or nail her after she jumps down, and you'll eventually move on to phase three after completing a couple of minigames.
Third Phase
Euryale becomes enraged at this point, and has some new attacks to whip out. The first is a quick-action stone ray, that's difficult to block or reflect; be ready to tap out of it before she smashes you. Secondly, she can shoot small red orbs at you that move at varying speeds; these can be caught with the Golden Fleece, if you're quick with it. Lastly, she can pound her fists into the ground, which is unblockable and will obviously incapacitate you.
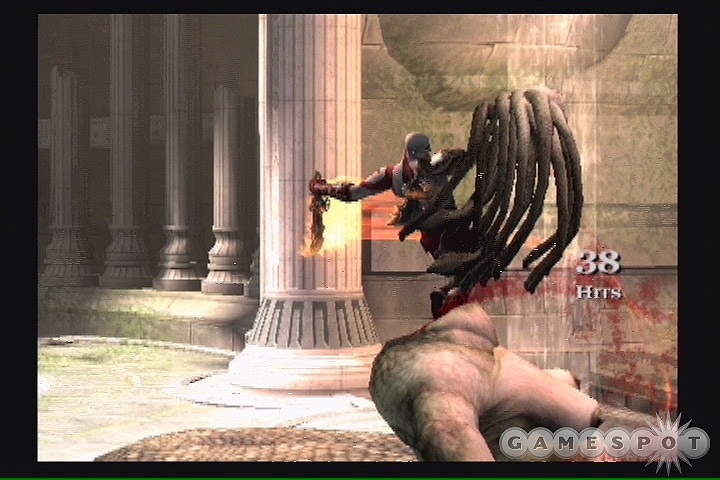
The best approach here is to just go hellbent. Activate your Rage of the Titans and start unloading on Euryale to deal as much damage as possible, assuming you have a decent amount of health remaining in your stores. It's a fair bit more difficult to play cat and mouse with her at this point, since she has a much broader array of attacks, but you can still unload with Cronos' Rage or Typhon's Bane if you like. After dealing enough damage to her (it won't take too long), you'll see an O-prompt above her head; completing the button pressing minigames will finish the beast off and earn you the Head of Euryale magic, which obviously is the same as the Gorgon's Stare magic from the original God of War. Use it on five of the soldiers that appear (press L2 to activate it) to open up the passage moving on.
Euryale's Defeat
After taking down Euryale, it's time to escape from the Island of the Fates. Head through the passage and examine the puzzle that lies before you. Well, you can't really examine it, since it's spread throughout a few rooms, but we'll go ahead and tell you about it. In order to move on from here, you'll need to swing around on a few grapple points, which aren't currently raised. Raising them will require a bit of swimming, however.
Anyway, move out from the save point and rotate the lever directly in front of you. That will raise the first grapple point post, of five total that you need to hit. With that done, jump to the nearby platform (note that most of the rooms here will have underwater jars that you can smash with your R1 swimdash for a few orbs) and pull the lever, which will open a gate underwater nearby. The gate will close as you approach it, so use your Amulet of the Fates (L1 + R1) before jumping into the water.
The second room features another post, so make sure it's fully raised and locked in place before jumping into the water and flipping the switch near the corner of the room, underwater. The gate nearby will open, allowing you to move on to the third room. As you'll find out, though, if you attempt to simply swim through the gates, the far gate will shut before you reach it. So, flip the switch, move towards the first gate, then use your R1 swimdash to jet through the second gate before it closes. If you mess up, you'll have to return to the first room.
Third Room
When you reach the third room, raise the third lever, then jump into the water and use your swimdash to bust through one of the fragile gates underneath; that'll lead to the fourth room. The fourth post is obviously here (take note of the hidden alcove above this room as you raise it), as well as a switch in a small alcove; flipping it will open the gate above the room, which is where you ultimately want to be. It's to be found in the hallway nearby, to the right of the ladder. Head into the room there and prepare for battle.
Truth be told, this fight is only as hard as you want it to be. As soon as you start rotating the lever underneath the fate statue, a horde of enemies will begin popping up, including a large gladiator and numerous smaller soldiers. The soldiers will be capable of flinging fireballs at you (which you can reflect with the Golden Fleece) and also crawling towards you and exploding when they're near death. The gladiators and just beat-down machines. Since you have the ability to stop time, you can do so as often as you like to either grapple the soldiers to death or beat down the gladiators.
Making The Jumps
After killing everyone here, move out into the hallway and climb the ladder. There are two red orb chests here, as well as a pressure plate that you should stand on. When you have all of those done, return to the gladiator arena and rotate the lever underneath the statue; that will raise up the post here. Unlike the others, though, this one will slowly rotate back down into the ground, leaving you limited time to get past the grapple point above.
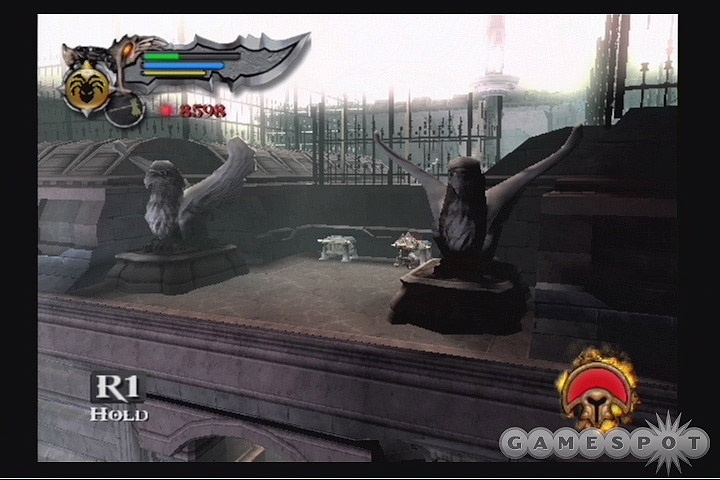
As soon as you lock the post as far as it'll go, activate your Amulet and run towards the ladder. When you reach the top, wait for your timestop to wear off, then activate the Amulet again. At this point, grab onto the grappling point in front of you, then start rotating and jumping from point to point. You'll want to be around 45 degrees away from a full rotation before attempting to jump to the next point. A little practice will show you the way, and if you need to start over, the ladder you unlocked will let you do so.
Note that there's a hidden alcove on the right side of your screen as you rotate around the fifth and final post. Jumping to it will net you more red orbs and a Phoenix Feather.
Catacombs of the Fallen
When you reach the elevator, flip the switch and start dealing with the dogs that unceremoniously drop in your lap. If you've upgraded your Blades of Athena a fair amount, you should have the Cyclone of Chaos move bound to L1 + Square, which will make quick work of the doggies. When you reach the top of the shaft, tap O repeatedly to push the elevator back down a bit, kill a couple more dogs, then repeat the process until the doorway here is open wide enough for you to roll through.
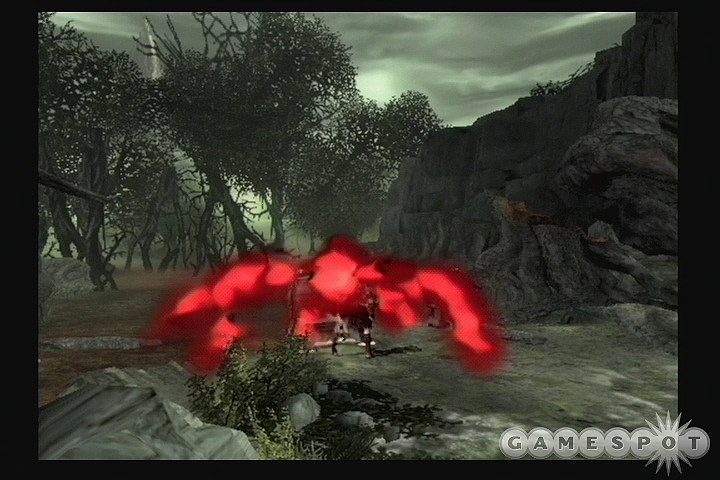
After making your way onto the wooden beams here, jump up onto the handhold to your right and creep along. Predictably enough, the stone pile in front of you is another stone golem. Take it out the way you did before, rolling away from it when it rotates, then rolling back in to hit it. Note that there's a dual mana/health chest back a bit, though; if you're already full on both resources, feel free to use your magic to drain most of the creature's health. The imps here will attempt to divebomb you with firebombs; get used to jumping just before they hit the ground to avoid the damage.
After swinging across the gap, be ready for a group of skeletons that will rise from the dead behind you. Use the Barbarian Hammer’s triangle attack to mash them, then kill them with the O-button to gain a few extra orbs. Head up the stairs and flip the switch to return to the Atrium of the Fates.
Before you move on from here, head to the left of your screen and enter the Bog of the Forgotten. If you return to the area where the Barbarian King grabbed you with his horse, you can find a Gorgon Eye and a chest containing around 4,500 red orbs. Nice!
Across The Cliffs
Return to the Atrium and use the Fleece to counter the fireball in the hallway nearby. That will lead to a passageway towards a cliff area where more skeletons appear. Blast the nearby skeleton archers with magic or combos, then bring the skeletal gladiator back into the hallway to take him out without having to deal with the more distant archers, who can then be destroyed with your bow.
When you’re ready to move on, swing across the first gap, but don’t keep jumping; land on the first platform and climb up the wall to find a Gorgon Eye and a red orb chest. Grab those items, then drop back down and swing along the grappling points.
Chapter Five: The Hall of Atropos
The exterior of the hall here has a few of the burrowing wight enemies you’ve come to know and hate. They drop plenty of magic orbs when killed with throws, so try to soften them up with magic before using your throw combinations to finish them off.
When you save your game, move to the doorway near the save point and head on through. Heal at the chests if need be, then move through to the next little arena. You’ll be attacked by a trio of summoners here; shamans that can summon minotaurs up from the depths to attack you. The summoners themselves can fling green energy at you to slow you down, or slice at you with energy blades.
Luckily, the summoners aren’t too troublesome to deal with if you can get close to them, which itself can be problematic since they can teleport. If you’re having trouble, lay down a Cronos’ Rage to stun them, then grab them with the O button. Mash O to break through their guard, then start lassoing them in from the air. Lather, rinse, repeat as often as it takes to finish them off; being immune to attacks while you’re throwing these guys around will make this fairly easy. Since they drop a lot of mana orbs when killed by a throw move, you can use your magic to weaken up the minotaurs before killing the third summoner, then finish the minotaurs off.
Moving On Up

You have to exit this room through the upper passageway, and there’s a platform that will reach it if you move the lever in the center of the room. Unfortunately, the platform will drop before you can get up there, necessitating some statuesque interventions. Begin by placing one of the statues in the room on top of the platform itself. The second statue should be placed just to the side of the platform, between it and the lever. What you have to do here is move the lever until the platform is locked at its uppermost point, then let go and push the second statue underneath the platform as it descends. If done properly, the second statue will arrest the fall, and you’ll be able to jump up to the top of the room.
Move along the corridor there, popping the red orb chest before moving out to an exterior area. Head down to the chest at the end of the smashed bridge to fight off some soldiers, then take the nearby stairs to reach another little abattoir where a couple of demonoid-looking creatures will accost you. These guys are difficult, and will block and counter most of your attacks, so it’s well worth using either magic or Rage of the Titans to wear them down before killing them off. When they’re dead, head to the doorway leading out, press R1 to grab the large block, then drag it backwards into the room you’re in to jump up and reach a Gorgon Eye. With that done, push the block down and into the atrium below you.
The Edge of Creation
Push the block around until it comes to rest underneath the half-broken ladder here. After climbing it, move around to the right to find a statue atop a cracked pedestal; smash the pedestal, then push the statue onto the ground below you. Move back towards where the eye-beams cross the bridge, then step across the beams that lead off to the other side of the area. You’ll find a Phoenix Feather here, as well as a doorway directly above the one you passed through earlier. You’ll come into a room that’s populated with soldiers and a gladiator or two. Kill them before jumping up to the platform above and moving on.
After swooping around on the grapple points, swing your way to a balcony with a fate statue and kill the soldiers there. Stand on the system of roots near the edge; you should notice a small pressure plate on it that extends the roots out to the central platform here. After extending the roots, activate your Amulet of the Fates, walk out to the central platform, then drop down to the treasure chest between the two trees to find another Phoenix Feather. With that in hand, hit the pressure plate on this platform and return to the balcony.
From the balcony, you need to first hit the plate, then stop time and run back to the central platform, taking a left to reach another small platform nearby. When you reach it, clear out the enemies, hit the plate, stop time, then run back to the central platform and take another left to reach another small garden area. The pressure plate here will extend the roots off to the structure beyond the two trees, so stop time and run towards it.
Boss Fight: Perseus
Perseus is trapped in the temple, and has apparently been looking for an audience with the Sisters of Fate himself. It doesn’t take him long to talk himself into attacking you, in the hopes that this will further his cause.
Phase One
The gift of the cap of invisibility from the Nymphs to Perseus will make this first section of the fight problematical, since, well, it’ll let Perseus fight while invisible. You can make out a vague shape in the water, and see his footsteps, but he’ll still be tough to spot. Luckily, you can dodge pretty much any attack he throws your way here.
Perseus’ attacks are fairly typical. He’s got a lunging attack, a charge attack that will attempt to repeatedly hit you, and a sling attack that will send a green bullet your way. When you see him charging up the sling attack, get ready to use your golden fleece to reflect it. If he’s far enough away, you’ll be able to do this twice per volley. Apart from that, use standard attacks to try and wear Perseus down. No need to fool around with elaborate combos or special attacks; just tap out an attack or two in his general direction when he stops attacking. You’ll know you’re hitting based on the blood that spurts out, as well as the hit meter.

This can be a confusing fight, but if you keep your guard up when you’re unsure of Perseus’ location, you should be able to avoid most of the unnecessary damage. Feel free to pop your Rage and spam out some combos if you just want to wear him down quickly.
Unfortunately, moving past this phase will require you to hit an O-prompt above Perseus’ head. Normally that wouldn’t be too bad, but the prompt here only lasts for a couple of seconds; if you miss it, you’ll have to resume damaging him until it shows up again. Again, try just tapping out a couple of normal attacks if you find yourself consistently missing this prompt, and wait until you know he’s close to you before attacking him. Launching supercombos will usually result in the prompt coming and going while you’re in mid-combo and thus can’t react to it. Stick with simple attacks, stay close, and keep on trying; eventually you’ll get to grapple Perseus and smash his helmet.
Phase Two
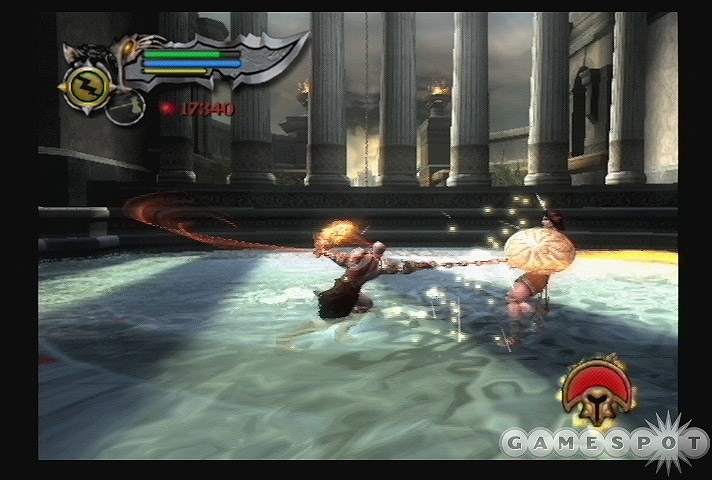
Without his helmet, Perseus is visible to you. He’ll attack in much the same way as he did in the first phase, here, save that his sling attack will now send out multiple bullets in an arc. In addition, he can occasionally blind you by holding his shield up to the sun. You’ll need to move your left analog stick left and right to break out of the stun that results; start doing it as soon as you see the screen go white, and you’ll almost always be free by the time his attack lands, letting you put your guard up.
This is a good time to pop your Rage, assuming you didn’t do so in the first phase of the fight. There’s nothing super complicated here; just keep your guard up while landing blows to Perseus as best you can. Eventually another O-prompt will appear, allowing you to grab Perseus’ sword and break it, thus mostly ending the threat that he poses to you.
Phase Three
At this point, without a helmet or a sword, Perseus is greatly weakened. He’ll still attack you with shield bashes and sling attacks, but he won’t be able to do much damage to you. Just keep mashing out your square button attacks, and try to maneuver him to the north side of the arena, making a special point of attacking him when he’s near the walls. Eventually he’ll move to the center of the northern wall and stick there, so redouble your attacks on him and wait for an O-prompt. When it comes, hit the first button to slam his head into the wall, then start waggling your left analog stick when his head is underwater. As soon as the stick icon disappears from the corner of your screen, though, get your thumbs back over the face buttons and get ready for one last button press. Hitting it correctly will kill Perseus and let you return to the atrium below you.
Moving On
Now that you have Perseus’ Shield, you can affix it to the statue that you kicked to the ground here earlier. With that done, push the statue onto the small platform in the middle of this atrium; there’s a little slot where it’ll fit into. After it’s been inserted, raise the platform it’s on with the lever nearby. You should see it start to reflect the beam of light back into the eye of the statue that’s emitting it. If so, then you’re halfway there!
When the platform is raised, and one of the beams is reflected, let go of the lever and quickly jump onto the stone and hop up the ladder. You need to get in front of the second beam of light and hit the L1 button to reflect it with your fleece before the platform drops and you have to repeat the movement. If you can get into position before the platform drops, though, the shield nearby will drop, allowing you to move on.
Return To The Island Of The Fates
Now that the shield is down, you can walk back towards the Island that you were on before; this time, however, you’ll be in a different section of it. The first thing you’ll notice is a statue with some chests hidden behind a door to its left. You can’t get them now, so head to the right and make your way past the archers. Follow the path in front of you until you come to a broken bridge; find the roots growing on the building nearby, climb them, and flip the switch that opens a gate here. Grabbing the purple object in the body of the bird will net you the third weapon of the game, the Spear of Destiny. Use it on the chump soldiers that attack you.
When the soldiers are dead, it’s time to go back and retrieve those chests. The lever in the middle of this room will rotate a bit of the floor, which you can use to move the fate statue here so that it points in directions that are more easily accessible to you. What you want to do is rotate it 90 degrees, so that it faces towards the door here. With that done, kick it out of the doorway here and move it back towards those blue and green chests you passed earlier. Park it there, then swim across the water. When you’re on the far side, activate your amulet to freeze time, swing across the gap, and quickly run across the pressure plate and into the door to nab your loot. You’ll nab a Phoenix Feather, a Gorgon Eye, and the Urn of Olympus.
With that done, push the statue back to its original spot, after rotating it again so that it faces the wobbly bridge nearby. Hop onto the bridge so that it straightens out, then hit your amulet to cross over.
The Crossing Of The Lowlands
What comes now is a fun grappling-point game, where you have to swing across a valley crossing while the pillars around you are smashed into the ground. Your checkpoint is right at the beginning of this area, so you have as many tries as you need to get across, but it can still be complicated at spots. The trickiest area is the jump immediately after the only grappling point that spins you in a circle; at that point, you’ll have to actually hold on to the grappling point and let it swing you back and forth once before jumping. If you jump too early, the next grappling point won’t be in position and you’ll fall to your death. In most of these cases, though, you can return to the point you just jumped off of if you think you jumped too early.
You’ll have a couple of fairly challenging fights in this little cave in front of you. The first will come across some relatively easy sirens and large minotaur-esque creatures. Deal with the sirens first, using Cronos’ Rage to stun them while beating on them with your weapons and waiting for the O-prompt to appear to finish them off; each will usually take two O-prompts before they die. The firebrands here will attack with flaming axes, so keep your distance and engage them with care.
Next up is another tough demonoid-like foe that attacks with a staff of his own. If you use the Spear of Destiny on him, mashing the triangle button combination will be one good way to take him down, as it’ll launch him into the air, juggle him, then bash him when he comes back down to earth. You can also try grappling him with the O-button. A couple of gladiators will make life interesting for you, though, so feel free to pop off some Rage and button mash your way out of the fight. You have a combo chest here, and another pair of health/mana chests coming up, so don’t worry too much about preserving your mana or anything; use magic to aid you in the fight.
The Great Chasm
After a lengthy talk with Icarus, you’ll fight him. This isn’t a normal fight, though; instead, it’s mostly a collection of stick twisting and button mashing minigames. It’s apparently impossible not to fall off the bridge, so don’t worry about that. Instead, wait until you and Icarus are both falling, then start hitting him with the square and triangle buttons when you’re on top of him. If he twists you underneath him, get ready for a 360-degree rotation of the left analog stick; if you pull it off, you’ll bash Icarus into some of the rocks.
Successfully completing the minigame will net you Icarus Wings and will land you on the Titan Atlas.
Chapter Six: Atlas
Begin by walking to the left from your start point to find a save spot. From there, walk back to the eyes of Atlas and climb up the handholds there. You’ll have some lengthy jumps to make; if you double-jump, then hold down the X button, you’ll sprout your wings and will be able to glide across the gaps. Keep flying around until you reach a small cave that’ll take you into Atlas’ blood and guts.

More of the demonoids will attack you here, and they’ll be matched up with fire imps. Attempting to throw the wolves will let you kill them, but each of them can take six or seven throws before you finally are able to finish them off. Doing so will net you a 25-orb bonus, though.
When you’re done with the enemies, slash at the growth on the wall to free up a pushable section of bone. Drag it into the room you just fought in and push it up against the left wall to find a small alcove with a Phoenix Feather on it. Jump up, grab it, then move the bone back through the hole. You’ll need to pull it backwards, with Kratos going through the hole first, in order to position it into place so that you can jump onto it and move on through the tunnel near the health chest.
Stone Golem
Now, one of the more difficult fights you’ll have experienced lately is coming up. There’s a stone golem on the ground before you, but this one is actually capable of movement, so you can’t simply expect it to sit still. When it activates, though, you can still use your old attack plan: wait for it to perform its spinning attack, dash out of the way, then jump back towards it with a couple of aerial Cyclones of Chaos for quick damage. You can expect to get bashed around a lot more than you would in a normal golem fight, for sure, so feel free to let loose with magical attacks to weaken the animal.
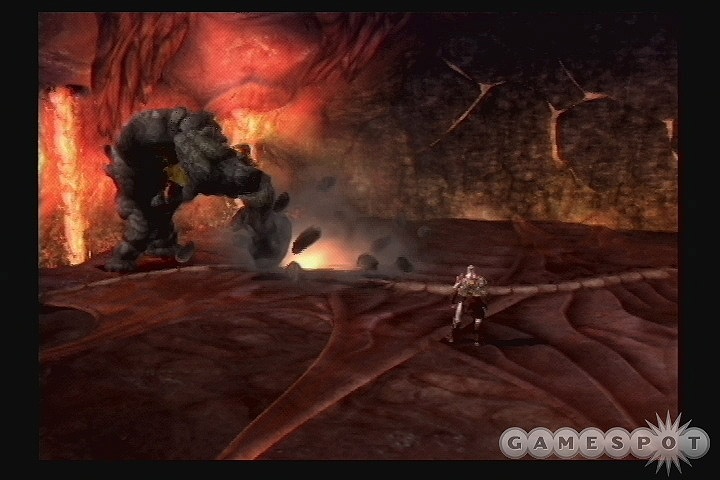
After you deal enough damage to the golem, it will release a lot of orbs your way, then smash the platform here, which will quickly sink. You have to jump onto the handholds on the wall before you die from lava damage, so grab on and wait. The golem is immune to the lava damage, so it will start picking up rocks and throwing them at you. Wait until just before it releases, then hit X to jump to the left or right to avoid the damage from the rocks. After a dozen or so attacks, the platform will re-raise, allowing you to finish off the beast with more normal attacks.
When the golem dies, it’ll leave behind a chunk of itself. Push it to the end of the platform and use it as a springboard to reach the upper ledge nearby. Although difficult to see, you can jump from the edge of the ledge to the left to reach a small platform with a Phoenix Feather on it. From there, jump across the platforms until you see Atlas’ hands in the distance. There’s a save point near the green chest to your left.
Inside The Mighty Titan
Slash at the growths on the wall near the save point to free a rock, which will float into the lava. Jump onto it when it stops, then smash the growth blocking its path. When the rock is about to float off the waterfall, double jump, grab the grappling point, then double-jump and glide to the cave nearby. You need to smash the rock here to open up an air vent. Double-jumping while standing on the vent will cause you to float up and be able to glide over to the next cave.
Inside the cave, a number of imp-producing holes in the wall are scattered around. You only get orbs for the first few imps that you kill, so play whack-a-mole until the orbs stop coming, then start smashing the holes with your weapons. When everything’s dead, climb up to the handholds and climb across the room to the mana and health chests. You can double jump and glide from there to another set of handholds nearby. Smash the stalagtite in your way to move on, then jump to another balcony overlooking the exterior area here.
When you see Atlas’ face in the distance, find another set of handholds and start crawling along outside. Smash every stalagtite you see, even the ones that aren’t in your way; one of them conceals a hidden entrance leading up to the Urn of Prometheus. Retrieve it, smash the stalagtites in your path, then climb up and drop down on the weighted platform inside the small room. That’ll lead you to some handholds that pass back over the room containing the last save point. Smash the pillars that drop from the ceiling, and they’ll open up a lava vent below you. Crawl back around the handholds until you can drop down to the ground here, then jump across the vent to reach the balcony beyond it.
Waving Platforms
Jump from the balcony to the first platform, then from there down to the platform with a lever on it. When you touch the lever, a very annoying fight will begin. You’ll be accosted by fireimps that can grab onto you and firebomb you, as well as some of the heavy soldiers that you’ve been seeing lately.
The fireimps should be grabbed whenever they’re nearby, as that’s an instant kill for them. If you can’t reach them, then jump up and grab them before finishing them off. They’re really annoying here, and will make it difficult to see what you’re doing as you run around, so try to kill them before attacking the soldiers, if possible. The soldiers will attack as you run around after the imps, but they can be knocked out by using the Spear of Destiny. Use the Piercing Shards attack (L1 + Triangle) on them, and they’ll instantly be knocked down, even if they’re guarding. While they struggle to get back up, start a triangle combo with the Spear; it’ll knock them into the air, stab them before they come down, then blast them as they land. Eventually you’ll get O-prompts for them, allowing you to finish them off.
Without any health pickups here, this fight can be quite difficult. Do your best and don’t hesitate to use magic or Rage to help you out. When the coast is clear, rotate the lever to raise up the platform and get yourself in position for the next few jumps. The platforms here sway, so try to wait until both of them are almost in the middle of their arcs before jumping.
Ascension of Atlas
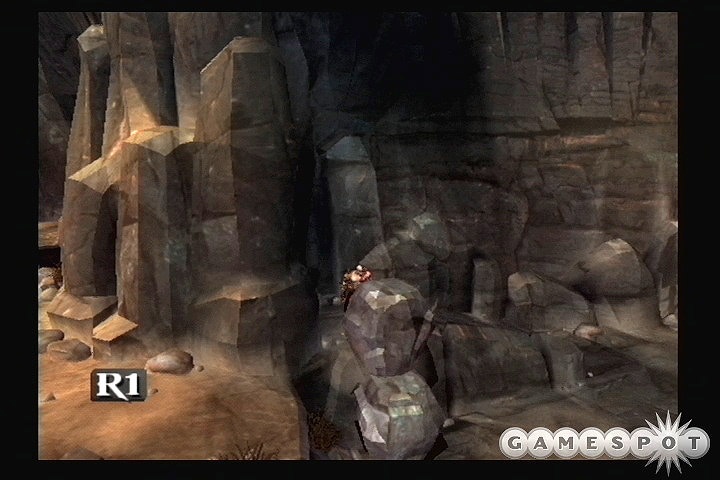
Save your game and start climbing up the handholds. At the top, you’ll need to hit R1 twice; once to drop off the handhold, and once to grab onto the grappling point. Swing around until you reach another handhold, then double-jump backwards from it onto the platform above. You’ll come to a pair of bricks. You need to position one of the bricks on top of the other. Push one of them up the ramp here, and position the other one nearby it on the ground. If you position them right, you can push the one at the top of the ramp onto the one below it, then push the lower one up to the ledge nearby. That will let you push the upper brick towards the ledge nearby and double-jump up to it. Before using the handholds beyond the green chest, jump to the handholds leading to the red orb chest and nab those.
The handholds above the green chest are going to be annoying. Large boulders will fall on your head as you climb. You can avoid them by jumping from side to side, but you’ll either have to proceed very slowly or just accept that you’re going to get knocked in the head once or twice, especially near the top of the two climbing sections. In between the two sections is a large channel that you have to descend; just hold the R1 button to glide down, and quickly move to the left to avoid the boulders that fall onto you.
When you reach the top of the hand, smash the chains that bind Atlas, then struggle out of his grip to start a lengthy cutscene. After receiving the Atlas Quake magic, start mashing on the L2 button to destroy the soldiers that come your way, and Atlas will return you to the world above.
Chapter Seven: The Palace Of The Fates
Time to get your ass kicked. Start jumping and gliding your way across the chasm in front of you. Don’t miss the red and green chests here; you can climb to them via the handholds.
When you reach the plaza in front of the palace, move to the right and flip the switch under the walkway, but be ready for a major fight. As soon as you flip it, two boarmen will appear and both blow their horns at the same time, summoning two cyclopes. In addition, a fireball-wielding soldier will continually spawn near one of the chests here, pelting you (or the enemies) with fireballs.
Cyclops!
Cyclopes will appear here, and if you’re not careful, you could face quite a few of them. Luckily, it’s fairly easy to avoid having to fight all but one cyclops if you wish to do so. Of course, the more enemies you face, the more red orbs you’ll likely collect. Feel free to adapt the strategies below depending on your skill.
Begin by slashing at the nearest boarman as soon as you’ve flipped the switch; that will interrupt his horn blast and cause only the horn summoned by the other boarman to appear. Start mashing away on your O button while engaging the boarman on the ground here; the other one will climb on top of the cyclops that is summoned, but don’t worry about that now. Keep throwing the boarman that’s running around; you’ll be immune to damage while you do so. If you stop attacking him, he’ll call for another cyclops, so just throw him until you kill him.
When that’s done, another boarman will spawn nearby. Again, stop him before he can blow his horn, then throw him around until he’s dead. Repeat this until all of the boarmen from that spawn point are dead and no more appear.
Now, focus on the cyclops. If you want its eye, use your throw button to pull off the boarman on his shoulders, then start throwing him around. When another respawns, grab it before it gets on the cyclops, kill it, repeat until no more boarmen appear, kill the Cyclops, kill the fire-thrower, and you’ll be golden. This is assuming everything goes perfectly well, of course; it’s possible that you’ll be knocked down long enough for another Cyclops to get summoned. But still, if it works, it’s the easiest way to approach the fight.
Into The Palace
When all the enemies are dead, start moving the small spike near the mana chest off to the left. You have to move it as far as it’ll go, then run back to the blue chest and grab another spike and push that. Repeating this a few times will eventually lock the gear into place and open the door leading on.
The spike room here is going to be another annoying section. Before you begin, grab the red orb chest in one of the rooms here, then flip the switch in the middle of the room. Doing so will cause the gates in the room to begin rotating around, periodically opening up new rooms for you to enter. It will also cause spikes to begin popping up from the holes in the ground; you’ll be able to see them before they appear. Lastly, poison imps will appear and start spitting at you. Annoying! Grab them and kill them if they get close to you.
Anyway, wait in front of the door in the lower-left corner of the area, with the softly glowing item inside. When the door comes around and opens up, head in, grab the Crank Handle and the orbs, then wait for the next door to open up. Quickly grab the two orb chests and get out; spikes will instantly kill you if you wait too long. The next door is currently closed, while the door after that has a large stone you can pull backwards to lock the gate in place and open the passage moving on. (Notice that we didn’t try pushing the block forward; it might lead to some secret area. Worth a try!)
East Auditorium
Head into the hallway and take a left (the passage to the right is a dead end). You’ll come out to a large open area featuring two locked doors, a switch, a pressure plate, a ladder, a large horn, and a jump that’s currently blocked by fire. It looks pretty complicated!
First things first. Climb the ladder here and press R1 to insert the crank handle into the post there. Turning the lever will shut off the flames below, so quickly activate your amulet of the fates, jump down, then jump across past the flame jets. In the small alcove, you’ll find a Phoenix Feather, then you can follow the hallway to reach a save point. Start jumping up onto the ledges, and eventually you’ll find a switch at the end of the corridor. Flipping it will lower one of the grates here. You have to quickly run back to the vent in the hallway, double-jump and spread your wings, then glide above the grate before it closes. It’s a quick timer, so be sure to just double jump and start heading towards the vent as soon as your wings open; waiting until you’re wafted higher will cause you to miss the opening.
Some easy dogs and soldiers will await you beyond the grate, so off them before opening the large door and moving on.
The Auditorium of Lahkesis
Go ahead and smash the scaffolding here; it’ll drop a rock. Push it along the path outside towards the man praying in the small temple here; he’s the translator, and you’ll need him to read the large book near the door leading on. Place the rock on the pressure plate he’s sitting on, then pick up the translator and move out towards the book.
Unfortunately, the underworld has different plans for you. Soldiers and dogs will attack you as soon as you drag the translator out of the door, so plop him on the ground and kill them off. You can’t let them damage him too badly, so try to just keep them away from him entirely by placing him back inside his small temple and using Cyclone of Chaos to keep them away.
The first wave will die quickly, but the second will have demonoids in it, appearing one at a time. This wave appears when you attempt to pass over the middle circle here, so be ready for them; as soon as they pop up, backtrack a bit and plant the translator down to give you some separation. Keep in mind that you yourself can’t hurt the translator, either with your weapons or your magic, so feel free to bust out an Atlas Quake now and again to keep enemies away from the translator. Use your throw button on the demonoids to keep them off balance; when the soldiers get the O-prompt on them, you can throw them into the demonoids to further knock them aside.

Lastly, when you reach the book, large groups of enemies will start appearing. Stick near the translator and use Cyclone of Chaos or Atlas Quake to whip your foes away from him. The main enemies here are three summoners, who will continually summon lesser soldiers to harry you. Luckily, the soldiers seem to grant the translator an exemption from attacking while you’re locked into a throw animation, so seek out the summoners, perform your lengthy throw animation on them, clear out the soldiers near the translator when that’s over with a spell or Cyclone of Chaos, then repeat the process. The summoners are the key, so focus on them before dealing with the rest of the soldiers.
When three summoners have been killed, take out the rest of the enemies and get to work interrogating the translator. You’ll need to mash his head into the book a few times with the O button to complete the scene, but eventually the door nearby will unlock. Approaching it will net you the Key Of The Ram.
Ram Door
Return to the exterior balcony and open the door with the ram insignia on it. There’ll be a combo chest inside; if you’re running low on mana, that’ll be what you want to pick up here.
As you walk along the corridor, two spiked doors will appear and slowly begin the process of crushing you. In order to escape your fate, you have to kill all of the enemies that appear before the doors can close. Whether or not you can do so depends on the upgrades you’ve obtained; we managed to complete the trap by immediately tapping our Rage of the Titans, using the Athena’s Blades square attack, and then, when the Rage ended, using Cyclone of Chaos and level two Cronos’ Rage on the remaining crowd. Obviously enough, you don’t want to bother with normal combos, since they won’t really do much good against the large crowds that you’ll be facing here.
The Garden of the Gods
After cleaning out the hallway and retracting the doors, move on through the hallway and into the garden at the top of the steps. There’s a Phoenix Feather in a chest here. If you wish, you can also destroy Athena’s statue with normal attacks, although it’ll take a while to do so; it’ll net you some red orbs.
The hallway beyond the cracked wall has a ledge that you need to walk along. You’ll see some red orb chests; move past them and hit R1 when you see the ladder to drop down and reach them, then move along to the save point.
Sacrifice To The Fates
After jumping to the chain here and dropping to the ground, read the door; you have to make an offer to the Fates, a sacrifice of fire, before they’ll allow you to move through. Sirens begin appearing, one by one. You need to maneuver them towards one side of the room, then flip the switch on the opposite wall to roast them.
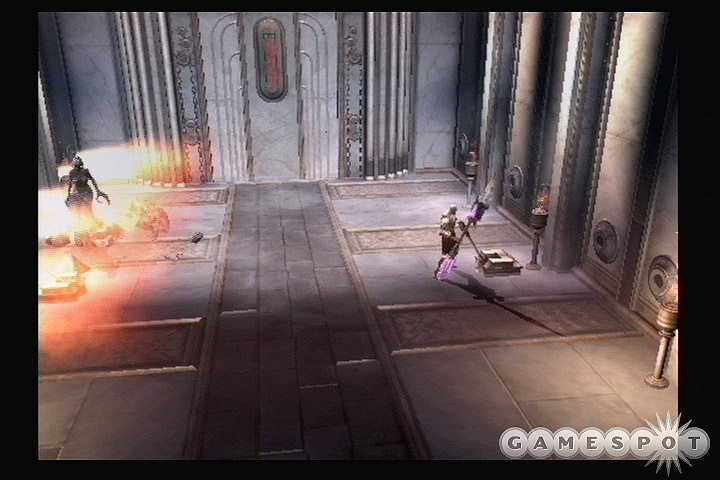
Of course, making them stay still until the flames appear is going to be difficult, and that’s where the Head of Euryale comes in. If you need mana, use the Spear of Destiny’s triangle attack combo to beat up the sirens and hit the O-prompt to gain some blue orbs. When you’re ready to fry one of them, stand near one of the walls and guard until one of the sirens comes near, then whip out the head and freeze them while walking towards the switch on the opposite side of the room. If you’re having a hard time getting them to freeze in place, you can try upgrading your Head of Euryale spell, or you can simply knock them down by one of the walls before using it on them. Note that the more beat-up a siren is, the quicker it dies to the fire, so you may want to beat them up a bit before freezing them.
When you’re done with the sirens, swim through the passage of blood beyond them until you reach a puzzle consisting of a number of icebound doorways.
Light And Ice
First things first: after jumping out of the pool of blood, head towards the bottom of the screen to find a pair of orb chests. Grab the orbs and head north to the room above you. This is the ice puzzle we mentioned.
Your basic goal here is to unfreeze the owl in the center of the room and use it to fire lava at each of the frozen doorways, allowing you to move on. Begin by dropping down into the center of the room and flipping the switch behind the owl; that’ll melt one of the doors, revealing a draggable mirror. You can’t do anything with it yet, though.
In order to melt the owl, you’ll have to redirect a beam of light that shines down from the ceiling. There aren’t any beams just yet, though, so climb up onto the ceiling via one of the broken walls and start smashing all of the frozen iceblocks up there. Be sure to get them all; one of them that’s particular important is near the hallway leading back to the blood passage.
Completing the Puzzle
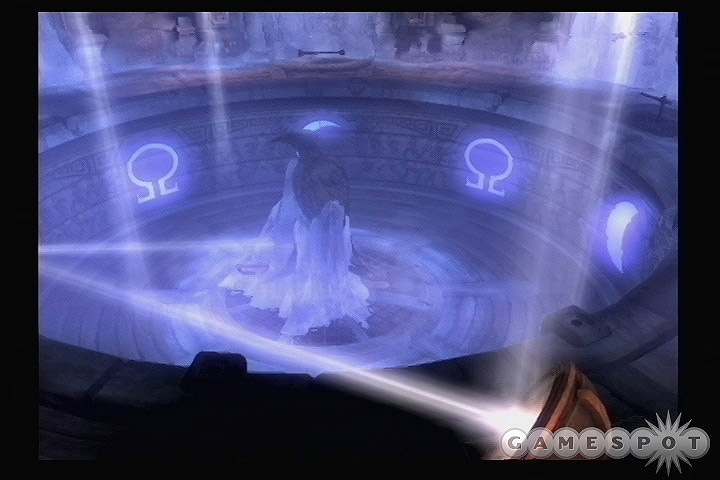
When you have the mirror unfrozen, and the light beams shining down, it’s time to get the mirror in the middle of the room in position to unfreeze the owl. You’ll note that there are three levers on the right side of the room, each of which controls one of the three rings inside the recessed center of the room. Take a look at the rings for a moment. There are eight patterns emblazoned on them, four of which are the God of War logo. The other four include three moons of varying thickness and the "sun", which is another mirror. What you want to do here is rotate the rings until you manage to make the moon with the middle thickness appear in the middle of your screen, under the middle of the three levers. If you get the fat moon or the thin moon, that’s not the one you want; the medium thickness moon is what you should be aiming for.
So, start moving the rings here until the medium-thickness moon is centered underneath the middle lever here. When done properly, the mirror-sun will appear on the opposite side of the circle at this point. If you drag the movable mirror statue down near the passageway to the blood pool, you’ll notice a shaft of light to the right of the exit. Placing the mirror underneath this shaft of light will reflect the light to the mirror in the rings, which will then melt the ice around the owl statue.
With the owl statue unmelted, you can begin rotating it around its axis and shooting its flames at the doors to melt them. There are two minotaurs here that will be unmelted, but they shouldn’t be a problem for you. Grab all the loot from the melted rooms before opening the door and moving on.
Olympus, We Have A Problem
Move through the hallway here to the room with a small lever in the floor. Moving the lever will be problematic with all the imps, so climb the walls to destroy their nests before rotating it. When the grapple point comes down to you, jump to it and let the chains carry you up to the upper part of the floor here.
One hell of a difficult fight will ensue after you move on from here, so be sure to grab all of the magic and health from the chests. At the outset, you’ll face off against two cerberus’; these being upgraded versions that can spit out smaller versions of themselves. You’re not going to be finding any mana during this fight, and health will likewise be difficult to pick up (unless you have a fully upgraded Head of Euryale), so you’ll need to preserve your energy for the second and more difficult part of the fight. The one thing you will have in spades is Rage of the Titans energy, so feel free to use that on the two dogies here while avoiding their attacks as best you can. Each of them will have two O-prompts before they die; the first will release more rage energy. No minigames involved, just simple taps of the O button.
Trouble!
After you start getting an edge on the dogs, trouble starts. More cerberus’ appear, with up to four attacking you at any one time. To add to the mess, a pair of gladiators pop in, giving you up to six enemies fighting you at once, none of which can be knocked down. The dogs can kinda-sorta be stunned by weapon damage, while the gladiators will only be stunned when you knock some of their armor off.
At this point, your tactics will depend on your remaining life. A good place to start would be to jump into the middle of the ring and bust out a level two or higher Cronos’ Rage or (preferably) a level two or higher Atlas Quake. Any area-of-effect magic will work, really, even the level three Typhon’s Bane spell. The Quake will be most effective on the dogs, which are what you want to take out first, anyway. It’ll also render you temporarily immune to damage while the animation plays, which helps, even if the gladiators will sometimes get free attacks if they’re in the middle of an attack animation when your Quake animation ends. If you have plenty of health, you can simply turn on Rage of the Titans and start mashing the square buttons; if you’ve upgraded Athena’s Blades to level four, then simply hold down the square button to filet any enemies near you. Granted, you’ll take damage doing this, but not as much as you would normally, and you can’t be interrupted by damage.
Regardless, your goal now is to hit the dogs and grab them when their O-prompts pop up. There isn’t much more to it than that. Avoiding damage will be difficult, so try to eliminate the dogs as best you can after hitting them with your powerful spells. When they go down, you’ll be left with the gladiators, who can take an excessive amount of punishment. Luckily for you, though, all of their attacks can be blocked, letting you dart away from them, hit them a couple times, block, then repeat, etc.
This is by no means an easy fight, but if you manage to survive the first couple of dogs with most of your health and all of your mana, then you should be able to eke out a victory in the end. Climb the ladder and save your game.
The West Auditorium
From the save point, jump across the gap that has the ladder in it. You’ll find more chests here, and can drop down to reach the red chests that you spotted at the bottom of the ladder. You’ll need to double jump from one side of the little hole to reach the upper platforms again.
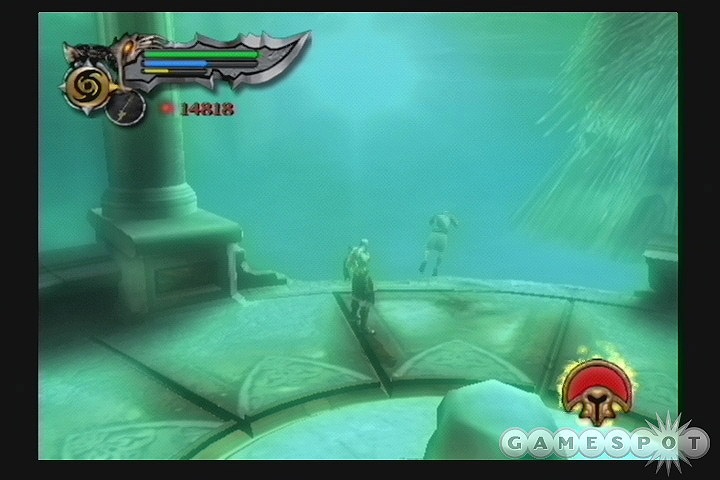
Open the door near the save point and move on. You’ll spot a fate statue here; smash the blocks in front of it and pull it out of its little alcove. Kick or push it down the hall until you spot another gate. Flip the switch to witness the untimely death of the translator…for the moment. Push the statue here underneath the gate that you’ve opened; maneuver it around the little block in the floor and push it towards the book until it can’t move further any more.
If you want to do so, you can achieve the Gift of Health at this point. To do so, head into the hazy painting, then freeze time. Instead of running towards the translator that's about to kill himself, run backwards down the hall as quickly as you can and look into the the alcove where the fate statue was located. You should find a large chest there; bust it open and you'll receive the Gift of Health, which is an instant health bonus to you.
Now, when you’re ready to go back in time, head through the hazy-looking painting here. You’ll wind up back at the gate, which is prevented from closing by the statue. The translator will begin his suicide run again, so quickly hit L1 + R1 to flip on your amulet of fate and run up to him before he can jump, using R1 to grab him and drag him back to the book. After being persuaded to read from it, you’ll be granted the Warrior’s Skull.
Return To The Balcony
Time to get back to the large balcony that’s been your hub of adventure for a bit. Head through the unlocked door to reach a lever. If you rotate it, a steam vent will open, letting you coast up to a small alcove. Flipping the lever there will release more steam below, so drop down, rotate the lever again so that it’s fully opened, then double-jump and glide straight up to the handholds above you. Make your way across the ceiling until you reach another lever. Move it to be brought down to the balcony.
Cyclops Attack!
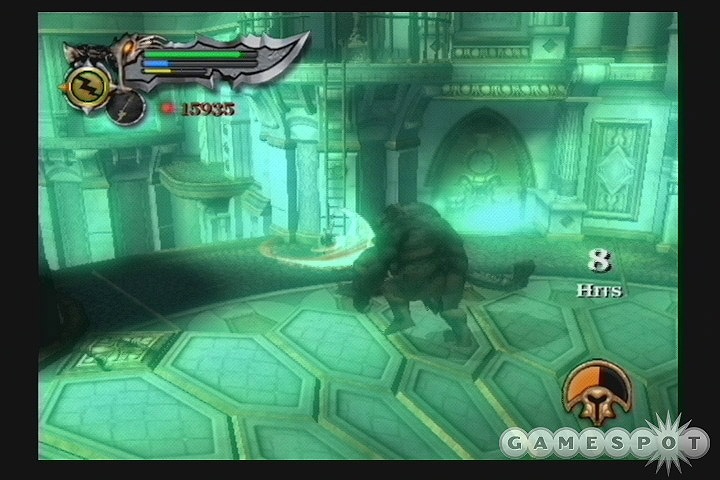
A group of cyclopes will attack you when you land on the balcony. These are tougher, meaner versions of the older cyclops you’ve been encountering, with some new attack animations and a different kill animation. You also don’t appear to be capable of grabbing their eyes. Luckily, there are no boarmen in sight.
Anyway, defeating these guys isn’t too difficult. Use Athena’s Blades from as far away as you can, tap the cyclops once or twice, roll away from their attacks, etc. Just stay away from them and tag them once or twice when you get a moment, and the damage will add up over time. If you are really having problems here, then climb the ladder and activate your amulet of the fates to stop time before dropping down and unloading combos on the beasts. These guys drop a good amount of health when killed via the O-prompt, so you shouldn’t have too much to worry about here.
Entrance To The Underground
Open the locked door with the Warrior’s Skull and save your game. If you haven’t upgraded your Cronos’ Rage yet, you’ll want to do so before stepping onto the platform here.
You have to approach the central chain here and press R1 to grab onto it, then start tapping O to move it down the shaft manually. As you do so, a spiked ceiling will begin falling down the shaft towards you at an alarming rate, while skeletons will begin reviving around you and both attack you and jam on the gears to prevent the floor from moving downward. You need to prevent the skeletons from killing you, prevent the skeletons from stopping the motion of the floor, keep the floor moving downward, then raise a gate at the bottom of the shaft to escape. All in a day’s work, right?
After you start the shaft moving downwards (use your index finger to jam on the O button to move as fast as you can), wait for the skeleton to jam on the gears before stopping, if possible. When it does so, run towards him and zap all the nearby skeletons with Cronos’ Rage. That will shock any nearby skeletons and remove the one on the gear. It might not kill them outright unless you’ve fully upgraded it, but it will knock them around and give you a couple seconds to either smash them to bits (just tap on the square button with Athena’s Blades; don’t do anything too fancy) or, if the ceiling is shaking and about to smash you, grab the chain again and resume your downward course.
Enough skeletons will appear here to jam the gears a few times, and they will also attack you, which takes you off of the chain, so you’ll need to reserve some mana for when you hit the bottom. The skeletons that jam the gears are your priority, so hit them with Cronos’ Rage when they get on there. If need be, use Rage of the Titans on groups of three or four skeletons to quickly dispatch them before getting back on the chain.
When you do finally reach the bottom of the shaft, you can knock the skeletons down with any remaining Cronos’ Rage mana you have. Even if that doesn’t kill them, it might give you enough time to open the door and escape before they recover and attack you, although it’s best to ensure that everything’s dead before doing so, presuming you have time.
Into The Pit
When you exit the shaft, check the bottom of the screen for red orb chests, then move out to the handrope nearby. As you cross it, archers will cut it down, so jump up beneath them and scootch over to the right until you can jump up and attack them. Undead gorgons will attempt to stone you here, so be careful! If you find yourself constantly getting petrified, use Rage of the Titans to make yourself immune from their blasts, or reflect it to them with the golden fleece.
When all the enemies are dead, jump back down to the pit below and use the handholds to move on. You’ll eventually come to a couple of chests with plenty of low-grade soldiers around them. Finish them off, then open the chests and look down the hall nearby. There’s something funky on the other side of that steam…take aim with your Typhon’s Bane at the wall and hit it a few times with your arrows. That will reveal a secret compartment with an orb chest and a chest containing the Gift of Magic, which is an instant mana bar upgrade for you.
With that done, jump back through the steam and let it glide you up to the platform above you. The goal now is to double jump above the lava, spread your wings, and glide through the next two chambers without getting hit by the rotating spikes. First move right, then move left, following the path that the spikes do.
The Phoenix Chamber
Your goal, as the book here states, is to place the ashes of the phoenix in the fire to resurrect it. The switch in front of the bird statue here is the mechanism for placing them in the fire, but you can’t access the ashes just yet. Save your game, then jump across to the platform on the left to move on to the spike room.
The spikes in this room are controlled by a large switch. Flip the switch, then aim your bow at the cracked wall in the upper left corner of the room and smash it, revealing a statue of fate and a couple of red orb chests. Don’t worry about the chests for now; if you get them, then die (a distinct possibility here), you’ll have to get them again. Instead, flip the switch again and grab the Hail of Boreas from the corpse on the lever in front of you. That will free up the lever for you to move, but for now, return to the switch.
After letting the spikes raise up and flipping the switch again, immediately activate your amulet to stop time, then move to the lever in front of you and start rotating it (your timestop will cease as soon as you begin revolving it, but it saved you a couple seconds!). You don’t need to rotate it all the way; just enough for you to get under it when you run towards it. One full revolution should do the trick, especially since inertia will continue the movement after you move away. When you think you have a good margin of error, let go of the lever, stop time again, then jump across the gaps in the hallway towards the gate. You’ll need to make two jumps, the second of which is hard to see, so be careful. When you’re under the gate you’ll be in the next section.
Fires of the Phoenix
A few red orb chests are behind a gate here. You can reach them by heading into the dark hallway nearby, jumping up on the right wall to reach a handhold, then double jumping back to the left to reach an upper alcove.
You’ll come across a pair of orb chests before the next large room. Unless you’re in dire need of mana or health, don’t open them yet. You’ll need all you can get in the next room here. When you’re ready for some fun, drag the statue to the left of the door into the room, but keep it between you and the statue of the phoenix at the far end. You’ll see why in a second, as the phoenix will send an unavoidable jet of fire at you; the only way to avoid its damage is to keep the movable statue between you and the phoenix, which will entail a lot of pushing it towards the northern end of the room.
There are some things to keep in mind here. First off, the statue will protect you from fire so long as you’re behind it; leave the area immediately to its rear, and you’ll take a lot of damage. Secondly, if you don’t actively hold onto the statue, it’ll be pushed backwards when hit by fire. Thirdly, you’ll be attacked by a demonoid and fire imps as you walk around; it’s best to simply avoid them as much as possible by laying down a high-level Cronos’ Rage when they get too close for comfort. That will shock them for a few seconds, allowing you to proceed on your way.
Lastly, there are a couple of optional treasure rooms here. To open them, you have to move the statue in front of the doors and quickly open the gates before the statue gets blown back to where it can’t protect you. The first room, on the right wall, holds a pair of red orb chests, while the second, on the left wall a bit further up, holds a red and a blue chest. Entering these rooms will usually let the fire burn you, unless you’re real lucky with your statue placement, so collect the rewards at your own risk, and remember that you (should) have a green orb chest back out the southern entrance, assuming you didn’t open it before.
Anyway, you need to maneuver the statue all the way to the top of the room. Eventually you won’t be able to move it any further due to a stone barrier; shift the statue above the switch nearby and flip it. That’ll lower the barrier, allowing you to move the statue further to the north. Plant it on the leftmost pressure plate near the phoenix. That raises the gate above you. Hold the statue in place until after a jet of flame ends, then quickly get on top of the right pressure plate to drop a grappling point above you. Snag it and swing up to the ledge above you before the gate closes (remember that the fire will push the statue, and it will eventually slide off the plate below). If you’re having trouble getting through the gate, try planting the statue on the northern side of the pressure plate before moving away.
One Last Fight…
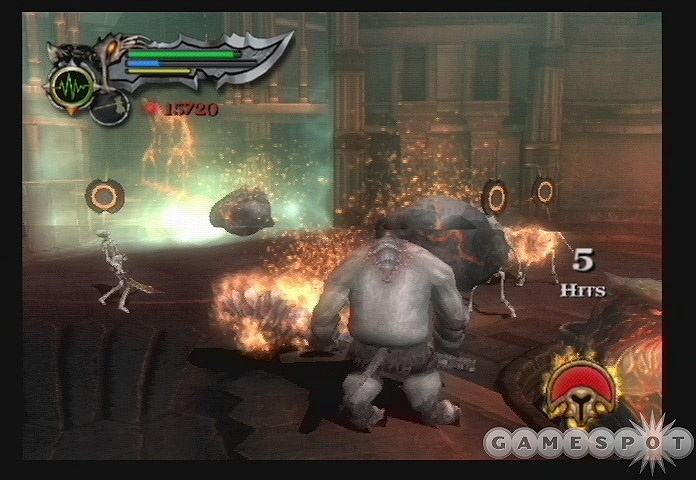
After you recharge your health, push the urn off of the plate that it’s on to descend a bit. Push the urn from the ground into the hole nearby, then move towards the switch you passed by earlier. Before you can reach it, a group of skeletons and minotaurs will attack you. Dispatch them as best you can, then flip the switch here to burn the ashes, reviving the Phoenix. If you need to, you can return to the spike room to go after those red orb chests that you may have bypassed earlier. Otherwise, glide across the steam from the lava to reach the stairwell to the right of the new pillar of lava near you. The upper reaches will lead you back up to the hub balcony, but if you want some more red orbs, check the lowest, broken section of the staircase first to find a chest.
Head to the top of the stairwell to find two orb chests, one to the left and one to the right. Flip the switch nearby to raise up the platform, and you’ll be standing in front of the painting of Boreas. Plant the Hail of Boreas in its mouth to open the door. Head inside, grab the red orb chest, then climb the chain to find a save point.
Releasing The Phoenix
Blowing on the horn here will release the phoenix from the jet of lava, resulting in two new platforms for you to jump to. Jump to the right platform to the left, and from there to the balcony with the broken ladder beneath it.
Inside the small room here, flip the switch to raise a platform nearby, then climb the side of it to reach the ceiling of the room. Slash both of the chains here to open the doors below you, then drop down and flip the switch again to lower the platform. Move the pillar that you unlocked onto the platform, but try to position it so that, if you flip the switch again, it’ll jam the works and prevent the platform from fully moving up. If you can do this, the platform will move up around halfway, allowing you to jump up to it, then pull the pillar onto it, allowing the upward motion to be completed. Put the pillar near the gate, then jump onto it and destroy the chain above it to open it.
Rotate the lever nearby to raise the platforms on the balcony below. When they’re locked into place, move into the nearby room and start rotating the gate to open the passage leading on. (There’s a hidden red orb chest on the right side of the room, if you maneuver the gate to that position.)
After moving through the door, a shadowy figure will assault you. He can be difficult to kill, but if you’ve upgraded your Athena’s Blades to level four, then activating Rage of the Titans and holding down the square button should get you an O-prompt relatively quickly. Feel free to use all of your magic bar taking the soldier down. You’re going to get it all back shortly, so if you want to get your hit meter up a bit, use up all of your mana on Cronos’ Rage.
Boss Fight: Scylla
We’re not sure precisely what mythological beast this animal is supposed to be, so for the sake of classification we’ll go with the Scylla. After the cutscene with the soldier, start tapping buttons to call out to the gods. The scylla will grab you and start to choke the life out of you. After another lengthy cutscene, you’ll get a Rage of the Titans upgrade and will earn all of your health and mana back when you activate it to break out of the Scylla’s grip.
Luckily, the Scylla is pretty easy, even if it does look intimidating. Her attacks don’t deal much damage, even if they are hard to avoid, and she’ll drop health for you a few times during the fight.
Phase One
You need to attack the scab on the beast’s head if you want to deal any real damage to it. But how to get there? Well, you should start by unloading on the tentacle on the left side of your screen; the one that covers the pressure plate that controls the air here. If you use Rampage of the Furies with a fully-upgraded Athena’s Blades, you should be able to cause the tentacle to rise up, revealing the pressure plate, with just a few volleys. With that done, pick up the body of the soldier here and place it on the plate to cause an updraft in the middle of the arena.
With the updraft active, double jump and glide up to the Scylla’s face and deal some damage to it! Cyclone of Chaos or Cronos’ Rage are good choices for attacking it here. You’ll probably have to jump up a couple of times to deal enough damage to it; you’ll know you’ve annoyed it when it rams its arm into the middle of the arena.
When the arm is planted here, you have to move to the side facing the screen and jump up onto the handholds. Climb up the pole that the arm has made itself into and start slashing upwards at the stony protrusion on it. After destroying the protrusion, you’ll get an O-prompt allowing you to destroy the creature’s arm.
With one arm out of the way, you have to repeat the process for the second arm. Slash the left tentacle on the ground to raise it, place the body on the pressure plate, jump and attack the head, and wait for the right arm to smash into a wall. You need to get underneath it near where it hit the wall, jump up to grab onto the handholds that are hanging down, scootch your way over to the middle of the arm and smash the protrusion there and slice the end of that arm off.
Phase Two
At this point, you’ve already won; the Scylla just doesn’t know it yet. Without its tentacle spikes to stabilize it, it’s going to slip off the platform when you attack the tentacles at the base of the two pillars here, so do so. Activate Rage of the Titans if you need to, but quickly attack one of the tentacles until you see the beast slip backwards a bit. Move to the other tentacle at this point and attack it as well until the Scylla is just barely hanging on. You should see a switch in front of its face; pull the switch to extend the bridge and kill the monster.
With that done, cross the bridge, grab the red orb chests behind the Phoenix, then mount it with the O-prompt and some button minigames. It will take you off to…
Chapter Eight: The Temple Of The Fates
The temple entrance is frozen in time. Make your way up to the large statue in front of you and hit R1 to swing on up to the small crystal there. Destroy it to unfreeze time.
There are two large bells here. In order to proceed onward, you need to be able to ring both of them at the exact same time. To do so, jump over to the bell with Cronos’ face on it and ring it by tapping L1 and R1 simultaneously. As soon as you let go of the bell, freeze time, then quickly get back to the central platform with the smashed crystal on it and hit R1 to grab the bell ringer here. That will ring the bell with Zeus’ face on it. So long as the two bells’ ringing even slightly overlaps, the face of the large statue here will crack.
In order to break it, though, you need to readjust the ringer. To move it, drop down into the water and find the lever on the base of the central platform. You can grab onto it and pull it or push it; you need to move it so that the wooden plank beneath the water lines up with the groove in the submerged stone. With that done, swim down under the water’s surface and flip the switch there. That will lock the groove into place around the wooden beam, allowing you to rotate the entire platform with the lever. Line the ringer up with the statue’s face, swing it, and break on through to the other side.
Boss Fight: The Sisters of Fate
So, we’re a little confused. One of the sisters of fate, Lahkesis, has been egging you on for the last hour or so of gameplay, appearing to you after you smashed the translators. Now, when you finally get to reach them, it turns out that all they wanted to do is give you a lecture. Wha huh? Despite their former friendliness, you’re going to have to fight these witches off.
Phase One
It’s you and Lahkesis, one on one, during this phase. She has a number of attacks, most of them involving her staff. She can attack you with a three-swing combo, but the bulk of her attacks are ranged, including a simply energy bolt. She can also throw her staff into the air, where it will rain down a few bolts on you; dodge away from under it when this occurs.
Your best opportunities for damaging her will come when she fires her green bolts of energy at you; activate your block just before they hit you, and the golden fleece wil reflect them back at her for heavy damage, periodically knocking her over and sending up health and mana. Since your mana will periodically replenish here, feel free to knock her with Gorgon’s Rage or Typhon’s Bane. You can, of course, hit her with your weapons; this is easiest to do just after you knock her over and she’s struggling to get back up.
As the fight goes on, Lahkesis will reveal more powerful attacks, including a large green bomb that will sit in one place before detonating for a fair amount of damage. Roll away from this when you see it coming! She’ll also swoop up into the sky and slam her staff into the ground for an area-of-effect attack. Again, just roll away. She’ll use her easily-reflected single-bolt attacks less often towards the end of this phase, so you may want to save up your mana and use your spells on her here.
Phase Two
After you deal enough damage to the sister, she’ll take to the air and become much more difficult to hit with your weapons. She’ll also add a couple of new attacks to her repertoire, including a frustrating one that electrifies the floor here; jump to the grapple points scattered around the room and start dashing between them to avoid the energy bolts she flings at you here.
It’s pretty difficult to attack her with your weapons at this point, due to her height off the ground. You can use Cronos’ Rage or Typhon’s Bane to deal damage to her, or attempt to reflect her energy bolts. She’ll be knocked to the ground after you deal enough damage to her, allowing you to use your normal weapon combos until she takes off again. After a while, an O-prompt will appear above her head as she hovers above you. Grab onto a grappling point, double jump off of it, and glide over to Lahkesis to grab onto her and end this section of the fight.
Phase Three
The second sister of fate, Atropos, is your antagonist here, as you fight atop the huge sword that you used to defeat Ares in the first game. If you have a fully-upgraded Cronos’ Rage, then this section of the fight is going to be a piece of cake.
Atropos will attempt to break the sword here, and thus cause you to die at Ares’ hands before the events of God of War II even take place. She’ll do so by zapping the sword with lightning, either from far away or at close range. There isn’t much you really have to do here except thwart her efforts. The sword will be populated by plenty of soldiers, but some of them will oddly drop mana orbs, so you should be able to pop Cronos’ Rage to ward them off while focusing on the sister.
When the sister is far away, she’ll fling energy balls at you. They don’t hit you directly, though, as they seem to travel a bit underneath you. Move towards the bottom edge of the sword (placing yourself closer to the bottom of the screen) and tap the guard button just as the bolt is about to hit you to reflect it back to the sister. You can also use Typhon’s Bane here to deal damage to the sister.
When Atropos approaches the sword and zaps it with energy, get close and use one of your magical attacks to deal damage; spamming Cronos’ Rage is the easiest way to proceed here. Eventually, after doing this, an O-prompt will appear over the sister, allowing you to stab her right in the head.
Phase Four
Tough stuff! Lahkesis is still around, but now she’s joined by Atropos, who attempts to enter the arena via one of the misty mirrors in this area. The original sister will attack with most of the original moves, while the new sister in the doorway will either send green bolts at you, or sweep a green laser across the entire arena; jump or grapple over this to avoid the damage.
You can get Atropos to retreat back into the mirrors by hitting her, but your focus should be on Lahkesis here. Dealing enough damage to her will drop her to the ground and reveal a fury orb. When it appears, instantly stop time and start attacking the sister in the doorway. If you can deal enough damage to her before time starts back up again, the mirror will crack, allowing you to hit that and smash it. You’ll need to repeat this process twice, doing it once for each of the two mirrors here.
When the two mirrors are cracked, Lahkesis will relocate to the front of the remaining mirror. Her main new attack is a pillar-of-energy attack that will cover most of the room. If you’re far enough away from her, you can dodge the pillars; zapping yourself up to the grapple points will also do the job, it seems. Regardless, if you have enough health, then this is the time to simply get close and unload on her, using Cronos’ Rage, Atlas Quake, or your Rage of the Titans ability. When you’ve dealt enough damage to her, you’ll get an O-prompt. Hit the next four button presses successfully to lock both sisters into the mirror, then smash it to move on.
The Inner Sanctum
Examine the frescoes here, if you wish, then climb the handholds to the ceiling. You can only drop down on the balcony here; if you want the red orb chests, you’ll have to double-jump and glide to them. Move up towards the broken wall and smash it to reach a lengthy gauntlet.
As you proceed down the path here, you will periodically be blocked from moving onward as enemies spawn in around you. The further down you go, the tougher the enemies get. It’s going to be tough to regenerate health for the most part, so try to conserve as much of it as possible until you reach the green orb chest along the path.
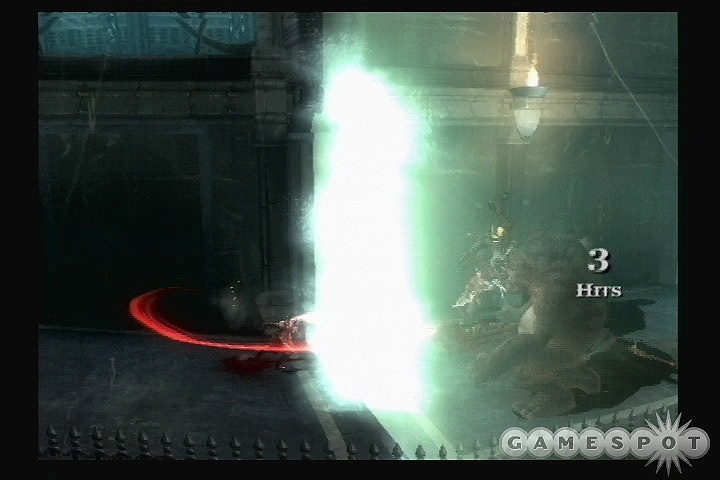
The first tough challenge here is the siren/gorgon teamup near the chests. Since these guys drop so much magic when they die, though, feel free to use your magic to keep them off guard and away from you. There are more tough fights in the future, but you’ll be all right as long as you don’t get knocked around too much. We found it helpful to use a fully upgraded Spear of Destiny in a lot of these fights. You can use the Altering Slash to lay a timebomb inside any enemy you hit, even the cyclopes near the end, which will explode after around ten seconds, doing good damage to the creature and anything nearby. Combine that with the Unfortunate Remains ability, and you’ll be knocking around the smaller foes just like you were using Atlas Quake. (Which of course you should be doing, especially when the cyclops attack you at the end of the path.)
Anyway, don’t go too quickly down the pathway. In fact, it’s a good idea to retreat anytime you spot a new barrier popping up in front of you. Most of the fights here are spread across two or three segments of the walkway, and barriers will rise up and fall down as you fight. Try to split up your foes by moving across these barriers; that’ll reduce the number of foes you have to fight against at one time.
When you reach the end of the road and kill everything, you’ll be able to unlock the door by slashing at the claws on it. First open up the lock on the left, then move the bolt on the right, then push the door open.
Before The Loom
The remaining sister, Clotho, spins the web of fate from her mechanical prison. You have to defeat her in order to return to the moment where everything went wrong. Doing so will involve a bit of a climb, though.
Begin by dodging the blades before you and taking a left. One of Clotho’s many hands will swipe at you here, but hitting it often enough will render it mute for a moment, allowing you to move the lever around and open the gate above you. If you do that, then you can head up the steps nearby and glide over to the platform here. Heal up if necessary before climbing up the handholds and reaching the ceiling. Crawl along the ceiling as far as you can towards the other gate, but be ready for Clotho to grab you. Tap the left analog stick left and right to break free, then move towards the gate and smash the two skeletons at its top. With that done, you can drop down and move the lever that opens this gate. Jump to the platform and climb the chain to move up.
The Second Level
Three of Clotho's arms will fluster you here. Luckily, they can all be dealt with. Begin by moving to the right of the chain that you climbed up from. One of the hands is here, located near a green switch that opens a hole in the ground underneath it. (The hole houses a red orb chest that you might want to pick up.) When you’re ready to kill the hand, stab it a few times to make it drop to the ground, flip the switch to open the hole, then flip it again to shut the hand inside.
The second hand is further to the right. You’ll have to stab it until it falls, then quickly double jump to a chain and jump from the chain to the platform above to flip the switch there, which will drop a spike into the hand. It can be complicated to make the jumps to the chain; your best bet is to simply double jump up there and immediately let go of the X button after hitting it the second time.
The third hand is a bit more complicated to take down. There’s a sliding platform that rotates around the edge of the platform here; you can find it back by the first hand that you caught in the hole in the ground. Slide it around the platform until you near the third, moving hand. You’ll notice that there’s a winch near a spike near the hand; you have to move the platform underneath the winch, then step on the pressure plate to lift the jar into the winch. That will let you move the spike when you move the platform. If you move the spike and platform next to the hand, then slash at the hand a few times, it’ll impale itself on the spike. Climb the rope from the spike and jump to the platform nearby to reach Clotho herself.
Boss Fight: Clotho
It’s virtually impossible to die here, so don’t worry too much about that. If you ever need more health, simply freeze time at one of the statues and hit Clotho a few times in one of her breasts or arms; she’ll drop a little health for you. If she ever bugs you with her attacks, repeat the process until both of her arms go dead and she’ll leave you alone for a while.
In order to kill Clotho, you need to find something a bit more rough and tumble than your puny weapons. Begin by heading towards the blocked door to the right of Clotho. There’s a handhold beside the door, which will let you climb up. If you see the two skeletons that are clogging the gears when you can’t climb any further, smash them with your blades, then drop back down to the floor.
Now that the gears can move, you can grab the handle near the edge of the platform, to the right of Clotho, and move it. The handle controls two loading docks that can be moved along the outside of the platform, where there are a number of threads hanging. All of the threads are connected to dead bodies, which you can bring up to the platform if you like; each of them will drop plenty of health when Clotho eventually explodes it. What you want to do, though, is align one of the docks with the chain that runs down the middle of the platform, near the metal plate in the floor that you entered the room from. If you do, then you can flip the switch under the chain to bring up one of the huge blades that you dodged earlier.
With the blade hanging down in front of Clotho, you have to maneuver it for the kill. Hit her until she’s subdued, then use the R1 button to twist the blade so that it points at her, then hit R1 again to pull it towards the edge of the platform. A few button presses later, and Clotho will have a huge blade in her brain, and the doors here will open.
Reversing Your Destiny
Head through the door and swim under the barriers until you reach the last of the fate mirrors. Save your game and flip the switch here, then return to the platform that Clotho’s body is on. You have to find the thread of fate that belongs to Kratos; it’s near her rightmost hand here. When you find it, tap O to start rewinding fate. Keep going until it stops; when that happens, you’ll have 30 seconds to get back to the mirror. Stop time before leaving Clotho’s lair, run to the platform, raise it, swim to the mirror, and jump through before the timer runs out. Time to take out the end boss!
Chapter Nine: The Final Battle
Time to rage at the gods one last time. After you step through the mirror, Zeus will blow you to a windswept mountaintop, where your fight takes place.
Zeus attacks you while supersized here, summoning a few sirens to keep you company. There isn’t much you can do about Zeus’ attacks, but there isn’t much you need to do, really. Your goal is to take down the sirens themselves. Use Cronos’ Rage on the sirens until you get the O-prompt above their head. When you crack their backs, you’ll hurt Zeus, freeing up some health orbs and causing him to slam his fist into the ground. Attack it to damage him. We found it helpful to crack a siren, then roll into the area where the fist hits and lay down a Cronos’ Rage before the fist comes down. It’ll deal damage when the fist does impact, and the explosion caused by it (if you’re using a level three Cronos’ Rage) will cause even more damage.
Repeat this process a few times until an O-prompt appears above Zeus’ hand. That will let you smash your sword into it and move on to phase two.
Boss Fight: Zeus Phase Two
Kratos vs Zeus. The final battle. When we last met, I was but the learner, now I am the master, etc., etc.
Lightning Bolt! Lightning Bolt! Lightning Bolt!
The first time you attempt this fight, Zeus is likely going to kick your ass, but it’ll get easier over time. Here are some of the attacks that he’ll throw your way.
- Lightning Bolts: A pair of lightning bolts. You can’t block these or dodge them, really, but you can make yourself immune to the damage by starting an Atlas Quake when they’re coming your way. Far better, however, is to hit L1 just before Zeus throws them to reflect them back at him. This is one of the few ways to earn health in the middle of the fight.
- Zeus Fu: Occasionally Zeus will rear back and charge across the arena with his fist outstretched. This will often be how he follows up if you reflect a lightning bolt at him. If he misses, nothing happens, but if you’re anywhere near the attack zone, he’ll continue to swing at the air and finish off by pounding the ground. You can dodge this attack.
- Shockwave: Zeus will call down lightning and pound it into the ground, sending a small shockwave towards you. Easily avoided by dodging or simple running.
The latter two attacks are relatively easy to avoid, but if you can’t get in the habit of reflecting the lightning bolts back at Zeus, then this is going to be a very frustrating fight. If you’re capable of doing so, then you can take things slow, by avoiding his attacks, reflecting the lightning bolts, and occasionally tapping Zeus once or twice with your sword when you see an opening. If you prefer to keep your distance, use either Typhon’s Bane or the sword’s L1 + Triangle attack to zap Zeus from a distance.
If you just can’t get the hang of reflecting the lightning bolts, then you’ll need to use either Atlas Quake or Rage of the Titans to deal most of your damage; both of those attacks will prevent you from getting interrupted by Zeus’ bolts.
I Didn’t See That Coming
After you deal enough damage to Zeus, he’ll shower you with orbs of various natures. His next attack will steal the Blade of Olympus from your hands. At this point, his attacks will change, and you’ll just have to deal with them if you want to live!
- Sword Combo: Zeus swings his sword a few times at you. You can easily dodge away from this attack.
- The Overhead Projector: Zeus will jump and swing the sword over his head, letting loose a beam of light towards you. Dodge laterally (i.e. not directly towards or away from Zeus) to avoid damage.
- The Zapper: Zeus holds the sword above his head, gathers down lightning, and attempts to zap you with it. It’s easy to dodge this attack too early and get hit by it, so wait until he starts bringing the sword down before dodging away.
For the most part, this is a bit easier than the earlier section of the fight, mostly because Zeus won’t be flinging those annoying lightning bolts at you. If you want to take things slowly but surely, simply dash away from the attacks that he sends at you, and use your blades to tag him once or twice when his guard is down before dodging away again. Avoid large combos and premade attacks like Cyclone of Chaos, or Zeus will land his attack while you spin around. If you wish, you can again use Rage of the Titans or spells to weaken Zeus up, but it’s really not necessary to do so.
After dealing enough damage to Zeus, he’ll start staggering around with the sword, acting like a loon. Hit him a few more times to cause an O-prompt, then get ready to mash on the O button to steal the blade back from him, which will send him into one of the walls here. Grab the shiny spot on the ground nearby to pick up a pillar and ram it into him.
Finish Him!
At this point, Zeus will return to his lightning-bolt throwing ways. You’ve already beaten him once in this form; now you just have to do it again. Feel free to use up as much of your magic and Rage of the Titans meter as you like here.
When Zeus steals the Blade of Olympus from you again, he’ll wind up being surrounded by an energy shield. Your normal attacks will wind up hurting you instead of Zeus, and your magic will simply knock off rage orbs. Thus, you need to flip over into Rage of the Titans mode and attack him with that. We managed to knock him out after just a few seconds of attacks in one of our fights, but other fights have lasted a bit longer, so just keep plugging away at him while you have Rage activated. Even while you’re in Rage mode, your attacks will knock rage orbs off of the shield and back into you, so you’ll be able to keep it up much longer than you normally would.
When you finally do bust the shield and get the O-prompt, you’ll throw Zeus into another wall and topple a pillar on his head. This will piss him off royally, and he’ll decide to finish you. You can’t fend off the lightning that he throws at you, so Kratos will surrender. The hardest button-hitting minigame you’ve seen yet will begin after this. You have to hit a random button just before Zeus swings the sword at you, another button when you knock the sword away, one more after you mash Zeus’ head into the rocks, and one last one as Zeus is reaching for the sword. After this last button hit, start mashing away on the O-button to stab Zeus through the chest. This whole sequence is annoying if you die, since you’ll have to rewatch the entire cutscene before playing the game again.
After the subsequent cutscene ends, you’ll find yourself back in Clotho’s lair. You need to rewind your fate thread one last time. Do so, stop time, get back to the mirror, and jump through to witness the game’s Halo 2-inspired ending. (Interesting how Kratos can rewind his own fate to a place where he’d never been and a time before he was born!)
Unlockables And Treasures
God of War II has a number of unlockable bonuses that become available after you beat the game for the first time. This section will detail these unlockables, and (eventually) tell you what you need to do to unlock them.
Urns
Urns are obtained as you play through the game. When you replay through the game on a difficulty setting you've already beaten, you can select them in the Start menu (tap L1 and R1 to find their sub-menu) for a variety of cheat effects. They can't be activated on difficulties that you haven't beaten yet. We note the general area where the Urns are found below; if you need more detailed directions, skip to the section of the walkthrough and look for the name of the urn in bold.
| Urn | Found | Cheat Effect |
|---|---|---|
| Urn of Gaia | Found in the Rhodes Palace early in the game. | You earn 10 times the normal amount of red orbs. |
| Urn of The Gorgons | In the Blood River section outside of Euryale's Temple, use the golden fleece on the petrifying beams on the rolling platform to reveal this urn. | Your weapon strikes will turn your enemies into stone. |
| Urn of Olympus | Found in the area near where you pick up the Spear of Destiny. | Infinite magical energy. |
| Urn of Prometheus | Found inside Atlas | Infinite Rage of the Titans. |
| Urn of The Fates | Achieve an overall rank of Mortal after beating the Challenge of the Titans. | Extends the time it takes for your combo meter to decay. |
| Urn of Poseidon | Achieve an overall rank of Spartan in Challenge of the Titans. | Allows you to replace Cronos' Rage with Poseidon's Rage. |
Treasures
Treasures are more unlockable goodies. You can select them via the Treasures menu, but most of them are only unlocked after you beat the game for the first time.
| Treasure | Unlockable By… | Description |
|---|---|---|
| Challenge Of The Titans | Beating the game on any difficulty | Seven progressively harder minigames. |
| Arena Of The Fates | Beating the game on Titan difficulty. | Presumably some kind of ultra-hard test of skill. |
| Titan Mode | You have to unlock Titan difficulty by beating the game on a lower difficulty first. | Ultra-hard difficulty level. |
| Urns of Power | Finding them during the game. | Allows you to cheat during gameplay. |
| Bonus Costume 1 | Beating the game on Mortal Difficulty. | Cod of War! (Preferred skills: Magic and Health) |
| Bonus Costume 2 | Beat the game on Spartan difficulty. | Hydra Armor (Preferred skills: Health) |
| Bonus Costume 3 | Beat the game on God difficulty. | ??? |
| Bonus Costume 4 | Beat the game in Titan Mode. | Athena costume. |
| Bonus Costume 5 | Beat the game in Titan Mode. | ??? |
| Bonus Costume 6 | Collect 20 cyclops eyes. | Unlocks Kratos outfit from the first God of War. (Preferred skill: Experience.) |
| Bonus Costume 7 | Receive overall ranking of God in Challenge of the Titans mode. | Kratos wears his godly armor from the beginning of the game, even after being struck down by Zeus. (Preferred Skill: Armor.) |
| In-Game Movies - High-Res | Beat the game on any difficulty. | Watch all of the CGI gameplay cutscenes in order. |
| In-Game Movies - Story Format | Beat the game on any difficulty. | Watch all in-engine cutscenes in order. |
| Credits | Beat the game on any difficulty. | Watch the credits. |
God of War Trophies
Note that there are Spoilers on this list.
| Trophy Name | How To Earn | Reward |
|---|---|---|
| 1.21 Gigawatts | Acquire Poseidon's Rage | Bronze |
| Rocking Out | Acquire Medusa's Gaze | Bronze |
| Bolt Action | Acquire Zeus's Fury | Bronze |
| Sword Man | Acquire Blade of Artemis | Bronze |
| Soul Search | Acquire Army of Hades | Bronze |
| Matador | Win the first Minotaur fight | Bronze |
| Scape Goat | Win the first Satyr fight | Bronze |
| Roll Over…and Die | Win the first Cerberus fight | Bronze |
| Don't They Ever Shut Up | Defeat the Desert Sirens | Bronze |
| Beat a Dead Horse | Complete the Centaur sacrifice to Hades | Bronze |
| Kickboxer | Complete the Spike Room Box Puzzle | Bronze |
| Rockin' the Boat | Complete the Sex Mini-Game | Bronze |
| Don't Leave Her Hanging | Rescue the Oracle with 10 seconds to spare | Bronze |
| Get the Ball Rolling | Complete the Challenge of Atlas | Bronze |
| Totally Baked | Complete the Human Sacrifice | Bronze |
| Splash | Kiss the Nyad | Bronze |
| Get Me a Beer Kid | Free yourself from the depths of Hades | Bronze |
| Zero Health | Open a Health Chest when your health meter is already full | Bronze |
| Getting My Ass Kicked | Die enough to get offered Easy Mode | Bronze |
| Hitman | Get a 100 Hits Combo | Bronze |
| Kratos' Marble Collection | Collect all the Gorgon Eyes | Silver |
| Stick it in Your Cap! | Collect all the Phoenix Feathers | Silver |
| It's the HUGE One | Retrieve the Captain's Key | Silver |
| Take the Bull by the Horns | Defeat Pandora's Guardian | Silver |
| God Killer | Kill Ares | Silver |
| Head Hunter | Obtain the head of the Architect's wife | Silver |
| The Power to Kill a God | Retrieve Pandora's Box | Silver |
| Hitman 2 | Get a 200 Hits Combo | Silver |
| Legend of the Twins | Watch the 'Birth of the Beast' Treasure | Silver |
| Seeing Red | Max out all Weapons and Magic | Silver |
| Prepare to be a God | Beat the Game on any Difficulty | Gold |
| You Got the Touch! | Climbed the Spiked Column in Hades without taking damage | Gold |
| I'll Take the Physical Challange | Complete the Challenge of the Gods | Gold |
| Speed of Jason McDonald | Beat the game in under 5 hours on any Difficulty | Gold |
| Key to Success | Collect all of the Muse Keys | Gold |
| Trophy of Zeus | Unlock all God of War Trophies | Platinum |
God of War II Trophies
Note that there are Spoilers on this list.
| Tropgy Name | How To Earn | Reward |
|---|---|---|
| Breaking Wind | Acquire Typhon's Bane | Bronze |
| Big, Tuff, Buff and Rough | Acquire Rage of the Titans Blue Balls - Acquire | Bronze |
| Blue Balls | Acquire Cronos' Rage | Bronze |
| Shiner | Acquire the Golden Fleece | Bronze |
| Rock their World | Acquire the Head of Euryale | Bronze |
| Learning to Fly | Acquire the Icarus Wings | Bronze |
| Shaky Ground | Acquire Atlas Quake | Bronze |
| Death from Above 2009 | Defeat the Dark Rider for the first time | Bronze |
| Resurrection | Climb from the pit of Hades | Bronze |
| Rock Hard | Defeat the Titan Minotaur inside Atlas | Bronze |
| Pick'n on the Little Guy | Win the battle outside of the Palace of the Fates | Bronze |
| Watcha Got on the Hot Plate? | Solve the riddle of the Fire Phoenix Statue | Bronze |
| Whip it Good | Whip the Steeds of Time | Bronze |
| Lift with Your Knees | Topple the Temple in the Bog of the Forgotten | Bronze |
| Swinger | Cross the collapsing Grapple Bridge | Bronze |
| Stoner | Stone and Shatter 30 Enemies | Bronze |
| Super Sized | Get a 500 Hits Combo | Bronze |
| Hitting Your Stride | Power up any item | Bronze |
| Eye Can't Believe it | Collect all the Gorgon Eyes | Silver |
| Go Make a Pillow! | Collect all the Phoenix Feathers | Silver |
| Eye Sore | Collect 20 Cyclops Eyes | Silver |
| Boss Batch 1 | Kill the Colossus of Rhodes, the Dark Rider, and Theseus | Silver |
| Boss Batch 2 | Kill the Barbarian King, Euryale, and Perseus | Silver |
| Boss Batch 3 | Kill the Kraken and all three Sisters of Fate | Silver |
| Daddy Issues | Defeat Zeus | Silver |
| Rise and SHINE | Awaken the Phoenix | Silver |
| Spread 'Em | Open the wings of the Temple of the Fates | Silver |
| Shine King | Open the door to the Temple of Euryale | Silver |
| Blowin' Your Wad | Max out all Weapons and Magic | Silver |
| The End Begins | Beat the Game on any Difficulty | Gold |
| Feel the Urn | Collect and use at least 2 Urns of Power | Gold |
| Bleeding Thumbs | Beat the Challenge of the Titans | Gold |
| 15 Min Fight Scene | Battle your way to the Loom Chamber in under 10 minutes | Gold |
| You Know the Germans Make Good Stuff | Collect all Uber Chests | Gold |
| Trophy of Gaia | Unlock all God of War II Trophies | Platinum |
Got a news tip or want to contact us directly? Email news@gamespot.com
Join the conversation