Ghostbusters Walkthrough
Bust some ghosts with our complete walkthrough to Ghostbusters, including hidden artifact locations.
The Ghostbusters are no strangers to videogames, but never before have they been brought to life as convincingly as in their latest game. As the newest member of the name, aptly known as The Rookie, you'll be fighting alongside the team to bust those pesky ghosts. Thankfully, we've prepared a field guide to help you with every situation the game has to offer. So who you gonna call? GameSpot Guides! (yeah…maybe it doesn't quite have the same ring).
Here's what you'll find in GameSpot's Ghostbuster's Game Guide:
- Training: Get the scoop on busting ghosts.
- Walkthrough: Don't get spooked with our complete walkthrough, including hidden artifact locations.
- Xbox 360 Achievements: Check out Ghostbuster's Achievements.
- PlayStation 3 Trophies: See how to grab all the trophies.
Training
Ghostbusting
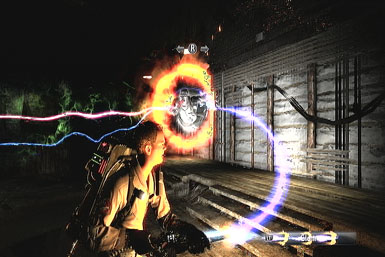
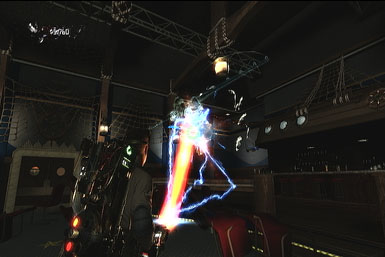
You're a ghostbuster--busting ghosts is what you do! As such, it's sort of important to learn the proper technique. In short, capturing a ghost is a three step process, best described by your colleague Peter Venkman as "Sap 'em, cap 'em, Trap 'em."
Sap 'em
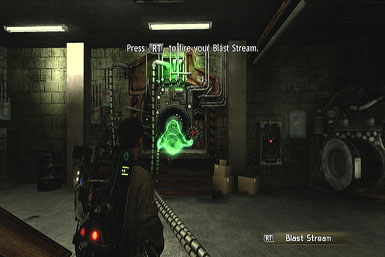
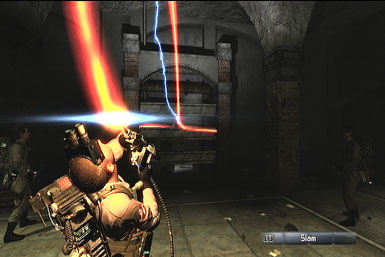
The first process is do sap the ghosts's energy by zapping him with one of your weapons (you'll acquire most as you go through the game). As you do, you'll notice a meter appears around your targeting reticule, which displays how much energy the ghost has remaining. The meter turns red when the ghost is sufficiently weak, indicating it's time time for the "cap 'em" stage.
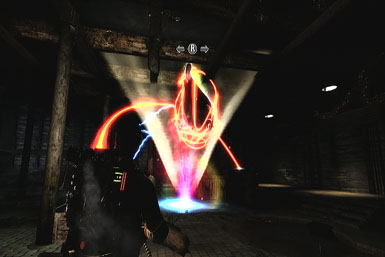
Cap 'em
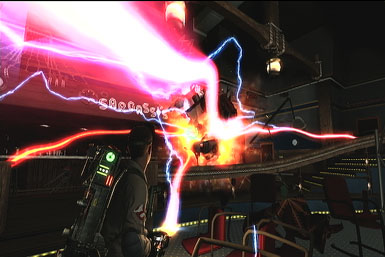
With the ghost weakened, it's time to wrangle him with your capture stream. Basically, your Proton Pack will automatically switch to "Capture Stream" mode once you've damaged the ghost enough, though you can also attempt to activate early by pressing the left-bumper or L1. Once you've caught the ghost in your capture stream, your goal is to wrangle or slam the ghost to wear it down even more, to the point that you can easily capture it. You may have noticed a "slam" meter in the bottom-right corner; this automatically refills whenever you've got a ghost in your capture stream. However, you can also fill the meter even faster by wrangling with the ghost--that is, tilting the right-control stick in the opposite direction the ghost is heading (it's just like Luigi's Mansion). Once you've built up some "Slam," tap the left-trigger while tilting the control stick toward the ground or a wall to slam the ghost into it. After a few hits, the ghost will become stunned, giving you a chance to capture him.
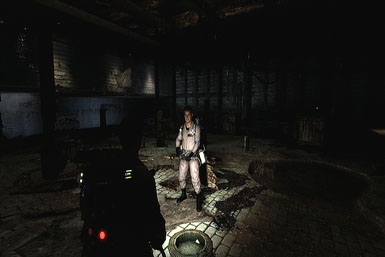
Trap 'em
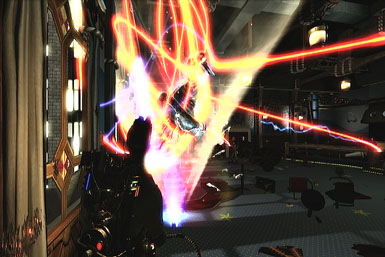
Deploy the Ghost Trap and position the ghost just above it to begin the capturing process. Now, the ghost won't take this lying down, so continue to wrangle the ghost into the trap by tilting the control-stick away from the direction the ghost is trying to escape to in order to force him into the trap. Or, if you've purchased the proper upgrade, you can also attempt to simply slam the ghost into the trap for an instant capture.
Upgrades
By trapping ghosts and finding hidden artifacts, you'll earn money which can be used to upgrade your equipment. You can purchase said upgrades at any time from the pause screen. However, not all upgrades are created equal, with some being borderline useless. Here are the upgrades we recommend getting as soon as they become available: Shock Blast Rate Increase, Shock Blasty Head Reduction, Slam Dunk Trapping, Fast Trap, and Blast Stream Focusing.
Work as a Team
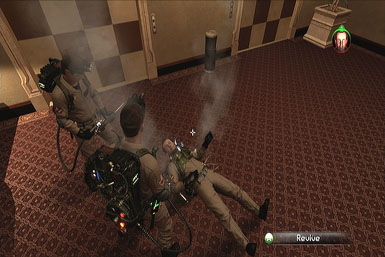
Thankfully, you won't have to bust ghosts alone, as your teammates will be by your side for most of the journey. Not only will they help you wrangle and capture ghosts, but they'll also revive you if you get knocked-out. It's important you return the favor whenever they fall to the ground--listen for their cries for help, or look for the icon that appears on the screen whenever they're knocked out to locate them. To revive a teammate, simply walk up to their body and press the button shown on-screen. Easy, huh?
Try to keep your team alive as much as possible, because you'll fail the mission if you all go down.
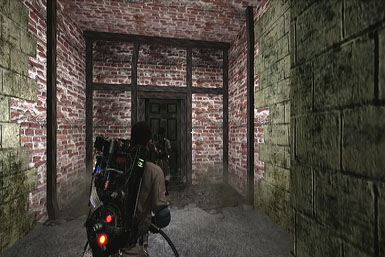
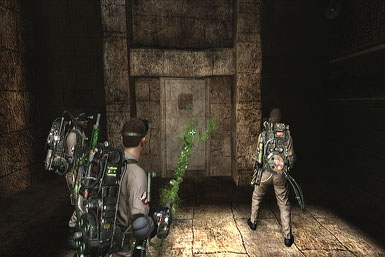
Firehouse
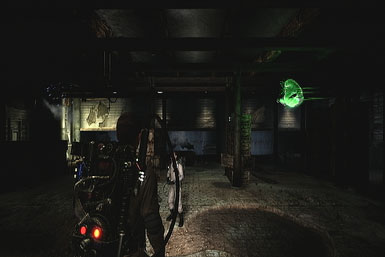
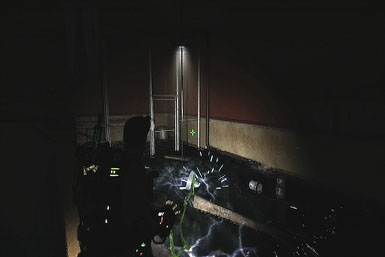
Alright rookie, it's time to get moving. Follow your fellow Ghostbusters down the fire pole ahead and then down the stairs to the right, leading to the basement. There you'll find Slimer--fire a blast from your Proton Pack at him, causing him and another ghost to hightail it into the next room.
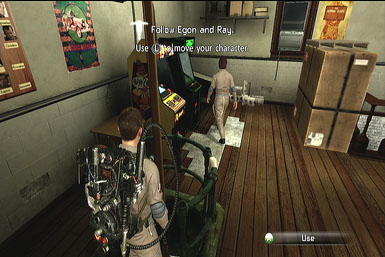
Head after Slimer by following Ray through the door. He'll give you a quick crash-course on the basics of your Proton Pack, such as where your health and temperature gauges are displayed. The health gauge is pretty self-explanatory, but there are some subtleties to the temperature gauge. In short, the longer you fire your Proton Pack, the hotter it's gonna get. If it overheats, you'll be a sitting duck while it automatically cools down. However, you can also dissipate the heat at any time by tapping the Right-Bumper (360) or R1 (PS3)--we suggest doing so whenever there's a lull in the action.

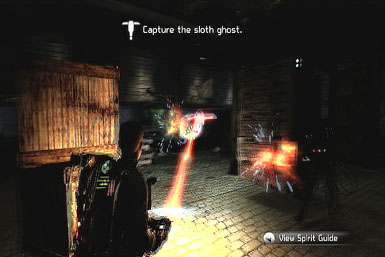
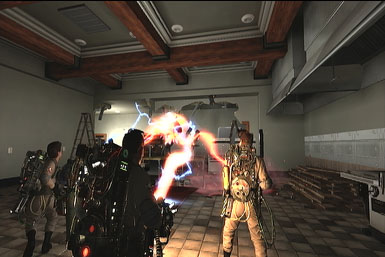
Alright, so Slimer's still running amok. Target him and open fire. As you do, you'll notice a meter will appear around your targeting reticule; this displays how much energy the ghost has remaining. You're going to have to wear him down before you can capture him. Unfortunately, Slimer will soon take off, and the Sloth Ghost will appear. Wear him down like you did with Slimer and strafe around the room to avoid the goop he sends your way.
Once you've reduced his health, Ray will tell you more about the "cap 'em" stage. Basically, your Proton Pack will automatically switch to "Capture Stream" mode once you've damaged the ghost enough. When this happens, your goal is to wrangle or slam the ghost to wear it down even more, to the point that you can easily capture it. You may have noticed a "slam" meter in the bottom-right corner; this automatically refills whenever you've got a ghost in your capture stream. However, you can also fill the meter even faster by wrangling with the ghost--that is, tilting the right-control stick in the opposite direction the ghost is heading (it's just like Luigi's Mansion). Once you've built up some "Slam," tap the left-trigger while tilting the control stick toward the ground or a wall to slam the ghost into it. After a few hits, the ghost will become weak, giving you a chance to capture him. Deploy the Ghost Trap and position the ghost just above it to begin the capturing process. Now, the ghost won't take this lying down, so continue to wrangle the ghost into the trap by tilting the control-stick away from the direction the ghost is trying to escape to in order to force him into the trap.
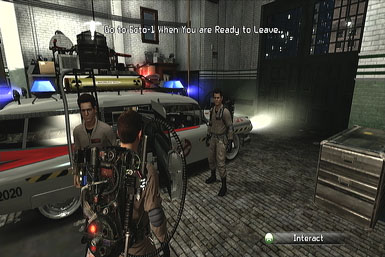
With the ghost captured, collect the trap and hop into the Ecto-1 to head toward your next mission.
Hotel Sedgewick (part 1)
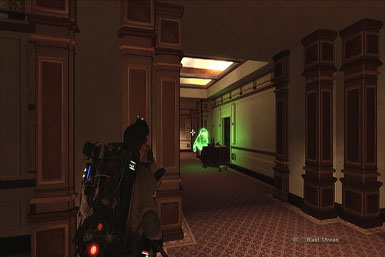
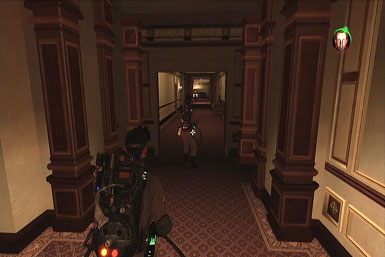
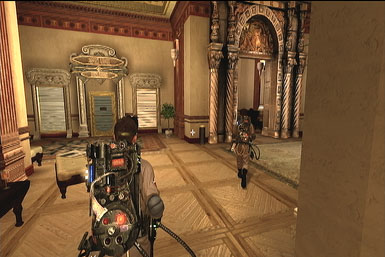
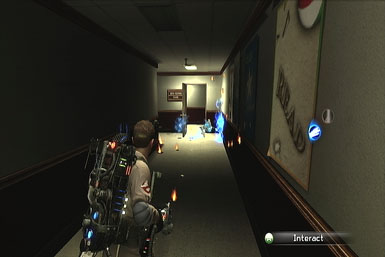
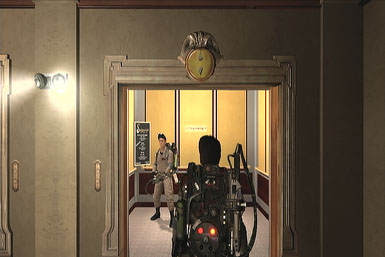
The Hotel can be confusing to get around, so it's best to stick with your teammates whenever possible, as they'll often lead the way. To get things started, follow them to the elevators and catch a ride with Peter and Ray to the 12th floor. Trail them down the hall and blast Slimer when you see him. Although he'll escape by jetting through the wall, you can use your PKE meter to scan the ectoplasm he left behind.

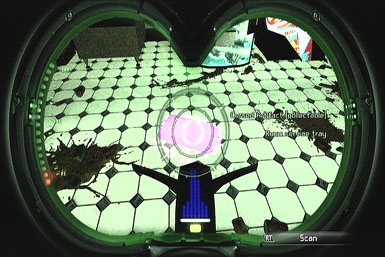
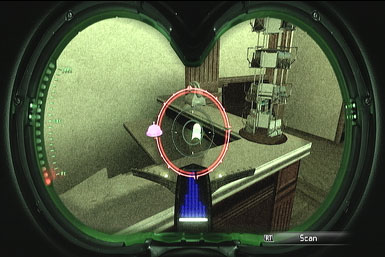
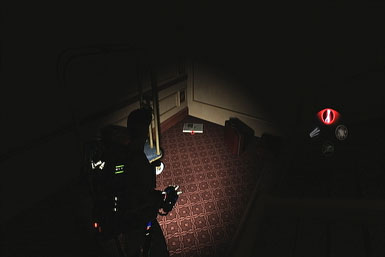
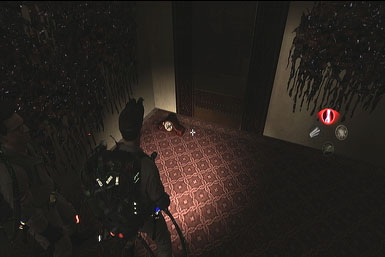
After doing so, follow Ray through the door on the right and scan the vase at the far end, along the right side, to reveal Slimer's hiding spot. He'll take off again, so follow Ray down right hall, to a mess by the vending machines. Use the PKE meter to scan the Room Service Tray on the ground, giving you your first cursed artifact. You'll find similar artifacts scattered around each of the levels; collecting them nets you extra cash, which can be used to purchase upgrades, so it's well worth your while tracking them down.

With the artifact collected, Peter will radio in for help. Follow Ray through the nearby door and down the hall to his location, where you can revive him. With the team regrouped, call the elevator and ride it down to the lobby.
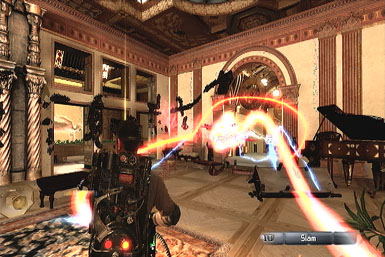
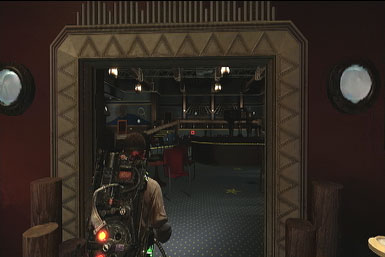
Back in the lobby, you'll find Slimer and a couple of bellhop ghosts--they put up more of a fight than the other ghosts you've seen, tossing furniture your way. Stay on the move to avoid it and then target ghosts, slam them, and capture them like those before. It's best to focus on a single ghost at a time, to reduce their numbers more efficiently. Once you've cleared the area, look for the Antique Service Bell on the desk of the first room of the lobby--just opposite of the elevators you came off of. Now follow Peter down the hallway to the ballroom, then to the kitchen after being turned away.
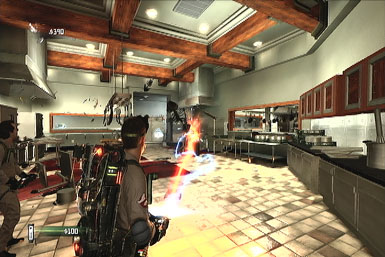
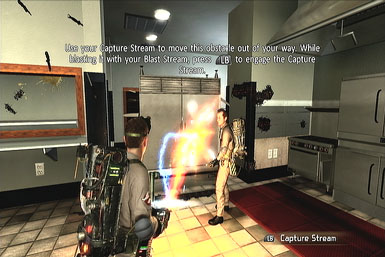
Trek through the kitchen until your path is obstructed by a large cabinet. Now get ready to blast some ghost fish coming your way--thankfully, they're weak and don't need to be captured. Once clear, use your Capture Beam--by tapping the left-trigger while using the Proton Pack--to move the cabinet out of the way, allowing you to continue on. Follow Peter down the hall to the left, through the kitchen, to the ballroom.
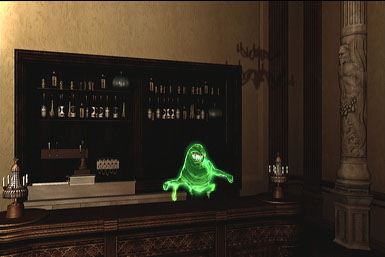
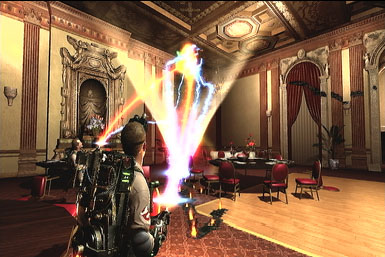
You'll find Slimer inside the ballroom, and now you'll finally be able to capture him. However, he'll occassionally hide inside some of the hotel's furniture--use the PKE to track him down then blast the furniture with your Proton Pack to expose him.
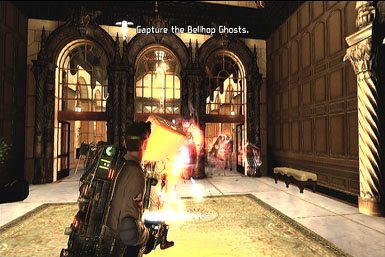
With Slimer captured, follow Peter back to the lobby where several bellhop ghosts are now waiting. Again, make sure to focus on one at a time, so you can reduce their numbers quickly. These guys are also quite throw-happy, so be ready to dodge or blast the stuff they're tossing around. If you take damage and need to recover, the hallway you came from is a good place to retreat to. Oh, and although your teammates will toss down a few traps, don't forget you can throw your own down too, which should make capturing the ghosts a breeze. Once you've captured the ghosts, follow Egon down the hall to the next room.
Hotel Sedgewick (part 2)
Track Down the Fisherman Ghost
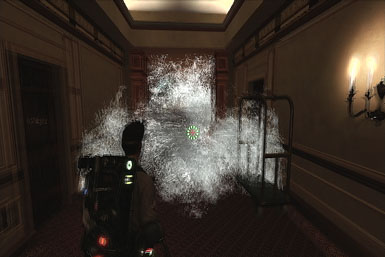
You're on your own for this next portion. Try heading up the staircase first and scanning the Old Painting with the PKE meter for a cursed artifact, before heading down the hall, where you'll experience a flash flood!

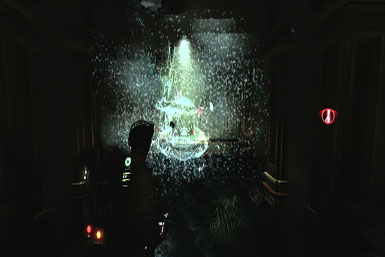
After coming to, follow the hall again and turn left at the first junction to find the fisherman ghost. Turn around and chase him down the hall, to the left. Although he'll vanish, take a moment to scan the candelabrum along the wall (the fixture with candles, in other words) with your PKE meter--this will cause it to spring to life. Blast it quickly (it doesn't take much), then step into the previous hall to take down a few more coming your way--be careful, as they can also crawl along the ceiling.

With the hall cleared, turn right at the next junction, where you'll soon spot another candelabrum tear across the ceiling. Head in its direction, to the left, and use your Capture Beam to clear some of the junk obstructing the path, allowing you to continue on. Turn right at the next intersection to find the Fisherman ghost hanging out inside a vending machine, though he'll take off down a blocked path--we'll get to him in a moment. For now, get ready to blast a couple more candelabrums heading your way.
Once they're down, venture back up the hall, turn left, and stick to this main corridor to spot the Fisherman ghost once again. Use your beam to move the obstructions, then head after him by turning left, continuing past the elevators into the dining room.
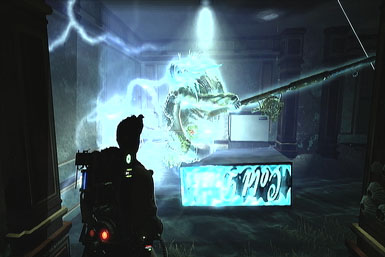
Okay, it's time to take on the fisherman, mano a mano. Strafe around the room to avoid his attacks while blasting him with your beam. If he vanishes, turn around as he'll likely reappear behind you. Once you've inflicted enough damage, the other Ghostbusters will join you, but the ghost will mysteriously vanish. Sniff him out with your PKE meter and approach the door in the corner, just past the bar--but get ready to back up the moment you see the Kitchen Golem blast through it.
The Kitchen Golem has some brutal close-range attacks…but that's all he's got. As such, your best bet is to stay as far away from him as you can at all times, as your beam can span the length of the room. Whenever the monster gets close, run away to the other side and tackle him from there--make sure to use the entire room, including the upstairs section. After you've inflicted enough damage, wrangle its exposed energy ball and slam it loose, revealing the Fisherman. He should be relatively weak by now, so deal with him like any other ghost for the capture,
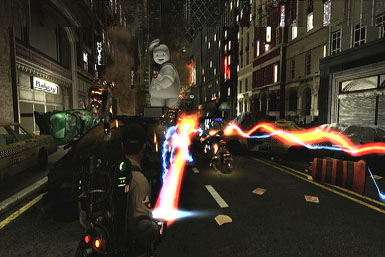
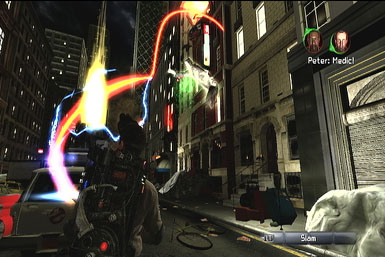
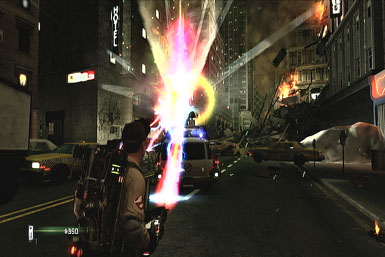
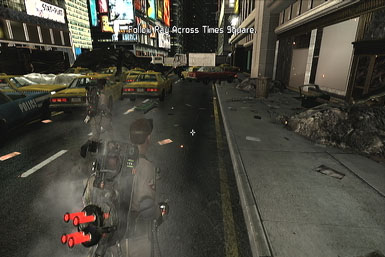
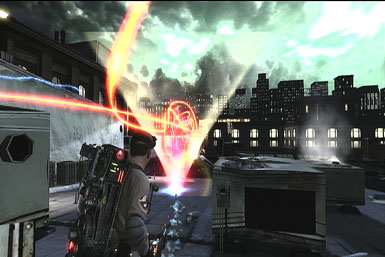
Times Square
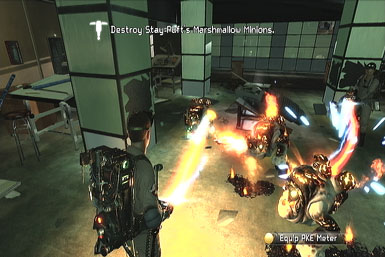
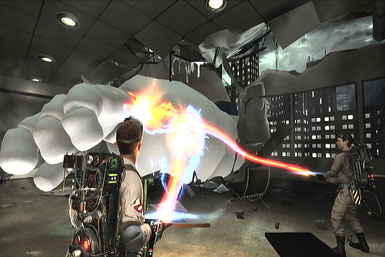
Oh no, the Stay Puft marshmallow man is running amok and you're going to have to stop him…eventually. For now, escort the Ecto-1 through Times Square, up to the barricade. Stay back, as some mini-marshmallow enemies are about to come your way, though a few quick zaps should take care of them. Hold your position, as ghosts will be coming your way as soon as the taxi ahead explodes, clearing the path.
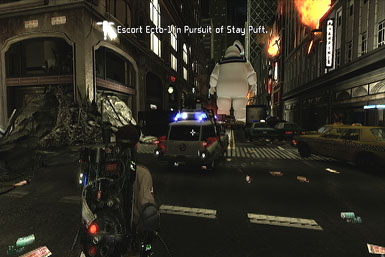
Now the Ecto-1 is outfitted with something called a "Super Slammer" on its roof, which is essentially a really large version of your normal Ghost Trap--except its far more effective as ghosts cannot escape its grasp. As such, we suggest following behind the Ecto-1 at all times, allowing you to easily grab the ghosts and slam them into the trap, resulting in an instant capture. This position also allows you to easily revive any fallen teammates, as well as allowing them to do the same for you. Just make sure to watch out for a few more mini-marshmallow enemies who'll sometimes appear.
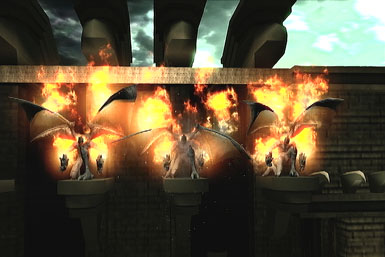
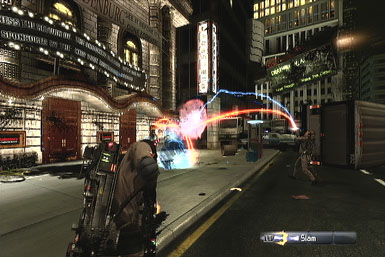
Just as the Ecto-1 begins to turn into an ally, several gargoyles will swoop in from a nearby building. Luckily, these guys are pieces of cake--just grab them with your capture beam (by pressing L2 or Left-Bumper while blasting them), then slam them into the ground to break 'em into pieces. After destroying the first few, more will swoop in, and they'll be joined by several construction-worker ghosts. We found a good place to tackle them from was the alley the Ecto-1 is trying to turn into--this provides a good vantage point, while shielding you from most attacks. Focus on the gargoyles first, then target the ghosts and throw them into the slammer.

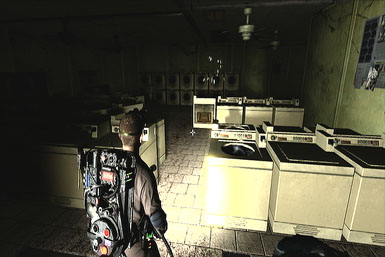
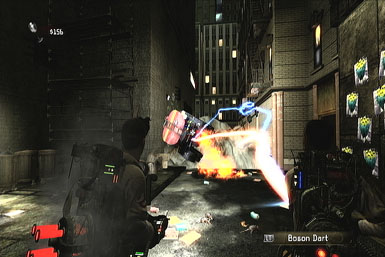
With the Ecto-1's path blocked, follow Winston through the adjacent laundromat. The ghosts will rearrange the machines, eventually revealing a path between them, leading to the other side of the blockage. There, you'll spot a leaking fuel truck--fire some Boson Darts at it with L1/Left-Bumper to blow it up, clearing a path for the Ghostbusters mobile. Follow the car up the street, and be sure to collect the 3-Toed Jenkin's bottle artifact on the right side, when the car comes to a stop. Now approach the fence to trigger its destruction, allowing you to push forward to the theater.
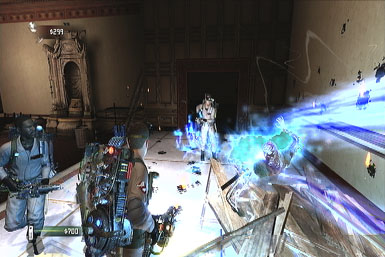
The theater is home to numerous ghosts who'll put up quite the fight. In addition, they're able to teleport around with ease via the red portals in the walls. It's generally best to stick close to one of your teammates so he can revive you if you go down--which you probably will several times. But make sure to repay the favor and revive them too, as they won't be able to help you if they're incapacitated. A short ways into the battle, some more gargoyles will attack--focus on taking them down before returning your attention to the ghosts.

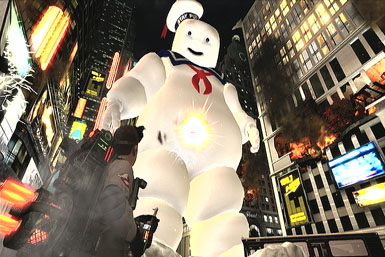
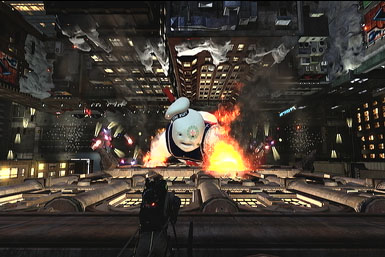
Times Square (part 2)
It's time to start teaching that marshmallow a lesson! While you wait for him to get close, turn around and hightail it as far back as you can, putting some distance between you and the enemies he'll soon spawn. When he starts coming your way, get ready to blast him with four darts the moment he comes to a rest. Now turn around and follow your teammate further up the street, to the next blockage, turn around and fire some more darts at him--just watch out for a few attacking marshmallow-mini baddies. Do the same once more: follow your buddy up the street, blast more darts at Marshmallow-dude, then turn around and duck into the store on the right.
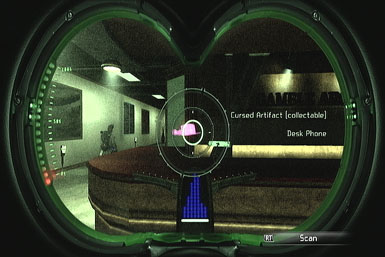
Inside, get ready to blow away the enemies who'll crash through the window. Afterward, scan the Desk Phone for a cursed artifact then board the elevator.
Times Square (part 3)
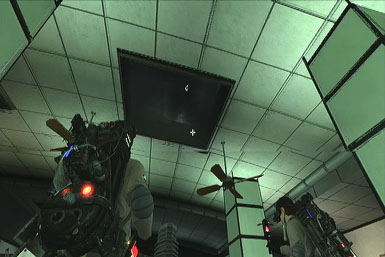
After riding the elevator, follow your teammate to a double-door that you can open. Toward the back of the large room, look up at the skylight dripping liquid-marshmallow to cause numerous marshmallow baddies to drop in. Quickly hightail it behind a pillar closest to the back windows, and open fire on the copious marshmallow-minis. However, regardless of how good your aim is, you'll soon be quickly surrounded; when this happens, hightail it to the other side of the room to put some distance between you and the enemies and open fire again. Remember to use darts on groups of enemies for some quick kills.
With the room cleared, open the door along the back wall, ready to blast several more Marshmallow Minis who'll storm through. Push forward to find a damsel in distress--fire a dart at Stay Puft's arm when he reaches for her to send him reeling, then take down the attacking minis after. You may want to back up into the hallway you just came from to funnel them to you for easy pickings. Afterward, follow Ray through the door to meet up with Peter and the girl.
Follow them through the door and up the stairs to the roof, where you'll battle a few Ghosts. They shouldn't pose much challenge--just keep your distance, giving you time to side-step their projectiles. Oh, and be ready for a couple more to spring out of one of the skylights. With the area clear, approach the ledge to find Stay Puft as climbed his way up to you! Knock him off with a dart!
Ha, as if a single dart was all it would take to defeat Stay Puft! Thankfully, he's still just full of hot air mostly. Don't bother shooting Stay Puft himself until he gets near the top of the tower, as your shots won't have any impact. Instead, focus on taking down the marshmallow-minis he spawns when he blows horizontally across the building. His only other attack is to try spitting marshmallows directly at you, which can also be easily shot down. Now when Stay Puft gets close to the roof, he'll grow visibly tired--shoot him now with a dart to knock him back down to ground-level. Repeat this twice more to do him in for good.

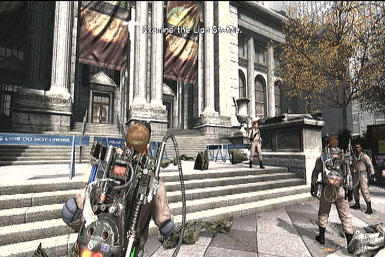
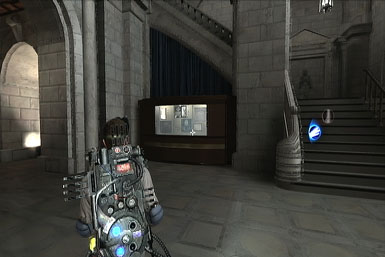
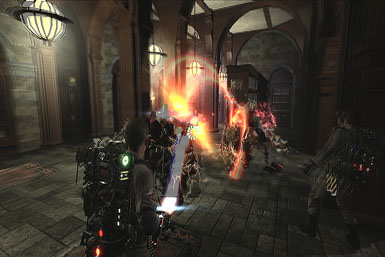
Public Library (part 1)
That's quite a crowd; too bad you've got work to do. Approach the lion statue, causing two ghosts to fly out and into the library. Follow them inside and up the stairs. After some antics go down, your teammates will inform you of a new weapon you can now test: the Dark Matter generator. It has two firing modes:
- Stasis Stream: Firing this at a ghost will slow it down, making it easier to target and then trap! However, make sure it doesn't overheat!
- Shock Blast: This is the shotgun of Ghostbusters. It packs a wallup, but only at close-range.
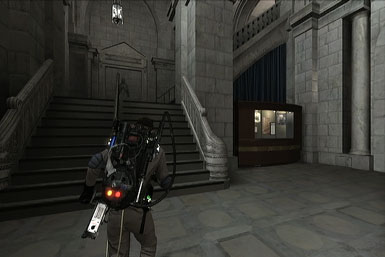
Now that you know how to use the new weapon, head downstairs and approach the display case by the right staircase to expose the ghost. Chase after him down the hall and into the large room on the right.
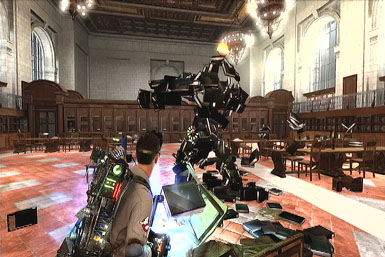
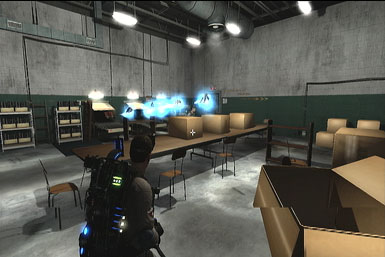
After stepping a short ways into the room, a Book Golem will appear. Although the other Ghostbusters suggest to "slow" him down, ignore their advice and instead use the Shock Blast repeatedly while circling around him from a few feet away. Because his attacks are slow, they should all miss so long as you continually circle around him. Once you've just about depleted his health, back away before delivering the final blast, as he'll explode exposing his energy ball--grap it with your Capture Beam and slam it loose, taking down the Golem once and for all.
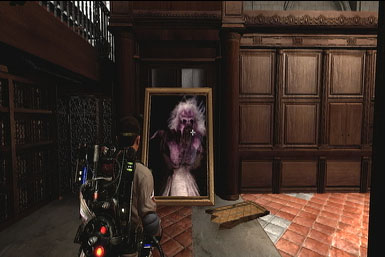
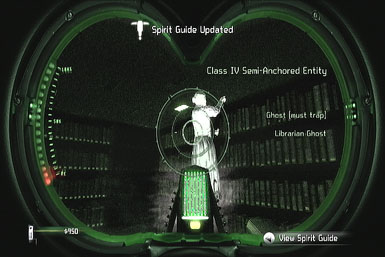
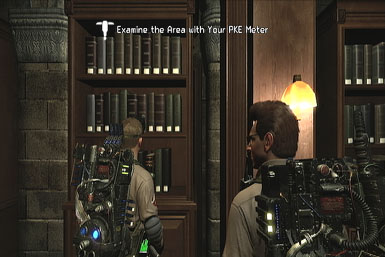
With the Golem defeated, you'll find two doors ahead. Head through the left first to find the Portrait of Eleanor Twitty artifact, then approach the door on the right, which Ray will open for you. Follow him down the staircase and approach the bookshelf that Egon draws your attention to, causing the librarian ghost to appear. Follow her into the next room, then through another door on the left.
Alright, so you're going to have to work your way through a maze of moving bookshelves--they may slam you around a bit, but not enough to kill you. If you ever have trouble finding the route, just follow one of the walls--a path will eventually be revealed. Eventually, you'll wind through a small room where you'll encounter a bi-pedal enemy--shock blast him for a quick victory. Continue into the hall and make a left toward the next room.
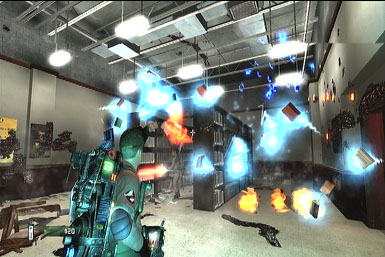
As you explore the room, a stream of book-bats will storm in. Step to the side and Shock Blast 'em. Soon after, two ghosts will roll in, we also suggest Shock Blasting them at close-range, then going in for the capture. This portion can be difficult, so make sure to stay near your fellow ghost buster so you can keep him alive, allowing him to do the same.
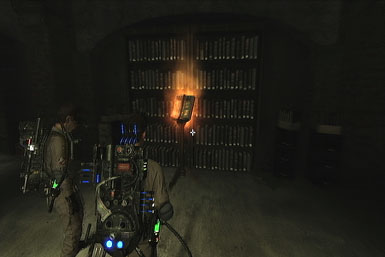
With the room clear, proceed through the door in the corner toward the next room. There you'll face several more of those bi-pedal ghosts--shock blast 'em all then continue through the doorway. Proceed to the small area at the end of the room and use the PKE meter to scan the glowing spot, revealing the Librarian. Follow her back to the previous room and Shock Blast the book-bats that appear when you try to exit through the open door. Stay on the move to avoid being hit. Once clear, follow Ray through the door he opens.
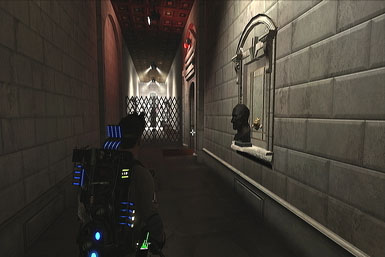
Public Library (part 2)
Push forward through the hall to a door that slams shut. Quickly turn around and prepare to take down some more bi-pedal enemies who'll charge from the door near Ray--Shock Blast 'em. Now go through the door they came from, then open another on the right into a dark room.
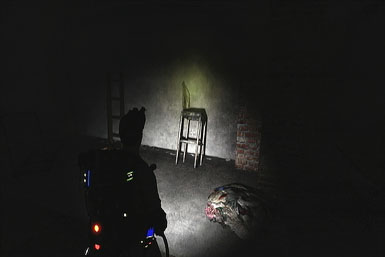
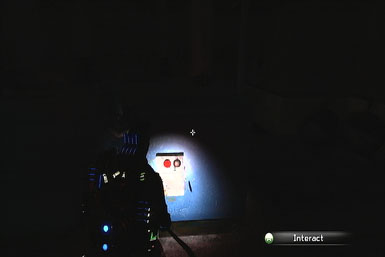
Inside the dark room, you'll find a small children's room on the left, but the door won't fully open because of an obstruction on the other side--fire a dart into it to force the door open. Now use the PKE to checkout the bear on the chair in the corner, then exit back into the main room. Use the PKE to follow the footprints on the ground to the kid's area in the corner, resulting in some spooky happenings. Afterward, proceed through the door on the left, down the stairs.

Once at the base of the stairs, first enter the room on the right (after blasting the chair blocking it aside) and scan the Wall Calendar inside for another artifact. Now head into the heading into the Special Collections on the other side to find the librarian. After she jets out of there (again…*sigh*), a couple of book-creatures will attack. Although Egon suggests using the capture beam, we suggest sticking with the Shock Blast to take them down quickly (what's Egan know anyway?).
With the creatures down, interact with the bookshelf your teammates are staring at to reveal a secret passage. Head down the stairs within and blast the bi-pedal paper dude at the base, before continuing into the next room. Approach the book on the stand toward the back and watch as it levitates into the air, spawning enemies as it goes--great. Stick with your Shock Blast and use it to take down the book-bats and other creatures it spawns. Eventually, a single ghost will appear--slow it down with your Stasis beam, then blast it a few times with Shock, repeating as necessary until you can capture it.
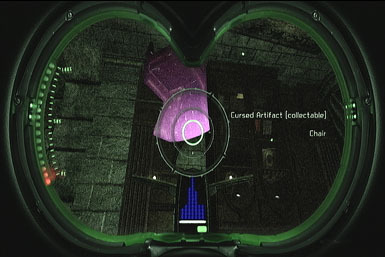
After capturing the ghost, approach the librarian again, then follow your teammates into the adjacent room once she departs. Once there, look for a Chair artifact behind the bookshelf in the back of the room. Now use the Capture Beam + slam to remove the beams and wooden planks blocking the doorway, allowing you to continue onward, down a staircase.
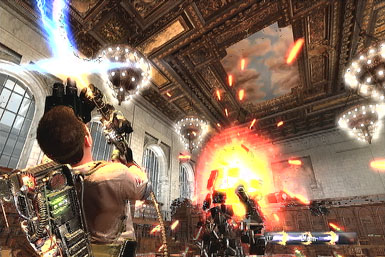
Hmm, it seems the basement's flooded. Well, whatever--climb up the short staircase and interact with the electrical generator. Unfortunately, the power won't remain on for long, instead causing another book Golem to appear. Just like before, circle around him while pummeling him with Shock Blasts, then wrangle and slam the energy ball of his when it appears.
With the Golem defeated, follow your team through the door and down the stairs into the boiler room…where two fire Golems appear. Keep your Shock Blast equipped and target the right-one first as you back away (but stay close enough so you weapon inflicts damage)--he should go down before you reach the back wall. Now you can tackle the remaining one like like the other Golems: circle around him and blast.
With the room cleared, approached the damaged wall in the corner and give it a blast, revealing a black slime-covered entrance. Egon will now inform you of a new ability he wants you to try out: the Plasm Distribution System. It has two abilities:
- Slime Blower: This slime-spitting ability is useful for getting rid of black slime-covered things, as well as unpossessing people.
- Slime Tether: This allows you to move heavy objects by tethering them to something else.
Try out the Slime Blower to get rid of the black slime, allowing you to proceed down the tunnel to complete the level.

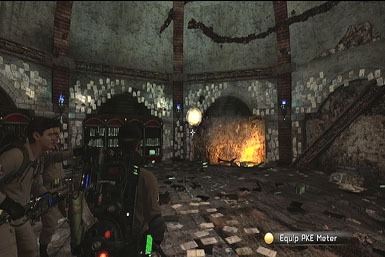
Public Library (part 3)
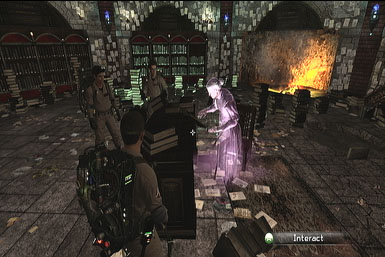
Grab the book the ghost is reading by approaching her and interacting with it. She''ll vanish in a hissy fit, Now pull out your PKE meter to spot her again…and she's not happy. This time, she'll be protected by a force-field, generated by the book stands hovering around the room. Stick to the room's perimeter and quickly take down the stands using Shock Blast. Once you've destroyed them all, she'll be exposed--Shock Blast her too, then capture her like you would any other ghost.
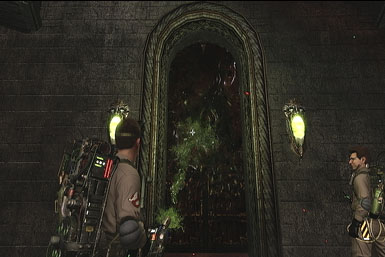
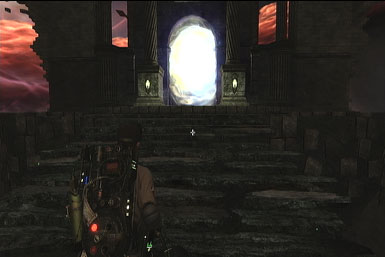
The librarian leaves behind an energy ball--interact with it to warp to the ghost dimension. Proceed through the gate that opens then clean the black-slime covered door with with Slime Blower and continue through the revealed entranceway.
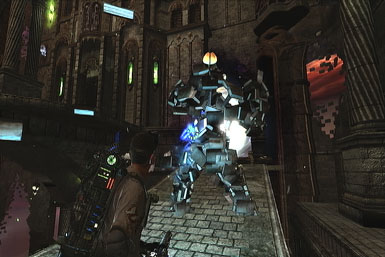
Inside, Egon and Ray will head through another portal, which shatters right after, revealing a book Golem in its place. Like before, circle around it and Shock Blast it repeatedly. Once he's down, head up the stairs dead-ahead and continue through the portal to the right.
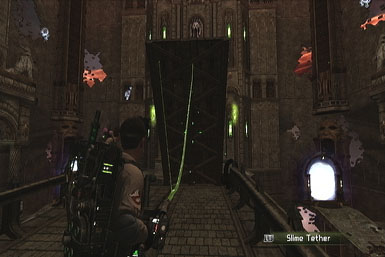
Look, another Book Golem! Unfourtantely, there's not much to maneuver around, because of the thin walkway. The small circular section halfway up the walkway does provide some room, though you're best off blasting him as you back up into the portal you just came from. He'll teleport somewhere nearby, but at least that area provides more room in which to battle him. Once he's defeated, warp back to the walkway and continue forward to meet up with Ray, near the raised bridge. Ray will inform you the bridge can be lowered with your hand Slime Tether; he'll demonstrate by pulling down the first half, and attaching one to the second. Follow suit by attaching a couple of tethers, one end to the bridge, the other to the ground, to pull it down.
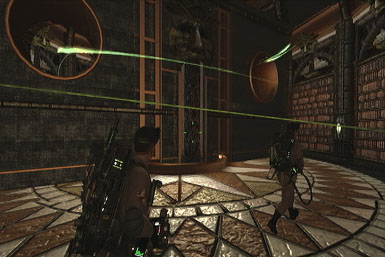
Follow Ray across the bridge and into the rotating room. Now you're going to have to spin that central wall to reach a portal on the other side--attach one tether to the far side of the central wall, then attach the other end to the perimeter wall on the opposite side, causing the central wall to rotate, allowing you to reach the portal it obstructs.
Once through, follow Ray down the hall to a second portal, which will vanish before you have a chance to get through yourself. As you turn back into the hall, you'll find a ghost has appeared. The only difference with this one is that it likes to hide inside the mirrors, so explore the hall and shoot down the mirrors to make it appear, then wear it down and capture it like the ghosts before. Afterward, head through the portal that appears at the end of the hall, then cross the walkway (skipping the book bats if you like) to a second portal, then along the red carpet at up the stairs to a third.

You'll emerge along a walkway with several bi-pedal page-enemies. You can either take them on from a distance with your Blast Stream or get in close with the Shock Blast--easy stuff either way. Head up to the portal at the top, then through another at the end of a walkway.
Take on a few more bipedal-page dudes, then follow the walkway to an opening on the left, leading into a hall with furniture scattered along the ceiling. Look for a Chair artifact in the corner, then continue through a short passage in the back of the room, leading to a tall staircase.
Alright, climbing the tall staircase is easier said than done, as swarms of book-bats will fly around specific portions in set patterns. Don't bother killing them now; instead it's easier to simply run past them as soon as a gap opens up. As you approach the stairs, the first group will begin circling around--wait for the break between the bats then dash through. Stop just before you reach the platform ahead, as another swarm will fly through the archway up the stairs--as soon as you spot the gap, trail after them up to a second platform. You'll now be surrounded by a ton of circling bats--now's a good time to pick them off with your Blast Stream--once you've cleared most of them out, run up to a third platform, which will drop down a few feet. Raise it back to the staircase using the Slime Tether; attach one end to the platform, the other to the stairs above.
With the platform raised, continue up the stairs to another platform that dislodges--tether it to the stairs on the left to put it back in place. At the top of the stairs, you'll find the portal, but you're going to have to reassemble the path to get there. Start off by bringing the closest platform back to you with a Slime Tether, then pull that platform up to the one on the left with another. Now ride this as it hovers around until it gets close enough to the portal's platform, allowing you to pull yourself in with a final tether.
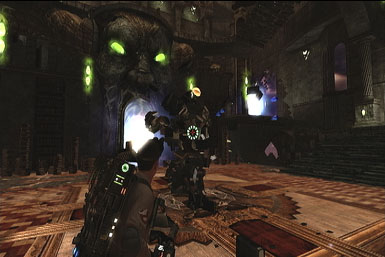
After warping at the top of the staircase, you'll have a huge boss to take on. Now there's a few steps to this one. First, you need to remove the black slime from its mask, so whip out your Slime Blower and fire it at its mask. The boss will raise its hands just before it slams the ground, sending a shockwave your way--perform a quick hop in either direction to avoid it. Once you've cleared the slime off its mask (as indicated when it starts glowing, or when your teammates say something), wrangle it loose with your Capture Stream.
With the boss's mask removed, he'll whip into overtime, giving you all its got. Back away and use your Blast Stream to target its now exposed eye. Although the Blast Stream is weak compared to your other weapons, its also the most accurate, so stick with it. Now evading the boss's attacks is going to be crucial if you want to make it though this life. Thankfully, that little hop of yours is enough to evade virtually every attack--just keep your distance and hop whenever he does his shockwave thing. When he gets close, back away if you can, and hop to either side if you see him start twirling around. If he attack does hit, immediately hop once you come you get back on your feet to avoid his subsequent attacks, otherwise he may just kill you out-right. As long as you blast him whenever you get a chance, it shouldn't take too long to destroy him.
History Museum (part 1)
Your teammates will lead you to a locked door on the far side of the loading dock. Turn around and blast the wooden crates on the opposite wall to find a power box you can interact with, which will unlock the door.
Follow your teammates through into a room with a shipping crate hopping around--break it open with a few blasts of your Proton Stream to reveal the museum's curator, who'll summon a nearby elevator. Unfortunately, a ghost seems to have caught a ride on it and will possess Ray! Blast him with your Slime Blower to free him of the ghost, then capture the ghost like you have so many times before.


After the cutscene, you'll wind up in a large room where many of the guests have been possessed! Like before, hose them down with your Slime Blower to expel the spirit. Because the ghosts can repossess someone after being freed, it's best to free only one at a time, capturing them before moving on. As for the capturing process, it seems most effective to wear them down using the Shock Blast from close-range. Oh, and beware that your fellow Ghostbusters can also become possessed--be sure to free them so you have an ally to heal you if you go down.
With the room cleared, follow your team through the hall. You'll face numerous mannequins who've come to life, but they're weak and will go down after a few Shock Blasts. Because the hall has several turns, you can use the walls before each for cover if you need to recover some health.

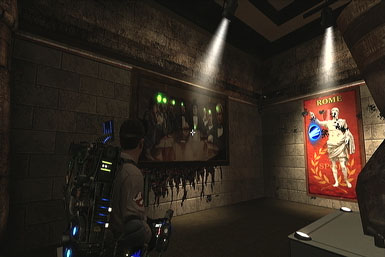
Eventually, you'll wind up in a long room with a temple in the back. Blast the mannequins along the way, holding back if you need cover. As you approach the temple, target the enemies from the ramp leading up to it, allowing you to easily retreat back down. Once you've cleared the main enemies, use your Blast Stream to take down the flying skulls. When finished, exit through the doors on either side of the temple and follow your team through some more hallways. Of course, you'll face more mannequins, but it's nothing you can't handle.
Before long, you'll arrive at a closed gate. Hang tight while Ray gets it open. Up ahead is a large exhibit dedicated to the Civil War--can you guess what kind of ghosts you'll soon be facing? As you try to exit the room, said ghosts will materialize--and they have guns too. Luckily, the short hall leading you're in now is perfect to battle them from, as it provides perfect cover from their attacks. Like usual, use the Shock Blast for any nearby ghosts, but switch to your Blast Stream for the far away ones--just remain in the short hall until you've captured most of the ghosts. With the room cleared, exit via the door you originally tried going through.
Museum (part 2)
As you pass through the Egyptian exhibit, some flying skulls will fly out via some black slime on the floor. Take a quick moment to get rid of the slime with your Slime Blower before turning your attention to the flying skulls. Once clear, exit through the door and follow your team into a large room.
As you enter the large room, several ghosts and mannequins will appear. We suggest taking the stairs down to their level and blasting the mannequins at close-range first with the Shock Blast, then use the pillars for cover as you target the ghosts. After clearing the room, approach the west wall, where you'll spot the outline of a door using the PKE goggles--spray that spot with your Slime Blower to make a door materialize, through which you can enter.

Push forward through the hall with the flickering lights, but be sure to scan the Bagged Stone Head artifact just before the door. In the room just after, you'll be attacked by more mannequins and flying skulls. Focus on the mannequins first, with the Shock Blast, then use the Blast Stream to clean up the skulls. When done, exit through the door into an exhibit hall.

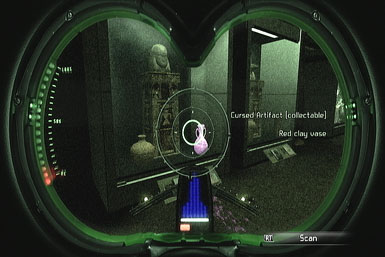
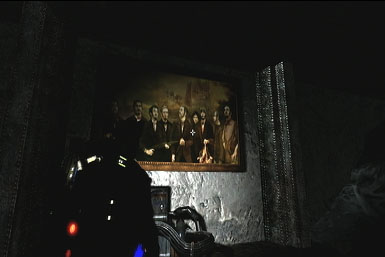
Inside the exhibit hall, turn left first to scan the Red Clay Vase artifact in the first display case on the left, then turn around and head the opposite way. As you do, more mannequins will appear--Shock Blast 'em. Once clear, scan the Large Painting of Gathered Businessmen artifact at the first corner, then continue on through the door, battling the mannequins as you go, until you reach a closed gate that Ray will soon open. Follow him into the next room where you'll find the captured girl.
History Museum (part 3)
Open fire on the large obelisk and descend down the revealed staircase. After your teammates do some yammering, follow Ray through the gate he kicks open and trail him through the tunnel.
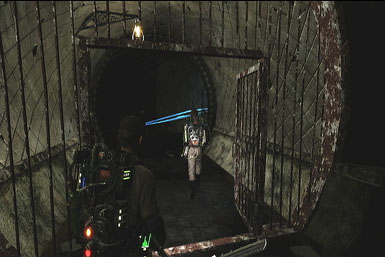
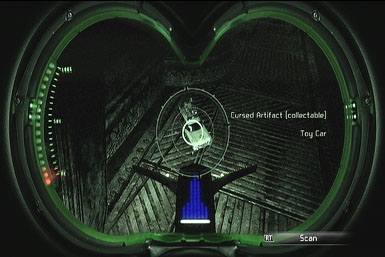
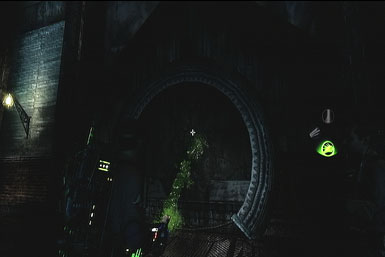
Upon emerging onto a walkway, head left first to find a Toy Car artifact, along the wall, then head the opposite direction. Look for a cracked circular covering along the wall, just before the gap. Spray it with your Slime Blower to reveal a tunnel you can now enter. Head on through and follow your teammates to avoid getting lost.
You'll soon wind up in a circular room, where Ray will fill you in on the new Composite Particle System you've been equipped with:
- Meson Collider: This fires a short, but powerful blast at your target. Even better, after hitting your first target, the gun's secondary function (overload pulse) will home in toward that target--nifty!
- Overload Pulse: This is the machine gun of the Ghostbuster's arsenal. It fires a rapid blast stream in a straight line--unless you've already targeted a ghost using the weapon's primary function (Meson Collider), in which case the blasts will home in on that target. Combine both weapons to pack a powerful punch.
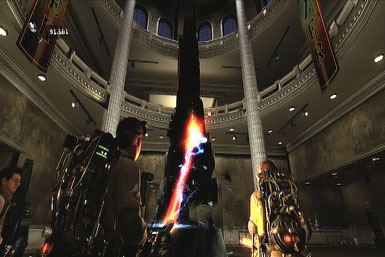
Exit the circular room through the gate and continue across the bridge, where you'll find the level's boss. The battle itself is pretty basic, cycling between two portions: the boss-fighting portion, and the minion portion. The first is where you battle the large boss himself. The large, glowing spot on his chest is his weakpoint--you're best off targeting it first with the Meson Collider to lock-on, then lay into him with the Overload Pulse which will now hone-in on his chest. He won't really attack you directly until he's almost out of health, at which point his attacks can be dodged by moving side-to-side; however, it is in your best interest to revive your teammates whenever they go down for the second portion of the battle. Oh, and you may want to shoot the cannisters surrounding the arena, preventing the boss from using them for cover.
Unfortuantely, you won't have much time to attack before he disappears, leaving behind four black-goo portals on the floor, one in each corner. Whip out your Slime Blower and use it on each of the enemy-spawning portals to close them quickly, then take down the enemies they created. The Slime Blower works on the enemies too, though the Shock Blast is most effective, at close range, of course. Once you've cleared out the enemies, the boss will return giving you another chance to attack. Repeat ad nauseam until he goes down.
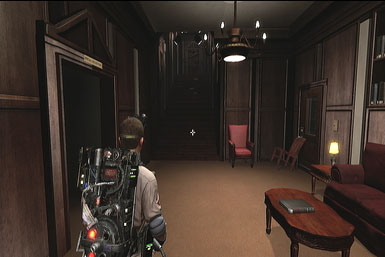
Return to Hotel Sedgewick
Follow the Ghostbusters to the elevators, then into the staircase room beyond, where you heard a girl scream. After meeting with the hotel manager, climb the staircase to find a Broccoli Queen Autobiography artifact at the top, before following the Ghostbusters back to the previous room. After talking with the manager some more, equip your Shock Blast as you follow your team toward the kitchen, ready to blast several skeleton enemies that'll soon surround you.
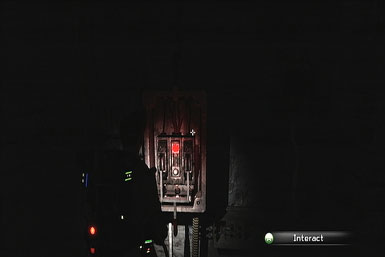
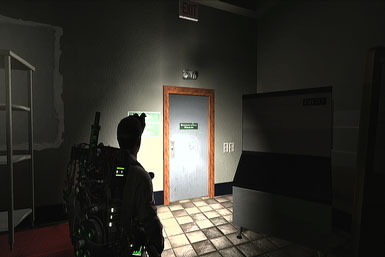
With the enemies down, follow your team onward into the kitchen (Ray will open the door for you). Once inside, follow the right wall to find the door leading into the generator room--it's marked by a sign. Proceed through the hall within, kick your way through the gate, then interact with the panel on the backside of the generator to get that baby started.
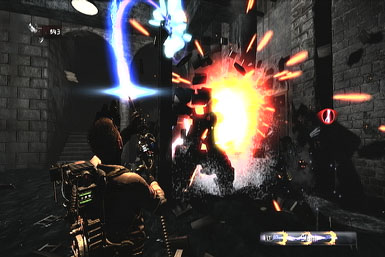
Uh-oh, starting the generator has electrified the flooded basement! It seems a fallen lamp near the entrance is the cause; use the Slime Tether to pull the lamp from the water up to the ceiling, allowing you to rejoin your team and follow them back to the kitchen. Great, looks like there are several ghosts running amok in the kitchen. Because they like to slip through the walls so much, you're best off sticking to your standard Blast Stream, as its the easiest to target them with. Try to stick close to your teammates during this battle, and be sure to revive them whenever they go down so they can return the favor.
With the kitchen cleared, the Ghostbusters will lead you back to the elevators. Before hopping aboard though, you may want to follow your PKE to a small room within the main lobby (where the fountain is) to find a Swiss Death Clock artifact.
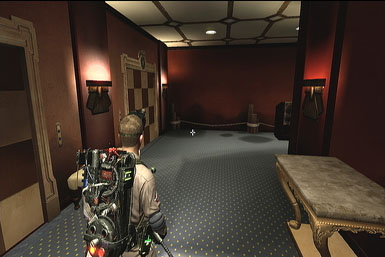
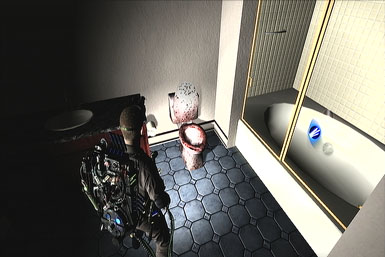
After riding the elevator, follow Egon down the hall to a door he kicks open. Before heading through, you may want to explore the nearest hall to find a room which has a Phantom Flush Toilet artifact in the bathroom.
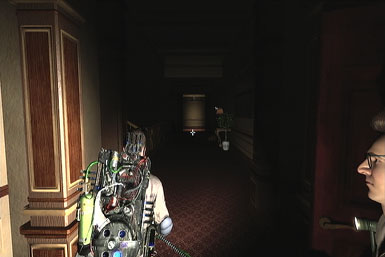
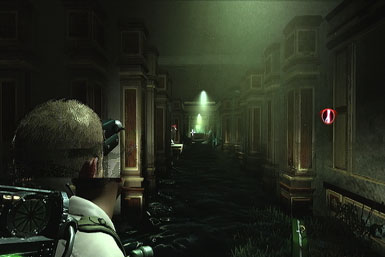
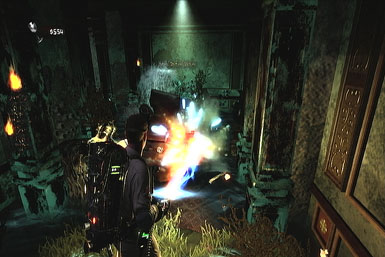
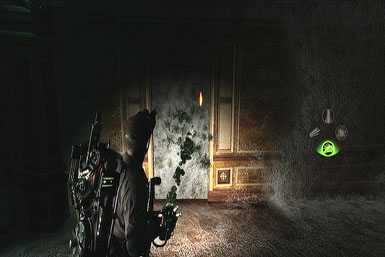
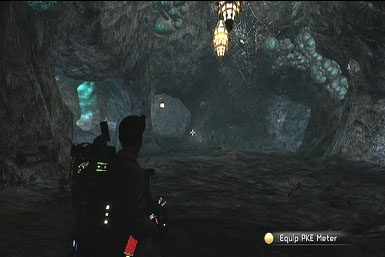
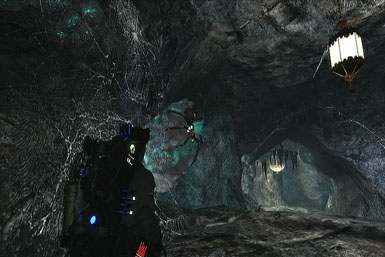
Now continue past the staircase to find a web-covered hall. Get your Shock Blast ready, as many spiders will attack as you explore the hall. Turn left at the first intersection, then continue on until you automatically pause to listen to some ghostly happenings. Afterward, turn right to find the The Unruly Beard of V. Belascu artifact, before heading the opposite direction. Follow Egon to a web-covered door that you can uncover using the Slime Blower, allowing you to push through. Exit through the door on the right, then another on the left.
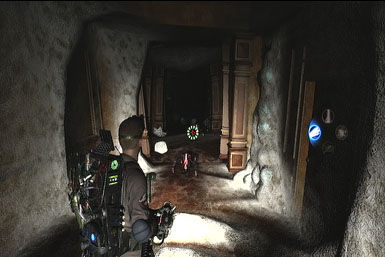
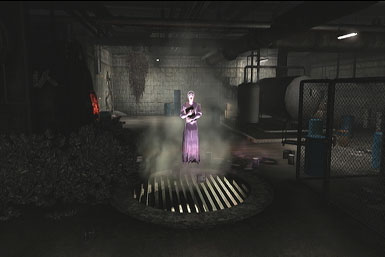
Proceed through the web-infested halls, and make a right through the short hotel-hallway section. Continue onward a ways until the next major split-path and turn left. Now whip out your PKE to close in on the ghostly signals until the spider-witch appears.

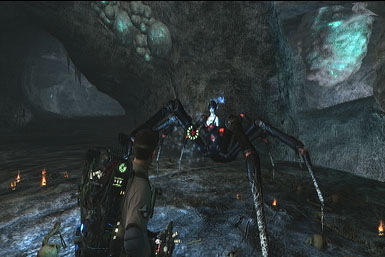
The Spider-Witch is a pretty easy boss. When she attacks, circle around her while shooting her with Shock Blasts. Occassionally, after a direct attack, she'll vanish in a poof, reappearing somewhere else. However, she'll also occassionally attach herself to one of the egg sacs scattered around the arena--use your PKE meter to quickly track her down and dislodge her with a quick blast before she "powers up," enabling her to unleash a powerful attack (which you should turn and run away from).
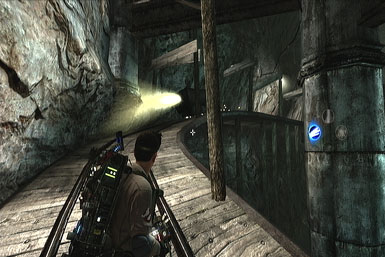
Lost Island (part 1)
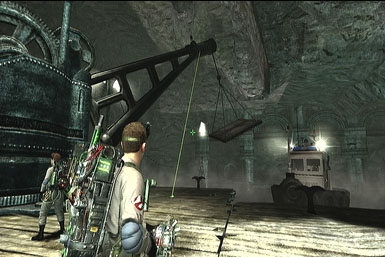
You guys need to cross over to the nearby staircase, but a giant hole in the ground is making things difficult. Thankfully, the platform suspended by the nearby crane is just what you need to make it cross. Swing it over to the gap by attaching slime tethers to the crane and the ground, causing the platform to make its way toward the hole--once it's close, it'll automatically fall into place, allowing you to cross over and climb the stairs. As you climb the ramp, a mine cart will come careening your way--step to the side to avoid being turned into a pancake.
At the top, look for a Strange Book artifact behind the boxes just past the statue. Now climb the staircase nearby and get ready for some gargoyles to appear as you attempt to cross the bridge. Like before, wrangle them with the Capture Beam and slam them into any object to destroy them. Just ahead, you'll face another, as well as several spiders, as you head through a short hallway--back up to target the gargoyle first, then use the Overload Pulse on the spiders. Make sure to cleap up any remaining black sludge with the Slime Blower. You'll face an identical group of enemies just after, followed by one more gargoyle in the second hall.
When at the third bridge, a door on the right will slam shut as you try to go through it. No worries--you can open it via a crank in the hedge maze just below, by taking the staircase on the left, just ahead. There are two main routes: head left first to find the Stuffed Animal artifact, then proceed the opposite way to find the crank in the back corner. Turn it clockwise using the Slime Tether by attaching one end to crank and the other to the ground. Once the door opens, work your way back to it by using the Shock Blast to take down the attacking black-slime enemies--proceed slowly to prevent them from getting behind you.
Once through the door, head right and follow the walkway around the large room. Bust through a wooden barricade at the end first to find a Large Painting artifact, then head down the hallway just before to a door…which slams shut as you approach. Several ghosts will now appear behind you--use either the Blast Stream or the Composite Particle System (right on control-pad) to take them on. Unlike other ghosts, these guys do not need to be captured. Once they're down, equip the Shock Blast to tackle a few black-slime creatures who'll attack immediately after. With the room cleared, continue through the now open door.
Lost Island (part 2)
Great, you've fallen through a trap door and are now separated from your team. Oh well--proceed through the corridor, being careful of the black slime, and duck into a tunnel on the right. It'll soon lead you to a second tunnel--equip your Overload Pulse as you'll be facing some spider baddies as you venture through.
Inside the second tunnel, head right first to find the Old Captain's Wheel artifact, then proceed the opposite way. You'll soon reach an expansive room with the entire center floor blanketed in black slime. Follow the walkway left, to a gate on the opposite side. Once there, use the Slime Tether to pull both weights on either of the gate to the floor, causing the gate to raise and draining the room.
With the room cleared, two large Black-Slime monsters will appear, in addition to several small spiders. While you can attack the Slime Creatures from a distance, it's actually easier to get close and take them down with the Shock Blast. If one attempts to charge you while on the walkway, simply run past him to evade his attack. Afterward, clean up the remaining spiders using the Overload Pulse, then look for a tunnel you can enter on the lower level.
Keep your Overload Pulse equipped as you venture through the tunnel, as you'll come across several spiders. When you reach the split path, head right for a Ghostbusters DVD artifact, then continue down the other direction. Before long, you'll emerge in a bright room, with Winston radioing in for help. Look for him inside the vertical coffin-looking thing, just a few feet left of where you entered from--interact with it to free him. Now follow him up the stairs and through a door he kicks open.
Through the door, head dead-ahead to find a Weird Color Jars artifact on the left, then climb the stairs and head to the far right corner. There you'll battle a couple of ghosts and more black-slime creatures--use the Shock Blast on the creatures, then use either the Plasma Beam or Overload Pulse on the ghosts. Afterward, follow Winston down the stairs and through the door a ghost blows open.
Inside the next room, open the coffin-thing on the right to free Egon, then get ready to take on a whole mess of enemies, including more ghosts, black-slime creatures, and one large black-slime monster. Because of the enemies will be in your face, stick to the Shock Blast--you should even be able to get close enough to the ghosts to make effective use of this weapon. Oh, and when the Slime Monster shows up, circle around him while blasting him. Just remember to keep an eye on your teammates and revive them when necessary so you've got backup.

After clearing the room, ride the lift (opposite the entrance) to the floor above and follow your squad to the next room, where you'll find an odd-looking machine in the center. Climb the stairs to the second floor, then use your grapple beam on the three balls floating around the machine and slam them downward, setting them in place. Unfortunately, this has the side-effect of summoning the level's boss--but thankfully, he's a push-over.
The boss begins the battle with several eyeballs floating around him, near your level--they're weak, so almost anything will take them down. With the eyes defeated, a glowing weak-point will appear on the boss's head. Its most vulnerable to slime, so equip the Slime Blower! Because the boss attacks frequently, keep on the move at all times, by strafing back and forth along the length of the walkway--as long as you keep moving, he'll always miss. While doing so, continually spray slime toward his weak-point to inflict damage. After dealing enough pain, he'll lower his head to your level briefly, making it even easier to target! Keep it up--he'll call it quits soon.
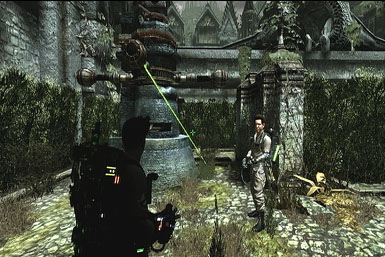
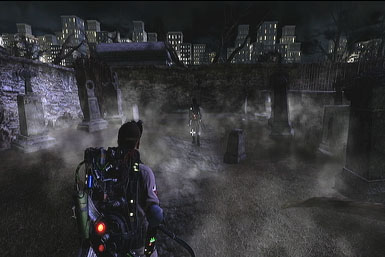
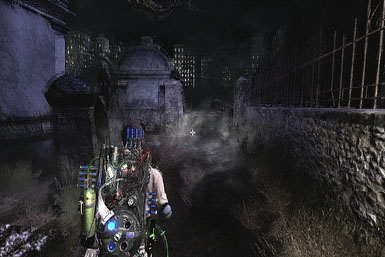
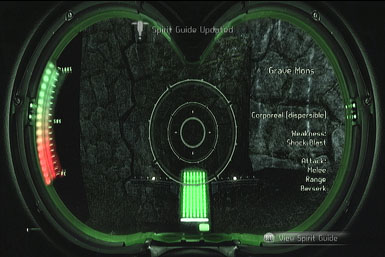
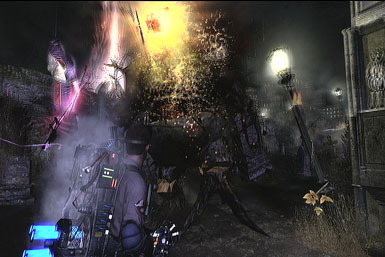
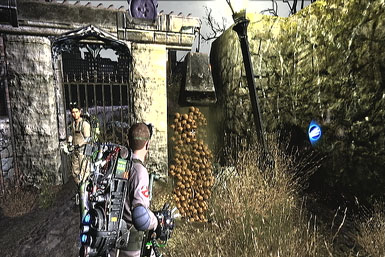
Central Park Cemetery
Proceed dead-ahead (get it?), but stick to the outside wall at first the Whistling Bust of Mausch artifact by a gate before heading deeper into the graveyard. Before long, your path will be obstructed by some gravestones that pop out of the ground--blast 'em. After passing through a gate bordered by two lamps posts leading toward a large building, turn right and go around the fence toward the mausoleum. As you approach, some flying skulls will fly out--ignore them and head on in.
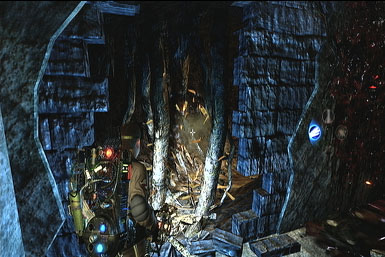
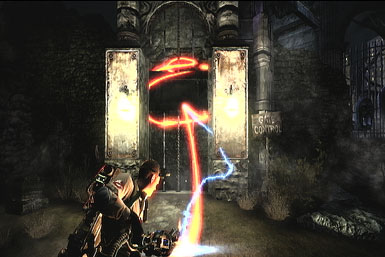
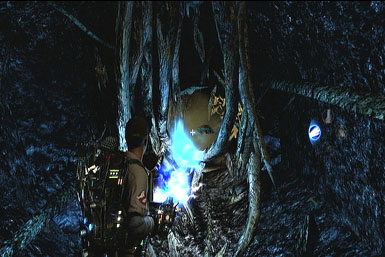
Continue down the stairs to a cracked wall obstructed by tree roots--clear them out of the way with a few blasts, and continue onward to a second set, then up some stairs leading back outside. Approach the "Gate Control" on the right (as marked by the sign) and slam it downward with the capture beam to open the gate for your fellow Ghostbusters. Afterward, Ray will team-up with you--follow him through the door he kicks open.
Follow the path through the graveyard until you come across some black-slime creatures, a couple of ghosts and attacking tombstone enemies. Equip your Shock Blast to tackle them all. For the most part, we suggest ignoring the tombstone enemies unless they're directly in your way, and instead charge right up to the ghosts for a few easy blasts. Once captured, take down any remaining enemies, then escape the area by destroying the tombstones blocking the exit (where you originally came through).
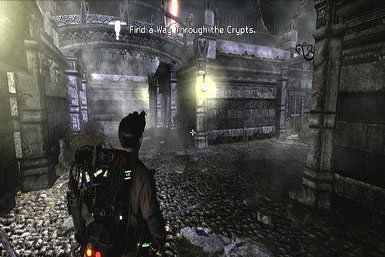
After exiting through the gate, check behind the wall just ahead for a Stone Angel Head artifact, before returning to the path, leading to another battle. Here you'll face three more ghosts and several tombstone enemies. Like before, rush right up to the ghosts with the Shock Black to easily take them down. Afterward, follow Ray through another mausoleum and out the other side, leading into the Crypt Maze.
Once at the Crypt Maze, take the first right, followed by a left, to find the exit…which will become locked. Head back the way you came, with the Shock Blast equipped to kill the enemies along the way, and turn right at the end to locate the key. Use your Grapple Beam to carry it back to the door.
As you attempt to take the key back, a large Golem thing will come to life. Get close, but duck into a nearby alley and use your Shock Blast to quickly take him down at close-range. Once he's defeated, grapple beam the key and position it inside the glowing lock to open the way.
Central Park Cemetery (part 2)
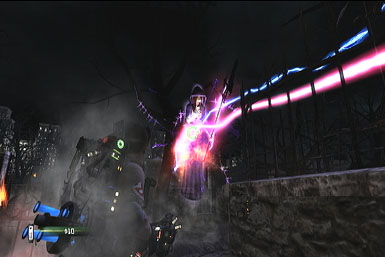
After climbing the stairs, head right and look for the Black-Fruited Tree artifact behind the building, by the wall. Continue past the bell tower toward a large tree, where you'll face several Black-Slime creatures, a ghost, and another large Golem. Equip the Shock Blast and get close to the ghost for easy pickings, then circle around the Golem when he appears, jumping to the side if he charges.
Once clear, head for the graveyard in the direction as the large tower in the background. Along the way, a few more Golems will appear--like before, circle around them if you can and Shock Blast 'em. If you get stuck with one in a thin corridor though, simply backup while blasting. Once you make it to the graveyard, use the PKE meter to scan a weak section of the wall, then get ready to take down a Golem and several ghosts who'll bust through immediately after. Focus on the Golem first, then get up-close and personal with the Ghosts--you know the drill.
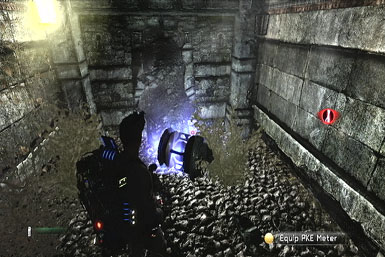
Continue through the hole in the wall to meet up with the rest of your team. Now approach the closed gate (where Ray's standing) and blast the skull pile on the right, dropping a weight, opening the way. Proceed through and into an underground tunnel, using the Shock Blast to blow your way through the roots obstructing the path.
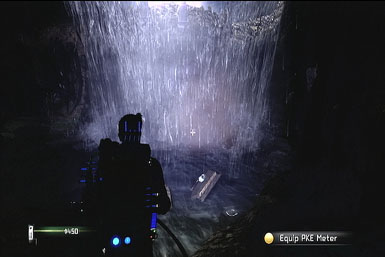
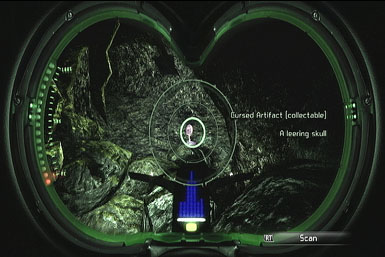
You'll soon reach a cavern with a ton of water pouring through the ceiling. Equip the Shock Blast and get ready for some Black-Slime fiends and tombstone enemies to attach. When finished, look for two paths on the left, each blocked by roots. Blow through the ones on the right first to find the A Leering Skull artifact, before heading down the other path.
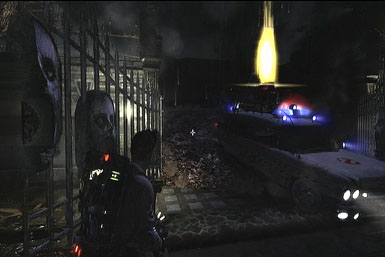
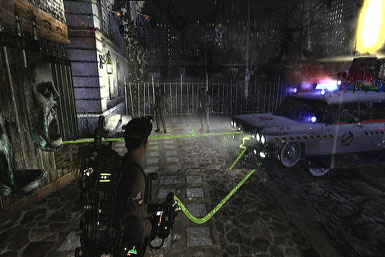
Work your way through the tunnel, blasting the enemies as you go with the Shock Blast. Once you're outside, take a moment to look for the A Jar Containing Something artifact along the wall, opposite the Ecto 1, then prepare to take on some stone angels--just in time too! You see,you can bust open the gate blocking the Ecto-1 by using the Capture Beam to slam them into the stone portion just above. It should only take a few hits. Once the Ecto-1 makes it through, a second gate will impede its progress--attach some Slime Tethers to both sides of the gate, then to the car's bumper to rip it free, allowing you to proceed onward.
Follow the Ecto-1 to the large building ahead. Oh look, the door's locked too--what a surprised. Fling a couple of Slime Tethers between the door and the Ecto-1's bumper to try and pull it open. Of course, something goes wrong and a whole bunch of ghosts attack. As you should know by know, get below them and take 'em down with the Shock Blast, then go in for the capture. After a short while, a ton of fiends will attack from the gate, but they don't post much threat. Instead, you need to watch out for the two large statues that soon come to life. Try and get behind them at close-range and Shock Blast them quickly. Once destroyed, they'll each leave behind a key you can then place into the slots on either side of the door, using the grapple beam, to open the way.
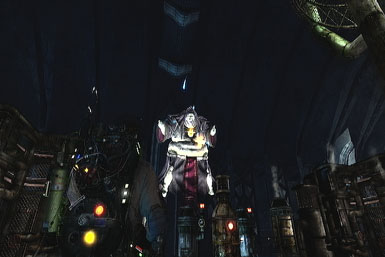
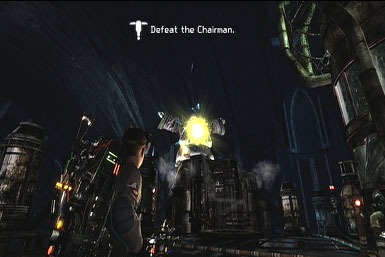
Abyss
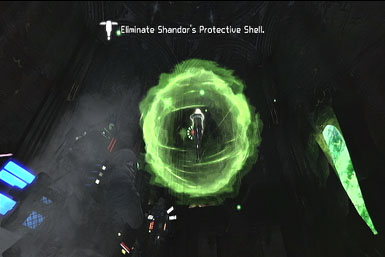
Okay, only two battles more and you've got this game in the bag! For this first battle, the boss is protected by a force shield, generated by the four crystals around the room. However, the crystals are also protected by a shell, that only opens to recharge his shield. Thankfully, you can force the shells open by using the Slime tether--attach one end to to the shell and the other to the ground, then fire a Bozon dart through the opening to destroy the crystal. Repeat the same for the remaining three. With the shield removed, it's a simple matter of wrangling him into the portal that opens, which leads to the second boss encounter.
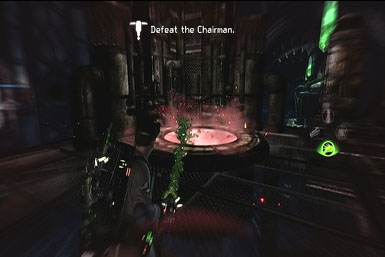
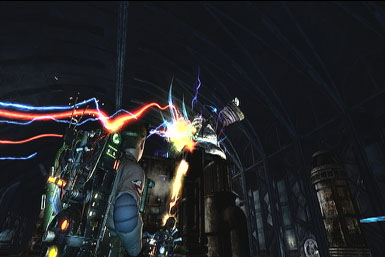
Alright, so this guy means business. In short, you can attack him with any weapon at virtually anytime, though we found the Bozon Dart to be the most effective. We also suggest keeping your distance as much as possible, while staying on the move, to avoid most of his attacks. After inflicting some pain, the boss will move to the arena's center throughout the battle and recharge his health with the help of four statues. Quickly destroy these from a distance by firing a couple of darts at each--you should be able to easily target three from wherever you're at, then make a mad dash for the fourth. The sooner you take them down, the less health the boss will restore.
Xbox 360 Achievements
Note that there are Spoilers on this list.
| Achievement Name | How To Earn | Reward |
|---|---|---|
| ...And You Want to Keep It? | Collect a Cursed Artifact. | 20 |
| Aim for the Flat Top! | Eliminate a creature. | 10 |
| Are You A God? | Complete the game on 'Professional' difficulty. | 100 |
| Back Off Man. I'm a Scientist | Obtain 100% PKE scans for every paranormal creature. | 40 |
| But the Kids Love Us! | The children's reading room has a story to tell, but it will take more than your eyes to see it. | 20 |
| Egon's Guinea Pig | Use one of every pickup (both power-ups and equipment). | 10 |
| Employee of the Month | Be top earner in each Xbox LIVE job type. | 10 |
| Ghostbusters Drinking Game | Quench your thirst wherever possible to avoid being scared spitless. | 40 |
| Gozer's Most Wanted | Successfully complete each Xbox LIVE job in every location. | 15 |
| Heat 'Em Up | Purchase all upgrades for the Proton Gun. | 20 |
| Hedgebuster | The hedge maze is a real eyesore; do some Protonic pruning. | 10 |
| I Ain't 'Fraid of No Ghost! | Trap a ghost. | 10 |
| I Don't Want My Face Burned Off | Purchase all upgrades for the Meson Collider. | 20 |
| I Feel So Funky | Get slimed by a charging ghost. | 5 |
| I Looked at the Trap, Ray! | Recover 20 of your own full ghost traps. | 20 |
| I Love You When You Rough-House! | The tidy arcitectural office could use some Proton-based humbling. | 10 |
| I'm a Ghostbuster, Not a Doctor! | Revive your teammates 20 times. | 20 |
| I'm Picking Up A Signal... | Obtain a 100% PKE scan on a paranormal creature. | 20 |
| I've Quit Better Jobs Than This. | Some ghosts had a real blowout in the Coat Room. Clean it up? | 20 |
| It's a Living | Trap over 50 ghosts in your Xbox LIVE Ghostbusting career. | 10 |
| It's Slime Time | Use the Slime Tether on 15 ghosts. | 20 |
| Kosher! | Remedy a dubious food choice to make the bar mitzvah as orthodox as it can be. | 10 |
| Loans Paid Off | More than $100,000 earned in Xbox LIVE. | 10 |
| Mother Pus Bucket! | Purchase all upgrades for the Slime Gun. | 20 |
| Nice Shootin', Tex! | Complete the game with less than $100,000 in property damage. | 30 |
| No Job Too Big | Defeat all Most Wanted Ghosts. | 10 |
| On the Payroll | Successfully complete one Xbox LIVE campaign. | 10 |
| One down, on the Ground! | Airborne coffins are an affront to gravity; use your Proton Pack to avenge Mother Nature! | 20 |
| Overachiever | Get over $2,500,000 in Xbox LIVE, over 30 post-job awards, 50 jobs completed. | 15 |
| Payday! | Be the overall top earner in each Xbox LIVE campaign setting. | 10 |
| Slam Dunk! | Slam dunk a ghost into a trap. | 15 |
| Slime Dunk! | Trap a ghost using the Slime Tether. | 15 |
| Spores, Molds, and Fungus | Collect all Cursed Artifacts. | 40 |
| Stasis Dunk! | Trap a ghost using the Stasis Stream. | 15 |
| The Destructor | Complete the game with more than $3,000,000 in property damage. | 30 |
| Total Protonic Reversal | Knock yourself down with your own weapon. | 5 |
| Wanted! | Defeat three Most Wanted Ghosts. | 10 |
| We be fast! They be slow! | Purchase all upgrades for the Dark Matter Generator. | 20 |
| We Came, We Saw... | Complete the game on 'Casual' or 'Experienced' difficulty. | 50 |
| We Have the Tools! | Purchase all available equipment upgrades. | 40 |
| You Gotta Try This Pole! | Slide down the fire pole. | 5 |
| You Never Studied | Keep your ears open to learn everything you can about the Civil War. | 10 |
| Disaster of Biblical Proportions | Complete the 'Central Park Cemetery' level. | 20 |
| Get Her! | Complete the 'Checking Out the Library' level. | 20 |
| Ghost Fever Grips New York | Complete the 'Museum of (Super)Natural History' level. | 20 |
| Let Me Guess, Gozer Worshippers | Complete the 'Lost Island Rising' level. | 20 |
| Once S'more into the Breach | Complete the 'Panic in Times Square' level. | 20 |
| Somebody Saw a Cockroach on 12 | Complete the 'Return to the Sedgewick' level. | 20 |
| The Flowers are Still Standing! | Complete the 'Welcome to the Hotel Sedgewick' level. | 20 |
| We Have the Talent! | Complete the Firehouse training level. | 20 |
PlayStation 3 Trophies
Note that there are Spoilers on this list.
| Achievement Name | How To Earn | Reward |
|---|---|---|
| ...And You Want to Keep It? | Collect a Cursed Artifact. | Bronze |
| Aim for the Flat Top! | Eliminate a creature. | Bronze |
| Are You A God? | Complete the game on 'Professional' difficulty. | Gold |
| Back Off Man. I'm a Scientist | Obtain 100% PKE scans for every paranormal creature. | Gold |
| But the Kids Love Us! | The children's reading room has a story to tell, but it will take more than your eyes to see it. | Bronze |
| Egon's Guinea Pig | Use one of every pickup (both power-ups and equipment). | Bronze |
| Employee of the Month | Be top earner in each online job type. | Bronze |
| Ghostbusters Drinking Game | Quench your thirst wherever possible to avoid being scared spitless. | Bronze |
| Gozer's Most Wanted | Successfully complete each online job in every location. | Bronze |
| Heat 'Em Up | Purchase all upgrades for the Proton Gun. | Bronze |
| Hedgebuster | The hedge maze is a real eyesore; do some Protonic pruning. | Bronze |
| I Ain't 'Fraid of No Ghost! | Trap a ghost. | Bronze |
| I Don't Want My Face Burned Off | Purchase all upgrades for the Meson Collider. | Bronze |
| I Feel So Funky | Get slimed by a charging ghost. | Bronze |
| I Looked at the Trap, Ray! | Recover 20 of your own full ghost traps. | Bronze |
| I Love You When You Rough-House! | The tidy arcitectural office could use some Proton-based humbling. | Bronze |
| I'm a Ghostbuster, Not a Doctor! | Revive your teammates 20 times. | Bronze |
| I'm Picking Up A Signal... | Obtain a 100% PKE scan on a paranormal creature. | Bronze |
| I've Quit Better Jobs Than This. | Some ghosts had a real blowout in the Coat Room. Clean it up? | Bronze |
| It's a Living | Trap over 50 ghosts in your online Ghostbusting career. | Bronze |
| It's Slime Time | Use the Slime Tether on 15 ghosts. | Bronze |
| Kosher! | Remedy a dubious food choice to make the bar mitzvah as orthodox as it can be. | Bronze |
| Loans Paid Off | More than $100,000 earned in online. | Bronze |
| Mother Pus Bucket! | Purchase all upgrades for the Slime Gun. | Bronze |
| Nice Shootin', Tex! | Complete the game with less than $100,000 in property damage. | Bronze |
| No Job Too Big | Defeat all Most Wanted Ghosts. | Bronze |
| On the Payroll | Successfully complete one online campaign. | Bronze |
| One down, on the Ground! | Airborne coffins are an affront to gravity; use your Proton Pack to avenge Mother Nature! | Bronze |
| Overachiever | Get over $2,500,000 in online multiplayer, over 30 post-job awards, 50 jobs completed. | Bronze |
| Payday! | Be the overall top earner in each online campaign setting. | Bronze |
| Platinum Trophy | Awarded for outstanding performance in Ghostbusters! | Platinum Trophy |
| Slam Dunk! | Slam dunk a ghost into a trap. | Bronze |
| Slime Dunk! | Trap a ghost using the Slime Tether. | Bronze |
| Spores, Molds, and Fungus | Collect all Cursed Artifacts. | Gold |
| Stasis Dunk! | Trap a ghost using the Stasis Stream. | Bronze |
| The Destructor | Complete the game with more than $3,000,000 in property damage. | Bronze |
| Total Protonic Reversal | Knock yourself down with your own weapon. | Bronze |
| Wanted! | Defeat three Most Wanted Ghosts. | Bronze |
| We be fast! They be slow! | Purchase all upgrades for the Dark Matter Generator. | Bronze |
| We Came, We Saw... | Complete the game on 'Casual' or 'Experienced' difficulty. | Bronze |
| We Have the Tools! | Purchase all available equipment upgrades. | Gold |
| You Gotta Try This Pole! | Slide down the fire pole. | Bronze |
| You Never Studied | Keep your ears open to learn everything you can about the Civil War. | Bronze |
| Disaster of Biblical Proportions | Complete the 'Central Park Cemetery' level. | Bronze |
| Get Her! | Complete the 'Checking Out the Library' level. | Bronze |
| Ghost Fever Grips New York | Complete the 'Museum of (Super)Natural History' level. | Bronze |
| Let Me Guess, Gozer Worshippers | Complete the 'Lost Island Rising' level. | Bronze |
| Once S'more into the Breach | Complete the 'Panic in Times Square' level. | Bronze |
| Somebody Saw a Cockroach on 12 | Complete the 'Return to the Sedgewick' level. | Bronze |
| The Flowers are Still Standing! | Complete the 'Welcome to the Hotel Sedgewick' level. | Bronze |
| We Have the Talent! | Complete the Firehouse training level. | Bronze |
Got a news tip or want to contact us directly? Email news@gamespot.com
Join the conversation