Ghost Of Tsushima Act 2 Walkthrough (Spoiler-Free)
All the strategies and tips you need to clear the second act of Ghost of Tsushima.
Warning: We've ensured that our walkthrough contains minimal spoilers so you can still enjoy the game even if you need help completing all the story missions. However, if you want to know nothing about the game before playing, stop reading now and consult this walkthrough later.
Ghost of Tsushima is a sprawling game in both its huge open world and its lengthy, emotional main quest. Though half the fun of a stealthy open-world title like Ghost is finding your pathway through the game, there are times when having the right strategies or knowing the right road can help you survive against overwhelming odds. That's why we're here to help with a full, spoiler-free walkthrough, to help get you past any rough spots on your way to become Tsushima's legendary warrior.
Below is the complete walkthrough for Act 2 (if you're looking for Act 1, it's right here). Check out the rest of our Ghost of Tsushima guides for rundowns on all of the Character Tales, Mythic Tales, and sidequests--as well as detailed guides for finding all of Tsushima's many collectibles and upgrades.
Ghost Of Tsushima News
- Ghost Of Tsushima Getting "Legends" Co-Op Multiplayer For Free
- Ghost Of Tsushima Review - Chaos In The Windy City
- Ghost Of Tsushima Mythic Tales Guide: How To Complete Them All
- + Show More Ghost Of Tsushima News Links (2)
- Ghost Of Tsushima Armor Guide: All Armor Sets And Locations
- Ghost Of Tsushima Walkthrough, Guides, Collectibles, And Tips (Spoiler-Free)
A New Horizon
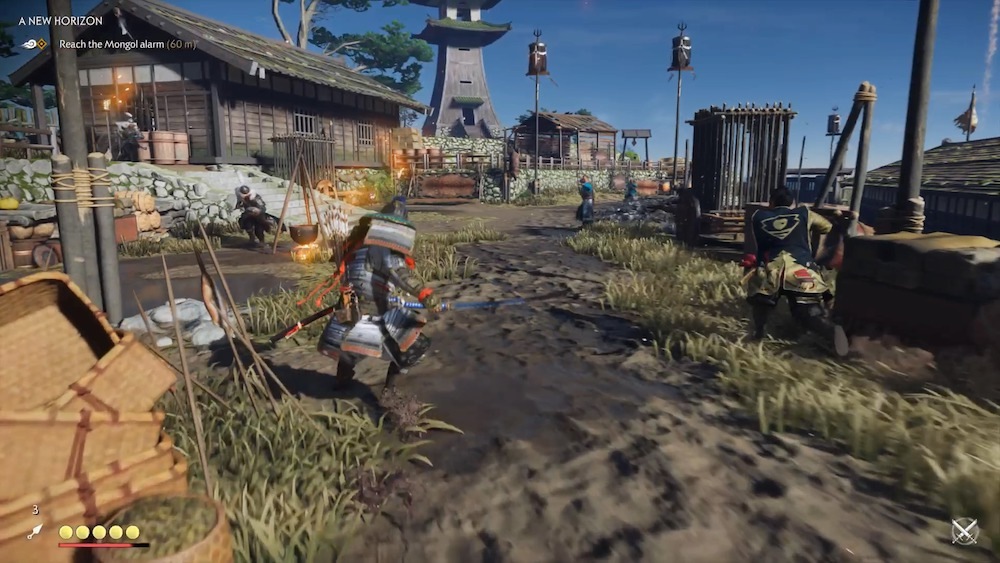
Speak with Shimura, then cut around to the right as you exit the keep to find your allies and speak with them. Find Yuna by the stable, then ride with Lord Shimura. This is a pretty straightforward and short tale: you and your allies will get into several big battles, and you just need to stay alive and support them in order to come through.
First, you'll have to take down a Mongol patrol on horseback. Snipe a few enemies with your bow to lower their numbers before you get down and fight at close range.
From there, you'll assault Fort Ito. Shimura is a good ally so you shouldn't have much trouble, but there are a lot of enemies here and you'll have to dispatch them all. Watch out for the Mongol Leader inside in particular. Be careful also of the Brute Mongols in yellow, who carry what are essentially gun clubs--they'll light their clubs on fire, which will cause them to fire a strong, short-range explosive, like a shotgun. When you see them light, dodge sideways to get clear. If you can manage to lure an enemy in front of the explosion, you can turn the Mongol weapon against them.
The last phase of the tale has you dealing with reinforcements trying to reach the fort and help out all the soldiers you just slaughtered. They'll come racing up the road on horseback, pulling a cart full of explosives. Any arrow into the cart will blow it up, pitching everyone to the ground and starting a proper battle.
Mongols from here on out will like to employ more fire in their battle strategies. You'll see more Mongols lighting their blades on fire, and archers firing flaming arrows. If you catch fire, use the roll ability to put the flames out and minimize the damage you'll take. Prioritizing archers is a good idea, as usual, but taking down the shield enemies with fiery swords as fast as you can is also a good idea--use the Water Stance to quickly try to stagger them for extra damage.

When all the Mongols are defeated, head with Lord Shimura to the lighthouse and you'll end the tale with some cutscenes. You now have a new slate of objectives to tackle. You can do them in any order, so feel free to mix and match from our guides below. It's also recommended you take on other opportunities, like Mythic Tales, to strengthen Jin, and Character Tales, which mesh better with the story when you tackle them around the time they first become available. For more details about Character Tales, consult our extensive Tales of Tsushima side-missions guide.
A Message In The Fire
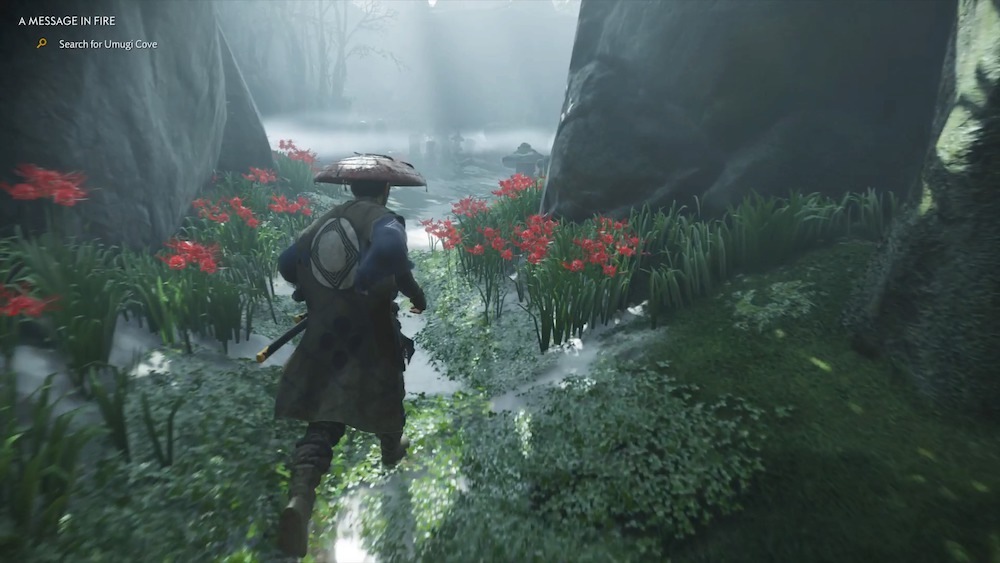
First, we're going to find Goro in Umugi Cove. Head to the marked location in the west end of Umugi Prefecture, near Lady Sanjo's Bridge. To find the town, look for red flowers marking a path through the stones here. If the flowers cross the path like a wall, you're going the wrong way--they'll line its sides, if you're headed in the right direction. Before long, you'll enter Umugi Cove and unlock the Umugi Trophy for doing so.
When you find the town, a messenger will lead you to Lady Sanjo, who runs the town. She'll tell you Goro is downstairs. Talk to him and walk to his house, deal with the Straw Hats that come to bother him, and then head way to the east to find Lord Shimura in Firefly Marsh. Talk to Shimura, then follow him until you get to Fort Mitodake.
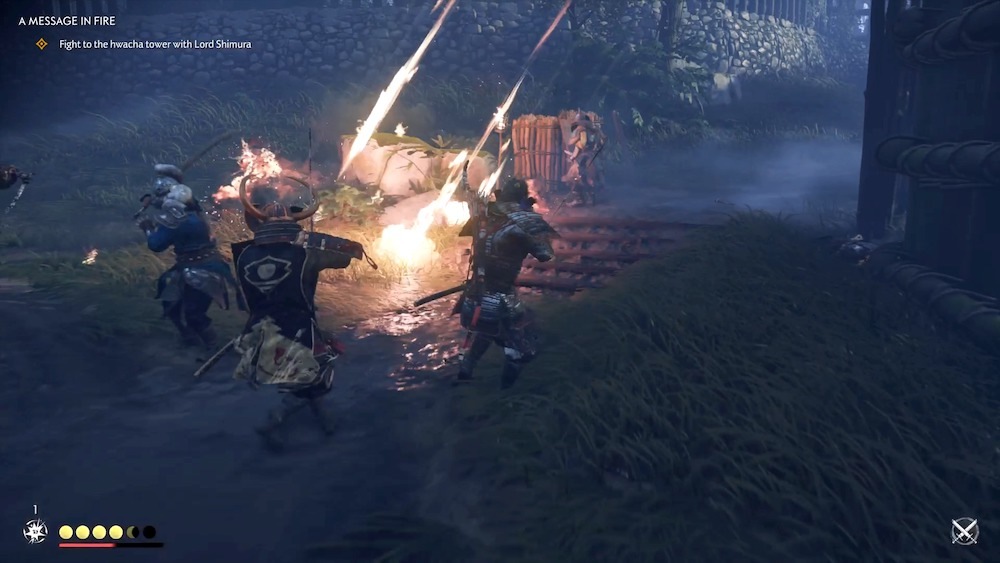
You and Lord Shimura will storm the fort head-on, so you'll want your Samurai Clan armor for the fight. Use archery to deal with whatever enemies you can at range, especially the Mongol archers, as that'll make the approach easier. About halfway through your fight into the fort, the Mongols will turn a hwacha on you--a siege weapon that fires a rain of fiery arrows. It won't change the fight too drastically except that you'll need to avoid the white circle that will appear on the ground periodically: that's where the arrows from the hwacha will land, so dodge clear. Note that you can coax enemies into the white circle so that they get blasted by their allies, which can actually give you an advantage.
Keep pushing toward the hwacha's tower. You'll eventually fight a Mongol Leader, but with Shimura backing you up, you should dispense with him easily. The hwacha's fire will increase as you approach, so sprint toward the ladder for the last 200 feet or so. When you get there, kill the archers quickly and turn the hwacha against the Mongols in the bay.
This part's pretty simple: sink the ships with hwacha fire. Be sure to lead your targets, as it takes the arrows a bit to find their mark. After you sink the boarding ships, you'll want to blast some archers on the shore, and the larger Mongol warships further out. Aim for the red barrels aboard whatever you're shooting at and you'll make short work of all of them to finish the mission.
The Walls of Yarikawa
Next, you'll need to enter Yarikawa Stronghold, which is under siege by Mongols. Head to Ruins of Old Yarikawa Survivor Camp to meet up with Yuna, then follow her toward the city to start the tale.
Entering Yarikawa is actually pretty simple. You're leading Yuna and Taka into the stronghold and you can't be seen or you'll fail the mission, but you also don't have to fight or even kill any enemies--in fact, trying to assassinate Mongols will probably get you spotted, so it's better to just avoid everyone altogether. Equip your Ronin armor so enemies will detect you more slowly and head down the ridge path ahead of you, toward the enemies. Drop off the side about midway into a patch of tall grass. There's an enemy here near a cart you might want to eliminate, but your goal here is actually to move from grass patch to grass patch across the center of the camp.

There are lots of enemies here, but you'll find they tend to conveniently move away from you or turn their backs as you approach. That includes the horseback Mongol in center of the area, patrolling the road. Head across the path to the grass just ahead and look for a gap in the fence that will let you through. From there, wait for a patrolling soldier to pass, assassinate him, then push past him toward the river and another stand of grass.
As you get to the creek, you'll be able to get down near the water, out of sight. Stick in the tall grass and head for the waypoint, which is in the larger body of water up ahead. You'll see enemies on horseback near the water's edge, but they'll leave as you get close. Slip in through the hole in near the waterfall to enter Yarikawa Stronghold. After some conversations, the tale will end and you'll kick off the next part of the Yarikawa story.
The Coward of Yarikawa
Return to Old Yarikawa, near the Survivor camp, and talk to Yuna again. To gain Yarikawa's trust, you'll need to find their missing archers. Look for evidence that'll help you track the archers--you'll find them planning an attack against the Mongols.
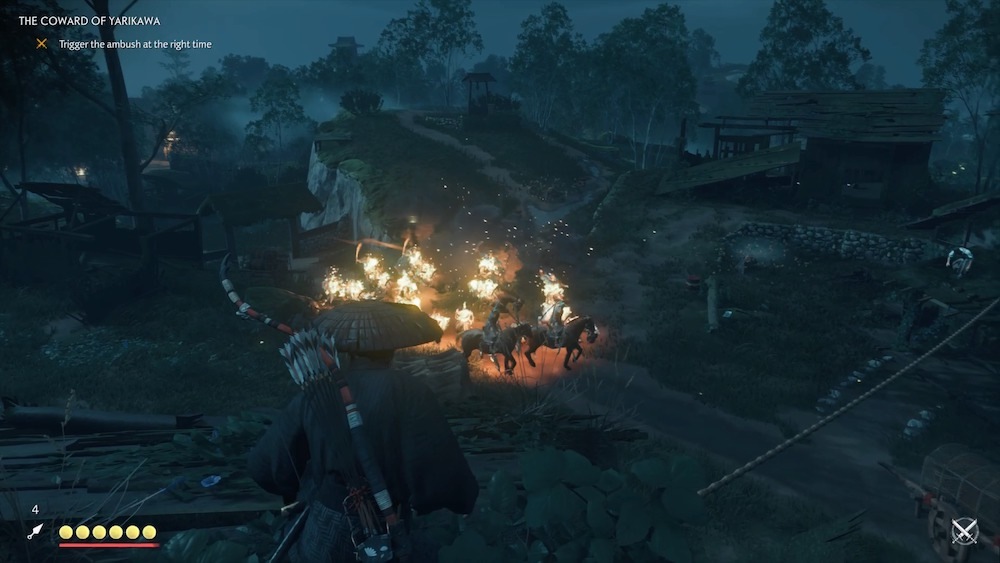
After speaking with them, you'll prep an ambush. Before the Mongols approach, note the things you can use against them--explosive barrels and wasp nests on either side of the road. You'll face three waves of Mongols, so let the first group get well into the kill zone before attacking them. The best way to deal with them is to blow them up with the big wagon of explosives near the archway.
The second wave will come from the left of your starting position, but that group will be mostly archers and hitting the wasp nest there will mess them up pretty well. The last wave will include a couple of Mongol Brutes that you won't be able to kill easily with arrows, so head down and finish them off with your sword. A Mongol Leader is among them, but you should still have distractions you can use in the area to swing things to your advantage. Throughout the fight, make sure Taka isn't killed or you'll fail the mission and have to restart. When the Mongols are dead, a cutscene will wrap up the tale.
The Ghost of Yarikawa
Return to Yarikawa Stronghold for one last stand to stop the Mongols. Talk to Taka when you get there, then head to the keep to talk to Yuna. After a cutscene, the Mongols will attack. Your goal here is to fight them off.
There's not a lot of strategy here. Run to the marked gate and the Mongols will break in. Make sure you're equipped with the right armor for the situation--Samurai Clan Armor is generally best, but Ronin armor also gives you a bonus to Resolve that can be useful. Vary your stances and use arrows and Ghost weapons to control the crowd and thin out the Mongols so you don't get overwhelmed.

When you've killed everyone at the main gate, Mongols will break in at the north gate. Follow the path to the right and engage in the fight there. The situation is the same; fight off all the Mongols who make it in. When Yuna shouts that more are rushing the bridge, use your bow to drive them back--explosive arrows are especially effective here.
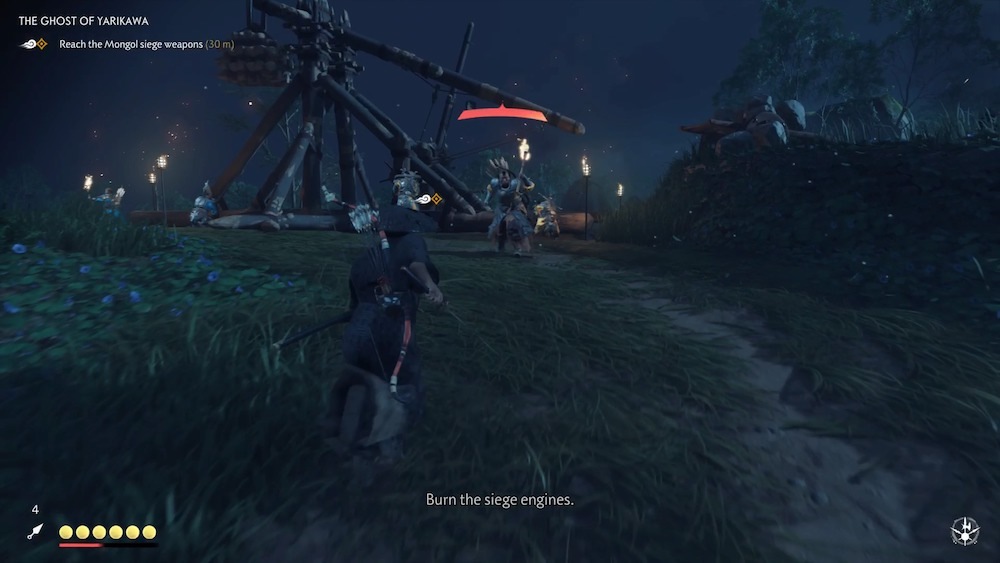
Kill everyone at the north gate and the Mongols will start using siege weapons against the town. Your job now is to sneak out through the Mongol camp and disable the siege weapons, although "sneak" is a relative term and getting tangled up in some battles won't slow you down too drastically. Stick with the tall grass as much as you can, but any fights you get into should stay relatively small-scale, provided you don't sprint into multiple groups of enemies.
Make your way up the hill. You'll face a few enemies on the way, including archers and a Brute, and more at the top of the hill near the siege engines, guarding them. Destroying one engine will spawn more enemies to defend the second; prioritize the archers, who will set you on fire, to keep them from harassing you while you fight everyone else.
With the siege engines destroyed, you can head back down into the camp and approach Yarikawa Stronghold. Use the iron hook to swing down. The good news is that now, most of the Mongols will be facing the town, not you, so you can sneak up and assassinate some or all of them on your way back to the stronghold walls. Though Jim says it'll be tough to get back, it won't be. Get inside and make your way through the Mongols to the keep.
Finally, you'll duel the general. Temuge likes to light his sword and come at you with unblockable attacks, while following up with unblockable blows from his shield. That can give him a combo of two to three attacks that you'll need to dodge, so either roll fully back, or get ready for multiple sidesteps in order to get blows in on his sides. The best way to do damage to Temuge is with a flurry of Wind Stance
Ghosts From the Past
Next, you'll need to reclaim the Sakai Clan armor from Jin's childhood home. Head to Sakai Manor near Omi Village and meet Yuriko to kick off the tale. She'll lead you to the cemetery, where you can compose a haiku to honor Jin's father.

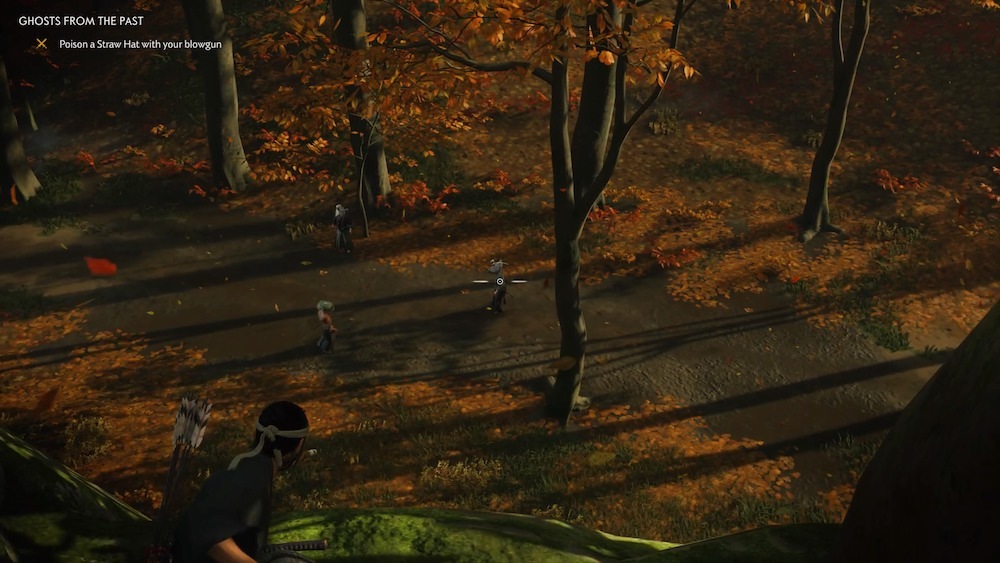
Complete the conversation with Yuriko and you'll head off to find a reed to make a blowgun. The reeds you need are found under the stone bridge in Kishibe Village, and to get them you'll probably need to sneak past some Mongols. You can take the stealthy approach (especially if you swim in, it's pretty easy), or liberate the outpost, which you'll probably need to do eventually anyway. It's a difficult fight to take back the village, but the rewards are worth it.
Return to Yuriko and she'll give you poison darts. Try them out on the Straw Hats that roll up shortly afterward. After you talk to Yuriko one more time, the mission will end, rewarding you a new weapon in the blowgun and new Yuriko character missions you can complete to unlock additional darts.
Your new armor is pretty useful. The Sakai Clan Armor gives you a battle bonus for damage and health like the Samurai Clan Armor, while also allowing you to increase your Standoff streak up to five if you fully upgrade it.
A Reckoning In Blood
Make your way to Lord Shimura's camp in Old Toyotama Hills and talk to him and Yuna. Your real destination is Fort Koyasan. You'll need to infiltrate the fort, either by slipping past the Mongols or eliminating them. Stealth is tough in this section because there's not really a great way to approach the inner gate, but a few well-placed arrows can help make it a little easier. Slip up into the buildings on the left and right side of the path and you can use them to get around behind the wandering guards. These also make handy getaway paths if you get spotted.
Once you're through the gate, a cutscene will ensue. After it's all over, you'll have to take on a bunch of Straw Hats. This is a tougher fight than most, since the Straw Hats are adept samurai fighters. It's tough to sneak up on them from your current position, but if you want to try stealth, try going into the building and taking out one or two before the others see you. A Standoff streak paired with the Ghost Stance might be a better plan, however.

Kill all the ronin to trigger a cutscene. You'll then face another, bigger battle, with Straw Hats mixed with Mongols. This fight has several waves and can be a pain, but you'll have Yuna as backup. Be sure she doesn't get surrounded and overwhelmed as you fight through several waves of enemies. You'll want to knock out the ronin quick in most cases, but if you have arrows, you can snipe them before they enter the battle. Watch out for dogs and Brutes as well. There are also a few environmental items you can use, like explosive barrels, to give yourself an edge. It's a tough fight, but once ever Mongol is dead, you'll wrap up the tale.
The Fate of Tsushima
This is a long mission, so make sure you've got some time for it and wouldn't rather wrap up any other loose ends first. It won't lock you out of any quests in the long run, but you will be stuck working on it for a while. When you're ready, talk to the samurai leader at Lord Shimura's camp, as well as the rest of your allies, then ride to meet Lord Shimura in the watchtower. (There's a Bamboo Strike at its base you can use, as well.)
You'll then launch your attack on Castle Shimura. The first portion of the mission is one big battle with all your allies, and you'll know how to handle it. As you get through the gates, watch for archers up on the ramparts; snipe them out to make things a bit easier. Note that you can also often snipe Brutes before they get to you to make eventual battles a bit easier. If any of your allies go down, make sure to revive them before the timer runs out or you'll have to restart the checkpoint.
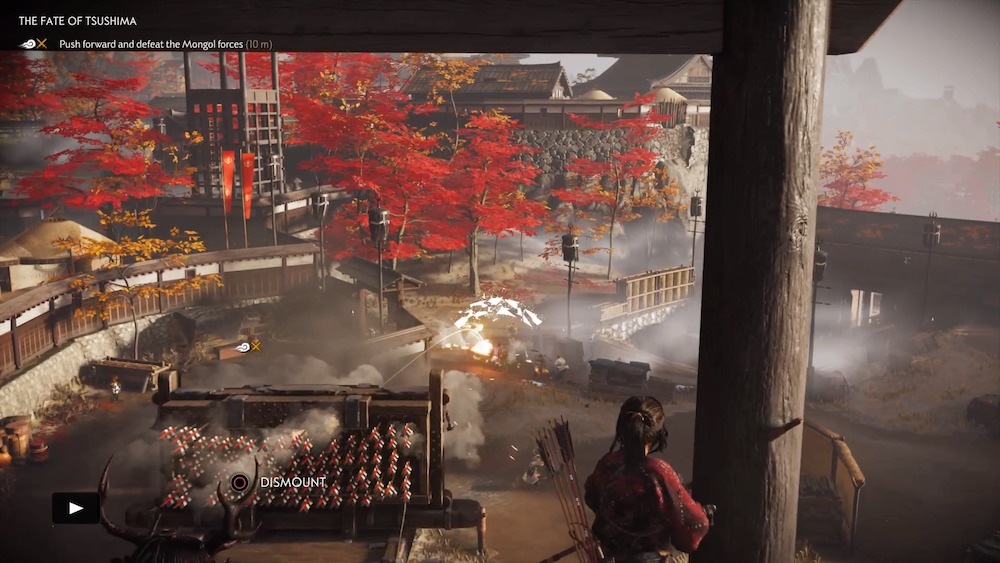
Inside the second gate, watch for archers on the wall. Clear this courtyard as well to trigger a cutscene. In the next area, you'll have a hwacha raining arrows down on you, and it'll be your job to reach and overtake it. There are a few fights you might get tangled up with along the way, but generally you can just keep moving for the hwacha, while using its fire against your enemies. Kill the group at its base and then climb the tower to take the hwacha for yourself and use it to clear the way for your allies to the next area. Look for explosive barrels near the gates to make short work of the Mongol forces.
You'll fight a few more big battles, but they're all pretty straightforward. Stick close to your allies to get their help in fights, but makes sure they don't fall. The fight will continue until you reach the bridge, where the tale ends.
From the Darkness
The next tale follows directly from the last. Spend a few minutes buying upgrades for your weapons and armor, as well as speaking to all your allies, before meeting Yuna to start the tale properly. She'll give you a new armor set, the Ghost Armor, which gives you bonuses to stealth and makes it easier to achieve Ghost Stance.
When you're ready, you'll need to sneak into the keep area of Castle Shimura alone. Use the iron hook to swing under the bridge and reach the cliffs alongside the castle. You'll climb up to the side of one building, where you can get in through a window. Take your time to assassinate the guards without being seen; they'll separate from one another if you're patient, and raising any alarms will fail the mission and kick you back to your last checkpoint.
Once the building is clear, head up to the top floor and you can check out the Mongol camp. You need to follow the path ahead of you to the courtyard beyond. It's swarming with Mongols, but you can make it if you move slowly and patiently. This is another case when not killing enemies is probably the right call in most situations when you could just avoid them.
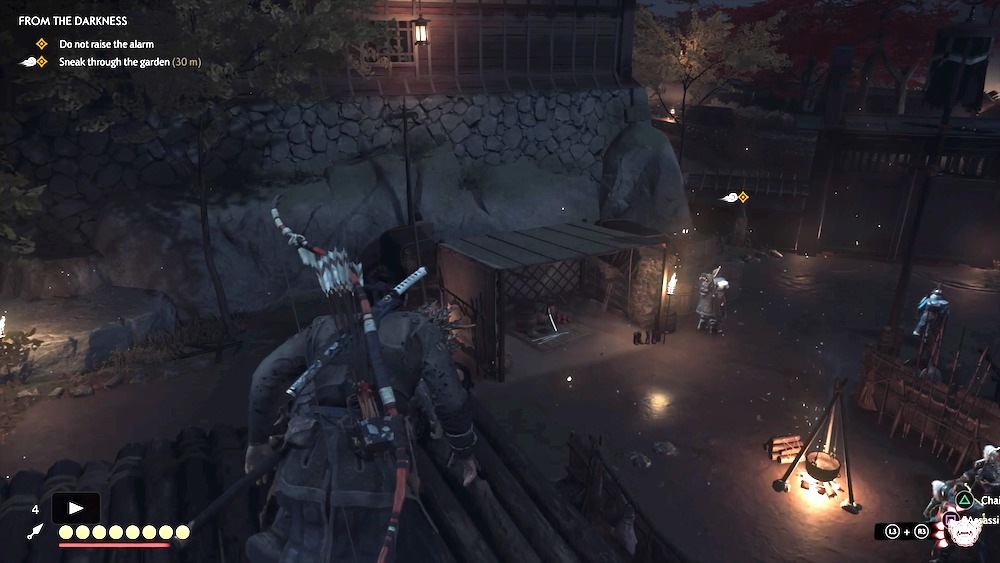
Jump down from the roof and use the slacklines above the garden path to avoid most of the enemies, although you'll want to get rid of the archer on the watchtower ahead. At the end of the line, drop down onto the tent and slip by behind it to reach a hole in the wall--you'll need to wait for the guard to move away so you're not spotted.
Now, sneak up using the tall grass and sticking to the side of the camp near the keep wall. Look for a chance to sneak across the path to the right side of the camp, where you can use cover to get to the fermented milk; you want to stay between various tents and other objects and the courtyard's outer wall. If you head to the left side, near the keep proper, you'll have a much tougher time. Get to the two marked milk locations and interact with them without being seen to trigger a cutscene.

Head up to the keep for a boss duel with Ryuzo. He's added a few attacks since last time: he'll now give you a shoulder charge that can knock you off your feet that you have to dodge, and add an often-unblockable high kick to his combos. That means he can come at you with even longer unblockable combos that you need to dodge. Ryuzo also has a delayed stab move that he'll add to his attacks; it can throw off your parry timing, so watch carefully for it. When he sheaths his sword, it means he's readying a multi-strike combo, so keep back or hit him with an unblockable of your own, like Heavenly Strike, to throw him off his game. It won't take much damage to defeat Ryuzo and end the tale.
Honor And Ash
You now have to sneak out of Castle Shimura altogether, but the path is pretty obvious. Go out the window of the building and stay behind the folks at the bonfire; make your way through the wooden building to find a hole in the far wall. On the other side, move along the cliff wall to the right, behind the cart and tents that will give you cover. Climb up to the next area and keep sticking to the right side to make your way through. When you hit the castle's outer wall, look for a hole you can slip through. Use the rooftops on the far side and the slackline to make your way to the stable.

After the ensuing cutscene, you'll get control back in a new region called the Endless Forest. Ahead, the Mongols are burning a town and patrolling its ruins, which means it's time for more stealth. There are multiple viable paths through this area and not a lot of densely populated enemies, but the easiest way is probably up to the right, near the lone, large building. Use the tall grass and the building's interior to get around the enemies and grab some supplies. There's also a Record on the ground near this building's main entrance.
Head back outside at the north end of the building and make for more stands of tall grass. With some patience, the soldiers should move out of your way as they mill around. Make your way into the big sacred tree at the north end of town and check the bodies you find there. Follow the trail of bodies to the north and keep checking them to find out what happened. A cutscene will trigger just ahead.
When you come to, collect your gear and find Yuna in a nearby watchtower to plan your next move. Ride with her to the frozen lake south of Jogaku Temple. After you survey the fishing village, make your way to the right so you can approach it from the tall grass and stay hidden. There aren't many enemies, but alerting them will put the prisoners in danger and give them a chance to sound the alarm for Jogaku Temple, so be careful not to get spotted or kill the enemies quickly if you are.

Up ahead, you can climb up onto the rooftop of the nearest building and get access to a slackline, which will make it easy for you to assassinate and snipe all the enemies in the area. After that, there's only a handful waiting with the prisoners near the docks and you shouldn't have trouble dealing with them at all.
Free the prisoners and then meet Yunta on a rock at the edge of the water. The plan is to use all those explosive barrels to blow up the Mongols. Use the alarm signal to draw them to you, wait fro them to get out on the ice, and then drop them at range. With effective use of the barrels, you shouldn't even need to draw your sword. The Mongols have archers of their own, though, so be wary of fiery arrows.
You still have to take the rest of the temple. Yuna will direct you toward the frozen waterfall, which will give you an easy path into the temple to ambush the Mongols. Sneak up behind the leader and you can use the Slaughter ability to instantly fill your Ghost Stance, making it even easier to eliminate the toughest fighters in the camp. After that, prioritize the archers, who now use poison arrows, forcing you to heal after every hit you take from them. Clear the temple and rescue the prisoners and the tale ends.
We've got plenty more Ghost of Tsushima guides and coverage to help you get everything out of the game. Check out our full Ghost of Tsushima guide rundown, and if you haven't already, read our Ghost of Tsushima review.
Continue to Act 3
Got a news tip or want to contact us directly? Email news@gamespot.com
Join the conversation