Freedom Fighters Walkthrough
Need help ejecting the Soviets from their occupation of New York? The GameSpot Walkthrough to Freedom Fighters contains a complete walkthrough for the game, including tips, weapon descriptions, and cheats.
Design by Katie Bush
Sometimes it’s the unassuming, underhyped games that fly in under the radar and make for memorable gaming experiences. Freedom Fighters certainly fits the definition of a sleeper hit; although many computer gamers will look at the streamlined interface and gameplay and dismiss it as just another console port, the game’s simplicity belies a surprisingly deep tactical action system. If you’re an action fan who’s looking for a change of pace from the typical run-and-gun gameplay style of most PC action titles, then Freedom Fighters is right up your alley.
In it, you’re cast as Christopher Stone, a humble plumber who’s caught up in a revolution after a Soviet invasion of New York. You start out as just another would-be freedom fighter, sent on missions as you attempt to prevent the Soviets from tightening the noose that they’ve slipped around the city. As word of your deeds spreads, however, other revolutionaries begin to respect you, enough so that they’ll take commands from you, allowing you to form a crack squadron of fighters with which to combat the red menace. Utilizing simple battlefield commands, you’ll be able to split your fighters into different groups, send them to different parts of each level, or tell them to attack or defend autonomously.
To help you fight off the Communist threat, this guide contains a complete walk-through, with advice on how to best use the game’s hub system, as well as gameplay tips, an overview of the weapons you’ll run across, and a bevy of cheat codes that’ll add a lot of replay value to the game (not that it’s hurting in that regard). So what are you waiting for? It’s time to strap on your assault rifle, mix a few Molotov cocktails, find a fellow soldier or two, and get down to the dirty business of urban combat.
Table of Contents
Walk-throughSoviet Domination
Brooklyn: Post Office 1
Brooklyn: Police Station 2
Brooklyn: Post Office 2
Breaking Free!
Desperate Revenge
Enemy Within
Winter Revolt
On Thin Ice
Gameplay Tips
Cheats
Walk-through
Before you begin playing Freedom Fighters, you’ll need to select one of four difficulty levels. As you ramp the difficulty up, Christopher and the other fighters will all receive much more damage when they take fire, thus requiring you to crank through medic kits and generally play much more slowly and more conservatively than in the lower difficulty settings. If you’re interested in a challenge, then a high difficulty level might be appropriate for you; your first play-through should probably be on one of the lower settings, though, since it’s somewhat of a task to adapt to the teammate system as it is.
Manhattan Invasion
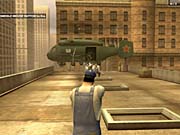
Well, the Soviets have taken over New York City, your brother’s been taken captive by a burly Soviet general, a helicopter’s shooting at you, and all you have to defend yourself with is a wrench. You’ve probably had better days. Then again, you and your brother are plumbers, so maybe this turn of events is a change for the better.
This first level doubles as a tutorial mission, so pay attention to the prompts that periodically pop up to get an idea of what buttons to press in any given situation. Avoid the helicopter strafing fire, then make your way to the door and wrench the comrade out in the hall. A friendly tutorial will begin, where you’ll need to follow the mysterious Mr. Jones out onto the rooftops; he’ll shoot the first soldier you meet, and you’ll be able to pick up your first sidearm, a humble pistol.
Your brother is being taken away by helicopter on the roof; you’ll have to dispatch the Soviets on the roof before moving on. Get used to using the precision aim button before firing; this will improve your accuracy and help you take down your targets quickly. Grab the soldiers’ pistols and get a move on.
As you head down the stairs, you and Mr. Jones will come across a few soldiers milling about next to suspiciously convenient fuel barrels. This is a rather laid-back invasion, apparently. Fire away until they’re dead, then head down the stairs, which inexplicably explode as you head down, severely injuring you. Fire escapes that explode of their own volition are a surefire indication of a building superintendent that probably won’t be retained by the new Soviet overlords. Use one of the nearby medic kits to get your health back. Pick up the pistol ammo from the dead soldiers, and the other medic kits, then follow Mr. Jones onto the street.
Avoid the enormous tank to your right, and instead head directly across the way until you run across the injured man with the red cross above his head. You can heal him with one of your medic kits; just use the action button when you’re standing directly above him. Meet Bagzton, who’s something of a fair-weather friend, with a smart mouth and not much combat sense. All is forgiven, though, because the character is well-written and has an excellent voice actor.
Follow Bagzton and Mr. Jones inside the nearby building; they’ll lead you to the second floor, where some Molotov cocktails await. (The higher floors of this building are locked off, so don’t bother going upstairs.) Once you have the explosives, equip them and walk outside.
The soldiers below have cover--get used to this situation, since it’s going to be fairly common. You probably won’t be able to shoot them from your little perch, due to the built-in inaccuracy of your pistol, but then, that’s why you just got Molotov cocktails. Molotovs are thrown with the regular fire button, and are lobbed longer distances if you hold the button down longer. If you stand at the edge of the perch here, and hold down the fire button until the meter is full, you should throw your Molotov directly on top of the soldiers below.
Grab the rest of the nearby Molotovs and head below. Take out the remaining soldiers; you can fire at the truck directly to blow it up and knock the soldiers down, then deliver the coup de grace while they’re getting up. Nearby is your first manhole, so make like a turtle and use the action button to get down below. Thus ends the tutorial.
Soviet Domination, Summer 2003
Welcome to the Rebel Base, which anchors Freedom Fighters’ hub system. This is actually a pretty neat way for a game to be set up; rather than proceed through a set of linear missions, you’ll be forced to visit each location more than once to complete your objectives. Your first target is the Police Station.
Brooklyn: Police Station 1
Your first visit here is uneventful; all you have to do is speak to the police officer near the overturned truck and grab the C4 nearby. Be sure you don’t wander around the barricade, unless you want to be sniped out of your shoes.
Once you have the C4, head back to the sewer entrance you entered the level through and go to the post office.
Brooklyn: Post Office 1
Objectives: Destroy gas station
You’ll encounter the enigmatic Kid once you enter the level; you can’t recruit him, but he’ll congratulate you on your explosives acquisition. At least you know you have the moral support of someone who expresses his outrage at the New World Order by spray painting "FREEDOM" all over the city, which is certainly a concrete contribution to the cause.
After you round the corner here, you’ll be facing off against soldiers near a barricade of their own. If you stand near the large tire in the alleyway and lob a Molotov at full strength towards them, you should be able to kill one of them; otherwise, just use your pistol and crouch to take them out. If you run out of bullets, find a hiding spot and reload.
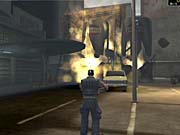
Once the soldiers are dead, grab their nifty assault rifles and head around the corner to the gas station. You may notice the snipers on the roof, but don’t shoot at them, unless you want to lose all of your progress. Instead, place the C4 at the base of the large gas tank, and run away before it detonates. Head back to the police station after it goes up in smoke.
Brooklyn: Police Station 2
Objectives: Raise flag on police station
Now that the snipers are gone, you’re free to walk up and down the street without worrying about having your brains leave your head. The police station is heavily defended, though, so the cop that you spoke to earlier will recommend that you head through the subway tunnel in order to not be noticed. You can actually make it along the top of the street if you hug the buildings on your right and crouch, but you’ll almost definitely take a few rounds on your way.
If you head through the tunnels, you’ll need to go through the one on the left; the tunnel on the right side of the street is blocked off. There are a few pistol-wielding soldiers therein, so make your way through, using the protuberances along the wall for cover. There’s a medic kit near one of the phones along the right side.
When you reach the end of the tunnel, you’ll need to crouch and make your way to the door of the garage. Stick to the wall until you reach it, then ready your weapon and make your way inside. The troops inside will usually stick near a pillar or car; if they stay too close to a vehicle, blow it up and take advantage of their stupor to dispatch them. Clear out the garage, and blow up the ambulance to get another medic kit. You’ll notice that there are a couple of shotguns near the police cars by the entrance to the garage; you can pick one up if you like to get up close and personal. There’ll be a bit more ammo inside the police station itself.
Make your way from the garage into the building. There are plenty of grunts inside the police station, but you’ll luckily find a wooden desk to hide behind once you reach the interior. Pick up the ammo near the desk, then crouch and fire at the soldiers above you. After you clear out the main room, you’ll have to start heading upstairs; go slowly, and pause for reloading after every firefight.
On the second floor landing, you’ll encounter more troops. Kill them and load up on ammo until you have a full load for your assault rifle; the two small office hallways off of this floor also should contain extra ammo and medic kits.
Isabella is on the third floor, in one of the offices off the main hallway. When you’re close enough to rescue her, you’ll get a charisma bonus. After she joins up, you’ll have to crawl out the window and hoist the flag on the flagpole outside. There are a lot of soldiers still milling about below, so try not to get their attention. Raise the flag and you’ll get your first Mission Accomplished screen; you can head straight to the post office from here.
Brooklyn: Post Office 2
Objectives: Raise flag on post office
Isabella will grant you access to her makeshift headquarters, so follow her up to the planning room on the second floor. You’ll pick up your first two recruits here; press the action key while looking at the other fighters to take them along with you, then head downstairs into the post office loading zone, where a rather sizable number of enemies await you. This level is something of a crash course in controlling your teammates, so go slowly and practice your commands before running into a horde of soldiers.
Your teammates will, by default, follow you around, firing on targets that wander into their line of sight. You can also order them to move and attack. If you tell a teammate to attack, he’ll move towards an area, then find cover and start firing at any enemy nearby. They’ll sometimes wade into heavily-fortified positions, so be careful when you use this command; you can designate a specific spot you want them to move towards by combining the attack key with your precision aim key. Just point to a spot behind some cover and let your teammates do their thing. Tapping the attack button will instruct one of your teammates to start attacking; holding the button down will tell them all to get a move on.
Defense is the other mode you can put your teammates into. You can instruct a teammate to hold ground near where you issue the command; you can also use it with the precision aim key to point a soldier to a strategically important spot. As with the attack command, tapping this key will issue a command to the first available soldier, while holding it down will instruct all soldiers to defend.
Use the follow command to revert soldiers to follow mode.
Anyway, you need to clear out the post office loading zone before you can penetrate the building itself. Start off by dropping the soldiers that are visible from the doorway of your base, then take a left and use a medic kit on the wounded civilian in the corner of this area for a charisma boost.
The rest of the soldiers on the far end of the courtyard are dug in behind barriers, so they’ll be tough to hit. Luckily, your teammates benefit from decent AI, and can shoot while moving, so instruct both of them to attack towards the wall behind the Soviets, and they should be able to clear them out by themselves. Your mileage may vary, depending on the difficulty level, so don’t hesitate to withdraw them if they’re getting pasted, or precede their assault with a few Molotovs. Try to stick with them and use your assault rifle to destroy the opposition.
Once you’ve killed all of the soldiers in this first area, reload your assault rifle. You should note a couple of machine gun emplacements off to the right of where you entered the courtyard. If you head through this defensive position and around where the gas station was located, you’ll come across a semi-secret wounded civilian that you can heal for more charisma. Luckily, she’s right next to some medic kits.
After you’re done with her, head back to the barriers and move around the corner to the post office’s loading docks. This location is a little more difficult to penetrate, due to the concentration of explosive barrels near trucks; if one of your teammates, or an enemy, hit a barrel, you could find your teammates halfway across the map in the blink of an eye. This is a good location to learn how to bait your opponents; all you need to do is send one of your soldiers on an attack run to a spot that’s visible from around the corner, then immediately recall him. If you time it right, you should be able to have both soldiers in a defensive position as the enemies come around the corner, allowing them to make some easy kills.
Once you’ve taken down the first wave of soldiers, drop down into the pit near the building on your right and use the cover to detonate the explosives in the loading dock; it’s best to get rid of them now, before your soldiers move into the area, since your fighters will sometimes use the barrels as hiding spots, which is emphatically not a good thing. Clear out the rest of the enemies, grab all of the medic kits in the area, and head into the post office itself.
There are a lot of medic kits on the first floor of the post office, so if you start to get the inventory full message, go ahead and use one on yourself. Your plumber brother Luigi--er, Troy--is on the second floor, surrounded by guards. Use your teammates to kill them off, and then get close to Troy to rescue him. He’ll sprint off to the roof, apparently overtaken by the flag-raising fervor that’s sweeping the city. Follow him, and set your teammates to follow mode: they sometimes don’t respond well to attack commands in multi-story buildings.
Kill the soldiers on the roof and hoist the flag to end the mission. If you want more kills for the end-of-mission tally-up, you can shoot the soldiers that get off the incoming helicopter, but this doesn’t really accomplish anything. After you raise the flag, you’ll get a somewhat implausibly informative cutscene consisting of a propaganda newscast. Congratulations; you’ve survived your first season of freedom fighting.
In a New York Minute, Fall 2003
Back in the rebel base, you’ll learn that you have three targets for this hub: the hotel, the harbor, and the fire station. To paraphrase Isabella and Bagzton: "Everything’s impossible. Go do everything, Chris!" To make matters worse, your brother Troy has decided to leave Manhattan, supposedly to organize a national resistance movement. Coward.
Fire Station 1
Make a pit-stop here before going to the hotel. Don’t penetrate the area too far; just heal the wounded civilian in the shed near your starting point for the charisma bonus, grab some grenades and binoculars, then head back to the sewer to get back your medic kit and travel to the hotel sector.
Hotel
Objectives: Rescue the POWs
Objectives: Raise flag on hotel
Your starting location here is near a firefight; wait for the nearby fighters to eliminate the soldiers, then recruit two of them. You shouldn’t head out into the street; the enemy has fortified the diner and will be fairly difficult to overcome. You can walk around and pick up ammo and grenades from the corpses, though, if you’re careful not to get too close to the street.
There’s an alleyway before the street entrance with an open window above it; climb up and through the window, then go through the first open door to find a wounded civilian. There’s a set of stairs nearby; at the top, you’ll find another freedom fighter, as well as some supplies.
When you get to the bottom of the stairs, move quickly across the street and into the building across the way. You’ll probably want to assault the diner from here, but it’s not going to be easy. The first step is to make your way upstairs and eliminate the snipers looking out over the street. Set up one or two of your fighters in the downstairs area, near the door to the street; as you shoot the soldiers in the diner, they’ll attempt to come up the same way you did, but if you position your fighters correctly, they’ll eliminate them as they approach. Your fighters won’t be much help against the diner itself; the soldiers are a bit too dug in.
When you’ve eliminated the snipers, grab their weapons and use your sniper rifle to pop caps into the soldiers on the top level of the two emplacements in front of the diner. You can use it on the grunts themselves, but there’s really little need for this, since you should have grenades and a lot of assault rifle ammo to throw down there. Don’t feel anxious about conserving ammo; the soldiers in the diner are going to be dropping an awful lot of it.
After all of the soldiers in the diner have been taken out, head back down the stairs and into the street, then cross the way to the diner and get into the machine gun emplacement that’s aimed up the hill, towards the influx of new soldiers. Use it to eliminate all of the incoming forces, then stock up on ammo in the diner itself, and don’t miss the C4 on the countertop. When you have a quiet moment, place one of your fighters on defense directly behind the machine gun; he’ll use it to mow down any of the soldiers that are periodically dropped off on the top of the hill. This is going to be important in a second.
Once you’ve gotten all of the ammo and medic kits (don’t forget to heal yourself), head out into the alley behind the diner and take a left. You should reach a flight of steps. Climb over the wall here to find the POW encampment; take out the guards, then unlock the door to free the prisoners. After they’ve joined your ragtag army, head back over the wall, towards the alleyway behind the diner. Follow it out to the inclined street, where a sizable number of soldiers will be advancing towards the diner. If you left one of your fighters on the machine gun, he’ll eliminate them fairly easily, so stand near the corner and wait until all of the soldiers are dead, then run across. The Kid and a couple of wounded fighters are standing next to a manhole cover; open it up to let the prisoners escape (hit Back when it gives you the option of returning to base.) The wounded fighters don’t give you any charisma for healing them, so don’t bother.
Now for the difficult part: assaulting and taking the hotel. Form up your squad and head back to the POW encampment, then take a left towards the northeast corner of your map. You should see some open doors here; head inside this building and use the vantage point on the upper floor to eliminate as many of the troops in the street as possible. You should set your teammates in a defensive position in the hallway, since your enemies will attempt to follow you into the building. After you’ve taken out as many of the troops as possible, head back out into the alley and go through the window that you passed before into the other nearby building. Grab the medic kits here and heal yourself up.
The street leading to the hotel is going to be a very unfun place, due to the periodic drop-offs of enemy troops, and the occasional pummeling you’ll take from the helicopter patrol. Speed is of the essence here: just dash across the street into the bottom floor of the hotel, and hope your soldiers survive the passage. Don’t waste any time on distant targets, and don’t worry about your teammates if they die, unless you have a clear shot at their body. At this point, your only priority is yourself.
(As a note, if you’re having a tough time getting past due to the helicopter, you can head to the harbor level to destroy the helipad before proceeding. Keep in mind that this will reset all of the enemy positions on this level, though.)
When you enter the hotel foyer, take a left into the coat check and take a moment to collect your fighters and fend off the incoming soldiers. Use a medic kit, if need be, then use a precision aim command to tell your fighters to attack the top of the stairs. Follow them up, then round the corner to reach the flagpole. Make sure you have plenty of health, then go out and raise the colors to tighten your grip on New York’s lucrative hotel market.
Now that you have some C4, you can start taking out your objectives in the other sectors. First, you should attempt to disable the helipad, to prevent any more helicopter interruptions.
Harbor
Objectives: Destroy the helipad
Objectives: Raise flag on warehouse
Your first priority here is the helipad. Grab a few recruits, then crawl through the smashed building in the middle of your starting area to find a little back passage around the Soviet fortification. Head through the first building you come across, then pass through the alleyway into another building with a Cargo Express office; load up on ammo and medic kits here.
Go out the nearby window to wind up on top of a storage building across from the helipad. There are plenty of enemies hanging around, as you might expect, so take an immediate left and drop off of the building onto the ground below, near the sewer entrance. You won’t take any falling damage, but enemies will probably be following you, so set up a defensive position in the alleyway nearby and wait until you clear out everyone on your tail.
Once you’re ready to go, stick to the wall and skirt around the corner until you reach the shipping containers. Use them for cover, and take out the soldiers around the helipad. Place the C4, and watch the helicopter burn.
Now, you can either return to a manhole cover, then return to base to save your game, or use your positioning to make a rear assault on the troops manning the base in the center of the map. Actually, you can do both, though you’ll have to make a trip back to the center manhole to restock on teammates, since the sewer entrance near the helipad doesn’t have any fighters nearby.
If you assault the base, a good vantage spot can be found by maneuvering through the shipping containers until you find a crate to hop on; you’ll eventually reach the top of the shipping containers and will be able to fire on the soldiers from above. Your teammates will actually jump from crate to crate--kudos to the AI programmer for this nice little touch.
After the soldiers are dead, you can climb up the drain pipe on the outside of the building to reach its interior. There’s a wounded old man in one of the upstairs rooms. Heal him up and head down to reach another enemy emplacement; luckily for you, there’s a machine gun set up just outside the door to the central building, giving you a perfect means of executing your enemies. You should take out all of the Soviets yourself, since your AI teammates can’t see quite as far as you can. Don’t bother leaving a teammate behind; you’re not where you need to be just yet. You can also stay on the upper floor of the building to find a window overlooking the fortification below, if you prefer to fire on the soldiers from above.
From the now-empty fortification, head west towards another well-defended area. You can take the stairs on the building to the south to gain height; there are a few extra fighters holed away in here if you’ve gained an extra slot recently. Drop back down to the ground and clear out the bunker, then head through the gate towards the warehouse buildings. There’s an alleyway next to the main building with a manhole, allowing you to make a quicksave. Unfortunately, there are only two fighters with assault rifles nearby; the woman has a shotgun. If all of your soldiers have assault rifles, then stick with them; if you’re running low on medic kits, on the other hand, you might want to take the opportunity to restock back in base and save your game.
The only entrance to the warehouse buildings is extremely narrow, so keep your teammates tight. Once you find the first large room, have your fighters head inside and attack towards the upper balconies. Clear out the room and follow your map towards the next building to the southwest.
Around the corner past the first building, you’ll come across a few windows overlooking a storage area; have your fighters defend on the small ramp in front of the middle window to and they’ll begin wasting the enemies below. You can use the nearby sniper rifle to pick off the snipers in the opposite building.
After the storage area is clear, you can head to the building in the southwest corner of the map if you wish; it’s not required and there’s nothing much of interest except for a medic kit stockpile on its northern side. The building where the snipers were hiding is the flag building, so head on in and raise the flag to finish the mission.
Fire Station 2
Objectives: Destroy the bridge
Objectives: Raise flag on fire station
Unfortunately, there are only three recruits at the entrance to this level, and only one of those wields an assault rifle; the other two have a pistol and a shotgun. Depending on your difficulty level, you should be able to survive with a sole teammate for the moment, so grab the assault rifle fighter and leave the other two behind. The shotgun fighter is not going to be very useful on this level, since most of the firefights here are going to revolve around ranged assaults, and it goes without saying that the pistol packer isn’t worth your time. Save a slot for an assault rifle soldier, instead.
When you have your recruit, climb on top of the parking office and start working on the Soviets on the street outside, then head to the top of the containers across the way and use the turret to eliminate the threats in the nearby fort. Head past the fort and take a left into the second street here. You should spot some soldiers exchanging fire with more recruits, hidden away in an alley; blow up the cars that the soldiers are hiding behind, then make your way down to the alley to get more teammates.
If you proceed along the street, you’ll eventually run into another fort with two machine gun positions. You can either attempt to flank its defenders by running through the park on the right, or climb up into the ruined building along the left side of the street to snipe out the soldiers below.
Once you reach the broken bridge, you can take a left to find another manhole; this one is somewhat nicer than most, since there are two assault rifle soldiers nearby, and you can walk back up the street to recruit two more if you choose to save here. Make a quicksave, at any rate, then head south at the broken bridge to reach a building that will take you down to the train tracks.
Follow the train tracks until you come to an exposed pillar underneath the bridge; set the C4 here and walk back under the bridge after the smoke clears. If you’re running short on medic kits, jump into the train car to grab some, then climb up the wall nearby to find that better save spot, replete with four assault rifle fighters and a shotgunner. Save your game before proceeding, since there’s no reason not to.

After you head through the alleyway near the save point, you’ll run up against a fortification. There isn’t much you can do to bypass it, except head across the street and start moving down the corridor formed by the pillars in the adjacent building. This should at least protect you and your fighters from the machine gun turrets, though you’ll still have to kill all of the Soviets guarding the fort. From there, it’s a simple matter to find the entrance to the fire station; just be careful of the machine gun emplacements on its roof.
The interior of the fire station is a series of smallish corridors and stairwells, so send your now-expendable fighters ahead to clear out each section before proceeding yourself. Once you reach the roof, hoist the flag to finish off this chapter of the game, and kiss the day missions goodbye; the rest of the game’s levels take place exclusively at night, which is a shame, considering how nice this game looks when the sun’s up.
Breaking Free!, Fall 2003
Warehouse District
Objectives: Rescue the POWs
Objectives: Destroy the bridges
Objectives: Raise flag on warehouse
Recruit your fighters, then head across the nearby bridge. Don’t blow it up just yet, though. Instead, send your teammates out ahead of you to clear out the Soviets, then hang a left and make your way into the POW camp. Your soldiers should do the talking here; have them attack a spot inside the main gate to clear out the enemies, then follow them inside to make sure the soldiers on the platforms have been killed. (You can find some items on the platform near the POW camp if you go up the ladder.)
The POWs are being held behind an electrified fence; if you try to open it up, you’ll get a nasty shock for your efforts. You’ll have to take out the generator first, so follow the electric cabling from the door to the generator, which is hidden away behind some nearby shipping containers, near the sewer entrance on your map. Blow it with C4, then open the fence and escort the prisoners back to the manhole near the generator for a hearty charisma bonus.
From the prison, head back to the manhole where you first entered the level. There’s a small path leading along the canal here; head down it until you reach the area’s second bridge. Blow it with C4, but make sure you stay on the side of the river from which you approached (where all of the freedom fighters are standing around). After it’s been blown, head back once more to the first manhole you came through; head back to base for a restock and autosave.
When you come back, recruit your fighters once more, then head across the first bridge as you did before, but this time, set your C4 on the bridge after you’ve crossed over. (You might want to have all of your soldiers defend a spot well clear of the bridge; they’ll sometimes run to the opposite side of the bridge if they’re near your C4 when it’s set.)
After the bridge goes kablooie, go up the nearby stairs to reach the top of the train tracks; this will give you the perfect vantage point from which to demolish the defenses in front of the warehouse. After eliminating the soldiers that are actually on the tracks themselves, start walking north until you’re above the machine gun nest. You can either use a weapon or your grenades to destroy the enemies below; your teammates won’t be much help due to the awkward angle, but they will still shoot at enemies that they can see.
When you’ve cleared out the enemies near the nest, walk down to the blue building and hop across the fire escape to the open window, then proceed downstairs and into the open area in front of the Warehouse. You can expect a rather sizable welcome wagon, so you may want to track down the nearby manhole and quicksave your game before proceeding into the warehouse proper.
Once you’re ready to go, send your troops on an attack run near the warehouse door, but back them up with gunfire; there’s going to be plenty of enemies for them to wade through, and they’ll need all the help they can get. Restock on medic kits and ammo from the platforms in the courtyard, then have your fighters do an attack inside the warehouse itself, or send a single soldier in, then withdraw him to lure out the fighters on the ground level. When the gunfire dies down, charge up the ramp inside and head for the roof. Raise your flag to end the level.
Movie Theater
Objectives: Destroy the helipad
Objectives: Raise flag over movie theater
You’ll start off with only two recruits in this mission; use them to take out the patrol near your starting point, then round the corner to come face to face with a spotlight. There are a lot of enemies just waiting to catch sight of you, so you’ll want to crouch and time your movement across the gap in the fence so that you don’t get lit up.
Recruit more fighters from the girls’ night out near the next manhole (or personhole, I suppose, given the context), and make your way through the building after creating a quicksave. You’ll eventually come to a street. Do your best to avoid drawing the attention of the soldiers at the barrel fire nearby; it’s to your advantage to just dash across the street and into the next building, if only because there’s a sniper on the roof waiting to shoot any of your teammates who get overzealous.
When you’re in the next building, go up the stairs until you reach some more recruits; grab the sniper rifle here and head to the rooftop. Kill the sniper on the roof, if you didn’t earlier, and take his rifle for a full loadout, then head back to the opposite side of the rooftop and start sniping away at the enemies near the helipad. A few of them will attempt to take cover behind explosive barrels; show them the error of their ways. Don’t miss the enemies in the alley to the right of the building that you’re on.
After you’ve popped all the heads you can see, retrieve your assault rifle and head down to the helipad on the fire escape. Stow your teammates a safe distance away, blow the pad, then head into the underground garage to find another manhole and, finally, some medic kits.
Proceed onto the street from the garage to find yourself in front of the movie theater. You won’t be able to enter the theater from here, however; you’ll have to go around the building and take the back door. There are, of course, a few Soviets who wish to lodge a protest against this plan of action, so dispatch the first group at their fortification, then take a right at the next intersection and head through another blue-tinged building until you reach another group of recruits. Heal up, if necessary, and head outside for another large firefight.
The best spot for your teammates will be on top of the large container; you should get yourself into the machine gun that’s immediately to the left of the door and start spraying lead, concentrating on the opposing machine gunner, if there is one. Quicksave your game at the manhole in the corner of this little area, then proceed into the movie theater’s rear entrance after healing up.
Send your sacrificial lambs into the theater ahead of you on attack mode and let them clean out the seating area before moving into the lobby, which has been delightfully redecorated with a military look. The theater’s inner workings are mostly empty, so make your way up to the projection room and find the stairway to the roof. Use your soldiers to clear it out, raise the flag, then prove to the Soviets that capitalism works by selling concessions to the theater patrons at a 2000% profit.
Power Plant
Objectives: Destroy the transformer tower
Objectives: Raise flag over power plant
You’re going to need to start moving as soon as you start this level, not because you’re in any imminent danger, but because some of your potential recruits are; they’re under fire from a machine gun emplacement and, fools that they are, won’t get out of the way or even duck. You’ll need to run over and recruit all of them as fast as you can, and repeatedly hold down the follow key so that they’ll actually follow you towards the truck instead of running closer to the machine gun. If any of them die, just leave them there; you’ll be able to come back for them soon.
After you’ve recruited the first wave, have them all follow you as you climb onto the Soviet truck and onto the nearby rooftop. Recruit the fighter up here, if you have a slot available, then send your troops down the alleyway until you reach a small clearing with stairs leading back down to the street. Keep your troops up on top for the moment; there’s another machine gun around the corner that you’ll need to take care of. If you have plenty of health, you can find the fire escape on the building around the corner to your right and run up to the top of that structure, where a machine gun of your own awaits; use this to take out the fort at the top of the hill, as well as the soldiers near the injured Soviets. After everything’s been cleared out, head past the injured soldiers and make a quicksave at the manhole.
In case you miss the soldier, the only exit from this little alley is to climb up the air conditioning ducts to reach the road above. There are two offshoots on the road itself: one containing a few recruits, the other with an ambulance and a couple of medic kits. Go through the tunnel and you’ll wind up near the transformer tower.
Make a new quicksave at the manhole here, then leave your teammates on defense near the recruits, but make sure they have a fairly clear shot towards the gate to your west. Head into the shelled-out building to your east; there’s a sniper here who’s difficult to shoot from the ground floor, so you might want to use a grenade or Molotov to eliminate him. Grab his sniper rifle and start picking off the troops near the gate of the transformer tower. As you do this, you’ll alert the other soldiers, who’ll wander out of the gate towards your teammates, who’ll pick them off one by one. Keep repeating this until you run out of targets, then switch your army to follow mode and drop down into the transformer area through the sniper’s window. There’s another horde of enemies waiting near the gates here, so kill all of them before placing the C4 underneath the tower. Grab the items near the gate, then proceed towards the main road.
This is essentially a shoot-out in the dark, since the area is very poorly lit and there will be quite a few Soviets coming your way. Stick close to your teammates, but keep them ahead of you until you reach the burnt-out bus that blocks most of the roadway. Use it as a bunker to fire on the oncoming soldiers. When you’ve made a path, jump into the pit beyond the bus; you might not have noticed it, but one of the Soviets was using a rocket launcher, which you can pick up if you wish.
The road will end adjacent to the power plant, which is very heavily guarded by a group of soldiers with three or four machine gun emplacements. You can use your rocket launcher on a machine gun to annihilate its user if your fighters can’t quite penetrate the shield, so stay back and send your teammates into the courtyard to draw the enemy fire so that you know which turret to aim at. When you’ve cleared the first courtyard, head to the east, pick up the medic kits, and make a new quicksave at the manhole.
The interior of the power plant is rather cavernous, and the Soviets have taken advantage of this by setting up a turret well above the floor of the main room. Luckily, there’s a rocket launcher with a single round near the entrance to the building; after you’ve set up your troops in a defensive position in the power plant, grab it and use it to kill off the machine gunners.
When all is quiet, raise your flag on the rooftop and you’ll have finished off this chapter.
Desperate Revenge, Fall 2003
The Soviets just made a grave mistake: they killed your brother. He wasn’t just your brother, though; he was also a fellow plumber, and your right to blood vengeance is right there in the union bylaws, so strap on a sniper rifle and a pistol and head out to find Tatarin.
Naval Base
Objectives: Assassinate Tatarin
Switch over to your pistol as soon as you arrive, and take out the soldiers near your little landing area. Grab their assault rifles; you can come back for your sniper rifle, although you shouldn’t have to. The biggest advantage of bringing it along was to get the extra bullets.
When you have a bit of clear space, work your way into the building near the dock and kill the sniper near the fan. Pick up his rifle, then start working on the other snipers around the base; there should be three or four of them around the area. Check next to the spotlights on the base, and also be sure to pick off anyone in the red buildings on your map. You’ll need to make a headshot if you want an instant kill, since body shots don’t kill your enemies outright, and you’ll have to time your shots so that they don’t impact the fan as it rotates.
After you’ve killed as many snipers as you can see, start working on the regular grunts around the base. Keep an eye on the soldiers near the shipping containers below; if they become alerted to your presence, they may attempt to enter the building and come up the stairs behind you. When you run out of bullets, grab your assault rifle and start making your way through the base. Tatarin is not precisely where he’s marked on the map; he’s actually inside the red building to the east. You’ll need to reach one of the two tall buildings above the harbor to get a clean shot.
The path is fairly clear from where you begin: first, make your way across the narrow landbridge to the southeast corner of the base. You can grab medic kits from atop the container with the spotlights, if need be; just be sure to grab more ammo from any dropped assault rifles as you proceed. Alternately, there is a cache of shotguns, also on the container with the spotlights, if they’re more to your liking. You’re going to be doing a lot of close-range combat during your travels across the base, so this is as good a time as any for a boomstick.
The southern portion is populated by guards; try to get on top of the shipping containers for a better view of what’s ahead. if you spot Soviets, pop a couple rounds at them to get their attention; you’ll usually have a better chance of getting through a fight unscathed if you force your enemies to move towards you, rather than being required to move yourself. It’s fairly important that you kill all of the guards in the area, so be thorough, and don’t hesitate to use your medic kits if you need to.
Make a quicksave at each of the manholes. There’ll be another sniper on a container near the second save spot; try to take him down and use his rifle to kill any of the remaining snipers in the elevated buildings over the harbor. When they’re dead, take your sniper rifle and climb the stairs leading to the top of the easternmost building. Depending on the number of bullets you have, you can snipe out a few of the soldiers milling about in the courtyard below Tatarin’s residence. One of them is a machinegunner, however, and can take quite a few headshots, so don’t waste all of your ammo. When Tatarin walks out onto the balcony, make a clean headshot for an easy charisma bonus, then start your trek back to the landing pad.
Tatarin’s .223 caliber love letter won’t go unnoticed, of course. Almost before his body hits the ground, an assault copter will swoop in over the base and head straight for your location. Its fire isn’t too difficult to avoid, but you’ll still want to get back to the cover of the shipping containers ASAP. Again, make a quicksave at each manhole cover. You may want to keep your medic kits in your active slot, since the chopper can drain your life rather quickly if it gets an unobstructed shot. Duck and weave back to your boat to end the mission and begin a rather startling cutscene.
Enemy Within, Winter 2003
Objectives: Escape from the sewers
Somehow your assassination mission took a couple of months, because when you return to base, it’s winter, and the Soviets have cleaned house in the sewers. You won’t have your usual rest and respite here in the underground; instead, you’ll have to wade through the enemy soldiers.
Begin by killing off the soldiers on the far side of the sewer water, then cross over the wreckage and head into the tunnels. There’s something of a secret area at the first right turn; if you climb up the wooden boxes to the upper level, you can find a medic kit and a Molotov.
Proceed along the sewer tunnels until you come to a room with, oh, about a million Soviets. This is going to be a challenge on the harder difficulty levels, but luckily there’s plenty of cover alongside the path, and the enemies on the far side of the water shouldn’t be able to fire at you. When you’ve killed everyone along the first half of the room, take the ladder up to the upper level and exterminate the soldiers hiding in the compression room. Using the rocket launchers on the rest of the soldiers in the large room below should let you cross to the other side without needing to worry about getting killed while crossing the channel.
When you reach the far side of the sewer room, you can continue through the tunnels, or head down to the opposite end of the room to pick up another fully-loaded rocket launcher. Either way, you’ll be faced with a fork when you head into the tunnel; the left passage leads to a dead-end sniper’s roost overlooking a room with a few Soviets in it, while the right passage takes you through a gauntlet of soldiers packed into one long hallway. (If you took the Rocket Launcher earlier, you can spam the rockets down the hallway to clear it out with relative ease.)
Heading along the right path will take you through a winding series of tunnels. Watch your corners, and take advantage of the fact that Molotovs and grenades can bounce by ricocheting them off of walls when you spot concentrations of enemies.
The path is linear, so you can follow it along until you come across a machinegun-wielding soldier dressed out in full-body armor; even his head is protected. He’ll chew you up in short order if you stay within his field of fire, so don’t. Your best bet here seems to be to use a grenade; bank one or two of them off the tunnel wall and the gunner should get blasted. He’ll drop his machine gun when he dies, so pick up your new toy and soldier on.
Unfortunately, there’s another machinegunner right around the corner from the first, and this one is a fair distance away from you. You’ll need to kill all of the grunts in the first part of the passage, then make your way into the corridor leading to the right, then bank another grenade off of the boxes near where he stands. He’ll drop another machine gun, which will make it a little easier to mow down all of the rank-and-file Soviets in the area.
From this location, it’s a straight shot past the traffic cones to where The Kid and Bagzton are hiding out. Walk up to Bagzton to end the mission.
Winter Revolt, Winter 2003
You’re the man now, dog, as The Kid might say--and the only man, by the looks of things. The Kid’s intelligence network seems fairly up to date, so he’ll be your planner for the rest of the game; just ignore the wannabe street slang and concentrate on your objectives. Bagzton, as usual, is all bluster and no brawn, so it’ll be up to you to put The Kid’s maps to good use. Start with the high school.
High School
Objectives: Rescue the POWs
Objectives: Destroy the helipad
Objectives: Raise flag over the high school
Well, it’s winter, it’s snowing, you’re cold, and you’re lonely. You can only fix one of these problems; do so by climbing up the ducts to the building behind your start point and recruiting a few fighters. If you’re playing on a lower level of difficulty, you can attempt to skirt around the north end of the helipad’s outer courtyard before heading through the building; this will give you a chance to thin out some of the Soviet numbers before exposing your recruits to gunfire.
When you’ve passed through the building and recruited your squad, take them out into the courtyard and head for the eastern wall. Skirt along the northern side of the courtyard to prevent the turret to the south from getting a bead on your men, then take the gunner out at close range. Infiltrate the building next to the helipad, then destroy the chopper with your C4. Note that there’s a partially-loaded rocket launcher near the landing pad itself.
Now that you’ve done one good deed, it’s time to do another and rescue the POWs from their camp. Head north out of the helipad complex. There’s an open window near a bonfire that you can climb to find some items; from there, turn around the corner to find another group of recruits and a save point. Hold your fighters back before heading on; there’s a rocket-wielding Soviet at the far end of the little choke point formed by the next road. He can really devastate your forces if he gets a rocket off, so take advantage of your maneuverability to move up the street and off him.
Hang a left and take the northern road towards the POW camp, but make a quicksave at the manhole first and grab a few more recruits, if you have any room left. From there, head into the park, which is heavily guarded. You should set up your fighters in a few different spots on defense, then use your rifle to lure out the enemies into a crossfire. It’ll take a little while, but you can clear out most of the Soviets in the park if you’re patient; just be careful not to wander too far south, since there’s a turret overlooking the northern approach to the high school.
When the park is safe, clear out the POW camp by jumping on the perch near the wall and picking off all of the defenders. Destroy the generator before opening the gate, then take all of the prisoners back to the northern manhole; there’ll be a few Soviets coming towards you, so make sure your fighters have set up a defensive station by the turret here to mow down the incoming enemies. When you reach the manhole, you’ll probably get a large enough charisma bonus to recruit another fighter.
Now you have to deal with the high school. As with most flag locations, it has an elaborate set of defenses, including a turret and a machine-gun soldier in the courtyard. The smartest play here is to flank the Soviets, by wrapping around to the southern side of the park via the southern manhole road, and entering the building adjacent to their fortification. You can drop in on a few more recruits in a bombed-out area; they’ve even got a machine gun for you.
There are more than a few soldiers in the hallways here, but you should have a large enough force to deal with them. The armored soldier will be a challenge, but with all of your soldiers unloading on him, he should be stunned often enough to prevent him from slaughtering your gang.
From the school’s entrance, you’ll need to send all of your fighters down to the lower level of the basketball court to take out the Soviets there. They’ll hide around all of the small containers that they’ve scattered around, but your troops will quickly overtake them, especially if you stay near the entrance to the room and set up a crossfire. From there, it’s a fairly straight path towards the smashed classroom in the upper level that leads out to the flag. Before you raise it, though, you should know that if you end a mission with a machine gun in your hands, it’ll get a full loadout of 300 rounds of ammo when you get back to base.
TV Station
Objectives: Raise flag over the TV station
This is a fairly small map, with only one objective: take over the TV station. You start off near a few recruits, including one with a submachine gun. Pick a few favorites, then round the corner from where you began and start shooting the cars that have packed the road; the soldiers milling about will be flung around, leaving you with a few less problems to worry about. If some survive and start creeping towards you, ignore them for now. Head back to the alleyway you began in and take the stairs up to the train station above.
Start walking down the tracks; you’ll spot a huge enemy base that’s been constructed outside the entrance to the TV station. If you grabbed the sniper rifle in the train station, you can use it to take out quite a few of the soldiers hanging out below. Proceed down the tracks until you find the fallen billboard, then jump across to the building, where another sniper rifle awaits. Use it on any remaining soldiers, then revert to your normal weapon and walk down the air conditioning ducts on the building’s south side to reach street level. Head around the corner and get on top of the crates to ward off the incoming troops.
There’s another manhole in an alley off of the street here, with a couple more submachine gun recruits, if you’re not full yet. Grab them, and quicksave, because this is where the fun begins.
Head across the street into the bombed-out building and tell your fighters to defend in a position where they won’t get themselves into any trouble. There are two civilians in here that need medic kits. You can heal up the wounded Soviet soldier, as well, if you need another recruit, but you probably shouldn’t waste your medic kit otherwise. Grab the rocket launcher in the easternmost section of the building, and head upstairs.
The tank outside is formidable: it’s immune to gunfire, of course, but it can also rapid-fire its shells quickly enough to kill you almost before you know you’re being shot at. The splash damage will also penetrate the walls, so stay back. It’ll only take a couple of rockets to destroy the tank, so dash into the open window, fire a rocket, then withdraw until you’re ready to fire again. After the tank goes down, retrieve your weapon and take your troops back to the street.
There’s no way to penetrate the TV station except via a frontal assault, so grab your friends and barge right in. The receptionist is a machine gunner, so you may want to try lobbing in a few grenades before proceeding inside, but it’s going to be chaotic no matter what you do, due to the way the building is laid out. There are a few tiers of walkways that circle in the inside of the building; Soviets will start charging towards the main floor as soon as you enter, so you’re going to be taking fire from all sides. You may want to set up a defensive position inside the building’s lobby, and wait for the enemies to come to you. If your fighters start to die, don’t worry too much; there’s a healthy supply of medic kits in the northeastern corner of the main floor.
You’ll have to take the long way up to the upper floors of the building, due to the broken stairwells. You’ll come to a group of office cubicles eventually, one room of which is darkened. Proceed carefully, as there’s a machine-gunner hanging around inside. Tag ‘em and bag ‘em, and get your butt on up to the newsroom, which is somewhat implausibly located next to an open window leading to the flag. Watch the awesome cutscene and get ready for one of the most difficult missions so far.
On Thin Ice, Winter 2003
After your quasi-coronation, your next task is to penetrate Governor’s Island (where you assassinated Tatarin), rescue Isabella, and eliminate the Soviet stronghold on the island. You’ll begin by taking your troops on a daring raid across the frozen water in the harbor.
Governor’s Island: Boat Landing 1
Objectives: Destroy the tower
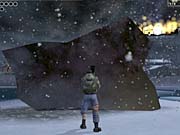
Welcome to Omaha Beach, or what might as well be Normandy, given the difficult landing your ships make upon reaching Governor’s Island. Not that they actually land; as you find out via the introductory cutscene, your ships are sinking (Chris’ ship seems to be called A Boy Named Hue; how colorful), Bagzton lost your C4, and the Soviets are breaking up the ice that your makeshift army is standing on. Sounds like an excellent time to retreat, but unfortunately that isn’t an option.
To make matters worse, the Soviets have two turrets placed inside the tower overlooking the harbor, and they’ll chew through your health quicker than a congressman taking a bribe if you don’t find cover, and the little cover there is barely adequate for keeping you alive. You’ll need to duck behind obstacles, then get on your feet and run from cover to cover if you want to live. Luckily, you’ll have a couple of teammates you can use as decoys; just tell one of them to attack towards the tower, then, as he’s getting mowed down, run towards the helicopter to the east.
The important thing here is to pick up all of the medic kits that you see; you’re going to need them in a hurry if the turrets lock on to you. At any rate, you’ll need to run around the rear of the ship where you start (it’s best to simply ignore the conversation between Bagzton and the fighters if you’ve heard it before; every second counts), then head towards the downed helicopter to the east. There’s a burning chopper in the middle of the ice; the smoke rising here will give you some cover if you need time to cycle through your items and use a medic kit, but your final destination is on the easternmost iceberg, where you’ll find a couple of rocket launchers. Use one and aim towards the tower to destroy it. You don’t need to aim for a turret; as long as you hit the upper part of the building (i.e., not the metal infrastructure below it), it’ll explode. Use any of your medic kits, if you have any left, on fallen fighters and head towards the island proper. Jump across the icebergs; if you try to swim, you’ll die within a few seconds.
When you reach the island, you’ll be faced with two ladders. Take the one on the left and run like hell towards the east, and try to keep your fighters with you, since they have a natural, and foolish, inclination to fight against the dug-in soldiers behind the barbed wire fence to the east. When you reach the courtyard with the truck, find the manhole cover and head back to the rebel base. Don’t worry, this doesn’t mean you’re going to have to go through the iceberg waltz again; the rebels actually have a makeshift base in the sewers of the island, which you’re going to have to use as a hub to conquer the five different locations here.
Your first priority has to be to get some teammates, but unfortunately the louts in the base feel nice and comfy down there, and won’t follow you to any of the island’s other locations. You’ll need to import quality fighters, by destroying the ventilation shaft grating back in the boat landing area. You can’t do that until you have C4, though, so the munitions depot will have to be your first stop. (If you’re critically low on medic kits, you can make a stop by Fort Jay to get some freebies near the manhole, without needing to fight anyone. Just make sure the attack helicopter doesn’t missile you to death. This is true of any of the gaps between these missions; just head to Fort Jay to get the maximum number of medic kits before starting any new area.)
Governor’s Island: Munitions Depot 1
Objectives: Find C4 storage
You’re on your own for this mission, so keep your head down and try not to get into any trouble for the short time that you’ll be here. For now, all you need is some C4; once you get it, you can get to a manhole and head back to the boat landing to get some help.
From your starting point, turn around and head northeast towards the C4 building. Like Elmer Fudd says, be vewwy vewwy quiet; there’s a machine-gunner in the clearing up ahead, and even if you manage to knock him down with a grenade, he has too many friends hanging around to make it a survivable encounter. Instead, climb on top of the storage container via the small pile of snow that’s accumulated against its side, then walk down the back alley towards the C4 storage building. The storage facility is guarded by four or five enemies, including a commando foe that you haven’t encountered yet; these black-clad vixens wield a submachine gun and night vision optics. They’re about as tough as the red-beret commanders. If you’re running low on ammo, try to use Molotovs to set their hearts afire; there’s a supply of Molotovs near the C4 building, so your net loss will hopefully be zero. If you have a healthy amount of ammo, on the other hand, you can try to get their attention with a single Molotov, then run across into the building and wait for them to follow you in before dropping them.
In either case, the C4 building will have a few sticks of C4 and a good number of medic kits. Heal yourself up, grab whatever ammo your victims dropped, and head around to the northern side of the building to find a manhole. Open it up and return to the boat landing area.
Governor’s Island: Boat Landing 2
Objectives: Destroy the ventilation shaft grating
Objectives: Raise flag over the harbor entrance
When you come back to the boat landing, you’ll find yourself standing by the manhole that you dropped into earlier. Make your way through the building to the east, and heal the man in the office upstairs for a charisma bonus. From there, weave your way through the shipping containers towards the ventilation building in the northeast corner of the map. Be sure to heal and recruit the fighter sitting near the containers; you’re going to need his help.
Your teammate should be sent into the ventilation building on an attack run, but follow close behind him to give him a hand. Make your way to the top floor, take out the sniper, and blow the shaft with your C4. (You need to stand next to the small pillar near the fan in order to get the C4 prompt.) After the grate is blown, you’ll bear witness to the beautiful sight of reinforcements welling up through the sewer tunnels. As soon as you do this, a machine gunner and some grunts will make their way to the cargo containers outside this building and set up a little defensive perimeter; if you’re quick, you can grab the sniper rifle and finish off the machine gunner with a few headshots before he can get into position.
Now, if you’re not averse to dodging some helicopter fire, you can finish off this map. If you’d prefer not to have to dodge death from above, then you may want to proceed over to the docks and blow the helipad before returning here. The helicopter doesn’t play a factor until the very end of the mission, so we’ll proceed to the flag.
Either way you want to go, you’ll need to fight through the troops outside the ventilation building and make your way to the manhole near the truck to the south. Quicksave if you want to proceed to the flag, then take your troops around the corner into the shooting gallery. There’s a turret set up at the top of the stairs; grab it and start hammering away at the 15 or so Soviets coming at you. There’s another machine gunner in the mix down there, so look for the bulky fellow and concentrate your fire on him.
When the gun smoke clears, heal up the lady near the turret for another charisma boost, then start down the same back passage you took on the assassination mission. There is a ton of enemy soldiers here, including at least one that’ll chuck grenades at your soldiers, but you should have plenty of medic kits to work with, so you can afford to be a little reckless.
You’ll have to turn down to the harbor entrance when you reach the end of the corridor, and this is where the fun begins. To start off, have your soldiers defend immediately behind the little brick barrier at the top of the stairs, near where you turn the corner; if you set them to attack anywhere below, they’ll have to jump off one by one, making them fish in a barrel for the Soviets below. Hopefully they’ll be able to kill off the harbor’s defenders by themselves, but regardless, you should be up against the wall popping off at the Soviets, as well; there’s a machine gunner down there, and your teammates will be far enough away to make him a difficult target to stun. Don’t be surprised if your teammates get blown up by a grenade; if this does happen, though, you’re probably going to find yourself quickloading, especially on the harder difficulty levels. You may want to keep some of them on the far side of the stairs, but it probably doesn’t matter, since they feel explosions in such a wide radius.
The helicopter will make an appearance shortly after you begin your assault on the ground troops. If one of its rockets hits you, you’re dead, which isn’t an outcome that you want to accept at this point. Your best bet is to storm the beach with your troops, let them clear out the enemies, then raise the flag before the helicopter can come swooping down. When you’re ready to make a run for the flag, head down to the trench, then run up the stairs on the left-hand side. The flagpole is in the south corner of this little bricked-in area; raise your flag and you’ll be returned to base automatically. If you find that this last little fight is too difficult to overcome, you can reload your savegame and attempt to destroy the attack chopper helipad before returning. If you do get the flag up, you should still head for the same objective.
Governor’s Island: Artillery
Objectives: Destroy the mortar positions
Objectives: Destroy the attack chopper helipad
Objectives: Raise flag over the sewers
There’s only one manhole here, in the same park area as the two mortar positions that you’ll need to destroy. For now, they’re too well-defended to consider a direct assault. Your first goal should therefore be the attack chopper helipad.
To get there, you’re going to need to head along the street to the south of your starting position. Send your troops ahead of you, as usual, but instead of proceeding down to the corner, climb atop the building marked in red on your map and use this vantage point to destroy the enemies manning the turrets below. After they’ve been eliminated, proceed back down to street level and place your soldiers in the small square concrete redoubt on the opposite side of the turrets, where they’ll start working on the rest of the soldiers in the area.
When your soldiers are in position, start helping them out by taking down the sniper in the wooden house on the right side of the street. There are more snipers on the roof of the helicopter building, but they may be too far away for you to shoot at the moment. When things have died down, head into the wooden house where the sniper was, heal the woman, then take the sniper rifle (if you switched back to your other weapon), and use it to pick off some of the soldiers at the northern end of the street. Switch back to your normal weapon and head inside the bottom of the helipad building.
There’s another woman in need of medical attention inside a bathroom on the first floor here. Patch her up before heading to the roof. After you blow the helipad, you’ll need to return to the first floor before passing through to the northern building, which appears to be some kind of barn. It has an odd layout, and one sniper in the upper northeastern corner; clean it out, restock on medic kits, and then head out through the northern exit.
You’ll find yourself in another alleyway between buildings, but this one has an exit to the east leading out to the central road, to the south of the eastern mortar position. This is where the troop transport helicopter is dropping off troops; if you want to leave some or all of your teammates in a defensive position here, they can kill the troops as they jump off the chopper, while you take out the crews manning the mortars. If you want to take your friends along to check out the mortar explosions, on the other hand, hold them back.
In either case, head into the hole in the wall near the staircase and make your way to the balcony overlooking the mortar position. Use this as a roost from which to take out the crews, but watch out for incoming grenades. Your assault rifle should be accurate enough to let you kill off most of the crews, without needing to worry much about return fire.
After the crews are dead, you can hop over the fence to the west of the building via the conveniently-placed crates. Unfortunately, there’s a machine-gunner here, and he’s in a terrible position for you, especially if your slaughtering of the crews alerted him. If he gets the drop on you as you go over the fence, he’ll likely kill all of your teammates as you advance; if you’re on a higher difficulty level, you might want to just retrace your steps back to where you came into the area and make a quicksave before taking him on from the east, which will give you a much better angle of attack.
Regardless of which path you take, the machine-gunner will have to die before you can destroy the mortar positions, but destroy them you must. (Actually, if you’re unconcerned with the difference between 11 teammates and 12, you can simply ignore the mortars and head straight to the flag building.) After the mortars are taken out, quicksave at the manhole and walk back through the level to the flag building.
There’s another machine-gunner inside the flag building, and with the number of obstacles inside, he’ll have a big advantage over your fragmented group. Your best bet is to leave your teammates outside, underneath where the troop transport helicopter drops its human cargo, then wander into the flag building, or send a single fighter in there to get his attention. When you hear the machinegun fire, you’ll know that he’s on his way; now all you have to do is to wait until he comes into your teammates’ zone of fire. Walk over his corpse and let your troops clear out the rest of the building before healing the last wounded civilian (how do these people find themselves in these warzones?) and raising the flag. Congratulations; you’ve finally established your dominion over the sewage treatment plant.
You might want to head back to the Munitions Depot to stock up on medic kits and C4 before progressing to the docks.
Governor’s Island: Docks
Objectives: Destroy the troop transport helipad
Objectives: Raise the flag over the generator building
The first street here ends with a group of Soviets, including a machine-gunner. You might want to blow up the truck nearest the enemies before sending your troops in; those things have a nasty habit of exploding when your teammates stand near them, so it’s best to eliminate that possibility before it comes into play.
Clear out the building to the east of the generator building, then heal the two women inside for the charisma bonus. There are two medic kits on the upper platform in this building, if you’re running low. From there, you’ll have to fight your way through the streets towards the western side of the generator building, where a group of Soviets is bivouacked with a turret. You can weaken them up by chucking grenades or Molotovs on top of them from the fenced-in area before charging ahead. After you take the position, a wave of soldiers will start filtering up from the south; man the turret, end the assault, and proceed on to the helipad.

The helipad, as per the usual, is heavily guarded, but hopefully some of these soldiers will have been filtering out to your position near the turret. In any case, there’s another concrete shelter facing in towards the helipad; position your soldiers in a defensive stance here, and let them cover your back while you blow the helicopter to smithereens.
The area leading to the generator building is overflowing with cargo containers, forming something of a maze, populated by a dozen or so guards. You can head through the containers, if you wish, but a smarter idea would be to take the stairs up to the small red building on your map, then grab the sniper rifle and jump across the containers until you reach the clearing on the east side of the area. There will be defenders manning a turret here, but your sniper rifle will make sure that they don’t have a chance to kill your teammates. After the soldiers in the fort are dead, you can send all of your troops to defend behind it; they’ll use the turret on any of the guards that might’ve followed you.
The generator building itself is your standard flag building, with an upper level of walkways making for a difficult approach to the flag. There’s a machine-gunner in here, who sometimes likes to hide outside with the flag itself, so if you don’t spot him in the building proper, send out your troops to check the flag area before you wander outside and get yourself killed; it’s a long way back to the manhole cover from here if you die.
Governor’s Island: Munitions Depot 2
Objectives: Raise flag over the supply hangar
Now that you’ve taken over most of the island, the munitions depot has outlived its usefulness as a source of C4 and medic kits, and you can feel free to conquer it. Begin by stocking up on your goodies; the soldiers outside the C4 storage building will usually be alerted to your soldiers as they come up from the manhole, so you might as well take advantage of the situation, finish them off, and grab their guns. You should try not to alert the machine-gunner nearby, though, especially on the harder difficulty levels.
From the manhole, send your troops into the northeastern corner of the map in a defensive position, wait for them to clear out the soldiers that approach, then set them to defend along the northern wall of the supply hangar. Make sure they’re not in sight of the turrets in the courtyard, though; you’ll deal with those yourself. Begin by eliminating the sniper in the uppermost building, then crawl west into the building between the two large fuel canisters. There’ll be a rocket launcher here; you only get one round, but that’s all you’ll need to take down the machine-gunner waiting near the turrets. After you slap him around with a rocket, take the sniper rifle and proceed to knock out the soldiers manning the turrets.
The supply center has a truck inside, near a few troops. Destroy the truck immediately before sending your own fighters into the building. Before you capture the flag, you can rescue a civilian near the destroyed truck, as well as one to the west of the turrets in the courtyard.
Governor’s Island: Fort Jay
Objectives: Rescue Isabella
Objectives: Raise four flags over the fort
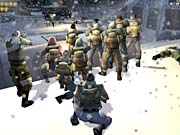
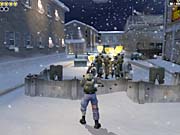
If you’ve healed up the citizens that you’ve come across and have been diligent in completing all of the optional objectives, you should be rewarded here as 12 fighters come up from the manhole to give you a hand in your final assault. You’re going to need them, if you can’t tell; give a glance up towards the imposing fort above you to see why. You’re going to have to cross the enemy territory between the manhole and the fort, and the fortifications here are impressive: there’s a ditch, for one thing, which the enemy guards will hide in and move along; there are two turrets set up outside the fort, with another above the entrance; there are two pillboxes, each with a machine-gunner inside, on either side of the fort entrance; and, finally, there are two snipers in treehouses near the entrance. You’ll have to kill everything, and that’s before you get to the hard part, which is storming the fort.
There are two buildings you can enter near your manhole; one is a large warehouse with a few medic kits in it, while the other is a shelled-out building with two floors, which you can use as a makeshift sniper’s roost, although your assault rifle won’t be accurate enough to hit enemies from very far away. It doesn’t need to, fortunately; if you set up your squad to defend at the point where the brick wall near your manhole gives them a ledge to shoot over, they’ll be able to cover the approach, as well as handle any enemies who come through the gap. When they’re set up, the first thing you’ll want to do is head out into no-man’s-land; this will trigger a wave of guards, who should get eaten up by your teammates as they approach the manhole.
Your first goal here is to penetrate the Soviets’ ammo bunker, located in the southern offshoot of no-man’s-land on your map. Walk up the battlefield slowly, and move in tandem with your troops, if possible, being sure to stay behind cover. There’s a second trench that runs north-south through the middle of the battlefield, ending near the entrance to the bunker; if you set your troops to defend inside of it, they should be able to take down most of the Soviets as they approach while receiving minimal damage themselves.
When you reach the entrance to the bunker, have your soldiers clear it out and stock up on ammo and medic kits. This supply will be crucial to you if you’re playing on a harder difficulty level, since they’re the last you’re going to see for a while, so you may want to leave them alone for now and return to your manhole if you haven’t picked up all of the medic kits there. In any case, grab the sniper rifle and return to the battlefield above.
You only have six rounds to work with, so you’ll need to use your teammates to cover your approach as you find your targets. The obvious first choices are the two snipers near the entrance, who can be shot as soon as you exit the bunker itself. The rest of the baddies will be somewhat tough to spot, especially the machine-gunners in the pillboxes, so you’ll need to find another way to kill them off.
The other way is located on the northern edge of the battlefield, inside a ruined house to the northwest of your manhole. You might want to make a quicksave before proceeding, if you’re doing ok on medic kit supplies. The ruined house contains a turret pointed towards the fort entrance. Use it to unload on any remaining troops on the battlefield, then hit the button and point at the pillboxes until the machine-gunners keel over. They can take an incredible amount of damage, mind you, and you won’t be very accurate at this distance, but you can kill both of them. You’ll probably need to use your binoculars to see if they’re still standing; once they’re dead, take advantage of the infinite ammo to pummel away at the left turret on the battlefield until its defenders are dead. If you can spot the central turret above the fort’s entrance, kill that defender as well; it should be just to the left of the sniper’s roost. The rightmost turret is probably going to be below a hill and therefore untargetable, but if you leave the turret and drag out your sniper rifle, you can probably take out a couple of its defenders.
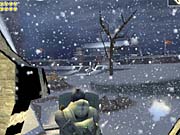
Now, grab an assault rifle from one of the dead guards and load up on ammo. If you need medic kits, or want to make a quicksave, now would be a good time. When you’re ready to begin taking the fort, head up the southern side of the battlefield, just in case there are still any soldiers alive in the northern turret. If you managed to get both of the machine-gunners, they shouldn’t be a problem, but if you find that they’re alive, you’ll need to stand close to the pillboxes and chuck in grenades to stun them, then send in your troops to finish them off. Be careful of more scripted assaults here; as you approach the fort, more soldiers will begin coming out of the entrance, so be sure your troops are set up in a defensive position.
After you breach the walls of the fort, you’ll find that the path therein is extremely linear, with often smallish corridors that will squeeze your troops almost into single-file formation. There’s little enough you can do to make this a safe journey, but the easiest way to proceed is simply to set all of your troops to Defend on a succession of target locations, such at the crux of every corner, following along behind them as they scout the path for you.
Check your map occasionally so that you’ll know when you’ve arrived at the northern end; there’s a fork in the road here, where the northern path leads into a prison cell where Isabella is waiting for you. The Soviets seem to have fairly low standards when it comes to imprisonment, since Isabella’s cell is unlocked, which robs you of your final chance to use your wrench.
Isabella won’t respond to your commands; instead, she seems to be on permanent follow mode, so that she’ll stick close to you, and fire on any soldiers who get too close. From her cell, proceed up to the first flag; raise it and head down the stairs into the guts of the fort.
More small, narrow rooms and hallways follow, so keep your fighters on a leash and proceed slowly. You will, after much travails, come across a room with a shelf full of medic kits; be on your guard here, as there’s a machine-gunner in the room below. If he comes up, you’ll have to swarm him in an attempt to take him down. Take advantage of Isabella’s complete immunity to gunfire, if you have to; she can kill the gunner all by herself if left alone with him. If possible, just avoid him and proceed up the nearby stairs to the three flags above.

You may have expected some kind of super-challenge here in the final area of the game, but instead you’re confronted with the regular assortment of red berets and grunts. Watch for snipers in the towers near the flags. Proceed to the northeastern flag and raise it first, then backtrack and clean out the areas around the southern flags to finish the game off. Enjoy the final well-made cutscene, and you’ll find that your savegame has become a level-select menu, where you’ll be able to travel back to any of the previous hubs and play any of the missions again. Try the game again on a harder difficulty level, if this was your first play through; the simple fact that you and your fighters take more damage changes the game’s dynamic drastically.
Weapons
Your inventory in Freedom Fighters is limited; you’ll only be able to carry one sidearm and one main weapon at any given time, so you’ll have to pick and choose based on your needs and the availability of ammo. You might prefer carrying around a submachine gun, for instance, but there’ll almost definitely be more ammunition to be found for an assault rifle, so this may flavor your choices when it comes to weapon selection.
Sidearms
Pistol
The pistol holds a 17-round clip, with 43 rounds in reserve. It has decent accuracy, and a superb rate of fire, making it ideal for close-range encounters, especially because of its large clip. It’s also useful for conserving your main weapon’s ammo when you want to destroy a car or explosive barrel near an enemy.
Revolver
The revolver only carries six rounds at a time, and is woefully inaccurate compared to the pistol, rendering it useless in most occasions. It does have an impressive amount of stopping power, but you’ll rarely want to get close enough to an enemy to make use of it.
Primary Weapons
Assault Rifle
The assault rifle is going to be your friend throughout the game. Although it lacks the pure power of the other weapons that are available to you, it does offer a large clip size and the best accuracy of any of the automatic weapons, which makes a huge difference in hitting targets at long range, or making headshots when a Soviet is nearby. As you start to accumulate more teammates during the latter portions of the game, using your assault rifle to stun enemies so that they can’t fire on your army becomes important; simply pop a round or two at an opponent so that they stagger, then move on to the nearest enemy, and repeat. If you can get the timing down, and position your fighters so that they have a decent shot at your target, you can make it so that most Soviets hit the ground without hurting any of your soldiers.
This weapon’s best attribute is an external one: since almost all of the grunt Soviets you encounter will drop an assault rifle upon death, you’ll never want for ammunition.
Shotgun
Although firing multiple projectiles at once sounds like it’d be a good thing, it often works to your disadvantage in Freedom Fighters, since the shotgun’s spread is so severe that hitting your target at anything other than close range is usually impossible. Each shell will throw out six or seven separate projectiles, though, and any single one will stun a foe; you can use this to your advantage as a crowd suppressant, since you’ll be able to stun multiple enemies that are standing close together. Still, the whole point of having teammates is to let them do the dirty work of killing the enemy; better to just recruit one or two shotgun-wielding freedom fighters and stick to an assault rifle. Ammo can also be somewhat difficult to find, since the rate of fire is rapid enough to make you chew through shells, and only the red beret enemies will be dropping shotguns.
Weapons
Primary Weapons - cont.
Submachine Gun
Take an assault rifle and increase its rate of fire, power, and recoil, and you’d get something similar to a submachine gun. These weapons are somewhat rare in the game world, since only commandos carry them, and between the scarcity of ammo, and the incredible rate of fire, you’ll probably find yourself only using one of these weapons for a short while before going back to an assault rifle.
Although it’s much easier to kill with an SMG, compared to an assault rifle, the recoil makes long-range encounters frustrating. You can attempt to control your aim by only firing a few rounds at a time, but this doesn’t play to the strengths of the weapon, which rotate around firing a lot of bullets at once. Although you probably won’t want to make this your first choice of weapon, you will encounter a few freedom fighters with submachine guns as you play through the game, and you should always recruit them, if possible. If you had infinite ammo and computer-controlled aim, it’d be a much better weapon.
Sniper Rifle
Sniper rifles are the definition of "situational;" you won’t come across many of these guns in the game, but when you do, you’ll almost always want to pick it up, since there’ll usually be some juicy targets in the area. It doesn’t pack as much power as you’d think, so you’ll need to aim for the head; even the grunts can take a few body shots before they buy the farm.
Machine Gun
Now we’re talking. You won’t find any machine guns in the early portions of the game, and it never appears in your base; if you want one of these bad boys, you’re going to need to pry it from the cold, dead fingers of a machine-gunner.
Oddly enough, you won’t usually have to worry about ammo for the machine gun, as long as you’re doing the smart thing and letting your teammates handle most combat tasks. The machine gun can hold up to 300 rounds in its main clip, which eliminates the need to reload during combat, and its rate of fire is slow enough so that you don’t chew through your ammo as fast as you might think. Assuming that your dead enemy drops a weapon with 150 or more bullets in it, you should be able to stay in the black by picking up ammo boxes in a level, even if you don’t come across any more machine-gunners to steal weapons from.
The machine gun’s obvious strength is in its power; you’re going to be spitting out extremely high-caliber rounds, and if you get a clear shot at an enemy, you should be able to drop them with a couple seconds’ of concentrated fire. It has surprisingly good accuracy, too; while you won’t be picking off soldiers from 200 feet away, you can adjust to the recoil and stay on target with relative ease, compared to the submachine gun.
Rocket Launcher
Like the sniper rifle, the rocket launcher is very situational, and extremely rare. This is never going to be a weapon that you’ll be carrying around for long periods of time, if only because it contains eight rounds maximum. Luckily, there’s no arc when you fire it; if you aim at something and press the button, you can be sure that it’s going to impact the target. There’s almost no zoom available, though, so you might need to scout out your target with binoculars before launching, if your target is across the map.
As would seem obvious, the rocket launcher will kill pretty much anything it hits, even helicopters. The splash damage is lethal, as well, although the radius isn’t as large as you may expect. Conserve your rounds, and fire on the most dense concentration of enemies available to you.
Other Items
Molotov Cocktails
Molotovs explode on contact with a surface, but the flames will drop down to the floor if it impacts on a roof or wall. If a soldier catches fire, he’s usually as good as dead, but actually hitting someone without getting shot to death is usually a tall order. Luckily, you can lob these over obstacles, so their usual implementation comes after scouting ahead and noticing enemies nearby. Retreat to cover, then just toss over a few Molotovs and hope you get lucky. In any event, you’ll likely break up the enemy concentration, allowing your teammates to more easily dispatch them when you press the attack.
Grenades
Like the Molotovs, grenades have to be lobbed, and are best used from behind cover. Unfortunately, your enemies are pretty smart when it comes to avoiding grenades; when they spot one, they’ll run away from it, and are usually fast enough to avoid taking any damage. If you catch them in the flat, they may dive to the ground, which will give you a moment in which to attack without fear of reprisal.
Although you won’t be getting many kills with grenades, their apparent weakness is actually their strength: since the Soviets will run away when they hear the grenade fall, you can throw them behind a fortification to flush them out. This is often the simplest way to deal with enemy turrets and forts, if you’re unlucky enough to run into one head-on.
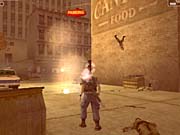
Wrench
This is the weapon you start the game with, although it’ll mostly be used for opening manholes after you find a pistol. It can knock soldiers out, but then, so can any other weapon, even if they run out of ammo.
Binoculars
You won’t use the binoculars very often, since the first-person zoom on your weapons will usually get you a good view of whatever you need to see, but when you’re scouting a dark level for turret or rocket targets, binoculars will give a broader view than a sniper scope will, and will zoom in further to boot.
Medic Kits
Like manna from heaven, these precious little packs of goodness will completely heal Christopher, or you can use them on a fallen comrade to revive them and restore them to fighting capacity. You can also use them to heal wounded civilians for a charisma bonus. You’ll always want to have as many of these on you as possible; you can have eight maximum. Occasionally you’ll come across extra supplies during a mission; if you’re at your carrying capacity, don’t forget to heal yourself and then pick another one up.
Gameplay Tips
Part of the pleasure of playing Freedom Fighters lies in mastering the ability to command your troops. The game does a good job of easing you into this role; since you start out on your own, and only slowly accumulate a team that can actually perform the lion’s share of the combat, you’re going to have plenty of time to adjust to the fact that this isn’t your standard action game, and indeed, by the midway point of the game, you will usually be at the rear of your Attack force.
Obviously, players who have difficulty adapting to the game’s combat paradigm, or who insist on using their troops purely for support, will quickly find themselves reloading games over and over again. Hopefully these tips will help you survive a few battles that you wouldn’t have otherwise.
Issue Precise Commands
Precision is a virtue, not merely in aiming a weapon, but in leading your troops. The generic attack and defend commands are sometimes useful, but you’ll almost always have better luck by issuing commands in tandem with your precision aim key. This helps your soldiers move in unison towards the target spot, and will restrict their movement so that they don’t run off in small groups, as sometimes happens with the untargeted attack command. If you instruct your fighters to move to a specific spot, they’ll usually stay there; if you just wave them forward, the grouping will usually break apart as some of them find a spot to hide, and others pursue an enemy that they’ve seen.
Using precision aim and defend is the most useful way to advance your troops through a level, since they will move to your target zone, firing on enemies along the way, but will then find a defensible position and stay there, rather than wander into enemy fire or follow a Soviet off into a deathtrap. If you’re not aware of what lurks around a corner, or are sending your troops into a blind spot, you’ll usually want to use the defend command to do so; otherwise, their group will usually lose cohesion. This isn’t always a bad thing, in the case of grenade attacks, but these are rare enough to be a non-factor on most levels of the game.
Crossfire Is Not Just a TV Show
Your teammates are luckily immune to each other’s fire, so you don’t have to worry about all the yelling that occurs when they shoot each other in the back. You can actually use this to your advantage, by splitting your team up into two groups and placing them on either side of a road or alleyway. Just use your precision aim key, send the entire group to defend on the near side of the road, then click on the far side of the entrance until you’ve sent a few of your troops across. With any luck, the mere act of passage will alert any enemies that are lurking out of sight; when they come around the corner, they’ll come under assault from both sides. This tactic loses effectiveness as the corridor or road becomes wider, of course; it’s not much of a crossfire if one of the teams can’t hit anyone on the other side.
Let the Enemy Come to You
In Freedom Fighters, the aggressor is usually at a disadvantage; defenders almost always get the first shot off in a fight, and have more time to pick spots from which to shoot. Since you can’t complete any of the game’s objectives without attacking your enemies on ground that they control, you’ll have to find ways to turn the tables on your opponents. The best way to do this is to lure enemy soldiers towards your fighters, especially when you have a defensible position.
The simplest method for drawing out the Soviets is to use rousting fire; just aim whatever weapon you have in the direction of a distant enemy and pop off a few rounds. If you hit them, or anywhere near them, they’ll crouch over and start heading in your direction, which will usually make them easy prey.
Another method is to use live bait, in the form of yourself or one of your fighters. If you can set your team up to defend near a corner, and then lure enemies around the bend, your fighters will almost always be able to stun them and drop them without taking any fire themselves, especially since the Soviets almost always move in single-file. Don’t forget that you can tap the defend or attack key to send a single soldier; if you hear gunfire, re-send the command for all of your soldiers to defend, which will lure your rogue agent back to the flock.
Gameplay Tips - cont.
Generals Don’t Fight
Your goal in Freedom Fighters isn’t to kill off every enemy in a level by yourself; rather, your primary objective, regardless of what shows up on your map, is to survive, and you won’t do this by charging ahead of your soldiers because you’re curious to see what’s around the corner. By the time you have four or more fighters on your side, you should attempt to stay out of harm’s way as much as possible. This is especially true on the harder difficulty levels: you’re going to be churning through enough medic kits on your fellow soldiers as it is; you shouldn’t be using them on yourself as well. This isn’t to say that you should always act like a coward; fortune does favor the bold, after all. But it’s better to be bold and smart than to be bold and dead.
At its core, enacting this philosophy in-game entails using the attack and defend commands to always send your soldiers ahead of you. You’ll have a much easier time surviving if you know for sure that enemies do or do not lurk in the area ahead of you, and there’s no better way of finding this out than by sending your troops forward and waiting for the sound of gunfire. This is most true in enclosed spaces, such as stairwells and building interiors.
Explosivo!
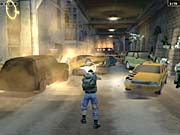
Luckily for you, the Soviets, who are generally pretty smart fellows, will use any object between yourself and themselves for cover. This isn’t always good, of course, but since most of New York’s roads consist of stalled-out cars, Soviet troop transport trucks, or, for some odd reason, barrels full of fuel, you’ll often have the chance to eliminate a few threats with a single, well-placed bullet (or a dozen well-placed bullets, in the case of cars). The Soviets are tough bastards, so even close-range explosions won’t often kill them outright, but they will be stunned long enough for you to move in for an easy kill.
They Call it Selective Service for a Reason
To be perfectly honest, you shouldn’t pick every recruit that you come across, even if you have empty slots left. There are a lot of would-be freedom fighters in New York who show up for the party with nothing but a pistol or revolver; they’re not going to be much help to you. If you run across one of these weaklings, you’re usually going to be better off saving your slot until you run into another group of fighters elsewhere in the level.
In rough order of usefulness, you should grab submachine-gun fighters first, then assault rifles, then shotguns. There are even a couple of soldiers in the game who use Molotov cocktails, if you want a break from the ordinary.
I Just Want To Play
This has nothing to do with actual gameplay, but PC players who are tired of the unskippable EA Games and Nvidia movies that play when you start the game up, you can simply delete them or move them out of the Movies directory in the folder where you installed Freedom Fighters.
Cheats
Freedom Fighters has a few tasty cheats for PC users (sorry console players), some of which can be implemented through the game’s console, and some of which are entered via the keyboard at any time during gameplay.
Console Commands
Before you can enter cheats into the console, you’ll need to edit the "freedom.ini" file in your Freedom Fighters directory; if your system can’t open it up, use Notepad and find the file manually. Add a new line to the file, consisting of "EnableConsole" (without the parentheses). Now, when you load a game in Freedom Fighters, you can press the tilde key, located to the left of the 1 key, to open up the console. When you’ve opened it up, enter any of the following commands to activate the cheat. Most of these are toggles, where setting the code to 1 (e.g., by typing "god 1") enables the code, while entering it with a trailing 0 (e.g. "god 0") will turn the code off.
god 0/1
Typing "god 1" (without the parentheses) enables god mode, which reduces any damage you take to zero, except for instant kills, like getting run over. Flip it back to 0 if you want to take damage again.
invisible 0/1
Invisibility doesn’t actually turn Christopher invisible, but it does prevent enemies from noticing his presence. They’ll still hear you, and react to gunfire, but they won’t fire at you.
no_damagefriendly 0/1
This is the companion code to God mode; flip it to 1 to enable god mode for all of your teammates.
flymo 0-10
Flymo increases the rate at which your enemies fly into the air when they die. The default setting is 1; you can take it as high as you want, but anything above 2 basically makes all of the Soviets just disappear when they die, since they move so quickly. Try setting it to tenths of a point after 1, such as 1.5, for the best results.
gravity 0-1500
1500 is the default amount of gravity in the game; you can turn it higher, but it’s usually more amusing to reduce it. This doesn’t affect how you or your teammates move; rather, it’s applied to how bodies move through the air after an explosion or after a character dies. At around 500, everything is slowed down noticeably; below that, things start to quickly become ridiculous, as bodies perform something of a ragdoll ballet in midair. You can even set it to 0 to let corpses float free in space. Try shooting the bodies as they fly through the air for extra fun.
nailgun 0/1
This is one of the more bizarre cheat codes to come along in recent memory. When enabled, it will cause dead Soviets to fly through the air towards a nearby wall or solid surface, where their corpses will hang as if they had been nailed to the wall through their palm.
infammo
Infammo will, appropriately enough, give you infinite ammo for your weapons and grenades.
giveall
giveneeded 1
Both of these codes give you an infinite supply of Molotovs and grenades. "Giveall" also supplies with an infinite-ammo sniper rifle, while "giveneeded 1" gets you a submachine gun with around 200 bullets.
Cheat Codes
Cheat codes can be entered at any time during gameplay; you don’t have to modify any of your game files to get them to work. Note, however, that they’re somewhat finicky; you need to enter the code rapidly, but not too rapidly. If you’re having difficulty entering them, try pressing each key and letting it go before moving on to the next. If you go full throttle, where your finger is already on the next key before the first one has been let go, you probably won’t get the effect of the cheat.
When a cheat does take effect, a pop-up message will appear.
ioigod
Activates god mode.
ioiflymo
Activates a higher setting for the flymo command.
ioicharisma
Gives you 12 recruitment slots.
ioiammo
Gives you infinite ammo for your current weapons.
ioiblind
Activates invisible mode.
ioislowmo
Slows the game down to around half-speed.
ioifastmo
Speeds up the game to around double the normal speed.
ioishotgun
Gives you a shotgun and plenty of shells.
ioirocket
Gives you a rocket launcher.
ioihgun
Gives you a machine gun.
ioisniper
Gives you a sniper rifle.
ioirifle
Gives you an assault rifle.
Got a news tip or want to contact us directly? Email news@gamespot.com
Join the conversation