Firebase Z Easter Egg Guide - Black Ops Cold War Zombies
How to complete the easter egg in Call of Duty: Black Ops Cold War's new Zombies map, Firebase Z.
Firebase Z is the newest map in Call of Duty: Black Ops Cold War's Zombies mode. Both the map and the Easter egg quest are now live. Below are the steps you need to follow to complete the Easter egg. We also outline some essential tasks you can get started on in the new Firebase Z map, including how to turn on the power and how to activate the Pack-A-Punch machine.
Here's everything you need to know about the Firebase Z Easter egg, including a new way to unlock the RAI K-84 Firebase Z Wonder Weapon.
Part 1: How to turn on the power
When you first drop into the map, your first objective is to talk to Ravenov. Follow the waypoint and you'll find him shacked up in a corner area of the courtyard. Chat with Ravenov and he'll tell you about the Pack-A-Punch machine, eventually directing you to a teleporter that'll take you to Omega Base.
How to get to the teleporter
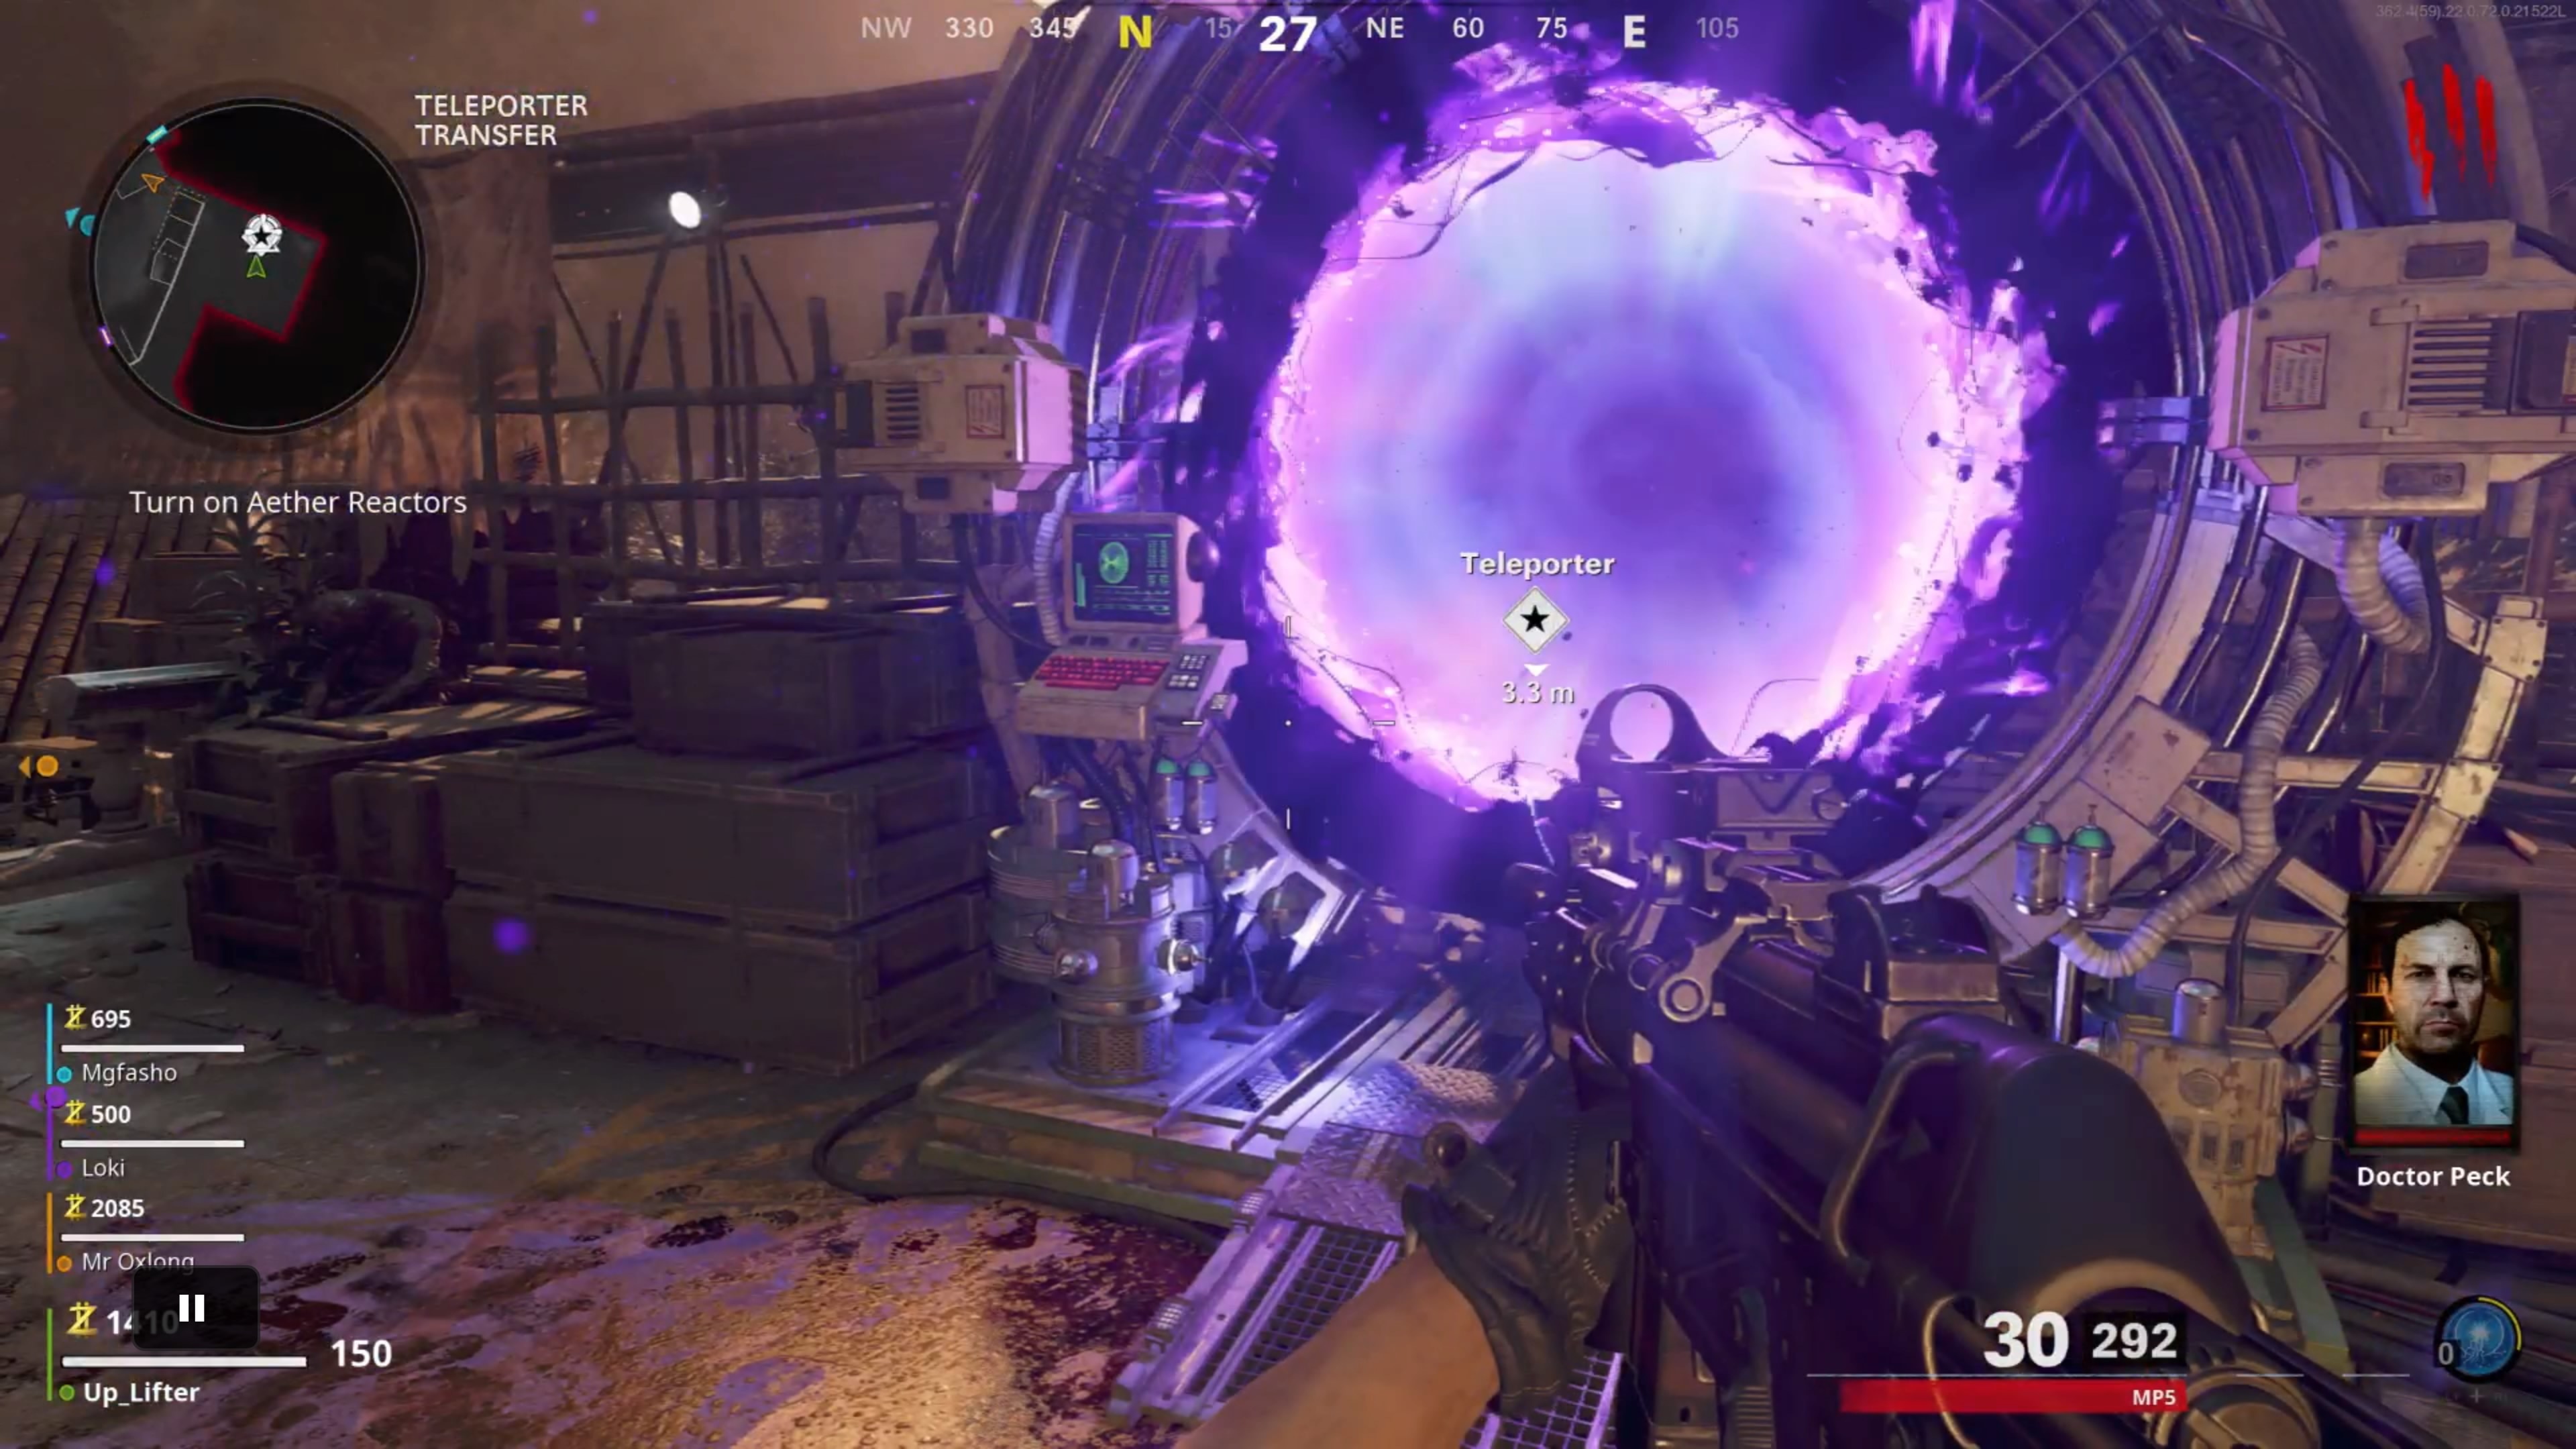
To get to the teleporter, you need to open up a door leading to an Equipment Storage area with stairs that'll take you to the roof. Shoot up some zombies until you've collected 1,250 points and then cash those in to get the door open. Follow the waypoint up and you'll hear some more radio chatter from Doctor Peck discussing turning the power on. But you can just ignore that and hop in to arrive at Omega Base.
How to activate the Aether Reactors
Once you arrive at Omega Base, your mission is to activate all three Aether Reactors at a total cost of 1,500 points--500 each.
Aether Reactor locations
- Reactor One - Military Command
- Reactor Two - Mission Control
- Reactor Three - Data Center
Each Aether Reactor is marked with waypoints on the map, so head to whichever one you and your crew want to start with first. Know that each area will be locked with some gates, so grind away at the spawning zombies until you have enough points to open the way to them all.

Activating an Aether Reactor is simple. Approach it and fork over the points needed to turn it on. Once you've done that, your next job is to defend the Collector points found in the immediate vicinity from a few waves of zombies. If you're having trouble keeping track of which collector is being attacked, look out for when each one's respective "Protect" waypoints flash red, which indicates when they're being damaged. Unload on the invading undead long enough and eventually the Collectors will charge fully, thus activating the Aether Reactor.

Repeat this process with the rest of the Aether Reactors and you'll have successfully turned on the power. With that objective finished, head back to the teleporter.
Part 2: How to activate the Pack-A-Punch
Now that you're back at the starting courtyard area, return to Ravenov and interact with the Pack-A-Punch machine to turn it on. You can now upgrade the firepower of your weapons, which will be a must to successfully complete Firebase Z's Easter egg.

The first upgrade will cost you 5,000 points, with subsequent ones coming in at 15,000 and 30,000 points. Be sure to come back when your currently equipped weapon isn't quite cutting it against the undead hordes.
Part 3: How to unlock the RAI K-84 Wonder Weapon

The RAI K-84 is the big new Zombies mode weapon added alongside the Firebase Z map. It'll be a big help to you when it comes to completing the Easter egg, especially during Part 6 where it's required. There are several different ways to unlock it, and one of them can take just a few moments. Others are a little more involved, so read our guide on how to unlock the RAI K-84. We'll update this guide when we learn how to unlock the RAI K-84 in tandem with the Easter egg. Otherwise, read on for the next steps in the Easter egg.
Part 4: Gassing Peck with truth serum
Once the Pack-A-Punch is operational, the next thing you'll need to do is return to Mission Control in Omega Base. Use the intercom system to talk to Doctor Peck, who you'll see locked in a room with a large glass window. Peck will tell you to shove it, so your next step is to return to the Atrium and see what Ravenov thinks can be done to get him to talk. He suggests gassing Peck's room with a handy dose of truth serum.
Truth serum locker locations
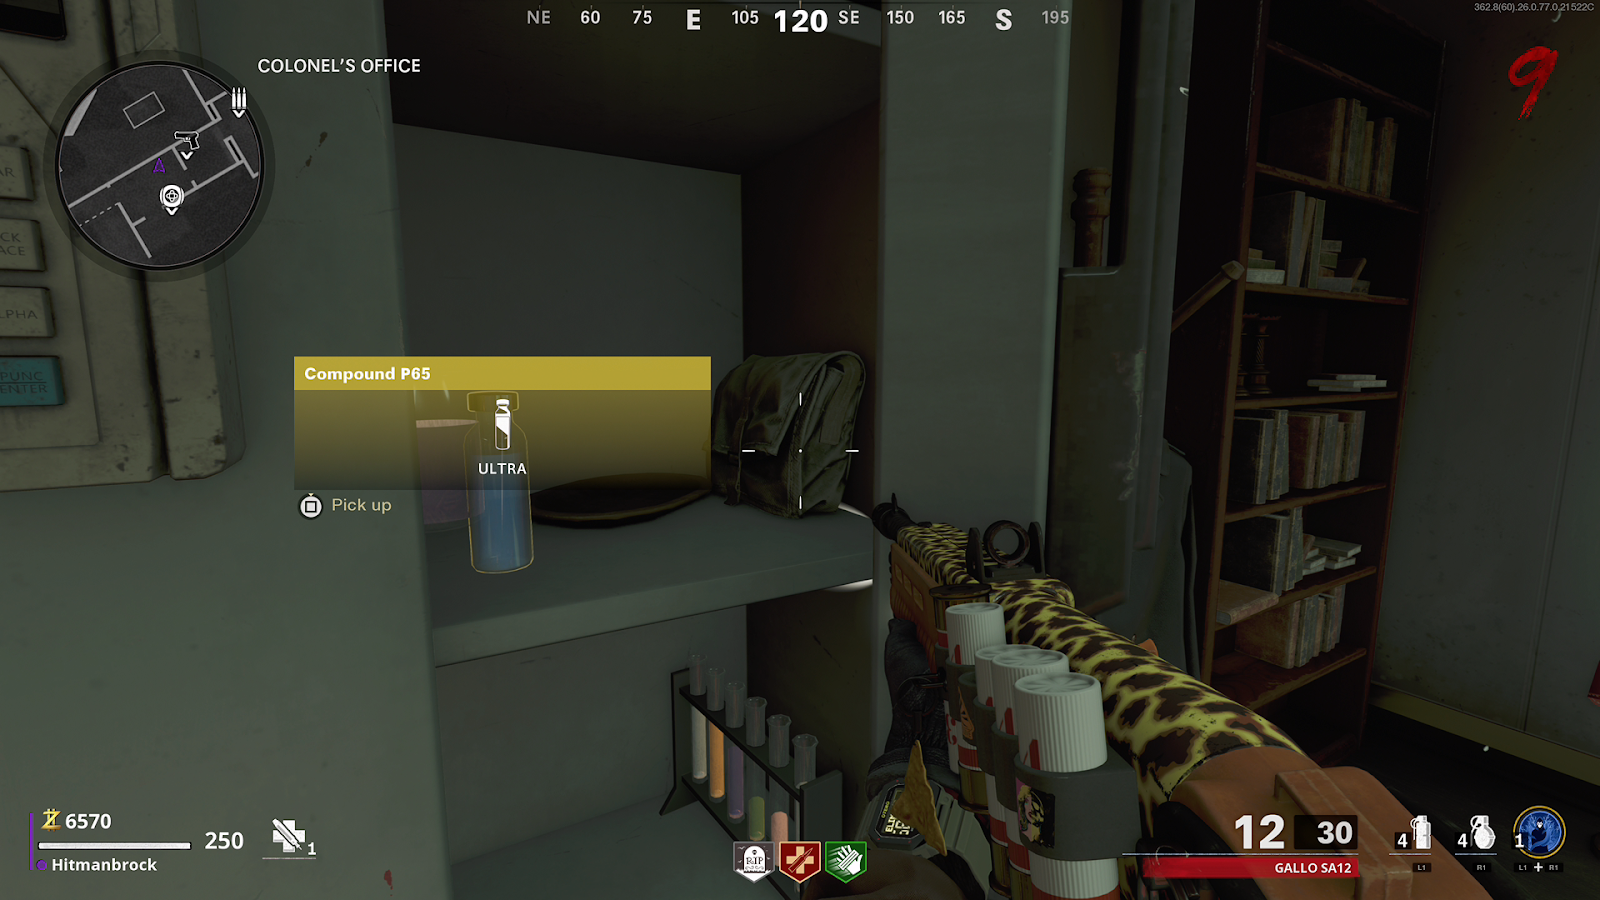
Ravenov will then give you an ID Card, which you need to use on three lockers, each of which is holding the compounds required to craft the truth serum. The first locker is located nearby in Equipment Storage. Once you've got the first compound, head back to Omega Base.

The second locker is found in the Colonel's Office, which you can reach by heading up the stairs by the Juggernog machine located in Military Command.
The final locker is in Engineering, tucked away in a hallway at the lower levels of Mission Control.

How to create the truth serum
With all three compounds in hand, head to the Field Hospital and interact with the Chemical Mixer to build the Agent Delivery System canister to disperse the truth serum gas. Be careful; this will spawn some nasty hellhounds, so ensure you've got the necessary firepower to deal with them before initiating this step.
Once you've grabbed the Agent Delivery System canister, make your way back to the upper level of Mission Control--just before the doorway leading to the Collector point you see when you first unlocked the door to get inside. Tucked away in a corner is an area called the OPC, which has an air conditioner vent where you can insert the Agent Delivery System. With that inserted, the gas will start pumping into Peck’s office. Find him back at mission control to get some answers.

Part 5: Trapping Mimic Memory Essence
Now that Peck has fully inhaled the truth serum gas, he will tell you to head to the Data Center to retrieve some Memory Essence Traps. These traps need to be used on three Mimic enemies disguised as inanimate objects only; standard Mimics that spawn in a given round will not work. These unique Mimics are generally found in the Motor Pool, Village, and other areas around the map.

To trap a disguised Mimic, trigger it out of its camouflage and whittle away at its health with all the firepower you got. Once the Mimic is weakened, set the trap and activate it by pressing the reload button twice once they're on top of it. Don't stick around to watch the animation, though, as you'll want to stay on the move as the zombies will be attacking you while you're trying to get this done. If you mess up, you can always go back to the data center and grab another trap.
How frequently you encounter disguised Mimics is mostly random, as only one disguised mimic will generally spawn in a given round--if at all. Hopefully, you've expanded your arsenal by now with the RAI K-84 and others, as you'll be needing the extra firepower to deal with the zombie waves you'll be likely to encounter while attempting to spawn the disguised mimics.

Regardless, once you collect the third and final disguised Mimic essence, head back to the Data Center to retrieve a floppy disk.
Part 6: Opening the OPC and activating the portal
Head to the Planning Offices and insert the disk into the quantum mainframe computer. This opens a portal at the top of the stairs just outside of the planning offices (aka the OPC). The portal will help you accomplish your objective, but it, unfortunately, does not have enough power. You need to head back to Peck for more help.

When you chat with Peck, he will tell you that you need three Aetherium crystals to power the portal. Ravonov tells you that you'll need to dig them up using a shovel and a special Aetherium Meter. The shovel you need is found in the Scorched Offense area inside a cabin, and the Aetherium Meter is in the locker to the left of Peck's window in Mission Control--which you can open with the code Ravanov gives you. With the shovel and meter in hand, it's time to dig up some crystals.

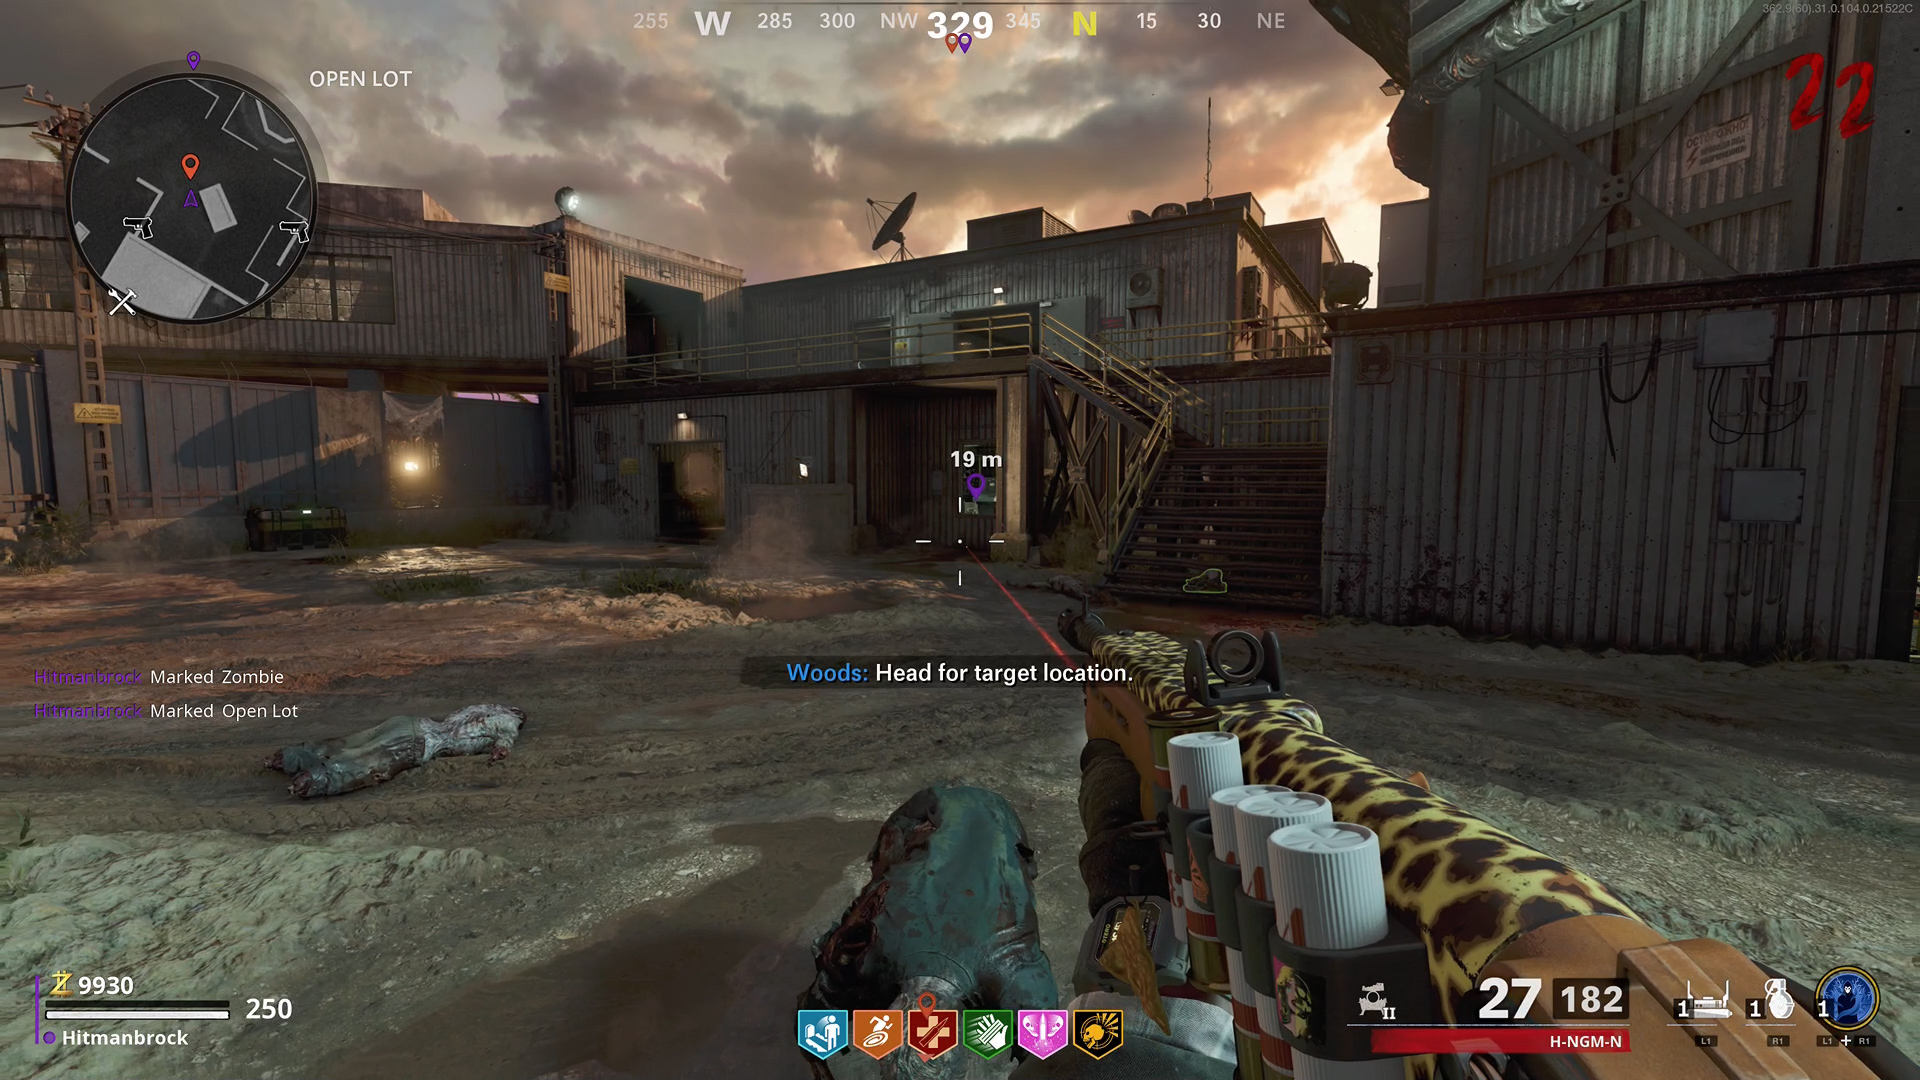
Open Lot
The Open Lot outside of Engineering is a great place to start your search. Look to the corner in the screenshot below to start your digging endeavors.
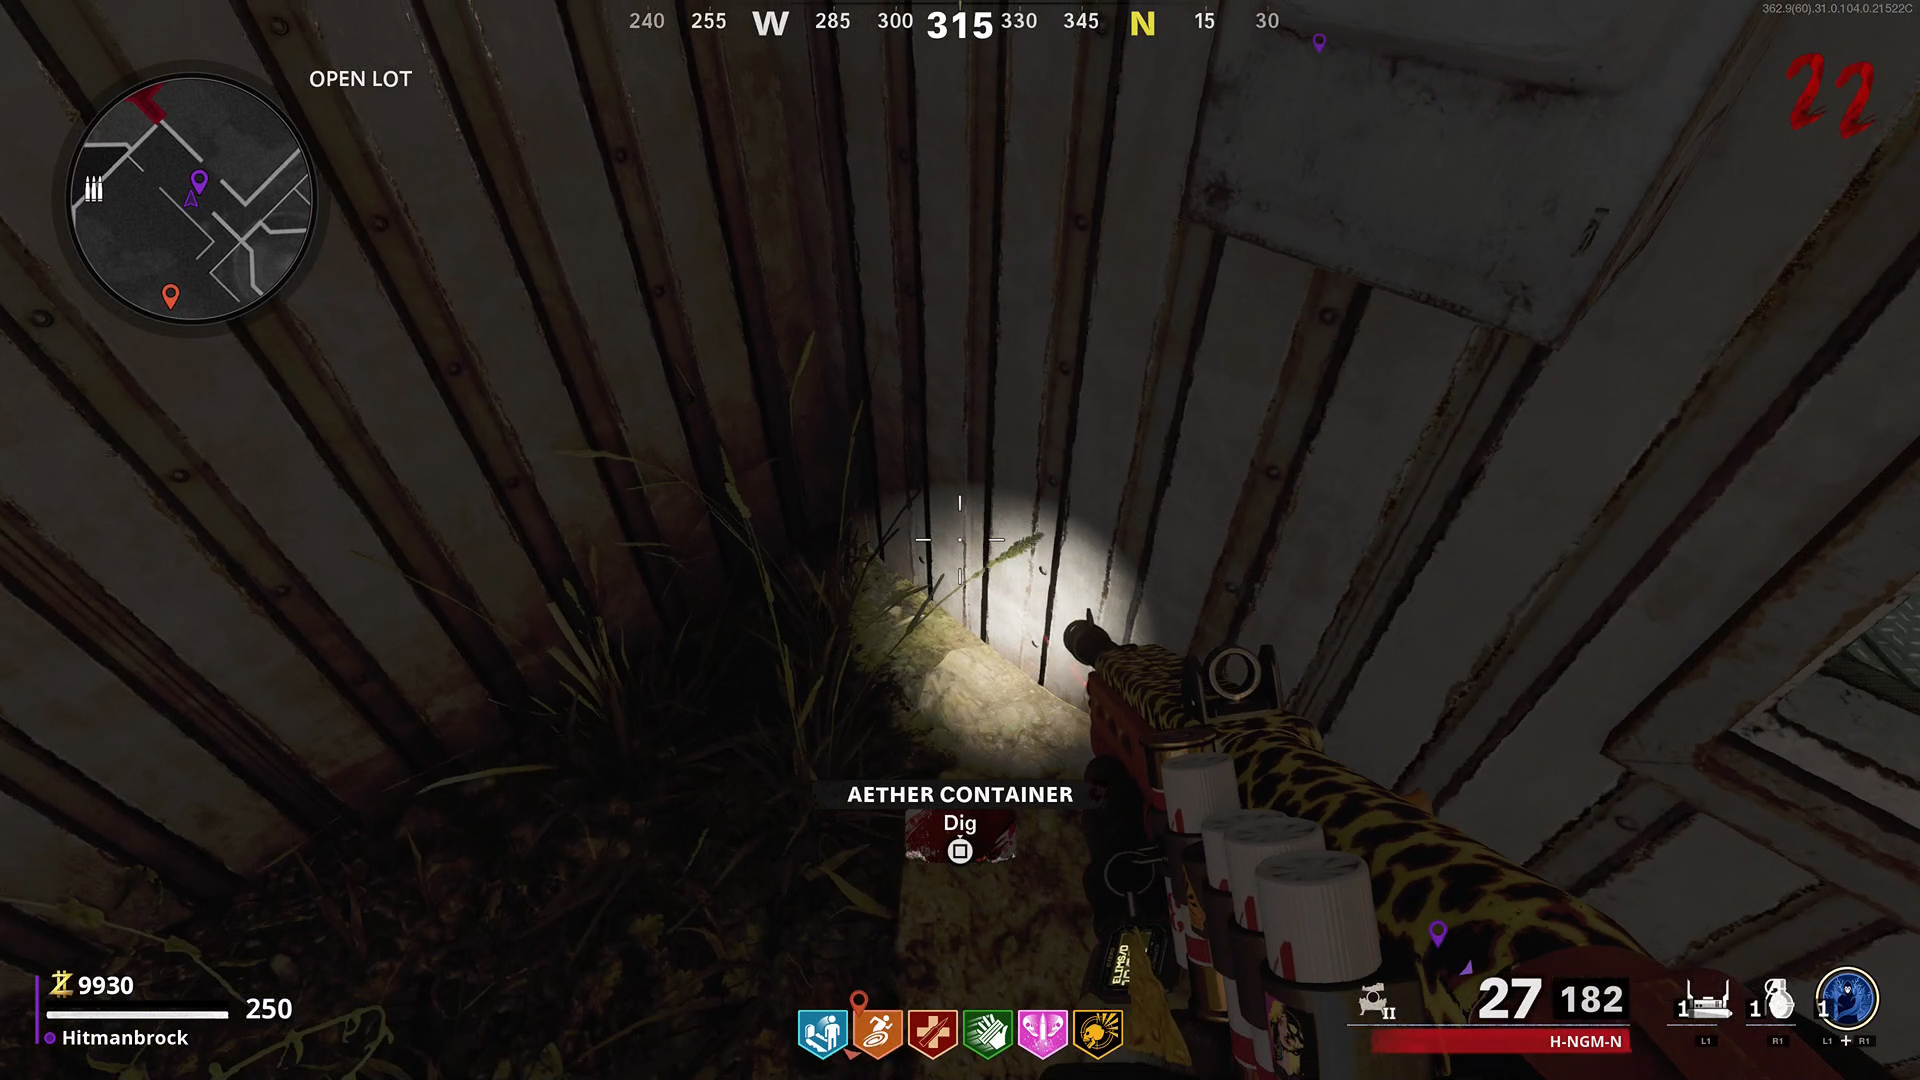
Digging in this area will spawn several crystals. All but one is fake, and you can tell if they're fake if the actual crystal has black smoke surrounding it. When you try picking up a fake one, some mimics will spawn, so be careful. Regardless, once you find the correct crystal, find the nearest Aether reactor and insert it to boost its power.
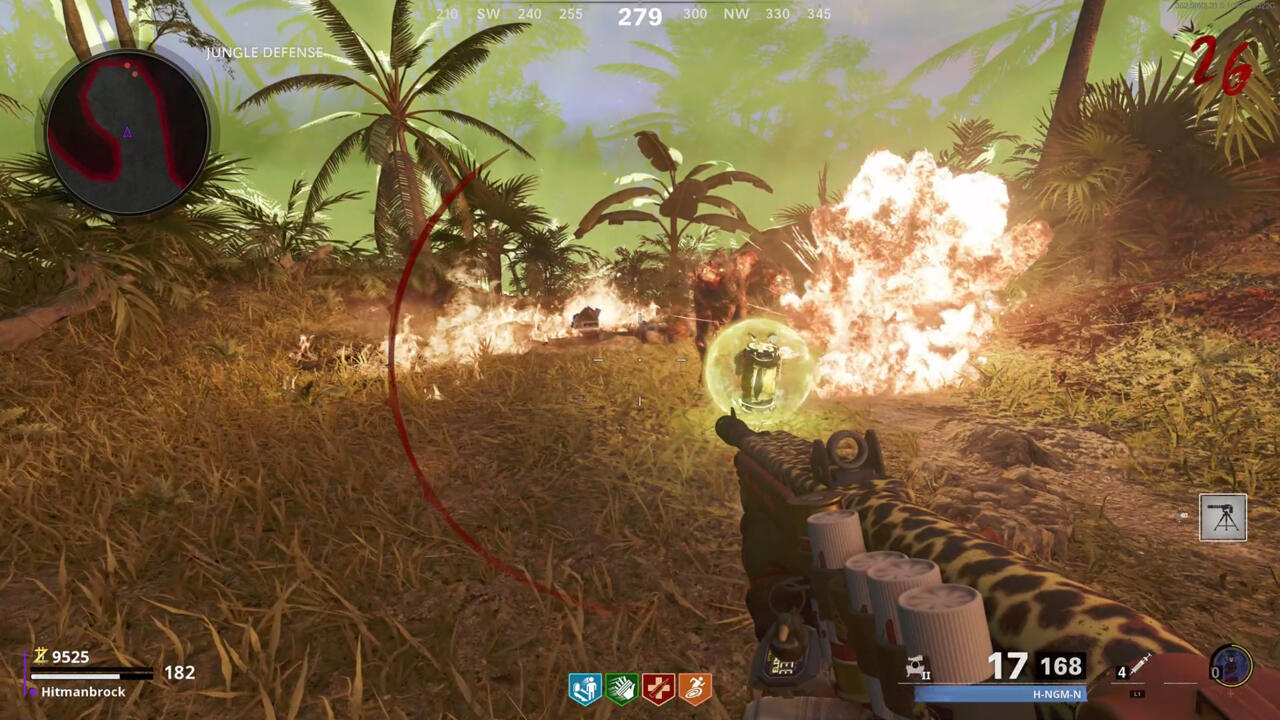
Jungle Defense Area
The next Aetherium crystal can be found in the Jungle Defense Area. Be careful for this once because as soon as you dig it up, a wave of enemies (including hellhounds) will spawn. This crystal will also form a barrier dome that you need to stay within its boundaries. If you try to leave the dome, you'll start to take damage, so get ready for some close-quarters combat. Once you've cleared out the incoming enemies, like before, bring the crystal to the nearby Aether Reactor and insert it for more power. One more to go!

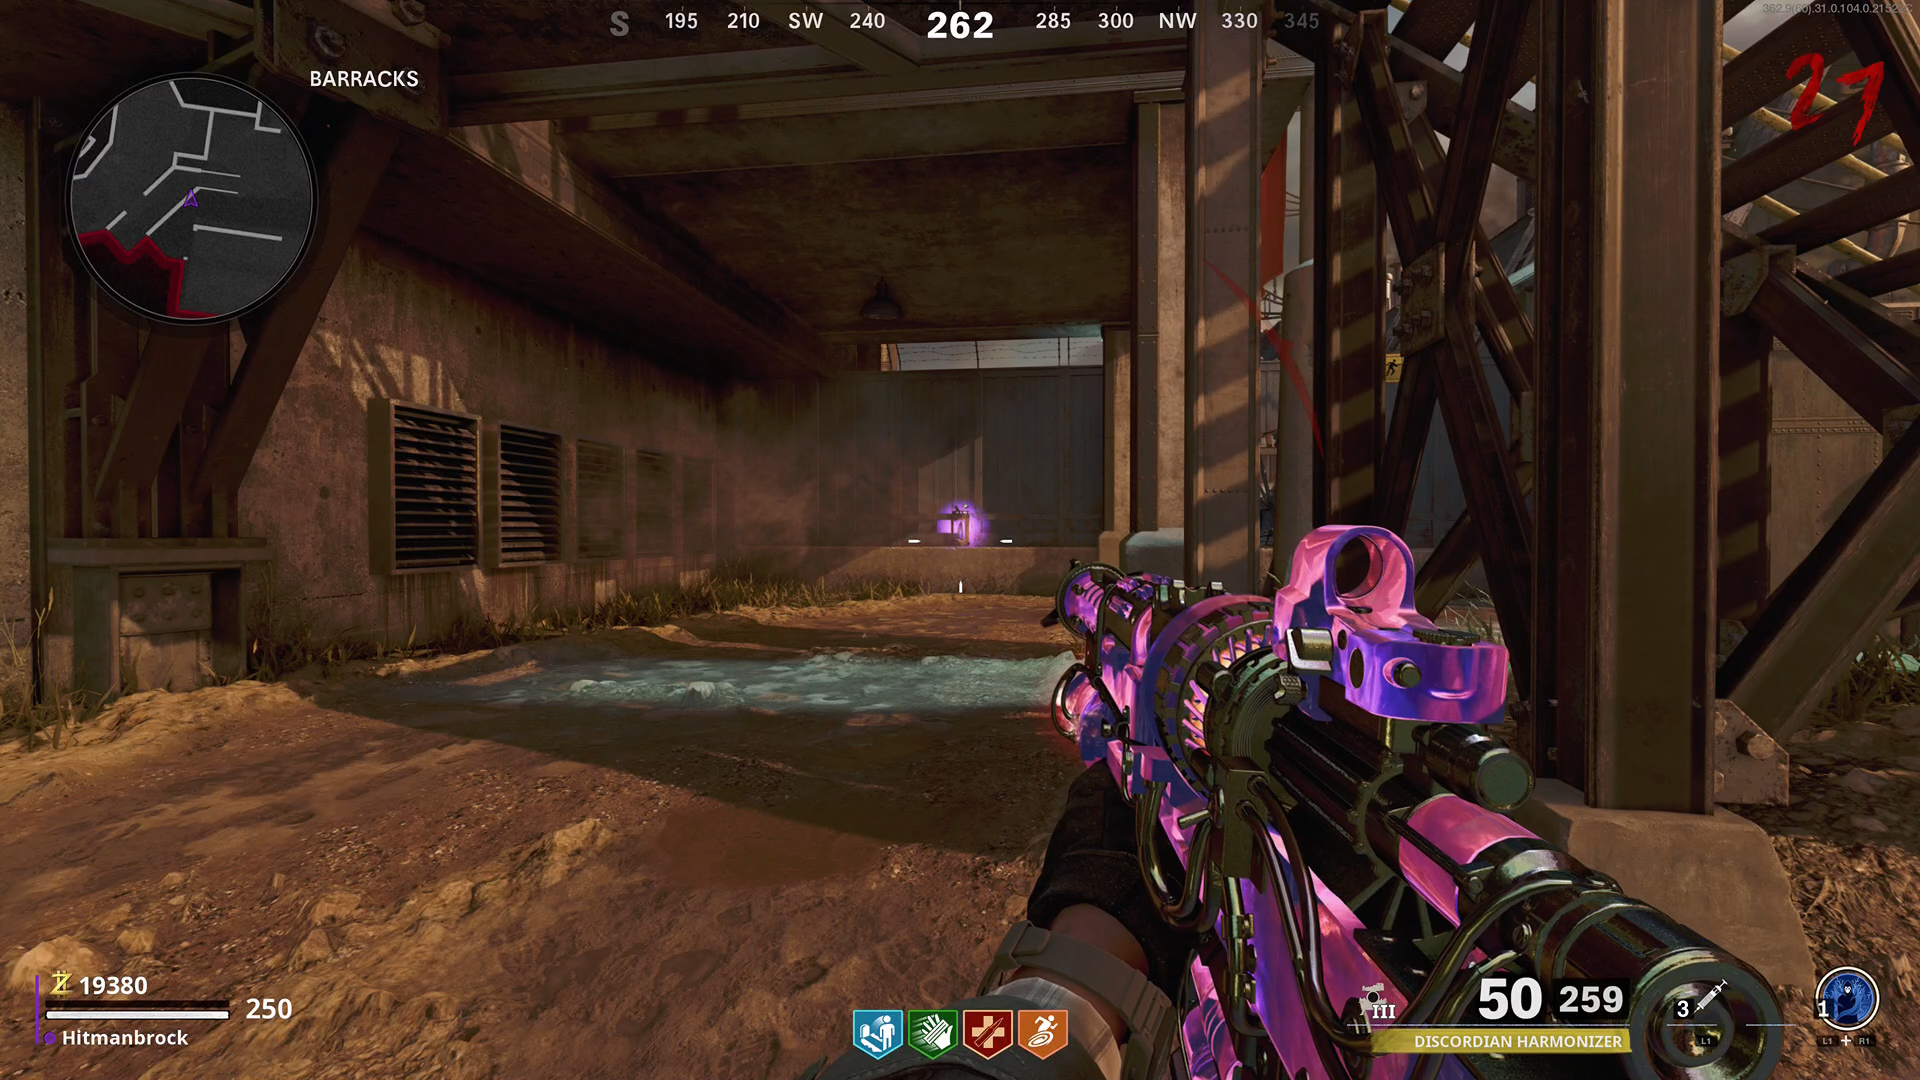
Barracks
The last crystal requires the RAI K-84 Wonder Weapon, so make sure you have it by now. If not, follow our RAI K-84 step-by-step guide to getting it. To find the final Aetherium crystal, head to the Barracks near the area where you mixed the chemical compounds earlier. You'll find the last area to dig for the remaining crystal to the far left of the workbench.
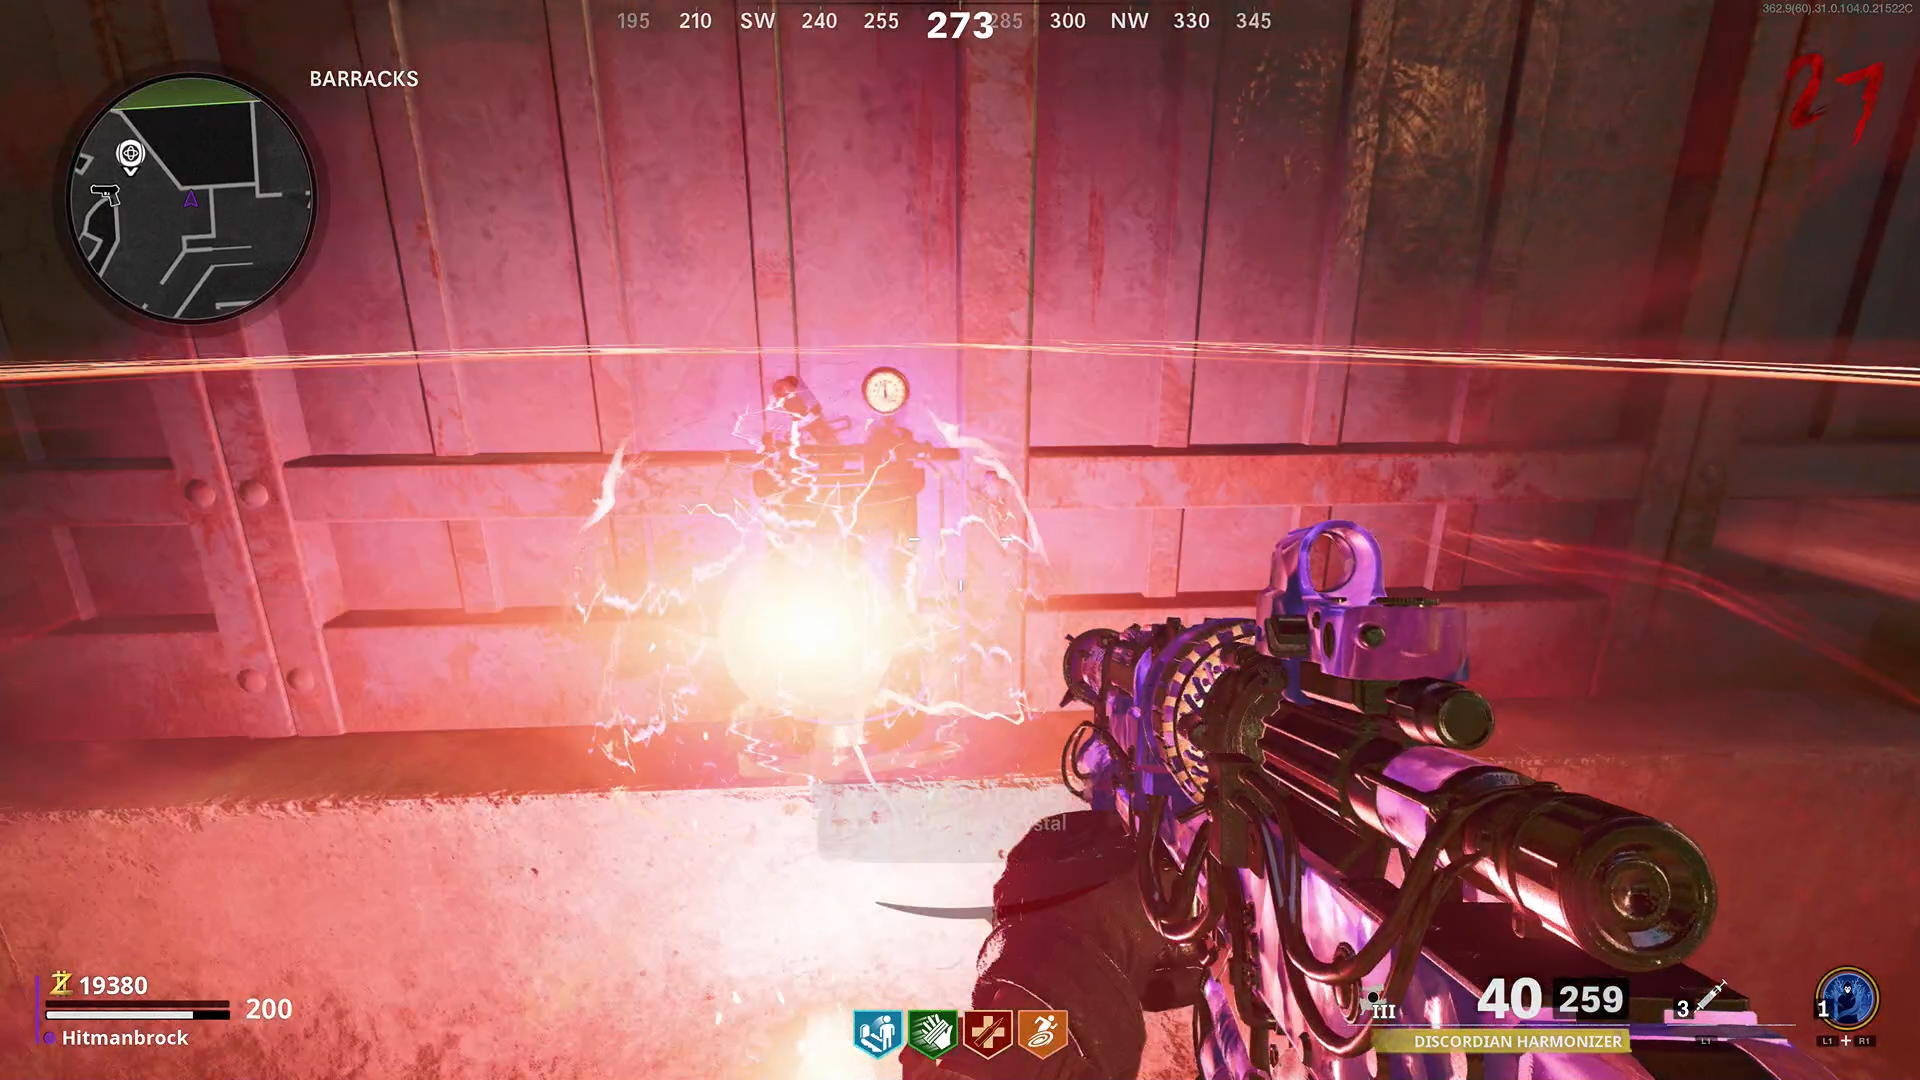
Once this crystal surfaces, it'll move around and be impossible to catch by regular means. However, using the RAI K-84's secondary firing mode (pressing up on the d-pad) can keep the crystal locked in one place. Just make sure not to get too close to the crystal, or else it'll disappear. Once you've stopped it, though, you'll be able to pick it up. Once again, bring the crystal to the nearby Aether Reactor to fully power the OPC. Head to back the OPC to check on the portal's power levels.
Part 7: Allign the satellite
When you arrive at the OPC, Peck reveals that the crystals did not work, and the portal will close again. You'll then hear a new radio transmission from the requiem team, who tell you to head to a computer in the Planning Offices to activate the portal via satellite.
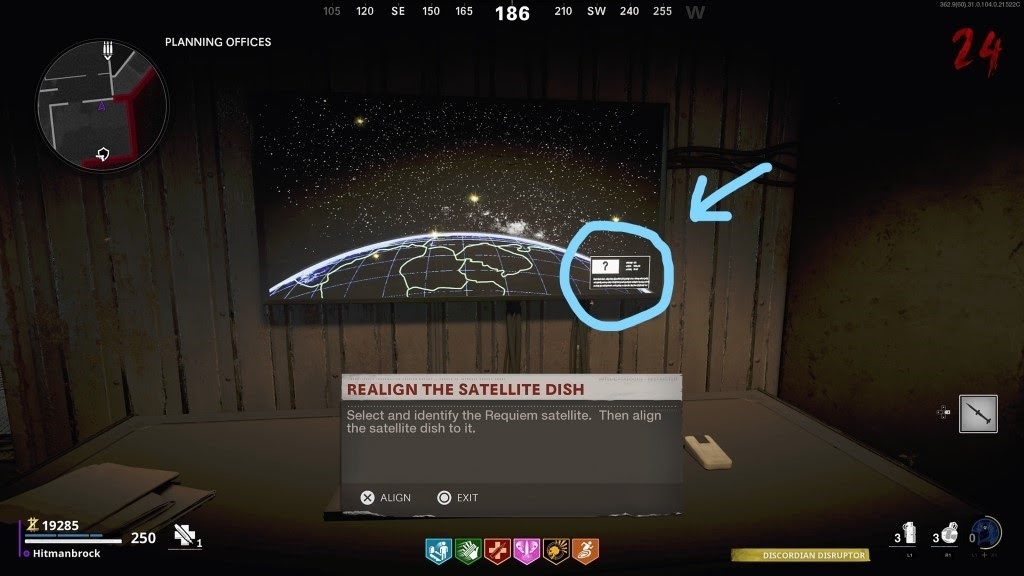
Make your way there, and you'll find the computer mentioned above. Interact with it, and using the d-pad, align the small on-screen aiming dot on to a point on the map marked with a "?" symbol. This takes a few seconds, so make sure there aren't any zombies nearby to pester you.
Once you find and activate the correct location, the satellite will target the base and generate enough power for the portal. At this point, if you have enough salvage, now would be a good time to craft an airstrike, stun grenades, and other lethals and tacticals. You're going to need them for the intense fight ahead.
With all the necessary preparations made, head to the OPC and use the computer on the right-hand side to activate the portal. A cutscene will play, and you'll find Samantha Maxis. Using the portal, the team heads back to the village but soon discovers a large monster known as The Orda has spawned to wreak havoc just before your escape.
Part 8: The Orda bossfight
First off, shooting The Orda directly in the mouth with the RAI K-84 is the way to go. Though be wary of the enemy swarms cropping up during the fight; you don't want to get surrounded this close to the end.

In our experience, we found it easiest to hit The Orda with an airstrike, as doing so takes away half of its health. Unfortunately, the Orda is not marked, so use your best judgment to estimate its location. If you're near the jeep (yellow marker), The Orda can be found to your left on-screen.
Otherwise, Stuns, Monkey Bombs, and your special ability will all come in handy here to distract the enemies away from you as you focus fire on The Orda. So long as you keep at it, you'll drop this behemoth in no time.

Once you pull it off, you'll be treated to a cutscene of the escape, a reunion of old friends, and a spicy cutscene involving Peck. Enjoy your hard-earned victory! You deserve it!
Got a news tip or want to contact us directly? Email news@gamespot.com
Join the conversation