FF7 Remake Boss Fight Guide: Strategies For Beating Every Boss
How to defeat all the toughest bosses in FF7 Remake on PS4.
Final Fantasy 7 Remake's complex battle system leads to a variety of exciting encounters against Shinra's military troopers, its huge robots, and its wild fiends--which are pretty demanding on occasion. But the game's biggest challenges are its lengthy, involved boss fights, which put your understanding of its battle mechanics to the test. If you're not the most experienced at dealing with fast-paced real-time combat, FF7 Remake is bound to give you some trouble. Fortunately, we've got you covered, as we've compiled a walkthrough detailing how to fight many of the game's bosses.
Below you can find in-depth strategies for every boss we've beaten so far. Click from the Table of Contents to jump to where you want to go, but be careful, as this guide has some spoilers to boss identities. And for returning fans, some of the boss fights you might remember have been tweaked in significant ways, so we also encourage you to proceed with caution.
Check back often as we update this roundup with even more boss strategies. For more guides, check out our feature highlighting some essential tips to know as you play the game, as well as our PSA on why you shouldn't skip side missions. Otherwise, you can read our Final Fantasy 7 Remake review.
Warning: Spoilers Follow
Chapter 1
Scorpion Sentinel

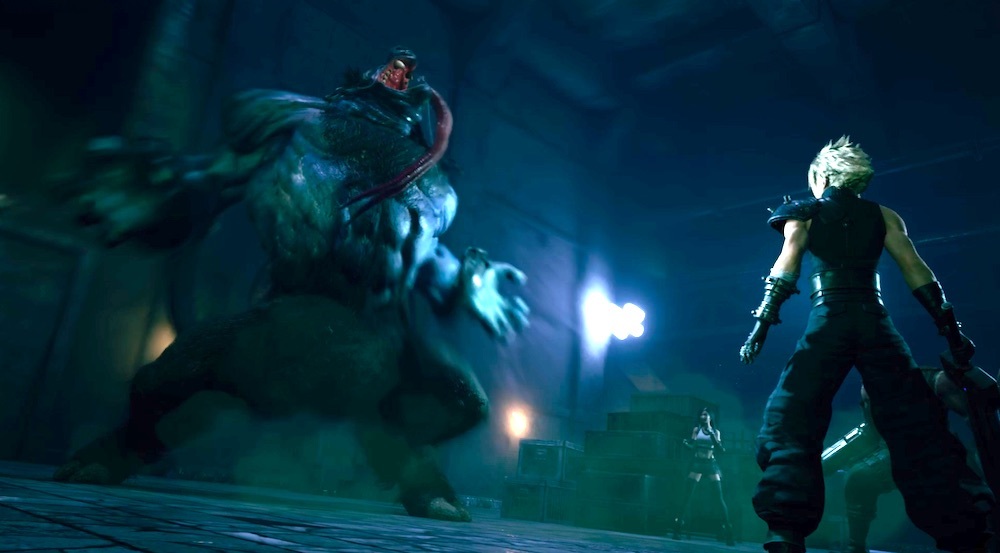
The Scorpion Sentinel is your first big challenge in Final Fantasy 7 Remake. As Cloud says at the start, Lightning magic is most effective. Lucky for you, Barrett has some Lightning Materia handy, so switch to him and unleash that as soon as possible. As a precaution, cast Steelskin on Barret to ensure he's got all the added defense and resilience he needs to stay in the fight. For Cloud, use Punisher Mode attacks and Fire spells to pile on the damage and keep increasing the Scorpion Sentinel's Stagger meter. But don't linger close; it'll swipe you with its tail or leap up and drop down onto you if you hang around too long. When it locks onto you with its targeting laser, get ready to block some missiles; you can try to dodge, but you'll probably still take a fair amount of damage.
Do enough damage and the Scorpion Sentinel will activate a barrier, hindering all incoming attacks. Circle its back and hit it in the Field Generator weak spot underneath its tail. Use Barrett's Focused Shot ability to do some substantial damage to it, while having Cloud follow up with a Fire spell. You'll want to stay back as much as possible until you can drop that barrier, as the Scorpion Sentinel will smash you with an area-of-effect attack. Once the barrier is down, start hitting it again with Barret's Lightning spells and Cloud's Punisher attacks. When the Sentinel Scorpion jumps onto the wall, switch to Barrett and hit it with Overcharge shots to bring it back down. If you stagger it at any point, make sure to spend ATB to unleash Cloud's Braver and Barret's Focused Shot upon it.
After you've dealt enough damage, the Sentinel Scorpion will launch a bunch of missiles that bring down debris from around the reactor. It'll then charge its Tail Laser; hide behind the debris to avoid getting hit by the attack, which is devastating. You can still use spells in the meantime, though.
During this final portion of the fight, the Sentinel Scorpion will cycle through several attacks, including an EM Blast around its body, a hail of missiles, lasers from its hands, and a machine gun attack. Dodge or block the incoming strikes and hang back until after the missile strike, when the Scorpion Sentinel is open for attack, then hit it before retreating to hide from the Tail Laser. Make use of Barret's ranged attacks as much as you can, as well as magic, because these will keep you out of range from several of the Sentinel Scorpion's abilities. Keep a consistent rate of damage, making sure to go hard when you stagger it, and you'll win in no time.
Chapter 2
The Huntsman (Mini-Boss)
You'll fight the Huntsman at the end of Chapter 2, who's accompanied by several Shinra troopers. He's basically a Riot Trooper with more powerful attacks, higher defense, and grenades. Before facing him, focus on his friends first, which include a Riot Trooper, several Security Officers. Start by wiping the floor with the Security Officers, then focus your attention on the Riot Troopers, which you can instantly drop with a Fire spell or a Punisher Mode guard stance counter.
When the Huntsman is alone, stay well clear of him, as he can deal severe damage and quickly punish you if your sword bounces off his shield. Watch out for his attack called Riot Shield, where he'll sprint straight at you and bowl you over; it's hard to dodge, so try to guard against it instead. He shouldn't be able to hurt you much otherwise, so remain guarded in Punisher Mode to deal damage with your instant counter-attack. Once your ATB charges up, hit him with a Fire spell to drop his defenses. That should put him on one knee; close the gap quickly and rip him apart with more Punisher Mode attacks. Repeat that process a few times, and you should down him pretty quickly.
Chapter 4
Roche (Motorcycle Chase)

The final portion of your motorcycle ride during Chapter 4 pits you against Roche, AKA "Speed Demon." This adrenaline-pumped maniac is a bit of a pain to deal with. First, use guard and dodge around to avoid the ranged sword slices he sends your way. If you swerve from right to left, you can easily steer clear of most of them in time. Pay attention to the pattern; his slashes stay in pretty much the same areas as they cross the street, and you can mostly zip past unscathed. When he's not up close, use L1+Triangle to fire off your own ranged attacks once charged to keep your damage output up.
When Roche drives up on the side of the tunnel, it means he's going to start sending vertical Lightning strikes your way. Don't worry about attacking; instead, watch for the attacks to come down and dodge them before they can hit you. If there's an opportunity to charge your ranged attack, shoot it his way, but remember that defense is your primary concern.
Roche will eventually jump off the side of the tunnel to smash down right next to you, so dodge hard to one side to avoid taking damage when you see him getting ready to move. He'll usually stick up close for a while, so keep slashing at him and unleashing your spin attack when you get the chance before he repeats his cycle. Keep consistent on dodging and damage-dealing, and you'll end this bozo's high-speed reign--at least, for now.
Roche (Shinra Warehouse)
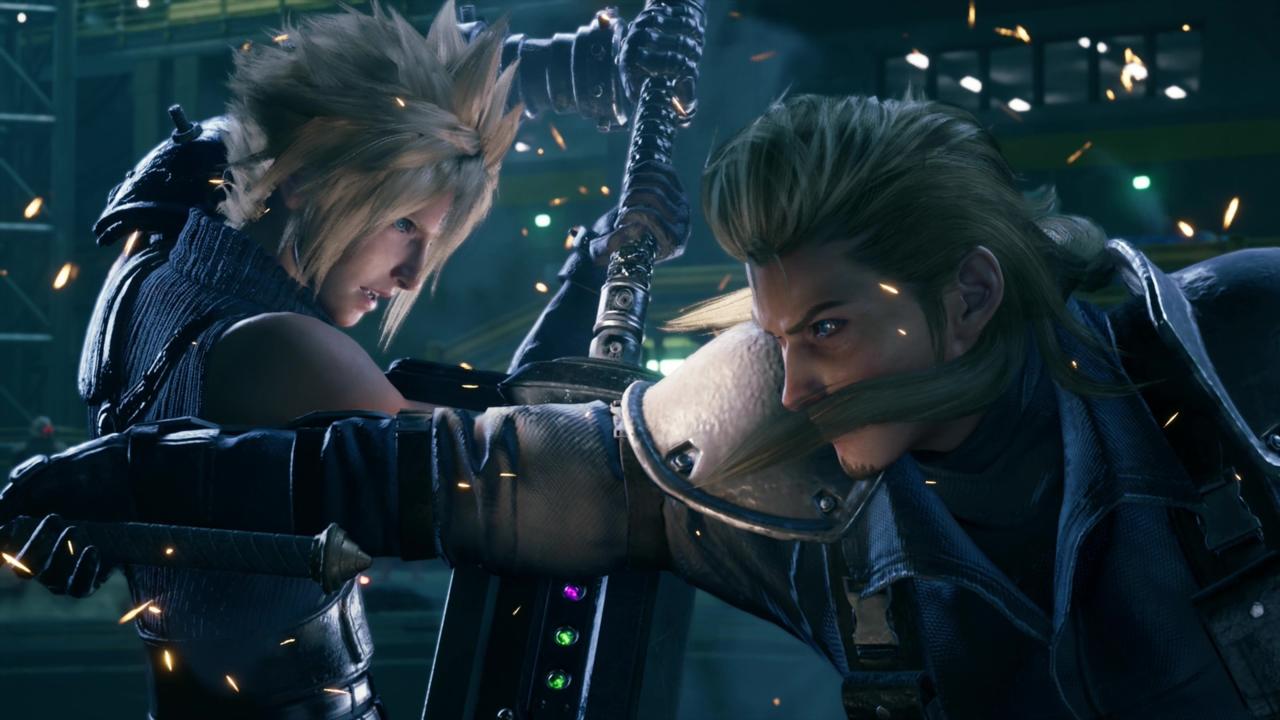
This second fight with Roche is more of a sword-fighting duel, and you'll want to rely on your guard here. Blocking Roche's attacks will bounce him off you, leaving him vulnerable for you to lay into him with a series of combos. The more you hit him or block him, the easier to interrupt he becomes.
Roche will start the battle fighting you conservatively, letting you get quite a few hits in before retaliating with his sword combo. If he starts up a flurry, dodge to the side before he lands the final spinning attack. He'll also occasionally cast Materia spells, so make sure you're paying attention to his casting animation to evade them in time. Stick to defense with the Punisher Mode's counter-attacks, which is a great way to circumvent Roche's speed and keep the damage output high. Generally, you want to stand your ground against Roche like you're having a swordfight: block and counter his attacks to pressure and stagger him, then lay into him with combos after he bounces off your guard. He's also weak to Fire, so if you can hit him with the occasional Fire spell, all the better.
Deal enough damage, and you'll eventually trigger the second phase of the fight. Roche is far more aggressive and agile here, capable of easily dodging your strikes and stunning you with powerful dash attacks, but he's still vulnerable to getting his attacks blocked. Maintain a defensive posture with Punisher Mode and keep wailing on Roche with that trusty counter. But once again, dodge away when you see him about to unleash a spell. Also, avoid using ATB abilities until he's staggered. Rinse and repeat until he's down for the count.
Chapter 6
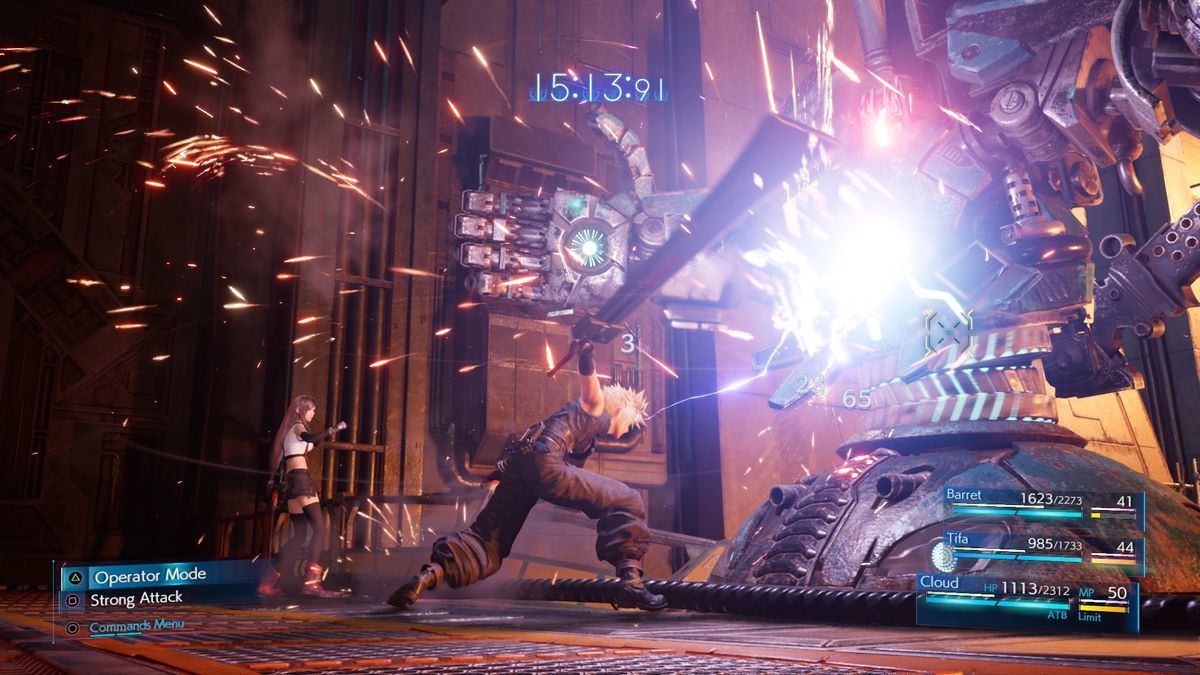
Crab Warden

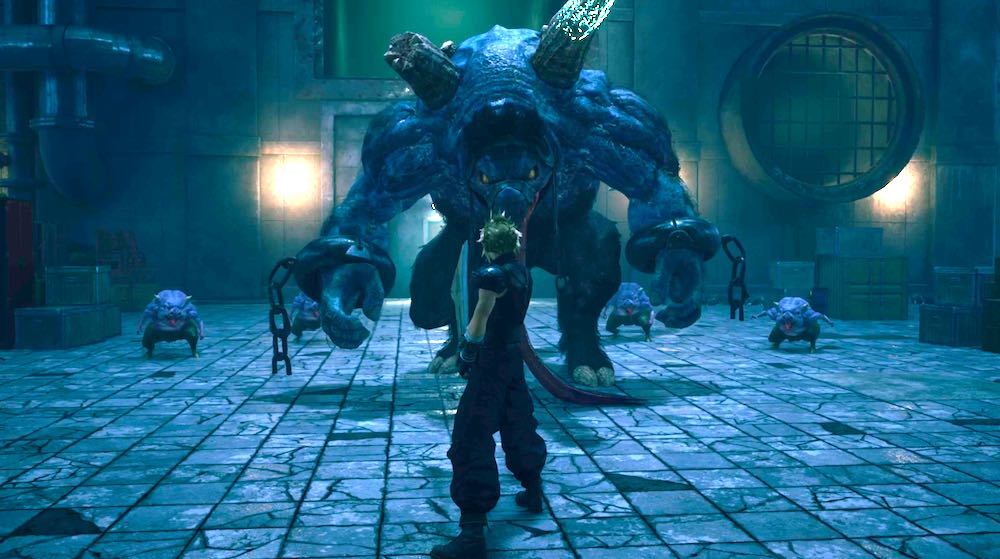
The Crab Warden has a bunch of different targets on its body, and to put it down for good, you need to cripple each of its legs in turn. It's weak to Lightning magic, so make sure you have some Lightning Materia equipped ahead of time--the more, the better, but definitely give an orb to Barret, since he can stand back from the battle and support the melee fighters with spells.
As soon as the fight starts, the Crab Warden electrifies the train tracks, so make sure your party isn't standing on them. It'll do this every once in a while, so keep an eye out for Crab Warden readying the attack, and get yourself clear. Once the electricity dissipates, have Cloud and Tifa focus melee attacks on the Crab Warden's legs, while commanding whoever you've assigned Lightning Materia to bolster their attacks with Lightning spells. Attacking the Crab Warden's legs from the side and back from the back can be very useful since most of its guns are in the front, but be careful of its EMP blast area attack, which will hit you for big damage if you're standing too close. Repeat this cycle of attacks and defense until you destroy a leg to stagger the crab; use that opportunity to deal massive damage with your ATB abilities.
The Crab Warden will add additional attacks as it takes more and more damage, eventually opening two big missile launchers on its sides. These are tough to dodge, so get ready to guard to mitigate the damage, and keep pouring out the Lightning in the meantime. The missiles are a significant threat, so focus on the launchers to destroy them, while also forcing the Crab Warden to expose its pilot generator. At that point, you should be free to lay into the exposed weak point with everything you've got to finish the boss off in short order.
Chapter 7
Airbuster
The Airbuster is a unique boss fight in that the decisions you make in Reactor 5 before fighting it impact how difficult the battle will be. If you're paying attention, you can find as many as six Reactor 5 keycards as you move through the labs ahead of the fight with the Airbuster. Each of those keycards can be used to remove armaments from the Airbuster that you can then retrieve yourself. Removing AI Cores cuts down on the Airbuster's movement speed and ability to use stun attacks; removing Big Bomber shells takes away the boss's ability to use big, massively damaging explosives; and removing M units gives you random items you can retrieve ahead of the fight--although it doesn't hamper the Airbuster's effectiveness. You can make decisions about what to take from the Airbuster based on your playstyle, but we found removing all its Big Bomber shells was pretty helpful.
If you've got the Elemental Materia, this is an excellent time to use it--set it with a Lightning Materia for Barret so that he fires Lightning-infused bullets, allowing him to do more damage while quickly increasing the Airbuster's Stagger meter.
In the fight itself, you'll start with Cloud separated from Barret and Tifa, and the Airbuster facing him. Take a defensive posture; block with your guard stance all incoming gunfire and laser beams from the Airbuster, and dodge the EM Mines it kicks out periodically. Close the gap and perform melee attacks if you can manage them, but note that the Airbuster will use a blast of static electricity to knock you back if you linger too close. Fire off magic spells instead when you're not defending--the Airbuster is weak to Lightning--just like the Crab Warden--so go nuts with it. Hit the Airbuster with enough Lightning, and it'll be stunned for a few seconds, allowing you to get in close and hit it with ATB abilities.
If Cloud is taking too much damage, Barret's Lifesaver ability from his Light Machine Gun can help, allowing him to tank damage from the other characters. Use it to spread around the hurt.
After a time, the Airbuster will turn and face Barret and Tifa. As Cloud, you now have a chance to get close for some damage, but watch out for the Airbuster's jets, which will fire periodically and knock you to the ground.
When the Airbuster's second phase hits, you'll need to worry about its massive Tankbuster laser. It'll shoot it down the center catwalk, making it pretty easy to dodge, but make sure you avoid it, or your characters will take a ton of damage. From here on out, the Airbuster will periodically fire the laser; when it does, drop everything and get clear.
You can now close the cap on the Airbuster and hit it at close range while continuing to smash it with as much Lightning as possible. After a short time, the Airbuster's arms will split off, firing arcs of electricity between them. When that happens, focus your fire on one of them to stagger and destroy it quickly, using Barret's ranged abilities and magic. The arms will move to the other catwalk and try to punch you before long, so try to stay clear of them.
You should also get the opportunity to use a summon during this phase of the battle, which will help take the pressure off fighting the arms. After you hit them hard enough, the Airbuster will pull the arms back to its main body. Keep hitting it as hard as you can with Lightning to stagger the Airbuster, and then lay into it for some considerable damage.
When the Airbuster gets down to about half-health, it'll hover off the side of the catwalk, beyond the range of your melee team's attacks. Switch to Barret and open up with his guns, while continuing to support him with as many Lightning spells as you can manage. When Airbuster floats back to the catwalk, send the melee fighters in to wail on it as much as they can.
Watch out for when the Airbuster rises to either crush you with a big punch from one of its fists, lay into you with its machine guns, or fire flamethrowers from its palms. When you see it preparing any of those attacks, dodge clear. It'll also fire its Tankbuster laser while rotating, covering more ground, so when you see it readying that attack, run for it.
As the Airbuster's health drops, just keep pounding away with Lightning spells to pressure it. Getting it close to death will trigger some significant, last-ditch attacks, like the Big Bomber, which will shoot a giant grenade at one of your teammates. But at this point, you should be able to overpower the Tankbuster and finish it off by unloading damage on it relentlessly.
Chapter 8
Reno
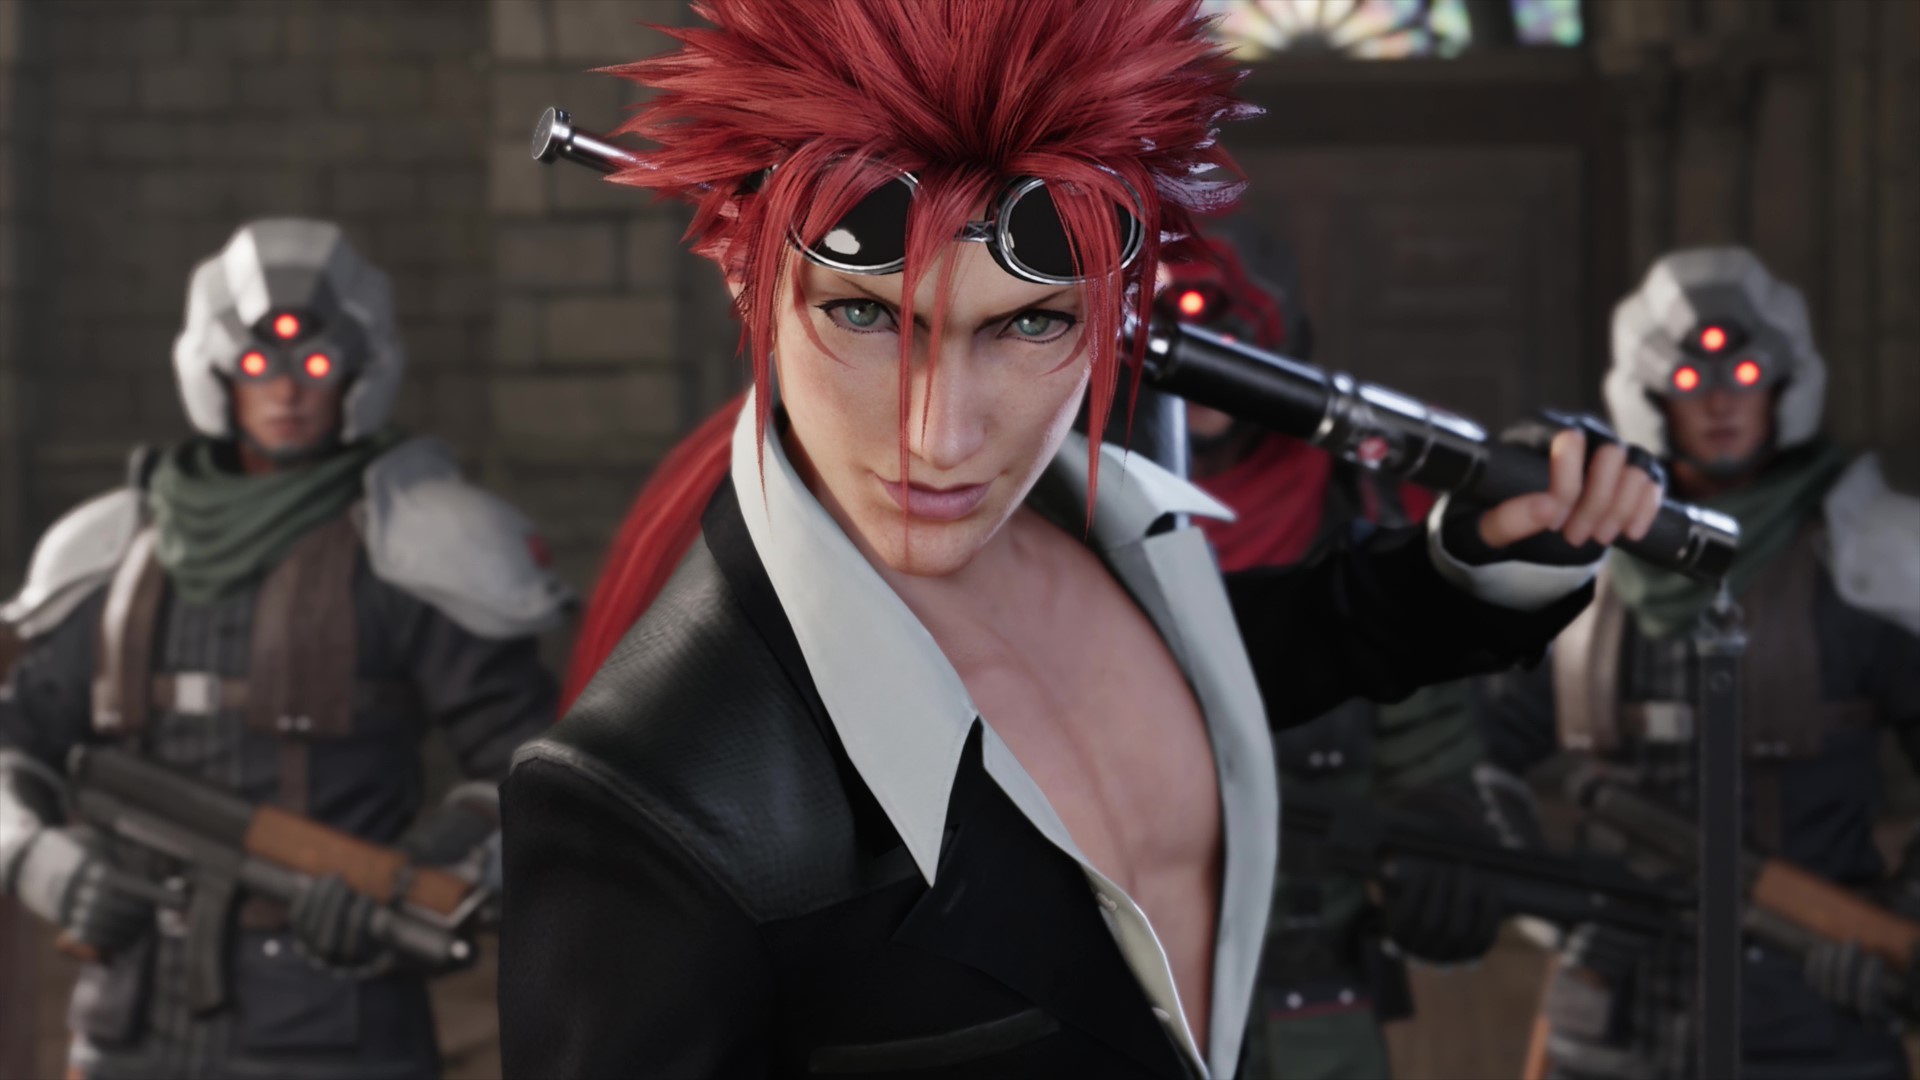
As soon as the fight starts, take care of the Security Officers; the Iron Blade's Triple Slash ability should come in handy here. Once they're dealt with, focus your attention on Reno. You want to maintain a steady balance between speed and measured defense. Similar to Roche, this is a swordfight of sorts, and you'll need to block Reno's attacks to open him up to attack. He likes to zip at you with a dash to get behind you, then attack you from the back, so you'll want to be ready to Guard when he closes the gap. Reno can be easily hurt with some well-timed Punisher Mode counter-attacks, but any block of his electro baton will allow you to strike back. You want to be sure to block him, because the baton won't just hurt you, it'll stun you, too. If you've got enough ATB stocked, follow up your Punish Mode attacks with a Focus Thrust.
Eventually, Reno will start to throw EM Mines at you, which will float around, arcing electricity between them to stun you and open you up to attack. Run away from the mines and either nail them with magic spells or cut in close and slice them out of the air, but be sure you don't attack them when they're charged with electricity or you'll get zapped. The EM Mines are particularly dangerous toward the end of the fight, when Reno will come after you for close-range attacks while you're dealing with the mines, so keep your distance and even up the odds as quickly as you can. Keep the pressure on, and you'll eventually come out of this encounter victorious.
Optional: Shiva
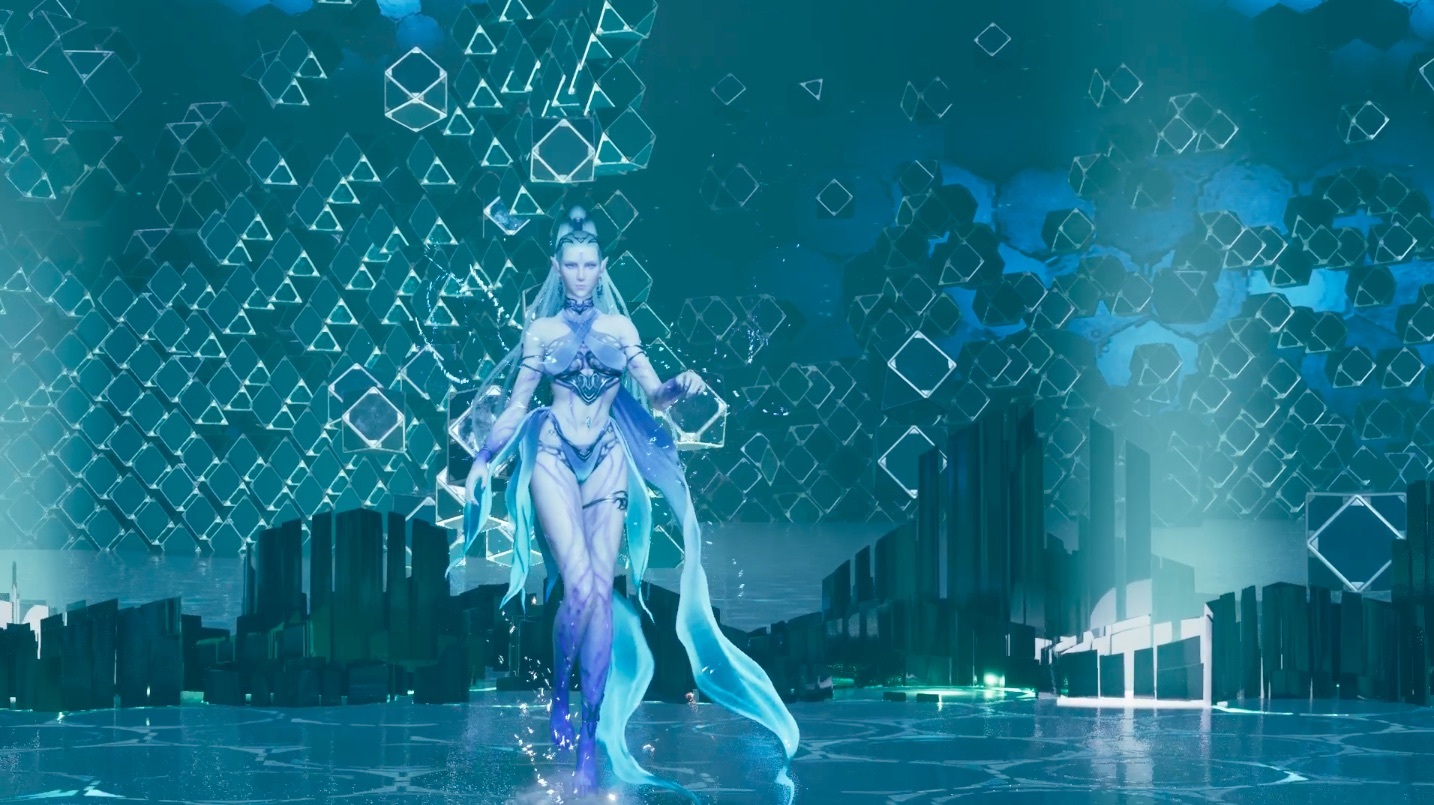
If you keep in touch with Shinra intern Chadley, he should provide you with a new Battle Intel scenario that pits you against summon creature Shiva in order to earn a new Materia. You'll have whoever's in your party when you take on this fight, so if you try it with just Cloud, it'll be tougher than if you tackle it with Aerith in your squad. We recommend that you bring Aerith along, though.
Shiva is an Ice summon, and thus weak to Fire. Give Aerith your best Fire Materia, and make sure you have the Ifrit summon equipped, then head into the battle. Cloud can pretty much take care of himself, so you're better off controlling Aerith to run up her ATB bars as quickly as possible; the more Fire or Fira spells you can cast on Shiva, the faster you'll manage to stagger her. Make use of Aerith's Arcane Ward ability, which automatically makes you cast two spells for every ATB bar you spend, to maximize your damage. A good Fire spell will knock Shiva to the ground, offering Cloud a chance to lay down some melee attacks. Make sure you're not too close when she gets back up, though, because she'll use the Icicle Impact area attack spell around her when she's back on her feet.
You'll want to keep laying down spells on Shiva while working to keep Aerith alive. You'll need to be on top of dodging her clear of incoming danger, which includes Blizzara spells that Shiva will shoot your way. Shiva will also summon a bunch of ice crystals to shoot at you in a group. Dodging that attack is a losing battle, so guard against it and power through.
Once you do enough damage, Shiva will get more aggressive, with spells that come faster and new Frost Familiars that protect her and increase the number of spells she casts. Keep firing away with spells to knock out the minions, but beware of the White Out attack, which will send ice crystals through the ground at you. If they hit you, you'll fall asleep, opening you up to a huge but slow magic attack from Shiva called Heavenly Strike. You'll see a massive ice crystal form above the sleeping character; quickly switch to your other character and use Smelling Salts to wake up the sleeper, then dodge away to avoid the big crystal.
As soon as you can get Ifrit in the battle, summon him and start using his abilities to do significant damage and keep Shiva off-balance. The Fire attacks should end up staggering her quickly, allowing you to do a bunch more damage. At about one-quarter health, Shiva will do her big summon attack, damaging your entire party. Makes sure you're healed up before that happens, or she can take you out in one blow. After that, keep hitting her with Fire spells until she's done.
Rude

After fighting Reno, it's expected that you'd deal with his buddy Rude sooner or later. Make sure you have Wind materia equipped, particularly on Aerith, because it's going to help you a great deal.
Rude is basically the opposite of Reno, in that his attacks are big, powerful, and tough to block--instead, you want to be ready with a dodge to avoid taking the brunt of it. Focus also on trying to dodge sideways rather than backward, as Rude will travel forward with a lot of his attacks to keep hitting you even if you back off. Keep away from his Haymaker attack, which does a whole lot of damage, and do what you can when he comes at you with the Running Tackle, which will leave Cloud bound and exposed to the suplex that follows. Deadly Dodge is an excellent way to open up on him after staying back for a moment.
Aerith will be completely ignored by Rude, giving you a chance to use her to dump spells on the boss. Wind magic will hugely push up Rude's pressure meter, allowing you to stagger him easily. So try to keep Cloud safe in the melee fight while focusing on Wind magic to do the real damage. Her Pray ability should also help keep the party in the right shape. Make sure you're switching back to her whenever you think Cloud is about to be in a tough position.
After you get Rude's health down some, you'll trigger a second phase, where he starts using attacks called Shockwave and Spirit Geyser. Shockwave travels through the ground and will track you some, while Spirit Geyser will cause explosions underneath you--in both cases, keep moving to avoid the damage. Keep firing away with Wind spells and you'll make pretty quick work of Rude.
Chapter 9
Hell House

The Hell House is a tough fight, so make sure you're prepared. Spread Magic Materia between Cloud and Aerith so you have spells covering all four elements: Blizzard, Fire, Wind, and Lightning. It's also a good idea to remove Elemental Materia from your weapons for this fight. You need a balance of elements because the Hell House will constantly change its elemental affinity, using a barrier that will defend it from your attacks. That means that if you're using Elemental Materia and the wrong barrier is up, your physical attacks will be useless, putting you at a big disadvantage. You also want to bring plenty of Ethers to this fight.
At the start of the fight, watch the Hell House's windows. When they're red, the house's barrier is tuned to Fire; green is Wind; yellow is Lightning; and blue is Ice. You want to cast spells of the opposite type of whatever the barrier is in order to run up the Hell House's Stagger meter--so if the barrier is Fire, use Ice, and if it's Wind, use Lightning, and so on.
In the first phase, the house will fling explosive furniture and toys at you, so stay well back. The Chair Salvo attack will launch a bunch of chairs that will track you like missiles, but you can avoid them fairly well if you just run around the arena and try to keep moving. When the house sprays out stuffed animals, stay clear of them--they're all bombs. And when it uses its Hospitality attack, try to run away; it'll suck one of your characters into the house, taking them out of the fight briefly while inflicting a bunch of damage. If you can hit the house with a spell opposite its barrier during that attack, do so.

The first phase isn't too tough if you have the magic to deal with it. After the house takes some damage, it'll flip to a much more aggressive second phase. You'll get fewer indications of the house's barrier from here on out; what magic to hit it with will be dictated by its attacks, which you can interrupt with the right spells. Keep back from its Jetstream attack, in which the house will spin around and spray fire, then use Ice. Do the same for the Double Rocket Charge attack, where the house will shoot itself straight at you--run to the side to avoid the first charge, but know that the house will follow up with two more. The Housing Shock attack will see the house chasing you around to do electrical damage, so try to hit it with Wind. Renewed Hospitality is a Wind attack, so use Lightning.
The tough part of this fight, really, is dealing with God House Mode. The house will create a barrier for itself that severely reduces both physical and magical attacks and isn't tied to an element. When that happens, change targets to the Hell House's arms and focus fire. A couple of big spells from Aerith or ATB attacks from Cloud should be enough to damage the house and drop the barrier, opening it up for your regular slate of attacks. You'll really need to be on your toes for this one, though; as soon as the barrier is down, hit the Hell House with whatever spell will stagger it most based on its window color, since you have a brief period after God Mode drops where you can get a big boost on stagger.
This battle will put you through your paces because it'll require you to be ready with the right spell at the right time, but it also makes charging your ATB meters difficult as you deal with the barriers. When you do get a big hit with the right element, close the gap with Cloud for Punisher Mode attacks and ATB abilities in order to run up as much stagger as you can. Above all, though, be careful about keeping your team alive; don't be afraid to use a lot of items and healing spells here, because you're going to need them.
In the last phase, Hell House will add an attack called Heavensward, where it'll fly around the battlefield, shooting more chairs and other explosives at you. If you keep moving, you should be able to avoid the missiles, but eventually the house will shoot itself back down at you. You'll have a brief window before it hits it with a spell, if you can land it, so pay attention and get your ATB bars charged ahead of time.
Optional Boss: Fat Chocobo
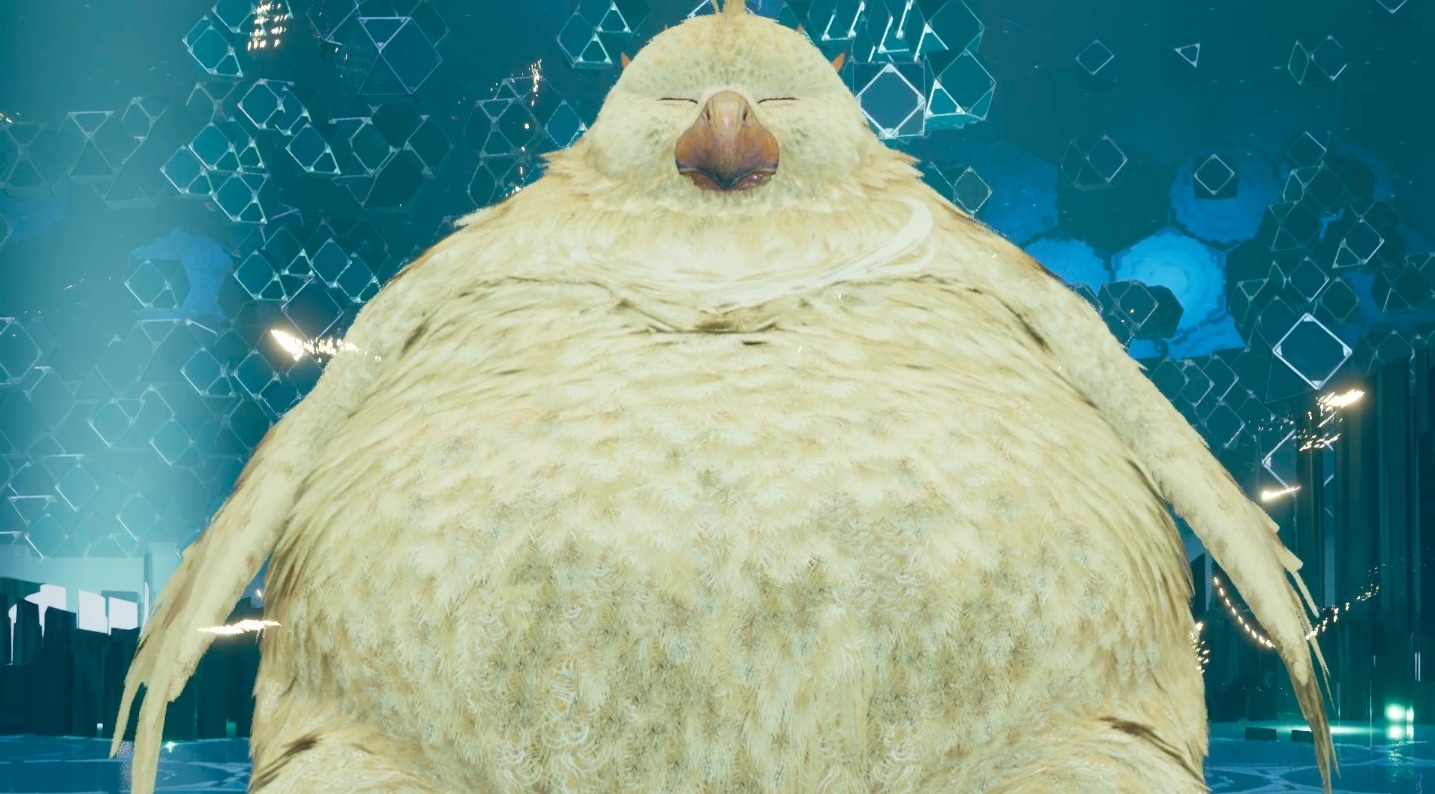
Fighting Fat Chocobo is a whole lot easier than Shiva, but you still need to keep your wits about you. The summon creature doesn't have any major weaknesses, so you'll just want to hit it with your toughest attacks and spells. The best way to pressure Fat Chocobo is with ATB abilities, like Cloud's Braver and Focused Thrust. Go with the ones you like best and deal the biggest damage, while having Aerith keep up a variety of spells, and keep hammering at Fat Chocobo in an attempt to stagger him.
Fat Chocobo his back with physical attacks, so if you have Barrier Materia, use it to protect your squad. His Wark attack has him throwing random garbage at you, which you can easily avoid. When you get in close, watch out for Boom, in which he pops up into the air and drops back down for a big area-of-effect strike. After a bit, he'll start rolling around with Roly Poly, which you can dodge clear of if you're quick.
Meanwhile, the Moogle that floats around Fat Chocobo will occasionally summon spectral enemies to come after you--specifically, Bombs and Tonberries. Knock these out quickly if you can with Triple Strike, or let Aerith handle them with her magic while you keep up your assault on Fat Chocobo. You'll occasionally want to switch to Aerith to speed her ATB gain for healing spells, especially if Cloud gets walloped with a few of Fat Chocobo's big attacks.
When you get a chance, summon Ifrit or Shiva into the battle to further pressure Fat Chocobo--the further into the fight you get, the more minion enemies will get spawned in to overwhelm you. They shouldn't bother you too much, though, but if you're finding yourself taking a lot of damage, peel off and take a second to deal with them before returning your focus to the boss.
Chapter 10
Abzu
Abzu is a big foe with a long reach, but the biggest danger in this fight is poison from all the sewage. Getting hit by certain attacks from Abzu will poison your characters, and you'll want to deal with that quickly with Antidotes or Cleanse magic, because you might not realize how much damage you're taking from it until too late.
Abzu is weak to Fire spells, so a pumped up Fire materia or two is key here. Fire massively drives up his stagger meter while also taking him out of the fight briefly, allowing you to inflict big damage. You'll want Aerith wielding the Fire materia if you only have one, but if you've got more, it can't hurt to get more magic into this fight, especially to stop some of Abzu's big attacks. Primarily, you want to focus your attacks of Abzu's horns whenever you can. Crippling the horn knocks out some of its biggest water-based attacks, so the quicker you can do that, the better off you'll be.
Early on, Abzu will use its Backwash attack, which is deadlier than it first appears. It makes bursts of sewage fly out of the brown puddles scattered arond the arena, which hurt and inflict poison. If your characters get hit, deal with the poison so that the damage doesn't pile up. Other than that, be careful of its Ground Slam attack, which you can dodge when you see it coming, and its big melee swings, which you can block and counterattack with Punisher mode. When Abzu jumps up onto the pipes alongside the arena, it means he's about to come back down with a big Pounce attack and pin one of your team. This is a great time to nail him with Fire, which will interrupt his mauling of your teammate and leave him vulnerable to more damage. After a few seconds, he'll flee into the water.
You can't raise Abzu's stagger meter with magic attacks, so reserve those for damage--instead, lay into him with melee strikes, particularly with Tifa, to try to push his stagger meter up. More important, though, is trying to cripple Abzu's horn, which will also open up to sustained attacks.
In the next phase of the fight, Abzu will get Enraged and become more aggressive. It'll jump on the pipes again and use its Backwash Blast attack, which will spray a bunch of sewage out of one of the big pipes on the sides of the arena; when that happens, run alongside the pipe to avoid the flood. You'll also want to watch out for Backwash Spout, which creates water tornadoes out of the puddles on the battlefield, which will come at you fast.
Crippling Abzu's horn will knock him out of Enrage and open him up to attacks again, so keep up with hitting him as much as you can and lay down big damage with Fire magic. Keep clear of him when he readies his Triple Charge and Bash and Smash moves, although if you're quick with a powerful spell, you'll be able to interrupt both. Keep your party healthy keep setting the boss on fire until you're victorious.
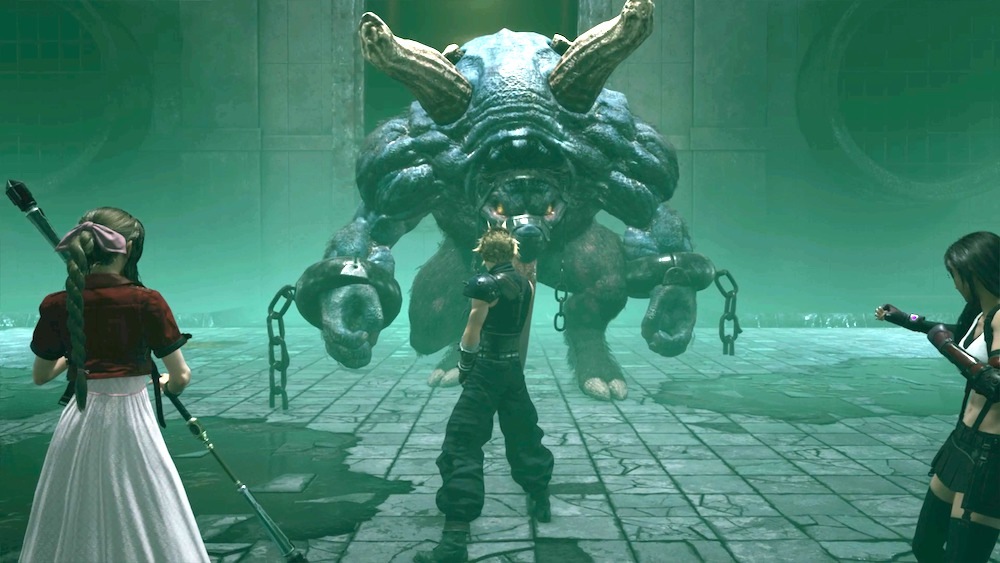
Chapter 11
Ghoul

Beating the Ghoul requires you to keep an eye on it, because only certain attacks will work at certain times against the big ghost. When it's solid, you can hit it with melee strikes, but magic will be pretty ineffective. When the Ghoul becomes ghostly and lit in red, melee attacks lose their potency, so switch to magic--landing any big spells will seriously drive up the Ghoul's stagger bar, with Fire being the most effective. You'll want to outfit Aerith with some strong spells, but scatter a few good materia to Tifa and Cloud as well, so they can also help out when the Ghoul shifts forms.
The Ghoul primarily likes to use its Telekinesis attack to suck up objects from around the room and chuck them at you. When that happens, duck behind any other debris you can for cover. You'll also want to watch out for the Ghoul's slash attacks. When the Ghoul is corporeal, its slashes leave a blue line on the ground that'll explode to deal big damage to your team, so be sure to dodge clear. When the Ghoul is ghostly, it can turn invisible to ambush your team with slash attacks, so watch for the red light that indicates where the ghost is.
The Ghoul likes to use a big scream attack that can stun your teammates if you're too close, and it has additional attacks that can afflict characters with silence. Switch quickly to attack the ghost if it stuns one of your group to interrupt its follow-ups, and keep Echo Mist on hand in case you get silenced.
Do damage when you can with your melee team, but the real time to capitalize is when the Ghoul is in ghost form and you can have a big effect on its stagger gauge. Hit the Ghoul with a couple of big spells and it should get pressured; close the distance with Cloud and Tifa and use moves like Focused Strike and Focused Thrust to try to stagger it.
Once you hurt the Ghoul enough, you'll get into the second phase of the fight, in which the ghost will add additional attacks, with blue flames crossing through the room and more area attacks around itself that you'll need to dodge away from, like Balefire. You should also watch out for the Ghoul to pick up all the objects in the room and swirl them around in the air; when that happens, stop attacking and get well clear.
The Ghoul will pick up a party member and hold them up in the air. However, this Ghoul is a lie! When this happens, remove your lock-on and look to the other side of the room to attack the real Ghoul. Wail on him enough, and he'll be forced to free your party member.
The Ghoul isn't too tough, so maintain spell pressure when it goes ghostly to put him back in the grave where he belongs.
Eligor
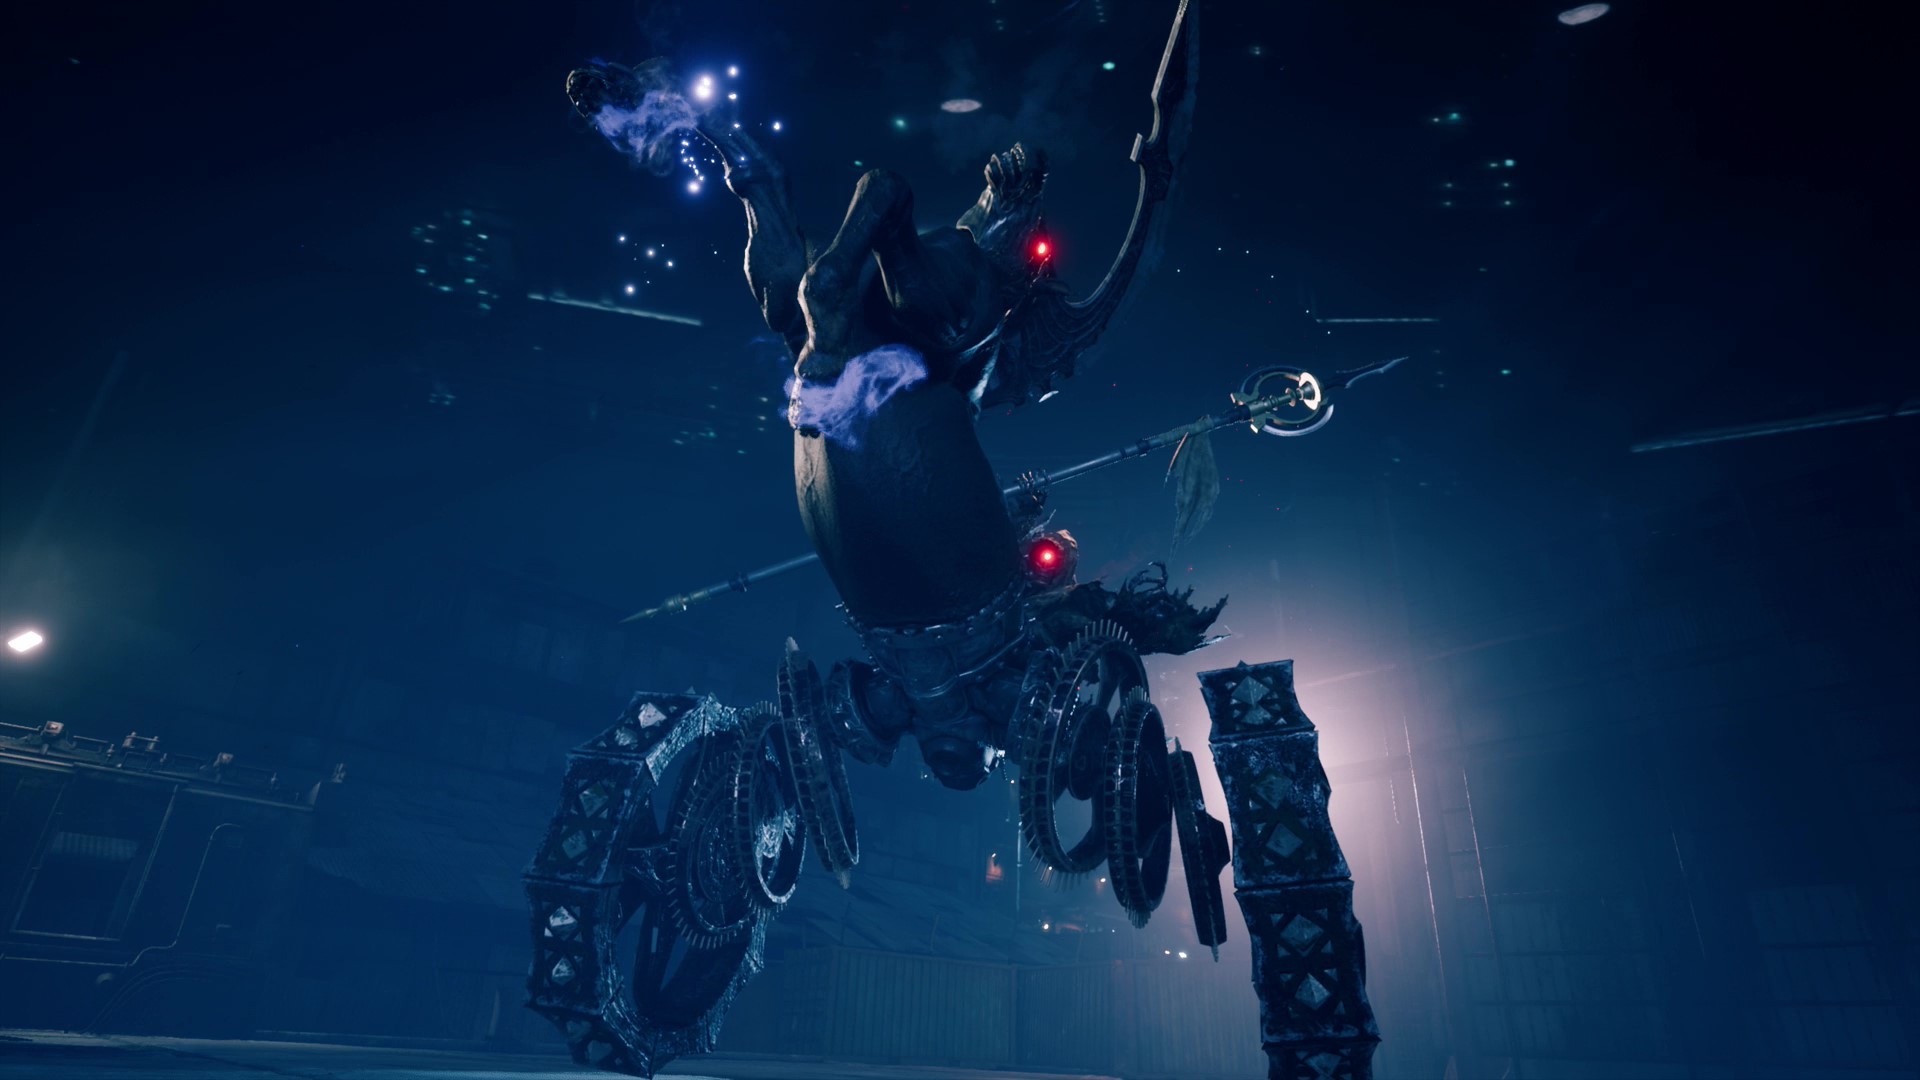
Wow, these boss fights are starting to get wild. It just goes to show how bizarre the enemies from the original Final Fantasy 7 were, so to see them represented in-world here is a wonderful treat.
First and foremost: Bring Steal Materia to this fight. Eligor carries the Bladed Staff weapon for Aerith, and you can only get it if you steal it off him. Steal attempts seem most effective when the boss is staggered, but keep up the attempts throughout the fight until you get your prize.
Eligor is a ghostly chariot who is particularly weak against Ice magic, but Fire and Lightning are also pretty effective at pressuring the boss and pushing its stagger meter, and you'll want to stock Wind spells for later as well. Physical attacks, on the other hand, are tough to land against Eligor. The boss is highly mobile, which can be troublesome for Ice spells, since they take a moment to detonate, but Thunder spells can make up the difference in a pinch with their guaranteed hits. Watch Eligor's movements so you can hit him with spells when he's stationary. Aerith is the obvious choice for spell-slinging, but extra Ice Materia on Cloud and Tifa can help spread out that burden.
You'll still want to bring melee attacks against the boss, they're just tougher to land than usual. The wheels of Eligor's chariot will bounce Cloud's blade, so you generally want to circle around the back of the boss and hit it from there--since most of Eligor's attacks go straight out in front of it, its back is also the safest place to be. You'll be most effective if you can hit Eligor with magic, but barring that, your melee fighters should work to stay behind Eligor and hit him as constantly as they can manage. Boost Tifa with Unbridled Strength and pummel him with Cloud's Deadly Dodge and Punisher Mode attacks.
In the first phase of the fight, Eligor is mostly a problem because he'll try to run you over with Trample. It's a move that can send you flying and do a lot of damage, but you can guard your way through it. That's the advisable course since it's very tough to effectively dodge the huge chariot as it comes barreling toward you. The Sweeping Gaze attack is also a problem, but easily avoided: when you see Eligor getting ready to use it, disengage and move well back to keep out of its range.
Magic is great for staggering Eligor, allowing you to pummel it and move on to the second stage of the fight, which sees Eligor taking to the air a whole lot more, which often will put him out of range of physical melee attacks. Aerith's regular attacks can help maintain damage when this happens, but you'll probably want to use Pray and Healing Wind to top off your party's HP while you're not in direct danger. This is also when you want to use Wind magic, because if you can hit Eligor with Wind while it's flying, you'll give it a ton of stagger. And while melee attacks are tough, if you can get a jumping attack off and hit the boss, you can knock it out of the air, as well.
While Eligor is up there, he'll use a Piercing Gaze laser attack that will stun your characters, then start throwing electric javelins at you. Dodge away and hide behind the cargo container in the room until it's destroyed. If you can get around the side of or behind Eligor while it's doing the javelin attack, hit it with Wind or melee strikes to get it out of the air.
The final phase of the fight highlights Eligor's final weakness: his chariot's wheels. Unfortunately, he'll be moving very fast the whole time while swinging a blade, so you'll want to try to stay in the center of the arena to avoid getting cut apart. Use magic on the wheels and be careful of the javelins that'll occasionally fall out of the sky just above you. You'll also want to be wary of the Wind of Gehenna attack--heal whoever gets pulled into it, or risk them getting knocked out in one big hit.
Go to town on the wheels while keeping your team healthy, and you should eventually stagger Eligor and finish it off. This party ain't afraid of no ghosts!
Chapter 12
Reno + Rude
The two Turks are cooperating to take you down for good this time. With Reno and Rude working together, you'll need to be on your toes because they've got some new attacks up their sleeves.
You'll start the fight against Reno, who moves around the arena more quickly this time, so don't count on slower hitting attacks like Braver or Divekick to hit him unless he's stalled or pressured. Your strategy is similar to what you used against Reno before, using Punisher mode counterattacks to knock Reno back and open him up to strikes. Guarding is key to this fight because Reno is a lot faster and likes to lock you up with a bunch of attacks.
Try to get a feel for how fast Reno moves, as one of his new attacks leaves behind a trail of lightning that can be painful if you foolishly run into it. Reno also has lots of combos, so be sure to keep your party's health at least three-quarters full, so you're not caught off guard by a sudden attack chain.
Block Reno's attacks and you'll have a few seconds to wail away on him. Use Focused Thrust and Focused Strike with Cloud and Tifa to keep pushing up Reno's stagger meter as quickly as you can, but be sure to only attack him when he's been thrown off his game. Barret can also chime in with Focused Shot and other big attacks, but you'll primarily want him on healing and spell duty.
While you're busy fighting Reno, Rude will be supporting his buddy from above while piloting a helicopter. He periodically dives in for a bombing run, but if you stay out of the middle of the arena, you should be fine. After a while, Reno uses an attack called Pyramid, which freezes a party member in place while damaging them. If it lands, have another party member attack the Pyramid with some big strikes to free them before Rude can attack them from his helicopter. Once you damage Reno enough, focus your attacks on Rude's helicopter until it crashes and he joins the fight on the ground.
As with most group battles in Final Fantasy 7 Remake, try to focus on taking out one enemy at a time. Your style should dictate which target you go for: Cloud is best equipped to knock out Reno with Punisher counterattacks, but his attacks are quicker and can cut your spellcasting and ability wind-ups short. Cloud has a tougher time against Rude, but he's slower and better for Tifa and Barret to take on.
Remember from your last fight with Rude that he's weak against Wind attacks, so hit him with Aero spells to raise his stagger meter and open him up to more attacks from Cloud and Tifa. He has more aggressive versions of his attacks from the Chapter 8 fight, including seismic attacks that track through the ground and can hit multiple characters at once. With Wind spells, you should be able to shut him down pretty easily, though. Once one Turk is down, finishing off the other one won't be an issue.
Chapter 13
Failed Experiment

The first portion of the fight sees you flooded by enemies called Unknown Entities. These guys are pretty weak generally, but can be a problem if they come after you in big numbers. Use attacks that take down lots of guys quickly: Barret's Maximum Fury is great because he'll blast an enemy until it's dead, then pick a new target and keep going, until his ATB is expended. Use the attack with two full charges and you can shoot down lots of Unknown Entities in one go. They're also weak to Ice spells in particular, so bring Ice Materia and Shiva to help you diversify your attacks. It's good practice to equip Barret with an Elemental Materia and Ice on his weapon, so he can more quickly take down Unknown Entities.
Keep fighting off the Unknown Entities until Barret yells for Tifa to go close the vent. When that happens, take control and head to the staircase as quickly as possible to advance the fight to its next phase, when the Failed Experiment appears. With Tifa on the upper level, use Chi Traps and Starshower attacks to quickly clear out the smaller enemies. Run toward the wall, because the Failed Experiment will start wrecking the walkway while you're on it.
You'll now have your team separated, with Tifa dealing with small enemies and Barret stuck closer to the big guy. You want to use Tifa to kill the smaller enemies and try to get the Failed Experiment's attention, while Barret focuses his fire on the "Appendage" target on the Failed Experiment's back. Maximum Fury, Focused Shot, and Overcharge are good for dealing a lot of damage to the weak point. At the same time, keep Barret on the move to avoid the Toxic Volley attack, which will afflict you with Poison.
Once you rip through the Appendage, the fight will progress with the walkway where Tifa is positioned getting destroyed, bringing her back down with Barret. Now the Failed Experiment will get serious, using the Claim ability to pick up the smaller minion enemies, and the Fling attack to literally throw them at you. Use the cargo containers and other debris around the room as cover to avoid getting walloped, and keep knocking out the little guys as much as you can.
You also need to keep an eye out for one of the Unknown Entity enemies starting to cast Thundaga. When that happens, immediately prioritize that target and kill the enemy before it can cast the spell. Otherwise, the Failed Experiment will get charged up with lightning, giving it the ability to throw electrified enemies at you, or to use a Plasma attack that sends blasts of energy coursing through the entire battlefield that can seriously mess up your day.
Keep hitting the Appendage as much as you can with Barret's gunfire and with Ice spells with one character while the other mops up other enemies as much as possible to keep the battlefield manageable. Once you do enough damage, you'll expose the Failed Experiment's weak point; pour on the damage even more with Focused Shots and Focused Strikes to stagger it. Take full advantage of your best abilities and Ice spells to put the hurt on it. Repeat the process from there, being sure to keep your team healthy and to keep eliminating Unknown Entities (they'll probably have barriers up now that make them immune to magic, so gun them down quick) until the boss falls.
Your reward for winning the fight is a new set of gloves for Tifa: the Mythril Claws weapon.
Chapter 14
Abzu
Don Corneo's pet monster is back in this boss fight, and the primary difference is that it brings along a bunch of those Abzu Shoat creatures for you to deal with as well. Like the fight against the Failed Experiment, you'll want to dedicate a fair amount of time to knocking out the little guys in order to clear space to fight the boss, without getting knocked out of your spellcasting animations. As with the last time you fought Abzu, Fire spells are very effective in dealing damage, although they don't do almost anything to the boss's stagger gauge, so keep that in mind.
Use Barret's Maximum Fury with two ATB charges to take out several Shoats at once, while also making use of Cloud's Triple Slash. You'll want to focus your attacks on the boss's weak points again--if you took out one of its horns last time, you'll be able to target the other this time, as well as its tail. Crippling the boss weakens its attacks and opens it to a lot of punishment, if you can do so quickly, but damaging the appendages isn't a reliable way to push up its stagger gauge, so keep that in mind. Using Tifa and Level 2 limit breaks you can get from Corneo's Colosseum to attack the boss directly and stagger it is an effective strategy as well, so see what works best for you and your team.
The first phase of the fight is pretty similar to the last time you fought Abzu. Watch out for the Ground Pound and close-range melee attacks; use the debris around the room for cover, and be careful not to get surrounded by Shoats. You can do a lot of good controlling Barret here, cleaning up Shoats and then turning ranged attacks against the boss. Barret can run up ATB very quickly, which allows you to get a lot of attacks off, whether they're from spells or abilities. You can also use him in a healing role, especially with so much cover around, because he can often get clear of the fight to get spells off. Don't forget also that a big Fire spell will briefly set Abzu on fire, giving you a clear chance to hit the boss with Focused Thrust, Focused Shot, and Focused Strike to push have a huge impact on its stagger meter.
After you deal some damage, Abzu will summon a bunch of sewage to wash all of Don Corneo's furniture to the sides of the arena. When that happens, a bunch more Shoats will appear; knock them out as quickly as you can and then go after the boss again. Abzu will get a bit quicker and use its Charge attack more, but you won't need to change your strategy too much. Keep clearing out Shoats and stay away from the boss to avoid its Tail Spin attack and melee strikes. Abzu will also occasionally kick off Blackwater Blast attacks, so run to the side of the pipe the camera centers on to avoid the water.
In the final phase, Abzu's Shoats will get more aggressive, adding the Headbutt attack to their slate of moves and making them more of a threat. Again, try to clear them out as quickly as you can to minimize the number of threats to your team. Abzu himself will get very tough, adding the Pounce attack, as well as a Blackwater Blast that won't warn you where to expect it to come from; when that happens, close in on the boss to avoid it.
Keep up the pressure on the boss as best you can, avoiding attacks like Triple Charge and Ground Pound. When you see Abzu readying its Blackwater Deluge attack, get close to the and do as much as damage as you can to try to interrupt the attack, but stick close to try to avoid the water when it rushes in from one side of the room, then the other. If you're not confident you can avoid it, heal up to make sure you can weather the full damage, and get ready to deal with Poison effects as well. Keep your party healthy and keep up the melee and Fire spells and you'll finally fell Abzu for good.
Optional: Leviathan
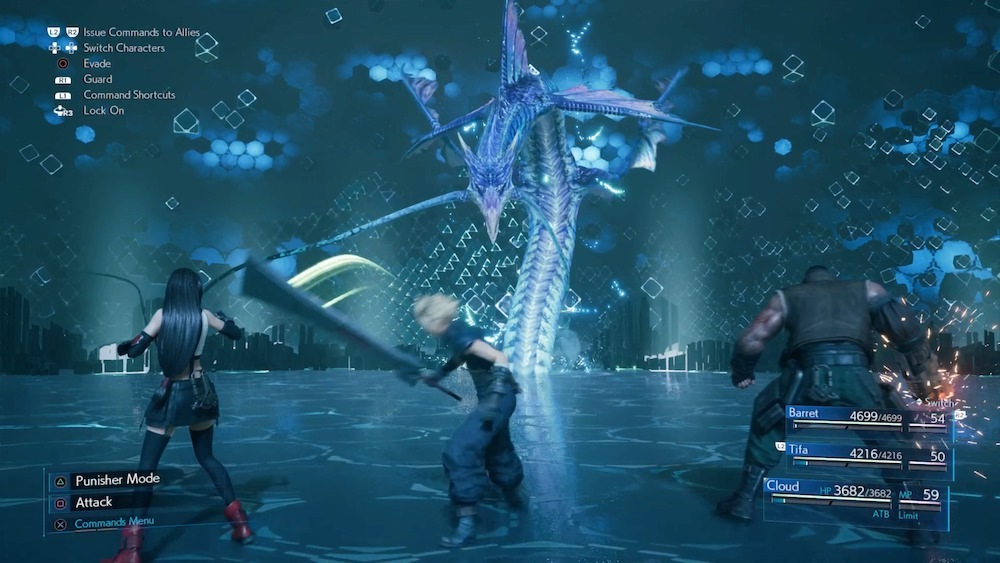
Leviathan's abilities don't have a particular element, but the best is weak against Thunder magic, so bring your best Lightning materia and outfit your team. The boss itself is a tough battle, mostly because its wily and tough to hit. It'll continually reposition around the huge battlefield, requiring your melee team to run around in an attempt to catch up. You'll want to hit the Leviathan with as much Lightning as you can because of this, and make use of Barret's ranged attacks. Aim for the head whenever you can.
In the first half of the fight, you'll mostly need to contend with hard-hitting Leviathan attacks that require you to pay attention to positioning. Its Briny Barrage attack is a tough one to dodge, so it's usually better to Guard through it. Briny Bellow shoots a laser beam at you that hits hard, but if you're quick you can sometimes dodge clear; the Leviathan will also turn its head to sweep the laser across part of the battlefield, so if you can keep moving, you can sometimes avoid it altogether. Be careful about staying too close to the Leviathan, however, because it'll activate its Gyre Spume area attack around itself to send you flying.
You want Tifa and Cloud to wail on the Leviathan's body (marked as "Dorsal Fin" on your menus) while Barret hits it in the head as much as possible, which will drive up its stagger meter. When it lowers its head to charge attacks like Aqua Focus, hit it as hard as you can in the dome to try to pressure it and knock it out of the attacks it's charging. Focused Shot, Focused Thrust, and Focused Strike are good to further push up the stagger meter--if you can knock the Leviathan down, you can really pummel it--but big damagers like Braver can be enough to stop the Leviathan from doing something painful to your team.
Be careful activating your big attacks like limit breaks, because the Leviathan likes to move around and force you to waste them. If it rears up, get ready for its big Spinning DIve attack, which is next to impossible to dodge and does huge damage as the Leviathan rams into you. Stick with Barret and keep hammering the Leviathan's head with spells and gunfire when it takes to the air, as well. You'll take a lot of damage in the fight, so make sure to keep your team healthy with healing magic and abilities like Pray.
After you've done some damage, the Leviathan will start flying around, using its Tidal Wave attack to create water cyclones around the battlefield. These will hurt you if they touch you, forcing you to keep moving, so get mobile while you keep firing on the Leviathan. Other than more things to deal with in the battle, nothing much changes, though; keep hammer the Leviathan's head as much as you can while the melee squad goes after the Dorsal Fin. We liked the Chocobo & Moogle summon for this fight as well, since the Chocobo Kick attack is geared at driving up enemies' stagger meters.
Be sure to keep your strength up, as eventually, the Leviathan will hit you with its big summon attack, which can seriously injure your whole team. You should be able to weather it, and by that point, a few more concentrated attacks will finish the Leviathan off.
Chapter 15
Valkyrie

Make sure you have Thunder and Wind Materia equipped, preferably with an Elemental linked. The Valkyrie takes big damage from these elements, both in magic form and when attached to a melee attack. If you can hit it with a few big spells in a row, you should be able to stagger it.
For the most part, this fight isn't too difficult, thanks to the fact that the Valkyrie can only really target one of your squad at a time. Switch to whoever has the right elemental spells, wait for the Valkyrie to draw a bead on you, then duck behind a piece of concrete or other cover to avoid getting shot up. When your ATB bar fills, fire off a spell, and repeat the process while the rest of your team deals damage while you keep the Valkyrie's attention.
In the second phase of the fight, the Valkyrie will get more aggressive, sweeping in with its attacks rather than staying stationary. Your tactics don't need to change too much, except that you should run around more to keep away from the boss, especially when it does its Napalm attack run. A Barrier spell will help you absorb the damage you can't avoid from gunfire, but mostly, just keep up the same rotation of Thunder and Wind spells against the boss. When the boss goes for its Fire Wheel attack, run in circles around whatever debris is on the battlefield to keep it from catching you.
The third phase sees the Valkyrie fire off a drone into the sky, which will then float round the battlefield, trying to fire a big blue laser at you. The boss, meanwhile, will have a barrier of its own up called Limiter, which will absorb your magic and make it difficult to deal any real damage. You want to draw the drone toward the boss and trick it into using the laser on the Valkyrie--that'll knock out the barrier and open the boss up so you can blast it with Thunder, Wind, and melee strikes. You should stagger it without much trouble, allowing you to finish it off.
Chapter 16
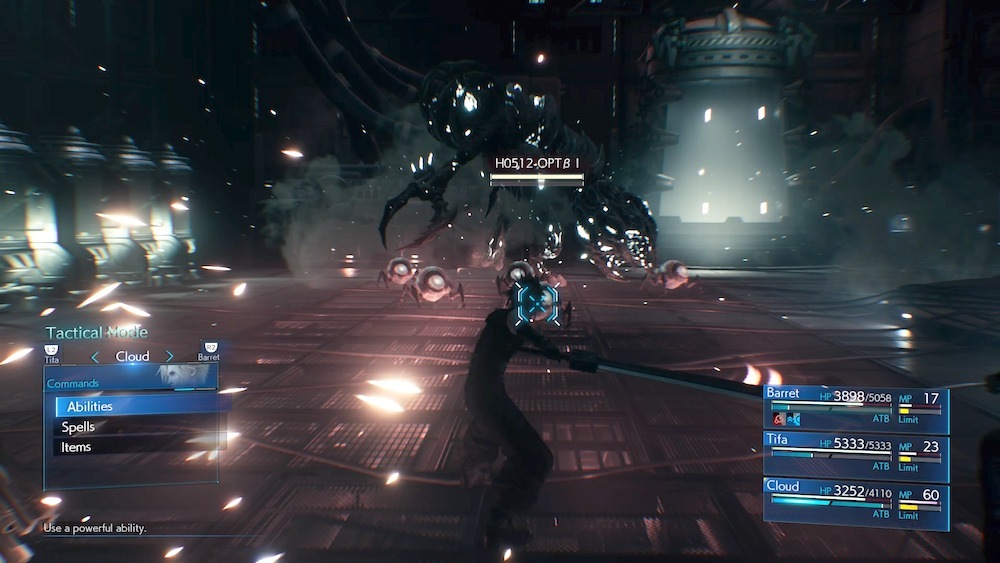
Specimen HO512
Specimen HO512 is somewhat similar to the Failed Experiment boss you fought in the Shinra Test Site, largely relying on smaller minion enemies to mess with you while it closes in to deal big damage. The boss especially likes a move called Rake, with which it closes the gap on one of your characters by dashing across the room, then follows up with big melee strikes. It's somewhere between very difficult and impossible to dodge the attack, so guard against the attack whenever possible and use Punisher mode to strike back when it hits you.
As you fight the boss, it'll spew out little HO512 monsters to harass and irritate you. Barret's Maximum Fury is good for thinning them out, as is Triple Strike, but make sure you keep on top of eliminating them. Meanwhile, avoid the Noxious Expulsion attack, which can poison you, by keeping your distance from the boss when you're not actively going after it. If the boss snatches one of your team, hit it with some big attacks to make it let go before it slams your character to the ground.
Your primary focus should be the big Left Claw target. Crippling it will open the boss up to a lot of damage. Stick with primarily physical attacks; HO512 doesn't have any magical weaknesses, so while you can use spells if you like there's no specific benefit to doing so unless you need to keep your distance.
After you do some damage, HO512 will suck up mako from a nearby tank, energizing it and producing a new, more dangerous batch of minion enemies. You still want to mostly want to prioritize eliminating the little guys first, as their Spinner attack can get really irritating when you're trying to deal with the boss. Try to stay clear of the boss's new Mako Expulsion attack by giving it a wide berth; after HO512 uses it, you should have a chance to close the gap and do some damage. Continue to focus on the Left Claw, which HO512 will regrow periodically after it sucks up mako.
If you see the boss go for the mako tank in the middle of the battle, drop what you're doing and go after it. Hit it with your strongest attacks, including Punisher mode, to interrupt it; that'll leave it pressured so you can drive up its stagger meter and do a lot of damage. The same is true if you happen to lop off the Left Claw.
HO512 will enter a third phase before the end, producing even more dangerous minions--now they'll explode and try to take you with them. If you see them readying a move called Apoptosis, steer clear. The same is true of the boss's improved Mako Expulsion attack, which he'll now fire in a stream like a hose in one direction, but with a lot more damage.
Though the boss has some big area attacks, it mostly will come after you at fairly close range, so do your best to stay away from it and keep your team healthy. Attack it when it's vulnerable as it goes for the mako tanks and use counter-attacks to lessen the effectiveness of its strikes. Your team's Focused ability attacks will help push up its stagger meter, but you should be able to take it down so long as you hit it when it's vulnerable and keep from getting surrounded.
Chapter 17
Swordipede
The Swordipede looks a lot worse than it is. Melee attacks are pretty ineffectual against this giant robot, which is basically all sawblades; Cloud's sword will bounce off the sides of the creature, and it has a saw in its head that's likely to mess you up if you're in front of it. Forego melee in favor of big elemental spells: Thunder, surprisingly, doesn't seem especially effective against the Swordipede, but Firaga and Aeroga hit for huge damage.
The Swordipede has a few big attacks you need to watch out for that'll send it spinning around like a big saw blade, dropping electric bombs out of the air, and flying around trying to electrocute you. None are particularly dangerous as long as you move to avoid them. Concentrate on ranged attacks and landing big spells when the boss is floating around and you should hit it very hard, very quickly, without much danger.
Halfway through the fight, the Swordipede will blast through the wall and attack your other party. Take advantage of the prompt to hold Square and access the menu during the cutscene, which will allow you to swap high-powered Fire and Wind Materia from one team to the other, should you need to do so. Once you're outfitted, repeat the process against the Swordipede at the Central Terminal. Move to catch it as it floats around the middle so you can hit it with spells--if you're not careful, they'll hit the pillar in the center of the room and get interrupted. A few big magical blows should put this one down for good.
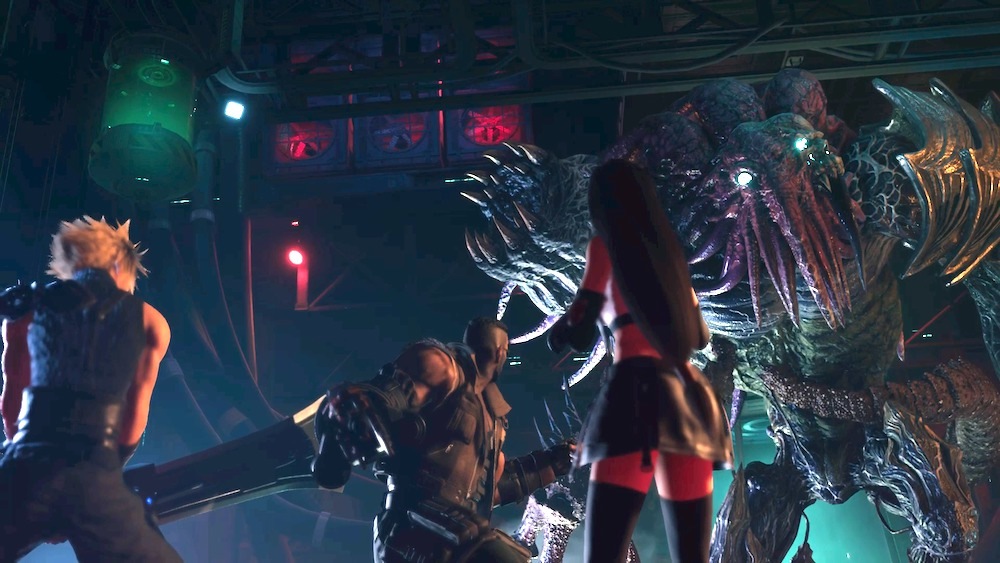
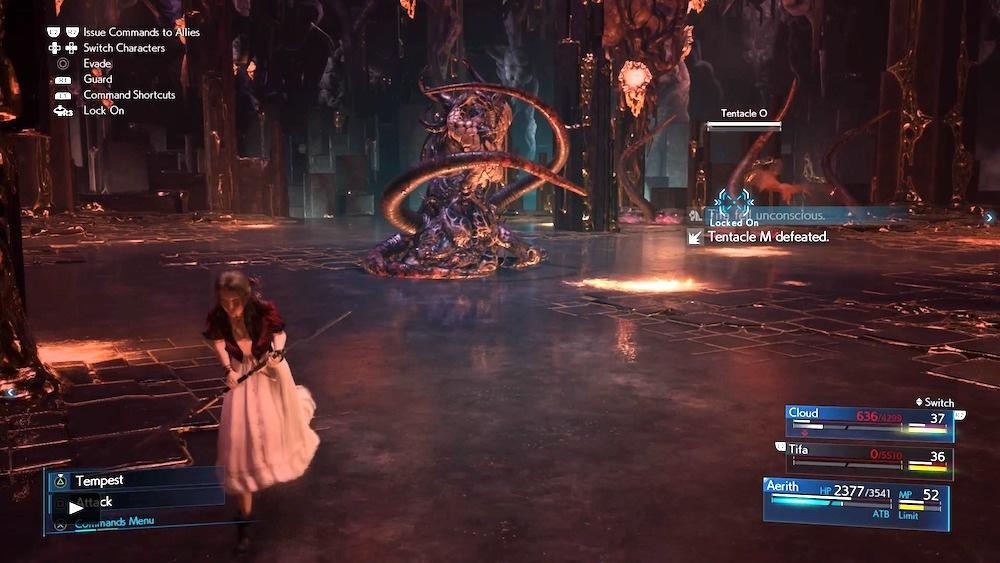
Jenova Dreamweaver
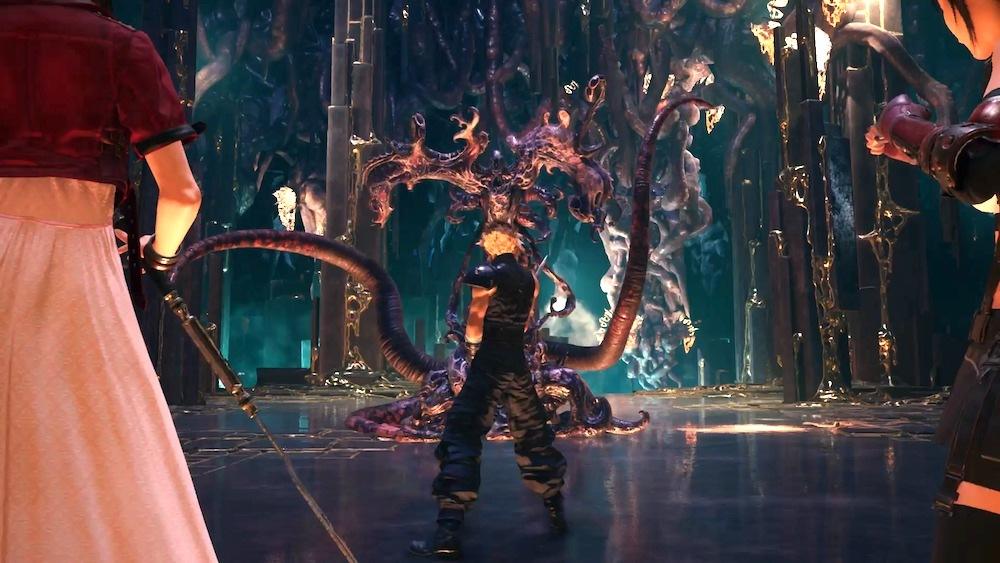
Fighting Jenova Dreamweaver is all about managing the battlefield and watching your positioning. The creature has two big tentacles sticking out of its sides, and your primary goal is to keep hacking those off to limit its attack capabilities and push up its stagger gauge. Avoid going behind Jenova, however--there's a third big tentacle back there that'll send you flying if you tempt it, and you can't cut that one off.
Get in close with your melee team and start wailing away on Jenova, while keeping an eye on what it's up to--if you see it readying its "Cast Aside" attack or start to see purple smoke swirling around it, dodge away and wait for the attacks to pass. Punisher counter-attacks are good for use against the tentacles, as is Tifa's Omnistrike, which can nearly cut one off in one shot. When the tentacles are gone, go to town on the boss. Meanwhile, Jenova's generally somewhat resistant to magic, so Aerith is best used as a support teammate here, although big spells will still hurt the boss as well.
Jenova has a lot of punishing attacks it'll throw at you. Watch out for Vengeance, a laser beam that hurts quite a bit, after you kill its tentacles--get behind a column to avoid it, or guard through it, because it'll knock you down otherwise. It'll regrow the tentacles periodically, so keep cutting them off to pressure it and get more damage in.
In its second phase, Jenova will introduce more attacks to threaten you. Watch out for the swirling smoky pit that will move around the battlefield; if it catches one of your characters, it'll hit them with Stop, freezing them in place for a time. You also want to avoid the Mourning Wail attack, which will catch any characters too close to Jenova in a whirlwind they can't escape. Jenova will also add some ranged attacks and spells like Bio and Aero to its repertoire, so make sure to spend some time on healing and additional protection like Barrier and Manawall.
When you cut off the tentacles, Jenova will be pressured and briefly vulnerable, but it'll also use an attack called Rejection to hurt you if you get in close. Use ranged attacks and abilities like Tifa's Chi Trap to do damage to the boss while keeping yourself safe.
The third stage sees Jenova at its most aggressive, with tentacles growing up out of the ground. You'll want to eliminate these, even though they keep regrowing, because they'll limit your movements; the good news is, Tifa and Cloud can cut them down quickly with moves like Triple Strike and Omnistrike, and Aerith's spells are effective as well. Kill the tentacles as quickly as you can, though--Jenova will ready attacks like Dream of Vengeance, which turns every tentacle into a Vengeance laser gun, and Dreams of Quietude, which fires orbs that can put Stop on your characters, making it much harder to avoid those attacks. In the meantime, watch out for Jenova casting a Reflect spell on itself that will bounce your spells back at you; focus on the tentacles around the room instead.
Destroying all the tentacles quickly will further pressure Jenova and leave it open to attack. At this point, you should be close to staggering it, so lay into it with stagger attacks like Focus Thrust and Focus Strike to push Jenova over the edge and get in some serious damage.
When Jenova's down to about a quarter health, you'll hit its fourth and final phase. Jenova will now teleport around the battlefield, summoning up tentacles and attacking you with third-level elemental spells like Firaga and Aeroga. Keep up the same strategy as before--send Tifa or Cloud around to hack down all the tentacles around the room to cut back Jenova's ability to fight. You'll see the floor turn purple around the tentacles as you destroy them, indicating that acid will drop on you from the ceiling, so keep moving to get clear. When the outlier tentacles are all gone, close in and cut off its Left and Right Tentacles to pressure Jenova.
Watch out for the boss's various big attacks: Quietude will send those pools of purple smoke that will Stop your team, while Vengeance will cut through you with powerful lasers, and Mourning Wail will trap you in a whirlwind. Jenova will sometimes alternate barriers, so check the icon next to its name to determine if you should hit it with physical attacks or magic. Just keep your team healed and maintain as much damage as you can to finish off the boss.
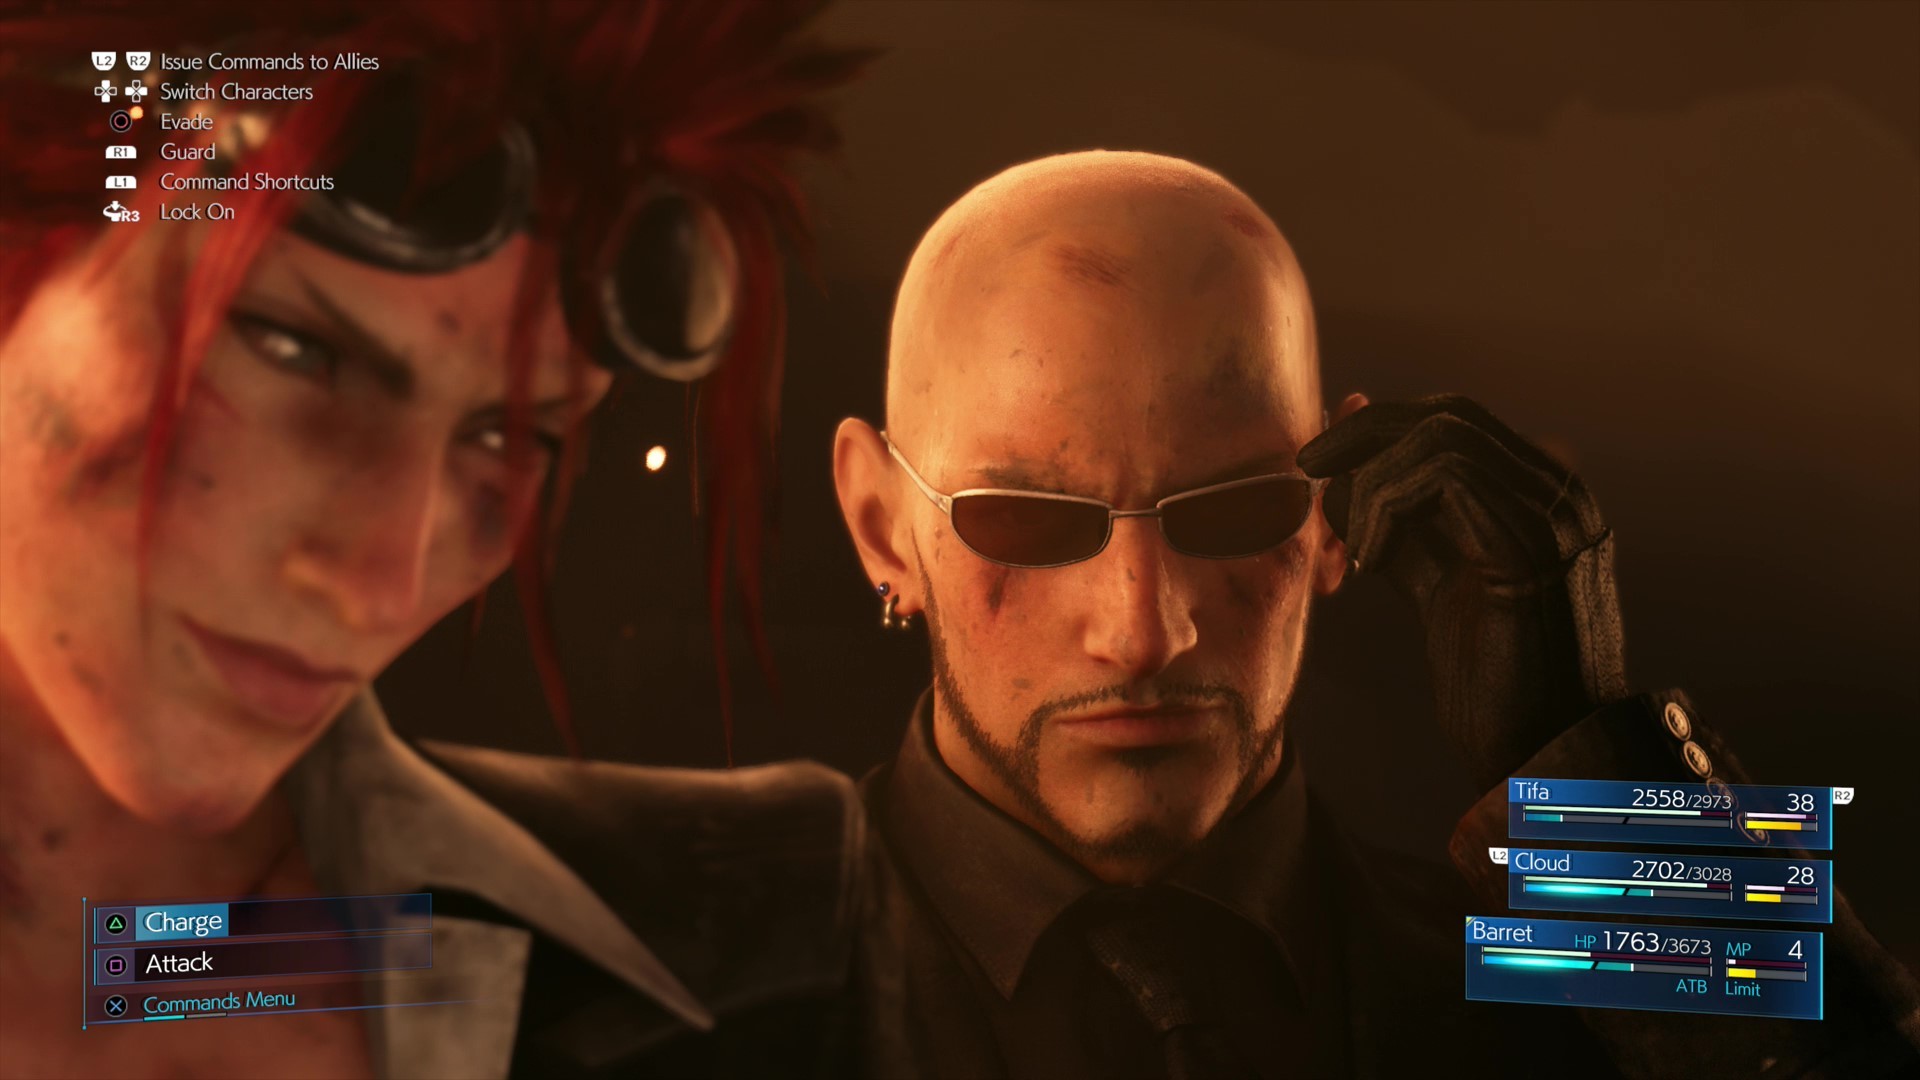
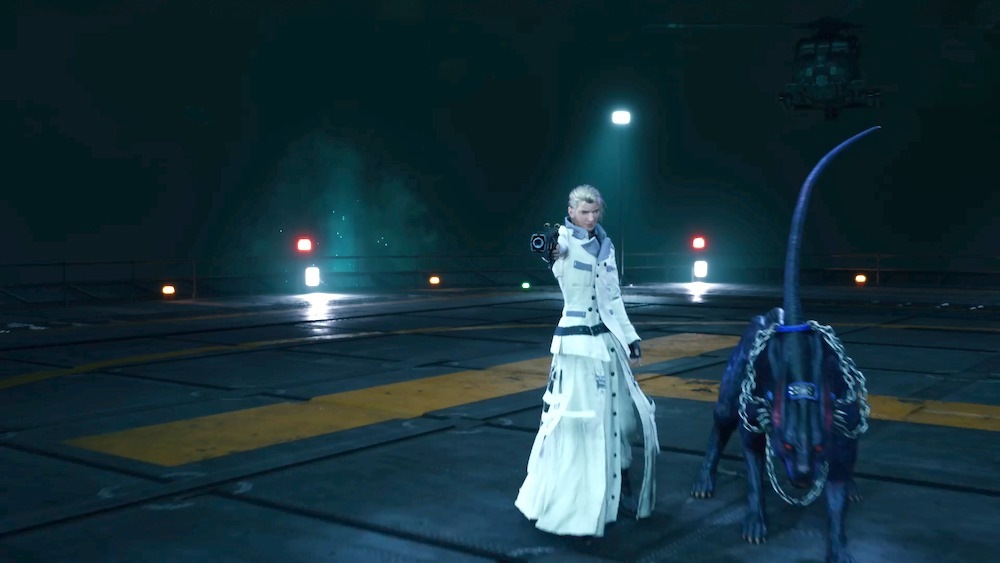
Rufus Shinra
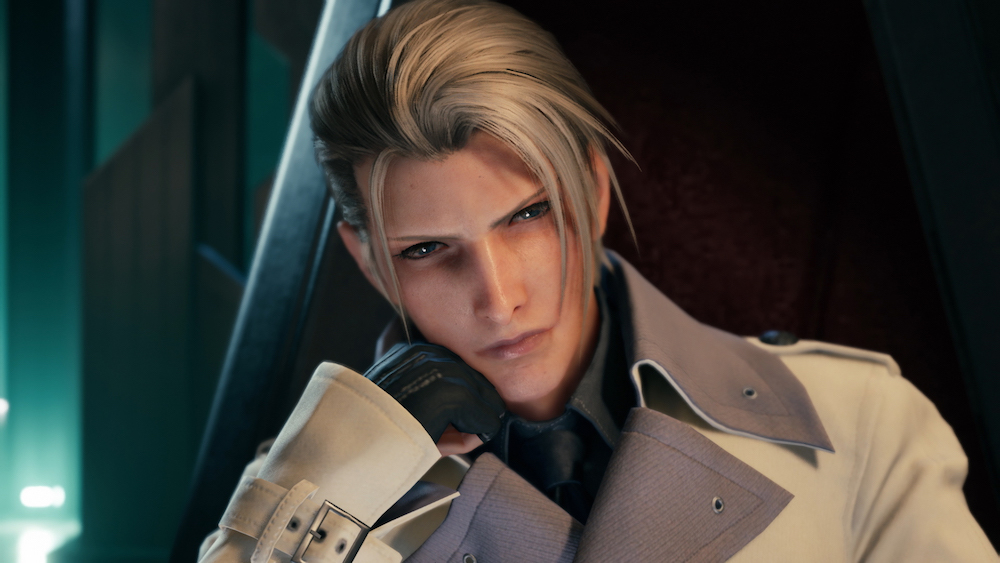
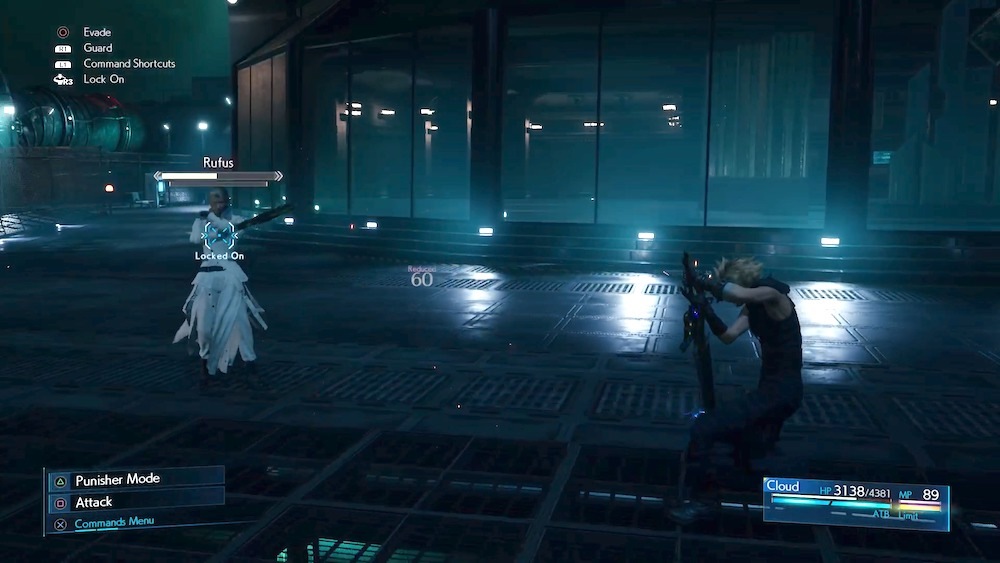
After some more story scenes, the son of Shinra's president, Rufus Shinra, will appear to challenge Cloud to a one-on-one fight. This is a duel similar to the ones you fought against Roche and Rude, requiring a lot of blocking and a lot of well-timed attacks to get through Rufus's defenses. The big outlier here is Rufus's dog, Darkstar, which you'll want to deal with first so you can take down the boss unimpeded. Darkstar heals Rufus whenever you do much damage to him, so until the dog is put down, you won't make much progress.
Rufus and Darkstar have a bunch of tandem attacks, where the dog knocks you down or holds you up, and Rufus closes in for a shotgun blast and a lot of damage. Generally, try to stay back from the two of them, forcing the dog to extend its leash to come after you, so Rufus can't close the gap easily to back it up. If you stay too close for too long, you run the risk of the team comboing you extensively for a lot of damage. Watch out for Darkstar casting Lightning on Rufus; when it does, Rufus will shoot a lightning blast called Thunderclap at you. You can dodge it, but you'll need to pay close attention, because it hurts bad to get hit.
You can pressure Darkstar with Punisher attacks, but the best way to push up its stagger meter is to damage Rufus. Your best bet is to use Triple Strike when Rufus is reloading or between attacks. Hitting both the dog and the master will break Darkstar's leash, giving you a chance to lay into the dog with melee attacks while Rufus is staggered. Don't overcommit, however--Rufus will eventually start trying to shoot you, so get clear before he recovers.
Once you've hurt Darkstar enough, Rufus will add some coins to his repertoire of attacks, which will give him new ways to hit you. Watch out for the Bright Lights attack, which fires lasers your way, but which is very dodgeable. You'll also want to be sure not to get caught in the hail of bullets from Guns Akimbo, as it'll leave you vulnerable to a follow-up strike from Darkstar.
Repeat the strategy of baiting and damaging Darkstar until you can finish the dog off, leaving Rufus on his own. At this point, he'll start using his guns to help him zip around the battlefield. He's pretty much invulnerable in most situations and will counter just about all of your attacks. You need to hit him at a particular moment: when he reloads. All other strikes will leave you vulnerable to his counters.
The trick here is to avoid all the big attacks, while guarding through the smaller ones. Bright Lights shooter a laser at you that you can dodge; Think Fast turns a handful of coins into bombs, so dodge backwards to avoid them; and Up In Smoke will stall you up if it catches you in its smoke cloud. You can avoid the fire of Guns Akimbo if you run sideways, but it's a riskier endeavor than just guarding. You want your guard up most of the time to stop Rufus's quicker, smaller gunshots, while staying ready to dodge the big ones.
Try to stay close to Rufus so that when he steps back to reload, you can close the gap quickly to attack him. Hit him no more than three times; when you see a sphere of distortion surround him, that means he's ready to counter your next blow. Three strikes lets you hurt him without getting attacked back. But the better move is to save up your ATB and use Focused Thrust on Rufus when he's reloading. That'll put him down on one knee and give him a bunch of damage, slowing his next move and giving you a second to breathe or hit him again.
Keep repeating the pattern of avoiding his big attacks and catching him with Focused Thrust until you get your Limit Break. Use it on Rufus while he's reloading and you'll stagger him instantly. You'll need to be patient, but keep up the damage while protecting yourself and your sword should win this gunfight.
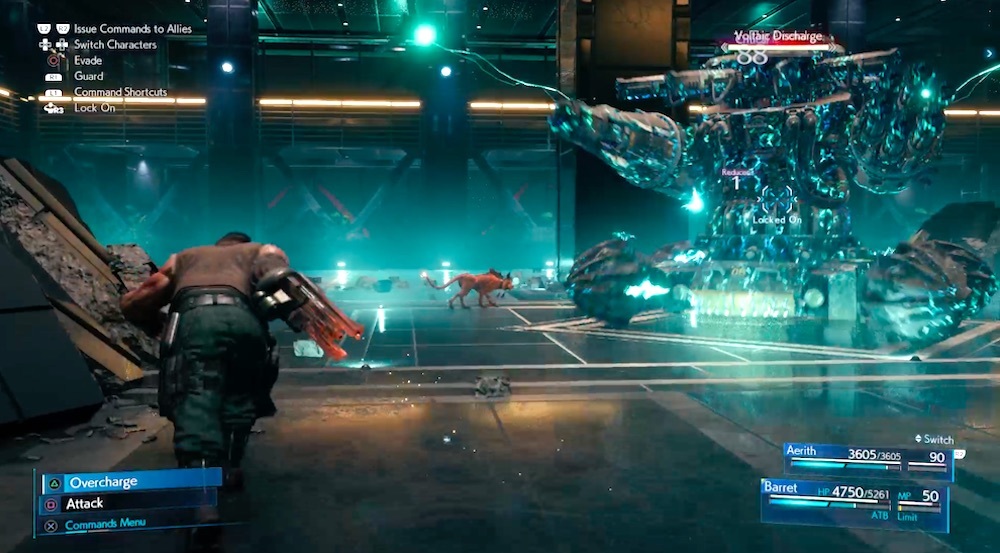
The Arsenal
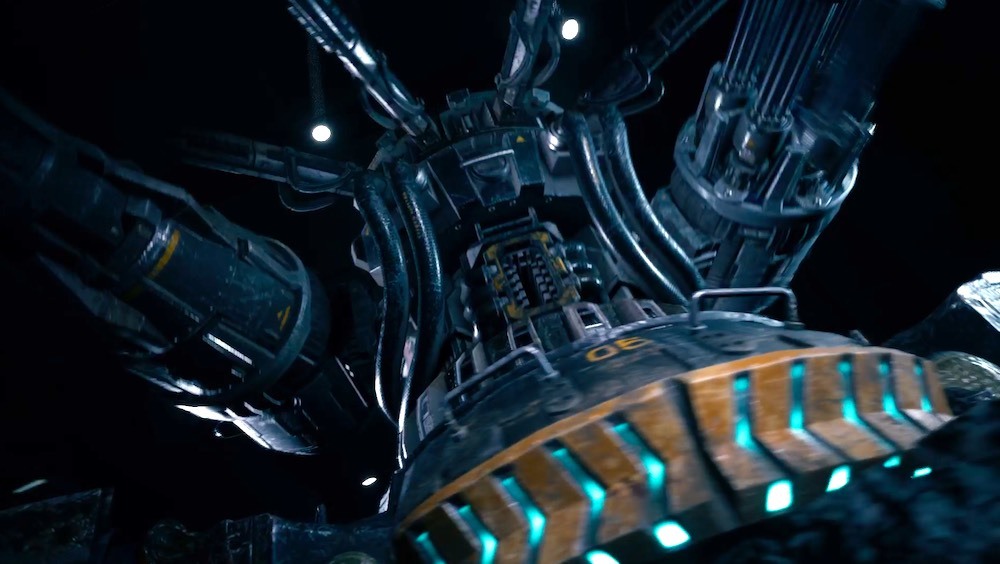
The fight against the Arsenal isn't about dealing damage right away--it's about accomplishing a few steps to open the Arsenal up to attack. The good news is, there's plenty of cover in the first part of the fight, allowing you avoid damage while you wait for your moment to attack. Stay back in cover when the Arsenal does its Saturation Fire, Homing Laser, and Voltaic Discharge attacks. When the boss readies its "Primary Fire" attack, step out and shoot its cannon, the weak point.
As soon as you blast the cannon, Red XIII will use the opportunity to stagger one of the drones projecting the barrier on the Arsenal. Hit it with your strongest attacks to destroy it, then repeat the process to take down the other two. Breaking down the barrier allows you to hit the Arsenal directly to do damage and push up its stagger bar.
Keep moving and blasting away at the Arsenal, while hiding behind debris and cover to avoid most of its attacks. When it activates its Physical Defense Protocol, start hitting the boss with Lightning attacks, particularly when it starts to fire up its Pulse Cannon. A big bolt of lightning will knock it out for a second, allowing you to continue attacking. That should prompt the boss to switch into a Lightning Defense Protocol, allowing you to continue with physical attacks. Watch for its wheels to stop being protected by a barrier, then attack those and try to cripple them to further stagger the boss.
In the next phase of the fight, the Arsenal will get more aggressive, blasting through the cover debris in the room and using its Firewall attack to trap you between two walls of flame. Keep an eye out for the Primary Fire attack, which you can interrupt by attacking the Arsenal's main cannon, just like before.
Once you damage the Arsenal enough, it'll create Firewalls to trap your team and charge up an attack called Cry Havoc. Turn around and duck behind the piece of debris behind you to avoid the attack, then lay into the boss with as much damage as you can manage. When it starts to charge up Cry Havoc again, you'll only have a few minutes to destroy the boss once and for all. Use Lightning spells to do serious damage and finish off the boss before it finishes you.
Chapter 18
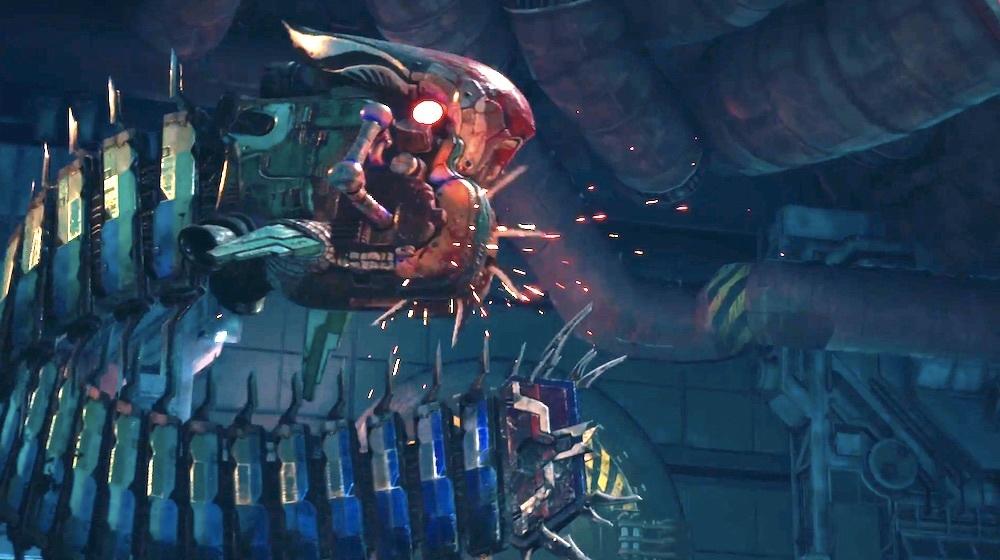
Motor Ball

The chase culminates in the battle with another robot boss. This one is pretty easy, since the high mobility of your motorcycle allows you to avoid all its attacks without much difficulty. Pull in alongside the boss and swing away, smashing its wheels. When Motor Ball lifts up on three wheels, hit the brakes and peel away so it can't smash down on you, and guard when it readies its guns to avoid getting blasted.
Slash at the wheels until you destroy all six of them, staggering the boss. When that happens, attack it as much as you can; drive up its stagger percentage and use your Spinning Attack for big damage. The boss will eventually recover, adding new attacks to use against you. Repeat the process and keep going after the wheels, but keep an eye on them--eventually, some will be shielded, forcing you to pick other targets.
Generally, Motor Ball doesn't throw anything at you that you can't see coming. When it readies its flame spin move after being staggered, brake and stay clear until it's all over. If the boss pulls ahead, reduce your speed a bit to avoid the electric bombs it drops on the highway ahead of you. As soon as you can, close the distance and attack its wheels again. Watch out for it to charge a big laser as well, which it'll shoot at one side or the other; again, hit the brakes and head to the opposite side. When the boss pulls ahead and shoots the laser back at you, cut to one of the sides of the road to avoid it.
Keep hammering the boss and avoiding its attacks until you finally destroy it. It takes a while, but it never gets especially tough.
Boss Fight: Whisper Harbinger, Whisper Croceo, Whisper Rubrum, And Whisper Viridi
Once you've progressed through the destroyed highway a bit, you'll face the giant arbiter of fate, the Whisper Harbinger. You don't have to deal with the huge colossus directly, luckily--instead, you'll fight three smaller Whisper bosses, called Croceo, Rubrum, and Viridi. Each has a different weapon, mirroring Barret, Cloud, and Tifa.
Contending with all three of the creatures is tough, but you only need to take down one of them right now. It's your choice, but we had the easiest time focusing on Rubrum. Cloud can counter its Flurry attack with Punisher mode to do some damage--Guard your way through its other attacks, like Crimson Arc. Hammer away at the Rubrum with Punisher mode and ATB attacks to give it as much damage as you can; the more you pour on, the quicker you'll pressure the Whisper and drive up its stagger meter. Guard as much as you can to avoid taking too much damage, while keeping yourself topped up with items and healing spells.
Hurt one of the Whispers enough and you'll advance to the next section of the fight, where you'll face the three Whispers again. In addition to their other moves, they sometimes like to use powerful spells like Firaga from Rubrum, Blizzaga from Viridi and Thundaga from Croceo. Follow up with the same approach, allowing your AI teammates to keep the other enemies busy while you focus on Rubrum. It'll add a new attack, Sweep, to its moves, but you'll still mostly want to guard as much as you can to avoid taking a lot of hits. Keep countering Rubrum and hitting it with your big ATB attacks to rack up damage, and you'll eventually knock it out of the fight. The Harbinger will intercede again, opening up the path forward.

When you get to the end of the next pathway, you'll take on Whisper Rubrum by itself. It'll use the Temper attack to power itself up and become more aggressive, adding more swings to Flurry and Crimson Arc. Guard through them to land counterattacks with Punisher mode, then do as much damage as you can with ATB attacks. Your best bet with Rubrum is to duel your way through, but don't be afraid to overwhelm the Whisper with attacks from your teammates. Just don't use Fire magic, as the creature can absorb it. Stagger the boss and you can damage Rubrum can do some damage to the Harbinger.
With Rubrum down, you'll fight Croceo and Viridi together. Pick one and go after it; Viridi is best attacked from behind while its attention is elsewhere, especially because the boss will protect itself with a shield. Watch out for Viridi's Azure Plume attack, which will stun anybody caught in it. Like Rubrum, hit the Whisper to do as much damage as you can to stun it, then finish it off to do more damage to the Harbinger.
Croceo is next, but it's probably the least of your problems. Watch out for its Amber Judgment attack, an orb that will track you, and Amber Whirl, a laser beam that cuts straight toward you and then out to the sides. Dodge the lasers as best you can, guard against Croceo's shotgun Scatter attack, and use ATB attacks to knock the Whisper out and stagger it.
You'll fight the three Whispers again in a moment. Repeat the process to do some damage to one and you'll trigger the real next phase of the fight.
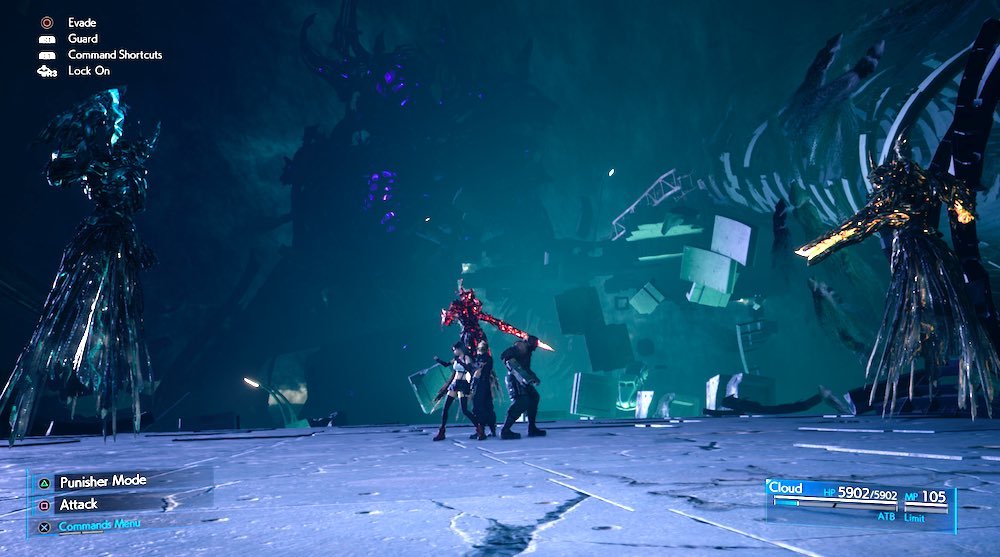
Whisper Bahamut

When combined, Rubrum, Croceo, and Viridi become a lot more dangerous as Whisper Bahamut. The dragon is fast and carries a bunch of powerful moves, most of which are really difficult to dodge. Expect Bahamut to come after you right away with melee swipes, as well as a spinning attack where it barrels its whole body through you. Dodging those moves is pretty tough; flip to Punisher mode and guard to minimize your damage so you can at least strike back against Bahamut when it comes after you.
Quickly try to get Manaward barriers on your team to deal with Bahamut's powerful attacks. Watch out for Bahamut's Umbral Strikes attacks, where it throws two big explosive blasts at you. The first arcs in from the left, and the second from the right--if you dodge right and then left, you can often avoid them. Its Umbral Inferno hits you with a bunch of painful lasers, but running or dodging sideways can usually get you out of the line of fire of most of them. Flare Breath will knock you down, but if you can get around to the side or behind Bahamut, or dodge backward, you should be able to avoid it.
You're going to take a lot of damage here, though. Keep Aerith on-hand to restore health with Tifa backing her up to keep your team going. Meanwhile, keep hitting Bahamut with ATB attacks from Cloud and Tifa whenever you charge them. Try to get your Manawards up before Bahamut uses Mega Flare, its ultimate attack. Do your best to keep your team topped up on health from items and spells so that the attack doesn't wipe you out.
If you can keep up the damage, you should be able to knock Bahamut to the ground and pressure it. Use that opportunity to hit it with Focused Strike and Focused Thrust to push up its stagger meter as fast as you can.
Kill off Bahamut and the Whispers will separate again, but they'll be a lot weaker. Focus on one and start pounding away to kill it, giving Barret an opportunity to attack the Whisper Harbinger. Repeat the process twice more to finish the giant creature.
Boss Fight: Sephiroth

The Whispers aren't giving up--they're now creating a version of Sephiroth to challenge Cloud. Like past one-on-one battles, this is more of a sword duel and you'll need to rely on guarding and using Punisher counterattacks to beat Sephiroth, especially in the first part of the fight.
Some of Sephiroth's attacks you should guard against for counterattacks to damage Sephiroth and increase his stagger, while you'll need to dodge others. Stand your ground against standard melee strikes and Telluric Fury, although be sure to keep your guard up through the entire attack, because Sephiroth will hit you with multiple blows most of the time. When you see Sephiroth ready Aeolian Onslaught, dodge sideways, because the attack will juggle you into the air and Sephiroth's movements make it ineffective for you to counter it. After countering, hit Sephiroth with some Punisher mode strikes to pressure him. He'll sometimes ready powerful spells like Blizaga and Firaga--if you can hit him hard enough, you might be able to interrupt them, but it's usually better to guard against them so you don't take the full brunt of the magic.
Keep countering Sephiroth until you stagger him. Aerith will then join the battle, which shouldn't really change your approach, but will give you more opportunities to do damage to Sephiroth. Get some Manaward barriers up if you can to cut the damage you take from Sephiroth's spells and keep hitting him. You can also hit Sephiroth with some spells, especially when he's charging magic of his own or preparing attacks, but try to conserve MP for later in the fight. Make sure to keep Cloud topped up on health as much as possible, because Sephiroth is going to hit you hard all the way through.

Keep landing counterattacks on Sephiroth to stagger him again. Tifa will join the fight next, but Sephiroth will become more powerful, using elemental magic for Infusions to amp up his moves and make them more effective. Pay attention to which element he uses, then hit him with the opposite spell--this is why you set up Aerith with all those spell Materia at the start of the chapter. When Sephiroth fires up Wind Infusion, blast him with Lightning magic; when he uses Lightning Infusion, he'll be weak to Wind magic. You'll do a lot of damage and push up his stagger meter if you can hit him with opposite spells.
Meanwhile, keep dueling Sephiroth with Cloud as much as you can, while using Tifa to alternately top off your health and hit Sephiroth with ATB attacks to push up his stagger meter. Countering Sephiroth and hitting him with opposite spells will put him down on one knee so you can deal some serious damage, but make sure to guard for the long haul with his wind-based sword strikes, and be careful of the lightning strikes with his Lightning Infusion, which will rain down around the battlefield.
As you damage Sephiroth more, he'll pull out new attacks, like Shadow Flare, creating gravity wells around the battlefield that then explode. Try to stay out of them as much as you can; the same goes for his Heartless Angel attack, which will light up the floor red and decimate your team if they're caught in it. When Sephiroth readies it, run for it.
By that point, however, Sephiroth should be close to finished. Keep up the pressure with everything you have left and take him down.
Optional: Bahamut

Complete all of Chadley's Battle Intel objectives and you'll gain the ability to fight Bahamut to earn a final summon. It's very possible you won't have access to this battle until after you've finished the game once and unlocked Hard Mode. Visit Chadley in any chapter once you finish all 19 Battle Intel assignments to get the Bahamut fight, but we recommend you do it in Chapter 14 or later so that you have all members of your team on-hand.
Bahamut is one of the toughest bosses in the game--it's fast and aggressive, with a number of powerful abilities that hit very, very hard. Crowning all of its lethal moves is Mega Flare, a final attack that will hit all your characters for so much damage that it'll likely wipe them out, even at full health and even if you're leveled all the way up to 50. Having the highest defense you can is key to dealing with Bahamut, and you'll want to rely on Guard when he comes at you with attacks like his claw slashes or his spinning charge attack. You won't avoid most of these because Bahamut is so huge, so get used to blocking. With Cloud, Punisher mode will allow you to get in some counter-attacks, so you're not just getting pummeled.
While defending against other attacks is important, you have to stop Bahamut from using Mega Flare at all costs if you want to win the fight. You'll know he's getting ready to use his massive attack when he starts counting down. He starts at five, and when he gets past one, he'll almost immediately wipe out your whole team. You can stop that from happening, however, by staggering him. Building Bahamut's stagger meter should be your primary focus throughout the fight and guide all your loadout and attack decisions.
Your battle strategy is to block the big attacks from Bahamut, while closing in and constantly wailing on him with anything that can drive up his stagger meter. We primarily utilized Tifa for this job, while issuing orders to Cloud and Barret to keep up the pressure or to heal teammates. When you can use ATB abilities, tend toward Cloud's Focused Thrust, Barret's Focused Shot, and Tifa's Focused Strike to push up Bahamut's stagger meter even more. You'll also want to spend some time in the Corneo Colosseum in Chapter 14, where you can earn the Ascension, Dolphin Flurry, and Catastrophe limit breaks for completing the individual "Character vs. Wild Animals" fights.
When you're not using abilities that drive up Bahamut's stagger, use the abilities you have that do high damage, like Braver. With Tifa, keep using Unbridled Strength to increase her attack power, which will allow you to pepper in some Rise and Fall and Omnistrike attacks along with Focused Strike.
We also equipped Tifa with Materia to drive up her ATB so that she was constantly able to dish out attacks to raise Bahamut's stagger, which paired nicely with Transference Module to quickly build up limit breaks.
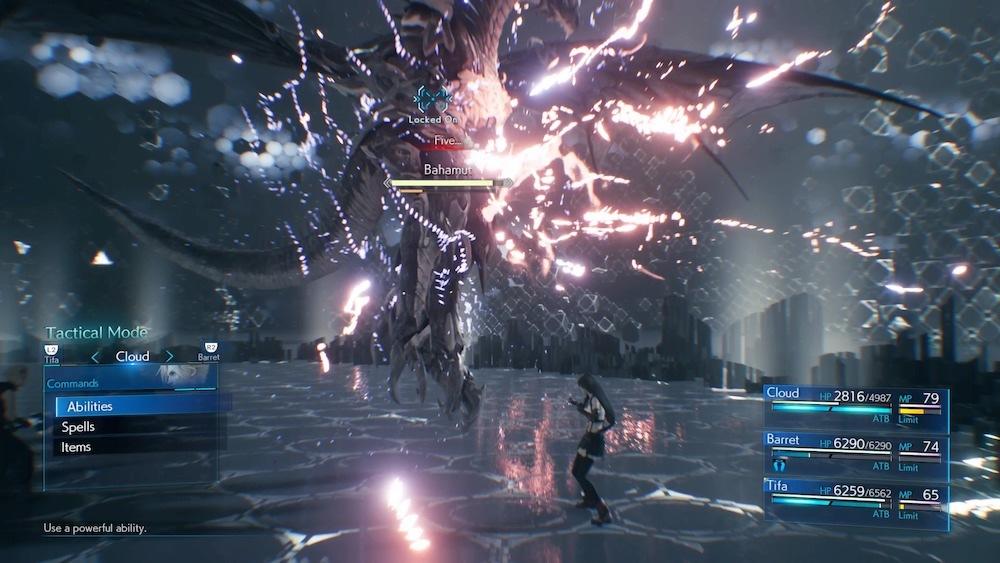
When Bahamut starts his countdown, he'll also fire up a powerful aura surrounding himself that will damage your team while they stand in it. Because of that, you're going to need to stay on top of healing spells; make Barret your primary healer, since Bahamut will mostly leave him alone. Do your best to keep up the pressure on Bahamut, as you'll stagger him most effectively if you're able to do a lot of damage.
Tifa's constant use of ATB abilities should get her limit break up pretty quickly; make sure Bahamut isn't about to start moving before you activate it, since landing your limit breaks is essential for big stagger increases. Dolphin Flurry should give you a huge boost to Bahamut's stagger, so you absolutely need to land it. If you use a summon, go with Chocobo and Moogle and use the Chocobo Kick summon ability, which specifically increases enemies' stagger meters.
Do your best to block and absorb Bahamut's big attacks. His Umbral Strikes are some of the most annoying, usually bouncing a teammate for two huge hits. They come from first the left, then the right, so a practiced dodge in one direction and then the other can sometimes avoid them. Bahamut will occasionally swing down and grab a teammate, so dodge that move if you can, but if not, switch to someone else and pound Bahamut with big attacks to get him to drop them (Omnistrike, in particular, seemed to work pretty well). If he pulls up into the sky for Divebomb, scatter your team so that he only hits one of them when he lands, then quickly heal that person. You can also use spells like Barrier to make yourself a little more resilient, but in general, constantly punishing Bahamut is the key to victory.
Staggering Bahamut will reset the Mega Flare timer while leaving him open to huge damage, so when that happens, hit him with everything you've got. Take the opportunity to heal up if you're in trouble, as well. When Bahamut comes out of it, you'll start the process over again, but you should be able to build up Tifa's limit break relatively quickly again so you can start building stagger.
Optional: Pride And Joy Prototype
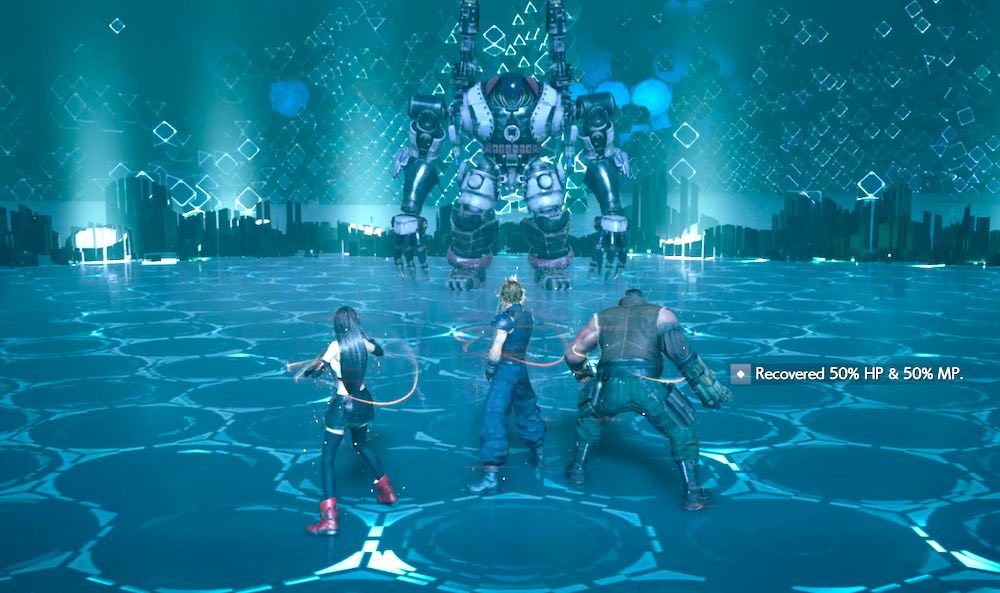
If you finish the game and unlock Hard Mode, complete all of Chadley's Battle Intel assignments, finish all of the battles in the Corneo Colosseum in both Chapters 9 and 14, and complete all the Shinra Combat Simulator fights in Chapter 16 and in the Hard Mode version of Chapter 17, you can access one last optional boss fight: a boss gauntlet called Three-Person Team vs. Top Secrets. The final fight puts you against a boss you can't encounter anywhere else, a giant robot called the Pride and Joy Prototype.
The trick with the robot is to keep your distance and stay behind it. You can spend most of or all of this fight as Barret, picking away at the robot and dodging attacks. That'll keep Pride and Joy focusing mostly on Barret, opening up Tifa and Cloud to attack it at close-range most of the time. Keep your distance with Barret and lay into the boss to build up your ATB bars. While it's leaving Cloud and Tifa alone, have them use big ATB attacks to deal damage to the boss until you can attack its feet; those are your primary targets and you want to try to destroy both at the same time.
Pride and Joy has a few big attacks that can hurt you pretty badly, but you can mostly just keep away from the boss to minimize your damage, and guard when you can't. Watch out for a few big attacks: Brutal Tackle will see Pride and Joy chase your character around the battlefield before giving them a big kick, and it's pretty much impossible to avoid. Brute Force sees the boss execute a bodyslam straight down, but you can easily get clear of the blast it creates by just running for it. When the boss starts to glow, it'll shoot napalm grenades that leave damaging orange flames on the ground, and laser beams at the ground in front of it.
The other big Pride and Joy attack you need to be aware of is Beam Cannon, which the boss will charge over time as it glows. When you see it readying the beam, run: the result is a giant laser that will hit you very hard and cover a big chunk of the battlefield, but getting to either side of Pride and Joy allows you to avoid the blast. It's damaging but not especially dangerous if you're paying attention.
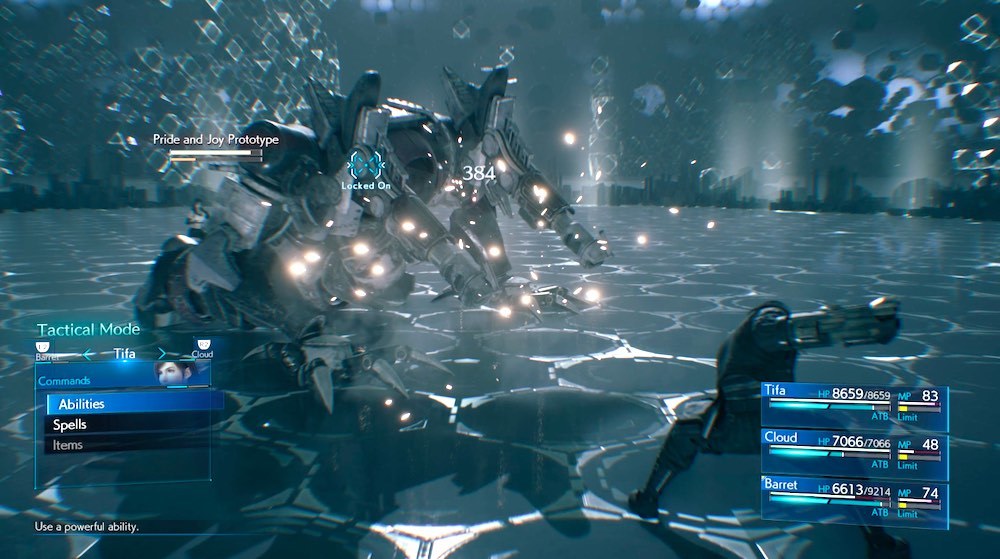
Use Barret to keep Pride and Joy's attention while Tifa and Cloud hack away at the boss's feet. Cripple one foot and the boss will fall; cripple both and you'll stagger it. When Pride and Joy goes down, you can also attack its arms to pressure it and drive up its stagger meter even more.
The rest of the battle is mostly a game of keep-away. Keep hammering Pride and Joy and healing up and you shouldn't have much difficulty, as the boss doesn't have nearly the agility of or devastating power of Bahamut. With a concerted effort and maybe a Limit Break or two, you'll come out victorious.
Winning the battle earns you the Gotterdammerung accessory, which lets you start battles with a full Limit Break meter and charges your limits over time, regardless of what actions you take. It'll also net you the Ultimate Weapon Trophy.
Got a news tip or want to contact us directly? Email news@gamespot.com
Join the conversation