Far Cry 6: Treasure Hunt Locations And How To Solve Them
Far Cry 6 has plenty of treasure hunts to take part in, and if you're feeling stumped, here's how to solve them.
Treasure hunts have long been a fun diversion in Far Cry, offering a change of pace from the action-packed missions of the core game. Essentially small puzzle sandboxes, treasure hunts require you to use all your available skills, powers of observation, and some cerebral heavy-lifting to solve the clues and earn some great gear.
Far Cry 6 has plenty of these treasure hunts to take part in, which can be discovered by stumbling into them while exploring the map, engaging with NPCs, or looking at the various maps below so that you know exactly where to go. Convenient.
- The Legend Of La Princesa
- The Mongoose And The Man
- Ida's Triada Relic
- Crocodile Tears
- High Supply
- Cache Money
- Liquid Courage
- The Missing Muse
- And The Beat Goes On
- Oku's Triada Relic
- The Truest Yaran
- Sword-Crossed Lovers
- The Long Drop
- The Emerald Skull
- Parting Gifts
- The Last One To Leave
- Passing The Torch
- A Little Birdie Told Me
- A Rising Tide
The Legend Of La Princesa
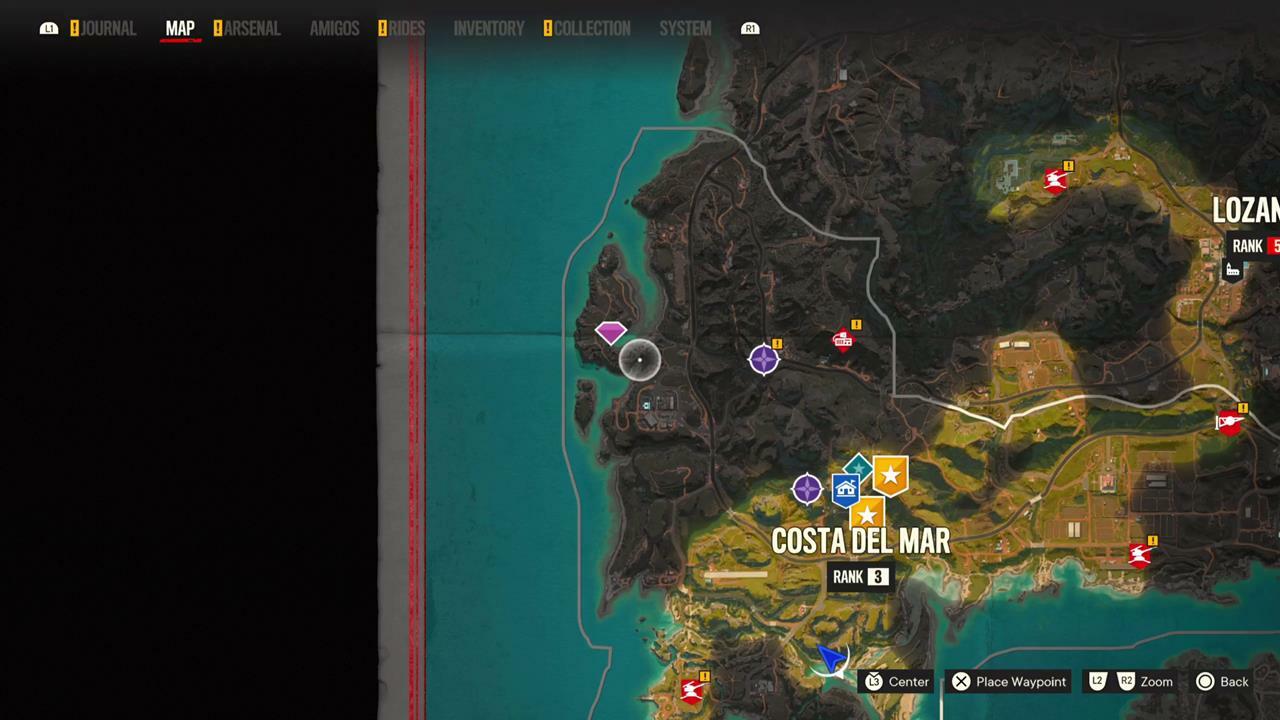
- Location: Costa Del Mar, the Blue Hole cave
- Rewards: 150 XP, 1000 Yaran Pesos, Permit meat, Tarpon meat, Bait charm
One of the early treasure hunts that you'll come across is the legend of La Princessa. To start it, head down to the Blue Hole Cave in Costa Del Mar. From the cliffs, dive into the waters by the objective marker and watch out for the jellyfish:

You'll need to move with purpose here, as Dani can only hold their breath for so long, and it's a long swim underwater. Once you're inside the cave, start making your way through it. To reach certain vantage points for your grapple, you'll need to swim through underwater pocket sections in the cave, usually inhabited by jellyfish. Avoid them, keep climbing up, and you'll earn the rewards listed above.
The Mongoose And The Man
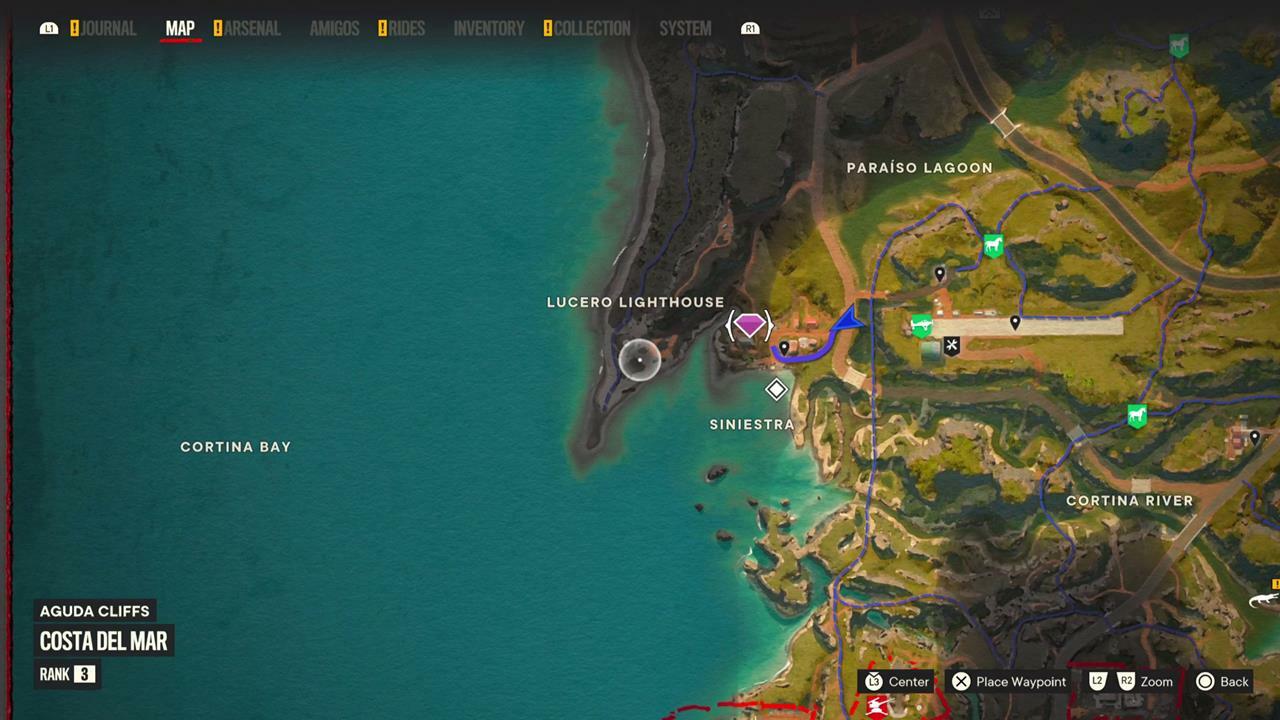
- Location: Costa Del Mar, Aguda Cliffs, Siniestra
- Reward: Lethal Dose sidearm
Over in the village of Siniestra, one resident has been tormented recently by a mongoose that appears to have some sort of vendetta against him. Having caught the relentless beast, the villager has taken off for the night and left behind some loot that's worth grabbing. Go to his home, which is the elevated house in Siniestra, and shoot the lock off his gate:

Open the shed with the red door using the key placed on the steps and prepare for bloodthirsty malice on four legs:
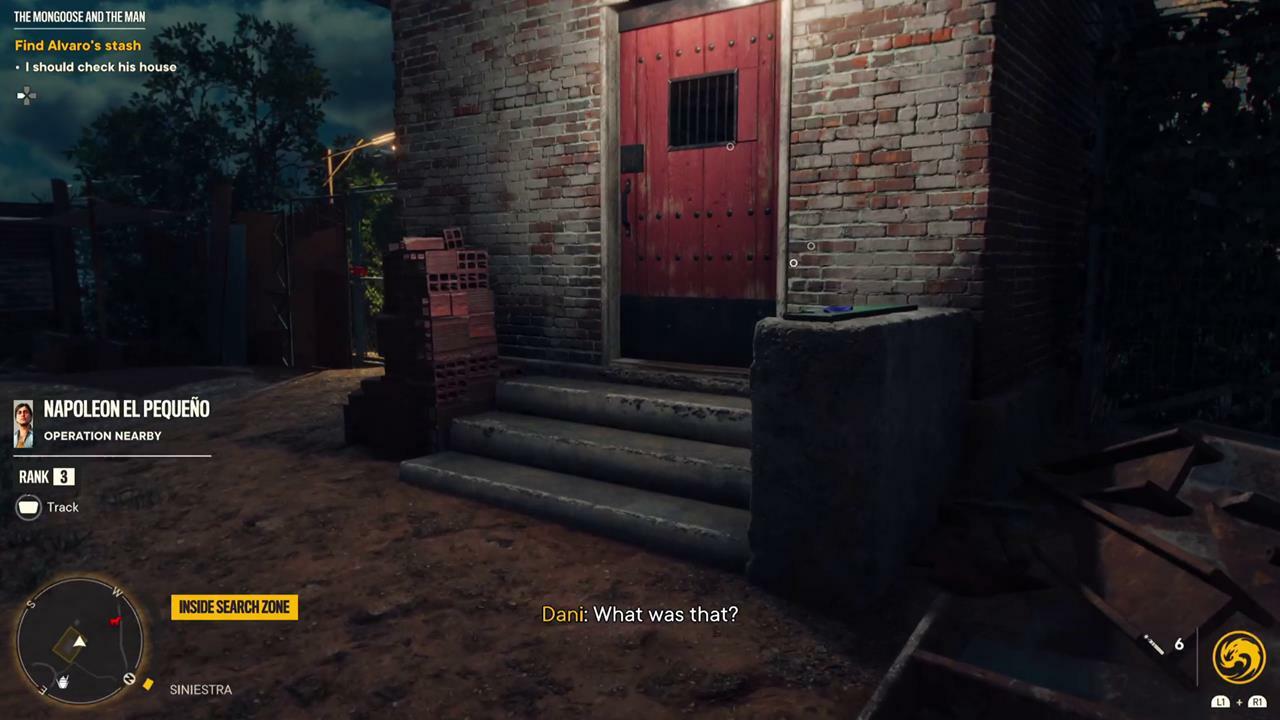
Chase down the dread menace known as La Comadreja, and once you've eliminated it you can grab the key to the house's stash. Go inside to grab some supplies, cash, and the handy Lethal Dose sidearm.
Ida's Triada Relic
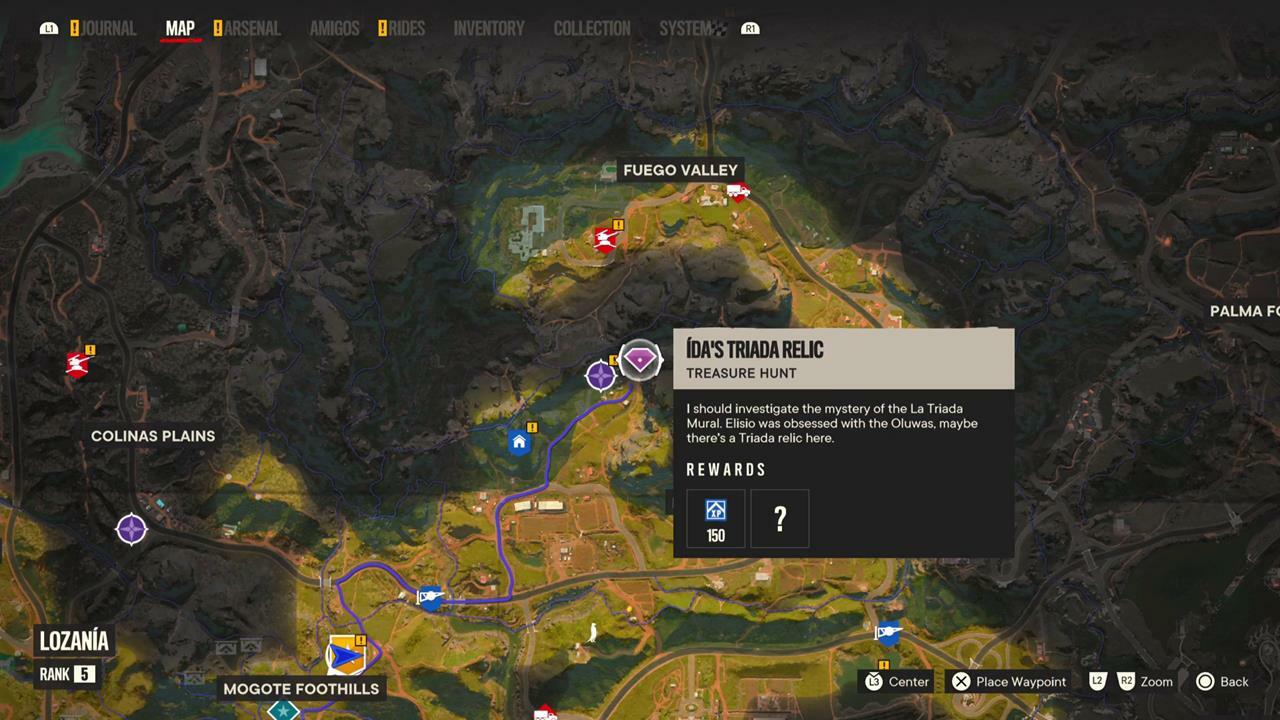
- Location: Lozania, Monjas Valley
- Rewards: Ida's Sigil
It's time to test your climbing skills in this treasure hunt. A fairly straightforward mission, all you'll need to do is follow the markers as you ascend the mountain and use ziplines inside of the cave.

Once you've cleared this challenge, you'll get your hands on the first Triada relic, experience points, and the Ida's Sigil gear.
Crocodile Tears
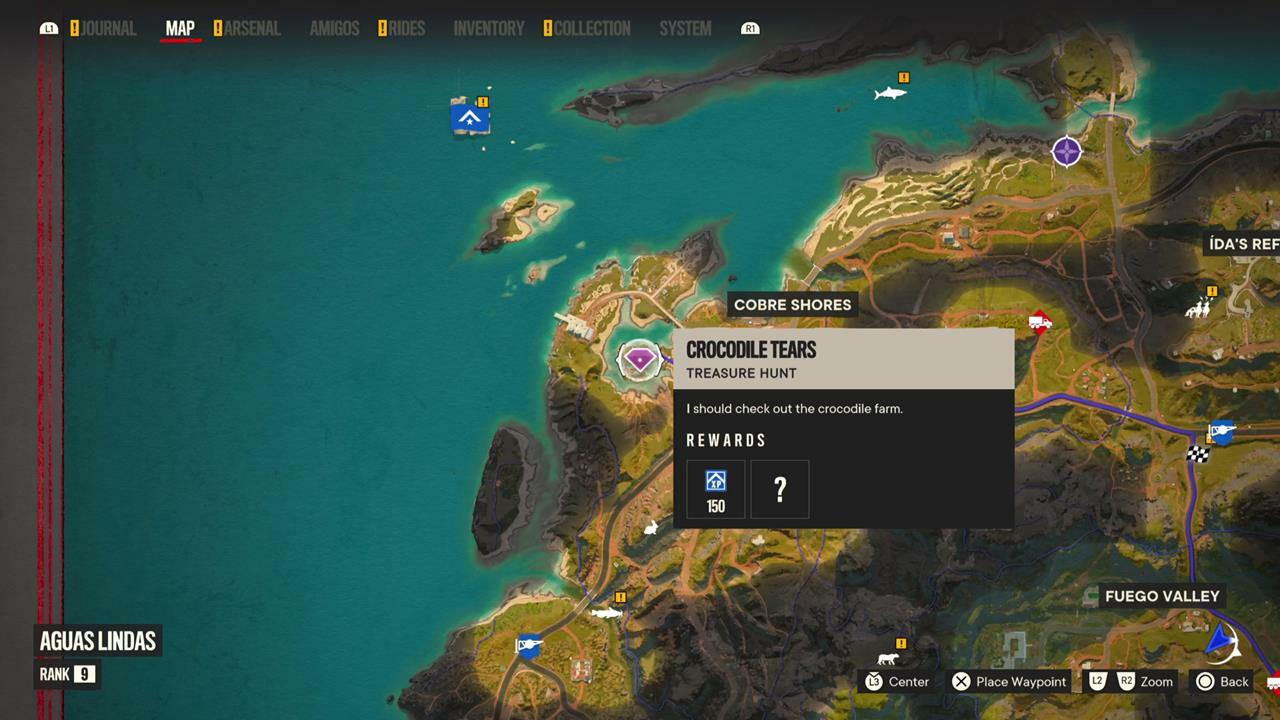
- Location: Aguas Lindas, Cobre Shores
- Rewards: Surf 'n Turf rifle
One crocodile fanatic's bond with his reptilian friends isn't as deep as he believes it to be, and after falling victim to the scaly love of his life, his best gear is up for grabs. Luis's farm needs to be cleared of all the crocs for you to safely proceed, with his star attraction Beatriz having a tough hide and the key to his stash:
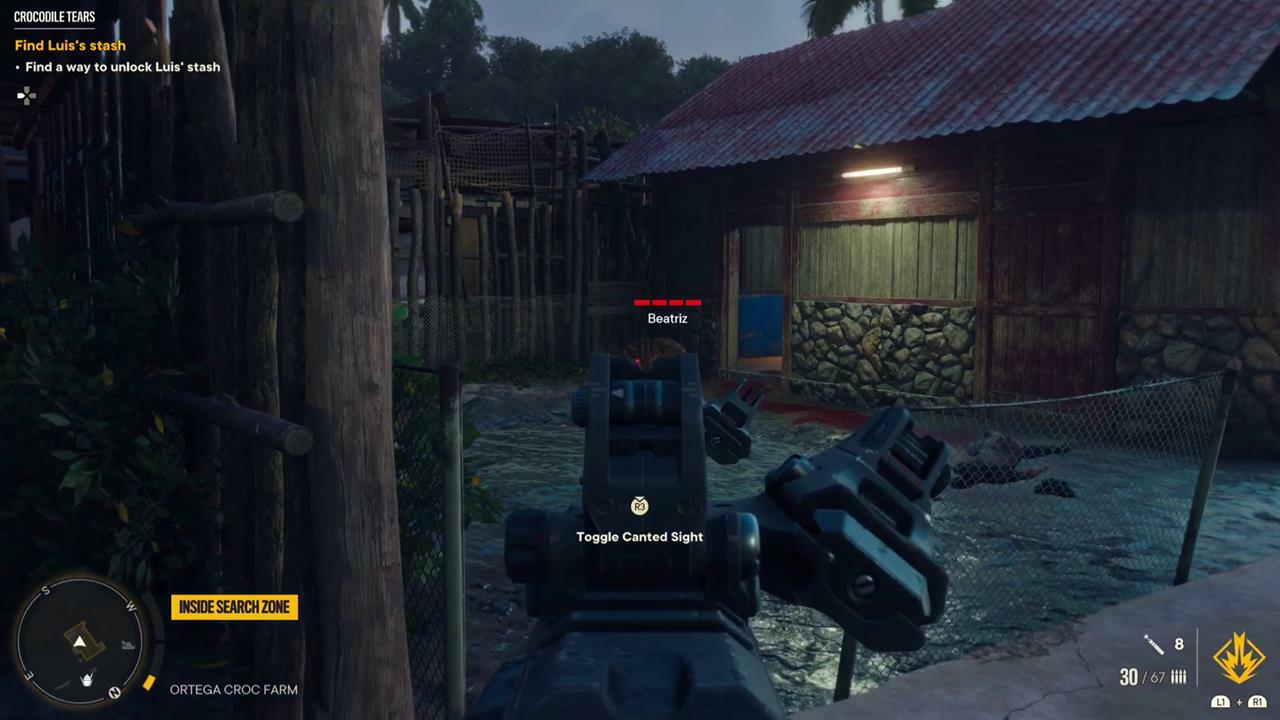
Once she has been dealt with, get out of the zoo by breaking locks, and circle back to the windmill:

From here you can grapple over the ledge to Luis's home, where you'll earn the Surf 'n Turf rifle for all your effort.
High Supply
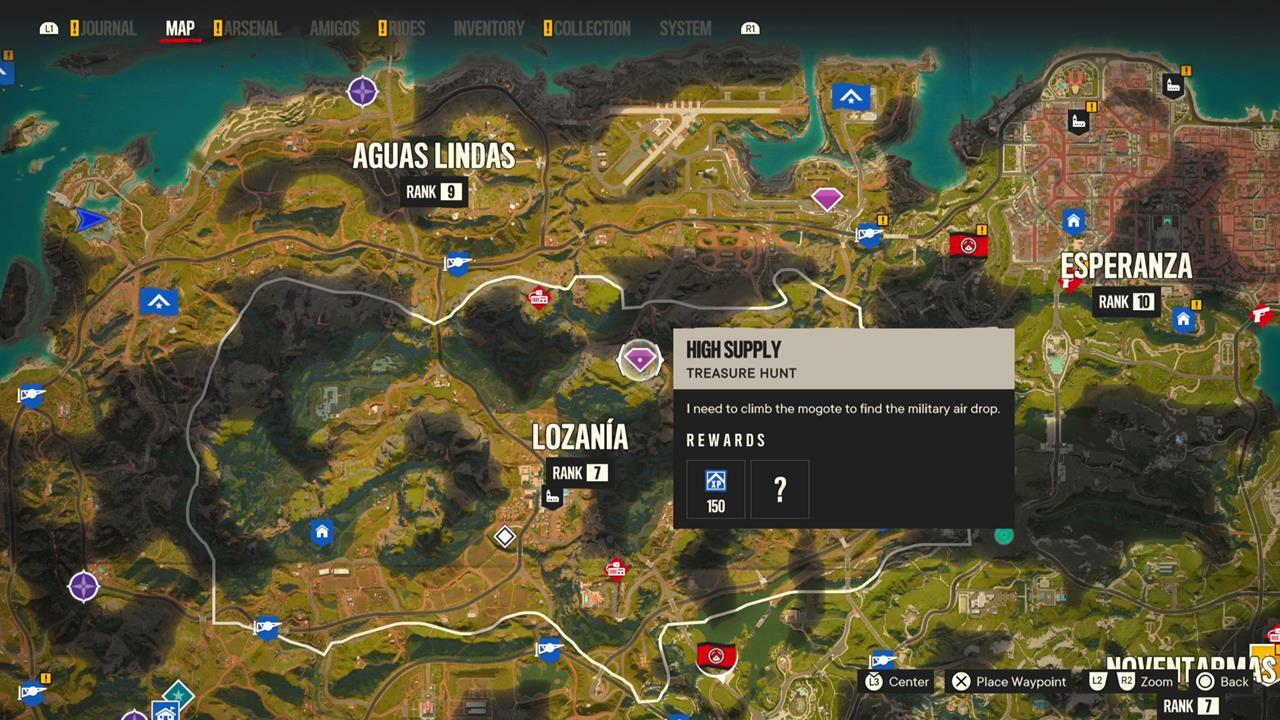
- Location: Lozania, Palma Forest
- Rewards: M16 A1 Rifle, experience points, gunpowder, supremo-bond materials
Another climbing mission, you'll be going up, up, and almost over the mountain here. Using your grapple hook, keep working your way to the summit. Eventually, you'll travel through a cave and on the other end, a dead end.
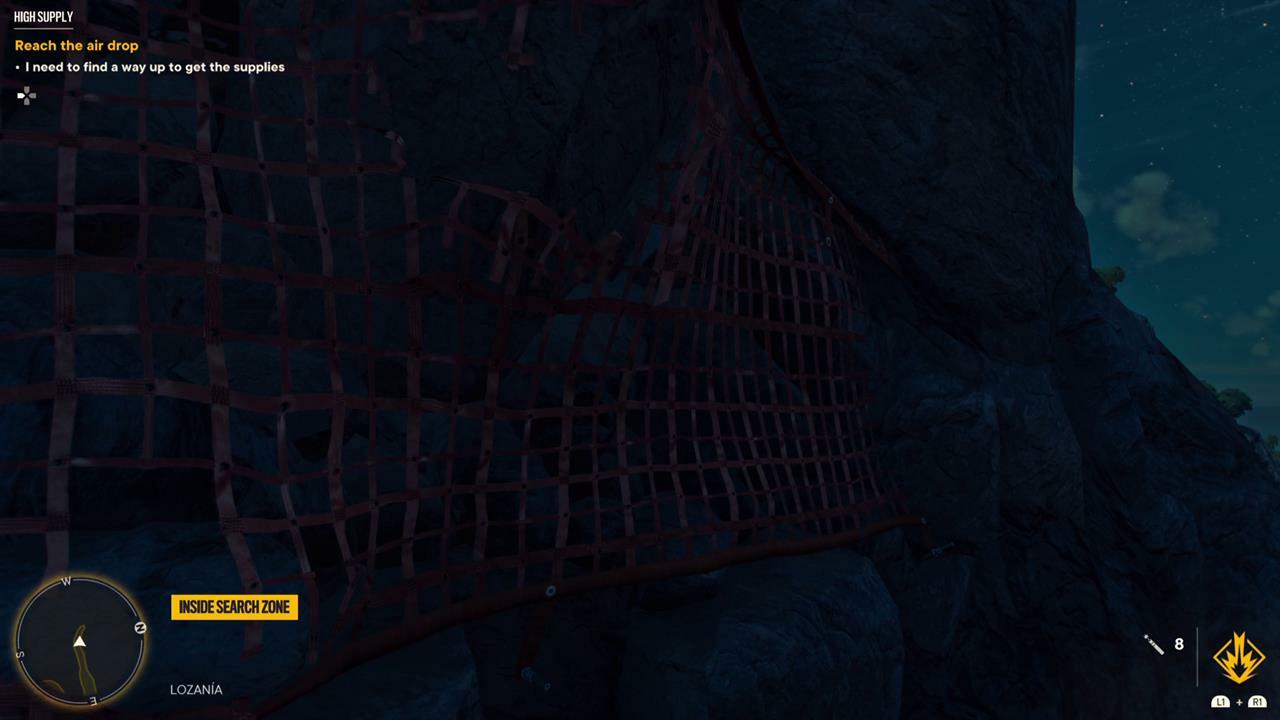
Not exactly! Fire a few rounds into the net holding all those rocks in place, don't think about the landslide you just created, and move on up to the supply drop to claim a new rifle and some materials to help upgrade it.
Cache Money
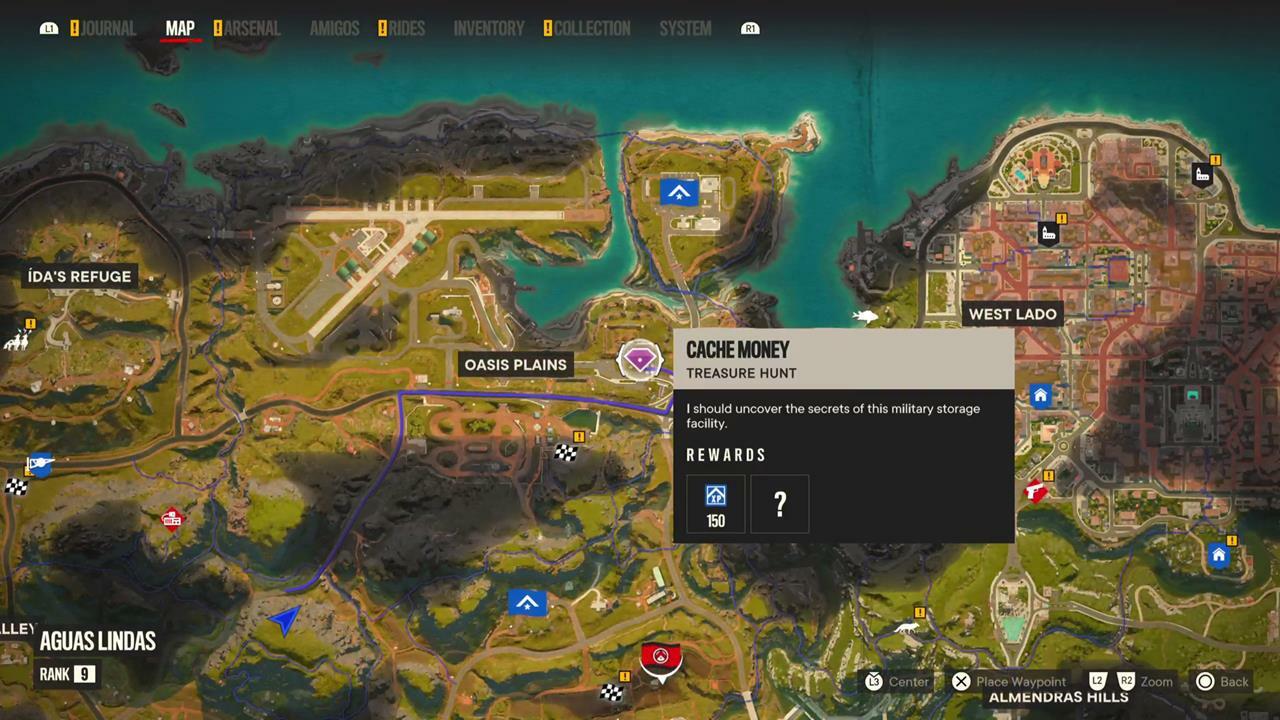
- Location: Aguas Lindas, Oasis Plains
- Rewards: Sobek Special sniper rifle
There's an FND Storage Hub with some supplies that are worth pilfering. You'll need to gain access to Bunker 2, which appears to be sealed up in an effort to deter any rebels from breaking in. That's not exactly too much of a barrier though, and to bust in you'll want to head to the top of this building:

Once you're on the roof, activate this switch:
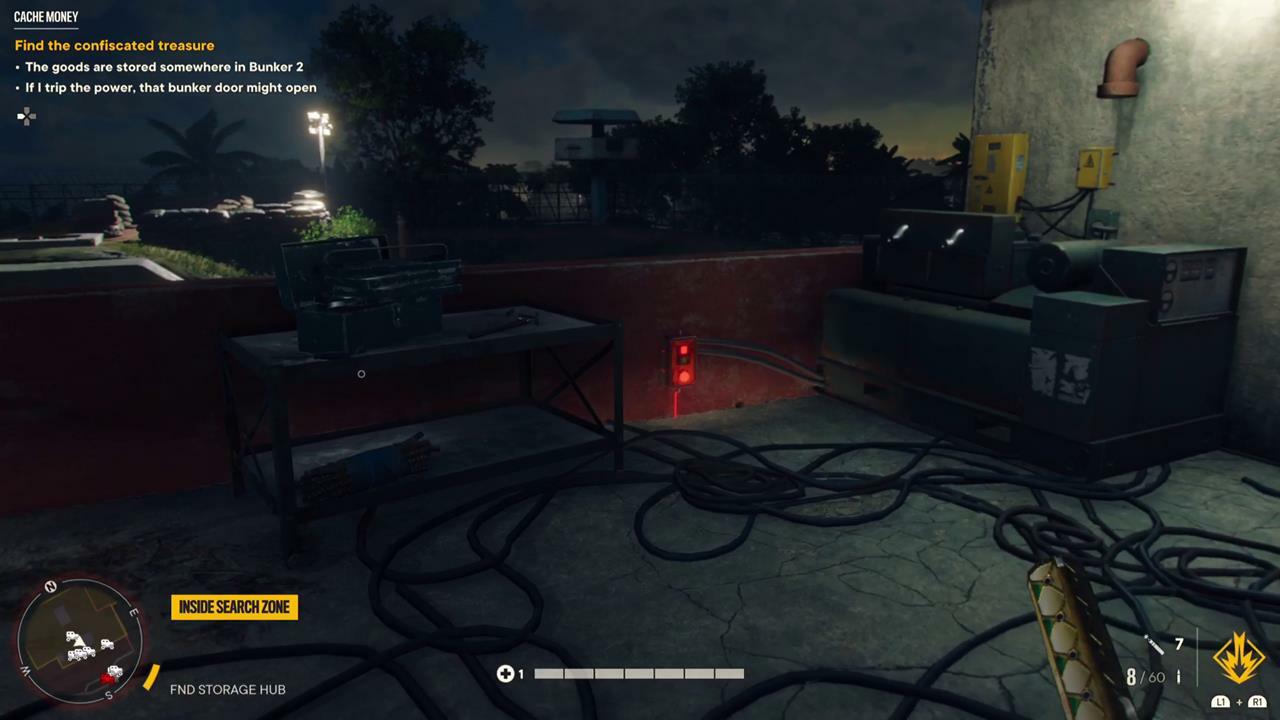
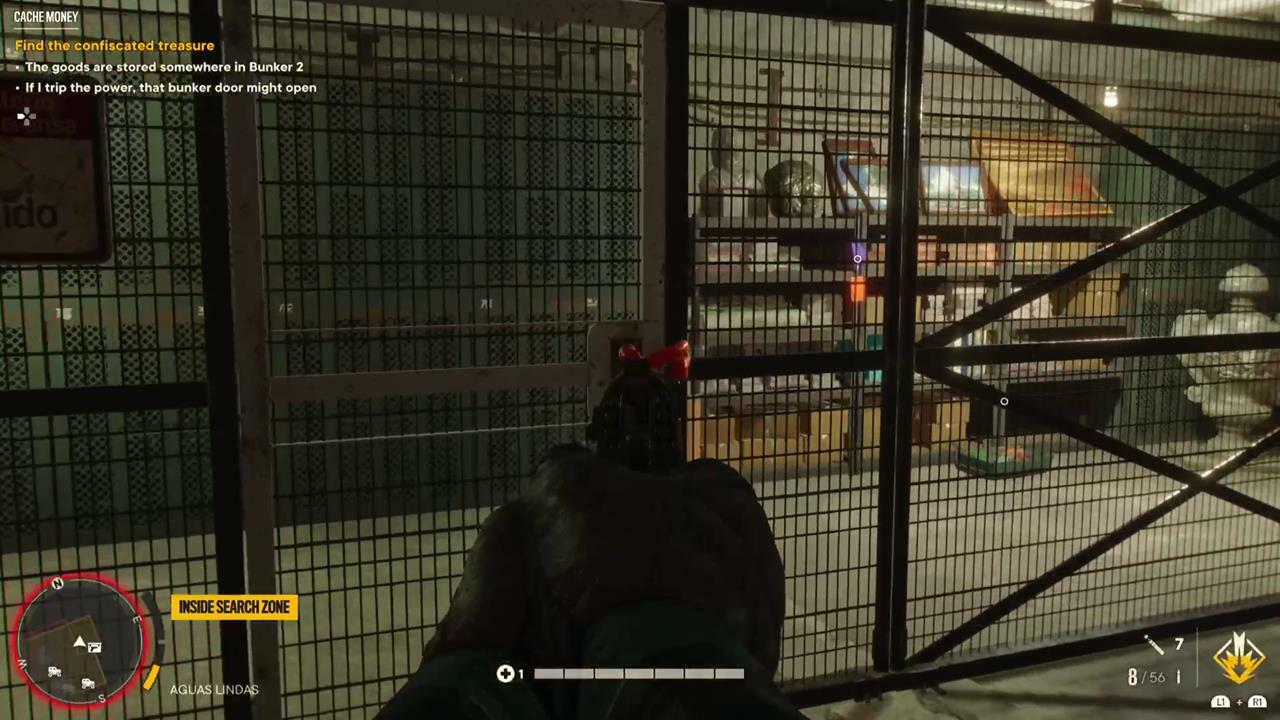
For the next part, you'll need to show off your marksmanship skills quickly, as the bunker door will be briefly open. Fire a few rounds into the gap to cause an explosion:

Take the zipline down, enter the bunker through the hatch on top and then open another hatch. Once inside, you can break the lock on the contraband lock-up, grab the keycard and open the door to the officer's quarter:
Press the red button behind the desk:

And there you go, free loot!
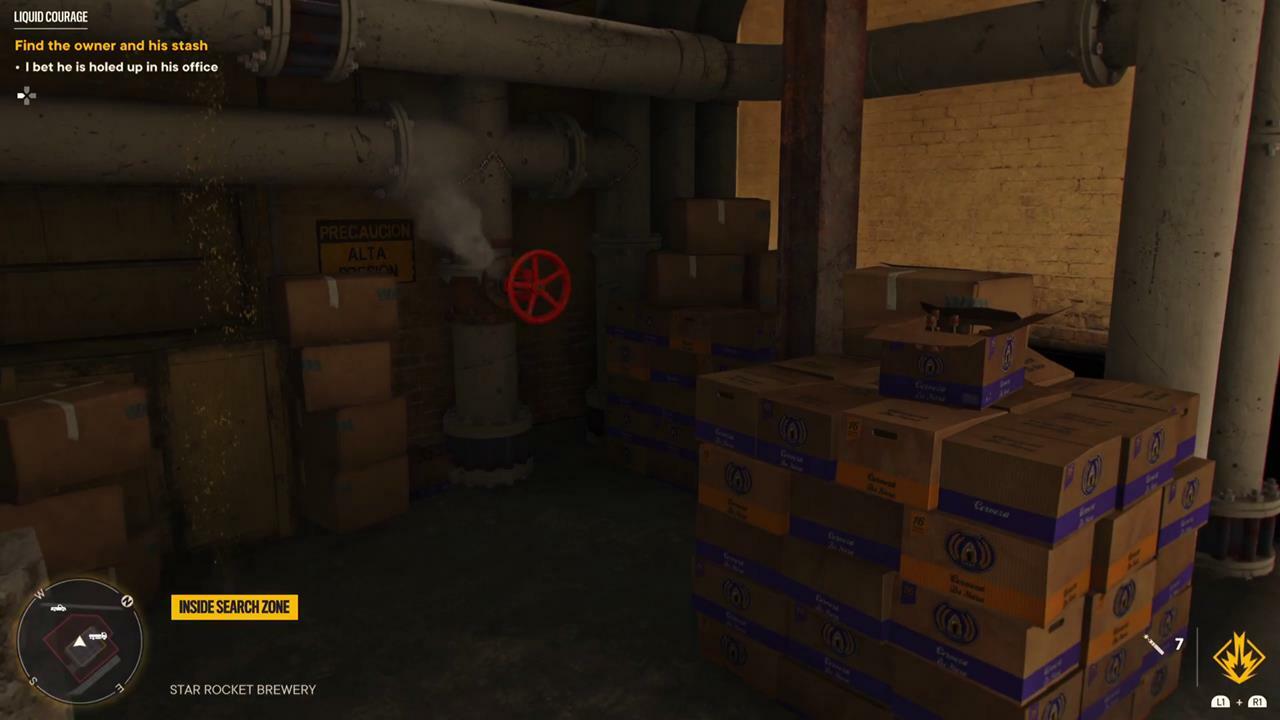
Liquid Courage
- Location: Noventarmas, Del Toro Port
- Rewards: Into Orbit rocket launcher
With Maria Marquessa having taken over a local distillery, the owner of the warehouse has locked himself in his office and drunk himself to death. To find a way in, you're going to need to do some remodeling by opening several valves and increasing the production pressure to an explosively dangerous level. The first valve can be found in the corner to the left of the main rocket vat:
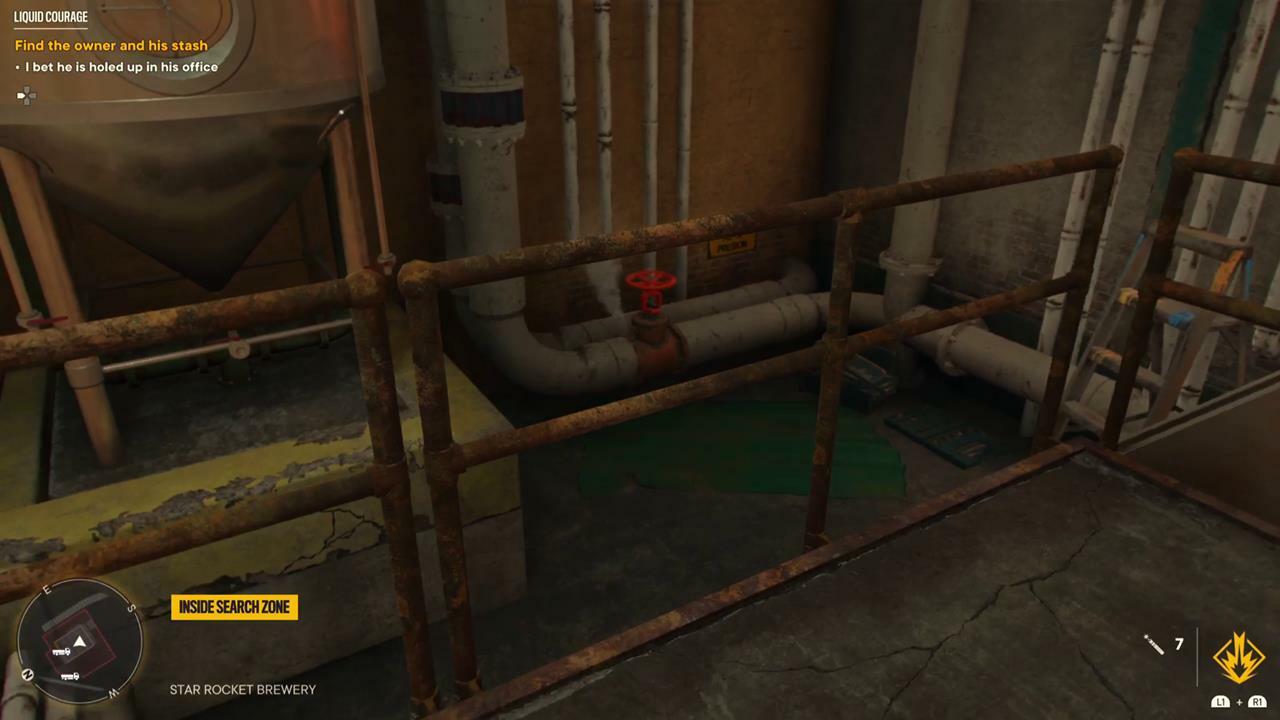
Another valve can be found under the stairs:
A third valve can be found under the ceiling. Climb the stairs, jump onto the pipes and follow them until you can leap across to the other side:

With pressure sufficiently built up, turn the valve on the rocket vat and prepare for the mother of all drinking binges. In Dani's inebriated state, they'll need to look through the busted ceiling and throw their grapple hook into a vantage point:

Climb on up, move through the air ducts, and you can claim one of the best rocket launchers in the game--as well as a nasty hangover.
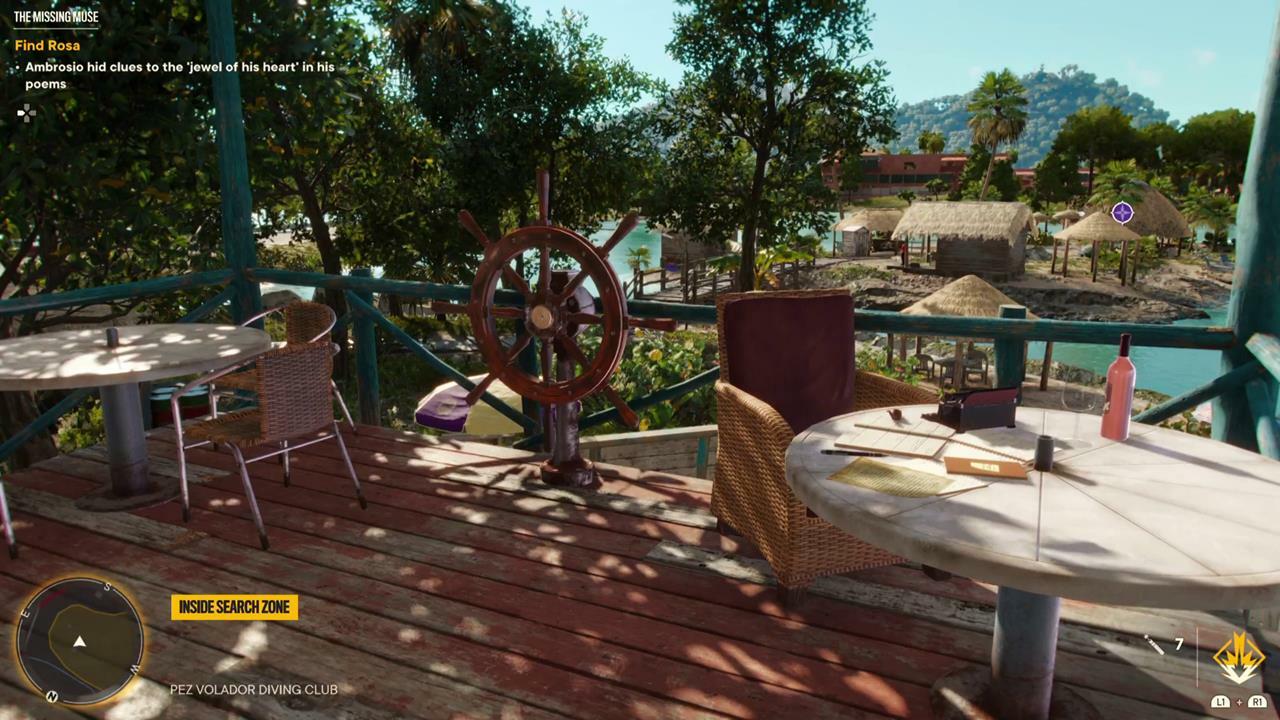
The Missing Muse

- Location: Cruz Del Salvador, Cape Santa Maria
- Rewards: Dark Tech head mask, Life Preserver charm
Ambrosio pines for his muse Rosa, and it's up to you to follow his clues to find his beloved boat. Your first lead can be found on the bar balcony, on the table to the right of the prop steering wheel:
Grab the key over here:

And then investigate the lookout point on the dock for another clue:

Take the zipline down to the nearby cliffs, climb them, and you'll discover one final clue:
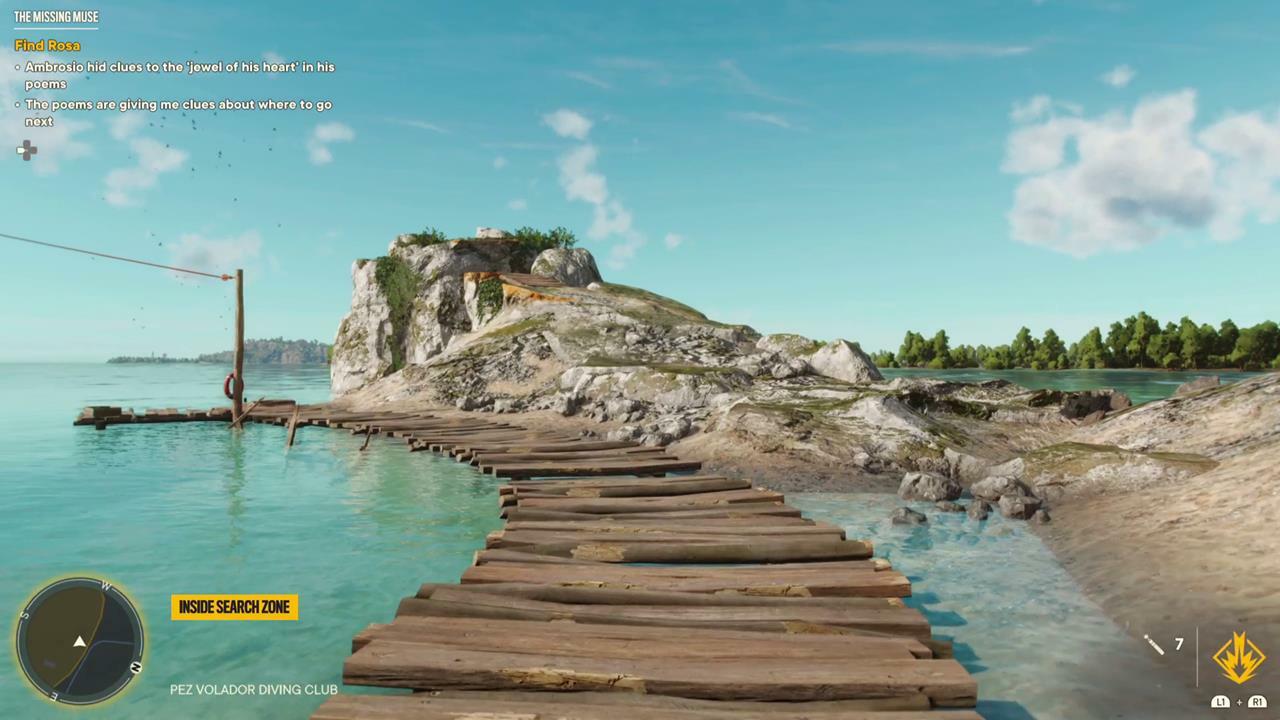
From here, dive into the water and search beneath the beacon to find the remains of Rosa, as well as some new gear for the revolution.

And The Beat Goes On
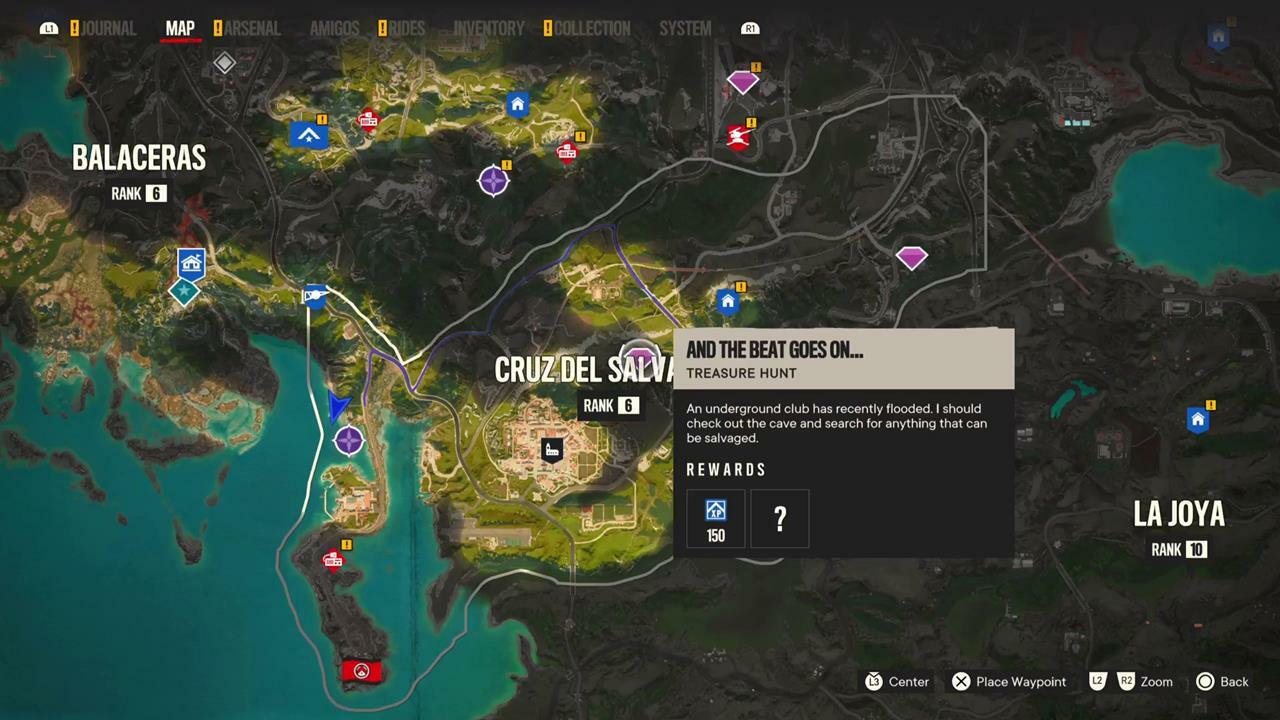
- Location: Cruz Del Salvador, Arroz Flatlands
- Rewards: USB stick, 1911 sidearm
After an underground club has been flooded, it's up to Dani to claim any useful supplies left behind. Bust through the barricaded door and make your way inside the cave. You'll need to restore some of the power, which can be done by using the grapple point located on the disco ball to climb up:

Swing on over and flip this switch:

Now begins the tricky part. With the power back on, you'll need to climb up to the DJ booth. It appears to be simple, but the catch here is that you must only climb when the power flickers off. When it briefly comes back on, stop what you're doing or you'll fall down and have to start all over. What makes this especially challenging is that you'll need to swing through some sections, so make certain that you get the timing just right.
Once cleared, you can grab a USB stick for your collection, the 1911 sidearm, and some experience points.
Oku's Triada Relic
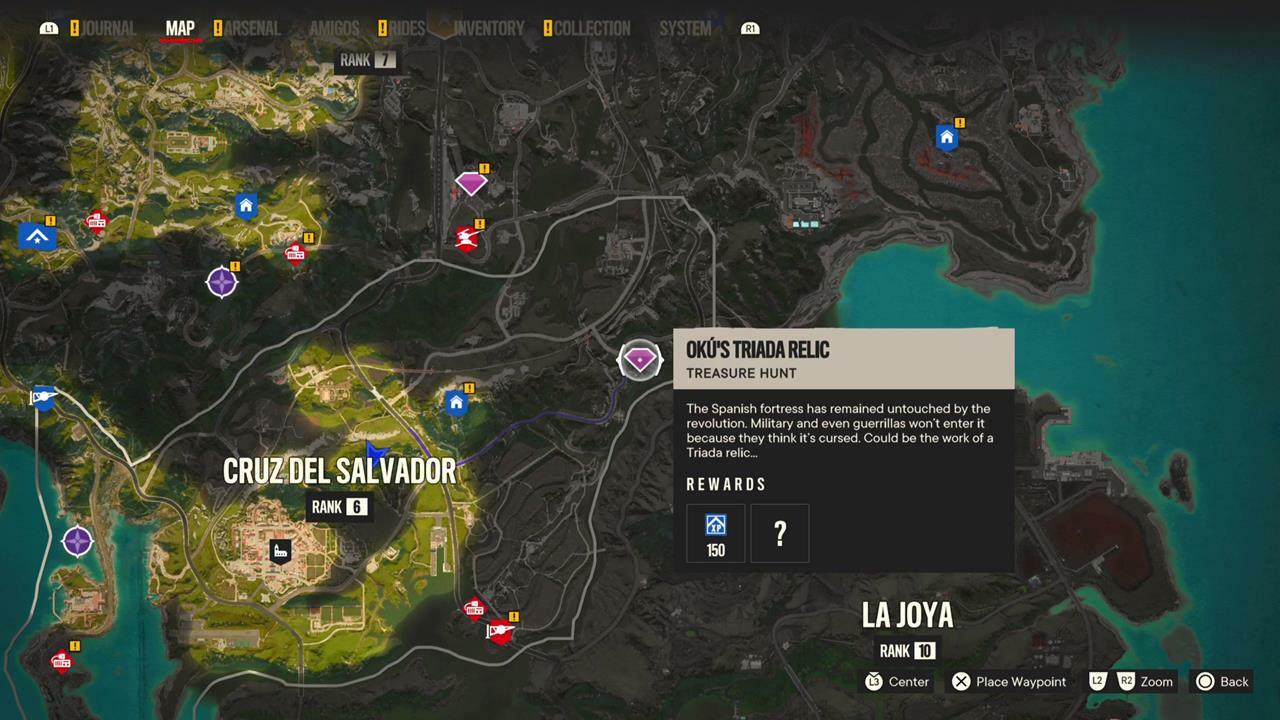
- Location: Cruz Del Salvador, Arroz Flatlands
- Rewards: Oku's Deliverance leg gear, Doubloon charm
This spooky mission can only be done at night, so make certain that the stars are out when you pay a visit to Fort Oro. Once you're inside, go to the dining room on your left, and try not to be scared by all the mirrors that break spontaneously. You'll notice that one mirror to the right of the entrance hasn't shattered, so finish the job and you'll find a hidden switch:
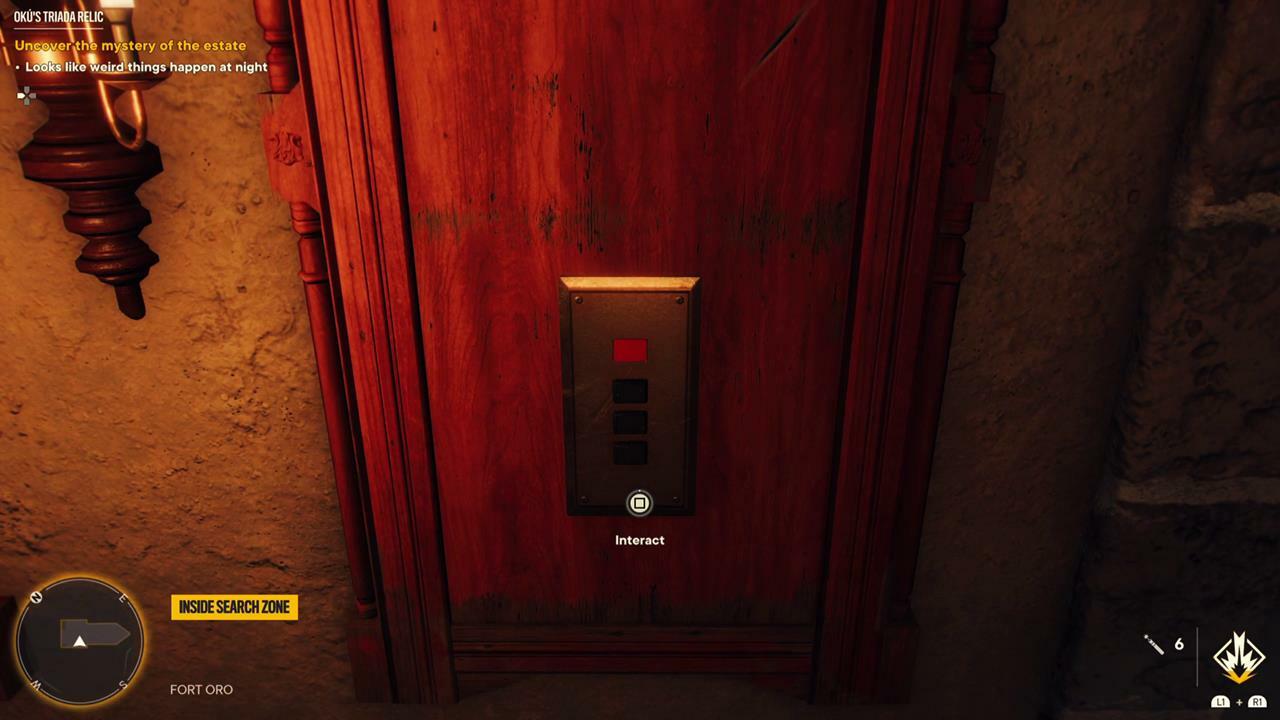
Press it, and the next room will open. Inside are several televisions and three switches:

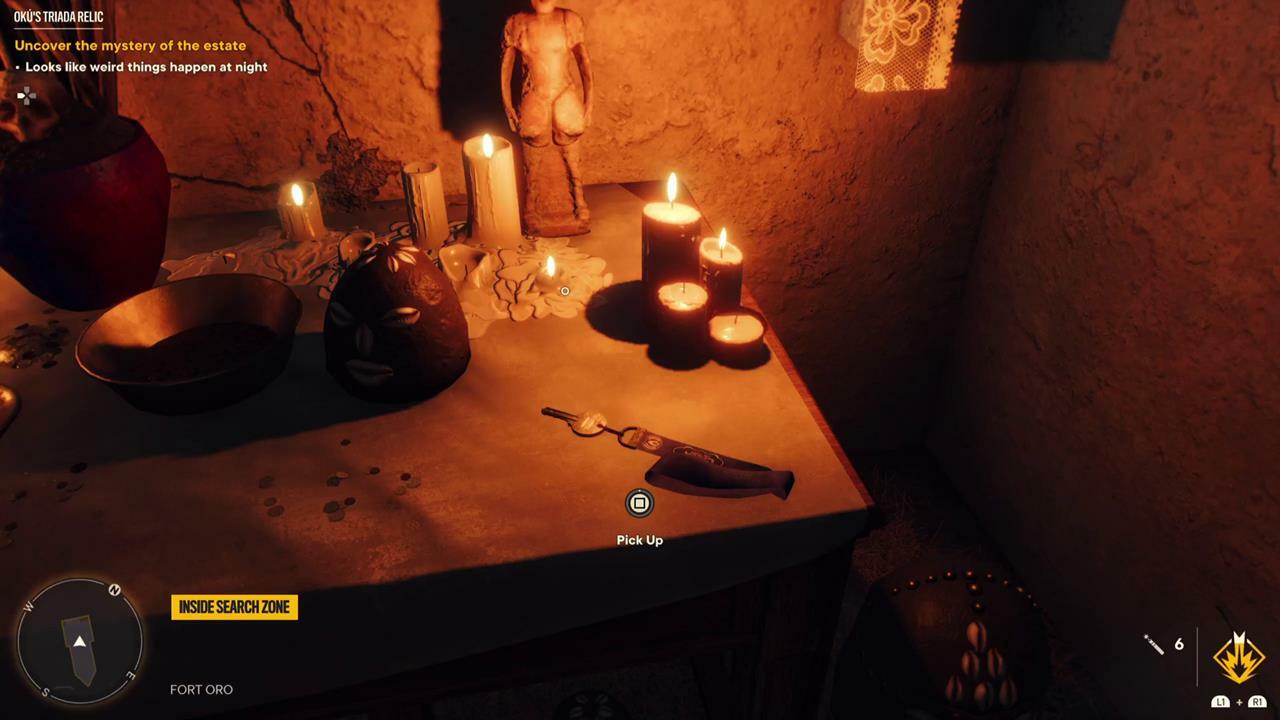
Press the middle one first, then the left one, and then finally the right switch. Now head upstairs and pick up the dungeon key on the fireplace mantle after the cupboard automatically moves:
Unlock the dungeon door in the entrance room, go downstairs, and break open the boarded-up door on the right side of the jail. Hit the switch on the pillar past the gunmen replicas:
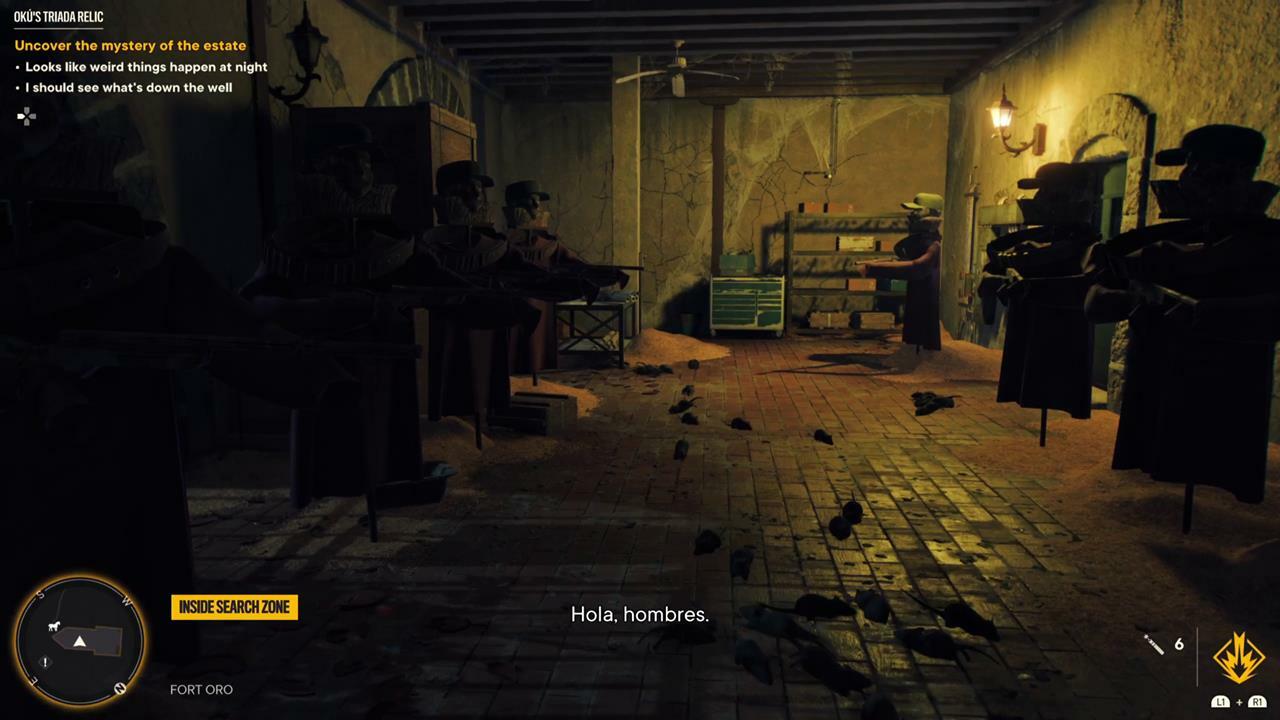
With the well now open, take the door behind the switch, follow the path, and grapple out of the dungeon. Take the zipline down to the well, descend down it, and follow the markers inside to the treasure chest.
Now that the creepy adventure is over, you'll have new Oku-themed leg gear in your collection and the Doubloon charm to add to your weapons.
The Truest Yaran

- Location: Noventarmas, Cielo Gardens
- Rewards: True Loyalist shotgun
The power station has gone dark, and one of Castillo's fanatics appears to be the cause of the recent outage. At the Gran Finca power station, you'll need to clear some blockages in the pipes before the lights come back on. Go to the grate on the floor, and fire a round into this blocked pipe:

Head down, and on the east side, it's time for a swim. Jump into the water, and look for this pipe:
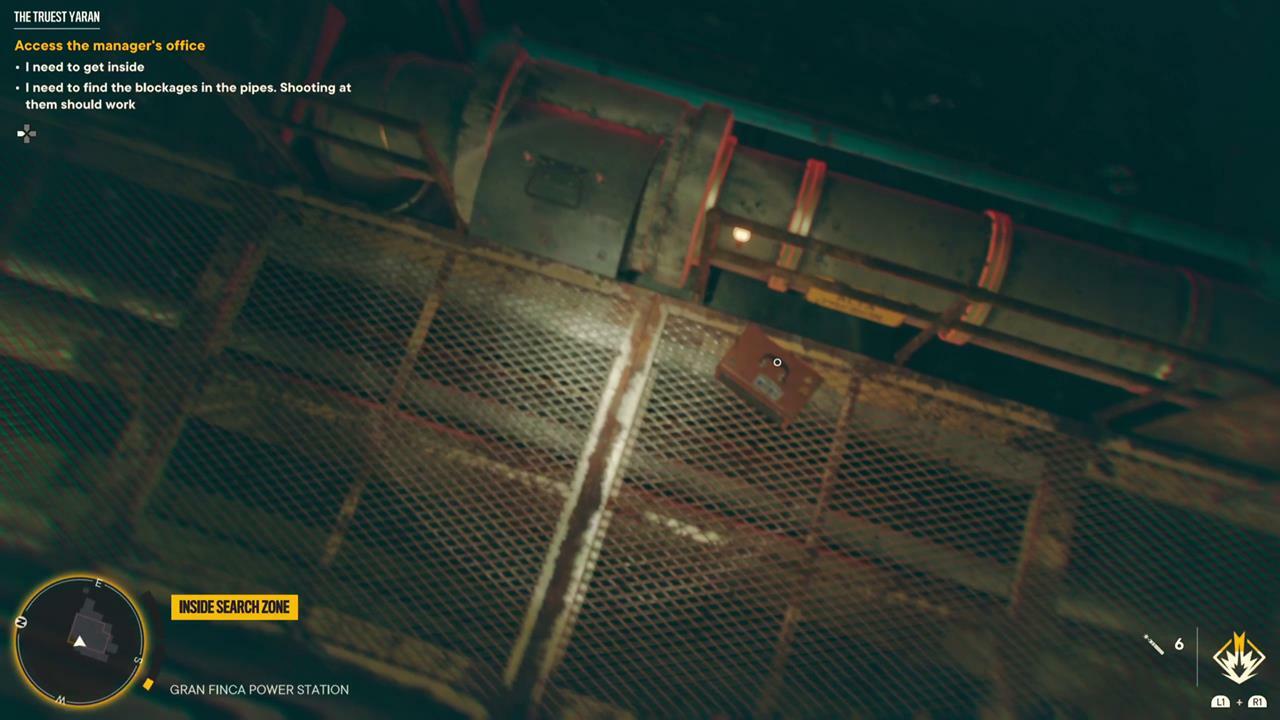
Give it a bash, and once the water has cleared, head down to the turbine. One more blocked pipe awaits you:
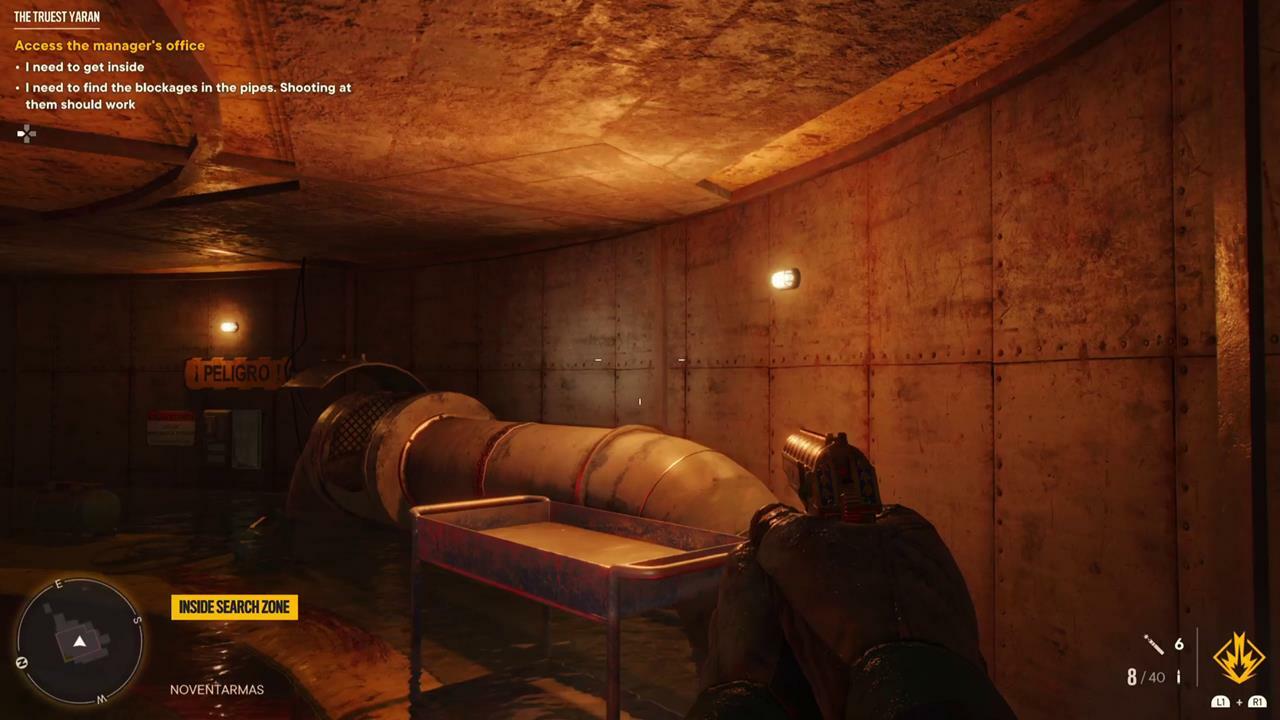
Clear it, and make your way back up to the control room. With power restored, the zealot's shrine to Castillo will open, and inside you can pick up the True Loyalist shotgun as a reward.
Sword-Crossed Lovers
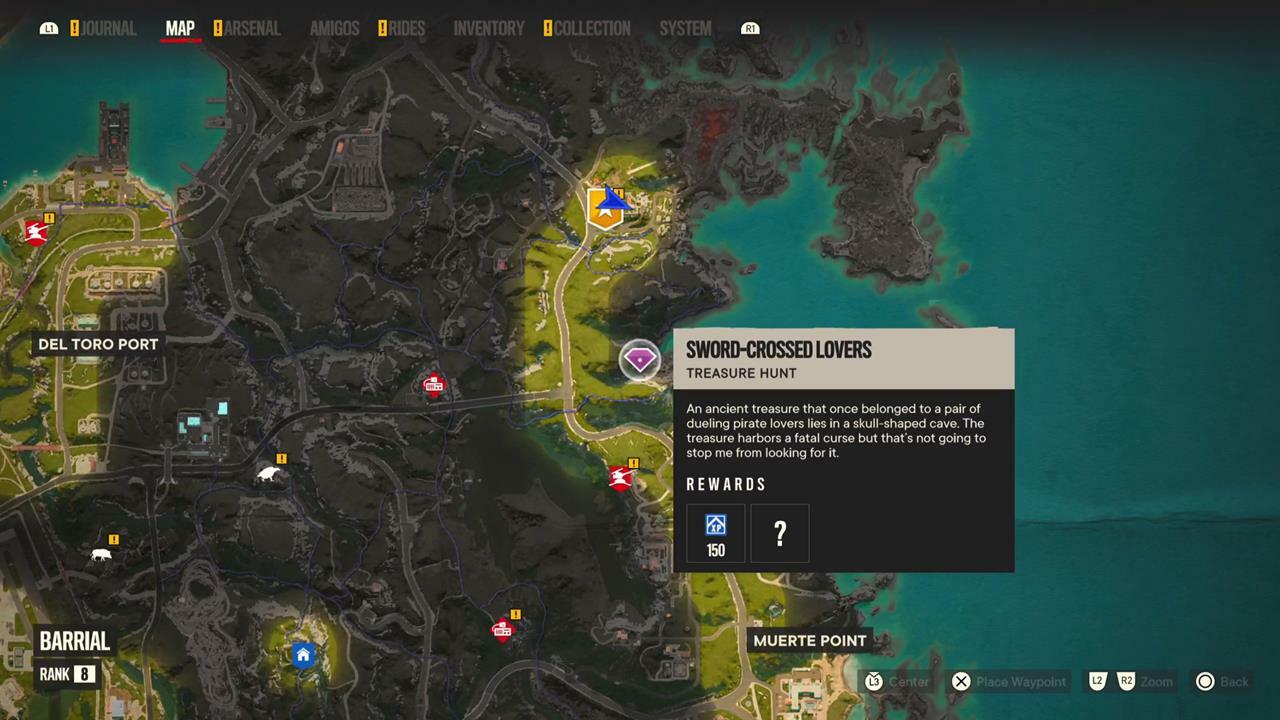
- Location: Barrial, Muerte Point
- Rewards: La Petite Mort grenade launcher
It's time for a pirate adventure next, as Dani heads to the coast and enters a cave that definitely does look like a skull:

This is one of the easier treasure hunts, as all you have to do is follow the path, climbing and rappelling along until you reach the partially-submerged shipwreck. Descend down to it, and light the fuse on the cannon:
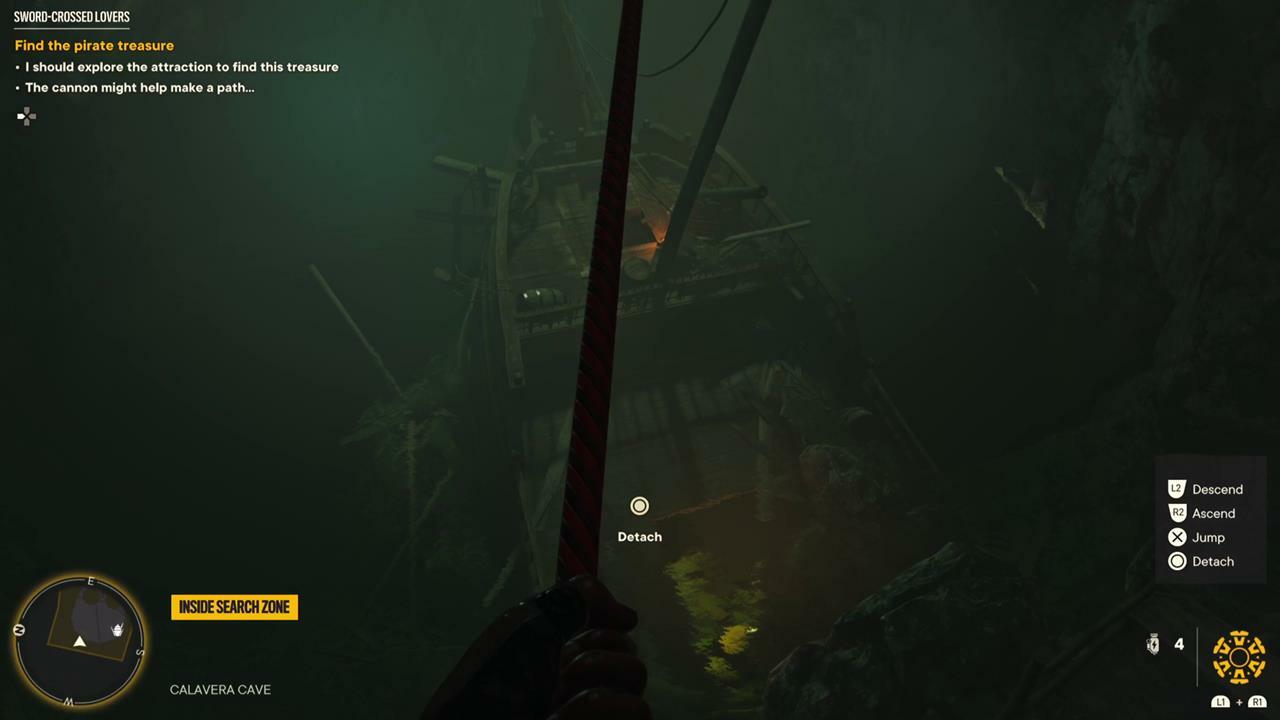
Once the cannon has cleared all the debris obstructing your path, head back up the path and into the now open gift shop, to grab some booty. And by booty, we mean a portable cannon that works as a grenade launcher.
The Long Drop
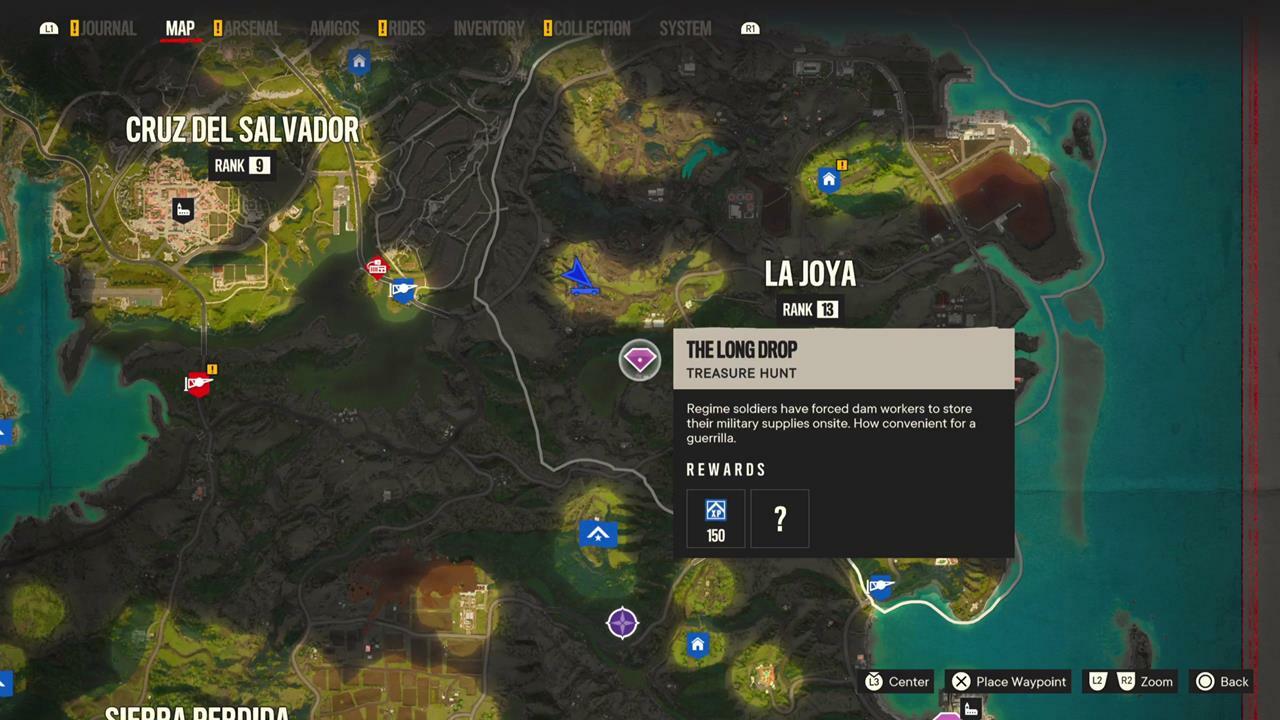
- Location: La Joya, Catalina Ridge
- Rewards: Excavation Execution shotgun
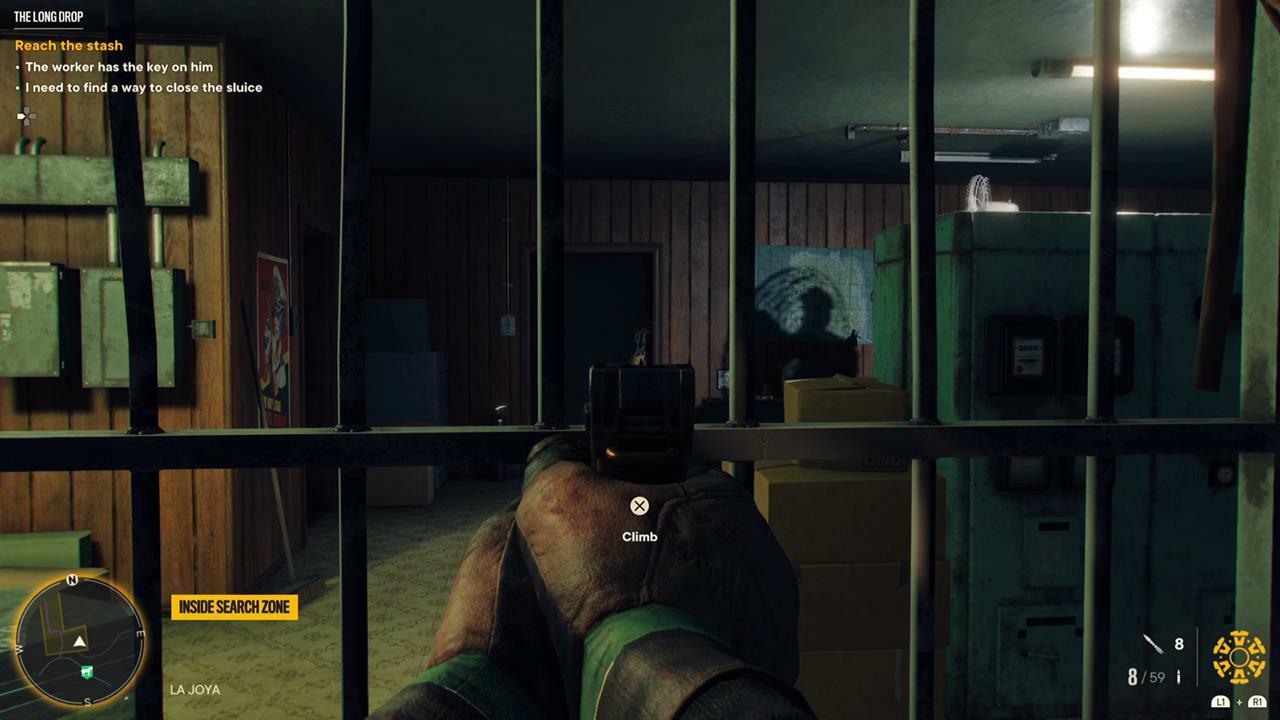
There's a bridge worker in peril, but by the time that Dani gets to them, it's too late to save the unlucky employee of Castillo's regime from a watery grave. What you can do though is close the sluice gates, grab the storage shed key, and help yourself to some loot. The control room shed may seem locked:
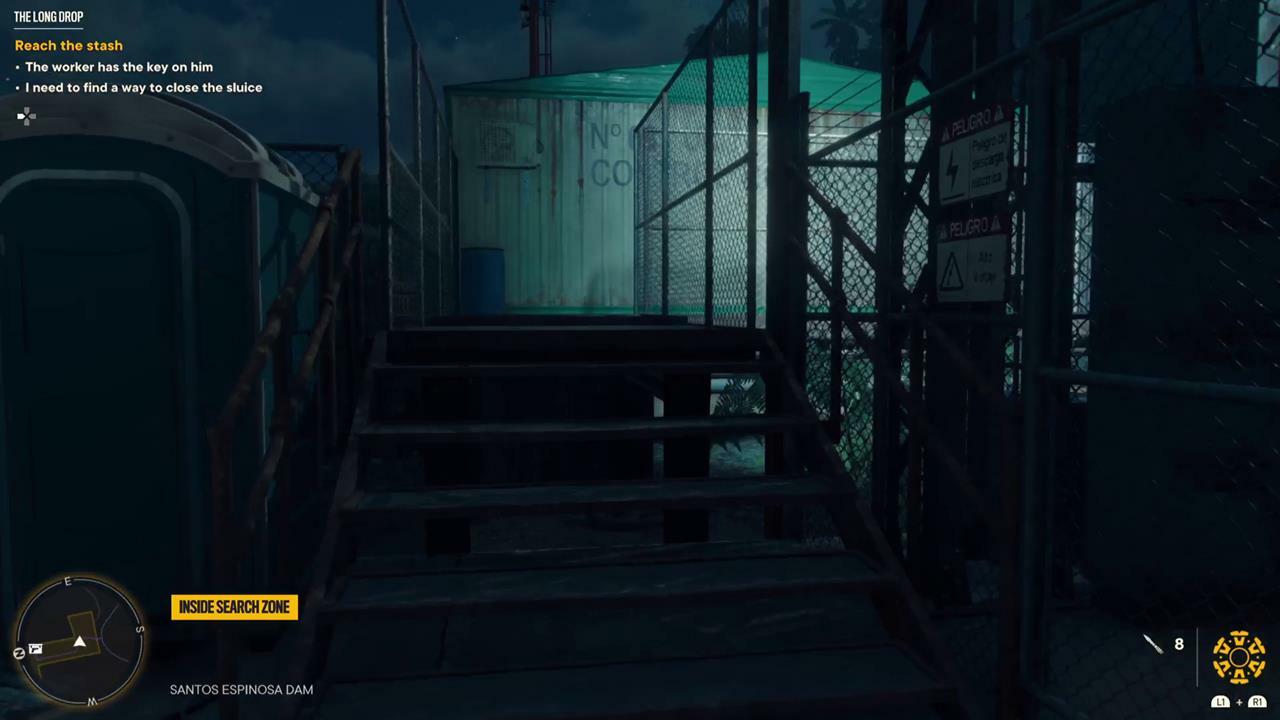
But if you peek through this window, you can spot a lock that you can open with a bullet:
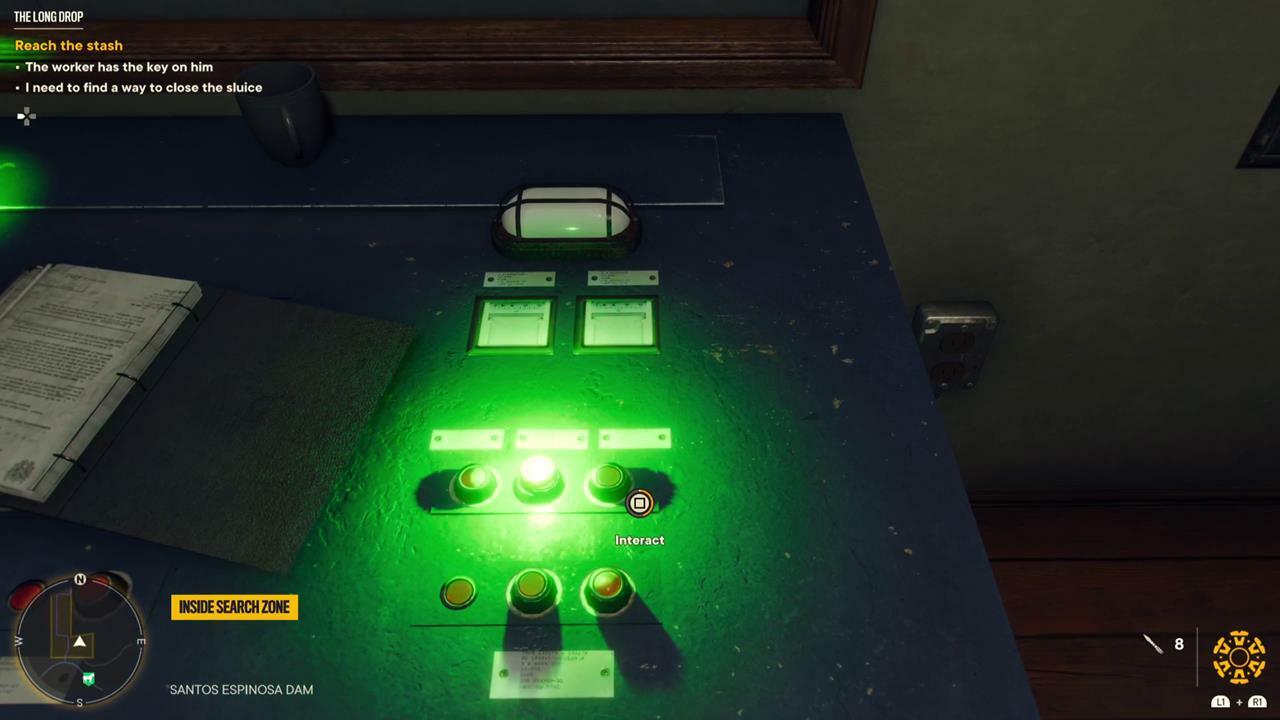
To close the sluice gates, you'll need to operate the machinery in a precise order. First, activate the sluice control by the calendar:

Press the button on the side of the hydraulic monitoring machines:

Turn the pressure valve:

And then go back to the main console to hit this button:
Go back to the broken part of the bridge, rappel down and take the key:

Now go open the storage shed, and grab the Excavation Execution shotgun for yourself.
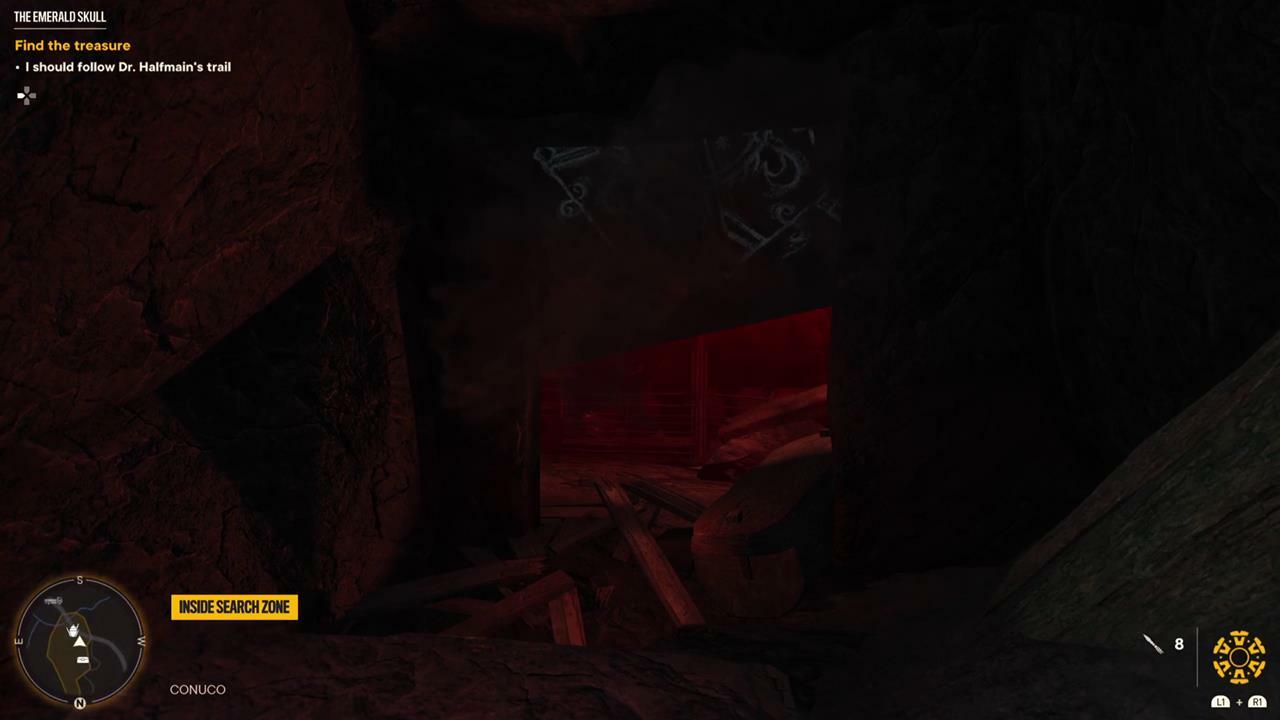
The Emerald Skull
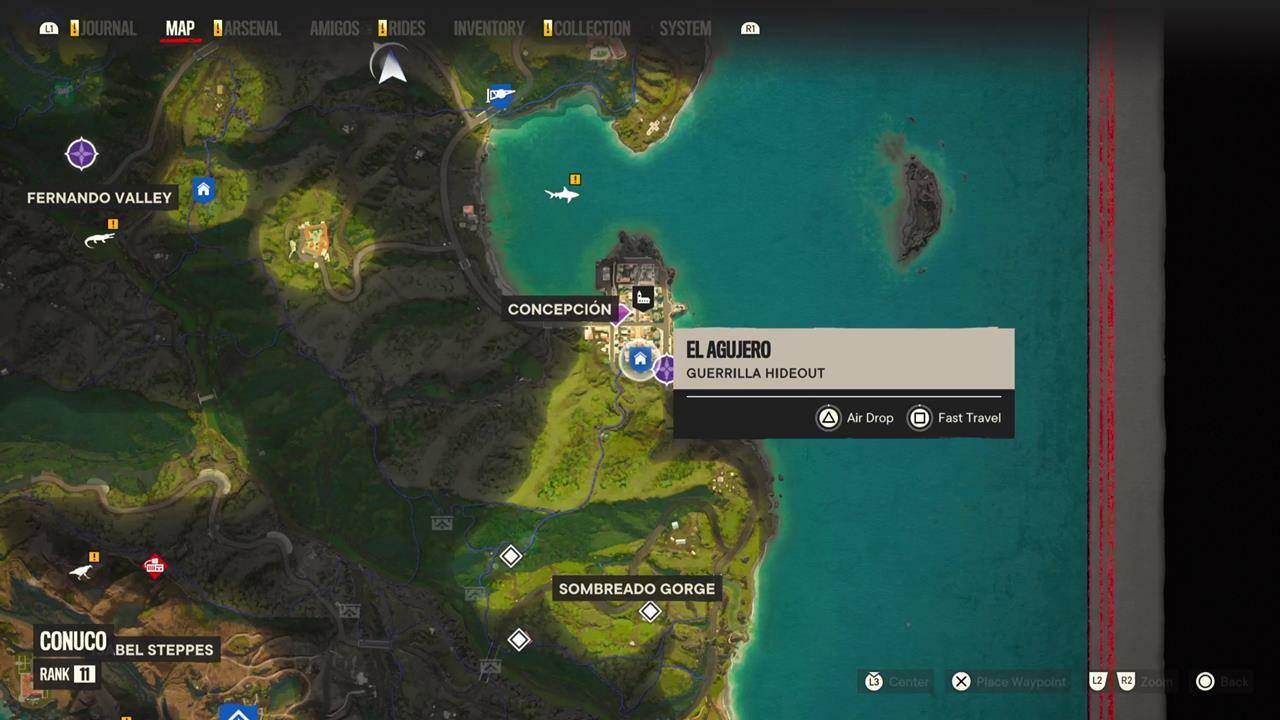
- Location: Conuco, Concepcion
- Rewards: 1,200 Pesos, Ida's War Dance charm
If you've been eager for an Indiana Jones-inspired Yaran adventure, then you've come to the right place. The Emerald Skull treasure hunt kicks off with a trip to the town of Concepcion, and then moves to a cave that will be marked on your map:
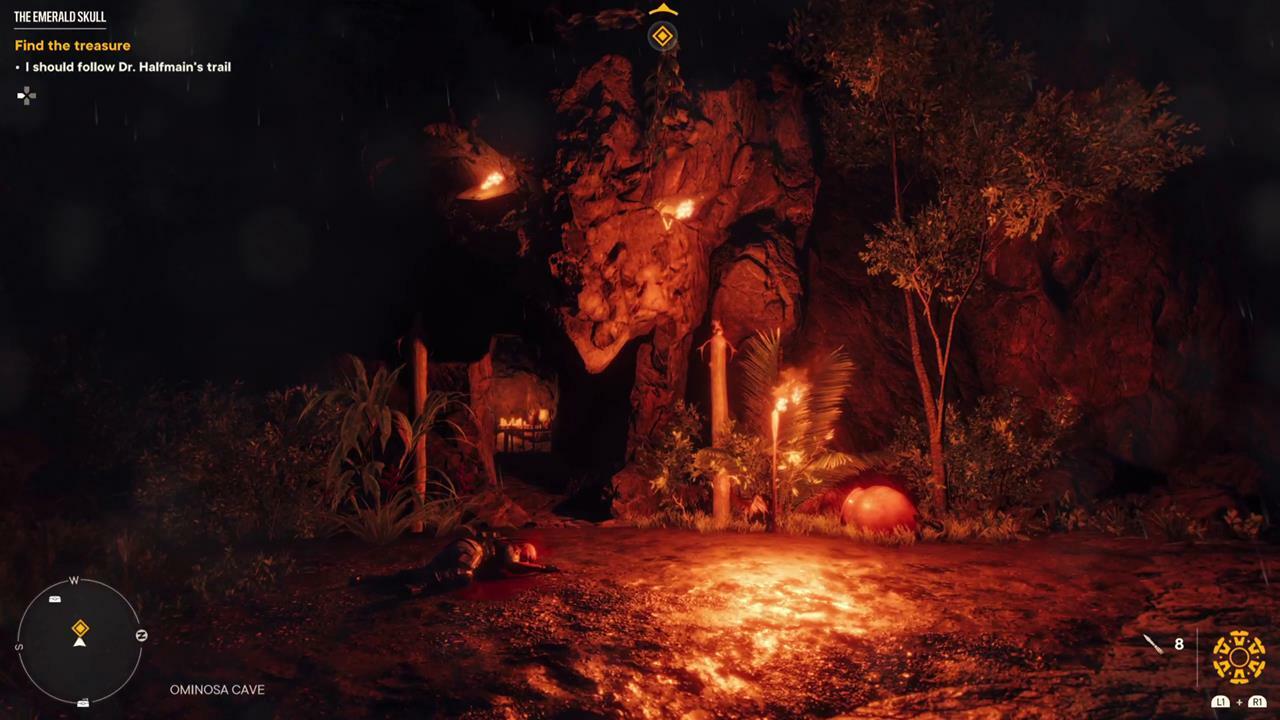
It's a small cave with a few jumps, until you reach a dead soldier clutching a mysterious skull:

Take the skull, and watch out for the booby trap as a live grenade will roll out from the deceased soldier. Dodge it, and then head to the next cave marked on your map. After dealing with a crocodile, place the skull inside of the nearby idol to open a secret entrance:
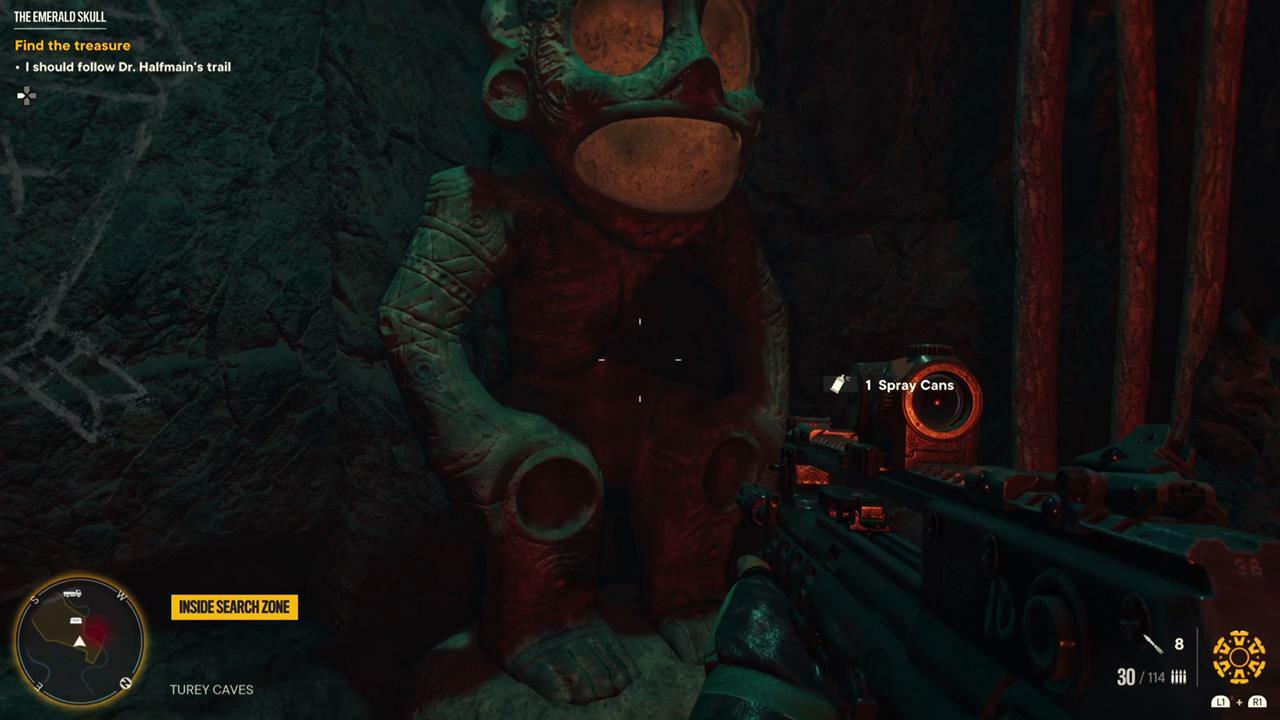
There are three angry crocodiles in here, so be wary. Next, climb the stairs and swing over to the idol on the left side of the cave. Place the skull in there:
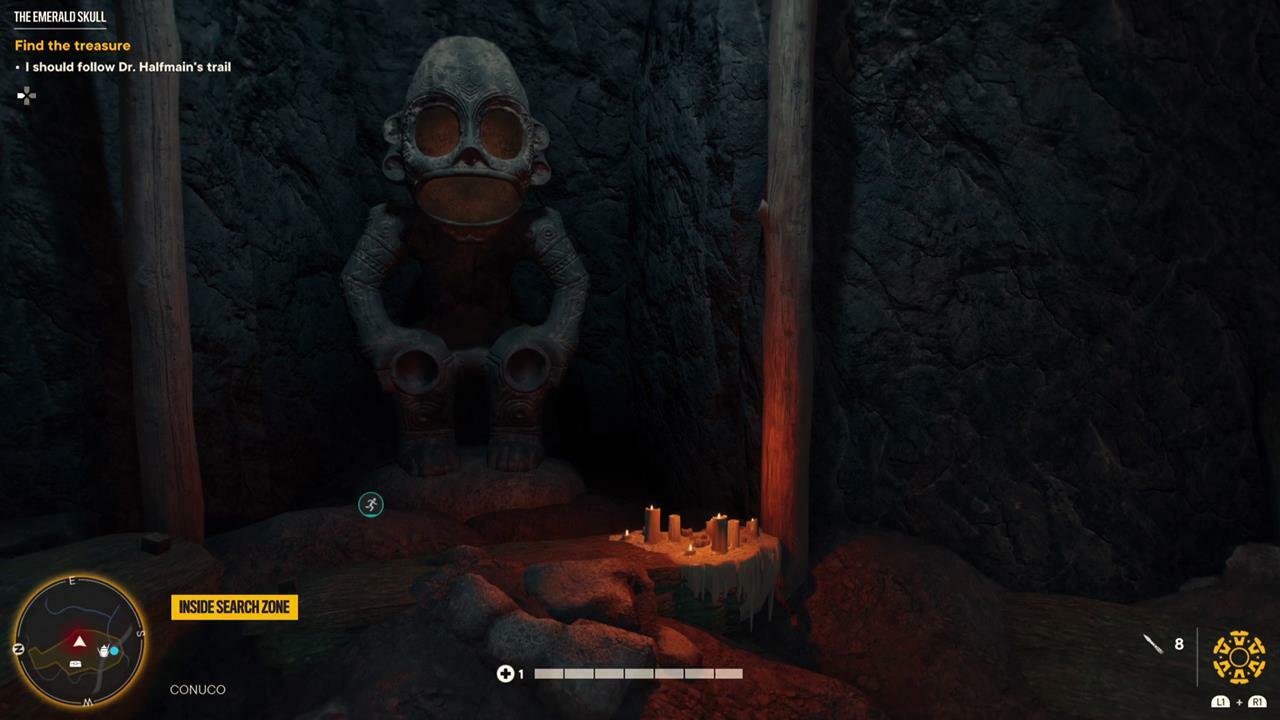
Now go place the skull in the idol on the right side:

A passage to a secret room will open up at the top of the stairs, but you'll need to be quick as it's full of poison gas:
Dash through, make your way to the top, and clear some obstacles. Swing over to the main idol, and your expedition will earn you a hefty sum of Yaran pesos and a new charm.
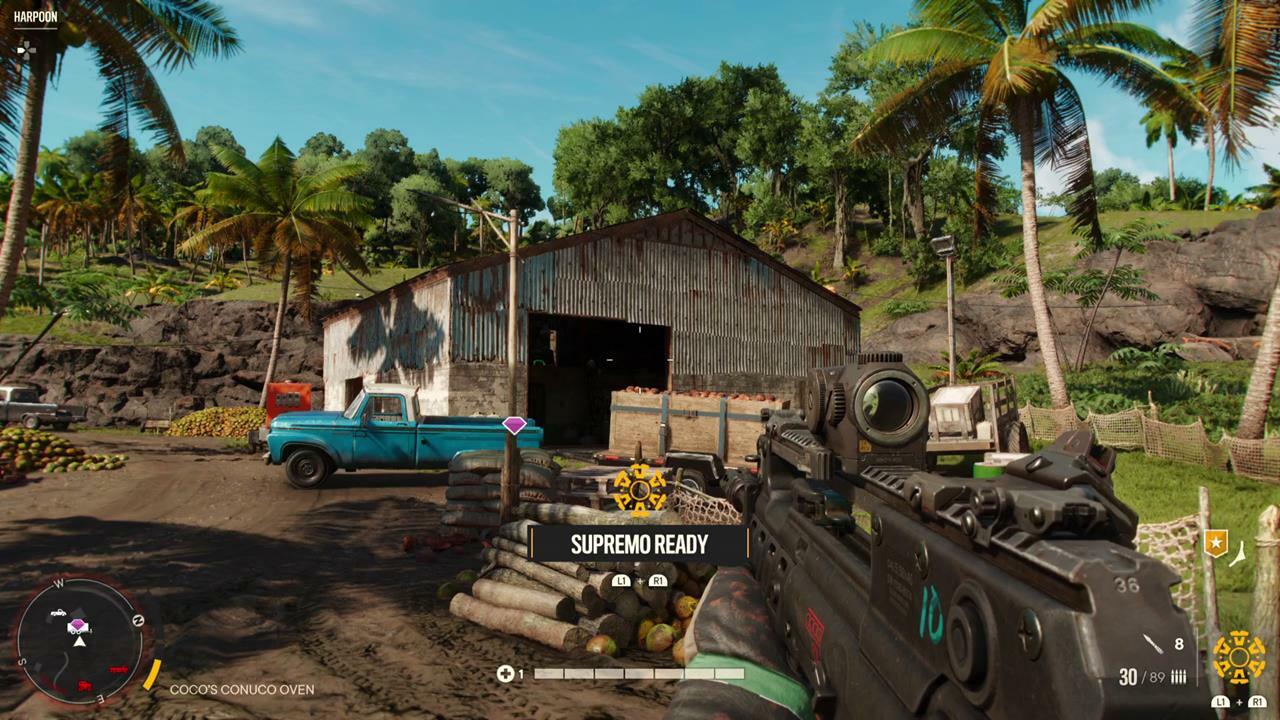
Parting Gifts
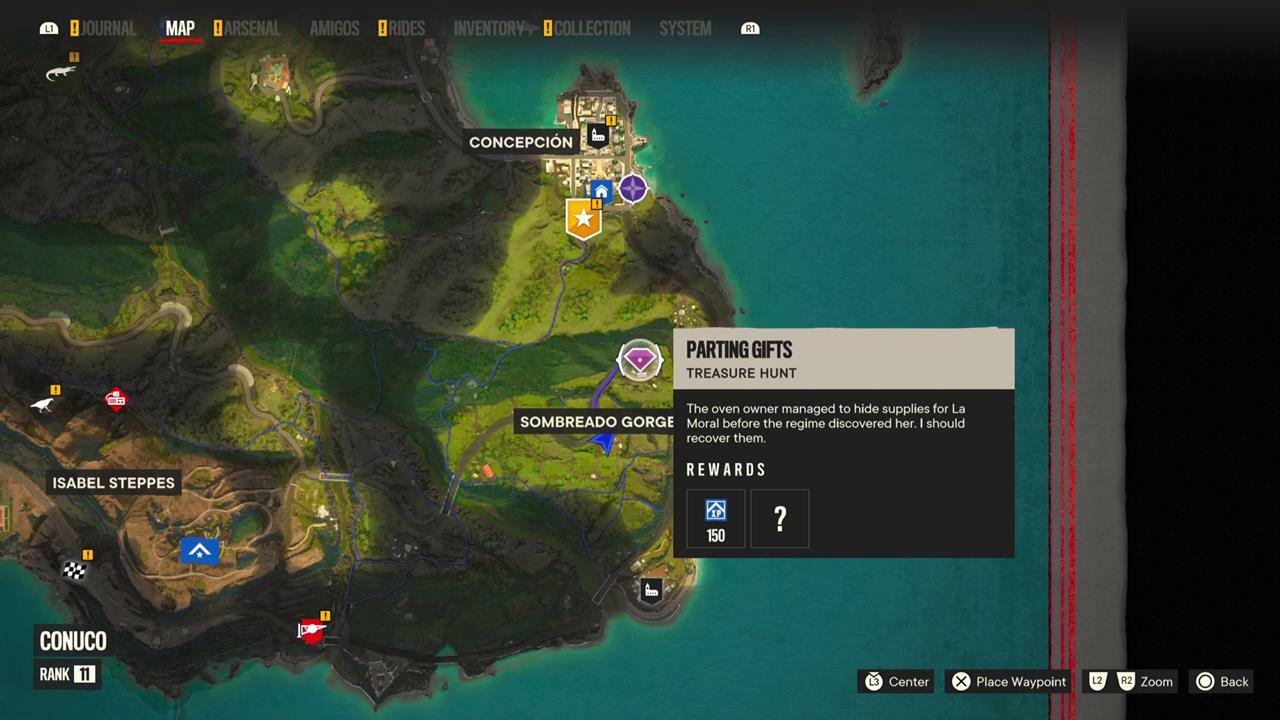
- Location: Conuco, Sombreado Gorge
- Rewards:
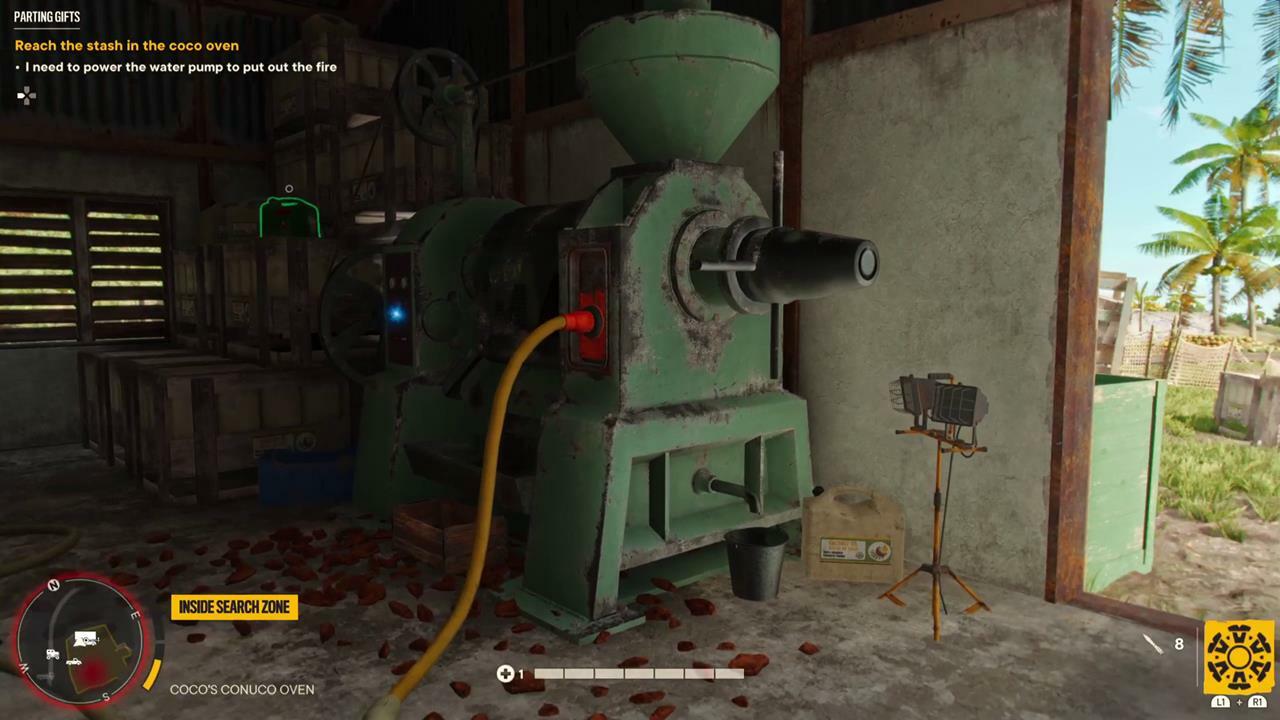
Over at the Coco farm, one rebel is keeping Castillo's forces out of his armory by setting everything on fire. To gain entrance to that room, you're going to need to douse the flames. First, go to this part of the search zone:
Next, unplug this connection:
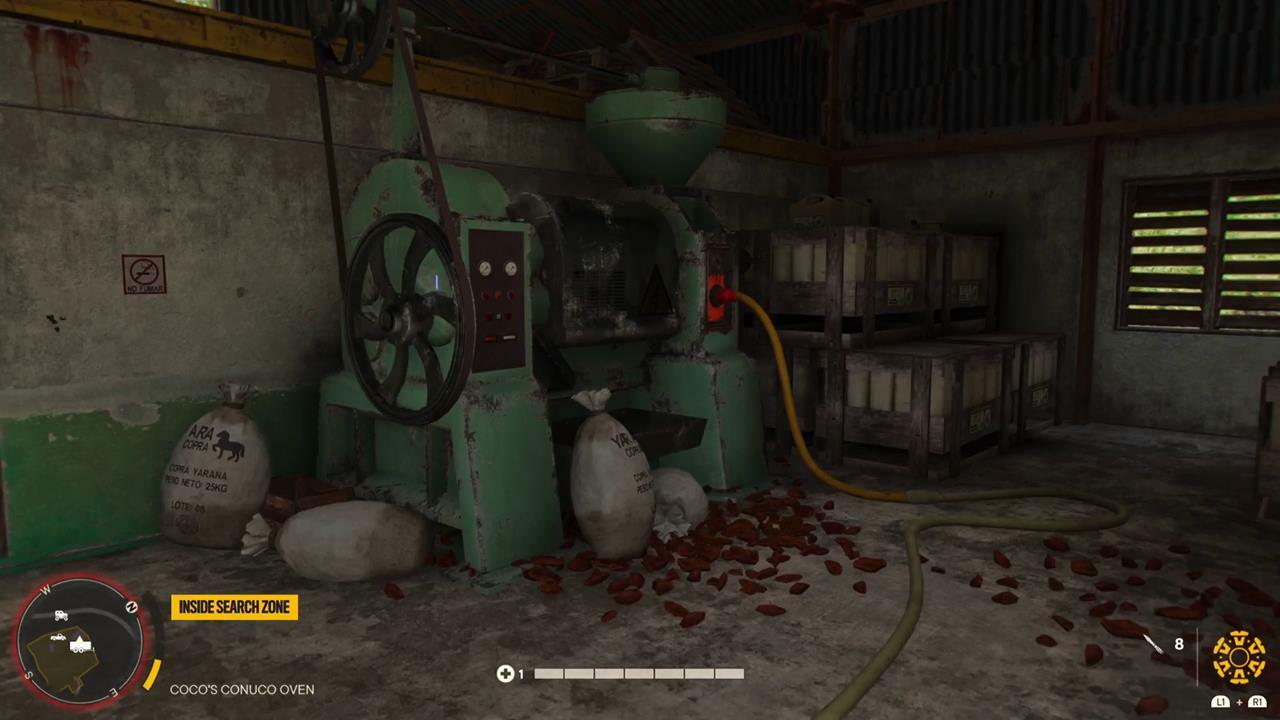
And then this one:
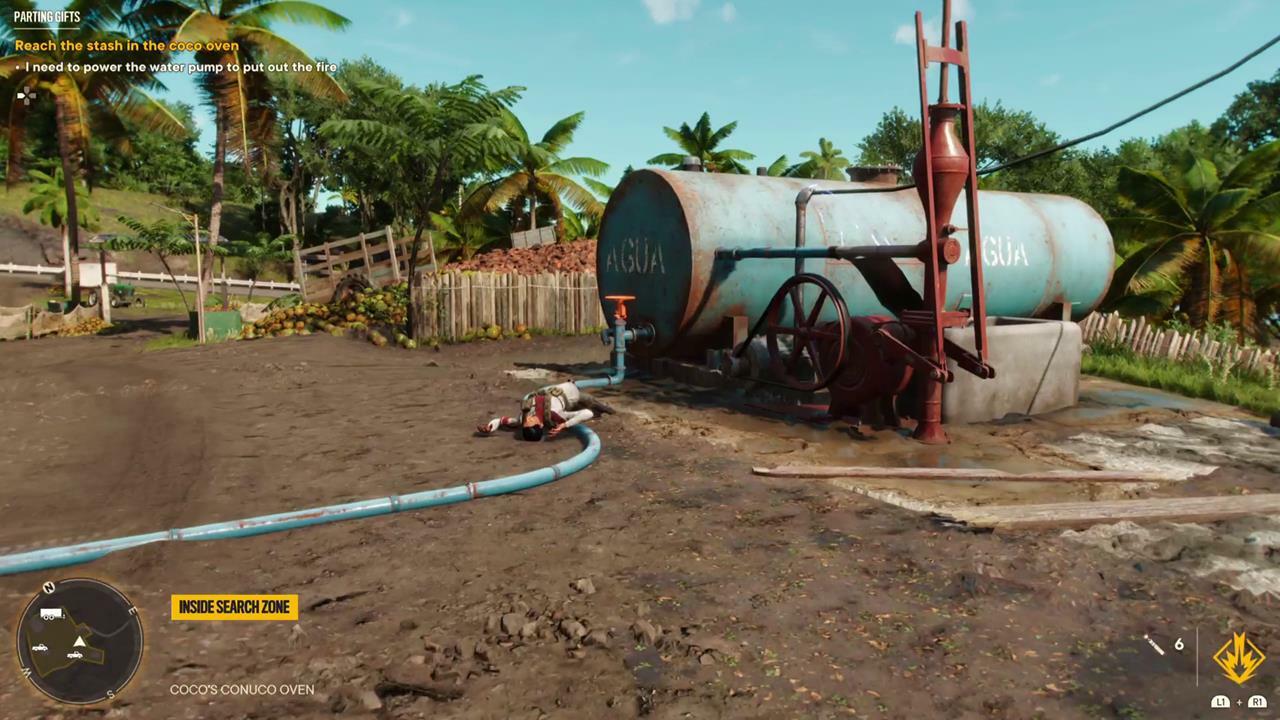
Now for the fun part. Grab the nearby truck, and hitch it up to the disconnected generator:

Drive the generator to the station over here and hook it up:

Now go turn on the water pump:
With the flames out, you can peek through the window of the bunker and spot a lock on the hatch that you can blast off:
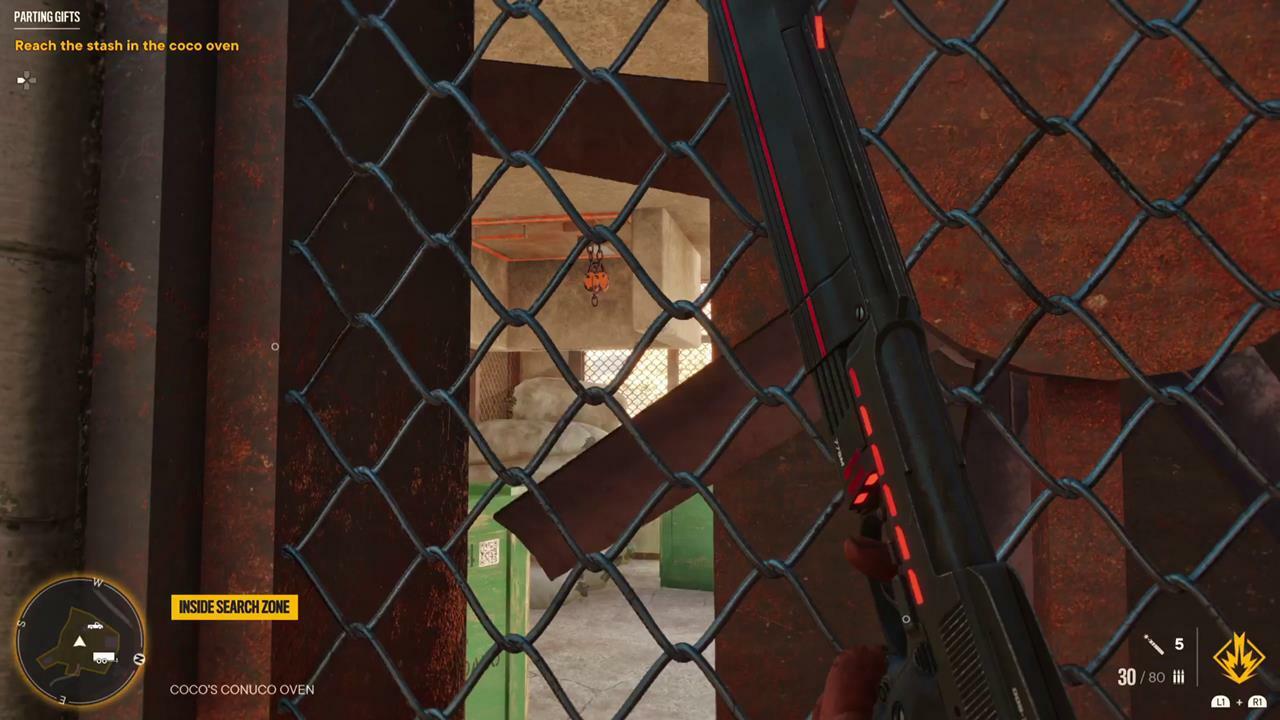
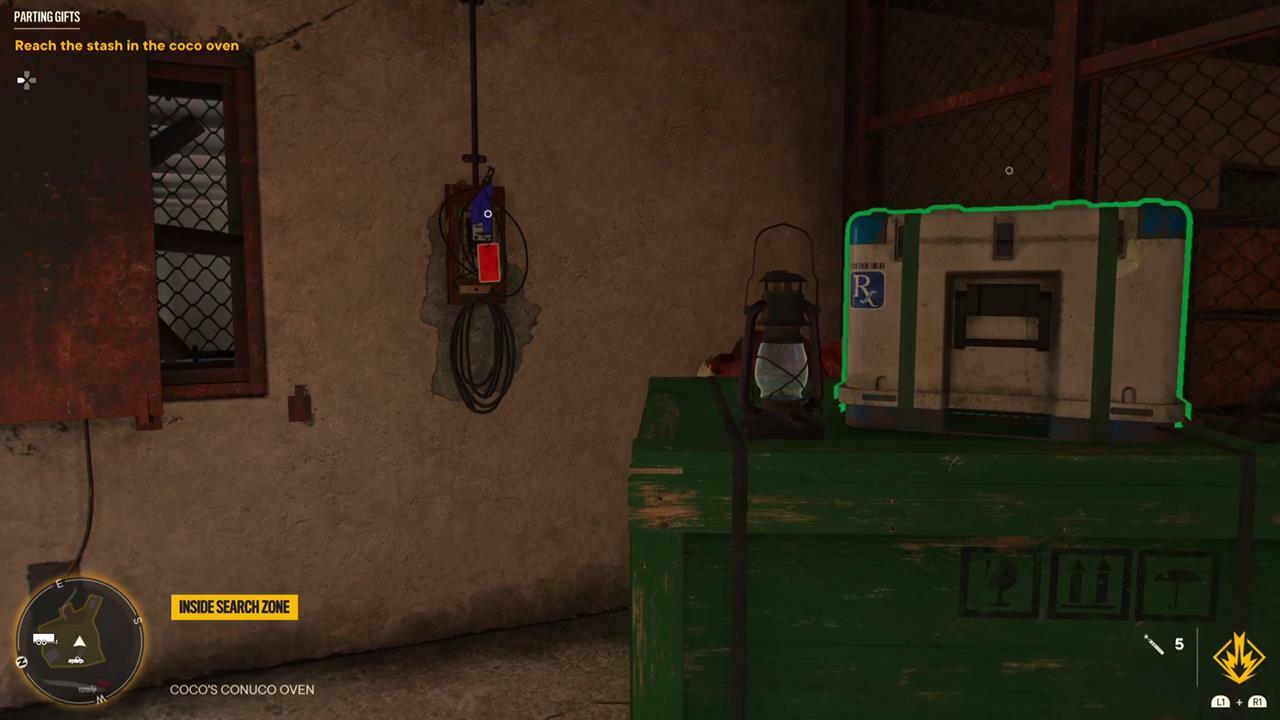
Now that the lock is out of the way, enter from the top and grab the keycard. You can now open the bunker properly and score some materials and the MGL-6 grenade launcher.
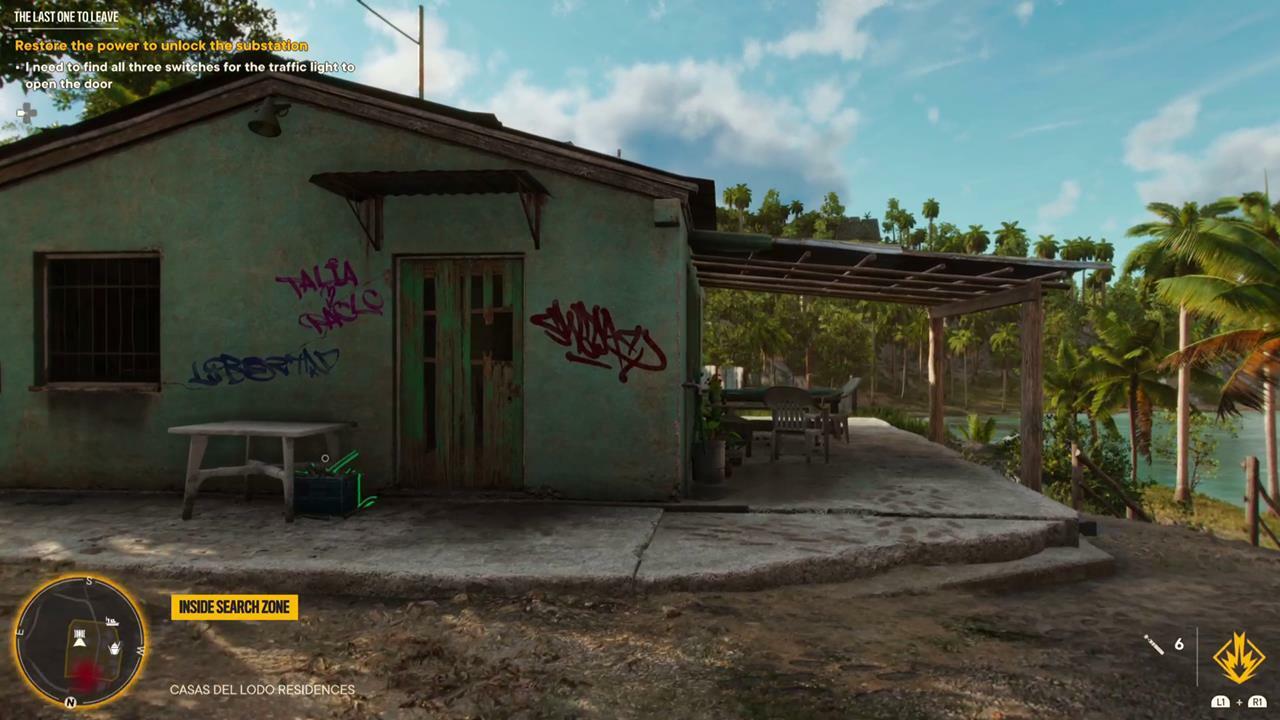
The Last One To Leave

- Location: Esperanza, West Lado
- Rewards: Desert Eagle sidearm, 1,000 Pesos, and Techmaster pants
A family hoping to escape Yara sadly never made it, and it's time to investigate what they left behind. Over in Esperanza, hop onto this power station roof and survey the area:

You'll need to flip three switches in this treasure hunt, with the first one being in this building:
To activate the secret switch, first turn the radio on, then turn the TV on, and then finally examine this framed photograph:

Next, follow the yellow pipeline from this blue house:
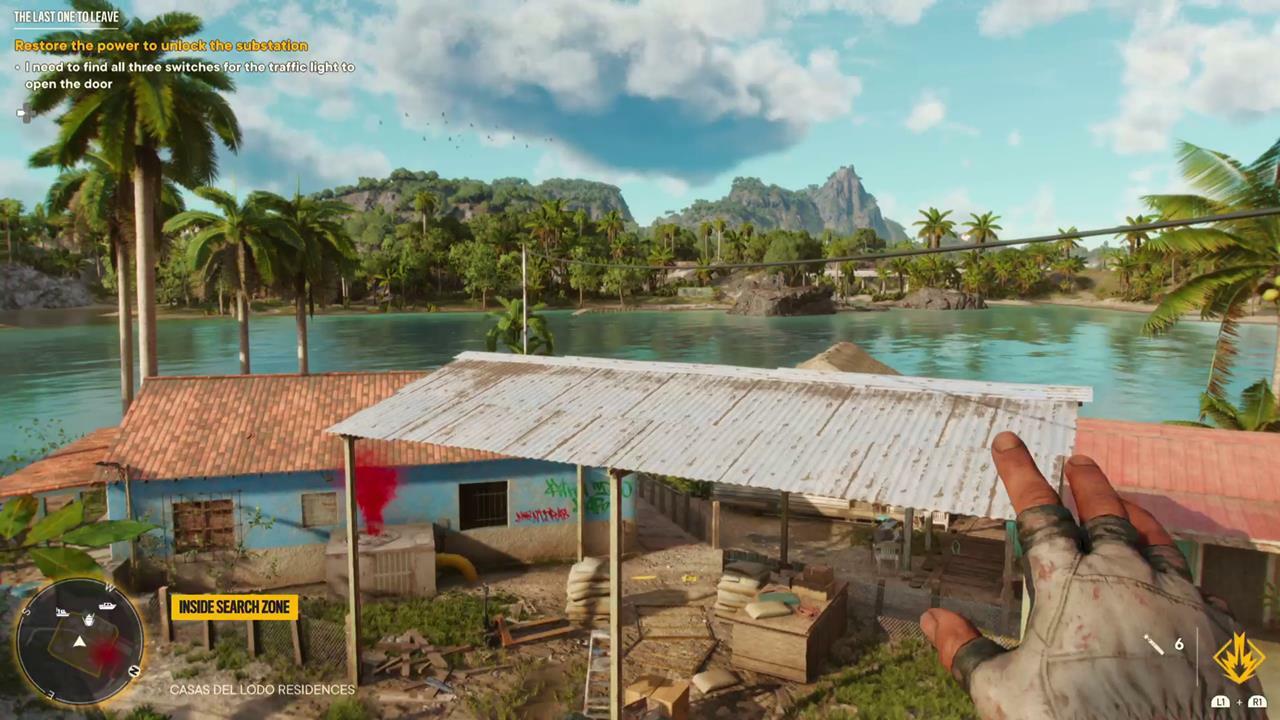
And turn the poison gas off:

Head inside the now safe home, and the switch will be here:

Make your way to this sentry post with the water tank, and turn the switch on over there:
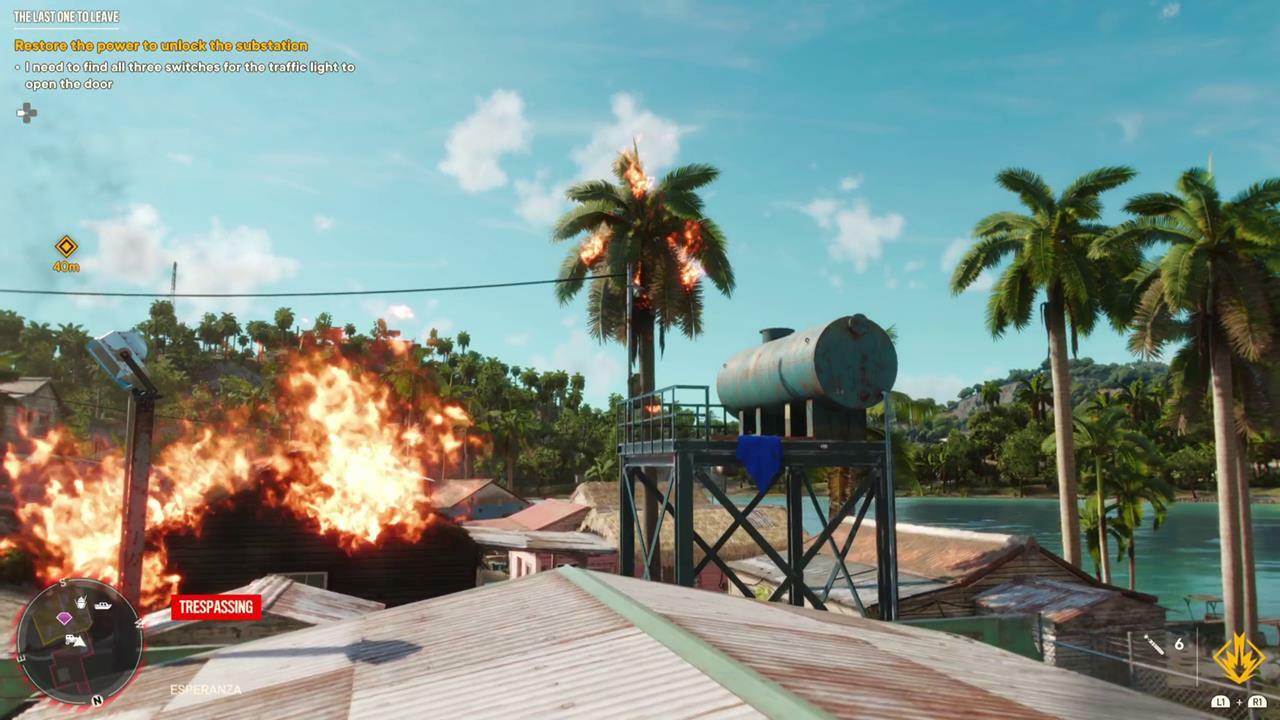
With all three switches flipped, head back to the power block and enter the now unlocked room to claim a Desert Eagle sidearm, 1,000 Pesos, and Techmaster pants.
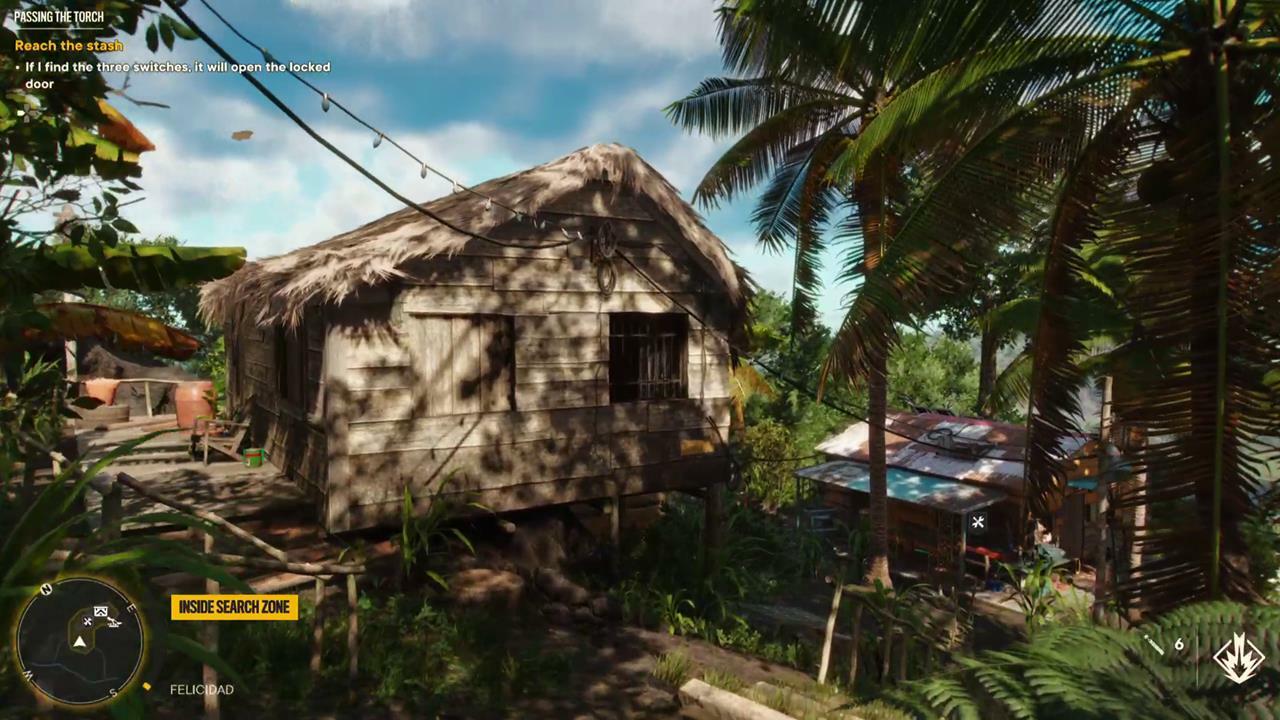
Passing The Torch

- Location: Sierra Perdida, Promise Peaks
- Rewards: Supremo-bond materials, Fifteen Wishes wrist gear, Spas-12 shotgun
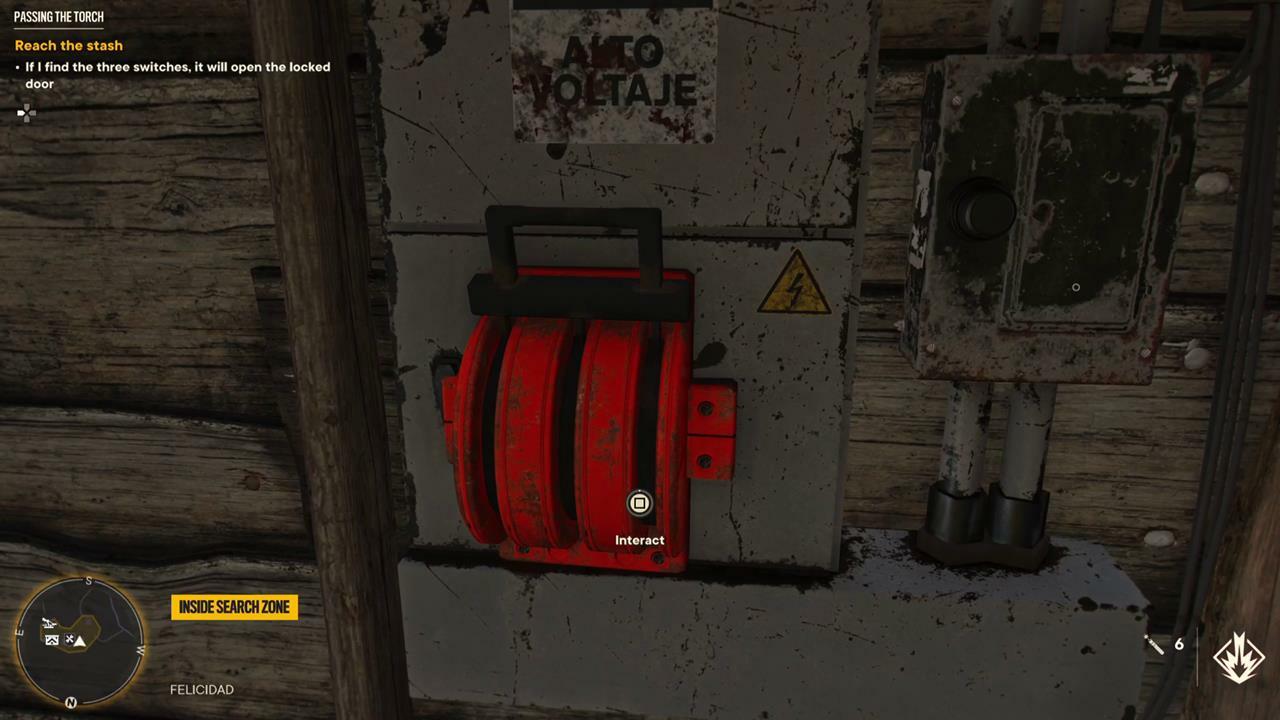
An abandoned rebel hideout is worth exploring, so head on over to Promise Peaks. Here the challenge is to flip three switches to power on the generator, which will open the vault. The first switch is inside this house:
Go onto the deck, jump onto the makeshift bridge, and walk around to enter the open window. The big orange switch is right there:
The second switch can be found in this yellow house:
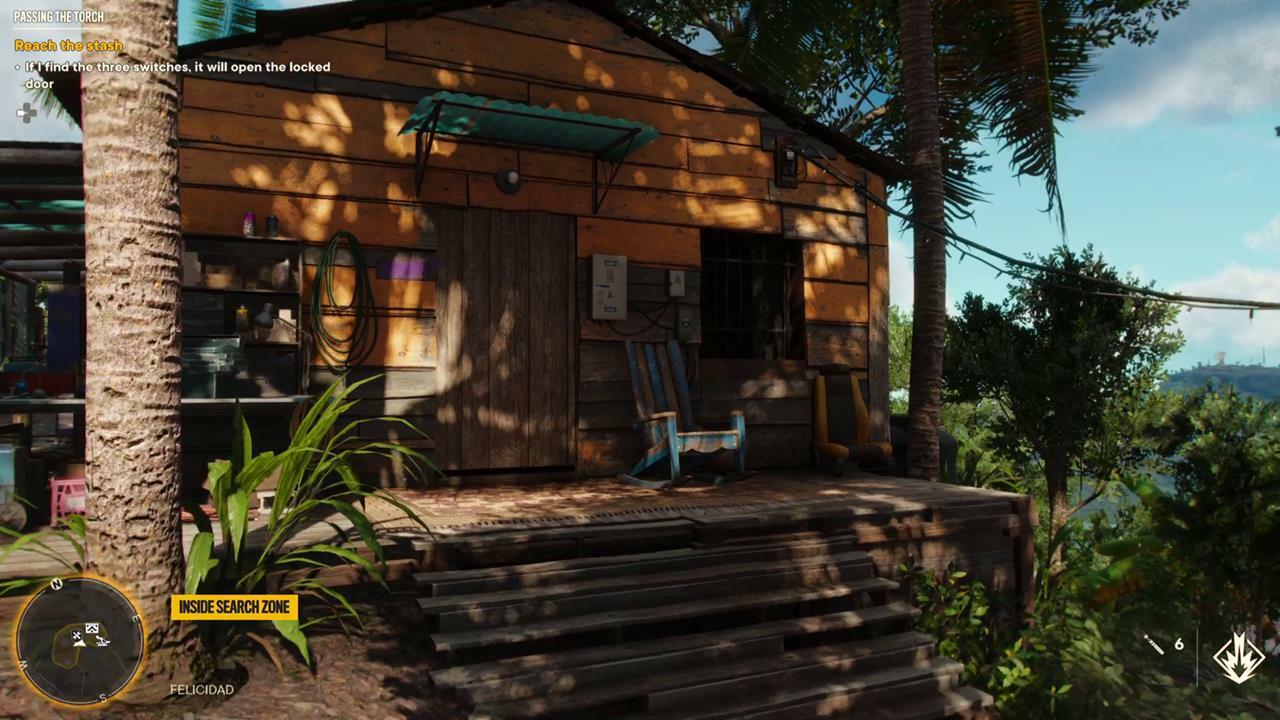
Go past the water tanks, and you'll spot this board that you can smash to get inside the house and flip the switch:
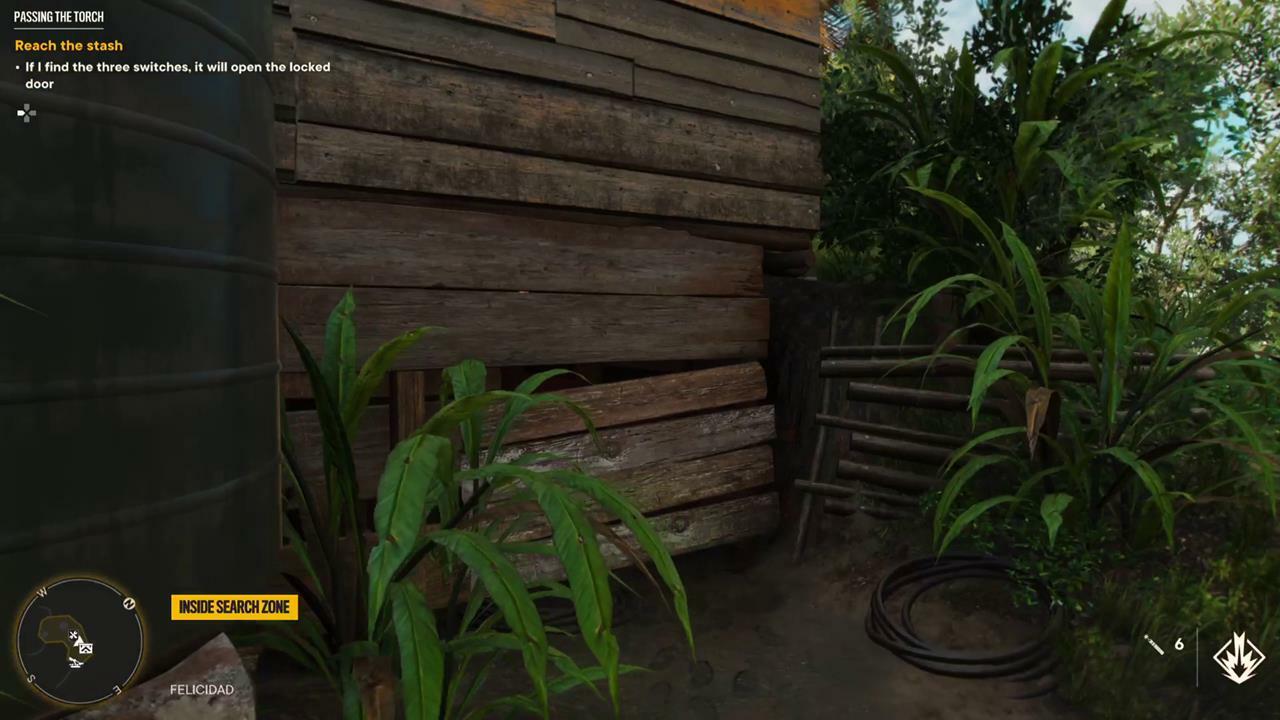
The final switch is in this modest shack:
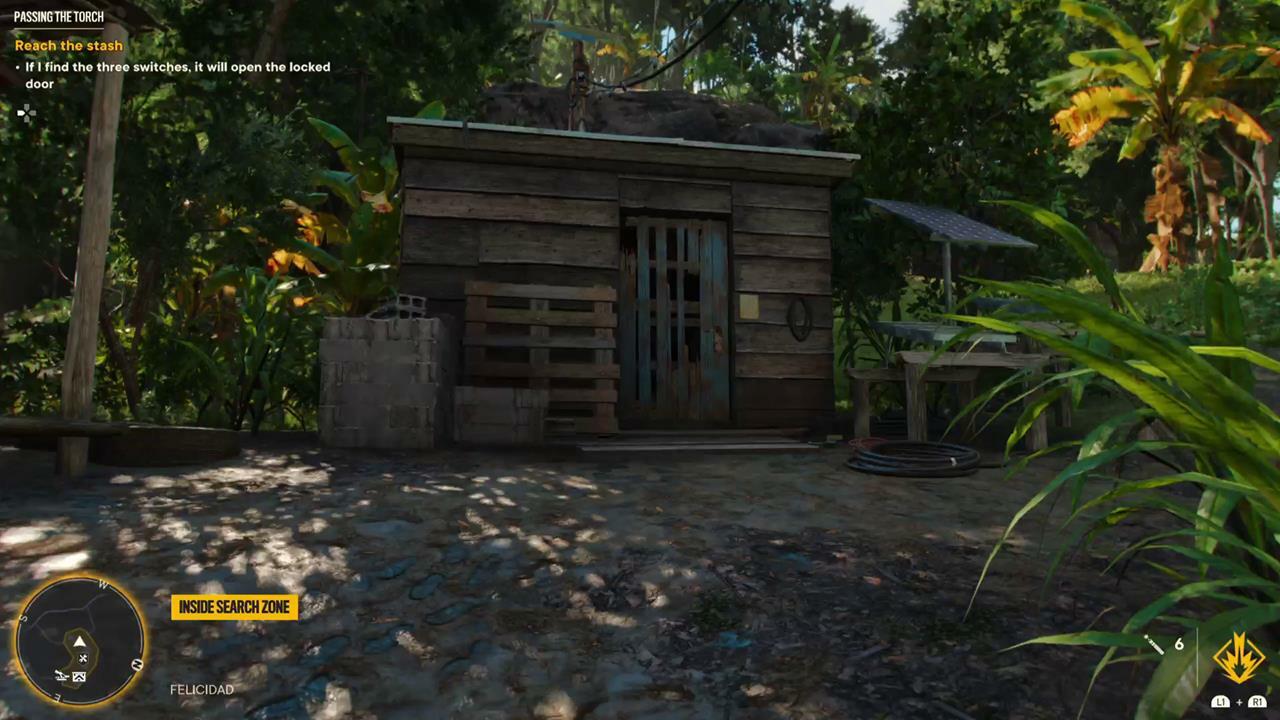
Simply break the flimsy door apart, go inside, and turn the power on. Easy. With all switches now activated, head back down the path and place the primary lever in the on position, and go claim your loot.
A Little Birdie Told Me
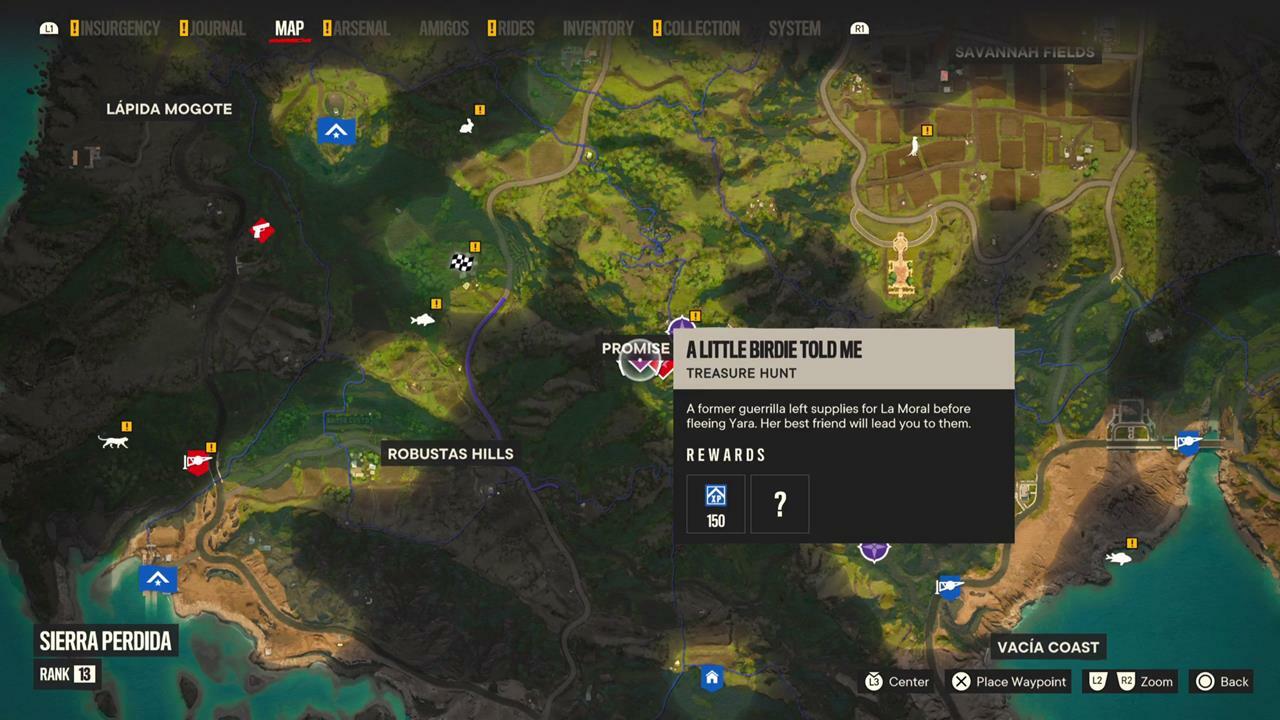
- Location: Sierra Perdida, Promise Peaks
- Rewards: AR-C rifle, Trogon charm
Unlike the other treasure hunts in this guide, this particular mission is all about speed, precision, and keeping a pelican well-fed. Head to your camp in Promise Peaks, and on the west side you can find Danilo the pelican.
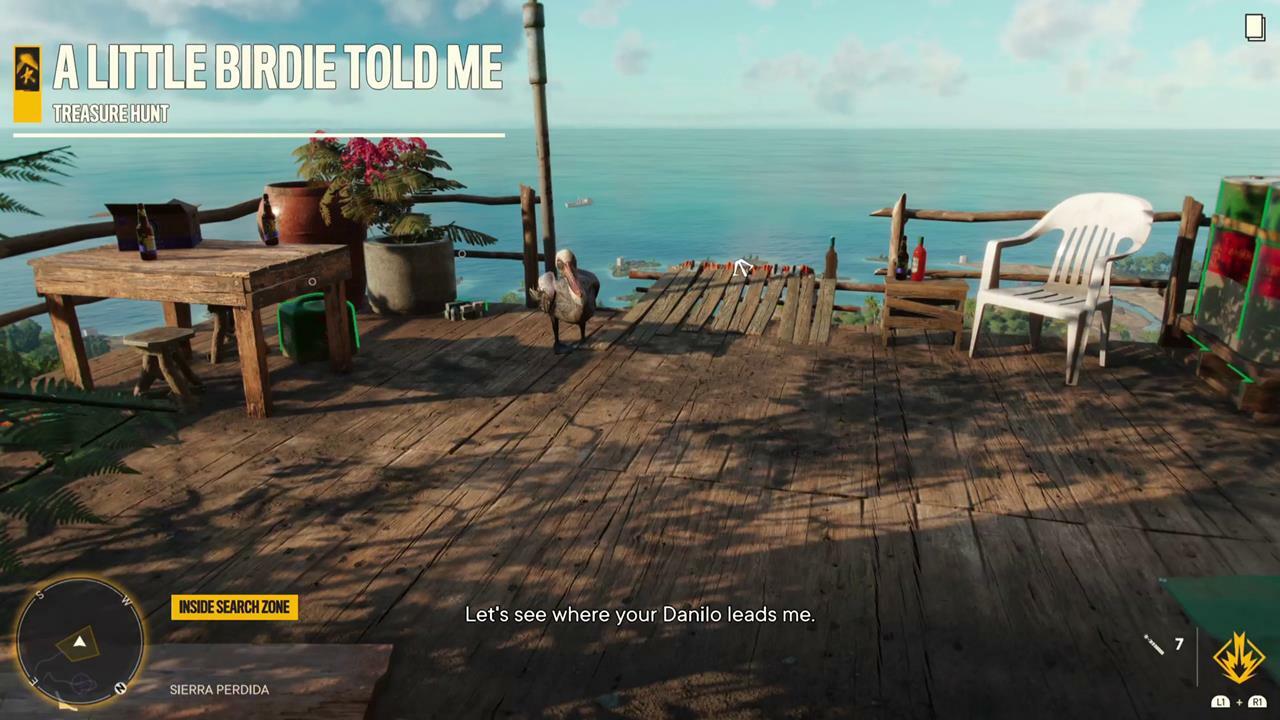
With a fresh supply of fish, Danilo will first fly off the lookout point and you'll need to follow him with your wingsuit. Just make certain that you don't get too far away or the hunt will be over.
Danilo will fly down to Roxas Farm and demand more treats, after which he'll take off again. To keep up with him, grab the nearby ATV and hit the road.
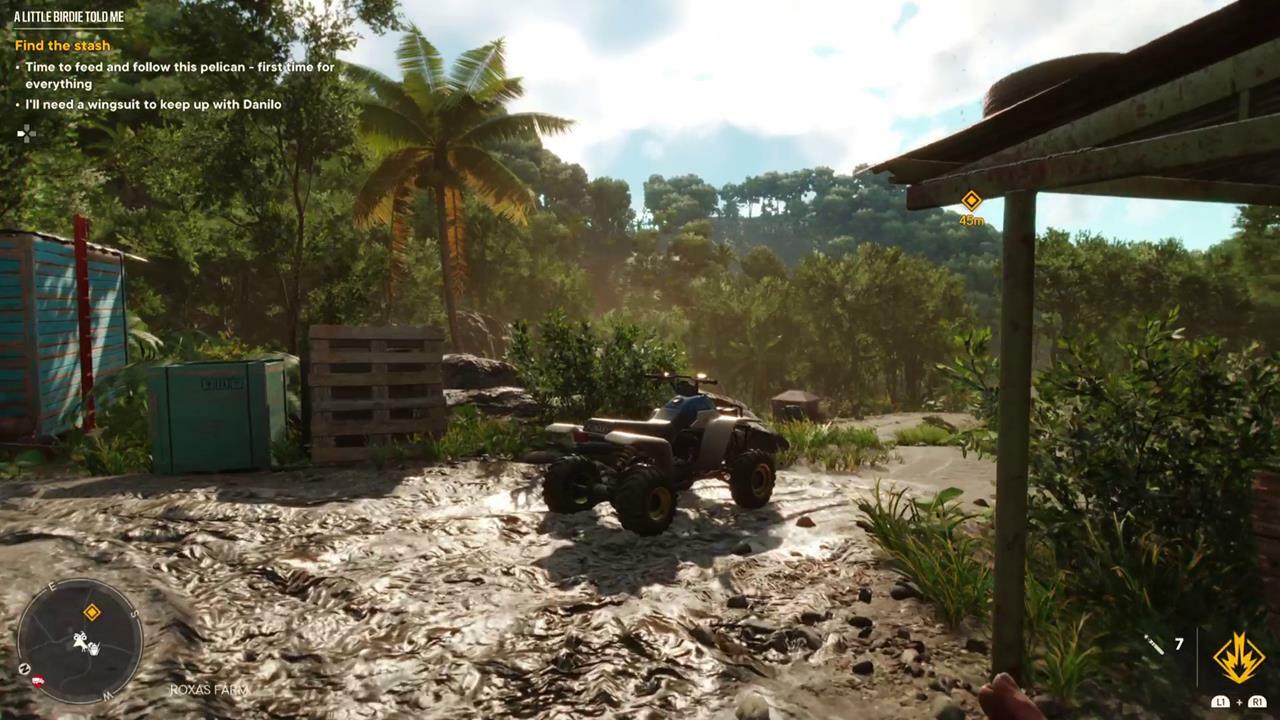
The next stop on Danilo's tour is Sotomayor Farm, and this time you'll need to jump off the cliff to keep up with him. Danilo will land just past Leyva Farm, and once you've fed him yet again, grab the jet ski and follow him to a nearby island.
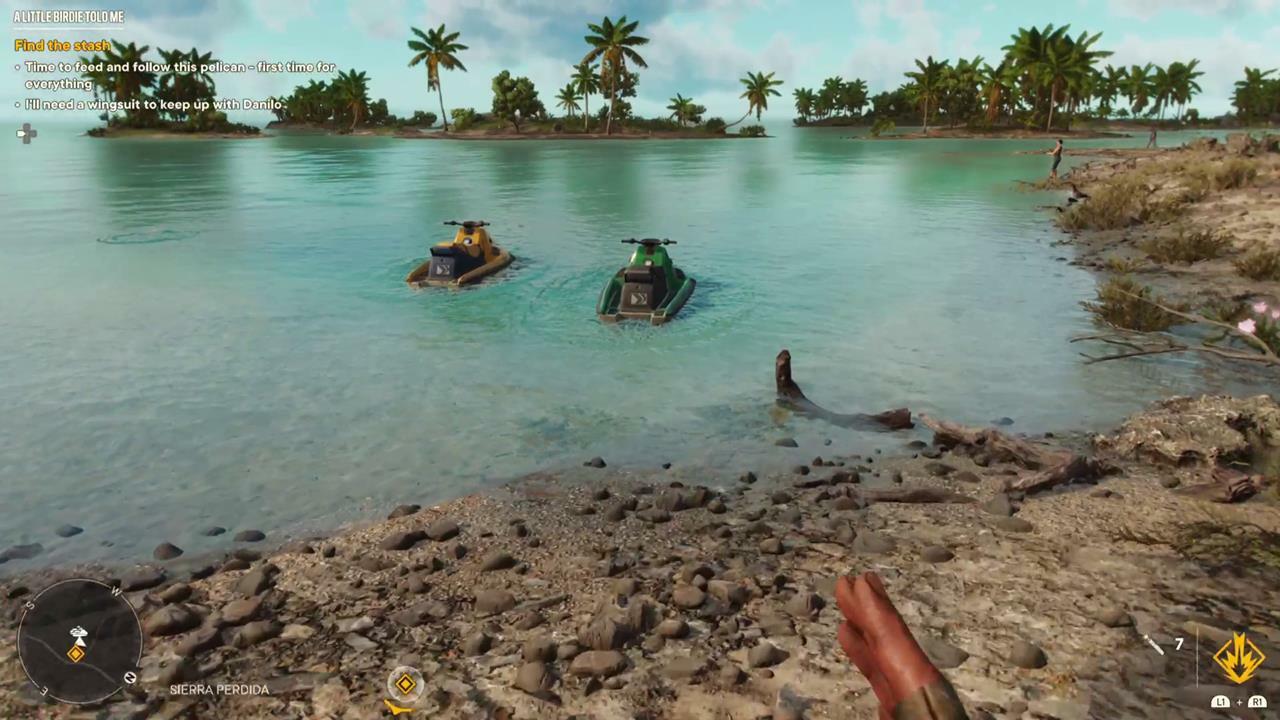
With his stomach full, Danilo will hand over the treasure chest key, which you can use to open the box and grab the AR-C rifle and the Trogon charm.
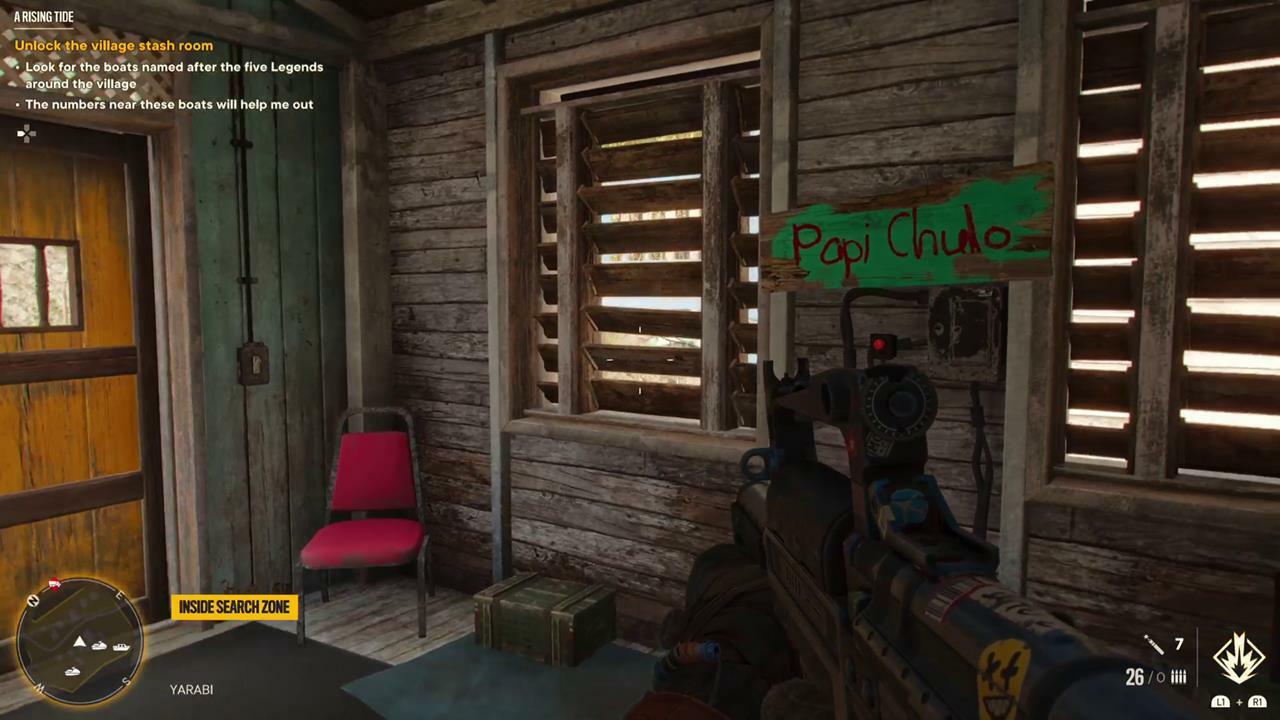
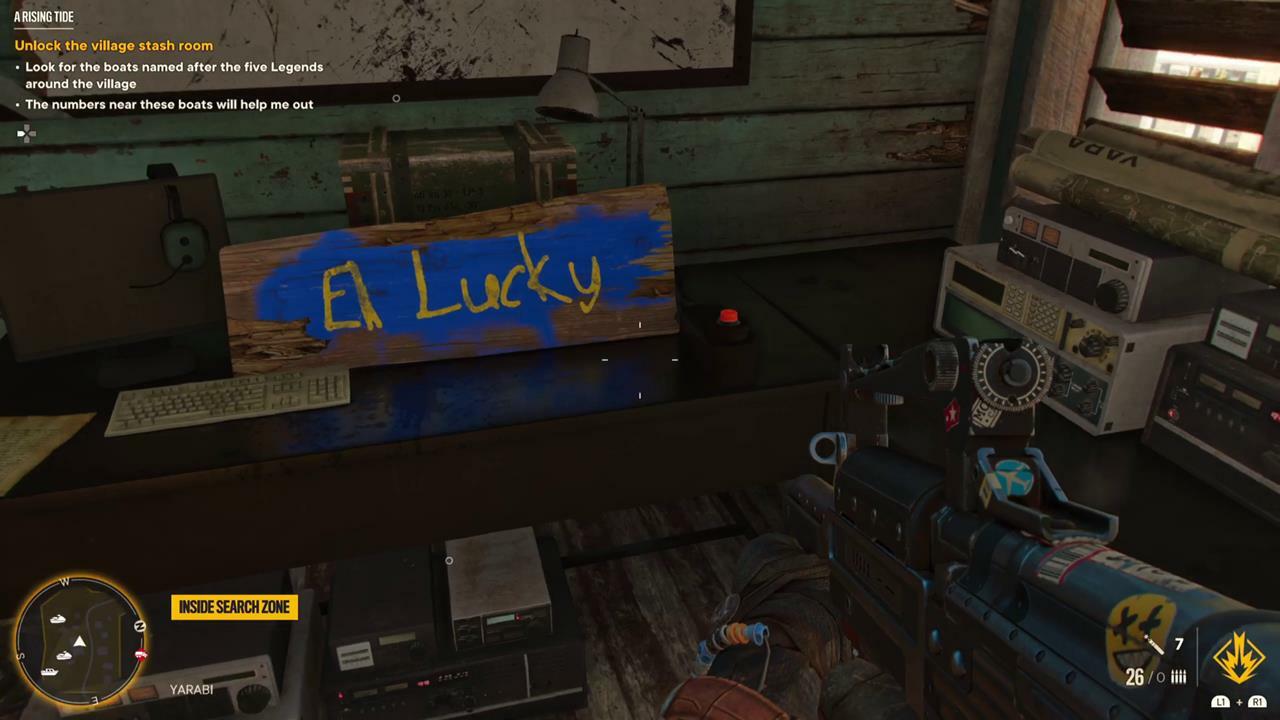
A Rising Tide

- Location: Sierra Perdida, Robusta Hills
- Rewards: Camo Quinceanera rifle
The Legends of '67 left some gear behind just in case anything unfortunate ever happened, and it's time to collect. Over in Sierra Perdida's small village of Yarabi, there's a vault in an old house that has been locked.

The solution? Check out several boats that hide mathematical clues as to how to open the vault, which can only be accessed by pressing five buttons inside the lodge in a specific order. I couldn't actually figure out how those numbers work, but there is a cheat-sheet beneath the house that tells you the exact order:

Back inside, press the El Tigre button first:

Then Papa Chulo:
El Lucky next:
Then the Clarita switch:

And finally the Roja Victoria button:

With the vault open, head inside to claim the Camo Quinceanera rifle and several supplies.
Got a news tip or want to contact us directly? Email news@gamespot.com
Join the conversation