Fable Walkthrough
Whether you've decided to follow the path of good, the path of evil, or something in between, you may need some help along the way. This guide includes tips on building out your hero, a full walkthrough, and locations for all silver keys and chests.
Design by Marty Smith
Fable has been turning heads ever since it was announced, lo those many years ago. As an RPG for the Xbox, a console that’s been notoriously dry of games in that genre, attention was perhaps inevitable, but Fable promised a bit more than your average adventure game, and it’s delivered on many of those promises. As you play through Fable, your character will age, grow fatter or slimmer (based on your eating choices), and drastically alter his appearance through a number of tattoos and hairstyles. Beyond cosmetic changes, though, your character will also be forced to make many choices between good and evil on his journey; your attitude towards the peasants and travellers that you encounter will influence the way that they respond to you. If you gain notoriety as a killer of innocents, they’ll grovel before you, in vain hope of gaining mercy; if you earn a reputation as a champion of the downtrodden, they’ll sing your praises and burst into applause as you pass by. As your fame rises, you may even be able to find a wife. (Or a husband!)
At its core, though, Fable is an excellent action-adventure RPG, featuring multiple different playstyles, a large number of spells, and a host of enemies and bosses to cut your swath through. You play as a nameless Hero, one of many graduates of the Heroes’ Guild, sent out into the world to conquer your fate and earn your reputation, such as it may be. Destiny dictates greatness for you, as you might expect, but how you treat the inhabitants of the game world may have far-reaching consequences and materially affect the outcome of your story. Evil, good, or somewhere in-between; the choice is yours.
Gamespot’s unofficial game guide to Fable aims to help you discover your destiny. Included is a full walkthrough for the game and its many quests, sub-quests, and hidden objectives, a run-down of your various attributes and spells, tips on finding Silver Keys and unlocking the many Silver Key chests that you’ll encounter in your journies, and the proverbial much, much more. Enjoy!
Table of Contents
Being A HeroAttack Spells
Surround Spells
Physical Spells
Combat
Melee Weapons
Archery and Spellcasting
Walk-through
The Hero's Guild
Wasp Menace and Bowerstone South
Protect/Attack Orchard Farm, Hobbe Killing Contest
Hobbe Cave
Trader Escort
Oakvale again, Find the Bandit Seeress
Find the Archaeologist and White Balverine
The Arena
Break the Siege, The Lost Trader
Execution Tree, Marry the Mayor
The Graveyard Path, Rescue Scarlet Robe
Prison Escape, Bounty Hunt, Bandit Spy Extraction
Final Quests
Mini-quests
Silver Chests
Demon Chests
Being a Hero
Attributes And Spells
In the world of Fable, your Hero’s abilities will be based upon his three primary attributes. Each of these corresponds to one of the three major playstyles, but you can feel free to spread your emphasis across two or even all three attributes if you wish; you don’t have to concentrate solely on one kind of style. You don’t increase your attributes automatically as you level up - indeed, you don’t even "level up" per se - but will have to manually decide what you wish to spend the experience you’ve gained on.
Although there are only three types of attributes, there are four kinds of experience: General, Strength, Skill, and Will. Each of the latter three will only be usable for that particular type of attribute. If you gain Strength experience, for instance, you’ll only be able to spend it on Strength attributes. General experience can be spent on any category of attribute, but you’ll need to use up all of the specific experience you’ve gained in that attribute before you can resort to your General pool.
In order to gain more experience, you’ll need to engage enemies in combat and complete quests. You’ll earn plenty of General experience as you finish off quests, but most combat rewards come in the form of specific experience, based on your favored methods of dealing damage. If you join the fray with a trusty broadsword and resort to melee weapons to kill your enemies, you will wind up with plenty of Strength experience; if you choose to zap them with lightning from afar, you’ll find that you’ve amassed a bit of Will experience. In this manner, you’ll be able to specialize in a certain type of warfare. You’ll always be able to spend your General experience on any kind of attribute, but if you choose to use bows instead of swords, for instance, your swordplay will almost always lag behind your archery skills.
Strength
Strength, as you might imagine, is the attribute most important to warriors, fighters, and other Heroes that like to get up close and personal with their enemies. If you sink your experience here, you’ll gain a longer life bar, be able to inflict more damaging blows, and are better able to avoid those of your enemy.
Physique
Physique is the most expensive of the Strength attributes, and with good reason: it directly increases the amount of damage you deal with melee weapons, allowing you to chop through enemies with ease. It also allows you to use heavier weapons as you level it up. Heroes who intend to spend most of their time casting spells have no need for even a single point of Physique; archers may want one or two of the cheaper levels, just in case things get too crowded for bow attacks.
Health
Health increases the size of your life bar. No one should have to have the utility of this explained to them! Every character, no matter if they’re an archer, warrior, or mage, will be getting hit as they wander through the world of Fable, and, well, more health will let you get hit more often without going to that great loading screen in the sky.
Toughness
Toughness is somewhat analogous to Health, in that it actually reduces the amount of damage that your character takes when he’s hit. This is less important than Health for non-melee characters, but is always useful. If you plan on getting into the mix with your enemies, though, you’ll want to level up both Health and Toughness for maximum durability.
Skill

Skill specialists of Fable are more classically recognized as rogues - these are the thieves and archers of Fable’s particular mythos. Improving your attributes here will make you more effective with ranged weapons, and better able to relieve merchants of their hard-earned items, whether through a smooth tongue or via slightness of hand.
Speed
Speed increases your movement rate in combat; it has no impact on your non-combat movement speed. Although the speed increases are tough to spot between each level, the cumulative effect at high levels can be impressive. Speed also decreases the time required to pull back an arrow on your bow.
Accuracy
Obviously enough, this will increase the accuracy of your ranged weapons. If you don’t possess Accuracy, you’ll notice that your aiming reticule will shake before you unleash a fully-powered arrow attack; higher levels of Accuracy will reduce and then eliminate this shaking effect. Accuracy will also improve your damage with ranged weapon attacks.
Guile
Guile has a few different uses. First, it will let you avoid attention when you walk slowly (by only slightly moving the analog stick). Secondly, it will net you a bit of a discount at vendors. It will also give you two new expressions as you level it up. Steal is obtained at level three, and lets you shoplift items that vendors have out for display - this is obviously an evil deed, though, so you won’t need to bother using this if you intend to be a good character. Picklock comes along at level six, and lets you stealthily enter locked buildings, rather than be forced to bash down the door. The fact remains, however, that you will always have the option to go through a door, Picklocking or not, so you likely won’t want to sink your experience into Guile just to obtain this.
Will
Will is the province of the magic-user. If you intend to blast your enemies with fire and lightning, then these are your attributes of choice. Unlike Strength and Skill, which are divided into three generic abilities, Will consists of one ability and a host of different spells that you can pick and choose from. Unlike the abilities, spells only have four different ranks that you can purchase.
Note that some spells are marked Good or Evil. This reflects the fact that characters of a specific alignment will have an easier time using them than others.
Magic Power
Increasing your Magic Power abilities has a fairly straightforward effect: your mana bar will increase in size. This is obviously a good thing for mages, but you’ll still probably want to spend most of your experience on your spells, as they are what let you actually have an effect on the game world. Still, a few ranks here should help you prevent those awkward out-of-mana experiences that so often lead to an early death. Warriors will also want to dump some of their experience here when they have some to spare, especially if they rely on expensive spells like Slow Time and Enflame in battle.
Attack Spells
Enflame
Enflame is a very expensive spell, both in terms of experience cost to acquire and in terms of how much mana you need to cast it. It acts much like Force Push, in that it will repel any nearby enemies from your location, but also adds in a bit of fire damage to the equation.
Enflame is primarily useful for melee fighters, who won’t be phased by the small range of the spell. If you can afford to lay down the experience for it, though, it’s a good reset button when you’re swamped by baddies. It’s most impressive feature, though, is that it only affects characters that are currently hostile to you. If you use Force Push when attempting to defend a bunch of traders, you’ll Push away all of the traders at the same time that you Push all of your enemies. There are plenty of instances when an area-of-effect spell that doesn’t target friendlies will come in handy, so you’ll want to put a couple of ranks into this spell if you can afford it.
At higher levels, you get a much larger radius of effect and increased fire damage. At level three or four, Enflame becomes one of the most efficient methods of killing enemies (especially Undead), assuming you can afford to cast it repeatedly and have enough targets to use it on.
Fireball
Fireball is one of those generic spells that we see in every game with magic in it, but in Fable, it’s actually going to be one of your most-used spells, especially if you’re leaning heavily towards the Will side of things. It acts in similar fashion to a bow, in aiming terms; you can’t manually aim it, however, but you’ll actually be able to hit more than one enemy, thanks to the splash damage that’s built into the spell. Fire damage is also important to use against enemies that are specifically weak against it, such as Undead or Hobbes.

Battle Charge
Battle Charge acts as something of a cross between Assassin Rush and Force Push. When you use it, your Hero will burst forward a short distance, damaging anyone in his path and knocking everyone down; your primary targets will likely be stunned and unable to regain their footing for a short while. This effect is unblockable, making this a great spell to use against the enemies that will normally block all of your attacks, such as Minions.
Multi Strike
Multi Strike has a fairly simple effect; when cast, your next melee hit will actually connect multiple times. At the first rank, your weapon will hit twice (for full damage each time); at level four, you’ll gain four extra hits. This will let you demolish most normal enemies with a single hit, but Multi Strike is mostly useful agains the boss enemies, who will normally block your standard attacks, or against enemies with absurd HP totals, like Trolls. Although Multi Strike doesn’t make your attacks unblockable, it will ensure that the attacks that do get through will dish out extra damage; if you want to increase the damage further, cast it while you have Berserk active to make an unblockable attack that deals extra damage three or four times over.
Note that Multi Strike doesn’t give you multiple charges per cast, unlike Multi Arrow; if you want to use it more than once, you’ll have to keep recasting it.
Lightning 
Lightning is the first spell you’ll receive in Fable; all prospective Heroes receive this during training. Although it is a basic, pure-damage spell, it should suit you fine throughout your career, thanks to its ease of targeting. When you first cast Lightning on an enemy, it will immobilize that foe and start dishing out pain; when you kill off an enemy, it will automatically shift over to the next nearest foe and start the process over again. At higher levels, you’ll gain the ability to hit multiple enemies simultaneously, stunning all of them, but dealing significant damage only to your primary target.
Surround Spells
Force Push
Force Push, as any good Jedi knows, is a very powerful ability, and indeed will be all but indispensable for your character during his journies, no matter what kind of Hero you’re playing. Rather than focusing on a single target at a time, Force Push sends out a wave of energy around your Hero, which violently repels any nearby enemies and sends them careening out of your way.
Although Force Push doesn’t do much damage, its primary purpose isn’t damage-dealing, but crowd control. If your foes are on the ground, they can’t hurt you! This is especially important for characters that haven’t been able to invest in a lot of health-bar extensions, such as magic-users, but you’ll encounter more than a few swarms of enemies in Fable that can overwhelm even the heartiest warrior; having a Force Push handy will let you make time to escape or regroup. Force Push also has the benefit of being extremely cheap, both to cast and to purchase.
Turncoat (Evil)
Turncoat lets you convert one enemy into your unwilling ally for a short time. This is difficult to accomplish, due to the long casting time for the more powerful enemies and the fact that they will eventually break free of your control and resume attacking you (assuming they didn’t die in the course of your battles). It can be amusing to gain control of a bandit and turn him against his allies, but it isn’t efficient.
Slow Time 
When you activate Slow Time, all of your enemies will begin to move more slowly than your Hero, which will allow you more time to plan your attacks or to dodge blows or projectiles. The utility of this is obvious, and though Slow Time is a bit expensive mana-wise, it’s well worth the cost, especially when taking on large groups of enemies, when things can get a bit confused. This is a consensus choice as the best spell in the game; it isn’t flashy and has no direct impact on combat, but after you start using it, you won’t want to stop. The only drawback is that it is mana-intensive, so you’ll need to have plenty of Will if you want to use it often. Even if you only save it for difficult fights, though, you’ll still get your money’s worth from it.
Drain Life (Evil)
There aren’t many healing spells in Fable; most of your healing will come from various produce items and the ubiquitous Health Potions that you’ll find all across the game world. Evil characters, though, can use the Drain Life spell to suck the life right out of their foes; any life drained in this manner will be added to your own life reserves. The main drawback is that you’re vulnerable to attack while you cast, so you won’t be able to use it in the middle of a heated melee. It’s best to save Drain Life until you incapacitate an enemy via a knockdown or stun, then get what health you can until your enemy regains his senses. Note also that some enemies, such as Undead, are immune to the effect of Drain Life.
Summon (Good)
When you first cast Summon, you’ll obtain the services of the ever-formidable Wasp. If you let the wasp kill an enemy, though, that enemy will replace the wasp as your new summonable helper! This process of replacement will let you constantly upgrade your helper throughout the game, but it’s important to let your summoned creature get the killing blow if you intend to replace it with something else. (Your summon can’t replace itself with a weaker monster, so you might just want to let it go crazy during combat.)
Although most enemies are Summonable, there are exceptions, including the various Trolls and, of course, boss enemies. You can, however, capture human opponents. You might want to attempt to capture an enemy that will complement your play style. A warrior, for instance, might want a spellcaster or archer, while a magic-user might prefer something with strong defensive capabilities and a large amount of health.
Higher ranks in Summon will increase the length of time that the summoned monster will stick around.
Physical Spells
Physical Shield (Good)
If you’re a spellcaster or an archer, you’ll likely want to keep Physical Shield close at hand. When cast, enemies will start dealing damage to your mana bar instead of your health, which in effect gives you two health bars to draw from. Whether or not this is actually useful will depend on your experiences in the game; if you find yourself constantly on the edge of death while engaging enemies, then you’ll want to keep a full bar of mana and Physical Shield up, but most players probably won’t have too many problems staying alive with just their health bar.
What makes Physical Shield most useful, though, is its ability to prevent your experience multiplier from dropping when you get hit by a physical attack. Attacks don’t hit you, actually; they’re repelled while the shield is up, meaning that your multiplier won’t get cut down while it’s active. Thus, if you can keep it up during a longish fight, you can get your multiplier much higher than you would be able to if you didn’t have it. This will greatly increase the amount of experience you get, and will also come in handy when attempting to open a certain Demon Door.
Higher ranks of Physical Shield reduce the amount of mana you lose when you get hit.
Ghost Sword
Ghost Sword is probably the most efficient summoning spell in Fable. When cast, you’ll conjure into existance the eponymous Ghost Sword, which will attack your enemies when they come near. Higher ranks allow you to summon more swords at a time, up to a maximum of four. While the swords don’t last too long, they’re quite helpful when dealing with crowds of enemies, as they’ll break up tightly-bunched groups of enemies and let you focus on whatever foe you deem the biggest threat.
Kills from a Ghost Sword don’t count as kills by your Hero, so if you attempt to take a boast that involves not killing any enemies, you may be able to use your Ghost Swords to kill by proxy, and simply keep your defense up while they do the dirty work. This shouldn’t invalidate your boast, but it will depend on the specifics of the boast; boasts involving not killing specific bosses or NPCs will still likely be failed if you use your Ghost Swords to off the target.
Berserk (Evil)
Berserk is a fantastic spell if you wish to be a melee warrior. When activated, it increases damage that you dish out, but more importantly, it makes your physical attacks unblockable. It also makes it more likely that your attacks will knock over an opponent when they strike. You’ll also attack more quickly. Unfortunately, Berserk will also increase the amount of damage that you receive when you take melee attacks, but this should be inconsequential in the short term, as you will have a much easier time getting your attacks through and therefore will be better able to keep your enemies on the defensive, or on the ground.
Even if you rarely whip out your sword, and even if you have to pay extra for it due to a good alignment, you’ll likely still want to have at least one rank in Berserk, as its ability to make your attacks unblockable comes in incredibly handy when used against some of the melee-oriented bosses, most of which will repel all of your normal attacks.
Higher ranks of Berserk will increase the amount of damage that you deal.
Heal Life (Good)
You won’t need to worry too much about your health in Fable. There’s plenty of produce to be had around the game world, both in shops and as monster drops, and in a pinch, you can fall back on a Health Potion, which are similarly plentiful. Heal Life is also rather expensive in mana terms compared to the amount of health that you gain back. So you won’t really need to worry about Heal Life for the purposes of keeping your Hero up to snuff.
Where Heal Life does come in handy, though, is during the many escort quests you’ll be running. In addition to healing up yourself, Heal Life can be used to heal any nearby friendly followers. So if, for instance, you’re escorting a trader from one location to another, and he takes a bit of damage, you can escort him to a safe spot of a zone and use Heal Life to bring him back up to full health before proceeding onwards. Every Hero will want at least one rank in Heal Life for this purpose, no matter if you’re evil or good.
Assassin Rush
Assassin Rush is the cheapest spell in the game, as befits something that deals no damage and has no direct effect on combat. When cast, your Hero will simply shift his position forward a few meters; if an enemy is directly in front of him, he’ll wind up behind it. If you’re not in combat, you can spam this just as a travel enhancement, but there are usually better things to have bound while you’re actually fighting enemies. As per usual, though, one or two ranks might come in handy at some point, and Assassin Rush is costed cheaply enough to make two levels in it cheaper than one rank in most other spells.
Multi Arrow
Everyone should pick up one or two ranks of Multi Arrow, even if your bow is only a fall-back weapon that you use in emergencies. There are a few enemies in the game that can’t be reached with normal weapon attacks, such as Nymphs and some bosses; in these instances, Multi Arrow can greatly increase the efficacy of your bow attacks, even if you haven’t been increasing your Skill attributes.
When you cast Multi Arrow, your Hero will be surrounded by four glowing balls of light; each of these balls represents one charge for the spell. You’ll have to switch back to the left-trigger toggle to actually fire the weapon; casting the spell doesn’t actually draw your bow or anything like that. While you have at least one charge remaining, you’ll shoot out multiple arrows each time you fire your bow. (Hence the name "Multi Arrow.") Although using Multi Arrow cuts the damage of each individual arrow by 50%, you will get three separate arrows at level one, and up to seven different arrows at level four, thus greatly increasing the amount of damage you can deal.
The main thing to consider about Multi Arrow is that it’s less effective at short range, due to the fact that your magical arrows will require a bit of time to lock onto their target. If an arrow does miss, it will wander around in an attempt to find a target, but this might result in civilian damage if you’re not careful about when you shoot! In all, though, the benefits of Multi Arrow far outweigh the negatives, so unless you exclusively use magical attacks, you’ll want a rank or two here.
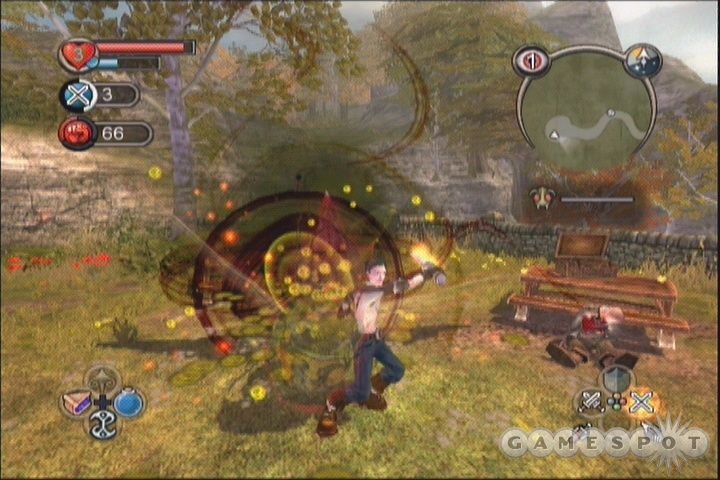
Combat
Beside the relatively benign interactions you can perform with the many townsfolk, the majority of your playing time will be spent beating down enemies. The combat system in Fable is relatively straightforward, so you shouldn’t have too many problems learning the basics, but as you progress into the game, you’ll find that the challenge level ramps up considerably, as enemies come in larger numbers and become more likely to be able to block your attacks. (The physical ones, anyway.) This chapter is intended to give you a few strategies that will hopefully help keep you alive.
There are three main types of combat in Fable. You can choose to focus exclusively in one of these, specialize in one and dip into the others, or attempt to spread your experience points out through all three areas. The most effective choice is probably the second; if you concentrate on one aspect of combat and master it, while still retaining a bit of experience for the other areas, you’ll be able to handle almost anything that’s thrown at you. You can switch between the combat types as you like, but keep in mind that the experience you gain for each area depends on how often you use it; if you never use your bow, for instance, you’ll only be able to spend general experience on skills there.
Melee Combat
If you intend to rip through enemies with a large sword, then you’ll want to sink your spare experience into your Strength attributes, which have a direct effect on your efficacy in combat. Extra Physique will help you deal more damage, and will let you wield the game’s heavier weapons with ease. Toughness and Health are also obviously useful to anyone who’s going to take damage (and anyone who engages in melee will be taking plenty of that).
Outside of the Strength attributes, though, you’re going to want to invest in some Skill and a few Will abilities, as well. In Skill, Speed will be useful to you, as it will increase your footspeed in battle, and will let you shoot arrows more quickly when you have to resort to ranged combat. Accuracy is also useful, albeit less so. Guile can be safely ignored, unless you’re desperate to shoplift and loot people’s houses. There’s some decent loot to be found doing this, but whether it’s worth spending thousands of experience to get it is another matter.
There are a few specific aspects of melee combat that deserve to be treated in greater detail.
Blocking and Flourishing
Blocking can be accomplished in fable by simply holding down the Y button. If an enemy hits you while you block, their blow will (usually) bounce off, which will result in them staggering for a second or so. If you have a weapon that’s categorized as Light, you should be able to take advantage of this by hitting them during the stagger; if your weapon is Heavy, though, you’re unlikely to be able to get a swing through before they can raise their own block again.
If you’re proceeding as a melee character that uses spells, then you shouldn’t have to worry about blocking very much; abilities like Berserk, Force Push, and Enflame will let you penetrate blocks or knock enemies down, which will let you get attacks in on them while they rise, since they can’t block until they stand up again. If you’re pure melee without any spells, well, you’re going to have to rely on blocking quite a bit, as you’re going to get swamped by enemies when they appear in numbers. You’ll also have to watch your back, as blocking won’t help overmuch when someone is swinging from behind you.
As mentioned, you can penetrate enemy blocks with a number of spells, the most effective of which is Berserk, which will enable you to knock down any enemy that you hit. If you’re low on mana, though, you’ll need to use your Flourish ability to get through blocks. When you get off a few hits without taking damage, you’ll notice that the B button indicator will light up; when this occurs, feel free to press it to send off a Flourish. What kind of attack this will result in will depend on your stance and the number of enemies. In most cases, you’ll do an overhand chop that will knock down the enemy; as with Berserk hits, Flourishes automatically penetrate blocks, so you can be assured that this hit will connect, if you’re aiming accurately. In fact, if you manage to hit with a Flourish, you’ll be able to do another one immediately, but if you miss with a Flourish, or take a hit, the ability will vanish until you get a few more hits off.
Note that you don’t actually need to do any damage to unlock a Flourish; if your attacks are repelled by an enemy block, keep attacking and you’ll eventually get a Flourish anyway. Since you lose a Flourish if you miss an attack, though, you’ll want to make sure that you lock onto your target with the left trigger before you bust your move.
Melee Spells
Your choice to focus on melee combat won’t block you from accessing any of the spells in the game, but you’ll find that some have much more utility for you than others. Here’s a list of what to focus on:
Berserk: Berserk is just plain useful! One of the common complaints about the spell is that it knocks your enemy down each time you connect (and you always connect), meaning that you have to wait while they get up before you can hit them again, but this doesn’t change the fact that penetrating blocks = a very good thing. This is especially great for dealing with large crowds.
Enflame/Force Push: You may want to only concentrate on one of these, but you can safely invest in both of them if you want a more diverse set of spell choices. Enflame has a smaller radius, costs more, deals more damage, and doesn’t hurt your escorts or friendly characters, while Force Push is cheaper, deals almost no damage, hits friendly characters, and pushes targets quite far. One of these is a requisite; getting both up to level three or so is perfectly possible.
Slow Time: Use it, love it. Equally useful in large melees and against single, powerful foes. Expensive, but worth it.
Battle Charge/Assassin Rush: Which of these you prefer to use will depend on your style of play, but they can both be useful in combat. Battle Charge is more desirable when dealing with mobs; Assassin Rush will prevent single enemies from getting a bead on you.
Melee Weapons
For the first half of the game or so, you’ll be reduced to using basic weapons and simple augmentations. The game’s shop interface will show you how much more powerful a prospective weapon is than the one you have equipped, but the general ranking goes, in the order of least to most powerful: Iron > Steel > Obsidian > Master > Legendary.
Most weapons are classified as either Light or Heavy. Light weapons swing more quickly, but deal less damage, while Heavy weapons are better equipped to deal massive blows a bit more slowly. This essentially boils down to personal preference; most of the Light weapons look less impressive, due to their lower damage, but you have to balance that against the fact that you’ll be attacking (and hopefully hitting) more often.
The most important weapons in the game are the Legendary Weapons, though. There are 14 or so of these scattered around the game world, and most of them are melee weapons. These deal more damage than most weapons, and come with built-in Augmentations. Here’s a list of the melee items; check the Archery section below for the bows.
Frying Pan
Weight and Type: Heavy Frying Pan
Damage: 100
Augmentations: None
Found: This is your reward for completing the Hidden Booty Hunt quest. Aren’t you glad you went to all the trouble?
The Harbinger
Weight and Type: Light Longsword
Damage: 198
Augmentations: Silver, Sharpening
Found: Found near the Church of Avo, stuck in a rock. In most cases, you will need to max out your Strength attributes to unlock it, but don’t feel compelled to do so; you can easily find better weapons out there, such as the Katana Hiryu inside Lady Grey’s estate.
The Cutlass Bluetane
Weight and Type: Light Cleaver
Damage: 165
Augmentations: Lightning
Found: Inside the Greatwood Caves Demon Door. You can get this fairly early in the game if you can satisfy the conditions of the Demon Door.
The Katana Hiryu
Weight and Type: Light Katana
Damage: 215
Augmentations: Flame, Sharpening
Found: Found inside Lady Grey’s house, after you marry her.
Wellow’s Pickhammer
Weight and Type: Light Pickhammer
Damage: 120
Augmentations: Piercing, Piercing
Found: Found behind the Demon Door at Greatwood Gorge. Unless you’re attempting to unlock all Demon Doors, don’t go out of your way for this weapon; it sucks, to be blunt.
Ronok The Axe
Weight and Type: Light Axe
Damage: 165
Augmentations: Silver, Sharpening
Found: Found past the Demon Door at Grey House, after you marry Lady Grey. This makes it somewhat irrelevant, due to the fact that you’ll find the Katana Hiryu at the same time.
Dollmaster’s Mace
Weight and Type: Light Mace
Damage: 135
Augmentations: Mana
Found: Found behind the Demon Door in Abandoned Road. Decent for spellcasters, who won’t actually need to use it in combat, due to the mana regeneration properties, but it deals very poor damage.
The Murren Greathammer
Weight and Type: Heavy Greathammer
Damage: 270
Augmentations: Experience, Piercing
Found: When you get 20 Silver Keys, unlock the chest at the Heroes’ Guild. Use it, love it. This is one of the best weapons for melee characters, surpassed only by the Sword of Aeons and the Solus Greatsword.
The Sentinus
Weight and Type: Heavy Greatmace
Damage: 255
Augmentations: Silver, Piercing
Found: Obtained by making a single large donation (of 35,000 Gold or more) to the Church of Avo. You’re better off saving your money for the Solus Greatsword, no matter how pious your character is.
The Murren Greataxe
Weight and Type: Heavy Greataxe
Damage: 240
Augmentations: Piercing
Found: Found at the top of the Hook Coast lighthouse. 
Solus Greatsword
Weight and Type: Heavy Greatsword
Damage: 314
Augmentations: Health, Flame, Sharpening
Found: You’ll need to pony up around 70,000 Gold for this at the shop in Bowerstone North, but it’s very well worth it if you ever plan on using a sword in combat. The built-in Health Augmentation alone is worth around 25,000 Gold in shops.
Sword of Aeons (Spoiler Warning!)
Weight and Type: Light Sword of Aeons
Damage: 550
Augmentations: Health, Mana, Experience, Sharpening
Found: This is the sword that Jack of Blades drops at the end of the game. If you choose to keep it, then let the credits roll, it’ll be in your possession. You won’t be able to do much with it, since there won’t be any quests, but hey, now you really shouldn’t have any problems with the enemies around the game world.
Archery
If you focus on Skill abilities, you’ll find that your Hero will be naturally better with a bow than other characters. If you intend to use a bow as your primary weapon, though, you’ll want to concentrate almost all of your experience points into Speed and Accuracy; Guile is more intended for thieving and stealthy characters, as it has little impact on combat, besides allowing you to sneak up on your enemies.
In order to succeed as an archer, you’ll need to ensure that you can get close enough to your enemy to shoot them without them getting wind of you ahead of time. This will require you to wear stealthy clothing; the Assassin’s outfit is naturally suited for this kind of activity.
Beyond getting in range, there isn’t much strategy involved in archery. Just get your bow ready and keep firing before your enemies get too close! You can manually aim by clicking the left analog stick; when you have high Accuracy, you can go for headshots, which instantly kill most enemies.
Spells
Multi Arrow: This is the only spell that directly affects archery combat. Needless to say, if you’re focusing on bows, you’ll want to max this spell out as quickly as possible, as it devestates most enemies; even boss monsters won’t usually be able to take more than two or three salvos from a maxed-our Multi Arrow.
Force Push: Force Push is more useful than Enflame in most cases, for archers anyway, although if you want the extra damage, feel free to concentrate on the latter spell.
Slow Time: When using ranged combat, Slow Time will let you pick out headshots on moving enemies with much greater ease, and will give you more time to strike after you make your initial shot.
Weapons You’ll only have two types of bows in Fable: longbows and crossbows. Bows are the standard choice for archers; crossbows deal a bit more damage, but require a much longer reload time, thus reducing the damage you deal over time. Unfortunately, the Legendary longbow is only available to greatly evil characters, or players who are willing to commit evil acts to obtain it.
Skorm’s Bow
Weight and Type: Longbow
Damage: 264
Augmentations: Lightning, Sharpening
Found: In order to obtain Skorm’s Bow, you’ll need to make a number of human sacrifices at the Church of Skorm. If you can persuade villagers to follow you in, you can use them; mercenaries also work well. If you want extra evil points, get your wife (or wives) to follow you here, then cast them into the void by talking to the NPC. You’ll obtain an age reduction and a new title before you get the bow, so you’ll need to spend a fair amount of time luring people to their death before you get the prize.
Arken’s Crossbow
Weight and Type: Light Sword of Aeons
Damage: 264
Augmentations: Flame, Silver, Piercing
Found: Found in a Silver Key Chest in Darkwood Lake.
Spellcasting
There isn’t much to say about a hard-core spellcasting approach to the game: start sinking your experience into spells and extra mana, and go to town! (In the metaphorical sense; actually casting offensive spells in a town will lead to hefty fines.)
Spells You have a number of spells to choose from here (obviously enough), and you’ll be able to reduce the time it takes to cycle through them all by eliminating spells that focus on melee or ranged attacks from your bindings.
Lightning/Fireball: You’ll probably want to get both of these up to a fairly high rank, if only for variety’s sake.
Physical Shield: This is critical for spellcasters, since you’ll have fewer methods of dealing with enemies at close range. If they can’t hurt you, though, you won’t have to worry too much.
Summon/Ghost Swords: You’ll need some way to distract your foes, so if you can get a high-level enemy as a minion, or summon four Ghost Swords, you should be much more able to deal with large mobs of monsters.
Social Options
In addition to the core of the game - the combat and questing built into the main questline - there are plenty of other activities your Hero can perform in Fable. You can’t give up on the adventuring lifestyle to live a peaceful, agrarian existence, but you can find a wife, loot and steal in the towns, or even get in trouble with the law.
Going To The Chapel
If you’re truly intent on getting married, you can nab as many wives (or husbands) as you wish in Fable, although it’s very difficult to get more than one wife per town.
To begin with, you’ll need to start racking up Attractiveness. You’ll notice that certain clothing options increase or decrease your Attractiveness; in general, town-like clothes, or simple dress, like the Will User’s Bright Clothing, will give you bonuses to your charisma, while full suits of armor will detract from it. More important, though, is your hairstyle and tattoos. You can find tattoo shops and barbers roaming around, or in most towns; check out the various options there to add to or decrease your Attractiveness.
As you gain Attractiveness and Renown (which you get through quests), you’ll notice that the ladies in town will begin appearing with hearts above their head. This signifies that they’re in love with you; the bigger the heart, the bigger the feelings. When you find a suitable candidate, you can start alternating between the Flirt interaction, giving Gifts, and engaging your chosen one in conversation (with the normal A interaction). After a while, she’ll start bugging you for a Wedding Ring when you talk to her, so give her one from your Gifts menu. (You can buy them fairly cheaply in Oakvale, and only a real one will do.) After doing so, you can talk to her again, and you’ll usually be able to marry her.
If you have a home in the same town as your beloved, you’ll automatically move in with her there, and you can start trying to WooHoo, in Sims terminology. Getting it on isn’t too difficult; repeat the wooing process of giving gifts and flirting, and your honey will eventually shift from a purple outline to a green one. After that occurs, interact with her to hop off to the marital bed. You don’t actually get anything out of this (aside from a bit of stress relief, we suppose), but it’s amusing nonetheless.
Love isn’t unconditional, though, so don’t expect to get away with beating your spouse or farting at her all the time. If you neglect or abuse her, she’ll ask for a divorce, which comes along with a significant Evil shift. If you’re planning on harrassing your wife into getting a divorce, you might as well make sure that it’s final, so sacrifice her to the Church of Skorm in the Darkwood.
The Life of Crime
In addition to wooing the ladies, you can also spend your downtime in the cities of Albion by looting and stealing. Most of these activities are considered to be evil, so you won’t want to repeatedly do them if you’re trying to get your golden halo, but even good characters can engage in some petty larceny without too many adverse effects on their alignment. Murder, however, is a bit less easy to get away with, morally speaking.
In addition to the small evil shifts from these acts, you’ll also have to worry about the constabulary. Each city has numerous guards wandering around, who are just itching to bust you for breaking the law. They even wander into homes when the door is open, so don’t think that you’re safe from the sheriff inside a house! If a guard or a civilian spots you committing a crime, then you’ll have to pay a fine before the guards will let you go; if you refuse to pay up, then all of the guards in that town will be hostile to you, making it difficult to get any business done. You can, of course, kill the guards, but they’ll respawn almost instantly.
There are a few different crimes that you can commit, with varying amount of fines. If you want to avoid a fine, then you should be careful not to commit crimes when your eye meter is open (which means someone is looking at you). If the eye meter is blank, you can loot away without any consequences; if it is only open a small crack, you’re probably just as safe.
Brandishing A Weapon: If you draw a weapon in a town that lets you keep them on your person, you’ll get hit with a 40 gold fine. If you did it by accident, hit the button again quickly to holster it again, and they’ll probably let you slide.
Picklocking: If you get your Guile skill up to level six, you’ll be able to pick locks. It’s much easier just to break a door down, and the difference in fines is very small: Picklocking costs 200 gold if someone sees you, while Vandalism costs 250 more.
Vandalism: Busting out windows is fun, but knocking down doors will let you access their interior. Destroying barrels will also let you pick up whatever contents they held. You’ll get fined 250 gold for each act of Vandalism, though.
Assault: You can punch most civilians by targeting them with your right trigger, but there’s little point to it. Expect a 500 gold fine.
Burglary: Now we’re talking! Townsfolk have plenty of stuff in their cabinets and furniture, and some of it’s actually decent. All you need to do to burgle (which may be the greatest word in the English language, by the way) is to walk up to an interior container and interact with it. Again, if you get spotted by a civilian or guard, you’ll get a fine (of 750 Gold).
Steal: This is similar to Burglary, save for the fact that it targets display items in shops, which are not normally burglarable (which is not the greatest word in the English language, and may not be a word at all). When you spot something you like (display items are chosen at random from the store’s stock when you enter a zone), sidle up to it, check your eye meter, and hit the Steal interaction when you think you’re safe. This has the benefit of letting you be sure of what you’re getting before you take the plunge, unlike Burglary. You can only Steal items if you have a Guile rank of three or more, but you’ll probably need as much as possible if you want to remain undetected while you steal. The length of time it takes to Steal depends on the quality of the item; if you get spotted while doing it, you’ll net a 750 Gold fine.
Murder: How much is a man’s life worth? 2,000 Gold. You’ll also get kicked out of town, but you’ll be able to come right back.
Note that murdering all the inhabitants of a home (which is easier at night) will immediately put the house up for sale. The same is true of shops, but buying homes and paying the fines for your death sprees will put a dent in even the most robust moneybag.
Walk-through
Oakvale
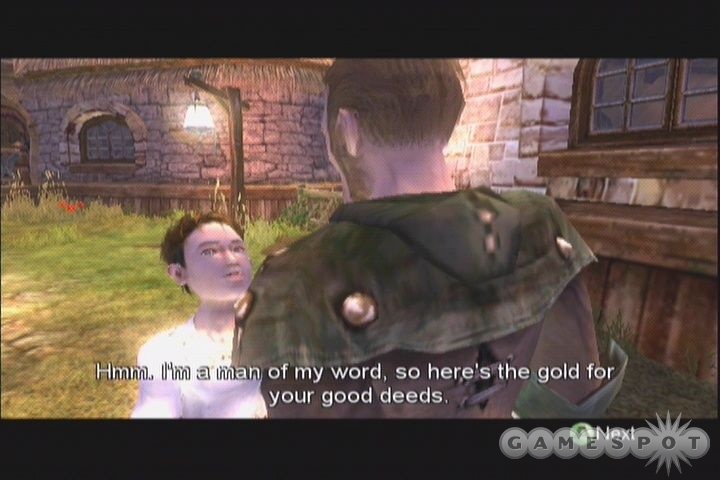
As with all good tales of a great hero or villain, Fable dawns with a story of humble beginnings. It seems that you have forgotten to buy your sister a birthday present; in order to rectify this situation, you’ll need to earn three pieces of gold from your father. He’ll give you a piece of gold if you do a good deed, but you can also find pieces of gold by being naughty. Your choices here don’t have too much of an impact on the rest of the game, but should give you some idea of how the quests in Fable work.
To wit, you will usually be forced to decide between two opposing actions during a quest, one of which will be "good," and one of which will be "bad." Determining which is which is usually a simple matter, but there can be shades of grey involved; you may have to lie or break a promise to further the greater good, for instance.
Choice: The Affair
If you head around the corner from where your father is standing, you’ll come across a man talking to a strumpet. This fellow is, alas, married, and not to the woman he’s talking to. If you speak to him, you’ll be able to choose between keeping quiet for a gold, or refusing to keep his secret. If you refuse, you can find his wife further into the village (near the merchant), and tell her about what you saw.
Good: Tell the wife about her husband’s wandering eye.
Bad: Accept the man’s bribe and stay quiet.
Choice: Guard Duty
One of the men near the merchant asks you to look over his stock while he hits the bathroom for a second. After you accept, a boy will come along and goad you into destroying the items.
Good: Stand where you start the quest until the timer runs out. The guard will return and you’ll have done your duty. (This takes around 20 seconds.)
Bad: Bust the barrels! You won’t find much, save a couple of enemies to beat on, and a gold coin. If you do this after you’ve already done the good portion of the quest, only the bad will count.
Choice: The Bully
Elsewhere in the village, a boy is being picked on by a bully. Talk to the boy to begin the quest. Good: Beat up the bully and talk to the boy, who’ll give you a teddy bear.
Bad: Help the bully beat up the kid! You’ll get the teddy bear off of him eventually.
Choice: Teddy Bear Blues
Another boy in the village is trying to return his sister’s lost teddy bear to her. Oddly enough, this is the same teddy bear that was in the possession of the boy who was being beaten up, so you’ll have to do that quest first and obtain the bear one way or another before you can decide what to do with it.
Good: Give the girl back her teddy. (She becomes the green icon on your minimap after you talk to her brother.)
Bad: Give the bear to the bully.
Note that if you committed any bad deeds within eyesight of one of the villagers (and it’s very difficult not to), the guards will likely have gotten wind of it. They’ll give you a talking-to at this point; later in the game they’ll tend to fine you for your malfeasance.
Whether you’ve raped and pillaged for your gold, or have earned it through deeds approved of by your father, you can return to the merchant in the town square and buy your sister her chocolate now. After you give it to her, though, things take a precipitous turn for the worst in your town. The ensuing events will see you warped off to the Hero’s Guild, though, so it all works out OK.
The Hero’s Guild
Although your town has been destroyed, and your family carried off into the wilds, you yourself have, through luck or destiny, been spared their fate, and are now able to start your Hero training at the Heroes’ Guild. As the headmaster and manual make abundantly clear, you can be as evil as you wish, and still be considered a Hero; these folk apparently aren’t quite as judging as most. I guess they’re lawful neutral, then.
After a few brief cutscenes, you’ll regain control of the hero, who will now be able to perform a few new actions, such as farting or belching. It’s a good thing your destiny wasn’t to be an orator. Anyway, when you are able to move your hero, head outside towards the pulsing yellow dot on your minimap. There are a few other side quests scattered about, but you either can’t do them yet or don’t have to until you begin your training.
Your first session with the guildmaster will be a simple affair of learning how to strike a dummy. You should’ve already engaged in a bit of combat back in Oakdale, so this shouldn’t be a problem for you. He’ll give you a Stick as well; a mighty weapon, indeed. You can draw it by pressing the white button while it’s equipped.
After you gain your stick, you’ll be asked to accept a quest to destroy beetles out in the woods. Before you go, though, you’ll probably want to wind up the mini-quests here. You can find one in the bakery in the northeast corner of the courtyard; the shop girl here will want you to gather four apples for her. You can find these near where the guildmaster is waiting for you. Return them to her for a Blueberry Pie.
The second mini-quest here is given by one of the boys in the courtyard. He’ll dare you to run to the Demon Door and back to him within 50 seconds. This is difficult, but doable. You don’t need to examine the Demon Door; just get close enough to it so that it flashes. You’ll earn 25 gold for completing this little race.
You can also wander around collecting some items here. There are plenty of books on the bookshelves, and there’s also a tattoo in the sleeping chambers above the map room. Also of note is the fact that Maze is stationed at the top of the tower in the southern section of the minimap; you can attack him as much as you like to earn Strength experience. If you use your stick on him, you can flip through his verbal warning quickly enough to chain your attack together. You don’t get a whole lot of experience from doing this, but, well, it’s kind of fun.
Quest: Killing The Beetles
Nothing to this one. Just head out into the woods and start whacking on the beetles there. If you wish, you can try to chain your attacks together, but the benefits of doing so are minimal at this point. It’s more important for you to concentrate on getting all of the experience orbs that drop. Eventually the Guildmaster will let you know that the infestation has been eliminated; return to him and hit the sack to begin your training for real.
Melee Training
The Guildmaster will have you and Whisper pair off for some rudimentary melee training. You shouldn’t have any problem beating her in any of the trials; she’s seemingly unable to block most attacks. After you choose to continue, wait around for a while, and another member of the guild will appear, offering you the opportunity to fight Whisper again, but for a grade this time. Accept, and if you manage to defeat her without taking more than one or two hits, you should receive the A+ necessary for the Iron Katana. Don’t forget to equip it with the equipment menu (Back button).
Archery Training
You can attempt to perform archery either with the default over-the-should view, or by manually aiming the bow by clicking the left analog stick. The first test is easily done with the automatic aiming, but the second will give you a good opportunity to practice with the manual view. When you’ve completed the test, opt to continue with the Archery training and run around until your Guildmate reappears. You’ll need to get 100 points to get an A+, and win the Yew Crossbow, but this is fairly easy to do if you aim for the rear target with shots at their maximum power. If you aim just short of the point at which it hits the eastern boundary and starts to move backwards, you should be able to let fly just as it rebounds and hit it almost every time. If you hit the first few shots, you can conceivably have your 100 points within ten seconds or so.
Spell Training
Your final phase of training involves learning how to cast spells. Your right trigger will enable you to select from any spells that you’ve hotkeyed; for now, you only have access to lightning. There are a couple of simple tests for you to perform before you can enable to take the final test, but it’s important that you choose to Play rather than Continue, because playing will let you come back to the Will testing area after a few moments to play whack-a-mole again. This time, your prizes are a Will Potion and a Resurrection Phial.
If you wish to play with Whisper, you’ll have the opportunity to improve your abilities in either Will or Skill by taking on some bandits that have hidden out in the woods. You can also try the last mini-quest in this area, which involves shooting sparrows around the courtyard of the Guild. You’ll gain +2 Evil for each sparrow you kill, so don’t do this unless you plan on being rather twisted down the line. You will gain Renown for each one, though, as well as some experience orbs and gold.
When you’re ready to complete the final challenge, talk to the guildmaster in the Map Room. He’ll escort you back out to the courtyard and instruct you to find Maze in the Guild Woods. Maze himself will ask you to fight him with your sword, bow, and lightning attacks; he won’t fight back, so you should have an easy time of dishing out a beatdown. After you’re done with him, you’re an official Hero! There are still a few more lessons to learn from the Guildmaster, involving how the map works and how you can increase your attributes or focus in a certain area of combat expertise.
The only quest available to you now is Wasp Menace, but before you attempt it, head back to the Demon Door and use your lamp (which the Guildmaster gave to you) while standing in front of it. This will unlock the door, and let you obtain a few new items, including the very handy Elixir of Life, which will extend your life bar.
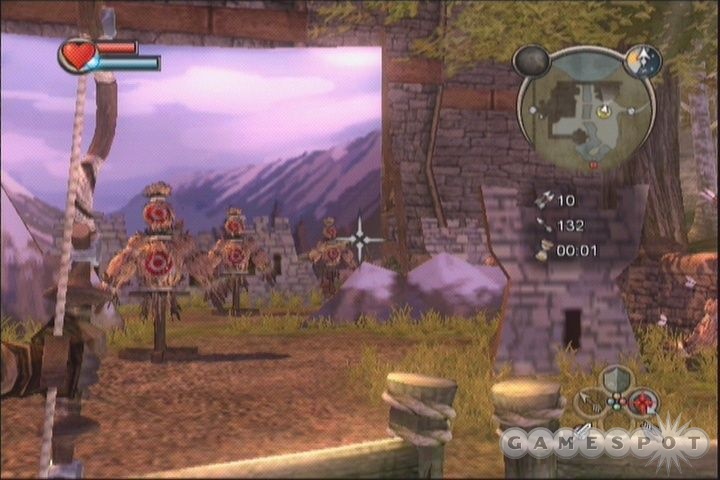
Quest: Wasp Menace
Summary: Wasps have taken over the Picnic Area. Wipe them out...alllll of them.
Money: 500
Renown: 200
For your first real quest, you’ve been tagged as a Hero that’s likely able to destroy the wasps that have infiltrated the picnic area outside of town. If you leave the guildhall through the main gates, a man will appear and escort you to the picnic area. Defeat all of the wasps, and the huge Wasp Queen that appears (while attempting to ignore the Guildmaster’s incessant whispering), and you’ll get a sizeable reward. Don’t forget to pick up the various items on the picnic tables; the corpses scattered around probably won’t need any healing potions.
The Wasp Queen’s head is your first trophy that you can display. Displaying trophies will net you extra Renown, so be sure to whip them out when you have an adoring crowd (or one that’s cringing in fear). The more people you show your trophy to, the more Renown you’ll get, but you only have a small window of time in which to brag. For now, you can try to show it to the three men on the bench, but you won’t net a huge amount of Renown for it.
After you complete the Wasp Menace, you’ll automatically pick up a new quest. Before you head off to meet Maze, though, there are a couple more things you can do at Lookout Point. The first involves another bully/abused situation. If you want to help the bully, belch in the beggar’s face before beating him up; helping the beggar entails scaring off the bully by farting at him. You can also locate your first Silver Key by chopping through the dense, thorny undergrowth near the statue. If you wish, you can now buy a new title from the vendor near the Guildhall gates.
Quest: Maze’s Information
Summary: Meet Maze at the Bowerstone Tavern.
Money: 0
Renown: 0
Maze is located in Bowerstone, which is a no-weapons town. (Towns will either allow you to hold weapons when you enter, or their guards will confiscate them and restore them when you leave.)
Bowerstone South
There isn’t a huge amount you can do in Bowerstone at the moment. If you wish, feel free to try for a more impressive display of the Wasp Queen’s head; if it’s daytime, you should be able to get a significant number of views by hitting the school to the west and the tavern to the east. After you nab all of those people, track down anyone else in the area with a question mark over their head and see how many views you can get! If you get enough, you’ll be able to increase your renown well over the 30 you got for the three men on the bench.
When you’re ready to move on, locate Maze at the tavern and speak to him. He’ll let you know that your sister might’ve actually survived the massacre of Oakvale, which should surprise absolutely no one. Beyond that, he doesn’t have much to say, and there isn’t too much to do in Oakvale. You can check out the vendors, if you wish, and purchase a new weapon or new armor if you have the money. You can also attempt to buy green items (the green denotes a big discount) from vendors here and sell the items back to the vendor in the Heroes’ Guild for a profit, but be sure the Heroes’ Guild barkeep will actually accept your wares; vendors don’t actually buy anything you might have. At the very least, you’ll likely want a new sword or weapon, if you’re going melee. There’s also a Silver Key here, on a balcony on the blue building on your map.
Back in the Guild, the previous quest choices have changed; the only quest available to you now revolves around the Orchard Farm that Maze mentioned. You have two choices here, one evil, one good. You’ll also be able to choose from a number of boasts if you wish to earn extra gold from the quest.
Before you can reach the Orchard Farm, you’ll have to travel south from the Lookout Point into the Greatwood Entrance zone. There are plenty of wasps hassling the travellers here, so you can choose between killing the wasps or killing the NPCs (or both), depending on your level of evildom. There are also some random items along the easternmost path here, including a very handy Will Master’s Elixir, which will extend your mana bar a bit.
Now, you’ll have the option to leave the Greatwood Entrance area and proceed on with the Orchard Farm quest of your choice, but first, you might as well learn how to fish. You can do so by entering Fisher’s Creek to the northwest; after a short time spent killing wasps, the fisherman there will give you a Fishing Rod, which you can use anytime there’s a ripple in the water to find an item. You’ll be doing this in a whole lot of places over the course of your adventure, unless you choose to ignore it completely, which is an option. There’s some decent stuff to be found, however; Fisher Creek alone has a Silver Key, 100 gold, a Moonfish, and a couple of other minor items. You can also fish at Lookout Point for an Ages of Skill potion and at the Guild Woods for another Silver Key. (You’ll want to go ahead and get this Key now.)
If you opted to attack the farm, you’ll be able to head right there; if not, you’ll need to proceed through Greatwood Lake. Regardless, you should probably head to the Lake first, where you’ll find a Silver Key and a new Silver Key Chest, which you should be able to open if you’ve been diligent about tracking those Keys down; it contains an Elixir of Life.
Quest: Protect Orchard Farm
Summary: Help defend the Orchard Farm from a gang of Bandits.
Money: 750
Renown: 400
If you’re of a good bent, feel free to help protect the Orchard Farm. You won’t be alone in this endeavour; you’ll have couple of guards around to help you out. (The Boast that you’ll keep these guys alive is easy money.) You’ll have to enter the farm through the Greatwood Lake area, but this shouldn’t be a problem. You’ll face three waves of bandits from the northern entrance; run up the pathway as they arrive and you should be able to head them off well before they get anywhere near the farmhouse. If someone does bust through and grab a crate, you’ll want to kill him before he escapes the zone.
Quest: Attack Orchard Farm
Summary: Protect the Bandits while they attack the Orchard Farm.
Money: 1000
Renown: 400
The Attacking quest is similar to the Protect, save that you have to escort the bandits in and kill the guard while your comrades escape with the loot.
Regardless of which quest you’ve chosen, you’ll have to have a duel with Whisper at the end. She will block most of your attacks, but you can still get through with your Flourish attacks (B button). You’ll gain Whisper’s Brooch as a trophy when you beat her.
When you’re done with your quest, start looking around the Farm for items. You can find a Jet gemstone in a chest behind the farmhouse. There’s also an Elixir of Life in the pool near the farmhouse and a new Silver Key in the eastern lake, both obtained by fishing. Most importantly, though, you can grab a Treasure Map in a chest near the orchard itself; this is part of a larger quest that will have you nabbing Maps all over Albion.
Now that you’ve earned a bit of Renown, you can return to the Guild Hall and start on some of the quests that you’ve unlocked. There’s one story-related quest, Trader Escort, which you’ll need to take, but first you should do Hobbe Killing Contest for the gold and renown. It can easily be combined with a quest that you can pick up from one of the traders in Lookout Point, who’ll ask you to escort him to Orchard Farm, which is coincidentally where the Hobbe Killing Contest is.
Quest: Hobbe Killing Contest
Summary: Kill the Hobbes that are bothering the farmers at the Orchard Farm. Kill more Hobbes than Whisper.
Money: 900
Renown: 200
When you reach the farmer at the Orchard Farm, you’ll find that he’s flanked by Whisper, who’s going to be competing with you for the spoils of this quest. This is a simple "kill everything that moves" quest, although the Hobbes are a bit more difficult than any of the enemies that you’ve been encountering so far, especially in terms of hit points; they take a lot of damage before they go down. When the spellcasting Hobbes’ start appearing, you’ll know that you’re close to the end of the quest.
After you polish off this last bit of business, warp back to the Guildhall to pick up another quest. The Hobbe Cave is likely still locked, unless you’ve been really good about getting Renown, so go ahead and pick up the Trader Escort and follow the arrows to Greatwood.
Before you can get there, though, you’ll have to deal with a new choice.
Choice: Highway Tolling
Bandits have fortified a position in the Greatwood Gorge, and are asking 400 gold to pass. You can pay it, if you wish, or kill all of the bandits in the zone to get past. There isn’t really an evil or good modifier to either of these choices, so there’s no reason not to kill all of the bandits; you’ll gain a whole bunch of treasure, including 500 gold, a bunch of potions, and a Flame Augmentation. If you bought a decent weapon earlier, such as a Steel Longsword, feel free to use the augmentation right away; if not, you can save it until later. The Steel Pickhammer that you’ll find is a pretty poor candidate for augmenting, as it deals 15 fewer damage than a Longsword. The only semi-difficult bandit to kill is the leader, who wanders around in the camp in the northern end of the zone.
Elsewhere in the Gorge is a Demon Door. Check our Demon Door section elsewhere in the guide for more info on this, and all other Demon Doors. The next zone beyond this (Greatwood Cullis Gate) also has a new warp point, so walk into it and warp back to Bowerstone if you don’t have any Chocolates; giving one of these to the Demon Door in the nearby Rose Cottage area will let you access a new suit of clothing. When you’re ready to move on, though, proceed onwards to the Trader Escort quest. If you have enough Renown, you can also try to polish off the Hobbe Cave quest at this point.
Quest: Hobbe Cave
Summary: The woman who lives at Rose Cottage believes that her grandson has been kidnapped. Enter the Hobbe Cave and rescue him.
Money: 5500
Renown: 400
This quest can only be attempted when you’ve reached a Renown level of three. Even if you’ve done all the quests so far, you might not be up to this level yet; you can attempt it later if that’s the case. Grab it from the Guildhall.

The old lady in Rose Cottage is the quest instigator, and when you reach her, she’ll give you a Hexagon Key and ask you to find her grandson, who apparently wandered into a cave full of Hobbes on his own cognizance. Sounds like a Darwin Award waiting to happen, but if she’s willing to pay for his return, and she substantially is, you might as well track him down. (Note that the Cave Dweller boast is unavoidable if you attempt to play through as a good character; evil players can take Sacrifice Innocent as well, if you wish.) You can also find a Silver Key by digging with a Spade in the circle of soil outside of her house. You can buy spades from merchants; these act somewhat like fishing rods, in that you’ll find certain areas in the game world that will have secret items buried beneath them. These areas are always circular, usually with some kind of border that gives them away. You’ll want to have a Spade before you enter the Hobbe Cave, as there’s another Silver Key inside of it.
The Hobbe Cave is located behind some bushes in the Greatwood Caves zone. You can explore all you like, but you should first follow the shouts of a human into the Cave Side Chamber zone; the thief here will offer to join you if you kill all of his captors, which spawn in a couple of waves. (If you get a high combat multiplier here, of 14 or higher, you might want to try retreating to the Demon Door in the Greatwood Caves zone. It’ll let you through if your multiplier is at least 14, but you’ll lose one or two ranks as you proceed back there.) Good characters will want the sizable experience gained from killing the captors; evil characters will be able to gain points (and complete the Sacrifice Innocent boast) by having the thief along.
Next up is the Cave Larder. If you haven’t already, you’ll rile up the many Hobbes in the cave when you attempt to reach the door leading to the larder; there isn’t much you can do about the numbers, so use Force Push to keep them off of you while you do your best to kill them off. As per usual, deal with the spellcasters first, then move on to the many melee enemies you’ll be facing. Inside the cave larder, you’ll find a Silver Key Chest with a Will Master’s Elixir.
The Main Cavern hosts another melee extravaganza. Beyond that is the Moonlit Tunnel, which should be empty for the moment. Beyond that is the inner recess of the cave, the Focus Chamber, where a nymph has the boy imprisoned. If you question her, she’ll offer to trade the boy for another prisoner; you can offer her the thief, if you happened to bring him along earlier. This will let you meet the conditions of the Sacrifice Innocent boast, and give you a large shift towards the evil end of the spectrum. Your other choice is to fight her!
If you do fight her, the nymph will call in numerous bodyguards, so it’s best to take advantage of the cheap shot opportunity you get due to the fact that you can attack first. You can either charge up a max-power bow shot, or use a spell like Fireball to deal the maximum amount of damage with your first hit. If you have enough time before the backup guards get to you (try to shoot from a point as far away from the stairs as possible, so that you can see them coming), you can get a couple more shots off and kill the nymph. A standard melee ensues, but you’ll have to be sure that none of the monsters (or yourself) accidentally kill the boy.
When you have the boy free, clear out the rest of the enemies and dig up the Silver Key from the circle of mushrooms. Have the boy wait for you in the Focus Chamber, then clear out the Moonlit Tunnel, where a number of Hobbes have spawned. Kill them, then bring the boy back to the Main Chamber and repeat the process for the Hobbe Cave Entrance. Be sure to keep an eye on the kid’s health; if it’s dropping, get back to him quickly!
Quest: Trader Escort
Summary: Escort the traders to the Barrow Fields.Money: 2000
Renown: 500
After you get to the Darkwood Entrance, you’ll pick up the two traders who need the escort. There’s another one further on in the zone who’ll ask to come along. Allowing him to do so is a good deed; refusing him is bad. Either way you want to go, check the area for items, but leave the traders behind with the Wait command before you move on to the Darkwood Marshes, which has a single Balverine in it, as well as a minefield.
The Balverines here are fond of jumping up and off of the screen, so keep your guard up and be prepared to strike when they land - they’re usually susceptible to attacks immediately after they hit the ground. Alternately, you can prime up a bow shot and wait for them to come back down. After the first Balverine is destroyed, use your bow or magic to destroy the mushrooms in the lake beyond. You can then either take the Demon Door test, which involves killing a few waves of Hobbes, or you can retrieve the traders, park them again at the end of Darkwood Marshes, then proceed into the Lake.
Inside the Lake, you’ll have to square off against a number of berserk Bandits. They won’t appear on your map until you get close, but you should be able to hear them coming due to the way they scream. Clear out the area and grab the Leather Boots and gold from the two chests before leading the traders into Darkwood Camp. There isn’t much of interest in the shops here, save perhaps an Obsidian weapon if you choose to buy one, but you can open the chests and smash the barrels without fear of guard intervention. Indeed, these aren’t even considered evil acts. If you want, you can check out the Chapel of Skorm area nearby - if you’re evil, you can even sacrifice one of the Traders to the Church. (This will void any Protect all Traders Boasts, though.) There’s also an Assassin’s Shirt behind the Church proper.
In the Ancient Cullis Gate, you’ll have to move forward and clear out the bandits that infest the area. When you near the end of the zone, the infected trader will lycanthropize, if that’s a word, and will come to attack you, so put him down the merciful way by slicing his guts out. After that’s done, clear the map and fish for a Silver Key off the bridge.

The Darkwood Weir is the last infested zone you’ll have to deal with, and there’s only one enemy. Check the southern end of the river to find a Lightning Augmentation and goodies before heading towards the exit - an Earth Troll will appear. His attacks are baldly predictable: he’ll throw rocks at you in two-rock salvos which you should be able to sidestep fairly easily. You can return fire with your bow or magical attacks until he’s dead.
After you get past him, you’ll have reached Barrow Fields, which is incongrously bright and colorful when compared to the regions that you just passed through. The Oakvale of your youth is the primary town here. If you look around, you’ll find a Sapphire in a treasure chest near the Demon Door. There’s also a Moonfish in the river to the south, along with a Coron Night Tattoo in the river next to the bridge.
Oakvale
Now that you’ve reached Oakvale, you can feel free to enter it and start looking around. There are some decent shops here, so you may also want to browse for new items and perhaps new armor; you can find a full suit of chainmail at a reasonable price.
Before you start doing the town quests, though, you may want to visit the Grey House zone, which lies east of the Barrow Fields. This is the homestead of Lady Grey, the mayor of Bowerstone. If you scout the exterior thoroughly, you’ll find a tattoo card on a scarecrow to the rear of the house, as well as a Silver Key by fishing in one of the bodies of water here.
Inside the house, you’ll have to fight off a number of Undead. These fellows are weak to flame, so you can use Enflame, Fireball, or a weapon with a flame augmentation to disperse them. Normal weapons and attacks work just fine, as well. Eventually, you’ll kill all of the skeletons and will be able to search the house. The key item here is the Sharpening Augmentation inside the Silver Key Chest, which you should be able to open. Afterwards, you can check out the basement for more items, including a Will Master’s potion.
When you’re ready to leave, you can abuse the undead on the paths around the house with your bow. They move very slowly, so you should have plenty of time to increase your combat multipliers - if you have any Ages of Skill or Ages of Strength potions, use them when you have a large multiplier to increase the amount of experience that you gain.
Oakvale
Maze’s New Information
Summary: Meet Maze at the Oakvale tavern.Money: 0
Renown: 0
This is another simple talk-to-Maze quest. After you find him, he’ll let you know that there’s a new Quest Card waiting for you at the Guildhall. Before you go, you might want to loot the town a bit, and check out one of the choices here.
Choice: Help the Pirate Ghost Arrrrr! The pirate ghost is located on the eastern beach here, and he’ll ask you to find some treasure that he buried and bring it to his wife, located on the far western end of the western beach. The treasure spot is just to the east of the boatlaunch on the western beach.
Good: Give the pirate’s wife her money.
Bad: Save the money for yourself. (Be sure to talk to the wife and explicitly deny her the cash.)
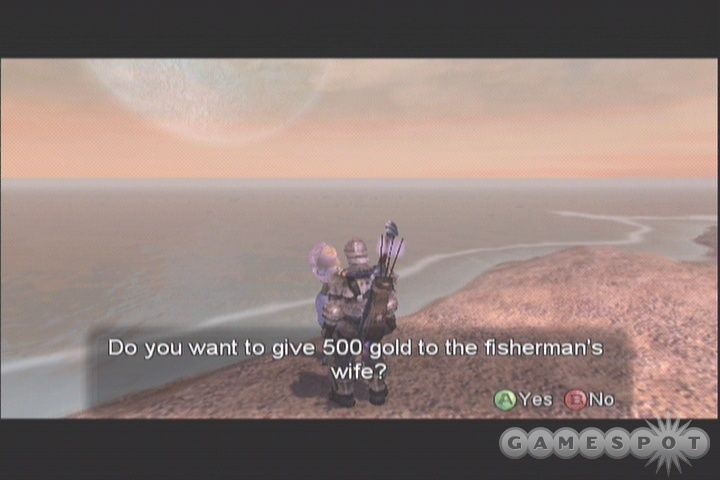
If you help the ghost out by giving his wife the money that you dig up, return to the ghost and he’ll point you towards the northeastern graveyard, where you can dig next to a statue to find a Silver Key and an Obsidian Greataxe, which, if you don’t choose to use it, should sell for much more than the 500 gold you lost by giving it to the ghost’s wife. You’ll also gain 150 Renown for doing this.
The rest of Oakvale is also open for exploration. You can dig any graves up that you see without fear of guard interference (and it’s not an evil act). You should also be able to find some decent items, such as a Resurrection Phial, in the miscellaneous treasure chests scattered about.
Quest: Find the Bandit Seeress
Summary: Track down the Bandit Seeress, who may have information about your sister.
Money: 4500
Renown: 1000
You can choose to either do Bandit Blood or Spare Bandits for this quest; these are mutually exclusive boasts.
Begin by returning to Oakvale, where the Clifftop Path will be pulsing on your minimap. Your first task will be to sneak past the three Bandits roaming around the path so that you can get through the gates on the far end of the zone. The simplest way to do this is to use a high-powered bow or Fireball spell (or both at the same time), and kill the bandits in one shot. If you merely wound a bandit, he’ll immediately raise the alarm and have the gates closed, but if you can kill them outright, you should be able to get to the gate without a problem. Alternately, you can slaughter the bunch, wait for the replacements to come out of the gate, and then sneak in when you have a clear exit. Or you can just sneak in past all of them, but this is difficult unless you have a fair amount of Guile and some dark clothing.
The next screen is populated by around 30 Bandits in small clumps. If you’re unconcerned with killing them (or want to fulfull the Bandit Blood boast), start chopping away. You’ll need to grab all of the chests that you see; the first five will have the Bandit gear that will get you into the Bandit camp. You can check your Equipment - Clothing - Suits screen to make sure you’ve got them all; there are five in total, so it’ll display 5/5 when you’re ready to rock.

When you get into Twinblade’s Camp by equipping the Bandit gear, you’ll be able to switch back to your normal equipment. You’ll need to get a Bandit Camp Pass before you can proceed further along the path; you can either play the annoying memory game inside the "tavern", or pay the guy nearby 1,000 gold for his, or simply kill him. Before you leave, though, check the small island beyond the lake to the south to find some items, and to dig up another Silver Key.
Inside Twinblade’s Elite Camp, you have yet another gate to somehow get past. There are a couple of ways to do this, but the easiest is to find the hostages in the southwest corner of the zone and kill the guard that’s, well, guarding them. He drops the key required to unlock their cage, and their escape will cover your entrance to Twinblade’s inner sanctum. You can also pay the assassins to create a diversion, but that’s expensive. Before you head into Twinblade’s Tent, though, check the area for more smashable barrels and treasure chests.

A fight with Twinblade is unavoidable, but he’s fairly easy to beat. All you have to do is stay locked onto him while he dances around, as you’re unable to hurt him normally. When he raises both of his blades above his head and smashes them into the ground, get behind him and blast away at his back. If you have the Multistrike power, you can use it before you hit him to get a few shots in at once.
When you’ve defeated Twinblade, you’ll be able to search his tent thoroughly for items, so do so, and don’t neglect the salient leading north that contains a Diamond. If you wish to kill Twinblade (and this is an evil act, just so you know), take out all of his men first before you return to the head honcho, or they’ll all attack you. If you want to be a goodie-goodie, just leave the area and return to the Elite Camp. You’ll get your quest reward at that point, and be told to return to the Guildhall for your next quest. You’ll have to find Maze in his quarters to take it.
Quest: Find the Archaeologist
Summary: Maze wants you to find an archaeologist somewhere in Witchwood.
Money: 1200
Renown: 0
When you warp to Witchwood, bust through the vines to find a chest and a path leading north. If you fish in the pond near the Cullis Gate, you’ll also obtain a Moonfish. Further up the path is another vicious Troll enemy; this one is much harder than the one you fought earlier, but the tactics hold: whip out a long-range spell or your bow and go to town. You’re going to take damage during this, so don’t feel guilty about retreating if you have to; the Troll doesn’t regenerate, so you can knock it down some, retreat and heal, then return for another round.
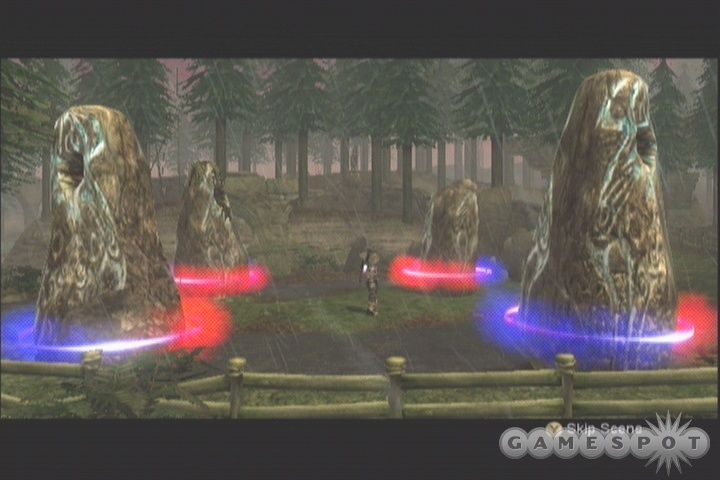
In the Witchwood Stones area, you can find an annoyingly difficult-to-fish Silver Key in the first small pond near your quest marker. The door here is locked, but you can obtain access to the room behind it by finding its name on the markers elsewhere in the zone. When you’ve scouted around and found the two treasure chests (one is behind thorny bushes), find the stones and hit the stones with a melee weapon until you spell out HITS. This will unlock the door and let you proceed inside. (If you’re in the mood for a laugh, spell out the naughty word that has the same letters in it a couple of times.) The archaeologist isn’t too impressed with your skills, but he’s not what you’re concerned about: the phat l00t should be more attractive to you. The 15-key chest here holds a Health Augmentation; if you can’t open it yet, mark the location and come back to it.
After you’ve "rescued" the archaeologist, return to the Guildhall for your next quest, which will take you farther into Witchwood Stones.
Quest: White Balvarine
Summary: Find and kill the White Balvarine, somewhere in Knothole Glade.
Money: 6200
Renown: 800
After you pick this up, you’ll have to warp back to the Witchwood Cullis Gate and pass through the zones you’ve already visited. No worries; the Troll doesn’t reappear, although other enemies probably will.
The Witchwood Stones area will lead you to another choice.
Choice: Mercy?
A man will approach you as you walk, and lead you directly into an ambush. If you’re evil, you’ll be fighting guards; if you’re good, you’ll be fighting bandits. (For some reason, you seem to pick up evil points as you fight even if you’re a do-gooder.)
Good: After the fight, talk to the man; this spares his life and nets you a bit of gold.
Evil: Kill the bastard! No one gets away with something like that!
Moving on, you’ll find the Church of Avo. If you’ve got plenty of gold (around 35,000), save your game and try donating it all at once in the Church’s altar. You may net the Sentinus weapon; if not, reload your game and come back later. Note that this is only available if you’re of a good bent; evil characters need not apply. Also in the Church area is Huw’s sword, which can be found on the hilltop overlooking the cathedral. You won’t be able to withdraw it from its stone at this point (unless you’ve maxed all of your Strength attributes), so come back later.
In Witchwood Lake, you can find another Silver Key by digging at the base of one of the first gargoyle statues you see; it’ll be the one along the northern edge of the path. You have to get right up next to it to have the spade icon pop up, so keep shuffling around until that’s available. Elsewhere in the zone, you can fish in a lake to find the ever-useful Will Master’s Potion. From there, head on to Knothole Glade, where the White Balverine quest will begin in earnest.
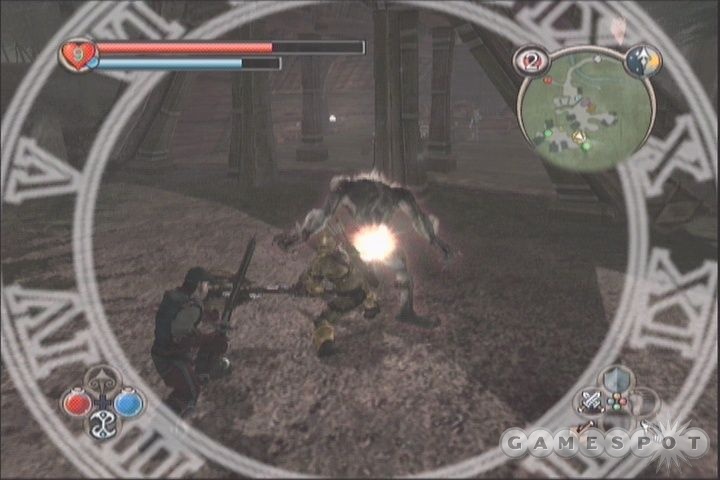
When you reach the gates of Knothole Glade, four Balvarines will start attacking. They’ll come one by one, so it shouldn’t be too difficult to defeat them. When you do manage to end that threat, though, an invincible White Balvarine will come inside. All you have to do to drive him off is to hit him ten times with your weapon. Afterwards, the town...guy...will point you towards the widow of the man who killed the last White Balvarine. She’ll hand over a Silver Augmentation, which you’ll need to equip into your weapon to kill ol’ Whitey.
Eventually, you’ll wind up having to pursue the Balvarine back to Witchwood Lake. He himself isn’t too terrifically difficult, but he will summon in regular Balvarines at regular intervals as you damage him. If you want to concentrate on the White, feel free to do so, but be sure to have some kind of crowd control, or you can quickly find yourself swarmed by the Balvarine charges. Eventually, you’ll put the White Balvarine out of commission, for which you’ll receive his head. The guy in town will also have a package for you from your sister; check the Logbooks entry in your Back menu to read the items therein.

In and around Knothole Glade, you’ll be happy to find another Silver Key (buried in a ring of dirt in the southwestern portion of town) and an Emerald outside the city walls, along one of the paths there. The merchants here also sell some decent stuff; the blacksmith in particular has some fantastic weapons, although they may be too pricey for you at this point. Beyond that, though, this is an ideal place to show off your trophies. With a few practice runs, you should be able to regularly hit the maximum number of views with each trophy, if you care to do them all.
When you’re ready to move to the Arena that everyone’s talking about, return to the Guildhall and grab the quest card. The Arena is north of Witchwood Lake. If you’re going evil, grab the Clean Sweep boast; if not, take the Merciful Hero option.
Quest: The Arena
Summary: Conquer the fights in the arena!
Money: Variable
Renown: 200
When you head into the Arena, you’ll be told a bit about the history of the place, about all your forefather Heroes who fought there, etc., etc. All you really need to know is that you’re going to have to do a whole lot of fighting when you step into the ring.
There are eight rounds of challenges in total, most possessing multiple waves of enemies. In between each round, you’ll be given the option to rest in the gladiator’s barracks. If you rest, you get to restore your health and start the next fight fresh; if you decide to keep on going, you’ll launch into the next round with your current health and mana, but will be able to fight for double the amount of cash you won last round. If you manage to get through all eight rounds without resting, you’ll win over 25,000 gold, so it’s worth trying for. You should have plenty of restorative items, so bind whatever produce you have in quantity to one of your quickkey slots and eat up whenever you get hit.
Inside the ring, you’ll notice that there’s a new element to your display. In the upper right-hand corner, you’ll get a readout of how many enemies are still alive of the current wave. You’ll also be able to see how favored you are with the crowd. If you deal a lot of damage without taking much in return, the audience members will throw in stuff like potions and roses. You don’t need to keep the crowd happy to win, though, so don’t feel pressured to keep this meter up; your priority should be survival.
Also note that there are some hazards in the Arena; there are four spots in the circle that can cause damage to you when you step on or approach them. Two of them raise spikes, while the other two cause a giant spinning blade contraption to raise up out of the ground. The blades can hurt you, but they can also hurt your opponents, so if you can lure them into the blades, you may be able to get a few cheap kills that way. There’s enough room for you to move between the blades and the wall of the Arena, so if you get in trouble, try to maneuver through that little gap; anyone following you will likely take some damage and get repelled.
Round 1: Wasps. These guys are easily killed with Enflame, or with a melee weapon.
Round 2: Hobbes. A few waves fought solo. Use Force Push to keep yourself from getting mobbed.
Round 3: Balvarines. Whisper will start fighting alongside you now; let her attack as many of the Balvarines as possible, so that she gets their attention and keeps them off of you. She can’t die, so don’t worry about her. If you get aggroed by too many enemies, try to trap them around a blade trap; no one has any ranged attacks here, so you may be able to whip out your bow and attack from afar if you manage to get a trap between you and them.
Round 4: Undead. You shouldn’t have any problems with these guys, since they move so slowly. Be sure to get your health and mana back up to full before you move on to the next round.
Round 5: Bandits. Tougher than any of the previous rounds, since there’ll be crossbowmen mixed in with the melee enemies, rendering the hide-behind-a-trap tactic less effective. Go after anyone with ranged attacks first; after they fall, the rest of the enemies will be easier to take down.
Round 6: Earth Trolls. There are two of these guys, and they’re really annoying! Whisper starts to be ineffective here; she seems to be incapable of doing anything but standing around, so you’ll have to do whatever you can to take down the trolls before they kill you. After you off one of them, the round becomes much easier.
Round 7: Rock Trolls. Even worse than last round! You’re going to need a lot of restorative items here. If you’re going melee, you might be best off just saying damn the torpedoes and going full-on against one of the two trolls until it dies, and then healing up as best as possible before using ranged attacks against the remaining foe.
Round 8: Arachanox. This guy isn’t as tough as his intimidating appearance might lead you to believe. All you really need to do is avoid his attacks until he starts charging up his primary burst of power. When he begins absorbing green energy, go for his eye and hit it with all you’ve got. After a few sustained offensives, Arachanox will melt away.
Round 9: Whisper. Bonus round fun time! Whisper isn’t too difficult to defeat, assuming you can get through her defenses. Berserk and/or Multi Strike will both shorten this fight up.
After your fight with Whisper, you’ll have the option of finishing her off. If you do so (obviously an evil act), you’ll gain an extra 10,000 gold from Jack of Blades, who seems far too charming to be evil himself, right? He’s got to be a good guy. Regardless of your choice, you’ll obtain two new trophies to bring back to Knothole Glade. As you exit the Arena, you’ll get word that your sister wishes to speak to you at the Grey House, outside of the Barrow Fields. Before you go to speak to her
Quest: Break The Siege
Summary: Bandits have lain siege to Knothole Glade. Drive them off before they can free their leader from inside the town.
Money: 5000
Renown: 450
The Kill Leader boast is relatively easy to do (if not mandatory), while the Solo Mission also isn’t too horrific an accomplishment, provided you have some decent area-of-effect abilities like Enflame or Force Push.
After you warp back to Knothold Glade, you’ll have to sit through a couple of cinema sequences. When you regain control of your Hero, you’ll be inside the town. If you didn’t take the Solo Mission boast, you can talk to the various guards around the area and enlist them in your cause by having them follow you. When you have enough guard minions, talk to the guard next to the gates and have him open them up. This will cause all of the bandits outside to come rushing in, but if you’re able to keep them away from the gates with something like Force Push, you should prevent any of them from getting past you. (As soon as one bandit gets behind you, the quest is usually uncompletable.)
After all of the bandits are dead, you’ll get your reward money, plus a hefty bonus if you did any of the boasts. If you leave Knothole and come back, you’ll be able to try your hand at the archery range outside of town; the prizes include a Treasure Clue 4, as well as a Silver Arrow Trophy if you beat the high score twice.
Quest: The Lost Trader
Summary: A trader is lost in the hills west of Oakvale. Find him and bring him to safety.
Money: 2600
Renown: 150
Although the renown reward isn’t so great for this quest, it’s easy enough to do and the pay is decent. You’ll have to warp to Oakvale and then head to the west in order to run into the trader’s brother, who says he’ll lead you to where his brother is located. Luckily enough, he just points you in the right direction; from there, you have to cut through all of the bandits and lead the trader back to his brother. A pretty standard escort quest, in other words. For your efforts, you’ll get the Treasure Clue #2.
Quest: Find the Archaeologist
Summary: Minions have captured the Archaeologist. Find him!
Money: 7000
Renown: 500
Since Lady Grey witnessed your exploits in the Arena, she’ll now allow you access to the area of Bowerstone North, which was previously blocked by guards. You can start the Lady Grey quest, where you have to make her your wife (this is optional), but you won’t be able to complete it until later anyway, so you might as well do the Archaeologist first.
You’ll start meeting up with Minions after you head north out of town. These guys are extremely tough, and will block most of your attacks, so this is a good point to begin taking stock of your equipment if you find yourself running low on health a lot. If you wish, take a look at how many Silver Keys you’ve managed to obtain, and see if you can unlock any of the Silver Key Chests that you had to bypass earlier that might have a decent weapon. (If you have 20, perhaps because of Hero Saves, you can get one bigass Hammer from the chest at the Heroes’ Guild that should serve you well.) You can also buy the Solus Greatsword from the Bowerstone North shop, if you have around 70,000 Gold. If you do have a few Legendary weapons, feel free to sell them to afford the Solus weapon; it’s the only melee weapon you’ll need from now on. If you have the cash to spend on a set of plate armor, you might want to pick that up from the merchants in and around Knothole Glade. If you feel like charging ahead, though, feel free.
The first screen here is a fairly straightforward hack-n-slash. Keep the guards alive, if at all possible; they’ll stay with you for the remainder of the quest if they survive. It’s best to charge ahead and get the Minions to focus on you and let your guards act as distractions, but you can feel free to let your pals be the vanguard if you wish.
The second screen, Windmill Hill, has more minions, another guard, and a few interesting items to locate. The small pond near the entrance has a Wedding Ring at the bottom of it, while there are not one, but two separate Silver Rings buried, one near each of the houses. You can also nab Treasure Clue 6 in a chest, not to mention a whole mess of other stuff from all of the barrels near the houses. Clean it out after you kill the summoner; his death will result in the dropping of the barrier leading to the next zone, Gibbet Woods.
The Woods are where things start to get tough. The Minions will summon in a Rock Troll as soon as you enter, so if you want to keep your guard friends alive, you’ll have to get through it as quickly as possible. You’ve faced these before, so you should know what your favorite tactic is; if push comes to shove, just melee it to death and worry about healing afterwards. There’s also a pair of Minions further along the path beating up on a pair of guards; rescue these guys for a whole little gang of followers.
After you manage to clear all the way to the Prison Path, heal up your teammates and yourself, and get ready for a somewhat taxing set of fights. You only have five minutes to defeat every Minion in the Prison Path zone, so get cracking! If you have a decent-level Enflame spell, you may be able to just dash ahead to the docks and spawn in all of the Minions so that they follow you to the end of the zone; from there, pop off a dozen Enflames or so and revel in the scent of burning demon.
Upon freeing the Archaelogist, he’ll give you a new quest card detailing the exact process of breaking into Bargate Prison. You can do that now, if you wish, or head back to the Heroes’ Guild to find a couple of new quests.
Quest: Execution Tree / Execution Tree Rescue
Summary: You have to either help the bandits rescue their comrade from the guards, or help the guards escort him to the execution site.
Money: 4500
Renown: 200
These quests are mutually exclusive; you can only take one or the other. If you take the evil version, you’ll have to rush to Headsman’s Hill and off your target, the executioner. You can avoid all of the enemies up until that zone, if you wish, as you’ll be on a pretty tight deadline.
On the other hand, if you’re trying to prove your virtue, you’ll need to escort a bandit prisoner through constant bandit rescue attempts. You will have two guards along for company, so do your best to avoid ramming them into walls with your Force Push ability. Your goal is to reach Headsman’s Hill, but if the prisoner dies early, you’ll still win; you just won’t get the full reward for the quest. Heck, he’s going to die anyway, so don’t be too careful about keeping him breathing.
Quest: Marry The Mayor
Summary: The Mayor of Bowerstone has an eye for you. Win her hand in marriage, and maybe you’ll get some treasure out of the deal!
If you feel like it, you can now start wooing the Mayor of Bowerstone, Lady Grey, who resides in Bowerstone North. This isn’t necessary to beat the game, but you’ll be able to unlock some new legendary weapons if you manage to get Lady Grey to marry you, as well as bypass the Demon Door at the Grey House zone.
To begin with, talk to Lady Grey and get an idea for what she wants you to do. Her first task is simple; buy a Black Rose at the gift shop near her residence and give it to her. After that, she’ll check to make sure that you have a house. If you haven’t bought one yet, the Marital Home in Bowerstone South should be adequate (and cheap); if you have, she might still not recognize it. You may have to sell it and buy it back.
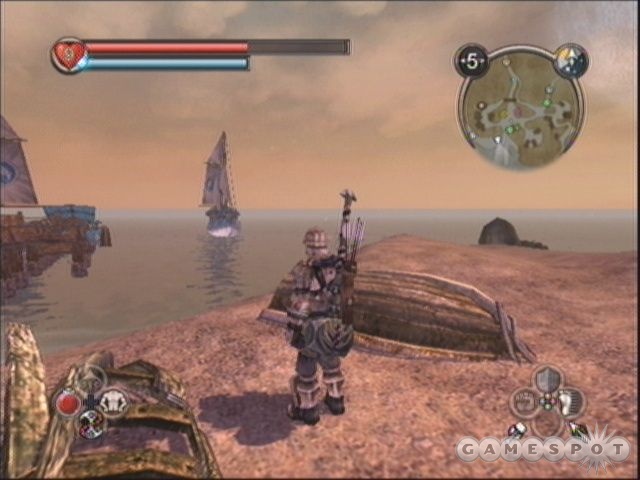
Your next menial task is to track down Grey’s necklace. You’ll have to speak to everyone that shows up as a green dot on your map in Bowerstone North; eventually one of them will point you to Oakvale. Ask the Lady for her gracious permission to proceed, then warp directly to Oakvale in order to track down the culprits of the theft. It turns out that they’re in the Memorial Garden, whispering away about the location of the necklace; you can either go up there and hide behind the wall to hear their conversation, or head straight down to the western beach and dig in the area between the two upturned boats. You’ll have to manually select your spade from the inventory menu; it won’t pop up automatically.
Now, for the final test! Thundarr the Barbarian will challenge you to a fight after you next speak to Lady Grey, so walk up to the Bowerstone Jail to pick this final bit of the quest up. He’ll ask you to meet him on Headsman’s Hill to the north.
Although Thunder hits hard, he isn’t too difficult to beat. One of the easiest ways to kill him off is to Berserk with Multi Strike; he’ll fall down almost every time you hit him, and should die quickly. You’ll have to fight him in three different places; when you defeat him in the cave, you’ll gain a new trophy, and should be able to nab the Mana Augmentation from the 15 Silver Key Chest. There’s also a Silver Key in the lake outside. The Demon Door here won’t open until you "defeat a Hero in battle." Technically, you already defeated Whisper a few times, so it shouldn’t even be worried about that, but defeating Thunder will satisfy the condition and let you through.
Now that you’ve proven yourself worthy, you can return to Lady Grey and accept her marriage proposal. For doing all that legwork, you’ll nab a 15,000 Gold dowry, and will be able to loot the Katana Hiryu Legendary weapon and a Silver Key from her home. You’ll also be able to open the Demon Door in the Grey House area, which contains the somewhat less impressive Ronok the Axe weapon.
Quest: The Graveyard Path
Summary: Find a way into the Bargate Prison.
Money: 1500
Renown: 200
Your first objective when you reach Lychfield Graveyard is to talk to the Gravekeeper. As you approach his shack, you’ll overhear him discussing the suit of Nostro’s armor that he’s hidden around the area. When you speak to him directly, the Gravekeeper will start following you around, but before you go anywhere, grab Nostro’s Helmet from his house, and loot the rest of his containers to find an Ages of Skill potion.
The rest of the pieces of Nostro’s panoply are hidden around the graveyard, along with a few choice goodies. If you just want the armor (which can’t be worn, by the way), dig up the graves near the first crypt to find his sword, grab his Shield from the fishing spot near one of the bridges, and get the Armor from the second crypt to the west. Also around the graveyard are no fewer than three Silver Keys: one in a fishing spot, one in a grave near the eastern crypt, and one in the first crypt. You can also dig up the rest of the graves in the area for some more items, such as potions and a couple of tattoos.
When you have everything together, take it to Nostro, who lies in the westernmost crypt on your map. If you’ve gotten all of his items, he’ll unlock the Demon Door in this zone, which will let you pass through to the Old Graveyard Path.
Said Path is infested with just a few Undead, and by "just a few," we mean an insane number. These guys pop out of the ground here four or five at a time; they’re of the weakest variety, but they’ll still cause a lot of damage if you get surrounded. Enflame is, as always, a good choice for dealing with these nefarious foes; Murren’s Hammer, if you were able to unlock it, is even better, as you should get one-hit kills with it against the Undead. When you kill one of the Undead leaders near the exit gate, it will unlock and let you through to the Circle of the Dead.
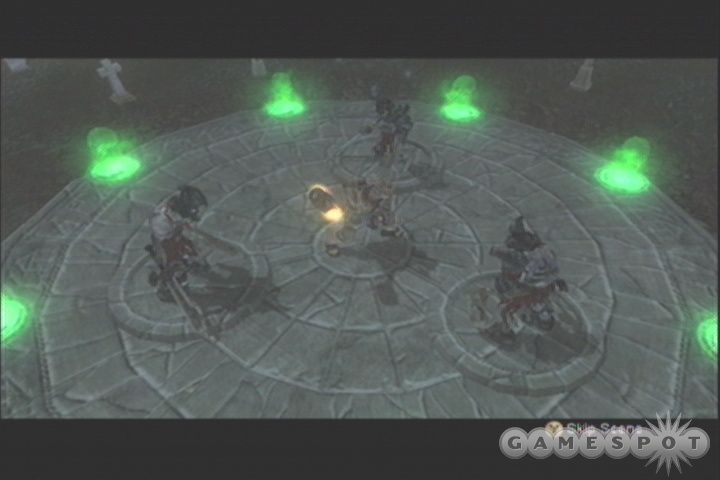
All you have to do to get past the Circle of the Dead is to defeat two waves of Undead. When they spawn, the waves will only take damage when they’re physically inside the ring, so wait for them to shuffle in before you go crazy with your weapons. After defeating both waves, the path to the Underground Chamber will open up. This ends the Graveyard Path quest and gets you a new Quest Card, so if you need to warp out to level up or buy items, now would be a good time.
Quest: Rescue Scarlet Robe
Summary: Get your mom out of Bargate Prison!
Money: 0
Renown: 0
The first area here is empty, for the moment, so head into the Underground Tunnel area for now. There are a few items in barrels here - check at the end of the dead end for a Resurrection Phial - and even more Undead, whom will employ their trick of digging upwards through what looks like heavy masonry flooring to get to you. That’s a big hit at their parties.
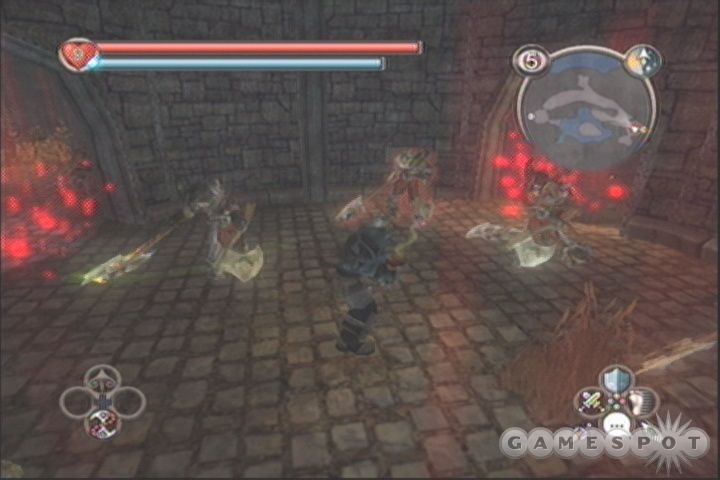
The next zone is the outdoor Cliffside Path. The only real secret here is a buried Silver Key near the treasure chest on the northern end of the zone; beyond that, all the treasure is in chests, albeit ones that are usually well-guarded. Before you head through the door leading to the Underground Passage, you’ll be trapped and forced to face off with a few of the heavy axe-wielding Skeletors. At this point, you shouldn’t be having too many problems with them, so bust a move and take them down before moving on.
The Underground Passage is full of guards, not undead, but you should still be able to proceed easily. Check the area thoroughly for treasure before heading on to the Torture Chamber, where you and your mother will be reunited. It might look all rosy at that point, but, of course, you’re soon captured. Every RPG has to have an imprisonment sequence, wherein all of your items are taken away and you have to track them down again; it’s a law. Welcome to Fable’s version of this venerable tradition.
Quest: Prison Escape
Summary: Escape prison!
The only way you’re going to get out of the prison is to win the footrace between yourself and the other prisoners. It’s not difficult; just hold down the B button and lock onto anyone who happens to get past you before beating them down. When you reach the Warden, he’ll escort you to his office for a poetry reading. The horror!
Your goal inside the warden’s office is to find the combination to his books, then open the one with the Prison Key inside of it. In order to get the combination, you’ll have to sneak behind the warden’s back and read it off the bulletin board near him; keep an eye on your noise monitor and make sure that he doesn’t have an excuse to ship you off to the torture chamber. If you can get the code and make it back to the table, try to open the leftmost book first; if you choose wrongly, you’ll have to endure a year of torture before you can attempt the footrace again. There’s also a tattoo on the warden’s bookshelf, so nab that while you’re there.
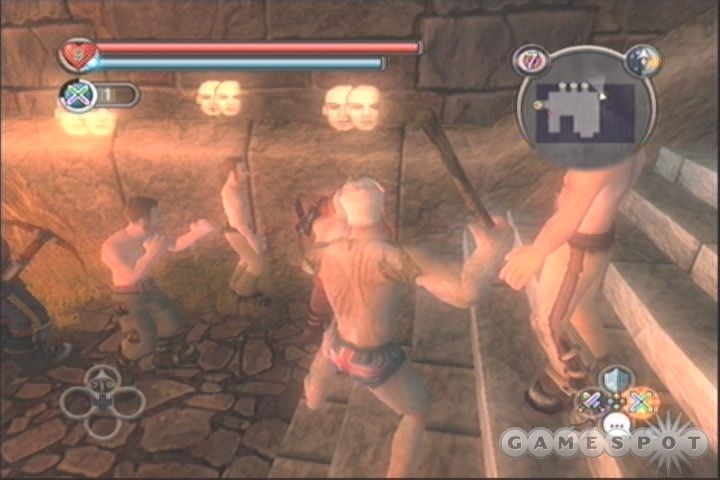
After you have the key, you’ll be sent back to your cell, which you can now conveniently unlock. You can also unlock the doors for your cellmates, if you wish; they’ll follow you out of the cellblock and will be useful as distractions if any guards catch wind of this prison break that’s a-brewing.
When you reach the courtyard, follow the footrace path, but stop at the top of the first set of stairs and enter the Prison Barracks, where you can find some Guard clothing, as well as your missing belongings. Take a second to equip your clothing again, and note that you can use magic again now.
All that’s left for you to do in the Prison is explore for items, and there are precious few of those, although there are some barrels on the upper level of the courtyard, along the race path, and some miscellaneous items in the other two cellblocks. When you’re ready to make like Papillon, head towards the Torture Chamber and collect your mother. She’s no longer invulnerable to attack, so keep an eye on her life meter as you escort her back through the path leading to the Circle of the Dead.
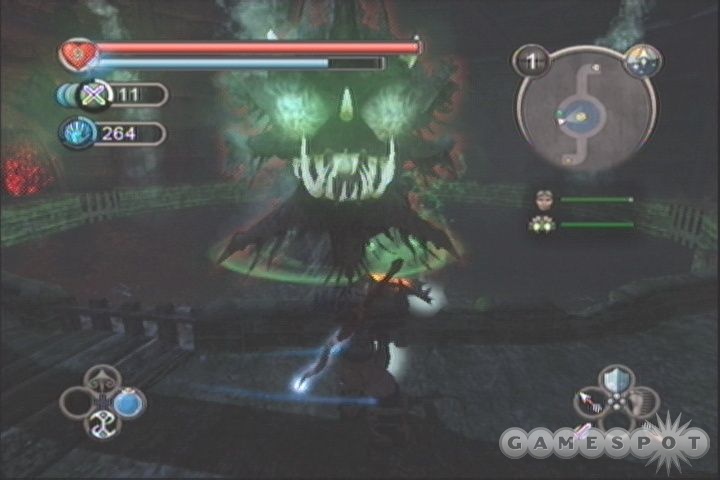
Before you can get there, though, you’ll have to face off against a monster which you bypassed earlier. The Kraken resides in the Underground Tunnel and is, well, really easy. He attacks both with his tentacles and a big energy beam from his mouth. When the tentacles are out, walk around the outer circle of the ring, wait for a tentacle to hit, then blast it with your melee weapon or whatever your favorite spell is. When the head comes up, go crazy with Multi-Shot or spells on it. Two cycles of this, and you’ll be good to escape.
Upon your exit from the dungeon, your mother will go off to find your sister, but not before she drops 40,000 experience on you. You’ll automatically get the Gateway to Hook Coast quest, and you’ll also be able to pick up either the Bounty Hunt or the Bandit Spy Extraction quest at the Guild.
Quest: Bounty Hunt
Summary: Two individuals have been taken from Bowerstone and held for ransom by Bandits. Find them and rescue them.
Money: 5400
Renown: 400
As you head south from Lookout Point to Greatwood, you’ll hit a civilian asking you to track down and rescue two Bowerstone citizens who’ve been kidnapped. One is in Fisher Creek; one is in Greatwood Lake; both can be retrieved with a minimum of fuss. Grab them for the quick cash bonus.
Quest: Bandit Spy Extraction
Summary: Extract the Bandit Spy from his trader group.
Money: 0
Renown: 0
Since you’ll probably have to kill a fair number of traders and/or guards to complete this quest, it’s not very useful for good characters, but you can always take it up if you’re looking for something to do. In it, you’ll have to extract Otto from his cover as a trader, then escort him back to his bandit friends. At its core, this is a simple extraction quest, save for the fact that you’ll be up against guards and traders instead of bandits and monsters. If you’ve been evil up to this point, you shouldn’t have too many problems adapting.
Quest: Gateway To Hook Coast
Summary: Activate the ancient Cullis Gate that leads to Hook Coast.
Money: 4200
Renown: 500
The Ancient Cullis Gate, you’ll remember, is in the Darkwood, so warp to the Barrow Fields and walk back to it. All you really have to do here is kill a certain number of Undead, so start a-choppin’ until the Gate activates; it’ll warp you to the town of Hook Coast.

The first thing you’ll want to do is to bust into the lighthouse here in town to find the last Silver Key and nab another Legendary weapon. Feel free to loot the rest of the items in the town, if you don’t mind taking a few Evil points onto your conscience. There’s some decent stuff, including tattoos and a Sharpening Augmentation.
When you’re ready to move on, examine the force field at the north end of town, then warp back to the Guild Hall to meet up with your mother. While getting captured again - not much of a Hero, this one - she’ll point you to a book on a lectern nearby. Grabbing it and giving it to the Guildmaster will start the Return to Hook Coast quest, but this will also start the endgame, and prevent you from completing any of your other quests for a while, so be sure to tie up any loose ends that you may have dangling before accepting the Guildmaster’s offer.
Quest: Return to Hook Coast
Summary: Bypass the barrier at Hook Coast with the Guildmaster’s help.
Money: 16000
Renown: 1500
When you warp back to Hook Coast, you’ll find that it’s under attack by a new kind of enemy, the Screamer. These guys (or gals) count as Undead, and should be rather easy to kill at this point in your career.
When you get past the barrier, you’ll come across a shocker: Maze has been working for Jack all along! Mind-blowing! Ok, well, you probably suspected Maze was up to no good since the end of your training or so, but now you can actually do something about it.
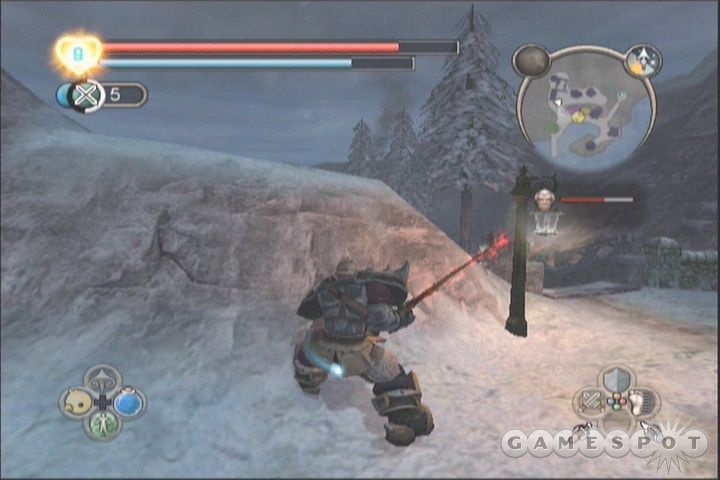
Truth is, Maze isn’t all that difficult, although his defensive capabilities are excellent, mostly thanks to his Physical Shield that he constantly casts. After a short melee scrum, he’ll retreat into the town and resort to magical projectile attacks. Screamers will also appear in small numbers to harry you, but you should be able to easily dispose of them with spells or physical attacks. As you pound on Maze, he’ll keep retreating, eventually winding up in the Lighthouse. Bash in the door and finish him!
Quest: Try to Stop Jack of Blades
Summary: This one’s pretty obvious, folks.
Jack of Blades now has the means to find the heralded Sword of Aeons; it’s your job, and indeed the job of every citizen of Albion, to stop him. You’ll have to track him down to a number of different Focus Sites across the game world and disrupt his plan in whatever way you can.
There isn’t too much to this segment of the quest. At each site, you’ll have to fight your way through seemingly endless numbers of enemies until you reach Jack, who invariably has already activated the Site that you were trying to reach. If you don’t feel like fighting, just run past the enemies towards the quest markers, using Force Push or Assassin Rush to clear your way.

You won’t be alone in your battle, though, if you do decide to fight, as a number of guards and pals from the Heroes’ Guild will be along for the ride. They won’t stick around after each site, though; you get a different friend at each one. Thunder has an especially good excuse for not helping you track down and kill Jack, something along the lines of: "Save the world? Well, I would, but I’m pretty tired."
At any rate, you’ve got four Focus Sites to hit before you get to the endgame at the Heroes’ Guild. Each time you reach one, Jack will have activated it, so there’s no rush to proceed. When you do finally reach the Heroes’ Guild, you’ll have a bit of time to rest and recuperate your mana and health before proceeding to the final fight.
There are three phases to the Jack fight. In the first, he’ll summon Minions while he meditates behind a shield; do whatever you have to to kill off the Minions, because you won’t be able to hurt Jack at all until they’re all in the ground. Next up is a bit of melee combat. As you might expect from the boss fights thus far, Jack is an excellent defender and will block most of your standard attacks. If you have even a single rank of Berserk or Multi Strike, now would be an excellent time to use those abilities.
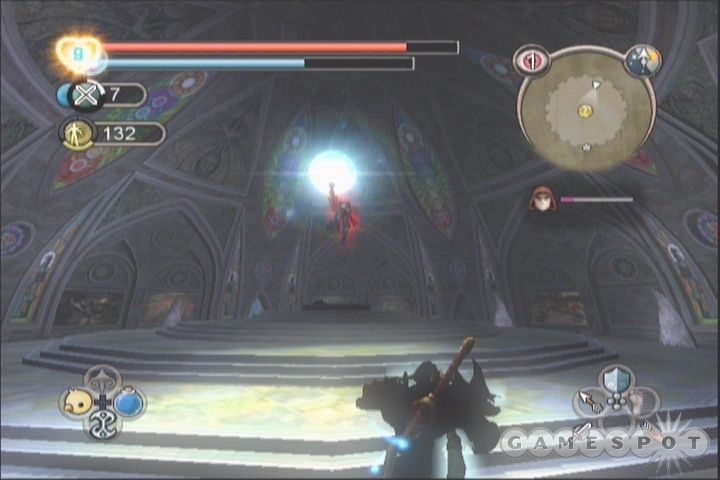
After you pound on Jack for a bit, he’ll go airborne and be beyond the reach of your melee attacks, so you’ll need to fall back on your bow or any magical abilities that you might have. You can’t dodge many of Jack’s attacks, so if you’re doing good on health, just lock onto him and use Multi Arrow to shoot him down. For the end boss of a game, Jack isn’t all that difficult to defeat.
Choice: Keep the Sword of Aeons?
Good: Cast the Sword of Aeons into the vortex.
Bad: Kill your sister to fully power the Sword, and keep it.
This is the final choice in the game. Your ending cinematic sequence depends on your choice here, as well as your alignment, making for four endings altogether. If you wait for the credits to finish rolling, you’ll be able to continue on with your character, but you might be better off starting a new game and trying to play as the opposite alignment.
Mini-Quests
There are a few open-ended quests in Fable, which will often span quite a long amount of game time. These are optional, so feel free to skip them if you don’t particularly care to deal with them.
Assassin Attacks
After you get done with the Breaking The Siege quest in Knothole Glade (which is only available after you complete the Arena quest), you’ll start running into assassins from time to time, sent by a mysterious malefactor. The first is actually outside Knothole Glade itself; there are more at Witchwood Cullis Gate, the Prison Path, Windmill Hill, and Hook Coast. You will have to explore these areas thoroughly to spawn in the assassins; they only appear in certain areas of the map. After you kill all five of them, you’ll gain the Treasure Clue 3, which is part of the Hidden Booty Hunt quest.
Temple of Avo
The amount that you have to donate to obtain the Sentinus greatmace is variable; it can be anything from 35,000 or so to 100,000 Gold. If you donate a lot of cash and don’t get the Sentinus, reload your game and try again at a different time. The Sentinus is a decent weapon, but it’s not worth paying too much for; if you’re looking for a great melee weapon, save your money for the Solus Greatsword at Bowerstone North.
Church of Skorm
If you really want to get the loot here, which includes Skorm’s Bow, you’d be advised to time your sacrifice for precisely midnight. As with the Temple of Avo, save your game first and reload if you don’t get what you want, but be advised that you’ll probably have to make multiple sacrifices to get the Bow.
You Do Not Talk About This Quest
If you saunter through Bowerstone Quay, Oakvale, Twinblade’s Elite Camp, and Knothole Glade at night, you may notice bare-fisted boxing fights occuring in the large rings. If you participate in these fights and win at all four spots, you’ll receive a trophy.
Collect Hero Dolls
There are a number of Hero Dolls scattered around Albion, and a boy in Bowerstone South will give you a quest to collect them. Most of them are obtained via the various mini-games in the towns and taverns of Albion. 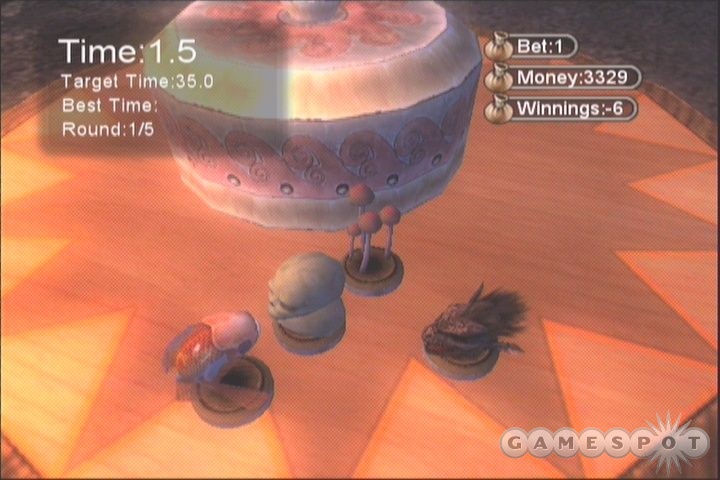
Briar Rose: The Card Pairs game in Bowerstone South. You have to win in under 30 seconds. Obtaining this will unlock the quest to collect the rest.
Whisper: Get two under par in the Coin Golf game at Oakvale.
Twinblade: Win the Spot the Addition game at the Bandit Camp.
Scarlet Robe: Win the Card Sorting game at Knothole Glade.
Thunder: Buy it at the Arena or North Bowerstone.
Maze: Get 30 or more points in Shove Ha’penny at the tavern.
When you turn all of these in, you can obtain the Jack of Blades doll from the teacher in Bowerstone South. Woo-hoo, indeed.
Beardy Baldy
If you talk to the quest-giver at Bowerstone Quay, he’ll ask you to get dressed up in a few crazy haircuts to please his daughter. He’s a crazy old man, but the quest reward is the Fire Monkey Tattoo, which gives you a large boost to your Attractiveness and Good alignment.
Hidden Booty Hunt
There are six pieces of a treasure map scattered around Albion; when you find them all, you’ll be pointed to the location of a devestating weapon!
Clue 1: Won in the Bounty Hunt quest.
Clue 2: Won after the Lost Trader quest.
Clue 3: Won after the Assassin Attacks quest.
Clue 4: Obtained after you beat the high score at the Knothole Glade archery contest.
Clue 5: In a chest in Orchard Farm.
Clue 6: In a chest near the windmill at Windmill Hill. When you have all the clues, dig up the treasure at Orchard Farm to get the Frying Pan. It’s worthless, so hopefully you weren’t hoping for something really great.
Sword In The Stone
At the Temple of Avo, you can obtain the Harbinger if you max out all of your Strength stats, or increase them significantly after the first time you try to yank it out of the ground. Talk to the guys milling around the sword to get an idea of what stats you need to increase.
Silver Keys and Chests
Silver Key Locations
Silver Keys are found throughout the game world, in a variety of places; you may find them sitting out for all to see, or they may be quite well-hidden. These are used to open the Silver Key Chests that are also scattered around Albion. You don’t use up Keys when you unlock a chest, though; rather, you are simply required to have a certain number of Keys for each chest, which are saved to use for the next chest that you encounter. Key Chests can require anything from five to 20 Keys to open; luckily for you, there are 25 Silver Keys to locate, so you may find more than you actually need.
In fact, if you’re willing to fudge the numbers a bit, you can actually find more than 25 keys, and indeed, you may be able to get as many Keys as you want fairly early in the game, thus eliminating the need to actually search for them as the game goes on. The trick here is that the game offers you the ability to make a Hero Save while you’re in the middle of a quest. Hero Saves will reset you to the beginning of the quest that you’re attempting, but you’ll keep all of the experiences, gold, renown, and items that you’ve gained during whatever portion of the quest that you’ve actually completed. The implications should be obvious: if you can find a quest that lets you gain a Silver Key during it, then make a Hero Save and load that save, you’ll keep the Silver Key that you obtained, and then gain another one when you attempt the quest again. You can do this multiple times, if you wish, and should be able to gain as many keys as you like, although you will have to play through the same segment of a quest multiple times.
One good quest for this is Trader Escort, which takes you into the Darkwood early in the game. You should be able to gain eight Silver Keys before you start the quest; the ninth is in the Darkwood Lake zone. If you continually get the key and then restart the quest, you can get yourself up to 15 or more keys fairly quickly, which will unlock the Silver Key Chest in the same Darkwood Lake zone as they key, netting you Arken’s Crossbow much earlier than you would’ve gotten it. If you want to get through the game without any effort whatsoever, keep on going until you’ve obtained 20 Keys, then return to the Heroes’ Guild to find Murren’s Greathammer, which should last you through most of the rest of your journey. This saps the game of much of its challenge, which is already in somewhat short supply, so use at your own risk.
Lookout Point
The first Silver Key you can get should be easily viewable from the main pathway leading to the statue from the Guildhouse. In order to get it, though, you’ll have to chop through some of the thorny undergrowth along one of the walls near the statue.
Bowerstone South
Another easy pick-up. The Key here is on the second floor of the clothing store (the blue building on your map). Walk out to the balcony to grab it.
Fisher Creek
After you learn to fish, hit all of the fishing spots in this area to find another Key.
Guild Woods
Again, fishing is the key here, no pun intended. The spot for the Key is at the same spot where you and Whisper killed the Bandits, if you chose to play with her at the end of your training.
Greatwood Lake
This one is in the clear near the broken bridge at the north end of the zone.
Orchard Farm
Fish off the pier at the eastern end of the zone and you should find the key fairly quickly.
Rose Cottage
There’s a digging zone near the house here.
Hobbe Cave
Another digging zone is located in the furthest recess of the cave, near where the Nymph holds the boy captive.
Darkwood Lake
There’s an ancient pillar with a hole in it jutting up out of this lake; shoot the hole with an arrow and net yourself a key.
Ancient Cullis Gate
Fishing off of one of the bridges here will get you the key.
Grey House
More fishing!
Oakvale (Memorial Gardens)
If you do the quest that you receive from the pirate ghost on Oakvale’s eastern beach, he’ll point you to the location of his secret stash.
Twinblade’s Camp
On the southern end of this zone, you’ll find some chests and barrels. Dig near them to find the Key.
Witchwood Stones
The small pond near the Demon Door holds a Key.
Witchwood Lake
Check out the statues near the western end of this zone. The one that is possessed with a red light has a Key buried at its base.
Knothole Glade
If you check around the homes in the southwestern corner of the zone, you’ll find another digable spot.
Windmill Hill x2
There are two Keys in this zone; each house here has a digging zone nearby.
Headman’s Hill
If you attempt to woo Lady Grey in Bowerstone North, you’ll be able to fish up a Silver Key from the pond where you and Thunder fight.
Bowerstone Manor
After you accept Lady Grey’s hand in marriage, you’ll be able to loot her house; there’s a Silver Key hidden away in her elaborate bed.
Lychfield Graveyard x3
There are no fewer than three Keys in the Graveyard: one is inside a tomb in one of the mausoleums; one is found in a grave outside that same crypt (you’ll have to dig for it); and the last is located in one of the fishing spots near a bridge.
Cliffside Path
You’ll find the last Silver Key that requires digging near the northernmost chest here.
Hook Coast
If you break into the lighthouse here, you can loot the Key from one of the cabinets.
Silver Key Chests
When you find enough Silver Keys to unlock these chests, track them down and pop them open!
5 Key Chests
Greatwood Lake: Elixir of Life
Cave Larder: Will Master’s Elixir
10 Key Chests
Grey House: Sharpening Augmentation
Circle of the Dead: Piercing Augmentation
15 Key Chests
Darkwood Lake: Arken’s Crossbow
Witchwood Stones: Health Augmentation
You’ll have to get through the Demon Door to find this one.
Headman’s Hill: Mana Augmentation
This is only accessible if you choose to fight for Lady Grey and then duel Thunder. It’s in the small cave at the bottom of the hill.
Bowerstone Manor: Katana Hiryu
After you marry Lady Grey, you’ll be able to find this chest in her house.
Hook Coast: Murren Greataxe.
This chest is at the very top of the lighthouse, so you’ll have to break in if you want it.
20 Key Chest
Heroes’ Guild: Murren Greathammer
This is the easiest chest to find, but likely the last you’ll be able to unlock. Be sure to keep track of your Key numbers, though, as you’ll want to get the Greathammer as soon as possible; it’s a very powerful weapon!
Demon Doors
The Demon Doors in the game are essentially riddles. After you locate a Demon Door, it’ll read off a bit of a riddle, or just tell you what it wants; your job then is to perform whatever deed or act the Door requires to get it to open. Some of these are relatively benign, but many will be rather difficult, and some will even require you to act counter to your chosen alignment on the good/evil axis in order to
Door 1: Heroes’ Guild
This one is the easiest Demon Door to get past, as all you need to do is bring over the Lamp that you receive from the Guildmaster after your graduation and walk up to the Door while it’s lit. After you fulfill this extremely basic condition, the door will pop open, revealing an Elixir of Life among other sundry prizes.
Door 2: Greatwood Gorge
This door is evil! EEVVVILLL! And before it opens, it wants proof that you’re evil, as well. You can do this by becoming completely evil before talking to it (check the Personality screen in your Back menu to see your current alignment), or by gaining around +50 Evil alignment modifiers in front of it. You can do this by eating Crunchy Chicks, which give you +5 or so, or by getting people to follow you to the door and then murdering them. Inside, you’ll find Wellow’s Pickhammer. This is one of the worst of the Legendary weapons, so don’t feel compelled to unlock it if you’re a Good character.
Door 3: Rose Cottage
This door wants to be loved! All you need to do to prove your devotion is to give it a gift. The tavern in Bowerstone South offers up Chocolates for 10-20 gold; just one of these will be enough to convince the door to let you through. Inside, you’ll find a set of Will User’s Bright clothing, which is decent if you use magic a lot, or if you need to be attractive.
Door 4: Greatwood Caves
The only way to get past this door is to get your Combat Multiplier up to 14 or so. If you have a decent rank in Physical Shield, you should be able to do this fairly early in the game, although you might have to duck into the Hobbe Cave and then come back out to find enough enemies to get your multiplier that high. Later in the game, you’ll find a troll outside the Demon Door, instead of the mob of Hobbes that are there earlier on, which can make it more difficult to achieve the target. Inside, you’ll find the Cutless Bluetane weapon, which is great if you can get it before you do the Trader Escort quest. Later in the game, though, it will pale in comparison to other Legendary weapons that you’ll be finding.
Door 5: Darkwood Marshes
You’ll probably first run by this door when you do the Trader Escort quest. In order to get through, you’ll need to defeat five or six waves of Hobbes, which shouldn’t tax you overmuch. Your reward is a set of Will User’s Dark clothing, which you’ll need to open another Demon Door later on, so don’t sell them.
Door 6: Barrow Fields

"You’re the one for me, Fatty," is essentially what this Door is saying; it will only let you through if you’ve become morbidly obese. The easiest way to accomplish this feat is to buy a bunch of Red Meat (30 or 40 or so) at the general store in Oakvale and bind them to one of your D-pad buttons, then start tapping away. You can get yourself fat in no time by doing this; don’t worry, the extra pounds will be shed through the course of normal gameplay (assuming you don’t binge any more). Through the door, you’ll find a Will Master’s Elixir.
Door 7: Grey House
After you successfully marry Lady Grey, you’ll be allowed to pass through here. Inside, you’ll find Ronok the Axe.
Door 8: Abandoned Road
The Abandoned Road Demon Door wants to see you play Barbie, so start collecting outfits! It wants to see you decked out in full suits of Bright Plate armor, Dark Will User’s Clothes (from the Darkwood Marshes Demon Door), and the Bandit Gear. You’ll find the Bandit Gear during the course of the Twinblade quest, but the Bright Plate can only be found in total at the Arena. You can buy a couple parts of it from Knothole Glade, and a couple more from travelling merchants, but if you want to make one stop, get it from the Arena and rest assured that you’ll be able to get through the Door without a problem. Note that you can’t return to the Arena after you finish the quest there.
Inside the Demon Door, you’ll get the Dollmaster’s Mace. This only does 135 damage, but it has a Mana Augmentation, making it ideal for magic users. If you don’t want to buy the Plate, though, you can just as easily wait to find a Mana Augmentation (you’ll get one in a Silver Key Chest during the Lady Grey marriage quest) and pop it into a non-Legendary weapon.
Door 9: Witchwood Stones
You’ll get through this door as a part of the game’s storyline quests. The main item inside is a Health Augmentation, which can be sold for 25,000 gold or so if you have no need of it. (Before you augment a weapon with it, you may want to check and see if you have enough cash to buy the Solus Longsword at Bowerstone North, which already has a Health Augmentation in it.)
Door 10: Knothole Glade
Hit this door with a powerful shot from your arrow, and it’ll let you through. If you have a decent Accuracy rank, a single shot from an Ebony Longbow should be enough to get you through; if not, use a Multi Arrow on it. You’ll nab an Elixir of Life inside, so it’s worth the (minimal) trouble required.
Got a news tip or want to contact us directly? Email news@gamespot.com
Join the conversation