Enter the Matrix Walkthrough
This guide will tell you everything you need to know to get through the game as Ghost and Niobe. Inside you'll find walkthroughs for both characters, as well as a hacking guide.
Design by Collin Oguro
Enter the Matrix provides an interesting counterpoint to The Matrix: Reloaded. You'll play as Ghost and Niobe, two secondary but important characters in the film, as they run around and perform the tasks that made the action in the film possible. However, you'll need this GameSpot Complete game guide to get the most out of Enter the Matrix.
Inside you'll find:
- Tried-and-true combat tips for dealing with the armies of enemies you'll face
- Complete walk-throughs for both Ghost and Niobe
- A thorough guide to the game's hacking mode, which allows you to alter the game after you've finished it
Table of Contents
General StrategiesThe Waiting Game
Disarming
Kick 'Em While They're Down
Close Combat
Get Your Bearings
Post Office: Epicenter
Post Office: Unexpected Arrival
Post Office: Redirected
Post Office: Backtracking
Post Office: Got It
Post Office: Big Distraction
Post Office: Breakout
City Driving: Get to the Hard Line
City Rooftops: Answer the Phone
Airport: Concourse
Airport: North Point
Airport: North Point 2
Airport: Monorail
Airport: Revolving Restaurant
Airport: Terminal
Airport: Control Tower
Airport: Control Tower 2
Aqueduct: Retrieving Axel
The Sewers: Abyss
The Sewers: Abyss 2
The Sewers: Pumped
The Sewers: Ice and Corrupt
The Sewers: Waterway
The Sewers: Waterway 2
The Sewers: Breathing Room
The Sewers: Malachi and Bane
The Sewers: Malachi and Bane 2
The Chateau: Great Hall
The Chateau: West Wing
The Chateau: Atrium
The Chateau: Secret Passage
The Chateau: Secret Passage 2
The Chateau: Merovingian's Office
The Chateau: Garage Hallway
The Chateau: Return to the Great Hall
The Chateau: The Dungeon
The Chateau: Cain and Abel
Under the City: Twins in Pursuit
Zen Garden: Trinity and Ghost
The Freeway: Chase Morpheus
The Freeway: The Truck
Power Plant: Reactor Constructor
Power Plant: Reactor Constructor 2
Power Plant: Nuclear Shipping
Power Plant: Transformer Field
Power Plant: Transformer Field 2
Power Plant: Nuclear Waste Sector
Power Plant: Nuclear Waste Sector 2
Power Plant: Core Control Room
Power Plant: Core Control Room 2
Chinatown: Seraph's Tea House
The Skyscraper: Vertigo
Chinatown: Smith's Trap
Chinatown: On Foot
Chinatown: Hard-Line Pursuit
Chinatown: The Virus Spreads
Chinatown: The Church
On Board the Logos: Tunnels of the Real
On Board the Logos: The Rabbit Hole
Post Office: Behind the Scenes
Post Office: Epicenter
Post Office: Unexpected Arrival
Post Office: Redirected
Post Office: Got It
Post Office: Big Distraction
Post Office: Breakout
City Driving: Get to the Hard Line
City Rooftops: Answer the Phone
Airport: Check-In
Airport: The Belts
Airport: Jackson in Steam
Airport: Jackson in Steam 2
Airport: Hangars
Airport: The Bowels
Airport: Catching a Plane
Airport: Agent on Board
The Sewers: Abyss
The Sewers: Abyss 2
The Sewers: Pumped
The Sewers: Ice and Corrupt
The Sewers: Waterway
The Sewers: Waterway 2
The Sewers: Breathing Room
The Sewers: Malachi and Bane
The Sewers: Malachi and Bane 2
The Chateau: Shadows
The Chateau: The Attic
The Chateau: Persephone's Bedroom
The Chateau: Merovingian's Office
The Chateau: Garage Hallway
The Chateau: Return to the Great Hall
The Chateau: The Dungeon
The Chateau: Cain and Abel
Under the City: Twins in Pursuit
The Freeway: Chase Morpheus
The Freeway: The Truck
Power Plant: Reactor Foundation
Power Plant: Reactor Foundation 2
Power Plant: Nuclear Shipping
Power Plant: Transformer Field
Power Plant: Transformer Field 2
Power Plant: Generator Turbines
Power Plant: Generator Turbines 2
Power Plant: The Core
Power Plant: Agent Escape
Chinatown: Seraph's Tea House
The Skyscraper: Vertigo
Chinatown: Smith's Trap
Chinatown: On Foot
Chinatown: Hard-Line Pursuit
Chinatown: The Virus Spreads
Chinatown: The Church
On Board the Logos: Tunnels of the Real
On Board the Logos: The Rabbit Hole
GENERAL STRATEGIES
In general, Enter the Matrix is an incredibly straightforward game. The levels are fairly linear, and the combat is pretty easy to understand. There are, however, a few things to keep in mind that will definitely give you an advantage as you wander its computer-generated environs.
Focus, Focus, Focus
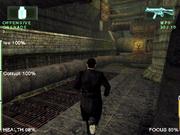
Though the benefits of the focus meter will undoubtedly become obvious during the game, it's not explained very well at the beginning. Focus basically allows you to go into what the filmmakers call "bullet time." You slow down the action, which allows your character to run faster, shoot more accurately, and perform all sorts of good-looking stunts.
Focus is good in pretty much any fight, but it becomes most useful during boss fights and when you are completely outnumbered. In the latter case, focus will allow you to perform some combat moves that will take down several enemies at once. Focus is also great for clearing long distances to reach enemies when you don't want to waste ammo on them. Because it makes you run faster, and makes you more difficult to hit, you can cover a fair amount of ground and take very little damage.
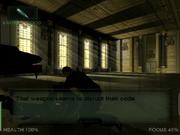
One of the best, and least obvious, uses for focus is when you are using a sniper rifle. Because you move at normal speed and everything else slows down, you can sweep the screen and find targets without having to take your eye from the scope. And focus also makes your shooting more accurate, giving focus sniping that much more of a benefit.
Basically, focus will be one of your most powerful tools during the course of the game, so use it liberally.
The Waiting Game
You will notice early on that your health and focus meters will slowly refill. If you are taking damage, your health won't refill. If you are using focus, your focus won't refill. There is a short gap between the depletion of either meter before it starts refilling again, and they recharge more slowly as they get filled up.
Charging through each level is a sure way to have to start all over. Be patient, and rest after any big fights. Combat-intensive levels tend to be combat intensive all the way through, so learn to rest after big fights so you don't go into an ambush without enough health to survive or enough focus to effectively fight.
Further, the level design in Enter the Matrix is based on a basic trigger system, meaning that once an area is clear, it will stay clear. There are a few exceptions to this, but for the most part you can rest easy once you've taken out any threats in an area.
Disarming
Of all the hand-to-hand combat moves in the game, disarming a target may be the most effective. When fighting large groups, disarming can turn the tide in your favor, because none of the enemies in the game, except for the bosses, are any match for you in hand-to-hand combat.
The one drawback to disarming opponents is that if you can't pick up any more ammo of the type they were using, the guns will just sit on the ground until they get back up and grab them. So make sure that once you disarm opponents, you knock them away from their guns.
Kick 'Em When They're Down
Speaking of knocking them away from their guns, hand-to-hand combat will be much easier if you learn to execute a low kick after you've knocked someone down. You can kick your opponents around the screen like a soccer ball, and usually one or two of these kicks will incapacitate them before they can even get back up.
Close Combat
Your opponents will be universally terrified of friendly fire, so use this to your advantage. If you are fighting large groups of scattered enemies, if you get in close to one, the others will be pretty much unable to respond until you've hurt their friend. This is also a great way to know whether or not an enemy you're fighting is down for the count, which can sometimes be difficult to determine in the heat of battle. If his buddies start firing at you and he's still moving, you'll know he's just doing his death animation.
Get Your Bearings
Knowing where to go in Enter the Matrix is sometimes tricky, because the perspective can often obscure a path. This isn't always the case--most of the time the path through the game is obvious because you'll just be running down an endless series of corridors.
On the off chance that you do find yourself at a dead end, switch to first-person mode and look around. This will allow you to look down and up, which will sometimes reveal a path that you may have missed. Also pay close attention to your objective arrow, which is often extremely specific in showing you where to go, to the point of pointing out doors and otherwise hard-to-see paths. This last point is especially important in some of the driving missions, where the perspective can often obscure necessary turns and side roads.
GHOST WALK-THROUGH
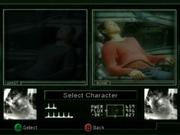
While Niobe and Ghost have a few overlapping missions, the majority of the missions are different depending on which character you choose. Ghost has a few more missions, and his are slightly more difficult than Niobe's. For the most part, though, all of the levels in the game are very straightforward. This walk-through will tell you what to expect, as well as how to get through the more difficult areas of each level.
Post Office: Closing Time
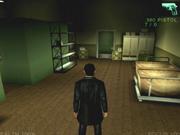
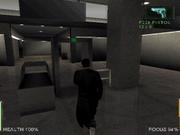
Welcome to the world's most hostile post office. Your goal in this series of missions is to wind your way through the back rooms of the post office, find a particular post office box, then make your way out.
You begin in the lobby. You don't have to attack the guards here, but you may want to practice your fighting and focus techniques before you get into the more hostile areas. If you head to the right, you'll find a room full of postal boxes. Sparks will tell you which box you're looking for and that it is located on the second floor. Return to the lobby, and follow the hallway to the elevator, which is inoperable. Some guards will come through a previously locked door and attack you. Go through that door and continue into a hallway.
Follow the hallway around, passing a cowering postal worker. Two guards will attack once you get near an unlocked door, which is located next to a yellow guardrail. Dispatch the guards and then head through the door.
To your left is a small set of stairs leading to a door. There is also a health pack nearby, if you need it. Go through the door at the top of the stairs. You'll find yourself in a hallway; at the end is another set of stairs leading up to a door. Proceed through this door. Yet again, you'll emerge in a hallway with stairs and a door at the end. Run up these stairs and go through the door.
Post Office: Epicenter
This next area is large, but you don't need to explore it quite yet. Run down the metal steps and attack the guard at the bottom. Continue forward and climb the fence. Follow the machines around until you go through an opening in a large fence. Turn left. More guards will attack. Once you've dealt with them, proceed to the large metal freight-elevator door that's directly in front of you.
Post Office: Unexpected Arrival
Sparks will warn you that the guards are waiting in ambush. The next few hallways are fairly dangerous, so you'll want to use your focus and deal with the guards as you come to them. After the first bend, a forklift will come at you; it moves slowly, so just make sure you aren't directly in its path. The guards will try to ambush you from behind crates--use focus to dodge their bullets, and disarm them as soon as you get close. Remember that enemies won't shoot at you if you're engaged in hand-to-hand combat, so try to keep it as up close and personal as you can.
Continue following the only available path. You'll encounter more guards, so just use boxes as cover until you can get close enough to disarm them. One of the taller crates has a health kit on top--it's sitting in the middle of the path and completely visible. Climb up on the crate and grab it if needed.
After you've run the guard gauntlet, Sparks will tell you that they're firing tear gas into the room. Ghost will automatically climb up on a forklift and onto some shelves. Focus-jump across the room to the air vent on the other side. Try to land as close to the nearby shelves as possible--the vent will collapse if you land too far to the right. Run along the vent onto the shelves, and then turn right into the large open area when you reach it. Drop through the skylight to safety.
Post Office: Redirected
Go through the open door into the next area. Fight the guard, then quickly get to the back of the room to fight the other two that are firing at you. In the next room, ignore the guards firing at you from behind the fence, and follow the path around until Sparks contacts you.
At the end of this hallway, you can either climb the fence or enter the small office and jump through the window. You can try to do a focus dive or just jump-kick at the window and go through.
The next hallway is filled with guards hiding behind the shelves. Take them on one by one, and make sure they are completely incapacitated before you move on to the next group; it's easy to get outnumbered if guards you thought were down get back up and start shooting from behind. Alternately, you can just focus-run to the safety of the opposite end of the area; you're almost to the end, and they won't be able to follow you.
You'll emerge in a group of offices. Follow the hallway down and find the doorway at the end. This leads to another group of offices that are guarded. Fight the guards, then follow the path until you see a door near a window and a metal guardrail. Proceed through the door, press the red button on the large computer, and then follow the room around to the next doorway.
Post Office: Backtracking
At the bottom of the stairs, you'll find a door leading to the large area in the epicenter. You need to get all the way back to the beginning of this room. Follow the path around, taking out the guards as you encounter them. When you see the freight elevator ahead, turn left through the opening in the fence, and continue running until you reach another fence. Climb it, and take out the guards ahead, either with your guns or by focus-running up to them and showing them your kung fu. Don't climb back up the steps--instead, go through the previously locked door nearby.
Post Office: Got It
You're back in the lobby. Go forward, then head right to the elevator. You can't access it until the guards are eliminated, but once you kill both of them the doors will open. Step into the elevator.
Run all the way to the far wall, then turn left. Run all the way to the last group of post office boxes ahead. Don't grab the health kit yet--if you need health, just wait for Ghost's health to recover before approaching the last bank of post office boxes.
A cutscene will show Ghost grabbing the package as more guards enter the room. Once again, the elevator is inaccessible until all the guards are gone. This is a good time to practice shooting from behind walls. Walk up to a wall until Ghost turns his back to it. Then lean around the corner and start firing. Be somewhat careful not to spend too much time in the tear gas filling the center of the room, but it isn't too harmful if you take the guards out quickly. Finish off the two guards guarding the elevator. Once the coast is clear, the elevator doors will open, and Ghost can return to the lobby.
When you try to open the exit doors, the security gates will slam shut, trapping you. This will most definitely be your toughest fight yet, because the guards that ambush you are armed with MP5s and shotguns. Play it safe, taking them on one at a time, and use pillars as cover. It's also a good place to do the lean-and-shoot trick, coupled with focus for better accuracy.
There are quite a few guards, so keep fighting until they are all gone and you have a nice supply of MP5 and shotgun ammo. Run back toward the elevator, which is now blocked by a security gate, and go through the door to the right. If the door isn't accessible, you still have guards to take care of. Follow the path until you come, once again, to the series of steps leading to the Epicenter.
Post Office: Big Distraction
You're back in the epicenter. Jump off the now-destroyed stairway and run forward. This section is very straightforward, but you'll be beset by an army of guards. Save your ammo until later in the section, and use hand-to-hand combat to take down the first few guards you encounter. Once you start seeing three or four guards at once, use focus and the firearm of your choosing to take the guards down from a distance. Remember that if your health or focus get low, just find a safe place to stop and wait for them to replenish.
Follow the path around until you reach the doorway. Go through the door, climb the stairs, and exit through the doorway at the top.
Post Office: Breakout
You'll likely recognize this area--you are basically backtracking through the first half of the level. Two guards will follow you into the room after you enter. Take them out. Note that guards will continue to follow you, so you'll need to be quick.
Two guards are waiting in ambush in the next storage room--take them out and grab their ammo, then continue into the offices. The room is full of guards. Luckily, you won't need to fight them. As soon as you enter the office area, make a left and then another left. Run to the door straight ahead and go through it.
City Driving: Get to the Hard Line
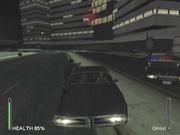
This is a fairly straightforward and easy driving mission. It basically trains you to shoot from a moving vehicle, which will be somewhat useful later in the game. Niobe does a fair job of driving in this mission, so all you need to do is shoot at any and all oncoming police vehicles. Just shoot at the cars themselves--they explode easily, and you can experiment with shooting civilian cars to block the police vehicles' paths.
Just keep firing at anything and everything in sight, and Niobe will get you to the exit safely.
City Rooftops: Answer the Phone
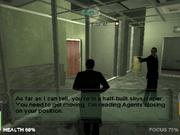
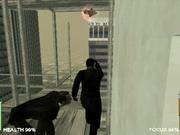
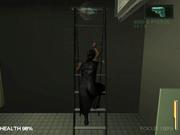
Turn and run toward the roof with the visible ladder. You'll need to jump across the gap--falling off any of these roofs means instant death. Climb the ladder, continue running, and then climb up the second ladder. An agent will appear and begin chasing you.
You can't fight an agent, as the "tips" will helpfully tell you. Best do what the tips advise and just run away. Run to the right of the fence ahead and jump the gap to the ladder. Note that the gaps between roofs are occasionally difficult to see due to the game's strategically challenging perspective. As a result of these obscured gaps, you'll want to be careful when traversing the rooftops.
Follow the path, jumping over the gaps as needed. Eventually, you'll jump onto some wooden planks that will collapse beneath you. Turn right and continue running through the concrete halls. You'll soon see a ladder ahead--jump to it, and climb up.
Continue along the rooftops. There is one point ahead at which the path becomes unclear. An agent will appear on a ledge ahead of you, which appears to be the correct path. It isn't. Turn left through a hard-to-see opening just after the agent appears. Soon, you'll crash through yet another set of wooden planks. Run up the stairs, and continue along the rooftops. You'll see the ladder leading to the exit ahead--climb up to end the level.
Airport: Concourse
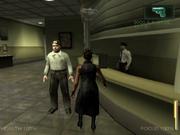
When you enter the concourse, you'll see a guard attending to his wounded friend. If you don't have any weapons drawn, you can waltz by all the guards until you get to the metal detector. There's no way to avoid fighting them, though, so you may as well open fire as soon as you set foot in the room.
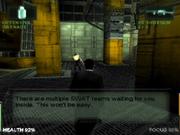
In the terminal, you'll be ambushed by guards. Once you've dealt with them, quickly take out the lone security guard at the end of the hall and grab the stun grenades he drops. You're going to want to save those for later. The gate at the end of the terminal will, hopefully, close before you get there. If it doesn't, don't go through--you'll get trapped in the short hallway leading to the next terminal, and the only way out is to quit.
Head into the restroom. Through the door at the far end is a SWAT team. Fight them hand-to-hand; they won't shoot in such close quarters, especially with the hallway full of their buddies. Go through the next bathroom and into the next terminal, where another SWAT team awaits. Use focus liberally and clear the terminal, then follow the sign into the customs area.
Airport: North Point
A group of guards is preparing for a fight in the first room. Get over to them quickly and bust them up before they can arm themselves and scatter. Grab the box of grenades and walk around until you reach a dead end with two windows. Stand at the far end of the hall and toss a grenade to shatter the windows, then jump through.
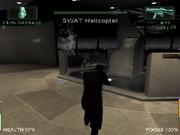
A group of security guards has barricaded itself at the far end of the terminal. Focus-run up to them and take them out--they won't be able to do much damage during your approach. In the next terminal, another SWAT team will enter as you pass by a window--you'll also have your first glimpse of the SWAT helicopter, which will become a problem shortly. Take out the SWAT team, grab all their ammo, and then wait until your health and focus meters are full. Now exit the terminal.
Airport: North Point 2
Boss fight! OK, this isn't too difficult if you are at full health and have a fair amount of ammo for the MP5. Once the level starts, quickly hide behind one of the walls. Listen to the helicopter's gunfire, and wait until it stops. Run out into the open with the MP5 armed, and activate focus. Fire at the helicopter until it's out of range or you're out of ammo. You should be able to get at least a third of its health with each pass.
Once the helicopter is gone, run to one of the far walls. Arm something other than the MP5 (you'll need to save the ammo for later), and get ready to throw one of those stun grenades toward the middle of the room. When you hear the SWAT team give the "go" order, throw the grenade. Start firing as soon as the team starts descending, and then finish off any stragglers after the grenade explodes. Quickly pick up any ammo left behind.
The helicopter will return. Hide against a wall, arm the MP5, and recover focus. When the helicopter stops firing, jump out and empty the MP5 again. Repeat the process, including dealing with the SWAT team, until you shoot down the helicopter. With effective use of focus when shooting at the helicopter, it shouldn't take you more than three or four passes to destroy it.
Airport: Monorail
When you first enter the level, the first gate you pass will be closed and locked. Continue forward, doing your best to deal with the SWAT team behind the locked gates. At the second locked gate, you will receive a message from Sparks. Double back to the first gate, which will now open.
Be prepared to deal with several teams of heavily armed police. Use disarm as often as possible, and remember to keep them close by so that the others won't shoot. When you get to the end of the walkway, turn right. A few more SWAT team members await you near the steps leading down. Once the steps are clear, you can run to the exit, which is just around the next corner.
Airport: Revolving Restaurant
This level is very easy if you don't mind standing still. If you want to clear out all the enemies, make your way up and over the staircase leading to the bar in the center of the restaurant, then continue down the other side. Otherwise, just jump on the piano near the outer edge of the restaurant, and shoot at the SWAT members as you revolve by them. Once the piano gets near the ladder leading to the roof, the mission will end automatically.
Airport: Terminal
When you first enter the terminal, you'll be attacked by SWAT team members from the far side of the room. The next threat will come from below, so either go down and take them out up close, or stay on the second level and deal with them from a safer vantage point. A second wave of officers will enter the area on the top floor. Once they're gone, the final wave will come in on the ground floor. Take them out from up high. When the room is clear, head down to the ground floor and go through the newly opened door.
Sparks will inform you that you need to find the escalators. The ground floor of the terminal is crawling with SWAT team members, but if you head right and follow the sign to the escalator you can avoid confrontation.
Two more SWAT team members await you at the top of the stairs. Be sure to deal with them as quickly as possible, and grab their guns. It is in your best interest to conserve your SG-552 ammo at this point, so try to use the MP5 and lesser guns when dealing with the threats in this area.
Turn right at the top of the escalator, then take a second right and shoot your way to the end of the walkway.
Airport: Control Tower
Immediately kill the nearby SWAT team member and grab his sniper rifle. Your fellow revolutionaries will do a decent job dealing with the police below, but you can help them out and learn to use the sniper rifle effectively at the same time. There are a few SWAT units on the roof of the building across the way, and more on the stairs. Once the coast is clear, you'll be told to head down to the balcony.
Make your way down the stairs, disposing of the SWAT team as it enters. When you reach the balcony, you should be able to easily get rid of the distracted SWAT unit and then use the sniper rifle to finish off the SWAT team across the way. Now, it's time to head back upstairs.
Airport: Control Tower 2
This mission is one of the more annoying levels in the game. It has two parts. The first is somewhat difficult, but not dangerous. The second is lethal.
Your first goal is to shoot out the wheel of the jet below before it can take off. The best means of doing this is quickly, because the plane is stopped for a moment at the start of the mission. Quickly get a bead on its front tire with the sniper rifle and fire. If the plane starts moving, you'll need to lead your shot a bit. Note that you'll probably hit the tire if you just shoot wildly in its vicinity--there doesn't seem to be much rhyme or reason to what constitutes a good hit.
Once the plane is disabled, arm yourself with the SG-552 and quickly get behind a nearby pillar. You'll want to be protected from the window you just shot through--an agent has commandeered a helicopter, and he's coming for you.
The helicopter will appear in the window. Activate focus, then lean around the pillar and open fire. You should be able to get rid of the helicopter before it disappears. If not, prepare yourself for a difficult fight. There's no way to know where the helicopter will appear next, and you'll usually get killed before you can orient the camera to see where it is firing from. So you'll need to either do it right the first time, or just repeat this whole level, including the airplane sniping, over and over again.
Aqueduct: Retrieving Axel
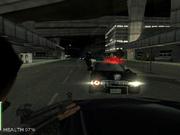
Now Ghost is behind the wheel of a police van. This mission is difficult for one reason: the perspective. For some reason, the camera is in the back seat, and Ghost's head blocks a good portion of your view. The only way it could be worse is if they had the camera on the hood, pointed backward. The objective arrow is your best friend here, as you will no doubt find once the route gets tricky.
Quickly accelerate and stay near the plane. If you manage to pass it, which is possible, you'll be in good shape, because you can avoid the large obstacles it will drop in your path. Follow the aqueduct until you hit what appears to be a dead end. Watch the arrow--it will point you to the left, where a gate leads to an elevated road and another, open side of the aqueduct.
Continue following the plane. The driving gets trickier on this side, including a large electrical tower and several tunnels you'll need to drive through. Keep your eye on the arrow if you think you're lost--it's easy to get stuck on the dirt mounds, and the other vans careening into you don't help much either.
Soon, a car will appear ahead of you. The plane is no longer your target. While Sparks will tell you to stay close to the car, if you just keep it in sight you will be all right. Follow the car through the next section of road, and eventually a cutscene will take over, with Ghost saving Axel from the clutches of the agent.
The Sewers: Abyss
Run along the pipe ahead of you to the wall, then follow the pipe and jump through the window into the alcove. A focus run up the wall here will put you perfectly in the room, if you want to do it with flair.
Continue following the path up--it's a decent jog, but there's no danger. When you reach the top, you'll be told that you need to protect Ballard. Attack the first SWAT member you see and grab his sniper rifle. Quickly arm it, and shoot the SWAT units across the way. Ballard will tell you to head up, so make your way to the ladder ahead and climb up.
Quickly aim the sniper rifle at the two SWAT snipers to your left--as you reach the top, they are at approximately 10 o'clock. There's one more near Ballard, so if he hasn't taken care of him already, help him out. Make your way down to the catwalk with the phone, and Ballard will escape safely.
The Sewers: Abyss 2
Unfortunately, you won't be as lucky as Ballard. Hoist yourself up from the pipe, and quickly get rid of the SWAT unit nearby. Take cover if you're getting sniped--there are two snipers nearby, one on either side of the catwalk. Shoot them both, then head over to the phone. The third sniper is on an elevated platform--if you face the phone and turn left, he will be directly above. He will also be firing at you, so use focus to pinpoint his location. Retreat to safety, wait until you are healed, then return and take him out with the sniper rifle, now that you know where to look. Finally, pick up the phone.
Sparks will return you to the same position, but with better equipment. Throw a grenade at the nearby ventilation fan, and then climb through the newly created hole and follow the tunnel around to the pit and drop down.
The Sewers: Pumped
Follow the tunnel until you come to a small passageway to the right. Drop down into the room and prepare for a series of firefights with a SWAT team. There are two SWAT team members in each of the next three rooms. Note that the barrels scattered about will explode if shot, and any seasoned action gamer knows how enemies love to stand around explosive barrels. Go into first-person mode and target the barrels to clear the rooms quickly.
You'll emerge in a large room filled with machinery and, unfortunately, more SWAT members. Luckily, there are more exploding barrels in here as well, so use them. You'll need to clear the room, then look for a red ladder near the hallway from which you entered this area. Climb the ladder, and follow the walkway around, then focus-jump to the next platform. The passage ahead is blocked by steam.
Turn around and take care of the newly arrived SWAT team, then jump down to the ground and go through the gate by which they entered. Drop down the hole, and run through the tunnels until you see a SWAT team member behind a chain-link fence. Shoot him through the fence, then climb onto the table to your right and hop up to the ledge.
More police are waiting for you. Continue through the hallways into the large chamber beyond. As expected, more SWAT. Once the room is clear, find the pump with the red blinking light. Turn off the pump and another SWAT team arrives. Once you're done with them, proceed to the next room and climb up the ladder.
The Sewers: Ice and Corrupt
Two allies are in the next area, being beset by police. Take out all the enemies in the room, then jump up onto the ledge near the entrance. There's a small ledge by a nearby gear that you can climb onto, so do so. A cutscene will show Ghost falling into the level below.
Take out the police, then head to the left. Continue through the passageways, making sure to grab ammo from the police you'll encounter. Just before the ladder back to the upper level, you'll run into a guard with grenades. Grab his grenades if you need some, then climb up the ladder.
Again, Ice and Corrupt are being attacked. Clear the lower level of the room, then climb up onto the ledge with the machine that is spinning wildly out of control. Ignore the SWAT team members that come into the room--it's a never-ending wave, and so you're just wasting ammo. Go into first-person mode and target the three large anchors at the base of the machine. Destroy all three, and Ice and Corrupt can escape. Do a focus jump into the nearby hole to proceed to the next level.
The Sewers: Waterway
Run through the tunnel, taking out the two guards you encounter. At the first bridge, do a focus dive to quickly kill the police at the end. As you follow the stairs down, police will come into the area behind you. Take them down before proceeding. Continue to the next bridge, where more police are waiting. Once they're gone, climb down the ladder and grab the nearby gun. This will activate the flashlight. Note that the flashlight will now be active whenever you have a weapon drawn in the dark. Shortly after you pick up the flashlight, a SWAT team will lob a grenade into the pit. Take cover, then take them out as they rappel down to get you.
Climb up the ladder; more SWAT team members are waiting. When the coast is clear, continue through the passage. Follow the tunnel to the end, then follow the SWAT team as it proceeds to your right. When you first see them on the lower level, toss a grenade their way and jump down to finish them off. Kill the police chasing Wurm, and then head down the ravine in the opposite direction.
You'll encounter a fair amount of resistance during the next section. Use the lean-and-fire mode to easily dispatch the guards on the upper level, then move to the next archway and do the same. Soon, you'll receive a warning that a large group of police are headed your way. Take cover in one of the side passages and ambush them when they pass by.
Continue down the ravine. When the tunnel branches, head right. Make sure you focus-jump over the ravine ahead--it's easy to miss the gap, and it would be a shame to have to replay this whole level just because you fell off a board.
The Sewers: Waterway 2
Run left, and then take your first left if you want some ammunition. The four police who were just shooting at you are easy targets here--just disarm them and then throw them into the ravine, one by one. Grab their ammo and head back into the tunnel.
More running through tunnels, more fighting. When the path splits, head to the right. The tunnel will emerge in a small chamber with three SWAT team members. Before climbing down the ladder, toss down a grenade or use the sniper rifle to clear the room below. Slide down the ladder and continue down the passageway. There's a police officer in the pipe nearby, but you can't see him very well. Luckily, your guns will automatically target him, or you can switch to first-person mode if you want to be proactive. Climb into the pipe.
In the next room, you'll see two police officers. Take care of them before proceeding. You need to sidle across the small ledge to the platform where the two police officers were standing. Once you're safely across, remove the police on the next platform, and climb across the pipe and through the tunnel.
Maneuver Ghost under the pipe, then jump up. You may need to try it several times in order for him to grab the pipe. Swing to the large pipe beyond, then drop down into it. If you want a health pack, you can climb along the top of the pipes and find one nearby.
When you're inside the pipe, follow the path, which is moderately guarded. Climb the ladder and continue to the end of the level.
The Sewers: Breathing Room
Follow the tunnel until you come into a chamber with two short passageways. Find the bridge by taking a right at the second passageway. The bridge will explode as you approach. Quickly turn around and shoot the police officer before he notices you. More police have entered, so deal with them, and then head through the newly opened gate that leads to an open pit.
Drop down and follow the tunnel--it's dark, so equip a gun to activate the flashlight. Run into the next room, but be prepared to backtrack immediately. The SWAT team will begin lobbing grenades, so take cover behind a wall. Lean and shoot with the M16 or a similarly powerful weapon. When the SWAT team starts approaching, they are easy pickings. Continue down the path, but beware of a SWAT unit waiting in ambush to your right. Grab the ammo and grenades, and the health pack if you need it. Then climb up the steps.
When you enter the next room, you'll be attacked from the upper left. Deal with that police officer, then continue forward down the narrow bridge. There are SWAT team members on each of the next two platforms, so be prepared. When you approach the final platform, another two SWAT team members will enter the room. When they're dealt with, continue into the next room, which is almost identical in layout.
A SWAT crew will rappel in shortly after you enter. Deal with them, then run down the bridge. Focus-jump over the gap, then take out the two SWAT team members waiting in ambush on either side of the room. Jump the final gap and go through the archway.
More SWAT units wait for you on the lower level of this small room. Toss a grenade to deal with them quickly. In the next room, four more SWAT team members are waiting. Take them out up close and personal to prevent them from shooting, then drop through the nearby hole.
The Sewers: Malachi and Bane
This next area is full of opposition, but you don't have to deal with everyone unless you choose to. Quickly run across the path ahead to the opposite side and into the next room. Run up to the sniper on the walkway and disarm him, then toss him off the walkway. Position yourself under the pipe, then use the sniper rifle to take out the sniper across the way. Jump up and grab the pipe, then shimmy forward. Before dropping down, pull yourself into firing position and eliminate the two patrolling police officers below.
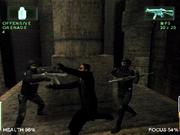
Drop down onto the red platforms below and then climb down to the lower level, using the red ladder at the opposite end of the catwalk. Jump or climb into the yellow pipe and follow it into the next area, where a large SWAT team waits in ambush, hidden behind the pillars. They are easily dispatched, and you can use hand-to-hand combat to stock up on ammo.
The next section isn't quite as easy--the SWAT team members are flush against the walls behind the pillars. Either rush in and engage them, or stay close to the walls at the end of the corridor and pick them off using focus and leaning. The corridor leads to another room full of pillars and police. Empty the room of the latter, then head into the pipe to leave the level.
The Sewers: Malachi and Bane 2
Once again, you need to keep your allies alive. Run left and climb the ladder. Take care of the sniper, then quickly equip your own sniper rifle and take aim at the SWAT team members on the bridge. More police will begin entering the room, so be prepared to make sweeps with the sniper rifle. Malachi and Bane can fight well, but they will need some help. Look for police entering from the top of the room, to the right and to the left. There are three points in all where the police will keep entering, so once you have a general idea of where they'll be, you can just sweep from one to the next until the room is clear.
The Chateau: Great Hall
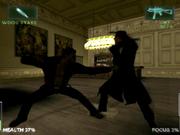
Go through the open doorway and follow the hallway. Ghost will automatically destroy a chair and grab a wooden stake. In the next room, you'll fight your first minion of Merovingian. With few exceptions, all of his minions are exactly the same, though you will occasionally fight them in greater numbers. Simply beat on them until Ghost automatically stakes them. That's right, they're vampires. Or, considering they live in a computer program, maybe they should be called rampires.
Note that this section of the game is extremely linear, and every section is basically a room or two with a few vampires in it. It's fun that you get to use your karate moves exclusively, but there isn't much strategy involved, other than running and fighting when needed.
The Chateau: West Wing
In the next area, you'll face two vampires, one with a gun. Disarm him, then proceed to beat them both senseless until Ghost applies a wood grain finish to their hearts. In the next room, you'll face several more vampires. The strategy will remain the same--just beat them as they come up, and Ghost will kill them automatically. Enter the elevator to the atrium.
The Chateau: Atrium
More rooms, more vampires. Again, you'll face two, one of which is armed. Disarm him, then kill them both. Continue into the next room, fight the next vampire, then head into the secret passage.
The Chateau: Secret Passage
The floor will give way, dropping you into a seeming dead end. Climb the wooden slats on the wall to the next level, where you'll be attacked by a vampire. Kill him, then continue climbing up into the attic.
In the attic, a fire will start. Use this to your advantage by throwing the oncoming vampires into the flames. After a few fights, an explosion will leave a large hole in the wall. Jump through.
The Chateau: Secret Passage 2
Jump from balcony to balcony, killing the vampires as you go. When you reach the door, enter the chateau. An armed vampire will approach, but you should be used to dealing with these guys by now. Continue through the chateau; there are three more rooms with two vampires each before you reach the end of the level.
The Chateau: Merovingian's Office
At the bottom of the stairs, you'll enter an office. After a fight, Ghost will pick up a crossbow, which can be used to quickly kill the vampires without all the kung fu. Another vampire will enter, opening a previously locked door in the process. Kill him and go through.
Continue through the hallways until you reach the movie theater. You'll encounter a new type of vampire here, one with a green pallor to his skin. Other than that, though, the strategy is the same. Beat him and stab him. He'll burst through the door at the bottom of the stairs, and once you kill him, you can go through the doors.
The Chateau: Garage Hallway
Two vampires will attack you here. This mission is a single room, so once the enemies are disposed of, you can exit to the great hall.
The Chateau: Return to the Great Hall
When you reenter the great hall, simply find the open door and go through it. A long cutscene ensues.
The Chateau: The Dungeon
Follow the passageway until you are attacked by two vampires, then kill them both. There's a health pack nearby, but it's doubtful you need it after all the practice fighting you've been doing.
Continue down the hallway. You'll emerge in a large pit and face one of the few different opponents this set of levels has to offer. His name is Cujo, and he really isn't all that different--he's just a much tougher version of the previous vampires. Fight him until he hops up to the ledge and sends his minions after you. Take them out one by one, and he'll jump back in. Fighting Cujo isn't tough, it just takes awhile. Be sure to use your blocks and counterattacks, and the crossbow, if you still have ammo. Once Cujo is gone, climb out of the pit and exit the room.
The Chateau: Cain and Abel
After you find Niobe tied to the table, pick her up and go through the door. Start down the hallway. Eventually, you'll be attacked by Merovingian's goons, Cain and Abel. Set Niobe down and get to work. You need to kick or throw Cain and Abel into the outstretched angry hands of the prisoners in order to slow them down. So just keep fighting until you get a good shot, then send each of them sailing into the waiting arms of their captives.
Once Cain and Abel are sufficiently detained, pick up Niobe and continue down the hall until the level ends.
Under the City: Twins in Pursuit
Without a doubt, this is the worst mission in the game. There's no real strategy to it: You basically need to clear a path for Niobe and block the path of the oncoming ghostafarian twins. You do this by blowing up the cars of innocent civilians, both in front of and in back of your automobile.
Unfortunately, Niobe won't avoid blocked roads, so you'll just have to hope that any cars you manage to dispose of actually land in a lane other than your own. Just keep firing at anything that looks like it might be a problem, and hope you make it to the end. If Niobe gets blocked, the mission will almost certainly fail. You have no control over her driving, though, so you'll just have to hope you can keep the coast clear and that the cars you dispose of land in a different lane.
Zen Garden: Trinity and Ghost
This fight is relatively easy, but it takes awhile--just remember to block and counterattack when given the opportunity. If you get hurt, run to a new location and wait for Trinity to approach. Note that you can lose, but it also doesn't matter. Ghost just needs to work out some of that unrequited love.
The Freeway: Chase Morpheus
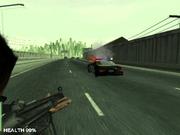
This mission is incredibly easy, but it makes for a pretty fun break from all the recent karate. And it redeems the awful "Twins in Pursuit" mission. As Ghost, you just need to shoot everything and anything you see. No joke. You have the police and agents on your tail, so you need to block their path with every car you pass. Just keep shooting vehicles as they pass by, and occasionally swing forward to clear out the police cruisers ahead. Perhaps the residents of Zion have a new plan to win the war against the machines: Just kill everyone in their power supply.
Once the agents back off, focus your attention ahead, because you need to clear a path for Niobe to make it to the truck.
The Freeway: The Truck
Again, this is an easy and fun mission. Your plan is the same as in the preceding mission: Just shoot at and destroy everything. But mostly you want to eliminate every police car in sight. Once Niobe reaches the truck, the mission ends.
Power Plant: Reactor Constructor
Run down the hall, and the double doors will open. You'll find three security guards in a group just beyond the door and a single lone guard taking shots at you from across the room. Head left and then right and into the concrete passageway. Follow the passageway around to the ladder, climb up, and head right.
Drop down and attack the security guard. Continue following the path. Soon, you'll get a message from Sparks saying that Niobe is taking sniper fire, and you must shut down a generator to help her. Drop down the concrete blocks ahead and turn left. Two guards will attack you near the pillars ahead. When they're gone, turn right, and face another two guards. Climb up the blocks at the end of this area to reach the generator and shut it off. After a brief cutscene showing Niobe's victory, make your way to the nearby ladder and climb up.
Soon, Niobe will appear and give you her newly acquired sniper rifle. Your goal is to clear a path for her through the construction site below. First, you need to get rid of the snipers: One is directly across from you, one is to your right, and another is to your left. The fourth sniper is on a landing above the third and slightly to the right. Next you need to provide cover fire for Niobe on the ground. Most of your targets will be hiding around the concrete pillars in the middle of the pit below, but occasionally one might be slightly to the right or left. Once Niobe has a clear path, turn left and continue running through the site, following the little wooden ledge when needed.
Around the corner, you'll encounter two police officers. When you've finished them off, find the fence-like structure nearby and climb up to the next level. Another small SWAT team awaits you. Continue moving, and soon you'll need to climb some iron outcroppings that make a nice ladder. You'll reach a wooden ledge, where you'll need to provide cover fire for Niobe again. Equip the sniper rifle and immediately look down. You'll see two SWAT team members. Take them out and continue down the path.
Follow the path up and around until you are dropping down the concrete ledges. Along the way, you will meet two more pairs of police officers. Finally, you'll need to climb two concrete walls. Climb over them to end the level.
Power Plant: Reactor Constructor 2
The path will lead you to a large, open area. It's dangerous to go rushing into the area, so hang back against the wall and pick off the police that are firing at you from the central platform. Turn left and then right, and more police will appear, including one (or two, depending on where you are) on the walkway itself. Get to cover and fire from a position of safety. It is also entirely possible to focus-run through the area and not fight at all. Continue around to the right and through the opening to the left.
Climb over the wood piles, and drop down. A SWAT team is hiding in this area. Take them out from behind a wall, or just climb up the iron grate and focus-jump over the gap ahead. Your goal is the doorway at the far end of the room, either way.
Another SWAT team awaits you in the pit below. Take out anyone in sight with the sniper rifle, then drop down and take cover behind the wood pile below, where you can take out most of the SWAT team in relative safety. Drop down to the lower level and finish off any stragglers.
The next area is difficult. You can hide behind a pillar and take out the SWAT team members from a position of safety, but more will appear. It's best to try to get up close and engage them in hand-to-hand combat, but they will have plenty of chances to take you down as you approach. Luckily, if you can get just below them, you can wait until your health is restored, then focus-jump up and quickly disarm them.
The easiest way through the next area requires you to run across the concrete beam and then turn right when you reach the end. Focus-jump to the open area to the left and just below where you are standing. You'll avoid all the opposition below and will land just by the exit door.
Power Plant: Nuclear Shipping
Run forward and take cover under the truck ahead. Equip the sniper rifle, and take out the sniper standing on the truck to your left. Then snipe the SWAT team members on the loading dock. Climb up onto the truck to grab the sniper ammo, and get the health pack from the truck backed into the loading dock, if you need it. Go through the double doors on the loading dock.
This next room is full of opposition, but it's fairly straightforward to get through. Just take cover, and get rid of any SWAT team members nearby. Make sure you get the enemies on the elevated platforms. Then press forward. At the far end of the room, more SWAT team members will enter the area. Once the opposition is gone, exit the room.
Power Plant: Transformer Field
As soon as you enter the area, take out the three SWAT team members. Then head up to the platform in the center, and activate the button at the top to get a grenade launcher. A SWAT team is invading, so hurry to the newly opened door ahead. Head down from the platform and run straight ahead. Make a beeline for the open doors. There are three SWAT members waiting for you in the corridor up ahead. Once the path is clear, head through the door at the end of the passage.
Power Plant: Transformer Field 2
This mission is fairly challenging--there's a great deal of opposition, but not much else. The opposition in this level is tough--heavily armed and armored SWAT team members. You'll need to take it slowly. After every encounter, be sure you rest and recover your health and focus, because there are not only constant enemies, but a few huge groups with which you'll need to deal.
You'll encounter two enemies on the first walkway. In general, it's best to try to deal with the smaller groups using hand-to-hand combat combined with short gun bursts, if only to save your ammo for the big groups. There's another guy around the corner, and then two more on the walkway just ahead.
Keep moving, and follow the objective arrow if you get lost. There are only a few dead ends, but most will lead to an extra SWAT team member. The last thing you want is more combat here.
Turn left up ahead, and be prepared for a fight with four more SWAT team members, two at the beginning of the walkway and two more at the far end. Keep moving, and beware of the area filled with pillars ahead--there's a SWAT ambush, and these guys are well armed and tough. Stay covered, and try to fight them one at a time. After a few more easy skirmishes with single SWAT members, you'll come to a huge, open area. There are two SWAT teams to fight here, so be careful--once you finish off the first team, another will come marching in.
You're close to the end, but don't get cocky. After a few easier fights, you'll come to a ladder. Climb up and over to exit the area.
Power Plant: Nuclear Waste Sector
Walk forward until the doors open. As Sparks will inform you, there are several SWAT teams ahead. In the first room, there are three SWAT team members. The one on the elevated platform is carrying grenades, so be sure to pick them up. Also notice the large white tanks around the room--these are basically economy-sized exploding barrels, which will make your trip through the sector a bit easier.

After clearing out the room, head through the large sliding doors. Two SWAT officers are waiting in ambush in this corridor. Note that the entire level basically follows this layout: big room, small corridor. Both will be crawling with SWAT. Clear the hallway and proceed through the doors.
The next room is a curve filled with SWAT team members and exploding tanks. As soon as the doors open, fire at the elevated tank to get the first guy, then start shooting the tanks on the far right wall. There's a health kit on an elevated platform ahead. Continue around the curve and into the next hallway, which is also filled with SWAT. Once the hallway is cleared, rest and recover your health before proceeding.
In the next room, just follow the path, taking out any opposition you see. Most of the SWAT team is separated from you by a large chasm, so try to use as little ammo as possible because you won't be getting much in the way of replacements. Once you've cleared the room, continue on to the exit.
Power Plant: Nuclear Waste Sector 2
Most of this section follows the same blueprint as the previous section: large room, small hallway, lots of SWAT. The first room is a short hallway, again with tanks and SWAT members. You've had enough practice in similar situations to know your preferred method, but it's best to conserve your ammo in tight situations like this.
When you enter the next area, turn right and immediately deal with the SWAT team member on the walkway, then climb over the machinery blocking your way and continue forward, shooting the SWAT team members to the right. It's a fairly straightforward jaunt to the next short corridor, which, again, is filled with SWAT team members.
When you enter the next room, you'll immediately be attacked by a SWAT team member on an elevated walkway. Shoot him quickly, then climb up and take out the two enemies to your left. Continue forward, climb down, and exit the area into yet another hallway filled with SWAT.
The final room has a large SWAT team lying in wait. Before entering, make sure that you are at full health. Once the room is clear, you can head to the exit door.
Power Plant: Core Control Room
Niobe needs your help making it to the reactor core. Equip the sniper rifle and take out the three police officers guarding the core--there is one to the left and two to the right. Once her path is clear, the core room will be infiltrated. This should be an easy fight, so get rid of the interlopers and return to your sniping position.
Three more officers are in the core. You should be able to spot them based on their gunfire, or just sweep around using the sniper scope. After the coast is clear, another wave of guards will enter the control room. Take them down by hand, and once again return to the window.
Two more officers are firing at Niobe. They are fairly close to each other and shouldn't be any trouble to find. When Niobe is safe, another wave of guards will burst in on you. Once they're defeated, the mission ends.
Power Plant: Core Control Room 2
Two SWAT teams will enter the control room, one after the other. Again, deal with them however you see fit. It's an easy fight, but you'll want to conserve your health for a fairly tough fight that's about to happen.
While you're fighting the SWAT teams, make sure you take some time to shoot some of the computers--they'll explode and become electrified. Once the agent enters the area, start fighting him close to one of the destroyed computers. When the opportunity presents itself, throw or kick him into the electrified computer to disable him.
Chinatown: Seraph's Tea House
Like the other hand-to-hand boss fights, this one is easy so long as you use counterattacks and focus. Once Seraph is beaten, he will allow you to see the oracle. Note that if you lose, you will actually continue on, skipping this whole chapter and moving straight to the final levels.
The Skyscraper: Vertigo
After speaking with the oracle, you will find yourself in a skyscraper. Immediately start running. An army of Agent Smiths is on your tail, and you need to avoid every one of them. Turn right, climb over the debris, and follow the path over the lumber piles. Another Smith will appear, so get by him quickly by running left and through the doorway.
Climb the stairs, then go out the window onto the scaffolding. Follow the scaffolding around until you see the "Caution" sign. Either focus-jump through the sign or head right and take the long way around. Continue following the scaffolding until another Smith jumps down and breaks the walkway.
When you land, jump through the window to your right then immediately go through the window to your left. What follows is a maze of scaffolding switchbacks heading up and back down. Don't try to follow the objective arrow here--most of the time it is pointing in the wrong direction. It's aimed at your objective, but not the path to get there.
Eventually, you will come to what appears to be a dead end, with a sloping plank ending in dead air. Just run at it, and a cutscene will show Ghost diving through a window. You'll land in a conference room, and you'll have a moment to breathe before another Smith bursts through a locked door. Go through the opening he left, and run straight for the elevator.
Chinatown: Smith's Trap
The next few levels may make you wish you'd let Seraph beat you. Make sure you keep an eye on the objective arrow so you don't get lost. Run through the first room and down the stairs. Turn right, and run down the street.
Follow the objective arrow through the streets. If you get caught by an agent, activate focus and dodge him until you can get away. Eventually you'll come to a white door--go through it and out onto another series of streets.
Eventually you'll come to what appears to be a dead end. Ignore the staircase, and wait for the nearby door to open. When it does, run through it and into the next street. Climb the stairs onto the roof. Once you jump down from the roof, you'll move on to the next section of Smith's pursuit.
Chinatown: On Foot
This level is fairly straightforward, but it can be pretty tough. You have Agent Smiths and the police on your tail, and no time to stop and fight.
Drop down and head left. Follow the road to its very end, where you will find stairs down to an underground tunnel. Though you don't have to take the tunnel, you'll avoid a bit of opposition if you do.
When you emerge to the street level, run to the nearby police cruiser. Grab the equipment from the trunk and keep following your objective arrow. If the police are getting to be too much, you can focus-run and fire off a few shots. Continue following the arrow until you reach a door. Go through the door and keep moving. The arrow will lead you to an intersection and tell you to turn left. If you look right you'll notice the truck atop which you started the level. A good note for the next time you play: Hang a right at the beginning and avoid this entire chase.
Follow the arrow to a fire escape--climb up and go through the door.
Chinatown: Hard-Line Pursuit
The Smith pursuit continues. Run down the stairs and out into the street. Follow the street past two police officers, and the phone line is just ahead. Or, it was before that SWAT team member blew it up. One has to wonder what would inspire a SWAT guy to blow up a phone. Regardless, continue toward the blockade ahead. As you approach, the truck will explode. There's a health kit nearby, if you need it.
Turn left by the truck and climb up the ladder. Grab the nearby grenade launcher, then follow the walkway to the end. An Agent Smith will appear--dodge him and jump down. Continue following the street until you reach the docks. Turn right, and then climb up the boxes and over the fence to the exit.
Chinatown: The Virus Spreads
Run up the stairs and out the door at the end of the hall. Make a right, and jump to the ground when you reach the end of the path. Run down the street until you reach the docks. Turn left at the docks, then head left into the small warehouse near the end. Continue forward and then turn right. Head across the walkway to the archway, then through the door on the left.
Chinatown: The Church
Note that as you run up the stairs, it's somewhat easy to get lost and not be able to find the next flight. Be sure to check your objective arrow for guidance if this happens. Run all the way to the roof. Then turn left.
You'll need to jump from roof to roof here. Though there are planks that will allow you to just run across, it's easier to focus-jump your way across the rooftops. You'll eventually come to a red door--go through it and up the stairs to the next roof. Follow the objective arrow and make one final jump, and you'll be safe at the sanctuary of the church.
On Board the Logos: Tunnels of the Real
The final two missions of the game are very easy. Basically, they are straightforward rail shooter missions that don't even require you to aim. You need to keep the sentinels from doing too much damage to the Logos. To do this, just press the fire button. Don't even bother to aim, other than to keep the crosshairs at the center of the screen.
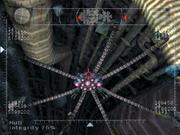
Watch the radar, and switch between your two viewpoints to keep both areas of the logos secure. You should have no trouble keeping the sentinels at bay, because they will constantly move through your line of fire.
On Board the Logos: The Rabbit Hole
The rail shooting continues here, but with a slight variation. Eventually, the sentinels will launch a bomb at the Logos. Just keep your crosshair on the bomb and keep firing. You can't destroy it, but you can push it back with the gun. Keep the bomb at bay for a while, and the game ends with a preview of The Matrix: Revolutions.
NIOBE WALK-THROUGH
Niobe and Ghost have many missions in common, but a good number of Niobe's missions are unique to her. She has fewer missions, and they are generally easier and shorter--at least until the last portion of the game.
Post Office: Closing Time
Your goal in this series of missions is to wind your way through the back rooms of the post office, find a particular post office box, then make your way out. Niobe's version differs slightly from Ghost's similar opening chapter, but the primary goal remains the same.
You begin in the lobby. You don't have to attack the guards here, but you may want to practice your fighting and focus techniques before you get into the more hostile areas. If you head to the right, you'll find a room full of postal boxes. Sparks will tell you which box you're looking for and that it is located on the second floor. Return to the lobby, and follow the hallway to the elevator, which is inoperable. Some guards will come through a previously locked door and attack you. Fight them, then enter the women's bathroom, climb up the ladder, and proceed through the vent.
Post Office: Behind the Scenes
You'll emerge in the men's locker room. Run to the door on the far end of the room, then follow the hallway to a door near a locked gate. Continue on through the next few rooms, taking out any guards who appear. You'll eventually arrive at a dead end with a window nearby. Jump through the window and press the red button under a sign showing a forklift.
Go back through the window and start backtracking. A door that was previously closed has opened; follow your objective arrow to find it. Turn left and head through the door. Run through the offices to the door at the far end. Continue following your objective arrow--in the next two hallways, you'll want to go through the last door on the right each time.
Post Office: Epicenter
You'll remember this room from your visit as Ghost. However, you enter through a different door. Climb the fence directly in front of you, then turn right and run straight toward the metal elevator door at the end. Attack the two guards blocking the door, then run toward the elevator.
Post Office: Unexpected Arrival
Sparks will warn you that the guards are waiting in ambush. The next few hallways are fairly dangerous, so you'll want to use your focus and deal with the guards as you come to them. After the first bend, a forklift will come at you; it moves slowly, so just make sure you aren't directly in its path. The guards will try to ambush you from behind crates--use focus to dodge their bullets, and disarm them as soon as you get close. Remember that enemies won't shoot at you if you're engaged in hand-to-hand combat, so try to keep it as up close and personal as you can.
Continue following the only available path. You'll encounter more guards, so just use boxes as cover until you can get close enough to disarm them. One of the taller crates has a health kit on top--it's sitting in the middle of the path and completely visible. Climb up on the crate and grab it if needed.
After you've run the guard gauntlet, Sparks will tell you that they're firing tear gas into the room. Niobe will automatically climb up on a forklift and onto some shelves. Focus-jump across the room to the air vent on the other side. Try to land as close to the nearby shelves as possible--the vent will collapse if you land too far to the right. Run along the vent onto the shelves, and then turn right into the large open area when you reach it. Drop through the skylight to safety.
The Post Office: Redirected
Go through the open door into the next area. Fight the guard, then quickly get to the back of the room to fight the other two that are firing at you. In the next room, ignore the guards firing at you from behind the fence, and follow the path around until Sparks contacts you.
At the end of this hallway, you can either climb the fence or enter the small office and jump through the window. You can try to do a focus dive or just jump-kick at the window and go through.
The next hallway is filled with guards hiding behind the shelves. Take them on one by one, and make sure they are completely incapacitated before you move on to the next group; it's easy to get outnumbered if guards you thought were down get back up and start shooting from behind. Alternately, you can just focus-run to the safety of the opposite end of the area; you're almost to the end, and they won't be able to follow you.
Turn left at the end and fight the guards blocking the conveyer belt. When the enemies have been eliminated, jump on the conveyor belt.
Post Office: Got It
You appear near the target post office box. Just turn left and walk forward. Don't grab the health kit yet--if you need health, just wait for Niobe's health to recover before approaching the last bank of post office boxes.
A cutscene will show Niobe grabbing the package, and more guards. The elevator is inaccessible until all the guards are gone. This is a good time to practice shooting from behind walls. Walk up to a wall until Niobe turns her back to it. Then lean around the corner and start firing. Be somewhat careful not to spend too much time in the tear gas filling the center of the room, but it isn't too harmful if you take the guards out quickly. Finish off the two guards guarding the elevator. Once the coast is clear, the elevator doors will open, and Niobe can return to the lobby.
When you try to open the exit doors, the security gates will slam shut, trapping you. This will most definitely be your toughest fight yet, because the guards that ambush you are armed with MP5s and shotguns. Play it safe, taking them on one at a time, and use pillars as cover. It's also a good place to do the lean-and-shoot trick, coupled with focus for better accuracy.
There are quite a few guards, so keep fighting until they are all gone, and you have a nice supply of MP5 and shotgun ammo. Run back toward the elevator, which is now blocked by a security gate, and go through the door to the right. If the door isn't accessible, you still have guards to take care of. Follow the path until you come to a series of hallways leading to the epicenter.
Post Office: Big Distraction
You're back in the epicenter. Jump off the now-destroyed stairway and run forward. This section is very straightforward, but you'll be beset by an army of guards. Save your ammo until later in the section, and use hand-to-hand combat to take down the first few guards you encounter. Once you start seeing three or four guards at once, use focus and the firearm of your choosing to take the guards down from a distance. Remember that if your health or focus get low, just find a safe place to stop and wait for them to replenish.
Follow the path around until you reach the doorway. Go through the door, climb the stairs, and exit through the doorway at the top.
Post Office: Breakout
You'll likely recognize this area--you are basically backtracking through the first half of the level. Two guards will follow you into the room after you enter. Take them out. Note that guards will continue to follow you, so you'll need to be quick.
Two guards are waiting in ambush in the next storage room--take them down and take their ammo, then continue into the offices. The room is full of guards. Luckily, you won't need to fight them. As soon as you enter the office area, make a left and then another left. Run to the door straight ahead and go through it.
City Driving: Get to the Hard Line
This is a fairly straightforward and easy driving mission. Sparks will direct you as you drive, so listen for his instructions or just watch the objective arrow. You'll also need to learn to use the "assist" command here, which tells Ghost to fire his gun. You actually won't need to shoot at anything here, but you can practice for when you do. To make Ghost fire, go into the outside view and press the "assist" key. He will fire at whatever is close by.
Follow Sparks' directions until you reach the roadblock. Then just drive back and forth along the road, hanging quick U-turns to shake the police. When the roadblock is clear, drive through and onto the bridge.
City Rooftops: Answer the Phone
Turn and run toward the roof with the visible ladder. You'll need to jump across the gap--falling off any of these roofs means instant death. Climb the ladder, continue running, and then climb up the second ladder. An agent will appear and begin chasing you.
You can't fight an agent, as the "tips" will helpfully tell you. Best do what the tips advise and just run away. Run to the right of the fence ahead and jump the gap to the ladder. Note that the gaps between roofs are occasionally difficult to see, due to the game's strategically challenging perspective. As a result of these obscured gaps, you'll want to be careful when traversing the rooftops.
Follow the path, jumping over the gaps as needed. Eventually, you'll jump onto some wooden planks that will collapse beneath you. Turn right and continue running through the concrete halls. You'll soon see a ladder ahead--jump to it, and climb up.
Continue along the rooftops. There is one point ahead at which the path becomes unclear. An agent will appear on a ledge ahead of you, which appears to be the correct path. It isn't. Turn left through a hard-to-see opening just after the agent appears. Soon, you'll crash through yet another set of wooden planks. Run up the stairs, and continue along the rooftops. You'll see the ladder leading to the exit ahead--climb up to end the level.
Airport: Check-In
While you're guided to take the long way round and fight all the security guards, there's a much quicker way through this mission: Immediately run and jump off the balcony. Turn around and climb onto the luggage conveyor belt, then follow it to the left to end the mission.
Airport: The Belts
Before getting too far into this mission, find conveyor belt number 10. You'll need to know where it is later.
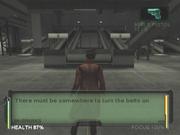
Head left and press the green button to open the door. The next room is occupied by a SWAT team. Take them out, then continue to the next room. Another SWAT team awaits you here, so deal with them and make your way to the control booth at the far end. There's a man in the control booth. As distasteful as it may be to kill civilians, you'll need to do it or he'll shut off the conveyor belts after you turn them on. Press the button to activate the belts.
Return back to the first room, again dealing with the SWAT teams that will try to impede your progress. Once you make it to conveyor belt 10, the mission ends.
Airport: Jackson in Steam
Run down the hallway until you see a SWAT team ahead. Don't charge them--they'll shoot a pipe that will emit fatal steam. Wait for them to approach you, or wait for the steam to subside, and then continue forward. You are looking for tunnel 7R. Note that it is easy to get lost in here, so make sure you follow the objective arrow if you do.
Take a left at the first intersection, and follow the objective arrow until it points you to a stairway. Head down, and follow the tunnels to another stairway heading up. You'll receive a message from Sparks telling you to find tunnel 7 in this area. You'll soon come upon an open fence; go through it to end the level.
Airport: Jackson in Steam 2
There's really no strategy to this mission--simply keep running and don't stop to fight the SWAT team for long. There's an agent on your tail, so you just have to keep on the move.
You can climb up to the catwalks or down into the lower level to avoid some gunfire, but it isn't necessary. Just keep moving, and focus-run and dodge if you are taking any damage. When you see the ladder ahead, you'll also see a civilian transforming into an agent. Quickly bypass him and climb up.
Airport: Hangars
Immediately begin running to your left. A SWAT team will enter the hangar ahead of you, so take cover and get rid of them. Then proceed into the long hallway leading to the second hangar.
Turn right and head toward the stairway leading up to the plane. At the top, kill the SWAT team member, grab the grenades, and then focus-jump onto the plane. Run along its length until you reach the stairway opposite. Climb up, and then climb the boxes onto the balcony. Go right and head through the door.
Follow the corridor to the next hangar. A large SWAT team occupies the area, so deal with them before proceeding. Turn left and climb down the ladder to the lift. Use the lift to reach the plane's wing, then sprint across and enter the plane, where a few more SWAT team members are waiting.
Exit the plane, and you'll face some SWAT snipers. Once the path is safe, continue to the next hangar. Another SWAT team awaits. When you're done fighting them, you can proceed to the exit.
Airport: The Bowels
It's completely dark. If you kill a nearby SWAT sniper, you'll get an infrared scope for your sniper rifle, which will be helpful down here.
Run down the hallway, taking out any SWAT team members that you encounter. Equip a firearm, because you'll likely see the targeting circle before you actually see the enemy. Continue following the hallway until you come to a stairway leading up to a large SWAT team. Jump up and deal with them up close--it will be tough, because there are quite a few of them. Use focus kicks to take out multiple enemies at once, and try to keep them down as you fight. Scavenge their ammo, then head through the tunnel marked "Tarmac."
Airport: Catching a Plane
A message will tell you to meet up with Vector on the balcony. There are plenty of police around, but you only have to fight them if you want. Otherwise, just use focus run and bolt for the ladder at the opposite end of the hangar. Climb up and follow Vector through the door.
In the next hangar, the ground level is heavily guarded. Again, fighting is optional. You may want to take out a few of the officers if only to make your trip a bit easier. From the door, head left and down the yellow ladder. Slide down the second ladder to the ground floor, then run toward the plane--the mission will end almost immediately.
Airport: Agent on Board
Check Axel--he's hurt but alive. Run toward the front of the plane and around the netting. Several SWAT team members will attack you as you near the parachutes. Deal with them, then grab the chutes.
Return to Axel, which will trigger a cutscene. You must now fight the agent. As soon as possible, run around so that you leave fighting mode. Run up to the button near the cargo lift and press it. Now get working on the agent. You need to push him out the back of the plane. Because he is good at blocking your throws, your best bet is to use focus kicks until he goes down, the kick him like a ball out the back. Keep working on him, and be sure to keep on the safe side of the plane. Eventually, he'll fly out the back.
The Sewers: Abyss
The sewer missions are exactly the same for Niobe and Ghost.
Run along the pipe ahead of you to the wall, then follow the pipe and jump through the window into the alcove. A focus run up the wall here will put you perfectly in the room, if you want to do it with flair.
Continue following the path up--it's a decent jog, but there's no danger. When you reach the top, you'll be told that you need to protect Ballard. Attack the first SWAT member you see and grab his sniper rifle. Quickly arm it, and shoot the SWAT units across the way. Ballard will tell you to head up, so make your way to the ladder ahead and climb up.
Quickly aim the sniper rifle at the two SWAT snipers to your left--as you reach the top, they are at approximately 10 o'clock. There's one more near Ballard, so if he hasn't taken care of him already, help him out. Make your way down to the catwalk with the phone, and Ballard will escape safely.
The Sewers: Abyss 2
Unfortunately, you won't be as lucky as Ballard. Hoist yourself up from the pipe, and quickly get rid of the SWAT unit nearby. Take cover if you're getting sniped--there are two snipers nearby, one on either side of the catwalk. Shoot them both, then head over to the phone. The third sniper is on an elevated platform--if you face the phone and turn left, he will be directly above. He will also be firing at you, so use focus to pinpoint his location. Retreat to safety, wait until you are healed, then return and take him out with the sniper rifle now that you know where to look. Finally, pick up the phone.
Sparks will return you to the same position, but with better equipment. Throw a grenade at the nearby ventilation fan, and then climb through the newly created hole and follow the tunnel around to the pit and drop down.
The Sewers: Pumped
Follow the tunnel until you come to a small passageway to the right. Drop down into the room and prepare for a series of firefights with a SWAT team. There are two SWAT team members in each of the next three rooms. Note that the barrels scattered about will explode if shot, and any seasoned action gamer knows how enemies love to stand around explosive barrels. Go into first-person mode and target the barrels to clear the rooms quickly.
You'll emerge in a large room filled with machinery and, unfortunately, more SWAT members. Luckily, there are more exploding barrels in here as well. You'll need to clear the room, then look for a red ladder near the hallway from which you entered this area. Climb the ladder, and follow the walkway around, then focus-jump to the next platform. The passage ahead is blocked by steam.
Turn around and take care of the newly arrived SWAT team, then jump down to the ground and go through the gate through which they entered. Drop down the hole, and run through the tunnels until you see a SWAT team member behind a chain-link fence. Shoot him through the fence, then climb onto the table to your right and hop up to the ledge.
More police are waiting for you. Continue through the hallways into the large chamber beyond. As expected, more SWAT. Once the room is clear, find the pump with the red blinking light. Turn off the pump and another SWAT team arrives. Once you're done with them, proceed to the next room and climb up the ladder.
The Sewers: Ice and Corrupt
Two allies are in the next area, being beset by police. Take out all the enemies in the room, then jump up onto the ledge near the entrance. There's a small ledge by a nearby gear that you can climb onto, so do so. A cutscene will show Niobe falling into the level below.
Again, Ice and Corrupt are being attacked. Clear the lower level of the room, then climb up onto the ledge with the machine that is spinning wildly out of control. Ignore the SWAT team members that come into the room--it's a never-ending wave, so you're just wasting ammo. Go into first-person mode and target the three large anchors at the base of the machine. Destroy all three, and Ice and Corrupt can escape. Do a focus jump into the nearby hole to proceed to the next level.
The Sewers: Waterway
Run through the tunnel, taking out the two guards you encounter. At the first bridge, do a focus dive to quickly kill the police at the end. As you follow the stairs down, police will come into the area behind you. Take them down before proceeding. Continue to the next bridge, where more police are waiting. Once they're gone, climb down the ladder and grab the nearby gun. This will activate the flashlight. Note that the flashlight will now be active whenever you have a weapon drawn in the dark. Shortly after you pick up the flashlight, a SWAT team will lob a grenade into the pit. Take cover, then take them out as they rappel down to get you.
Climb up the ladder; more SWAT team members are waiting. When the coast is clear, continue through the passage. Follow the tunnel to the end, then follow the SWAT team as it proceeds to your right. When you first see them on the lower level, toss a grenade their way and jump down to finish them off. Kill the police chasing Wurm, and then head down the ravine in the opposite direction.
You'll encounter a fair amount of resistance during the next section. Use the lean-and-fire mode to easily dispatch the guards on the upper level, then move to the next archway and do the same. Soon, you'll receive a warning that a large group of police are headed your way. Take cover in one of the side passages and ambush them when they pass by.
Continue down the ravine. When the tunnel branches, head right. Make sure you focus-jump over the ravine ahead--it's easy to miss the gap, and it would be a shame to have to replay this whole level just because you fell off a board.
The Sewers: Waterway 2
Run left, and then take your first left if you want some ammunition. The four police who were just shooting at you are easy targets here--just disarm them and then throw them into the ravine, one by one. Grab their ammo and head back into the tunnel.
More running through tunnels, more fighting. When the path splits, head to the right. The tunnel will emerge in a small chamber with three SWAT team members. Before climbing down the ladder, toss down a grenade or use the sniper rifle to clear the room below. Slide down the ladder and continue down the passageway. There's a police officer in the pipe nearby, but you can't see him very well. Luckily, your guns will automatically target him, or you can switch to first-person mode if you want to be proactive. Climb into the pipe.
In the next room, you'll see two police officers. Take care of them before proceeding. You need to sidle across the small ledge to the platform where the two police officers were standing. Once you're safely across, remove the police on the next platform, and climb across the pipe and through the tunnel.
Maneuver Ghost under the pipe, then jump up. You may need to try it several times in order for him to grab the pipe. Swing to the large pipe beyond, then drop down into it. If you want a health pack, you can climb along the top of the pipes and find one nearby.
When you're inside the pipe, follow the path, which is moderately guarded. Climb the ladder and continue to the end of the level.
The Sewers: Breathing Room
Follow the tunnel until you come into a chamber with two short passageways. Find the bridge by taking a right at the second passageway. The bridge will explode as you approach. Quickly turn around and shoot the police officer before he notices you. More police have entered, so deal with them, and then head through the newly opened gate that leads to an open pit.
Drop down and follow the tunnel--it's dark, so equip a gun to activate the flashlight. Run into the next room, but be prepared to backtrack immediately. The SWAT team will begin lobbing grenades, so take cover behind a wall. Lean and shoot with the M16 or a similarly powerful weapon. When the SWAT team starts approaching, they are easy pickings. Continue down the path, but beware of a SWAT unit waiting in ambush to your right. Grab the ammo and grenades, and the health pack if you need it. Then climb up the steps.
When you enter the next room, you'll be attacked from the upper left. Deal with that police officer, then continue forward down the narrow bridge. There are SWAT team members on each of the next two platforms, so be prepared. When you approach the final platform, another two SWAT team members will enter the room. When they're dealt with, continue into the next room, which is almost identical in layout.
A SWAT crew will rappel in shortly after you enter. Deal with them, then run down the bridge. Focus-jump over the gap, then take out the two SWAT team members waiting in ambush on either side of the room. Jump the final gap and go through the archway.
More SWAT wait for you on the lower level of this small room. Toss a grenade to deal with them quickly. In the next room, four more SWAT team members are waiting. Take them out up close and personal to prevent them from shooting, then drop through the nearby hole.
The Sewers: Malachi and Bane
This next area is full of opposition, but you don't have to deal with everyone unless you choose to. Quickly run across the path ahead to the opposite side and into the next room. Run up to the sniper on the walkway and disarm him, then toss him off the walkway. Position yourself under the pipe, then use the sniper rifle to take out the sniper across the way. Jump up and grab the pipe, then shimmy forward. Before dropping down, pull yourself into firing position and eliminate the two patrolling police officers below.
Drop down onto the red platforms below and then climb down to the lower level, using the red ladder at the opposite end of the catwalk. Jump or climb into the yellow pipe and follow it into the next area, where a large SWAT team waits in ambush, hidden behind the pillars. They are easily dispatched, and you can use hand-to-hand combat to stock up on ammo.
The next section isn't quite as easy--the SWAT team members are flush against the walls behind the pillars. Either rush in and engage them, or stay close to the walls at the end of the corridor and pick them off using focus and leaning. The corridor leads to another room full of pillars and police. Empty the room of the latter, then head into the pipe to leave the level.
The Sewers: Malachi and Bane 2
Once again, you need to keep your allies alive. Run left and climb the ladder. Take care of the sniper, then quickly equip your own sniper rifle and take aim at the SWAT team members on the bridge. More police will begin entering the room, so be prepared to make sweeps with the sniper rifle. Malachi and Bane can fight well, but they will need some help. Look for police entering from the top of the room, to the right and to the left. There are three points in all where the police will keep entering, so once you have a general idea of where they'll be, you can just sweep from one to the next until the room is clear.
The Chateau: Shadows
This isn't the first Niobe mission in the chateau, but the first one--The Great Hall--doesn't require you to do anything. This one doesn't require much either. Simply chase the vampire down the hallways until the mission ends and Niobe wakes up in the attic.
The Chateau: The Attic
Run forward and fight the vampires that attack. As with Ghost, you just need to work them over, and then Niobe will finish them off with the stake. Once they're dead, Vlad will enter and attack. As with every boss fight, just use focus to keep the advantage. Once you've worked him over and pull out the stake, he'll block your attack and fly away.
You'll find yourself in a series of wooden passageways. Just follow them, killing any vampires you encounter. Eventually you'll find what looks like the back end of a secret passageway. Go through.
The Chateau: Persephone's Bedroom
Run into the door ahead and into the next room to find a health kit and a UMP. Return to the bedroom, where Vlad and a few of his minions have come to pay you a visit. Take out the minions, and then get to work on Vlad. As before, use focus liberally, and try to keep him more involved with your attacks than executing his own.
Once Vlad is dead, head through the newly opened door and follow the hallway around to the double doors. Go through and activate the elevator.
The Chateau: Merovingian's Office
The next few levels are identical for Niobe and Ghost.
At the bottom of the stairs, you'll enter an office. After a fight, Niobe will pick up a crossbow, which can be used to quickly kill the vampires without all the kung fu. Another vampire will enter, opening a previously locked door in the process. Kill him and go through.
Continue through the hallways until you reach the movie theater. You'll encounter a new type of vampire here, one with a green pallor to his skin. Other than that, though, the strategy is the same. Beat him and stab him. He'll burst through the door at the bottom of the stairs, and once you kill him, you can go through the doors.
The Chateau: Garage Hallway
Two vampires will attack you here. This mission is a single room, so once the enemies are disposed of, you can exit to the great hall.
The Chateau: Return to the Great Hall
When you reenter the Great Hall, simply find the open door and go through it. A long cutscene ensues.
The Chateau: The Dungeon
Follow the passageway until you are attacked by two vampires, then kill them both. There's a health pack nearby, but it's doubtful you need it after all the practice fighting you've been doing.
Continue down the hallway. You'll emerge in a large pit and face one of the few different opponents this set of levels has to offer. His name is Cujo, and he really isn't all that different--he's just a much tougher version of the previous vampires. Fight him until he hops up to the ledge and sends his minions after you. Take them out one by one, and he'll jump back in. Fighting Cujo isn't tough, it just takes awhile. Be sure to use your blocks and counterattacks, and the crossbow, if you still have ammo. Once Cujo is gone, climb out of the pit and exit the room.
The Chateau: Cain and Abel
After you find Ghost tied to the table, pick him up and go through the door. Start down the hallway. Eventually, you'll be attacked by Merovingian's goons, Cain and Abel. Set Ghost down and get to work. You need to kick or throw Cain and Abel into the outstretched angry hands of the prisoners in order to slow them down. So just keep fighting until you get a good shot, then send each of them sailing into the waiting arms of their captives.
Once Cain and Abel are sufficiently detained, pick up Ghost and continue down the hall until the level ends.
Under the City: Twins in Pursuit
As Niobe, this level is much, much easier than as Ghost.
All you need to do is drive. You can use Ghost for support if you really want, but it's a quick jaunt, and the ghostafarians can't keep up with your superior driving skills. There's only one tricky part: You may notice that you're driving in circles. If this appears to be the case, watch the objective arrow. There's a turn you need to take, which isn't very apparent. It's a hard right turn, and once you take it, the mission will end.
The Freeway: Chase Morpheus
These driving missions are much easier as Niobe. Simply floor it, and swerve in and out of traffic as you race toward the truck. You'll likely need Ghost's gun in this level, so learn to use the outside perspective and the assist key to shake the police and the agents on your tail.
The Freeway: The Truck
Same as before--just keep racing toward the truck. Have Ghost take out any cops that become a problem, but most likely he won't even need to.
Power Plant: Reactor Foundation
At the end of the hallway, you'll face four security guards. Take them down and grab their weapons, then continue through the door in the upper right corner of the room. Follow the passageway, then climb the ladder. Drop down the concrete blocks and take out the guards hiding among the pillars. Climb the ladders and the iron rods to the upper level, taking out any opposition along the way.
You'll come to a bright light, and Sparks will warn you to wait until Ghost has disabled it. So just wait until the light is gone, then sidle across the ledge. Climb up and jump over the large gap ahead--a cutscene will show Niobe taking out the sniper.

Next, you need to get across the pit while Ghost provides almost useless sniper cover. Deal with the SWAT team, then find the ladder hidden around a nearby corner--if you don't see it, follow the objective arrow until you do. Run across the concrete bridge or around the curve to the right, taking out any SWAT units you can see. When you get to the other side, turn left and jump down toward the tunnel to the exit.
Power Plant: Reactor Foundation 2
Continue down the tunnel. You'll go through several rooms filled with SWAT team members. Follow the path until you come to a ladder and climb up.
Sparks will warn you that there are snipers across the way. Focus-run to the far end and into the passageway to the right. If you're getting hurt, take cover behind the lumber piles to recover health. Continue moving into a similar area. There are snipers as well as SWAT team members, so do your best to clear out the nearby enemies while avoiding sniper fire.
You'll come to a large, mazelike pit. Make your way through, taking out the SWAT team one by one. Find your way to a ladder near a wooden bridge above. Climb the ladder, and you'll be greeted with a few shots in your direction. Kill the rifleman, then get to the wooden plank that serves as a bridge to the exit.
Power Plant: Nuclear Shipping
Take out the two security guards, then head out the door into the loading docks.
Run forward and take cover under the truck ahead. Use your best gun to take out the sniper standing on the truck to your left. Climb up onto the truck to grab the sniper rifle and ammo, and then take out the SWAT team members on the loading dock. Get the health pack from the truck backed into the loading dock, if you need it. When the area is secure, go through the double doors on the loading dock.
This next room is full of opposition, but it's fairly straightforward to get through. Just take cover, and get rid of any SWAT team members nearby. Make sure you get the enemies on the elevated platforms. Then press forward. At the far end of the room, more SWAT team members will enter the area. Once the opposition is gone, exit the room.
Power Plant: Transformer Field
As soon as you enter the area, take out the three SWAT team members. Then head up to the platform in the center, and activate the button at the top to get a grenade launcher. A SWAT team is invading, so hurry to the newly opened door ahead. Head down from the platform and run straight ahead. Make a beeline for the open doors. There are three SWAT members waiting for you in the corridor up ahead. Once the path is clear, head through the door at the end of the passage.
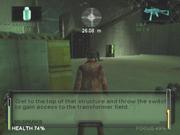
Power Plant: Transformer Field 2
This mission is fairly difficult--there's a great deal of opposition, but not much else. The opposition in this level is tough--heavily armed and armored SWAT team members. You'll need to take it slowly. After every encounter, be sure you rest and recover your health and focus, because there are not only constant enemies, but a few huge groups with which you'll need to deal.
You'll encounter two enemies on the first walkway. In general, it's best to try to deal with the smaller groups using hand-to-hand combat combined with short gun bursts, if only to save your ammo for the big groups. There's another guy around the corner, and then two more on the walkway just ahead.
Keep moving, and follow the objective arrow if you get lost. There are only a few dead ends, but most will lead to an extra SWAT team member. The last thing you want is more combat here.
Turn left up ahead, and be prepared for a fight with four more SWAT team members, two at the beginning of the walkway and two more at the far end. Keep moving, and beware of the area filled with pillars ahead--there's a SWAT ambush, and these guys are well armed and tough. Stay covered, and try to fight them one at a time. After a few more easy skirmishes with single SWAT members, you'll come to a huge, open area. There are two SWAT teams to fight here, so be careful--once you finish off the first team, another will come marching in.
You're close to the end, but don't get cocky. After a few easier fights, you'll come to a ladder. Climb up and over to exit the area.
Power Plant: Generator Turbines
Follow the beams around and focus-jump to the roof of the building across the way. Climb over the yellow ladder, and then down the ladder into the control room. Take out the SWAT team, then continue down the stairs. A cutscene will show Niobe opening the doors for Ghost. Now, continue down to the bottom floor.
More SWAT await you in the next room. Disarming them is no use, because they'll keep grabbing weapons from the rack. Once the coast is clear, shoot out a window and jump through. Go through the open door back into the main area and run to the door on the far wall. You'll go through a series of long, empty hallways before you reach the end of the mission.
Power Plant: Generator Turbines 2
The first section of this lengthy mission places you in a long corridor filled with SWAT team members. The doors on the left lead to the generator turbines, but you need to get to the door marked "1," so it's easy to mark your progress. In the first small control room, you'll see a health kit. The rest of the control rooms are occupied by SWAT members. When you reach the end of the corridor, turn left into the open door to generator turbine number 1.
Climb up the ladder and walk along the catwalk to the control panel. Use the action key to plant a bomb. Once the bomb is planted, the SWAT team will attack. Note that every room you enter will be occupied from here on out.
Make your way to the door to generator turbine 2 and go through. Follow the catwalks up and around to generator turbine 3 and again to generator turbine 4. The fourth turbine is a nightmare of catwalks, but there's a central path that goes up and over to the fifth turbine. There are more SWAT team members here, but once the room is empty you can climb down and end the level.
Power Plant: The Core
This level can be very difficult. You'll want to proceed slowly and take out every SWAT team member you see as soon as you see them. Follow the stairs down and then take the catwalk around. SWAT officers will be coming into the reactor core from the sides, and the units on the central core will be firing at you. Use your most accurate weapon to take out the long-range enemies, and use less powerful guns or hand-to-hand combat on those that are closer.
Make your way to the central core, and climb the ladder. Turn right and continue up. Another large SWAT team will enter, so use the strategy from above--use your powerful weapons for long-range fighting and your weaker weapons or hand-to-hand combat for those enemies in the central area. When you reach the top of the core, the mission will automatically end.
Power Plant: Agent Escape
Walk into the ventilation shaft and go forward. When you drop down, turn and run for the elevator at the end of the hall. Ride the elevator up, activate focus, and run as fast as you can. The white tanks on either side of the path will begin exploding, but you can outrun them with a focus sprint to the end. When you reach the window, a cutscene will show Niobe's escape, and the mission is over.
Chinatown: Seraph's Tea House
Like the other hand-to-hand boss fights, this one is easy so long as you use counterattacks and focus. Once Seraph is beaten, he will allow you to see the oracle. Note that if you lose, you will actually continue on, skipping this whole chapter and moving straight to the final levels.
The Skyscraper: Vertigo
After speaking with the oracle, you will find yourself in a skyscraper. Immediately start running. An army of Agent Smiths is on your tail, and you need to avoid every one of them. Turn right, climb over the debris, and follow the path over the lumber piles. Another Smith will appear, so get by him quickly by running left and through the doorway.
Climb the stairs, then go out the window onto the scaffolding. Follow the scaffolding around until you see the "Caution" sign. Either focus-jump through the sign or head right and take the long way around. Continue following the scaffolding until another Smith jumps down and breaks the walkway.
When you land, jump through the window to your right then immediately go through the window to your left. What follows is a maze of scaffolding switchbacks heading up and back down. Don't try to follow the objective arrow--most of the time it is pointing in the wrong direction. It's aimed at your objective, but not the path to get there.
Eventually, you will come to what appears to be a dead end, with a sloping plank ending in dead air. Just run at it, and a cutscene will show Niobe diving through a window. You'll land in a conference room, and you'll have a moment to breathe before another Smith bursts through a locked door. Go through the opening he left, and run straight for the elevator.
Chinatown: Smith's Trap
The next few levels may make you wish you'd let Seraph beat you. Make sure you keep an eye on the objective arrow so you don't get lost. Run through the first room and down the stairs. Turn right, and run down the street.
Follow the objective arrow through the streets. If you get caught by an agent, activate focus and dodge him until you can get away. Eventually you'll come to a white door--go through it and out onto another series of streets.
Eventually you'll come to what appears to be a dead end. Ignore the staircase, and wait for the nearby door to open. When it does, run through it and into the next street. Climb the stairs onto the roof. Once you jump down from the roof, you'll move on to the next section of Smith's pursuit.
Chinatown: On Foot
This level is fairly straightforward, but it can be pretty tough. You have Agent Smiths and the police on your tail and no time to stop and fight.
Drop down and head left. Follow the road to its very end, where you will find stairs down to an underground tunnel. Though you don't have to take the tunnel, you'll avoid a bit of opposition if you do.
When you emerge to the street level, run to the nearby police cruiser. Grab the equipment from the trunk and keep following your objective arrow. If the police are getting to be too much, you can focus-run and fire off a few shots. Continue following the arrow until you reach a door. Go through the door and keep moving. The arrow will lead you to an intersection and tell you to turn left. If you look right you'll notice the truck atop which you started the level. A good note for the next time you play--hang a right at the beginning and avoid this entire chase.
Follow the arrow to a fire escape--climb up and go through the door.
Chinatown: Hard-Line Pursuit
The Smith pursuit continues. Run down the stairs and out into the street. Follow the street past two police officers, and the phone line is just ahead. Or, it was before that SWAT team member blew it up. One has to wonder what would inspire a SWAT guy to blow up a phone. Regardless, continue toward the blockade ahead. As you approach, the truck will explode. There's a health kit nearby, if you need it.
Turn left by the truck and climb up the ladder. Grab the nearby grenade launcher, then follow the walkway to the end. An Agent Smith will appear--dodge him and jump down. Continue following the street until you reach the docks. Turn right, and then climb up the boxes and over the fence to the exit.
Chinatown: The Virus Spreads
Run up the stairs and out the door at the end of the hall. Make a right, and jump to the ground when you reach the end of the path. Run down the street until you reach the docks. Turn left at the docks, then head left into the small warehouse near the end. Continue forward and then turn right. Head across the walkway to the archway, then through the door on the left.
Chinatown: The Church
Note that as you run up the stairs, it's somewhat easy to get lost and not be able to find the next flight. Be sure to check your objective arrow for guidance if this happens. Run all the way to the roof. Then turn left.
You'll need to jump from roof to roof here. Though there are planks that will allow you to just run across, it's easier to focus-jump your way across the rooftops. You'll eventually come to a red door--go through it and up the stairs to the next roof. Follow the objective arrow and make one final jump, and you'll be safe at the sanctuary of the church.
On Board the Logos: Tunnels of the Real
The final two missions of the game are very easy. As Niobe, you have a bit more to do, but not much. Simply steer the Logos through the tunnels, following the objective arrow. Fire the gun when needed, but don't worry about aiming. Ghost will do most of the firing for you, so you just need to guide the ship through the maze.
On Board the Logos: The Rabbit Hole
Keep following the objective arrow and firing when necessary. Eventually, the sentinels will send a bomb hurtling at the ship. At this point, you want to be careful with your steering--don't get stuck for too long. After you've successfully outrun the bomb, the game ends, and you are rewarded with a preview of The Matrix: Revolutions.
HACKING GUIDE
You can jump into the game's hacking mode at any point. However, it's much more fun to start digging around after you've actually finished the game. If you haven't finished the game, certain options will be locked. This guide will assume that you've finished the game before you begin hacking.
The A: Drive
You start with a few simple commands: HELP and EXIT. Type HELP, and the system will tell you how to use help. It will give an example: HELP DIR. (Note that when you use a command, it will appear on the menu, allowing you to easily access it without having to type it again. This will be helpful later.) If you type HELP DIR, you will be given advice about the DIR command, and it will again give you an example. In this case, the example is DIR A:. Again, follow the example and type DIR A:.
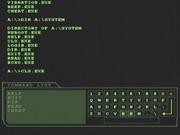
The directory listing for the A: drive will appear. The directories are SYSTEM, TOOLS, and TEXT. Check each directory individually, using the DIR command from the menu, followed by the appropriate directory, a list of which will appear in the menu after you select DIR.
The SYSTEM directory contains several commands. A few to pay attention to: READ.EXE and LOGIN.EXE. The others aren't of any use for finding the deeper stuff on the system. The TOOLS directory contains a few executables that you can play around with, but not what we're looking for yet. It does, though, include the CHEAT command, which will allow you to input cheat codes. To activate a cheat code, type CHEAT and then the code. Here are a few that are helpful:
| CHEAT 1DDF2556 | Gives you unlimited ammunition |
| CHEAT 69E5D9E4 | Gives you unlimited focus |
| CHEAT 7F4DF451 | Gives you unlimited health |
| CHEAT 0034AFFF | Unlocks all the weapons |
| CHEAT FFFFFFF1 | Makes you invisible |
| CHEAT 13D2C77F | Unlocks Sparks' Training Construct |
The last is the most interesting--it will unlock a series of minigames that can be found by returning to the main menu, selecting LOAD GAME, and then moving the menu all the way to the right.
The TEXT directory contains an interesting file. Type READ so that it appears on your menu, then select READ NOTEZ from the menu. You will receive the password for the virtual drive: FROZENFISH. Remember this, or write it down.
OK, we have what we need to dig deeper. Type LOGIN at the prompt, then type GUEST. You will be granted access to the B: drive.
The B: Drive
Type DIR B: to see the directories on the B: drive. There are several directories showing assets from the game, but the directory you should go straight to is TOOLS. Choose DIR from the menu, then choose B:\TOOLS from the drive menu.
You will have to solve an easy puzzle here. You need to break the five-digit binary code protecting the directory. Choose a sequence of ones and zeroes and hit enter. It's easiest if you start with all the same number, such as 11111 or 00000. The system will then tell you how many numbers you have correct and how many are in the correct position. Continue fiddling with the sequence until you get the correct one.
The B:\TOOLS directory has several executables that will allow you to view the game assets in the other directories. There are three other important executables in the directory: DROP.EXE, VIRTUAL.EXE, and TRACEKILL.EXE. The latter will only be useful later. The first allows you to place extra weapons in predetermined areas on the game maps. To do so, you need to view the maps. Each one has a code that you will need to use the DROP function. Play around with it if you like, but the next level of the system is now accessible.
Type VIRTUAL, and you will be prompted for a password. Type in FROZENFISH, and the V: drive is now available.
The V: Drive
Once you open the V: drive, you'll need to complete a puzzle. There are two possible symbols you can create: one for blue and one for red. You want the red one. If you get the blue symbol, quickly run TRACEKILL to prevent the system from rebooting.
There are two directories on the V: drive: TOOLS and ROOT. Choose DIR V:\TOOLS from the menu, and then run ROOTSEARCH. You will receive the password for the root directory, which is THISISNOTREAL. Select DIR V:\ROOT from the menu, and type THISISNOTREAL when prompted for the password.
There are two executables in the ROOT directory: MAIL.EXE and PORTKEY.EXE. Run MAIL, and type "Y" when asked if you want to read the mail. You will find an e-mail with a list of phone numbers:
001-949-555-0112
001-714-555-0187
001-213-555-0142
001-310-555-0111
Only the last two work. Type DIAL 0012135550142 at the prompt to hear a message from Morpheus. Now type DIAL 0013105550111 to hear a message from Trinity. Remember the number she gives you: 942. Type PORTKEY 942 at the prompt, and you will connect to Trinity.
Answer her questions anyway you like--she'll say the same responses regardless. Eventually, she will upload CRACK.EXE to the system. Once it's uploaded, type CRACK 8RAM to access the RAM drive.
The RAM Drive
Select DIR RAM: from the menu. There are several directories here, and they'll give you access to the best features of the hacking mode. The first place to look is in the TRINITY directory. The READBIO.EXE program will allow you to read the biography of your character in the BIO folder. It isn't too interesting. It's the other programs that we want.
Check the PROG directory for a program called SWORD.DSK. Then type TRAINING SWORD.DSK. This will add a sword to your game so that you can go in and use it at anytime (so long as you don't reset). Now type HANDSHAKE to connect to the Logos.
Sparks will get online and chat with you a bit. He'll also say that you've uploaded a virus to the Logos computer and that you have to run EMP.EXE to help him out. Run the program once he's done jabbering, and you'll be presented with the multiplayer mode. This can be accessed at the load screen from the main menu by moving all the way to the right, past the On Board the Logos missions. You will need a second controller plugged into your console to make the multiplayer mode appear.
Got a news tip or want to contact us directly? Email news@gamespot.com
Join the conversation