Doom Eternal Sentinel Prime: Mission 8 Walkthrough, Gladiator Boss Fight, And Tips
Short, But Sweet (And Bloody).
Doom Eternal's eight mission has a surprising focus on story, so it's fairly straightforward. Regardless, it has a big fight in it, so you'll still have to come in ready to shoot things up. Below you can find a walkthrough detailing exactly what you need to do to overcome the threats that lie ahead.
For walkthroughs of Doom Eternal's other chapters, check out our guide hub collecting what we have up so far. We'll be publishing more in subsequent days. But if you're looking for more basic Doom Eternal tips, be sure to read our guide detailing everything you should know before playing. Otherwise, you can read our Doom Eternal review.
Mission 8 Walkthrough -- Sentinel Prime
Follow the path onto the elevator and keep going after the cutscene ends. Eventually, you'll exit through a door and see a large hole in the building to your right. Carry on from here and go left in the next room and climb up the platform to reach the top. Take a right through the next door and take the stairs up to another elevator, then head straight and prepare for the next boss.
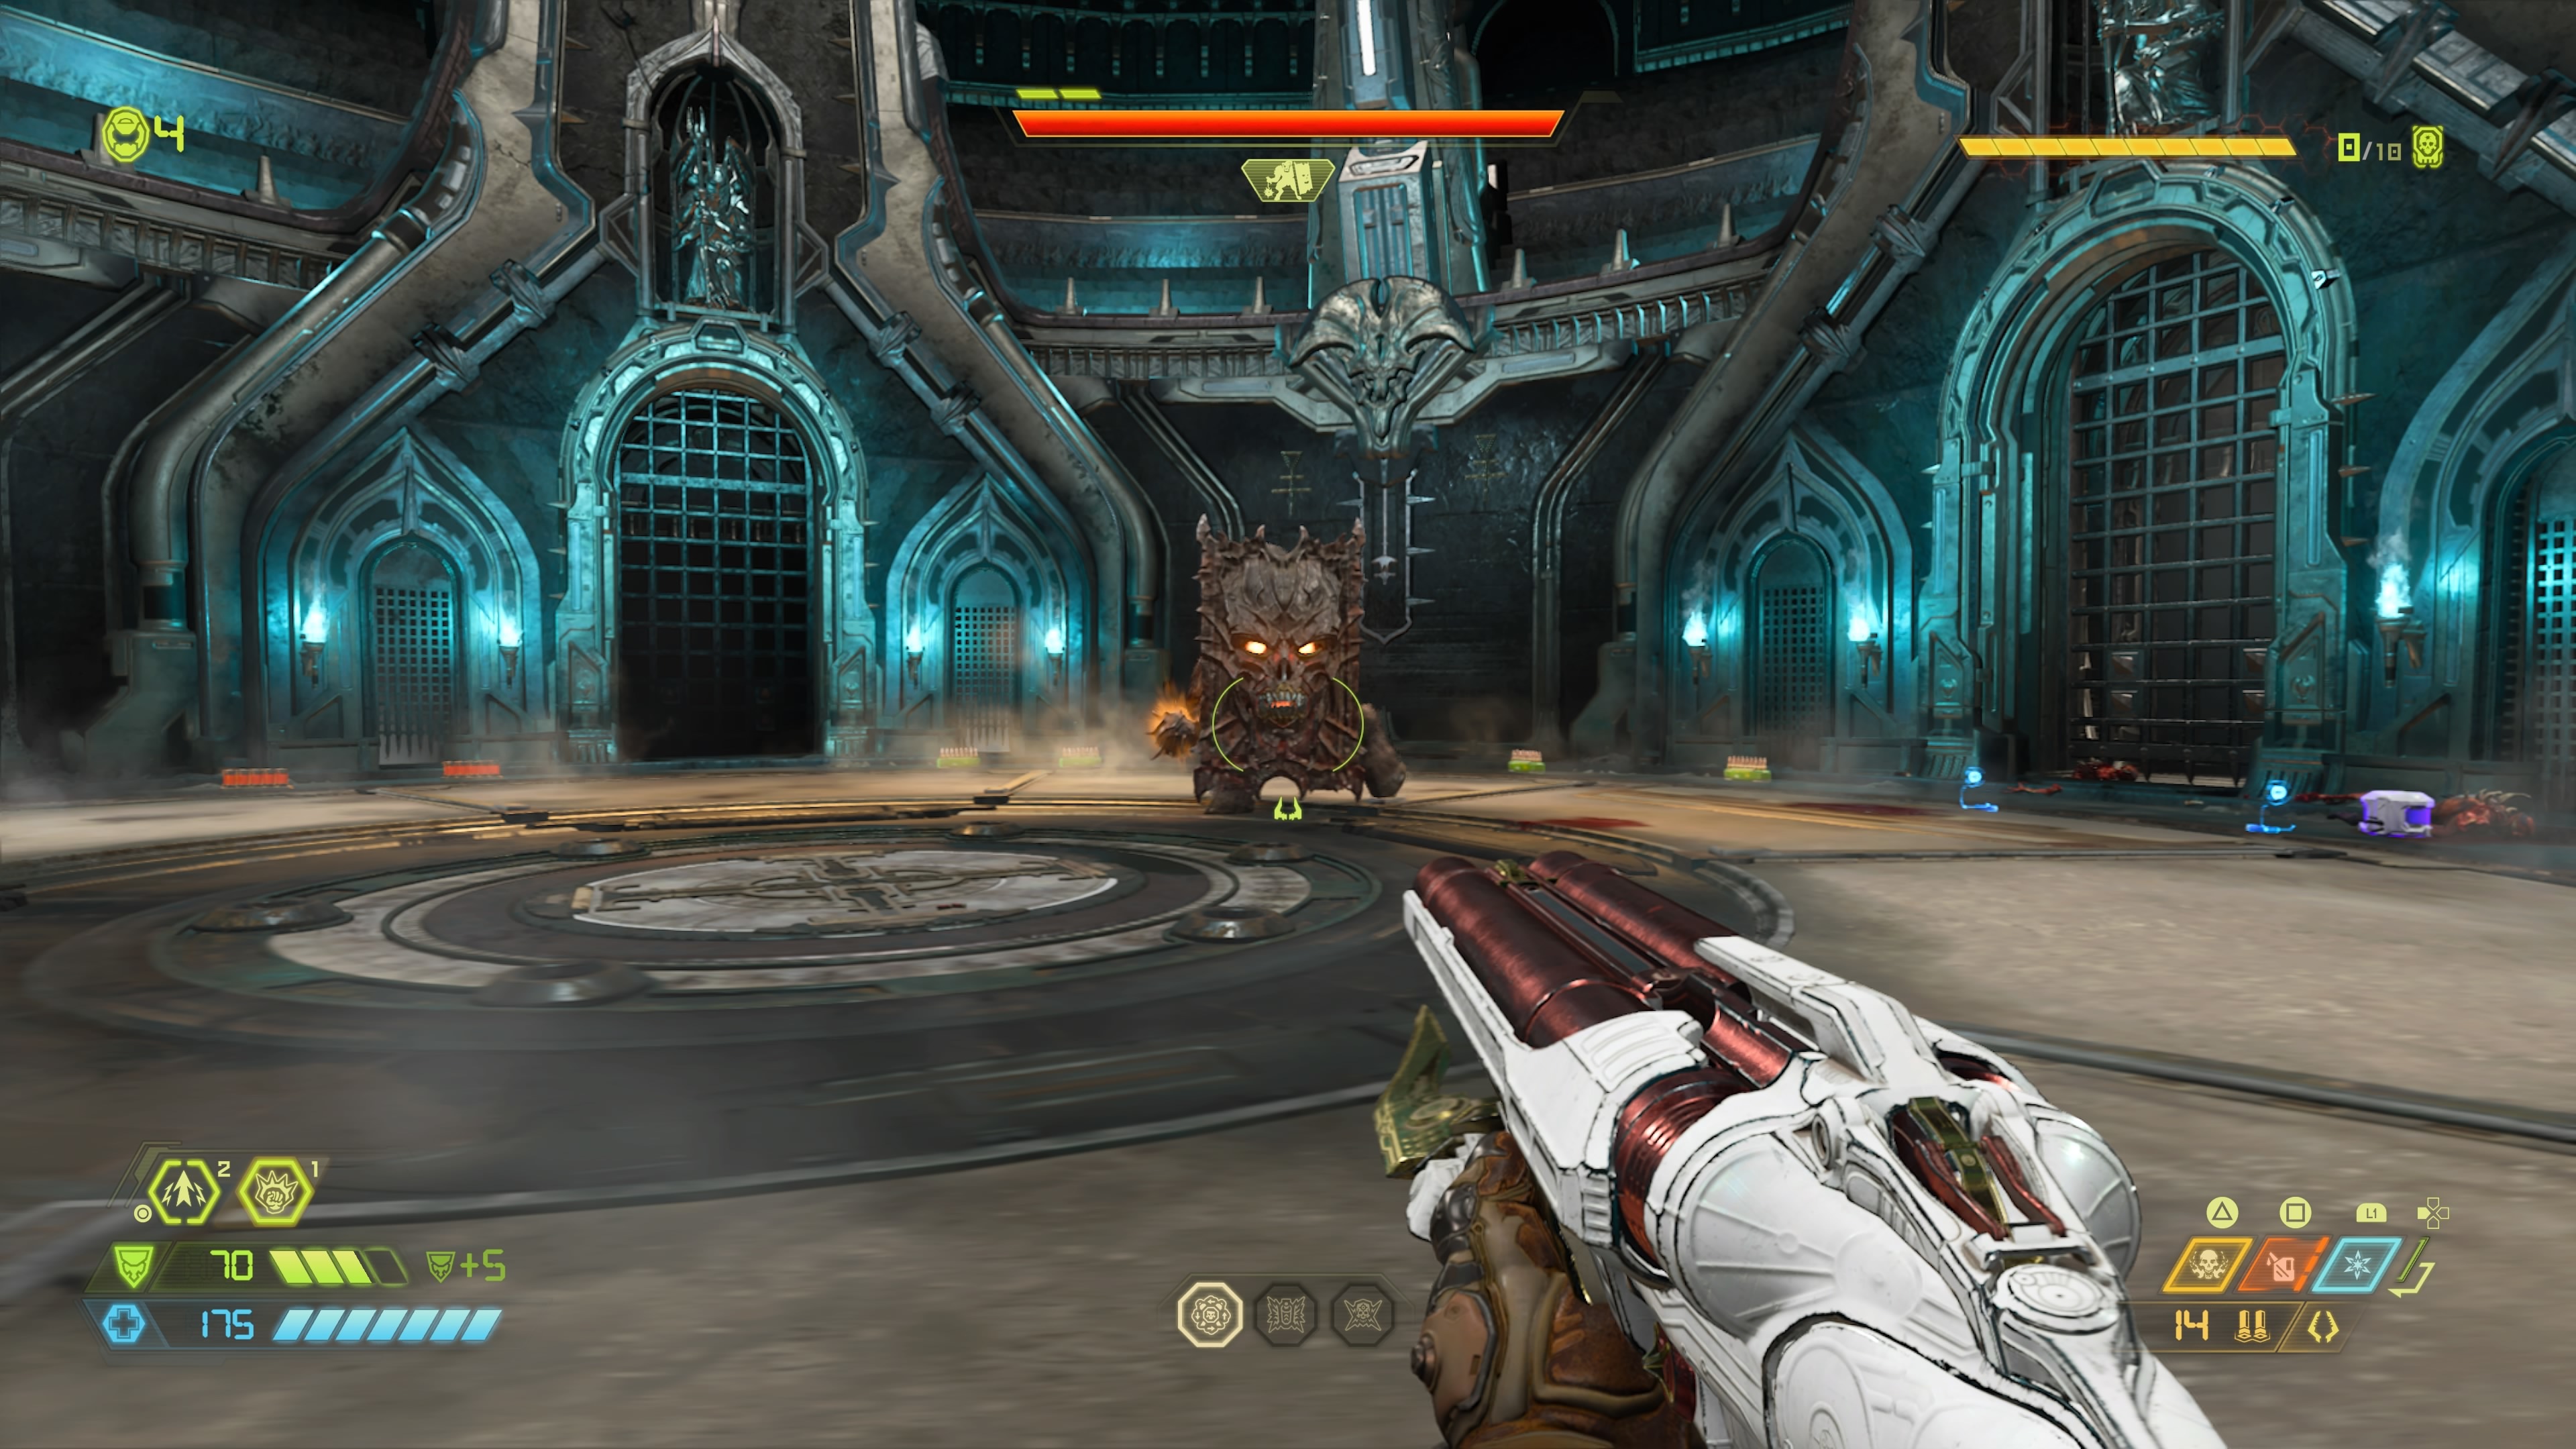
Boss Fight - Gladiator
The Gladiator functions similarly to the Marauder in that you need to counter attack when it flashes green. In this instance, it's the eyes on the Gladiator's demonic shield that will flash green when it's about to attack. Keep strafing the boss and shooting when that flash happens. A successful hit will give you the opportunity to execute a Glory Kill and take off a chunk of the Gladiator's health. Once its health bar drains down to the halfway point, it will start shooting replicas of its shield at you. These are easy to sidestep--you just have to look out for its shield bash to know it's coming.
Once the Gladiator's health bar has fully depleted, the second phase of the boss fight begins. Instead of using a shield, the Gladiator will now spin one of its flails for a few seconds. Avoid shooting it when it does this or your shots will deflect right back at you. Shoot the Gladiator whenever it's not spinning its weapon, and Dash out the way of its attacks when one of its flails flashes. Occasionally, it will put up two barriers on either side of you and launch various projectiles your way. Use the Dash to quickly position yourself beneath the highest point on these projectiles to avoid them. Once you've done enough damage, you can finish the Gladiator off with a Glory Kill.
Fortress of Doom
Your latest return to the Fortress of Doom is a little bit different than the others. With the Khan Maykr overloading the fortress' systems, you need to kill a group of fodder enemies before making any progress. This is simple enough, so once they're all dead, just follow the waypoint to restore power and then travel through the portal to the next mission.
Doom Eternal News
Got a news tip or want to contact us directly? Email news@gamespot.com
Join the conversation