Doom 3: Resurrection of Evil Walkthrough
Although the unnamed Marine of Doom 3 managed to stem the tide of demons through the Hellgate leading to Mars, the job remains incomplete. Two years after the events of that game, you take on the role of yet another unnamed Marine, who's tasked with returning an Artifact to Hell in an attempt to seal the border between the dimensions once and for all. GameSpot's Walkthrough gives you the details on the new enemies, weapons, and, of course, a complete walkthrough.
Design by Marty Smith
The ending to Doom 3 made it clear that there was unfinished business left to be tended to in the depths of Hell, and Doom 3: Resurrection of Evil puts you in the shoes of the Marine who’s going to handle it. After the events of Doom 3, wherein UAC’s Mars labs were almost completely overrun by demons coming through a Hellgate, they’ve unwisely decided to set up shop on the red planet once again. It doesn’t take long for yet another invasion to occur, but this time, it’s triggered by the discovery of a powerful artifact. In order to shut down the link between our dimension and Hell, you’re going to have to ferry said artifact back to where it came from.
GameSpot’s Game Guide to Doom 3: Resurrection of Evil will guide you in your journey through UAC’s Erebus Complex. In addition to the walkthrough for the game’s new content, we’ll also detail the new enemies and weapons that you’ll encounter. If you’re looking for information on Doom 3, don’t forget to check our Game Guide for the original game as well. Otherwise, enjoy!
Weapons
There are a few new weapons for you to wield in Resurrection of Evil, which are described here. If you’re looking for descriptions of the other weapons in the game, check the Doom 3 Game Guide. All of the weapons in that game, save for the chainsaw and the Soulcube, return in Resurrection of Evil.
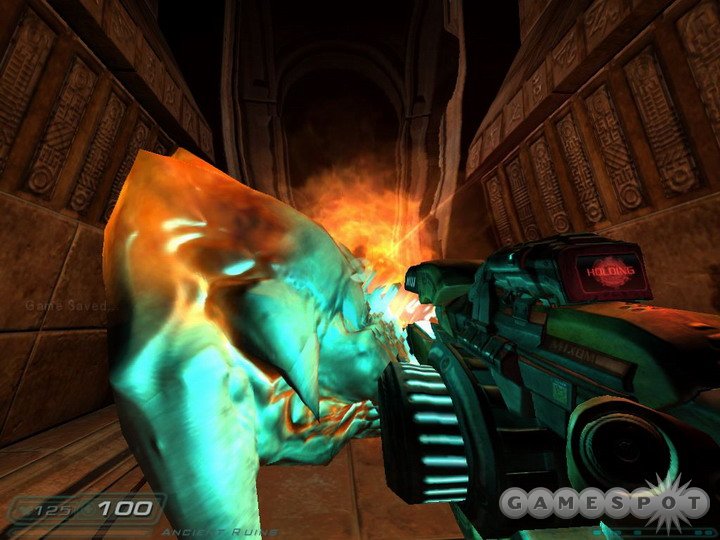
Double-Barreled Shotgun
The classic boomgun returns in Resurrection of Evil, and it’s about as good as the one from Doom II. There’s nothing terrifically complicated about the double-barreled shotgun; instead of the single-barrel design of the original shotgun, you’ll be able to unload two barrels full of buckshot into your demonic foes at once. And, well, two is better than one.
The main drawback to the DBS is its lack of accuracy, which is a problem it shares with the single-barreled variety of gun. You’re going to need to be fairly close to your foe to hit them with all the pellets, and this is especially important on Hard difficulty, where even a few missed pellets will generally leave your enemy alive and kicking while you frantically reload. The second drawback is the fact that you have to reload the weapon after each shot, whereas the normal shotgun can be fired eight times without needing a reload.
Luckily, though, a point-blank shot from the DBS will kill almost any enemy in the game in one hit, even on hard mode, even when you’re dealing with something like a Hell Knight. Since you do have to reload, though, when dealing with multiple enemies, you’re going to want to use your Artifact and power yourself up with Hell Time before getting up close and personal with your foes. When dealing with just one or two enemies, though, it’s easier to just get behind a corner, wait until they come to you, and pop them as they round the corner. No muss, no fuss.
Artifact
This ultimate weapon of Hell, spawned untold eons ago, is, oddly enough, both the origin of the latest of the many invasions from Hell, and the key to stopping it.
You’ll obtain the Artifact at the very beginning of the game, although it’s initially inert, petrified by its long removal from any form of life. In order to unlock its powers, you’ll need to charge it with the souls of three powerful demons, known collectively as the Hunters. You’ll encounter these demons as boss enemies throughout your trip through the UAC labs on Mars, and each will grant the Artifact a unique power upon being defeated.
Although the Artifact requires demon souls to unlock its powers, it also requires human souls to actually use those powers. The Artifact can hold up to three souls at a time, and each activation of its powers will use one of those charges. To restock on souls, you’re going to need to find ensouled corpses, corpses with their life energy (depicted as an orangish glow about the body) still intact. When you find a corpse like this, all you need to do to absorb the soul is stand over it with the Artifact equipped. Any nearby souls will automatically be sucked into it, resulting in one charge per soul absorbed.
To activate the Artifact, all you have to do is switch to it and press the fire key, as you would a weapon; all of its current powers will simultaneously activate at this point and will stay in effect for ten seconds or so. After the Artifact is activated, you’ll automatically be flipped back over to your last equipped weapon when this occurs. Each activation will consume one of the charges in the Artifact, but if you happen to be standing over an ensouled corpse when you use it, you’ll be able to simultaneously use a charge and absorb the soul, resulting in no net loss.
Hell Time: The first power of the Artifact is Hell Time, which you’ll pick up on the game’s second level. When activated, this will slow down time for all of your enemies for a short duration, and will also increase your movement speed, allowing you to run around an area, unloading shotgun blasts at point-blank range with minimal risk to yourself. Weapons will reload at their normal speed here, but doors will open more slowly.
Berserk: After the second Hunter goes down, you’ll obtain the Berserk power, which lets you kill pretty much every enemy in the game, even on Hard mode, with a single punch from your fists. This is about as good as it sounds, since you can take down Hell Knights, Bruisers, and Mancubi in a single blow, without having the sometimes lengthy reloading time of a double-barreled shotgun to deal with. This is going to often be your get-out-of-jail-free card when dealing with the tougher enemies in the late game.
Invulnerability: The third power you’ll get will leave you completely immune to damage for the duration of the Artifact. This can be pretty handy, as you may imagine, but isn’t quite as necessary as it might’ve been; the Hell Time effect will usually be powerful enough to let you dodge or avoid any sources of damage that may be coming your way, at least until you get close enough to an enemy to hit them with your fists.
Grabber
The Gravity Gun - oh, excuse me, the Grabber - allows you to pick up certain elements in the game, such as rocks, crates, and corpses, and fling them at your enemies. This is perhaps most useful when dealing with enemies with energy projectile attacks, such as the Imp and the Vulgar; all you need to do is grab the projectile in mid-air and shoot it back at your foe, and they’ll usually die with one hit. That said, the grabber won’t help you in combat unless you have something to throw with it, so in most cases, you’re going to be better off using one of your actual weapons to do your killing.
One major exception to this comes when you have to deal with smaller enemies, like Cherubs and Lost Souls. These tiny creatures can often be instantly killed by sucking them up with the Grabber, then dropping them with the reload key. No muss, no fuss. There’s still going to be a half-second charging delay after each successful grab, though, so when dealing with multiple enemies, you’ll want to switch over to a machinegun or chaingun and do your business like a real Marine.
Enemies
There aren’t a huge number of new enemies in Resurrection of Evil; most of the foes you face will be familiar from your travels through the Delta Labs in Doom 3. There are a few new faces to fight, though, and we’ll describe them below.
Vulgar
Vulgars are essentially superimps; they’re tougher and deal more damage than their Imp counterparts, but act in a similar fashion, meaning that they’ll fling energy balls at you from a distance, then switch over to melee attacks when they get close. The Grabber can be used to fling their energy attacks back at them; failing that, you can pelt them with the chaingun or hit them with your double-barrel shotgun at close range.
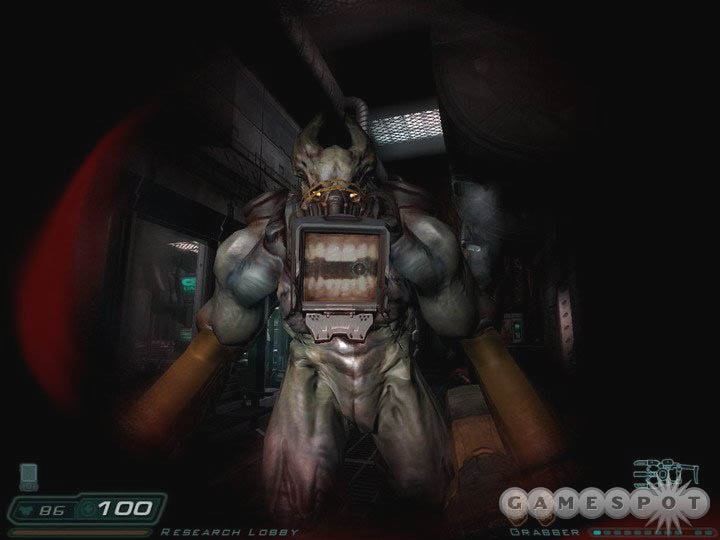
Bruisers
Bruisers are the new ultra-enemies in Resurrection of Evil, and are essentially souped-up Mancubi with monitor screens for teeth (which doesn’t seem like it’d work too well) and a pair of rapid-fire energy beams for hands. Taking these guys on without using the Artifact is almost suicidal, but you shouldn’t run into them before you get the Berserk power for that weapon, making it a relatively easy matter to run up to them and take them down with a single punch.
Zombies
There are a couple of new zombie varieties to deal with, as well, but nothing too troublesome. As with most other zombie types, simple pistol shots are usually going to be your best bet for taking these guys down.
Walkthrough
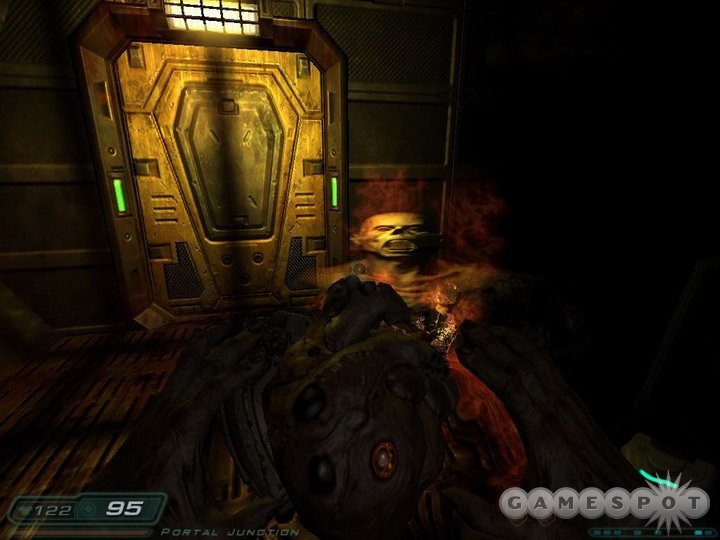
Level One: Ancient Ruins
Mission Objectives: Explore the Ancient Ruins
As you may have surmised from the opening cutscene, things have started to go very, very wrong on Mars. Unfortunately, you’ve been made exempt from the quick death of your comrades, and are now forced to wander the ruins that UAC has uncovered with nothing but a wimpy pistol at your side - your corporate masters sure don’t seem to be too interested in keeping their soldiers alive. You’ll also have the new Artifact available to you (you can switch to it via the Q key), but it’s useless to you until you find souls to fuel it with.
Luckily for you, though, you’re going to be able to find a Shotgun immediately after you gain control of your character. After walking down the hallway a bit, you’ll encounter a vision of blood; after that passes, take a right into the seemingly dead end, and duck into the small hole there. Shotgun ahoy!
Further up the hallway, you’ll come to your first Lost Soul enemy; you can expect to see plenty of these little guys in the game. If you dance around with it for too long, it’ll charge and attempt to slam into you, so don’t give it the opportunity; a couple of shots from your pistol should be enough to off it. There’s a medkit and some ammo on top of some scaffolding overhanging the pit here, but it’s very difficult to jump to; we recommend that you just leave it be.
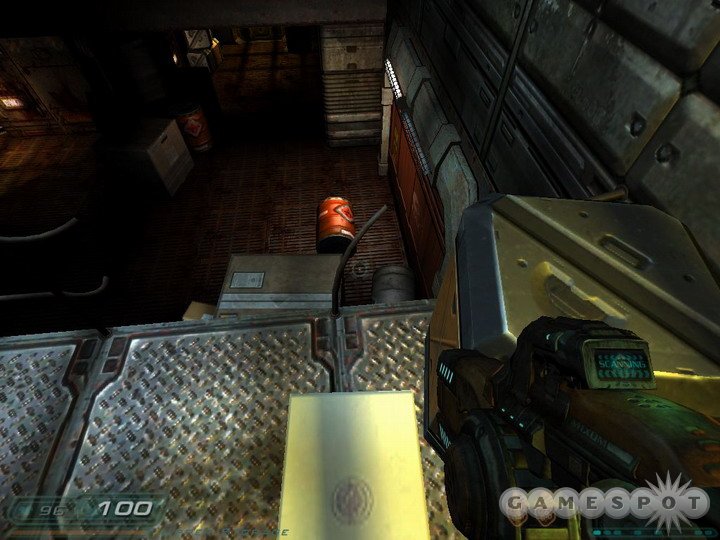
Further down the hallway, you’ll come to your first power generator. You’re going to come to a lot of these during the course of the game. Each of them runs on a single powercell; if you spot a generator that’s actually up and running, there’s a good chance that you’re going to need to remove the powercell from it and insert it into another generator that you encounter later on. For example, in this room, you’ll need to take the cell from the first generator and plug it into the generator further down the path, which will power up the lift leading to the upper part of the level.
Objective: Bring the Artifact to Dr. McNeil
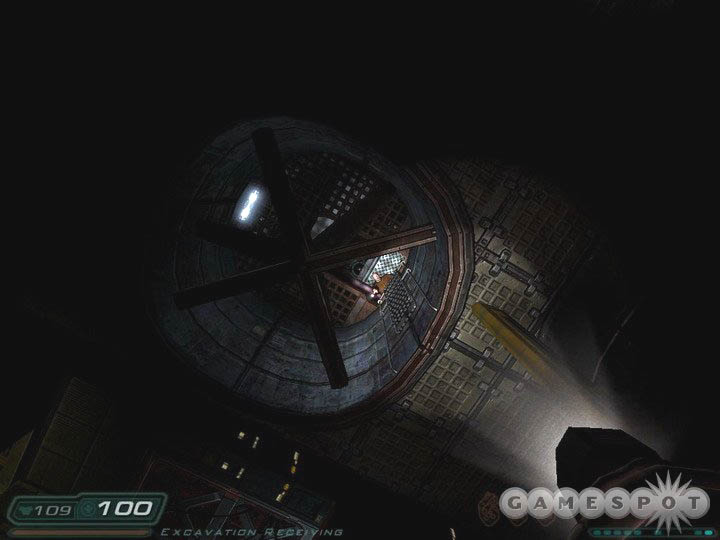
When you power up the lift, McNeil will radio you, requesting that you return to the surface with the artifact that you retrieved from the ruins. To do so, you’ll need to access the main excavation elevator elsewhere in the level and ride it up.
Begin by hopping on the lift. About halfway up, you’ll be able to jump off to your left to pick up some armor; you can then hop back onto the lift and ride it all the way to the top, where you’ll be accosted by more Lost Souls and the first Imps. Imps prefer to sit back and chuck fireballs at you; if you’re far enough away, these can easily be dodged by strafing, allowing you to pick off the Imps with your pistol. If you get close, though, they can be downed with your shotgun without much fuss.

Eventually you’ll come to a golden alien door; be sure to grab the Machinegun lying nearby before heading through. Although the room beyond looks ominous, it isn’t too bad; there’s not much lying in wait besides a couple more Imps and Lost Souls. Feel free to climb the sides of the scaffolding here to pick up more ammo. It’s in the next room that you get the first new weapon of the expansion pack: the Grabber. With the grabber, you’ll be able to pick up crates, rocks, and corpses and chuck them at your foes. You can also grab the energy projectiles that some enemies, such as Imps, use and throw them back at them. It can also be useful for grabbing powerups that are out of reach and attracting them to yourself; if you can use an item, this will act just like running over it.
With the Grabber in hand, use it to move the barrel out of the way of the hole in the left wall here and grab the armor inside, then blast through the crates blocking the path at the end of the stairs. You’ll come across more Lost Souls in the tunnel access, but luckily, the Grabber works on them, too; just grab them, then chuck them away to kill them, much like you probably did with the gravity gun and the Shredders in Half-Life 2.
You’ll come to a large stairwell in Central Excavation. Judging by the gaping hole in the floor, it looks like UAC excavated the hell out of the place. Head up the steps to reach the long corridor leading to the excavation elevator, but be ready with your Grabber, as there are plenty of Lost Souls flying about.
Level Two: Erebus Dig Site
Mission Objectives: Find the Exit
Before you head out underneath the half-fallen bulkhead door here, you’re going to need to head upstairs and find the PDA data hidden in the locker room there. This will net you the log data for Marcus Tanner, who has Site One clearance. With that in tow, fight your way through the Imps back to the elevator, then head underneath the door to face off against your first superimp, aka the Vulgar. These guys are basically buffed-up Imps, with more powerful projectiles and a fierce charge attack that’s almost Imp-ossible to dodge (yuk, yuk). The best way to deal with them is to suck in their projectiles and throw it back at them, but if they go down on all fours, they’re about to charge, so be sure to get around a corner if at all possible.
The Marcus Tanner PDA will have given you clearance for the door after the Vulgar, so head on through. There’s going to be a spider in the hall leading to the quasi-bossfight, so have your pistol ready; spiders only require a couple of shots to kill.
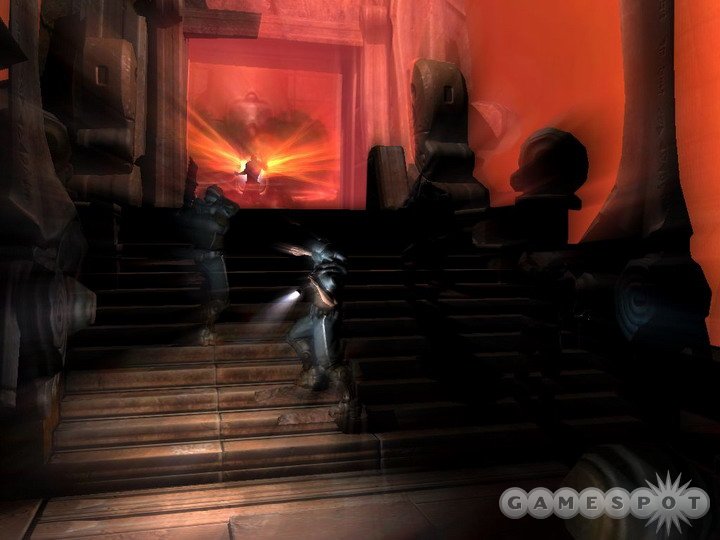
Boss Fight: Hunter One
The next area certainly looks ominous, and it is in fact the location of a miniboss, some sort of flying, legless, oversized Imp. It will fling firebolts at you as it warps around the room, but is rather easily defeated by grabbing the green energy balls from the two turrets and redirecting them towards the monster. You’ll need to hit it five or six times to kill it, and it’ll probably zap you once or twice, but you should be able to finish it off nonetheless. Killing it will restore the power of your Artifact, enabling you to use its special ability, called Hell Time. If it’s been charged with a human soul (which you can extract from the many corpses in the facility), you can force the artifact to consume the soul, which will let you enter a bullet-time-esque slow-mo period for ten or fifteen seconds. While Hell Time is active, you move normally, but the rest of the world is slowed, allowing you to maneuver around enemies, bypass traps, and so on. Each use of Hell Time requires one soul, though, and you can only hold three, so try not to use them unless you need to.
The Crushers
Immediately after charging up the Artifact with human souls from the corpses in the hallway, you’ll come across a set of crushing mechanisms. In order to bypass them, you’re going to need to use the Artifact to slow time, then wait for the crusher closest to you to shut and open before charging through. You’ll need to pass through two of these crushers to get past; after the second, you should have enough time remaining on your charge to kill the enemy soldier in slow-motion.
In the room beyond the crushers (Tablet Site Beta), you’ll come to another powercell generator. After looking around the area for items, you’re going to have to grab the powercell from the generator, then quickly duck under the nearby door before it closes. No need to use Hell Time; simple sprinting will do.
Central Excavation: Call Main Elevator
Welcome to Central Excavation, where frame rates go to die. In order to clear the level, you’re going to need to use your powercell to charge up the elevator, then ride it up to the upper level.
To begin with here, you’ll need to make it through the door to your right, which is blocked by a pair of crates. (If you take two rights onto the walkway where some panels are sitting, you can walk onto the stone and walk underneath the walkway to find a suit of armor, if you need it.) This will lead you to Excavation Control, wherein you can backup the data on the laptop. This seems to just be some token interaction, but maybe it’s important later on. You know, just in case all your mp3’s get erased or something.
Moving on from here will lead you to the elevator bay, where there are indeed two elevators, neither of which you actually need to use. There will, however, be three Vulgars in the area, so feel free to use some Hell Time to deal with them. If you do duck underneath the door to the left one, though, you’ll be able to climb the ladder there, which will lead you around to the Sean Weston PDA in the small room there. The PDA isn’t really the prize, though; Storage Lockers 028 and 029 are near this area, both of which can be opened with code 516 (from Marcus Tanner’s PDA).
The next room on is Lower Storage, where a trio of hell soldiers will come after you. Although the machineguns they wield sound as wimpy as ever (as does yours, for that matter), they can still put a hurting on you, so, again, feel free to use Hell Time and charge in to blast them with your shotgun. Make your way from there through mechanical support back out to Central Excavation again, where the elevator you need to use resides. It is, as promised, without power, so you’ll need to grab Gregory Martin’s PDA from his corpse nearby and use it to access the service ladder near the elevator.
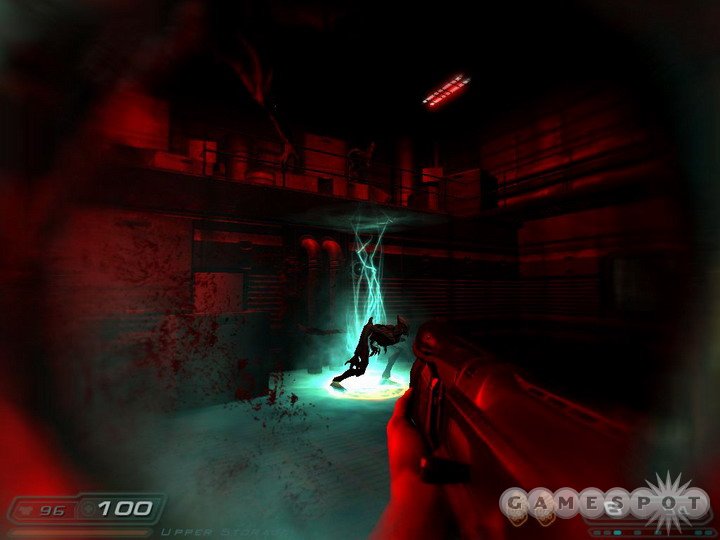
Restoring Elevator Power
Head from the ladder to Upper Storage, where a pair of Vulgars will attempt to corner you. After you finish them off, but before moving on, note the presence of a gap in the railings of the upper level. If you stack a few crates near the boxes beneath the gap, you can climb up to find some ammo, armor, and another soul for your Artifact. From there, it’s a short distance to Transfer Control, where you’ll be able to insert your powercell, then flip the switch on the monitor by the window to call the elevator. When it’s where it needs to be, you’ll have to fight your way back to it and use it to access the Erebus Labs.
Level Three: Erebus Labs

Mission Objectives: Find The Primitive in Artifact Storage
It seems that Dr. McNeil needs an object from Artifact Storage to help her continue her research into what precisely is going on at the Erebus facility. Since you’re gopher boy, it’s up to you to track down the item and bring it to her colleague.
After clearing out the first room here, head into Levitation Site Gamma, kill the Wraiths that attack you, then head throught the junction to reach the Proving Grounds, where you can find the Stewart Jackson PDA. In order to get through the spike traps here, you’ll need to use your Hell Time power to run through the area in slo-mo. You should be able to get past two sets of spikes with each activation of your Artifact, pausing between each one, with a reactivation coming when you reach the corpse in the middle of the room.
When you reach Main Excavation, you’ll see that there’s a scaffolding set up in front of an unlocked door. Before you head through the door, climb the scaffolding to reach a medkit and a clip, then sprint-jump onto the rocks beyond to reach the upper walkway here, where you can grab some more shells. You won’t be able to jump back to the scaffolding; instead, you’ll have to drop down to a large storage container and drop from there to the ground.
Objective: Locate Power Cells
After reaching the Excavation Utility corridor, you’ll be given a new objective: in order to pass through Artifact Storage, you’re going to need to track down two powercells and use them to activate the Storage area’s filtration system. Begin by rounding the corner and finding the elevator up to the Medical Labs on level two.
When you reach the labs, start working your way through the area until you reach the Medical Ward, where one Preston Glenn is in the early stages of zombification. A single punch will kill him, so grab his PDA and the powercell from the generator near the gurneys. That’s one cell down. Now you need to make your way back through the medical level to the elevator that you rode up on. Be ready with your Hell Time when you reach it, though, as three Vulgars will appear just outside of it. You can use the code you obtained from Glenn’s PDA (769) on the storage locker near the elevator.
Site 1 Research
After taking the elevator back down, head into Site 1 Research through the locked door nearby; Glenn’s PDA will grant you access. Shortly after you head through, you’ll find Steven Crane’s PDA, which has the all-important access code for a double-barreled shotgun located somewhere up ahead. Time to get yourself a boomgun.

Head into the door near Crane’s body, then head through the door leading to the Offices. After you wade through the zombies in Lab Systems, you’ll reach the offices themselves; Sarge’s office is on the left. Use the code 428 on his weapons locker to retrieve the Double-Barreled Shotgun. Cracking the locker will also net you a keycard, which you can use on the other office’s door to access that. You can also play Sarge’s Big Game Hunt on the arcade machine here, if you like, but your real goal is in the second office, where you can find another powercell, the second of the two that you need.
With both powercells in hand, head back to the entrance to the offices. Lab Systems will have been re-infested with zombies, and you’ll need to kill all of them to proceed. This is a good time to let loose with a few hand grenades. When you reach the entrance again, head across the room and into Artifact Control, where you’ll be able to insert both of your powercells and then activate the filtration system, which will flush the toxins out of the air in Artifact Storage. Returning to where you pick up Crane’s body will lead you to the door that takes you into Storage, where you can grab the Primitive, as well as the PDA for Viktor Kharkov.
After you grab the Primitive, fight off the four Vulgars that appear, then head out through the only door available to you to reach Erebus Control.
Level Four: Erebus Control
Mission Objective: Power The Lift
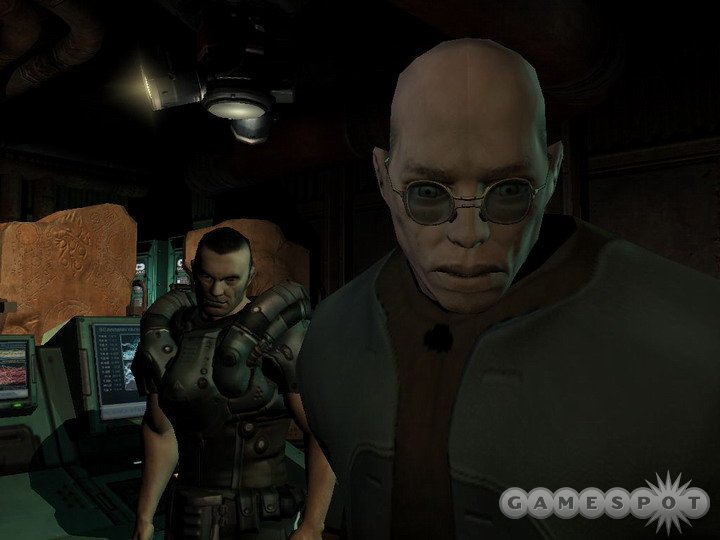
As soon as you walk into the first room of this level, you’re going to come across a man in the ventilation system above you, yelling down at you and instructing you to power the lift. Seems he wants a big burly Marine on his side before he attempts to make it to the surface. You’re going to need to track down a couple of powercells and bring them back to the lift before you can make it into the ventilation shafts yourself.
Keep moving along the path available to you until you come to Artifact Processing, where you’ll come to a PDA-locked door. You don’t have clearance to bypass it yet, but there is another, unlocked door in this room which leads to the Artifact Administration Checkpoint. The door leading on is apparently locked, but it’ll pop open after you rub up against it, revealing an Imp that’s preparing to jump at you. After you take it out, head into Administration Access, where a few enemies are either waiting or will spawn in after you walk around; be wary.
In Administration Access, you can witness a little cutscene by jumping atop the boxes near the end of the walkway and heading up, but you can’t head through the door there yet. There is, however, a medical station up there should you need one. You can’t access the footlocker yet (unless you check our codes section), so leave that be as well and move on into the intestine-like corridor that’s been melted - or grown - into the walls here. The Administration Junction will be another ambush-laden room, so make your way through it as slowly as possible, and don’t hesitate to use Hell Time to get a jump on the warped-in Vulgar. When you reach the end of the room, you’ll find the hallway where the dead scientist you spotted earlier is laying, so grab his PDA.
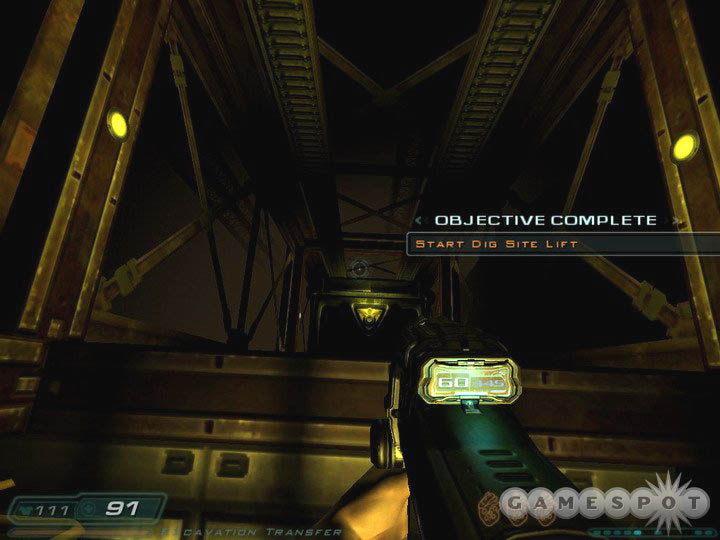
Objective: Start Dig Site Lift
With the new security access, head through the door near the body and open the locker in this room with the code in Gibbons’ email (937). With shells in hand, head back to the Junction and unlock the door leading to the South Hall. Go ahead and check out the room on your right before heading up the hall, where three Vulgars will spawn in and start to pound you. Likewise, feel free to check the second room in here before moving out to the East Hall, where you’ll come to another locked PDA door and what appears to be an airlock leading out to Excavation Transfer, where you can find Mac Smith’s PDA. This will grant you access to the PDA door before the airlock, wherein you’ll find a powercell. (The 937 code will work on the locker here.)
With the powercell, return to Excavation Transfer and use it on the generator near the lift (after killing the two zombies with your machinegun). This will, obviously enough, start the lift again, so ride it up one level, then turn around and jump back onto the platform above the generator. If you ride it too high, you’ll be crushed. The only path available to you at this point will lead you to a reception lobby, wherein you’ll find the PDA of one Nathan Reynolds; be ready, though, as a pair of Vulgars will appear as soon as you grab it. With it in hand, head through the Lounge and back into the other side of Excavation Transfer, where you can unlock a door leading to Debris Processing. If you unlock the bridge there, then head down the ladder on the far side, you’ll obtain the powercells you need to power the lift back in the first room of this level. With them in hand, you’ll really only have one path to take, which just so happens to be the one that leads back to the lift, so head out and restore the power there to reach the ventilation systems.
Not unpredictably, the guy who was yelling at you earlier is dead, so harvest his soul, if need be, then take the lift up to Erebus Research.
Level Five: Erebus Research
Mission Objectives: Find Dr. Cloud
The Cargo Storage room you begin this level in is a deathtrap; two Imps will spawn in initially, followed by three concurrent Vulgars. There are two ensouled corpses here, though, so you’ll have at least a pair of Hell Time charges if you wish to use them, and you probably will.
There’s only one path here, which leads through the Storage Hallway to Dr. Cloud’s lab, where you’ll hand off the Primitive to him. After analyzing it, he’ll shuffle you back out to kill some demons, but will also give you the key to the armory.
You’ll begin in Research Support; there’s a suit of armor underneath the stairwell here which you can find by crawling in through the gap in the supports. From here, your path is pretty linear until you reach the Cargo Storage Stairwell and Sean Gibson’s PDA. Along the way, you’re going to be facing off against numerous Imps and Vulgars, so keep your Artifact juiced up and ready to go.
After obtaining the PDA, head out into another Cargo Storage room to tussle with a tassle of Imps and Vulgars. After the numerous foes have been put down, use your Grabber to place a crate near the large boxes by the chainlink fence, which will allow you to jump over and obtain the shells on the other side. From this room, you’ll have to head back through the first Cargo Storage room, into the Storage Hallway where you can find the entrance to the Armory. You’ll probably want to activate Hell Time as soon as you head in, as a Vulgar will be spawning in. When it’s dead, grab the Chaingun from the floor and all of the ammo belts, as well as the PDA from the storage locker, which will grant you access to the Waste Tunnels.
Objective: Surface Access
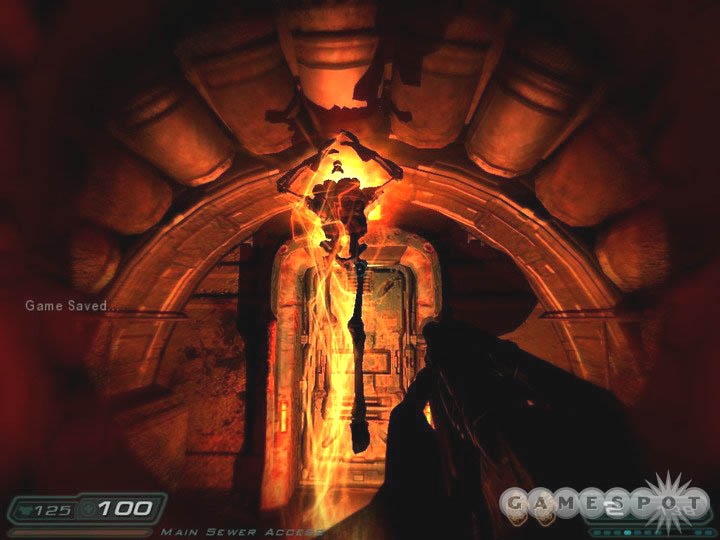
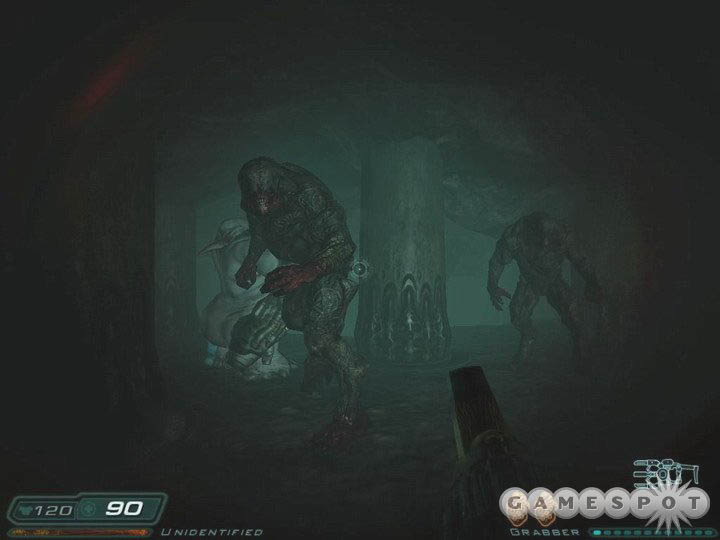
Your goal now is to head through the Erebus Complex’s sewers to reach a cargo station on the surface. In order to pass through the noxious environment, though, you’ll need a sealed suit, which you’ll obtain automatically if you move on.

As soon as you step out into the sewers, we’d recommend that you make a full save, as the next section can be rather difficult, especially on the higher difficulty settings. What you need to know is that your suit only has a limited amount of air, on the order of sixty seconds worth when you first enter the tunnels. In order to increase this limit, you’ll need to kill the zombies with environmental suits here and take their tanks, which drop when they die. In addition to the zombies, you can also expect to face off against Cherubs - which can be grabbed with your Grabber in the same manner as the Lost Souls - and Maggots. The Maggots can be effectively neutered by the railings here, since they have to get up close to hit you.
If you drop down to the water (which doesn’t hurt you), you can expect to see a couple more Maggots than you normally would, while staying on the walkway will spawn in more Cherubs. The Cherubs are the easier enemies to deal with, so we recommend that you stay up top. If you see a zombie walking around below, try to grab an explosive barrel and chuck it at him; you can then grab his oxygen tank with your grabber and pick it up.

At the end of the hall here, more Cherubs will spawn in, along with a Mancubus. The Mancubus can wipe the floor with you relatively quickly if you let it hit you with its cannons. It can also take a ton of damage, but it is big enough to easily hit. To take it down, you can either use your machinegun, or duck behind cover and pop out to throw grenades, or use your Grabber to nab its projectiles and throw them back in its face.
You’re going to need to make your way through three tunnels like this, each with a mancubus at its end. So long as you kill all of the zombies and grab their tanks, you should be able to make it to the fourth tunnel and into the airlock at its end with some oxygen to spare. Just stick to the walkways, use your grabber to take out the Cherubs, and the double-barreled shotty to blast the Maggots if they attempt to get close, and you should be all right. After passing through the airlock, you’ll find the Surface Access corridor, leading to another airlock.
Level Six: Erebus Station
Ah, another glorious lack-of-oxygen level. After you hit the surface, you’re going to have to head right and start making your way towards the ladder leading up to the airlock leading into Erebus Station proper. There are plenty of air tanks lying about, well more than you’ll need, but there are also Cacodemons flying about, which will attempt to zap you with their firey breath. You can use your Grabber to return their fire to themselves, but we found this to be pretty difficult; better to just wait for them to get close, then use the boomgun to finish them off.
When you reach the ladder and climb up, there are going to be plenty of Vulgars to deal with as well. It may be easiest to just use Hell Time and rush past them to the airlock. Keep in mind that your oxygen use remains constant in Hell Time, so you can’t afford to dilly-dally as you might like to.
Mission: Find the Sentry Bot in the maintenance tunnels
After heading in via the airlock on the upper level, you’ll find a technician perched atop a sentry bot, attempting to repair it. He won’t help you besides pointing you towards a door elsewhere in the room. "Oh, I should leave through the door, huh? Glad you’re here to tell me these things." You can kill him by using your grabber to chuck a crate at him, if you wish, the useless ponce.
Keep moving on until you come to the Sewage Stairwell, guarded over by a fat zombie with a wrench. There are two doors here; take the lowest one to find the PDA of one Fred Grossman, which will net you access to the Armory nearby. The codes for the armory lockers are 134, so use that on both of them and grab the ammo within before heading to the Main Sewer Access area. The troubles here are legion, or at least two: a pair of Revenants will appear as you make your way towards the door. These guys can quickly knock your health down with their rockets if you’re caught in the open, so feel free to activate Hell Time and put them in their place with a double-barrelled shotgun round to the chest.
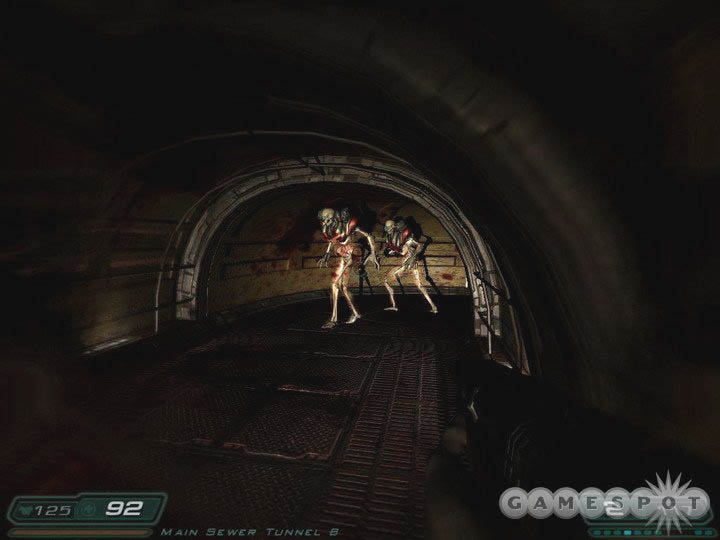
After you pass through the next door, you’re going to come to the main sewer tunnels, as well as the Sentry Bot. The Sentry Bots, as you may remember from Doom 3, will walk alongside your character, using their machineguns to blast away at any enemies that come into view. This little fellow can be destroyed, though, so you won’t be able to just let him do all the heavy lifting while you sit back and relax. You’re going to want to use your Hell Time power to take down the larger concentrations of enemies, especially near the end of the fight, where a few Vulgars and three Revenants will come at you. If you can get past these guys, then you should be able to drop the sentry bot off in the Sewer Filtration room, where you can grab a couple of souls and a full health recharge. You’re going to need it, too, as the first real boss fight is coming up shortly.
Boss Fight: Hunter Two
The second Hunter you’re going to face is a bit larger than the first one you encountered, and possesses feet, which is always a plus. Luckily for you, he’s not too difficult to beat, so long as you know his attack patterns.
At the start of the fight, the Hunter will try to run you down by leaping at you through the air. These initial charges are more fright-inducing than really damaging. You might be tempted to use Hell Time to avoid them, but you seem to have an infinite amount of sprint energy here, so instead use that to sidestep the charges while you fire at the Hunter’s glowing red heart with your chaingun. You can also try to use the four pillars in the corners of the room to block the charges.
After you hit the central heart target enough, the Hunter will harden its skin and become mostly invulnerable. At this point, it’ll stay away from you and attempt to use projectile energy balls on you, which really hurt. While it’s doing so, grab them with the grabber and fling them back at it; it might not do any damage, but it’ll make you feel better.
When the Hunter gets tired of flinging fireballs, it’ll flip back over to its charging form, at which point its heart will become vulnerable again. When this occurs, activate your Hell Time and get as close as possible before unloading your boomstick into its chest. After a few cycles of this, the Hunter will apparently give up and yield its soul to you, netting you another ability for the Artifact: the mighty Berserk. When you activate the Artifact, you’ll still net the Hell Time ability, but while it’s active, you’ll also be able to kill most enemies in just a couple of shots from your fists. When you’re ready to move out, head into the monorail to reach the Phobos Labs
Level Seven: Phobos Teleportation
Mission Objectives: Activate the Teleporter to Delta Labs.
After you get off the horn with Dr. McNeil, explore the Monorail Station area. There are some ensouled corpses to grab Artifact charges from, including one that can be found by taking the ladders to the area underneath the railcar. This last corpse also holds a Rocket Launcher, so be sure to grab it before heading up the steps leading away from the monorail.
The path here is quite linear, so keep following it until you reach Teleportation Reception, where you’ll be warmly welcomed by a host of Vulgars. You’ll probably have to burn a couple of Artifact charges for this little fight, so be sure to whip out your fists and pound away at your enemies from close range; feel free to return to the monorail station afterwards to get more Artifact charges from any corpses that remain there.
There’s only one path from Reception, and it leads through Connecting Corridor 2A. Teleportation Science will be the scene of another good-sized melee, but when you attempt to exit it, you’ll find your first demon enemy, so enjoy the extra fun! These guys can charge you, as you’ll recall, but the ever-deadly combination of corners and the double-barreled shotgun should put it down fairly quickly.
Soon afterwards, you’ll come to the Teleporter Chamber. Make your way into Teleporter Control and use the monitors there to target Delta Labs. Unfortunately, there isn’t enough power for you to teleport out (although there’s apparently enough power for a Hell Knight to warp in).
Mission Objectives: Take the Skytram to the Research Sector
With teleportation unavailable for the moment, you’re going to have to huddle up with Dr. McNeil to find out precisely how to reroute power to the teleporters to get them back online. This is going to be accomplished by making your way back to the Skytram and finding her in the Research Sector. Begin by cutting a swath through the Revenants in the Teleportation Chamber until you reach Teleporter Mechanical. The large door at the bottom of this room appears to be the same locked door that you encountered in Teleporter Reception, so the fact that it doesn’t open isn’t a big deal.
Instead of heading through the door, then, take the upper walkway, which leads to Storage. You haven’t found the combination to the locker here yet, so head through the door, popping the demon there with a boomgun shot, then crawl through the Subfloor Conduit to find the PDA of one Bernard Fresko, who has the code as both a audio and email log (714). After returning to the locker to grab an ammo belt and some shells, crawl back through the floor to find a security key near Fresko’s body.
If you take the nearby elevator back down to Reception, you’ll discover precisely what the key is used for: it opens the doors leading out to the skytram. Unfortunately, the skytram is going to be well-guarded by a Hell Knight and a few Revenants (although the Revenants don’t appear until the Hell Knight is dead). The Hell Knight is, as always, a fiercesome foe, so your best bet to take him down is to simply use your Artifact and punch him in Berserk mode, which is a one-hit kill, then finish off the Revenants in the same manner.
When you reach the skytram, take the ladders down beneath it to find a Plasma Gun. You won’t have much ammo for it at first, but you’ll get more later on.
After you activate the skytram, you’ll eventually reach the section of Phobos Labs where Dr. McNeil is stationed.
Level Eight: Phobos Molecular Research
Mission Objectives: Rendezvous with Dr. McNeil.
There isn’t much to see here initially, and no enemies will really attack you, so just start heading through the green doors as they appear to you. If you wish, you can duck into the Gallery to find some armor behind the large relic there. In the Research Lobby, you can also grab a box of shells by using your grabber to pull a crate from a small gap between the security office and the wall near the x-ray machine/metal detector, or whatever it is.
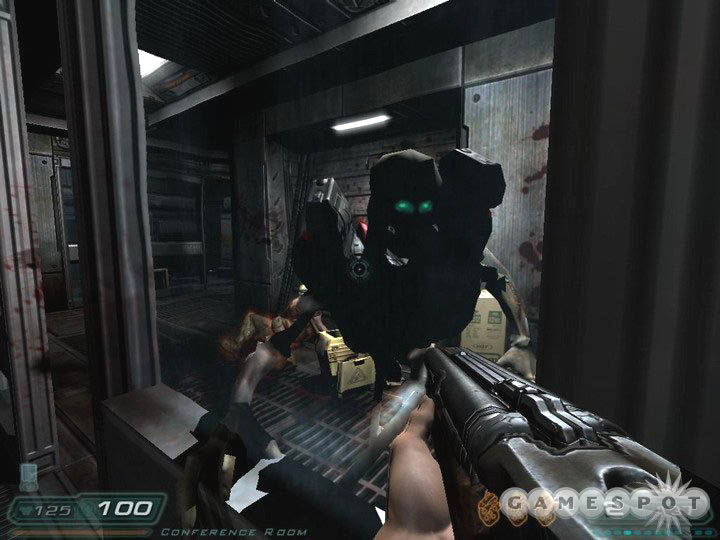
You’ll eventually come to Research Sector A, where something very bloody apparently occurred not too long ago. A bunch of enemies are going to spawn in when you pick up the PDA in the conference room here, so you’ll want to be sure to have full health beforehand. Dealing with them isn’t too bad; you should be full up on Artifact charges, and even before you whip that out, you can wait by the entry to the conference room and use your shotgun on enemies as they attempt to enter. When you hear the Bruiser’s footsteps, though, you’ll definitely want to go into Hell Time and use your double-barreled shotgun to blast him; even on hard mode, he should go down after a single blow.
With the PDA in hand, open the door to Research B, where you can meet up with Dr. McNeil. She’ll tell you that you’re going to have to return the Artifact to Hell if you wish to stop any further invasions, and instruct you to shut down four separate systems in order to gain enough power to reroute to the teleportation systems.
Objective: Shut Down Pumping Station
From McNeil’s lab, keep on moving until you find another airlock, and head outside. Your exterior jaunt won’t take too long; scan the locked door you come to eventually and go through to the Pumping Station. (If you want some more rocket ammo, head past the door and climb the ladder to the top of the silo nearby.)
Inside the Pumping Station, you can find another PDA, albeit one with no useful info and no new security clearance. If you walk up the stairs above it, you’ll find the switch to shut down the pumping station, so flip it off to receive your new objective.
Objective: Shut Down Auxiliary Power to Research Labs

To reach the next area, you’re going to have to run through another exterior area. This is a really short run, albeit full of Cacodemons and Lost Souls; you may want to just go through in Hell Time and get to the far airlock with a minimum of fuss, but beware of Lost Souls that attempt to ram you while you’re waiting for it to cycle.
Make your way through the Security Core Access and take a right into the commons. There are going to be eight or so zombie soldiers scattered throughout this area, so your best bet for getting through unscathed will be to enter Hell Time and use either your fists or your single-barrel shotgun to blast them from close range.
Eventually you’ll come to the Upper Walkway, where the PDA of one Kevin Noordzy awaits you. This will contain the code needed to extend the nearby bridge (281). So...head to the bridge and extend it. Inside the small security office there you’ll find a monitor which will allow you to raise a lift, so do so, then fight your way through the substantial number of Vulgars and Revenants that appear in your path until you reach the lift (it’s near the medical station you passed by earlier). You can use it to access the third and final Hunter fight.
Boss Fight: Hunter Three
This largest Hunter variant has apparently managed to tap into the power core’s plasma systems, and draws their energy to fuel his own power. His primary attacks here are going to be a ground-stomp move, which inflicts light damage and can be jumped over (with some difficulty), and a ranged attack that deals severe damage. He’s also draped in electricity, and so can’t be punched at melee range, meaning that you’re going to have to take him down the old-fashioned way...by earning it.
The basic cycle here involves just unloading on him while he stamps around the middle of the room. His ranged attack is pretty easy to dodge, if you’re far enough away from him; the stomping attack doesn’t hurt all that much, so you don’t need to worry overmuch about dodging it. After you blast him (we liked to use the chaingun, if only because there’s a bunch of ammo for it below the platform), he’ll eventually move to the center of the room and draw in more energy from the three active plasma chambers. When this occurs, you have to activate Hell Time, click the green "Open Shield" button on one of the chambers, then fire at the plasma within until the chamber catches on fire. If you don’t use Hell Time, the chamber will open and close too quickly for you to damage it.
You’ll need to repeat this action three times, once for each chamber, and then finish off the Hunter with one final round of attacks. If you run low on Artifact charges or health, hit one of the platforms on either side of the room to access the sub-platform area, where you can find numerous corpses and a health dispenser. The Hunter’s stomping attacks can hit you while you sit around here, so don’t dilly-dally too long.
When the Hunter’s dead, the Artifact will gain its third and final power: Invulnerability. While active, you’ll be able to move more quickly, kill people with your punches, and be immune to incoming fire. Yeah, that’s pretty powerful.
Objective: Return to the Skytram
With the Hunter out of the way, take the lift back to the Security Control station and use the monitor there to unlock the door. Two Bruisers will stand in your way, so activate your invulnerability and punch them both to death; multiple Revenants and a couple more Bruisers will await in the passages back to the skytram, so feel free to give them all the same treatment, Artifact charges permitting.
Level Nine: Phobos Main Reactor
Mission Objectives: Shut Down the Phobos Labs Main Reactor
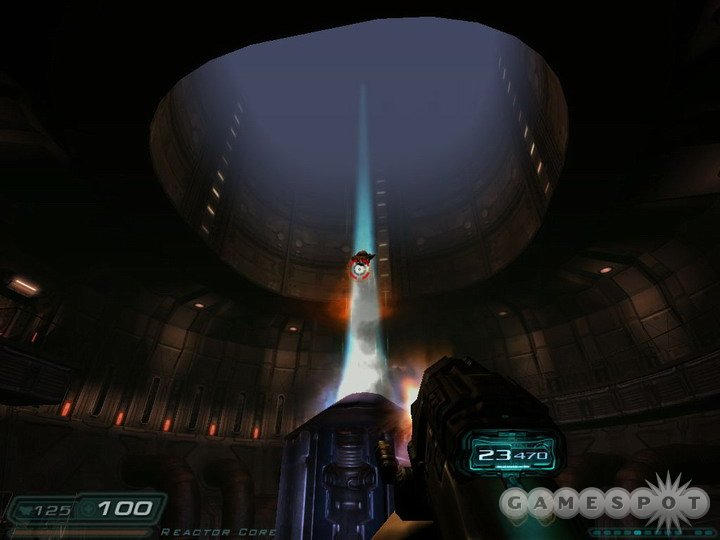
After taking the skytram to the reactor, you’ll get your mission objectives. Apparently, to make up for the lack of power, you’re going to have to shut down the main reactor here. Wuzzuh-huh? Well, if Dr. McNeil says so, guess she must be right.
Your first goal here is to clean out Reactor Systems, then head into Plasma Storage to completely load out your plasma rifle. After heading up the steps, you’re going to find yourself in the Reactor Core, where numerous Lost Souls and Cacodemons are going to warp in through the plasma stream to attack you; keep your chaingun or machinegun handy to deal with them. It’s easiest if you just walk slowly around the walkways, keeping your gun pointed towards the plasma stream, and killing enemies as they appear. Their warping appears to be triggered by your movement, so if you try to rush through the room, you may be overwhelmed. Just move until one appears, pause, kill it, then move on. Do so and take the two lifts until you reach the bottom of the room.
You’ll come out to Reactor Maintenance, where you’ll have to climb a few ladders down until you reach a PDA and Security Card belonging to one Nicolas Haag. With your new security clearance, return to the Reactor Core and make your way to the top of the lifts there, where you should find a previously impassible door; use your security card to get past it. It leads to Reactor Control, where you can shut down the reactor. The code for the locker here was on Haag’s PDA; it’s 492. Use it and the medical station to heal yourself up before returning to the now-silent Core and extending the bridge there. This will take you to Reactor Support, so fight your way through and lower the lift there; a good half-dozen Revenants will warp in to pop you, and a demon will come in through the door, so this might be an apposite time to use an Artifact charge.
Objective: Shut Down Life Support
Speaking of apposite times, though, you’re almost definitely going to need to burn a charge or two in the Energy Processing room, where you have another pitch-black jaunts through a room full of Wraiths and Vulgars. You will have a sentry bot on your side, though, and it does seem to be quite capable of taking the damage that the enemies are going to dish out, so feel free to sit back and let it do all the heavy lifting here. If you wish, you can also use an Artifact charge and just rush through the entire room to the elevator on the far side.
When you reach an airlock, head outside to reach the Phobos Labs Rooftops. No enemies here; just a suit of armor on the second level and some hand grenades and an ammo belt on the lowest level. You’ll have to fight your way to another elevator to reach the Cargo Tunnels.
Cargo Tunnels

The Cargo Tunnels seem to be primarily intended to cause you to burn through your Artifact charges. There are lots of Revenants and Hell Knights to burn through here, so you may just want to flip over to Berserk mode and mow them down with your fatal fist of fury. It’s not entirely necessary, though; there’s a chokepoint at the end of the first hall that you can use to take on enemies as they come through; most everything will go down with a single double-barreled shotgun blast to the chest. Note that opening the shutters in the first hallway will actually spawn in a couple of extra Revenants, so avoid doing so if you don’t mind the gloom.
You’ll have to fight your way through Environmental Support; at the tail end of this room, you’ll come to a glassed-in office, where you can shut down the life support systems. With that done, all you need to do is fight your way back to the teleporter to reach Delta Labs. The skywalk is located near the office, so walk down it and through the airlock to reach the teleportation wing of Phobos Labs again.
Level Ten: Phobos Labs Teleportation
Objective: Take the skywalk back to the Phobos Labs Experimental Teleporter

It’s here that the game starts its run-and-gun phase. There aren’t going to be any keycards to acquire, or codes to use on lockers; all you have to do now is fight your way back through a bunch of enemies to reach the teleportation chamber, then warp your way over to Delta Labs.
There are going to be plenty of ensouled corpses lying around, so be sure to use your Artifact whenever necessary. The biggest fight will occur in the Monorail Station, where three Bruisers will spawn in in waves. Be sure to suck the souls out of the corpses in this room when you use the Artifact, else they’ll be likely to be destroyed by the many explosive barrels in the area.
Teleporter Reception and Teleporter Mechanical will also be the site of more fierce melees. Be certain to mark the location of ensouled corpses in your path; if you pass one up, then be sure to return to it after using a charge to top yourself out. You’re going to meet up with your first Archviles in the Reception room; you’ll recall that these guys can shoot out lines of flames for some serious damage, so try to approach them only while invulnerable.
Eventually you’ll reach Teleportation Control. You’ll need to make your way to the control room, select Delta Labs as your destination, and then activate the teleporter while standing in it. There are two ensouled corpses in the area, which will match up nicely with the two Bruisers that will appear as you attempt to teleport out.
Level Eleven: Delta Labs
Mission Objectives: Go to Hell
There are plenty of ensouled corpses in the beginning of this area, so feel free to dispatch everything Betruger sends at you while superpowered. That’s basically the theme of the entire level, in fact; it’s exceedingly linear, but packed with foes, including a new type of zombie that may scare you at first. The only reason for this is that they look fairly similar to Archviles, but possess only the basic zombie shuffle-and-punch movement patterns, and thus aren’t very difficult to take down. The biggest news from the beginning of this level is the appearance of a BFG, so be sure to grab it; it’s quite near the opening teleporter.
Beyond that basic instruction - fight - there’s not much to say about this level. There are numerous short-range teleporters scattered around, which look like a bunch of light particles rushing inward towards a point. When you spot one of these, don’t bother wasting ammo on enemies near it, unless they’re blocking your path; just run through and into the warp to reach the next area. Health is going to be at a premium here, though, so it’s often going to be worthwhile to activate your immunity to avoid taking a lot of damage.
After a couple of shortrange jumps, you’ll come to the Common Area (i.e. kitchen) where you can find the PDA of one Patrick Hook, which will update your security clearance. You’ll come to the Specimen Research Lab soon thereafter, which will contain a couple of medpacks for you, as well as a pair of storage lockers which you can open with the code 634. After that, it’s pretty much a straight slog. The last short warp is in Central Processing, and is guarded by a pair of Revenants; if you’re quick, you can rush to it while they’re still warping in and avoid them entirely.
When you reach the final teleporter - the Helleporter? - you’ll only have a few seconds to grab items from the area before you’re automatically sucked into the warp, so grab the medkits and get ready for a fight.
Level Twelve: Hell
Mission Objectives: Return the Artifact to Hell
Almost as soon as you step out of the portal leading you to Hell, you’re going to be set upon by a few waves of enemies: first Cacodemons will appear from behind you, then a pair of Wraiths, then a Hell Knight (his projectile will probably destroy the body near the lava here, so feel free to use it to fuel your Artifact), and then a trio of Cherubs. Kill them all, then look for some rockets by one of the walls near the far door. You can also jump atop some of the stone walls to the left of the door to find a medpack.
A little further down the path, you’ll come to an open room where hellspawn are swirling from the floor to the ceiling. Another gang of enemies, mostly consisting of Lost Souls, will start pummeling you here, so keep killing the waves until they stop spawning in. If you want to find some shells, climb the rocks on the right side of the room; otherwise, head down the left path to move on.
You’ll eventually come to another teleporter with a couple of medkits near it. Unless you can get the full health benefit from these medkits, just leave them be; you may need them when you return.
Monster Mash
The room beyond the portal is some kind of proving grounds; you’re going to be facing off against Imps, Hell Knights, and mancubi. Initially, there are going to be plenty of Imps, but as you kill enemies, more spawn in, and the later stages of the fight will see you taking down numerous mancubi at once. There are three ensouled bodies in this area, though, so if you come in with a fully-charged Artifact, you should be able to stay almost perpetually pumped-up if you suck in souls every once in a while. You should probably begin the fight by taking advantage of your infinite sprint and all the pillars in the area, though, and run around pelting the Imps with rockets to force the tougher enemies to spawn in before activating your first Artifact charge and going to town on the Hell Knights and mancubi.
When the green teleporter pops up, head through it to return to the area you were in previously; feel free to grab the medkits now, if you were wounded in the melee. The previously blocked path will now be passable, so head through, kill the Lost Souls, and grab the items near the flaming skull before moving around. After killing the Wraiths and the Mancubus, you’re going to have to take on a Hell Knight, but it’s not too difficult to do so; just lure him back into the hallway, then grab his projectiles and fling them back at him with the grabber.
Eventually, you’ll come to a very large open room; some kind of city of the dead thingamabob. There are some items in the "hills" here, but they’re a pain in the butt to get to, and you’re almost at the recharge station before the last bosses anyway, so we say ignore them. You’ll know you’re at Betruger’s lair when you see the giant skull above a green teleporter. Pick up as much of the health and ammo here as you can, and be sure to get a few souls for your Artifact. Reload all of your weapons, too.
Boss Fight: Betruger
Betruger’s going to be pretty tough, but not unbeatably so. As we all knew from the ending of Doom 3, and some of the cutscenes in Resurrection of Evil, he’s been morphed from his previous human form to some kind of hell dragon, complete with the breathing of fire and the flames and the wings. Oh my.
As with the rest of the bosses, though, Betruger definitely has a pattern that he follows throughout the fight that, when learned, should make him relatively predictable. He’ll begin by doing a little fly-by and pasting the platform with a trail of flames; sprint to either side of his approach vector to avoid these. Although the first time he does this, he’ll come straight at you from the small hill at the front end of the platform, most of the concurrent strafing runs will approach from the side, so keep your ears open for his screeching sound approaching from either side of you.
After the first strafing run, though, he’ll swoop up above the hills and summon in four Lost Souls to divebomb you. You’ll want to quickly take these guys out with your chaingun, then reload, turn around, and wait for Betruger to surface on the back end of the platform (i.e. opposite from the hills). At this point he’ll start shooting fireballs at you, first one at a time, and then in tight little groups. Since you have infinite sprint, though, you should be able to avoid these without taking too much damage. While he’s shooting at you, hit him with whatever you can. We liked to use the chaingun, just because we have plenty of ammo for it and its rounds traveled faster than did the plasma cannon’s bolts or rockets, letting us hit him more easily.
You can expect this cycle to repeat a few times until you finally put a dent into Betruger’s health. He won’t react overtly, but will instead start to engage in a new behavior pattern. You’ll notice him swoop low above the hill here and land on it; when he does, whip out your Artifact and get ready to hit it. When meteors start to appear in the sky above the platform, engage your invulnerability, then switch over to your BFG and hit him with two fully-charged shots. Don’t forget that the BFG will overload if you hold the switch too long; just charge it up and let it go. You should have enough time to do this twice before your Hell Time wears off.
Now, the meteors that are coming atcha will quickly pound you to death if you don’t get away from them. We found it difficult to outrun them, but if you can make it to the far end of the platform, near the tip-edge on the side across from the hills, you should be able to avoid most of the damage coming your way. He’ll repeat this cycle a couple of times; if you run out of BFG ammo, then switch over to rockets or the plasma gun to paste him while he sits on the hill.
After a few rounds of this back-and-forth, you’ll automatically launch into a cutscene that ends the game and, presumably, the Doom experience...for now. Congratulations!
Locker Combinations
| Locker Number | Combination |
| 028, 029 | 516 |
| 105 | 769 |
| Sarge’s Shotgun Locker | 428 |
| 408 | 937 |
| 034, 035 | 134 |
| 009 | 492 |
| 116, 117 | 634 |
Got a news tip or want to contact us directly? Email news@gamespot.com
Join the conversation