Destiny 2 Spire Of The Watcher Dungeon Guide
Connect nodes and become a futuristic electrician in Destiny 2's Spire of the Watcher dungeon for Season of the Seraph.
In Season of the Seraph, Bungie launched its second dungeon, Spire of the Watcher, for Destiny 2 Year 5. This season centers around secret bunkers and Golden Age technology, making this Mars dungeon a perfect setting. To access the Spire of the Watcher dungeon, head to Ikora at the Tower and pick up the Ares Desperado quest. The first objective is to complete the dungeon. Load into the dungeon from the Mars location in Savathun’s Throne World.
The Spire of the Watcher's recommended Power is 1570 on Normal, or 1610 with additional modifiers on Master difficulty. The game will drop you in a place called the Ishtar Chronoscopic Analysis, but you need to make your way around the cliffside by following the large yellow electrical cord. Once you arrive at the entrance mechanic area, shoot the lone Goblin or enter the combat zone to trigger the rest of the Vex to spawn--scouring the area are Void-shielded Conduit Minotaurs, Harpies, Goblins, along with four Cyclops sitting atop the cliffs.
Entrance Dungeon Mechanic
As one person figures out the mechanic, the others can help clear out the enemies. The enemies will constantly spawn in, and one of the Cyclops may return even after being defeated.
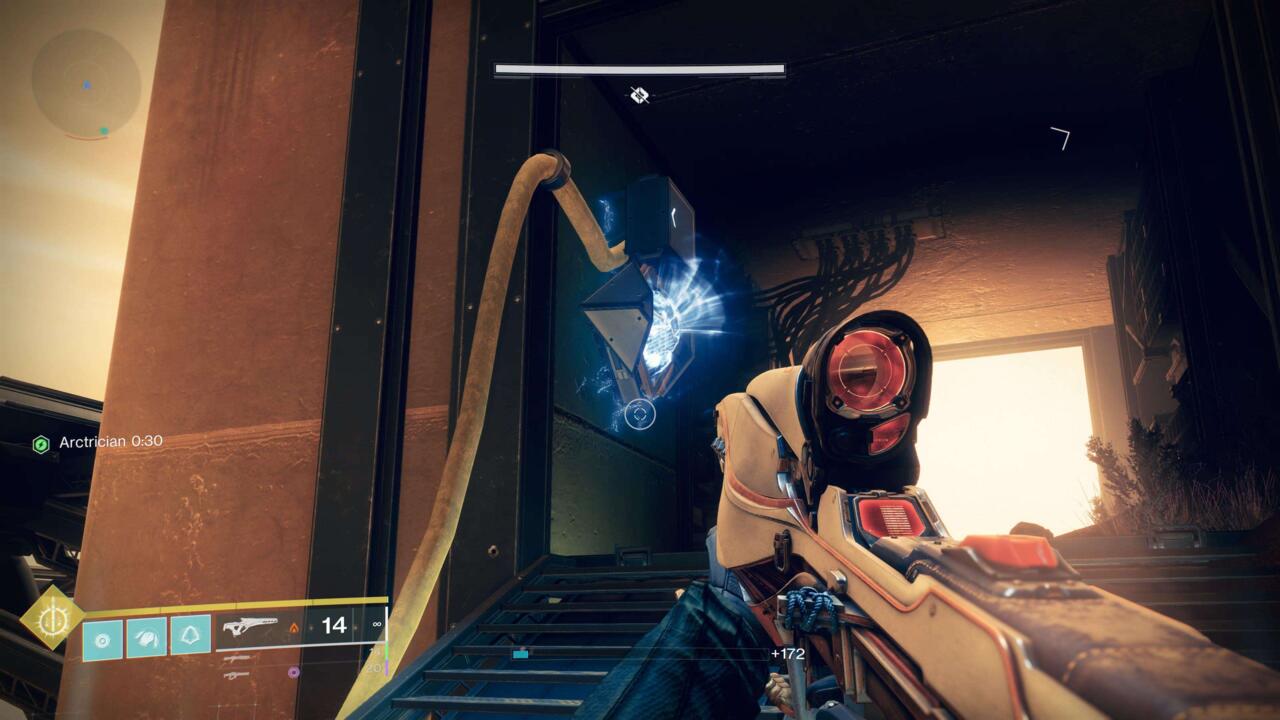
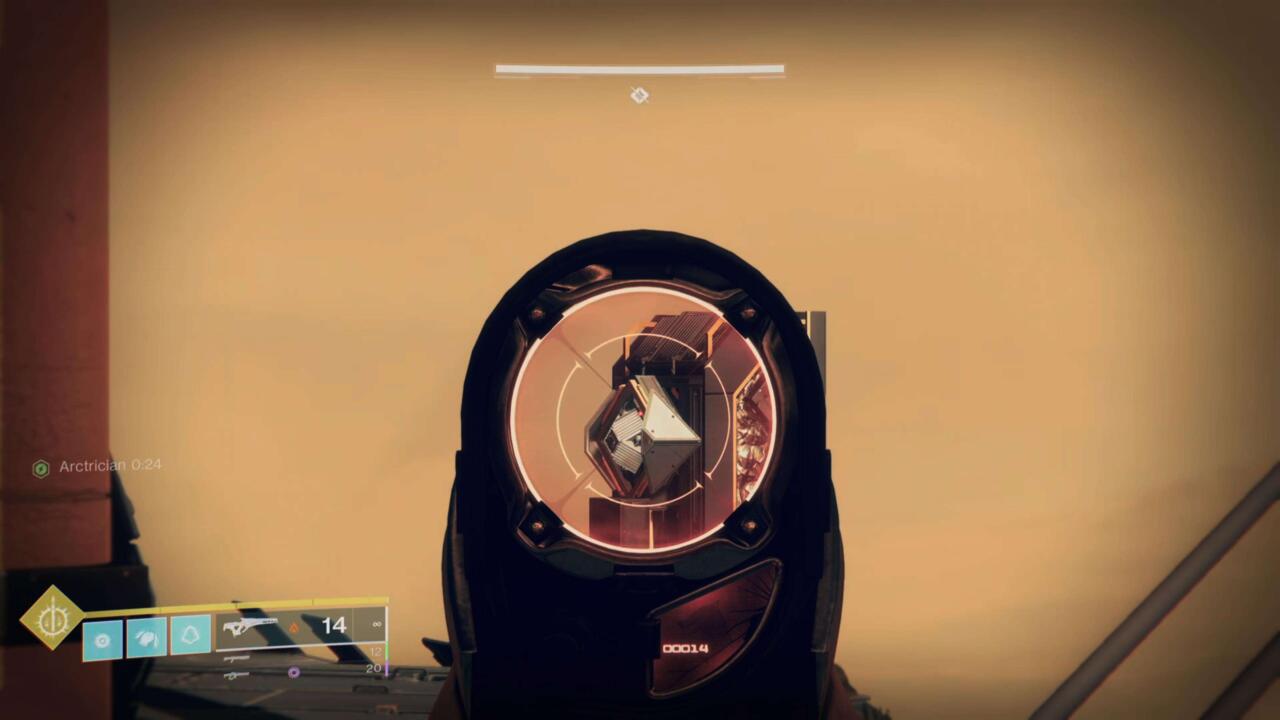
Defeating a Minotaur drops a large circular Arc buff called "Arctrician" that lasts for 30 seconds. Using this buff, you'll need to shoot the diamond-shaped nodes and follow the yellow cord, shooting additional nodes you come across along the way and completing the circuit. At the center of the map, by the floor entryway for the spire, there are four endpoint nodes.
Keep in mind, when you connect the nodes in order, the cord turns blue, but if it doesn't, you may have skipped one or started at the wrong node. Shooting the correct nodes adds a few seconds to your Arctrician buff, so if you’re fast enough, you can get through most or all of the nodes. In case you need another buff, Minotaurs do spawn several times.
For yellow cords, you don’t need to worry about doing them within a time limit, or in a single buff. Once you turn the cords blue, they’ll stay blue so take your time with it. Remember for this part: the first node has a small arrow pointing in the direction of the cord and only has one wire attached to it.
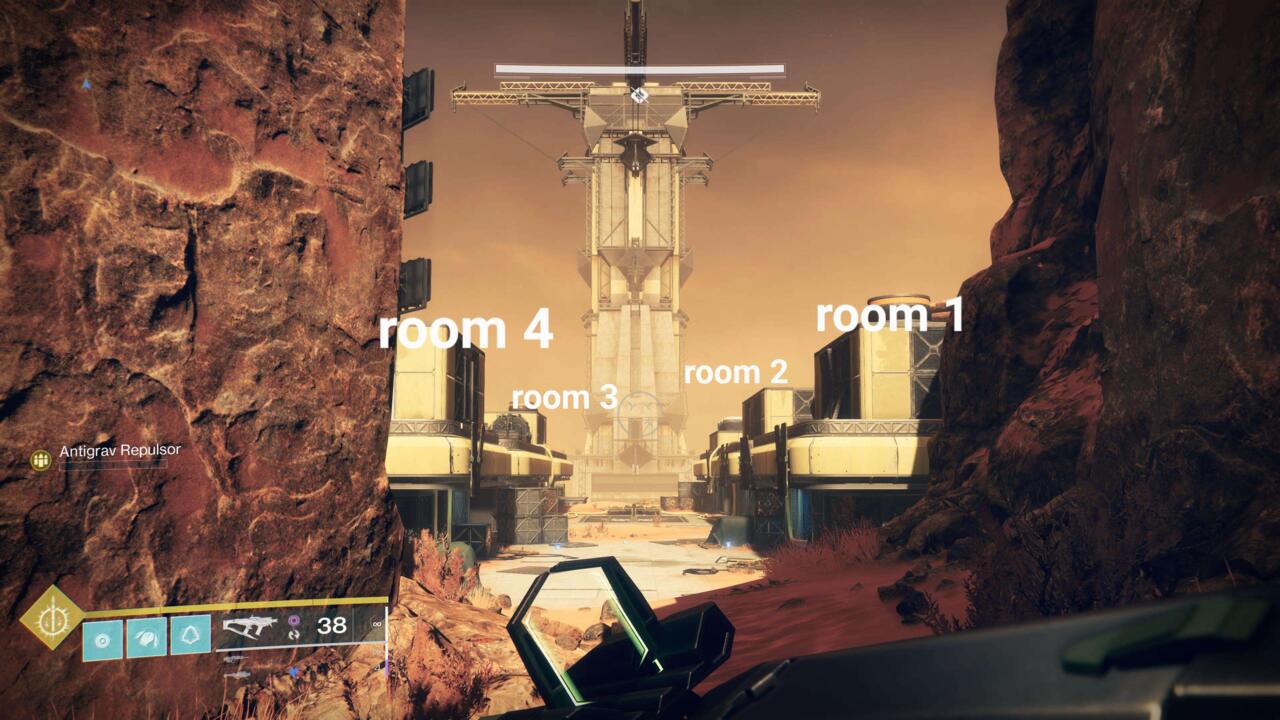
Room 1
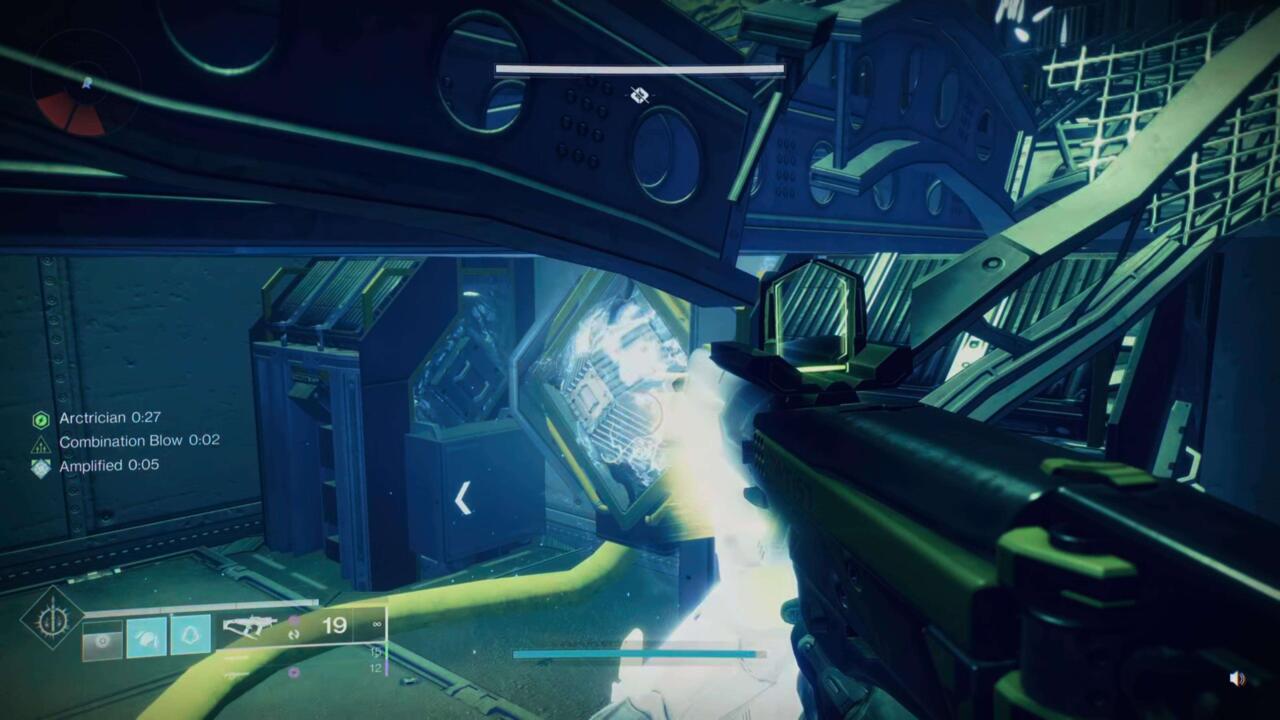
The first room has five nodes, and the last cord connects to the center. When facing the spire, Room 1 is closest to you on the right side. There should be a hole in the floorboards inside the room. Jump down and shoot the diamond shape node to start the mechanic for this room. All you need to do from here is follow the yellow electrical cord to each node and shoot it with the Arctrician buff.
There are three more inside Room 1 and one outside of the room. Go to the center of the area and connect the circuit to the bottom right node.
Room 2
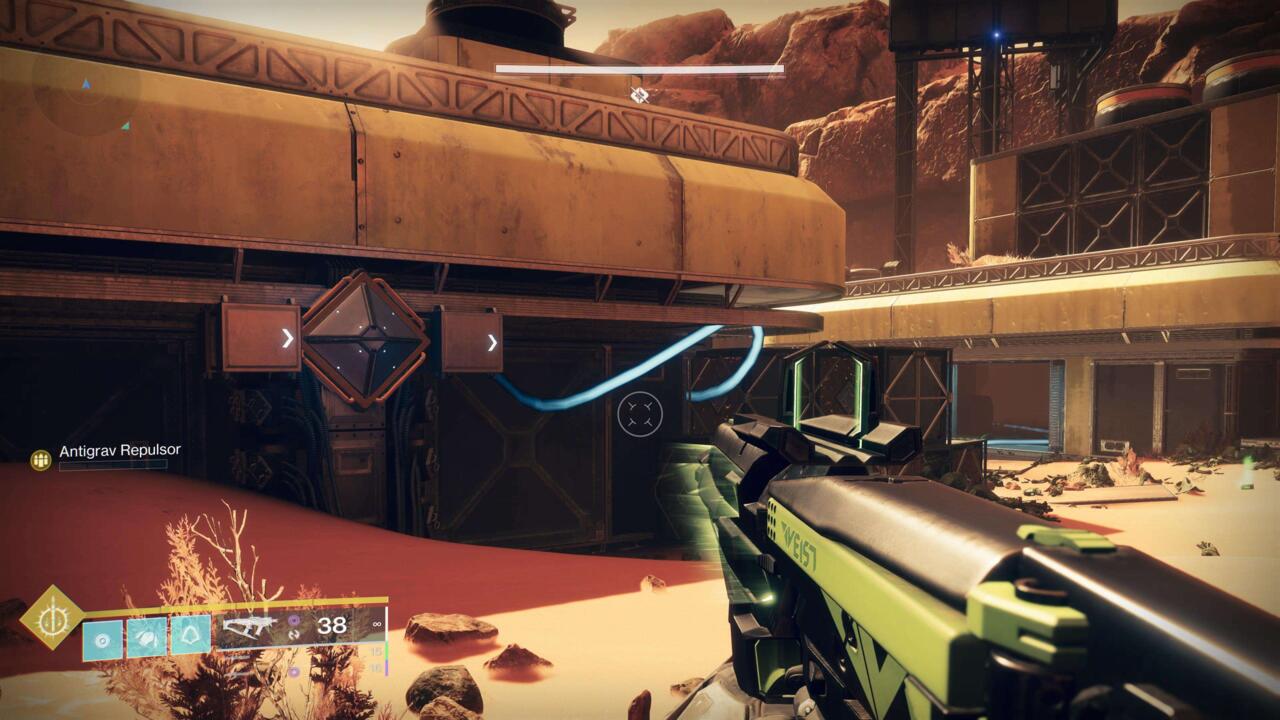
Room 2 is next to Room 1, still on the right side of the map. The first node is in the back of the area, attached to the side of the building. From here, go to the rooftop of Room 1, then follow the cord into a tiny lab on the rooftop of Room 2. Lastly, connect the circuit to the top right node by the door.
Room 3
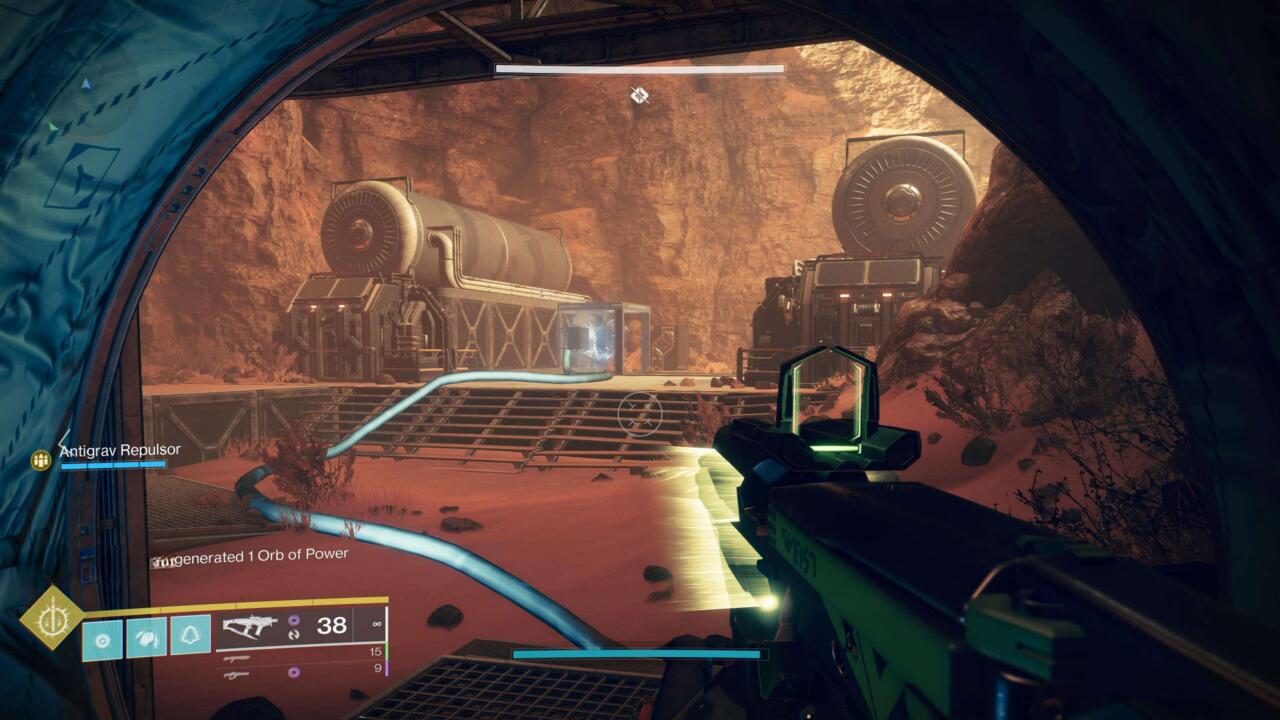
This room is opposite Room 2 and has a tunnel that connects to a large generator. The first node for Room 3 is there. The head back into the room and shoot the one on left, the one outside, and another inside Room 3. Then, at the center, shoot the bottom left node to complete this room's circuit.
Room 4

The starting node is on top of Room 4, inside a much smaller room. Next, exit the room and cross the bridge, the second node should be directly beside you. Jump down, and the third node is directly below the second one. The other two nodes are on Room 3’s rooftop, as well. Finally, with your Arctrician buff, shoot the remaining node at the center to open the spire entrance.
Center Nodes

Reactor Firewall Jumping Puzzle
You're going to come across a lot of locked doors that don't open, demanding you find another way around. Slide down from the entrance, then jump onto the catwalk above and through the yellow-lit vent. You’ll get to a corridor with red and white lights, head down the second red-lit hole to enter the Reactor Firewall. In the room, climb up the catwalk above and make your way to the other side.
Here, Incarcerator Hydras, Goblins, Hobgoblins, and Harpies will spawn; keeping a long-range weapon will be beneficial since distant enemies can become a nuisance. There isn’t anywhere else to go here besides jumping on catwalks and hanging structures, so it’s easy to find your way around. However, when you get to the last bridge, it may seem like a dead end, but there is one more platform behind the large pillar. Drop down and defeat enemies and go up the lift. When thrown into the computer lab room from the lift, head to the other side and climb up the broken lift.
Arriving at Ares Spire, place a Rally Flag. Jump onto the catwalk on the side of the building and make your way up to the first encounter of this dungeon.
First Encounter - Ascend the Spire
Ascend the Spire Part 1

There are plenty of nodes to connect--a repeating mechanic throughout the dungeon. Defeat the lone Conduit Minotaur for the Arctrician buff and begin the mechanic. There are two starting nodes (the starting node always shows a small arrow in the direction of the cord) by the Conduit Minotaur, so you’ll need to connect two separate circuit cords from here to the opposite side--there are six nodes on each side, including the start and end ones. Remember that it only takes a single shot to activate a node, you can sprint through this section--long-range and medium-range weapons work best.
Connecting the nodes here is pretty straightforward since you only need to follow a single cord on separate sides--they don't intertwine. Even in this small area, enemies will spawn, and jumping can become tricky.
After completing the nodes, head up the lift for Part 2.
Ascend the Spire Part 2
More nodes! The staring nodes are inside a small corridor with electrical pulses that deal damage, so avoid the electricity and shoot the starting nodes inside. Similar to Part 1, you only need to follow one cord at a time to the opposite side and complete the circuit. Jump onto the solar panels to access the end nodes. Also, each side will have five nodes.
Head up the lift for Part 3 of Ascend the Spire.
Ascend the Spire Part 3
It’s a bit more complicated this time since the cords do intertwine. This platform is diamond-shaped, which means the starting nodes are at separate points--one starts on the left and the other on the right side, but both circuits end in the same place. Basically, from the starting node, you’re running three-quarters of the way around the structure to get to the end.
You’ll reach a point where two cords intersect, but here’s an easy way to remember where to go:
- From the starting node, if your cord runs at the top, then from the intersection, it will run from the bottom.
- From the starting node, if your cord runs at the bottom, then from the intersection, it will run from the top.

Completing Ascend the Spire will reward you with a chest. The dungeon rewards for this level are the Terminus Horizon machine gun, Long Arm scout rifle, the Seventh Seraph Carbine auto rifle, and the TM-EARP Custom Armor.
Jump up the shaft and onto the catwalk. Open the window and jump to the subsequent encounter.
Silence the Siren Boss Fight
This fight requires you to complete the circuit mechanic. The giant Harpy boss, Goblins, Harpies, and Conduit Minotaurs will spawn throughout the fight. There are four starting nodes at the center of the map. When you get Arctrician from the Minotaur, shoot all four starting nodes to make things easier for you and your teammates. You’ll need to connect four circuits, that, thankfully, don’t overlap.
The map has bridges labeled one through four, and each cord starts at the center and ends at the edge of the bridge by the fuel rod.
Throughout the encounter, Goblins will spawn with the Conduit Minotaurs, and annoyingly, several Harpies will spawn in the air between bridges.
Bridge 1

For Bridge 1, the starting node is in the center. There are two nodes on the lower level of the square platform. Then, one node is on the right side of the bridge, and the next is on the left of the bridge. The last one is by the fuel rod.
Bridge 2

For Bridge 2, the starting node is in the center. There are two nodes on the lower level of the square platform, one node is under the bridge, and the next one is on the right side of the bridge. The last one is by the fuel rod.
Bridge 3

For Bridge 3, the starting node is in the center, but all other nodes are on the bridge. There’s one inside the bridge, then one on top and the next two are facing each other inside the bridge. The last one is by the fuel rod.
Bridge 4
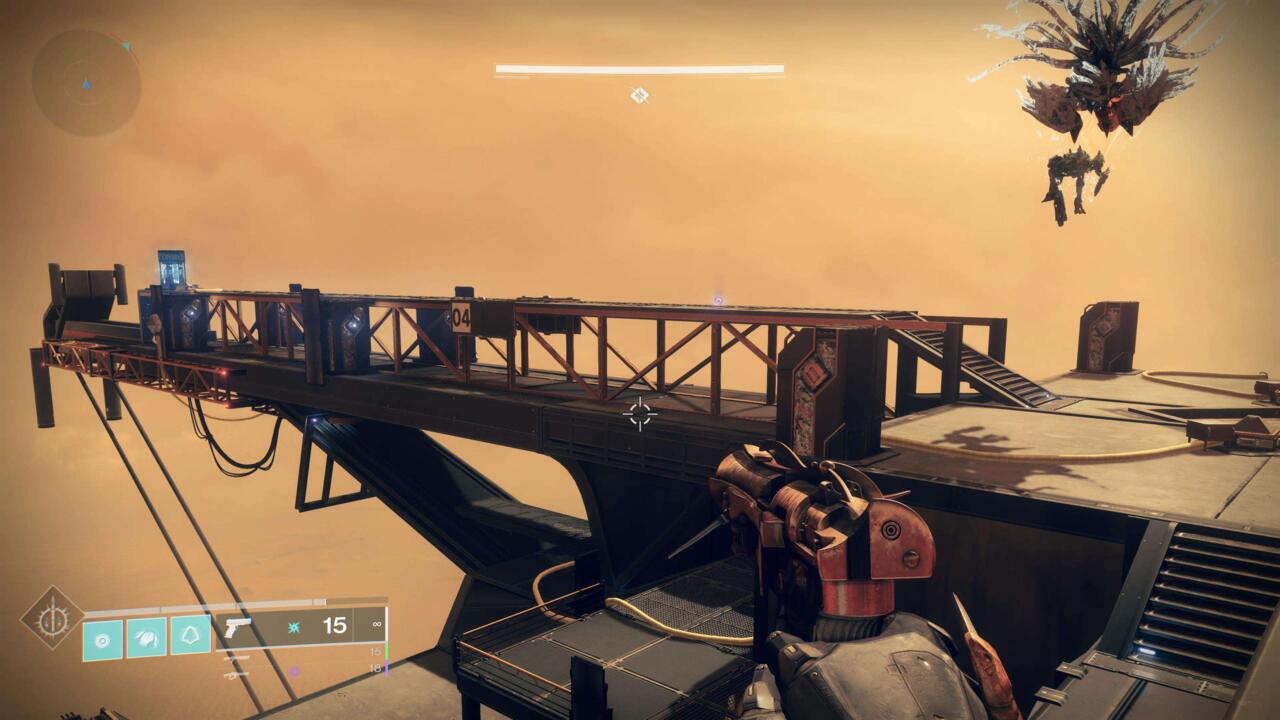
For Bridge 4, the starting node is in the center. There are two nodes on the lower level of the square platform, one node is on the right side of the bridge, and the next is on the left side of the bridge. The last one is by the fuel rod, again.
Connecting all four circuits begins the damage phase on Akelous, The Siren’s Current. The team must gather up at the fuel rod of the last connected circuit for the damage phase. For example, if you last connected the circuit at Bridge 3, the team should meet there. Akelous will come directly to you and open its shell. The shell will have several glowing spots, shoot them all as quickly as you can--preferably with a submachine gun--to remove its shield. After Akelous becomes vulnerable, deal damage to the boss by shooting at its glowy center. Linear fusion rifles work really well here, but you can use a rocket launcher too. The damage goes by quickly, which makes remote Supers, and Well of Radiance efficient.
In each damage phase, Akelous will drift toward the center of the map, so keep your post near the center of the bridge when dealing damage. Warning! When Akelous overcharges its shield and blows you away, jumping can make you lose control and fall. If you’re at the center of the bridge, you’ll get pushed back, but not so far that you’ll fall off. Repeat the steps to defeat Akelous.
Completing this encounter can reward the Terminus Horizon machine gun, the Seventh Seraph Officer Revolver hand cannon, and the TM-EARP Custom Armor. From the center, descend into the Pillory-0 Cell Stack.
Pillory-0 Cell Stack Doors

The cords here are red, which means that these are timed circuits. With the Arctrician buff, shoot the nodes in any order quickly--all five nodes are visible from the bottom floor.

Carefully descend through the fan blades, then shoot the next set of red cord nodes.
Pillory Stack Containment
Drop into the Pillory Stack Containment and defeat enemies. Take down the Incarcerator Hydra, grab the Arctrician buff from the Minotaurs, and shoot the red cord nodes--the room has four walls, each with a node. Avoiding the electric pulses in the center, shoot the final node at the center.
Finally, drop down to the Seraph Reactor Core for the final boss fight.
Persys, Primordial Ruin Final Boss Fight
The boss fight requires red and yellow cord circuits. Also, in such a small space, it's wise to be constantly on the move even if you're not shooting the nodes. Enemies will constantly spawn, making it tough to stand in one place--grenade launchers can help against these groups of enemies. Also, Void damage resistance and Concussive Dampener mods can help with the incoming damage throughout the boss fight.
Here’s how to reach the Persys boss damage phase:
First, you’ll need to take care of the enemies, which include Goblins, exploding Harpies, two Incarcerator Hydras, and the immune boss will be on your tail.
Defeating the Hydras opens the doors to the other side and spawns the Conduit Minotaurs. With Arctrician, shoot the red cord nodes first. There are four on the pillars and one above the big doorway.

Next, find the two yellow nodes that are open. The starting nodes for the yellow cords are behind the pillars with the red cord nodes. Follow each line to complete the circuit in one of the four end nodes inside the Reactor room.

After completing two yellow cord circuits, a message at the bottom left of your screen will say, "Reactor core purge - Armed. Reactor Isolation Chamber Active. Take Cover." When you get this message, an alarm will ring. The alarm signals to head back into the room with the red cords and wait until the red cord nodes open up again.
As soon as the red cord nodes open, shoot them. The message on the bottom left will tell you that Persys is vulnerable. However, if you get a message that says, "Reactor Isolation Chamber Deactivated," the team missed the damage phase opportunity and must redo the steps.
For the damage phase, gather up in the middle of the red cord room to allow for some distance between the team and the boss. The precision damage spot for Persys is the small glowy center, which can be tough to target. You can apply the same weapon and Super damage method from the previous Akelous encounter--especially damage from linear fusion rifles.
In short, the steps are:
- Defeat Hydras
- Get Arctrician from the Conduit Minotaurs
- Connect the red cord nodes quickly
- Connect the two yellow cord nodes
- Run back to the initial room and wait for the red cord nodes to open again
- Re-connect the red cord nodes quickly
- Deal damage at vulnerable Persys
- Repeat the steps
The dungeon rewards for this level are any of the previous level rewards, Liminal Virgil sidearm, Wilderflight grenade launcher, and the Hierarchy of Needs Exotic bow.
If you need more seasonal activities to do after the dungeon, find Resonance Amp chests in Override Frequency puzzles or complete Heist Battlegrounds.
Got a news tip or want to contact us directly? Email news@gamespot.com
Join the conversation