Destiny 2 Lost Lament Exotic Quest Guide - Find Dead Exos And Unlock The Exotic Sword
We've got everything you need to know to earn the new Exotic sword, The Lament, quickly and easily.
Beyond Light brings a new slate of Exotic weapons and armor pieces to Destiny 2, and with the release and defeat of the Deep Stone Crypt raid, most of them are available for you to earn--if you know how. A few of the new Beyond Light Exotics are dependent on random drops, while others, like Salvation's Grip, come from quests, and still others ask you to knock out some prerequisites before their quests become available. One of the best Exotics in the expansion is The Lament, which is basically Destiny's version of a chainsaw sword, but getting it will take some effort. The quest centers around searching for Dead Exos on Europa, completing Exo Challenges, and taking on a number of story quests.
Here's everything you need to know to knock out the Lost Lament Exotic quest and pick up your new sword, while unlocking some of the most interesting lore in the Beyond Light expansion so far.
Step 1: Visit Banshee
The Lost Lament Exotic quest became available alongside Deep Stone Crypt, so you can pick it up from Banshee. He has some interesting lore info to give about how the Crypt is affecting him more than other Exos. To find out more, he sends you to go find dead Exos on Europa.
Step 2: Find Dead Exos
You only need a total of three dead exos to advance the quest, but there are nine to find in total. Discovering them all unlocks more lore and Triumphs for the Europa seal, and they're all pretty simple to track down. Here's a complete list of all the dead exo locations.
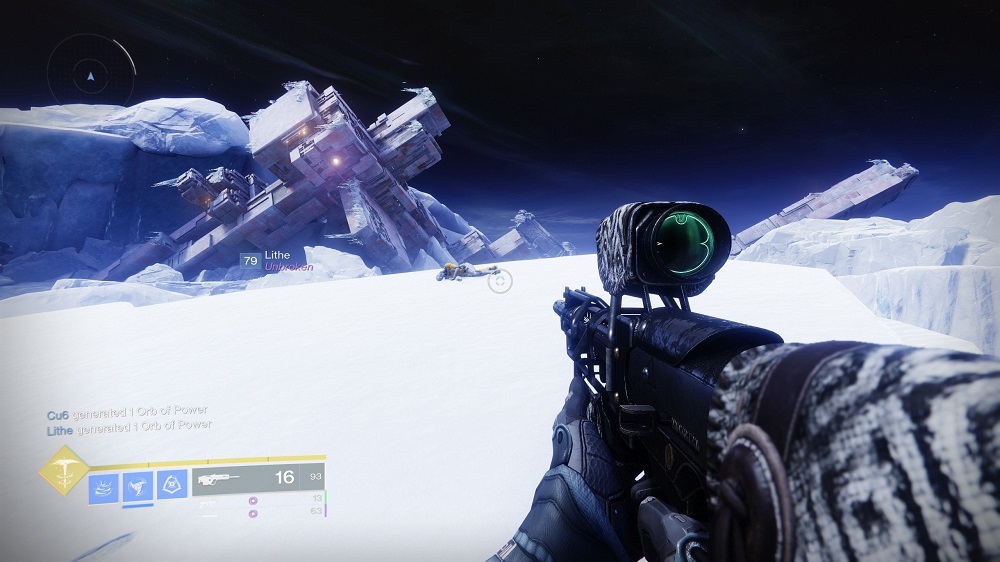
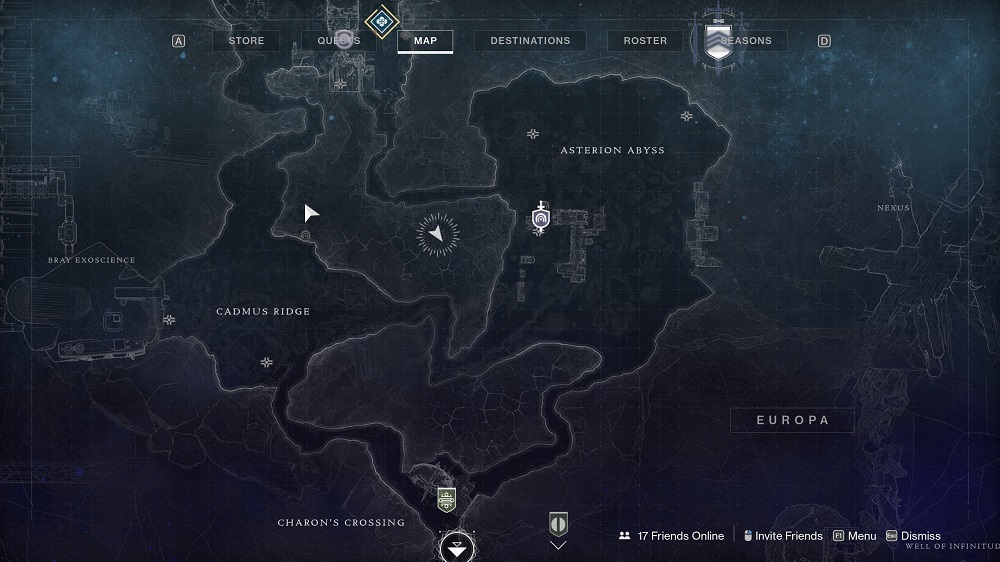
Dead Exo 1: Cadmus Ridge
The first exo is easy to find in the Cadmus Ridge patrol zone, although it's a bit out of the way. Follow the path from Charon Crossing (where Variks hangs out) to Cadmus, then immediately turn left and hop up on the ice platform, where you'll often see Fallen enemies spawn. Keep moving north toward another, taller ice platform. Climb up on it to find a big flat plateau and the dead exo in the snow in the middle.

Dead Exo 2: Perdition Lost Sector
Enter the Lost Sector in Cadmus Ridge, just north of where you found the first exo, and fight all the way through to the boss room. As you enter the boss room (it's the orange one with the four pillars), turn left and check the corner closest to the door to find the body.
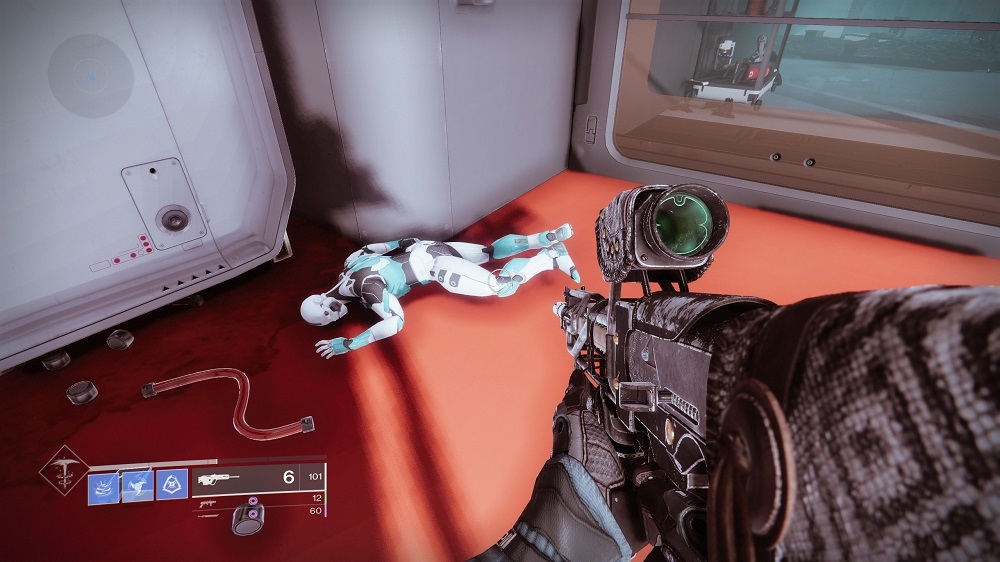
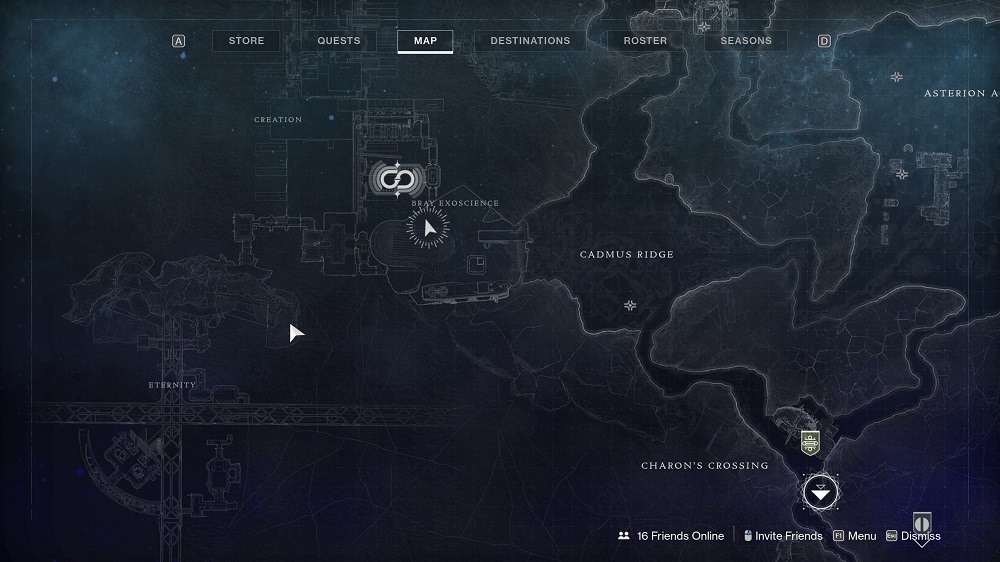
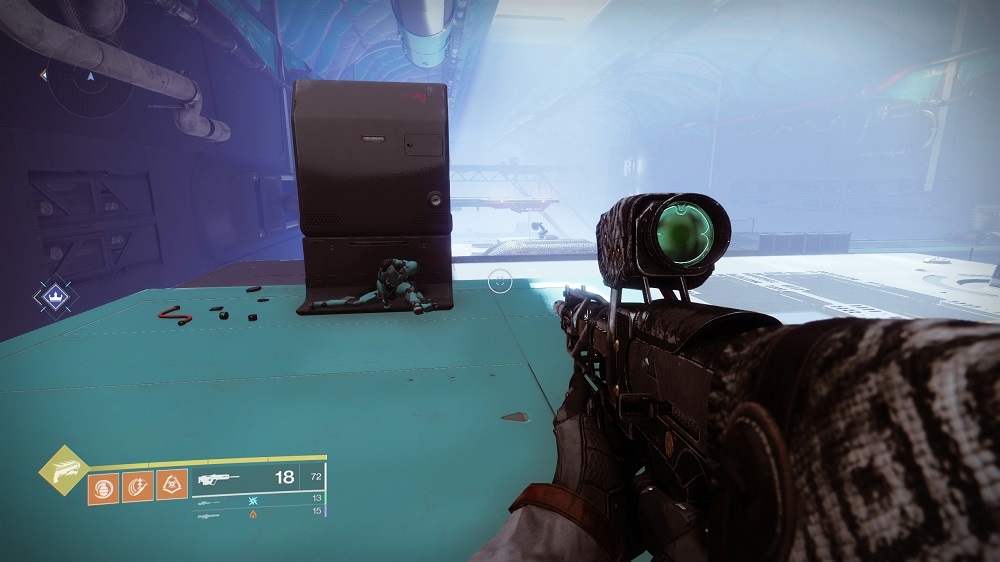
Dead Exo 3: Braytech Exoscience
Head to Braytech next and keep moving until you hit the big room full of Fallen. To the right is a set of stairs that leads to two smaller rooms. The exo you want is in the second one, in the corner on the left side behind some beds with other exo bodies on them. (Once you have three total, you can proceed through the newly opened door in this room to enter the Creation area and advance the quest.)

Dead Exo 4: Creation
Make your way through Creation and proceed until you hit a huge room where you can see walkways far below you. On your left will be glass walls with machinery running. Drop down to the walkway, and then down again through the broken glass floor to the one beneath it, and hop forward onto the next platform. You'll have even more platforms below you, but the dead exo you want is propped up against a crate before you drop down to the lowest level.

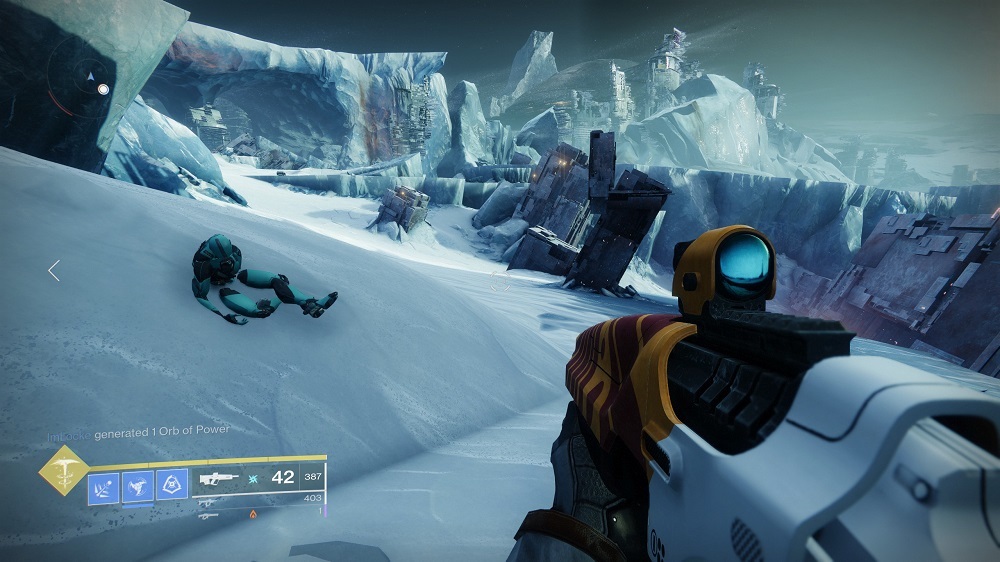
Dead Exo 5: Asterion Abyss
Once you're done in Braytech Exoscience and Creation, head over to Asterion Abyss. Make your way toward the Nexus on the northeast side of the map (the path you take for the Glassway Strike). Just south of the entrance to the Nexus, your next dead exo will be half-buried in a snowbank.

Dead Exo 6: Concealed Void Lost Sector
This is an easy one. Fight your way all the way through the Asterion Abyss Lost Sector and kill the boss. Look just behind and to the right of the boss chest and you'll spot the orange dead exo body lying on the ground.


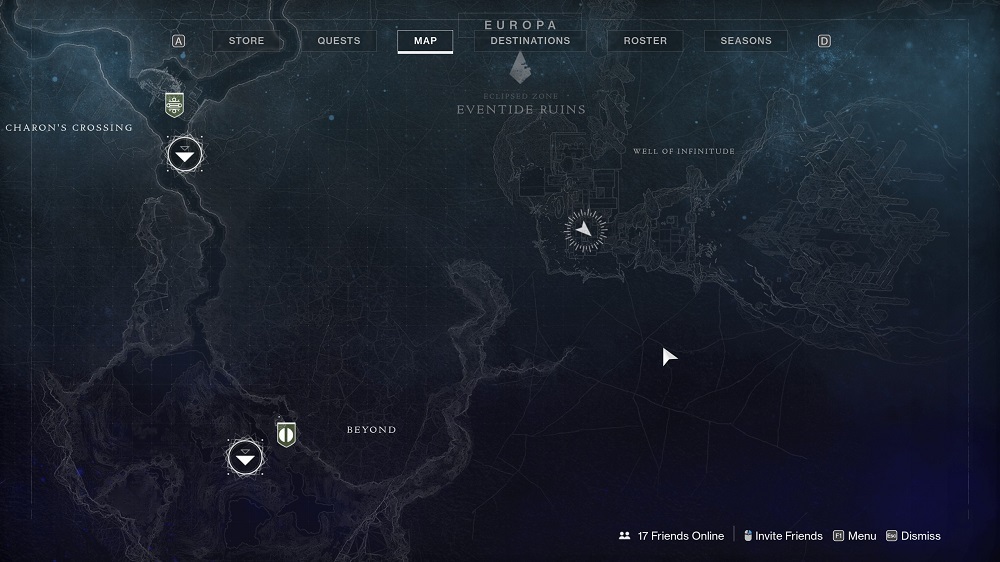
Dead Exo 7: Well Of Infinitude
Enter the pathway to the Nexus and when you hit the junction, follow it to the right (this is the path you take when you're completing the Empire Hunt for The Warrior). Keep moving along the pathway until you hit a large room that's cut in an L-shape, which has a big pool of radiolarian fluid beneath it and usually has a group of Fallen fighting Vex inside. If you check the map, this will be the furthest south the pathway takes you; this is the point where the path forward turns east. At the corner, check the wall for the dead exo tucked among some cubic Vex machinery.
Dead Exo 8: Eventide Ruins
Make your way to the north end of Eventide Ruins, into a destroyed building in the northeast corner of the area. If you've gone into Deep Stone Crypt, you'll know this as its entrance; you'll find two Fallen captains here sporting yellow life bars. Beside the big dome-shaped DSC door, look for the exo propped up against a pillar, next to three identical pieces of machinery.


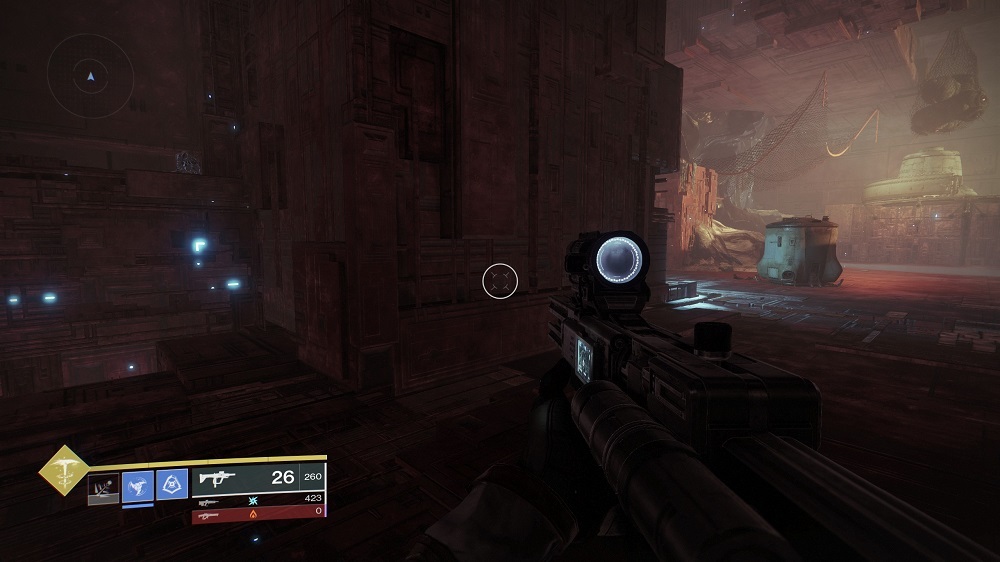
Dead Exo 9: Bunker E15
Enter the Lost Sector in Eventide Ruins and make your way through it about halfway. You're looking for the room full of Vex, where you can free two groups of Braytech security frames from Vex cages. If a Cyclops spawns in, you're in the right place--this is before the main boss room. When facing the Cyclops, check the right side of the room to find a flight of stairs up to a higher catwalk. The exo is beneath the steps.

Step 3: Enter Creation And Talk To The Giant Exo
With three exos found, return to Banshee and he'll direct you into the Creation section of Braytech Exoscience. Make your way to the end of the area, where you'll meet the artificial intelligence in charge of the facility. After a quick but illuminating conversation, you'll get your next step in the quest, which is the grindiest portion. Your objective: Defeat Vex with swords on Europa. Fallen Guillotine is great for this--you need to rack up 100 total Vex sword kills, as well as 20 sword kills against tougher Vex, specifically Minotaurs, Cyclops, and Hydras.
This sounds like a lot, but it goes pretty quickly if you venture to the correct areas. Go either to Asterion Abyss, where a ton of Vex hang around all the time or to the Perdition Lost Sector in Cadmus Ridge, which is also full of Vex. A couple runs of the Lost Sector or a short stint in Asterion Abyss should allow you to rack up enough kills, particularly if you take part in a Vex Public Event in Asterion.
Step 4: Complete An Exo Challenge
Once you've got enough kills, the AI will direct you to try out an Exo Challenge, which is a new Europa activity that became available after the release of the Deep Stone Crypt. You'll find it on the Europa Director map near Braytech Exoscience. These activities seem like they'll rotate weekly, much like the Ascendant Challenges found in the Dreaming City. Load in and clear one to advance--the mission itself is pretty straightforward.
Step 5: Defeat Vex With Finishers
Another grindy part of the quest, you'll need to get back to Europa and wreck a bunch of Vex with Finishers, which is only really difficult because, as you level up, it'll be easy to kill Vex accidentally while you try to whittle down their health. Powerful Vex give you the fastest progress, so while you can repeat the process you did for sword kills and head to Asterion Abyss, the Perdition Lost Sector is a better bet. We completed the step in less than two Lost Sector runs.
Step 6: Complete The Glassway Strike
You now need the pieces of The Lament in order to repair it. You'll find them in The Glassway Strike. Load it from the Europa Director map (it's on the right side) and proceed all the way to the boss room. You should get the blade pieces you need without killing the boss, so once they pop on your screen, you're free to leave the Strike without finishing it--although, that might be a bit rude to your teammates. Once you have the blade pieces, head back to the Tower and talk to Banshee again.
Step 7: Find The Abandoned Bunker In Eventide Ruins
Banshee doesn't know exactly where you need to go next, but he has an idea that what you're looking for is in an "abandoned bunker" in Eventide Ruins. The most obvious bunker in the area is Bunker E15, the local Lost Sector. Head in and clear it out as normal. Once you hit the boss and grab the chest, you'll get a message from the Giant Exo calling for your help against a Vex invasion. This triggers your last big step.
Step 8: Complete The "Reforging The Past" Mission

As soon as you leave Bunker E15, you should find the mission flag that will take you back to Braytech Exoscience to save the Giant Exo from destruction. Like other missions, this one will tell you what's expected of you. It includes a section where you get to run over a bunch of Vex with a tank and will take you all the way back through Creation, so get ready for a big fight.
When you finish the mission, you'll get the reforged Lament blade, although it won't be completely fixed.
Step 9: Return To Banshee And Claim Your Sword
Go back to the Tower and talk to Banshee. That'll wrap up the quest and give you The Lament, as well as a bunch of intriguing lore about Clovis Bray and the ongoing story of Beyond Light. The sword itself is pretty sick: hold the block button when you have it equipped to "rev" it, which will increase its damage significantly. The Lament can also chew through shields and break Barrier Champions with ease. Players have already found The Lament is pretty useful in the Deep Stone Crypt raid, so if you're making completing the new endgame content a priority, this is a good weapon to pick up.
Destiny 2 News And Guides
- Destiny 2 King's Fall Raid Guide: How To Beat Every Encounter And Open Every Secret Chest
- Five Years Of Destiny 2's Dramatic, Transformational Changes
- Destiny 2: Season Of Plunder Guides, Season Pass Gear, Exotics
- + Show More Destiny 2 News And Guides Links (2)
- Destiny 2 Season Of Plunder: Seasonal Challenges Guide Week 10
- How To Get Map Fragments, Treasure Coordinates, And Maps In Destiny 2: Season Of Plunder
Got a news tip or want to contact us directly? Email news@gamespot.com
Join the conversation