Dead Space Walkthrough
Scared? We'll hold your hand and walk you through the bowels of Dead Space with our complete walkthrough.
What was that sound? Did that shadow just move? Why is there a monster-shaped hole in that wall?
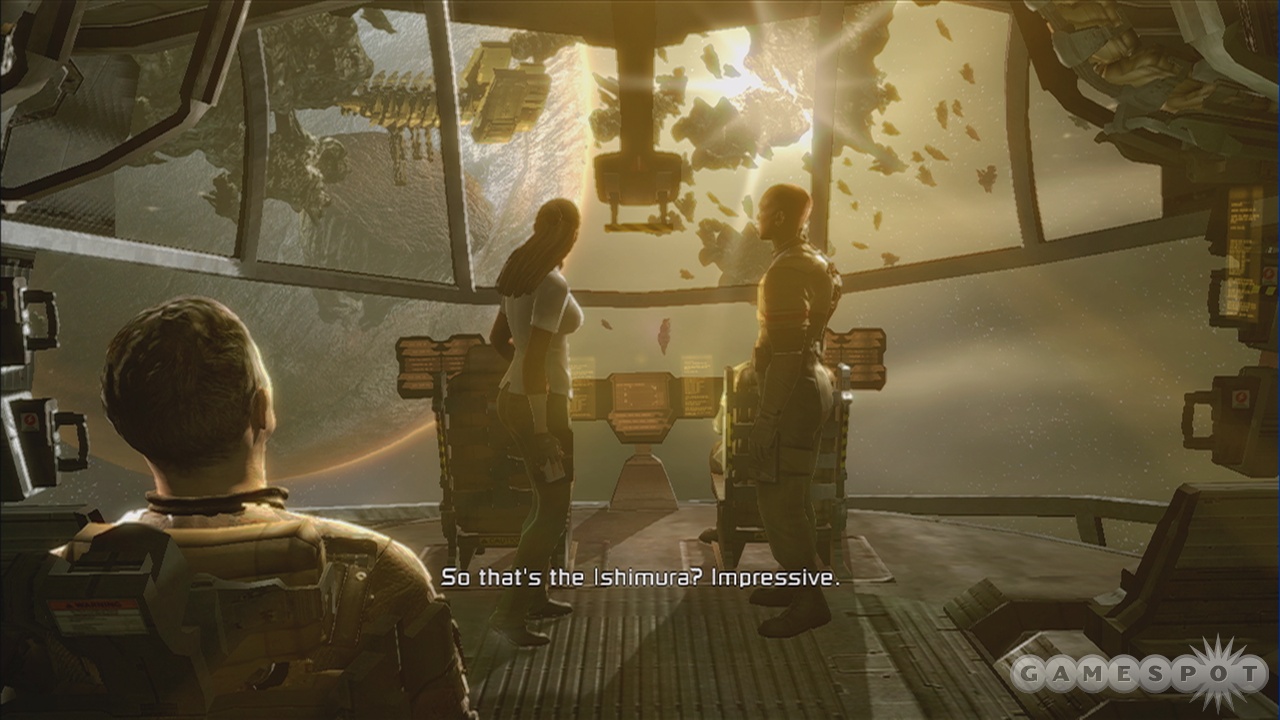
Welcome to Dead Space. You'll find yourself asking these very questions as you explore the derelict mining ship, Ishimura. Well, we should say "mostly derelict." For you see, while you may be the only living human left on the ship, you're not exactly alone…
If you hate being caught by surprise, or simply aren't sure how to tackle the enemies in a given room, our walkthrough will give you the information you need to forge through. But remember this: In Dead Space, no one can hear you scream.
Here's what you'll find in GameSpot's Dead Space guide:
- General Tips: Get the lowdown on the basics of Dead Space.
- Walkthrough: Our complete walkthrough will prepare you for each and every enemy encounter.
- Achievements: Not sure how to unlock some achievements? This here is for you!
General Tips
Battling aliens is nothing new to most gamers, but the ones in Dead Space are—how should we put this—a bit different.
The Aliens
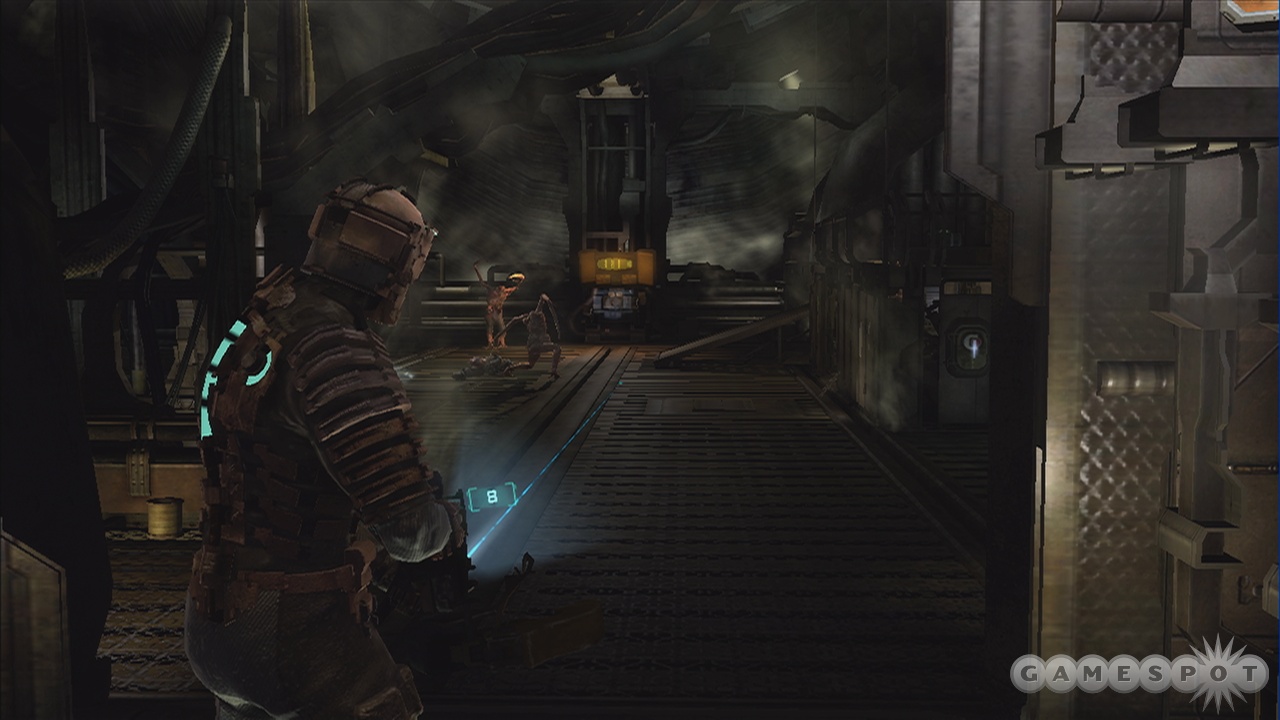
Dead Space's aliens like to hide and pop out at the most inopportune times, whether it be from a vent or around a corner. As such, you should be prepared for them to appear at any moment—always, always have your gun at the ready. Thankfully, their appearances are often based on some kind of trigger, such as entering a new room or activating a switch or grabbing an item, so be prepared anytime you perform one of these actions.
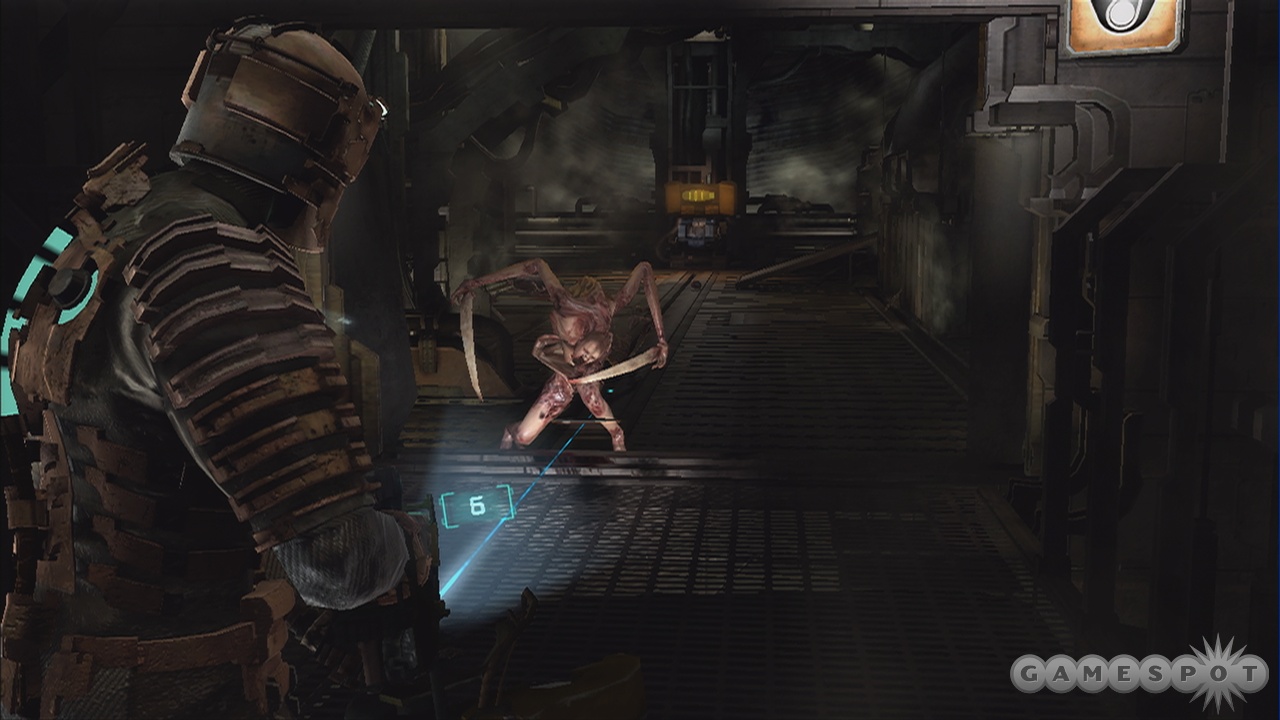
Oh, and forget what you know about most first-person shooters, as aiming for the head won't work here. Instead, you want to aim for the limbs (arms, legs, tentacles) as these are the aliens' main weakness. In fact, most enemies will perish immediately if you can manage to destroy all their limbs—just be quick, otherwise they may respawn! In addition, you can slow most bipedal enemies down by aiming for their legs—it may not stop them, but it'll buy you more time to target the rest of their body.
Weapons aside, you have two other tools that can be used against these guys: Stasis and Kinesis. Stasis's effectiveness, when used offensively, can not be overstated. If blasted at an enemy (or even a group of them), they'll slow to a crawl, allowing you to either focus your attention to enemies elsewhere or selectively dismember the poor sod. As for Kinesis, while its primary usage is for solving puzzles, it can also be used to hurl objects at enemies, including their very own dismembered limbs! Make sure to keep an out for the explosive canisters scattered throughout the complex, as they're quite effective at killing foes.
Weapons
Dead Space has several weapons at your disposal and each has its own advantages and disadvantages. However, you can only carry four at a time, so you'll have to choose wisely. For what it's worth, we found the Plasma Cutter, Ripper, Line Gun, and Contact Beam to be our preferred setup. Here's some more information about each one:
Plasma Cutter
The Plasma Cutter is the first weapon you'll acquire, and arguably, the most important one you'll have throughout the game. It's deadly accurate and is quite powerful to boot—perfect for chopping limbs. Its secondary function rotates the gun 90 degrees, so instead of firing horizontally, it shoots vertical. Although seemingly insignificant, changing its orientation vertically can be quite helpful for targeting some enemies, such as the annoying headcrabs who like to scamper along walls. In addition, this gun has a large clip, and thus is important to hold on to in this ammo-sparse world.
Line Gun
The Line Gun is essentially a wider and more powerful version of the Plasma Cutter; however, it's limited by its clip size, which is why you should only pull it out when you feel threatened by groups of enemies. Because of its wide-spread, the Line Gun is ideal for dismembering groups of enemies—aim for the legs to slow them down! Also, its secondary weapon fires a timed mine, which is perfect for taking down the wall-enemies.
Ripper
Now this is what we're talking about. The Ripper fires a saw blade in front of you, then hovers in place while you move it around freely, ripping through anything in its path. It has a decent reach and an insane duration, allowing you to quickly dismember almost any alien. In fact, we suggest making this your primary weapon, as running out of ammo is rarely a problem.
Contact Beam
The Contact Beam is, bar none, the most powerful weapon in the game. However, its effectiveness is somewhat tempered by it having to charge before firing a shot. It's quite handy for boss battles and slow moving creatures, otherwise keep it on the backburner unless you run low on ammo.
Flamethrower
The flamethrower is a close-range weapon that can quickly engulf a group of enemies in flames, but is ineffectual at dismembering them. We don't really recommend using it, though it can be handy for swarms of those little insect-like aliens.
Force Gun
Think of the Force Gun as like a Shotgun; it's only effective at close-range, and as such, isn't one of our preferred weapons (seriously—who wants to get close to these monsters?). It can be handy for taking down limbs (again, at close range), and its secondary grenade functionality can be useful in group situations, but otherwise, we suggest finding a different weapon to keep in your inventory.
Pulse Rifle
We'll be straight up with you—this weapon sucks. Although it has a large clip, it's weak and you'll find yourself running out of ammo all the time. Its secondary is also a colossal waste of bullets and is only useful if you're somehow being attacked from all directions—in which case, you're probably a lost cause to begin with. Avoid this weapon at all costs.
Upgrades
If you take the time to explore the ship, you may just come across objects known as "Power Nodes." You can use these to power up your weapons and special abilities, such as Stasis/Kinesis (plus your air supply) at any of the "Bench" stations scattered around the ship.So what exactly do these upgrades net you? Upgrading Stasis improves its capacity and duration increases, while powering up Kinesis extends its range. And improving your Air Supply allows you to withstand non-pressurized rooms for increased amounts of time. As for weapons, they can all be improved in one of several ways, such as Strength, Capacity, Reload Speed, and others depending on the weapon.
With so many decisions to make, it can be difficult to figure out what you should focus on improving. First, upgrading air by any more than one-slot is a waste of time. Since there's generally a checkpoint prior to any air-less environments, you shouldn't have any trouble getting through those sections. You should primarily focus on improving your Stasis's capacity and duration, and your weapon's capacity and strength (ignore Reload speed—it's quite unnecessary).
Oh, and when it comes to buying items, always purchase the next suit upgrade as soon as you can. The increased defense and added inventory slots is always worth it.
Walkthrough
Chapter 1: New Arrivals
Objective: Follow the Security Team
After the ship crash lands on the mining rig, take a few moments to get used to the controls—you'll be glad you did when you encounter the aliens. Before exiting the ship, check a room on the left side for an item, then regroup with your team outside.
Objective: Open the Hangar Door
After meeting with the team, open the door ahead by tapping the "Action" button.
Objective: Activate the Security Console
Check the cubbyholes on the left for an item, then continue through the door on the opposite side (just right of a Save Station) to enter a small room. Activate the security console at the end, which quarantines the area—that doesn't sound good, especially since you're completely unarmed and defenseless.
After the alien drops into the main room, get ready to run like the dickens out the door on the right as soon as it unlocks! Dash through the hall until you reach the elevator, which you can activate via the console—be aware, you will likely take damage from the attacking enemies, just keep on the move to minimize the amount.
Objective: Get to Safety
After the elevator ride, grab the Plasma Cutter off a table to the left to obtain your first weapon!
With your weapon in hand, use a melee attack on the generator to the right of the locked door to open the way. But get ready to blast your first real enemy—remember, target the limbs (you may also want to back away from the door to give you more room)! Continue through the door at the end of the hall.
Turn left to find an item at the dead end, then head the opposite way and look for a few more before continuing through the door.
Objective: Replace the Damaged Tram
After the brief rendezvous with your team, check the cupboard on the right for an item, then continue out the other door into the Cargo Walkway. Turn right and go through the door, then down the ramp, which leads to the Tram Tunnel.
Inside the Tram Tunnel, look for an item along the left barricade, then continue to the malfunctioning door. Pick up the Stasis Module from just in front of it, then try it out on the door to slow it down (aim, then press the stasis button), giving you enough time to run through unharmed!
Go up the incline, collect another item at the top, then save your game at the station just ahead. Ignore the dimming lights (don't worry, no enemies will attack) and check out the two bathrooms on the right for a some goodies, then head into the Tram Repair Room at the far end of the hall.
In order to repair the tram, you're going to have to grasp it with two mechanical arms, one of which is malfunctioning. Activate the first terminal to extend arm #1 to the train car. Now follow the walkway to the other side, but get ready for an alien to pop out of the ventilation cover as you descend the ramp—try using Stasis, since there's a recharge kit nearby, by the main terminal. Open the cupboard right next to where he busted out from for an item, but immediately back away as this triggers a second alien to emerge from the adjacent ventilation cover. Look for an item and an Audio Log just beyond. Now, activate the second terminal, but then immediately fire a Stasis at arm #2 before it completely extends. Now quickly run up the ramp and activate the main terminal while both arms are latched on.
Objective: Find the Data Board
Great, the tram is on its way to be repaired, but get ready to tackle another enemy who's about to run in through the door you entered through—make sure to replenish your Stasis Energy via the recharge station on the wall. Now it's time to backtrack to the room where you could see your teammates through the window.
Along the way, prepare to tackle a couple of aliens that pop out of some manholes in the Tram Tunnel, then continue through the Cargo Hallway. As you turn one of the corners, what appeared to be a corpse will spring to life! Quickly back away for some room and shoot him as he approaches. Save at the Save Station where the corpse was, grab an item on the right, then an Audio Log ahead—finally, ride the lift leading to the maintenance bay.
Objective: Find the Maintenance Bay Key
Ugh—as soon as you step off this lift, get ready for three aliens to attack: One ahead, and two from the right. We strongly suggest using Stasis on the enemy ahead first, then immediately target the remaining two running your way. Head right along the walkway to an elevator leading to Crane Control (there's an item in front of it, too), but prepare for an enemy to pop out behind you shortly after turning the first corner.
After riding the elevator, you'll spot a corpse dead-ahead (sorry)—get ready for it to spring to life as you close in—try ducking into the extension on the left to shoot at it without being as vulnerable. Also, look for an item in a cupboard to the left. Now cross the walkway to find the Maintenance Bay Key, a Text Log, and another item. With everything collected, ride the elevator back down, but prepare for an enemy to drop-down on the right, before boarding.
Oh yeah—when riding the elevator, ready your firearm, as an alien's gonna charge your way as soon as those doors open. Proceed right around the walkway and use the Storage Key to open the door leading into the Bay Office.
Inside the Bay Office, check the room for a few items, including a Power Node inside a cabinet, then snatch the Data Board from off the table.
Objective: Install the Data Board
As you exit the room, two enemies will attack, one from ahead, the other on the right—tackle the one in front first, then turn around for the second. Continue right around the walkway, but prepare for another corpse to spring to life just before the lift leading to the Cargo Hallway. Speaking of which, when onboard the lift, ready up for an enemy to charge once those doors open. Follow the hall back into the Tram Control Room.
Objective: Call the Tram
Great, you can see your friends again! Use the Data Board on the control panel on the other side, then interact with the central terminal to call the tram. Now go through the door leading to the Flight Lounge and follow the corridors he cargo lift.
Objective: Return to the Kellion and Run Diagnostics
After riding the lift, you'll spot an alien dart down the hall. You don't have much time to do anything, so follow him around a couple corners—when you see him for the third time, try and take him down before he enters the vent. Oh, and get ready for a second alien to appear behind you too—fun, eh? Now enter the Flight Lounge through the door.
Continue through the Flight Lounge into the Hangar. Be careful: there's an enemy hanging out just above the other side of opening leading onto the walkway—step through it for just a moment, then duck back inside to cause him to drop down on the far side, giving you plenty of time to shoot him. Once done, follow the walkway and enter your ship. Now you'll have to activate the panel in the cockpit, which causes your ship to catch on fire for some reason—escape ASAP!
Objective: Go to the Medical Deck
Your troubles aren't over yet as four aliens are coming your way (all from the front).Try delaying them by using Stasis, or shooting them in the legs. Once they're down, backtrack to the lounge and continue through the left door. In the hall, open the storage units on the left for some items, then bathrooms on the right for another, before boarding the lift ahead leading down to the Tram Station.
As you get off the lift, stop by the store on the right and check out their goods (we tend to buy the Level 2 suit, but it's up to you). There is also a bench on the opposite side, if you feel like upgrading anything. Now hop onto the train car to complete the chapter.
Chapter 2: Intensive Care
Objective: Go to the Medical Deck
As you disembark the train, you'll hear the whispers of a female survivor…who clearly isn't all there. However, before her parting breath, she'll gift the Kinesis Module—an anti-gravity device that enables you to pick up and movie objects (like in Half-Life 2…or any FPS since, really). Use it to move the large boxes obstructing the hallway so you can continue into the Security Station. But make sure to seek out the item in the waiting room, before leaving. Oh, and make sure to grab the Flamethrower Schematic on the right side of the hall, allowing you to then purchase that weapon from the store (although you really shouldn't waste your money on it).
Objective: Find the Thermite
After your commander radios in, you'll be tasked with finding Thermite and a Shock Pad-all in due time. Head toward the door leading to the Research Wing, and look for an item on the ground and save at the nearby Save Point.
At the end of the hall is another one of those darn malfunctioning doors—restore your Stasis at the nearby charging station, then use it on the door and dash through into the Main Lab. Check the cabinet on the left for some Plasma Energy, and some more just behind the desk. Now you need to work your way to a lift on the opposite side, but as you step a few feet into the room several enemies will attack from either side—use Stasis to try and stall at least two at a time and focus on the others. Once they're down, peek over the balcony to see if you can find anymore wandering below and kill them from here, before riding the lift.
After riding the lift, make sure everything is dead, then look for a Stasis Recharger along one of the columns. As you explore, get ready for several more aliens to emerge from seemingly out of nowhere. If you can, try to hightail it back up the lift then run to the entrance for a good place to take these guys on from—remember to use Stasis! You'll know the room is cleared when the lights come back on.
Once on the lower floor, explore the bathrooms in the back for a pair of items and an Audio Log. Now enter the room to the right of the lift to find a couple of items in the lockers, then finally go through the door adjacent to the lift, leading toward the Bio Lab. Scope the cabinets for two more items and continue onward to the Bio Lab.
Upon entering the Bio Lab, you'll spot a poor soul being maimed through the glass—there's nothing you can do. Grab the item from the right corner, then continue through the door on the left, leading to the other side of the glass (you may have to wait a few moments for it to unlock). Enter slowly and prepare for that gnarly creature to emerge from around the left corner ahead (we found a Stasis plus a few stomps to the head worked wonders). Now look for another item in the right corner before riding the lift on the left.
After the lit carries you up a floor, pull out your gun, strafe to the right and wait for another one of those little suckers to roam out. Afterward, another will burst from the shelves on the right—if you run up, you can stomp him to death. Look for an item behind the test tubes on the left, then continue through the door ahead, leading back to the Main Lab.
Back in the Lab, grab the Thermite from the desk ahead, then some items on the left and right sides, and finally check the cabinet right of the door for a Power Node. Now exit the room.
Objective: Find the Shock Pad
Continue through the door ahead, then use Stasis on the malfunctioning one to slip past. Now just around the corner are two enemies coming your way down the ramp—look for them quickly, so you have some distance between them.
Inside the Security Station, you'll find a Save Station to the right and a Store on the opposite side. Also, look out for an item in a locker, and another near the door you entered from. Now proceed through the Imaging Diagnostics Wing door. After the hall, look for a Stasis Recharger and Plasma Energy on the right, then continue through the door leading into Imaging Diagnostics.
In the Imaging Diagnostics room, you'll spot an enemy scurrying around in the distance—you'll be dealing with him soon enough. For now, grab a Text Log ahead, then enter the locked room on the left by interacting with the panel to find several items including an Audio Log and a Gold Semiconductor. Back in the main room, follow the walkway to the tube-thing blocking the path—grab it using Kinesis and push it out of the way. Now wait here, as two aliens are about to attack: one from the left and another will climb down the wall ahead. Afterward, head into the small room around the corner to find an item a Schematic and a Power Node in the cabinet—but get ready for an alien to drop down to your left as soon as you grab it.
Once you've collected everything, you'll find the lift in the corner is turned off, because the power cell has been disconnected. Look for it on the ground (the glowing green thing), grab it using Kinesis, then plop it into the electrical outlet, just right of the lift. If it's properly connected, the power will be restored, allowing you to ride the lift up a floor. Follow the walkway to the gap—use Kinesis to grab a platform hanging from a track to the left and drag it over, creating a bridge—but be prepared for an enemy to scamper toward you right after (from ahead). Prepare for another alien to attack as you turn the corner (there's also a Stasis Recharge station there), then approach the gap and drag the same platform over again so you can cross and continue up to a Save Point, near the locked door. To get through, destroy the power-unit on the right with a melee attack.
After a short hall, you'll be exposed to an oxygen less walkway. The timer on your back displays how much time you have left before you suffocate, so although this is a short walkway, you can't afford to dilly-dally. The path is pretty straight-forward, but check inside the lockers along the way for an Air Can, 1,000 Credits, and Ammo. Continue though a couple of door at the end to escape the airless environment…and enter a gravity-less one!
Interact with the panel to disable gravity, then look across the gap and zero-G jump across to the wall just above the door (to perform a Zero-G jump, simply aim where you want to leap, then tap the 'jump/inventory' button). From here, aim for the platform just in front of the door to land on it. Good! Unfortunately, the door is lacking power, but there just so happens to be a power cell floating nearby, on the left! Grab it with Kinesis and insert it into the outlet, then head inside to find the Shock Pad on the table. Explore the rest of the room to find three credit stashes, giving you 3,300 Credits total!
Objective: Destroy the Barricade
Be careful as you exit the room back into the anti-gravity chamber, as two aliens are about to come flying your way. We suggest waiting in this room and blasting them from here, though if you have trouble targeting them, quickly launch yourself across the hall to the other door and blast them from there. Now exit the room and work your way back across the airless hallway, but get ready to encounter an alien along the way, as well as another in the hall just before reaching the Imaging Diagnostics room.
Back in the Imaging Diagnostics room, move the platform again to cross the gaps back to the lift—but watch out for an enemy who leaps from the wall as you approach, then look for another one below before you ride the lift down. Continue to backtrack through the far door into the hall, but take it easy! Around that corner is a small horde of tiny little creatures who can quickly overtake you (if they jump on you, rapidly tap the Action button to knock them off). Your best bet is to hang by the entrance and shoot them as they come through the doorway (the Pulse Rifle is ideal).
Now carry on to the Security Station and plant the bomb you've created on the debris to clear the way.
Objective: Retrieve the Captain's Rig
Go through the door, leading to the Shimura Clinic (don't worry, there's no enemies in the first hall). After the hall, continue through the first room into the Emergency Room. Stay by the door so you can shoot two of the little head-crabs running around. Afterward, follow the right wall to find two Ammo containers and 1,000 Credits. The door you need to go through is again missing a power cell—look for it along the right wall.
As you enter the ER Hallway A, prepare for another headcrab, and two more large aliens to come running from around the corner as you approach. Continue through the door leading into the next room (ignore exploring the rest of ER Hallway B for now). Don't worry about the female doctor, her time's just about up. Look for a Text Log on the left, then look for a Save Station just before the door leading to the Morgue. Grab the Audio Log on the right side of the hall, then get ready to tackle a head-crab at the corner. Catch a ride on the elevator at the end up to the morgue.
Objective: Kill the Captain
As you enter the morgue, a new type of alien will appear inside the glass-room ahead. This pink-fleshy thing is able to bring corpses back to life, starting with the captain's body in that room, which means you now have two aliens to deal with (and potentially more, if you don't kill the fleshy thing quick!). Wait for the aliens to bust through the glass, then nail both of them with Stasis, giving you the chance to take them down! Oh, and try to stay away from the fleshy one, as he'll try and suck on your face, too—rapidly tap the "Action" button to throw him off.
Objective: Go to Engineering
With the Captain killed, grab the Rig he leaves behind, then explore the rest of the room to find some items and a Power Node in the room where the aliens escaped from. You'll also find a Text Log along the wall in the main room. Now ride the lift in the corner up to the next room. Once there, check out the lockers in the small sub-room to find two items.
As you go through the door leading back to the Security Station, get ready for an alien to charge at you. Now go through the larges doors and head through the Security Station back to the Tram Station, and catch a ride on the train to complete the level.
Chapter 3: Course Correction
Objective: Re-Fuel the Engine
After departing the tram, check the area for two items, then go down the hall toward the control room. Look for a Save Station and store on the wall, and several items scattered about. Now exit into the Machine Shop.
At the bottom of the ramp in the Machine Room, get ready for the corpse around the corner to spring to life. Once he's dead (again), head into the room on the left to a couple items in a locker, then a Fuel Flame Schematic on the table. Now follow the walkway and look for a Text Log on the right, next to the Bench Station. Go through the door into the Refueling Control Stations.
As you enter the Refueling Control Stations, you'll spy a creature roaming on the underside of the walkway—you'll be seeing him again soon. Follow the walkway to the left and enter a small room to find an item—as you pass through a doorway, prepare for an enemy to drop in from the ceiling right in front of you. Just beyond check inside a cupboard for another item and carry onto a platform on the right, containing a switch. Grab it with Kinesis and pull it down to activate the first pump.
After activating the first pump, go down the ramp to find a deactivated Gondola on the left. Pull it to you with Kinesis, then hop aboard and get it moving with the onboard panel. As it approaches the other side, a small army of fiends will drop in—awesome. Shoot them as much as you can from here (since they can't reach you…yet), but make sure you reload before it docks so you're not left vulnerable. We also suggest unleashing a Stasis to stall the grouped foes just before you arrive.
Afterward, follow the walkway to a room on the left where you'll find several items, including a Power Node in a cabinet and Audio Log. Climb the ramp and get ready for two aliens to pop around the far corner, so don't get too close. Look for a couple items in the corner opposite of where you entered. Continue downstairs to a Save Point, grab the Ripper Schematic in the corner, then pull down the second pump switch ahead (on the circular platform) using Kinesis to complete your first objective.
Objective: Activate the Centrifuge
With the Engine Refueled, you're going to have to work your way all the way back to Control Room…but of course it won't be easy. As you re-enter the first hall, prepare for three head-crabs to waltz on out. Afterward, make way to the Gondola and ride it across. As you climb the nearby ramp afterward, prepare for an alien to climb out from underneath the walkway, as well as several of those tiny ones—use the Pulse Rifle on them. Look for a an item in the corner at the top, then go through the door.
Back in the control room, you'll spot one of those annoying fleshy zombie-creating aliens roaming around on the other side of the glass. Ready your weapon and take him down as you go through the door. Continue onto a lift on the right, leading to the Centrifuge, but don't forget to open the locker just before for an item.
After stepping off the lift, check all over the hallway for a ton of items, including an Audio Log. You'll also find a bench on the far side. When you're ready, step into the central room and activate the terminal to cause the room to go into lockdown. Now put your back against the wall (facing the terminal) and wait patiently for three aliens to pop in—the first on the left, second on the right, and the third from the left vent (all three appear near the back). There should be just enough time between each one's appearance to tackle each one without worrying about the others barging in. Now exit through the far door, then open a locker on the right for an item before continuing through the door.
Turn left down the hall first to find an item and a Power Node at the dead-end, then head in the opposite direction. Keep an eye out for a Gold Semiconductor in a hole in the wall, then continue through the door leading to Centrifuge Access. Look for a Save Station on the right, and an item on the ground just after, then proceed through the door into the Centrifuge.
Inside the Zero-G Centrifuge, keep an eye out for a couple of enemies roaming around, then jump to the bottom floor, where you'll find two Generator Modules on either side of the generator itself. You'll first have to blast them with Stasis to slow down their rotation, then use Kinesis and drag it until it locks into the generator—do the same for the second. But get ready for an alien to pop out just after connecting each one. With the Generator ready to go, jump to a walkway above and activate the terminal to activate the centrifuge.
Objective: Manually Ignite the Engine
Unfortunately, an airlock will open, leaving you with nothing to breath! Turn around and go down the elevator, to find a circular walkway. However, the giant spinning machinery periodically swings along the walkway, destroying anything in its path, meaning you're going to have to run from one alcove to the next and wait until its safe. Start off by going counter-clockwise, but get ready for an alien to drop down in the first alcove—ignore him and keep on running when it's safe and let the machinery take him out. The second alcove contains an Air Station, so stock up and continue onward. Prepare to shoot one an alien ahead, then ride an elevator in the fourth alcove up a floor and hurry through the airlock!
Phew—you made it back! Save at the Save Station and continue through the door…uh-oh, didn't see that coming, did you? After being grabbed by the tentacle, aim your weapon at the large yellow joint before it drags you away. After he drops you, continue your way back through the decontamination room onto the Cargo Lift, but prepare for an alien to attack as you exit the decontamination room.
After returning to the Control Room, you may want to consider stocking up on health/ammo as a pretty epic battle is coming up soon. Now proceed through a couple of airlocks to exit the spaceship. Look for an item on the right, then leap to a walkway above, straight-ahead. Now leap back to the other half of the ship, by the circular tunnel leading to the door, and re-enter the ship. Of course, there are a couple of aliens that will try to prevent you from entering—if you're running low on air, Stasis them, so you can enter without harm.
Inside, look for a Medium Med Pack Schematic in the corner, then check for an item in the cupboard. Continue down the walkway to enter a creepy, organic shaft. You're going to have to work your way down to the bottom floor by riding the elevators. But make sure to check out the small rooms along the way to find various items and logs. But prepare for some small critters to attack from one of these rooms just before reaching the second elevator. Once on the bottom floor, using Stasis on the malfunctioning door (leading to the Engine Room) and head through (if you're out of Stasis, you can find a refill station in the room to the left).
Look for an item on the left side of the hall, then prepare for an alien and a swarm of the little guys to climb down the ramp ahead—try blasting the explosive canister on the right when they get close for a quick victory. Continue up the ramps and use the Save Station at the top, then head through the door on the left…but prepare for one hell of a battle.
Well, would you look at that…the aliens don't seem to be aware of your presence yet! Well don't worry, because they will be as soon as you fire a shot. All in all, four enemies will attack: the three right in front, then a fourth from the left. Hang back by the door and use the Ripper to tear them to shreds (if you lack the Ripper, try using Stasis to slow them down). After the first four, a new type of alien will appear from the left as you step into the room—he sort of looks like a turtle on two legs. And like a turtle, his mid-body is well protected by a shell, so aim for the limbs! It should be safe to explore…for now. Check out the structure on the right and an alcove on the left for some items.
When done, interact with the terminal in the back to begin the ignition sequence, but get ready for a ton of aliens to appear from all around you—first from the far side, then from the right and left. We suggest tackling the two aliens ahead first, then running to that side and battling the rest from there (near the door you entered from). Once you've cleared them out, interact with the terminal once more to ignite the engine and complete the objective.
Objective: Go to the Bridge
With the engines roaring, exit the room through the large door. Continue through the hallway to return to the Control Room, but prepare for an alien to emerge on the left upon entering the main area. Go down the tunnel he emerged from to find the tram, where you'll complete the chapter.
Chapter 4: Obliteration Imminent
Objective: Meet Hammond on the Bridge
Come on, you know to explore the Tram Station by now, right? Look for a an item in the waiting area, and check the cupboards for items. Now go through the door leading to the Main Atrium. Don't be scared by the alien-thing that tries to barge in on the left, as it'll soon go away. Look for an item in the corner, then continue through the hall, where you'll find a Store.
Explore the far left and right sides of the Atrium to find some items (don't forget to check the bins), then continue down the ramp ahead to a Save Point, then proceed further down to a lift leading to the Captain's Nest. Step off the lift and look for a Level 3 Suit Schematic on the left, the proceed into the Captain's Nest.
Hey, it's your favorite captain! While he's yakking, bust open the box and check the cupboards on either side for some goods.
Objective: Activate the Elevators
Hmm, so the news the Captain gave you wasn't exactly good—regardless, it's up to you to activate the elevators. Head back upstairs to the Atrium and approach the door in the back…slowly.
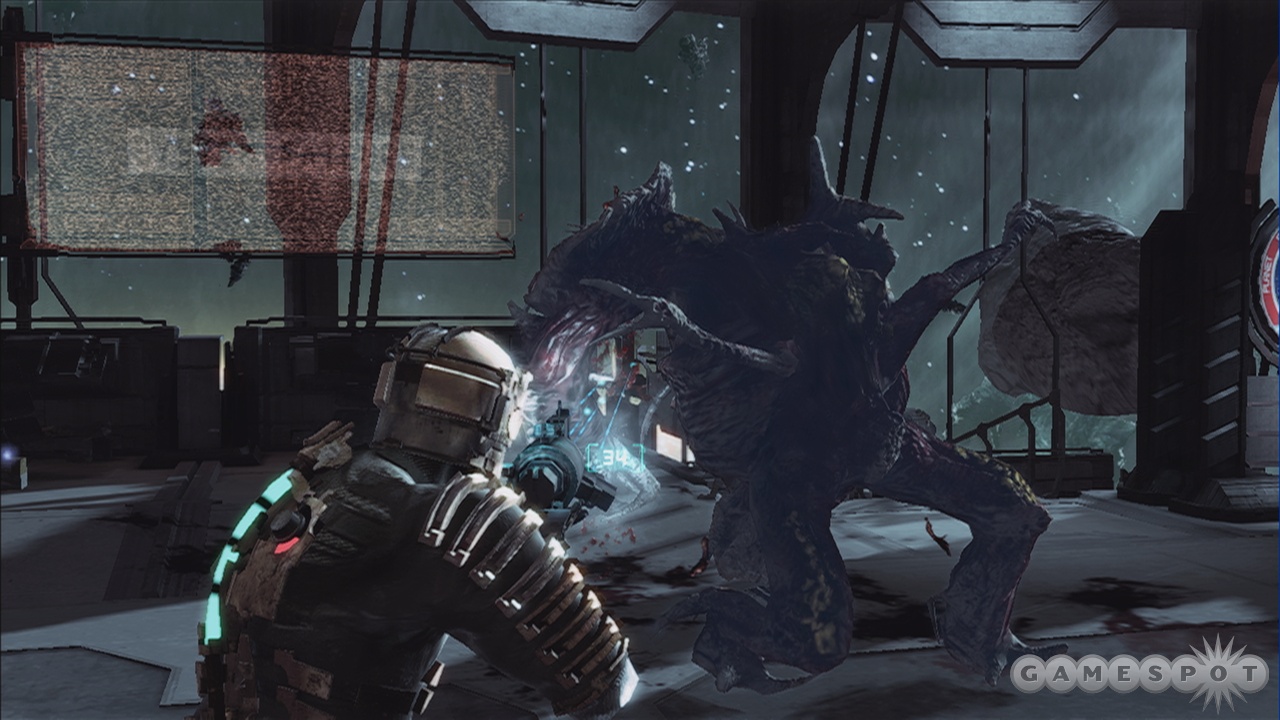
A giant, new type of alien will burst through as soon as you get close, so start backing up and get ready to shoot. Now here's the thing, his main weak point is on his back, but it can be difficult to target while he's roaming around. However, you can attack his limbs to knock him to the ground temporarily—or better yet, just Stasis him—giving you the change to get behind him and fire several shots. Of course, the alien won't just take this lying down, and will actively pursue you around the room. We found the best way to avoid him was to circle the central structure (remember to run), facing him at all times. He'll often get caught up in the corners giving you a chance to attack—so long as you keep your distance, he won't be able to touch you. Once he's down, proceed through the door he busted through, leading to the Security Room (although you may first want to stop by the store, through the door next door, to purchase that Level 3 suit for strengthened armor and more inventory slots). Inside, look Power Node in a cabinet, as well as several more items in the lockers and a box on the ground. Then activate the elevator via the panel to complete the objective.
Objective: Re-Route ADS Power 1/3
Exit the room and ride the elevator dead-ahead, in the central structure of the Atrium. Check out the Video Log as you ride it down several levels. Look for a bin on the right, and a breakable box on the left, then continue on to find a Save Station in the next room. Look for a Contact Beam Schematic just ahead, then check out the storage room for some items and a Stasis Recharge station (but prepare for an alien to spring to life inside). Continue through the hall into the Ship Stations room.
Inside the Ship Stations room, you'll find that the gravity is out of whack in the sections that look like steam's rising from the ground. Whatever you do, do not step through the steam, otherwise you'll be crushed into the ceiling. Anyway, check around the corner to the right for an item, then prepare for a head-crab to attack further up the hall, followed by a larger alien, and another head crab around the corner. As you proceed a bit deeper into the room, you'll hear an alien pop up back near the entrance—quickly run back to the entrance to head him off, so you're not stuck fighting him in a confined area. Finally, prepare for two more head crabs around another corner—you may want to use Stasis on them, particularly since there's a recharge point just ahead.
Use Kinesis to move a pair of blocks obstructing the path, then get ready for another one of those large alien things (which you fought in the Atrium) to burst through the wall ahead. Now this room's quite a bit smaller, so there's not much room to maneuver. As such, your best bet is to blast him with Stasis, then circle him while running to get a good shot—since he turns slowly, you shouldn't have much trouble getting behind him. Grab the Power Node he drops, then continue through the wall he bursted from.
Inside, you'll find two electrical wires wildly dancing around—do not touch them (unless you like dying). Instead, freeze them with Stasis, then quickly run past and activate the terminal on the wall to re-route the power in this area. One down, two to go. Grab the item on the other side, then backtrack all the way to the Alrium, but prepare for two more enemies in the hallway leading to the lift.
Objective: Re-Route ADS Power 2/3, 3/3
As you re-enter the Atrium, five aliens will attack. We suggest immediately running to the door ahead, to the left (which leads to the store) and hanging out here for protection, as you shoot the enemies through the doorway (you may have to step back into the room occasionally to trigger them to come at you.) Once they're down, enter the elevator on the other side of the central structure. Now this one provides you the option of one of two floors: Floor 1 or Floor 3.
Floor 1
On Floor 1, open the bins on the ground then save at the Save Station. As you enter the next hall, the right wall will burst apart, creating a vacuum, so you have to move quick. Follow the hall to a storage room ahead for a breather and some items (as well as a Bench), then continue onward through the far door, leading into the Admin Mining Room. A trio of enemies will open as soon as you enter the room, so hang back by the entrance and blast them from here. Afterward, check out the storage room on the left for an item, and another on the right for several more (though it requires a Power Node, which is more than worth it). You'll find the Power Re-Reroute panel in the back, though there's a single head-crab waiting for you just before it. However, after activating it, a couple of enemies will start running toward you from the front of the room. Wait here, but look for them down the left aisle. Keep a careful eye on the vent just across from you though, as they may choose take a detour through there.When finished, work your way back to the lift, but you may first want to check out the computer rooms left of where you entered for several items and a Power Node. Just make sure to watch out for one of those fleshy-aliens roaming around.
Floor 3
On Floor 3, after the weird dude walks off, explore the room for some items, including a Force Gun Schematic on the left. Save at the station in the hall ahead and check the cabinets for some items, then get ready to tackle a pair of enemies around the corner. Once they're down, activate the panel against the wall to re-route the second power station. Now return to the lift.
Objective: Destroy the Asteroids
After re-routing the power at all three terminals, return to the lift and ride it to the third floor (if you're not there already). Follow the path into the Ship Exterior Access. Explore the storage room on the right for several items, then ride the lift at the end of the hall and continue through the airlock, outside.
Here's where it gets tricky: the asteroid debris bombarding the ship will kill you if exposed, so you're going to have to take cover as you trek across the ship's surface. But you're also going to have to move quick, due to the lack of oxygen. Thankfully, you can tell when a meteor storm is about to start when the camera starts shaking violently—if that happens, take cover behind one of the structures immediately. As soon as it lets up (look for the lines shooting by to vanish) run as fast as you can before the next storm begins, you should be able to make it past two or three structures before you have to take cover. Enter the door at the end and hop into the gunner's seat to restore oxygen in preparation of shooting some asteroids.
So here's the deal: you have to shoot the asteroids before the hit the ship. The bigger the asteroid, the more damage it does. The hovering number displays the hull's integrity; if that number reaches 0, it's game over. Now you have two cannons, controlled with the left and right triggers, respectively. But they share a heat gauge; if it overheats you'll be out of business for several seconds.
Since the asteroids start off bunched close-together, the trick is to shoot the asteroids as soon as they appear—it makes aiming significantly faster & easier. But be careful when targeting the large asteroids, as they'll break into smaller ones—we suggest holding down both triggers to quickly clean up their mess. If you can hold the asteroids off for a minute or two, you'll complete the objective.
Objective: Go to the Tram Station
Finally, it's time to return to the Tram Station. The path is pretty easy: just follow the halls, ride the lift to a second lift and take it to the second floor, then go through the door leading back to the tram station. But before leaving the asteroid gunner room, scour it for some goods, including a Ruby Semiconductor. As you work your way back across the ship's exterior, you'll face two aliens. Keep an eye out for a few, small slithering aliens just before the first lift. Finally, when you enter the final hall (with the store) before the trams, get ready for two aliens to pop out, one in front and another behind.
Chapter 5: Lethal Devotion
Objective: Find the Chemicals
Pick up what you need from the store on the left, then exit through the nearby door, leading to the Security Station, where you'll find another store and a Save Point. Continue into the Imaging Diagnostics Wing, and prepare for a couple of head crabs to emerge around the dark corner. Inside the next hall, look for a Stasis Recharge station on the right, then continue into the Diagnostics Room.
Upon entering the Diagnostics Room, you'll find a bench in the corner, and a sub-room on the left that contains an item. Now just as you turn the main corner, toward the lift, you'll find a new type of enemy, embedded in the wall (hereon known as "Wall Enemy," or Wall-e for short). Although these guys can't move around, they can kill you in one hit if you get close, but more annoyingly, they'll toss out smaller enemies that can really ratchet up the damage. As such, its imperative you take down Wall-e as fast as you can. In this case, grab the canister in the corner (before the bend, facing Wall Guy) using Kinesis, then chuck it at him for maximum damage. Then lay into him with whatever else you have (the Ripsaw will get the job done fast)—just remember not to get too close.
Once Wall Guy's down, ride the nearby lift up a level, then prepare for a head crab just across the gap. Now use Stasis to slow down the quick-moving platform as you cross over it twice (make sure to refill your Stasis at the recharge station after the first crossing), then Save at the Station on the left before going through the door, and down a hall to a lift leading to the Chemical Research Lab.
After stepping off the lift, look for an Audio Log in the corner, then go through the far door leading into the Chemical Research Lab. Look for some items scattered around, including a Force Energy Schematic on a table to the left, and a Power Node in a cabinet between the two tanks. Now interact with the main terminal and collect the sample it leaves.
Objective: Find the DNA Sample
After grabbing the chemicals, a Dr. Demented will have a short chat with you. As soon as he's finished blabbering, one of his creations will spring from the test tube and attack! Here's the thing: He can't be killed, since he can regenerate his limbs…but you're also trapped in the room—oh what to do? Immediately blast him with Stasis (continue to use Stasis whenever it wears off), then focus on detaching a limb (ideally a leg, to slow him down)—after dismembering a limb or two, your teammate will come through on the radio and tell you to run. Get ready for the door you came through to unlock, and run through as soon as you can—as long as the door shuts behind, you're home free!
After escaping the regenerator, continue into the Imaging Diagnostics Room. Backtrack across the room, using either your Pulse Rifle or Ripsaw to deal with the packs of small creatures.
Back in the Security Station, head through the door leading to Ishimura Clinic. After meeting with Dr. Demented again, proceed through the door to the right once it unlocks, head on through into the Emergency Room, where a large battle is about to take place. Good thing you're in the ER, as there's about to be an emergency. You see, after stepping a short ways into the room, a ton of aliens will swarm around you, including the regenerating "creation" from before (and no, you still can't kill him)! In short, you're going to have to keep him at bay, while killing the remaining creatures in the room until Kendra can finally unlock the far door, so you can get the hell out of there.
Here's the game plan: Grab the item closest to the entrance (since it doesn't trigger the enemies to appear), then head left around the corner just before the door: you will now be face to face with the Regenerator. Immediately nail him with Stasis, then stick close by to keep tabs on him while you target the room's remaining enemies, including one who pops out from a vent, just right of the Regenerator (there will be quite a few enemies in all, so keep your back to the wall to minimize where they can attack from). Once the Stasis wears off, either hit him with it again, or chop off a leg to slow him down, then back away. Continue to Stasis or dismember him as necessary until you can completely clear the room of foes (try and grab the various items as you roam the room). Soon enough, Kendra will come on the radio and announce she has opened the door—run like hell to it and escape!
After escaping the ER, continue through the hall, but grab the explosive canister just past the bend (on the left) and launch it at the Wall-Enemy just before the exit, on the left (look for some items at the end of the hall, by the whimpering survivor).
Continue through the Intensive Care Unit to a Save Station, then proceed through the door leading into Dr. Mercer's Office. Look for several items inside, including a Gold Semiconductor and Audio Log. Now interact with the terminal to grab the DNA.
Objective: Restore Life Support
Unfortunately, the moment you grab the DNA, the area will depressurize, meaning you'll have to make a mad dash back to the Security Room! And because time is short, it's crucial you begin your trek as soon as you grab the DNA, and don't wait for the radio conversation to end first.
Anyway, as you re-enter the dark hallway, prepare for a bunch of those little guys to come around the corner (Ripsaw or Pulse Rifle them). As you re-enter the ER, prepare for one of those Turtle Guys to attack—Stasis him and run. The next hall contains a small head-crab and potentially another Turtle Guy; just keep on running past both of them to the Security Station, where you'll find the terminal to reactivate the oxygen.
Objective: Create the Poison
With the oxygen reactivated, exit through the door leading to Imaging Diagnostics Wing. As you near the end of the corridor, the door will slam shut—don't let it scare you, it'll reopen after a few moments, leading back into the Imaging Diagnostics Room. Now head through the door (right of the lift) into the Chemical Research Lab, and continue into the room where you battled the Creation. Interact with the terminal to grab the DNA Poison.
Objective: Go to Hydroponics
After grabbing the poison, proceed through the nearby door and head right to find a couple of breakable boxes for some items. Now continue down the hall to a Save Station and several lockers containing more goodies! Now proceed into the Cryogenics Lab.
Ah yes, the Cryogenic Lab. If you've ever seen Terminator 2, you might be able to guess what you have to do. In short, you're going to have to lure the doctor's "creation" into the center freeze-chamber, then either freeze him with stasis, or chop of his limbs to ensure he stays there long-enough for you to run up to the control room (where the Doctor was) and activate the freezing process.
So here's the game plan: Upon entering, quickly check along the right wall and bust open the boxes ahead and in a corner to the left for some items while the Doctor yaks away. Now stand a few feet away from the glass and to the left of where the Doctor is and prepare for his "creation" to emerge from underneath the floor, right in front of him. Blast him with Stasis, then focus on killing the enemies that climb down from the wall, so you won't have to deal with them later. Once the room is relatively clear, stand inside the freeze chamber (or on the opposite side of it, depending on where the creature is) to lure him there, then either blast him with Stasis (look for a recharge station along the wall opposite of the control room) or dismember him completely so he stays put! Now run like the dickens into the control room and activate the terminal to freeze the beast and complete the objective (move fast, as the enemies can enter this room too).
Once you've frozen the beast, check the control room for some items, including a Power Node along the wall. Now exit through the door and head toward the tram station (and don't forget to grab the cash in the waiting area.
Chapter 6: Environmental Hazard
Objective: Poison the Leviathan
After disembarking the tram, look for an Audio Log on the ground, then grab the item from the waiting area. Continue down the hall toward the Hydroponics Deck, but you may want to make a detour through the bathroom on the right for several items, but watch out for some little creatures on the men's side—since they can be hard to spot, you may want to back up into the clean hall and tackle them there. Now ride the elevator at the end up to the Grow Decks.
Off the elevator, bust open the box for an item, then look for the Contact Energy Schematic on the ground. Proceed into the Growth Areas to find Hammond.
Objective: Destroy the Poison Pods
As Kendra will report, you'll now have to destroy eight poison pods to stop the air from being further poisoned. Bust open the box ahead for an item, then continue onward into Atmosphere Control. Look for a Save Station near the control panel ahead, then exit through the left door, leading to the West Grow Chamber.
The next hall is full of pipes leaking poison; thankfully, they both blink and beep just before, so cross the room slowly, after each pipe has blown its load. Oh, and the rooms on the left contain little of interest for now, aside from a bench in the middle one, but do open the cabinets at the end for some items. Ride the lift in the back up to a walkway and prepare for a single alien. Continue through the door ahead into the actual Grow Chamber.
Okay, so the Grow Chamber contains about 10 enemies total, and they'll appear at various moments as you explore the room. We discovered the easiest way to battle them was to trigger them a batch at a time, then return to doorway you entered through and tackle them from here (this way, you can retreat into the hallway for cover, but keep in mind that the enemies will stop coming after you at that point—step back into the room to lure them back to you). We suggest following the right wall first until the first enemies are triggered, then retreat to the door and kill them (mostly head crabs). Now follow the left wall until more appear, then retreat and do the same. Finally, another batch or two will be triggered as you explore the remainder of the room. Once clear, collect the various items scattered about, then continue through the door in the back.
Trudge through the poison and get ready for the first Poison Pod around the corner. One down, seven more to go. As you open the door ahead, quickly turn around and kill the alien that appears, then prepare to take down a head crab as you enter the next room. Follow your glowing-light thing to the door on the other side to find the second Poison Pod. Now grab the item in the corner and exit the way you entered…but be ready for a large alien on the other side.
Ride the central lift up to the second floor. Now head through the door behind you (the one your glowing path leads you to) into Hydroponics Control and look for the third Poison Pod near the back, on the left, then immediately take down the two fleshy aliens that appear behind you before they can reanimate the corpses. Scour the room for items, then exit the same way you entered and follow the walkway to the opposite door.
After entering Refrigeration West, open the box for an item, then save at the Save Station before heading through the next door. In the refrigeration hall, you'll encounter a new type of foe that is capable of exploding, causing damage. Keep your distance and shoot at the glowing sac on their arms to prematurely explode them, then follow the hall through the next door.
Check out the lockers for some items then step into the Zero-Gravity chamber ahead. Launch yourself to the wall on the left, then use Kinesis to slide open the cover with the glowing emblem, but prepare for two head crabs to leap out! Once they're dead, launch through the hole you revealed, onto the wall. Now launch to the opposite wall and slide open another cover and launch to the wall within, but prepare for a head crab on the wall above the opening. Afterward, launch yourself to the wall just below said opening, then walk on through it to the door leading into the Air Filtration Room.
Inside the Air Filtration Room, climb the walkway on the left for an item, then head the opposite way for an Audio Log and ride the lift down. Recharge your Stasis via the station on the left, grab the nearby item, then shoot the electrical generator next to the door to unlock it, but don't head inside yet! Giant flames shoot through the furnace every few seconds, and they'll roast you alive if caught in them. Wait for the flames to subside, then hurry through the door on the right into the next chamber…which thankfully is not an inferno.
Bust open the second electrical generator adjacent to the next door, but prepare for an enemy to appear behind you as you do. Wait for the flames in the third chamber to go away, then hurry through a third door, after breaking its generator as well, but be ready for an enemy immediately on the other side of that door. Once he's down, target the fourth Poison Pod on the left, then ride the lift up a floor.
After riding the lift, head right to find a couple of items in boxes, then continue into the small room for even more, including a Power Node along the wall. Now that you're stocked, head the other onto an elevator leading to West Grow Chamber.
Once the elevator comes to a stop, prepare for a large enemy to attack from the left, and two head crabs from the right. Stay on the elevator, and target the large dude first, careful not to burst open its stomach (otherwise the critters will pop out). Now head through a door on the left, leading to Atmosphere Control.
Cross the walkway to the lift and ride it down, back to the hall with the poison-spitting pipes. Cross back over to the room ahead, which if you remember is where you'll find the Store and a Save Point. Now head into the room just across the way, leading to the East Grow Chamber. Check the Text Log inside, then prepare to face another wall-enemy dead-ahead once you open the next door. Hang back and shoot its tentacles to take it down (make sure to kill any enemies he spits out too). You're going to want to catch a ride on the lift at the end, but you may want to check out the rooms on the right beforehand: the first contains a Bench, the second contains an enemy and a few items. After riding the lift, cross the walkway toward the East Grow Chamber.
After entering the East Grow Chamber, prepare for one of those large aliens that you first met in Chapter 4 to emerge from the back wall. Fight him like before: Stasis, then circle to his backside and wallop him. Now follow the left wall to the door (opening a couple of cabinets along the way for goodies). Kill the fifth Poison Pod around the corner, then grab the items in the room. Before exiting, recharge your Stasis from the station on the right.
As you exit the room, check for a cabinet just left of the door, then look for a hidden item down a passage to the left. Now head into the room adjacent to this passage to find more goods, then exit out the side and follow the left wall to find a few boxes in the corner. Now approach the control panel, adjacent to the lift and look through the glass below—see that sneaky sixth Poison Pod waiting below? Because the glass is shielding him, interact with the panel to briefly open in, then step forward as far as you can and target him through the small opening.
With the seventh pod taken care of, ride the lift in the room's center to the third floor, where you'll find the seventh Poison Pod. Now ride the lift back down to the second floor to find some items, then go through the door to Refrigeration East to find a Power Node and a Save Station. Continue through the door to find a Gold Semiconductor, but then be prepared to be grabbed by another one of those tentacle things. Switch to a long-range weapon and again aim for the sack on its arm to destroy it.
Continue into the next room and open the boxes along the wall for some goods, then enter the Zero-Gravity area. Vault up to the wall on the left, then follow it (jumping at the corner) to the electrical generator. Stasis it to stop the sparks, then quickly jump past it and immediately jump through the hole on the right into the next area (before the Stasis wears off). Prepare to take on a couple head-crabs on the right wall, then leap to the opposite wall and vault through the hole. Quickly kill two more head crabs, then target the final Poison Pod in a high corner.
Objective: Recycle the Atmosphere
Okay, it's time to backtrack to Atmosphere control. As you work you way back through the Zero-Grav area, make sure to Stasis the electrical generator again, then leap through an opening in the upper-right for a direct shot out of Zero-G. Continue to backtrack down the lift and into the hall leading to Atmosphere Control, but be prepared to tackle a few aliens here.
Once back at Atmosphere Control, interact with the central panel to activate the Air Recycle System. Now continue through the now-unlocked door behind the panel, leading to Primary Food Storage. As you cross the walkway, grab the Audio Log, then bust open the boxes at the end for a couple items and continue through the door. Look for a Health Pack on the ground, then activate the Food Filter panel to kill the tentacles ahead, allowing you to continue through the door.
Objective: Kill the Leviathan
Actually…before tackling the Leviathan, you may want to consider stocking up on ammo at the store, as you're going to need a lot of it (we found the Plasma Energy to be the most useful). If you're low on cash, try this: just as you open the door leading to the Leviathan (you'll know it when you see it), stand just inside the doorway (so you don't activate the boss) and look all over this giant cylinder for floating items that you can pull toward you using Kinesis, allowing you to stock up ahead of time.
As you step into the room, the giant beast on the opposite wall will come to life. So here's the deal: The entire battle takes place inside a giant cylindrical-room in zero-gravity. The battle begins with three tentacles that take turns popping out and trying to swat you. As you may have guessed, you want to target the golden sack near the base of whichever tentacle's extended. Although any weapon technically works, we found a slightly-powered up Plasma Cutter to be the most effective—it might take 5 or 6 hits, so shoot fast once you've targeted it.
If you take too long shooting the sack, the tentacle will rest against the wall, then come sliding in your direction. You moment you see it set-down, immediately jump to the opposite side of the room to evade it, which will then give you a chance to aim for the sack.
Once you've destroyed all three tentacles, the creature's mouth (it is a mouth, right?) will open, exposing its weakness: the glowing tonsil thing inside. However, at the same time, the creature will launch glowing balls of goo at you, which will block your shots. As such, you need to shoot rapidly toward the Leviathan's mouth, to both destroy the goo balls, and to nail its tonsil (if you take too long between shots, he'll simply launch another ball which will again block your target—repeat ad nauseam). Continue to shoot the inside of his mouth until it clamps shut and more tentacles appear—focus on them until his mouth opens once again. By this point, you shouldn't have to destroy all of the tentacles again in order for his mouth to open, so target the mouth as soon as he opens up. After a few more direct hits, he'll go down for the count.
Objective: Go to the Mining Deck
With the Leviathan dead, it's a simple matter of returning to the Tram to complete the level! Don't worry, there's no hidden surprises along the way.
Chapter 7: Into the Void
Objective: Find the Mining Access Key
Get off the Tram, then grab the items in the box and in the cabinet. Follow the hall into the next area and look for another box on the ground, then a Power Node in a hidden alcove, just left of the door leading into the Rig Room.
Inside the rig room, duck into the sub-rooms on either side to find several items, and a Store & Bench. Once done, save at the station on the right then hop onto the elevator in the back and ride it down to Processing. Oh, and stand back in the far-left corner, as four aliens are about to board your ride; since the last two appear together, you may want to Stasis them.
After arriving on the Processing Floor, step off the elevator and grab the Audio Log ahead. Follow the walkway to the right and prepare for a trio of enemies around the corner, followed by a fourth soon after (and be ready for one to potentially come from behind). Once they're dead, explore a room and tunnel to the left for some items, then save at the station on the right and continue down the ramp into the Central Processing Area.
As you enter the hall, turn right and prepare for an alien hombre to head your way. Continue onward to find a Store, a Text Log, and a couple of items in the storage units, then a hole in the wall you can go through (though make sure to grab the hidden item just past the hole, before going through).
As you enter the room, you'll be told about four asteroids floating around that need to be destroyed—just grab using Kinesis and toss them into the giant blue-ray (no, not blu-ray) to destroy them. The first two can be reached from your current position, though you'll back to jump down to the walkway below for the pair on the other side of the beam. Oh, and be on the lookout for two aliens that may attack during this process, as well as two head crabs who'll pop out from the entrance after destroying the first two.
Once the asteroids are astroyed (See what we did there? I'm are so sorry), leap over to the control panel to the right of where you entered (assuming you're facing away from the entrance) and interact with it to reinstate gravity. Beware: Once gravity is activated, a ton of enemies will drop from all over the walkway, including several behind you. What we found best was to stasis the ones ahead, then run past them and duck into the hole you originally came through and tackle them from here. Or, you can try running around the walkway and waiting for them to group together so you don't have to be worried being attacked from behind. In any case, continue through the door exactly opposite of the control panel, leading to Mineral Processing Control. Inside, you'll find the Mining Access Key, as well as several other items.
Objective: Find the S.O.S. Beacon
Exit the room through the only other door, then open the cupboard for a Power Node. Now follow the hall to the door—and ignore the blinking lights, it's just the developers trying to scare you! Continue through the door on the right, then up the ramp and down the tunnel ahead—but be prepared for an alien to drop down from the ceiling. When you reach the elevator, ride it down to the Maintenance Deck.
Upon reaching the Maintenance Deck, you'll find two of those fleshy creatures trying to reanimate a pair of corpses. If you're fast, you can try to kill them before they reanimate one (or both!). We suggest dashing down the left ramp first, then stasis the fleshy thing, then target the other on the right. Once he's dead, go after the stasis'd one. Afterward, collect the goodies scattered about, including a Gold Semiconductor in the corner. Now continue through the door into the Equipment Maintenance Bay.
In the Equipment Maintenance Bay, save at the Save Point on the right, then pull the gondola to you using Kinesis and hop aboard. As you ride it across, get your pistol ready for several projectile-firing creatures on either side. First one on right, two on left, two more on right, then on the left. Once on the other side, disembark and grab the goodies scattered about before exiting through the door, into the Repair Room.
You'll rendezvous with your "girlfriend" inside the Repair Room, but you'll have to protect both her and yourself while she tries to unlock the door. Put your back to the wall so you can survey the entire room, then pick off the enemies as they go for her and you—there's quite a few, so hang in there. Once she unlocks the door, head on through into the Maintenance Storage Room.
Inside the Maintenance Storage Room, you'll find the S.O.S. Beacon as well as a Power Node and a Level 4 Suit Schematic, plus several other items.
Objective: Plant the Beacon
Return to the gondola and ride it back across, but as you likely guessed, get ready to face more enemies along either side as you go. Oh, and be ready for two large aliens to be waiting for you on the other side. As you approach the elevator, get ready for the alien just in front to burst to life. Once he's dead, ride the elevator up to the Mining Deck.
Once on the Mining Deck, step forward to trigger the enemies, then retreat to the elevator and battle them from here. Since it can be difficult to see them through the dust, you may want to wait for them to come to you. Once clear, head left first (despite what your HUD indicator might say) and enter the room. Climb the ramp, then get ready for an enemy to follow after you. Once he's dead, check out the Store and Save Point on the left side, then a Bench on the other half of the room (as well as several items, including an Audio Log). Oh, and be careful if you use the Bench, as an enemy will drop down as soon as you finish—evil bastard.
Anyway, before leaving, use Kinesis to pull the Energy Block from the wall, then carry it across the dusty hall to the room on the other side (but be prepared for an alien to approach as soon as you enter the hall). Once on the other side, plus the energy block into the outlet to power the lift, then ride it down a floor. Head past the first door for now to gather all the goodies from the cupboards and a Gold Conductor in the corner (in addition to a Stasis Recharge Station on the right). Now head through either door into the Mining Bay.
In the Mining Bay, get ready for the three usual suspects to appear. Once they're dead, it's up to you to plant the Beacon on the asteroid, and you know what, it wouldn't be that bad if it weren't for those two giant clamps swinging around it at a pretty brisk pace, which can and will tear you to shreds. The best way to go about this is to get close to the asteroid and wait until both clamps rotate to the left and bottom positions (essentially, they should be touching at the bottom left corner). Wait for them to depart from this location, then immediately jump to the center of the asteroid and plant the Beacon ASAP (by tapping the "action" button)— as soon as he finished, leap anywhere else (the ground, the ceiling, whatever, as long as you get off that rock before the beams swing around), you should make it just in the nick of time.
Objective: Destroy the Gravity Tethers
With the beacon planted, it's time to tend to the Gravity Tethers. There are four, two inside and two outside—they're the large, blue spinning wheels. The first two can be found on the ground and ceiling of the main room—slow them down using Stasis, then fire a shot through the opening to take them down. Now the next to are a bit trickier, as you have to head outside via the asteroid. Wait for the beams to clear either side, then leap to the asteroid and follow it outside. Get ready for a couple of head-crabs, then launch yourself to the Gravity Tether on either side. Again, stasis it, then shoot through the hole to destroy it, then travel to the one on the other side and do the same. Now quickly hop back to the asteroid and run back inside (but watch out for the beams!), then leap back to ground level.
Objective: Launch the Asteroid
There's only one thing left to do: Launch the asteroid, which you can only do from the main control room. As you enter the first hall, prepare for an enemy around the corner, then continue to the lift. Once off the lift, regrab the Power Block from the wall, then carry it back to the original outlet you got it from, in the room just across from the one you're in now. Watch out for the flames as you cross the dusty room, then ride the lift the power block activates up a level, then proceed through the door into Mining Control.
Scour the Mining Control room for goods, including a Power Node on the wall, then interact with the control panel to launch the asteroid. Now get ready for 5 or 6 aliens to drop in as you attempt to leave the room—remember, Stasis is your friend!
Objective: Go to the Bridge
Now simply ride the lift back down, then take the main elevator from the dusty room to the Processing Level (but watch out for an enemy to drop down during the lift). Be careful for the three squirming aliens as you step off the lift, then make your way back to the tram to complete the level.
Chapter 8: Search and Rescue
Objective: Contact the Military Ship
Hey, you've been here before! Anyway, proceed through the door and follow the hall leading to the Main Atrium. As you enter, the area will go into quarantine and several explosive-aliens will attack (remember to shoot the glowing sack for an easy kill), followed by a few more aliens. For the most part, we suggest hanging by the entrance to deal with the first batch, but you may want to get some distance when the aliens start dropping in right around you. Once clear, check the storage units to either side for some items, then ride the elevator on the backside of the central column to Level 3.
Once on the third floor, grab the items in the first room then proceed down the hall toward Comm Array and Exterior Access. Save at the station ahead, then prepare to take down two wall-enemies ahead (remember, shoot their tentacles)—one dead-ahead, and the other just around the corner. Afterward, open the cupboards on either side for goodies, then proceed through the door at the end.
As you step through the door, prepare for a slow, but strong alien ahead (like usual, aim for the limbs), who'll then break apart into several small, slithering creatures. No go through the door leading to Comm Array. After using the Save Station and Bench, ride the lift to a door above (and grab the nearby Audio Log, which leads to a Power Node on the left, and a Gondola to a far door.
Objective: Fix the Array
Great, it seems you need to swap out some broken communication dishes in order to use the radio. Explore the room for some items (including a Medium Air Can schematic), a station recharger, and a Save Station, then continue through the door, where you'll find even more items. Now proceed through the airlock to enter a Zero-Gravity room.
We suggest hanging by the doorway and wait for a trio of aliens to come flying your way. Once they're down, look for any nearby items you can grab using Kinesis, then run down the wall toward the satellite array. Now this part's pretty simple: remove the obviously broken satellites (as marked by the red lights) using Kinesis, then rearrange the working ones (as marked by the blue light) into the slots closest to the center, forming a tight ring. Make sure to look high along the walls to find all of the satellites.
With the array fixed, head back to the Comm Room via the same way you entered, then interact with the control panel overlooking the satellites.
Objective: Use the AOS Cannon to Clear the Blast Doors
Looks like it's time to find another cannon. Exit the room back to the Gondola and ride it back to the other side. As you go through the door, get ready for an alien to ride the lift right to you. Now ride it down and proceed through the door, then through hop onto the elevator on the right, leading to ADS Cannon 48.
After the elevator ride, grab the items (including those in a couple of concealed boxes in the corner), then proceed through the circular door. Grab the Power Node from the right, then Save at the Station on the left, then finally hop into the gunner's seat to blast some alien butt.
Yeah, yeah, you probably don't have too many fond memories of your first go-around with the cannon, but this time it's much easier—we promise. Simply target the glowing sac on each tentacle to destroy them. But make sure to shoot the debris it throws before reaching the ship. Because the amount of debris it throws is restricted by the amount of tentacles it has remaining, it's best to focus your efforts on one at a time. Also, try to shoot in a fairly rhythmic fashion, so your gun doesn't overheat.
Objective: Go to the Cargo Deck
With the alien destroyed, re-ride the cargo lift and head down the hall through the door, but prepare for a couple of slithering aliens on the other side. Proceed through the corridor onto the lift and ride it to Level 2. As you step off, prepare to face a rather quick alien on the right side. Now follow the path back to the Tram Station to complete the level, but get ready for a large alien just before the final corner (just past the store).
Chapter 9: Dead on Arrival
Objective: Enter the Military Ship
Off the tram, grab a couple of items and check out the bench if you wish. Now proceed down the hall to Zero-G Ore Storage. Look for an item box just left of the store and continue on through the airlock (bust open the box just before it for an item). Check the cabinet before venturing outside.
Objective: Clear Radioactive Material
There are six glowing radioactive balls that you must dispense of, but your first task is to open the bay doors so you can toss them outside. Run down the wall and stomp on the six electrical generators bordering the large door to force it open, allowing you to begin dispending of the trash. However, you may first want to tend to a group of aliens that'll now appear—we suggest running back up the wall to the entrance and attacking them from here (this way, you can duck back into the previous room for air, if need be).
With the aliens destroyed, use Kinesis to grab the floating radioactive balls and chuck them through the open door. You may find that several of them are out of reach, so simply zero-g jump to their location and grab them from there. Once all six are disposed of, zero-g jump to the door on the opposite side of the entrance to enter the military ship.
Objective: Find the Singularity Core
After entering the ship, open the box on the right for an item, then continue down the hall to a Save Station, being careful of the wonky gravity section, then proceed through the door into the cargo room. Look for a couple of items here, then use Kinesis to push the boxes out of the way so you can get through. Once you make it past, prepare for a group of four new aliens to appear—these guys are very fast, but aren't much stronger than your average alien. But because of their speed, they can dart up to you fast and inflict damage, so using Stasis may not be a bad idea when it comes to groups. Anyway, once they're dead, use Kinesis to move the debris blocking the door leading to the Torpedo Room.
Inside the torpedo room, look for a few boxes on the sides of the room, then cross the walkway through the door. Open the box on the right, then save at the station ahead. Now, before you do anything else, we suggest dismembering the corpses in this room, by stomping on them—you'll see why in a moment. Afterward, try and go through the door on the left—we dare you! At that very moment, the power-block will explode and two fleshy aliens will climb down from the walls—if you destroyed all three corpses, the aliens won't be able to reanimate any others, making them easy targets. We suggest attacking them from the other side of the hall for maximum visibility.
Once clear, grab the other power block, opposite of the unpowered door, and place it in the outlet so you can continue onto the elevator. Once off, check the alcove on the right for a few goodies, then continue through the door ahead, leading to the Armory. Now wait by the entrance and prepare for one of those slow, lumbering aliens to approach, as well as several explosive ones from the right. Once clear, grab the Power Node from the left, then use the Bench ahead if you wish. The sub-room on the left contains a locker and a shooting gallery, but be prepared for a couple of explosive enemies to approach from the entrance if you enter. Now continue through the door leading to Infirmary.
Access the Stasis Recharger ahead, then continue through the next door. Inside, you'll find a laser-tool has gone out of control, but thankfully, it should take down the first alien in the room. Scattered around the room are several items, including a Large Med Pak Schematic on the left. Because there's still one alien left, we suggest going to the left side first (if you hug the wall, the laser won't touch you), then wait for an alien to pop-out of the vent ahead—if all goes well, the laser should kill him too. Now stasis the laser so you can proceed to the back of the room and exit through the door leading toward the Barracks.
As you enter the hall, wait in the doorway and get ready to backup so you have some room to tackle a fast alien, and several explosive ones that attack. Once the coast is clear, head right first to find several items, including a Power Node, then continue the opposite way to find more items and a Save Station, and go through the door.
After stepping a few feet into the Barracks, it'll go into lockdown and a swarm of enemies will charge your way. Hold your ground by the entrance and try to take them down at a distance. If they close in, Stasis them, then back away to give yourself some room. Once finished, explore the entirety of the room for a ton of items (don't forget to check the cabinets along the central columns) and check out the store along the back wall, then exit through the Exit Door (fitting, eh?).
Grab the item on the right, then continue into the hall ahead to find a Save Point. Check the locker at the corner before proceeding into the hall leading to the Engine Room. Check both side of the corridor for goods (including a few more at the end), then proceed through the large Engine Room doors.
Inside the engine room, check the cupboards on both sides, then ride the lift to the level above. As you'll see, giant flames roar from the engine every few seconds and will bake you to a crisp if you're not protected. Thankfully, you can turn disable the engine by destroying six energy cells—three on either side, but it involves trudging through the flames in order to do so. Stand behind the suspended engine piece on either side for protection, then grab it using Kinesis and push it forward slowly (you may have to bump it to the right on occasion to get around obstacles) from one generator to the next. As you pass each one, shoot it to put it out of commission. Now make sure you stay behind the engine at all times, otherwise you'll become a living candle. Once you've destroyed the first three, backtrack to the starting point and do the same for the other side. After all six are destroyed, the engines will turn off, allowing you to safely collect the Singularity Core from the back.
Objective: Go to the Crew Deck
With the Singularity Core in hand, It's time to return to the tram! Head down the ramp to the right (facing the back wall) and open the boxes along the way. Go through the door at the base and approach the glass in the back to meet a friendly fellow…well, he was a friendly fellow!
As you probably guessed, the giant alien's not done yet—back away from the glass and wait for him to break through. Like before, you ideally want to attack it from behind or the sides—inflict enough damage and he'll become stunned for several seconds, allowing you to pummel his backside. Because this dude is both fast and strong, you're going to want to keep your distance anytime he's facing toward you. Try circling the central machinery and shooting his limbs from a distance. And if you get lucky, he may just charge right past you, giving you a great opportunity to strike his backside. If you run low on ammo, check the cupboards for more.
With the alien done for, exit through the door in the rear, then turn right and follow the hall through the door. At the end, grab the power block and insert it into the outlet so you can proceed through the door leading onto the elevator to the lower deck.
Head left off the elevator and continue through the External Airdock. Now Zero-G jump to the other airlock, just opposite of where you are now to reboard your own ship. Prepare for a fast-alien inside the first hall, then follow the path back to the Tram to complete the level.
Chapter 10: End of Days
Objective: Find the Crew Key
Look for an item in the corner of the waiting area, then proceed down the hall to the Commons area, where you'll find a shop and a lift that'll take you to the floor above. Grab the Text Log, then use the Save Station on the right, open the nearby cupboard and continue toward a Bench and the door leading to Residential Hall.
After seeing Dr. Demented through the window, enter that room via the door to the left and follow it to a lift in the corner (make sure to bust open the green boxes along the way for some goods). Get ready for two tall aliens to attack, then explore the room for several items, including the Crew Key in a cupboard in the far corner (watch out for the dude in the wall), then a Power Node along the right side.
Objective: Override the Locks to Block B
With the Crew Key in hand, go back upstairs and exit the room. Turn right and proceed into the Residential Lobby. Prepare for a wall-guy around the right corner then grab the room's goods. Check out the bathroom on the left for an item in a cupboard, then continue onto the elevator leading to Sleep Block A.
After the elevator, check the cupboard on the left them proceed into the room ahead. Look for some items in the center, then Save at the station along the right wall and proceed through the door leading to Sleep Block A Bunks. After entering, you'll get grabbed by another tentacle—you know the deal, shoot the sac! Once he drops you, grab the treasures scattered about and then enter the Security Room.
Look for an item in the corner of the Security Room, then use Kinesis to pull down the switch and then interact with the unlocked terminal to unlock the doors to Block B in the Commons.
Objective: Find the Navigation Cards
As you exit the room the Security Room prepare for an alien to attack, then continue through the door on the right. Head right again and through the door toward Block B.
After a short hall, you'll walk right into a vacuum—thankfully, there's an oxygen supply right on the opposite wall, which you should return to frequently since there's a ton of stuff to collect. Upon entering, two aliens will attack from the left—once they're dead, explore the two sub-rooms on the left for items—you may have to return for air once after. Now approach the door on the opposite side leading into Sleep Block B, but prepare for an alien to spring to life immediately to your left.
Upon entering Sleep Block B, prepare for a head crab to appear on the ceiling ahead, then two more aliens around the left corner. If you have time, explore the room on the right for a Power Cell (you may have to return for air again), then prepare for a fast-alien to appear as you work past the beds. Look for the first Nav Card around the first real corner, then prepare for another fast-alien to drop down from the ceiling ahead, then a head crab soon after. Continue through the door, then exit back from the way you came, via the door along the opposite wall.
Back in Sleep Block A, turn right and continue through the door leading to the Commons elevator and ride it up a floor. Once off the elevator, proceed into the Residential Hall, but get ready for several aliens to invade from a vent on the right. Continue down the hall through another door and ride the lift downstairs. Turn left and proceed into Sleep Block C.
As you enter Sleep Block C, get ready for a fast-alien ahead. Now open a cabinet on the left, then enter Zero-G Basketball Court locker room via the door on the right. Explore the locker room for some items, including the Level 5 Suit Schematic. Now exit through the other door to find a few more items, including a Text Log which documents the rules of "Z-Ball"— a game you can play to earn items! Continue through the next door onto the Basketball court proper.
Zero-G jump to the platform ahead to find the second Nav Card, but this also triggers two head crabs to appear. If you grabbed the card, you can simply ignore them and backtrack to the commons. Otherwise, we suggest jumping back to the entrance and attacking them from the doorway, ducking in and out of the previous room for cover. Once the basketball court it clear, you can try out the Z-Ball for yourself! Simply score the ball in any of the four "hoops" to score a point. Try jumping from platform to platform between shots to increase your score! Each time you complete a level, you'll unlock a reward in a locker.
Anyway, now that you have two Nav Cards, head back through the locker room (but be ready for an enemy as soon as you open the door) to the hallway. Now hop aboard the elevator on the far side leading to Sleep Block C.
Step off the elevator and save at the station on the left. Go through the door ahead and prepare for three small enemies: one in the center, another to the right, then the last in the back. Explore the bathroom on the right for various items, then continue through the door leading to Sleep Block C Bunks.
Inside Sleep Block C Bucks, if you have a Power Node to spare, use it to access the Storage Room on the right for a ton of goods. Now use your Kinesis to pull the bunk beds in the far left corner away from the wall, then slide the one in the center to the right, revealing a path into the next room. Look for a Ruby Semiconductor on the floor, then slide the same bunked back to its original position, so you can then slide the two against the wall to the right, then the center toward the wall, revealing a second path deeper into the room, where you'll find the third Nav Card at the end (along with a couple of boxes you can break open along the way).
Objective: Repair the Shuttle
Get ready, for as soon as you grab the third Nav Card, the "Creation" will drop from the ceiling. Remember, you can't kill this guy, so it's running time. Either Stasis him, or chop off his limbs to slow him down, then quickly retreat back to the bunk bed area. Once there, seal off the area by moving the bunk bed (right of the gap you just ran to) across the gap, to prevent that nasty creature from following you—for now. Continue to work your way back through the bunch beds, then exit through the right door.
Unfortunately, the exit out of this room is locked for the time-being, which means you're going to have to fight off several creatures, including the "Creation." Use Stasis or dismember him to keep him at bay, then focus on the remaining aliens. Once the room's cleared (except for the creature), the door will finally unlock—run through it fast and continue through the hall (the creature can appear here too, so don't stop for anything!) to the elevator.
After the elevator ride, proceed through the door leading to the Commons, then prepare for several enemies to appear as soon as you take the lift on the right. Once they're dead, you'll be able to proceed through the door from this walkway leading to the Security Hall, then go through the left door to meet with the crew member. While he chats, open the box in the corner for an item, then ride the elevator in the corner to the Executive Block.
Continue down the hall and prepare for several large enemies in the next room—hang back by the door and wait for them to come to you. Once clear, explore the sub-rooms for items before proceeding through the door leading to the Executive Shuttle Hall. Follow it to a Save Station and then the Shuttle Bay.
Inside the Shuttle Bay, explore the walkway for several items, then board the shuttle and interact with the fuse box to fix it.
Objective: Test Fire the Shuttle Engines
Step off the shuttle and enter the control room and interact with the left panel to Test Fire the engines—good, they're still in working order! But that's where the good news ends, as the "Creation" about to drop in to your right—oh no! But this time you're equipped to take him down. Essentially, you need to lure him behind the ship (where the engines face), then Stasis or dismember him so he stays there for a few moments. Now quickly return to the control room and activate the ship's engines again to burn him alive! Unfortunately, you'll also have to contend with several other aliens all over the walkway—since the Creation moves slowly, we suggest circling the walkway (staying as far away from him as you can) while you tackle the other threats. Once they're down, focus on killing the Creation, as mentioned.
Objective: Release the Shuttle
With the Creation taken care of, launch the shuttle by interacting with the second panel in the control room as soon as the crew member climbs aboard.
Objective: Go to the Flight Deck
Now simply return to the tram to complete the level. Just prepare to tackle a fleshy alien as you reenter the Commons.
Chapter 11: Alternate Solutions
Objective: Transfer the Marker
Look for an item in the waiting area, then enter the Tram Station Hall door. Check out the bathroom on the right and the alcove on the left for an item each, then proceed into the Cargo Room. Here, you'll find a bench on the left, and a lift which will take you take to the floor below, but you can actually shoot a couple of enemies from here before taking it.
After riding the lift, check the lockers for some items, then go left and interact with the panel to cause the Marker to appear. However, several aliens will now appear, including one by the lift and from the other side of the room. A great place to battle them from is from the walkway where you first entered the room (so you'll have to ride the lift back up). As you approach the lift, that alien we mentioned before may pop out, but it seems he'll ignore you for the time being. From here, the aliens have only one way of reaching you: the vent by the bench. Aim your gun toward it and wait for the enemies to climb through after you, one at a time—it's almost too easy.
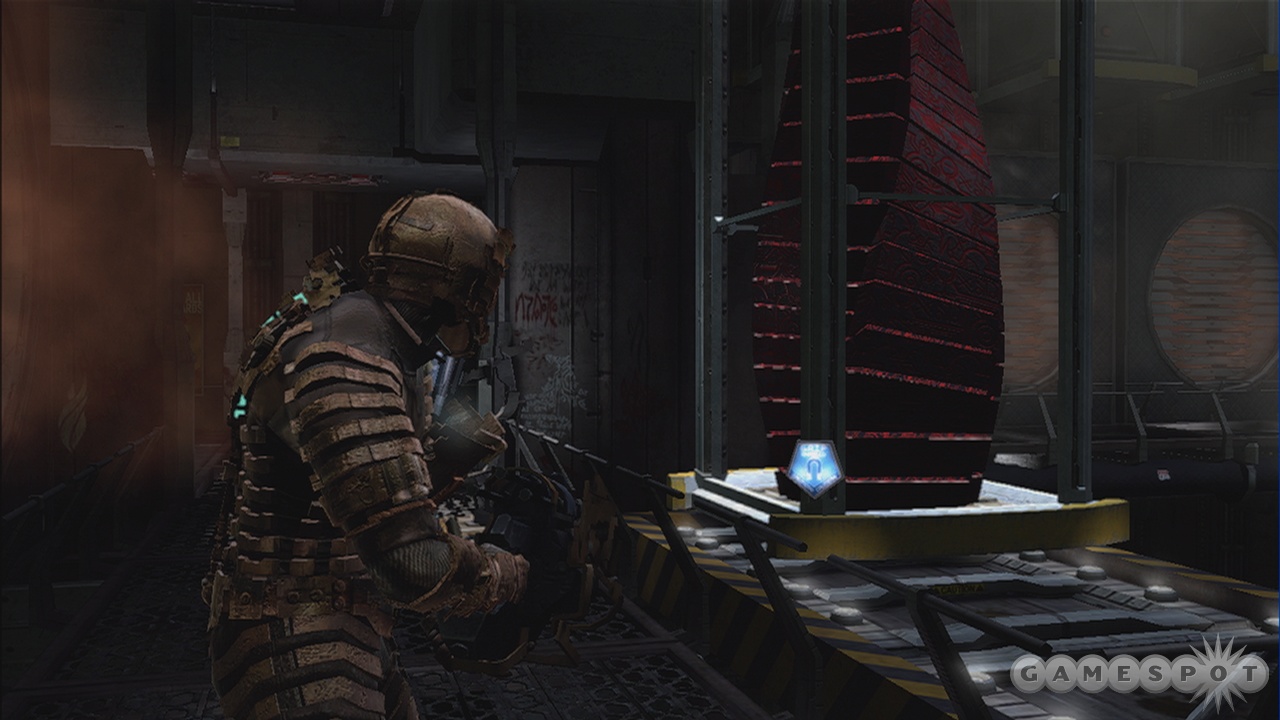
Once it seems things have calmed down a bit, drop back down and use Kinesis to begin sliding the Marker along the track to the far end. Before you can get it too far, more aliens will appear! Again, you may want to tackle them from the walkway above. Oh, and as you try to cross the bridge, a giant tentacle will appear from the right (and another further ahead)—so long as you remain at the exact point that you triggered the tentacle's appearance, he won't be able to hit you, allowing you to safely target the yellow sac.
After sliding the containment unit to the end of the track, even more aliens will appear! Once they're dead, check the corners of the room for a ton of items (including a Power Node in the far-right corner, then ride the lift back up and exit the room.
Objective: Meet Kyne at the Hanger Bay
Return to the tram station and ride the elevator to the Flight Lounge. Once on the floor above, check the bathroom on the left for an item, then continue through the doors into the Flight Lounge. Save at the station on the left then approach the far door…as you do, the room will go into lock-down and a ton of enemies will attack. Stay here, as it'll funnel the enemies to you, but do be aware that the "Creation" will soon drop down from a panel to your right. If you hold the enemies off for long enough, the door to the Shuttle Bay will unlock.
Objective: Position the Marker
After Kyne docks the ship, head through the door on the right leading to Runway 2. Open the box on the left for an item, then continue through the door ahead and up a ramp to the Control Room. Check around the corner first for some items, then interact with the panel to disable gravity.
Leap to the ground below, then check for goods on either now. Now follow the track up to Marker Unit, but prepare for four or five headcrabs to appear—try taking them on from the walkways above. When you reach the Marker grab hold of it using Kinesis and drag it along the track. It'll come to a stop at the track switch—rotate the track at the nearby control panel, then drag it across to the perpendicular track, then rotate the piece again so you can resume its path down the track—oh and a couple of aliens will attack too. As you approach the next track-switch, prepare for a few more aliens, then rotate the switch and drag the containment unit to just below the ship.
Objective: Restore Gravity to the Hangar Bay
With the Marker in place, jump back to the balcony above and reactivate gravity at the terminal.
Objective: Meet Kayne at the Shuttle
Follow the path back to the ship to meet with Hayne, and learn some engrossing plot details.
Objective: Meet Nicole in Flight Control
Hmm, a betrayal? Who would have guessed? Anyway, you must now work your way back to the Flight Control room to meet with Nicole. Head back to the balcony, then go through the door and up the ramp to the Control Room A. Watch out for the Wall-Enemy inside, then grab the goods and head for Control Room B, where you'll find Nicole (as well as a Power Node, Diamond Semiconductor, and a Save Point.
Objective: Remote Pilot the Shuttle
Interact with the control panel to gain control of the shuttle.
Objective: Fly the Shuttle to the Colony
Head back to the ship to complete the level, but prepare to face three aliens on the walkway leading up to it.
Chapter 12: Dead Space
Objective: Bring the Loader to the Shuttle
It's the final level—you're close to victory, can you taste it? Anyway, you're going to have to drag that darn marker all over this level and into the colony. After getting off the ship, use Kinesis to drag the loader on the track (near your Nicole) to just in front of the ship, then interact with the control panel to load the marker.
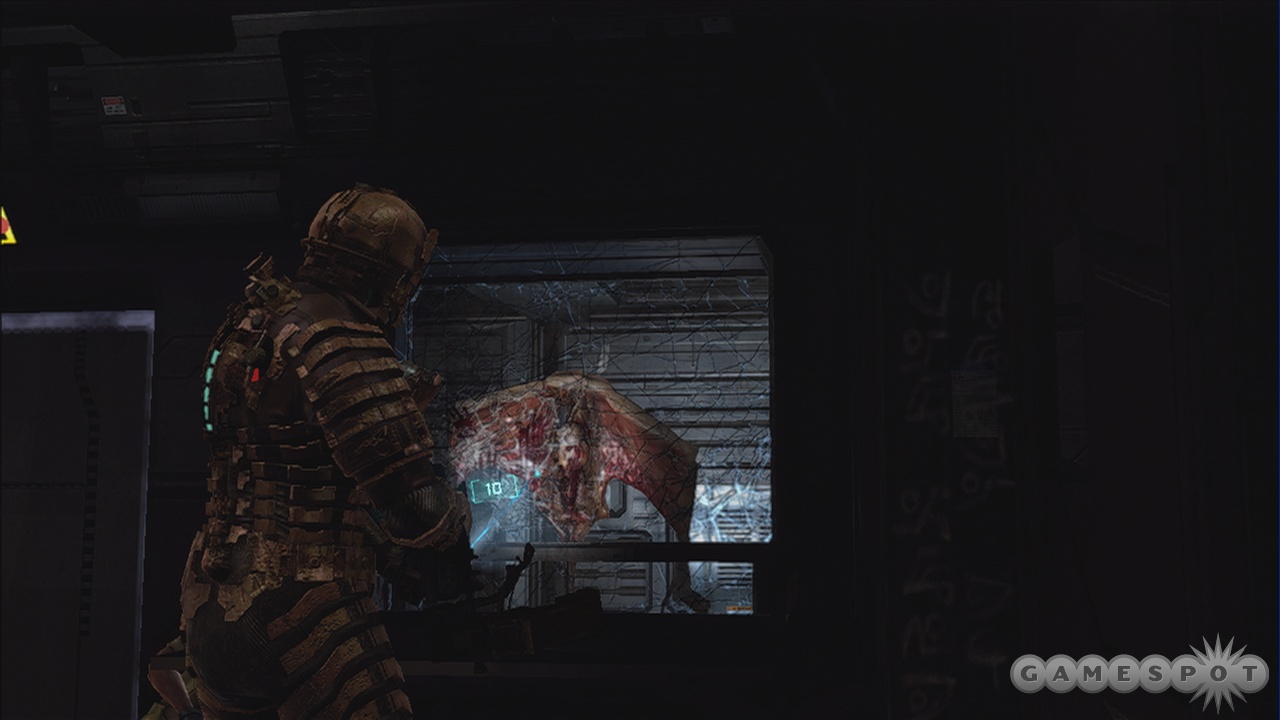
Objective: Open the Supply Depot Door
With the Marker onboard, drag the loader to the other end of the track until it locks in place. Now you need to open the door to the Supply Room, but it's missing a required Power Cell, so it's time to get searching. Go through the door leading to Control Room Barracks and look for a Save Point on the left, as well as a Bench and Store. Now check out the control room on the left for some items, including a Gold Semiconductor, then proceed into the Computer Room on the other side (although you may want to destroy the corpses here first, so they can't be reanimated).
Get ready to tackle two fleshy aliens in the computer room, then grab the items and the Power Cell in the corner, and drag it outside. As you do, prepare for an alien on the right, then insert the Power Cell into the outlet on the left, allowing you to enter Gravity Tether Operations A. Drag the marker inside and push it against the far wall, then use the Panel to close and open the appropriate doors and continue into the room beyond.
Upon entering the room, look for a Stasis recharger and a couple of items to the left, then prepare for the room to enter quarantine and a ton of enemies to drop in. The key is to use Stasis liberally—since there are recharge stations all over, you shouldn't have to worry about running out. With the room cleared, you'll have to use the panels scattered about to raise the walkways blocking the track, then drag the Marker past each one—prepare for more enemies to appear along the way.

Objective: Restore Power to the Bridges
Push the Marker into the Gravity Tether Core room and open/shut the doors via the panel, like before. Prepare to take on two wall-guys on the right (remember, the Line Gun's secondary is awesome for killing them) then head through the door between them.
Run through the Zero-G chamber, but prepare for a scorpion-alien and a head-crab ahead. Jump through the hole in the grate and onto the back wall to find a few items, a Stasis Recharger, and a switch you can pull down using Kinesis to restore power to the bridges.
Objective: Take Marker to the Pedestal Site
Leap back into the tube above and work your way back to the previous room. Use Stasis to slow the fans so you can pass, but prepare for a couple of headcrabs and another scorpion creature along the way.
When you re-enter the room, you'll find another one of those large aliens waiting for you. As you should know by now, Stasis him then aim for the back. If you run out of Stasis, run across the bridges to keep your distance and target him from across the way. Afterward, raise the bridges and drag the Marker into Gravity Tether Operations B, then open/close the doors again to drag in onward.
Scour the room for several goodies, including a Power Node by the door across from the one you came through. Now drag the Marker past another bridge, but make sure to refill your Stasis at the charger before entering the Excavation Site.
Look, you're back outdoors! Grab the goods to either side, then prepare for a boat load of enemies to scour in through the vents, as well as a few tentacles to emerge from the crevice below. If you can, try to take down the first tentacle quickly, that way you can stand on the walkway without being wacked, thereby funneling the enemies toward you (there will be several waves). Once the area's totally clear, drag the Marker to the far side, interact with the terminal, then turn around and climb onto the platform to the right to learn more about Nicole.
Objective: Return to the Shuttle
Go on through the door, and follow the hall to eventually reach the Landing Pad. Grab the items along the way, including a Power Node, and don't forget to save your game in the room just before exiting outside (you may also want to stock up on items and use the bench to improve your stats, as this is your last chance before the final boss).
Just when you thought you were home free, some gigantic alien had to appear and rain on your parade. His initial weak points are the five antenna things surrounding his mouth—destroy all five to cause his chest to open, revealing his true weak point—but we're getting ahead of ourselves.
The battle begins with the boss getting all up in your grill, screaming—this is a perfect time to shoot any of the five antennas. Afterward, he'll begin thrashing his tentacles around, one at a time. Simply keep on the move and run in the direction opposite of the tentacle (so if it's the left tentacle, run right)—he'll scream after each one, giving you another chance to shoot the antennas.
Now here's the thing: As soon as you destroy three of his antennas, he'll grab you and hoist you into the air. You now must quickly destroy the other two, otherwise he'll devour you whole! Now aiming can be tricky, since your reticule controls are reversed. We found the Contact Beam to be most effective, as it'll destroy the antenna in a single hit! Otherwise, stick to your Line Gun or Plasma Cutter.
Once you've destroyed the five antennas, his chest will open, exposing his true weakness: the five sacs inside. Use your most powerful weapon and shoot them as quickly as you can. Once it closes up, he'll begin thrashing his tentacles around rapidly—remember, run in the direction opposite of the one he's using, then switch directions afterward to avoid the other tentacle. After his tantrum, his chest will again open allowing you to fire off a few more shots. Repeat this pattern to finish the battle and finish Dead Space!
Xbox 360 Achievements
Note that there are Spoilers on this list.
| Achievement Name | How To Earn | Point Reward |
|---|---|---|
| Dead On Arrival | Complete Chapter 1 on any difficulty setting | 20 |
| Lab Rat | Complete Chapter 2 on any difficulty setting | 20 |
| All Systems Go | Complete Chapter 3 on any difficulty setting | 20 |
| Cannon Fodder | Complete Chapter 4 on any difficulty setting | 20 |
| True Believer | Complete Chapter 5 on any difficulty setting | 20 |
| Greenhouse Effect | Complete Chapter 6 on any difficulty setting | 20 |
| S.O.S. | Complete Chapter 7 on any difficulty setting | 20 |
| Strange Transmissions | Complete Chapter 8 on any difficulty setting | 20 |
| Wreckage | Complete Chapter 9 on any difficulty setting | 20 |
| Keeper of the Faith | Complete Chapter 10 on any difficulty setting | 20 |
| Betrayed | Complete Chapter 11 on any difficulty setting | 20 |
| Exodus | Complete Chapter 12 on any difficulty setting | 20 |
| Epic Tier 3 Engineer | Complete Chapter 12 on any difficulty setting | 150 |
| Survivor | Complete the game on any difficulty setting | 50 |
| Pack Rat | Store 25 Items in the Safe | 10 |
| Story Teller | Collect 75 Logs | 20 |
| Legend Teller | Collect 150 Logs | 40 |
| Full Arsenal | Own every Weapon in the game | 30 |
| Z-Baller | Complete Level 6 in Zero-G Basketball | 5 |
| Merchant | Collect 8 schematics | 10 |
| Armstrong | Shoot 50 objects using Kinesis | 10 |
| Marksman | Dismember 20 Limbs | 5 |
| Surgeon | Dismember 500 Limbs | 20 |
| Butcher | Dismember 1000 Limbs | 40 |
| Freeze | Use Stasis on 50 enemies | 15 |
| Crackshot | Achieve a perfect score in the Shooting Gallery | 5 |
| Air Alert | Zero-G Jump over 100 times | 10 |
| One Gun | Beat the game using only the Plasma Cutter | 40 |
| Brawler | Kill at least 30 enemies with a melee attack | 10 |
| Maxed Out | Upgrade all weapons and equipment | 75 |
| Ragdoll Check | Force an enemy into a Gravity Panel 5 times | 5 |
| Big Spender | Spend 300,000 credits at the store | 10 |
| Full Contact | Kill 30 enemies with the Contact Beam | 10 |
| A Cut Above | Kill 30 enemies with the Ripper | 10 |
| Tool Time | Kill 30 enemies with the Plasma Cutter | 10 |
| Pusher | Kill 30 enemies with the Force Gun | 10 |
| Live With The Hot Ones | Kill 30 enemies with the Flamethrower | 10 |
| Autofire | Kill 30 enemies with the Pulse Rifle | 10 |
| Eviscerator | Kill 30 enemies with the Line Gun | 10 |
| There’s Always Peng! | Find the Peng Treasure | 15 |
| Exterminator | Kill the Leviathan | 15 |
| Brute Force | Kill a Brute | 15 |
| Mindless Pray | Kill the Hive Mind. | 30 |
| Playing Catch | Catch a Brute or Leviathan Pod using Kinesis | 10 |
| Don't Get Cocky, Kid | Survive the ADS Canon with over 50% shield strength remaining. | 10 |
| Kickin It | Escape from a Lurker's grab attack 10 times. | 10 |
| Slugger | Kill the Slug Boss with more than 50% shield strength remaining | 10 |
| Get off my Ship | Kill the Slug Boss | 15 |
Got a news tip or want to contact us directly? Email news@gamespot.com
Join the conversation