Dead Rising Walkthrough
Trapped in a mall. Surrounded by evil. Low on katanas. It’s up to Frank West to survive and uncover the secrets of Dead Rising, but at least you have GameSpot’s Walkthrough to help you out!
Capcom is no stranger to the zombie genre of videogames. Their series of Resident Evil games has been by far the most popular zombie franchise in the history of gaming, with the latest installation, Resident Evil 4, earning huge amounts of acclaim from critics and gamers alike (despite technically not having any zombies in it). They've already announced Resident Evil 5 for the Playstation 3 and Xbox 360, but in the interim, they've cobbled together a nifty little next-gen zombie-killing game called Dead Rising.
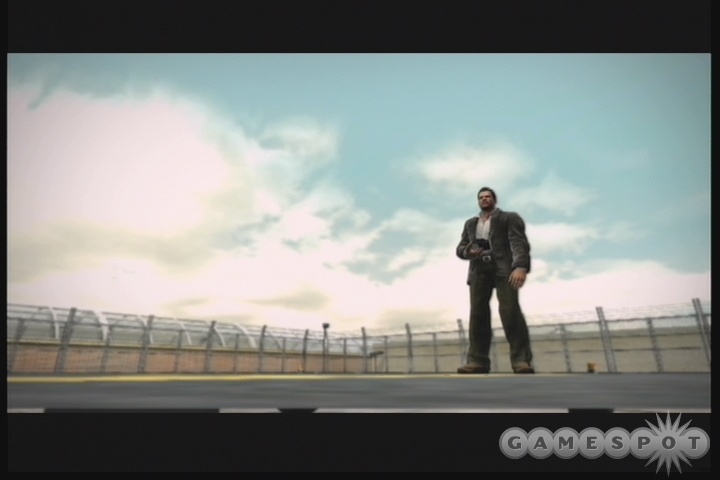
In Dead Rising, you take on the role of Frank West, hardnosed freelance photographer who gets a hot scoop about some shady events going down in the town of Willamette, Colorado. After chartering a helicopter to drop him into the middle of town, he finds widespread rioting and mayhem. When he lands on the roof of the local mega-mall, he discovers that most of the town has been infected by some kind of zombie plague. Although there are a few survivors scattered around the mall, there's also a few thousand zombies to deal with.
Dead Rising tells the story of Frank's efforts to get to the bottom of the mysterious zombie plague. As you attempt to winnow out clues and interview suspects, though, you're also going to partake in some of the finest zombie-killing action ever to grace a home console system. If you've ever wondered what would happen if you stuck a shower head into a zombie's neck, or attacked one with a mannequin or hockey puck, or threw a bowling ball at a crowd of them, then this is your game.
GameSpot's Game Guide to Dead Rising offers up all the information we have on the game's single-player adventure, from the beginning of Frank's stay to the end. We're going to tell you about the many bosses that you'll encounter, as well as give you tips on the many optional Scoop missions that come along, as well as pop out a few general tips. With a game as large as Dead Rising, though, we're sure there's more stuff to discover; if you note anything that you think would be worth adding to the guide, feel free to drop us a line via the Feedback link on the sidebar. We'll update the guide as we go along with whatever you submit!
Need help defeating a tough boss? Want to discuss your favorite weapons or zombie-killing strategies? Post a comment below!
General Tips
Shooting From Cover
One of the tricks of the trade in Dead Rising to take advantage of, especially in boss fights, is the way that you can sometimes attack slow-moving or stationary targets without exposing yourself to fire at all. To do so, take stock of the fact that Frank, while in aiming mode for a ranged weapon, tends to lean a bit to the right. If you position yourself behind a pillar or wall and aim around the right corner, you can often find yourself hitting your targets without them reacting to your presence or counter-attacking. Just be sure that the shots are actually hitting your target; if you stand too far away from the edge of your cover, you can fire your bullets directly into it without really being aware of it. If you shoot a wall or something similar, sometimes your bullets will just disappear. Look for blood to come out from your target to ensure that you're actually hitting them.
In most boss fights, your targets will be too mobile for you to take advantage of this technique, but if used at appropriate times, it can be quite helpful to your overall prospects for survival.
Weapon Selection
You're going to have a cornucopia of weapons to select from in Dead Rising, with the claimed number being around 250 individual types of items that can be used against zombies in some way. Many of these are simply going to be poor choices for an aggressive action, however, as they'll either be too weak or too difficult to use properly. Sure, you can try whacking on a zombie with a toy sword if you like, but you'll have to hit them a hell of a lot of times in order to kill them. The opposite problem is apparent when you use weapons like cash registers, benches, or TVs. They'll kill what you aim at, but they're so slow that you'll often be moved out of position by your attacks, allowing zombies to attack you from behind.
There are a few standard weapons that you can expect to be using quite a bit, though. This section is intended to give you an idea of what to look out for.
Melee Weapons
Lead Pipe: A solid weapon in the early game, and whenever you have to make your way past a large number of individual zombies. One can be found in the Warehouse, on the floor. When swung, will usually instantly kill any daytime zombie, and can be swung quite fast, to boot. The speed of the swing makes this useful when dealing with many bosses, since you can bust it out quickly to stagger the boss and stop their movement temporarily.
Baseball Bat: Another good choice for melee combat. It has a longer swing than the Lead Pipe, and doesn't have quite as much range, but will swing through multiple enemies, knocking them down and away from Frank. When you have to get through a dense crowd of zombies and don't have a shotgun at hand, then spamming out bat swings will usually get the job done quite well.
Katana: An excellent weapon, although it will tend to break rather quickly. You can find one of these early on by jumping off the railing in the Colombian Roastmasters store in Paradise Plaza onto the awning below. Quick swings, instantly kills zombies, can usually kill multiple zombies if they're bunched up. A slight amount of recovery after the second swing, but not nearly as bad in that regard as the Battle Axe or the Sword.
Nightstick: One of the best crowd-control melee weapons, perfect for wading through zombie hordes. Nightsticks are dropped from zombie cops that carry them. There's virtually no downtime with this weapon, no recovery from your swings, allowing you to simply jam on the attack button and use it to knock down any zombies in your path. If it doesn't kill a zombie on the first swing (and it usually won't, especially at night), they'll usually keep standing until you kill them, preventing any awkward "I thought that guy was dead!" moments.
Hunting Knives/Cleavers: Plenty of the zombies in the mall are apparently freshly returned from safari. These guys wear little Hawaiian shirts and will attempt to slash you with their knives if you get too close, but like most other weapon-wielding zombies, they'll drop the knives the first time they take damage. Hunting knives and cleavers are great for quickly slicing through zombies. Since they can be swung quickly and recover almost instantly, you can simply spam the attack button and be almost sure of getting through a crowd without a scratch. Since they do attack quickly, though, you'll often go from having a fresh weapon to a broken one in the matter of a couple groups of zombies.
Ranged Weapons
Handgun: The handgun is one of the most common ranged weapons in the game, and is going to be found on many of the zombie cops stalking the mall's hallways. As a single-shot weapon, it'll be useful for getting headshots on zombies in your path, but you'll have to use the aiming mode to get the most use out of it; shooting without going into aiming mode generally will only wound a zombie in front of you. Thus, it's not quite as useful as a shotgun or an SMG, but it'll still be handy in the early portions of the game or against certain bosses.
Handguns are probably better for survivors than any melee weapon, but they're still likely to be the worst ranged weapon choice for survivors. If you have no other ranged weapons to hand over, then sure, kill a zombie cop and give them a handgun, but don't expect them to be particularly handy with it.
Shotgun: A fine weapon, if you can find them. There are no fewer than three shotguns in the Huntin' Shack in North Plaza, but they're scarce besides that. Still, if you can grab a shotgun, you'll find that it's going to be one of the finest zombie-killing weapons in the game. The spread of the weapon is such that you can fire it from the hip - i.e. without going into aiming mode - and still be relatively sure of hitting anything in front of you. When firing into especially dense crowds of zombies, a single shotgun blast can often kill four or five zombies in a row. Shotguns are especially handy in most boss fights, as they can be fired either in aimed mode or in freeshooting mode, and still have a good chance of hitting the boss either way.
Submachinegun: SMG for short. You can find SMGs above the camera shop in Paradise Plaza (walk along the blue awning to reach it) and in the fountain in Al Fresca Plaza. These are the only fully automatic weapons you're going to have for the bulk of the game. They're not terrifically useful against zombies, since you'll usually have to go into aimed mode to nab headshots, but if you do use aiming mode, then you can quickly take out a horde of zombies by aiming at the average level of their heads and sweeping back and forth while holding down the fire button.
SMGs are also great to have in hand for boss fights, as you don't have to be as accurate as you would be with a handgun. They're also a good second choice for giving to survivors (after shotguns), since they'll generally be able to mow down multiple zombies more rapidly than they would with a handgun.
Sniper Rifle: Sniper rifles are typically only going to be used when fighting against psychopath opponents and other bosses. They'll kill zombies in one headshot, obviously, but they're overkill against zombies and will slow you down as you zoom in and line up your shot; better just to jumpkick them aside. Even against bosses, they're typically not going to be very useful, as most bosses will have ranged attacks that will make you pay for standing still too long, which is required if you're going to take careful aim with a rifle. Rifles can be fired without going into aimed mode, but there's not much point in doing so, as they act just like handguns in that instance.
We haven't run across any survivors that can actually use sniper rifles. There may be one or two that can handle them, but we didn't carry the weapons around often enough to get a very large sampling.
Machinegun: Later in the game you'll start running across machineguns. These guys are vicious and powerful, and are capable of laying waste to even the most powerful of opponents, and by the time you actually start getting them, you'll need the firepower they represent.
Maintenance Tunnel Keys
One of the quickest ways to get from plaza to plaza in the mall is to take the shortcuts through the Maintenance Tunnels. To obtain the key for all of the different locked doors there, head to Leisure Park, grab one of the cars in the parking lot there, then head down into the tunnels below the mall. If you check your map, you'll notice that there's a single dead end in the center of the tunnels. Head there and enter the door nearby to find a small storage space. The Maintenance Tunnel Key is inside this room. Obtaining it will let you access the tunnels from many of the plazas themselves, although you may not always find a vehicle when you reach them.
Escorting Tips

A good amount of the game will be spent with Frank attempting to escort survivors from their hiding spots back to the safety of the Security Room. You'll get an example of this early in the game when you encounter Jeff and Natalie Meyer on the rooftops of the mall, near the Security Room. All you need to do to get them back to safety is bring them together and escort them to the safety of the air duct nearby.
Needless to say, future escort missions are going to be much more difficult. On the plus side, they eventually become very lucrative in terms of Prestige Points, to the point where you'll eventually be able to level up two or three times after bringing back a batch of survivors.
There's a lot of variability involved in the process, in terms of where survivors are located, whether or not they're injured, whether or not they can carry weapons to protect themselves, etc. You'll have to factor in all of these variables when you decide whether or not you want to escort someone back to the Security Room.
Typically, once you see a survivor, you'll add them to your Notebook list. You don't have to rescue them if you don't want - there's no penalty involved for dead survivors, although some of the achievements and your end-game score do factor in your rescuing abilities. If you leave the area that a survivor's in before you add them to your party, their health will usually start draining away as they fend for themselves. If you move two areas away from the survivor, they'll generally die automatically, or at least be so far gone that you can't reach them before they die. For instance, if you found a survivor in Colby's Movieland, left them there and travelled to the Entrance Plaza, then they'd generally automatically die. It doesn't matter if they were in a safe part of the Movieland where there weren't any zombies; they're still going to be just as dead.
Types of Survivors
Survivors will have a few different behaviors available to them. Generally you'll have to go up and select Talk in order to first speak to them, but after you finally get them to join you, you'll be able to see what other ways in which you can interact with them. Here's a listing of the most common interactions.
Give: By far the best kind of interaction. If you see "Give" pop up when you first speak to a survivor, that means that you can give them whatever you currently have in your hands. If you see this when you first meet a survivor, it often means that they can hold a weapon, which is what you want. If you cycle through your inventory and find that you can give them weapons, you'll definitely want to do so.
The choice of weapons that you can give isn't infinite; most survivors can't use large items like chainsaws or excavators, and some advanced weapons like sniper rifles are likewise out of their league. The vast majority of civilians that can actually hold weapons can hold SMGs and shotguns, though, which are the best types of weapons to give to survivors, as they can quickly kill multiple targets with them. Handguns are also workable, but aren't quite as good as the aforementioned weapons since it's more difficult to instantly kill zombies with them. Shotguns are arguably the best choice here, but keep in mind that you'll probably get hit every once in a while by your escort as he or she tries to shoot enemies. We'll talk more about escort combat down below.
Survivors can also hold melee weapons, like knives and batons. This is less than ideal, simply because they're less likely to be able to use them as well as you can, which often leads to your escorts getting hurt, but it helps in a last resort to be able to pick something off the ground and quickly hand it off to your escort. In cases like these, weapons which hit multiple zombies, like baseball bats or swords, work best.
Hold Hands: Some of the more timorous survivors can't hold weapons at all. Although they're perfectly capable of following you around, they'll be much more likely to survive the trip back to the Security Room if you hold hands with them. Holding hands will prevent you from firing your own weapons, but will let you guide your escort along the path that you choose for them, and will keep them safer in the meantime, at least compared to having them run around independently.
If you ever need to fire your weapon, you can stop holding hands by attempting to jump, or just pressing the B button again, and you'll revert back to your normal movement mode.
Note that most people who have the hold hands option don't actually need to use it. If you attempt to have them follow you, they'll usually do so, but they won't be very bold about it; they'll often stop and quail a bit before resuming their following. Holding hands will avoid these little fits, but if you're willing to trade off a little extra time for the ability to actually use your weapons, it's optional. The exception is with some of the older survivors. If you find that an escort runs a little while, then keels over and has to catch their breath, then you might be better off using the hold hands option to get them home safe and sound.
Carry: Definitely the most obnoxious kind of escort. A few of the survivors in the mall will be wounded and incapable of moving quickly enough to keep up with you. In these cases, your only interaction with them will be to carry them back to the Security Room. You're going to use a saddleback carry, preventing you from using your arms, and therefore preventing you from using any weapons. Carrying a survivor follows the same rules as carrying a large weapon like a chainsaw, meaning that you'll drop your survivor if you get hit by a zombie or an enemy. What's more, you'll be unable to use the right trigger to tell any other escorts you're bringing along where to go; you'll be forced to simply have them follow you.
You can set down carried survivors at any time by using the B button. It might be useful to do so when you're about to pass through dense crowds of zombies, especially when you have other survivors following you, and use a weapon to thin them out a bit. If you only have to worry about the survivor that you're carrying, though, usually you can just run through zombies without worrying too much; they seem to be slightly less aggressive towards you if you're carrying someone on your back.
If you're not trying to save every single survivor, then feel free to leave carry-only survivors behind when deciding who lives and dies. You don't need to save every survivor to beat the game, obviously, and carried survivors are often going to make it more difficult to shephard large groups of survivors back to the Security Room. Just let them join your group for the join bonus, then simply leave them behind. Only the strong survive.
Dealing With Zombies
Each survivor has a different kind of personality towards the zombies. Some will be rather reckless and aggressive, while many will be scared and will have a hard time keeping up with you. In general, it'll be the most timid of a group of survivors that will drag you down. If you're escorting five survivors, and one of them is scared and refuses to move, then you'll constantly be returning to that survivor in an attempt to get them to move forward. Typically you can counteract this by staying close to your survivors and not running fast; the closer they are to you, the less likely they seem to be to get caught up by zombies.
Even if your survivors are aggressive, though, they'll still occasionally be attacked by zombies. If a survivor gets grappled by a zombie, they'll be unable to move or use their weapon, so unless they get some help, either from you or another survivor, they'll likely wind up being killed. In most cases, you can free them by dealing even a small amount of damage to the zombie, which will knock them off the survivor and free them up to move on. If you accidentally hit one of your survivors as you attack the zombies attached to them, don't worry overmuch, as they can take the pain more readily than a zombie can. Again, staying close to the survivors will make this less likely to happen.
Using Weapons
The reason even weapon-wielding survivors can be grappled by zombies (and keep in mind that survivors without weapons will usually be able to push zombies away from themselves) is that they simply aren't going to use their weapons very often while they're moving. If you're running along towards the other side of an area, and your escorts are following you, they'll very rarely pause to shoot their weapons, choosing instead to run headlong into a pack of zombies, which rarely ends well. There is a trick to getting them to use their weapons more often, which involves travelling more slowly, but is a better way to get back to the Security Room if you're escorting a large group. How, you ask? Read on...
Follow, Don't Lead
As you proceed through the game's 72-hour mode, it's more likely that you're going to be encountering groups of three-six survivors all in the same area of a mall. In a large group, you're typically going to have around half of the survivors be capable of using weapons, so it'll be important for you to carry around spare shotguns or SMGs to give to survivors as you encounter them. (This becomes easier on your second play-through of the game, when you know where the survivors will be and in what numbers and will be able to plan ahead for their appearances.)
Even with weapons, though, your survivors will still often run through crowds of zombies without firing, due to the aforementioned problem involving them being unlikely to fire unless they're standing still. You can take advantage of this behavior if you're smart, however, and make your own little group of zombie-killing survivors do the work for you.
If you can't make your survivors shoot while moving, it's pretty obvious that your best bet is to make them stop temporarily. You can do this simply by stopping your own movement and waiting for them to catch up to you, but this will generally make it more likely that zombies will start attacking you. Instead, you can use the targeting system to force your group of survivors to stand in a certain spot. Do this by holding down the right trigger and pressing Y while aiming at the spot you want your civilians to group at. They'll run up to the spot, avoiding zombies as best they can, then stop. When they've all stopped, any of them with weapons will start methodically taking out zombies in a good-sized radius around them. Large groups of survivors will sometimes bunch up and start knocking each other around, unfortunately, but they'll still usually be good enough to shoot out any zombies that get too close to them.
If you're looking to get a large group of survivors back to the security room, and a few of them possess shotguns or SMGs, then you can let them do the hard work by repeatedly telling them to move out to a point between you and the exit to the next area. When they get there, let them thin the crowd of zombies a bit, then tell them to move as far forward as seems to be safe. This technique requires a bit more time than simply having them follow you would, but is generally going to be safer for your escorts than simple following would be.
Zombait
One of the best ways to increase the chance for successful retrieval of survivors distant from the Security Room is to mix up a couple cans of Zombait. It can be made at any blender, and although you may have to fool around a bit to find a reliable recipe (bread products, such as bread and corn, mixed together seem to work well), when you do, you'll be able to carry a bit of Zombait around with you whenever you attempt an escort.
Zombait has a short-lived effect, so it's best to mix together a pair of cans of it if you're coming from a long distance back to the Security Room, such as from the North Plaza. When you consume Zombait from your inventory, you'll gain back a good amount of health, and more importantly, all of the zombies near you will make tracks for you, and ignore all other humans in the area. While you increase the personal risk to yourself when you drink it, you can generally handle yourself well. It's the survivors you have to worry about! When the effects of Zombait are active, you'll be able to simply run like hell right through zombie crowds, safe in the knowledge that your escorts will be able to walk right past the zombies without being attacked. Just be sure not to greatly outrun them, as their walking speed will usually be slower than your own.
Early Game Walkthrough
The first half-hour or so of Dead Rising will always follow the same basic outline: you'll ride your helicopter into the mall, snapping pictures along the way, witness the initial breakthrough that allows the zombies access to the mall, retreat to safety, then venture forth into the mall itself to cover the story. Nothing ever really changes in this sequence of events, but if you know what to look out for, you can nab yourself plenty of points to play around with and reach level four or five by the time you reach the interior of the mall and get to choose where you want to go from there.
This section of the guide is intended to get you through the bulk of the early game, with an emphasis on obtaining as many points as humanly possible.
Helicopter Ride
Before you even hit the mall, you coast into Willamette in your hired chopper, eager for a scoop. This section of the game is entirely optional - feel free to hit start at any time to skip it. However, you'll be passing up the opportunity for plenty of free points if you do so.
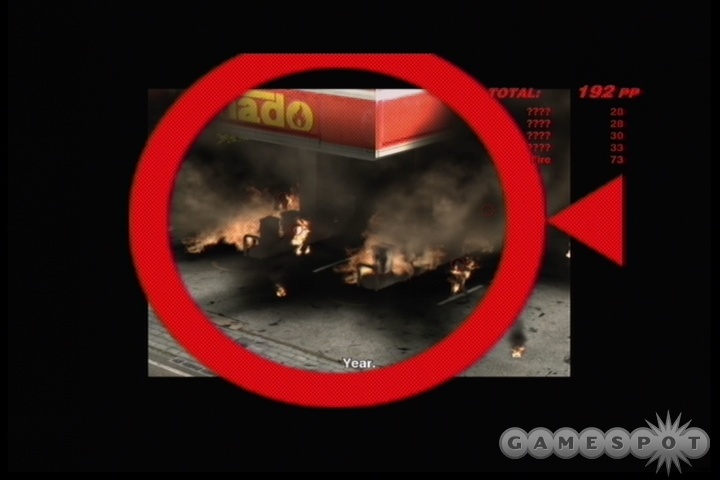
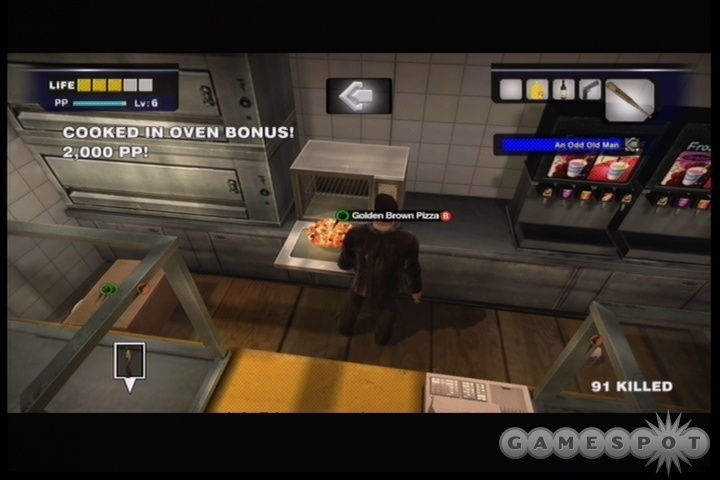
Your goal here is basically to learn about shooting pictures. You've only got room for 30 pictures on your camera - sounds like Frank needs a good digital SLR - so you'll have to be sure to only take pictures that are going to return you plenty of prestige points. This basically entails zooming up as close as you can on the action in the frame and taking your shot. There are a few points of interest in this zone. The first is the man stranded on top of his car; take pictures of him waving his hand in the air at your chopper, and then again when he gets dragged off the car to his death. Next up is the bus; there aren't any critical actions happening here, but taking a picture with so many zombies in it will be worth a good amount of points.
After the bus, focus your aim on the gas station and try to get a well-centered shot of the explosion when it goes off for big points. You can follow that up with a few shots of the burning zombies that stagger out of the fire, as well. Lastly, the woman on top of the building is your last chance for big points. Since she forgets Rule Number One of zombie attacks - always save the last bullet for yourself - she's going to run out of ammo and be thrown off the building by zombies. If you act quick, you should be able to get a picture of her fall, as well as some good brutality shots by zooming in on the bodies on the ground before you jet off to the mall.
Mall Security Room
Not much to see when you land, save for your first meeting with the soon-to-be insane Carlito. You can save your game on the couch here, but most of the area near the security room will be empty space - you'll fill up the space later on when you start rescuing people. The noteboard above the sofa is a PP sticker opportunity.
Entrance Plaza
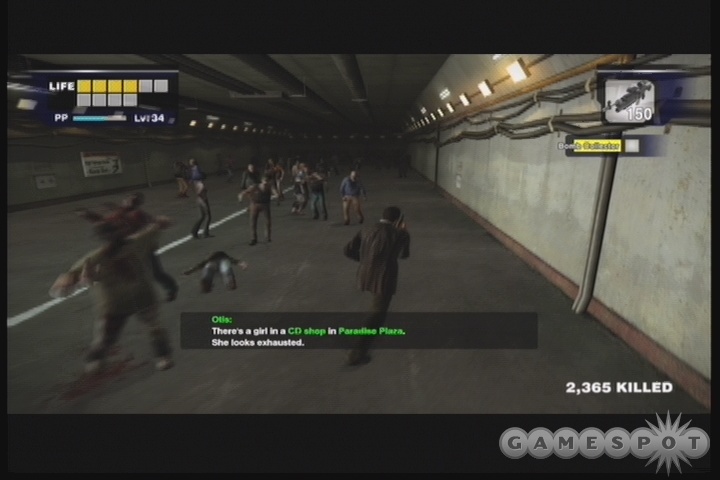
The quick thinkers in the Entrance Plaza have managed to barricade the entrance to the mall, but it's not quite complete yet. You're going to be tasked with finding more benches to shore it up. There's some a bit further down the hall, but don't go for them immediately. Instead, look around to find a few more photo opportunities. There are at least four PP spots in this section of the mall. The first is on the Wendy standee for her Love Spur album, upstairs in the Robsaka Digital store. (There should be another standee of a fox near this same store.) The second is on the front side of the bee mascot, on the pillar above the small pool near the entrance; you'll also have to head upstairs to take this picture. Thirdly, you can find one on the tent in the Sports High shop on the lower level. There's also one near the front door that's difficult to pin down, but with a little strafing around you should be able to locate it. If you can't see it through the zombie hordes, no worries; you can get it later.
After you grab a few nice pictures, head to the collection of benches near the rear of the area. This will automatically start the zombie attack. When the zombies are in the mall, feel free to grab as many pictures of the mayhem as you can; it's possible to crack 1,000 or 1,500 PP in a single picture here if you manage to get a large number of zombies in the frame, preferably including one of the mobs that's eating one of the other people who was here. (If you're having trouble with zombies getting too close and messing up your shot, either climb atop something, like the advertisement near Verlene, or walk up the first few steps of the stairs and take your pictures from there.) You won't be able to save any of the civilians, so don't worry about that. Even if you die here, you'll just wake up back in the security room, so feel free to risk your life if need be - anything for a shot. When you make it back to the Security Room, you may want to save any pictures you took with especially high scores for Brutality or Horror - they may come in handy down the line.
Rooftop
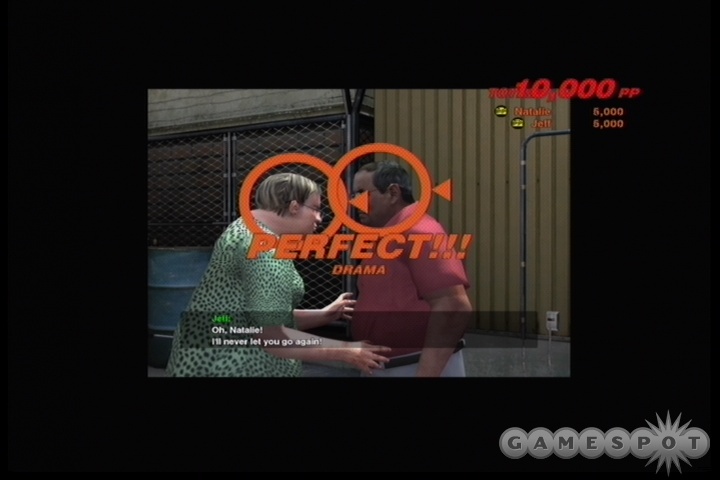
When you're done with the cutscenes here, speak to Otis to grab the Mall Map and Transceiver, then head up to the Rooftop area to follow Brad. There aren't any zombies on the rooftops, but there are Natalie and Jeff, two old people who apparently can't find each other despite being all of 100 feet away from one another. You can get mad points by reuniting them. Simply grab one of them by pressing the B button when near them, then walk them to their mate, then quickly zoom in on them with your camera and snap a picture when they're just pulling away from each other after their hug. After that's done, talk to them again, and they'll both follow you back to the Security Room. Enter there to complete the escort mission. Your point tally will be 5,000 points for Jeff's escort, 5,000 points for Natalie's escort, 20,000 points for getting the both of them back to the security room, and up to 10,000 points for the picture of them hugging. Sweet!
Note also that the air duct you use to enter and exit the Security Room is another PP sticker opportunity.
Warehouse
Despite having left her back in the Security Room, Jessie will somehow get in front of you in the Warehouse area and offer up Case 1-1, in which you're supposed to give Brad backup when you encounter him in the Food Court; apparently he's under attack by a mysterious assailant.
When you exit the Warehouse into Paradise Plaza, though, you'll be on your own. You can choose to perform any of the Case Files or Scoop Missions that you receive, or just explore for a bit, if you wish.
IMPORTANT - Weapons in Paradise Plaza
Submachine Gun
One of the most important things to realize about the Paradise Plaza section of the mall is that there's a submachinegun hidden here for your weaponing pleasure. If you manage to find it and hold onto it, it should make some of the early boss fights much easier, or let you get through any scrapes you happen to get into.
It's on top of the blue marquees above the stores directly near the exit from the Warehouse. If you look up at the marquees, you should see a stuffed bear atop one of them; you need to get up where the bear is to find the SMG. To do so, climb the steps near the Kids' Choice Clothing store and jump from the middle landing on the stairs to the blue section of the marquee. From there, you can walk down across the marquees (when you hit the narrow spots, walk partially into the wall to prevent yourself from falling off), past the stuffed bear, to find the SMG.
You can only carry one of these SMGs at a time; if you grab one, leave the screen, then come back, it won't respawn. It will respawn if you drop it in another area or run out of bullets for it, however, so you can always get another one if you need one. It's going to be a damn handy weapon, so grab it and try to have one in your inventory at all times. It's also great for giving to hostages that you're escorting, assuming that they can actually use guns.
Katana
If you head upstairs to the Colombian Roastmasters store in Paradise Plaza, you can jump over the railing there to reach the awning above the water and the store below it. If you peek your head over the railing before you jump, you should spot a katana that someone's helpfully left there for you. While katanas don't last long, they'll devastate most of the enemies you're going to be facing off against, and are great for slicing and dicing your way through crowds of zombies.
Case Files
The Case Files that you undertake in Dead Rising are the main thrust of the storyline. Each of them has its own specific timer, and you must complete the Case File by the time that timer is up, or you lose the game. You'll also get plenty of Scoop missions in addition to the Case Files, and you'll generally have plenty of time to complete them if you proceed along with the Case Files efficiently.
Case 1: September 19, 12:00 PM
Panel 1-1: A Chance Encounter
After you attempt to enter the Paradise Plaza area, near the beginning of the game, you'll run into Jessie in the hallway leading there. You'll automatically attack her, spraing her ankle. Too bad she was on her way to help out Brad, who's taking fire in the Food Court. With Jessie incapacitated, it's up to you to help out Brad.
Panel 1-2: Backup For Brad
You can reach the Food Court by heading out into Leisure Park from Paradise Plaza and then heading southwest. The entrance is blocked by numerous zombies, but there's a lawnmower nearby that you can use to clear the way. Press B to get behind the wheel, then use X to push the lawnmower ahead. When the coast is clear, head to the door to get inside.
Brad is under attack by Carlito for some reason. Brad's got an unlimited supply of handguns, but Carlito has some kind of SMG that he's going to use to good effect, both on you and Brad. Despite not knowing what the heck is going on, you're going to be enlisted into the cause on Brad's side, so you'll have to do your best to fire away at Carlito while he runs around atop the upper level of the Food Court here.
If you can aim the gun that you're given, then this fight is almost impossible to lose. You have an unlimited supply of ammo (if you run out of bullets, just talk to Brad for more), and there's food lying all around if you happen to run low on health. Hitting Carlito can be difficult, though, as he'll be a good distance away from you, and will fire back, knocking you out of your aiming sight if he manages to hit you. Still, you can take your time if you wish, since there won't be any distractions during the fight; it's just you, Brad, and Carlito.
After you knock Carlito down to around half health, he'll retreat a bit and you and Brad will have to pursue him. It's no big deal, he'll just move back further into the food court. Keep an eye on Brad, though, as he'll occasionally run into a chair or other obstacle and stop moving; just move anything that you can out of his way, and he'll resume his routes. Carlito will begin throwing more grenades at this point, so be on the lookout for them and move away when they do drop down.
When you've hit Carlito enough, he'll retreat via an ingenious trapdoor, leaving you and Brad to pick up the pieces from your fight. You'll get a 20,000 PP bonus for defeating Carlito.
Panel 1-3: An Odd Old Man
After Carlito's been taken out, Brad will automatically head out towards the Entrance Plaza, passing through Al Fresca Plaza along the way. You will probably have had a couple of Scoops given to you by the time you head through here (Barricade Pair and A Mother's Lament), so you may want to try checking into them on your way through, although you can probably leave them be until you get done with Case 1-3. Also notable are the hardware store, within which you can pick up chainsaws, and the gym, where you can pick up a total of 18,000 PP by destroying the four sandbags.
When you reach the Entrance Plaza, Brad will attempt to talk to Dr. Barnaby, but will be unsuccessful in his efforts to get him out of there. With that done, you're on your own for a little while; now all you need to do is return to the Security Room to wrap up this Case. You're not going to have to keep an eye on Brad anymore, though, so now would be a good time to wrap up the aforementioned Scoops and perform any escort quests you've bypassed thus far.
Panel 1-4: A Temporary Agreement
All you have to do now is get back to the Security Room. Since you should still have plenty of time to work with, you can try to pull off any Scoop Missions you might have racked up in the meantime.
Case 2: September 20, 6:00 AM
Case 2 is pretty time sensitive. It appears that Case 2-2 and 2-3 are timed together timewise, so that both of them have to be completed by 11:00 AM on the 20th. You don't have a huge amount of time to deal with other cases, in other words, so try to focus on this one and save the Scoop missions that you pick up for later, if at all possible. If you think you can squeeze them in, feel free to try and do so, but don't be surprised if you wind up losing the game due to timing out. . There are two boss fights involved, but neither of them are super-difficult.
Case 2-1: Image in the Monitor
A simple cutscene case. If you walk into the Security Room after 6:00 AM on the second day, you'll see Carlito dragging Dr. Barnaby out of the bookstore he was hiding in. It's up to you and Brad to make it to the scene of the crime before he gets away!
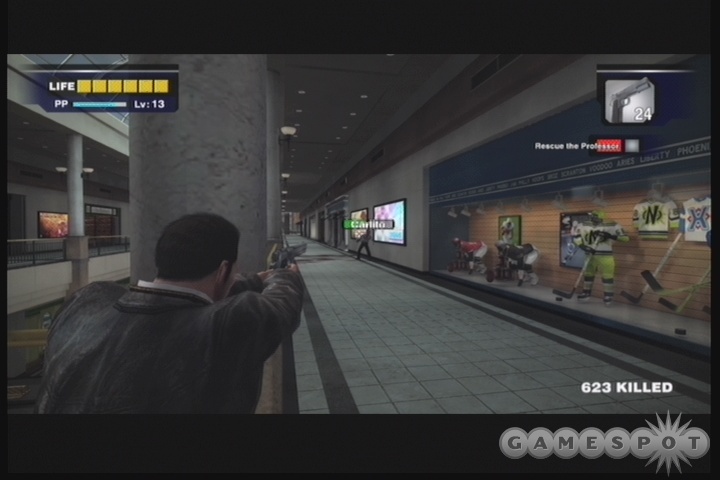
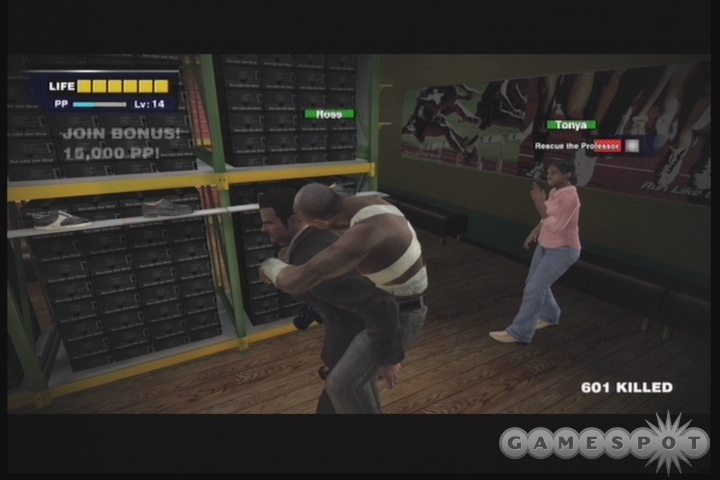
Case 2-2: Rescue the Professor
The gate from Paradise Plaza to the Entrance Plaza will be open at this point, so head through there to reach the goal area. You're going to be facing off against Carlito again, but this time he's packing a bit more heat than he normally would be; he's got a huge sniper rifle. You don't have much time to spare here, as if you wait too long to take him down, he'll probably kill Brad. Before you enter the Entrance Plaza, it'll be a good idea to pick up some orange juice from the Colombian Roastmasters so that you have a few healing items stored away before taking Carlito on. Handguns are probably the easiest way to take Carlito down, but if you don't have any of those, then melee weapons can do the job - it'll just be more difficult.
When you start the fight here, run up the escalator behind Brad, but head down the opposite side of the platform above when he starts moving. He should be on the west side of the upper floor, which is the same side that Carlito will be on, while you proceed down the eastern side towards the south.
Fighting Carlito
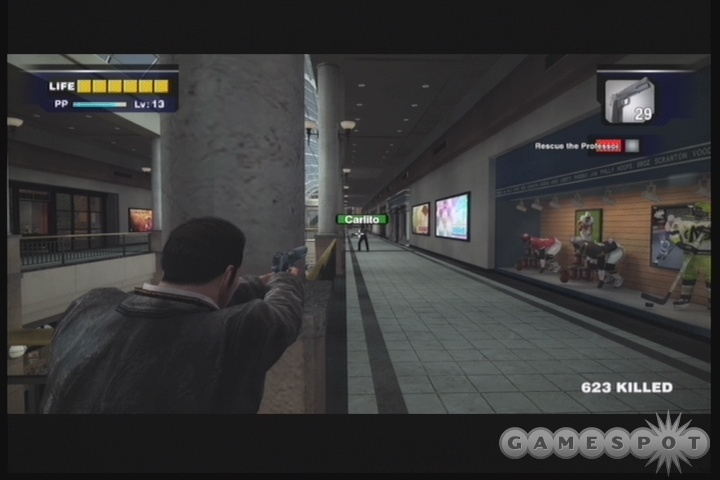
If you're using handguns or other firearms, then your goal here is to hide behind one of the pillars that jut up from the railing in order to shield yourself from Carlito's fire. If you can position yourself right, any shots he takes will harmlessly deflect off of the pillar, but you should be able to shift into first-person view and still fire away at him! You'll need at least three handguns to kill him off in this manner - you can find a few of them on the group of cops in Wonderland Plaza, near the bookstore. Otherwise, the SMG will make typically short work of the guy.
If you're reduced to using melee weapons, then you'll have to get up close and personal. Carlito runs about as fast you can, and if you can get close he'll usually run away. He has three main attacks while you melee him: he'll attempt to drop grenades in your path which you can either avoid or Flying Dodge over; he'll smash you with his rifle if you hit him; and he'll attempt to bum rush you on occasion. The goal here is to chase him until you're close enough to whack him with your weapon, then back away a bit to dodge his counterattack. It's tedious work, but it'll get the job done eventually. Since there's no excuse not to bring an SMG to this area, though, he should be almost dead by the time you have to chase him, assuming you landed most of your shots with that weapon. If you have a sniper rifle, you can also try using that to land a headshot on him, which should drain a good amount of his health in one shot.
Case 2-3: Medicine Run
If you've been to the supermarket before, you'll know that it's normally packed with zombies...but now it's mysteriously silent. If you head to the door between the meat and the seafood counters, you'll learn why: the manager of the place has gone insane, and is driving around a cart packed with knives. He's also got Isabela in the cart. You'll have to take him out if you intend to rescue her and get the medicine for Brad. Luckily, he's not as bad as some of the other bosses, especially if you've brought in an SMG and a shotgun or two. You also have plenty of food in the area to heal yourself up with, so don't worry too much about bringing stuff in. Raw meat will get you healed up pretty well. Take note of the time here, though; you're going to have to defeat the boss, grab the first aid kit, and get it back to the Security Room in the time allotted; just facing the boss doesn't reset the timer. You actually have a bit of leeway after 11:00, but still; it's best to get it there before 11:00 so you can start on the next Case right away.
Defeating Steven
The shotgun is probably preferable here, as you won't always have a huge amount of time to aim. With a couple of shotguns, you can ensure your victory without worrying too much about damage. Don't worry about bladed weapons at all; a shotgun will be all you need.
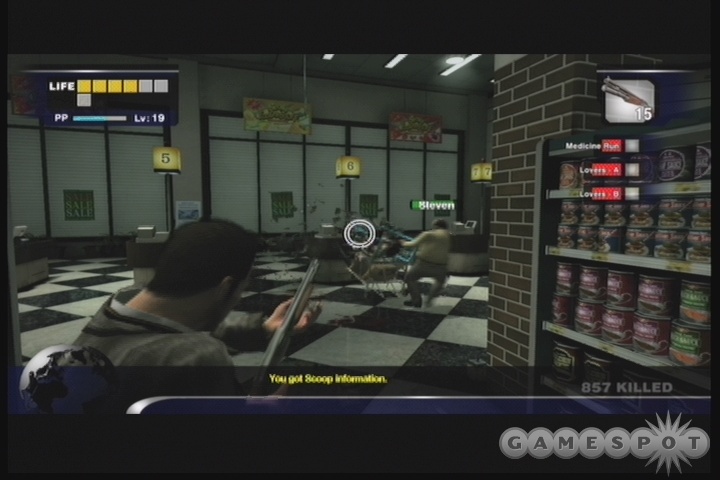
When Steven attacks, hop on top of the nearby aisle to avoid his charging attack. Most of the time he'll attempt to hurt you by running you down with his blade-endowed shopping cart, but if you wait too long in an area where he can't get to you, he'll whip out his shotgun and knock you back down to the ground. Luckily for you, you can be on the ground and still be mostly inaccessible. To do so, just head to the checkout aisles and use them for cover! Steven can't easily get through the checkout aisles; he'll have to whip his cart around quite awkwardly to do so, so it'll be easy to avoid him. While he's moving around, take out your own shotgun and blast him in the face or back as the opportunity arises. He'll occasionally attempt to shoot you with his shotgun, but that does pretty light damage; put some distance between him and you to force him back into cart mode.
In point of fact, his cart should never really have an opportunity to hit you; there are simply too many obstacles in the store for him to get around and you have too many opportunities to escape. Keep in mind that there's a mega-PP photo op when he hops up on the back of the cart and attempts to ram you; sometimes he'll attempt to perform this move with an obstacle between you and him, so get ready to shoot it!
If you do have to take out Steven with melee weapons (which will be difficult, since there are few of those in the store), your best bet is to hide in the aisles and wait for him to come charging after you. If you hop to the next aisle over and wait for him to charge out of the end of the aisles, it'll take him a second to turn around, giving you an opportunity to hit him in the back. Again, this will be difficult, and it's much easier to hit him with firearms. If you haven't cleared out the gun shop yet, at least try to get a few handguns from the zombie cops in North Plaza before coming in here. At the very least, you'll have plenty of healing items available to you.
Aftermath
When Steven's out of the picture, quickly use the Pharmacy Key to unlock the pharmacy and grab the first aid kit. Get back to the Security Room as quickly as you can to avoid timing out the mission. Again, you have a bit of leeway here, but the earlier you get there the more time you'll have to spend on Scoop missions before Case 4 starts.
Case 3: September 20, 11:00 AM
This is a simple cutscene mission. You don't learn anything new, except that you'll have nothing to do for the next four hours. Now would be an excellent time to take on some of the Scoop missions you may have waiting for you. If you haven't done The Hatchet Man, that's the most lucrative one available to you, as it'll allow you to escort no fewer than three civilians back to the Security Room at once, and unlock a couple of new books for you.
Case 4: September 20, 3:00 PM
Case 4-1
This is a simple cutscene. When you reach the Security Room after 3:00 PM, you'll see Isabela storming around in her motorcycle. She appears to be near Seon's supermarket...
Case 4-2: Girl Hunting
You have to be at Seon's by 11:00 PM or so if you want to face off against Isabela. She's not going to be happy to see you, though, and will indeed do her best to stomp you with her motorcycle. She's a tough broad in the initial sections of the fight, but with a little luck you should be able to beat her without too many problems. Keep in mind that you have to both get to her and defeat her by the time the timer runs down on this mission. You have a bit of leeway here, but if you wait until the timer's almost out, then even if you beat her you may find that the game will be over from time expiration. We believe that the timer is set for midnight for beating her.
Avoiding Isabela
Most of Isabela's damage will be coming from her motorcycle. She has a gun that she'll use if you're inaccessible, but for the most part she'll just try to run you down; this'll throw you into the air and cause a bit of damage. She can get her bike anywhere there's a ramp, including most of the scaffoldings in the area, so there's not much you can do to avoid it save sidestepping. If you're looking forward and she's coming up from behind you, try to gauge how close she is based on the power of her headlights and walk out of the way if possible. She has limited turning abilities, so you shouldn't have too difficult of a time avoiding her. You can also attempt to hop up on the scaffoldings, drop down when she gets close, then hop back up after she shoots by.
Attacking Isabela
Your goal here is to grab a shotgun or two, if you don't already have them, and use those to take Isabela down. Getting to the Huntin' Shack shouldn't be too overly difficult, especially with Isabela running down so many of your enemies. Grab the shotguns, take a moment to rest (Isabela won't come near the gun shop, unfortunately), then head back towards the hardware store. You should set yourself up near the fountain in the middle of this area; despite the ramps leading towards the center of the fountain, Isabela can't get to you, but will spend a lot of time trying. From the fountain, whip out your shotgun and blast her when she stops or if she gets caught up in an obstacle. After a couple dozen rounds, she should wind up dead, allowing you to move on.
Alternately, if you're pressed for time, you can walk down the corridor between Seon's and the hardware store, but stop when you reach the set of scaffoldings with ramps on either end. Since Isabela can come up on these ramps and run you down, she'll attempt to do so. Since you'll be able to see her coming, though, it's easy to line up a shot with your shotgun as she approaches and hit her in the head.
Case 5: September 21, 3:00 AM
Case 5-1: A Promise To Isabela
There's an empty shop with a pair of closed doors near the camera shop. Open them up and head through around midnight to meet up with Isabela again. She'll be attacked by zombies as she comes in, so shoot the zombie off of her and talk to her. We get the feeling you're being manipulated by these people...
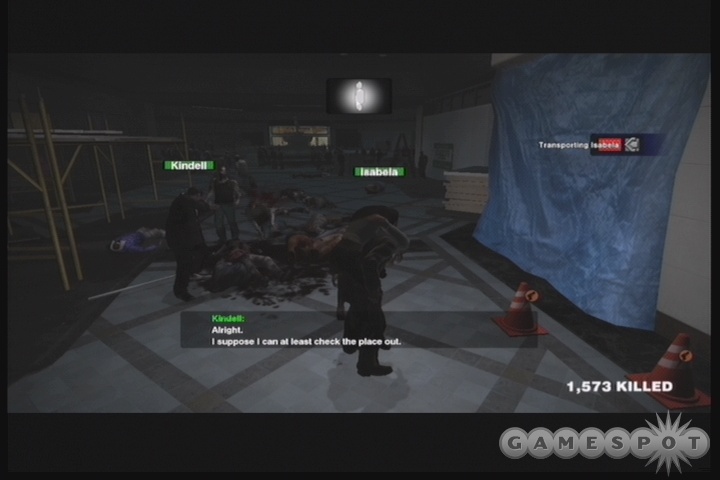
Case 5-2: Transporting Isabela
You'll have to carry Isabela all the way back to the Security Room yourself. Luckily for you, you're going to find yourself accompanied by Kindell Johnson, a shotgun-toting civilian you'll encounter as you're leaving the empty area you're holed up in. His shotgun will help clear a path for you back to the Security Room, so bring him along until you're safe and sound.
Case 6: September 21, 3:00 AM
Case 6-1: Santa Cabeza
Another cutscene to begin the case. The origins of the zombie epidemic are explained here, at last. McDonalds was the center of the dystopia, Dr. Barnaby reveals, before he zombifies in front of your eyes. "So, the terrorism is a retaliation for a cruel government cover-up?" It's unclear why everyone's concerned about whether or not people get bit here; Frank's been bit all game long, but he's still doing fine. Good to know that Brad's completely recovered from his bullet wound, by the way. Those 12-hour miraculous heals are wonderful.
You have eight hours to kill after this cutscene occurs, so feel free to take on some of the side missions that are now available to you. Note that the gun shop will eventually be filled with survivalists, so be sure to take a picture of the airvent leading into the Security Room from the roof; you'll need it to gain access to the guns there.
Case 7: September 21, 11:00 AM
Case 7-1: The Last Resort
Cutscene. Carlito plans to blow up the mall! Zombies everywhere! Mets win the pennant!
Case 7-2: Bomb Collector
Get to the maintenance tunnel and collect the bombs that Carlito has set down there! That's the main thrust of this mission. As it'll be almost completely vehicle-based, you won't have to worry too much about weapons, although some form of crowd control might be appropriate. You're going to be in the midst of a huge number of zombies, so a couple of baseball bats or shotguns might prove appropriate. If you want to have enough time to get back to the "Long-Haired Punk" Scoop mission and the other Scoop missions in Wonderland Plaza, though, just get the heck over to the maintenance tunnels and get the job done. Just be sure to bring some powerful healing items!
To get to the maintenance tunnels, head through Leisure Park towards the access road that the arrows point you towards. Hop on the motorcycle - not the car - and head down into the tunnels. Only the motorcycle is capable of getting past the barriers here.
The Chase
When you're in the tunnels, take the left in front of you and head north. This is a dead-end, but it'll lead to one of the bomb trucks in the northwestern corner of the tunnels. Grab the bomb out of the back, then hop into the other truck here; the one with non-slashed tires. It'll be better for you than the motorcycle in the long run, as it'll be more durable (the motorcyle will eventually break if you run over enough zombies with it) and you'll rack up more zombie kills due to its wider body. There are a couple of other vehicles in the tunnels, so don't hesitate to switch out for another one if your vehicle gets damaged.
And damaged it will become, as Carlito will eventually show up in a truck and attempt to run you down while you go for the bombs. If you're still in your own truck, then you can usually manage to outrun Carlito; the problems begin when you have to get out and run towards a truck with a bomb in it. At this point, Carlito will start chucking grenades at you from his truck, which will cause damage to both you and your own vehicle, should it be close enough to the explosions. A half-dozen or so explosions near your truck will be all Carlito needs to shut your car down for good, which is a bad thing. Traversing these tunnels without the protection of a vehicle is risky business, as Carlito will come along and attempt to run you over, on top of which you'll have hundreds of zombies to deal with.
If you want to preserve the health of the truck, then you may want to use the motorcycle to make the first couple of bomb pickups, and only then wheel back around to the northwest to grab the working truck, which will then hopefully get you through the tunnel chase with Carlito without having to get out and walk. If you do happen to get stranded on foot, though, you'll have to proceed in fits and starts. As with the Isabela fight, try to tell when Carlito is coming up behind you with his truck and move out of the way, and be advised that he'll also try to rear-end you if he spots you.
In addition to the working truck, there should also be a working car somewhere in these tunnels. If you can find it, you should be able to use it as well, thus almost guaranteeing that you won't have to go too far on foot before you complete this mission.
Case 8: September 21, 5:00 PM
Case 8-1: The Jamming Device
Cutscene time! A hidden computer! Can you take me to his hideout! Looks like this case is going to be a long one, so buckle up and get ready for the endgame.
Case 8-2: Hideout
Carlito's got a hideout in the North Plaza, and Isabela's going to take you there. She doesn't act as an escort in this mission; she'll be her own girl, and will go her own way, forcing you to follow. You can't give her any new weapons or healing items during this little following mission, so be sure to stay on top of her and fight off any zombies in her path. She has a handgun which she'll use well in self-defense, but sometimes she'll just pause and start firing away at zombie enemies without moving forward; if this happens, finish off all the zombies in the area to get her going again.
Eventually you'll wind up in the North Plaza. The entrance to the hideout is right near the Huntin' Shack, and there will be a psychopath fight coming up, so now might be a good time to stock up on shotguns. If you happen to come across any high-efficacy healing items, those might also be worth stopping for.
When you reach the Hideout, go up and speak to Isabela to move on to the next case. It's a simple running mission; you have to get back to the Security Room by 9:00 or so. Don't save your game on the mattress in the hideout, however.
Case 8-3: Jessie's Discovery
A simple cutscene ensues here, detailing Carlito's handling by a madman in the basement of the North Plaza. In order to reach him, you'll have to head back into the Maintenance Tunnels. If you're like us, you're not going to have a lot of time left, so save your game and book it! If you really think that you won't have enough time to get to the Maintenance Tunnels before the timer on the mission expires, reload your game and start again from 5:00, and try to get Isabela to the Hideout in a bit better time.
Case 8-4: The Butcher
There aren't any barriers barring your access to the maintenance tunnels this time around, so feel free to grab the car in the parking lot and take it down. Two left turns and you'll be right near the Meat Processing Area, where Carlito's being held hostage by the butcher, Larry Chiang. You're going to have to fight Larry to free Carlito here, just in order to get some answers.
The Fight
If you come in prepared, with shotguns and healing items, then this fight won't be too difficult for you. Larry's got a few attacks, including a standard melee slash, a knife-throwing technique, a charge where he drops down and attempts to ram you, and a meat-throwing attack where he'll pick a side of beef off of a rack and chuck it at you.
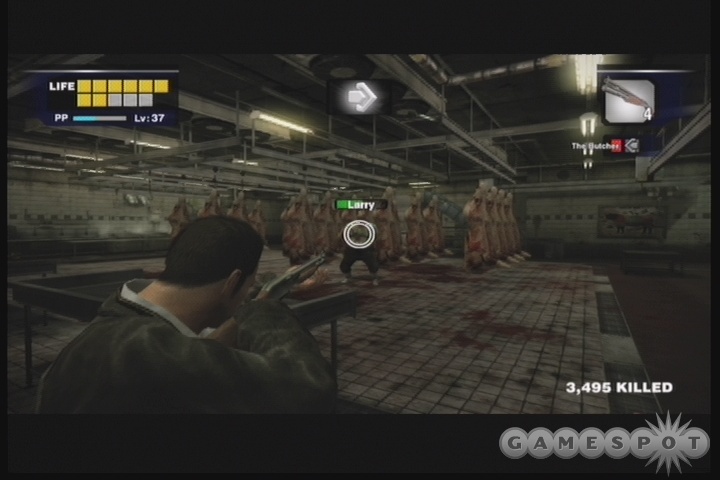
You can dodge many of these attacks by standing behind the three preparation tables on one side of the arena, though. If you do, Larry doesn't even attempt to ram you, but he'll still throw knives (which sometimes bounce off of the tables) and sides of beef. The beef deals the most damage here, but you'll be able to see it coming from a mile away, allowing you to Flying Dodge out of the way. Even if you Dodge earlier than necessary, you'll still be rolling when he throws, causing the beef to hit the table and bounce away from you.
While all this is going on, just unload on Larry with your shotguns. You'll probably need two or three of them to finish him off, but kill him you eventually will. Keep in mind that he'll eventually go for a slop bucket and attempt to heal himself when he's on the verge of death; you can grab a picture of this for extra PP, but otherwise, this is the time to go after him and finish him off.
Aftermath
Carlito's dead. Bask in the irony of his death in a meat locker when his little crusade started over a project to create more meat for Americans. What the hell could possibly happen now? The only way to find out will be to get back to Carlito's Hideout by 10:00 PM, when the final Case File starts up!
The Facts: September 21, 10:00 PM
When you reach the Hideout, you'll have to give Isabela the Locket that Carlito gave to Frank after his death. It's the key you need to unlock the computer's password, oddly enough. A touching moment ensues.
After that, all cases are closed! Good job! On your way out of the hideout, though, another cutscene plays, as Jessie attempts to contact DHS HQ, now that the line's freed up. When that cutscene's done, head down to the Huntin' Shack and grab some weapons. You'll see why after Jessie contacts you again. Things are about to get pretty rough up in the old Willamette Parkview Mall, as the next couple of cutscenes will reveal. Start making your way back to the Security Room, but don't expect to get there in time for what happens next. Be sure to have a shotgun or two in your inventory before you make it inside.
Plot Twists
As the cutscenes reveal, not all is as it seems with Jessie and the DHS. Be sure to photograph Jessie after she's dead to unlock an accomplishment.
When midnight hits, yet another cutscene will play, revealing the entrance of the dreaded Special Forces, who've come to liquidate the mall and everyone inside. Human, zombie - doesn't matter. You're on their hitlist as well. What, you thought they'd want pictures of these events to get leaked out? Call it what you will - plausible deniability, disavowal, a massive coverup. As far as Frank is concerned, it's bad news no matter what.
Unfortunately for you, now you're going to have to deal with Special Forces agents. These badasses bring body armor and helmets to the table, rendering them almost impervious to bullets. They're also packing machineguns, as well, making them almost unstoppable in combat...unless you know how to handle them.
Killing Soldiers At Range
When tackling soldiers, it's best to try and take them down from long distance with one of their own machineguns. The reason for this is that they're simply incapable of firing at you until they're almost on top of you; when you hit them, they'll simply run towards you until they get in range, allowing you to keep firing at them as they approach and hopefully kill them by the time they get anywhere near you. Note that you can periodically stagger them with damage, every five seconds or so; if you're facing off against multiple soldiers, sweep your fire across them to give yourself a break in the incoming damage.
Just try to keep your aim centered on the soldiers' chest area. Their helmets will prevent you from getting headshots. If they're in range, their fire will periodically break your aim, but if you re-aim yourself after recovering, you should be right back where you started, aiming-wise, allowing you to pick up where you left off. Just be sure to focus your fire on a single target until he goes down, then move on to the next and repeat the process, and so on.
Killing Soldiers In Melee
Soldiers like these are tougher than zombies, obviously, but if you have a bladed weapon, like a katana or a cleaver, then you can usually kill them in three or four hits, depending on your level. It's easiest to kill them at melee range by getting their attention, then ducking into a store or side corridor and waiting for them to come to you. When they round the corner, they'll be within melee range of your weapon, and you can slice them down.
If you manage to see a target at long range, it's best to take them down with a machinegun, but meleeing them can be a useful strategy. Note that some weapons, like the stungun, won't work on a soldier. Neither will most of your melee barehanded maneuvers, in case you were hoping to disembowel a zombie or something.
The Caveat
If you can, make your way to Carlito's Hideout. It'll be difficult to make it there with all of the SF soldiers in the area; there's also a chopper that'll make strafing runs on you if you happen to visit Leisure Park.
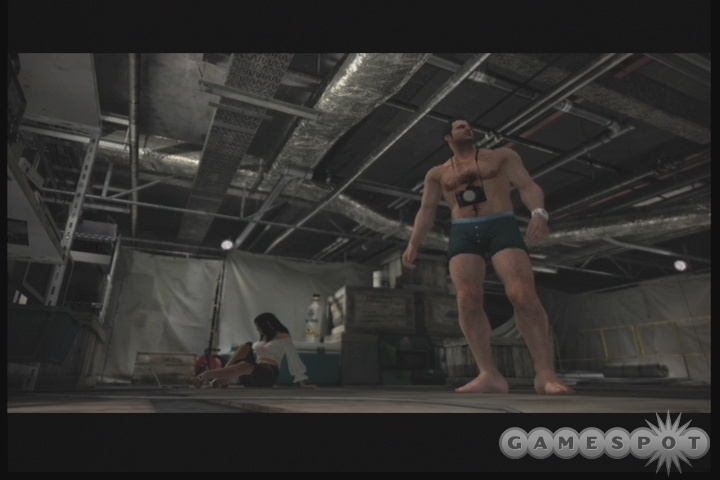
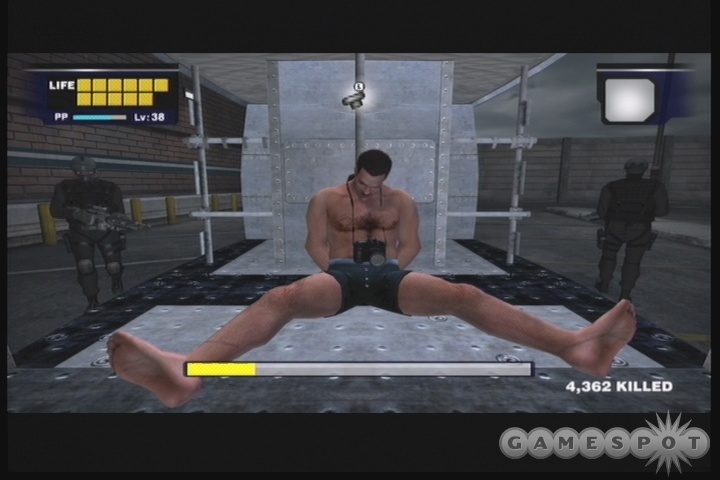
If you get "killed" by a soldier, don't worry overmuch; it's actually probably a good thing to have happen. You may actually want to save your game, then let one of the soldiers shoot you down. If you do, you'll be transported out to the parking lot above the Maintenance Tunnels, where a pair of soldiers are going to imprison you by tying you to the chassis of what appears to be a helicopter or truck. Why don't they just kill you? Who knows! Even though you'll be stripped of all your clothes and equipment when you're "killed", they'll be happy enough to leave you your camera with all of the incriminating zombie pictures on it. Hell, why don't they just blow up the mall and claim it was a gas explosion or something?
Anyway, your goal here is to free yourself by jostling the left analog stick back and forth. Doing so will cause the meter on the bottom of the screen to fill up. If you stop jostling, the meter starts to go back down. The trick here is to only jostle the stick while the soldiers on either side of you have their backs turned. If they spot you trying to free yourself, they'll beat you senseless and knock a few hours off the clock.
In most respects, though, this isn't a bad thing; if you can get the soldiers to move you up to around 9:00 or 10:00 in the morning (2-3 hours before the chopper arrives), then you'll be better off than you would be otherwise, unless you like running around the mall without anything to do but survive. If you manage to free yourself later in the morning, you can head to Carlito's Hideout (you'll have a car to get you all the way to the door of North Plaza, but the walk from there to the Hideout will be dangerous) and talk to Isabela. After 10:00 AM, leave the hideout, and she should contact you immediately with more information. This will lead to a cutscene revealing the second wave of the military's operation.
Fully Operational!
After the cutscene plays out, you can head back into the mall, where you'll find...nothing. All the zombies are dead, apparently. There aren't any Special Forces around, having apparently retreated after completing their mission. It's a solitary post-apocalyptic playground for one Frank West. What do you do?
Well, all you can really do now is head back to the Security Room. There's a note on the table underneath the security monitors if you want to read it. You'll need to be somewhere near the Helipad by noon if you want to achieve the real ending; if the pilot doesn't see you on the helipad at noon, you're going to get one of the bad endings. You'll probably want to stock up on supplies before the endgame begins, so grab a few shotguns, the Survival book from the Empty Store by Crislip's (assuming you did the Hatchet Man Scoop mission), and healing supplies.
Endgame
Needless to say, wait until the end credits roll here. You'll have to go through all of the credits and the ending score screens before the next section of the game starts. Save your game and wait for the game to start again!
September 21st
After Isabela rescues you from your suicidal torpor on the helipad. Unfortunately, it wasn't just anomie that got you down - you're zombified. You have 24 hours to get all the tools that Isabela needs to save you, as well as perform any other ancillary tasks that she assigns you! Note that at any point during this 24 hours, you can be caught by the SpecOps soldiers and returned to the helicopter they were holding you in before. You'll be stripped of your items (and possibly the stuff Isabela needs to heal you), and you'll lose a bit of time, so it's best to just not get captured. You're not necessarily pressed for time, however; if you manage to avoid getting caught, and perform your objectives proficiently, you should be able to complete your tasks in around 12 hours. So you've got plenty of extra time if you need it.
Supply Run
Here's what you're going to need, in no particular order. Your goal for getting all of these and getting back to Isabela should be around four hours of game time.
Cold Spray: SporTrance in Paradise Plaza
First Aid Kit: Seon's Supermarket
Blender: Different restaurants (Plenty in the Food Court, Colombian Roastmasters in Paradise Plaza, etc.)
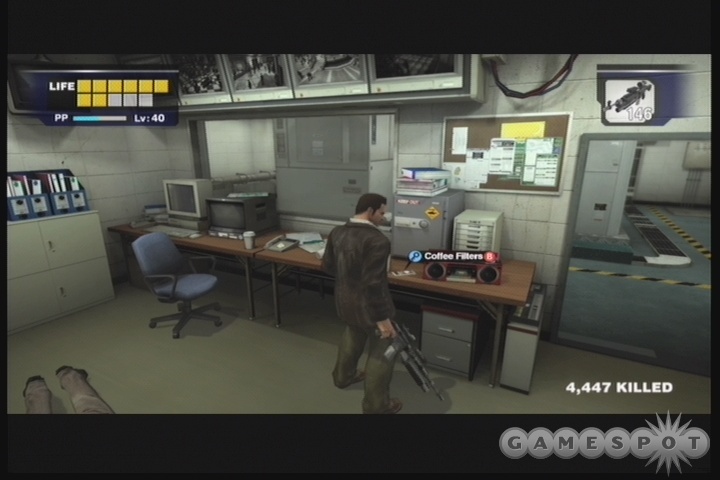
Coffee Filters: Security Room
Magnifying Glass: Wonder Jewels in Wonderland Plaza
Camp Stove: Sports High in Entrance Plaza
Developing Solution: Cam's Camera in Paradise Plaza
Perfume Bottle: Estelle's Fine-Lady Cosmetics in Entrance Plaza
The Route
It's best not to tackle these objects in the order they're presented; with a little ingenuity, you can make one huge circuit around the mall and get them all in one big run. It'll be easier to do so if you happened to complete the Out Of Control mission and opened up the secret passage from Wonderland Plaza to Paradise Plaza, but it's not absolutely necessary.
As you leave the Hideout, though, you'll encounter a military drone. These little buggers are equipped with machineguns, and will fire at you when they see you. They're mostly dangerous for the fact that they'll draw in more Special Forces soldiers with their alarms, though. If one spots you, quickly shoot it down; they can't take much fire.
Your journey begins in the North Plaza, so that's where you should plan your trip from. If you happen to need guns, grab some from the Huntin' Shack until you can replace them with machineguns from the SpecOps boys. If you completed the Hatchet Man Scoop mission earlier in the game, return to the Empty Store near the Crislip's and grab the Survival book to double the healing effect of your healing items. You may want to grab a katana or two from the knife shop in case any soldiers get up close and personal. Last but not least, Isabela's motorcycle in front of Seon's will make it easier for you to get through the Wonderland Plaza and the Food Court.
Regardless of your ultimate path, your first stop should be the Seon's grocery store here in North Plaza. The First Aid Kit is back where you first obtained it for Brad, so kill anything in your way, grab it, heal up, then head to Wonder Jewels in Wonderland Plaza, where you'll grab the Magnifying Glass. From there, your path will depend on whether or not you opened up the path from the bathrooms linking up Wonderland and Paradise.
Shortcut Open
If the shortcut is available to you, then head to the bathroom in Wonderland after grabbing the Magnifying Glass and head to Paradise Plaza. Head up to the second floor to find the Cold Spray on the upper level of the SporTrance store there, as well as the Blender in the Colombian Roastmasters. Grab the Developing Solution from Cam's Cameras, then fight off or simply run through the numerous soldiers in the Warehouse to get the Coffee Filters in the Security Room.
When that's done, fight your way back to Paradise Plaza, move over to the Entrance Plaza, and grab the items there as well before making your way back to North Plaza via whatever the closest route might be to get back to Isabela.

Shortcut Closed
If the shortcut is closed to you, then you'll have to approach these areas in reverse order. Use the motorcycle to speed you through to the end of the Food Plaza, head into Al Fresca Plaza and travel through it on foot into the Entrance Plaza to grab the items there. With that done, enter Paradise Plaza, grabbing the Coffee Filters first (since they're the toughest object to obtain, what with all the soldiers in the Warehouse), then return to Paradise Plaza and grab everything remaining there, including the Blender from Colombian Roastmasters, before returning to Isabela.
Generator
Now Isabela needs a generator. Nothing too complicated here: just run out to Leisure Park, head towards the clock tower, watch the cutscene, then grab the generator from the rear of the tower (on the opposite side of the huge hole) and return to Isabela. You shouldn't need more than an hour for this, if you avoid any unnecessary fights with the soldiers on your way in and out of the North Plaza.
Adult Queens
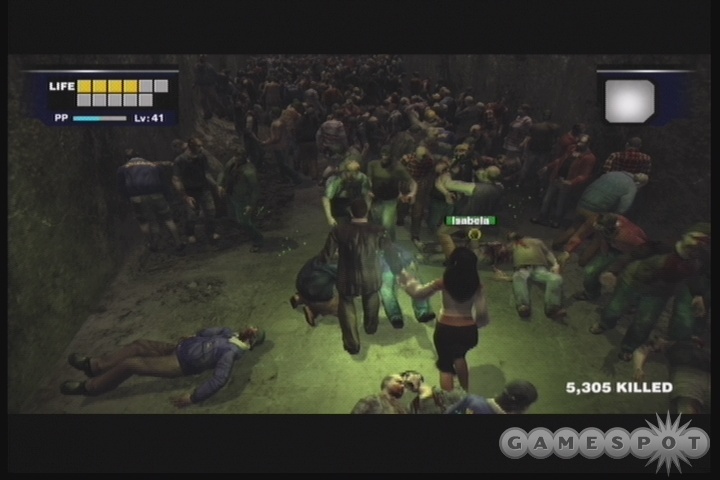
With the generator back on and power restored to the Hideout, all Isabela needs are queens, glorious queens, to get her research back on track. There's no easy way to find them, besides what you've done all game long: kill some zombies.
Unfortunately, it's rare to find queens except in large concentrations of zombies, and with the SpecOps agents on the prowl, it's going to be difficult to find any of those. While there are zombies milling about in most of the sections of the mall after you unlock this mission, few of them will reliably let queens loose, and even if they did, you'd still have to fight through plenty of SpecOps agents to get to them.
Your best bet here is to get to the Maintenance Tunnels and drive around for a bit. If you hop into the car in the parking lot and head down into the tunnels, you'll be able to drive slowly along after taking the first left, smashing zombies and waiting until you hear the queen-sounds coming from behind you. When you do catch an earful, stop the car, get out, grab the queen, then get back in, using a leadpipe or katana to clear out the zombies. Or just shoot them with a machinegun, obviously. If you head to the northwestern corner of the tunnels, near the Meat Processing Area, you'll find a huge number of zombies, as well as a fresh vehicle to use when you need to make an escape.
The thing to remember here is that Isabela needs a full 10 queens in order to continue her research. It's possible to grab them all at once, if you have that many slots in your inventory, but accounting for things like emergency weapons and healing items (you have to fight off the zombies in the tunnels to nab the Queens, after all, after you get out of the car), it'll probably be best to split this up into two trips of five apiece. If you can bring back six each time, you'll have enough for Isabela and enough to cover your butt in case you accidentally throw down a jar after one of your other weapons breaks and you get auto-switched to it.
In order to give Isabela the queens, hold them in your hand and speak to her in the Hideout. You'll need to hand each one of them to her individually. When she has all ten in her possession, she'll inject Frank with a shot that should hopefully hold off the zombification process for a little while. It's important to note that you'll automatically be warped to another area of the mall when you give her the tenth queen, so before you hand it off to her, be sure to head back into North Plaza and pick up more guns and healing items, with healing items being especially critical.
The Tunnel
When you hand in the tenth Queek to Isabela, you'll automatically be warped out to the clocktower in the middle of Leisure Park, where your final journey will begin. You have to navigate through the tunnel here to reach the area outside the mall, where you hope to find some way to reach the outside world in general. However, the tunnel is packed full of zombies...
Note that there's no way to return to the mall after you hit the tunnel. If you save here, you're essentially cutting yourself off from the mall until you start a new game. Just take it under consideration.
Traversal
Luckily for you and Isabela, her little pheremone scent works wonders against the zombies. Whenever they come close to Isabela (as she's the one holding the pheremone), they'll get knocked over. You can easily get outside the protection radius of the pheremone, however, so try to keep Isabela close by holding hands with her as you walk down the tunnel.
Every so often you'll have to let Isabela go ahead of you by opening a vent on the left side of the tunnel. Isabela will crawl through to the other side of the gate and open it for you. You'll have to survive for around 15 seconds each time this occurs. If you brought weapons with you, this shouldn't be difficult; if you're short, then try using the Double Lariat maneuver to buy yourself some space until you can link up with Isabela again. Eventually you'll come across a pickax on a raised stone, and there'll also be some cop zombies up ahead that will drop nightsticks.
Escape!
When you hit the long ramp heading down, prepare for another loading screen/cutscene. The pheremone will only be powerful enough to protect one of you at this point, forcing you to carry Isabela. No big deal, though, as you only have to walk a short distance. Simply move down the ramp (after saving your game), head around to the left, find the ramp leading up to the switch you spotted, and flip it. This will open the door leading to the jeep. Move through one of the doors on the left or right side of the area to avoid the gunfire of the guards, and hop into the jeep when Isabela is nearby to start the real endgame.
Construction Zone
Boss Fight: XM3 Prototype Tank

Things look bleak as this cutscene begins, but rest easy: you're not going to have a problem dealing with it, if you keep your head on straight and your aim steady.
The tank has three primary attacks: a shell launched from its main cannon, a series of drones that fire machineguns at you, and a set of rockets that float slowly towards your jeep. You only possess the ability to fire your weapon here, but still, that should be enough to completely protect you from the tank's firepower once you know what's going down.
To begin with, start firing your weapon at the small green lights that appear on the tank, just above the treads. This appears to slow the tank down, keeping it off your tail, and increasing the likelihood that its shells will impact walls or other barriers when they're fired; if it's right on top of you, it's more likely to hit you. Unfortunately, this makes it more difficult to hit the second target of opportunity, the laser targeting pod that periodically pops up from the top of the tank. When this appears, you can shoot it (aiming just below its position seems to make it easier to hit). If you hit it enough, it'll retract into the tank momentarily, thus cancelling the attempted fire from the main turret.
The other attacks involve drones and rockets. The drones will be launched in clusters of four, which are easily shot down, assuming you can track them closely enough to actually hit them. Even if you don't manage to shoot them right away, their machinegun fire misses most of the time and only deals light damage. Rockets, on the other hand, will deal more significant damage, but they can also be shot down while in transit, although they travel more quickly than the drones will. Keeping up the fire on the treadlights will, again, keep the tank farther away and give you more time to shoot down the rockets.
It may sound simplistic to leave you with a "here's what to shoot!" objective for this boss fight, but hey: it's a rail shooter. There isn't much you can do except keep putting metal in the air and aim for the right spots on your target until it shuts itself down.
Boss Fight: Brock
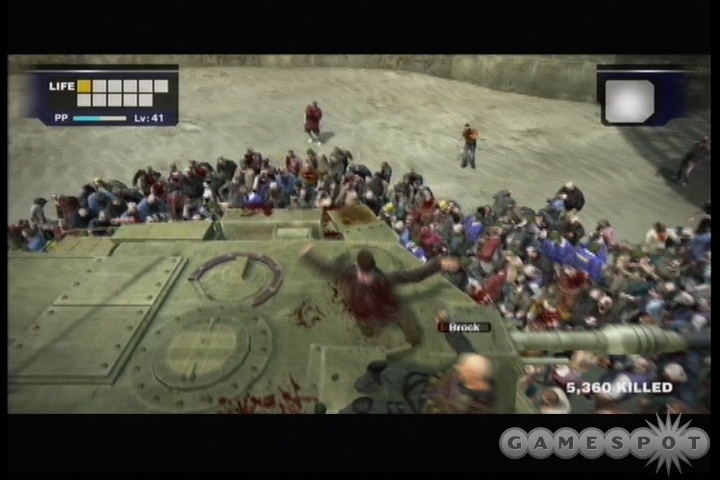
Got to wonder what this guy's last name is. Chestmeat? Brickfist? Slambody? Whatever it is, he's a badass. He'll likely be the most difficult enemy you've had to face thus far in the game, as befitting the final boss.
Oddly enough, though, you won't have any healing to worry about here, or guns; your inventory is stripped bare as soon as the fight begins. You're going to have to take Brock on mano a mano at this point, with nothing but fists and rage to see you through to the end.
Brock is a cunning pugilist, though, so if you haven't been using your usual attacks up until now, you're going to have a difficult time penetrating his guard. Simple punches are going to be easily blocked by his raised fists, and most of your grapple techniques will fail to register on him, simply because he'll avoid them by moving quickly. The skills that you do have to use on him include the double lariat and the jump kick, with the former being the instrument of choice.
Brock's Attacks
Brock's attacks mostly consist of either a bruising punch combination, which will often send you flying off the tank if it lands, or a vicious stranglehold that will slowly leach out your life if you let him keep it on. Shake it off with your left analog stick as best you can. You can't really avoid either of these attacks, so try to keep your distance as best you can from the bad man.
Attacking Brock
If you recall the fight with Sean, the leader of the True Sight cult, you'll remember how he was vulnerable to attacks as he jumped up or down from elevated areas. The same is true of Brock, here. He'll refuse to leave the tank's roof, but he does hop up and down from the rotating turret section back down to the chassis to follow you in your movements. During his little hops here, he will be temporarily vulnerable to your hits. This is a prime time to let loose with a double lariat. The number of blows it dishes out will be more than enough to hopefully hit Brock on the way down.
And...that's pretty much all there is to it, really. If you're unlucky enough to have not obtained the double lariat by now (although we're not sure that's even possible), then this fight will become marginally more difficult; you'll just have to try and hit him on the way down with your normal fist attack or a jump kick or something like that. The double lariat is the key to winning this fight, though, certainly, although a good amount of Attack and Life upgrades from a high level (40+) will definitely be a boon here.
The End...?
After defeating Brock, you'll have to sit through the credits one more time before you can save your game. You'll unlock Infinity Mode after doing so, which apparently allows you to restart the game at the 72 hour mark, if you so desire. You can, of course, feel free to restart the game in 72 hour mode to see if you can escape with more hostages, or to experience the joy of using your super-powered hero to defeat multiple zombies with your bare hands. The world is yours!
Scoop Missions
Scoop missions are going to be delivered to you by Otis, who'll periodically attempt to communicate with you via your Transceiver. When you hear the tone and see the phone icon on your screen, you can press to the right on your d-pad to talk to him. You can only do this while walking (i.e. you can't be in a vehicle) and the transceiver temporarily acts as an item, so if you have a full Stock, or if you're carrying a large two-handed weapon, like a bench, you'll have to drop it while you talk to Otis. You can't attack or jump while speaking to Otis, so be sure you're in the clear before answering the call.
Scoop missions are often going to conflict, time-wise, with your Case Files. Since your game will end if you don't complete a Case File, they should obviously be the priority for you, but if you time yourself right you should be able to manage to hit many of them in between or during Case File timers. Whether or not you can hit all of them is another matter; we suspect it's possible, but probably not on the first time you play through the game. If you're playing 72-Hour mode with a high-level character, then you'll know where to go and at what time to complete the game with a high completion percentage. We can't wait for the first Dead Rising speedrun, personally!
September 19th
Cut From The Same Cloth
Location: Colombian Roastmasters, Paradise Plaza
NPC: Kent
Time Available: 2:00 PM, September 19th.

When you meet up with Kent in the Colombian Roastmasters store (keep in mind that you'll have to not be in Paradise Plaza to get this Scoop), he'll mock your photography skills and offer to teach you a few things. If you agree to learn from his expertise, you'll be tasked with taking a few pictures of him in various poses. Why he thinks that he should be the star of the show is beyond us.
First up is a picture of Kent taking a picture of you taking a picture of Kent taking a picture...erg, never mind. In point of fact, you just need to take a picture of Kent while he's taking a picture, and ensure that you nab at least 500 PP for the picture. A nice, close zoom on him as he's holding his camera up to his face should net you the points.
Next up is a shot of his perfect pose for 700 PP. It seems that this refers to the pose that he does when he holds his fist up in front of his face; he'll often throw it out there right after taking a picture. If you catch him in the act, you should net the PP pretty easily; just be sure to zoom in on him before taking it. It can be frustrating to wait for him to pose; you might want to walk over near the entrance to Colby's Movieland and clear out the zombies there before attempting to capture this pose. Standing still with your camera focused on Kent obviously makes it difficult to stay aware of your surroundings.
Note that you can also nab 10,000 PP for snapping a picture of Kent's jump kick, if you can hit it while he's still in midair. It's tough to do, but not impossible.
Photo Challenge
Location: Paradise Plaza
NPC: Kent
Time Available: After completing Cut From The Same Cloth.
After you finish off Kent's "Cut From The Same Cloth" mission, he'll tell you to return to him by noon on the 20th with three shots, one of drama, one of brutality, and one of erotica. It's pretty easy to get drama and brutality, especially if you've been planning this out for a while. For drama, grab a picture of Jeff and Natalie as they embrace after being rescued and save it in your camera. (You should probably still have it in your camera at this point.) For brutality, a picture of one of the Entrance Plaza victims being eaten alive will probably suffice. We're unsure of the full point requirements for these pictures, but we estimate that they'll have to be at least 500 PP for them to count for Kent's purposes.
Erotica is the toughest of these requirements. You can snap erotica pictures by taking shots of scantily-clad female zombies, as well as attractive survivors, but there simply aren't many of those around. The best way to proceed if you want an appropriate Erotica shot is to rescue Sophie, the survivor who's being harrassed by the convicts in Leisure Plaza late on the 19th. If you do so, you have two options for the erotica shot. You can either tell her to stand on some stairs and attempt to snap a picture up her skirt, or you can try to get her in the Security Room after rescuing her. If you talk to her there, wait for her to sit back down and zoom in on her crotch for the picture. It's creepy, but it'll probably get you the 500PP Erotica shot you need for this mission. Alternately, after Brad gets wounded and you're assigned the Medicine Run case file, you should be able to take a picture of Jessie as she sits down for major pointage.
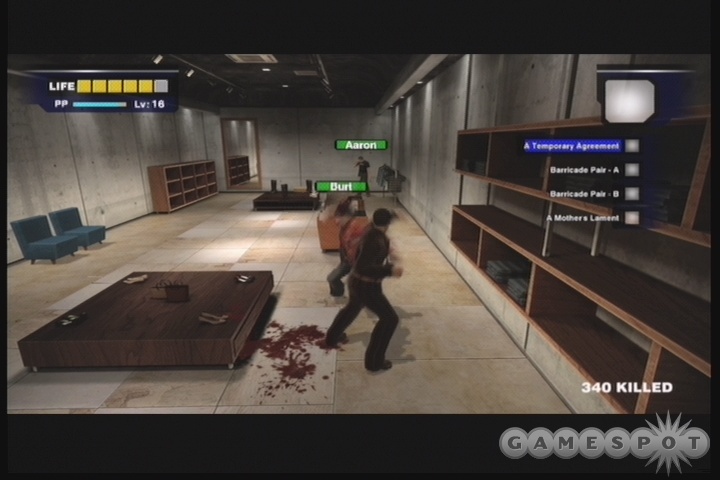
Barricade Pair A & B
Location: Weber's Garments, Al Fresca Plaza
NPC: Burt and Aaron
Time Available: 4:00 PM, September 19th.
These guys are holed up in Weber's Garments, behind some plywood and a set of shelves that they've thrown up. In order to convince them to come with you back to the Security Room, you're going to have to beat up the one with the baseball bat a bit; just press up on the D-Pad to switch to your bare hands and hit him a few times. When you do, they'll both come along for the ride. If you can give them shotguns, that'd be perfect; otherwise, hand off your SMG to one of them (you can find one in the fountain here in Al Fresca if you don't have one) and give the other one a handgun. When they're in your party, you can grab Leah from the A Mother's Lament mission nearby and attempt to get them all back to the Security Room.
A Mother's Lament
Location: Riverfield Jewelry, Al Fresca Plaza
NPC: Leah
Time Available: 5:00 PM, September 19th.

Leah is standing in Riverfield Jewelry in Al Fresca Plaza, sobbing over the loss of her "baby". She says the zombies ate it right in front of her. If you keep talking to her, she'll eventually agree to come with you back to the Security Room. She has an injured leg, though, so you'll have to carry her.
Getting her back to the Security Room is going to be a pain. To begin with, you'll have to tell her to follow you, then jump over the counter of the jewelry store and wait for her to follow you; since you can't jump while carrying her, you can't jump over the counter while she's on your back. Be sure to have a weapon handy to clear out the zombies that will be milling around the counter while you talk to her. Also be sure to bring plenty of healing items when you go through the Food Court.
When you reach Leisure Park, you're probably going to have to deal with the three psychopaths in the jeep that are driving around. You can pick up Sophie as an additional escort here, if you wish, but steer well clear of where the psychos are parked, as they'll start shooting at you if you get too close. We recommend hugging the southern wall as you move along and sticking to it until you reach the door to Paradise Plaza. If you do aggro the psychos, each time they shoot you you'll drop Leah, making this a ridiculously difficult escort task.
When you get Leah into Paradise Plaza, though, things become a bit easier. Take her from there back to the Security Room, and you'll get a handy reward for your services.
Out Of Control
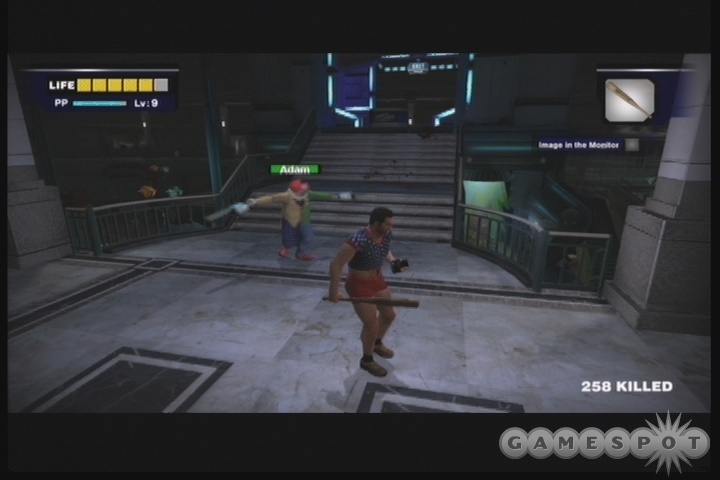
Location: Wonderland Plaza
NPC: Adam MacIntyre
Time Available: 9:00 PM, September 19th.
Save your game somewhere in Wonderland Plaza before attempting this mission! You'll also need a few healing items if you want to take down Adam. We recommend stopping in the pizza shop in the Food Court and cooking a few uncooked pizzas in the oven there. The resulting hot pizzas should fill up your entire health bar, unless you've restarted the game a few times. If you have the inventory space, a Health 1 or Health 2 book will increase the healing powers of these items.
Adam's a chainsaw-wielding clown that's gone crazy as a result of the chaos in the mall. You'll encounter him when you use the panel in the little Space Rider control room; he'll automatically appear and attack you.
Defeating Adam!
In order to take down Adam, you have to beat on him with melee weapons; he'll deflect gunshots with his chainsaws. We recommend baseball bats. They're not ideal (if you can find any kind of bladed weapon, like a katana or a sword, that's probably preferable), but you'll find plenty of them in the sports store near the Space Rider.
To go after Adam, just get close to him and attack! He can obviously attack you with his chainsaws, and also has other attacks that he'll bust out, such as flaming breath or a whirlwind attack that'll quickly doom you if you get caught up in its midst. Generally speaking, the best way to approach Adam is to try and knock him down; a solid blow with any good weapon will usually do the trick. When he's down, run away from him or jump over him, as he'll invariably sit up and breath fire before standing back up. When you can penetrate his defense a bit, knock him down again and wear down his health in this manner until he's defeated.
Of course, getting through Adam's defense is tough; if you attack at an inopportune time, he'll hold up his chainsaws and destroy your bat as you swing it. Good times to attack include while he's blowing up his balloons (if you have a gun, feel free to shoot him at this point, then follow through with a melee attack while he's stunned by the balloon powder), or at the end of the whirlwind attack, while he's standing still for a moment. You can also attempt to confuse him by attempting to lure him into a crowd of zombies; he'll kill most of them instantaneously, but he'll sometimes get hurt by them. If you have a shotgun, they also work well, much better than handguns. When he throws knives, you can free-shoot him with the shotgun in between throws without bothering to go into aim mode, for instance.
Your task here is made extra difficult by the fact that there aren't any food stores in the vicinity. If you run out of healing items, you may have to run around looking for cardboard boxes to smash in order to carry on the fight; you can find a couple of apples here and there, so pick up the Health 1 book from the bookstore to double their effectiveness.
Defeating Adam can take over ten minutes if you get unlucky with your attacks or get hit by a few of his; we don't recommend trying it unless you're level 8 or 9 and have enough inventory slots and life slots to survive. When you do defeat him, you'll net a large PP bonus, as well as the ID key. Use the ID key on the Space Rider platform to reveal Greg Simpson, who apparently knows of a shortcut to the Security Room. For some reason, it's behind a mirror in the lady's bathroom downstairs! (Jump on the counter to see it.) It'll be tough to get him there, so be sure to pick up both of Adam's small chainsaws and use them to cut a swath through all the zombies between you and the exit. You can earn some PP by running ahead of him, waiting for him to call to you, then turning around and snapping a picture.
Greg will follow you through the shortcut, so be sure to have a weapon ready for him when you wind up in Paradise Plaza. If you give him one of the chainsaws, then you should be in for some fun. Since you can save as soon as you hit the bathroom, you shouldn't have any trouble getting Greg back to the Security Room, or if you do, you shouldn't have to fight Adam again at any rate.
Japanese Tourists
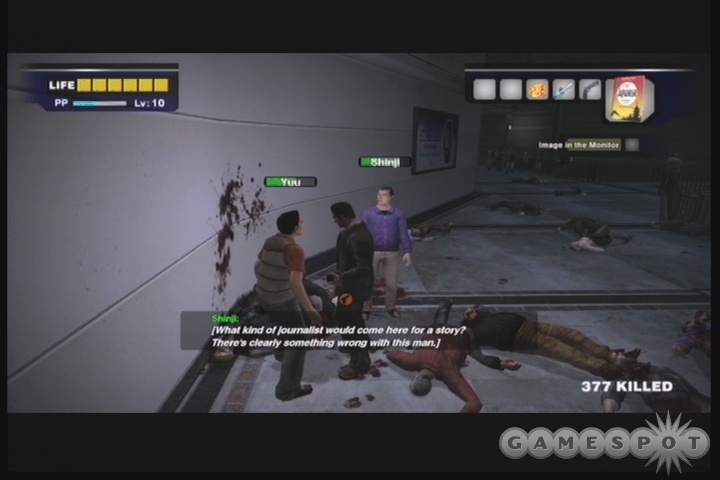
Location: Sir Book-A-Lot, Wonderland Plaza
NPC: Yuu & Shinji
Time Available: 10:00 PM, Day One
These Japanese tourists are holed up in the bookstore in Wonderland Plaza at around the same time as the Out of Control mission will be given to you. If you want to complete the escort, it's probably best to do it before Out of Control; otherwise you may stumble across them while fighting Adam and won't be able to protect them from the hordes of undead coming their way.
If you do manage to get in touch with the Japanese tourists, grab the Japanese book from the bookstore they're in to talk to them. They require a lot of talking before you can actually start escorting them, so get through that as best you can, then take them back to the Security Room to earn your points. They can carry weapons, so you have that much to offer them. If you've completed Out Of Control, then you can take them back via the bathroom shortcut that gets opened up.
Shadow of the North Plaza

Location: North Plaza - A frantic man has been spotted running from the supermarket.
NPC: David Bailey
Time Available: 11:00 PM, September 19th.
You'll find David Bailey in one of the under-construction shops in the North Plaza, sitting on the floor. He'll tell a tale of woe and dread, revolving around a psychopath that's inhabiting the grocery store nearby. Don't bother checking it out yet; your goal is to get David back to the Security Room. If you've completed the Out of Control mission and have unlocked the Wonderland Plaza - Paradise Plaza ladies room shortcut, then that will be the best way to get him back in one piece, especially if you still have to deal with the convicts in Leisure Park. Otherwise, you may have to drag him across that stretch of land.
Regardless, you need to get David back to the Security Room to earn your escort reward. He's injured and will need to be carried.
September 20th
Lovers
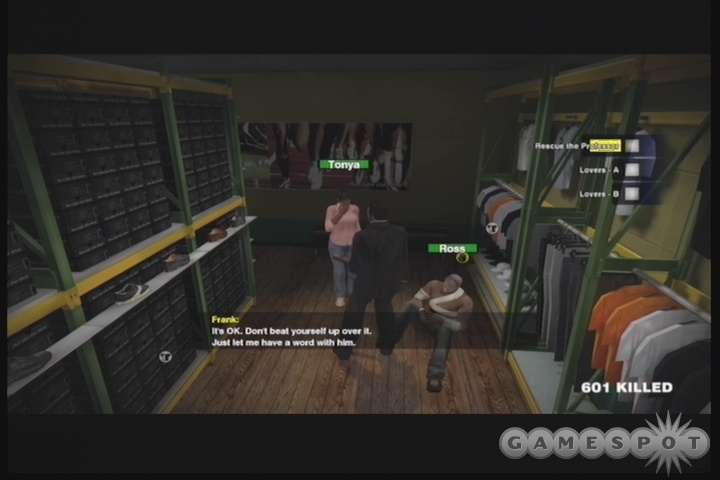
Location: Run Like The Wind [Wonderland Plaza] - A couple has been spotted in Wonderland Plaza. NPC: Tanya & Ross
Time Available: 7:00 AM, September 20th. END: 11:00 AM
A difficult mission to accomplish, mostly due to time issues. This mission's going to pop up while you're either preparing for or engaged in Case 2-1, which is on a tight timer itself, and leads into another tight timer after it's over. Getting all the way to Wonderland Plaza and completing the escort back to home base will be difficult, even if you've unlocked the ladies room shortcut during the Out Of Control Scoop mission.
When you reach Tanya and Ross, who are holed up in the shoestore in Wonderland Plaza, they'll present a wicked predicament: Ross has been injured, probably beyond repair, and Tanya will refuse to leave without him. If you keep asking both of them questions, you'll eventually have Ross ask for a gun to defend himself with while you force Tanya away from the shop and back to safety. If you happen to have a gun on your person when he asks, you can give it to him by equipping it and talking to him again. He'll immediately shoot himself (which you can photograph for major prestige points), but this will leave him dead, and Tanya will refuse to come with you afterwards.
Alternately, if you press on Tanya, or just keep talking to the couple without a gun in your hand, you can convince them to come with you to the Security Room. You'll have to carry Ross while Tanya follows; you can give her a weapon if you wish, with something like a baseball bat or shotgun probably being ideal. Tanya's the sticking point here, as she'll easily get caught up in zombie crowds as you run along. Unless she has something that's capable of freeing her from a melee, like a shotgun or a baseball bat, she's going to be almost impossible to escort even as far as one of the exits from Wonderland Plaza. If she dies, though, you can keep on taking Ross back to the Security Room; he'll net you a reward and won't even notice his girlfriend is dead. Zombait will help here, if you can make some before the escort begins.
The Hatchet Man
Location: Crislip's Home Saloon [North Plaza]
NPC: Cliff Hudson
Time Available: 8:00 AM, September 20th.
A difficult mission. This will probably pop up while you're working on Case 2-2 or 2-3, and you'll have a hard time getting to it in between accomplishing those missions. It's best to wait until the gap between Case 3 and Case 4 to attempt it.
Cliff dwells right within the hardware store in North Plaza, which for the purposes of this fight will be cleared of zombies. He's going to attack you mainly with his wicked machete, but he'll also throw in some dynamite here and there in the second half of the fight. Keep in mind that there aren't any healing items in the room, unless you get lucky with the cardboard box behind the register, so bring in anything you need ahead of time. There are plenty of weapons in the store, but few that will match your needs; you're going to be best off grabbing a katana or sword from the knife shop before entering here, or use one of the lead pipes in the North Plaza area. An SMG or shotgun will make the second half of the fight a bit easier, but these aren't critical if you can't find them or don't have room in your inventory.
The Fight!
The first section of this fight isn't horrific, although it can be difficult to dodge Cliff's attacks. He'll constantly come at you with melee attacks in mind and attempt to slash at you with his machete. If you blast him in the face with a shotgun, he'll go down on one knee and be stunned for a second, allowing you to back off a bit and attempt to regroup before he gets back up and comes at you again. If you have a melee weapon equipped, then you can dash up to him, hit him, then back away before he manages to counterattack. It's probably more difficult to do this than it is to use a shotgun, but it's whatever floats your boat, really.
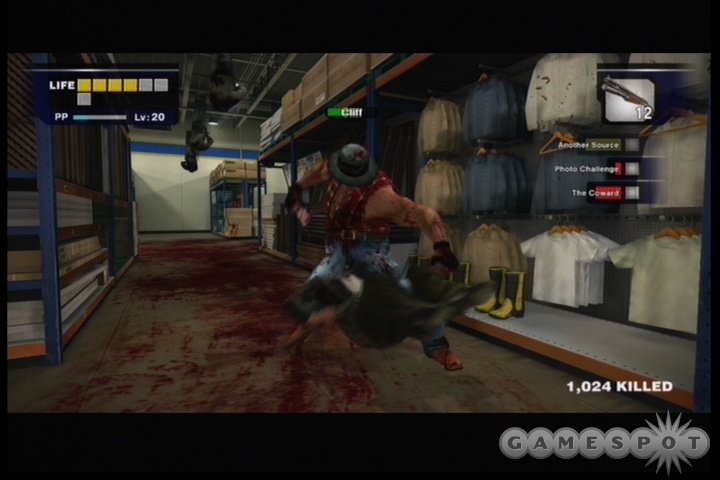
In the second half of the fight, Cliff will periodically drop down into the numerous hatches in the floor to escape your onslaught. (If you can catch a picture of him doing this, you can earn a decent amount of PP.) His main new tactic here is to stand on top of the hardware store's shelves and throw items at you; he'll either throw pipe bombs or smoke grenades. Smoke grenades will cause you to cough and stand still, but deal no damage, while the pipe bombs will obviously hurt you and knock you down. If you stand outside of his field of vision, he won't throw at you, and if you avoid enough of his bombs, he'll hop back down and attempt to melee you again, letting you decide what you're most comfortable with.
If you have a ranged weapon, then it's not too difficult to shoot at Cliff in between bomb drops. If you want to be brazen, you can run around and shoot at him in plain sight, but if you angle yourself right when you spot him, you can probably pull off the hiding-behind-a-shelf trick and get him in your crosshairs without having him spot you. He's immobile while he stands on the shelves, so he won't be able to move around for a better angle on you, but he will drop down to the floor eventually and come at you with his machete again.
Aftermath
When Cliff goes down, he'll offer up the Empty Store Key, as well as his machete. The Empty Store Key opens the locked store just outside Crislip's, which contains three hostages willing to be escorted back to the security room. Luckily, each of them can hold weapons, so grab a few shotguns from the Huntin' Shack and load them up; an easy escort should follow.
The Coward
Location: McHandy's Hardware [Al Fresca Plaza] - A cowardly survivor has been spotted in Al Fresca Plaza.
NPC:
Time Available: 9:00 AM, September 20th.
When you reach Gordon, who's crouched over in the rear area of the hardware store in Al Fresca Plaza, he'll take a lot of coaxing to convince him to follow you. Specifically, you need to hit him in the face. He can be tough to hit with most weapons, so you may have to throw something at him. We managed to lure zombies back towards him, which caused him to stand up, then hit him with a punch. After you give him a good whack, he'll come along for the ride, so bring him back to the Security Room for your reward. It's not a difficult escort, as he'll carry a weapon and won't need to be carried or anything. Bring some Zombait if you wish.
Restaurant Man
Location: Jill's Sandwiches, Paradise Plaza
NPC: Ronald Shiner
Time Available: 11:00 AM, September 20th.
Ronald's holed up in Jill's Sandwiches in Paradise Plaza. He won't agree to come with you until you bring him some food, so grab some orange juice from the Colombian Roastmasters store upstairs and give that to him. After that it's a pretty simple escort mission; just give him a gun or something and get him back to the Security Room.
Above The Law
Location: Lovely Fashion House, Wonderland Plaza
NPC: Jo Slade
Time Available: 1:00 PM, September 20th.
Jo Slade is a cop with a mission: she's got four bad little girls tied up in the Lovely Fashion House, and intends to torture them for their promiscuous ways. Whether they're actually promiscuous or not is besides the point; this chick is psychotic, isn't she?
Anyway, the adventure begins when you actually enter the Lovely Fashion House, but three of the hostages are treated as normal civilians. In other words, if you get close enough to the Fashion House to hear them screaming and witness their presence, they'll be active in the world from then on. Even if you don't enter the Fashion House to fight Jo, they'll still die if you leave them in there for too long. So it'll be best to be ready to take on Jo the first time you come into the area. Wonderland Plaza isn't particularly well-known for its plethora of healing items or weapons, so come loaded for bear. If you want to attack Jo with melee items, lead pipes will be your best bet, while sniper rifles or the SMG will probably be best if you want to take her down from a distance. Shotguns are a big no-no, thanks to the hostages scattered around the area.
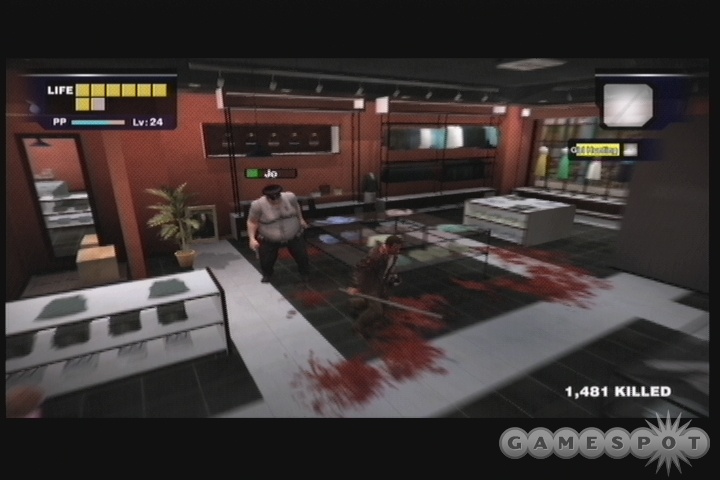
Jo's Attacks
Jo's a bruiser; there's no doubt about that. For much of the fight, she'll simply chase you around the shop, attempting to kick you or use her stungun on you. The stungun is going to be the deadliest tool in her limited arsenal. If she happens to land a hit on you with it, then you'll hit the ground and be unable to get up for a few moments. During this time, she may decide to come over and stomp you on the balls. There's apparently no way to dodge this attack, so you may find yourself losing four or more life squares each time you get hit with the stungun. Needless to say, it's not something you want to have happen.
Attacking Jo
If you're quick, though, it shouldn't happen at all. The technique you want to learn is to run away from Jo and force her to chase you, then to quickly turn around and whack her with your lead pipe. (Any melee weapon will do here, but the lead pipe has an excellent combination of range and speed. You can find plenty of them on the floor in the North Plaza.) She'll stagger and be thrown off her gait, allowing you to run away a bit, turn around, and wait for her to approach again. Repeating this process for a while should let you wear down her health and eventually kill her, although it won't necessarily be easy. If she happens to try and attack one of the hostages, take advantage of that by turning on her with your pipe or the SMG.
When Jo dies, free Kay and get as many of the survivors back to the Security Room as you possibly can. Kay can't hold many weapons, but she will be able to use your SMG if you give it to her.
Mark of the Sniper
Location: Estelle's Fine-lady Cosmetics, Entrance Plaza
NPC: Hall family
Time Available: 4:00 PM, September 20th.
Otis will eventually radio in some disturbing news to you: it appears that a sniper has taken up his roost in the Entrance Plaza, and is firing away at a target inside a cosmetics store there! Sounds like another psychopath attack.
And indeed, when you arrive in the Entrance Plaza, you're going to find yourself under siege by no fewer than three snipers, all part of the militant Hall family. Although Thomas seems reluctant to throw in his hat with his other family members, he's still an enemy of yours, so you'll have to take all three of these guys out if you want to rescue any of the civilians trapped in the area.
The Attacks
The Halls aren't difficult, just annoying. They all feature the same basic intelligence: they'll turn and fire their sniper rifles at you when they're a good distance away, but if you get too close to them, they'll turn and run. Their fire doesn't deal very much damage, and you won't get hit very often if you stay on the move, but when all three of them are spread out, it can be difficult to nab one of them, since the others will often be firing on you. This is one of the few psychopath fights that gets easier as you go on; when one or two of the Halls are taken out, the remaining forces will be easier to deal with.
Attacking The Halls
You can attempt to take these guys down with guns, if you like; shotguns are probably best since they can be fired without reverting to aiming mode while you're chasing down the snipers, and will still usually hit due to their spread. Each time a sniper is hit, he'll pause for a second, allowing you to take more careful aim and try to get a headshot. The SMG is also going to be fairly useful here, especially when you're down to only a single target. Note that each of the Halls will drop a sniper rifle; when you've finished off two of them, killing the last should be a relatively simple matter of engaging in a sniping duel and rapid-firing shots off at your target.
Alternately, melee weapons can be used against these guys, although it'll be a bit more time-consuming. You're going to want to have something like a lead pipe, if possible, although a baseball bat will do in a pinch. To melee your opponent, run behind them and attempt to match their speed. (If you don't have at least enough levels to have obtained the first speed upgrade for Frank, then this may be impossible.) When you get out in front of your target, turn so that you swing in the direction they're heading and try to pop them with your weapon. This is difficult to time properly since they'll still be moving, but when you get the hang of it you should be able to do it fairly consistently. Also note that each of the snipers will periodically take time to reload or shoot at one of the zombies or civilians in the area; a perfect time to hit them with your weapon.
When you've killed all of the Hall family members, you'll find Wayne holed up in the Cosmetics store. He'll be escortable back to the Security Room, and he can also hold an SMG or a shotgun, which is helpful if you also intend to complete the Woman Who Didn't Make It and the Antique Lover Scoop missions, which should both also be active for you in the Entrance Plaza as well.
The Woman Who Didn't Make It
Location: Gramma's Kids, Entrance Plaza
NPC: Jolie Wu
Time Available: 4:00 PM, September 20th.
Jolie Wu awaits you in a shop on the first floor of the Entrance Plaza. You'll have to fight off the snipers from Mark Of The Sniper to get to her. When you do reach her, she'll tell you of her friend Rachel, who was left behind in the Ladies Place shop upstairs. If you bring Jolie up to the Ladies Place, you can get both her and Rachel to join your little escort party. Be sure to snap a picture of them hugging when they're reunited. Neither of them can handle weapons, so you'll need to protect them well on the journey back to the Security Room.

Antique Lover
Location: Ned's Knicknackery, Entrance Plaza
NPC: Floyd Sanders
Time Available: 4:00 PM, September 20th.
Floyd is holed up in Ned's Knicknackery in Entrance Plaza, and will require quite a bit of talking to be convinced that joining you is the right path for him. When you do, though, you'll be able to carry him back to the Security Room for your reward. Don't be too upset if you have to put him down, though, as he can walk a little ways before getting winded. Note that the Knicknackery is also one of the game's few sources of Battle Axes. They're too slow to be much use to you, but they're still fun to use.
September 21st
A Strange Group
Location: Colby's Movieland, Paradise Plaza
NPC: Sean Keanan
Time Available: 12:00 AM, September 21st.
A strange group of cultists have been spotted in the Movieland. It's up to you to investigate, being the photojournalist of the group. If you manage to make it into Colby's and fight your way into Theater #4, you'll finally come face to face with the leader of the group, one very demented theater manager.
Enter this fight prepared, as you won't have many weapons or healing items on hand. You're going to almost be forced to fight with melee weapons, as Sean is going to be coming after you with a sword, and will sidestep your aim if you try to get guns on him. You can try to free-aim a shotgun blast or two at him, but any firearm use here will be risky, as there are four hostages that you may wind up killing if you aren't careful. If you can find a couple of lead pipes, those will work well, as will hunting knives or cleavers. Note that you're going to have a lot of hostages to escort to the Security Room after this fight, so if you can, bring along a shotgun or two to give to them afterwards.
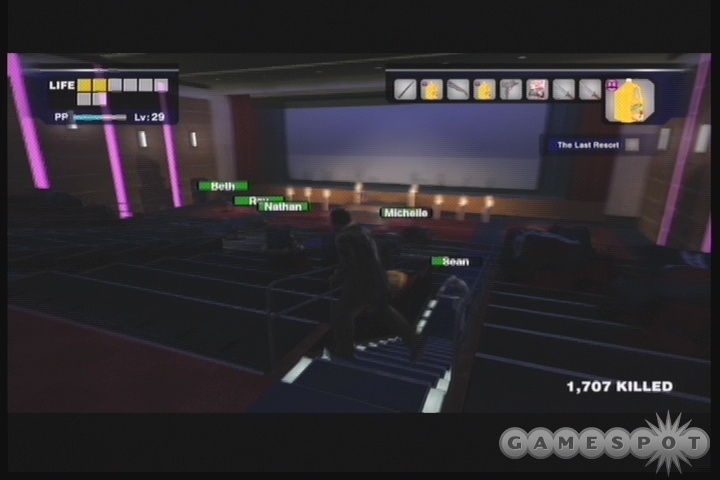
The Fight
Your basic tactic here is somewhat similar to the one you employed for Cliff Hudson in the Hatchet Man quest. Sean doesn't have much to do here except charge at you with his sword and attempt to swing it into your body, but he does have a few different ways of doing that. Sometimes he'll jump and swing, sometimes he'll swing at the end of a charge, sometimes he'll swing once and follow it up with another swing a second later, etc. Most of these attacks will knock you down, so it'll behoove you to avoid them as best you can. He'll also occasionally perform a little sliding maneuver that knocks you off balance, which he'll usually resort to if he notices you trying to eat food. He moves quickly and attacks constantly, making it difficult for you to get any healing in.
What you basically want to do here is avoid Sean as best you can, and pick the moments when it'll be easiest for you to hit him with your weapon. If you have a lead pipe, then you can simply run away from him, wait for him to catch up to you, and whack him as he attacks. He'll stagger, giving you time to run away and set the whole deal up again. If he happens to go down on his knees, take advantage of that and either quickly flip to a shotgun for a blast to the head, or hit him again with your weapon to knock him all the way down.
You're going to have to learn his attacks and how to avoid them if you want to get your own attacks in, though. Usually this is a simple matter of sidestepping when he charges in; just be sure to stay away from the hostages, as Sean's attacks can sometimes accidentally hit the hostages, and that's a bad thing. If you do learn to dodge the attacks, then you can usually manage to get a pipe blow in after he misses you. Alternately, you can just keep hopping up on top of the stage near the screen and hitting him as he jumps up to follow you.
Aftermath
When Sean's dead, quickly grab the Ceremonial Sword that he drops and use it to kill the cultists coming through the door. When all of them are dead, close both of the doors and use the free time to set all of the hostages loose. You've got four of them to deal with, but if you pick up the Brainwashing Tips book from Sean's body, you'll be able to give most of them weapons and make them more aggressive in combat. In addition to the hostages in the theater itself, Sean will also have dropped the warehouse key when he was killed, allowing you to open the nearby door, which reveals Cheryl, another hostage.

When you do bring these guys back to the Security Room, take a picture of the airduct that leads into it and save it on your camera. It'll come in handy soon, when you encounter the survivalists in the Huntin' Shack.
Floyd the Sommelier
Location: Security Room
NPC: Floyd
Time Available: 1:00 AM, September 21st.
Floyd asks you to bring back some wine to the Security Room. If you find a bottle in your travels (there's plenty in the Food Court), feel free to pick it up. Bringing it back to Floyd before the time limit runs down will result in an easy 10,000 PP reward.
Long-Haired Punk
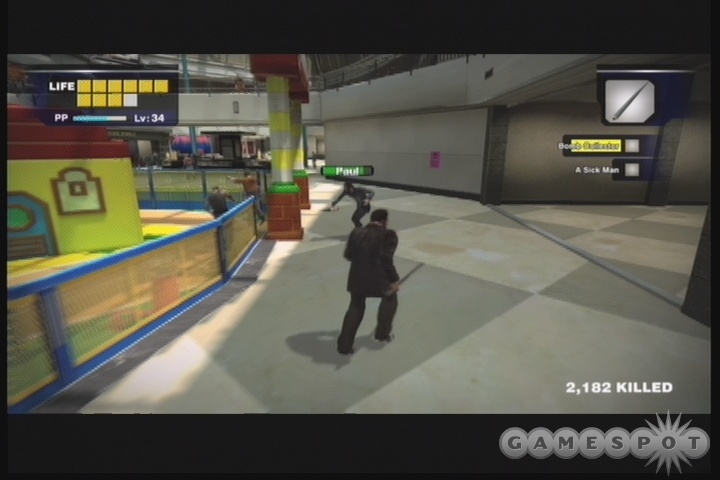
Location: Casual Gals, Wonderland Plaza
NPC: Paul Carson
Time Available: 6:00 AM, September 21st.
Another psychopath event! Paul Carson is a troubled teen that's going to take out his social frustrations on a pair of women in the Casual Gals store in Wonderland Plaza. You should probably get out that way before he does anything rash...
The Fight
When you reach Casual Gals, Paul will automatically start attacking you. This is functionally similar to your second fight with Carlito, when he was using the sniper rifle. As then, you're going to have to give chase to Paul, who'll drop bombs on the ground behind him in an attempt to blow you up while you follow him. If you're close enough to chase Paul around, you should be able to avoid these bomb blasts; if you think you're going to get hit, just Flying Dodge out of the way and resume your chase.
Occasionally Paul will turn around, light a molotov cocktail, and chuck it at you. This is the time to deal your damage; just sidestep the cocktail, then whack Paul with a melee weapon while he recovers from the throw. He'll also occasionally run out of breath while running, making another good time to shoot him or whack him with a lead pipe or knife or something. A few repetitions of this will finish him off, and you'll wind up back in the Casual Gals store.
The Aftermath
After the ensuing cutscene, Paul's going to wind up on the floor of the store with his crotch on fire and his health slowly leaking away. There are at least three fire extinguishers in the immediate area, though, so grab one of them and immediately take aim. Stand near his feet, point at his crotch, and move the extinguisher back and forth over his body until the fires go out. It can take a bit of time, and note that you can't manually aim down, so just keep moving the beam until you manage to get him free of his painful agony. After talking to him for a bit, Paul will join your group. He can hold a weapon, so give him something while you tend to the two ladies in the back room, one of whom can also hold a weapon.
A Sick Man
Location: Estelle's Fine-Lady Cosmetics, Wonderland Plaza
NPC: Leroy McKenna
Time Available: 11:00 AM, September 21st.
Leroy's holed up in one of the cosmetics shops in Wonderland Plaza. There's nothing special about him. Although he complains of an injury, he's perfectly capable of walking around on his own, and can even hold a weapon, so give him something to use before escorting him back to the Security Room.
A Woman In Despair
Location: Players, Paradise Plaza
NPC: Simone Ravendark
Time Available: 3:00 PM, September 21st.
Simone is located in the Players CD shop in Paradise Plaza. She's been bitten by a zombie and is worried that she can't be saved. If you talk to her long enough, though, she'll be convinced that Isabela can help her, and will agree to come back with you to the Security Room. She can hold a weapon, so give her something to use and get back home!

Kindell's Betrayal
Location: Security Room
NPC: Kindell
Time Available: 3:00 PM, September 21st.
This one's pretty simple. Kindell is attempting to sow discord with his fellow Security Room evacuees, by telling them that the helicopter you've promised them won't actually be coming after all. If you return to the Security Room and speak to him before the time limit is up, you'll be able to convince him to wait another 24 hours, thus averting the mutiny and buying your helicopter a little more time to show up.
Paul's Present
Location: Security Room
NPC: Paul Carson
Time Available: 5:00 PM, September 21st.
If you saved Paul's life after the "Long-Haired Punk" Scoop mission and brought him back to the Security Room, he'll eventually offer you a present. In exchange for keeping secret about his psychotic urges when you all escape, he'll cook you up an unlimited amount of molotov cocktails, should you wish to have them. They're nice little portable explosives, capable of killing multiple zombies at once (not unlike shooting a propane tank), but each molotov takes up a whole inventory slot, making it unlikely that you'll want to carry more than one at a time.
Events
As you wander around Willamette Parkview Mall, you'll occasionally stumble across events or cutscenes that aren't tied to a particular Case File or a Scoop mission. These usually occur after you walk into an area after a set trigger time has passed.
Warehouse
September 19th
An Insect Infestation
When you return to the Warehouse on the evening of the first day in the mall, you'll find that it's been overrun by zombies. A weakness is revealed, though, as stomping on the bee that appears will let Frank kill multiple zombies in one swift swoop. From this point on, some zombies will drop Queen bees when killed; if you capture them, they'll act as short-range grenades, killing all nearby zombies when you smash the jar.
The warehouse will be filled with Zombies from this point forward, however, including the elevator leading to the rooftop, making escort missions an adventure. You have mannequins near the elevator, though, allowing you to knock down most of the elevator's zombies and hit the button to get to the rooftop relatively quickly. No need to kill the zombies in the elevator, just distract them and make sure your escorts are close enough to come along for the ride.
Leisure Park
September 19th
Psychos in a Jeep
Late in the day on September 19th, probably on your way back from Case 1-3, you're going to come across a disturbing scene in the open area in the middle of the mall, as three prisoners have apparently hijacked a military jeep and are using it to cause chaos in Leisure Park. They'll instantly kill one of the civilians that's running around, leaving Sophie to their tender mercies. You can escort her back to the Security Room, if you wish, but eventually you're going to want to take down the three prisoners here, because they'll otherwise greatly hamper your attempts to cross the park in the future.
The three prisoners each take up one of the slots in the jeep. One's the driver, one's the passenger, and one's the gunner. The gunner will be using an M60 machine gun to wreak havoc whenever you come close to the jeep, so if you're just trying to cross the park, give the jeep a wide berth and hope they don't notice you; if they do, they'll come in close and attempt to take you out, both by firing on you and by running you down. You're not going to stand much of a chance to beat them unless you have some pretty hefty firepower, so be sure to take them on with either an SMG or a shotgun at close range. Ideally, though, you'll be able to bring a couple of sniper rifles to the fight and use those for your kill mechanism.

Killing The Convicts
If you watch the jeep as it runs around the area, you'll notice that the driver isn't exactly the best in the world; occasionally he'll get caught up in trees or grind against a wall. He'll back up when he hits an obstacle, but as often as not he'll just run right into the same obstacle again. When he's grinding against a tree, you have an opportunity to use your sniper rifle and cap them in the head.
Of course, there are plenty of zombies that are going to be coming for you while you're sniping, so try to set yourself up in the zombie-light area around the clocktower before zooming in. If you have escorted civilians with shotguns in your posse, you can park them in a spot near you, and they should kill any enemies that attempt to come your way. When you actually get eyes on the psychos, though, each should only require five or six shots to the head before they die, with the gunner being the weakest of the three.
When you kill all three of the psychos, you'll be able to grab the Heavy Machine Gun from the back of the jeep and use it for yourself. It's only got 200 bullets, and is oversized and therefore will be dropped when you cycle through your inventory, but if you can drag it to a nearby boss fight, such as for Cletus or the Out Of Control scoop mission, your job will get a lot easier.
Paradise Plaza
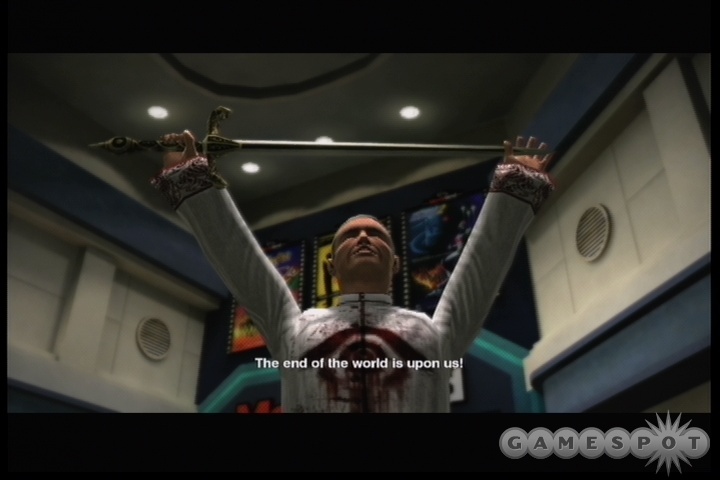
September 20th
Walk into Paradise Plaza around 2:00 PM
When you enter Paradise Plaza around this time, you'll come across a bizarre ritual, as a number of True Eye cultists from the movie theater are about to sacrifice Jennifer in their bizarre ritual. All you have to do here is kill off the True Eyes, get Jennifer out of the box, then escort her to the Security Room for your reward. You can combine this with the Restaurant Man Scoop mission if you like.
September 20th
Walk into Paradise Plaza after the Jennifer encounter
If you attempt to re-enter Paradise Plaza after the above encounter occurs, the True Eye cult will still be hanging around in full force. You can kill them if you like, for 500 PP apiece, although they can take a lot of damage. However, if one of them gets close enough to blow smoke in your eyes, you'll be stripped of your equipment and thrown into a locked room adjacent to the Leisure Park. Do they expect you to talk? Why no, Mr. West, they expect you to die.
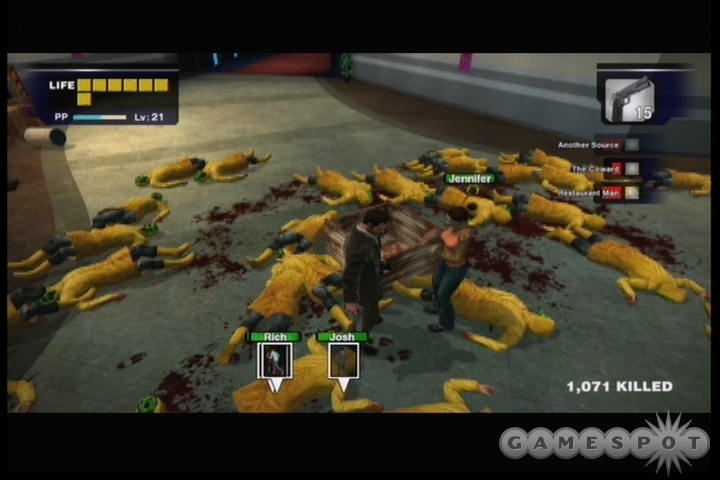
More cultists will be inside the room, apparently some kind of studio, and they'll attack in their ponderous way when they see you. You've got a pair of stepladders to attack with, as well as any objects in the cardboard boxes that you find. There's also a sword; use it with the Double Lariat move to quickly chop down any enemies around you.
There doesn't appear to be any way to get your stuff back after this little encounter, so you'll just have to find some clothes and more weapons! When you get the code after killing all of the enemies, enter it into the keypad by the door, then use the door (the prompt may be invisible) to escape back into Leisure Park.
North Plaza
September 19th

Cletus in the Gun Shop
After you spend a few hours wandering around in the mall, you're likely going to wonder when you can find some nice, heavy weaponry. The answer? Well, if you want more than the SMG that's in Paradise Plaza, then your answer is in the Huntin' Shack, a one-stop shop for all your hunting needs in Willamette Parkview Mall. It's in the North Plaza, and contains numerous shotguns, as well as a couple of sniper rifles. These aren't the heaviest weapons you'll ever have available, but gaining access to them will make upcoming fights that much easier.
Unfortunately, if you head into the gun shop after 6:00 PM on the 19th or so, the shop will have been taken over by Cletus, a shotgun-wielding redneck that's hopped up on wine. He'll turn his gun on you whenever you enter the shop or even get close to the doors, but still - this is where the guns are, so you'll want to take him down before too long, if only to make further adventures in Parkview a bit easier.
Doing so is, luckily, not that complicated. You'll need a handgun or an SMG, with the SMG being preferable, but at least handguns are easier to find, with many of the zombie cops in North Plaza carrying them. To take Cletus out, first clear out the small room outside the Huntin' Shack, killing all the zombies there to ensure that you have a little room to work with. When you're done, be sure that both of the double doors leading into the shop are open, then stand to the left side so that you can just barely aim into the shop when you're in aiming view. Cletus periodically stalks behind the counter from north to south; when he's on the south side, him in the head or body with a bullet, wait for him to recover, then do it again. He'll occasionally be able to hit you with the shotgun even when you're partially obscured, but if you're just barely able to hit him, normally he won't even try to fire at you. Be sure to take a picture of him while he's drinking for a few thousand prestige points.
Note that you can try to run into the shop and melee him, but if you get too close, he'll grab you and throw you back into the middle of the store, making this a tough way to kill him off.
September 21st
Survivalists in the Gun Shop around 10:00 AM.
Another shining example of man's inhumanity to man, you'll encounter a few survivalists in the gun shop on your third day in the mall. As soon as you enter, they'll open fire on you, but when you retreat back out of the door (use the Flying Dodge skill to avoid the stunlock you'll be under), one of them will run to the door to check if you're still alive. You can walk into the store to talk to him, but you can't proceed far enough to pick up any weapons, or you'll get shot again and will have to leave the store to reset the whole encounter.
Basically, these guys are going to require a lot of talking to convince them to let you escort them home. In addition to the talking-to, you'll have to show them a picture of the air duct leading to the Security Room! If you already have one in your camera, then you can show it to them immediately to make them all come along, but if not, you'll have to hightail it all the way back through the Warehouse to the Rooftop and grab a picture there and bring it back. When you do, you'll be able to escort all three of the survivors back to the Security Room for your reward. All of them are heavily outfitted with weapons, although Alyssa is only packing a handgun. You can take the machinegun from Brett and use it yourself, if you like.
Wonderland Plaza
September 20th
Walk into this section of the mall around 3:00 PM.
If you hit up Wonderland at this time on this date, you'll spot a couple of civilians dangling from the statue in the southeastern corner of the area, waiting to fall into the horde of zombies beneath them. If you have a Queen bee in your inventory, now would definitely be the time to use it. If you don't have one, you'll have to wade in with something capable of quickly finishing off zombies. Your Double Lariat move will be helpful, for sure.
In order to get the Nick and Sally down from the statue, pick up a Hunk of Meat from the zombie corpses and throw it at them, but only after you get the huge PP photo op for both of them. When they're on the ground, give Nick a gun and start walking them back to the Security Room.
Skills
As you level up Frank in Dead Rising, you'll occasionally earn new skills to play around with. Some of these are incredibly useful, while some are best used once or twice and then completely forgotten about. Confusingly, although we're listing these skills in the order that they appear in your Status menu, you won't always earn these skills in that order; there appears to be some randomness built into the system. In general, though, this list is pretty accurate at determining how far along in level you'll have to be in order to get a skill. Note that there are fewer skills than levels, though; most of the level upgrades will be adding to your attack power, speed, health, or inventory size.
For the purposes of brevity, any references to the Left Analog Stick will be shortened to LAS in this section. It'll happen a lot!
Jump Kick: Allows you to quickly knock down an enemy. Press X while jumping. When you land you'll be momentarily unable to move, so be careful when performing this. Fantastic for clearing out individual zombies that happen to be in your way, or for setting up a Neck Twist or Giant Swing (since it doesn't usually kill zombies on the first hit), but if you perform this on the edge of a crowd, you'll likely get grappled before you can recover.
Zombie Ride: Lets you jump over unsuspecting zombies (those with their backs turned) or walk across densely-packed crowds of zombies. Press A while pushing the left analog stick towards a zombie. Most of the zombie crowds you'll encounter won't be dense enough for this to be of much use; simply jumping through them or slashing your way through with a bladed weapon will be a better method of getting past. You can be attacked by zombie punches while performing this attack, which will drop you to the ground. There is an achievement based on your ability to zombie ride for 33 meters.
Kick Back: When you're grabbed by a zombie, you can rapidly push the left analog stick (LAS) in the direction Frank's facing to kick it off of you. Zombies in the direction of the kick will likewise be knocked down. This isn't something you really need to plan on doing; as you frantically wiggle the LAS around, it'll happen on its own in plenty of cases.
Flying Dodge: Tap a direction on the LAS twice in rapid succession to perform a rolling dodge. You can't be hurt while in the dodge, but it'll take you a second to get up at the end, leaving you vulnerable to attack. Very useful skill in psychopath battles to avoid attacks, gunfire, or (especially) explosives. Against normal zombies you won't need it very much. When escorting civilians, you can use this to jump past them if they get stuck between you and a door (such as around the air vent leading back to the Security Room).
Power Push: When grabbed, push the LAS to the left or right (not both) to escape the attacker. This will send your zombie off to one side, knocking down any other zombies in that direction. Like the kick back, this will happen naturally; just move the LAS as rapidly as possible when dealing with zombies.
Football Tackle: Tackles a zombie by pressing A while clicking the LAS. You buckle down on one knee for a second, then charge forward, knocking enemies to either side and onto the ground. This generally stops you as soon as you hit a single zombie, making it handy for knocking them off of platforms that you happen to be on, but you're vulnerable to attack when the maneuver ends.
Judo Throw: When grabbed by a zombie, push LAS downward repeatedly to toss the attacker over your shoulder. This seems to only be usable when the zombie is attacking you from behind. Looks cool and nets you 100 PP, but it's tricky to pull off, with wiggling LAS left and right being a much more natural movement.
Double Lariat: Press X and click on the LAS at the same time to send Frank twirling around like a top. His arms will push back any zombies nearby, clearing some space for him to breath for a moment, and netting you 50 PP per zombie killed. This is an excellent move for clearing out a crowd, especially when you have to get escorts into the elevator leading up to the Rooftop from the Warehouse, but can be used pretty much any time, since you're all but invulnerable while you're spinning. There's the usual half-second vulnerability after the move is done, but most of the zombies nearby will be tossed to the ground by this move, so it's not really worth worrying about.
Roundhouse Kick: Press X just before you hit the ground after a jump or a short fall to deliver a roundhouse kick to the nearest zombie. The zombie kicked will fly backwards, knocking down any zombies behind it. Each zombie kicked will deliver 10 PP. A nice little maneuver, albeit not as reliable as the standard jump kick, but capable of hitting more enemies. You need to hit X a split second before hitting the ground to pull it off, and even with practice it can be difficult to do reliably.

Lift Up: Press X and A simultaneously while facing a zombie from the front, without pressing LAS at all. If you do so, you'll pick up the zombie and be able to throw it at any other nearby zombies. Cool-looking, but a poor crowd control skill, and facing a zombie to pull it off will open you up to attacks.
Knee Drop: While jumping, tap down on the LAS and hit X to immediately drop to the ground, smashing any zombies nearby. This can be used to kill a single standing zombie, but it's best used to finish off a zombie writhing on the ground, and will hopefully result in a dismemberment for some extra PP. Note that this can be used at any height, letting you jump from the upper level of some of the mall plazas (Paradise, Wonderland, Entrance) to the bottom without taking damage.
Suplex: While standing behind a zombie that's facing away from you, hit X and A simultaneously to perform a classic suplex move. The zombie will be thrown away from you, hitting other zombies and hopefully killing them. A fun move, but more for show than possessing any real utility.
Wall Kick: While jumping near a wall, press the LAS away from the wall and tap X to kick away from the wall towards any nearby enemies, knocking them down. Helpful in tight quarters, although we didn't often find ourselves finding it necessary to engage in combat near walls.
Hammer Throw: While standing near the side of a zombie (i.e. neither their front or back), press X+A to grab them and prepare them for their throw. You can aim them by moving the LAS around, then let them loose with the X button again. They'll stumble forward for a few dozen feet, knocking over any zombies in their path. You need a pretty dense crowd for this to reach its funniest level, but as far as simple utility goes, it's often too difficult to get on the side of a zombie without walking too close to a crowd. Showy but not very useful.
Neck Twist: If you manage to knock down a zombie without killing it (a jump kick works well for this), you can stand near its head and press X+A to twist the head off, instantly killing the zombie and earning you 300 PP. This is a single-target attack, and thus not very useful, save for being pretty gory. If you could use the head as a weapon, then we'd be talking. Still, if you want to earn some points, this is a decent finisher.
Giant Swing: Alternately, if you stand near the feet of a fallen (but not dead) zombie, you can press X+A to start a giant swing. This picks the zombie up by its feet and has Frank start twirling it around, resulting in quick deaths for any nearby zombies. While you can throw the corpse by tapping X while performing the move, it won't travel very far.
Tip: You can move Frank with the LAS while twirling the zombie around, allowing you to use it as something of a zombie lawnmower. Frank will get dizzy after performing this move for too long, however.
Face Crusher: If you face the back of a zombie, press towards them and hit X+A, you'll smash their face into the ground, earning you 300 PP. As a single-target skill, this is neat, but, like Disembowel, is more for show than for actual utility.
Disembowel: A gruesome but cool-looking move, disemboweling a zombie requires you to be facing it while tapping LAS towards it and tapping X+A at the same time. If you pull it off, you'll rip the zombie's guts out and earn yourself 300 PP. (Now if you could only use the guts to strangle the zombie afterwards.) Neat-looking, but not very useful outside of showing off for your friends.
Somersault Kick: If you tap X immediately after hitting A to jump, Frank will perform a somersault kick, decapitating any zombies in front of him. This can be useful for defense, since it doesn't have much vulnerable time after it's performed, but if you move before hitting the jump button, you'll perform a jump kick instead, meaning that you have to be stationary to pull this one off.
Karate Chop: Frank apparently picks up some karate skills during his travails in Willamette Mall, as this move attests to. While a zombie is standing beside Frank, pressing the X button will cause him to perform a little backwards side-chop, which will usually be instantly fatal to anything it hits. It can hit multiple zombies, but still, in order to perform it, you'll have to have zombies behind you, which is never a very good idea in Dead Rising.
Zombie Walk: The obligatory Shaun of the Dead reference gets thrown into Dead Rising when you max out your level at 50. When you're around zombies, you can remove any objects from your hands by pressing up on the d-pad, then hold down the X button to imitate zombie mannerisms, preventing them from recognizing you as human. It's amusing to watch, but you move about as rapidly as the average zombie does, making this another skill that's better in concept than in execution.
NPC List
You can check on the number of survivors and psychopaths that you've encountered by selecting the Notebook option in your start menu screen. It'll keep track of civilians you've encountered and their eventual fate. If you're curious about the gaps in your list, feel free to check our own list to see what you've missed. Maybe the next time you play through you can try to rescue them!
Note that even we missed a few of the characters in the game during our playthroughs. If you know where any of our gaps can be filled, feel free to send us an email via the Feedback link and we'll update this guide with your information.
| Number | Name | Notes |
| 01 | Ed DeLuca | Charter Helicopter Pilot. |
| 02 | Carlito | Game's main villain. |
| 03 | Alan Peterson | Dead after the melee in the Entrance Plaza. |
| 04 | Brian Reynolds | Dead after the melee in the Entrance Plaza. |
| 05 | Chris Hines | Dead after the melee in the Entrance Plaza. |
| 06 | Dana Simms | Dead after the melee in the Entrance Plaza. |
| 07 | Freddie May | Dead after the melee in the Entrance Plaza. |
| 08 | Kathy Peterson | Dead after the melee in the Entrance Plaza. |
| 09 | Lindsay Harris | Dead after the melee in the Entrance Plaza. |
| 10 | Todd Mendell | Dead after the melee in the Entrance Plaza. |
| 11 | Mark Quemada | Dead after the melee in the Entrance Plaza. |
| 12 | Ryan LaRosa | Dead after the melee in the Entrance Plaza. |
| 13 | Verlene Willis | Dead after the melee in the Entrance Plaza. |
| 14 | Otis Washington | Mall janitor - will periodically send you information over your transmitter. |
| 15 | Jessie McCarney | DHS Agent. |
| 16 | Brad Garrison | DHS Agent. |
| 17 | Dr. Russell Barnaby | Genetic researcher. |
| 18 | Isabela | Enemy, friend, boon companion. |
| 19 | Jeff Meyer | Found on Rooftop above Warehouse on top of Paradise Plaza. |
| 20 | Natalie Meyer | Found on Rooftop above Warehouse on top of Paradise Plaza. |
| 21 | Bill | Found in the In The Closet store in the Entrance Plaza after the end of Case 1-4. No mission involved. |
| 22 | Kent | "Photojournalist" interested in instructing Frank in the fine art of photography. Encountered during the "Cut From The Same Cloth" Scoop mission. |
| 23 | Cletus | Psychopath holed up in the gun store with a shotgun. |
| 24 | James | Gets killed by Cletus on one occasion as you enter the gun shop. |
| 25 | Sophie Richards | Rescued from convicts in Leisure Park. |
| 26 | Burt Thompson | Barricaded into a store in Al Fresca Plaza, part of "Barricade Pair" Scoop mission. |
| 27 | Aaron Swoop | Barricaded into a store in Al Fresca Plaza, part of "Barricade Pair" Scoop mission. |
| 28 | Leah Stein | Mother of a baby eaten by zombies. Found in the Riverfield Jewelry store in Al Fresca Plaza during "A Mother's Lament" Scoop mission. |
| 29 | Adam MacIntyre | Psychotic clown encountered during the "Out Of Control" Scoop mission. |
| 30 | Greg Simpson | Held captive by Adam. Freed from the Space Rider after defeating Adam. |
| 31 | Yuu Tanaka | Found in the Sir Book-A-Lot store in Wonderland Plaza as part of the "Japanese Tourists" Scoop mission. Must use the Japanese book to communicate with them. |
| 32 | Shinji Kitano | Found in the Sir Book-A-Lot store in Wonderland Plaza as part of the "Japanese Tourists" Scoop mission. Must use the Japanese book to communicate with them. |
| 33 | David Bailey | Found as part of the "Shadow of the North Plaza" Scoop mission, in one of the under construction stores in the North Plaza. Must be supported back to Security Room. |
| 34 | Tonya Waters | Found in Run Like The Wind in Wonderland Plaza during the "Lovers" Scoop mission. |
| 35 | Ross Folk | Found in Run Like The Wind in Wonderland Plaza during the "Lovers" Scoop mission. |
| 36 | Cliff Hudson | Crazed Vietnam vet that dwells in Crislip's Home Saloon in the "Hatchet Man" Scoop mission. Drops the Empty Store Key. |
| 37 | Josh Manning | Found in the Empty Store after killing Cliff Hudson in the "Hatchet Man" scoop mission. |
| 38 | Barbara Patterson | Found in the Empty Store after killing Cliff Hudson in the "Hatchet Man" scoop mission. |
| 39 | Rich Atkins | Found in the Empty Store after killing Cliff Hudson in the "Hatchet Man" scoop mission. |
| 40 | Heather Tompkins | Found in one of the toy stores in Paradise Plaza around noon of the 20th. We're unsure if she appears at the exact same time as Pamela does. |
| 41 | Pamela Tompkins | Found in Paradise Plaza around noon of the 20th. No quest associated, but she'll probably be surrounded by zombies when you meet her. Either have some Zombait or a Queen ready to save her. |
| 42 | Gordon Stalworth | Found in the hardware store in Al Fresca Plaza during "The Coward" Scoop mission. |
| 43 | Ronald Shiner | Found in Jill's Sandwiches in Paradise Plaza during the "Restaurant Man" Scoop mission. |
| 44 | Jennifer | Held captive by the cult that's located in Paradise Plaza, around 2:00 PM on the 20th. No quest involved. |
| 45 | Jo Slade | Female police officer psychopath involved in the "Above The Law" Scoop mission. |
| 46 | Kay | One of Jo Slade's hostages. |
| 47 | Lilly | One of Jo Slade's hostages. |
| 48 | Kelly | One of Jo Slade's hostages. |
| 49 | Janet | One of Jo Slade's hostages. |
| 50 | Sally Mills | Found hanging from a giant statue in Wonderland Plaza on Sept. 20th. No quest involved. |
| 51 | Nick Evans | Found hanging from a giant statue in Wonderland Plaza on Sept. 20th. No quest involved. |
| 52 | Roger Hall | One of the three snipers found in the Entrance Plaza during the "Mark Of The Sniper" scoop mission. |
| 53 | Jack Hall | One of the three snipers found in the Entrance Plaza during the "Mark Of The Sniper" scoop mission. |
| 54 | Thomas Hall | One of the three snipers found in the Entrance Plaza during the "Mark Of The Sniper" scoop mission. |
| 55 | Wayne Blackwell | The target of the snipers in the "Mark Of The Sniper" Scoop mission. |
| 56 | Jolie Wu | Found in Entrance Plaza during "The Woman Who Didn't Make It" Scoop mission. |
| 57 | Rachel Decker | Jolie's friend, encountered in Entrance Plaza during the same mission. |
| 58 | Floyd Sanders | Antique lover, found during the "Antique Lover" Scoop mission. |
| 59 | Kindell Johnson | Shotgun-toting civilian you'll run across during the "Transporting Isabela" Case File. No mission involved, but he'll help you out during that Case File. |
| 60 | Sean Keanan | Leader of the True Eye cult that takes over the movie theater in Paradise Plaza. Killed during the "Strange Group" Scoop mission. |
| 61 | Ray Mathison | Hostage of Sean during the "Strange Group" Scoop mission. |
| 62 | Nathan Crabbe | Hostage of Sean during the "Strange Group" Scoop mission. |
| 63 | Michelle Feltz | Hostage of Sean during the "Strange Group" Scoop mission. |
| 64 | BethShrake | Hostage of Sean during the "Strange Group" Scoop mission. |
| 65 | Cheryl | Found in the Movieland Warehouse after defeating Sean in the "Strange Group" mission. |
| 66 | Gil Jimenez | Found in the food court early on the third day. He'll refuse to follow you; punch him and walk away and he'll come along for the escort. He'll need to be supported back to the Security Room. |
| 67 | Brett Styles | Survivalist found in the Huntin' Shack on Sept. 21st. No mission involved. |
| 68 | Jonathan Picardsen | Survivalist found in the Huntin' Shack on Sept. 21st. No mission involved. |
| 69 | Alyssa Laurent | Survivalist found in the Huntin' Shack on Sept. 21st. No mission involved. |
| 70 | Paul Carson | Psychopathic teen from the "Long-Haired Punk" Scoop mission. |
| 71 | Mindy Baker | Hostage of Paul Carson during the "Long-Haired Punk" Scoop mission. |
| 72 | Debbie Willet | Hostage of Paul Carson during the "Long-Haired Punk" Scoop mission. |
| 73 | Leroy McKenna | Injured man in the "A Sick Man" Scoop mission. Wonderland Plaza. |
| 74 | Susan Walsh | Found on the large soccer ball in Wonderland Plaza around the time of the "Long-Haired Punk" Scoop mission. |
| 75 | Simone Ravendark | Found in Players CD shop in Paradise Plaza as a part of the "A Woman In Despair" Scoop mission. |
| 76 | Tad Hawthorne | Held captive by Kent in the Photographer's Pride scoop mission. |
| 77 | Steven Chapman | Manager of Seon's Food & Stuff. Encountered during the "Medicine Run"; case 2-3. |
| 78 | Larry Chiang | Mall's butcher. Fought during Case 8-4. |
Book List
There are dozens of books to play around with in Dead Rising. When you pick up a book, you'll gain the beneficial effects of that book as long as you carry it around in your inventory. While plenty of books give good effects, you'll have to balance out their effects with the fact that you're going to be losing one of your inventory slots.
Contemporary Reading - Paradise Plaza
[Sports]: Hold onto sporting goods (bowling balls, soccer balls, baseball bats, boomerangs, etc.) three times as long as usual. Mostly useful for baseball bats. It's unsure if this lets you pick up and throw soccer balls and bowling balls more often you normally would (eventually they disappear).
[Hobby]: Hold onto toys three times longer than normal. Not very useful, as toys are generally going to be more good for laughes than actually killing enemies. Items like stuffed bears, toy cube, boomerangs, and toy laser swords are affected.
[Camera 1] : Get a 25% PP boost from photography. Stacks with Wartime Photography.
[Weekly Photo Magazine]: Gives you a visual cue as to when it's best to take pictures for maximum PP. Generally these icons pop up just as a zombie is lunging towards you, making this magazine more annoying than helpful. Most bosses and civilian encounters have these icons automatically for their PP events, as well, without needing the magazine.
Bachman's Bookporium - Paradise Plaza
[Entertainment]: Hold onto entertainment goods three times longer than usual. Includes bass, acoustic, and electric guitars, as well as the small chainsaw.
[Horror Novel 2]: Get a 25% boost to PP from defeating zombies. This only accrues after every 50th zombie, making it difficult to get much use out of in melee combat. If you have one on you when you kill your 1,000th zombie, though, you'll gain a large amount of extra PP, and you can double your gains by grabbing Horror Novel 1 as well. Apart from that, there's no need to lug this around; the bulk of your points in the game will come from escorting civilians and defeating psychopaths.
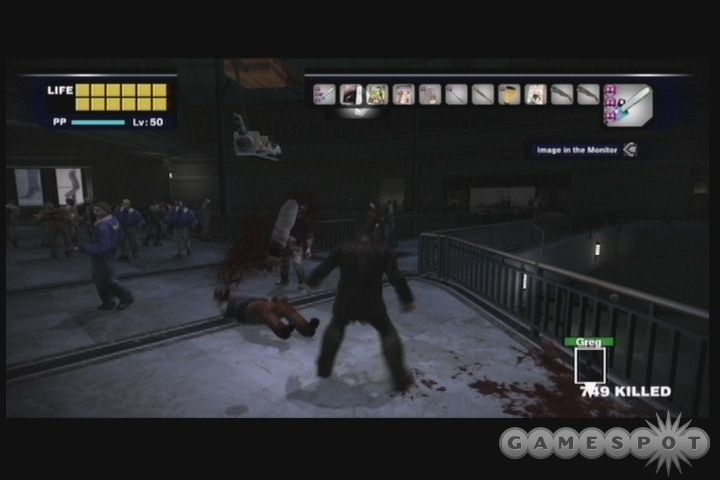
[Engineering]: Hold onto tools and construction items twice as long as usual. This includes lead pipes, 2' x 4's, chainsaws, and small chainsaws.
[Interior Design]: Hold onto interior design items three times longer than usual. Affected items include chairs, stools, paintings, and TVs. Generally these are unwieldy items, making this book less than useful.
We Luv Books - Entrance Plaza
Book [Wartime Photography]: Get a 25% PP boost from photography. Stacks with Camera 1.
Book [Cooking]: Your mixed juices' effects last twice as long. Best used with Zombait while performing lengthy escort sequences.
Book [Cycling]: Allows you to perform a trick while riding a bike, and lets you use bikes three times as long as normal.
Book [Travel]: Hold onto travel and shopping goods three times longer than usual. (Pick Ax, Benches, Shopping Carts, Handbags, etc.)
The Sinister Read - Entrance Plaza
Book [Health 2]: The healing effects of food items are boosted by 50%. Stacks with Health 1 and Survival.
Book [World News]: Get a 25% PP bonus related to survivor-related activities. It's unclear what precisely this means, although it would seem to affect your escort PP bonuses.
Book [Horror Novel 1]: Get a 25% boost to PP from defeating zombies. This only accrues after every 50th zombie, making it difficult to get much use out of in melee combat, but if you use it while going for a spin through the maintenance tunnels, you can rapidly level up. Stacks with Horror Novel 2.
Book [Lifestyle Magazine]: Hold onto furniture, fixtures, and other daily living supplies three times longer than usual. Things like chairs, stools, hedge trimmers, sickles, shampoo, hangar, etc. Nothing you'd actually want to use as a weapon for extended periods of time.
Sir Book-A-Lot - Wonderland Plaza
[Criminal Biography]: Hold onto edged weapons (knives, katanas, sickles, hedge trimmers) three times longer than usual. Very, very handy book to carry around if you're a fan of the katana or hunting knives. If you like yourself some chainsaw action, then grab both this and the Engineering book from Bachman's Bookporium in Paradise Plaza to hold onto chainsaws nine times longer than usual. Also works on the small chainsaws that Adam drops.
[Japanese Conversation]: Learn to speak rudimentary Japanese, allowing you to communicate with some of the non-English speaking mall denizens. This only comes in handy during the "Japanese Tourists" Scoop mission, but it's required to pass that mission.
[Skateboarding]: Gain the ability to perform a skateboarding trick.
[Health 1]: The healing effects of food items are boosted by 50%. Works cumulatively with Health 2 for double the bonus.
Empty Store - North Plaza
You gain access to these books if you complete the "Hatchet Man" Scoop mission. You can pick them up near the survivors in that store, but they'll always be there again if you need to go back and pick them up.
[Wrestling]: Damage done with fists and unarmed attacks is significantly increased. Not tremendously useful, unless you're an extreme fan of the double lariat move.
[Survival]: Food items' healing ability boosted by 100%.
Colby's Movieland - Paradise Plaza
You gain access to this book if you complete the "Strange Group" Scoop mission.
[Brainwashing 101]: When carried, escorted survivors are less likely to be afraid of zombies, and will require less hand-holding to get them to the Security Room.
Achievements & Unlockables
Achievements
There are 50 achievements in Dead Rising, each worth 20 points apiece, for a total of 1,000 points. Since there are so many achievements, and since they're all worth the same amount, you're practically guaranteed to wind up hitting at least half of them through your first play-through of the game. Even if you miss a few during your time with Dead Rising (and some of them are difficult to obtain), you should still wind up with a good number of points from playing the game naturally.
SPOILERS!
There are plot spoilers in this list, so if you haven't played through the game at least once, you'll probably want to check back after doing so.
| Achievement Name | Description |
| Zombie Hunter | Defeat at least 1,000 zombies. |
| Zombie Killer | Defeat at least 10,000 zombies. |
| Zombie Genocider | Defeat at least 53,594 zombies. This has to be performed all in one game, so if you're planning on performing it, you'll have to abandon all of your hopes of getting case files completed and just head to the tunnels and start running zombies over. This is easiest to perform after you've obtained the Maintenance Tunnel Keys (which are located in the room in the exact middle of the tunnels), because then you'll be able to pop out of one of the doors to refresh all of the vehicles here when they're destroyed. |
| Self Defense | Defeat one psychopath. |
| Peace Keeper | Defeat five psychopaths. |
| Punisher | Defeat ten psychopaths. |
| Legendary Soldier | Kill 10 Special Forces soldiers. |
| Hella Copter | Unknown. Probably requires you to shoot down the Special Forces helicopter that appears on the third day. |
| Tour Guide | Escort eight survivors at the same time. |
| Frank The Pimp | Escort eight female survivors at the same time. |
| Full Set | Get all portraits in the notebook. Note that this doesn't mean that you actually have to save all the survivors; you just have to get close enough to get their names and faces written down. |
| Humanist | Get at least 10 survivors out of the mall. |
| Life Saver | Get at least 20 survivors out of the mall. |
| Saint | Get at least 50 survivors out of the mall. Frickin' hard! |
| Strike! | Launch at least 10 zombies in the air with a bowling ball. Doesn't have to be all in one throw, so feel free to use multiple balls. Aim low. |
| Costume Party | Place novelty masks on at least 10 zombies. Easiest to do this in Paradise Plaza, probably. |
| Raining Zombies | Push at least 30 zombies out of the way with a parasol. Easiest to do this in Entrance Plaza or Al Fresca Plaza. |
| Gourmet | Eat all types of food available in the mall. Difficult, but heading off to Seon's and eating everything there would be a good start. Keep in mind that the game seems to differentiate between such items as "Ice Pops" and "Melted Ice Pops", so it'll be tough to keep track of what you've consumed and what you haven't. |
| Item Smasher | Break at least 100 items. |
| Bullet Point | Fire at least 1,000 bullets. If you spend time with the machineguns late in the game, this will come naturally. |
| Perfect Gunner | Don't miss with a machine gun. Unknown when this is applied, but if it's applied when you witness the "true ending", then your best bet is probably just to never pick up a machinegun at all, as they're fairly inaccurate and you'll likely screw this achievement as soon as you fire one. |
| Photojournalist | Score at least 1,500 PP from a single photograph. Can be polished off in the Entrance Plaza during the first zombie attack if you stand on the advertising kiosk and aim at a horde of zombies. |
| The Artiste | Score at least 3,000 PP from a single photograph. Unknown if survivor/psychopath PP tags apply to this achievement. |
| Group Photo | Get 50 target markers with the camera. Find a huge mob of zombies, stand on something to aim down at them, and go to town. Like the Photojournalist tag, this can be earned in the Entrance Plaza with relative ease. |
| Portraiture | Photograph at least 10 survivors. |
| Census Taker | Photograph at least 50 survivors. |
| Psycho Photo | Photograph at least 4 psychopaths. |
| Psycho Collector | Photograph at least 10 psychopaths. |
| PP Collector | Photograph all PP stickers. Good luck with this one... |
| Snuff Shot B | Take a picture of zombified Brad, dead or alive. He's in the maintenance tunnels, in the dead end in the center of the area, near where you found the Maintenance Tunnel Key. He should be the only zombie in the area. |
| Snuff Shot J | Take a picture of zombified Jessie, dead or alive. She's located in the Security Room after you witness the cutscene where she dies. Open the door leading to the couch there and she should be wandering around. |
| Transmissionary | Answer all calls from Otis. Unclear whether this requires you to answer them the first time they arrive, answer them and not get interrupted, etc. More difficult than it sounds. |
| Indoorsman | Spend at least 24 hours indoors. |
| Outdoorsman | Spend at least 24 hours outdoors. |
| Freefall | Drop from a height of at least 16 feet. Most of the drops in zones like Entrance Plaza, from the top floor to the bottom, should be sufficient to get this. |
| Marathon Runner | Cover a total distance of 26.2 miles with Frank. Should be automatically unlocked by the time you get to the end of the game, unless you just don't move very often. |
| Carjacker | Steal the convict's vehicle. All you have to do is kill the fools, get into the car, and drive it for a little ways. |
| Stunt Driver | Jump a car at least 33 feet. Easiest to do if you grab the sedan in the parking lot in Leisure Park, give it a good amount of space between that and the entrance to the Maintenance Tunnels, then accelerate hard towards them. You should fly off the top of the ramp and land far enough down to get the achievement. |
| Stunt Rider | Jump a motorcycle at least 33 feet. Easiest to do if you grab the motorcycle in the parking lot in Leisure Park, give it a good amount of space between that and the entrance to the Maintenance Tunnels, then accelerate hard towards them. You should fly off the top of the ramp and land far enough down to get the achievement. Grabbing Isabela's bike after it's parked outside of Seon's will also give you plenty of opportunities to pull this off. |
| Zombie Road | Walk over 33 feet on the heads of zombies with the Zombie Ride skill. If you don't manage to do this during the main section of the game, it can easily be accomplished during the end boss fight. |
| Karate Champ | Kill 1,000 zombies barehanded. Will likely require a lot of use of Double Lariat. |
| Sharp Dresser | Change into at least 20 different costumes. This includes shoes, hats, sunglasses, and outfits. |
| Clothes Horse | Change into all outfits available in the mall. |
| Level Max | Reach Level 50. |
| Unbreakable | Get the true ending without being knocked out. Basically this means that you can't be captured by the special forces or the True Sight cult before you beat the end boss. |
| Overtime Mode | Unveil all Cases and be at the heliport by noon. |
| Infinity Mode | Get the true ending. |
| 3 Day Survivor | Survive for at least 72 hours. |
| 5 Day Survivor | Survive for at least five days. |
| 7 Day Survivor | Survive for at least seven days. |
Unlockables
We don't have too much information on the unlockable modes in the game as of yet. We'll update this section of the guide when more info becomes available.
Overtime Mode: Overtime mode is unlocked when you finish the first 72 hours of Frank's stay in the mall and return to the helipad by noon on the 22nd. When you start a new game, you can press down on the D-Pad when the cursor is over 72-Hour Mode. It'll shift down to a seemingly blank space, which you can select. Doing so will start you out right after the events on the helipad, allowing you to skip right to the game's denouement.
Infinity Mode: This is unlocked by obtaining the "true ending". We believe we've unlocked this - it appears to become available after defeating Brock - but it's unclear how to activate it or precisely what effects it has.
Got a news tip or want to contact us directly? Email news@gamespot.com
Join the conversation