Dark Messiah of Might and Magic Walkthrough
It's time to embrace your destiny as your kingdom's savior…or its destroyer. GameSpot's Walkthrough to Dark Messiah of Might and Magic will show you the ropes.
Design: Randall Montanari
The Source engine has been the home to relatively few games over the past couple of years, with Half-Life 2 and assorted mods being the biggest splash. It’s taken a while for the physics revolution to capitalize on the seeds sowed by HL2, but not, with the arrival of Dark Messiah of Might and Magic, it appears that some developers are seeing how to use physics as an integral part of their games, instead of simply more eye candy.
Dark Messiah puts you in the role of Sareth, an orphaned adventurer-in-training, under the tutelage of your master Phenrig. Despite his unfortunate name, Phenrig seems to see potential in you, and sets you out onto the path of adventure by sending you after an important relic: the Shantiri Crystal. Along the path of delivering the crystal, watching it get stolen, tracking it down, delivering it elsewhere, tracking down another mystical artifact, etc., you’ll learn more about your dark destiny, make some new friends, and kill a whole lot of orcs and goblins.
Although a few games have attempted to incorporate melee combat from a first-person perspective, few have done so as viscerally as Dark Messiah does, mostly through its complete control of your camera perspective. You’ll get more head-bobbing action here than in any dozen other comparable games. That said, though, the action is simply fun, what with all the kicking people off of cliffs, into fires, into water, into spikes, into spikes that are on fire, etc.
GameSpot’s Game Guide to Dark Messiah has all the information you need to complete the single-player journey, including details on skills, secret areas, and boss fights. Enjoy!
General Tips
Know Your Foe
Various weapons are listed as doing more damage to enemies that are vulnerable to fire or lightning. If you don’t pay attention to the loading screens, you may not know this, but, for the sake of being thorough, we’ll spell it out for you.
Weak to Fire: Humans and spiders. Set them alight!
Weak to Lightning: Orcs, Goblins, and Cyclopses. Cyclopi. Cyclopses. Whatever.
It’s unclear if undead have any particular weaknesses; they appear not to. The most powerful weapons in the game deal double damage to the undead, though, so you likely won’t have to worry about it.
Using Physics To Your Advantage
Dark Messiah is based on the Source engine, which hasn’t powered a large number of games thus far, but which is well known for one in particular: Half-Life 2. One of the things that game in particular was known for was its innovative use of physics, with such craziness as the Gravity Gun letting everyone fling around sawblades with abandon. Luckily, Dark Messiah incorporates much of the physics whackiness from Half-Life 2, but it does it in some new ways. Here are a few tips to putting the physics in Dark Messiah to work for you.
Kicking
It’s easy to dismiss the kick mechanism here as a gimmick, something to use once or twice and then never touch again. Well, there is a mechanism that fits that description, but you won’t get to it until chapter seven. Kicking, on the other hand, is massively useful, allowing you to kill powerful enemies in a single blow.
Basically speaking, if you kick an enemy from a height, they’re going to instantly die. There are many, many large heights in Dark Messiah. You can do the math. The trick here is that your enemy has to be a set distance away from the edge. If they’re too far away, you’ll only tap them back lightly, and lose stamina to boot. If they’re within the necessary range, though, they’ll be flung back violently to the their deaths. Fun! Getting the hang of this will take some time, and it’s sometimes difficult to get in range of a kick without getting hit by a weapon.
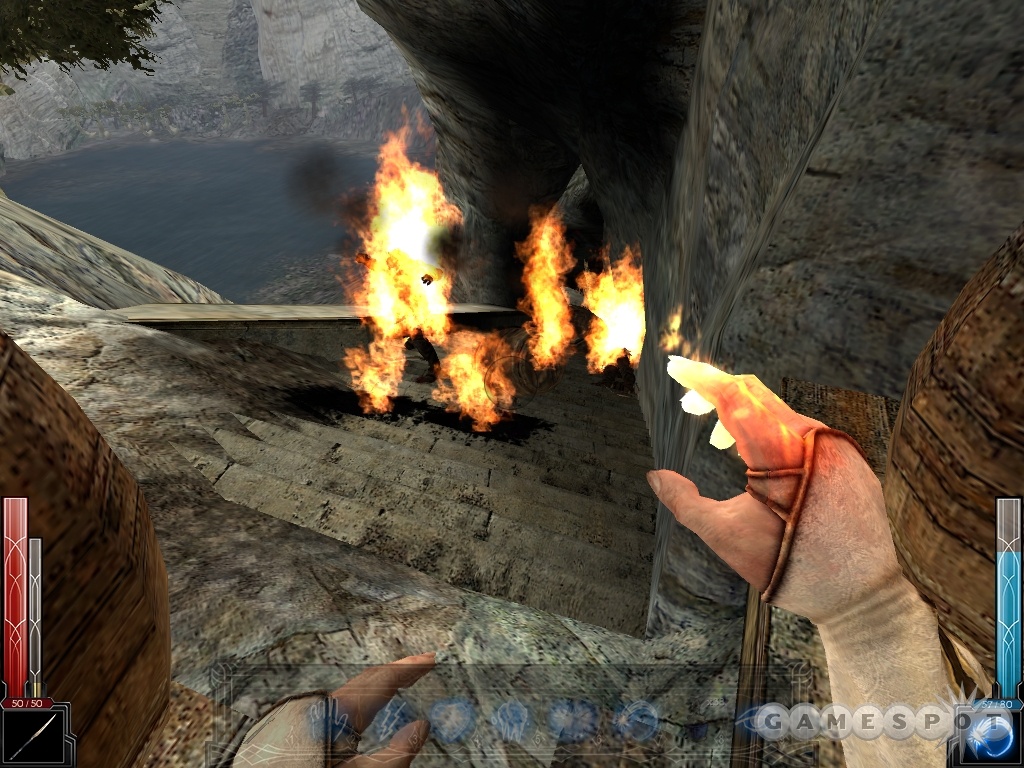
Kicking can also be used in the same manner to knock your opponent into an environmental hazard. There are two main examples of these: spikes and fires. Spikes can be found lining many of the game’s corridors and walls, for some odd reason; if you stand with an enemy between you and one of these spike traps and give them a good swift kick, they’ll go flying into the spikes and immediately die. Fire is another version of this, with the added bonus of usually being in the middle of a room, giving you more leeway about rotating around to get a good kick angle. Lastly, if you kick an enemy into deep water, they’ll die right away; none of your enemies can swim.
Note that every character, from the beefiest warrior to the wimpiest spellcaster, is equally proficient at kicking. Characters that pay the skill point for Stamina can kick a couple more times before wearing out (and it’s a great skill for that very reason), however.
Throwing
There’s plenty of detritus scattered around the world of Dark Messiah. Most of it can be picked up and thrown as makeshift weapons! Things like barrels, boxes, candlesticks, chairs, frogs, shovels, small children, barnyard animals...well, some of those, anyway.
Picking up something is as simple as walking over to it and using it. Throwing it simply requires you to hold down your attack button and release it! The heavier the object you pick up, the more damage you’ll do to your opponent, with things like stones and barrels generally being one-hit kills in most instances. This is a bit more complicated than kicking people around, though, as it’s difficult to run away from someone, pick something up, and chuck it at them before they close into melee range with you.
Skills
Skills are going to be the way in which you define your character as you play Dark Messiah. There are no classes to choose from (at least not in the single-player portion of the game), so all of your character’s abilities will be determined by what skills you pick. This chapter will be dedicated to the various character archetypes and descriptions of the key skills for each.
Combat Skills
Melee Combat
Level One: At level one of Melee Combat, you’ll unlock Flurry of Blows, which will allow you to button mash a bit with your standard attack key, resulting in more strikes. Most melee enemies will have their parries up, making these strikes useless, but if you get close to an archer you can quickly wear them down with these.
Level one also unlocks Charge, a handy attack that can be used by combining your sprint key and any power attack. When you unleash it, it’ll stun your enemies, leaving them vulnerable to a follow-up power strike or to Disarming.
Level Two: At level two, you unlock Disarming. When an enemy is stunned, either by Charge or from getting kicked around too much, you can target them with any power strike to fling their weapons out of their hands. In practice, this is sometimes more annoying than useful, since you deal no damage on a disarm, and sometimes all you really want to do with your enemy is finish them off. That said, a disarmed enemy is pretty harmless, but they will track down any nearby weapons and use those after picking them up. Also note that disarming will allow you to automatically disarm any opponent when you win a locked-blades contest with them.
More importantly, perhaps, is the ability to use shields. Shields will block more attacks than simply parrying will, such as arrows flung your direction, but they will degrade over time as they get beat on.
Level Three: At level three, your Flurry of Blows will sometimes be capable of breaking enemy parries. By the time you get up to level three, though, you’ll probably be fairly well used to using power strikes for that purpose. Still, every little bit helps.
In addition, you’ll unlock a leaping attack that can be performed by jumping and letting go of a power strike. Not extremely useful, in our experience, but it looks neat. Lastly, you get a Whirlwind attack that can be busted out when you’re at full Adrenaline. Hit crouch and let go of a power strike, and you’ll swirl around, chopping everyone within melee range on any side of you.
Archery
Archery is a powerful ability, letting you hit enemies from far away, when they often won’t have any way to strike back. While magical bows aren’t as common as magical swords or daggers are, you’ll still find enough of them to lay the hurt down on your foes. You do need a supply of arrows to work with a bow, but there are enough of those around to let you never run dry.
Level One: You’re allowed to zoom in when you notch an arrow. This will give you an extra amount of precision, but you won’t be able to fire at distant targets unless you keep the arc that the arrow travels in mind.
Leve Two: Steadies the aim of the bow, completely eliminating what in another context would be called scope drift. This is more or less required before you can start hitting difficult shots, such as for using the bow to cut ropes at long distance. Again, the dip of the arrow will still make it difficult to accurately place them until you practice with them a fair amount.
Level Three: Decreases the amount of time required to reload an arrow after firing. If you’re solely using archery as support, to try and take down enemies from afar with headshots or to use it to set off traps, then this likely isn’t a necessary upgrade for you, but if you plan on using archery for most of your killing, it’ll be required.
Strength
The three levels of Strength, although expensive to purchase, will make a huge difference for your character’s experiences in melee combat. They’ll add two, four, or eight points of damage to each of your attacks. Strength is also a requirement on some of the advanced weaponry you’ll be finding, especially the Sword of the Dragonbane and the Souldrinker, the latter of which will be an important weapon for melee characters. Heck, the former will be important as well, but you won’t be able to use it until late in the game, even if you max out your Strength.
Critical Hit
The two levels of Critical Hit add either 2% or 4% to your chance to get a critical hit when you swing your weapon. In our opinion, consistently getting high damage is more helpful than adding a small chance to get a critical hit, so we’d generally go with Strength before adding to this skill. That said, Critical Hit is also a requirement on some of the weaponry you’ll find, so you’ll want to pick up both skills eventually.
Adrenaline
Although expensive, Adrenaline will be worthwhile for any advanced warrior, as it will allow you to recharge your adrenaline more quickly and perform two killing attacks when you have full adrenaline. It has no impact on which weapons you can use in the single-player game, though, so by the time you unlock Strength and Critical Hit, you may want to spend your extra points in Endurance to let yourself wear some of the higher-end armor that you’ll be finding.
Magic Skills
Dark Vision
Dark Vision is basically an amped-up gamma shift. When cast, it’ll light up the dark areas around you, but turn your entire field of vision blue, like night vision. It’s purely utilitarian, but every character gets it for free at the start of the game, and it won’t require any mana to cast. Use it often. It’s best to bind this to a permanent key near your left hand on the keyboard, just so you don’t have to go to great lengths to cast it. You’ll be putting it on and off nearly constantly in some areas of the game.
Flame Arrow
Flame Arrow is basically the magical equivalent of a pea-shooter in Dark Messiah. It’s not going to be of much use against enemies in the early going, since you won’t have much mana to use it with; you’ll be better off sticking with weapons instead of trying to use this on enemies. It is, however, quite useful as a replacement for bow attacks, at least when you’re trying to fire at stuff like ropes that hold up traps, and the like, since it flies straight ahead and can even be steered manually if you hold down your casting button.
Fire Trap
Fire trap is a tricky spell to use properly. When cast on the ground (be sure to hold down the button to avoid miscasting it when your view bobs around), it’ll place a small ward that glows. Any enemy that walks into the fire trap will set off a large fireball that’ll deal damage and knock around anyone in the area, including you.
The trick is to get the enemies to walk over the fire trap. Since the casting time takes a couple of seconds, and you’ll have to herd any prospective enemies back over the firetrap to set it off, so in general it’s best to place one on the ground as soon as you spot an enemy, then get its attention with a flame arrow or bow attack and lure them back to the trap. Most enemies will die after impacting it, although creatures with demon blood, like orcs, will be more resistant to the fire effects.
Freeze
Freeze is an interesting spell with some not-so-obvious uses. When cast on an enemy, it will cover them with ice, temporarily preventing them from blocking or attacking or moving at all, giving you plenty of time to queue up a power attack or kick them off a cliff or something. After a few secondss, the ice will break and they’ll be right back on your tail, however.

When cast on the ground, however, Freeze will create a slick spot of ice where you aimed it, causing any enemies that walk over it to fall to the ground. This is obviously a hilarious way to make your foes go through a number of pratfalls, but as with Fire Trap, it can be more amusing than useful at times. Paired with a fast weapon, though, like daggers or a short sword, you can take advantage of your enemy’s fall by finishing them off with a power strike as they’re on the ground, which is usually an instant kill on most enemies.
Adrenaline Effect: Freeze will permanently freeze your target when cast when you have a full Adrenaline meter, essentially killing them.
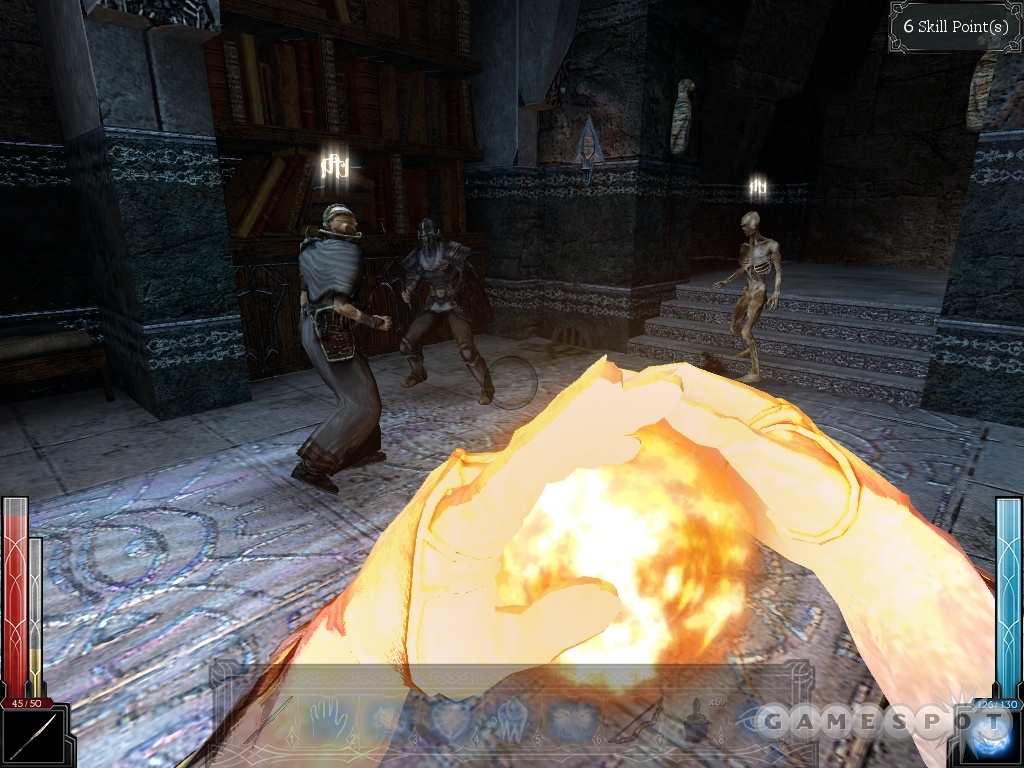
Fireball
Fireball, when unlocked, will be a powerful offensive spell against humans and animals, who are weak to fire. It’s essentially an upgraded Flame Arrow spell; you let it charge up for a second, then chuck it out in front of you and guide its progress through the air with your mouse. When it hits, it’ll deal a good amount of damage to anything it strikes, as well as the enemies nearby, and hit them all with explosive force great enough to knock them around a bit. Thus, it can sometimes be useful as a quasi-rocket launcher; just aim it at the ground next to an enemy to make them fly away and over the edge of a cliff, for instance.
Best of all, fireballs are cheap, cheap enough to let you cast an almost continuous stream of them after you get Mana Regeneration. Unfortunately, the large flaming ball in your hands will obscure a good amount of the screen and kind of fade out whatever’s left, making this a poor choice as a spell to keep queued up all the time.
Adrenaline Effect: When you have full Adrenaline before casting Fireball, it’ll often completely demolish your target, rendering them into a dew, or at least a fine mist of blood and gristle.
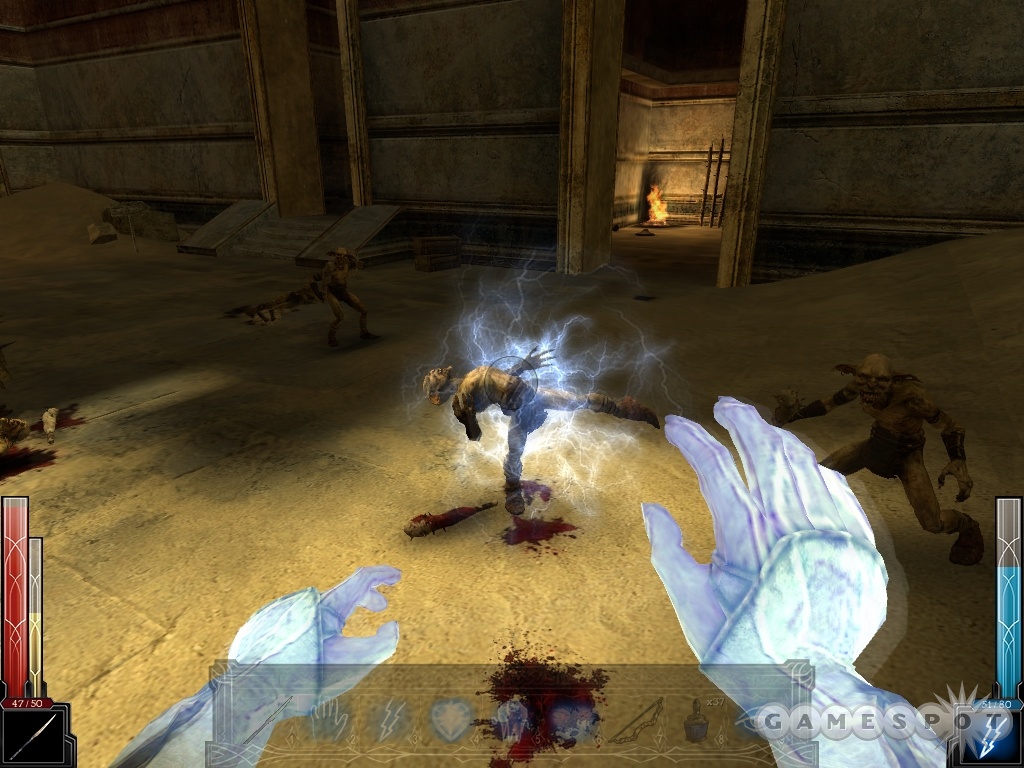
Lightning Bolt
Orcs, goblins, and cyclops are all considered to have demon blood, which is odd, considering the orcs accost you halfway through the game and lament your "demon taint". (Which in another context would be a hilarious accusation.) All of them are supposedly weak to lightning bolts, and indeed, you can usually instantly kill goblins by casting this at them. Orcs will be a bit more resistant to its effects, usually taking at least two bolts before going down, and since there’s a couple of seconds of casting time before the bolts come out, that’s usually enough for them or their friends to get some good whacks on you. Stick to weapons or fireballs for Orcs, in other words. The fireballs won’t do as much damage, but they’ll knock the orcs around and let you blast them off cliffs and such.
Against Cyclops, lightning bolts are going to be a mage’s best friend, although you will still have to aim your bolts at your target’s eye in order to deal good damage. It’ll take a lot of bolts before you manage to stun a Cyclops, and when you do, you should still switch to a strong weapon for a power strike.
Adrenaline: Lighting Bolts on adrenaline cause chain lightning, meaning the bolt jumps from target to target in a given area. Great for clearing out low-level enemies. The bolt also seems to do more damage than it usually does, so it’ll more often cause an instant kill.
Inferno
Inferno is the most expensive offensive spell you can obtain in Dark Messiah, although honestly, for the skill points and mana you’re going to invest into it, it would’ve been nice if it was a bit more effective. Basically, it’s a flamethrower: when you activate it, it’ll shoot flames directly out in front of you, roasting anyone standing there and eventually killing them entirely after a few seconds. You can hold the button down as long as you like to keep the stream flowing.
Unfortunately there are some problems here, including the cost. Just activating the spell costs 20 mana; keeping the button depressed will cause you to rapidly lose more mana to boot. Also, when cast against enemies that are closing to melee range, the spell will begin to damage you, as well, since it has nowhere to go. This, combined with its short range, make Inferno rather inflexible and expensive compared to its effect. With the preponderance of cliffs and spike traps throughout the end of the game (which is where you’ll be before you can unlock this), you may just want to spend the skill points on something like Endurance, use your regular spells when necessary, and simply kick enemies to their deaths rather than expend huge amount of mana on Inferno.
Adrenaline Effect: Deals even more damage! Wowzers!
Heal
At a one skill point cost, this is effectively a no-brainer for every character in the game, whether you’re a warrior or a mage. It’s simply, really: for ten points of mana, you get 15 health. That effectively means that even the most non-magical warrior can convert a mana potion into 30 health after casting two heals on himself. Since warriors won’t be spending much mana on spells, this will give them something to actually use their mana points (and mana potions) on. You’re going to be finding a lot of mana potions in your travels, so using them to heal yourself up during downtime will let you save your health potions for the important fights.
Telekinesis
Telekinesis is expensive enough, mana-wise, to only be useable by serious mages as an offensive skill. You can pick up potions and small items for around five mana, but if you want to pick up something heavy enough to actually kill an enemy, like a crate or a stone, you can expect to be laying down 15 mana all told, making it something that you won’t want to do very often until you get Mana Regeneration to rely on. That said, when you can bust out Telekinesis as often as you like, it’ll be the most fun you can have in the game, since you’ll be able to use all the objects in the environment to chuck at your enemies.
In mundane terms, Telekinesis can also be used to solve puzzles and flip switches, although it’s somewhat twitchy at this last task. It’s perhaps best used by non-magicians for picking up potions and items that are out of reach, or that rely you to crawl around to get them.
As a weapon, Telekinesis is best used when cast on unbreakable items, like stones and bales of hay, that can then be targeted at your enemies and sent flying at them. (Press the cast button again to fling the object away from you at warp speed.) Almost anything can be used, really, but crates will break when they impact, and smaller items won’t deal as much damage. Stones are usually the best, when you start finding them, usually in chapter Nine and the Epilogue. Keep in mind, though, that you can also cast Telekinesis on enemy corpses and throw those. Hot.
Adrenaline Effect: You can pick up and throw living enemies while your Adrenaline is full.
Charm
For fifteen mana, this spell will enable you to temporarily take over the mind of one of the enemies in the area, forcing them to fight on your side for around 30 seconds, or until they die. For spellcasters, this is one of the best spells to have queued up when you’re running around, unsure of what’s behind the corner. If you stumble across a single enemy, you can use charm to simply brainwash him and run past him before the spell runs out, or get him into position for a kick off a cliff. With multiple enemies, charm will cause them to attack each other, thus also letting you either run past them, or watch them eliminate each other and make your life easier when the spell runs out.
Keep in mind that charm will end if you damage the charmed opponent, so be careful when firing arrows or spells into a melee involving one of your slaves. Necromancers are especially good targets for charm, as any foes they’ve resurrected, or zombies they’ve summoned, will be in thrall to you as well.
Sanctuary
Your standard god mode, sanctuary will render you temporarily immune to damage when cast. It’ll cost 25 mana, and will last for around 20 seconds, but can be a big, big help in some of the tougher fights in the game, especially since it doesn’t prevent you from attacking or moving or anything like that. You can even cast it while falling to eliminate all of the falling damage that you might take. (You’ll still die if you fall into a bottomless pit, obviously.)
This is probably going to be more useful on hard difficulty than on normal, but it’ll be useful any time you need to avoid some damage.
Weaken
Considering how deep it comes in the skill tree, we were hoping for a bit more from Weaken. When cast on an enemy, it will essentially just temporarily cripple them, temporarily turning them purple, reducing their speed drastically and reducing the damage that they deal to 1 point per attack. It's less dramatic an effect than most of the magical spells that you can cast, but it has the benefit of being castable on multiple foes when dealing with large crowds, giving you a better chance of outrunning your opponents.
Miscellaneous Skills
Stamina
For one lowly skill point, Stamina will allow you to use more stamina-based skills before having to rest. That means more sprinting, more swimming, and most importantly more kicking before you run out of juice. Since almost everyone will be kicking enemies over cliffs in every part of the game, this is a must-have skill for most every character.
Endurance
The three levels of Endurance are expensive, but worthwhile for warriors, or anyone who can afford them. Nothing especially mystifying here; the more you spend, the more your maximum health will rise. Endurance also effects the kinds of armors that warriors can wear.
Poison Resistance
At six skill points, Poison Resistance isn’t a cheap investment, but it’s likely also not a necessary one. Poison is annoying, sure, but it can’t kill you; all it will do is bring you down to four or five HP before getting out of your system. Luckily, Antidotes can be found in numerous places throughout the game, especially when you need them most (in the catacombs under the Temple of the Spider, look for the green vases and smash them). Since zombies and spiders are the only poison-causing enemies in the game, it’s best to simply learn to avoid their poisonous attacks, use antidotes when needed, and save your skill points for something more important.
Vitality

Vitality will increase the health regeneration rate of your character. We never unlocked this on our character, but if it’s anything like the speed which you’ll get back for Mana Regeneration, this should mostly ween you off the need for health potions, since you’ll probably be regenerating up near maximum health after every fight. That said, though, the warrior Souldrinker sword is going to be more effective at regaining you health than the Soulreaver Staff will be for regaining mana for mages. If you’re willing to rely on potions, then this skill is optional, but it’ll be helpful nonetheless for characters that take a lot of damage.
Alertness
At one skill point, this one’s not too bad, but warriors can likely skip it. It’ll highlight hidden items and secret areas if you remain standing still for a moment. We used it throughout the game and will be describing most of what it’ll show you in the walkthrough, so skip it if you don’t think you’ll need it. As a prerequisite, though, mages and rogues will have to have it.
Magic Affinity
A basic skill, Magic Affinity will greatly increase your base maximum mana, eventually increasing it to five times your starting allotment. It’s useful in and of itself, and since it’s required to unlock Mana Regeneration, that’s twice the reason to get it.
Stealth
Stealth is a fairly cheap investment, allowing any character to be a master backstabber for just six skill points. While it’s a small price to pay, it’s worth pointing out that stealth will be one of the more difficult routes to take through the game, since you’ll often have to creep around slowly before backstabbing your foe and attempt to stalk through the darkness where mages or warriors can simply rush in and fling people around. That said, most stealth characters will also have enough points in combat skills to deal with their enemies in a more traditional way, if need be.
Burglar
Allows you to pick the locks on doors and chests. There are plenty of both in the game that don’t have keys, so this skill will open up a shortcut here or there or give you access to some potions. We never accessed it for ourselves in our playthroughs of the game, so we can’t say for sure if it unlocks any super treasures, but we’re kind of doubting it. In any case, it’s never required to proceed through the game.
Mana Regeneration
While mana potions are a lot more efficient than health potions, returning 50 MP per potion used, you’ll still want to invest in Mana Regeneration if you’re a practicing magician, as it’ll let you regenerate your mana way more quickly than you’d be able to otherwise, allowing you to all but do away with mana potions. You’ll still need them in long fights, but Mana Regeneration will let you bust out numerous Telekinesis kills without having to worry too much about running out of mana.
Walkthrough
Prologue
Your master, Phenrig, is finally ready to put you into the field, giving you an assignment to track down and retrieve a mystic artifact from within a large temple. Phenrig is apparently too busy with lessons on how to talk like a crappy D&D dungeon master to bother raiding the temple himself. If you played the Dark Messiah demo, you should be familiar with this level.

Anyway, this level is, for the most part, a simple tutorial on how to interact with the environment in Dark Messiah, as well as how to defend yourself against hostile foes. Begin by running down the hallway in front of you and grabbing the spider medallion from the altar there. It can be placed in the doorway nearby to unlock it. With that done, pass through the door, flip the switch, then use your sprint key to quickly move past the portcullis before it falls again.
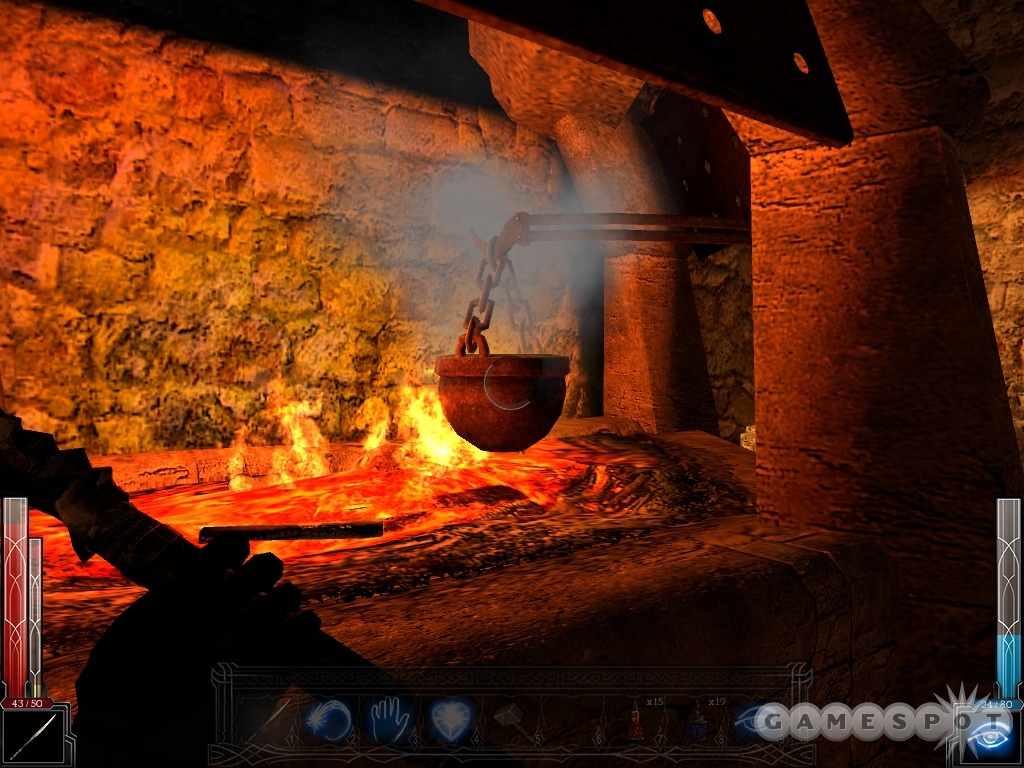
Next up is a weak spot tutorial; kick the pillar and climb the chain upwards to move on. Pick up and move the boxes that are highlighted, then kick through the boards to move on.
At this point, Phenrig tells you to activate your Dark Vision spell. This is a free (no mana cost) ability that can be used to pierce the veil of darkness around you, allowing you to see at night and in gloomy surroundings.
Combat!
God, Phenrig has an insufferable voice! When you’re through the darkened area, open the chest and grab the sword inside, then use it to cut the rope nearby. Up next are some combat tests, starting with zombies.
The Black Guards will be a bit more difficult to deal with, but if you simply kick them into the central pillar (the one with all the spikes sticking out of it), they won’t be too hard to kill. Feel free to toy with them as much as you like, though. When they’re done, you’ll get your first skill point. Allot it now, if you wish, then climb the rope past the portcullis to end the mission.
Chapter One: The Gates of Stonehelm
Phenrig has sent you off to Stonehelm to deliver the Shantiri Crystal to Lord Wizard Menelag. Unfortunately, as you arrive at the gates, the necromancer army also arrives, with a zombie Cyclops. They’re going to start knocking through the city gates in short order, so you’ll have to quickly evade your death and somehow help repel the Cyclops away from the town center. Try to ignore the low-rent seductress voice in your head. Yes, it’ll be there for the entire game. No, there’s no way to turn it off. Insert frowning face here.

When you get your bearings and manage to get back on your feet, start running away from the Cyclops. There’s a chain nearby; run to it and quickly climb up. Don’t get distracted when you’re following the path through the building here. If you stop and pause to allocate skill points or something similar, you’re going to wind up dead due to ghoul attacks. Just keep moving onward and upward until you reach another rope to jump to. Jump to it, then immediately jump from there across to the platform that the soldier is standing on.
At this point, ghouls may get up the stairs and attack. You can block them from doing so by running over to the gate control switch and dropping it; if any ghouls get through, grab the boxes nearby and use those to throw at them. Just be sure not to hit any of the soldiers! When that’s done, you’ll be taken to a nearby ballista. Nothing too complicated here; just point it at the Cyclops and hit it three times to weaken it enough for the soldiers to kill it. You may have to lead it a bit since it takes a second for the ballista’s bolts to travel to the courtyard.
With the Cyclops dead, follow the path nearby and open the portcullis to move on.
Hot Town, Summer In The City
Now that you’ve earned Stonehelm a temporary reprieve from its siege, it’s time to track down Menelag. After phasing into the next level, you’ll be in the city center. Grab all the weapons you find, which should include a short sword, bow, daggers, and a staff. No need to pick a favorite just yet, although the short sword will probably be best for cracking open the chests and crates in town.
If you’re looking for another weapon, though, head down the slope from where you exit the tower and take a right turn through the tight corridor there. If you look up, you should see a blue glow above you. This is a Combat Staff, which deals +2 damage on hits. Getting it will require you to have Telekinesis, apparently, but if you do you can simply wand it down from its airy heights. Don’t worry if you can’t get it; staves are mostly intended for magicians, and this weapon’s requirement that you have Melee Weapons 1 will prevent most of them from using it.

Another secret area can be found near Leanna, the comely female who stands outside Menelag’s abode. Check the area for a ladder, climb it up, then push open the windows to reveal a hidden attic. Break the chest for a Full Health potion.
After poking around thoroughly (there are some private residences with goodies inside, but the guards will be upset if they spot you entering them), talk to Leanna to end the chapter.
Chapter Two: The Gleam Of A Cold Knife
Ooh, sounds mysterious! This chapter will be where you finally start making the hard choices about skill options and the like, and get a much more in-depth look at how you’ll be fighting off foes for the rest of the game.
Begin by fighting off the Black Guard that’s coming up the stairs towards you. If you’re not confident in your use of weapons, you can chuck a box at him, or kick him down the stairs a few times until he perishes. Fun!
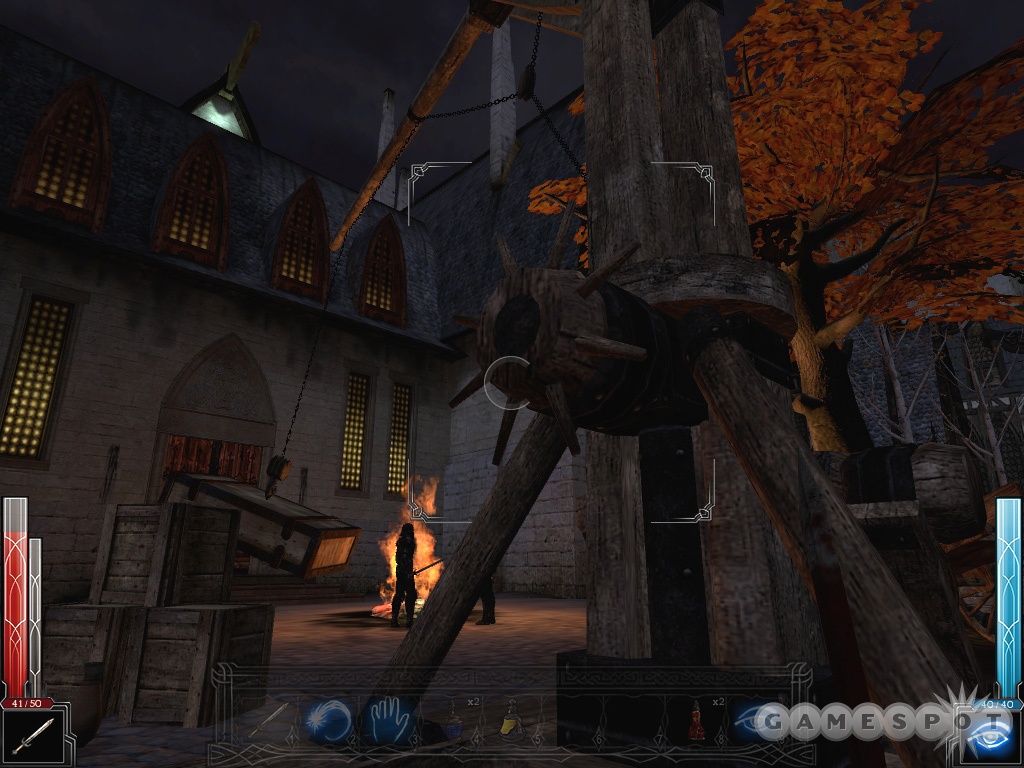
When you’ve collected the items in the guest house, walk outside to deal with the soldiers there. You can be as sneaky or as overt as you like. If you want to weaken them up significantly, exit the house, sneak along to the right, and twist the lever on the small crane there to move a large crate over into the two soldiers that are standing by the fire. If you’re just looking for some action, try standing near the fire and kicking the soldiers into it, which will set them alight. More reinforcements will be coming around the corner; if you shifted the crane, simply stand on the other side of the crate, and more often than not they’ll walk right into it and get knocked around.
Move around the corner here (the main doors to Menelag’s keep are locked). If you pass through the garden, killing or avoiding the guards there, you’ll come to a back alleyway. Open the door with the chain attached to it and head down to reach the next part of the chapter.
Exploring The Keep
After heading downstairs from outside, open the door across the way. It’s seemingly empty, save for a couple of item crates. However, if you dig out the barrels behind the large cask of wine (either by destroying them or by throwing them out of the way, you can find a Ring of the Weaponmaster. This will add 2% to your chance to make critical hits with your weapons. Pretty handy at the moment, since even spellcasters will still be using weapons for most of their kills.
Move down the hallway nearby to find another couple of soldiers chatting it up in a room. You can avoid them if you wish, by simply heading towards the portcullis nearby (although you’ll need to be sneaky to do so), but if you do, you’ll be missing a secret area. If you look around for a suspicious block sticking out of the ground in the far corner of the room, you can hit it to open up a path to a shut-off part of the cellar. Inside you’ll find some potions, as well as a trapped chest. The chest’s trap only goes off if you step right in front of it, though, so quicksave your game and approach it from the side if you want to avoid it.
Move on from there up into the throne room of the castle. There are going to be a couple of guards here, with four or so more coming along as you kill the previous ones. Luckily, there’s a way to dispatch them all with minimal fuss. When you first come out of the doorway, hang a left, walk up the steps, and cut the rope on the pillar. This will cause the chandelier at the top of the room to swing down and hit any guards that get in its way. With your kick function, you can stand near the path it takes and make sure they get in its way. Just be sure to stand away from it a bit, or you’ll wind up getting killed yourself.
Upwards
There’s a small library at the bottom of the steps in the throne room; you can find some Wizard Robe armor in there if you look around, which will net you +10 Mana if you meet the requirements to wear it. The Bow of the Disciple will be sitting by the throne itself, so be sure to grab that if you like arching stuff.
Make your way up to the main library, but before heading in, take the stairs all the way up to find the Old Key on the ground. When you reach the library, kill the guards, then flip the switch on one of the walls to bring down a rope. Climb up it, and keep an eye out on the ground below; a set of shelves here block off one corner of the room, and you can drop down to find another secret area.
Likewise, when you start heading back up the steps nearby, find the small panel on the wall in the shadowed area of the floor to find yet another secret area in the rafters of the throne room. Nearby is the transition to the last part of the chapter.
Rooftop Chase
On the rooftops, kill the guard near where you start the level, then jump down to the roof area and start making your way to the next building. Inside, you’ll find three soldiers. If you can break the weak beams beneath them, they’ll all tumble down to the floor below in an amusing manner. Check the rafters above you (there’s a chain that’ll take you up) to find a box with a couple of mana potions.
When you reach Menelag’s lair nearby, he’ll quickly be killed by a ghoul, which also steals the Shantiri Crystal. Way to go, Mr. Bigshot Wizard! Guess it’s time for Sareth to clean up the mess. Get used to it; it’ll be a recurring theme throughout the game.
Give chase to the ghoul here. It’s a fairly linear path from here to the end of the level.
Chapter Three: Dead Man’s Trail
The beginning of this level will pick up the chase of the ghoul. No time to waste! Begin by heading out to the rooftops, taking a right, then entering the window there. The ghoul will pass in front of you. You’ll have to jump across the gap to follow him. Get used to sprinting towards the jumps in front of you; it’ll give you extra distance required to clear the gap.
Follow the ghoul through the nearby building. Smash the planks that block your way, then walk out onto the rooftops and rotate around to the stone path nearby. Follow the ghoul for a bit (it can’t be killed, even if you get close enough to slash at it), then jump onto the chain when it appears, climb up, and jump from that. Some of the gaps that are too far to cross normally will be crossable that way.
Eventually you’ll reach a large wooden construct. If you can cross it properly (if you fall, you’ll have to climb up from below), you’ll be able to mantle up the stone bricks nearby, cross around, and finally reach the Necromancer lair. Before you hit the loading screen, nab the Staff of the Disciple. It’ll do +3 damage for you if you’ve managed to pick up one rank of Magic Affinity.
Necromancer’s Lair
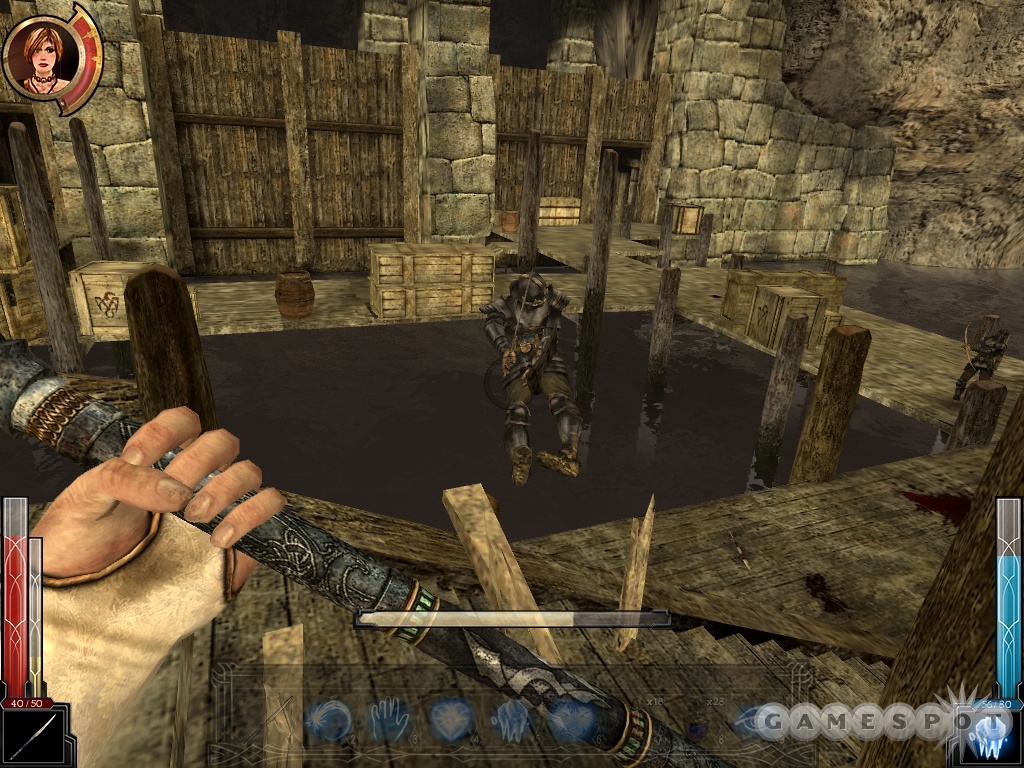
There are two ways to get into the building here after hitting the ground. If you go to the left, you can kill a few of the guards outside, take their key, and enter through the door. If you head to the right, on the other hand, you’ll be able to head through the sewers and enter the building directly, with less resistance. Up to you.
If you do head to the left and take on the guards, though, be sure to run up the ladder along the left wall where one of the archers is located. Kill him, then check the room up here for a Long Bow and some Assassin’s Garb, as well as some potions. When you’re through, head into the hideout, kill or steal the Trap Door Key, and check the rooms for the Daggers of the Disciple before heading down through the trap door here.
Smithing
Now, once you’re in the basement, you can run across the way to find a smithy. If you want, you can make a Long Sword for yourself by using the tools in the manner described in the book by the smithy. At this point, it’s kind of pointless to do so, since you’ll be finding better equipment very soon.
Notice the boarded-up passageway in the smithy. This is the alternate route to where Arantir is using the Crystal. The primary passage is back in the room before the smithy. The alternate route has some goodies, like the Ring of Arcane Brilliance, which adds 10 mana to your total, but the primary route has two doors near its start which has the upgrades for fighters. You can find a Naga Silksword (+3 damage, +2% crit chance) and a suit of Chainmail Armor on a bed in one of the barracks, while the other room will have a Poison Kriss dagger set.
Regardless of the path you take, you’ll eventually reach Arantir’s location, where the Shantiri Crystal is also located. When you find him, quietly sneak over to one of the cells and unlock the cells with the switch on the wall. Sneak close to Arantir and his men, but don’t get spotted! If you do, you automatically lose. When you hear the "Now’s my chance!" coming from your lips, run up, grab the Crystal, and beat your feet back the way you came. When you come to a locked gate, turn to the right and follow the water to the end of the level.
Chapter Four: Across The Sea of Blood

Ah, the Sea of Blood. We always wanted to go there for vacation. Looks like now we’ll get my chance!
With Arantir finally packed away behind you, head down the sewer path in front of you to find Leanna, who’ll ask you to single-handedly retake the ship that she and Menelag were planning on taking to the temple across the Sea. Head out to the docks and kick the soldier in front of you into the water. You’ll note that this instantly kills them...it’ll come in handy later. You can find the Staff of Reflection nearby.
Instead of walking across the docks, which is a surefire way to get killed, dive into the water and swim towards the crane on the left side here. Twist the dial on it to move the platform over to the open hatch in the side of the boat, then jump across and go in.
The Boat
Kill the first soldier in the boat here, then smash the planks and move on. Kill the two soldiers in the next room to grab the key, then move through the door, grabbing the Ring of Arcane Brilliance if you didn’t already. The room beyond this will have two Necromancers in attendance. These guys are more difficult than the normal Black Guards, due to the fact that they can cast Flame Arrows and have much more health than their melee counterparts. If you have Telekinesis, your best bet is to chuck a barrel at one or both of them to instantly take them out, then close in and engage them in melee combat.
The next room beyond these guys will have a necromancer, a Black Guard, and a whole lot of cages with goblins in them. If you can find the switch that allows you to open the cages (on the upper level, to the left of where you come in), you can free the goblins, who will then attack the guards and keep them busy while you finish them off. If you accidentally hit any of the Goblins, though, they’ll come after you as well, but they’re not a serious threat.

When you grab the key from the necromancer, head through the door to reach an auto-save point. There’s a ladder here leading up, but before you take it, climb on the box nearby and jump from there to the platform behind you to find a Flamegold Bar and a Ring of Might. The Flamegold can be used the next time you find a smithy, while the Ring of Might will add one damage to all of your weapon strikes.
One of the doors leading on is locked, but the other will lead you to the ballistae. Kill the guards here to accomplish one of your objectives and earn some more skill points, and don’t miss the very nice Elven Bow nearby. There’s a central area with some chests that’s locked off to you; if you head back to the small room where the Wizard Robes were, near the ladder you just walked up, you can find the Rusty Key hanging on a nail.
The Deck
Clear out the deck of enemies before removing the wood barricade on the gangplank. Leanna will be along shortly, which begins a quick game of defend-the-boat. This is fun stuff; all you have to do is prevent the Black Guards from getting onto the boat or killing Leanna. Since you’re going to constantly be near the water, just kick the guards as they come at you into the drink. There will be archers, as well, who will be more difficult to deal with, since they won’t get near the gangplank at all. If you have magic, you can try Telekinesising stuff towards the archers, or just ignoring them. If you run out to attack them, though, the swordsmen will likely run past you in an attempt to get to Leanna. Kick them into the water as they get close to you.
Tip: If you want to have an easier route through this fight, feel free to try heading back down below decks towards the ballistas that originally covered your advance to the ship. If you man one of those, you should be able to destroy most of the incoming forces with ease.
When everyone’s dead (a few archers will appear by themselves at the end of the gauntlet), return to Leanna, who puts the moves on you despite having only been around you for a couple hours, at most. Raise the anchors here to end the level and move on.
Chapter Five: Temple of the Spider
You’re going to begin this level with a lengthy fight against a number of Orcs. With Leanna on your side, you’re effectively unkillable, since she’ll heal you whenever you fall below around 30 health. Just be sure to protect her and kick or kill anyone that attacks her.
The orcs are a fair amount tougher than Black Guards, although they still get killed instantly by being kicked into the spike walls that litter the area. If you want to have a little fun with magic, park Leanna back near the wizards, get up on top of one of the ruined buildings here, and use Freeze to cause the Orcs to fall off the walkways when they try to reach you. Battling on top of the buildings will let you kick the Orcs around for extra damage, but it will make it easier for the archers to fire on you.
The Bow Of Rope
When everyone’s dead, find the portcullis that needs to be raised. In order to raise it, you’ll have to drop down into the nearby tunnels; just fall down and let Leanna heal you if you took any damage.
You’ll soon be attacked by numerous Facehuggers here. It’s best just to spam out attacks at these guys. If you head into one of the nearby tunnels, they’ll be forced to bunch up as they attempt to follow you, which will cause the attacks of the rear creatures to hit the ones in the front and help you out a bit. You can also Charm them if you have that spell.

When the creatures are dead, walk up the sand slope in the same room that they appeared in and hop into the tunnel there to find the Rope Bow. Flip the switch on the wall to open the portcullis for Leanna above you. Now, you can exit the pit you’re in by firing the Rope Bow at the pillar above the hole near the corpse, or you can explore a bit to find a secret area.
If you’re interested in the latter, head back to the sand-filled room and walk down the tunnel nearby. The small chamber at the end has another wooden beam above it, so fire a rope arrow up and wait for it to stop swinging before climbing up it. (If it’s still swinging when you climb, you’ll likely get stuck inside a wall.) The chamber above has a Poison Bow, as well as a full health potion and an antidote.
When you’re ready to move on, return to the room where you found the Rope Bow, fire it into the ceiling, and climb out. You’ll be attacked by a Paokai here almost immediately. Follow the two orcs into their little chamber to evade the Paokai’s lightning attacks. Kill the orcs, head upstairs and kill the other orcs, then meet up with Duncan before heading into the Temple proper.
Temple Of The Spider
You’re in! Now you just have to find whatever it was that you came here for. Some kind of skull? Or crystal? Or MacGuffin? Well, whatever it is, it ain’t going to find itself.
The first large room you find will have a small altar with some potions and a very handy Ring of Regeneration. It’ll increase the rate at which you regenerate health. Equip it if you like. When you want to move on, fire your Rope Bow at one of the rafters near the ledge nearby, then flip the switch to allow Leanna to follow you. Kill the Orcs nearby to clear the altar, then wait for Leanna to clear the path leading on for you.
The next room, with the many statues, is the location of the next secret area, and it’s one that may be impossible for you to get unless you’ve unlocked Telekinesis. Look around a bit; you should see a bunch of statues on the pedestals. There’s one statue on the ground, though, and one pedestal that’s empty. If you pick up the statue with Telekinesis and move it over to the pedestal, you’ll find a number of goodies, including potions and the very nice Superior Naga Silksword. With +6 to damage and +4% Critical Hit chance, this will be a sword you’ll probably be using for quite a while. It does require two points in the Critical Hit skill, though.
Another secret area can be found in the room with the goblins. Look for one of the support pillars that’s braced up with wood. Break the wood and climb up the pillar to find a hidden chest.
Goblins...Why’d It Have To Be Goblins
Fight your way past the next couple of goblins, but get your rope bow out before proceeding. You’re going to enter a trap room with stone blocks that will attempt to crush you. Rope yourself up to a wooden beam and climb up to escape the stone blocks. The passage on will be a dead end, so you’ll have to return to Leanna.
Before you get to do anything with Leanna, though, the Paokai will attack. It may look impossible to defeat, but it’s anything but. Simply get its attention, run back through the gate you use to exit and re-enter the room, then flip the switch when it attempts to follow you through. You’ll plunge the gate through its neck in pure Rancor style, which will earn you an automatic kill.
When Leanna clears the path for you, drop down and move on.
Spiders...Why’d It Have To Be Spiders...Oh Wait
Unfortunately, you won’t move far before you hit a rotten section of the floor and fall through into a spider lair. The poison that these guys hit you with is insanely damage, so the best bet is to simply run past them as often as possible.
When you hit the first branch in the path, you’ll be forced to go left or right. Left is the proper exit from the pit, while right will lead you to a secret area with two antidotes and a Key on a dead body. When you do hit the exit, start climbing up the chain that leads down to the floor. You’re safe from the spiders while you’re on the ropes, so your best bet is to stay there. Unfortunately, you can’t!
Here’s the basic sequence of events. Climb up the first chain, then jump off to the platform near the top. Grab the potions and scroll from the cubbyhole there, then fire a Rope Bow arrow up to the piece of wood above the platform. Climb up and jump to the next platform. Now, you have to remain still enough to fire your rope bow twice here, to make a little path of ropes for you to jump from one to another until you reach the chain hanging on the far side of the chasm.
When you make it across, you’ll find a small passageway. Head in and down to move on.
Canyoneering
The first pool of water you pass by has a treasure chest at the bottom, which counts as a secret area. Following the cliff path to the end will branch; head to the right and fire a Rope Bow arrow up at the beam to grab a couple of potions. Follow the path from there until you fall down into a pit of water. Swim down to release the hatch under the waterline to fill the pit, allowing you to climb out.
Up next is a fun little combat against numerous goblins, perhaps ten altogether. On hard difficulty, these guys can definitely swarm you, especially since they can sometimes all come at you at once and there’s no way to easily dispatch them. Use whatever means you have available to kill them off.
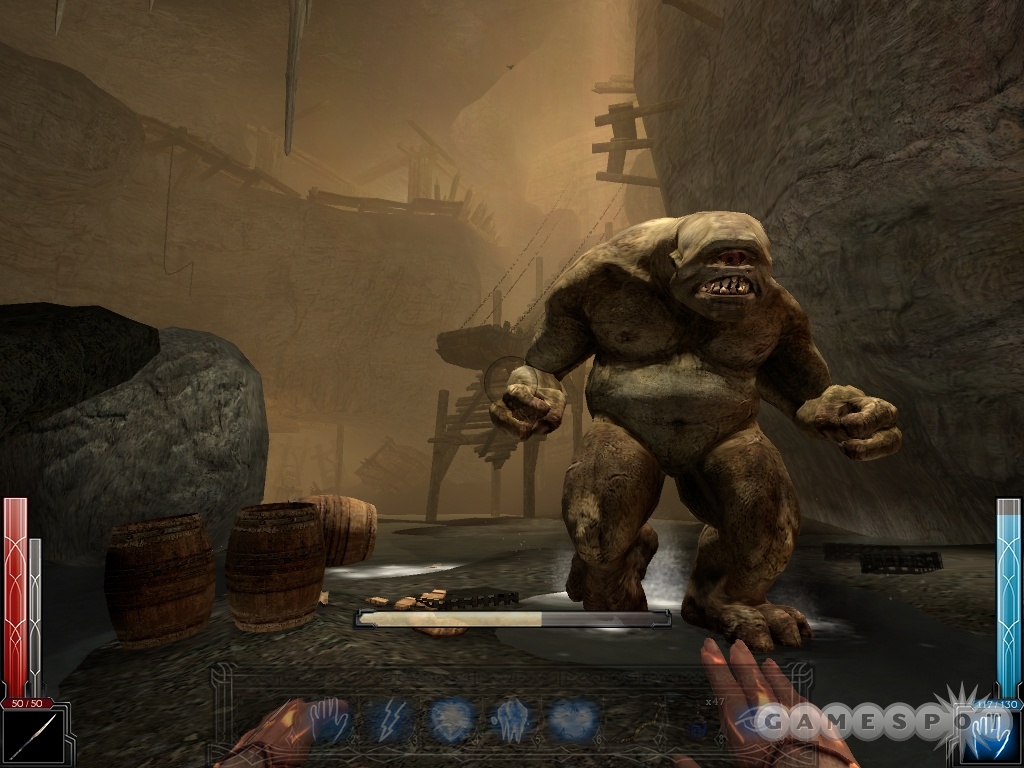
If you want a couple of optional skill points, and it would be wise to get them, you can try your hand at fighting a cyclops in the large, open area at the end of the hall here. When you see the two small goblins attempting to flee from you into the wall, wait a few seconds and the mighty Cyclops will appear.
Cyclops Fight
This fight can be difficult, although it can help to simply make your way to the Cyclops area as soon as you see the goblins. If you can avoid their fire for a few seconds, most of them will break off to attack the Cyclops when it does appear, sacrificing their lives to give you a distraction. You can also take him on one-on-one, of course.
The only way to take down the cyclops is to attack his eye, which is normally going to be a bit off the ground. If you have the Lightning Bolt magic, then that seems to damage him no matter where you hit him. However, if you want to use weapons on him, then you’ll have to lure his eye down to where you can reach it.
The best way to do that is to drop the braced-up statue in the corner of the room right onto the monster’s head. Stand in the corner, wait for it to get near, then strike the boards that keep it upright and it’ll drop, hopefully stunning the monster. It’ll keel over on one knee and put its head down, allowing you to stab it in the eye. Multiple times.
You probably won’t be able to kill it right off the bat, though, so you’ll have to make it lean over at least once more before you can finish it off. Most of the Cyclops’s attacks will cause its head to come down almost to ground level for a moment, though, so if you can quickly attack it then, you have a chance to deal enough damage to it to finish it off. The best way to go here is to let it come up to you, wait for it to start its attack animation, then run backwards (i.e. turn around and run away; backing up is too slow) for a second, turn around, then move in with your attack queued up as its head is within striking range.
It can take a bit of time to wear down the Cyclops, so keep your health up and avoid its attacks as best you can. When it kneels over again, though, queue up a power attack and finish it off once and for all.
Moving On
With the Cyclops defeated, head back and take the steps up to the upper temple. Plenty more goblins will attack you here, but they can be kicked off the walkway to their deaths. If they become problematic, head into the red-tinted room nearby and wade into the water there to restore your health. The blue room across the way does the same thing for your mana.
When you’re done healing up, you can find a secret area in one of the rooms next to the health-replenishing pool. The walls here are trapped, though; you’ll be able to see small flamespouts on the walls. Avoiding them isn’t too difficult, though; just sidle up to the wall opposite one of the spouts, run past it so that you’re in between them, wait for the flames to go off, then run through. The secret area is found in a hole in the wall near the first treasure chest. You’ll find a Staff of the Firelord inside.
Across the way, another Telekinesis secret area can be located. Grab the statue near the mana pool, drag it down the hallway, and place it on the empty pedestal. Doing so will unlock an area of the floor with a number of potions in it. (Don’t worry too much about the spider-medallion doors here; you’ll be able to unlock them later.) Moving down towards the ladder that leads to the end of the area will reveal a chest with the Gutting Kriss.
Up Mountain
The path that leads on from the interior portion of the temple will take you to a set of walkways winding up the outside of the mountain. There are going to be two orcs in front of you, but when you engage them, four more will come barreling up the steps behind you. That’s fitting, since there are a number of barrels being supported by some rotting wood at the top of the steps. Wait until the latter orcs charge, then cut the supports to send all the barrels down the hill. You can also use the oil jars to full effect, or kick the orcs down the mountainside if you get into position to do so.
A bit up the hill, you’ll come to a cave with a wooden ram pointing at a door. (The elevator nearby is nonfunctional, but you’ll be coming back to it later.) Use the ram three times to break the door to find a secret area. Inside you’ll find some potions, as well as a set of Lightning Daggers inside the sarcophagus.
Head back out to the mountain path to meet up with more orcs. The archers here are going to be pretty annoying, so you may want to lure the sword-wielding enemies back to the caves and deal with them there before charging across and taking out the archers.
At the top of the steps leading upward, you can find another Poison Bow. If the bridge leading onwards has been cut, find the stone path around the canyon and use your Rope Bow to move up. The Souldrinker sword is hidden in the water at the base of the next tower, so be sure to grab it if you’re going melee.
Mountain Paths
Now you’re finally getting up to where Menelag’s expedition was located, before they were slaughtered by the orcs. You’ll also be coming near the place where the ice trap was so lethally used in one of the earliest trailers for the game, if you happened to follow it. Anyway, search the first little hut for the Ring of the Phoenix (which will come in handy during an upcoming fight), kill the orcs, then check out the barricaded hut nearby to get an objective. Take the walkways around the first hut to find a ladder leading up. On the third floor of the hut you can find a Wizard Robe, but the second floor leads to the path onward.

Avoid the spiders in the cave and kick your way out to the roof of another hut. You can bash the planks on the roof to fall through, but when you hit the bottom floor, be very very careful about how you move; the entire building will fall if you venture too close to the windows. You can telekinetically grab most of the potions in the room, if you like, but you have to creep very, very slowly (crouching helps) towards either the Plate Armor or the chest if you want to get one of those. The chest has scrolls in it, and the Plate Armor is +3 to armor class. Just creep along until you pick it up, then backtrack hastily to prevent falling to your death.
After following the path to the next hut, you can use a Rope Bow to get up in the rafters to find a Mana Potion. The next hut onwards is the one that was barricaded earlier. Pick up the Logbook from the ground to learn about the wizards’ last days. You can jump onto the table that’s jutting out from the window and sneak through to find another Superior Naga Silksword that’s stuck to the wall outside. Shooting a robe bow into the rafters here will reveal another Mana Potion and Antidote.
Take the cave path nearby to lead yourself back into the mountain. The machinery that you discover powers the elevator that you passed by lo those many orcs ago, so flip the switch to get it up and running again. There’s another smithy nearby, as well. If you want to use that Flamegold Bar you found way back in Menelag’s ship, you can do so now. To reiterate, the steps required to forge something are:
- Place metal in the smelting pot.
- Use the wheel to rotate pot over the furnace.
- Pump the bellows to heat the pot.
- Use the wheel again to move melted metal over the mold.
- Fill the mold with water to cool the sword.
- Grab the blade from the water bath and place it in the fire.
- Wait for it to heat up, then place the blade on the anvil.
- Grab the hammer, equip it, and strike the blade.
- Bring the blade over to the leather straps and make a hilt.
- Use blade to crush your enemies and hear the lamentations of their women.
The Earthfire Sword, which you get for using the Flamegold bar in the smithy, deals +6 damage, or +12 to anyone weak to fire damage (which includes most human targets). Nice.
Now you have to get back all the way to the elevator that’ll take you up to the main area of the temple. You can head back to the ruined hut where Menelag’s expedition was slaughtered and kick down the door in there to move on, then head back to the previous loading screen. Walk back to the elevator, flip the switch, and ride, ride, ride on up to the pedestal where the Shantiri Crystal is inserted. This will power up the temple again and theoretically allow Leanna to do her thing and get the Skull you need.
Powering Up
When you reach the top of the elevator, you’ll have to fight off some spiders. Do so quickly. You can head left or right from here. To the right, you’ll find another hut. If you fire a Rope arrow into the rafters, you can hit the second floor, then jump out to the chain hanging outside the window to climb up that. Move quickly, as it’ll start fracturing. Jumping to the second hut up top will let you move around to the windows and head inside to a secret area. Inside you’ll find potions and a Soulreaver Staff, which will let magic users steal mana from their enemies. To get back down, jump to the lower rooftop, then fire another rope arrow into the wooden supports for the upper hut to remake the chain rope that fell to the canyon floor, and jump from there back inside the first hut.
The left path will lead you to the spider pedestal, after flipping a couple of switches. Place the Shantiri Crystal into the pedestal here to power the temple, but get ready for a fight.
Two Men Enter
Orcs will quickly attack you after you insert the Shantiri Crystal. Aratrok and his men will offer you a deal: defeat Aratrok in a fair fight, and you can go free. "Fair" meaning that you can’t use spells at all, or attack anyone but Aratrok. If you do, then everyone in the room will attack you.

Now, if you’re a warrior, then this shouldn’t be a big deal. Aratrok has more health and deals more damage than normal orcs, but doesn’t have any special attacks to speak of. Finish him off quickly. Wizards will have a more difficult fight, obviously, since you won’t be able to cast any spells or use the Stone Skin potion which might let you harden yourself up considerably. That said, on normal difficulty, you should be able to take him out with a staff without too many problems. Just try to use power attacks to knock him down, then quickly que up another power attack while he’s down to...well, you can’t finish him off while he’s on the ground, but they definitely seem to do more damage than normal. You may even get all the way up to a full adrenaline charge, which will let you instantly kill Aratrok.
If you’re willing to play around a bit, you can try taking on all the enemies here. You can Charm one of the peons to cause the rest of the orcs to focus their attacks on their brethren, and use stuff like Freeze to keep the rest of them off you. Sanctuary might also help. This is a tough fight, but you may be able to survive. Using the Ring of the Phoenix might get you an extra chance if you die.
Back To Leanna

Grab the key off of Aratrok’s corpse and use it to open the door. You’ll come out to another elevator which will return you near to where you left Leanna. Before you head back her way, though, retrace your steps back to the area where you fought the Goblins and the Cyclops. If you can return there, you can find the three spider-locked doors near the health and mana pools and open them with the spider key. Inside these secret areas, you’ll find an Arcane Robe, Lightning Daggers, and a Shadowsteel Staff, among other goodies.
When you’re ready to move on, return to Leanna and she’ll open the gate leading onward. Before she can do so, though, you’ll have to deal with a pair of ghouls. If you can Charm one of them, that’ll help you a great deal here, but if not, try to kick them off near the Altar to the ground below so that you can deal with them one at a time. When the gate opens, run underneath and leave Leanna behind you. The passage onwards leads to the next chapter.
Chapter 6: The Altar Of The Skull
You have to somehow find the Skull of Shadows here. The Altar of the Skull is key to doing so, but it’s curiously inaccessible at the outset. You’ll have to drop down into the pit below you to access it. Do so, and ignore the zombies for now. If you head through the passage at the left, you can poke around for a bit and find a glowing crystal on the wall. This is the Moonsilk Crystal. Grab it.
Now, you have to get to the Altar, which is above you. To do so, head towards the gate here amongst the zombies and look up. See the beam with the chain looped below it? Fire a rope arrow into the beam near where its end and climb you. You should be able to jump to the Altar from there.
Head up to the Altar and place the Moonsilk Crystal into it. It’ll open up a passage into the Crypt, and you’ll get objectives telling you to find three more crystals in order to unlock the path leading onward to the Skull of Shadows.
The Crypt
The Crypt is going to be filled with zombies, so be forewarned. In most games, zombies are generally pushovers, but here in Dark Messiah, they’re actually quite tough. They hit pretty hard, have an astonishingly large health count, and can spit poison clouds at you, which is, needless to say, really damn annoying. In general, if you can get away with it, it’s best to just avoid them entirely. You’re far enough gone in your specialization to have learned a bit about how to play, though, so if you want to formulate a plan of attack, feel free to do so.
As you enter the Crypt, you can jump from the steps to the chains in front of you if you catch them while they’re going down. If you do, you should be able to nab a magic mushroom at the top of the rafters there. From there, feel free to explore. There’s a secret area in one of the tombs here, to the left of the entrancec, which leads to a Full Health Potion. If you can’t spot the cracked tomb with Alertness, it should appear to be fairly bright when you hit Dark Vision. There’s also another magic mushroom in the rafter area above the bottomless bit.
When you’re ready to move on, cut the rope in this area to break down a wall. The path leading on will let you hit a huge tomb, with a sarcophagus in the center. The chest near the sarcophagus seems to be only openable if you can pick locks, but if you open the coffin itself you can find some Poison Kriss daggers. If you can get up into the rafters (and you should be able to find access points in each of the corners of the room), you can find a couple more magic mushrooms up there.
The corner of the room with the smashed coffins is the path leading onwards, so head that way and move through to the next loading screen.
The Maiden’s Eye

The first gem you need to find is staring you in the face as you start this level. It’s the yellow object glowing up in the wall opposite where you start the level. If you can’t Telekinesis it to you, you can throw a bow arrow into the rafter in front of it and climb up that to nab it. There’s also some rafters above the main area here; throwing a bow arrow up and looking around will net you a chest with an Arcane Robe inside of it.
With the Maiden’s Eye in your possession, find the steps leading down and start heading to the bottom of this area. When you finally encounter a ghoul, climb atop the stone blocks nearby and start climbing upwards with your Rope Bow. When you hit the top of your bow, you should be near another tomb, atop which is located the Sword of the Dragonclaw, a massively powerful sword. Grab it, then flip the switch on the nearby wall to raise a gate. Climb back down the rope and head through before it closes.
The next room is full of Zombies, as you might expect. The goal here is to find the rotating wheel on the upper platform and rotate it until you raise the gate in the water below you, then dash into the water and sprint underneath the gate before it closes. The only other item of interest here is a Ring of Arcane Brilliance atop a chest in the water.
After maneuvering past the zombies in the water, open the sarcophagus that you come to and jump inside to move on.
Soul Of The Crone
The watery pit that you land in is full of zombies, but has no obvious secrets in it. Find the path moving on to reach the abattoir that will be your doom! Or something. Well, nothing that serious, actually, although you do have a tough fight coming up here.

When you enter the room with the large sarcophagus in it, head up the steps and watch the tomb slide out from the wall. You’re going to be fighting against a Lich and his assorted zombie minions when the tomb is all the way out of the wall, so prepare accordingly. Magic users will want to take the nearby steps and move around to the upper ledge of the room and prepare their ranged attacks.
The Lich isn’t necessarily all that powerful, although his Lightning Bolts will definitely hurt. He can be knocked around and knocked down, obviously, so keeping him on the ground and attacking him there will be a winning strategy. It’s the zombies that are the annoying part of this fight, since they’ll whack you when you get near them and poison you to boot. If you can lure the Lich away from his minions, you’ll stand a much better chance of beating him one-on-one than you will if you have to face his entourage as well.
Mages, on the other hand, should stay on the upper ledge and fire off fireballs or lightning bolts at the Lich. Eventually you’ll hit full adrenaline, at which point a single lightning bolt fired at him should take him down.
Regardless, you need to kill the Lich to move on. Grab the Soul of the Crone gem from the casket and walk around to the chain behind it to climb up. Don’t miss the Staff of the Firelord if you missed it earlier.
The Matron’s Heart
Take the steps up from where you begin the level; the other path is a dead end for the moment. When you reach the large, open area, a number of Ghouls are going to attack you. If you can withstand their blows, you can lure them to the lower area of the upper walkways and kick them off to their deaths. Alternately, note the three spike traps near where you enter the area; if you move around among them, you can sometimes lure or kick the ghouls into them for the instant kills.
When you’re done poking around, dive down into the water and find the Matron’s Heart in one of the tombs there. With that in hand, look around for a dangling chain nearby that leads up to a metal gate. Jump from the chain to the gate and flip the switch, then return to the large chamber where the Ghouls attacked you. Your goal now is to walk along the suspended stone walkway, then sprint and jump across the gap towards the gate on the far side. The walkway will collapse below you as you run, so if you fall, you’ll have to use your Rope Bow on the beams off to the right of the gate to get back up.
The Skull of Shadows
The gate leads you all the way back to where you entered the Crypt, right below the Altar of the Skull. Place the crystals into it to open the pathway leading to the Skull itself...but there’ll be a test to pass before you can acquire it.

In order to win the Skull of Shadows, you’ll have to defeat around eight or ten spiders, of the large variety, all at once. Needless to say, be sure that antidotes are bound to your hotbar before this fight begins. Spellcasters will have the easiest time with this quest, as you can simply cast Fireballs or Lightning Bolts at the spiders until you get an adrenaline charge, then Lightning Bolt all of them to death. Melee fighters, especially stealthy ones, will have to rely on dodging in and out of melee range, making some swipes, and also building up some adrenaline to hopefully auto-kill one or two of the beasts at a time. If you’ve purchased Poison Resistance, then you’ll have an easier time with this fight, but it’s winnable either way.
Chapter Seven: Fire In The Blood
After the cutscene, where the plot twist you probably saw coming ever since you read that Sareth was an orphan in the manual is revealed, you’ll find yourself in an Orcish pit that the beasts have been using to dispose of bodies. Luckily for you, you’re not dead, although your essence has been fused with Zana’s, thanks to her use of the Skull of Shadows to revive you. You now have the ability to morph into Zana in battle, using her claws and tail to lash out at enemies who oppose you.
There are two paths to take here, one in the water, and one leading up the slope towards where the Orc was throwing the goblin into the pit. The slope is quicker, although you’ll have to fight off two more enemies than you would otherwise. Morph into Zana and use her attacks to finish off the orcs, but keep in mind that you’ll be bleeding your life away while you’re in that form. You take damage as normal, but you will also gain back around 20 life when you kill an enemy, so that’s a plus.
When you find the orc archer, head through the corridor with the hanging drape. It’ll lead you to where the orcs have stashed away your equipment, so follow the trail and open the chest to get it all back in one fell swoop. From there, use your Rope Bow to get up and over the door leading onwards.
The next room has an unopenable chest, which you’ll likely need Burglary to get open. We, at least, didn’t see a key anywhere. There’s also another smithy if you want to use the Flamegold Bar that was in the chest with your loot.
Cyclopean Rage
Another cyclops is in the area ahead of you. This fight should be a bit easier than the one in the Spider Temple, though, owing to better weaponry and spells and the fact that there are more places to hide if you need them. There are two different traps you can use to pour crap onto the beast’s head, as well. When you’ve killed it, rotate the wheel near the gate leading out to move on.
Use your Rope Bow to climb the nearby chasm, then start making your way through the tunnels there to finally reach the end of the level.
Goblin Rage

You’ll finally reach the level from the game’s demo here, although it’s substantially different than the one you played through there. To begin with, you’ll first head into a large goblin lair, with...goblins. Dispatch them, then look around for treasure: there’s an Earthfire Shield in a dragon crate, a Lightning Shield at the bottom of one of the pools of water, and Shadowsteel Daggers in a treasure chest inside the hut in the corner of the large room.
When you’re ready to move on, climb the scaffolding above the hut and turn the wheel there to lower a chain. Start climbing! The first large hole you see is the path onwards, but if you climb up further you can find some potions.
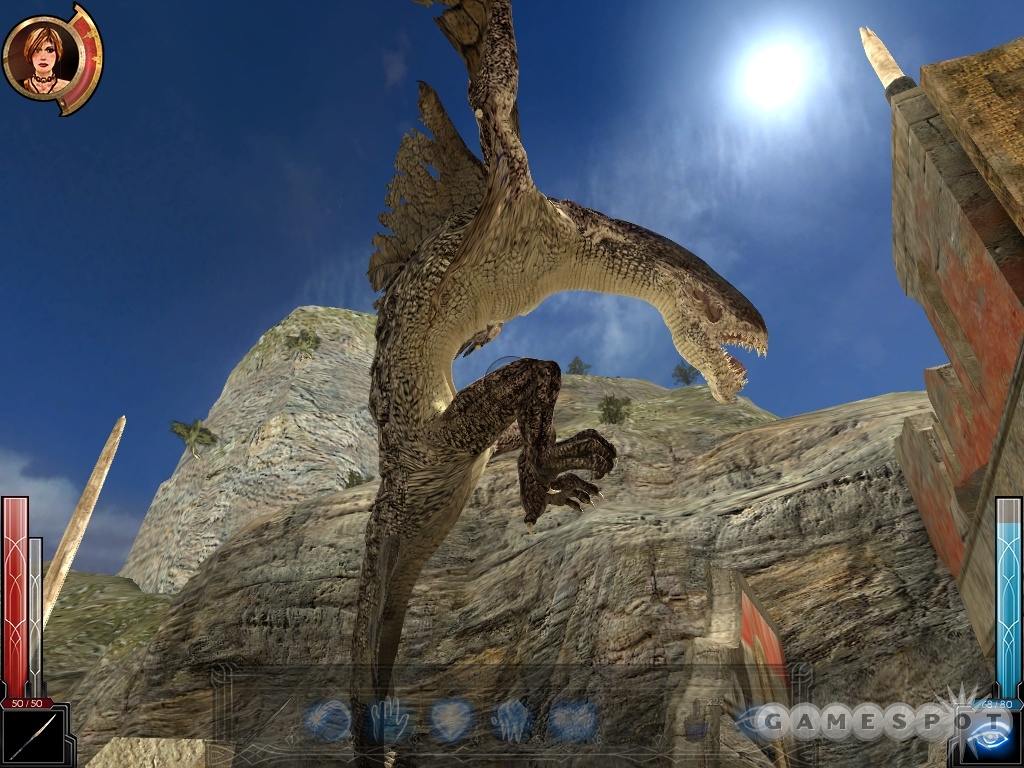
The Worm
There are some potions in the treasure chest at the bottom of the water pit you fall into at the beginning of the next level. Those will be scant comfort to you, though, when you encounter the Giant Worm that inhabits the center of this level. It will attack you as you attempt to cross the makeshift bridge that you find, which will in turn cause the ceiling to collapse, shearing the bridge in half. Luckily for you, it’ll fall towards the far side of the gap, allowing you to ride the pieces as they collapse and finally jump to solid ground.
From the solid ground, find the stairs leading up and kick out the door at the top of them. If you want another Magic Mushroom, sprint around the walkway here to the right and pluck it, then follow the path back to the left as best you can. You can duck into the small cave to find some potions and let your sprint meter refill. When you’re ready to go, sprint down the hill, across the scaffolding, and start making your way along the path that’s littered with all the small chests, jumping over or kicking them aside as best you can. When you reach the corner, turn and hide in the small alcove there.
Now, you’re apparently at a dead end, but if you look up, you’ll spot a rafter and a small hole nearby. Use your Rope Bow to fire an arrow at the rafter, then wait for the worm to stick his head at you before jumping up to the rope and jumping into the hole. You’ll quickly find the end of the level.
Moving On
After defeating the facehuggers that attack you in the first open room, throw some rope arrows up to the rafters up top. The hole on the left will lead you to a spider cave secret area, where you can find some scrolls and a Magic Mushroom. The path on is at the bottom of the room, though.
The large waterhole that you find yourself in has a nice secret for stealthy characters. The Master Thief’s Armor is in one of the holes in the chasm. If you can spot one that has a rafter sticking out next to it, you can fire a rope arrow into it and climb up to retrieve the armor, or you can simply Telekinesis it as the water’s rising.
To get to the top of the area here, stand on the raft and flip the switch to flood the canyon with water. Where’s all the water coming from, is what we’re curious about. There’s got to be a good couple thousand cubic meters of space in here, and that’s a lot of water to have lying around waiting for a switch to be pulled. Regardless, it’s there for your use. Stay on the raft as it ascends, though, as if you fall off you’ll most certainly die.
At the top of the waterpark, jump around to reach the goblin scaffolding and use your Rope Bow to ascend to the top. You can enter the goblin-infested mines near here, but as you do so, take a left and walk into the small hole in the wall. Jumping up into the tunnel above will give you access to a secret area with some scrolls and potions.
Orc Lair

When you reach the level transition, you’ll be back to the second half of the demo level. Ride the carts to find a Bow of Winter’s Breath before reaching the main section of the level, which comes after the second cart ride.
Stay on the upper level here after killing the orc that throws the goblin into the chasm. If you follow the path all the way to the end, you’ll find a wooden hut that’s seemingly empty. Firing a rope arrow in the beam above it, though, will allow you to jump to the roof and find a set of Shadowsteel Armor.
Head down from there to the room full of orcs and wood. Kill everything that moves, then push the brick jutting out from the wall above on of the platforms full of barrels to open a secret area nearby. There are some Daggers of Frost inside, as well as some potions, but grab them quickly, as the ceiling will begin falling as soon as you open the chest.
As you move up the steps leading on from the area, a large barrel will begin rolling down the steps. You can either sprint forward towards it to find a cubbyhole in the wall, or sprint backwards and leap to the small foothold across the gap to wait for it to go down the hole.
The Coast
You’ll need to use your rope bow a couple of times to escape from the cave here. Once you’ll be going up to find the path leading on, and the second time you’ll be using the bow to enable a safe descent. Both times you’ll be attaching the rope to tree branches, instead of the usual rafters or wooden beams.
When you reach the coast, approach your followers to get a boat ride back to Stonehelm. Time to start planning the doom of Arantir.
Chapter Eight: In The House Of Ashes
When you start this level, you’ll be in the sewers underneath Stonehelm, near where you first encountered Arantir. Kill his minions here, then run through the portal to the Necromancer lair beyond. Now that you’ll mostly be fighting against Necromancers and Black Guards, don’t forget to equip fire-based weaponry, which they’ll be most weak against.
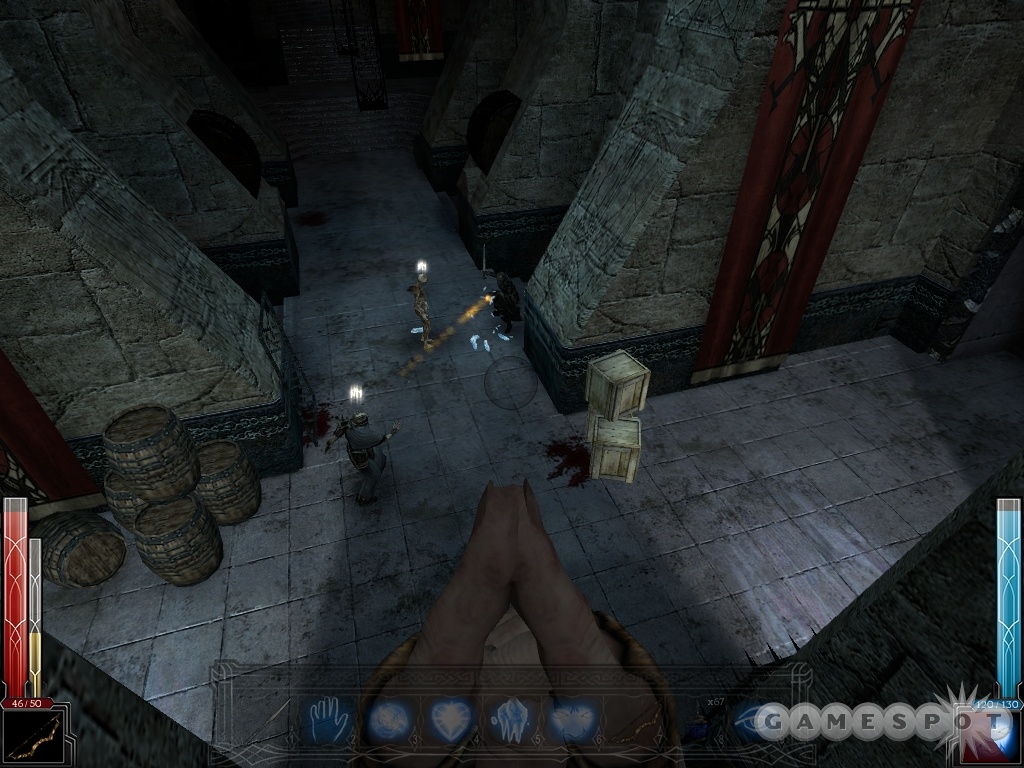
Make your way through the lair towards the huge room in front of you. There are doors here leading to sleeping chambers, but most of them will be locked at the moment. Kill anyone you see, obviously, and you’ll eventually make it to The Cells. (This is the ultimate destination of whichever path you take from the portal, although the left path will give you high ground when you arrive.) If you’re a magician, try Charming the Necromancer here to bend him to your will. Necromancers, when charmed, will summon zombies in, which will also wind up being charmed, giving you two helpers for the price of one. Note that the guards here are actually Vampire Knights, tougher than the Black Guards and much, much faster. (They’re also apparently immune to the vampiric effect of the Souldrinker blade.) If you can lure them up the steps, you can kick them down to the cells and finish them that way. There doesn’t appear to be any tactical advantage to opening the cell doors here, since the Ghouls won’t attack the guards or necromancers.
When you’re ready to move on, find the dragon chest here; the corridor nearby will be marked as leading to the East Quarters. Head down there. There will be some quarters with necromancers in them; the second room will contain a chest with an Endless Quiver, which will eliminate the need to hunt for arrows.
The Library
There are a large number of enemies in the Library, including vampire knights and necromancers, but luckily for you, you start at the top of it and head down, allowing you to gain easy kills by kicking your foes or casting spells like Fireball or Fire Trap.
When you reach the bottom of the library, you’ll head through to the training area, where more vampire knights will be sparring. A necromancer overlooks the area, and is capable of bringing fallen knights back to life, so he should be your first target, whether for a sword or a Charm spell. In the small room at the back of the training area, you’ll find a Black Orb, which is what you need to unlock the doors here. Use it on the door at the bottom of the library to move on to the North Quarters and laboratory.
The laboratory is going to be a tough place to infiltrate, overrun as it is with at least four necromancers with zombie pets. If you want to avoid most of them, you can try opening one of the trap doors in the area and heading down there, but you won’t be able to reach exit unless you get the Trap Door Key off of one of them (which also lets you pick up your third or fourth pair of Daggers of Frost). If you go head on, use Charm to pull one of the necros to your side, or attempt to lure them into one of the smaller offset rooms and throw barrels at them as they enter.
When you leave the lab, you’ll come across another necromancer quarters. There’s some potions behind the wall scroll here, and a chest that appears to be permanently locked. Move on from there to the Pit.
The Pit
The pit, ominously named as it is, will reveal the presence of an old flame: Leanna. She’s not dead, as you probably suspected all along, but is instead a prisoner of the necromancers, who immediately chuck her into the spider pit as soon as you see her. There’s no way to save her - yet.
Fight your way down through the Prayer Room. A large number of necromancers, perhaps five in all, will be stationed here; now would be a good time to bust out those Fire Trap and Charm scrolls. You can cast fire traps in the long hallway that has the arrow slots in it; that’s the only way for your enemies to approach you. Kill everything that moves, then find the gate that leads on and open it before dashing under.
When you take the elevator down to the lowest level. Arantir’s room is directly across the way; Xana wonders where Arantir’s journal could be. Maybe it’s the huge book called Arantir’s journal on the podium in front of you? Could be...check it to learn of Arantir’s plans for the city of Stonehelm. He’s fighting to keep the demons imprisoned, oddly enough, but his plan involves wiping out the entire city to strengthen the prison permanently. Of course, Arantir’s quarters wouldn’t be complete without a secret area. Click the candleholder on the wall to reveal a chest with a number of scrolls inside of it.
With Arantir’s secrets revealed, all that remains is for you to return to the portal and get back to Stonehelm and stop him.
The Spider’s Lair
After taking the elevator down, you’ll come out to a room full of spiders. Killing them and heading down the ramp will reveal their grandma, a giant spider.
Mages will have an easy time with this fight. The three torches here will mark the furthest that the giant spider will travel. If you sit behind them, you’ll be able to throw off fireballs at it without fearing any attack. It’ll spit poison at you, sure, but that won’t be able to kill you, just bring you down to four or five health. So long as you pick off any other smaller spiders coming your way, you should be more or less invulnerable.
Melee characters will have a harder time, but like the Cyclops, this beast has a fairly obvious set of attacks. It’ll usually either attack with both of its forearms, or with only its left forearm. Dodge these attacks as best you can and whack it from below. If you can get around to its large rear area, striking it there will let you avoid most retaliatory strikes from its forearms.
Regardless, you need to kill the spider to move on, so do your best to take it out. You’ll find Leanna encased in spider’s webs in the rear of the cave, on one of the ledges. Free her and start running back towards Arantir’s room. A previously unopened path will now be available to you.
Return To The Portal
After fighting off the enemies in the bottom of the valley underneath the portal, open the door at the end of the far corridor to find an elevator up to the top. Leanna can get pretty retarded here; she’ll sometimes run into the elevator, then run right back out again. Try to let her run onto the elevator before getting on yourself, then block the passage with your body before flipping the switch and getting on yourself.
When you’re at the top of the elevator, talk with Leanna, then run over to the portal and use it to open it back up again. Head through, then return to the sewers to find a passage back to Stonehelm.
Chapter Nine: City of Flames
Quite the ominous loading screen in front of this chapter, we have to say. It looks like Arantir might get his wish after all...
Anyway, you have to get up and out of the sewers if you want to help save your city. You’ll meet up with Duncan again when you hit the top of the ladder leading up. Protect him as best you can, but you don’t need him to live to move on. In fact, if you want to simply avoid this first fight altogether, you can feel free to do so. Fire a rope bow into one of the beams overlooking the windowed archway, and you can climb up to one of the windows, then climb out the window on the far side and drop down near the bridge.

Many more ghouls will come your way now, so be ready to either attack them or kick them off the bridge or into the spikes here. There’s a secret area underneath the bridge, where the body of a soldier lies next to a full health potion. You can simply Telekinesis the potion, if you wish, or you can extend a rope arrow down from the beam above it.
When you move up the path towards the burning buildings, you’ll encounter Percy, Duncan’s cousin. He tells you of a path that will lead you to the Necropolis, but warns you that an undead Cyclops will stand in your way. He won’t follow you unless you manage to either kill the beast or find an alternate route around it.
It Stinks Of Death

If you wish to avoid the cyclops, walk along the path until you reach a sewer grate that’s been opened. Head down, kick the gate that stands in your way, and jump across the gap to the far side. After climbing up the ladder there, open the door in one of the nearby buildings and climb the ladder up to the rafters. You can climb out the windows here and move over to the next building and look around for a key. The key will open the doorway nearby, which will let Percy into the building. (It will also open the upper locked doors in the same building, which lead to uninteresting secret areas.) After following Percy through the building, he’ll open up the gate leading onwards to the next level.
If you want, you can fight the cyclops and kill it to allow Percy to cross the square here. There’s nothing to drop on its head, so you’ll have to simply dodge its blow and hit its eye numerous times before finally finishing it off, or cast a huge number of Lightning Bolts at its eye. You get the same amount of skill points for killing or avoiding the Cyclops, so feel free to leave it be if you wish.
The Sanctuary Of Ylath
After you get split up from Percy, run down to the well area nearby and fight off the necromancer and ghouls. If you can keep the civilian alive through the entire fight, he’ll open up a door nearby when you’ve killed everything. Just some potions inside; nothing very interesting. To move on, walk down the alleyway with the crates in it and climb the chain there.

If you want to bathe in the waters of the Sanctuary and get Xana out of your soul, then head up the slope here. Getting rid of her now will have no effect on whether or not you can achieve the good or evil ending to the game. If you do decide to purge yourself, you’ll lose the ability to switch to a demonic form (which you’ve probably rarely used), but you’ll gain a few highly-powerful weapons that will serve you well in the final chapter of the game, as well as three skill points. The only characters that aren’t directly rewarded for this (outside of the skill points) are pure warriors, but then again they’ve had the Sword of the Dragonclaw for a while now. Outside the Sanctuary, you’ll find another full health potion and some Shadowsteel Armor, if you missed it earlier. If you go inside and cleanse yourself in the fountain, you’ll gain the Staff of the Dragonbane, the Bow of the Dragonhorn, and the Daggers of the Dragonfang. Each of these, like the Sword of the Dragonclaw, does a good amount of damage to everything, and deals double damage to undead foes. Since the last chapter of the game will pit you against large numbers of undead, grab one of these weapons and use them wisely. You can try them out on the zombies that are raised in the graveyard outside.
Getting To Percy
Head back down the slope and engage the ghouls that attack the city guardsmen there. If you can keep these guards alive, they’ll travel with you for a bit, but it’s really not necessary to do so. When the doorway opens up to the next part of the city, walk through to reach another open area with more ghouls. A stone bridge crosses a chasm here to the house through which you have to pass now, but there’s another secret area that can be found by jumping off of the bridge onto the ground to the right of it, underneath the overhanging building. Nothing major there, just another magic mushroom and some regular mushrooms. The building will lead you to another loading screen afterwards.
Undead Villagers
The attic of this first building is one of the least secret secret areas you’ll find in the game. It has some scrolls in a chest, whoo hoo! Also downstairs is another Lightning Shield and Master Thief’s Outfit if you didn’t see the other two instances of each earlier on.
Kill the zombie villagers outside the building and move on until you run into Percy. He’ll tell you to open the flow valve in the backyard that he points you to. It is, of course, overrun with undead, including a powerful Necrolord. Kill everything that moves and rotate the wheel until it locks into place, then run back to the canal and jump in. When you reach the grid, Percy will open it up, giving you access to the tunnels that lead to the exterior of the Necropolis.
Necropolis Exterior
When you reach the exterior of the Necropolis, you’ll find a large obstacle in your path: a Paokai. Luckily for you, it’s easily defeated by running into the large open archway nearby, climbing the stairs, finding the ballista, and using it to blow the damn thing away. You can’t heal while in the ballista, though, and will be a sitting duck to boot, so don’t forget to run out of it and into hiding to heal yourself when need be.
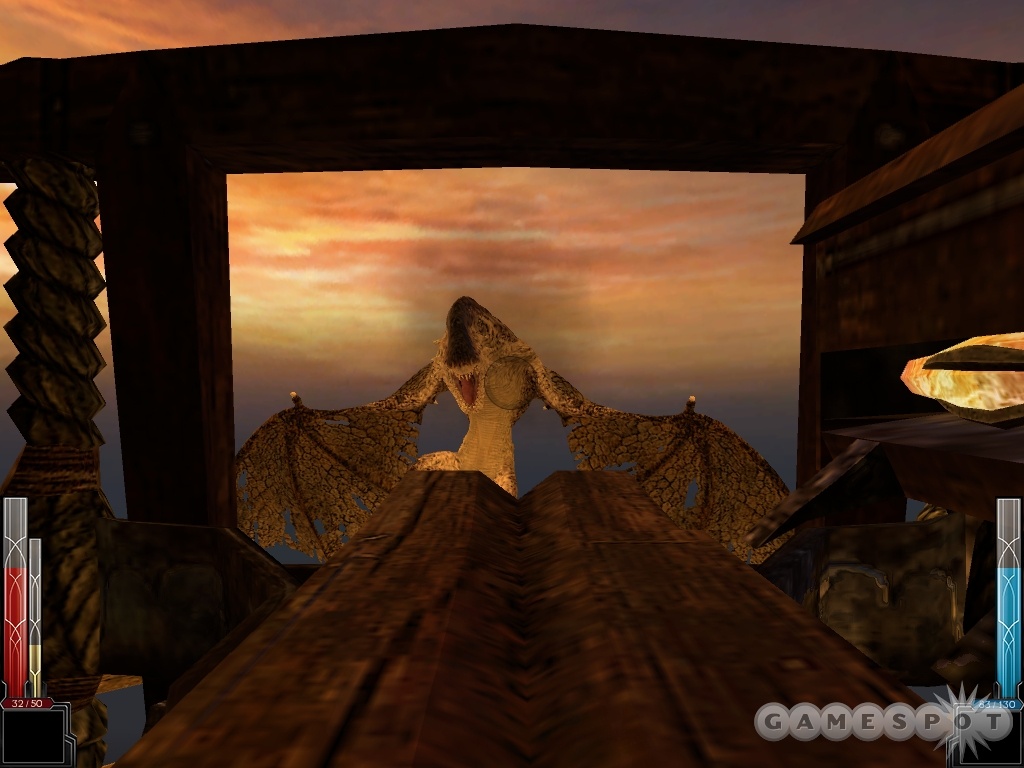
When you’re done with the Paokai, explore the rest of the keep until you find a winch. If you look outside, you’ll note that the winch opens one of the far doors below you. Press the winch until the wheel stops moving, then destroy the planks in the floor nearby, drop down as quickly as possible, then sprint across the exterior surface until you reach the entrance to the Necropolis. If you don’t move as quickly as possible here, the door will shut before you can reach it.
Inside, reunite with Leanna (how the hell did she get in here?), then head down the steps to reach the game’s final chapter. If you happened to keep Xana in your soul instead of bathing in the sacred blah blah blah, you'll have to fight Leanna and kill her before you're able to move on, you bad boy, you. You'll get the three skill points you missed out on earlier for doing so.
Epilogue
Time to track down Arantir once and for all. He resides somewhere in the bowels of the Necropolis, near where the prison of your father is located. If you wish it, you can either seal your father back inside his prison without sacrificing the entire city, or claim your destiny as son of the greatest demon there ever was.
As you walk down the steps into the Necropolis, a spirit named Ishtvan will contact you, asking you to release him from his eternal torment. If you do, he promises to put a good word in for you with his father. This is easy enough to do, and earns you two skill points for doing it, so...you might as well.
Freeing Ishtvan
Keep in mind that there are a few hidden potions and the like hidden in some out-of-the-way portions of this upper part of the Necropolis. Nothing particularly major, just the usual run-of-the-mill health and mana potions sequestered out of sight. Feel free to poke around if you really need them.
In order to free Ishtvan, you have to find and loosen two bolts that link his chains to the tombs around him. The first can be found after you fight off a Black Guard archer. Move down the steps near him, and on the landing below, you should spot some chains leading to an anchor. Pull the pin in the anchor, either by hand or with Telekinesis, then move onward.
After killing off a few more necromancers, you’ll come to a vista overlooking a glowing pit and Ishtvan’s body, now hanging by a single chain. (You can blast off the chain with a Fireball spell, but Ishtvan actually won’t fall.) Head into the spiral staircase nearby and climb the chain upwards. A necromancer and Necrolord watch over the upper reaches of the temple here. Finish them off, then look around for the second chain that anchors Ishtvan and free him completely.
With that done, move towards the large statue of the man holding a sword near where the necromancers were and locate the difficult-to-see switch near it to unlock the path leading downwards. You may need to throw a rope arrow to make it easier to descend, or you can just drop down and heal yourself afterwards. When you reach the glowing pit, Ishtvan will tell you that you’re totally cool with his pops now, and give you your skill points.
Down, Down, Down
Beyond the pit, you can find a tomb with four mana potions inside of it. Move up the slope from there to find a bunch of zombies. They’re going to be the least of your problems, though, as another undead cyclops is nearby, along with a pair of vampire knights. Luckily, there’s a large stone tied to a rope here, which will usually knock the cyclops down straightaway, allowing you to kill it with a power strike from your Dragon-whatever weapon. You may want to kick the vampire knights into the abyss before you go after the cyclops, though.
When everything’s dead, rope arrow yourself up to the tomb atop the pillar nearby. Two full health potions are inside. Jump from there to the ledge that skirts the whole room here, and walk along it until you reach the side of the room on the other side of the chasm below you. Drop down when it’s safe to do so, kill the necromancers, then topple the wooden beam nearby. Climb the chain and jump through the hole to move on.
Deeper And Deeper
A small trap to begin this area. As you walk towards the gate here, it’ll close and flames will begin spurting out of the walls. Simply climb up the rocks off to the side where the body is hidden and wait there until you hear the gate opening again, then run through it.
You’ll soon come across a large room with a couple of soldiers milling about below. Don’t be fooled, though; they’re just the tip of the iceberg. Perhaps ten soldiers all told dwell in the area, with half appearing up front and the other half coming in when most of the initial wave is dead. It’ll be a fun fight if you drop down and use stones to Telekinesis them to death, but if you want to deal them from above, you can cast fireballs or charm spells on them from where you’re out of reach, or simply arrow them to death. Alternately, you can jump down, run past them, and flip a switch when you turn one of the corners beyond them to seal them up behind you.
The Four Liches

If you managed to deliver Ishtvan to the pit, then his father will speak to you as you enter the next room, which holds the doors that lead on to the game’s final battle. Completing the Ishtvan quest will force Ishtvan’s father to fight on your side in this battle, so it’ll be you and him versus three lich lords. Even if you didn’t complete Ishtvan’s quest, this shouldn’t be too hugely difficult a fight, however, not if you wield the weapons that deal extra damage to undead. Pick a target, power strike him a couple of times until he falls down dead, move on to the next target. Telekinetic characters can use the stones that litter the floor to get one-shot kills on the liches.
When all the enemies here are dead, head out to the next set of steps leading down. Plenty of vampire knights and necromancers to keep you busy here. On one of the landings, you can find the tomb of Lamontian the Healer behind a switch-controlled door; stepping on the platform within will completely heal you; if you're evil, on the other hand, it'll bring you down to one health. (There’s an item glowing in one of the caskets high up on the wall above his door; you can obtain it by firing a rope arrow into the wooden beams in the top of Lamontian's tomb.) Beyond that, all you have to do is fight your way to the bottom of the pit before moving on to the final level of the game.
Arantir...And Friends
Now, really, how the crap did Leanna beat you down here? Sure wish she had filled you in on whatever shortcut she had routed out before you had to fight your way through the legion of undead that blocked your path down here.
Anyway...Arantir. He stands at an altar in front of the demon prison, intent on using the Skull of Shadows to destroy Stonehelm and seal away your father forever. Whether you intend to find a more peaceful way to accomplish the same goal, or free your father to rule the earth, you have to take on Arantir.
Begin by luring his necromancer and vampire knight guards back to you and killing them, then heading after Arantir. Leanna will likely simply stay back in the stairwell, well away from the action, leaving you and Arantir to do your thing.
Fighting with Arantir is basically just another Necrolord fight. He actually doesn’t seem to cast many spells, but then again we kept a lot of pressure on him when we were fighting. He’ll occasionally turn half-invisible, as other Necrolords are capable of doing. We didn’t spot him summoning any zombies or anything; most of the time during our fights he simply lunged at us with his fists, which were easily dodged. Of course, this isn’t the real fight.
The Special Friend
When you’ve done enough damage to Arantir, he’ll Sanctuary himself and return to the altar. It’s now that he brings out the special treat for you: an undead Paokai.
This fight is almost unwinnable without either archery or magic, we’re sad to say. If you have enough points in Archery, then the Bow of the Dragonhorn will be more than enough to finish the beast off. If not, then you’ll have to pick the best bow that you actually can use. Otherwise, Fireballs will be the weapon of choice. The last resort will be a melee weapon; it is possible to slash at the dragon's tail when it comes to swoop down on you, although this will be a difficult task, to say the least. You can get a better attack vector on it by standing on the fallen wooden beam in the center of the room. Unlike in previous Paokai fights, there's no environmental method to kill off the beast, despite the appearance of the scaffoldings that run up to the top of the ceiling.
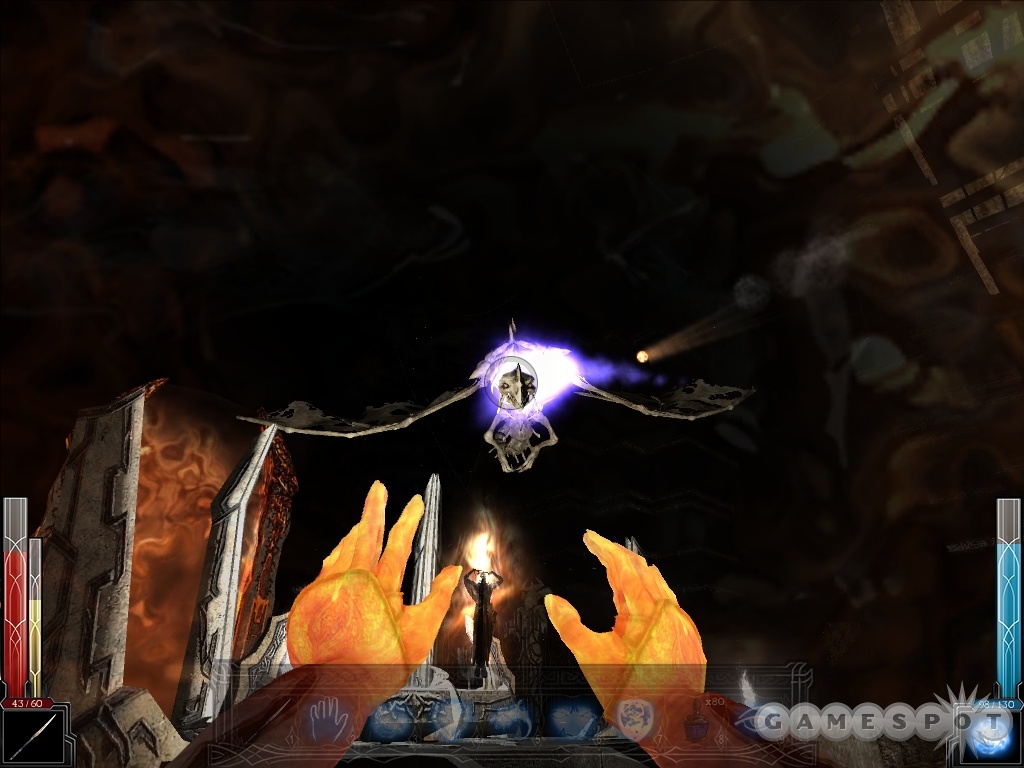
There isn’t anything particularly complex about shooting the dragon. If you’re using a bow, do your best to land your arrows while strafing to avoid the lightning breath. If it attempts to land on you, sprint out of the way before it can do so. Fireballs have the advantage of being targetable, so keep holding down the button until you can veer the fireball into the dragon’s head; it’ll require four or so shots before he disappears.
When the Paokai is vanquished, quickly turn your attention to Arantir, who’ll be temporarily vulnerable after you finish off his beast. If you’re using a bow, send a few rounds into his head (unless your sword is stronger, in which case you can switch and strike him with that). Otherwise, you can switch to a powerful magical attack and use that on him. He'll quickly become invulnerable again, and restart the cycle, so that you'll have to defeat the Paokai a few times before you finally finish off Arantir. You may want to finally bind those full health potions or magic mushrooms to your hotbar here.
The Final Choice
When Arantir admits defeat, you can choose the ending you want to see. If you want the good ending, pick up the skill and immediately place it on the altar again. If you want the bad ending, pick it up, run it up the stairway beyond the demonic portal, and hand it off to your father. There are also alternate endings based on whether you chose to let Xana remain inside your soul. Either way, you can look forward to playing through the game again with a different style than before.
Got a news tip or want to contact us directly? Email news@gamespot.com
Join the conversation