Brink Walkthrough Primer Guide
Save or escape the Ark. Our Brink Walkthrough Primer Guide gets you ready for the fight with details about matches, weapons, and challenges.

- Classes and Abilities: Learn about the four classes and the skills they can utilize
- Weapons: A List of weapons and attachments
- Maps: Learn about the maps and objectives used in campaign and multiplayer
- Challenges: Discover how to win Challenges to unlock weapons
- Xbox 360 Achievements: Boost your Gamerscore with a huge list of Achievements
- PlayStation 3 Trophies: Gain new Trophies for your collection
What's New:
- May 10, 2011: Version 1.0 of the Brink Primer Guide made.
Classes and Abilities
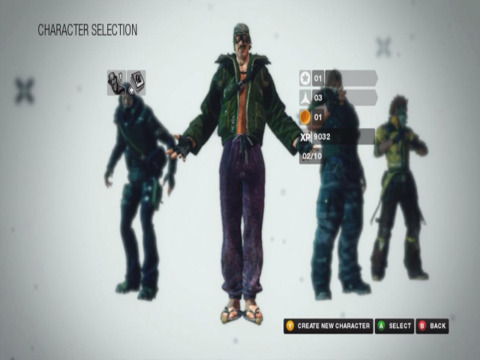
There are four classes that can be used from the start of the game. You can select a preferred class to spawn in as for the start of the match, but can also instantly switch classes at a command post. As you level up you will gain points to spend on various abilities. Which abilities you can purchase from are restricted by your overall rank. Additionally, as you level up you can unlock body types to change movement speed, health, and equipment choices.
Soldier
Soldiers' key abilities include Destructive objectives with their HE Charges. At their base skills Soldiers can restore ammo and throw explosive Molotovs in place of grenades.
At rank 2 Soldiers can give themselves armor piercing rounds, throw flash bangs, gain supplies from dead enemies, and quickly restore their grenade timers. With Rank 3 Soldiers can equip Kevlar armor and increase magazine size. Advancing to Rank 4 will allow soldiers to have increased grenade radius and damage. Finally, at Rank 5 Soldiers can place remote detonated satchel charges.
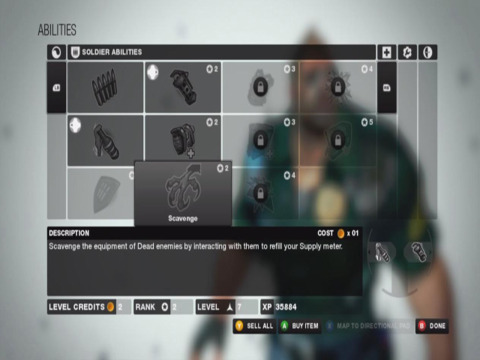
An offensive based Soldier will most likely want to gain Extra Magazine and Kevlar Vest, along with Combat Intuition, Battle Hardened and Sprinting Reload from the general abilities. A More supportive Soldier will want Scavenge, Supply Max Increase and Resupply Rate Increase for sure.
Medic
A Medic can heal and revive teammates with their medical syringes. They can also do the same with human Escort objective VIPs.
At Rank 2 they gain abilities to boost health regeneration, temporary invincibility, increase supplies by one pip, and can give supplies to allies. With Rank 3 Medics can purchase another supply pip and boost a teammate's run speed. At Rank 4 Medics can further increase allies' health with a second pip and can self revive when downed. Their final ability at Rank 5 allows Medics to throw a revival grenade at all allies in the area.
Medics can be used as tough tanks with Improved Increase Supplies and Improved Life Buff, especially with a Heavy body type. However a more traditional supportive Medic will want Transfer Supplies, Speed Boost, Adrenaline Boost, and Lazarus Grenades to help teammates.
Engineer
Engineers can complete Constructive Objectives (Including broken machinegun nests) and can even counter HE Charges and Hackboxes placed by enemy Soldiers and Operatives. Additionally they can improve an allies' damage output and place hidden mines. Mines are armed when an enemy steps on them, but don't explode until they step off it. During this time an enemy Engineer can disable the mine.
At Rank 2 Engineers Can give their allies armor, build faster, and can deploy light turrets. At Rank 3 Engineers can upgrade command posts with an extra health pip and use stronger turrets. Advancing to Rank 4 will give Engineers a bigger weapon boost and allow them to place two mines at once. At the highest Rank of 5 Engineers can place their strongest turret.
Offensive Engineers will get the biggest bang from not only Improved Weapon Buff, but also placing a Gatling Turret near chokepoints and key objectives. A support Engineer will of course want to place down a turret, but also have access to Extra Kevlar and Command Post Upgrade. As you'll be completing many objectives it's also a good idea to have Sense Of Perspective.
Operative
Operatives can complete Hack Objectives by placing a Hackbox on the device. They can also discover hidden landmines and disguise as dead enemies.
At Rank 2 Operatives can make it harder for enemies to capture command posts, can spot enemies through walls, reveal all enemies on the radar, and throw sticky bombs. At Rank 3 Operatives can throw down caltrops and hack enemy turrets. At Rank 4 Operatives can take manual control of allied turrets and can explode when downed. Last, at Rank 5 Operatives can throw EMP grenades to stop turrets, mines, radars and further hamper Hackboxes and HE Charges.
An attacking Operative will want to make use of Caltrop Grenades to harm enemy forces, and Control Turret for heavy damage. Sticky Bomb and Cortex Bomb are also good for disrupting the enemy and getting the last laugh beyond the grave. Supportive Operatives will want Homing Beacon and Comms Hack to keep their allies informed at all times. They will also get quite a bit of use from Silent Running and Sense Of Perspective.
General
There are universal abilities that can be used by all four classes. In general, you'll want the abilities that add pips to your health and supplies. Sprinting reload is helpful if you are mainly an attacker, even more so if you're a Light body. Perspective is good for classes that will be completing many objectives, namely the Engineer and Operative. Downed Fire is great because many enemies will often ignore your fallen body to deal with your allies, leaving them shocked when you continue to attack.
Weapons
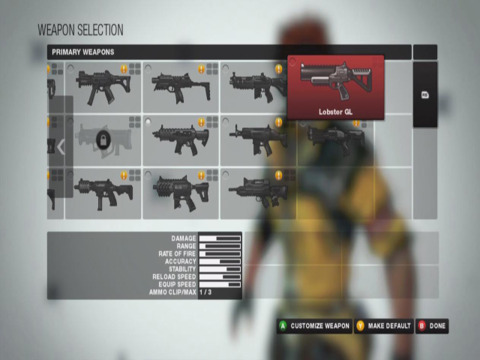
While you start with most weapons unlocked, others are gained by completing the four Challenge maps. You only need to complete these challenges once to use weapons and attachments with any of your characters. Lighter size weapons--such as pistols and sub machineguns--can be used by all body types, but stronger weapons are restricted to the beefier builds.
Rifles
Drognav
- Strengths: Range, Accuracy
- Weaknesses: Rate of Fire
- Ammo Total: 24
- Attachments: Front, Bottom, Top, Magazine
- Usable Primary: All
- Usable Secondary: Medium, Heavy
- Unlocked From Challenge: Default Weapon
Barnett
- Strengths: Damage, Range
- Weaknesses: Rate of Fire, Reload Speed
- Ammo Total: 12
- Attachments: Front, Bottom, Top
- Usable Primary: All
- Usable Secondary: Medium, Heavy
- Unlocked From Challenge: Parkour This *
Sub Machineguns
Kross
- Strengths: Rate of Fire, Stability
- Weaknesses: Damage, Range
- Ammo Total: 210
- Attachments: Front, Bottom, Top, Magazine
- Usable Primary: All
- Usable Secondary: Medium, Heavy
- Unlocked From Challenge: Default Weapon
Galactic
- Strengths: Rate of Fire, Stability
- Weaknesses: Damage, Range
- Ammo Total: 180
- Attachments: Front, Bottom, Top, Magazine
- Usable Primary: All
- Usable Secondary: Medium, Heavy
- Unlocked From Challenge: Default Weapon
Bulpdaun
- Strengths: Rate of Fire, Accuracy, Stability
- Weaknesses: Range
- Ammo Total: 162
- Attachments: Front, Bottom, Top, Magazine
- Usable Primary: All
- Usable Secondary: Medium, Heavy
- Unlocked From Challenge: Be More Objective **
CARB-9
- Strengths: Rate of Fire, Stability
- Weaknesses: Range
- Ammo Total: 180
- Attachments: Front, Bottom, Top, Magazine
- Usable Primary: All
- Usable Secondary: Medium, Heavy
- Unlocked From Challenge: Default Weapon
Tampa
- Strengths: Rate of Fire, Stability, Reload Speed, Equip Speed
- Weaknesses: Range
- Ammo Total: 180
- Attachments: Front, Bottom, Top, Magazine
- Usable Primary: All
- Usable Secondary: Medium, Heavy
- Unlocked From Challenge: Default Weapon
Assault Rifles
Gerund
- Strengths: Accuracy, Stability
- Weaknesses: Damage, Range
- Ammo Total: 90
- Attachments: Front, Bottom, Top, Magazine
- Usable Primary: Medium, Heavy
- Usable Secondary: Heavy
- Unlocked From Challenge: Default Weapon
Euston
- Strengths: Rate of Fire, Stability
- Weaknesses: Range
- Ammo Total: 84
- Attachments: Front, Bottom, Top, Magazine
- Usable Primary: Medium, Heavy
- Usable Secondary: Heavy
- Unlocked From Challenge: Default Weapon
Rhett
- Strengths: Stability
- Weaknesses: Range
- Ammo Total: 75
- Attachments: Front, Bottom, Top, Magazine
- Usable Primary: Medium, Heavy
- Usable Secondary: Heavy
- Unlocked From Challenge: Default Weapon
Rokstedi
- Strengths: Reload speed
- Weaknesses: Damage, Rate of Fire
- Ammo Total: 60
- Attachments: Front, Bottom, Top, Magazine
- Usable Primary: Medium, Heavy
- Usable Secondary: Heavy
- Unlocked From Challenge: Default Weapon
FRKN-3K
- Strengths: Accuracy
- Weaknesses: Damage, Range
- Ammo Total: 72
- Attachments: Front, Bottom, Top, Magazine
- Usable Primary: Medium, Heavy
- Usable Secondary: Heavy
- Unlocked From Challenge: Tower Defense *
Grenade Launchers
Lobster Grenade
- Strengths: Stability
- Weaknesses: Damage, Range, Rate of Fire
- Ammo Total: 4
- Attachments: None
- Usable Primary: Medium, Heavy
- Usable Secondary: Heavy
- Unlocked From Challenge: Be More Objective *
EZ-Nade
- Strengths: Damage
- Weaknesses: Range, Rate of Fire, Accuracy, Reload Speed, Equip Speed
- Ammo Total: 12
- Attachments: None
- Usable Primary: Heavy
- Usable Secondary: None
- Unlocked From Challenge: Escort Duty **
Shotguns
Mossington
- Strengths: Equip Speed
- Weaknesses: Range, Rate of Fire, Accuracy, Stability
- Ammo Total: 24
- Attachments: Front, Bottom, Top
- Usable Primary: Medium, Heavy
- Usable Secondary: Heavy
- Unlocked From Challenge: Default Weapon
Hjammerdeim
- Strengths: Damage
- Weaknesses: Range, Rate of Fire, Accuracy
- Ammo Total: 32
- Attachments: Front, Bottom, Top
- Usable Primary: Heavy
- Usable Secondary: None
- Unlocked From Challenge: Default Weapon
Machineguns
Maximus
- Strengths: Accuracy, Stability
- Weaknesses: Reload Speed, Equip Speed
- Ammo Total: 150
- Attachments: Front, Top, Magazine
- Usable Primary: Heavy
- Usable Secondary: None
- Unlocked From Challenge: Default Weapon
Chinzor
- Strengths: Rate of Fire, Stability
- Weaknesses: Range, Reload Speed, Equip Speed
- Ammo Total: 200
- Attachments: Front, Magazine
- Usable Primary: Heavy
- Usable Secondary: None
- Unlocked From Challenge: Default Weapon
Gotlung
- Strengths: Rate of Fire, Stability
- Weaknesses: Accuracy, Reload Speed
- Ammo Total: 200
- Attachments: None
- Usable Primary: Heavy
- Usable Secondary: None
- Unlocked From Challenge: Tower Defense **
Pistols
Kalt
- Strengths: Accuracy, Reload Speed, Equip Speed
- Weaknesses: Damage, Range
- Ammo Total: 48
- Attachments: Front, Bottom, Top, Magazine
- Usable Primary: None
- Usable Secondary: All
- Unlocked From Challenge: Default Weapon
Tokmak
- Strengths: Accuracy, Reload Speed, Equip Speed
- Weaknesses: Damage, Accuracy
- Ammo Total: 72
- Attachments: Front, Bottom, Top, Magazine
- Usable Primary: None
- Usable Secondary: All
- Unlocked From Challenge: Default Weapon
Belgo
- Strengths: Rate of Fire, Accuracy, Stability
- Weaknesses: Damage, Range
- Ammo Total: 60
- Attachments: Front, Bottom, Top, Magazine
- Usable Primary: None
- Usable Secondary: All
- Unlocked From Challenge: Parkour This **
Sea Eagle
- Strengths: Accuracy, Equip Speed
- Weaknesses: Damage, Range, Rate of Fire
- Ammo Total: 30
- Attachments: Front, Bottom, Top, Magazine
- Usable Primary: None
- Usable Secondary: All
- Unlocked From Challenge: Default Weapon
Ritchie
- Strengths: Reload speed, Equip Speed
- Weaknesses: Damage, Rate of Fire
- Ammo Total: 24
- Attachments: Front, Bottom, Top, Magazine
- Usable Primary: None
- Usable Secondary: All
- Unlocked From Challenge: Be More Objective *
Front Attachments
Silencers
- Function: Prevents showing on the radar during firing
- Usable on Rifles: Drognav, Barnett
- Usable on Sub Machineguns: Kross, Galactic, Bulpdaun, CARB-9, Tampa
- Usable on Assault Rifles: Gerund, Euston, Rhett, Rokstedi, FRKN-3K
- Usable on Shotguns: Mossington, Hjammerdeim
- Usable on Machineguns: Maximus, Chinzor
- Usable on Pistols: Kalt, Tokmak, Sea Eagle, Belgo, Ritchie
- Unlocked From Challenge: Parkour This **
Muzzle Brakes
- Function: Improves aim
- Usable on Rifles: Drognav, Barnett
- Usable on Sub Machineguns: Kross, Galactic, Bulpdaun, CARB-9, Tampa
- Usable on Assault Rifles: Gerund, Euston, Rhett, Rokstedi, FRKN-3K
- Usable on Shotguns: None
- Usable on Machineguns: Maximus, Chinzor
- Usable on Pistols: Kalt, Tokmak, Sea Eagle, Belgo, Ritchie
- Unlocked From Challenge: Escort Duty *
Bottom Attachments
Front Grips
- Function: Improves stability
- Usable on Rifles: None
- Usable on Sub Machineguns: Kross, Galactic, Bulpdaun, CARB-9, Tampa
- Usable on Assault Rifles: Gerund, Euston, Rhett, FRKN-3K
- Usable on Shotguns: None
- Usable on Machineguns: None
- Usable on Pistols: None
- Unlocked From Challenge: Parkour This *
Speed Slings
- Function: Boosts equip speed
- Usable on Rifles: Drognav, Barnett
- Usable on Sub Machineguns: Kross, Galactic, Bulpdaun, CARB-9, Tampa
- Usable on Assault Rifles: Gerund, Euston, Rhett, Rokstedi, FRKN-3K
- Usable on Shotguns: Mossington, Hjammerdeim
- Usable on Machineguns: None
- Usable on Pistols: None
- Unlocked From Challenge: Be More Objective **
Speed Holsters
- Function: Boosts equip speed
- Usable on Rifles: None
- Usable on Sub Machineguns: None
- Usable on Assault Rifles: None
- Usable on Shotguns: None
- Usable on Machineguns: None
- Usable on Pistols: Kalt, Tokmak, Sea Eagle, Belgo, Ritchie
- Unlocked From Challenge: Be More Objective **
Underslung Grenade Launcher
- Function: Replaces normal grenade function with a grenade launcher
- Usable on Rifles: None
- Usable on Sub Machineguns: None
- Usable on Assault Rifles: Gerund, Euston, Rhett, Rokstedi, FRKN-3K
- Usable on Shotguns: None
- Usable on Machineguns: None
- Usable on Pistols: None
- Unlocked From Challenge: Tower Defense *
Top Attachments
Adjusted Iron Sights
- Function: No Longer zoom, maximizing peripheral vision
- Usable on Rifles: None
- Usable on Sub Machineguns: Kross, Galactic, Bulpdaun, CARB-9, Tampa
- Usable on Assault Rifles: Gerund, Euston, Rhett, Rokstedi
- Usable on Shotguns: Mossington, Hjammerdeim
- Usable on Machineguns: Maximus
- Usable on Pistols: Kalt, Tokmak, Sea Eagle, Belgo, Ritchie
- Unlocked From Challenge: Tower Defense *
High Powered Scopes
- Function: Zooms in, but hinders peripheral vision
- Usable on Rifles: Drognav, Barnett
- Usable on Sub Machineguns: Kross, Galactic, Bulpdaun, CARB-9, Tampa
- Usable on Assault Rifles: Gerund, Euston, Rhett, Rokstedi
- Usable on Shotguns: None
- Usable on Machineguns: Maximus
- Usable on Pistols: Kalt, Tokmak, Sea Eagle, Belgo, Ritchie
- Unlocked From Challenge: Escort Duty *
Red Dot Sights
- Function: Places a reticule on the target
- Usable on Rifles: Drognav, Barnett
- Usable on Sub Machineguns: Kross, Galactic, Bulpdaun, CARB-9, Tampa
- Usable on Assault Rifles: Gerund, Euston, Rhett, Rokstedi
- Usable on Shotguns: Mossington, Hjammerdeim
- Usable on Machineguns: Maximus
- Usable on Pistols: Kalt, Tokmak, Sea Eagle, Belgo, Ritchie
- Unlocked From Challenge: Escort Duty *
Magazine Attachments
Duct-Taped Magazines
- Function: Increases reload speed
- Usable on Rifles: None
- Usable on Sub Machineguns: Kross, Galactic, Bulpdaun, CARB-9, Tampa
- Usable on Assault Rifles: Gerund, Euston, Rhett, Rokstedi, FRKN-3K
- Usable on Shotguns: None
- Usable on Machineguns: None
- Usable on Pistols: None
- Unlocked From Challenge: Be More Objective *
Drum Magazines
- Function: Greatly increases ammo in each magazine, but lowers reload and equip speeds
- Usable on Rifles: None
- Usable on Sub Machineguns: Kross, Galactic, CARB-9, Tampa
- Usable on Assault Rifles: Gerund, Euston, Rhett, Rokstedi
- Usable on Shotguns: None
- Usable on Machineguns: None
- Usable on Pistols: None
- Unlocked From Challenge: Escort Duty **
High-Capacity Magazines
- Function: Increases ammo in each magazine
- Usable on Rifles: None
- Usable on Sub Machineguns: Kross, Galactic, Bulpdaun, CARB-9, Tampa
- Usable on Assault Rifles: Gerund, Euston, Rhett, Rokstedi, FRKN-3K
- Usable on Shotguns: None
- Usable on Machineguns: Maximus, Chinzor
- Usable on Pistols: Kalt, Tokmak, Sea Eagle, Belgo
- Unlocked From Challenge: Tower Defense **
Rapid Fire
- Function: Increases rate of fire
- Usable on Rifles: Drognav
- Usable on Sub Machineguns: None
- Usable on Assault Rifles: Rokstedi
- Usable on Shotguns: None
- Usable on Machineguns: None
- Usable on Pistols: Kalt, Tokmak, Sea Eagle, Ritchie
- Unlocked From Challenge: Parkour This *
Maps
Brink features eight maps: four with Security on the Offense, and four with the Resistance as Offense. If you decide to play the Campaign, you'll play each map in a different order depending on your faction. During Co-Op games the enemies will be bots, while Versus games can feature human players.
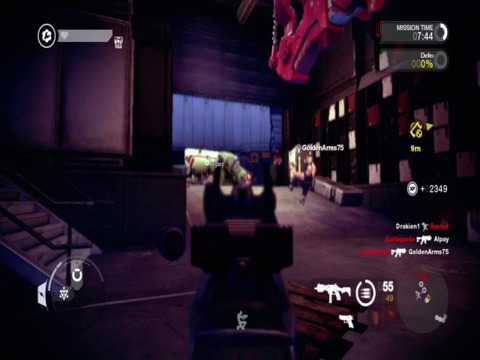
Container City
Security
- Campaign: Day 4: Dirty Bomb
- Side: Offense
- Primary Objectives: Destroy the Gate (Soldier), Escort Maintenance Bot (Engineer), Repair the Crane (Engineer), Deliver Sample (General)
- Secondary Objectives: Hack the Side Door (Operative), Construct Side Stairs (Engineer), Destroy Market Barricade (Soldier)
Resistance
- Campaign: Day 7: Attack on CCity
- Side: Defense
- Primary Objectives: Defend the Gate (Engineer), Disable the Maintenance Bot (General), Defend the Crane (General), Defend the Sample (General)
- Secondary Objectives: Defend the Side Door (Engineer), Defend the Side Stairs (Soldier), Construct Market Barricade (Engineer)
This is a Security focused map where you will be escorting a Maintenance Bot. Engineers will be needed to repair the device if it is damaged by the enemy. The two key chock points are at the Gate and Crane, where the Resistance will have a spotting advantage and machinegun nests. It's actually a great offense tactics to place down turrets to help defend the bot. After you've taken the Maintenance Bot far enough you can abandon it and simply run with the sample.
Aquarium
Security
- Campaign: Day 1: Hostage Rescue
- Side: Offense
- Primary Objectives: Destroy Door (Soldier), Escort Hostage (Medic)
- Secondary Objectives: Repair Lift Generator (Engineer)
Resistance
- Campaign: Day 1: Getting Answers
- Side: Defense
- Primary Objectives: Defend the Door (Engineer), Stop the Agent (General)
- Secondary Objectives: Defend Lift Generator (Soldier)
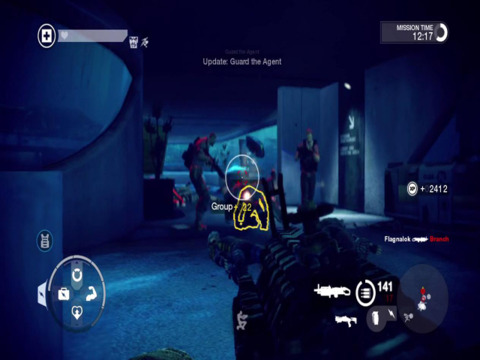
This is the first map for both Campaigns. Security needs to send a Soldier to quickly destroy the door and then escort the hostage to the boat on the docks. While the hostage will automatically take the ramp to the top, it's still a great idea to fix the lift generator and allow access from several points.

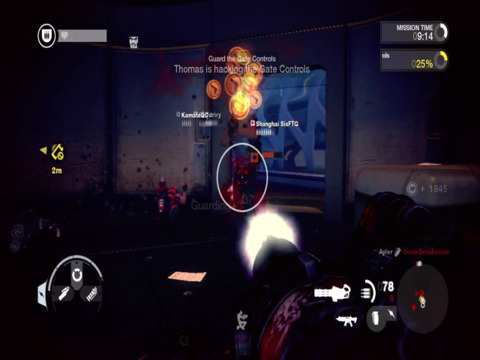
Shipyard
Security
- Campaign: Day 6: Early Launch
- Side: Offense
- Primary Objectives: Repair the Crane Controls (Engineer), Hack the Missile Controls (Operative)
- Secondary Objectives: Destroy Main Barricade (Soldier), Destroy Side Barricade (Soldier), Repair the Crane Controls (Engineer)
Resistance
- Campaign: What-If: Operation Babel
- Side: Defense
- Primary Objectives: Defend the Crane Controls (General), Defend the Missile Controls (Engineer)
- Secondary Objectives: Construct Main Barricade (Engineer), Construct Side Barricade (Engineer), Defend the Crane Controls (Soldier)
Yet another Security based map. Your first objective is to repair the broken crane in the center of the map. There are three ways to enter the area, but Resistance Engineers have the capability to seal off several sides with constructed barricades. It's smarter to split up and take the enemy from all sides, making sure to place turrets to keep the Resistance reinforcements at bay.
In the second part of the map be sure to repair the crane controls to create a shortcut. This will help immensely in getting the jump on the Resistance. You'll want to switch to Operative and place the hackbox on the missile controls. You can move a short distance and still maintain two or three bars on your hacking device. It's best to take cover behind the short panel behind (you will want to also crouch down) or into one of the doors on either side.
Security Tower
Security
- Campaign: Day 5: Prison Break
- Side: Defense
- Primary Objectives: Defend the Conduit (Engineer), Defend the Safe (Engineer), Defend the Pass Code (General), Defend the Prisoner (General)
- Secondary Objectives: None
Resistance
- Campaign: Day 2: Breakout
- Side: Offense
- Primary Objectives: Destroy the Conduit (Soldier), Hack the Safe (Operative), Deliver the Pass Code (General), Escort Nechayev (General)
- Secondary Objectives: None
The first Resistance based map. Taking down the Conduit is very easy as it's tucked into a small nook that the enemy will have to drop down to defend. It's better to march from the top route to get to the safe, although sending a few people through the lower stairs will help distract the enemy.
Escorting Nechayev is the hardest part of the mission, as there are plenty of choke points, especially at the exit to the docks. The small nook that worked to your advantage at the start of the map will now be the main hurdle. To remedy this, send a few Resistance members over the top of the wall, similar to what the Security did at the start of the map.
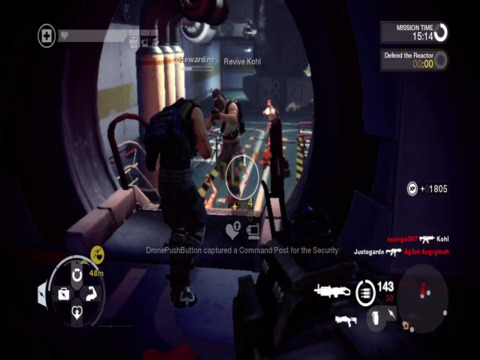
Reactor
Security
- Campaign: Day 8: Fallout
- Side: Defense
- Primary Objectives: Defend the Vent System (Engineer), Defend the Reactor (Engineer)
- Secondary Objectives: Defend the Bridge Access Panel (Soldier)
Resistance
- Campaign: What-If: Critical Reaction
- Side: Offense
- Primary Objectives: Hack the Vent (Operative), Destroy the Reactor (Soldier)
- Secondary Objectives: Repair the Bridge Access Panel (Engineer)
Reactor is a Resistance attack map, even though it's not a part of their campaign. There are two locations to hack the vent, allowing an easy means to distract the enemy and access the next area. There are some wide open areas, making long range rifles one of the best weapons for takeout enemies that carelessly try to defend the doors. In the second area there are two winding paths leading to reactor, forcing the enemy to spread their forces thin. You can try storming everyone full force, or split up and allow one squad to slip by and plant the charge.
Refuel
Security
- Campaign: What-If: Grand Theft Aero
- Side: Defense
- Primary Objectives: Defend the Storage Depot Door (Engineer), Defend the Hydraulic Fluid (General), Defend the Warehouse Controls (Engineer), Defend the Avionics (General), Defend the Fuel Pump (General)
- Secondary Objectives: None
Resistance
- Campaign: Day 8: Airborne
- Side: Offense
- Primary Objectives: Destroy the Storage Depot Door (Soldier), Deliver the Hydraulic Fluid (General), Hack the Warehouse Controls (Operative), Deliver the Avionics (General), Repair the Fuel Pump (Engineer)
- Secondary Objectives: None
This is the final map to the Resistance campaign and among the most challenging. Getting to the Storage Depot can be tad frustrating, but once you have it defending the area is key. Place turrets and mines to help support your Soldier destroying the door and your runner taking the fuel to the plane. The defenders will most likely try and stop you both at the depot door and at the plane itself, leaving some space in the middle to ready your offense. Delivering the Avionics is almost the same as the previous objective, although you'll no need to use Operatives rather than Engineers. The hacked terminal is rather close to the Security spawn, making it difficult to get the Avionics if they are dropped.
Terminal
Security
- Campaign: Day 3: Smash and Grab
- Side: Offense
- Primary Objectives: Hack the Mainframe (Operative), Crack the Safe (Engineer), Deliver Datakey (General)
- Secondary Objectives: None
Resistance
- Campaign: Day 3: Chen's Plan
- Side: Defense
- Primary Objectives: Defend the Mainframe (Engineer), Defend the Safe (General), Defend the Datakey (General)
- Secondary Objectives: None
An early map designed for a Security offense. Both of the main objectives can be rather hard, though. The mainframe is housed in a glass room, allowing the Resistance a strong foot to defend the area and spot anyone who attacks. The second area, where the datakey is stored, is very open and hard to attack. If the Resistance manages to place turrets and mines near the safe it's can be rather difficult to retrieve the datakey. If you do manage to nab the items, it's a short sprint to the goal line.
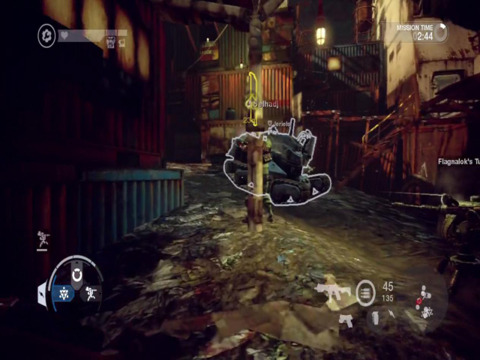
Resort
Security
- Campaign: What-If: Chopper Down
- Side: Defense
- Primary Objectives: Defend the Pillar (Engineer), Disable the Bot (General), Defend the Bridge (Engineer), Defend the Gate Controls (Engineer)
- Secondary Objectives: Defend the Shop Door (Engineer)
Resistance
- Campaign: Day 6: Black Box
- Side: Offense
- Primary Objectives: Destroy the Pillar (Soldier), Escort the Bot (Engineer), Destroy the Bridge (soldier), Hack the Gate Controls (Operative)
- Secondary Objectives: Hack the Shop Door (Operative)
The fourth Resistance offense mission. The pillar that needs to be destroyed is in the center of a large room. While the enemy might try to place turrets to guard one section of the room or another, there are too many entrances to fully protect the whole zone. Sneak in from the least defended side and push the enemy into one of the store fronts. Place the charge, all while using the pillar itself as cover. In the second is the Resistance version of escorting the bot. However, it's even harder to defend it due to how open the area is.
At many turns Security will have access to high up machinegun nests and several routes to jump your location. You can use the Bot itself or the bridge to defend from enemy fire, though you'll have to repair the machine afterwards. It can be hard to get into the small hacking room, but once inside it's a breeze to defend. Place up a turret and several guards at each of the four doors. This will allow Operatives to hack without fear of being shot.
Challenges
Challenges can be undertaken in order to gain new guns and attachments. There are four different challenges: Be More Objective, Parkour This, Escort Duty, and Tower Defense. When a character completes on level of each challenge type they will move onto the next level and cannot repeat an earlier challenge. To play the lower end challenges again, you will need to create a new character.
Be More Objective
You will need to complete several different objectives in a row, each which require a different class. The first is Demolition with a Soldier's HE Charge, the second is repairing with an Engineer, and finally hacking as an Operative. In solo type matches you will need to manually change classes, as your bot allies will never complete the objectives themselves. As you move up into higher difficulty levels the amount of enemies will increase from four up to six.
It is highly recommended that you complete these challenges with other human players as the friendly bots are incompetent. It's best if all four players each take a different class to cover one another. This way each player can synergize, such as an Engineer to lay down turrets to stall enemies, a Medic boosts the health and adrenaline of the team, while the Soldier plants the charge. If possible, make sure that each player is at minimum of Rank 3 and knows abilities for their role.
Parkour This
This is a movement based challenge that does not require shooting or other means of fighting. Your goal is to touch each of the targets scattered around the course. Each challenge level decreases the amount of time you have to complete the mission. While it's fairly easy as a Medium body type, you can shave off several seconds of time by waiting until character Level 7 for the Light body type. Avoid using a Heavy body type unless you really want a handicap.
Escort Duty
For this challenge you will be escorting a maintenance bot to the other side of the map. During solo play you will be restricted to the Engineer class, so be sure to have abilities purchased for the job. Because you don't need to be by the bot at all times, feel free to march ahead and place down mines and a turret to stall the enemy. Keep in mind that the bot will destroy your turret if they collide with each other. Most importantly be sure to steal and upgrade the enemy command post to increase your health pips. If you want to make the mission very easy wait until Rank 4 and be sure to purchase a Medium Turret and the ability to place two mines at once.
Tower Defense
The goal of this challenge is to secure and protect the command post in the center of the map. As with Escort Duty, you must play as an Engineer for the solo mission. Rank up to 3 or 4 and buy some Engineer skills to make this challenge simpler. Before taking the command post set up your mines and turret on the catwalks to block off the enemy. Once the post is in your control the enemies will start spewing out.
Each wave of enemies will increase the amount of troops that attack at once. In the early levels only about two Resistance members will attack, but at higher challenge levels up to six or more enemies will charge simultaneously. They the enemy does manage to steal the command post, you will have thirty seconds to clear the area and retake the post. Despite the timer for this challenge, you don't need to protect the post for the entire time. Instead there are a finite amount of enemies that you will need to kill, though there is never an indication of the enemy's totals.
Xbox 360 Achievements
| Achievement Name | How To Earn | Reward |
|---|---|---|
| A bit of a headache | Take down an enemy with a Cortex Bomb | 5 |
| Boom! | Detonate a HE Charge | 10 |
| Brinkmanship | Complete an Operative Primary Objective within 5 seconds of breaking disguise | 10 |
| Cut 'em off at the pass | Close an enemy team's shortcut | 10 |
| Great shot kid! One in a million | Take down an enemy by shooting a grenade | 10 |
| I live… again! | Revive yourself | 5 |
| I think I know a shortcut | Open a shortcut for your team | 10 |
| It's a trap! | Take down an enemy with a Satchel Charge | 10 |
| King of the world! | Complete all 3 Star Challenges | 100 |
| No I insist, you take it | Use the last of your Supplies to refill a teammate's ammo rather than your own | 5 |
| Not over till the fat lady sings | Take down an enemy with gunfire while knocked down | 10 |
| Not so sneaky now, are you? | Reveal an enemy in disguise | 10 |
| Oh I'm sorry, was that yours? | Capture an enemy Command Post | 10 |
| Pump up the volume! | Upgrade your team's Command Post | 10 |
| Smart decisions win battles | Attempt to Revive an objective-class teammate over a non-objective teammate near a Primary Objective | 10 |
| T'is better to give than recieve | As a Medic, using the Transfer Supplies ability, give the last of your Supplies away | 10 |
| That mine you found? Disarmed! | Spot a mine which is later defused by another Engineer | 10 |
| That's how you win a match | While on defense, take down an attacker who's completing a Primary Objective | 10 |
| The start of something big | Win any mission, whether campaign or What-If | 20 |
| The story has just begun | Win both story campaigns (not including What-If missions) | 100 |
| They never knew what hit them | While on offense, win the match in less than 30% of the time limit | 20 |
| Time to start a new character | Reach Rank 5 | 100 |
| To serve and protect | Win every Security campaign mission, including What-If missions | 50 |
| Tough as nails | Win all storyline campaign missions (exc. What-If missions) in either Online Versus, or in Hard mode | 80 |
| Use the wheel, earn more XP | Complete an objective after first selecting it on the Objective Wheel | 10 |
| Very well done indeed! | Complete your first 3 Star Challenge | 20 |
| Viva la revolution! | Win every Resistance campaign mission, including What-If missions | 50 |
| Was it the red or blue wire? | Disarm an HE charge | 10 |
| Well done! | Complete your first 1 Star Challenge | 10 |
| Well that was educational | Collect all Audio Logs | 50 |
| Who's bad? | Complete all 1 Star Challenges | 25 |
| You can place another mine now | Take down an enemy with a mine | 10 |
| You shall not pass! | While on defense, prevent the attackers from completing their first objective | 20 |
| You're going places, kid! | Reach Rank 2 | 20 |
| You've escaped the Ark | Win all main missions of the Resistance campaign (not including What-If missions) | 75 |
| You've saved the Ark | Win all main missions of the Security campaign (not including What-If missions) | 75 |
PlayStation 3 Trophies
| Trophy Name | How To Earn | Reward |
|---|---|---|
| A bit of a headache | Take down an enemy with a Cortex Bomb | Bronze |
| Boom! | Detonate a HE Charge | Silver |
| Brinkmanship | Complete an Operative Primary Objective within 5 seconds of breaking disguise | Silver |
| Cut 'em off at the pass | Close an enemy team's shortcut | Silver |
| Great shot kid! One in a million | Take down an enemy by shooting a grenade | Bronze |
| I live… again! | Revive yourself | Bronze |
| I think I know a shortcut | Open a shortcut for your team | Silver |
| It's a trap! | Take down an enemy with a Satchel Charge | Bronze |
| King of the world! | Complete all 3 Star Challenges | Gold |
| No I insist, you take it | Use the last of your Supplies to refill a teammate's ammo rather than your own | Silver |
| Not over till the fat lady sings | Take down an enemy with gunfire while knocked down | Bronze |
| Not so sneaky now, are you? | Reveal an enemy in disguise | Bronze |
| Oh I'm sorry, was that yours? | Capture an enemy Command Post | Bronze |
| Pump up the volume! | Upgrade your team's Command Post | Bronze |
| Smart decisions win battles | Attempt to Revive an objective-class teammate over a non-objective teammate near a Primary Objective | Silver |
| T'is better to give than recieve | As a Medic, using the Transfer Supplies ability, give the last of your Supplies away | Bronze |
| That mine you found? Disarmed! | Spot a mine which is later defused by another Engineer | Silver |
| That's how you win a match | While on defense, take down an attacker who's completing a Primary Objective | Silver |
| The start of something big | Win any mission, whether campaign or What-If | Silver |
| The story has just begun | Win both story campaigns (not including What-If missions) | Silver |
| They never knew what hit them | While on offense, win the match in less than 30% of the time limit | Silver |
| Time to start a new character | Reach Rank 5 | Gold |
| To serve and protect | Win every Security campaign mission, including What-If missions | Silver |
| Tough as nails | Win all storyline campaign missions (exc. What-If missions) in either Online Versus, or in Hard mode | Gold |
| Use the wheel, earn more XP | Complete an objective after first selecting it on the Objective Wheel | Bronze |
| Very well done indeed! | Complete your first 3 Star Challenge | Silver |
| Viva la revolution! | Win every Resistance campaign mission, including What-If missions | Silver |
| Was it the red or blue wire? | Disarm an HE charge | Silver |
| Well done! | Complete your first 1 Star Challenge | Silver |
| Well that was educational | Collect all Audio Logs | Silver |
| Who's bad? | Complete all 1 Star Challenges | Silver |
| You can place another mine now | Take down an enemy with a mine | Bronze |
| You shall not pass! | While on defense, prevent the attackers from completing their first objective | Silver |
| You're going places, kid! | Reach Rank 2 | Silver |
| You've escaped the Ark | Win all main missions of the Resistance campaign (not including What-If missions) | Bronze |
| You've saved the Ark | Win all main missions of the Security campaign (not including What-If missions) | Bronze |
| Time to Sleep | Earn all other trophies | Platinum |
Got a news tip or want to contact us directly? Email news@gamespot.com
Join the conversation